mash
Kinda New

Posts: 3 
|
|
Jul 27, 2015 12:49:43 GMT
|
|
Oh wow, can not believe how much you have got done. The wood and fitting really look amazing and glad you hit that deadline.
You must be really pleased, i especially like the look of the fitted fridge.
Thanks for sharing, am taking major notes.
|
| |
|
|
|
|
|
|
|
|
|
Well, it’s back! I’d love to say that it all went without a hitch, but it was way more fun than that! It went right down to the wire getting it ready to rock for its first outing, finally seeing it roll off the drive late on the Thursday before the wedding. Al then had an hour and a half back up to his place in Shrewsbury, which highlighted a couple of annoying issues. Firstly, the exhaust was rattling against the van somewhere and secondly, the engine cover catch kept popping undone, allowing the driver to experience the delight of a free revving engine almost in your lap. So it’s a bit noisy! Friday saw him take an eight hour drive, thanks to traffic, up to the top end of the Lakes. Another niggle which was discovered was the engine’s reluctance to idle when it got fully warmed up – obviously providing deep joy in heavy traffic! Then there was the small matter of the fuel gauge having an accuracy level of +/- 50%, which resulted in running out of fuel 8miles from the venue! This had the knock on of dragging all the muck up out of the tank and clogging the carb up for good measure! The wedding itself went as well as these things ever do and the van earned its keep, ensuring everyone stayed adequately hydrated. The return journey was another 8 hours of badly fuelled, sickly running, noisy misery – but overall we’re calling it a success! So, when the van left here, it was looking great inside but on the outside; not so great.... 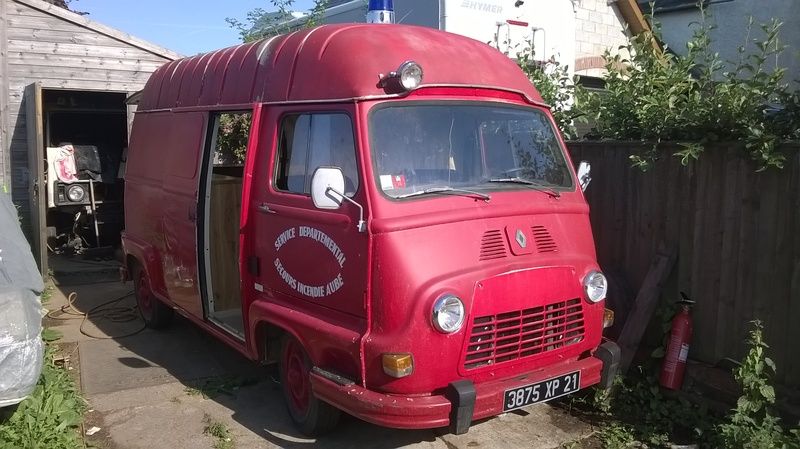 It bugged me a bit that we didn’t have the time to freshen the paint up before it left, so I wondered if I could revive it a little with a quick mop. I was pretty damn stoked with the result....  Oh yeah! Nice! The roof was toast though.... 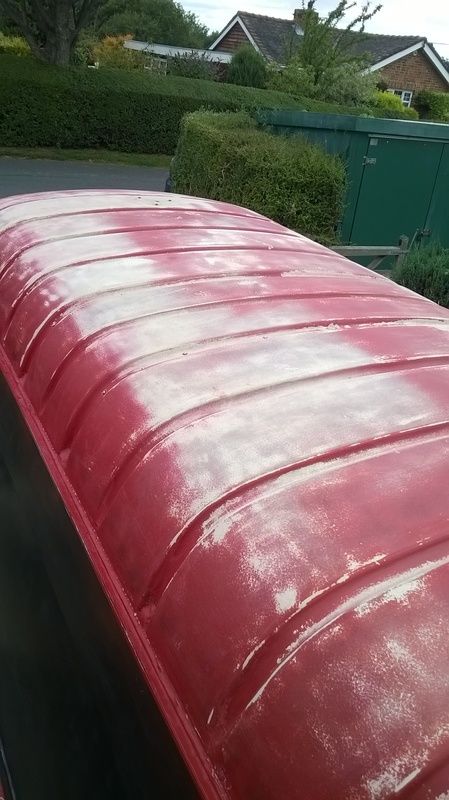 And obviously, there was the small matter of the side I rebuilt being black. Time for a bit of primer... 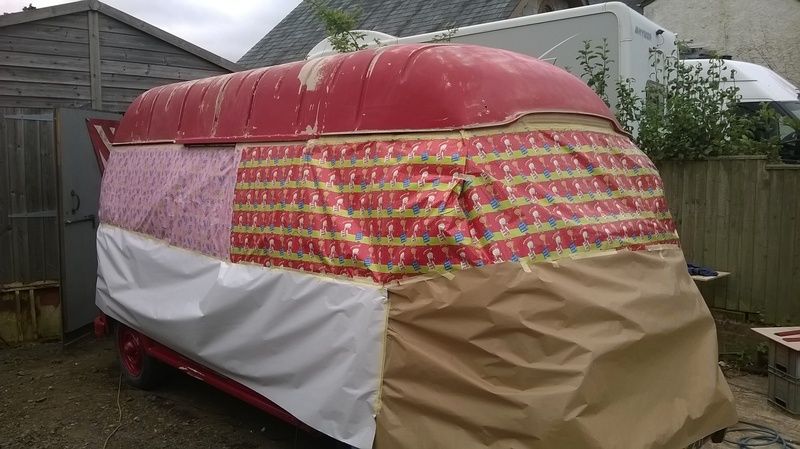 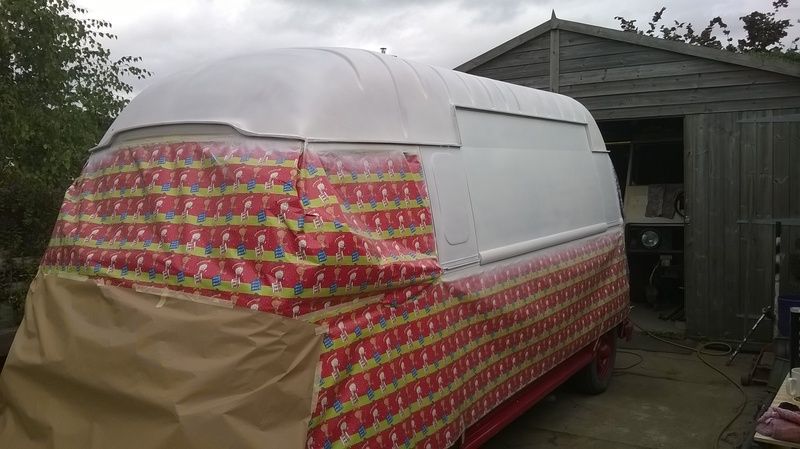 As you can see – I was a bit low on masking paper! Now time to throw on some top coat and see if we got the colour match anywhere near – they didn’t have any Pompiers Francais on the shelf, so we took a punt..... 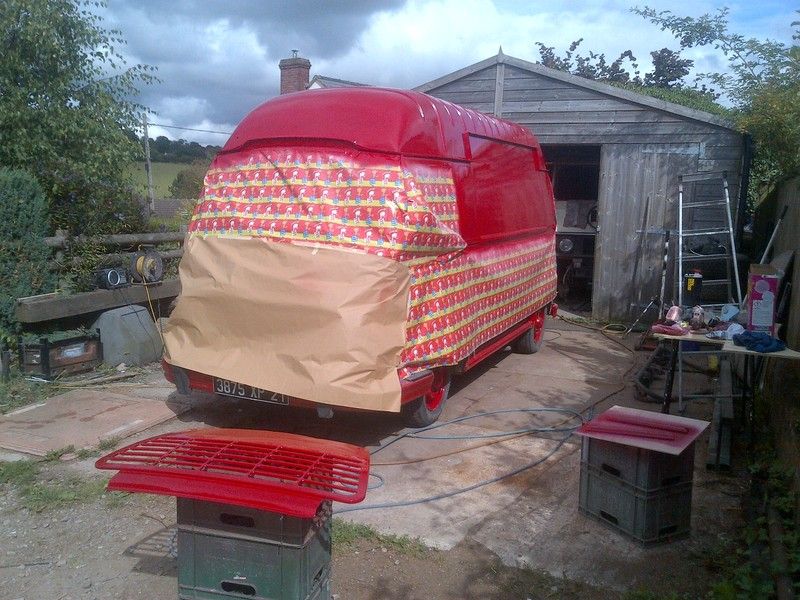 Looking promising..... 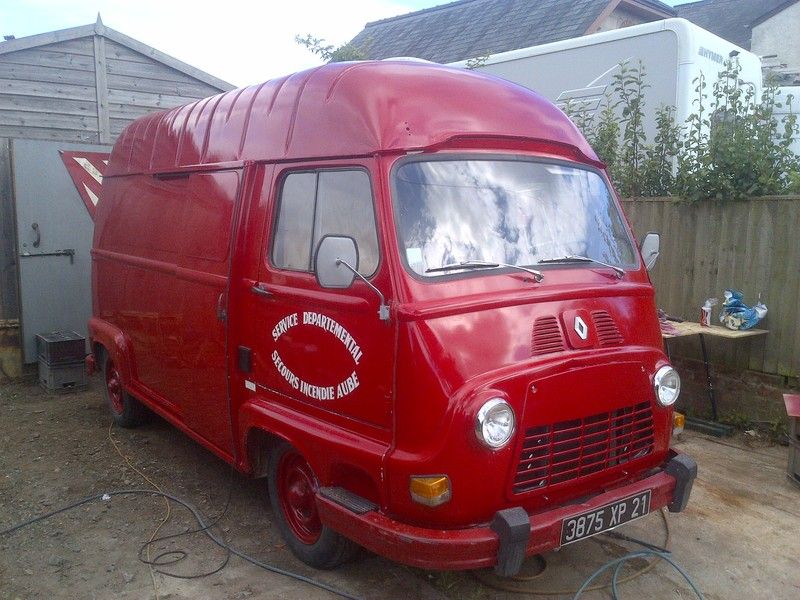 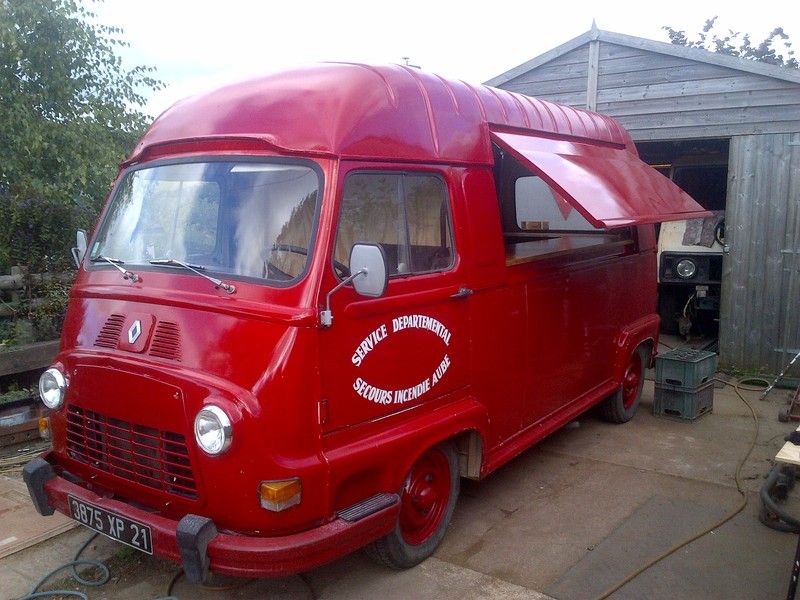   Ended up painting the grille, half the side, a sill, back arch, bumper and the roof! Next up is all the interior stuff that needs sorting, but that’s for another day! Thanks for stopping by, Joe |
| |
|
|
Carlosfandango.
Part of things
  Now with added Suffix B Range Rover classic - another bucket list car acquired.
Posts: 145 
|
|
|
|
|
Well that's just bloody lovely. Well done man, very cool indeed.
|
| |
1966 Fiat 1500 fast road/race conversion
1967 Porsche 912
1968 Fiat 124 Spider
1973 Range Rover Suffix B
1993 Series one Discovery 200TDI
1997 Jaguar XJ6 3.2 sport
2001 P38 Range Rover 2.5 TD
Brace of Triumph bikes
|
|
Speedle
Posted a lot
   Need a Country Rock band in the Hampshire Area? https://www.facebook.com/DirtRoadDiaryUK
Posts: 2,221
|
|
Aug 10, 2015 14:58:36 GMT
|
|
That looks the business! The mop and roof job looks great and the paint match looks very close to my eye!
|
| |
|
|
|
|
|
Sept 9, 2015 16:33:26 GMT
|
I guess it’s about time I got this thread back up to date, so here goes…. I’ve pretty much got the van finished now, it just needs some of the interior woodwork repainting where I’ve been altering bits and pieces and I’m waiting for a new tap and water heater to turn up after the original ones both leaked. The cab jobs were probably the most time consuming, so I kicked off with these. I rebuilt the carb, sorted the alternator tensioner and insulated the engine cover the other week, but I still had a few other things to tick off. One of the footwell panels had been holding water, from a leaky door seal, and was looking a bit rough – this was sorted and painted and then some sound deadening was fitted under the floor matting. I refurbished the blue light and the Appleton-style search light and got them refitted and wired up properly. Then pulled the dash clocks to check the wiring for the mis-reading fuel gauge. It wasn’t a lot more work to take the entire dash out, so I stripped that out and gave it a lick of red to cheer the dull interior up a bit. Next big job was the over-cab locker area. This was a pain in the  as it has loads of compound curves due to it tapering and narrowing. I ended up building it up in sections, starting from the roof rail just above the doors. I did the roof panelling first and then put the cupboard base in last. I neglected to take any photos of this, as I think I was too busy swearing or wiping glue drips out of my eyes. Or both. Anyway, the inside of the locker looks like this from inside the bar area of the van….. 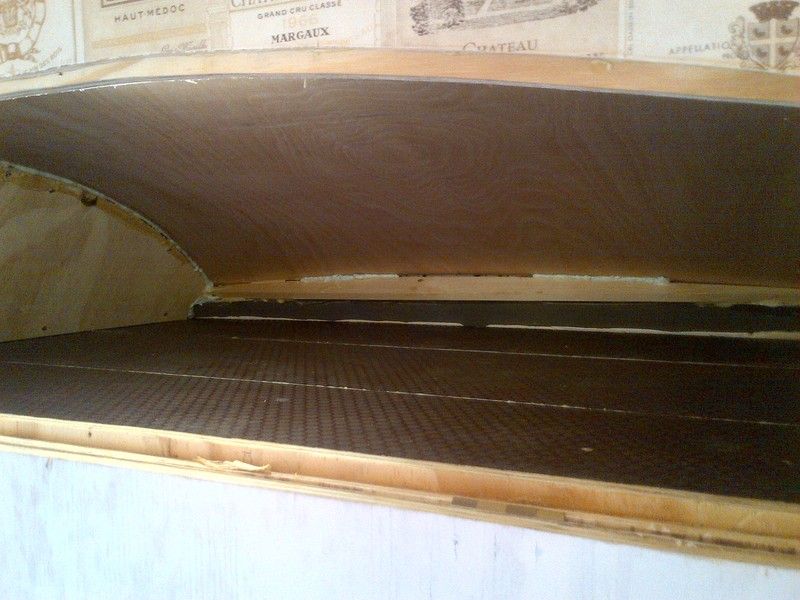 There’s a light in there too, which should prove useful down the line. Next task was to pretty up the cab interior, as it was now awash with ply! Did it with that stretchy lining material and was pretty pleased with the results. I’ve never done this before, so I wasn’t sure how tricky it would be. Turns out, it’s really great stuff to work with…..   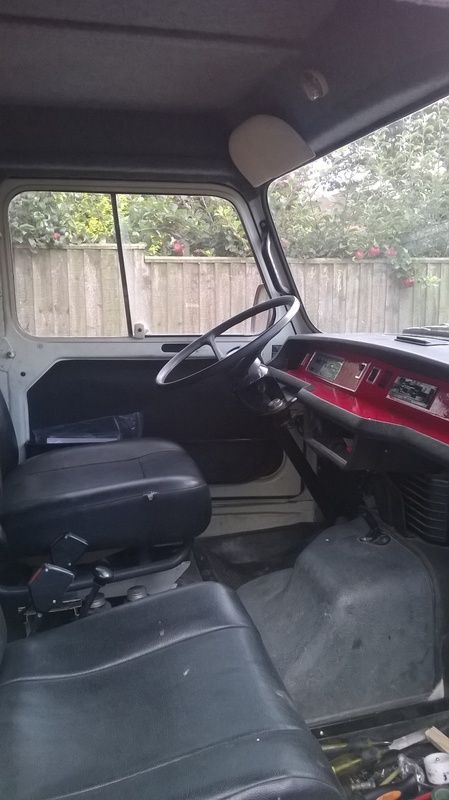 Moving back into the bar, I added a built in bin under the rear drawer. The bin slots in behind (or infront of) the water containers and has an aluminium shoot to guide the rubbish – this barely even registers in the picture, but took me bloody ages to make! I also fitted the missing door to the under sink cupboard and altered the shelving under the back bar area. 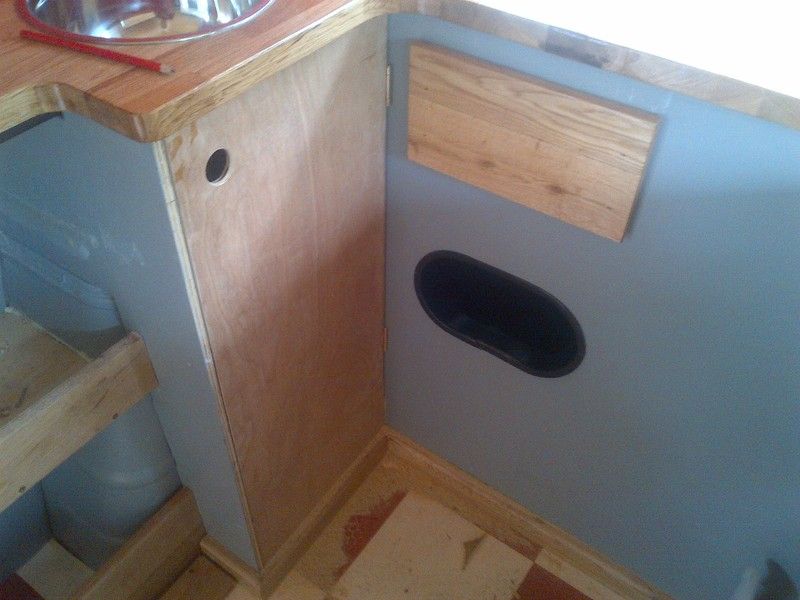 Another niggly little job was, with the tailgate open, you could see into the cupboards at the back and it just looked scruffy. I folded up a hinged ally cover to finish to a more acceptable standard. As a bonus, there was enough clearance room between the top and bottom doors to allow me to form a drip return over the lower doors. This should help keep the rain out if the tailgate is open when the bar is in use. Going from this…. 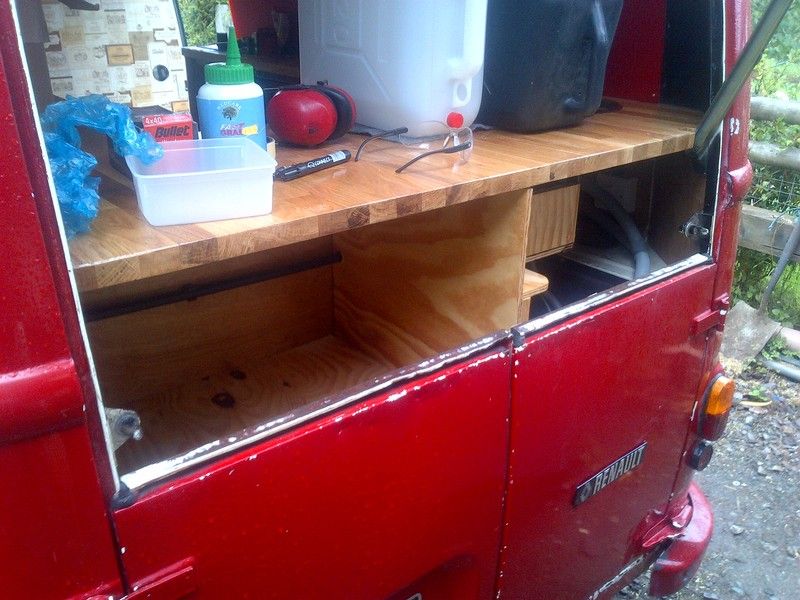 To this… 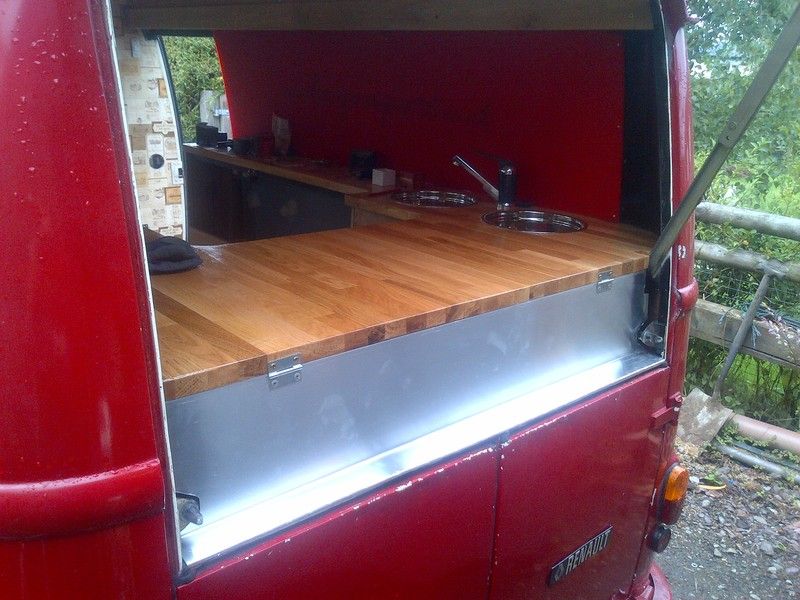 I’ve finally got the internal catch sorted for the big hatch and done a couple of mechanical jobs too, so it’s pretty much there. Plan is to get the few other bits sorted and then try and take some decent photos of it set up, probably in the field up the road one sunny evening. Cheers, Joe. |
| |
|
|
|
|
|
Sept 9, 2015 17:46:23 GMT
|
|
Absolutely brilliant work!
|
| |
|
|
|
|
|
Sept 9, 2015 18:57:12 GMT
|
|
cracking job
|
| |
91 golf g60, 89 golf 16v , 88 polo breadvan
|
|
stevek
Yorkshire and The Humber
Posts: 728
|
|
Sept 9, 2015 20:57:30 GMT
|
Hi, that's a great job you've done. As has already been said it's a refreshing change from VW's and H VANS. (I like seeing those too mind) This was serving pizzas at Leeds Beer festival last weekend...  ... Another interesting base vehicle but not as nice a conversion as yours. It still looked cool though. -Steve- |
| |
Last Edit: Sept 9, 2015 20:59:57 GMT by stevek
|
|
slacky
Part of things
 
Posts: 479
|
|
Sept 9, 2015 23:13:41 GMT
|
This is fantastic , great workmanship  |
| |
Audi 90q - Cab - UrS6 - 80 Sport
|
|
|
|
|
Sept 10, 2015 8:26:42 GMT
|
|
Cheers for the positive feedback guys!
and stevek - shhh, don't tell everyone about J7 vans - I may be trying to source a couple in France whilst they're still cheap!
Joe
|
| |
|
|
|
|
|
|
|
Sept 10, 2015 10:16:45 GMT
|
Don't buy them all Joe76.. I am looking for a J7 campervan in France too before prices go up.  Oh and the estafette looks great! |
| |
|
|
|
|
|
Sept 22, 2015 16:16:48 GMT
|
Hi Joe, Came across your journey with the estafette today and wow, you put in so much effort! My conversion wasn't easy in the slightest and definitely would never want to do it again.. BUT it's all worth it, as they are lovely vans. I'm currently looking to buy another van so being super cheeky, if you fancy the potential of selling yours on, it'd go to a great home. Sorry if this is a complete no no, but thought its always worth asking  Victoria |
| |
|
|
|
|
|
Sept 22, 2015 16:18:02 GMT
|
 My boy when he was first painted...
|
| |
|
|


 as it has loads of compound curves due to it tapering and narrowing. I ended up building it up in sections, starting from the roof rail just above the doors. I did the roof panelling first and then put the cupboard base in last. I neglected to take any photos of this, as I think I was too busy swearing or wiping glue drips out of my eyes. Or both.


