|
|
|
Apr 15, 2020 20:44:39 GMT
|
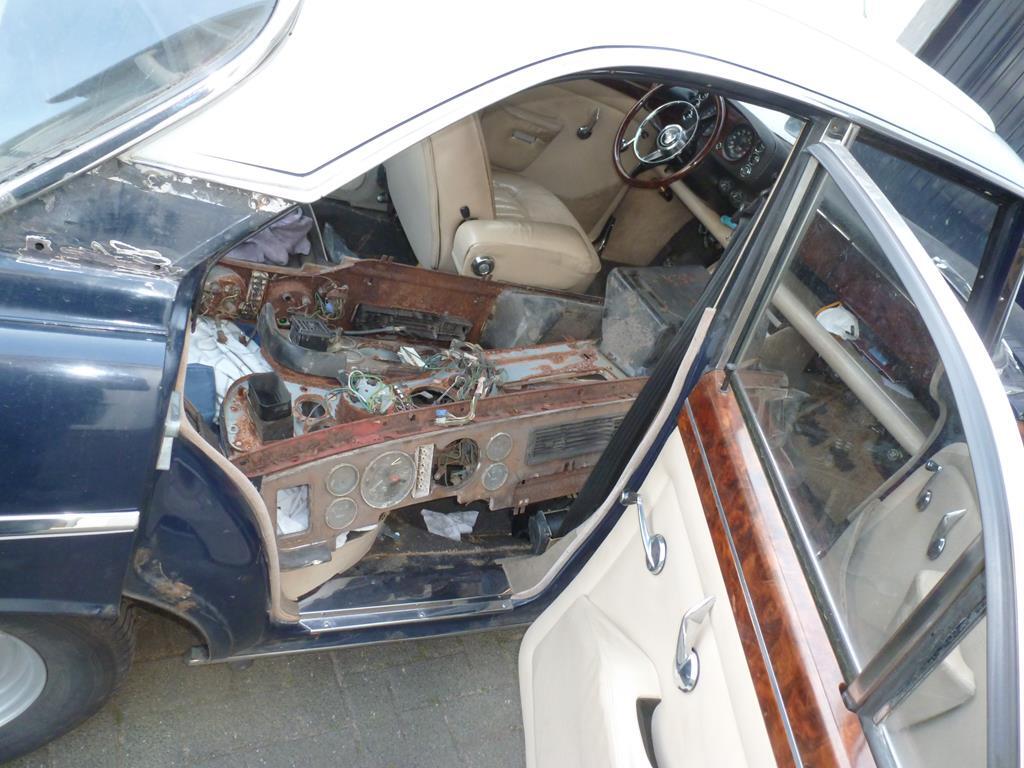
Peter - Never met you but I know through your threads that you are both diligent & practical - From what I see nothing much phases you either - Personally I have to say that I always take the challenge on 'You will never do it on your own - you can only do it with 2 of you' and just get on with it by myself - whilst it may take me longer I've never been beaten yet - hope all goes well with it Cheers Chris. Always like new challenges but am glad that i do not need to count the hours. I can see from your threads that you do most jobs: welding, painting, mechanical items and trim and all at a high standard and very quickly I imagine if you're cutting a gaping hole in the middle of the fabric, you'll have plenty of room to adjust the fit of the fabric! Good on you for going it alone. Thanks. That was what i thought and it worked out well Did some more work on the roof. After removing the center part, i glued the headlining to the Webasto frame. It worked out well. The release-close mechanism was fitted to the wooden bar. The method with the wooden dowels worked well so i could tighten all the screws in fresh wood. All moving parts got a coat white grease out of the spray can and after fitting the rails it was trial fitted 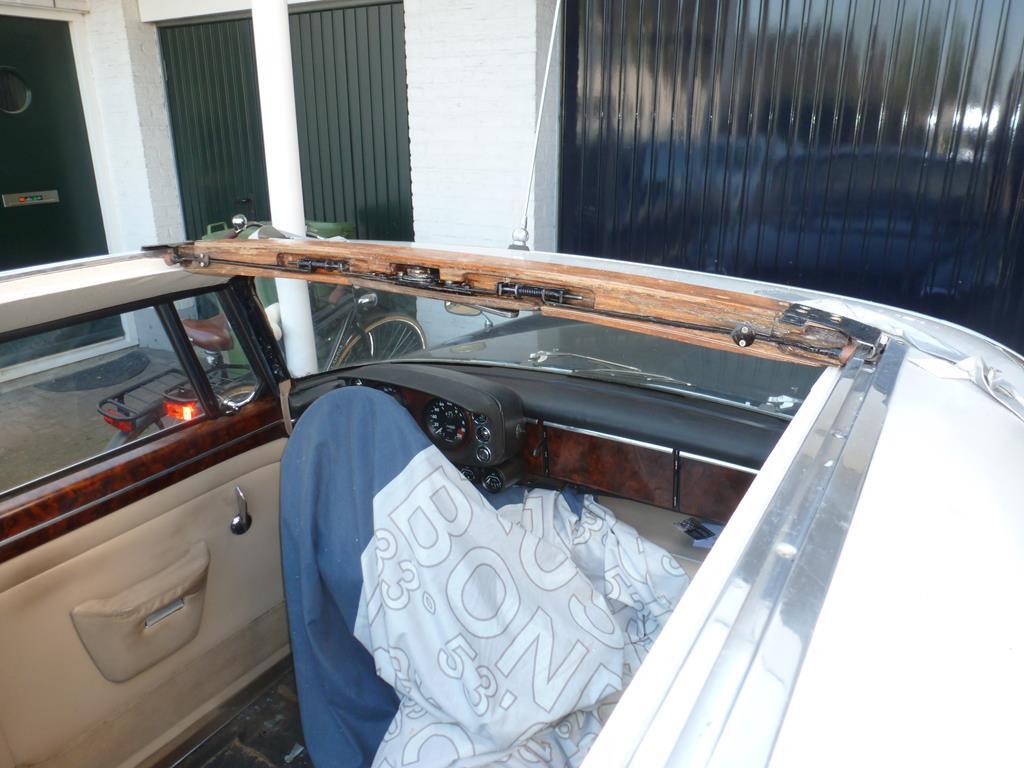 It works smooth again. After that, i fitted the 4 interior lights. You need to make a cut in the headlining to connect the wires and it is good to do it now as if you cannot find the wires, the headlining frame needs to be removed to guide the wires to the right position. do not ask me how i know as this happende on my project P5 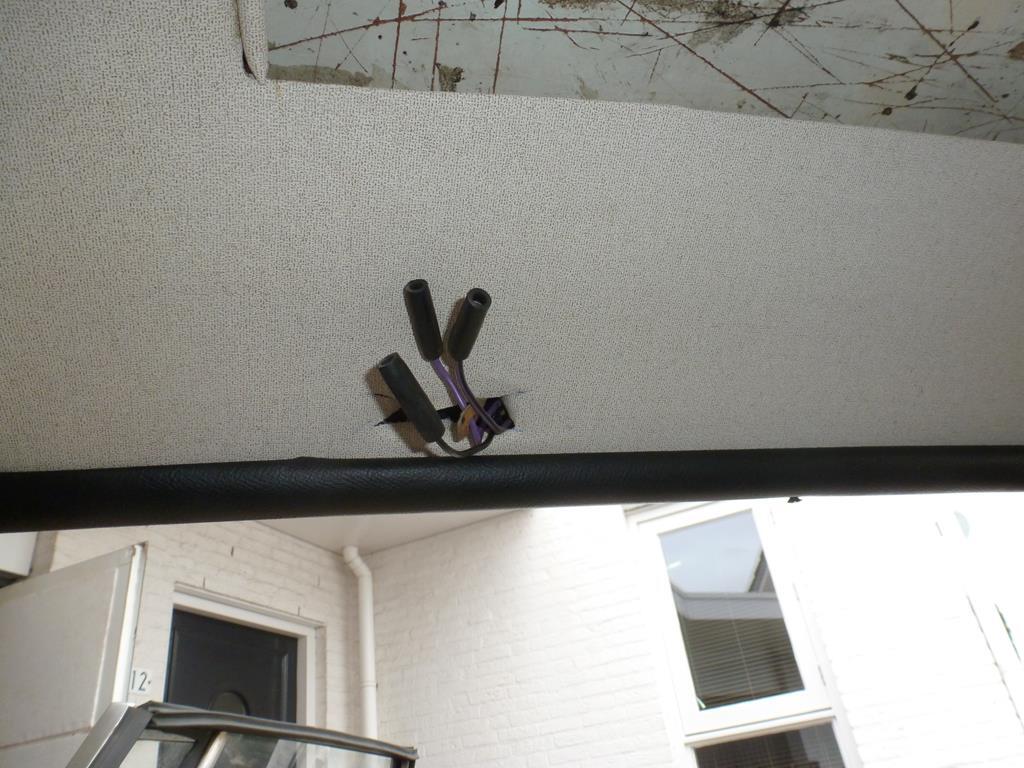 All wires were found and the lights were fitted 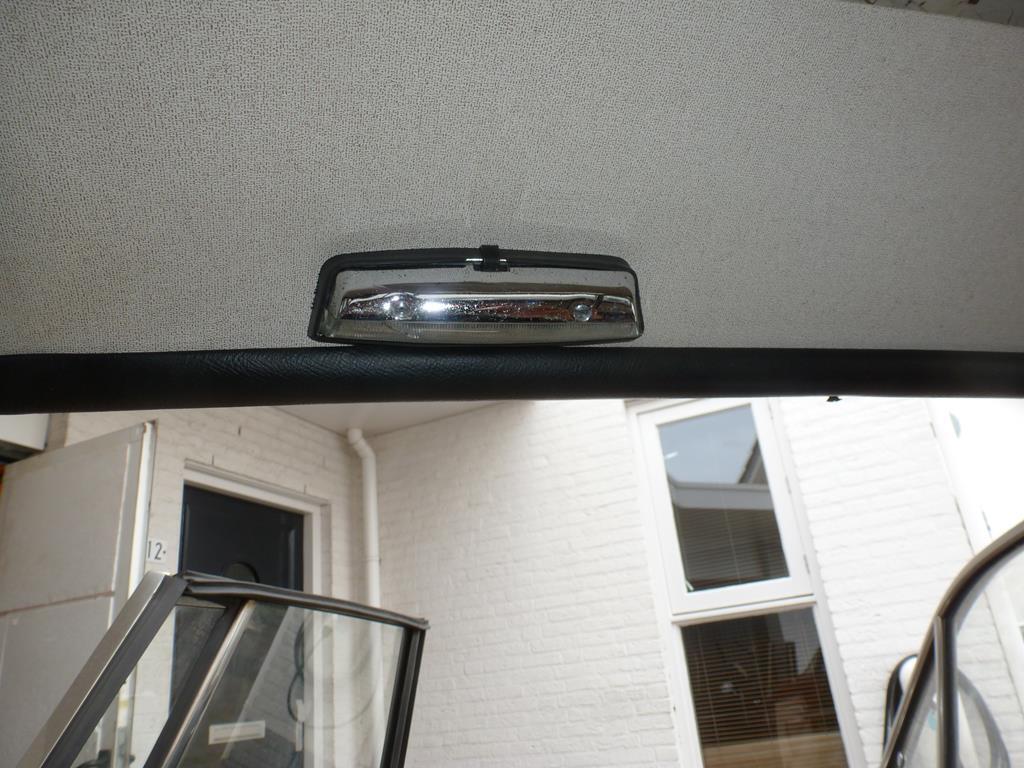 Then took out the trusty Singer to stitch the pockets on both sides of the sunroof material which houses SS cables. This vinyl is called Everflex which is a special vinyl for sunroofs and feels a bit greasy and should not shrink. It came from Martrim in the UK. It is not possibel to buy these materials in Holland 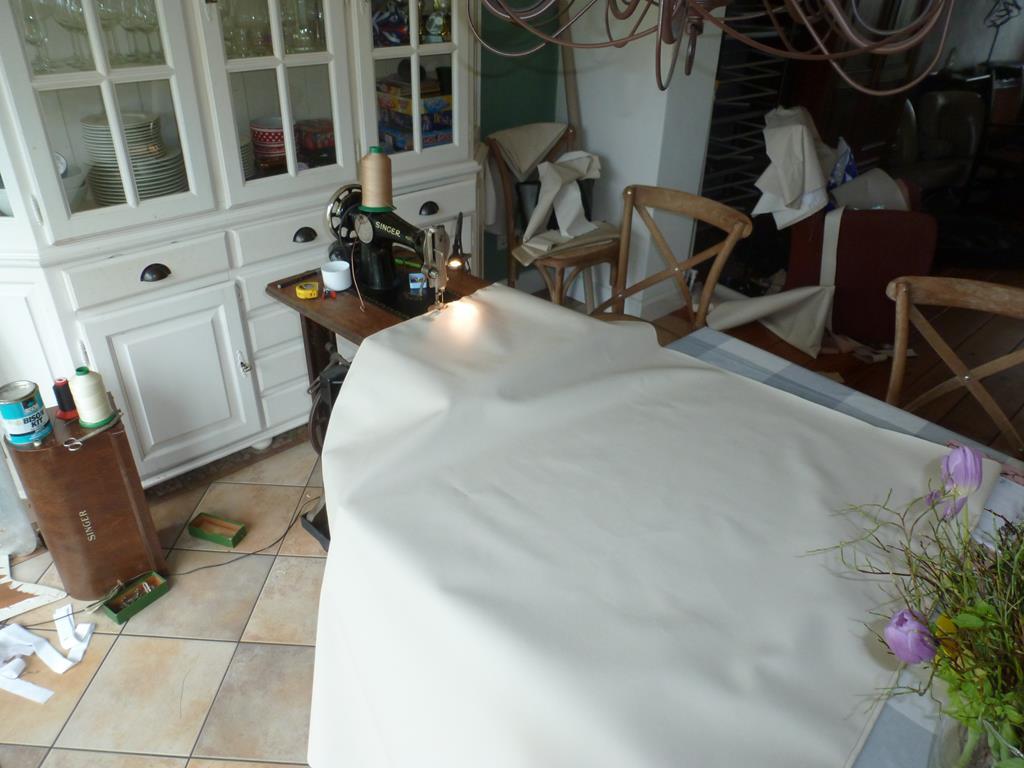 This Singer keeps amazing me as it has no problem with stitching 2 layers of thick vinyl. I found a serial nr database which showed that my Singer was build in 1937. I cannot find any wear on the mechanical parts as it is build so well. Peter |
| |
|
|
|
|
|
|
|
Apr 17, 2020 19:30:09 GMT
|
|
Lovely work as usual!
I've used Martrim before a couple of times and been happy with them. Surprising that there is no equivalent over in Holland.
I can't imagine today's sewing machine still going in 2013!
|
| |
Sometimes, others may not understand why you like a car so much. Sometimes, you may not even understand why you like a car so much. But none of that matters; all that matters is that you like the car, and having it makes you happy.
|
|
|
|
|
Apr 18, 2020 16:26:21 GMT
|
I can't imagine today's sewing machine still going in 2103! A typo reduced the impact of what you said ..... so amended in the quote 😊 |
| |
|
|
|
|
|
Apr 20, 2020 21:39:00 GMT
|
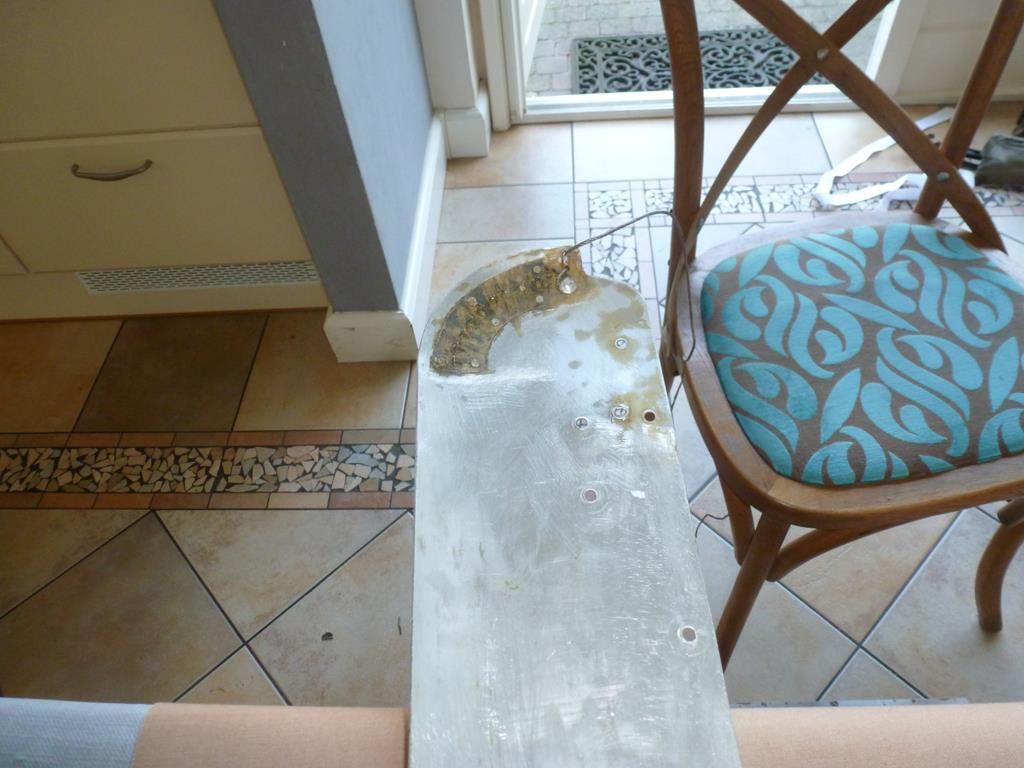
Lovely work as usual! I've used Martrim before a couple of times and been happy with them. Surprising that there is no equivalent over in Holland. I can't imagine today's sewing machine still going in 2013! Yes Martrim is very helpfull and friendly and i had a good look but could not find an equivalent in Holland. Todays sewing machines are curse word compared with these old Singers. I was given a modern defect sewing machine and after opening it i found ¨plastic gears which lost a few teeth which meaned scrap. Did some more work on the roof. After stitching the pockets on both sides, i had to pull the SS wires connected to the front aluminum plate threw the pockets This is the aluminum plate with the SS wires
 To pull the SS wires threw the pocket, i tacked with my MIG a piece of welding wire to the SS cable which worked well 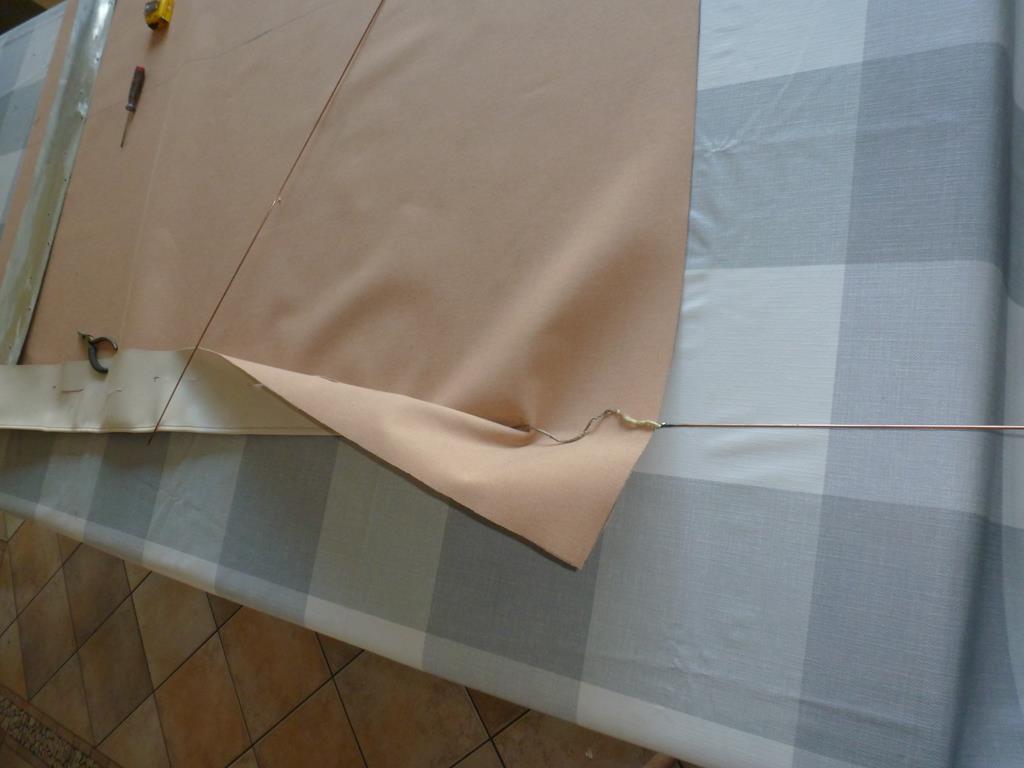 Glued the vinyl to the alu plate 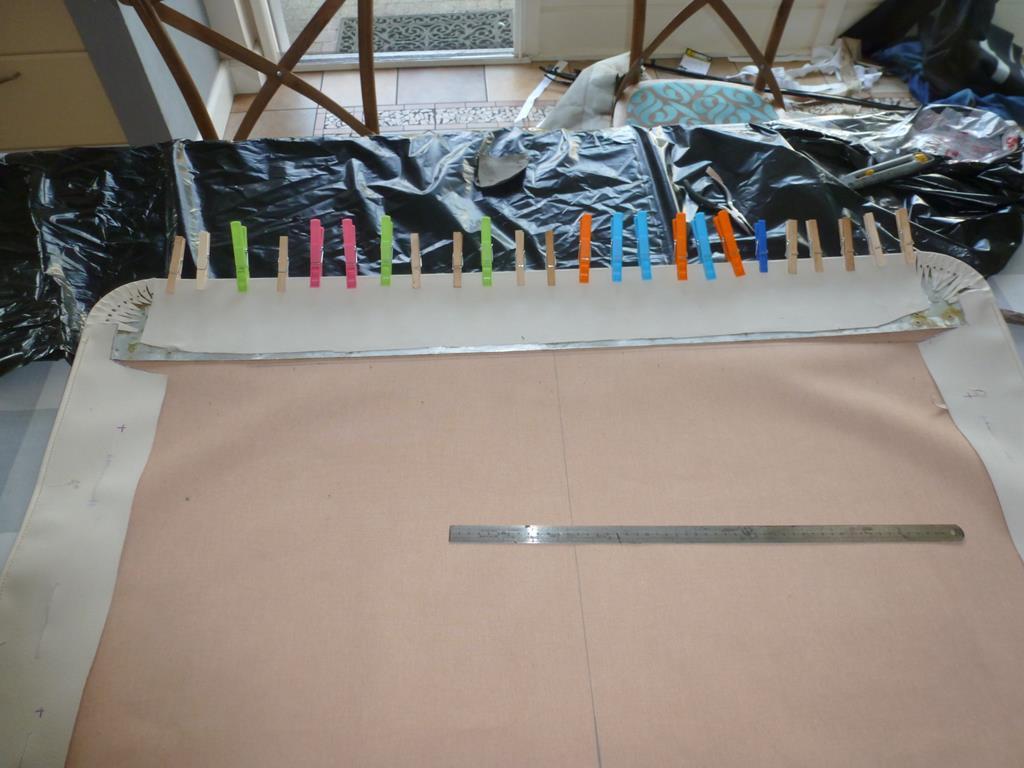 Took a lot of measurement on the old roof and transfered these to the new roof 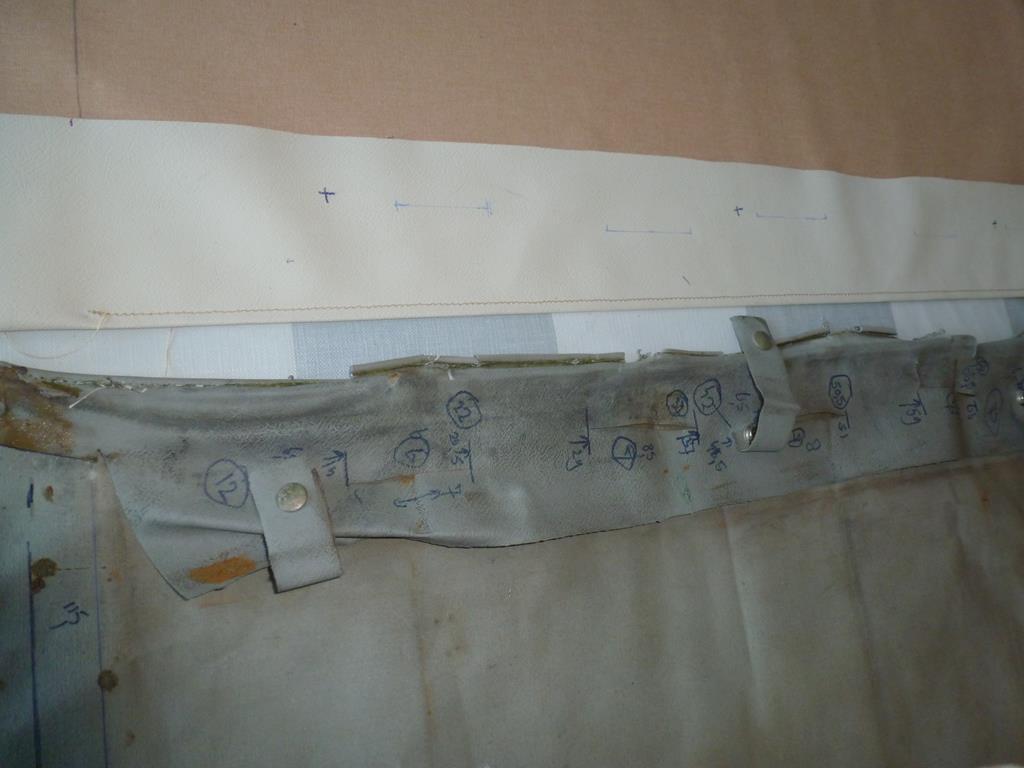 Glued the rear plate to the vinyl 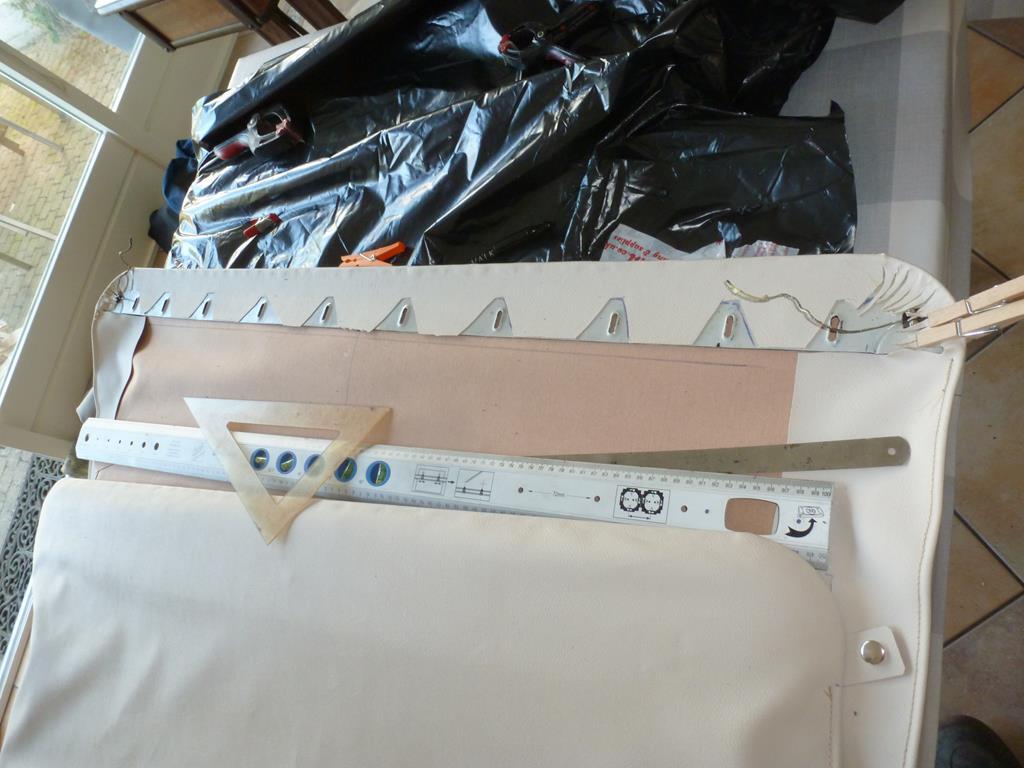 Attached headlining material to the wooden bracket and fitted all the ancelleries 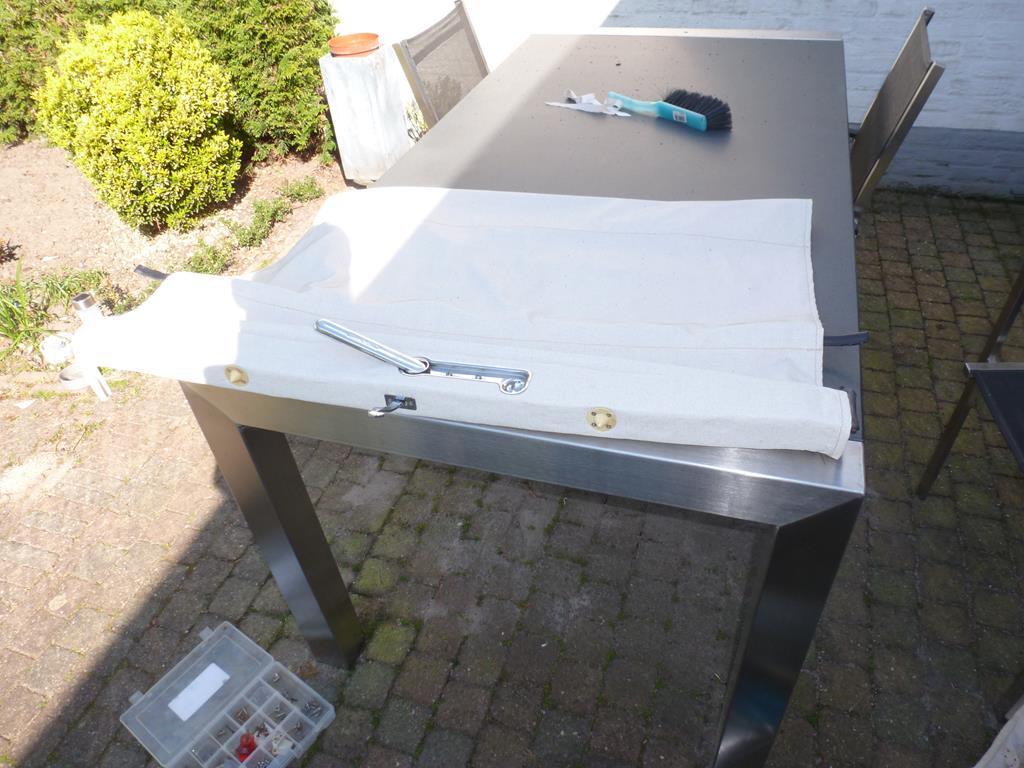 Then it was the moment to fit the roof to the car. It is rather difficult to describe how the roof is made and i made not enough pictures But all went well and the roof fits nicely and no reason to believe it will leak 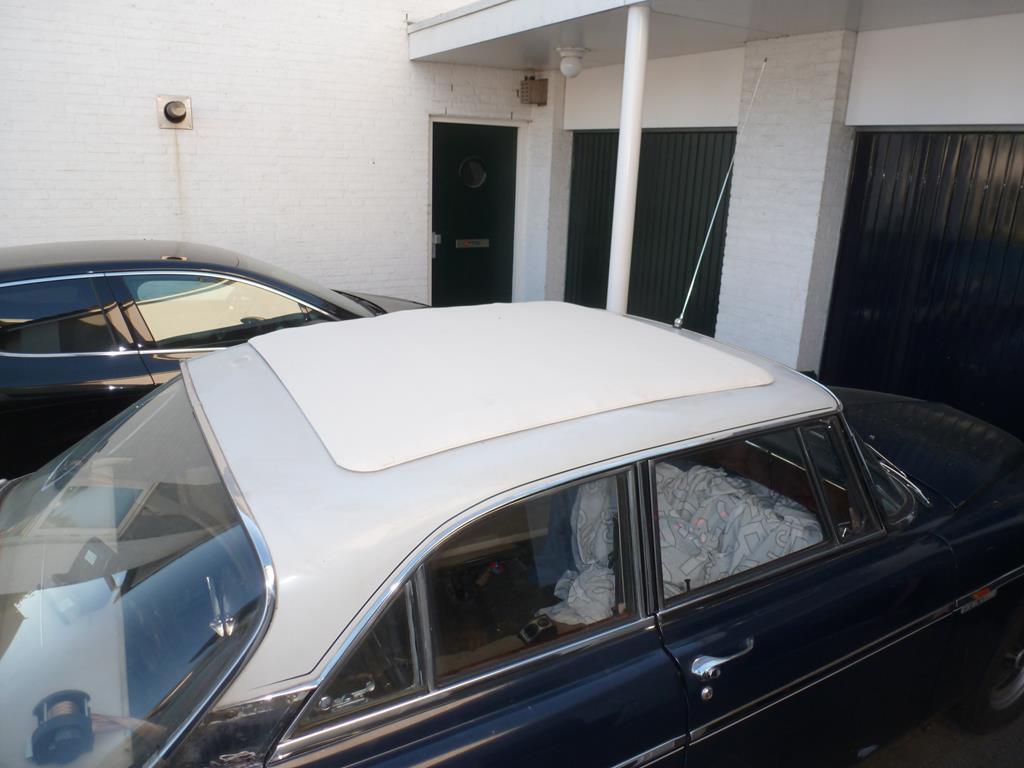 and a huge improvement compared to how the old roof looked 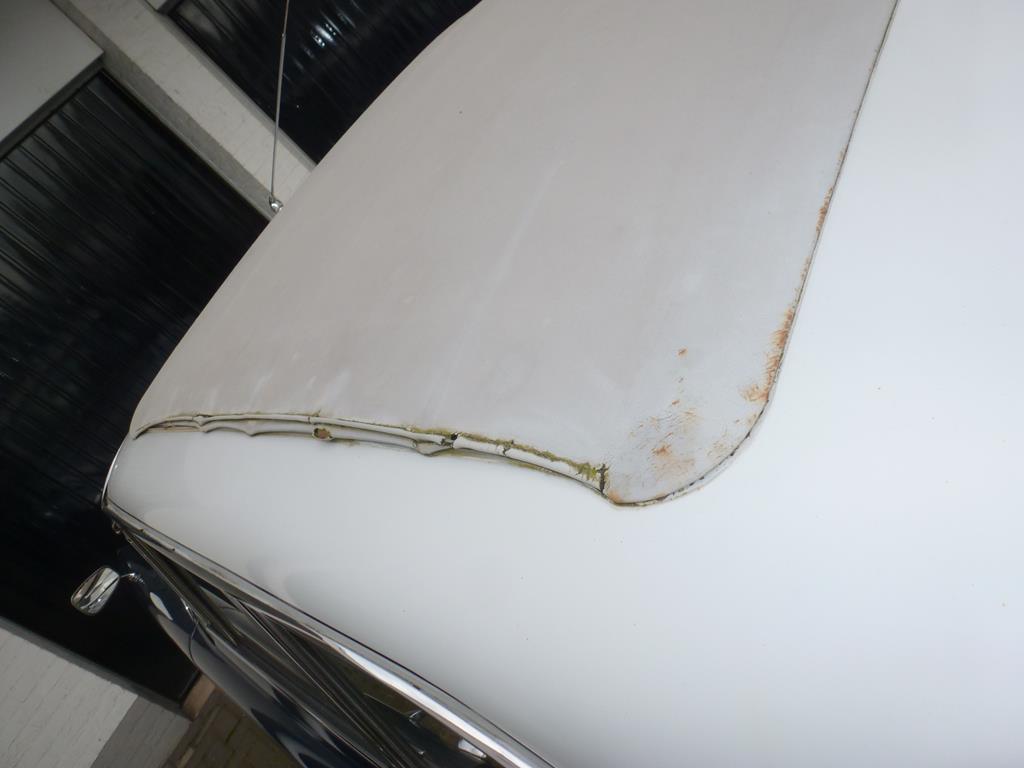 Still have to fit the headlining on the moving part of the roof and make new covers for the sun visors Peter |
| |
Last Edit: Apr 20, 2020 21:40:42 GMT by petervdv
|
|
|
|
|
Apr 20, 2020 22:31:35 GMT
|
|
That looks great, Peter!
|
| |
|
|
|
|
|
Apr 20, 2020 23:18:53 GMT
|
|
Very, very smart. Huge difference.
|
| |
|
|
|
|
|
Apr 25, 2020 14:46:37 GMT
|
Thanks! Very, very smart. Huge difference. Cheers George! Did some work on the sunroof. I ordered enough headlining material to give the sun visors a new cover. They were basically in good condition but a bit dirty 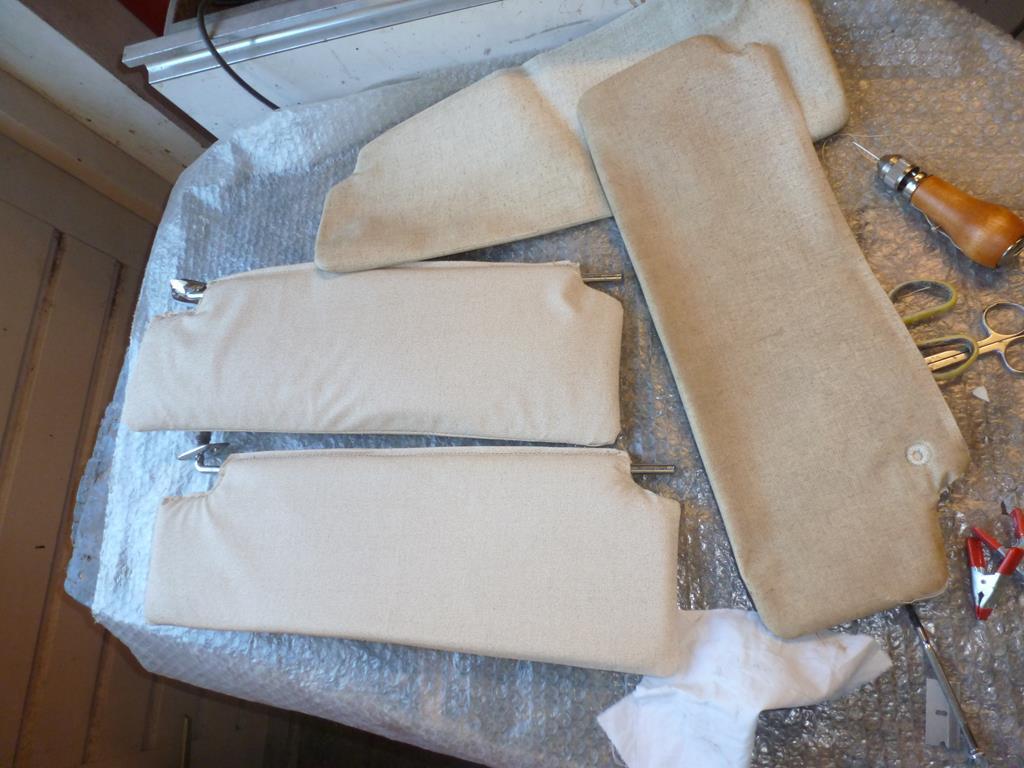 Then fitted the headlining on the moving part of the roof. On the rear it is screwed in to the roof frame and it has to fitted between headlining and sunroof when the roof is open. I made a curved piece of wood which matches the curve of the roof and drilled some holes in it to let small screws threw 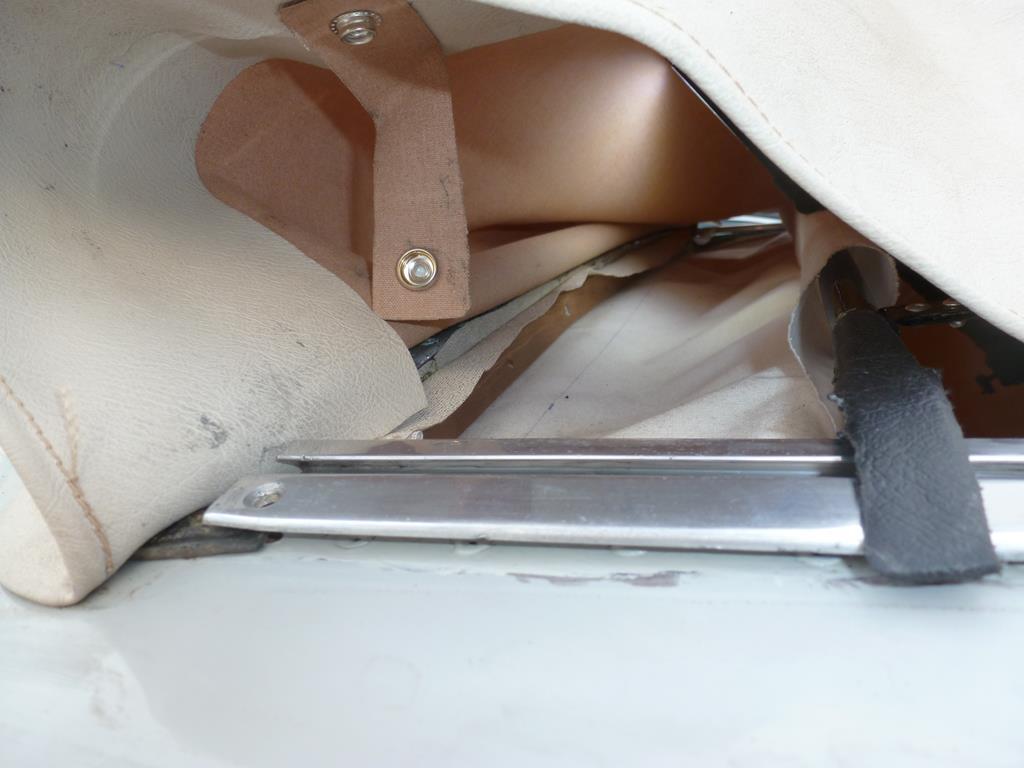 You have to make a guess how tight it is, tighten 3 screws (when the roof is open), then close the roof and check and give it more tension. This sequence was done 5 times and after that the 4 screws on the sides were fitted. It came out well but there are a few creases. Maybe it will sttle a bit but for the moment i am happy with it and it is a lot better then it was. 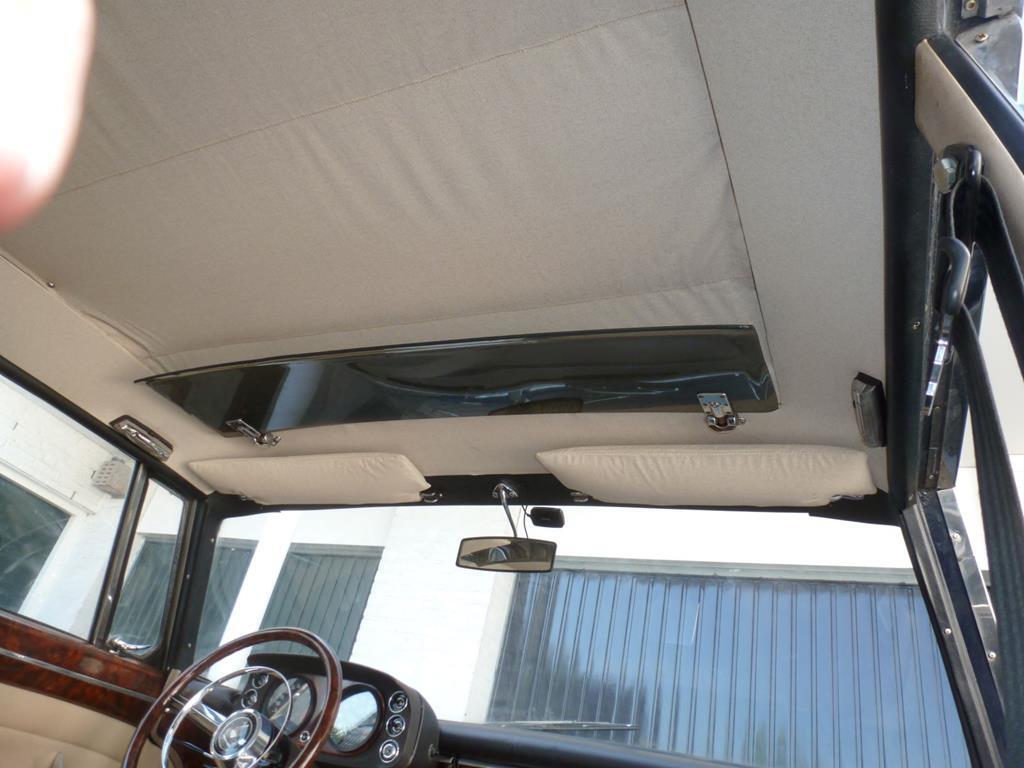 I ordered some SS screw for the aluminum channels and trim. 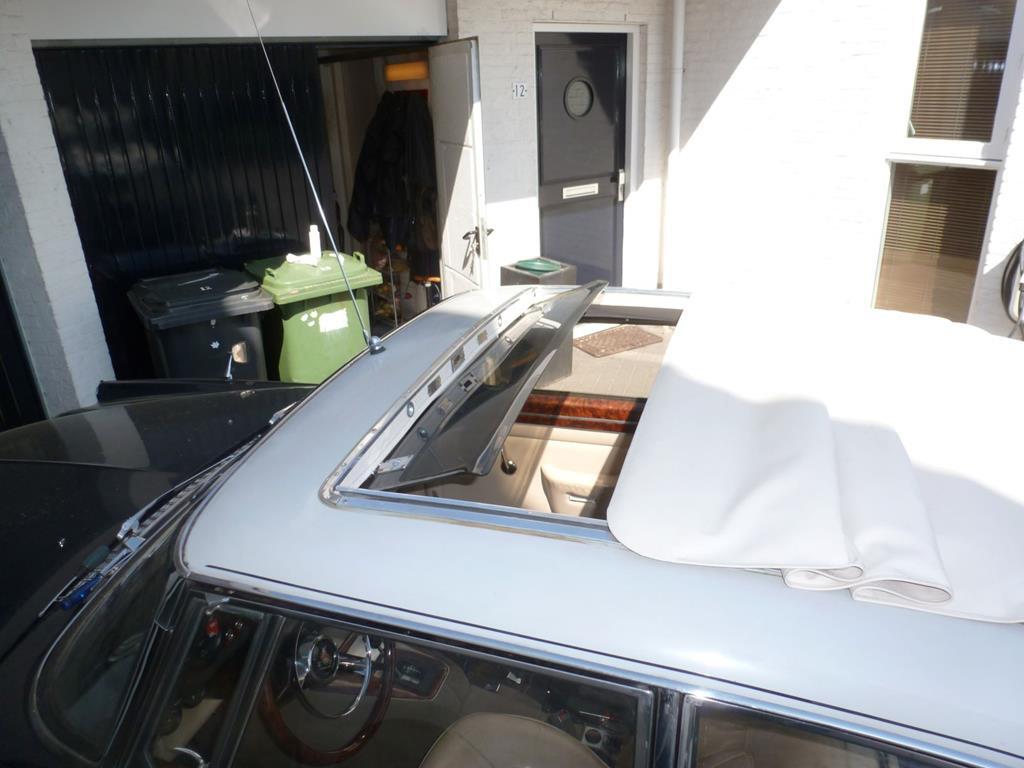 Let the summer come! Peter |
| |
|
|
|
|
|
Apr 25, 2020 16:40:54 GMT
|
|
Great work
|
| |
|
|
|
|
|
Apr 30, 2020 21:08:12 GMT
|
Cheers Jim. Following your YouTube postings with great pleasure. Used the Rover for a 500km trip to pick up 6x Jaguar XJ6 dashboards. It was handy that only the drivers seat was fitted so there was enough room for the 6 dashboards without damaging the interior It was a great trip and good to find out the roof does not clapper. Nowadays in Holland due to enviromental issues, the speed limit is 100km per hour betweem 6 am and 19.00pm. I find driving 100km per hr much more acceptabel in my Rover then in a modern car. Did some more work on the Rover. There are some rust spots on the car which is no surprise as the car has been living outside for the past 6 years and is used in the winter with salty roads. Now my wife works from home and her car is not used much, i can do more time consuming jobs on the Rover as her car is available. The first job is to replace the battery box. When i bought the car 6 years ago, i had spotted that the battery box in the boot was a bit rusty and some not so nice repairs were done on the surrounding boot floor. There were no holes so it was not really urgent and not an MOT problem. About 3 years ago, i restored a spare battery box but never managed to fit it. Battery box with metal cover and a vinyl cover over it 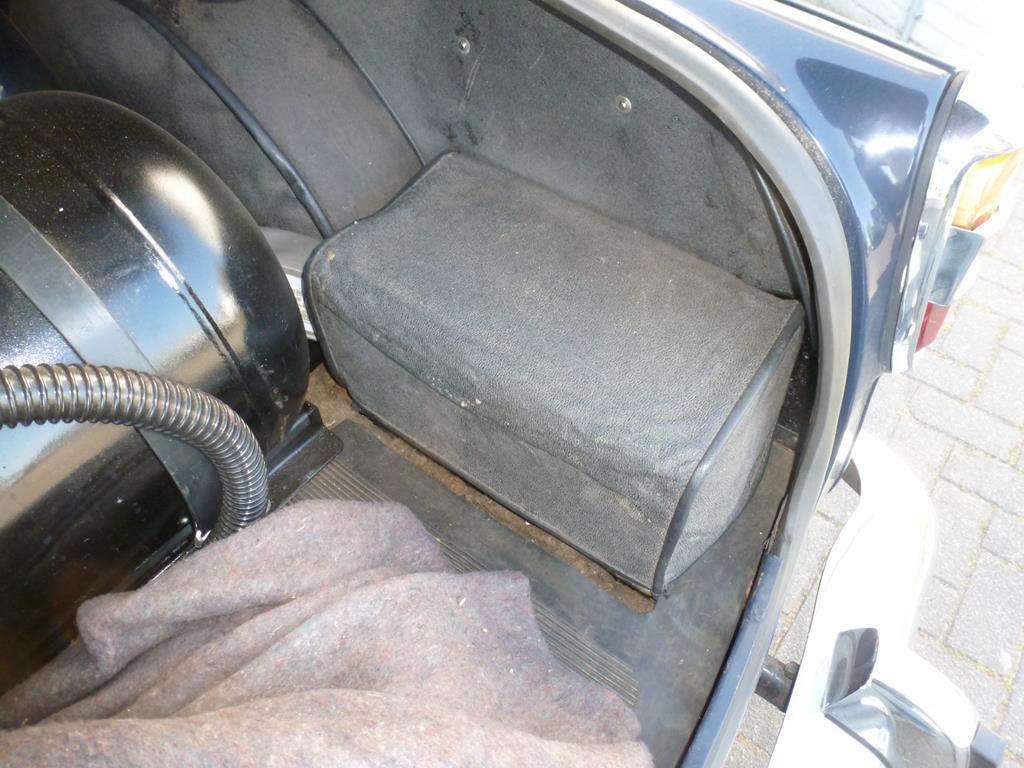 After removing the crusty battery box [/div] 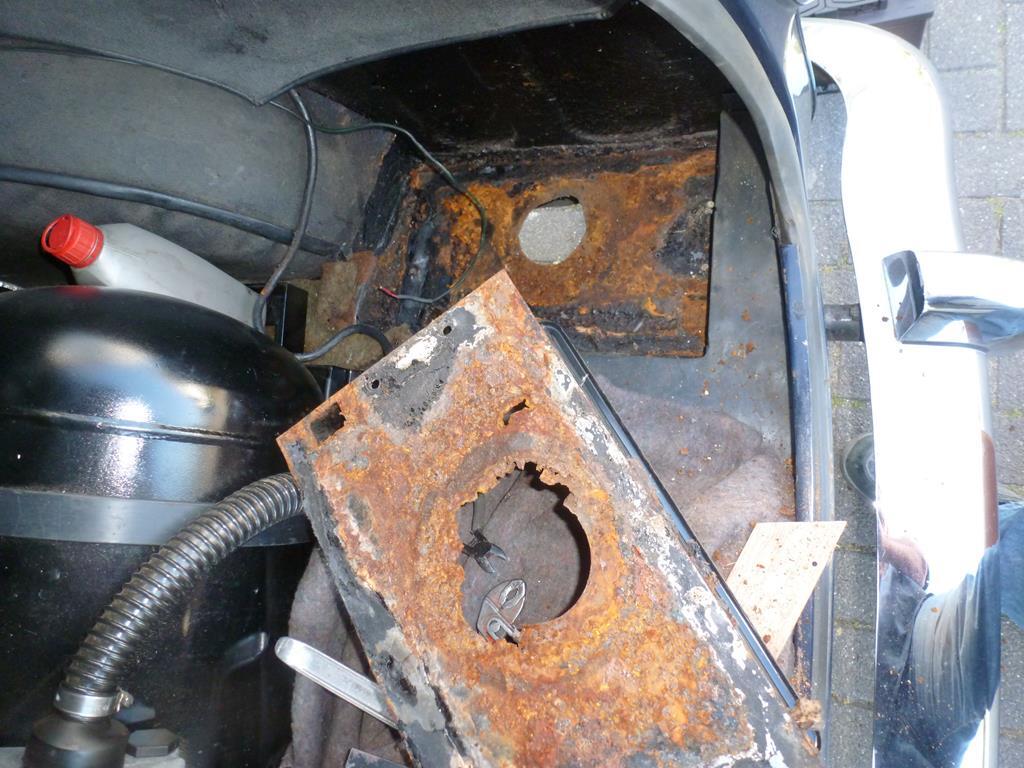 My Rover has been restored in the past and the restorer just welded pieces of sheet steel over rusted areas. A few years ago, i have removed several patches in the front inner wings which were visible so it was no surprise this method was used in boot area around the battery box and after removing loads of underseal and seam sealer, the lower part of the inner wing also had a patch over repair 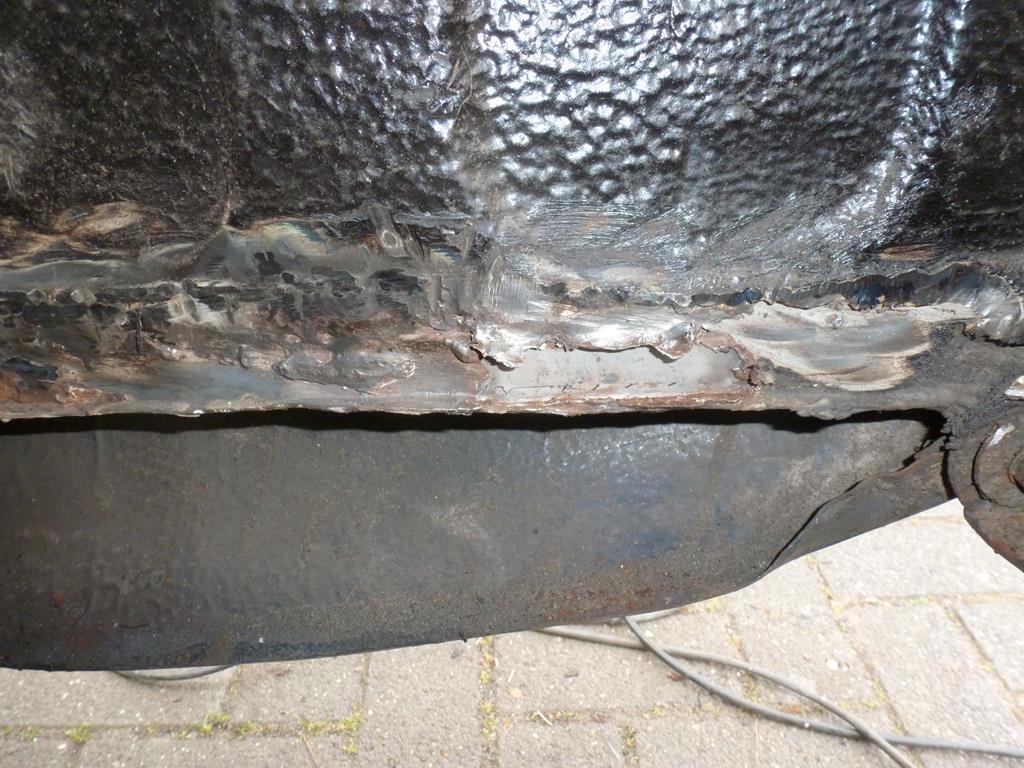 After removing the rear bumper and rear wing and removing the underseal, the patch over plate became visible 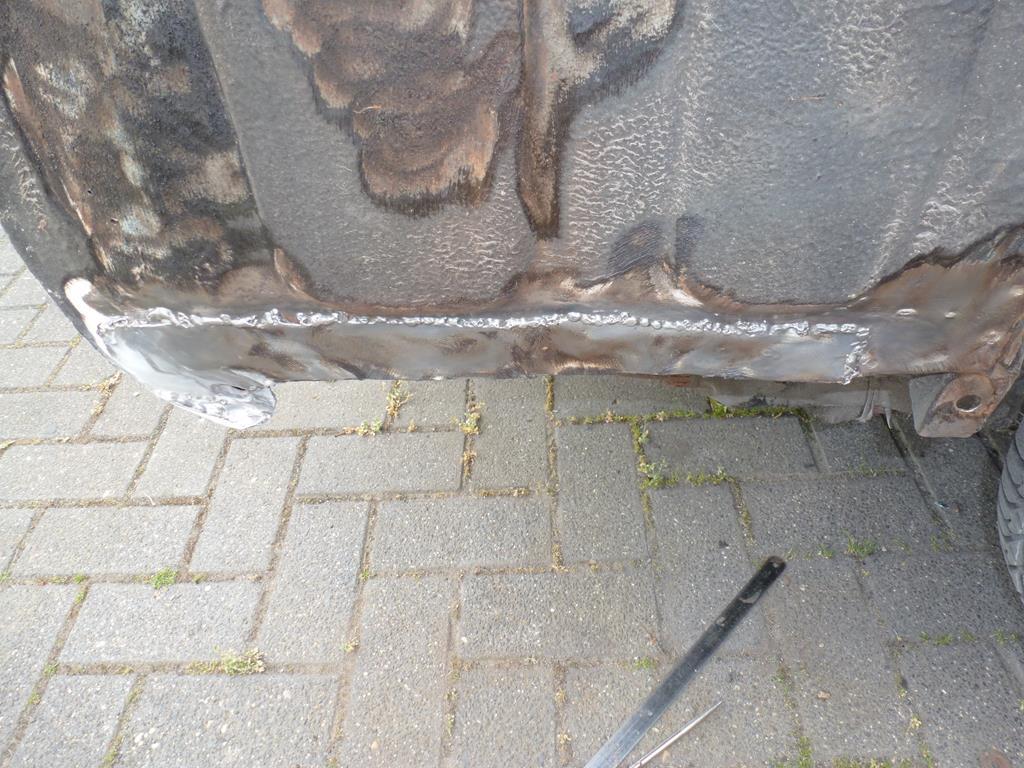 Still need to remove some pieces of the old boot floor. The inside of the chassis leg looks good and only has some surface rust. Will also clean that and treat it with Hydrate 80 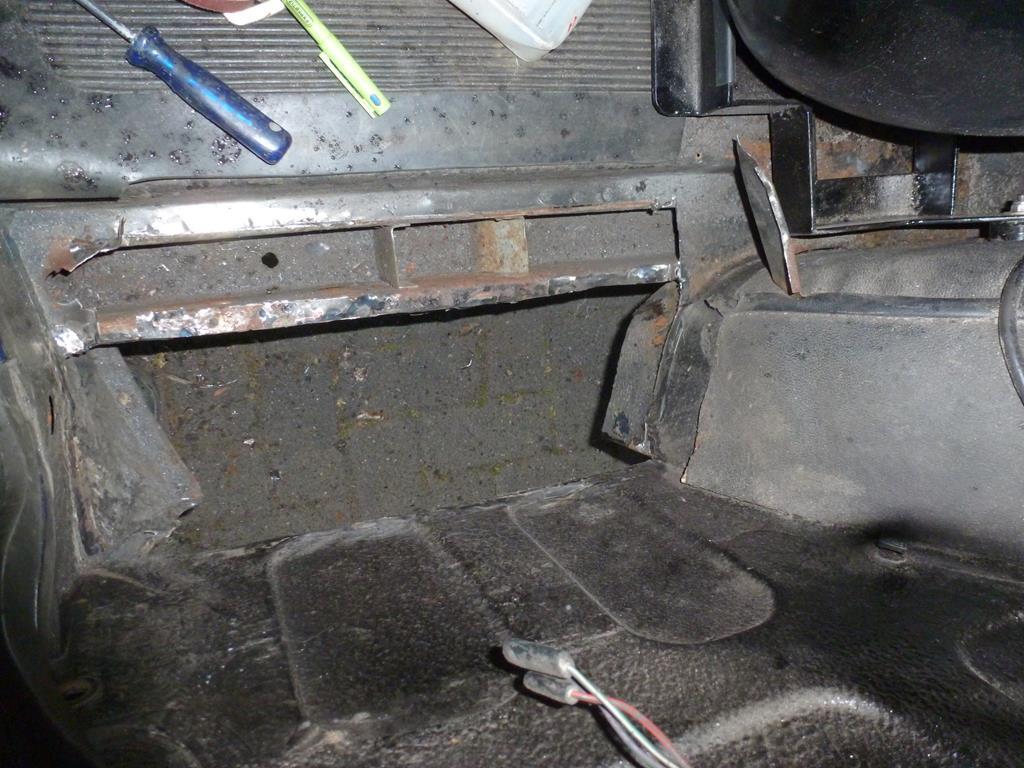 Thats it for now Peter
|
| |
Last Edit: Apr 30, 2020 21:11:52 GMT by petervdv
|
|
|
|
|
Apr 30, 2020 22:17:06 GMT
|
SIX dashboards??? That's just greedy!  Spares, repair/sell, or all for a customer? |
| |
|
|
|
|
|
|
|
|
|
SIX dashboards??? That's just greedy!  Spares, repair/sell, or all for a customer? I want to make a few demo dashboards with different veneers. The dashboards are in pretty poor condition but therefore cheap but usable for me. The seller deals in used Volvo parts and got these with a badge of Volvo parts. Not familiar with classic cars as he asked if my Rover was a Jaguar.... |
| |
|
|
|
|
|
|
|
Did some more work on the daily Rover. You can buy a repair panel for the floor underneath the battery box but these are including shipping costs close to Euro 100,- and i am often not impressed by the fitment of repair panels so decided to make it myself. Took a piece of rough cut cardboard and made the final lines by adding painters tape and copied this to a piece of sheet metal, taking notice of the flange 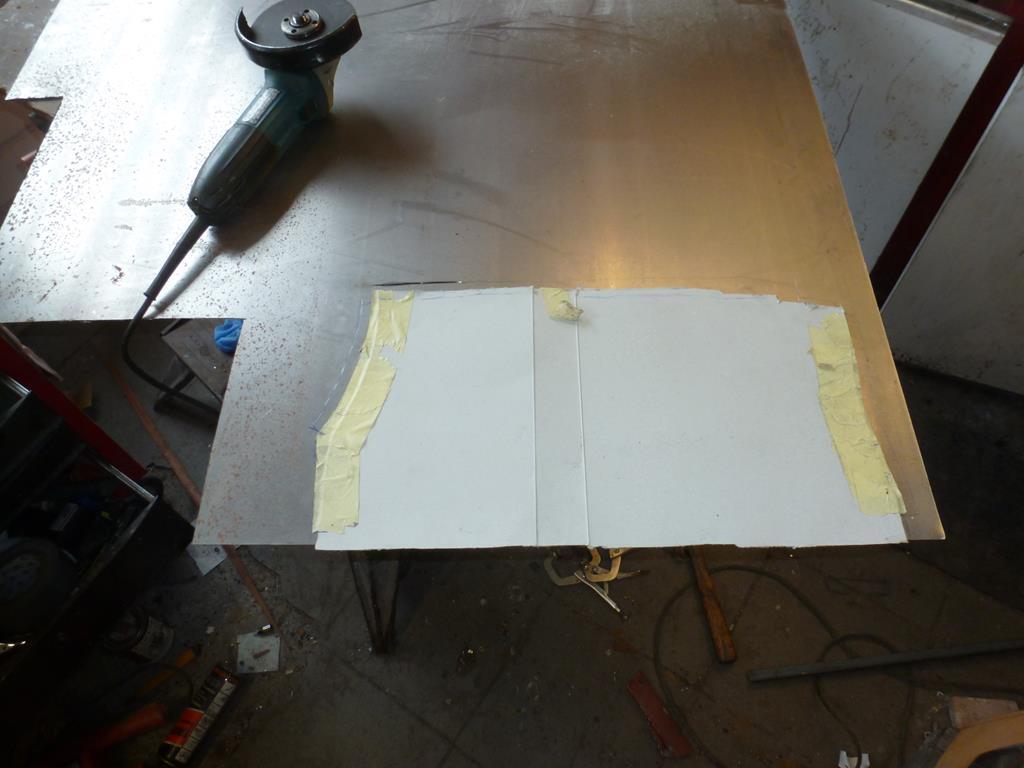 With a adjustabel spanner and hammer and dolly the edges were made and a hole for the battery tray 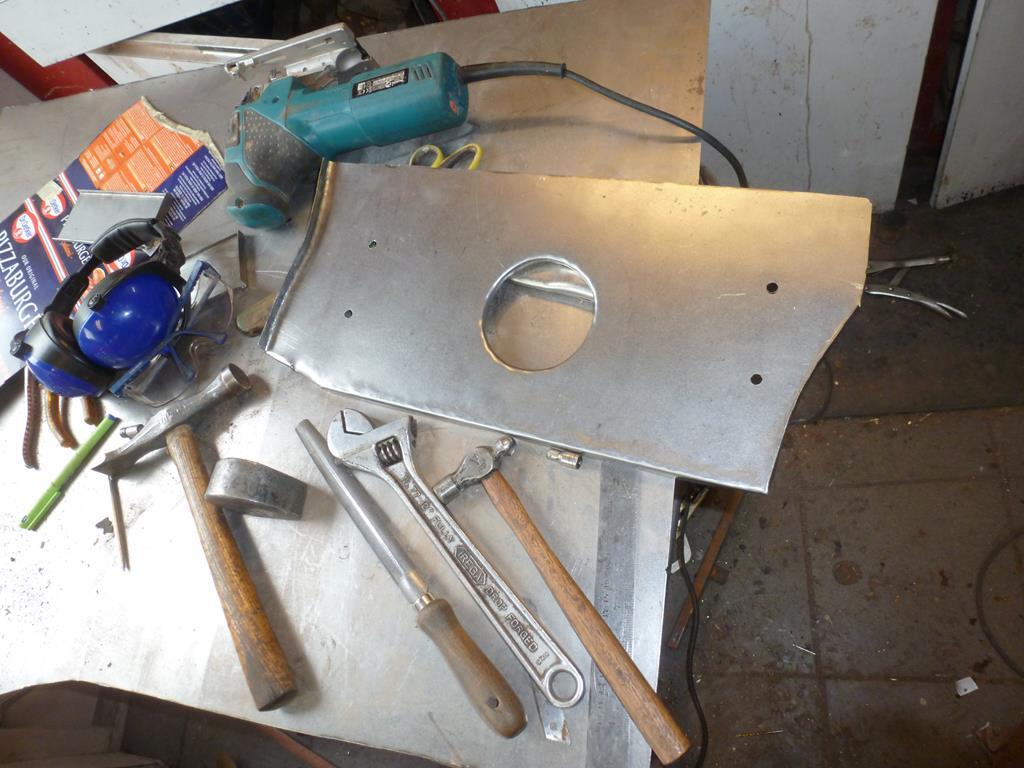 Also made 2 strenghening plates. These are fitted underneath the floor panel from the factory but were no longer on my car. I am not sure if these are really needed and on most restored P5s these are missing but it is not much work so i will fit these 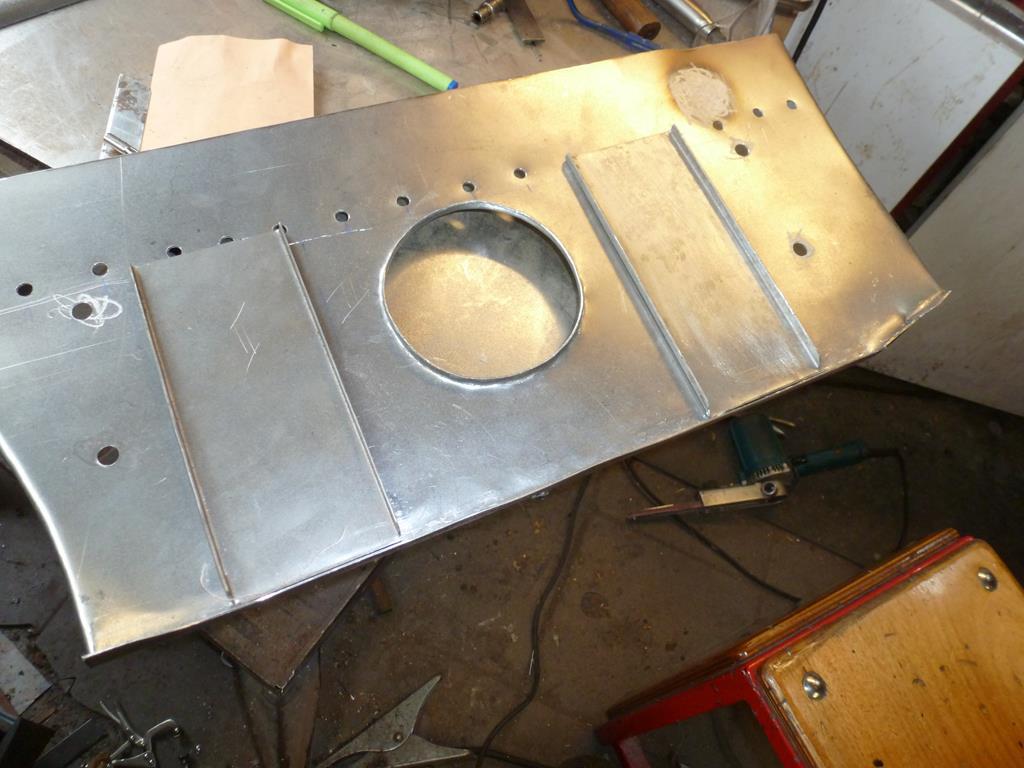 Drilled all the holes for the welds to connect the floor with the chassis leg and the 2 strenghening plates and welded on the earth connecting point 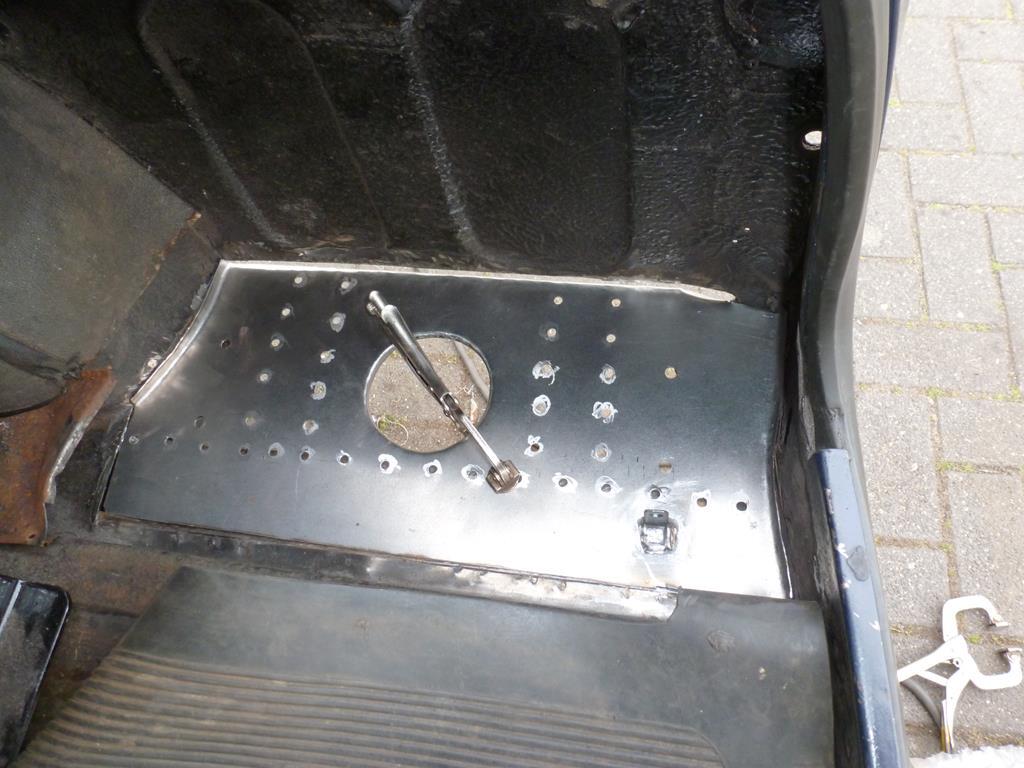 A pictures of the restored battery box which i welded in a new floor and got it powder coated 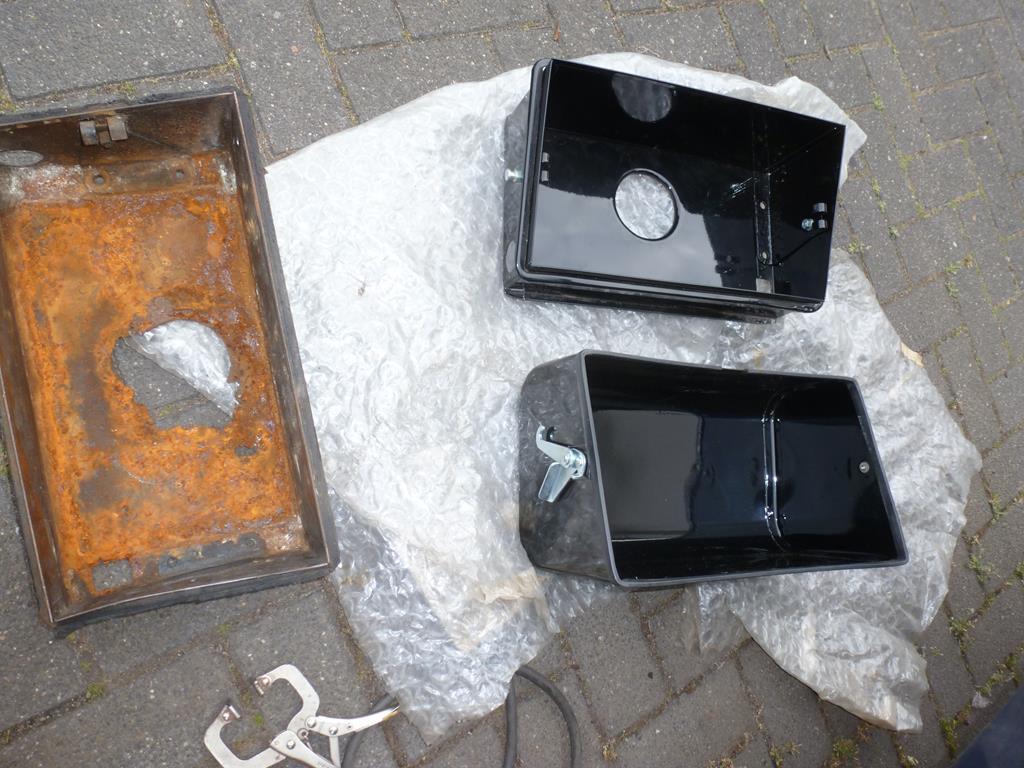 Still need to make the repair piece for the lower part of the inner wing and then the welding can be started. The removed patch repair looked horrible 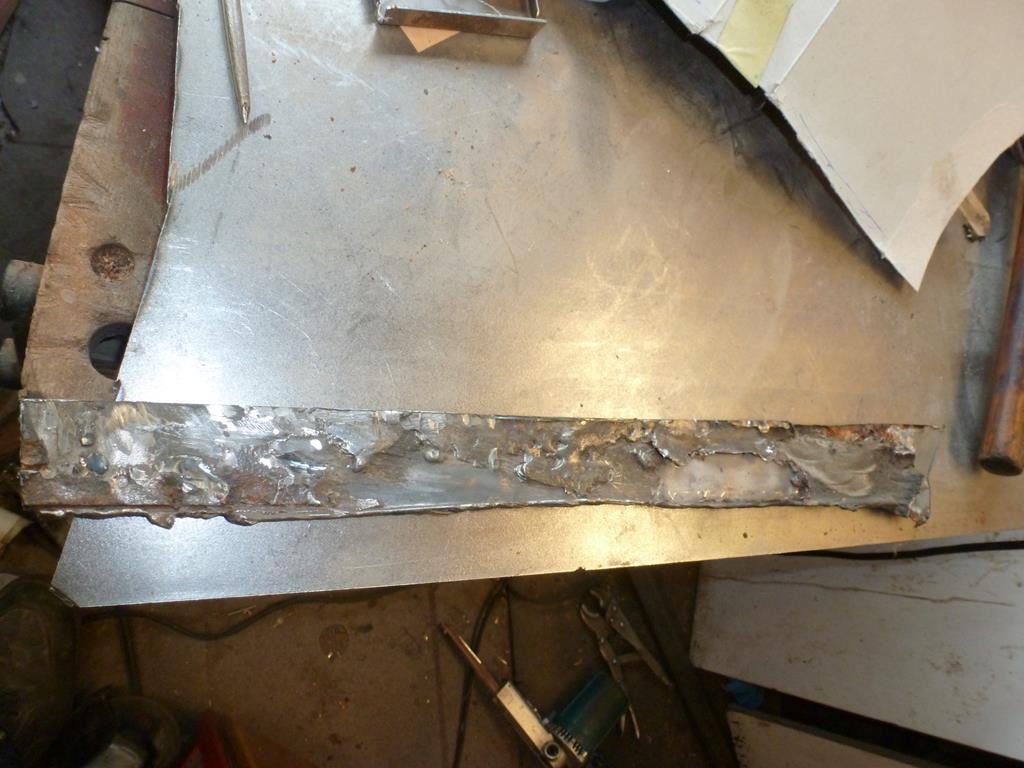 Thats it for now Peter |
| |
|
|
|
|
|
|
|
Did some work on the Rover. Cleaned the inside of the chassis leg and gave it 2 coats of Hydrate 80 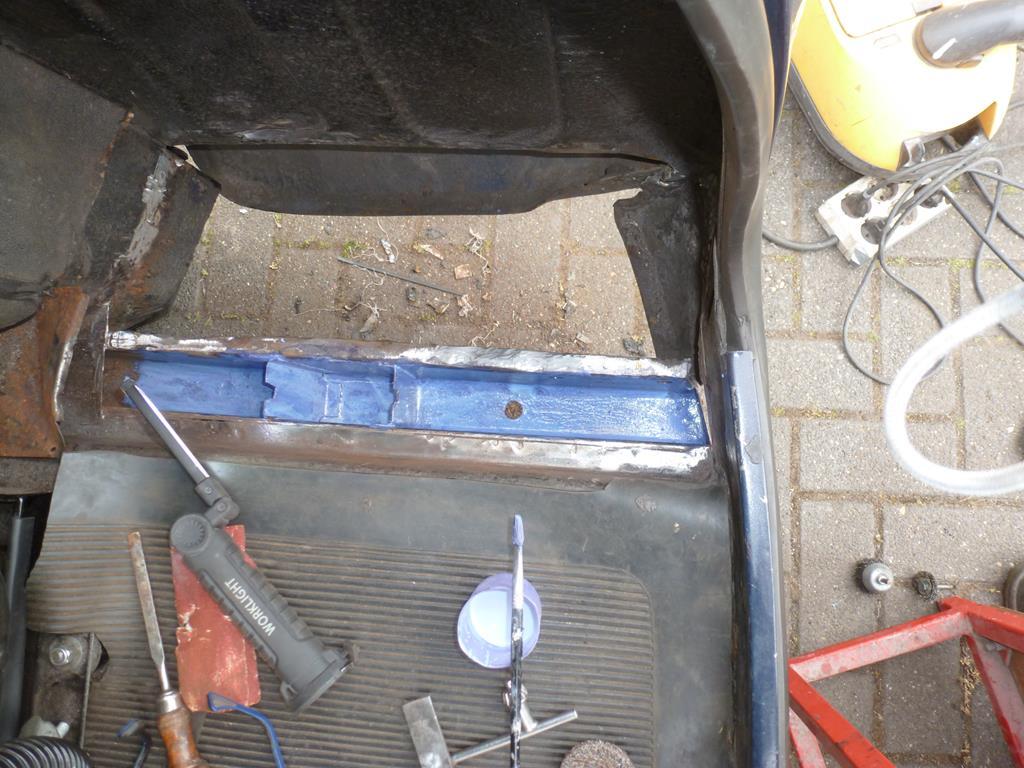 Welded in the floor repair panel 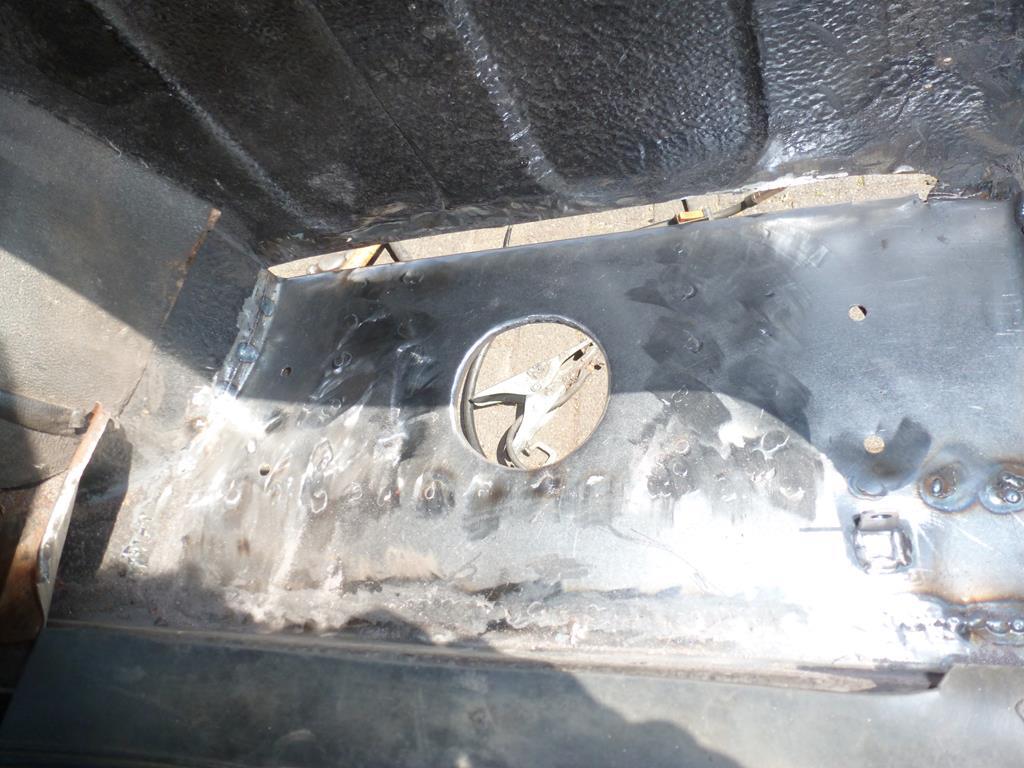 Made the repair panel for the bottom of the inner wing with the holes for the plug welds to the bottom 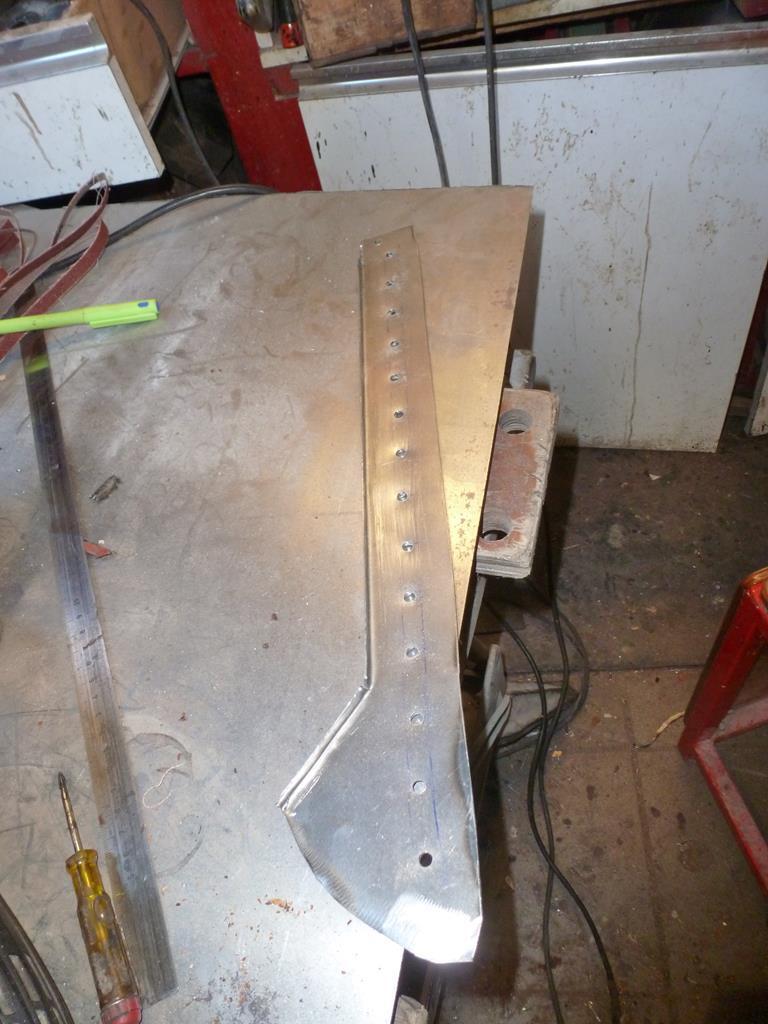 Clamped the repair piece in position and used the clamps to hold pieces of copper sheet to avoid burning holes 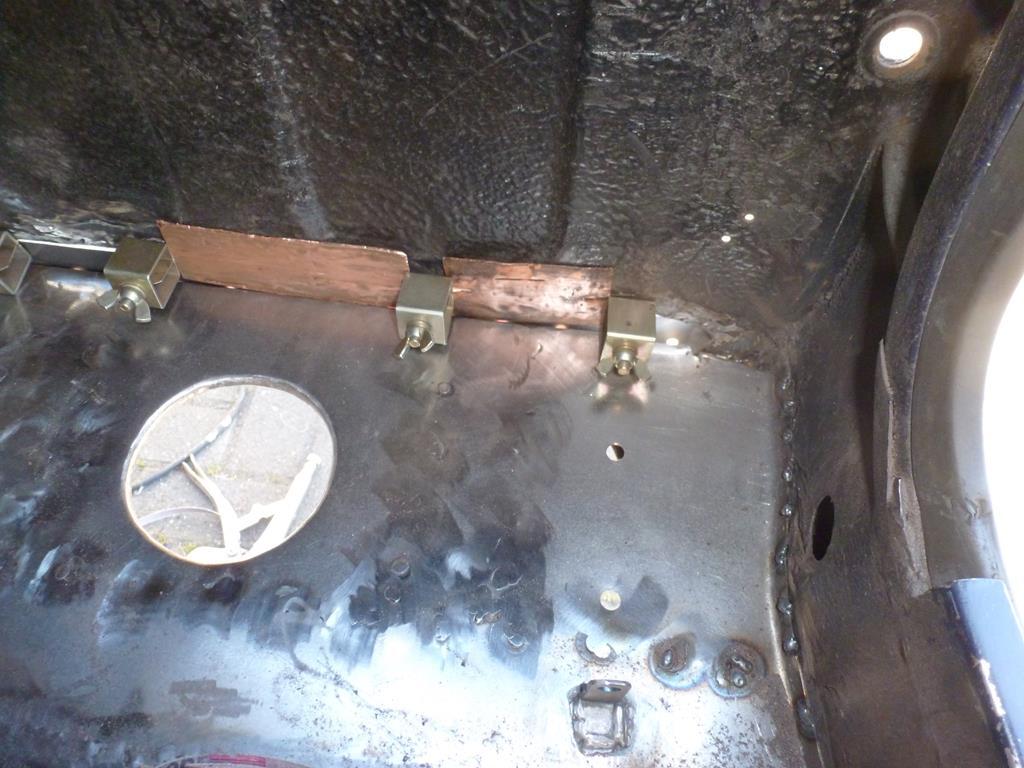 Repair piece was welded in cluding the filler weld to the bottom floor.In 2 places the original inner wing material was very thin and even with the copper, some holes appeared which were welded with a low settinfg. All welds were grounded flat 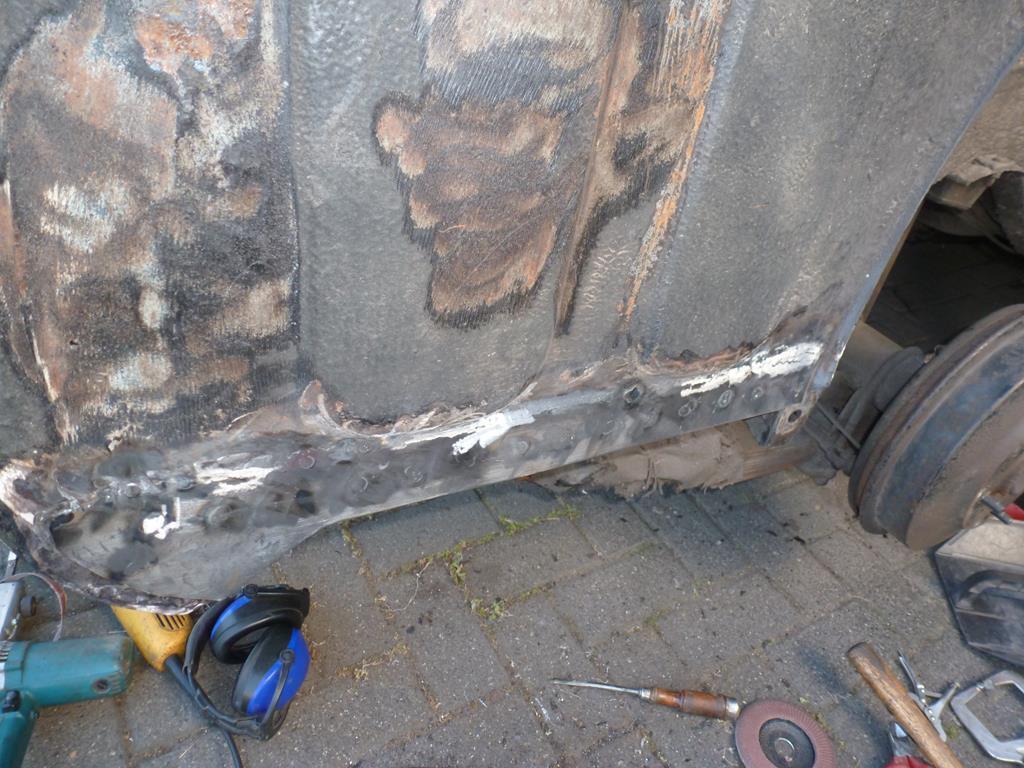 The underside look good again with good welding penetration 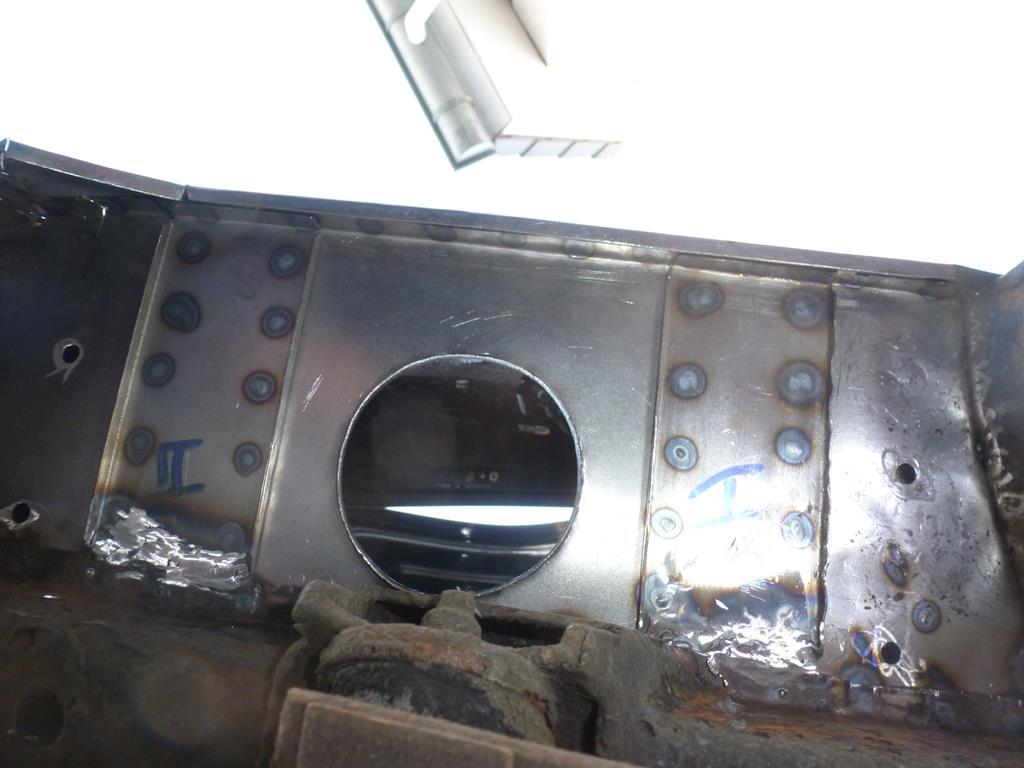 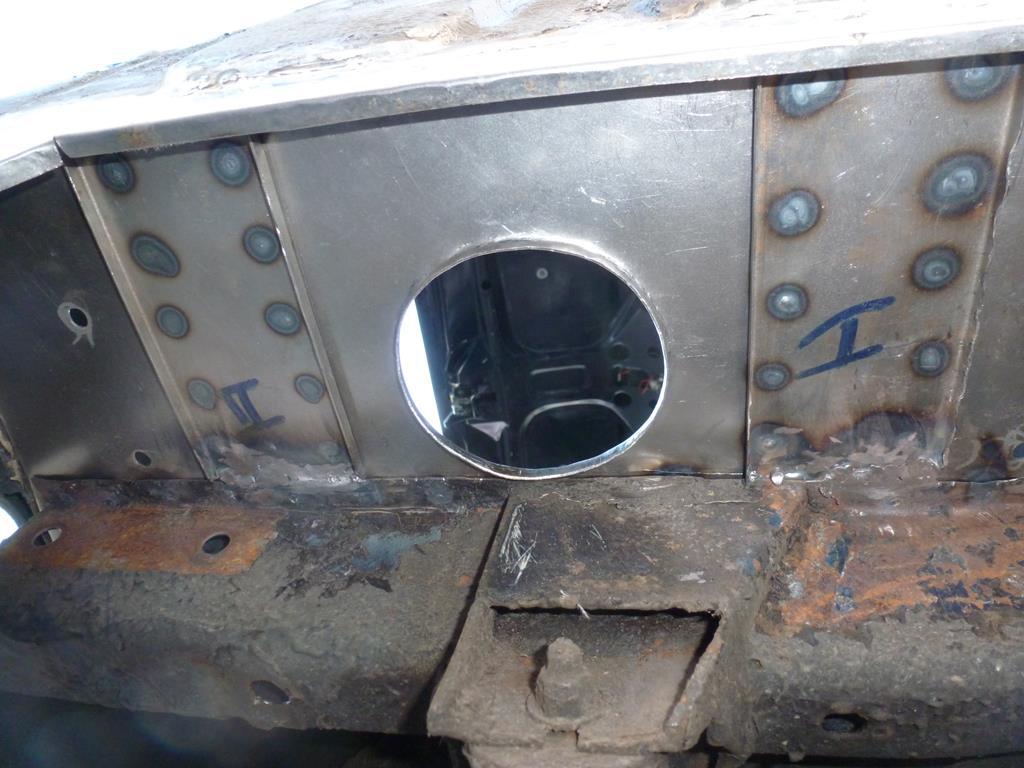 The next step was to remove the coating on the inner wing as some test showed rust underneath. It was a nasty job as the coating was not hardened so it did not come off chipped 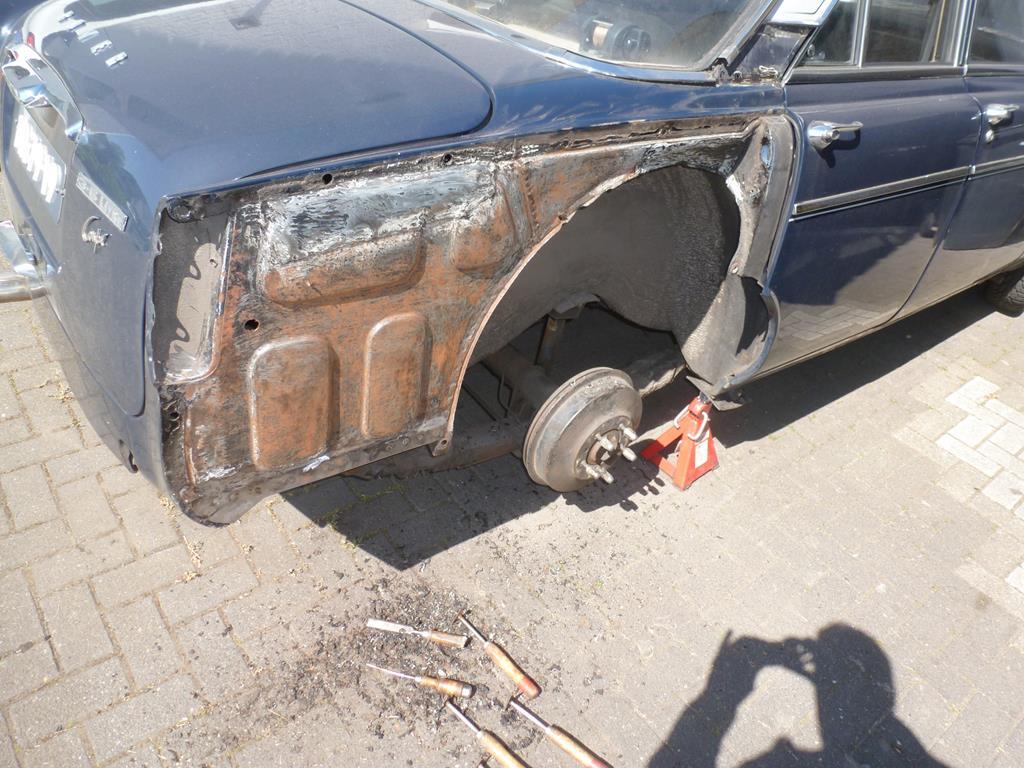 There is welded over repair panel on the top which i would liek to remove and fit a but welded repair panel but i will leave this for the moment. A small hole was found 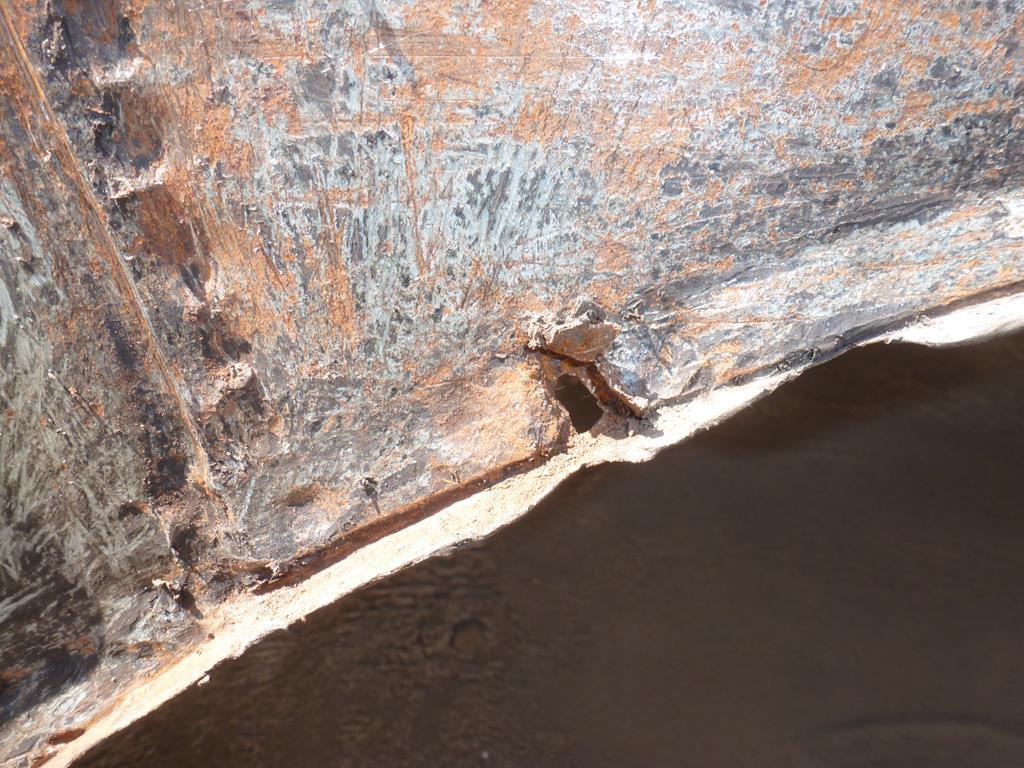 And repaired in 2 stages. First the wheel arch 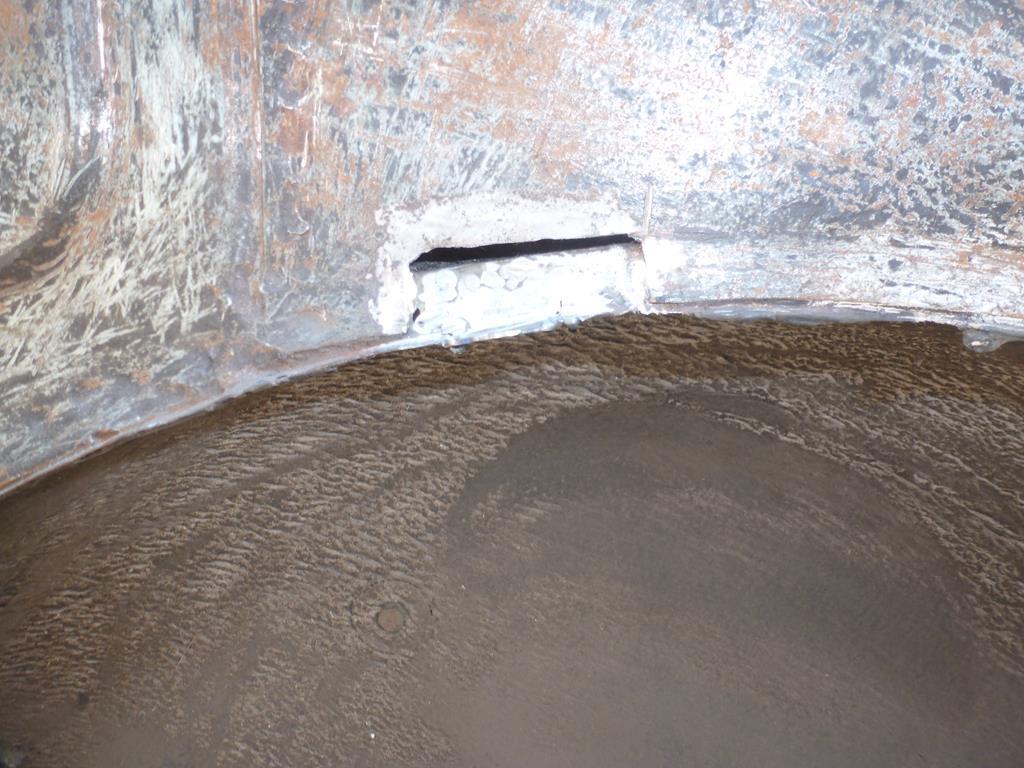 And then the inner wing 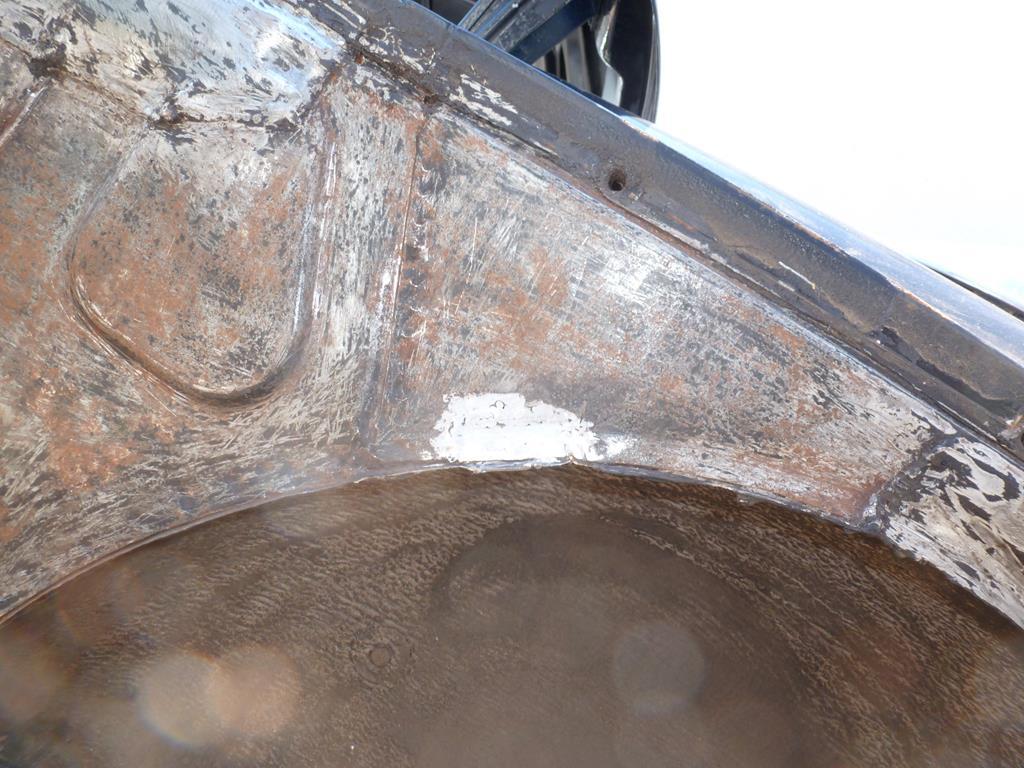 The inner wing was sanded to bare metal and showed a lot of pitting 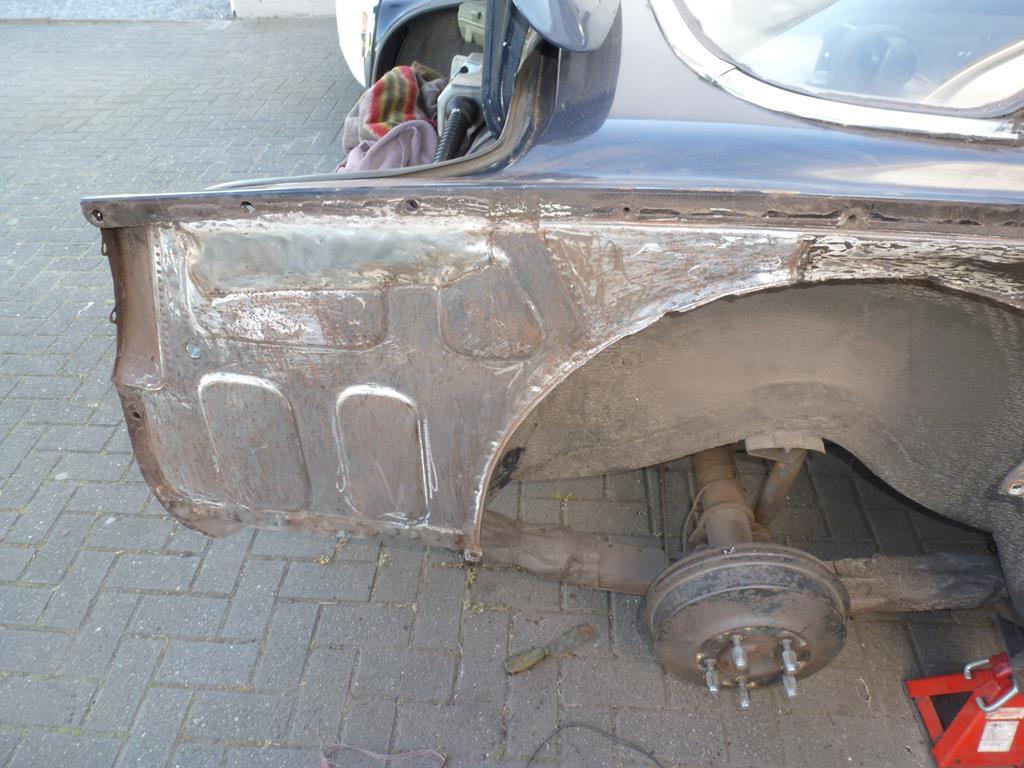 And threated with Hydrate 80 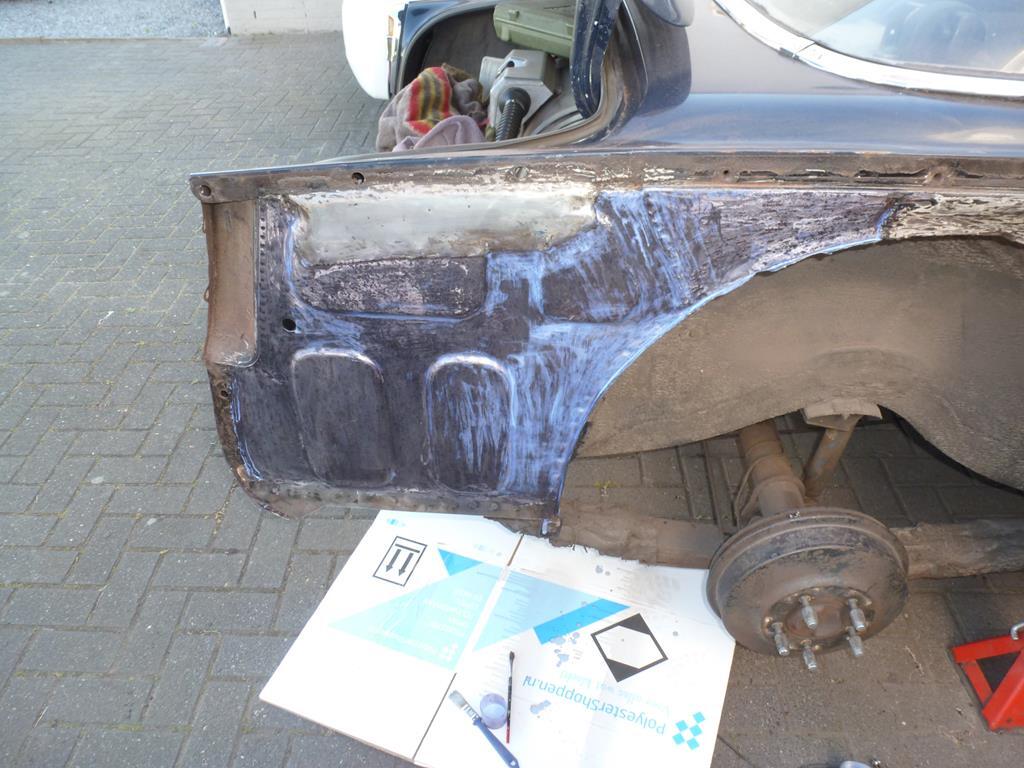 More later Peter |
| |
Last Edit: May 6, 2020 18:14:34 GMT by petervdv
|
|
|
|
|
|
|
|
Good job as always, great to see these old cars getting used properly
Note to self, must get on with my own 4 wheeled projects!!
|
| |
|
|
|
|
|
|
|
|
That is still remarkably clean for a daily peter!
|
| |
'80 s1 924 turbo..hibernating
'80 golf gli cabriolet...doing impression of a skip
'97 pug 106 commuter...continuing cheapness making me smile!
firm believer in the k.i.s.s and f.i.s.h principles.
|
|
|
|
|
|
|
Good job as always, great to see these old cars getting used properly Note to self, must get on with my own 4 wheeled projects!! Thanks. Having the Rover as a daily is going pretty well. I just gave it a try and was afraid of breakdowns and late night repairs but no breakdowns and only scheduled repairs during the past 5 or 6 years. Now it is time to do some more time consuming jobs. Actually i should have taken the car off the road1 summer month every years to do some bigger jobs and use the MG during that month. Now the jobs have stacked up a bit but due to the Covid situatuion, i do not need the Rover so it is not a problem That is still remarkably clean for a daily peter! Yes it is quit good. It had a fair number of weld over repairs but lot of seam sealer was used so it lasted well and in the mean time i have sorted most of these. The car looked a bit tatty due to the sunroof, some rust spots and the paint is a bit dull. The sun is a bigger enemy then the rust as the roof was damaged by the sun as are the rear direction indicator lights glasses which lost a bit of their orange color. I am plannig to treat all the rust marks and give the paint a polish so it looks oke again. Technically it is in good nick and very reliable Some more work was done. Gave the with Hydrate 80 treated areas a light sanding and applied a coat of primer and was that dried, applied seam sealer 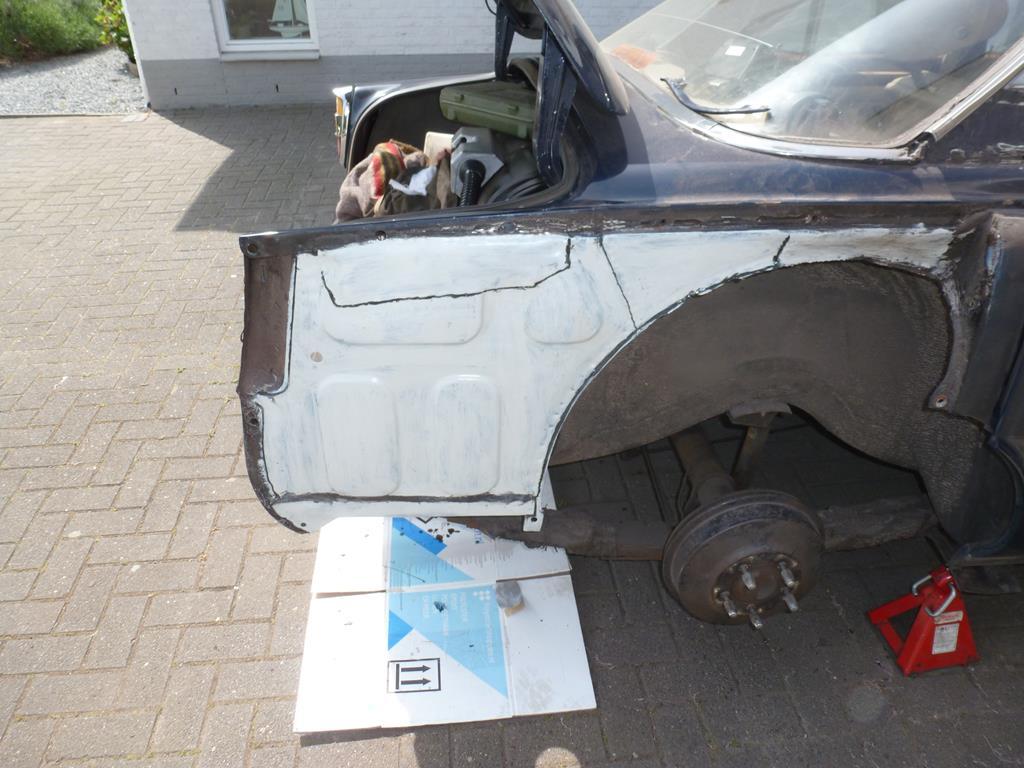 and a coat of black 2K paint 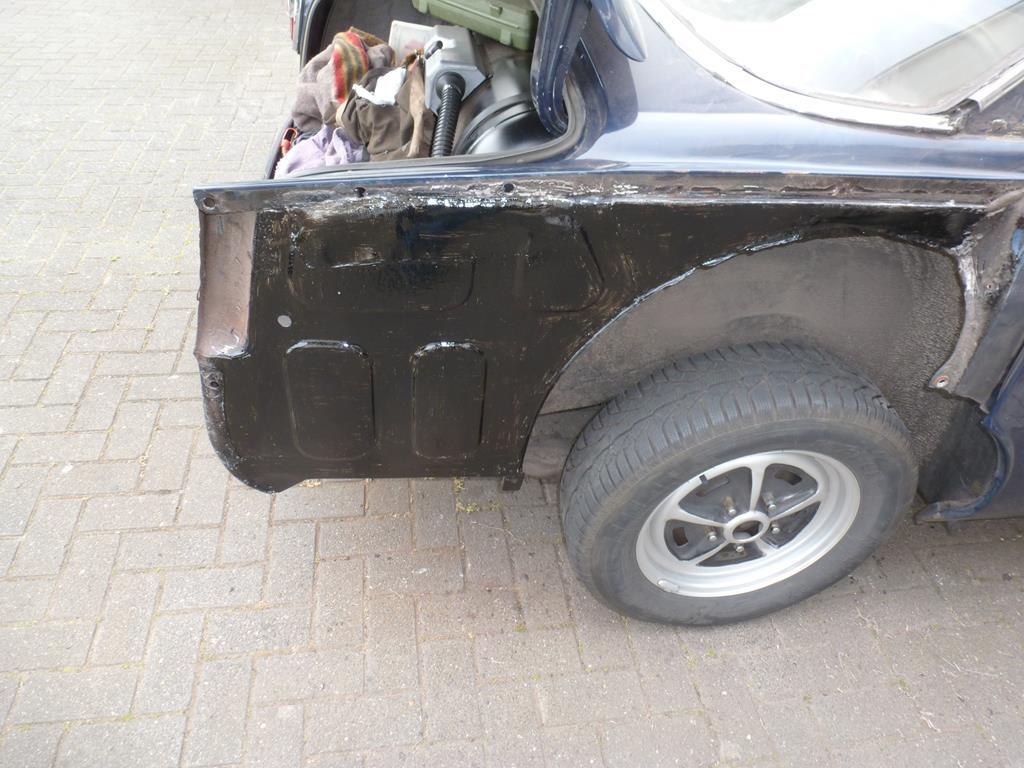 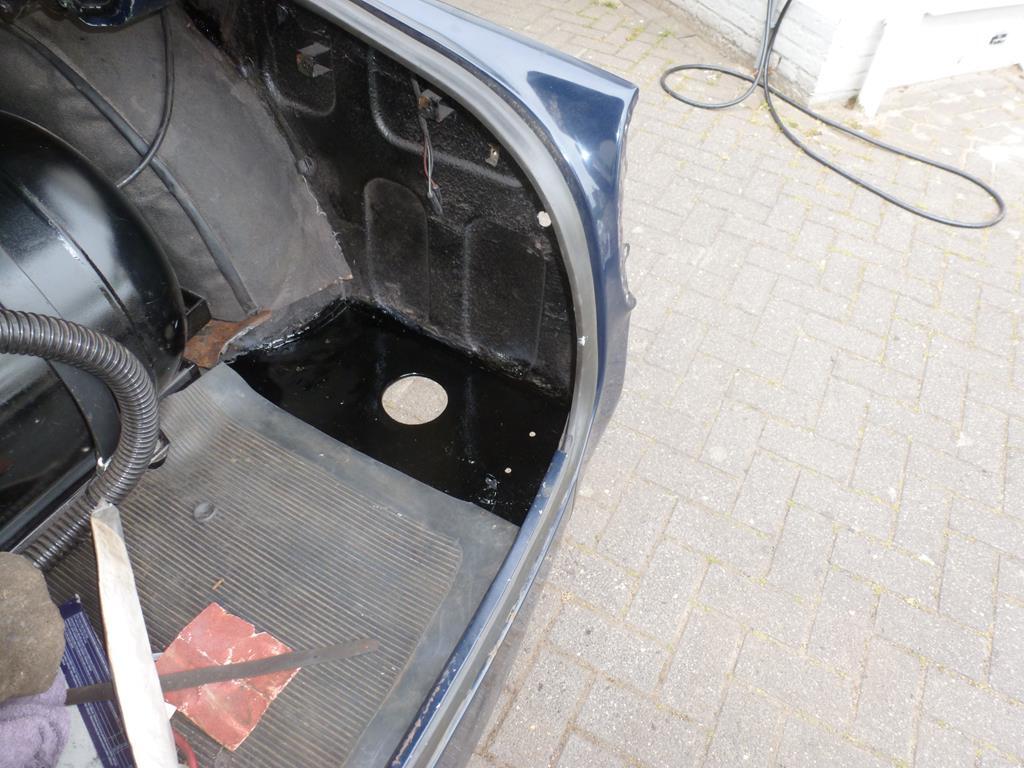 Then fitted the lower part of the battery box with some sealant, the battery box and the RC main switch 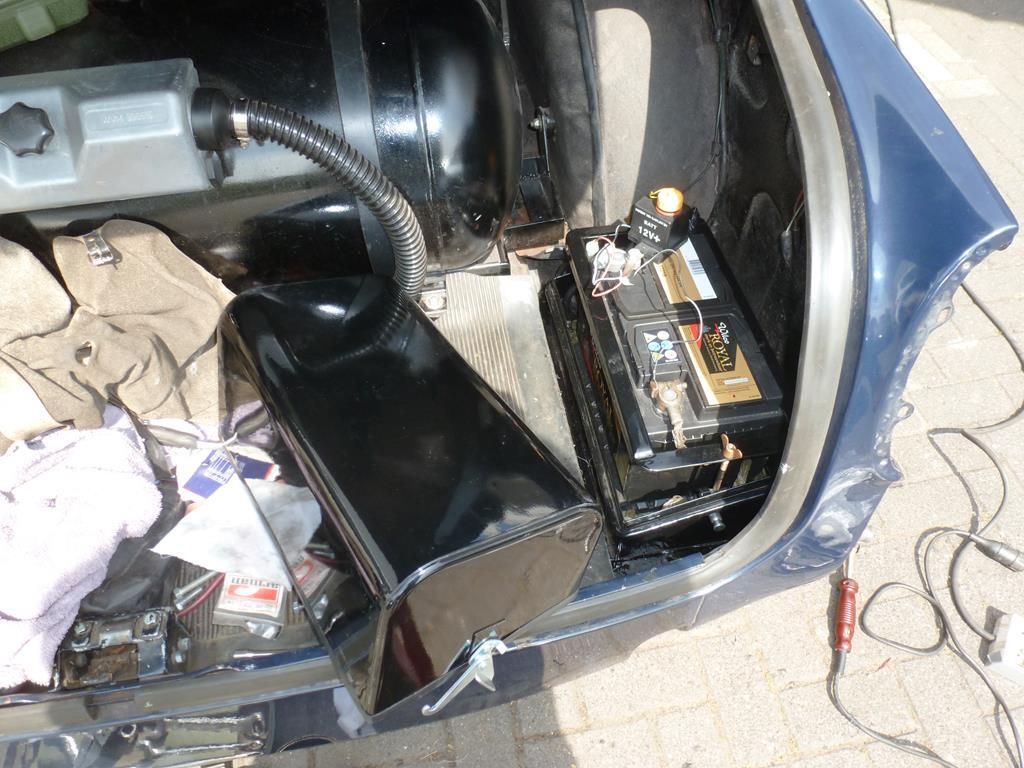 After that the toppart of the battery cover and the hardura cover 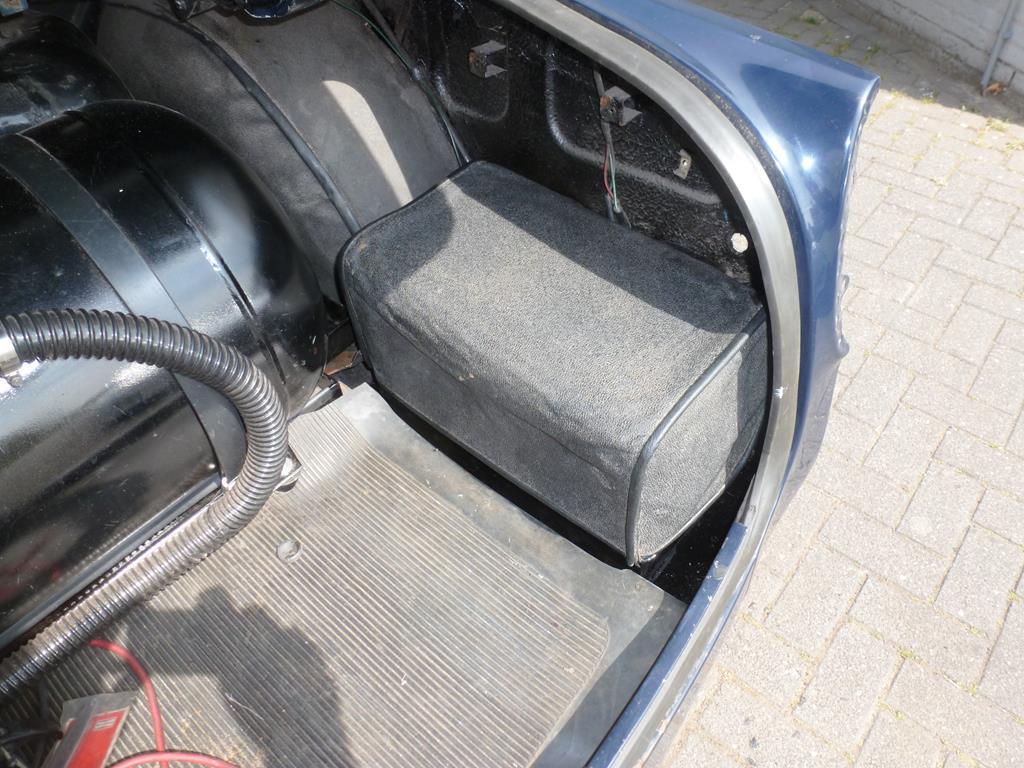 Also received the SS screws for fitting the roof trim and sliders as the originals were plain steel and fairly rusted 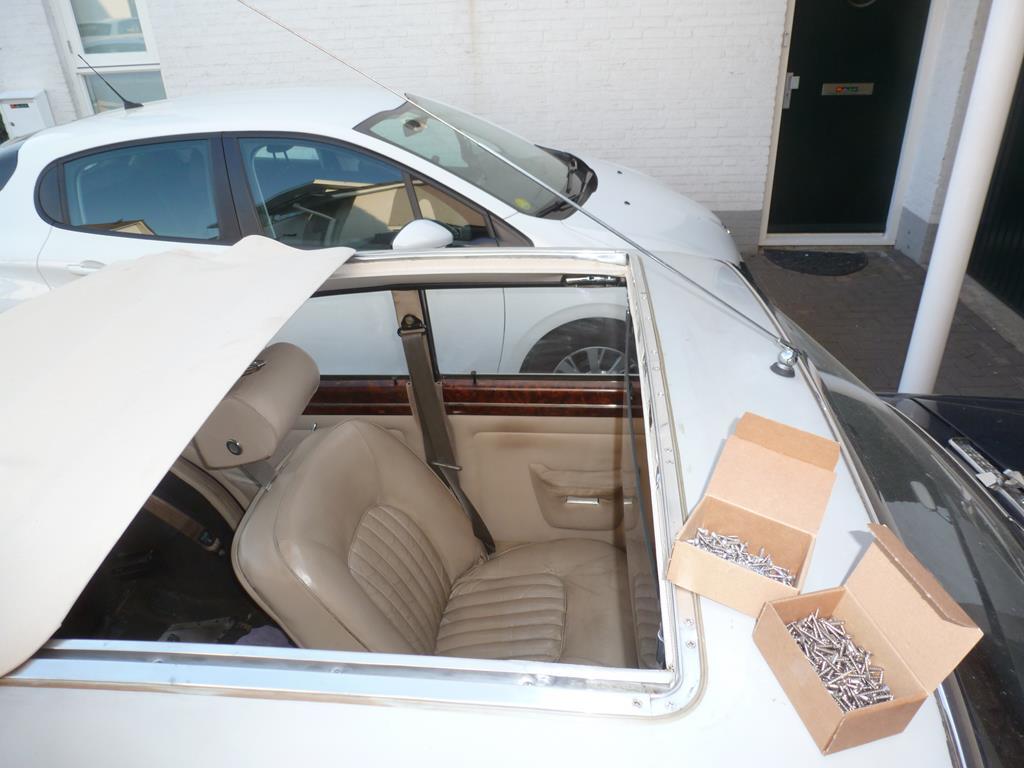 Morre later Peter |
| |
|
|
|
|
|
|
|
|
Great work, and a lovely car. Your attention to detail with everything is fantastic and the car is a real credit to you!
I just wish my daily (P6 3500s) was as clean and well presented - it's got a long way to go though!
|
| |
|
|
|
|
|
May 12, 2020 20:21:51 GMT
|
Great work, and a lovely car. Your attention to detail with everything is fantastic and the car is a real credit to you! I just wish my daily (P6 3500s) was as clean and well presented - it's got a long way to go though! Cheers. Looking at your azitar, i think i have seen your post on the Classic Rover forum. The P6 got me into the RV8 cars. As a kid about 10 years old, i frequently saw a P6 V8 when walking with the dog and i was so impressed by the smooth V8 sound. Now i have a MGB V8 and a P5 but not (yet) a P6
spend a few hours on the Rover. The next job is to repair the poorest part of the P5 body. Its only visible when you open the rear door. There was a small rust bubble when i bought the car 6 years ago. As expected the rust spot got bigger threw the years and now is the time to repair it 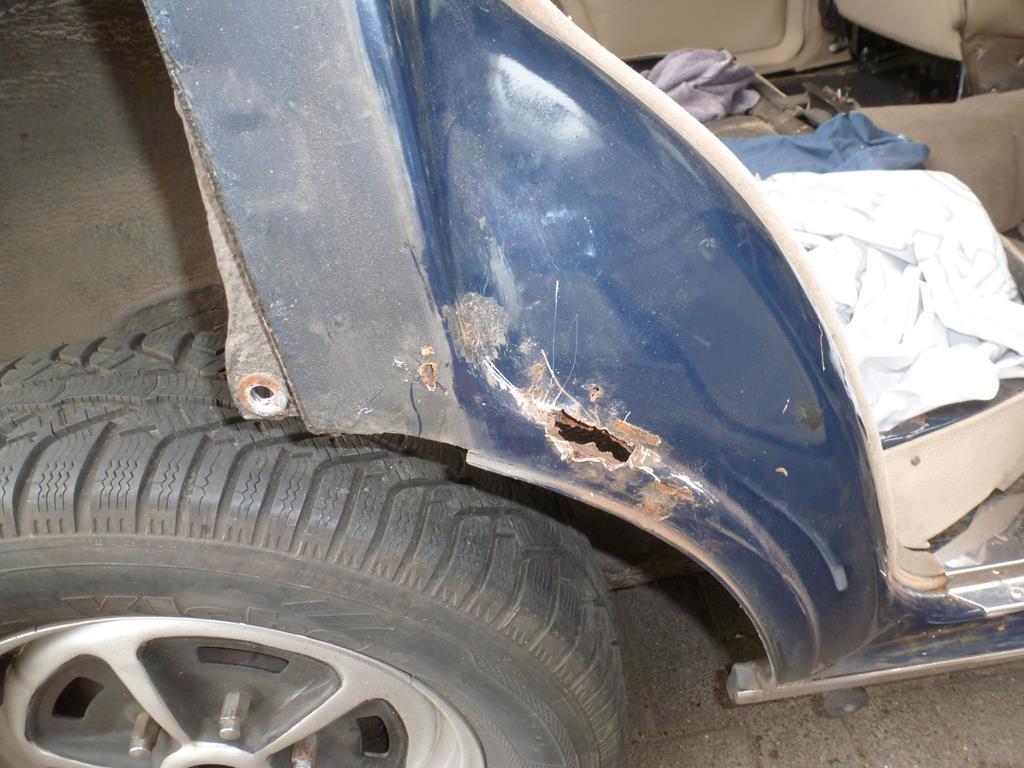 I already had a repair panel 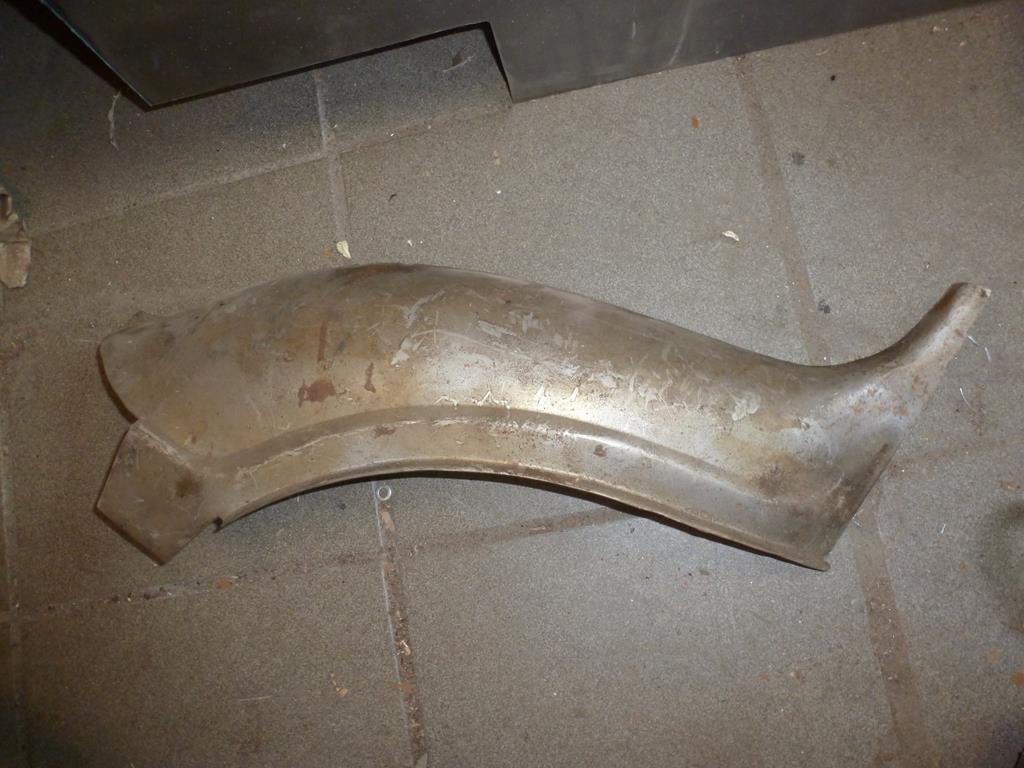 it looks a bit poor but i covered it in Tectyl a few years ago to protect it against rust After a wipe with white spirit it looked good again 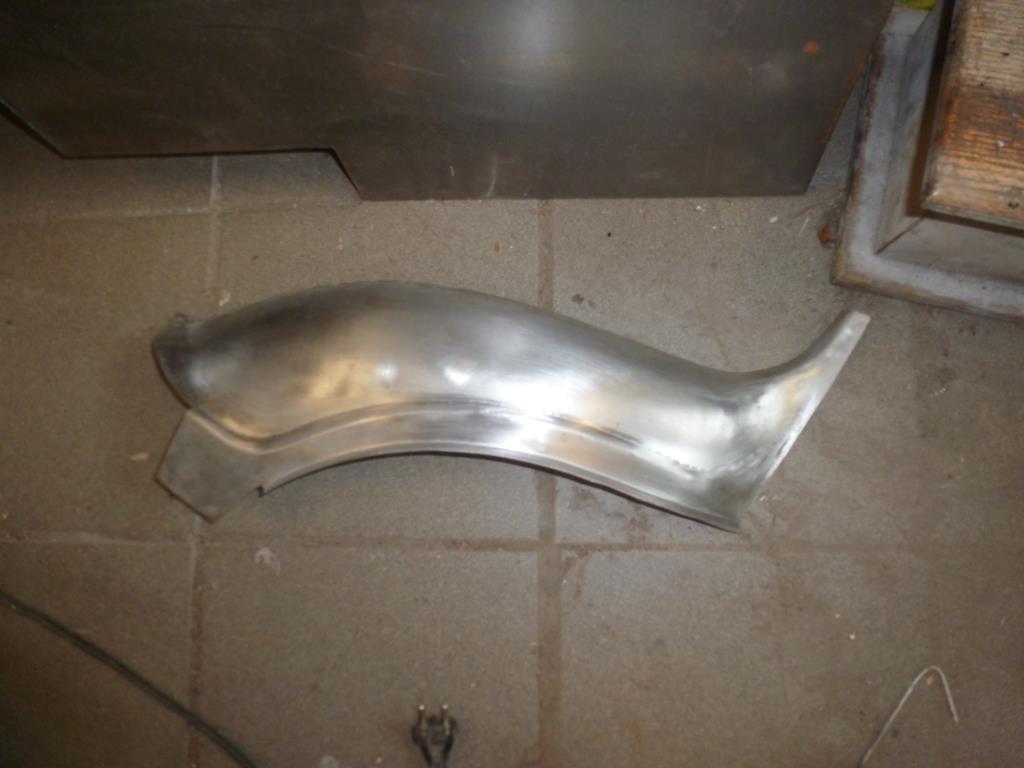 Out with the drill and spotweld bit and drilled out all spotwelds 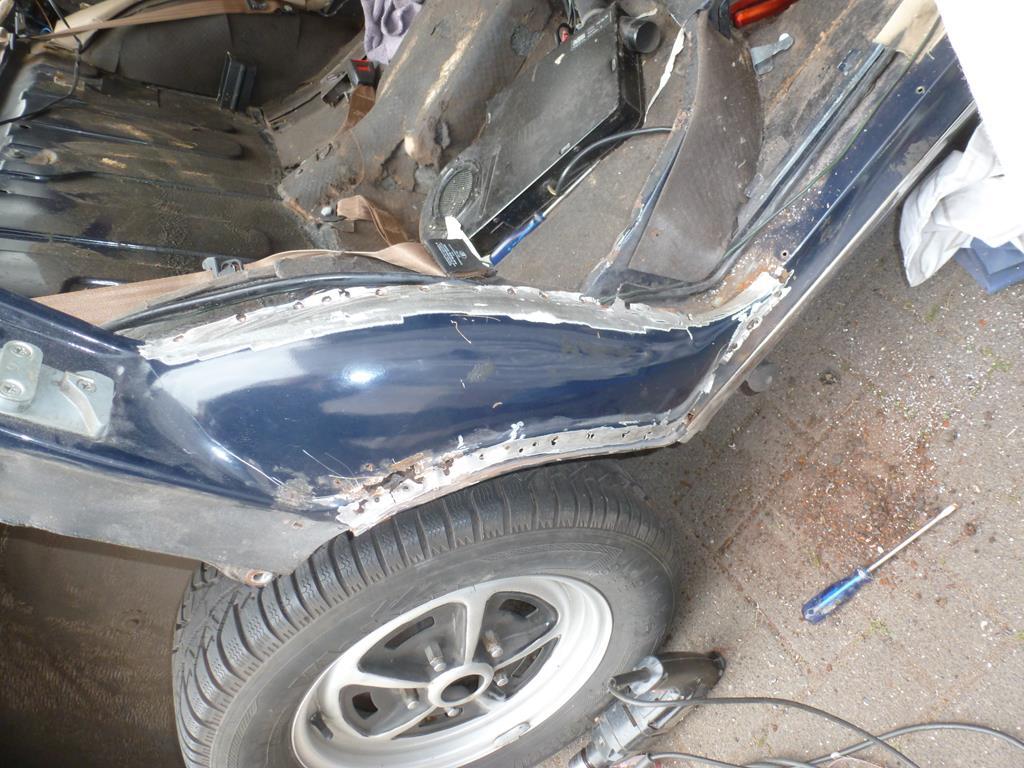 And made a cut with the grinder to remove the panel 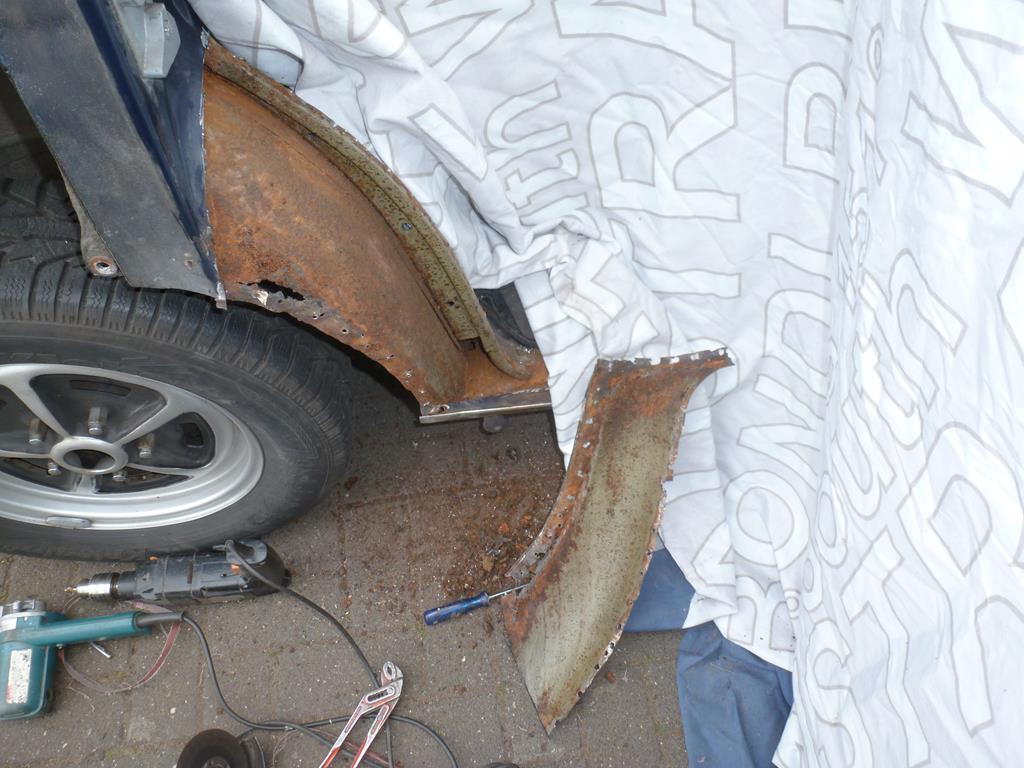 From a distance it looks fairly rusted but it is not that bad as most of the rusted areas are covered in tectyl which stops or at least slow down the rusting proces The sill also needs some work but in general i had expected it to be worse 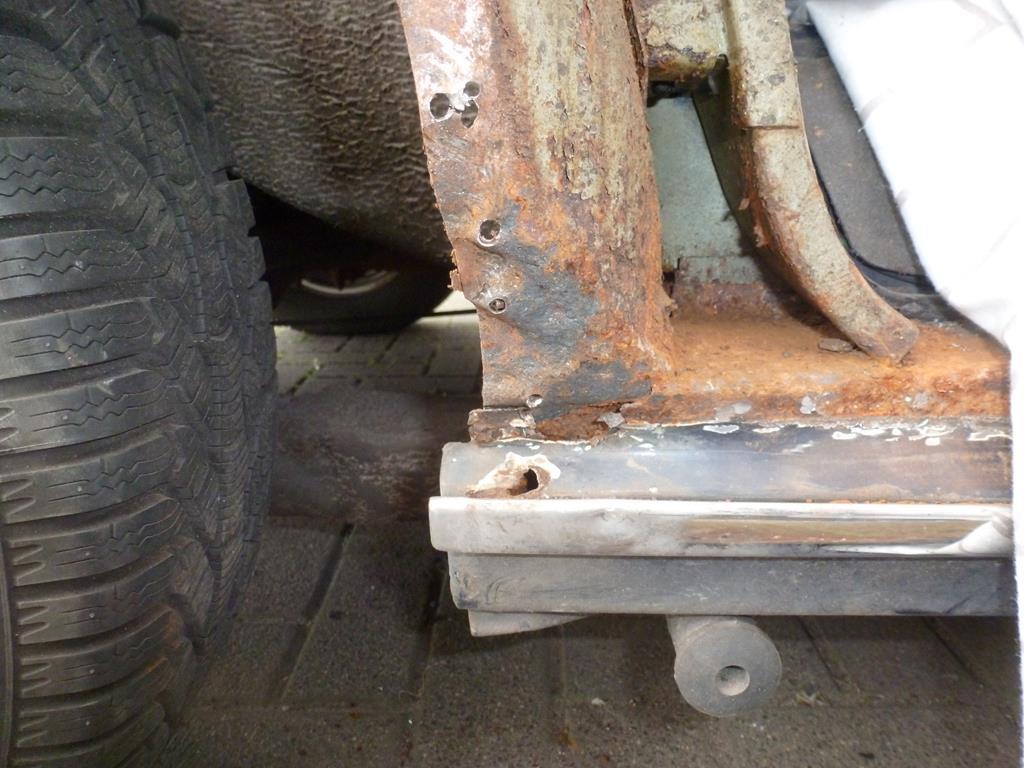 I will also replace the inner wing part which also has a poor area. This repair ppanel i also have Thats it for now Peter |
| |
Last Edit: May 12, 2020 20:23:32 GMT by petervdv
|
|
|
|
|
|
|
|
It's great to learn more about these magnificient motorcars. I remember seeing British VIP's beng chauffeured in them on the TV news when I was a kid, and of all the British cars these just seem to exude one of the best total packages, and maybe a true peer of an equivalent Mercedes-Benz of the time? Were they more reliable than Jaguars of the same era?
Looking at the sharp features of those RoStyle wheels makes me think the plant that made them must have had some very serious pressing tools to punch those out. John
|
| |
|
|
|
|
|
May 16, 2020 16:39:57 GMT
|
It's great to learn more about these magnificient motorcars. I remember seeing British VIP's beng chauffeured in them on the TV news when I was a kid, and of all the British cars these just seem to exude one of the best total packages, and maybe a true peer of an equivalent Mercedes-Benz of the time? Were they more reliable than Jaguars of the same era? Looking at the sharp features of those RoStyle wheels makes me think the plant that made them must have had some very serious pressing tools to punch those out. John It was a car for VIPs and member of the government and i like this very much as the drivers seat offers a lot of room for me being 2.00m. Also like the V8 and the design and this one is very reliable. I agree with the size of the pressing tools although the wheel has a seperate inner piece which is riveted to the rim Did some more work on the Rover. As i have a repair panel for the inner wing panel which also has a few rust holes, the drill with spot weld bit was used to drill out all the spot welds 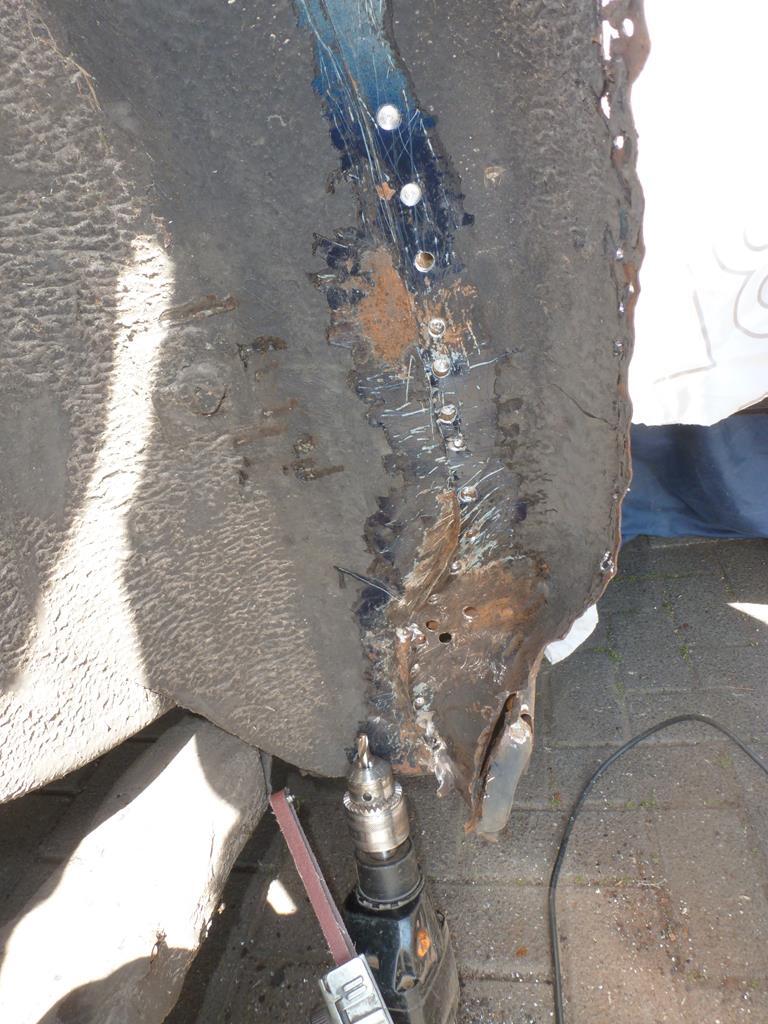 The flange was a bit rusty but in good condition, The end of the upper sill where it meets the inner wing was a bit crusty so a repair piece was made and welded in 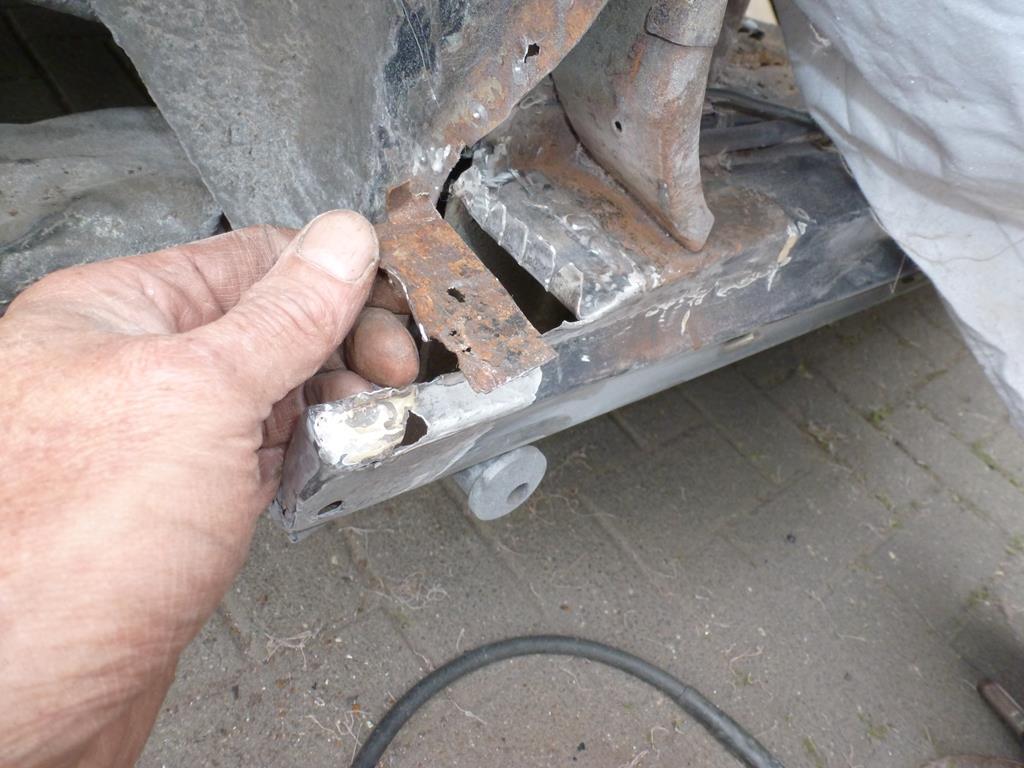 The inner side of the sill was mostly in good condition with lots of sticky Tectyl in it. Only the end had a few small holes and the lip for the inner wing was poor 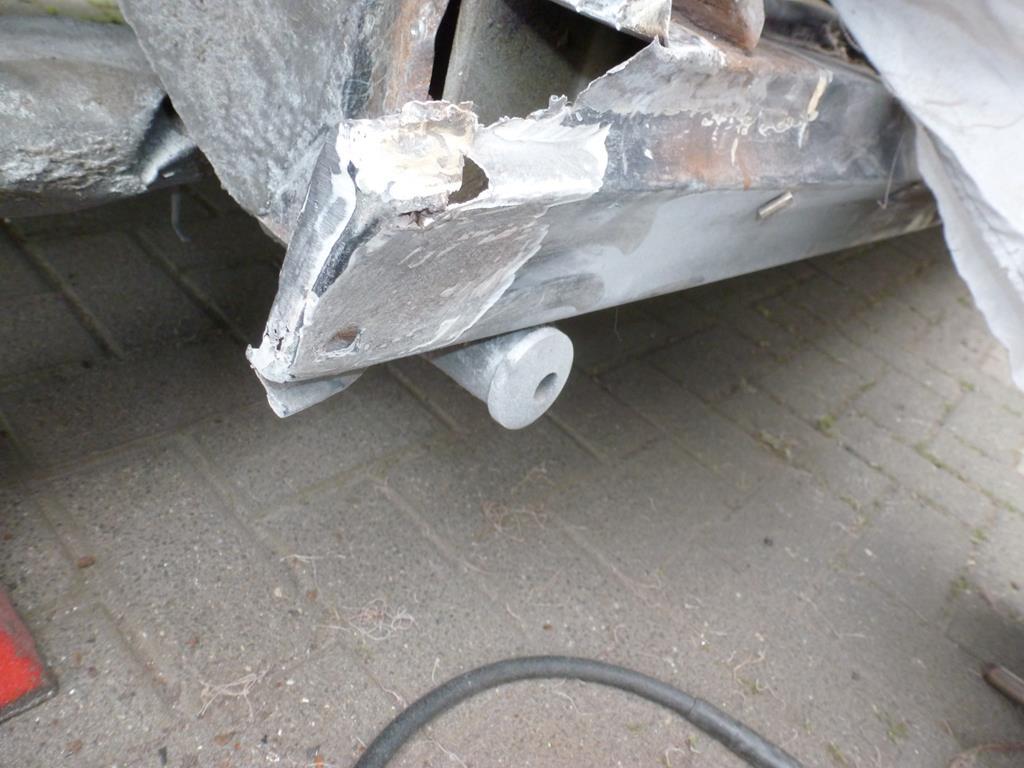 It would be difficult (at least for me) to repair the sill end with 1 repair piece so this was done in 3 stages First the upper part and the lip welded in and the side already cut out 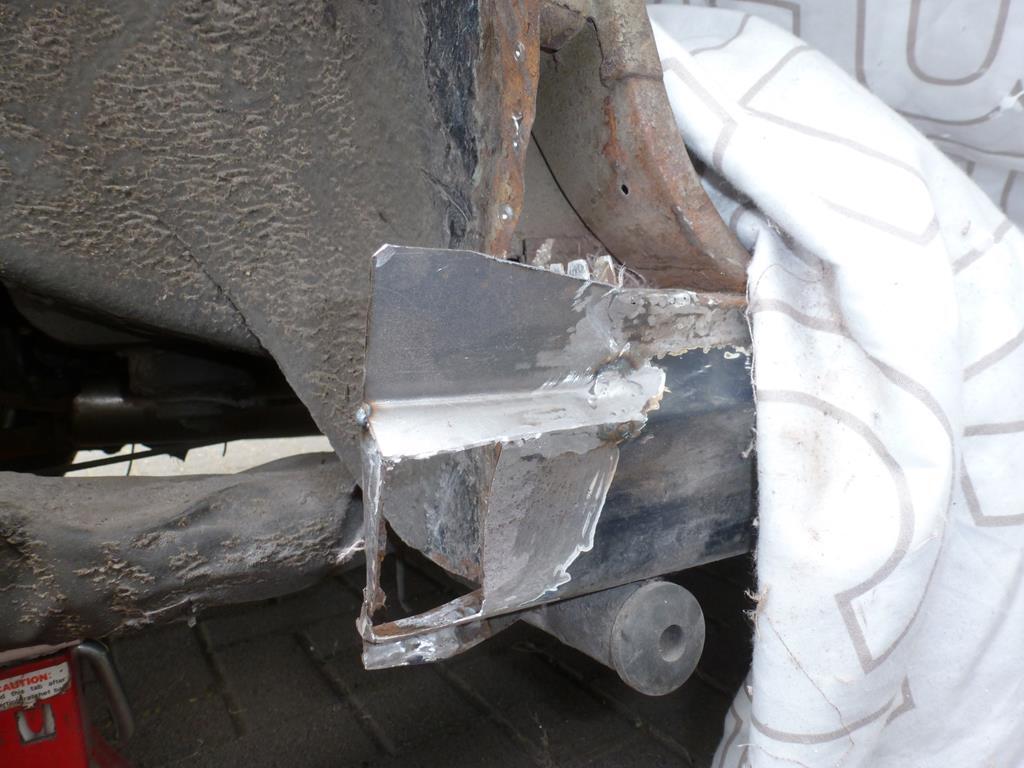 Side piece tacked in 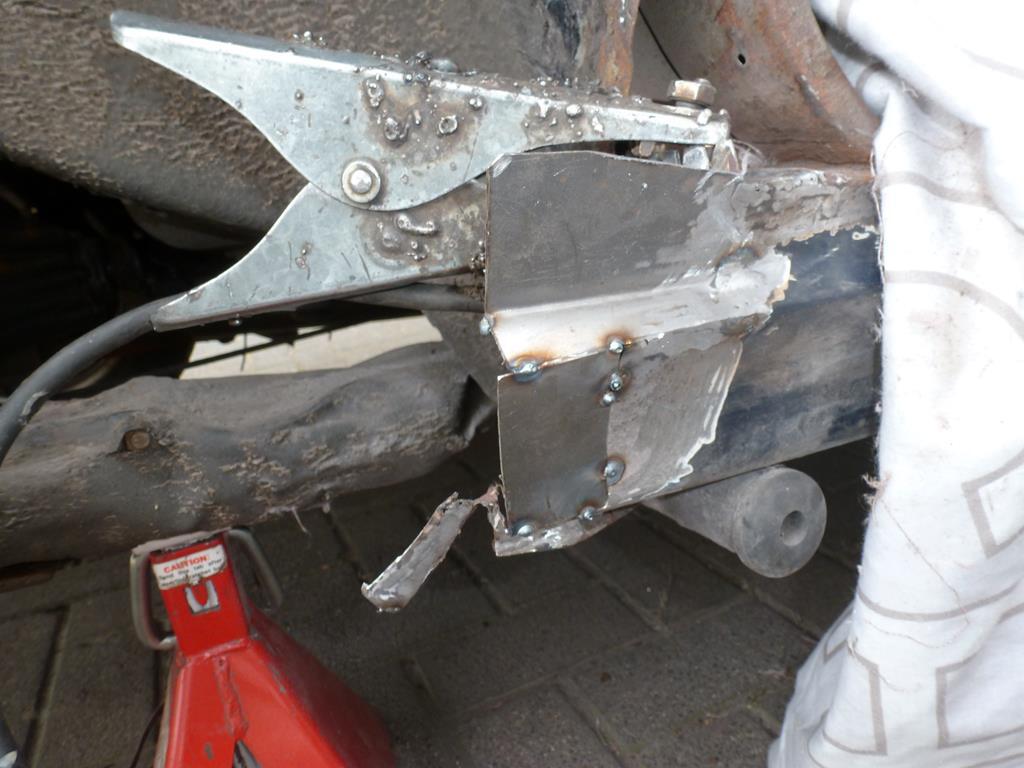 and fully welded and the welds grinded flat 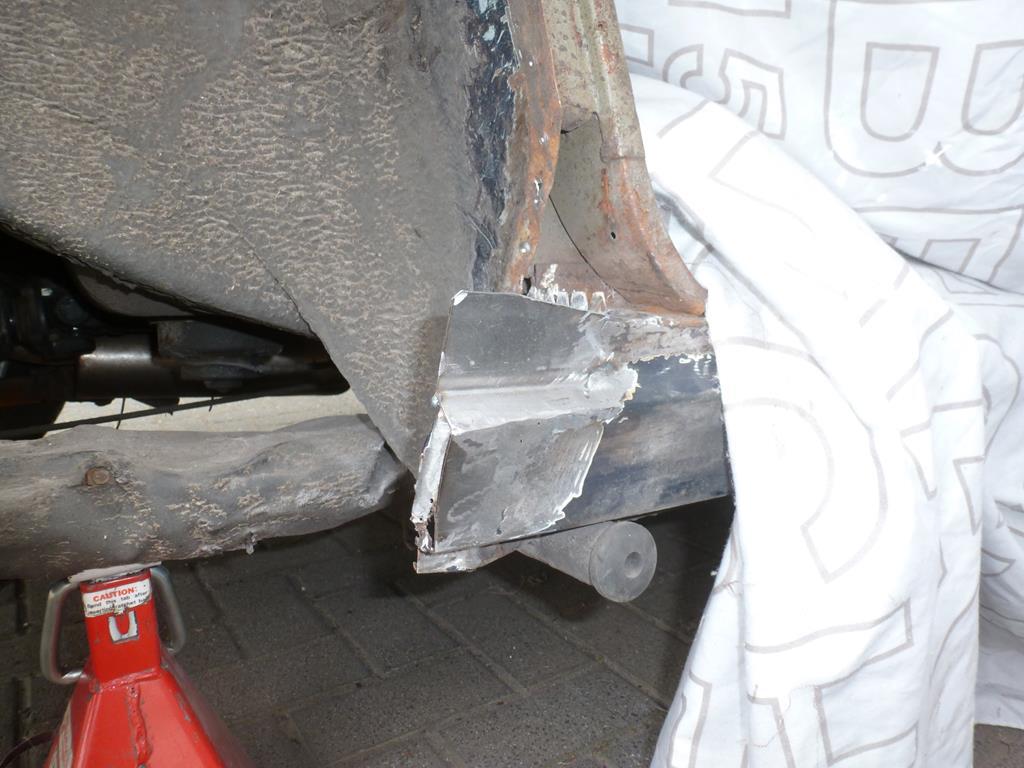 And then the rear part repair piece made and welded in 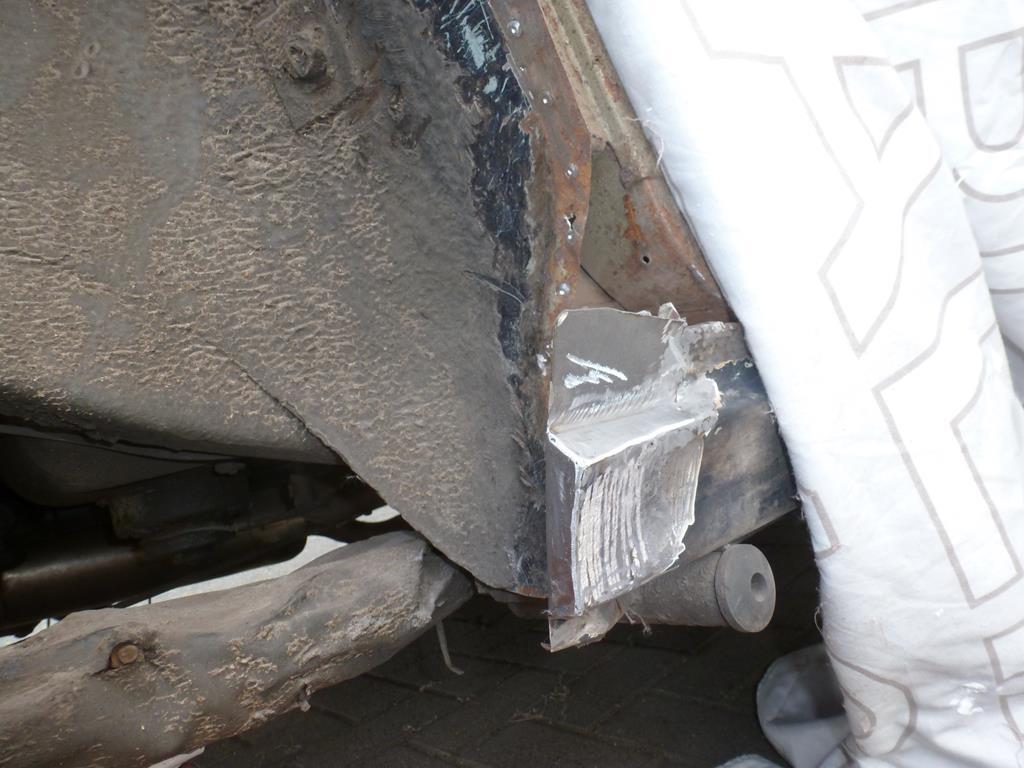 This piece also has a flange on the rear to get welded with the inner wing panel 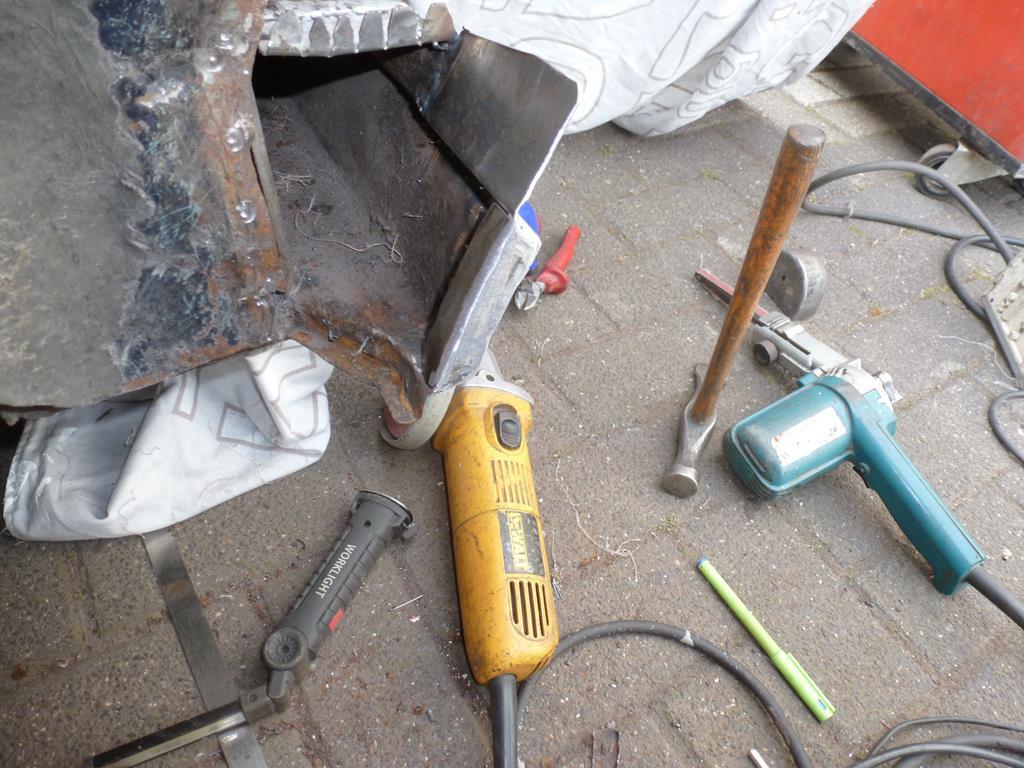 The SS sill cover panel has been loose as these were fitted with far to big parkers so i welded up the holes 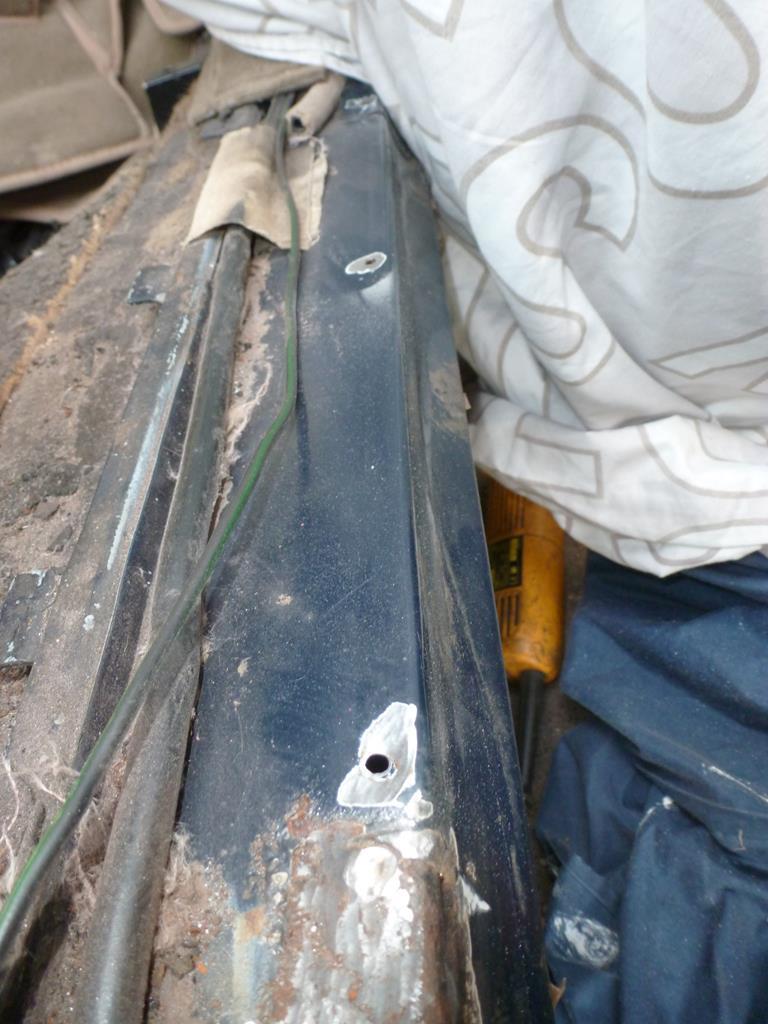 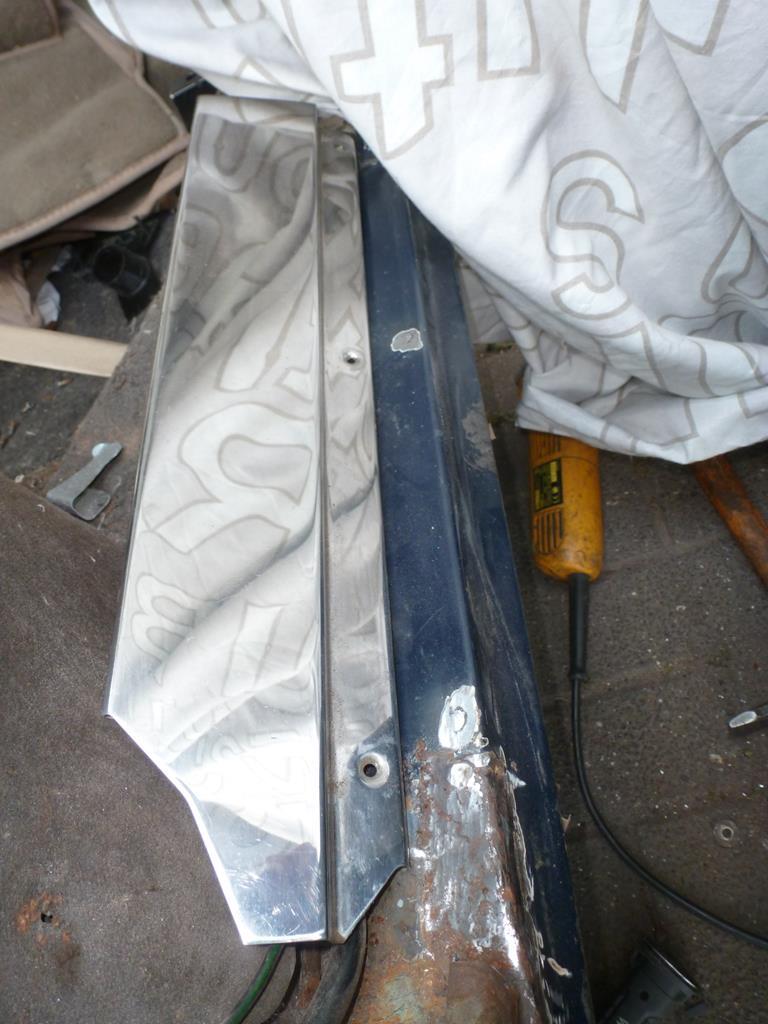 Thats it for now Peter |
| |
|
|
|
|


