|
|
|
Oct 30, 2017 21:01:44 GMT
|
|
I m betting for saving the weight of underseal etc. I built some WRC cars from new and they hand zero underseal etc due to weight and not much paint either . Then kevlar floor covers some time to stop the gravel rash , otherwise the floors would be shot though and paper thin after one rally due to the constant peening effect of small stones .
I'm guessing a few years of that , and then underseal on top sealing in some moisture , or more likely torn underseal allowing water to get trapped between floor and sealant .
|
| |
|
|
|
|
jonomisfit
Club Retro Rides Member
Posts: 1,790
Club RR Member Number: 49
|
|
Oct 30, 2017 21:33:20 GMT
|
|
If the rest of the factory underseal had been removed i'd agree with you (it was a road shell). With about 90% of it remaining on the car it strikes me as apathy toward sorting it or ignorance of the need to paint it. Where I've gently cleaned back some of the black tar stuff (which I think might be black body wax) there is 0 trace of any paint.
That coupled with it having lived outside for some time has caused the majority of the rust.
WRC cars I can see having no underseal as every gram saved adds up to a marginal gain.
The tar like underseal I'm pretty certain was applied to try and hide the extent of the rust by the person selling it.
You based in Cumbria?
|
| |
|
|
|
|
|
Oct 30, 2017 22:01:11 GMT
|
|
No , Oxfordshire , so unfortunately not Msport !
|
| |
|
|
|
|
|
|
|
If the rest of the factory underseal had been removed i'd agree with you (it was a road shell). With about 90% of it remaining on the car it strikes me as apathy toward sorting it or ignorance of the need to paint it. Where I've gently cleaned back some of the black tar stuff (which I think might be black body wax) there is 0 trace of any paint. That coupled with it having lived outside for some time has caused the majority of the rust. WRC cars I can see having no underseal as every gram saved adds up to a marginal gain. The tar like underseal I'm pretty certain was applied to try and hide the extent of the rust by the person selling it. You based in Cumbria? Every time I go up to Envirostrip who do my vehicle dipping / paint / rust removal there is always a couple of new bodyshells either in colour or factory primer waiting to be bare metalled - these are for the race / rally teams who start their builds with everything in bare metal now days - weight reduction with the sound deadening / sealer removed and saves having to clean the paint / primer off all the areas that they fabricate / weld / modify the fillets / gussets / strengthening plates to |
| |
Last Edit: Oct 31, 2017 9:58:29 GMT by Deleted
|
|
|
|
|
|
|
|
We used to use fresh shells dragged off the line before they had underseal or anything on , just in that green/grey undercoat stuff .
Still needed 3 weeks work just to remove the factory parts such as double skinned areas for brackets , filling holes in bulkheads , seam welding , lightening doors etc . Thats before you started to modify and add bits .
|
| |
|
|
|
|
|
|
|
|
I guess that's the difference from Factory operations running in the same country and outside companies running operations half way around the world!
|
| |
|
|
jonomisfit
Club Retro Rides Member
Posts: 1,790
Club RR Member Number: 49
|
|
|
|
|
The bit I always found interesting was early 2000s when the fia mandated wrc cars had to be built from production shells and not panels and min shell weight of 300kg. Which gives some insight into how build methods were going and I can guess the direction panel thicknesses were also going.
That said you look at the mid 2000s wrc build pics on the web and there's not much left that's not stripped off the shell.
Anyway for me. It'll be clean up somehow followed by lots of tin work. :-)
|
| |
|
|
|
|
|
|
|
|
The cars I built circa 2000 ish would have new wings, 1/4 panels, bonnet. Doors were standard but extensively modified as well as the boot. A small portion of inner front wings would 've left after being tubbed. Rears completely new as the rear chassis rails are raised. All that's left really is a the bulkhead, some of the floor and the inner panels of sills, a b and c post areas. All of it has work though. Pretty fascinating to see how it all fits.
Edit- i should add that even back then the car basically hung off the cage , pretty much all of the loads went into the cage structure rather than the body so they were basically new cars built inside a production shell.
|
| |
|
|
jonomisfit
Club Retro Rides Member
Posts: 1,790
Club RR Member Number: 49
|
|
Dec 16, 2017 18:53:39 GMT
|
I got a multi-tool the other day and noticed it came with a scraper attachment. 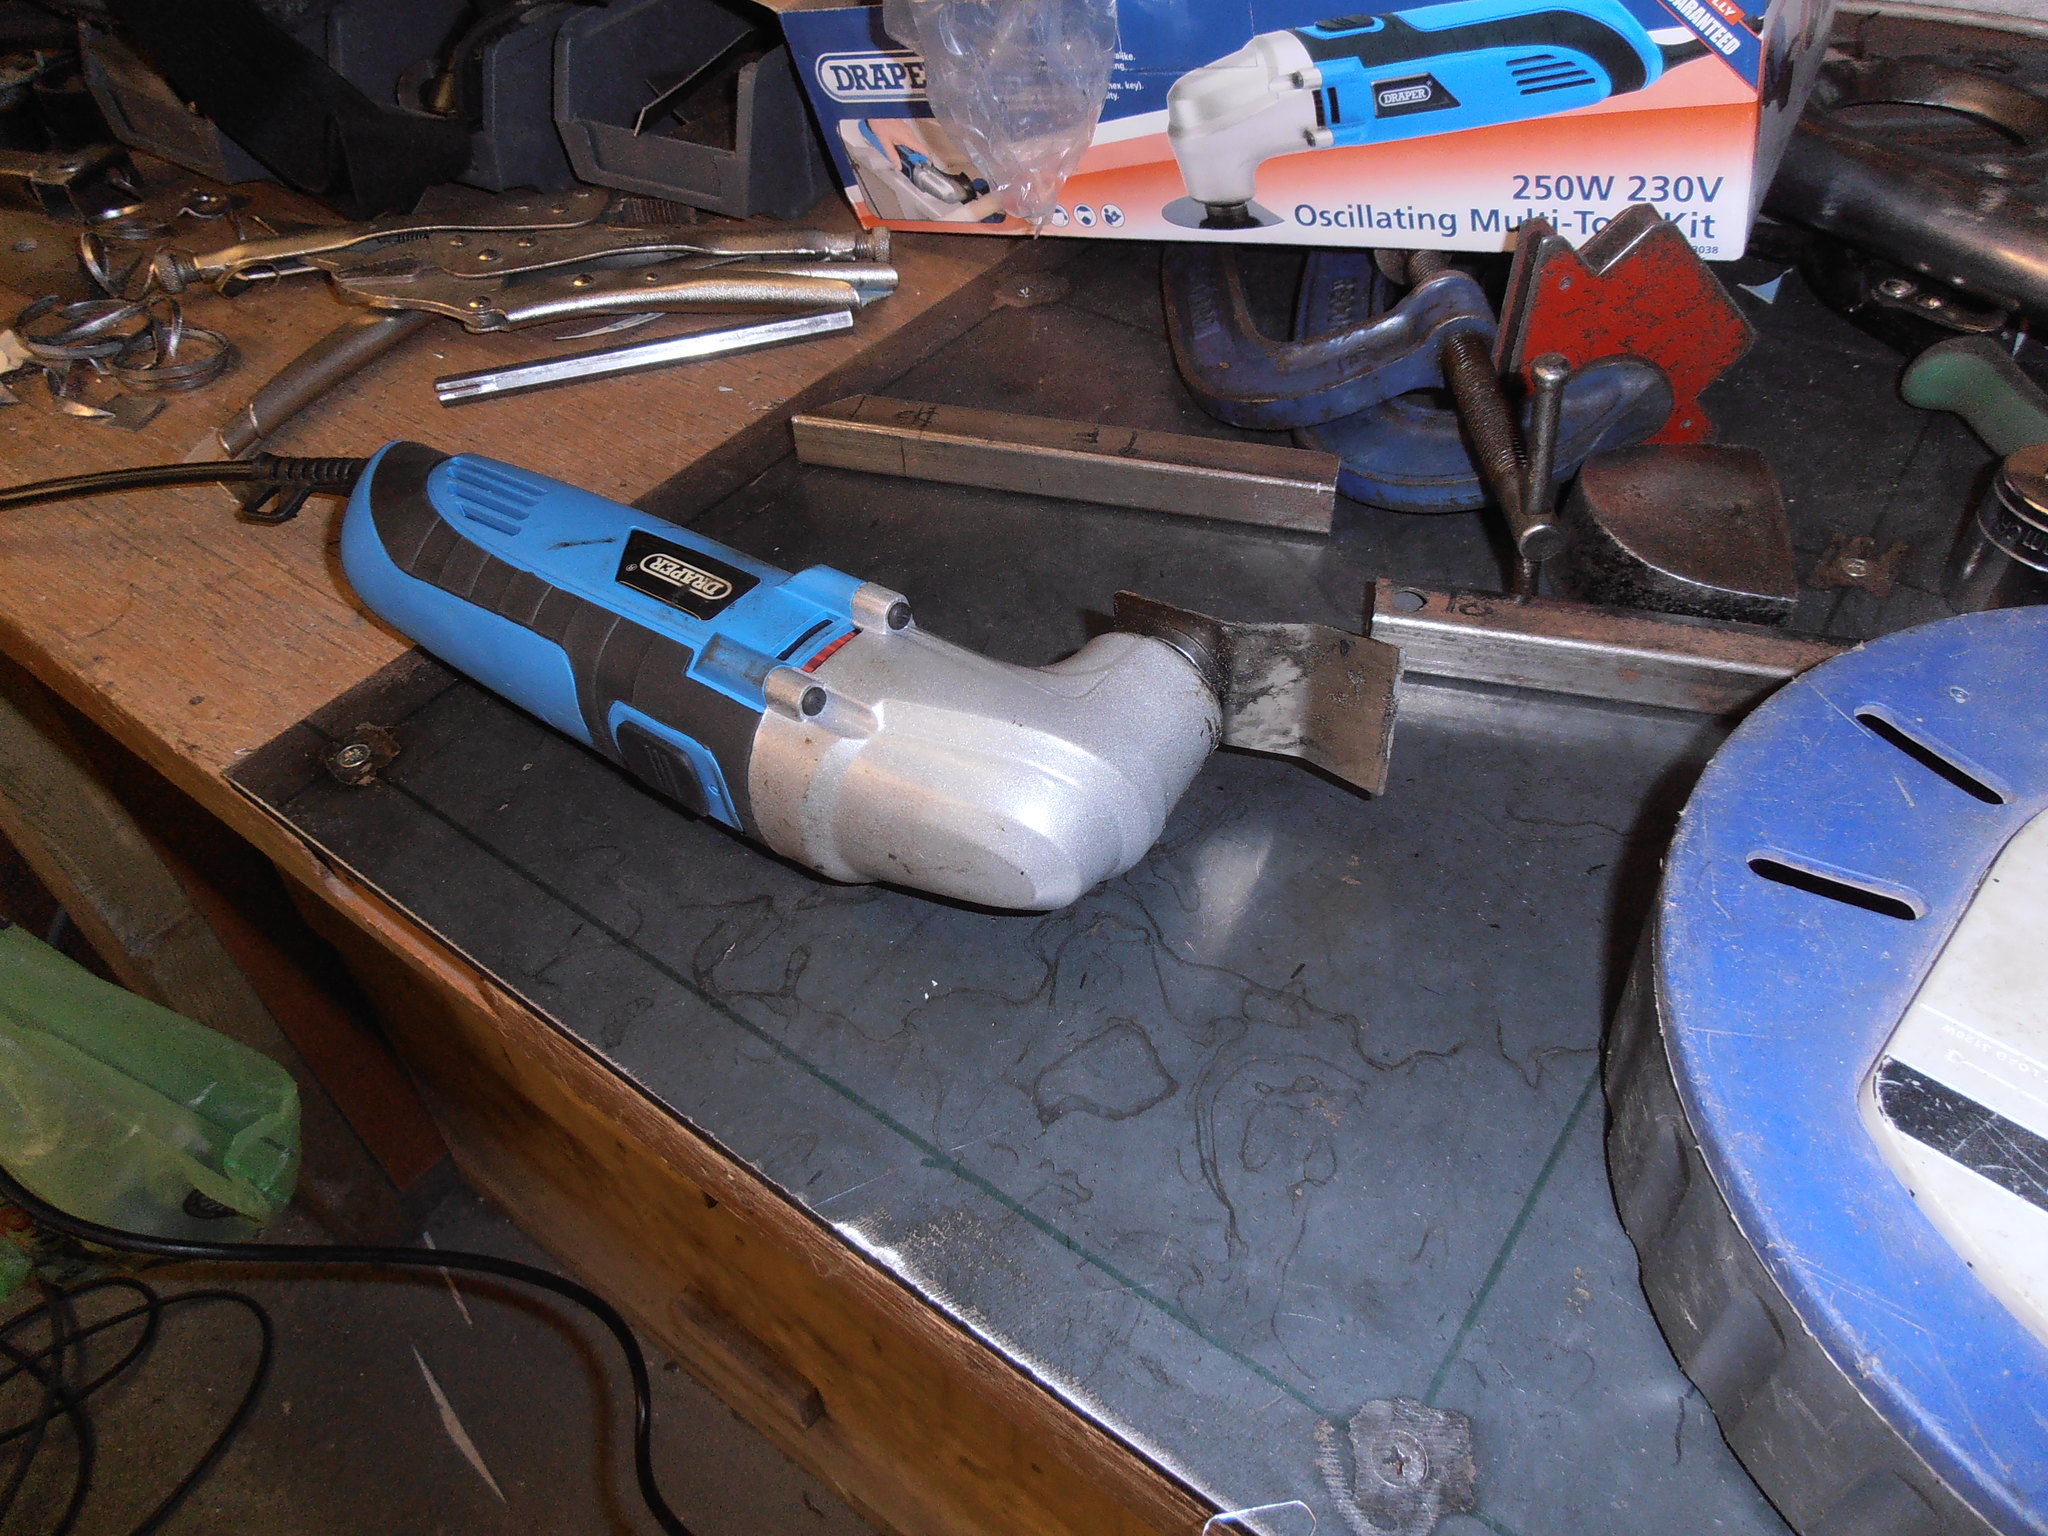 PC164254 PC164254 by jono_misfit, on Flickr i thought i'd just try it on the underseal 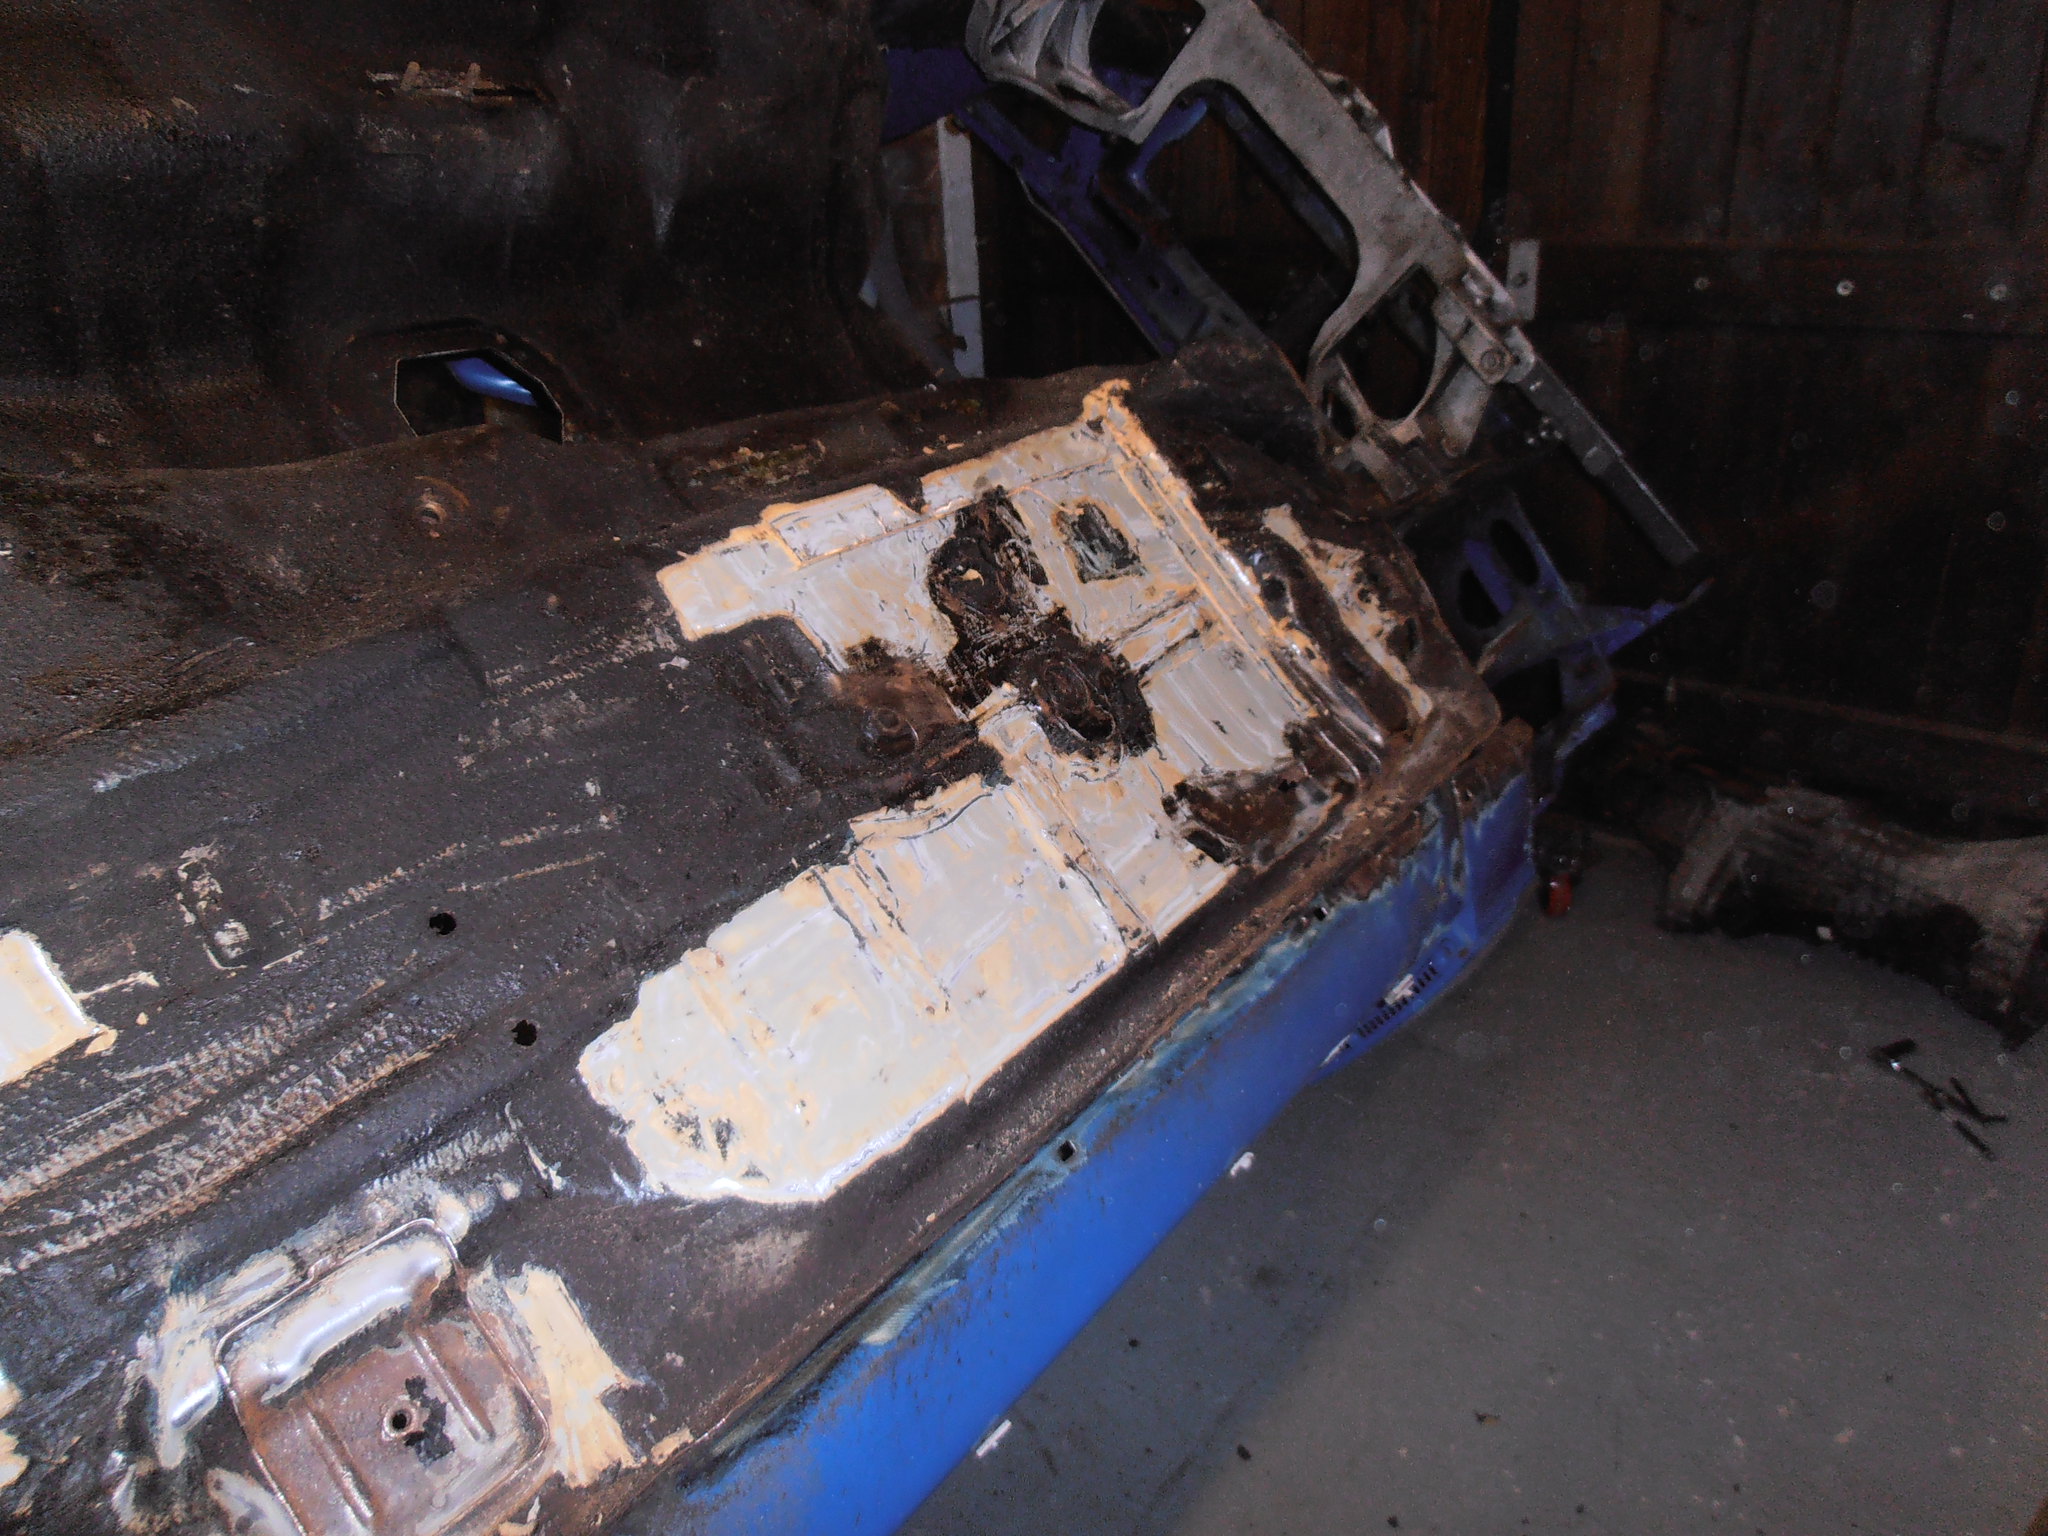 PC164255 PC164255 by jono_misfit, on Flickr  PC164256 PC164256 by jono_misfit, on Flickr ^ is about 10 mins efforts I'm impressed. It came off like someone cutting kebab meat. Whilst not as good as dipping etc, it'll give me another option to get the worst off and have a good look at what lies beneath. Back into hibernation.... |
| |
|
|
|
|
|
Dec 16, 2017 19:50:05 GMT
|
|
Never thought about using an electric scraper for under seal. Good idea. Certainly beats a wire brush on a grinder that heats it up and flicks it everywhere.
|
| |
|
|
|
|
|
Dec 16, 2017 20:06:42 GMT
|
|
A hot air paint stripper gun would work well with that scraper.
|
| |
|
|
jonomisfit
Club Retro Rides Member
Posts: 1,790
Club RR Member Number: 49
|
|
Jan 27, 2018 20:56:39 GMT
|
i spent a little time on the escort today. Ordered a pair of these should I need them. Mk5 escort sills. Escort Cosworths look to have a front section of the sill thats the same as a mk5 escort, so these should work for hopefully. 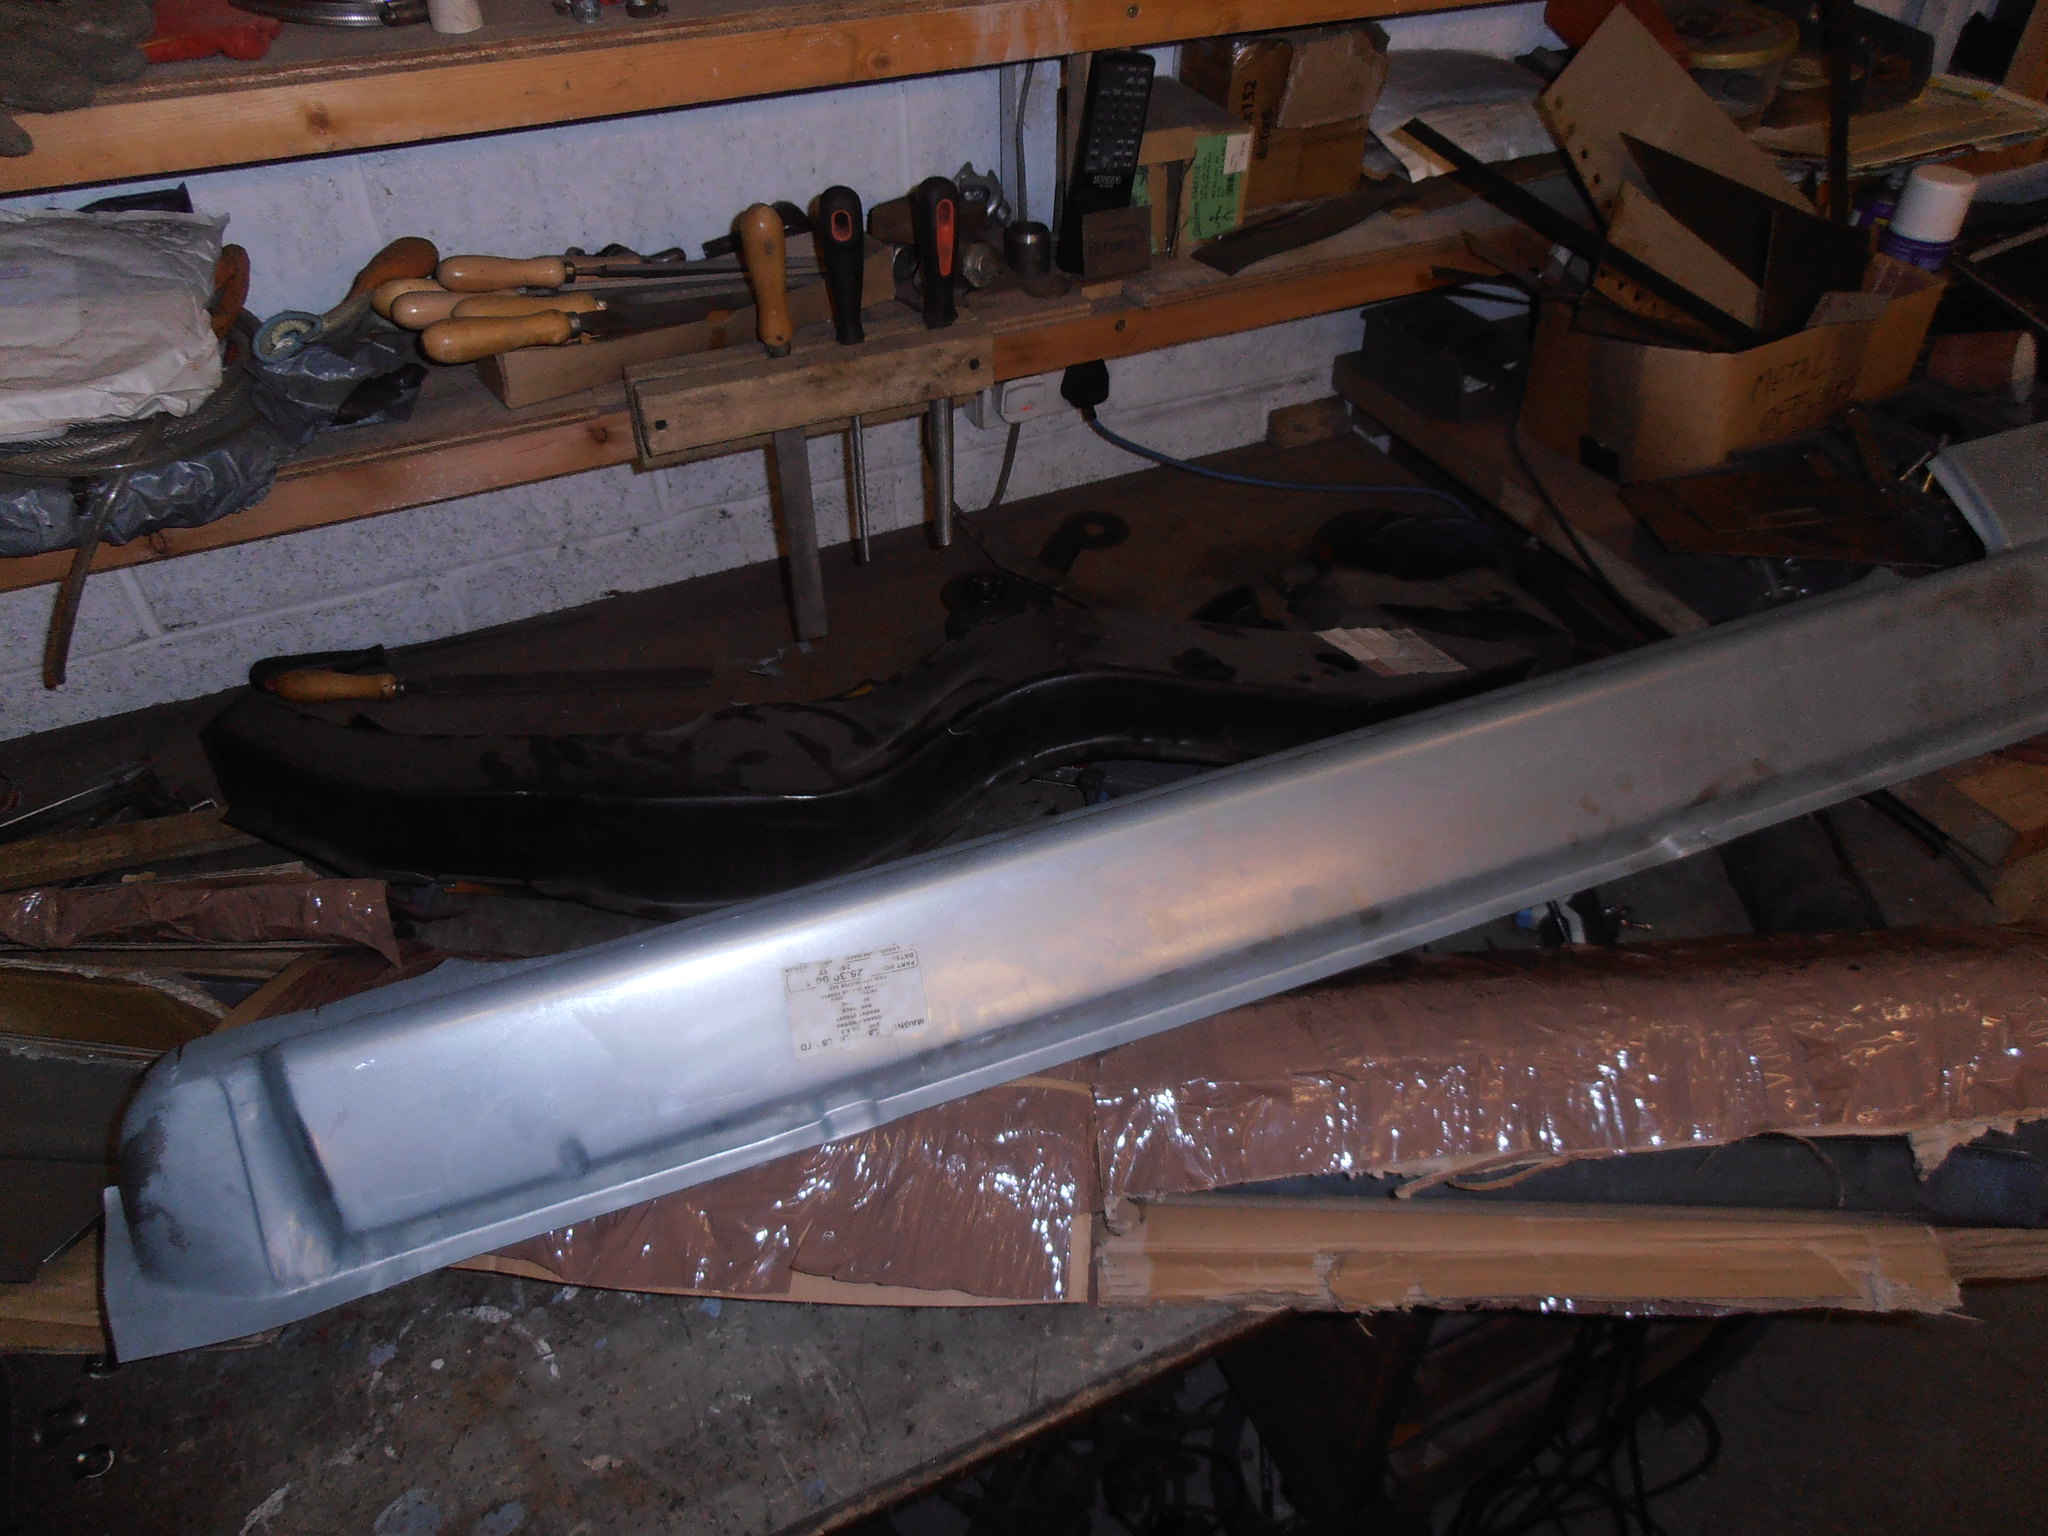 P1274365 P1274365 by jono_misfit, on Flickr in between waiting for things to cool on the morris I gave the floor a bit more of a shave  P1274376 P1274376 by jono_misfit, on Flickr 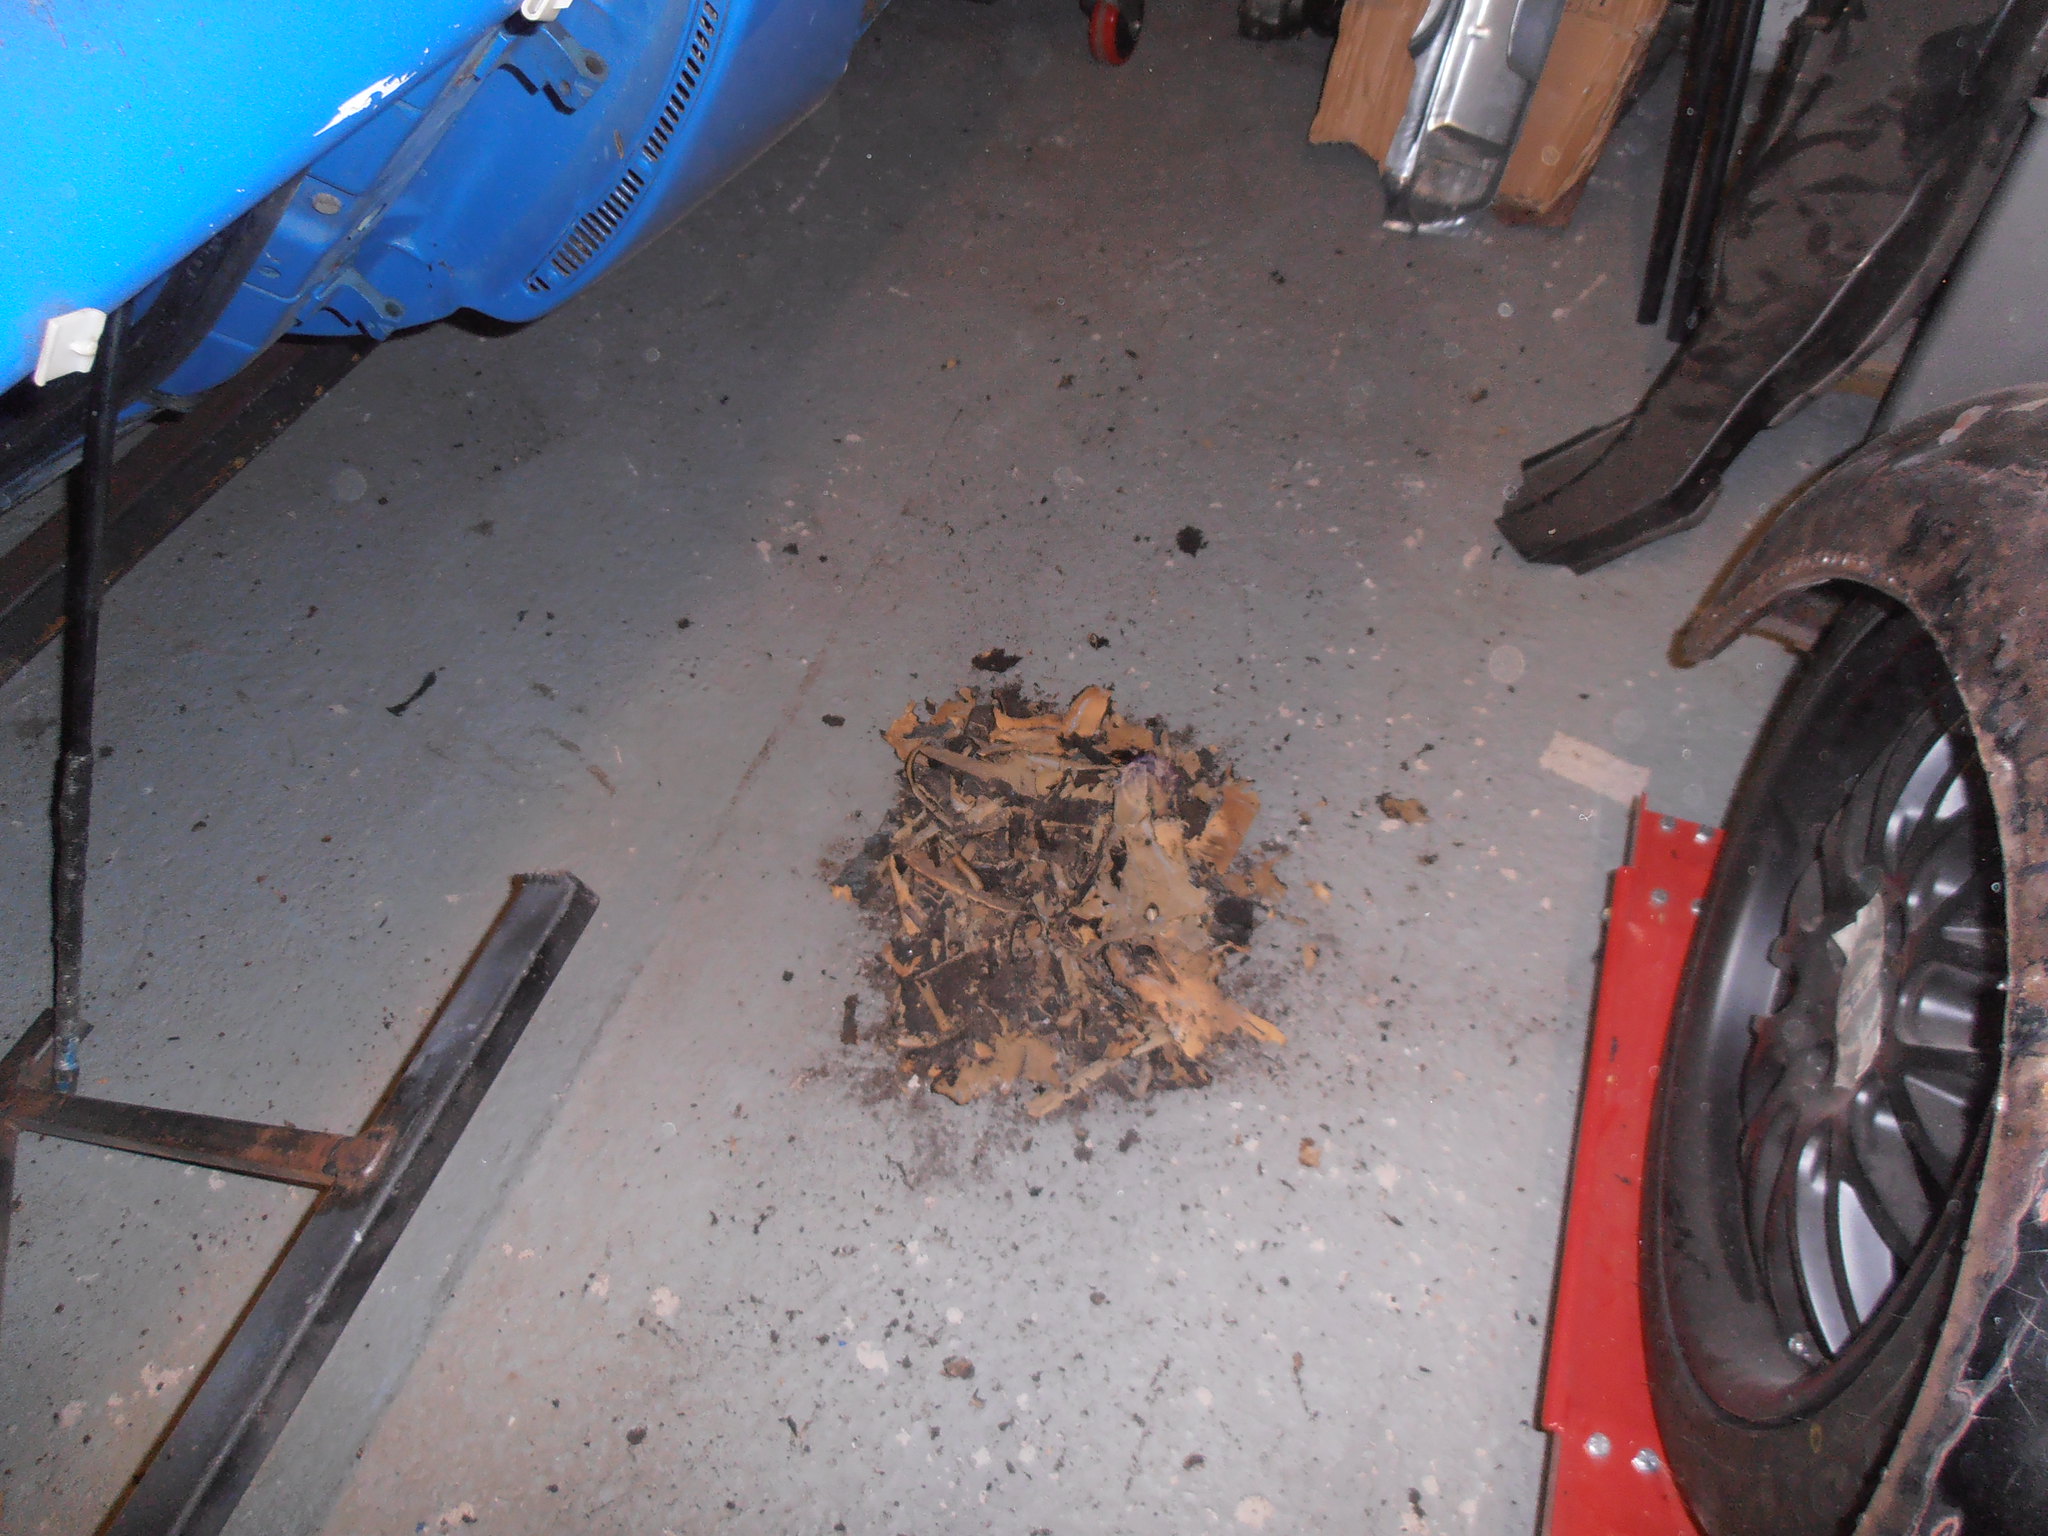 P1274377 P1274377 by jono_misfit, on Flickr still a long way to go, but I figure a bit every now and again will get me there. |
| |
Last Edit: Jan 27, 2018 20:57:13 GMT by jonomisfit
|
|
|
|
|
|
|
|
Impressive work on the spit, I can recall a 2wd 24v Escort Cosworth but don’t think I’ve ever seen a 4wd done one. Excellent project look forward to seeing it come together.
|
| |
Sierra - here we go again! He has an illness, it's not his fault.
|
|
jonomisfit
Club Retro Rides Member
Posts: 1,790
Club RR Member Number: 49
|
|
Jan 29, 2018 20:22:39 GMT
|
I'll see what ends up happening, but thats the way i'm going engine wise at the moment. A look on the web shows a number of sierra cosworth V6 AWD cars about, but nothing came up for escorts. I did find some other interesting swaps, like a skyline engine and AWD in Australia. scraping is a boring job, so i'm going to try grabbing 30 mins on it each time i'm in the workshop. todays minor progress 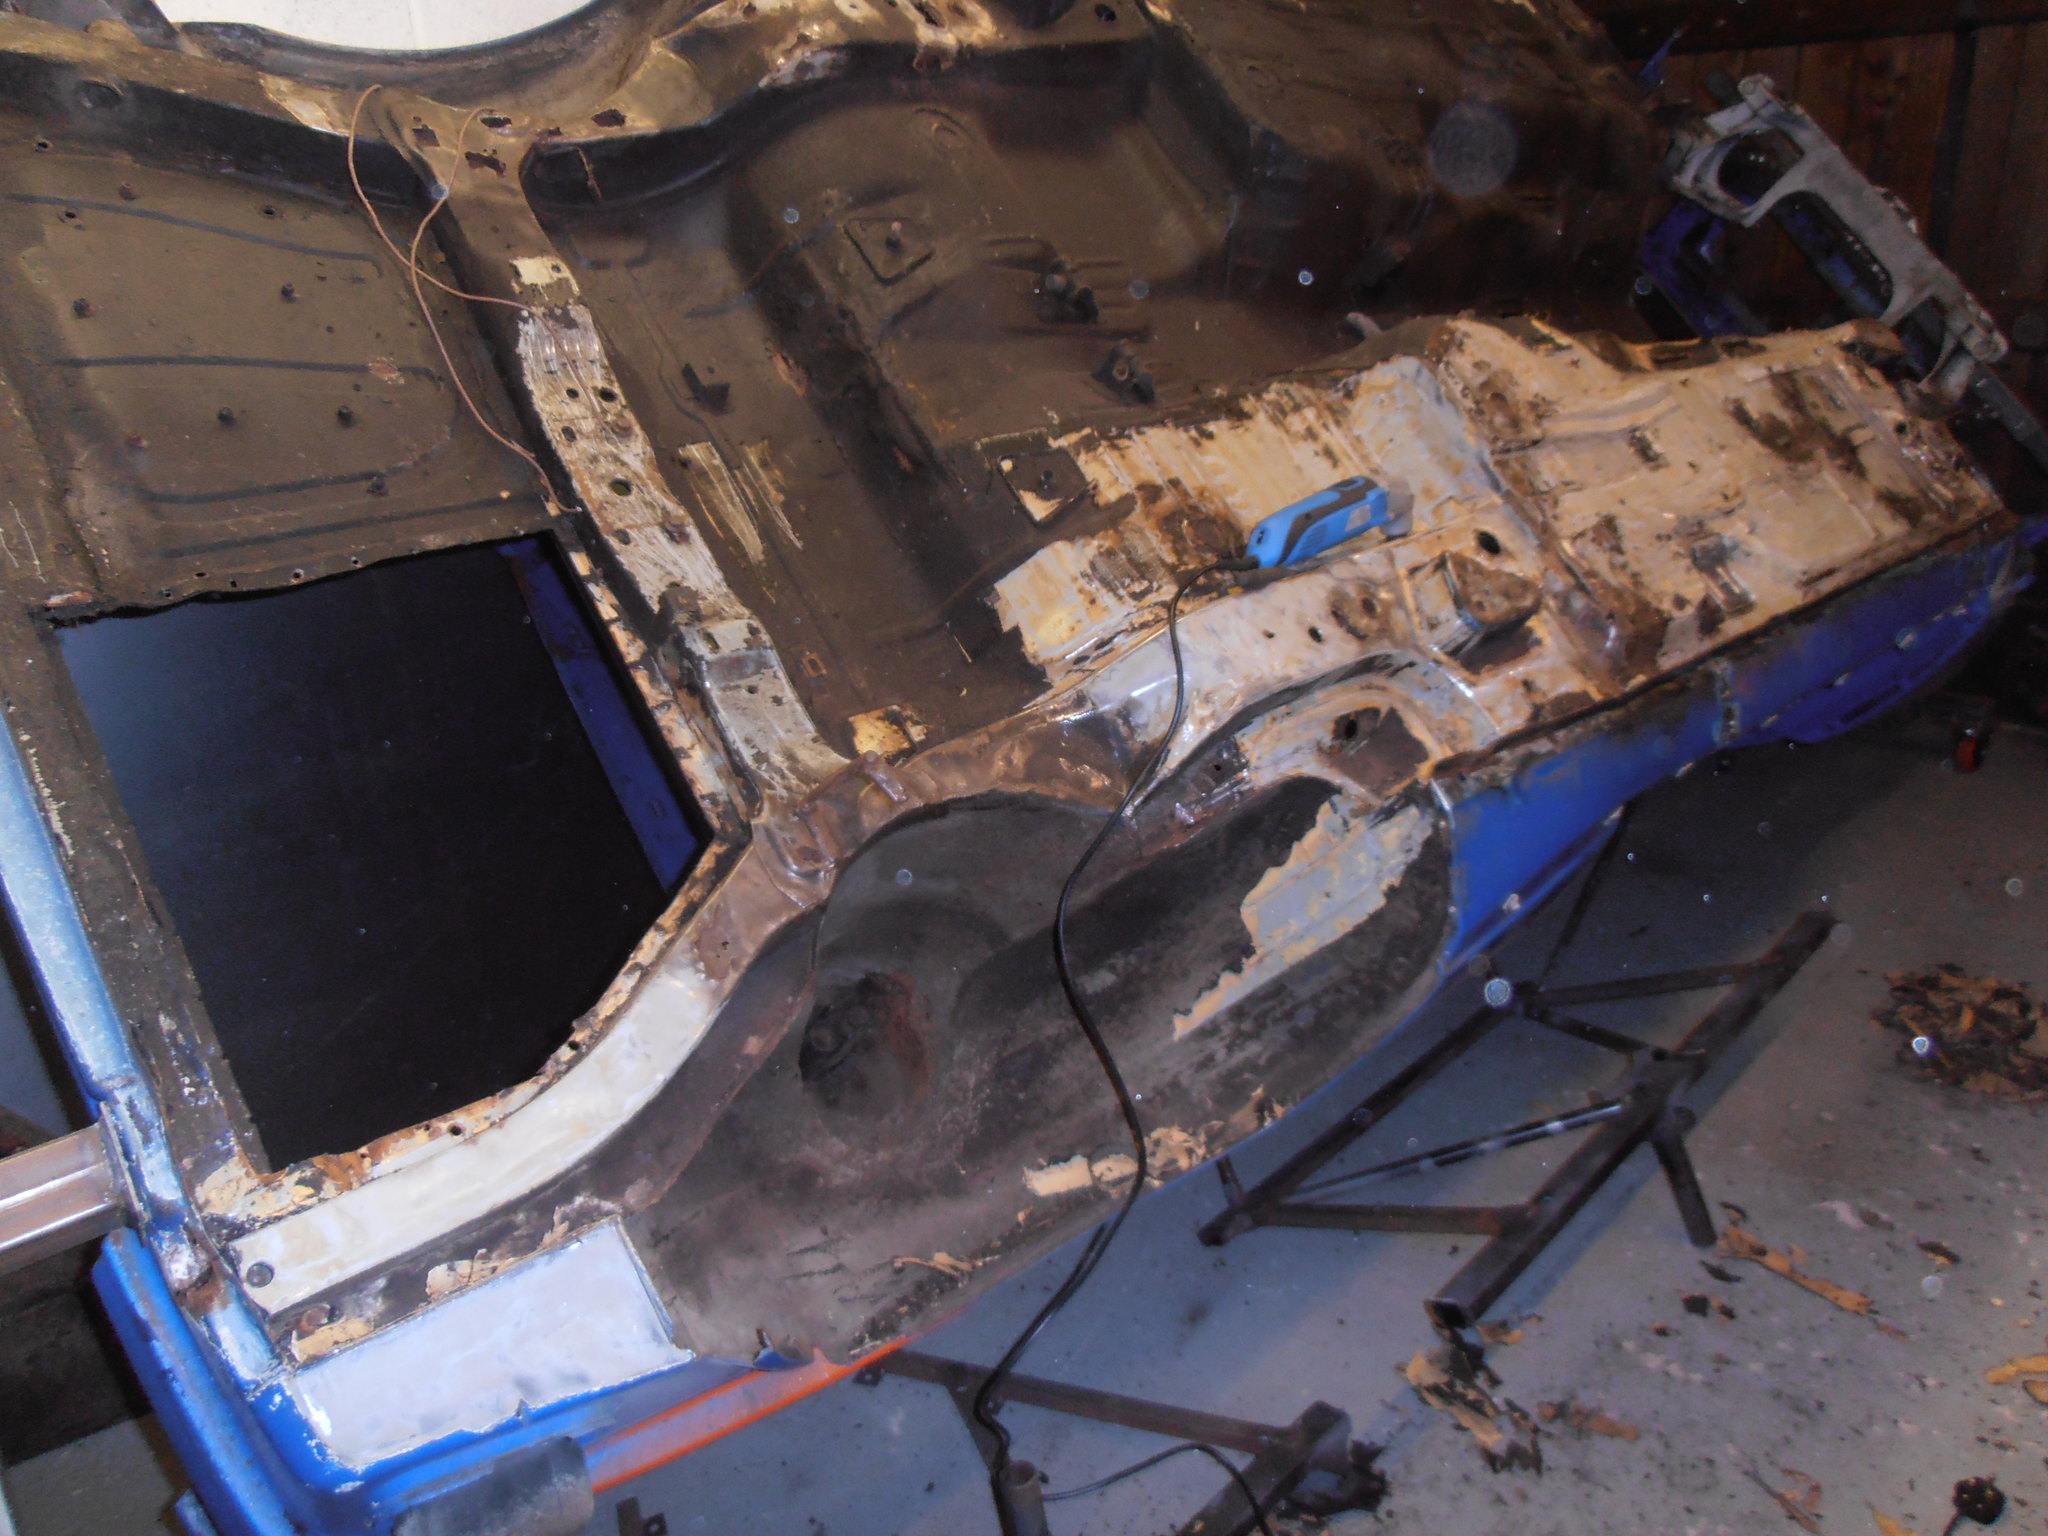 P1294396 P1294396 by jono_misfit, on Flickr 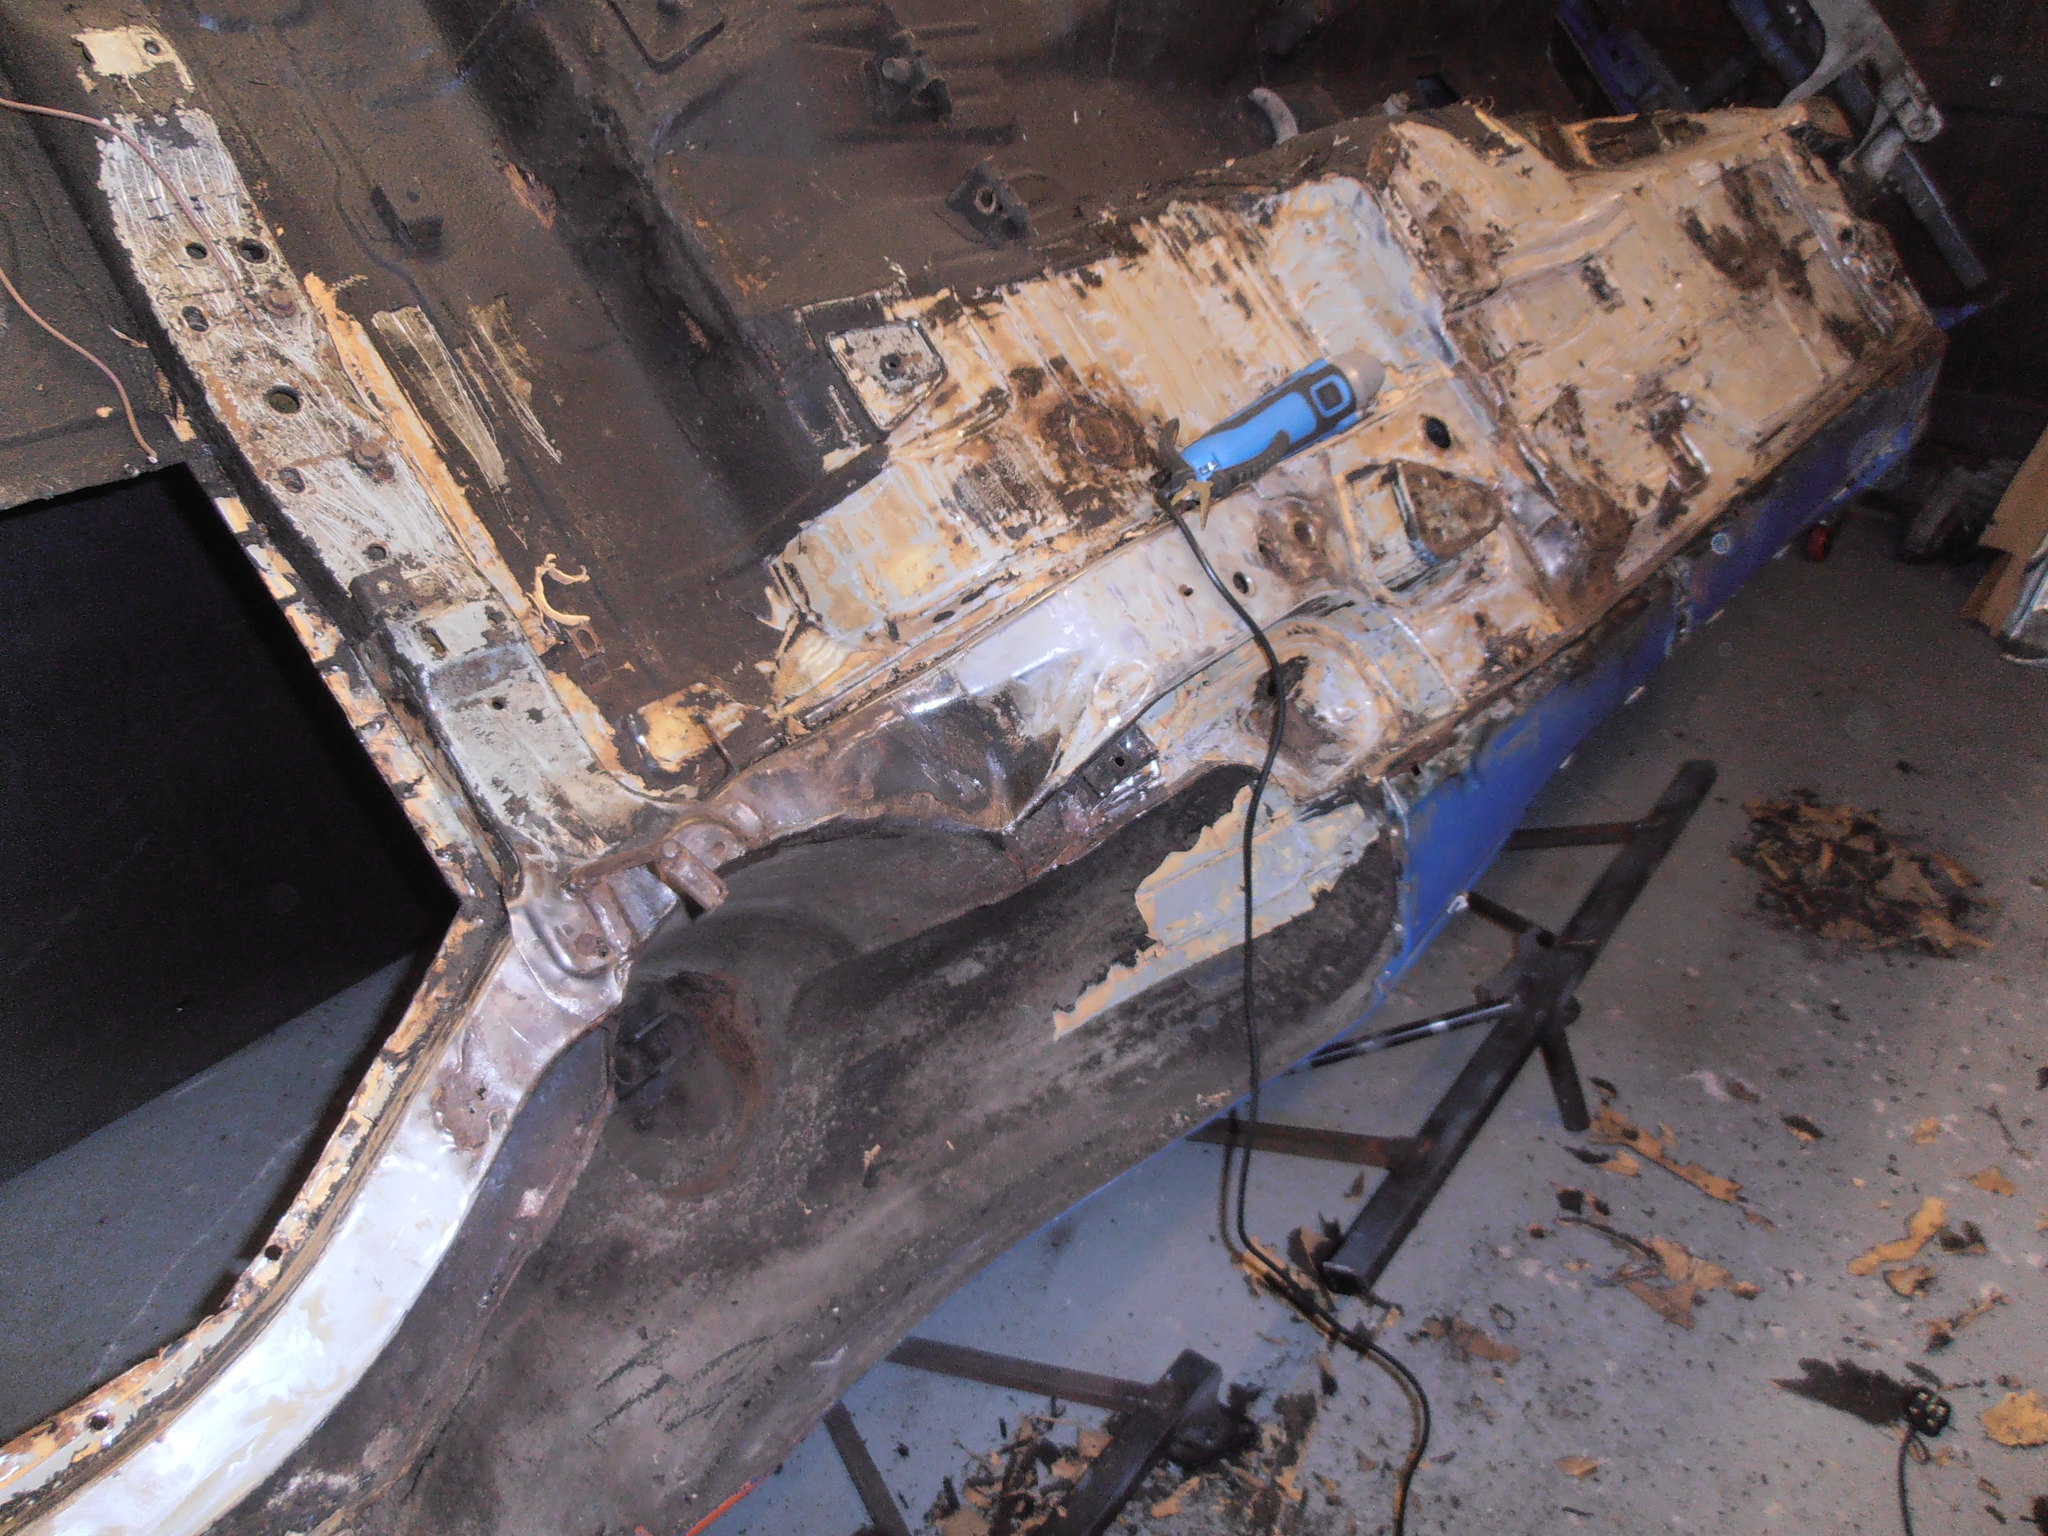 P1294401 P1294401 by jono_misfit, on Flickr its impressive just how much tar like underseal has been sprayed on, and how badly its been applied.... |
| |
Last Edit: Jan 29, 2018 20:23:32 GMT by jonomisfit
|
|
jonomisfit
Club Retro Rides Member
Posts: 1,790
Club RR Member Number: 49
|
|
|
|
i've got more of the underseal off the first side, just doing the odd bit here and there. I decided today i'd do the odd bit of the easy repairs. It turns out most of the passenger side is in much better condition that I thought. Still a few bits to fix. First up the end of the chassis leg. It has a rust hole through the double skin. 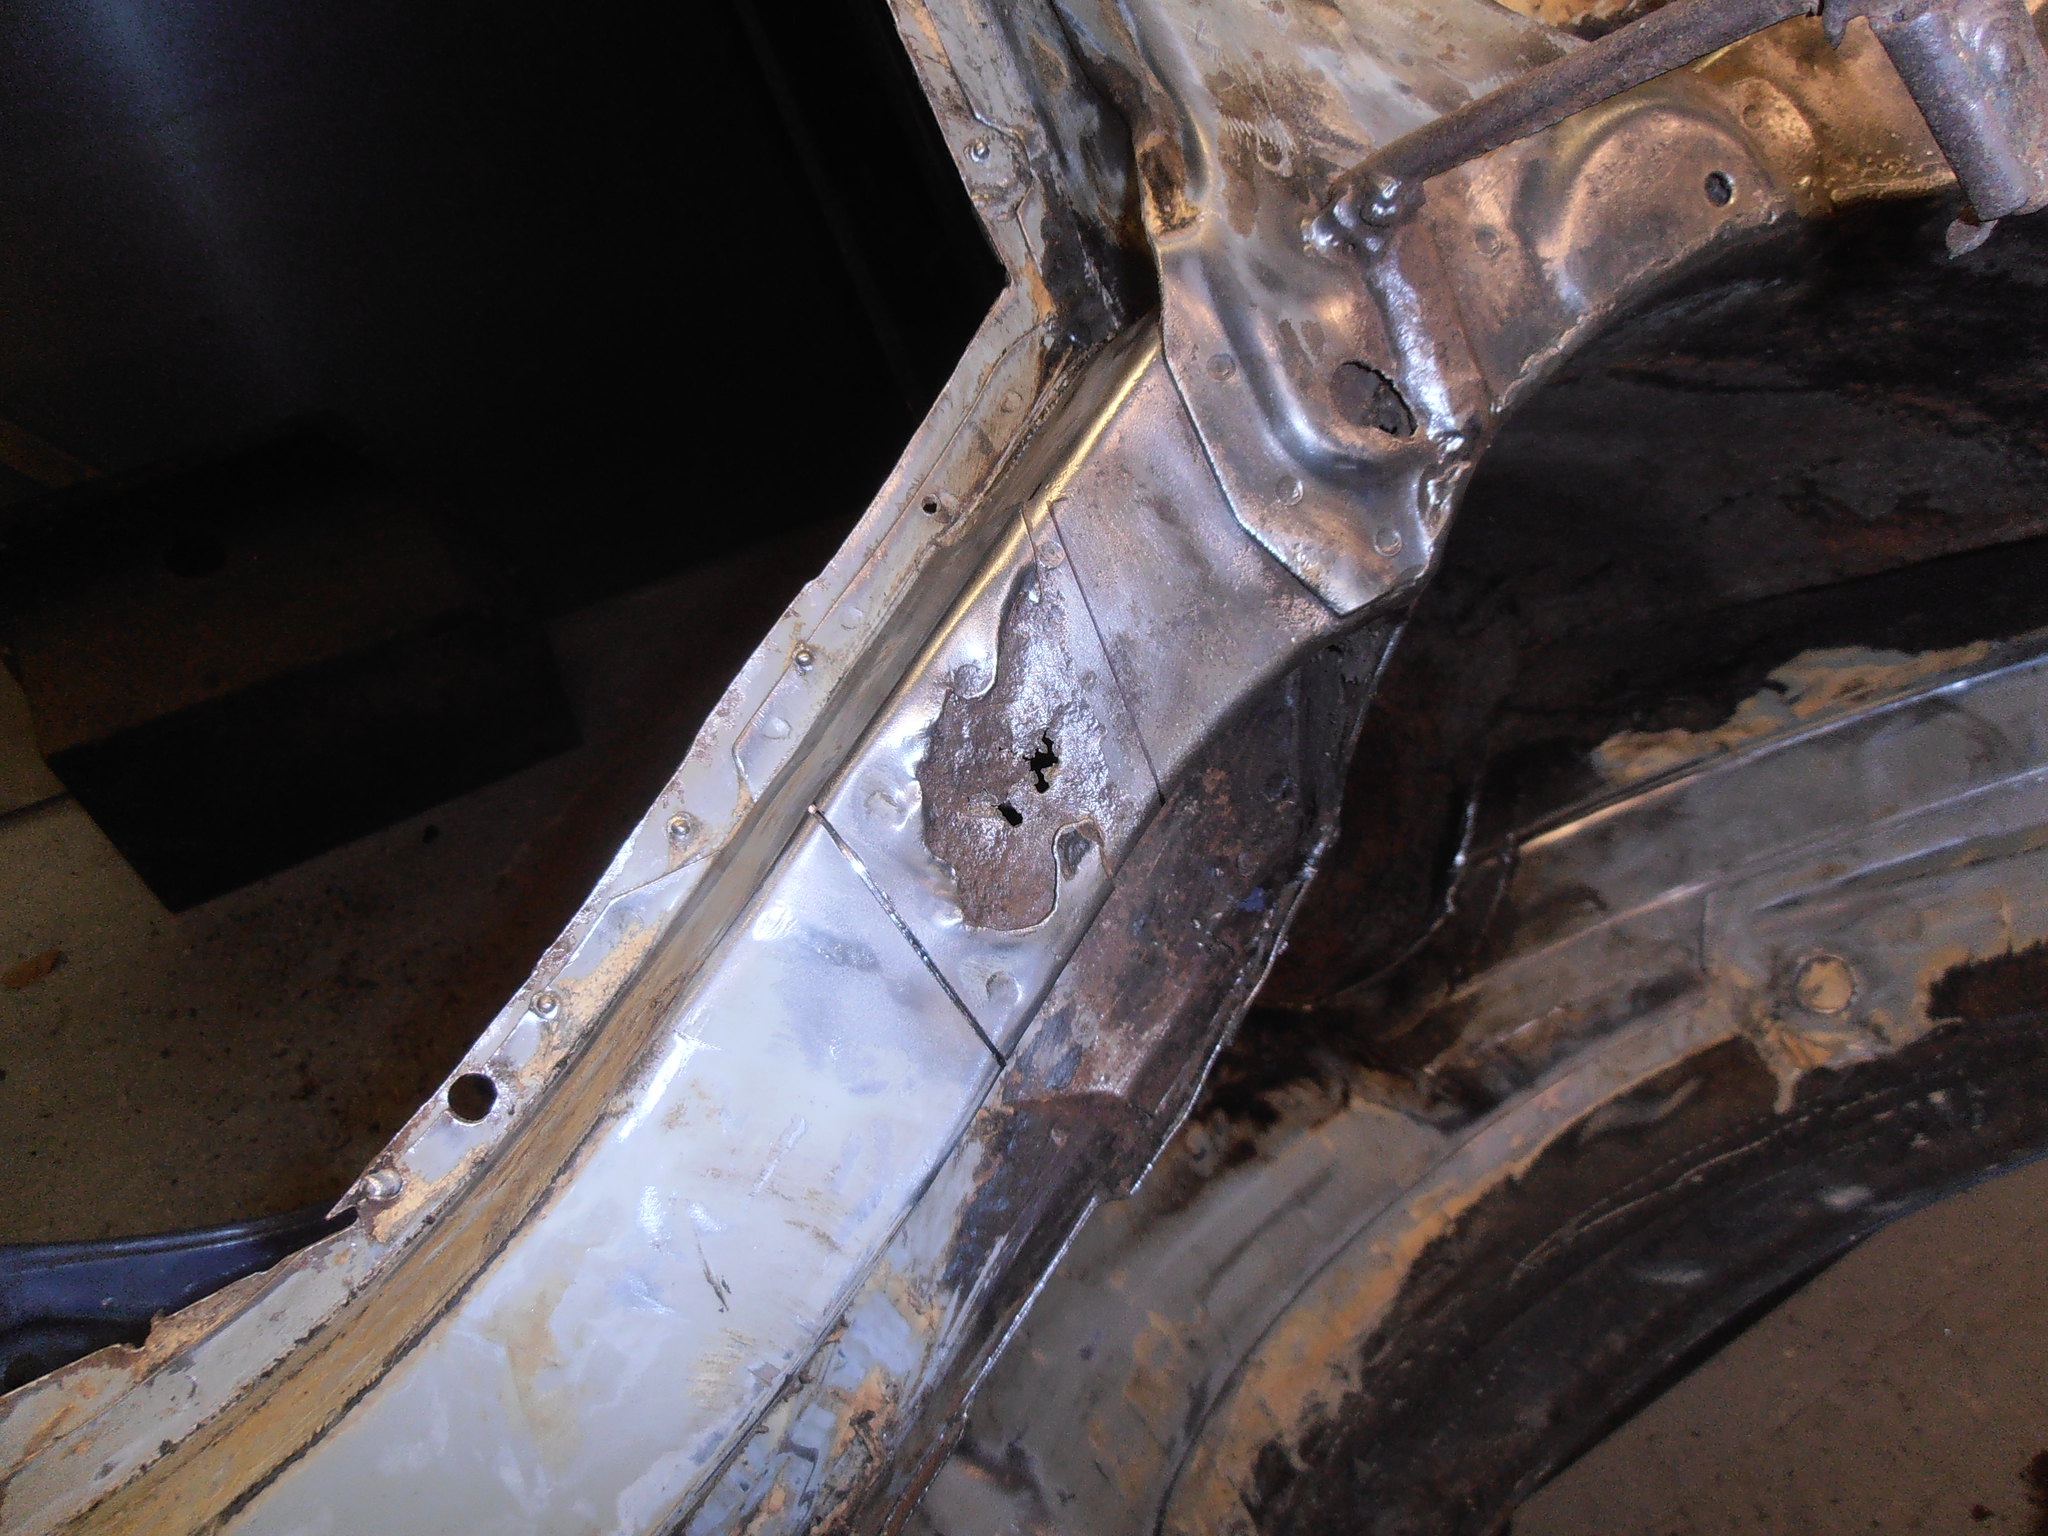 P4014513 P4014513 by jono_misfit, on Flickr removed a piece of top skin. 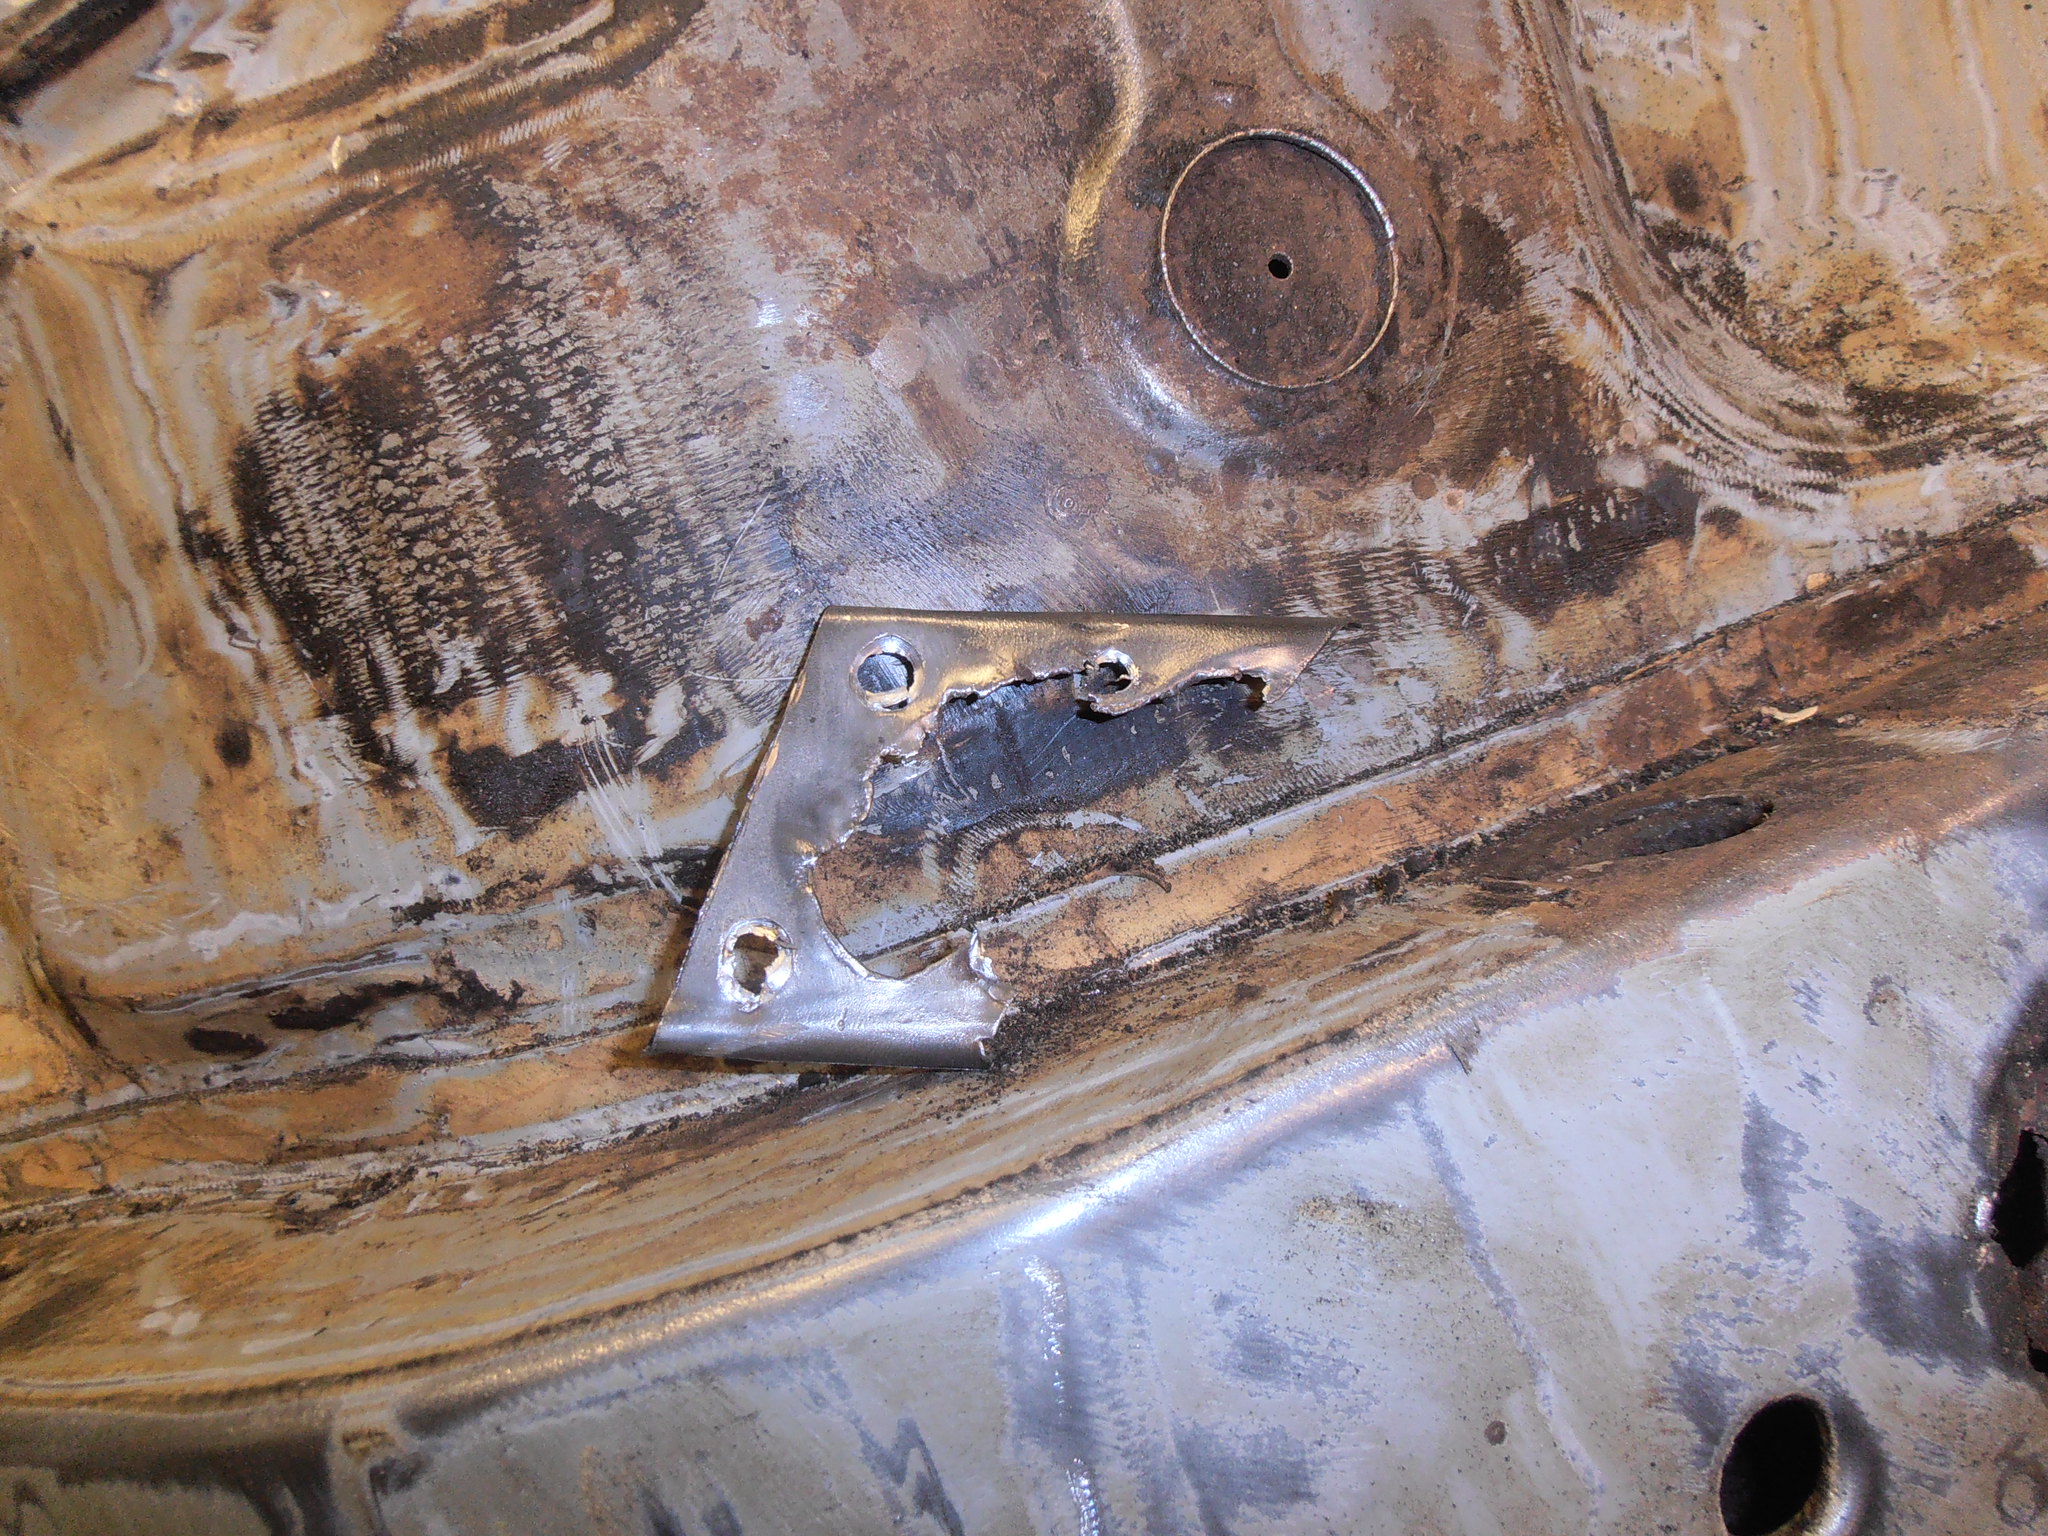 P4014514 P4014514 by jono_misfit, on Flickr manky metal there 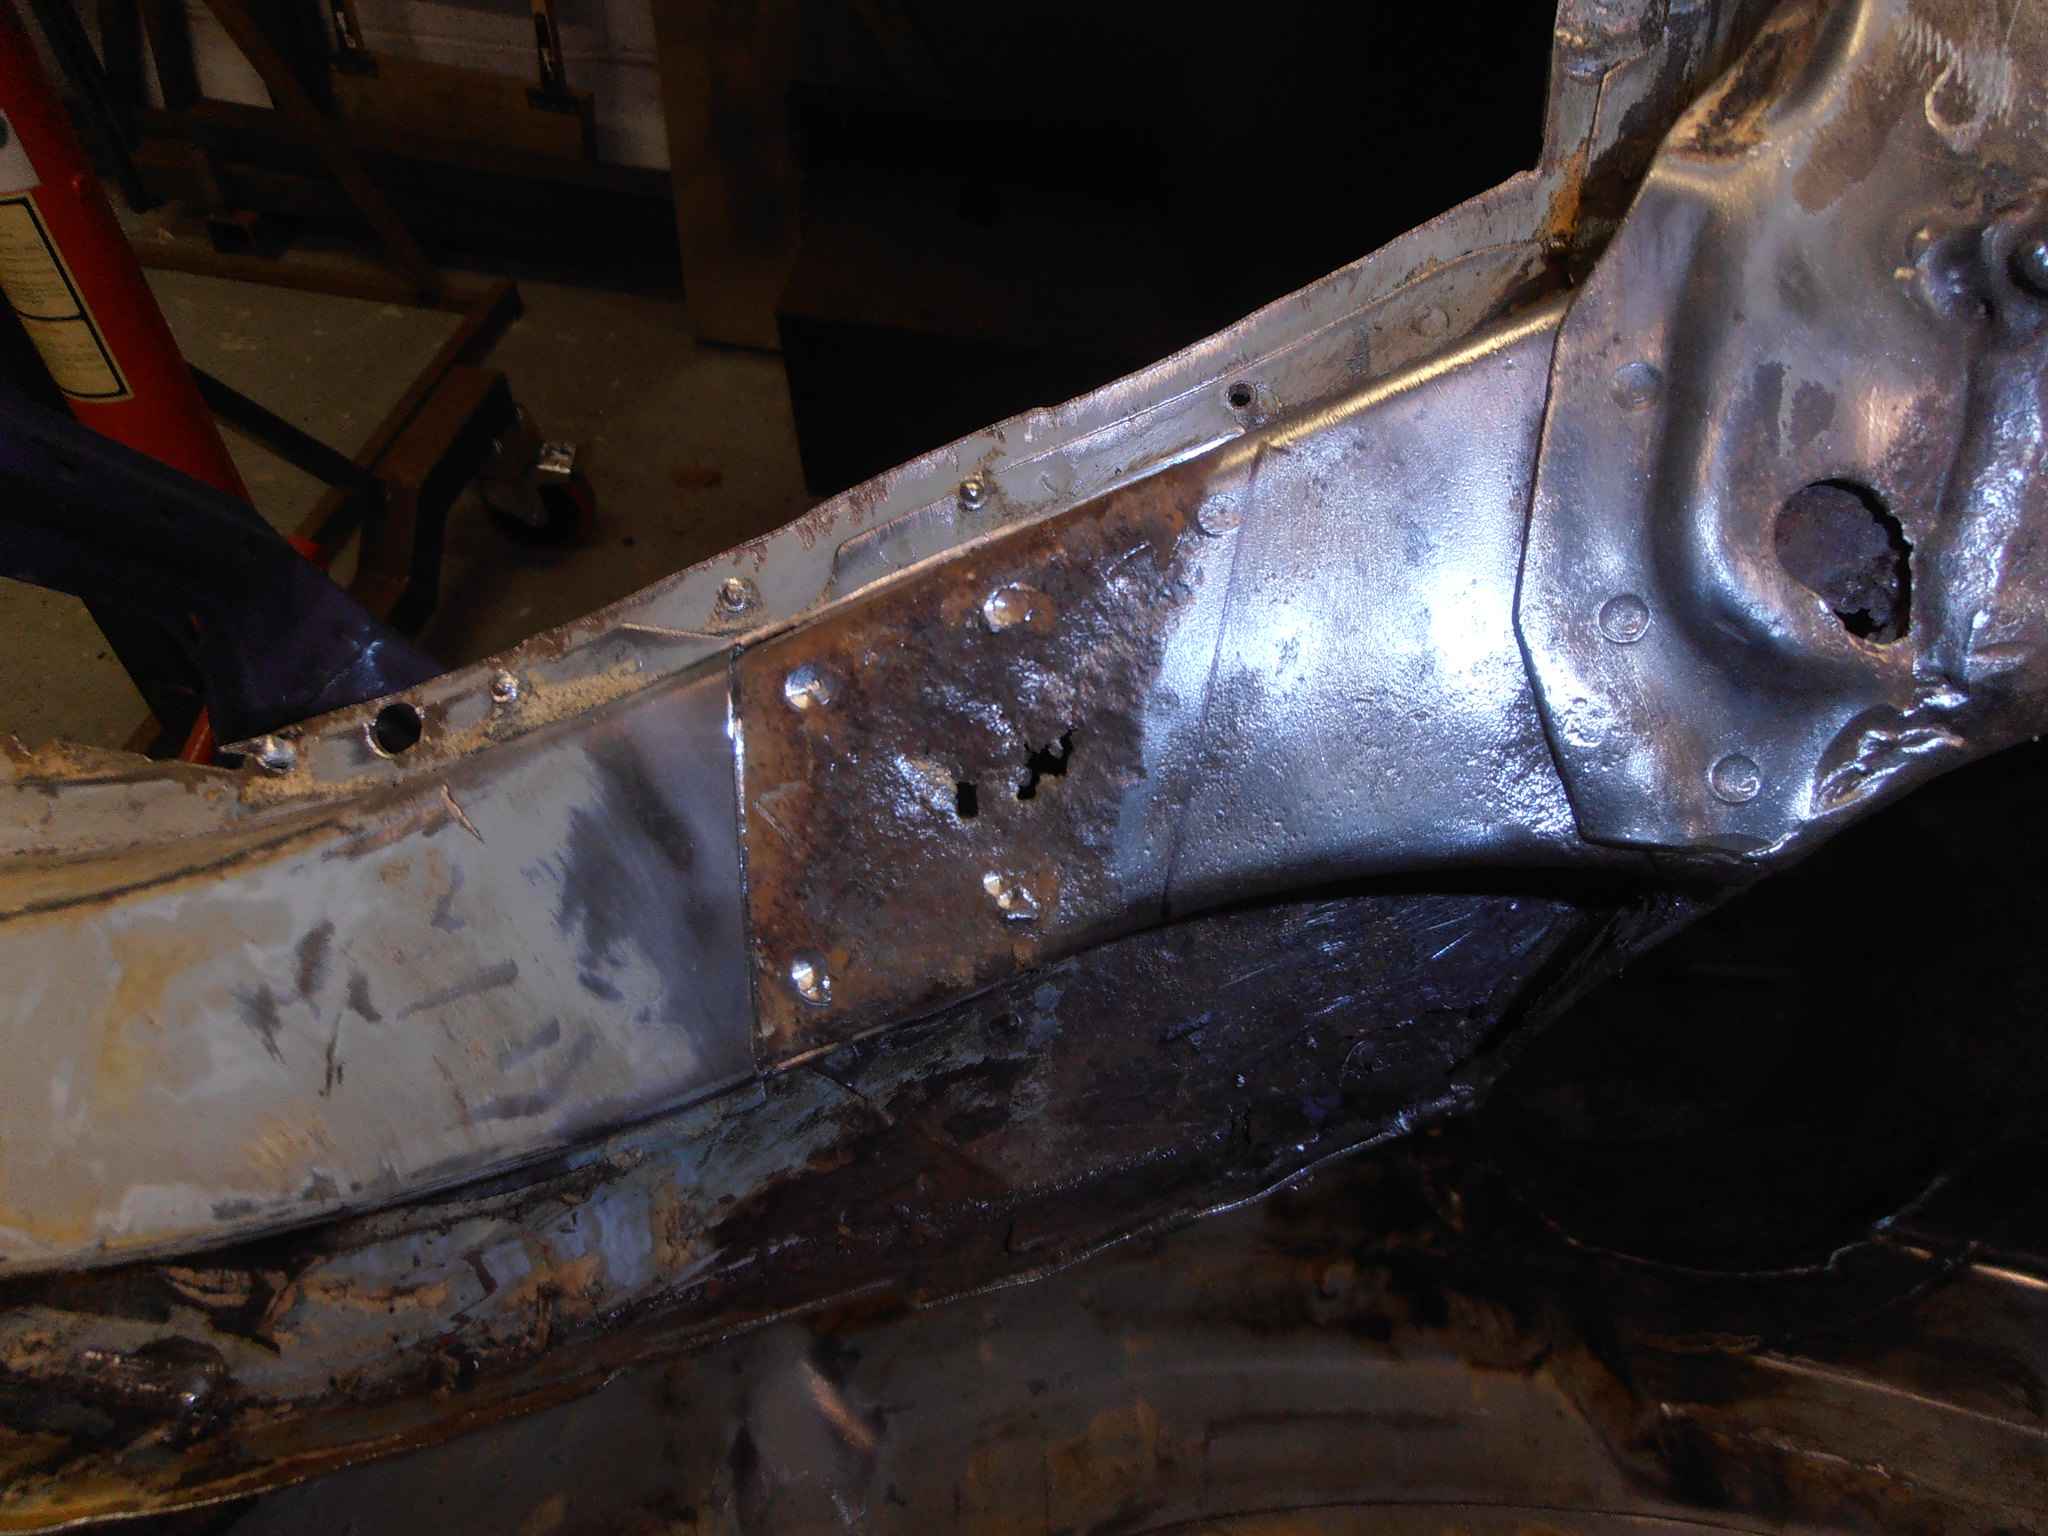 P4014515 P4014515 by jono_misfit, on Flickr cut that out as well 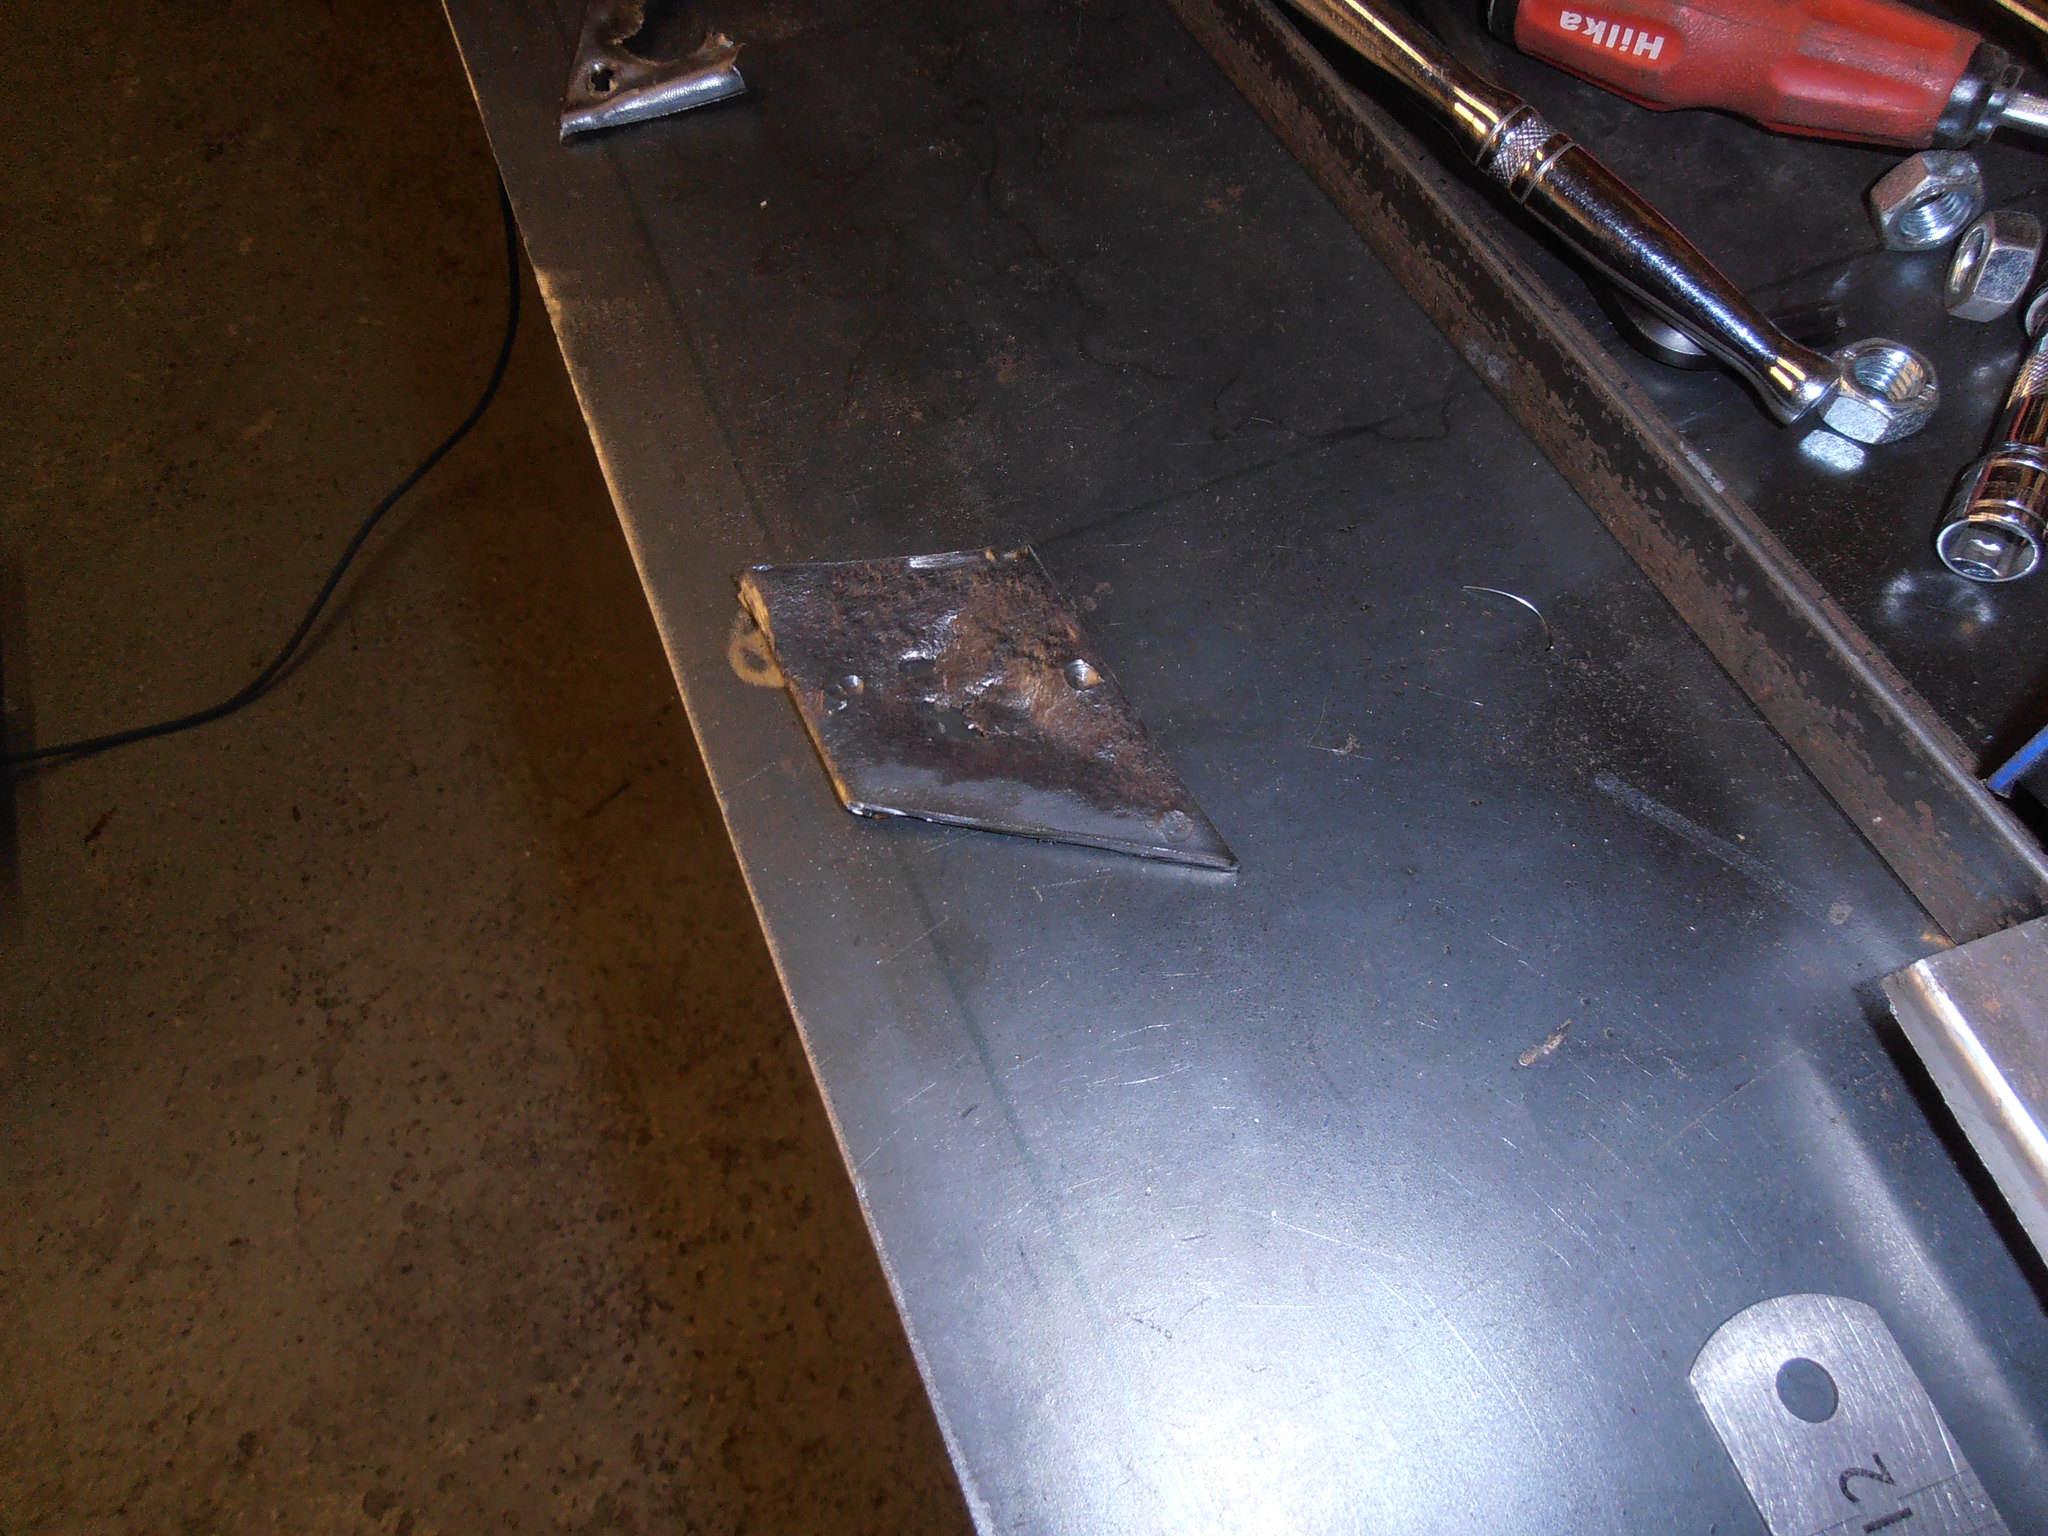 P4014516 P4014516 by jono_misfit, on Flickr inner skin (main leg) is 1.5mm thick. The outer skin is circa 1mm. noseying indie the leg (that I can see with a light and a mirror on a stick) shows the rest to be in fairly good condition inside. Make the inner patch and prime. 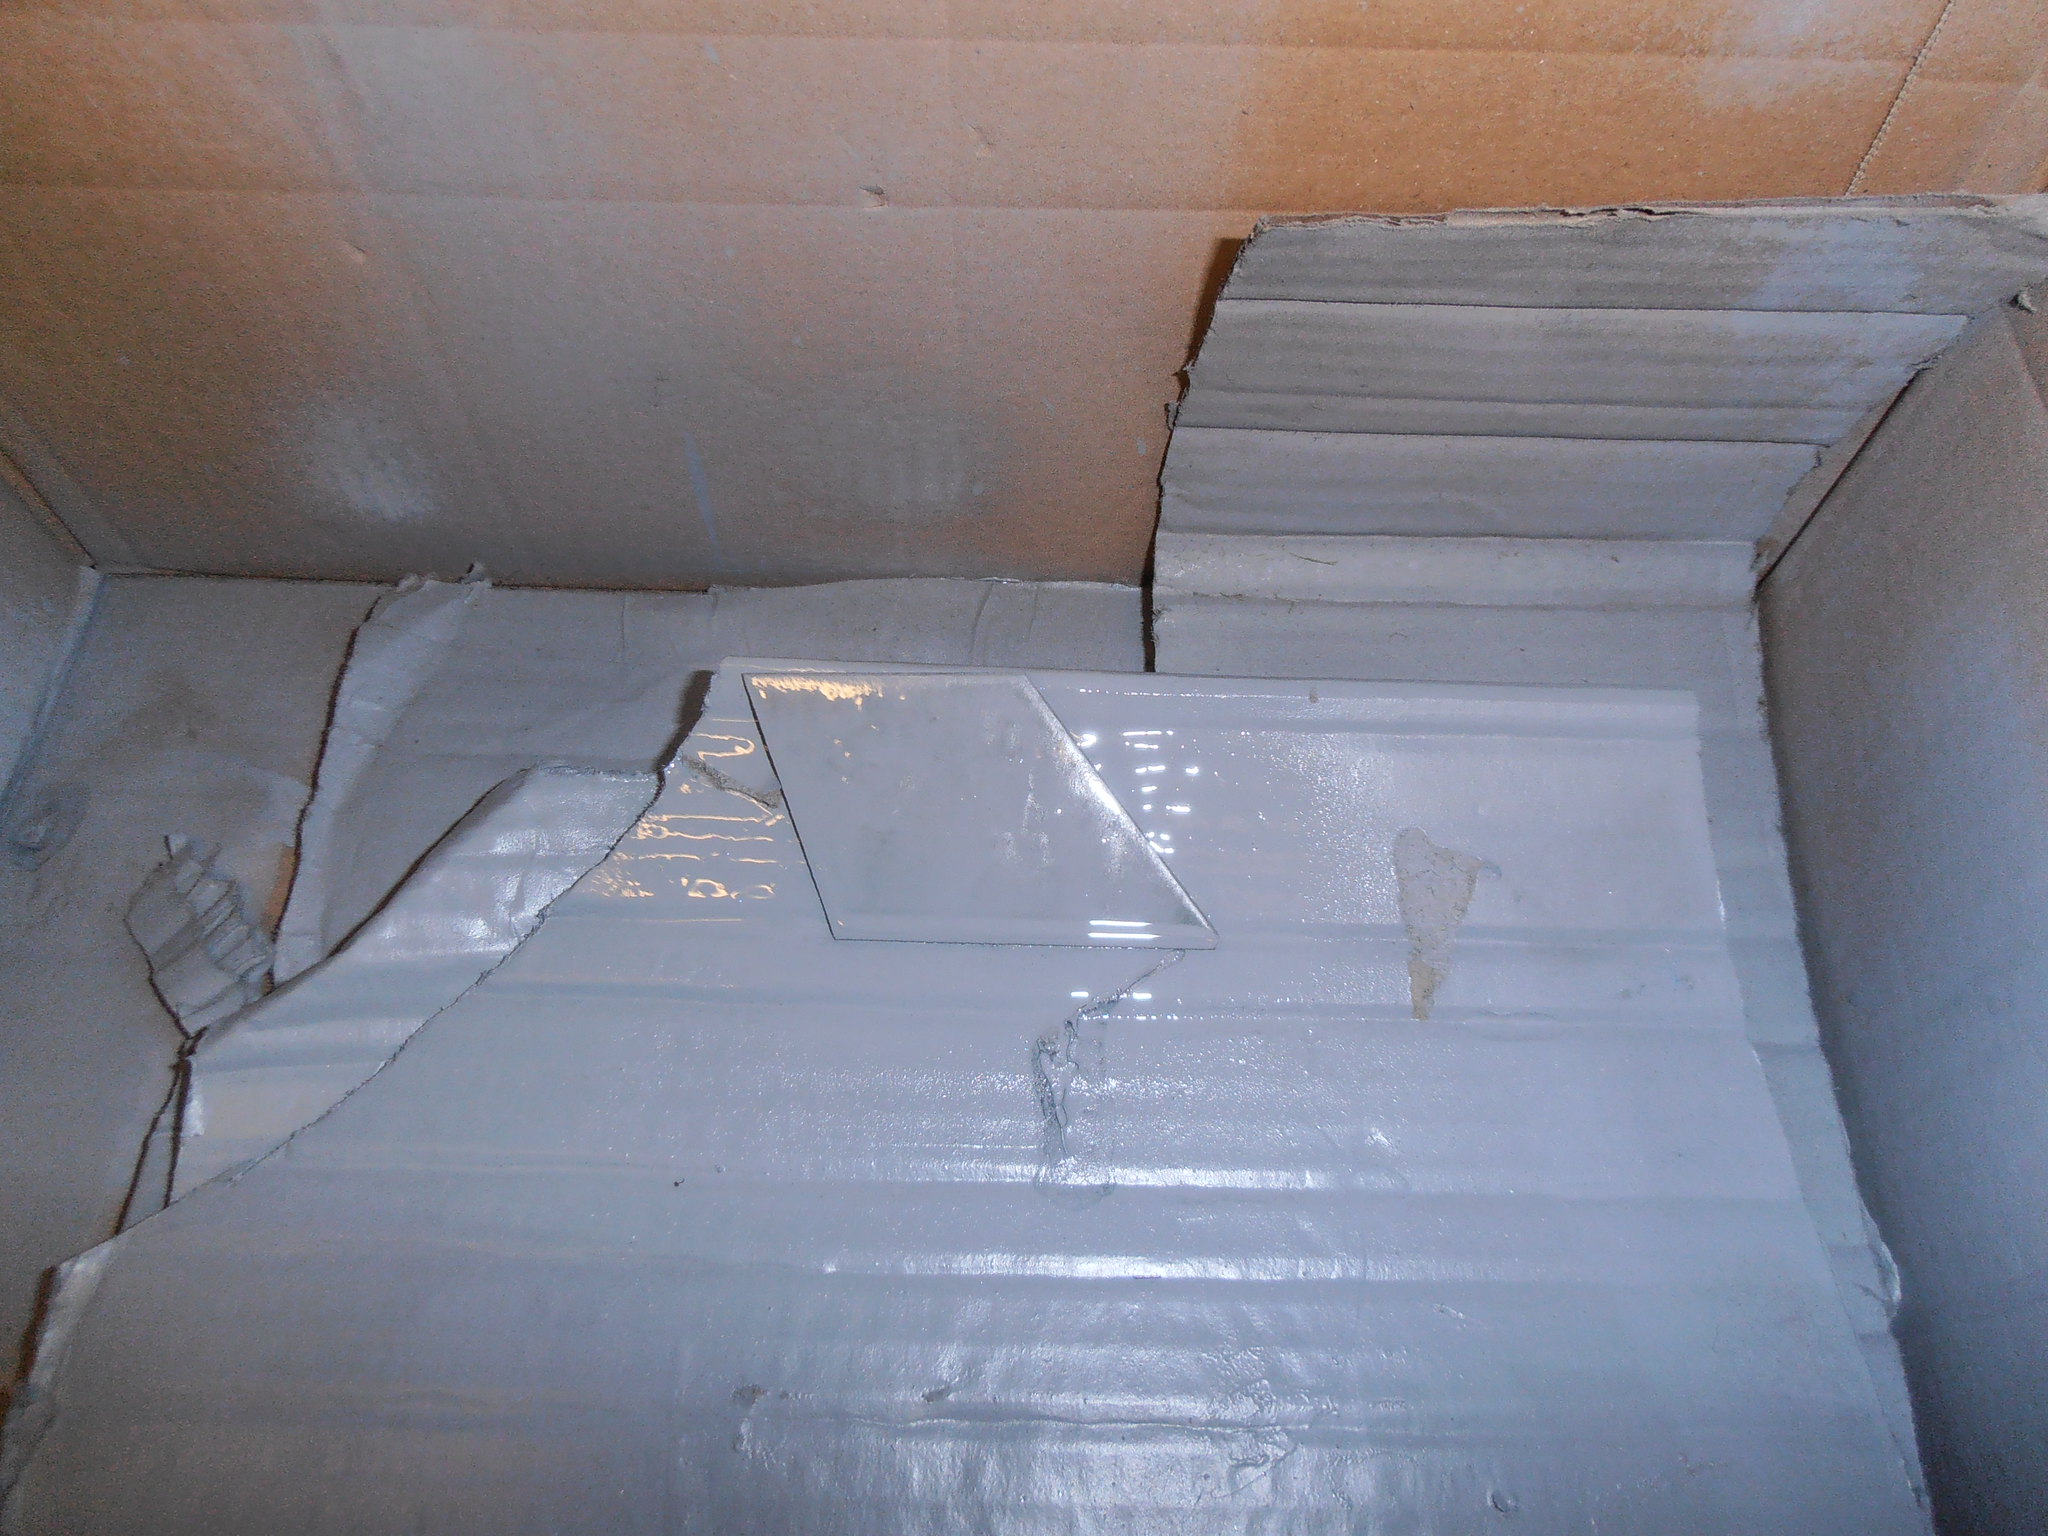 P4014517 P4014517 by jono_misfit, on Flickr Clean up the surrounding area and prime 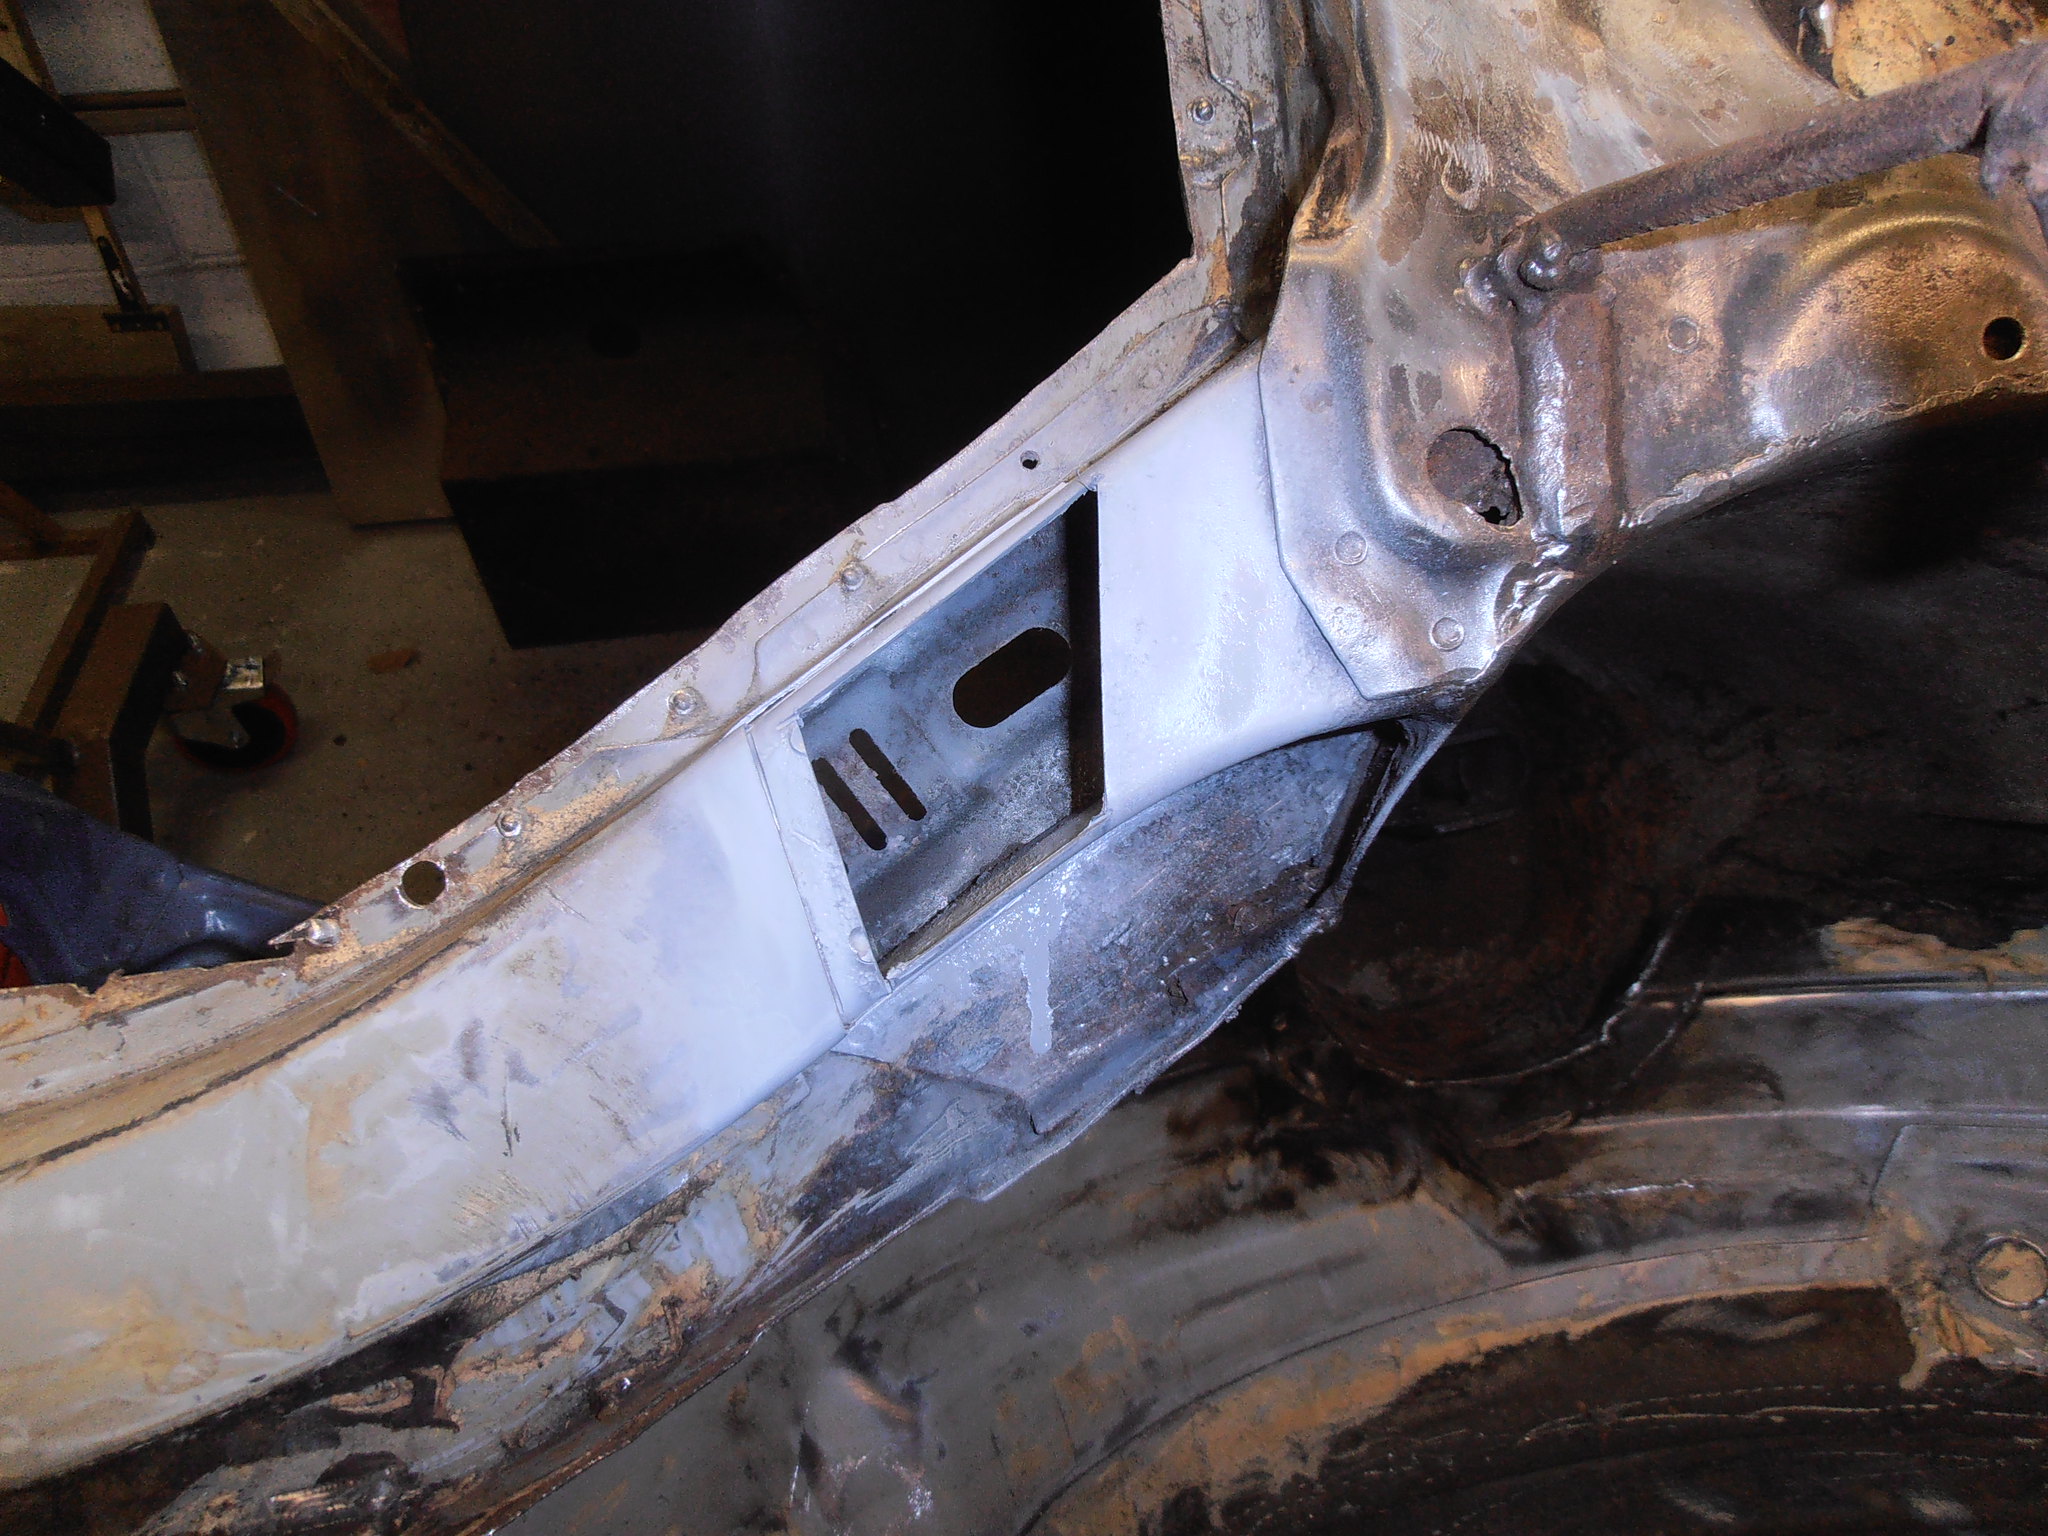 P4014518 P4014518 by jono_misfit, on Flickr make the outer skin 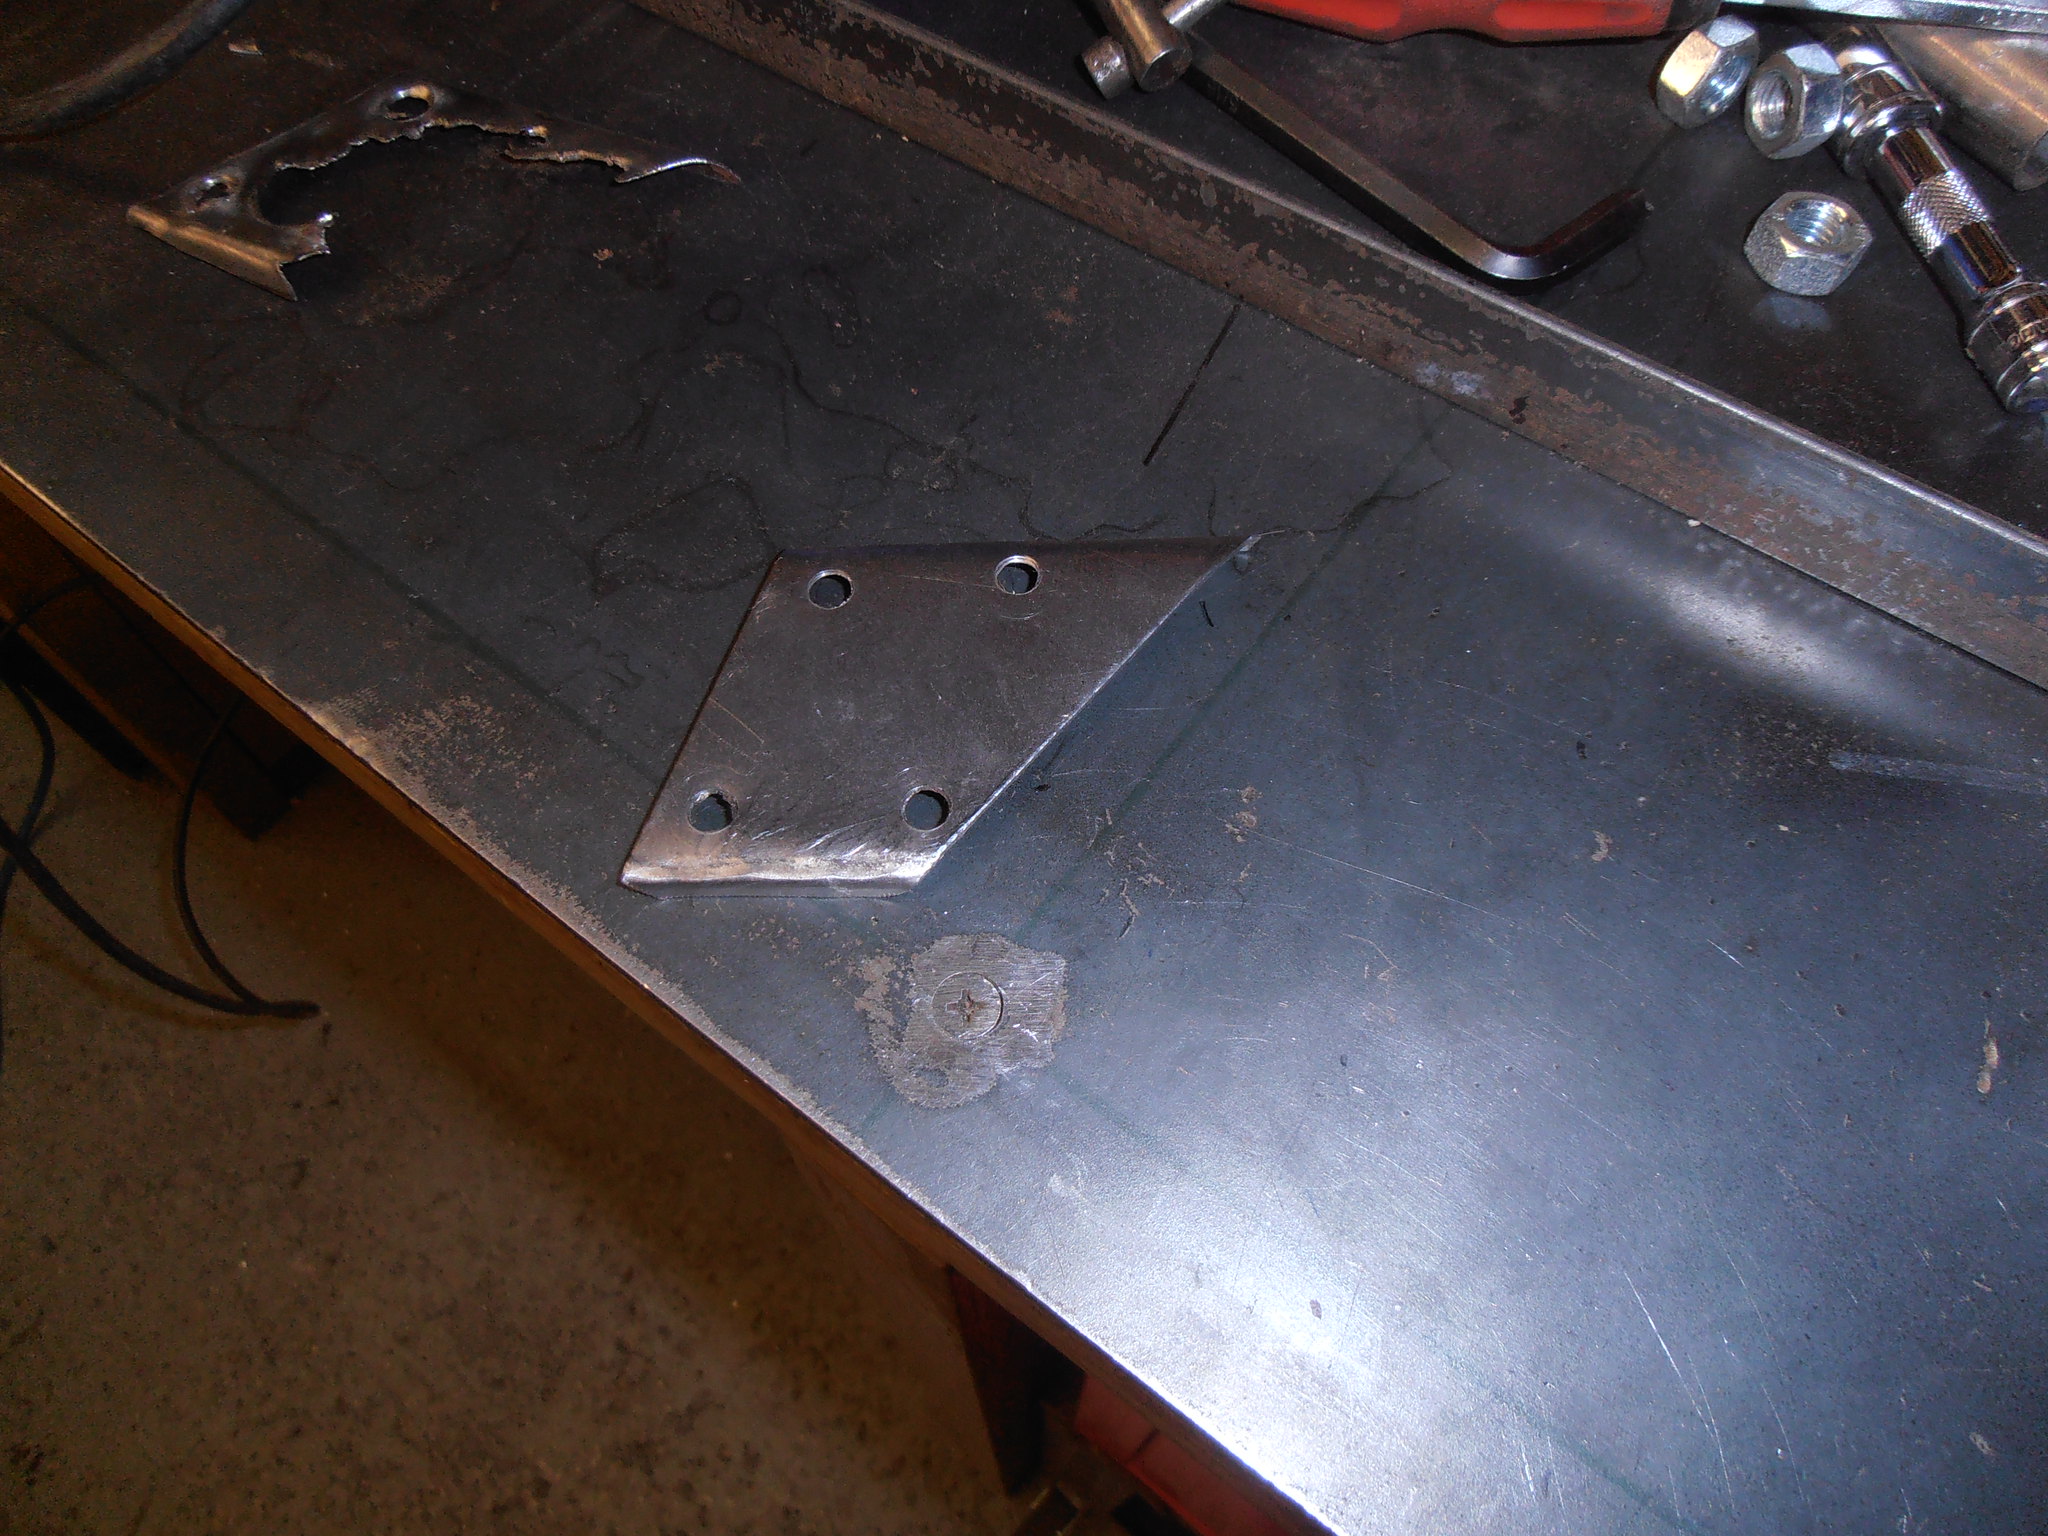 P4014519 P4014519 by jono_misfit, on Flickr goes like so 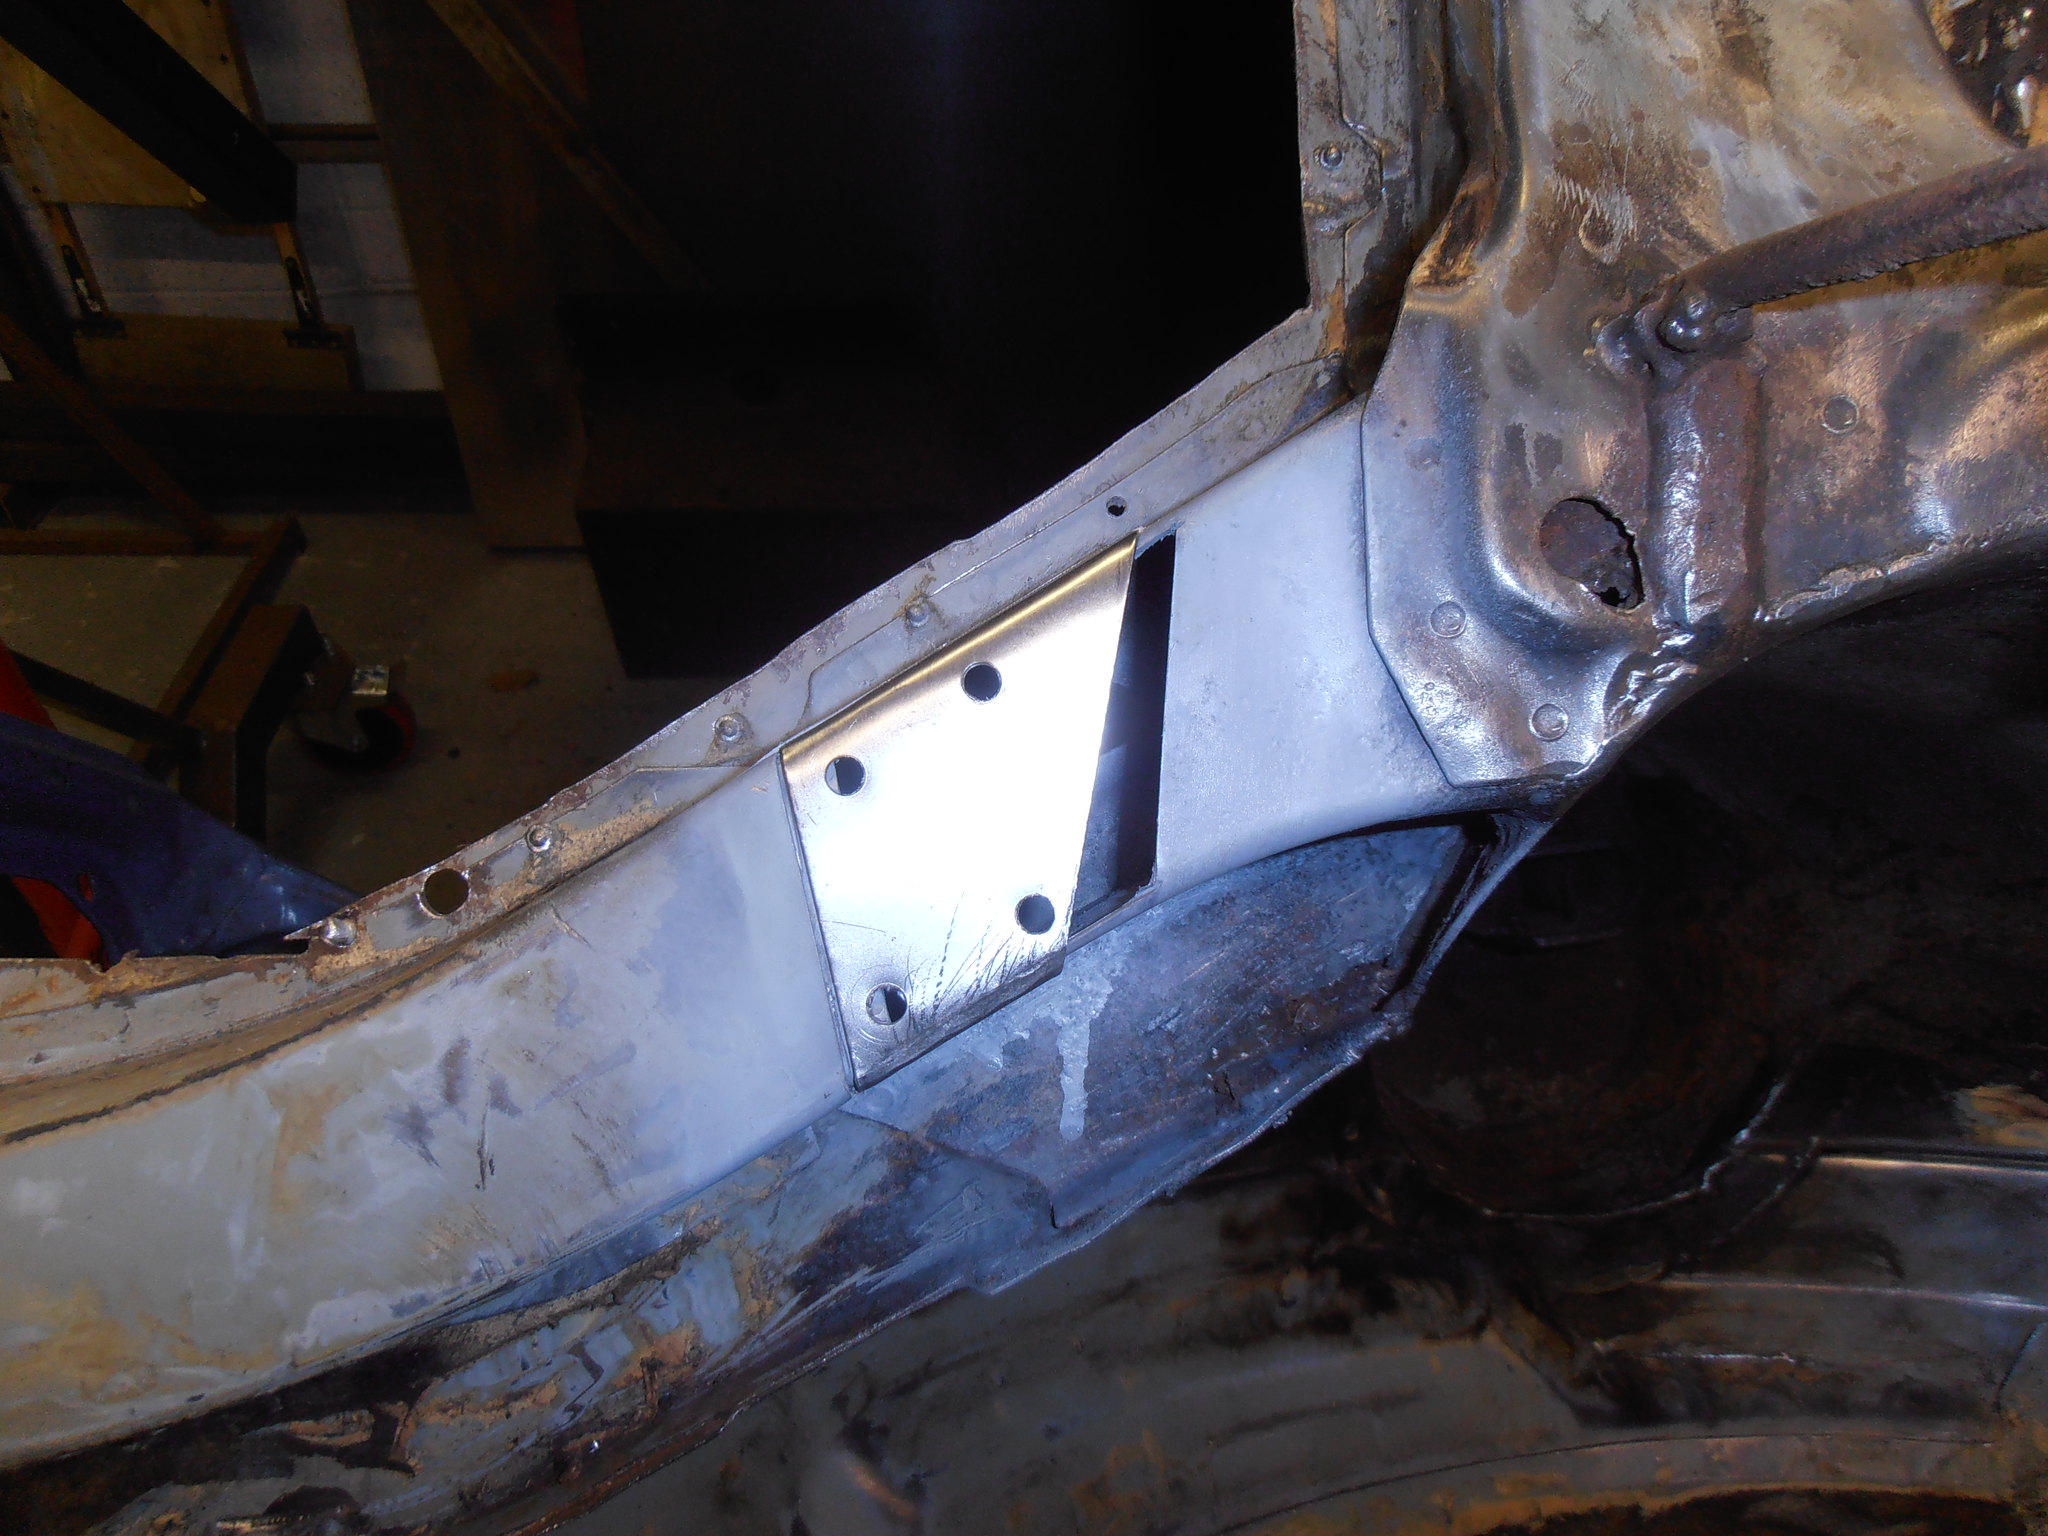 P4014520 P4014520 by jono_misfit, on Flickr weld on the inner skin 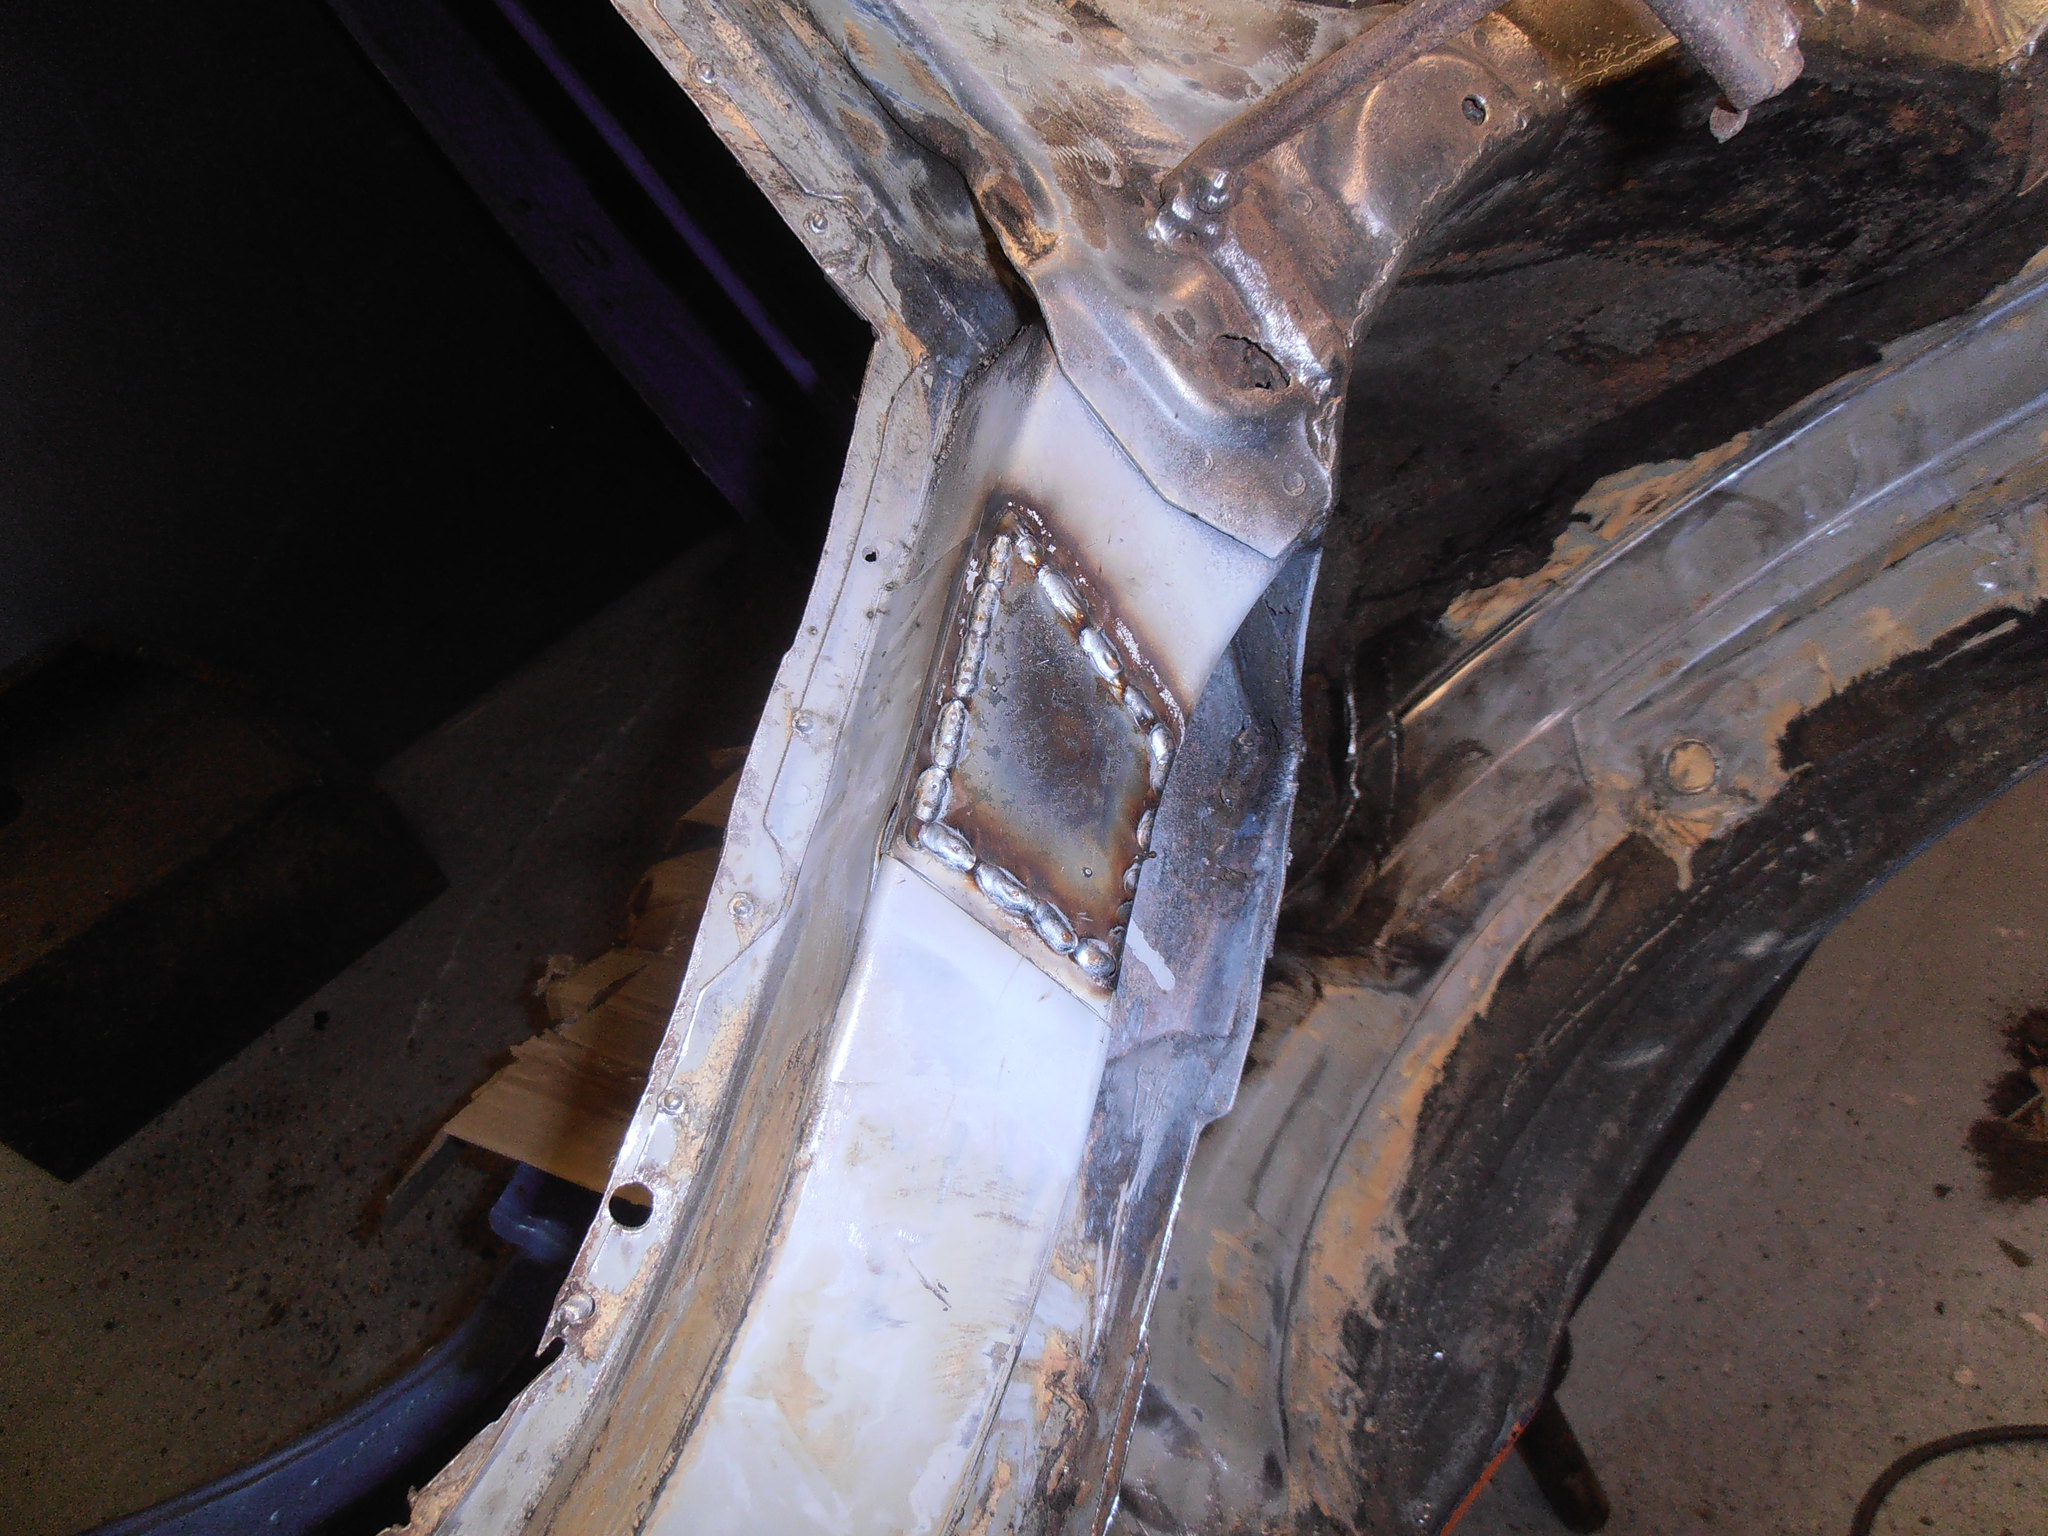 P4014521 P4014521 by jono_misfit, on Flickr clean back and prime 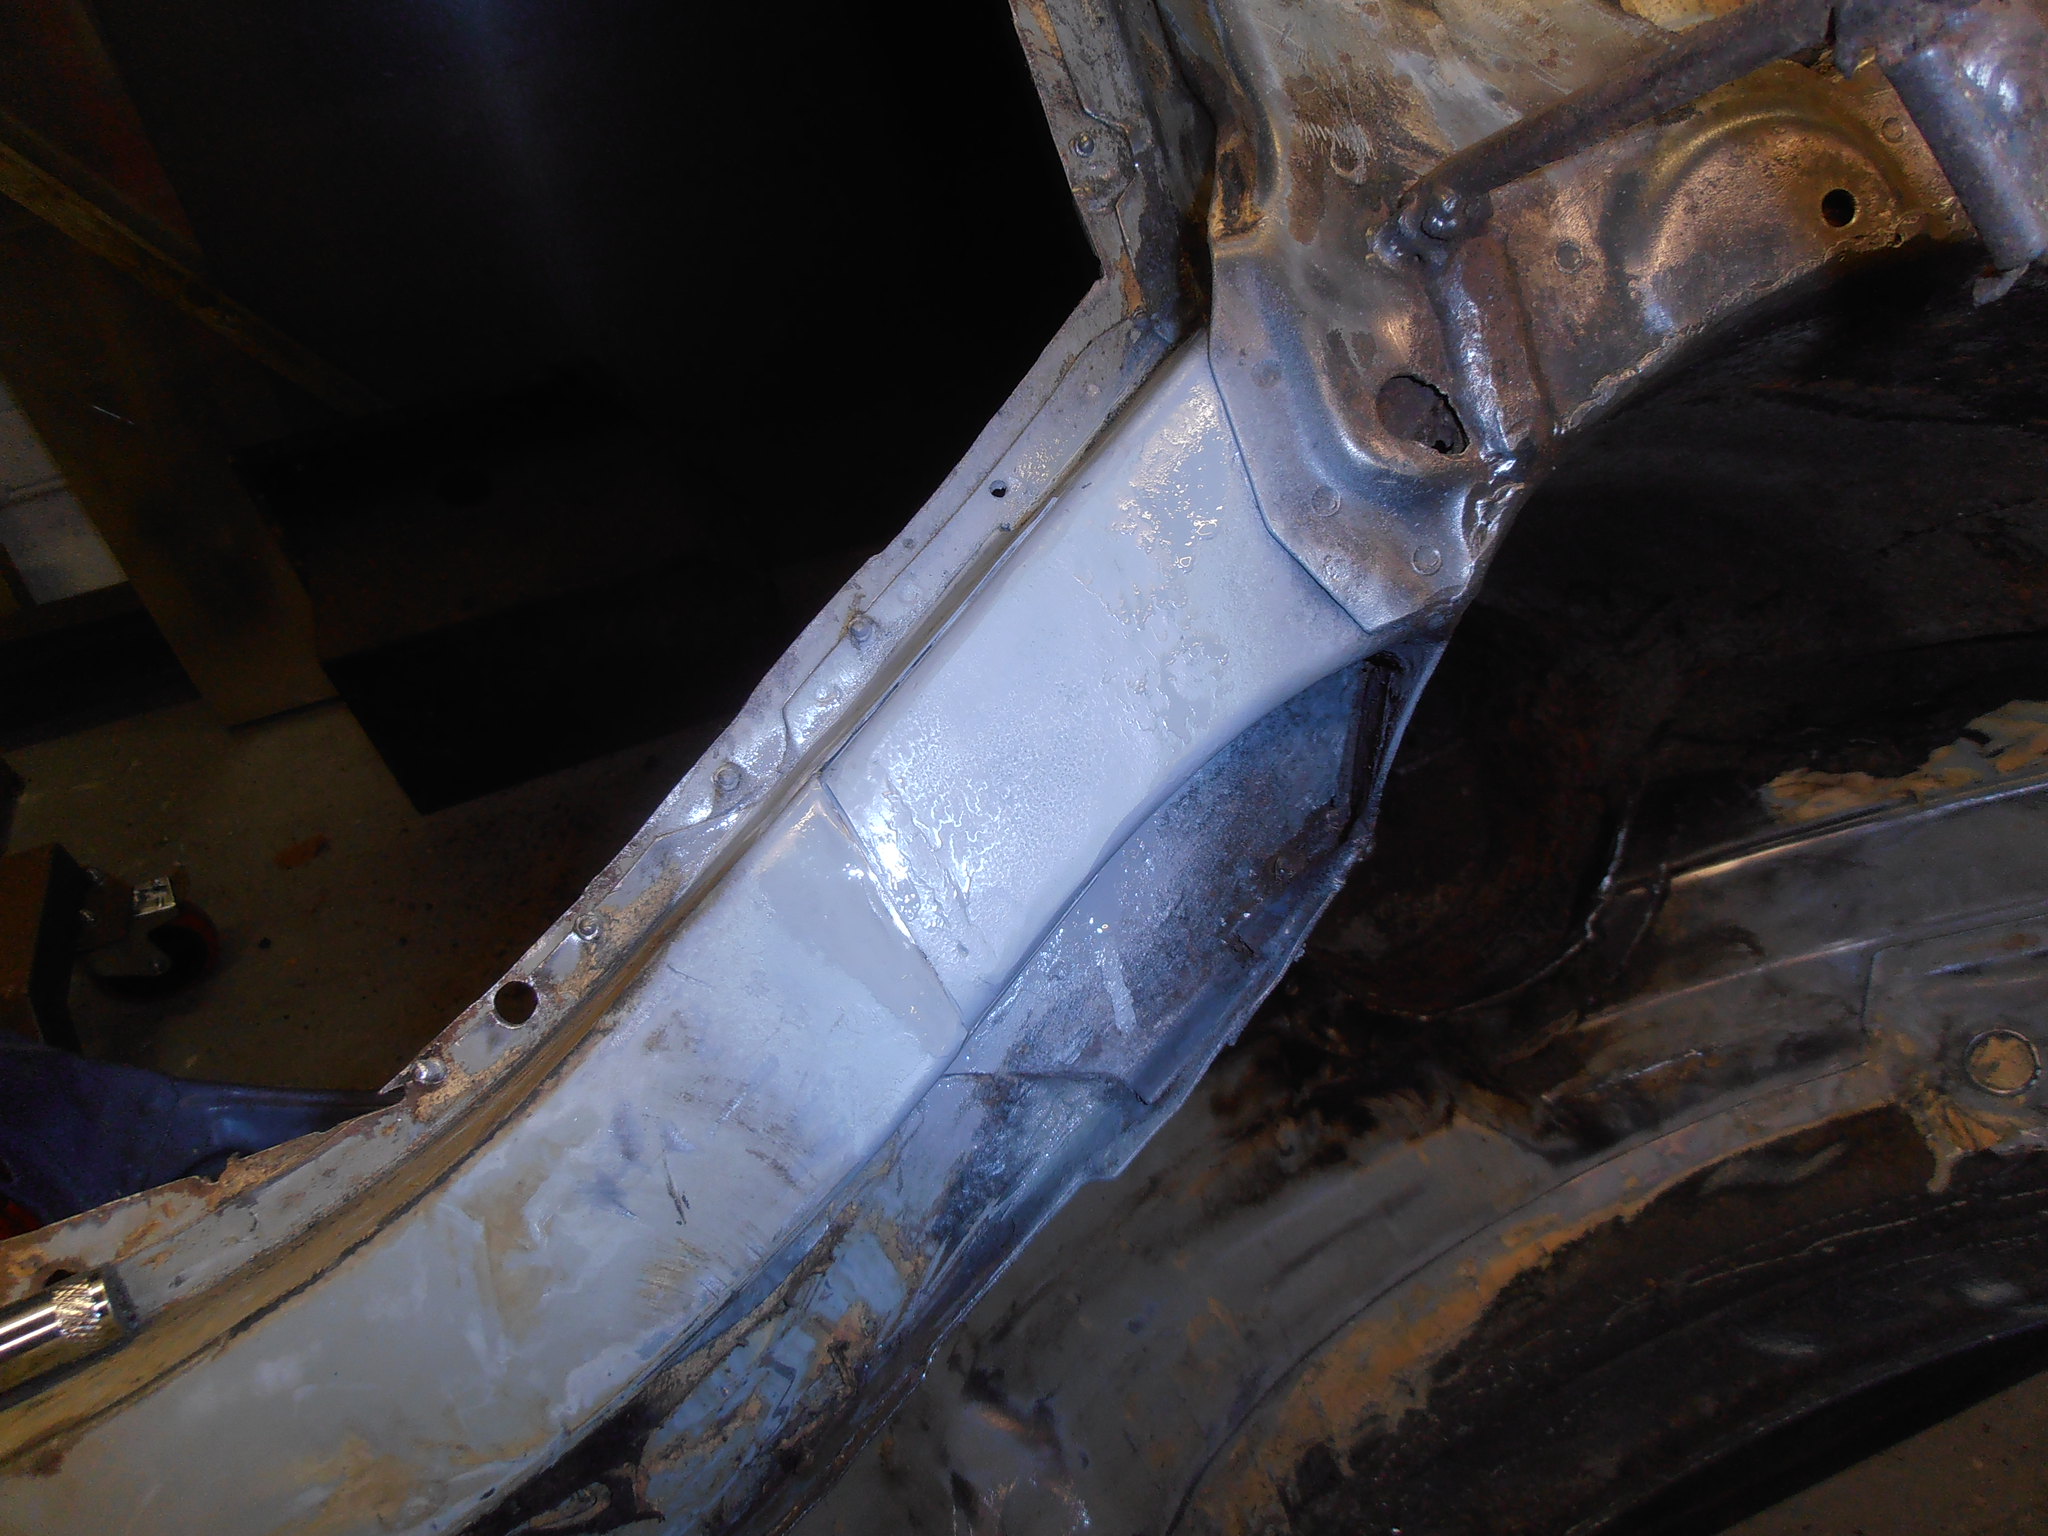 P4014522 P4014522 by jono_misfit, on Flickr weld on the outer patch, including best effort to make the plug welds look like spots. 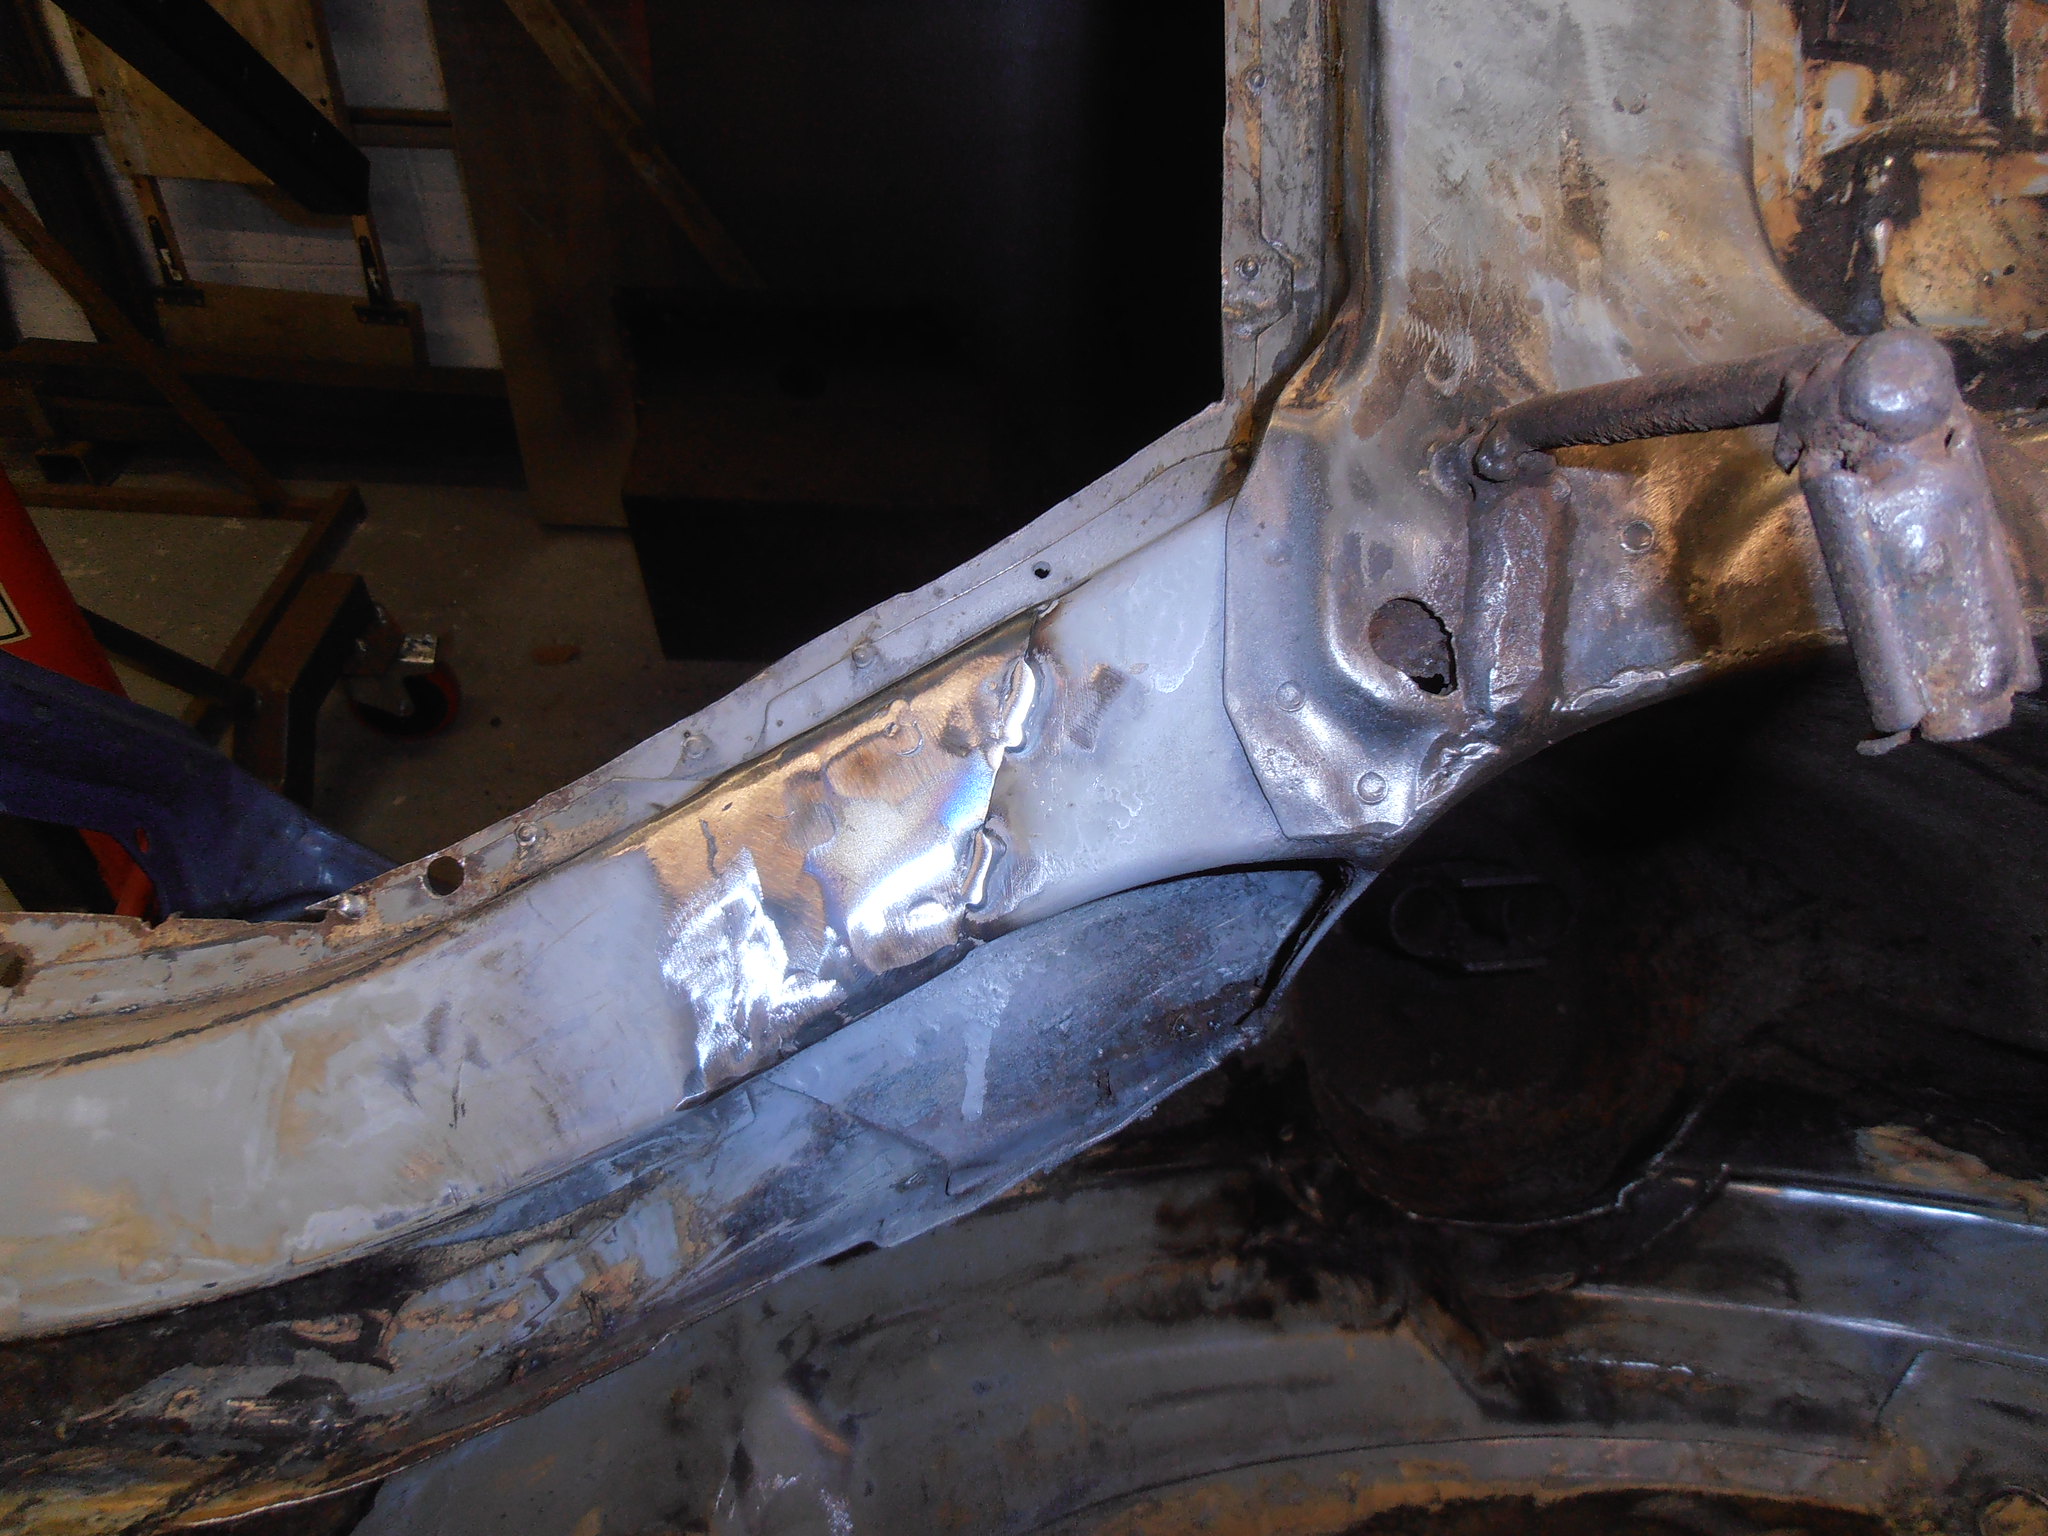 P4014523 P4014523 by jono_misfit, on Flickr with the primer on its not particularly visible. 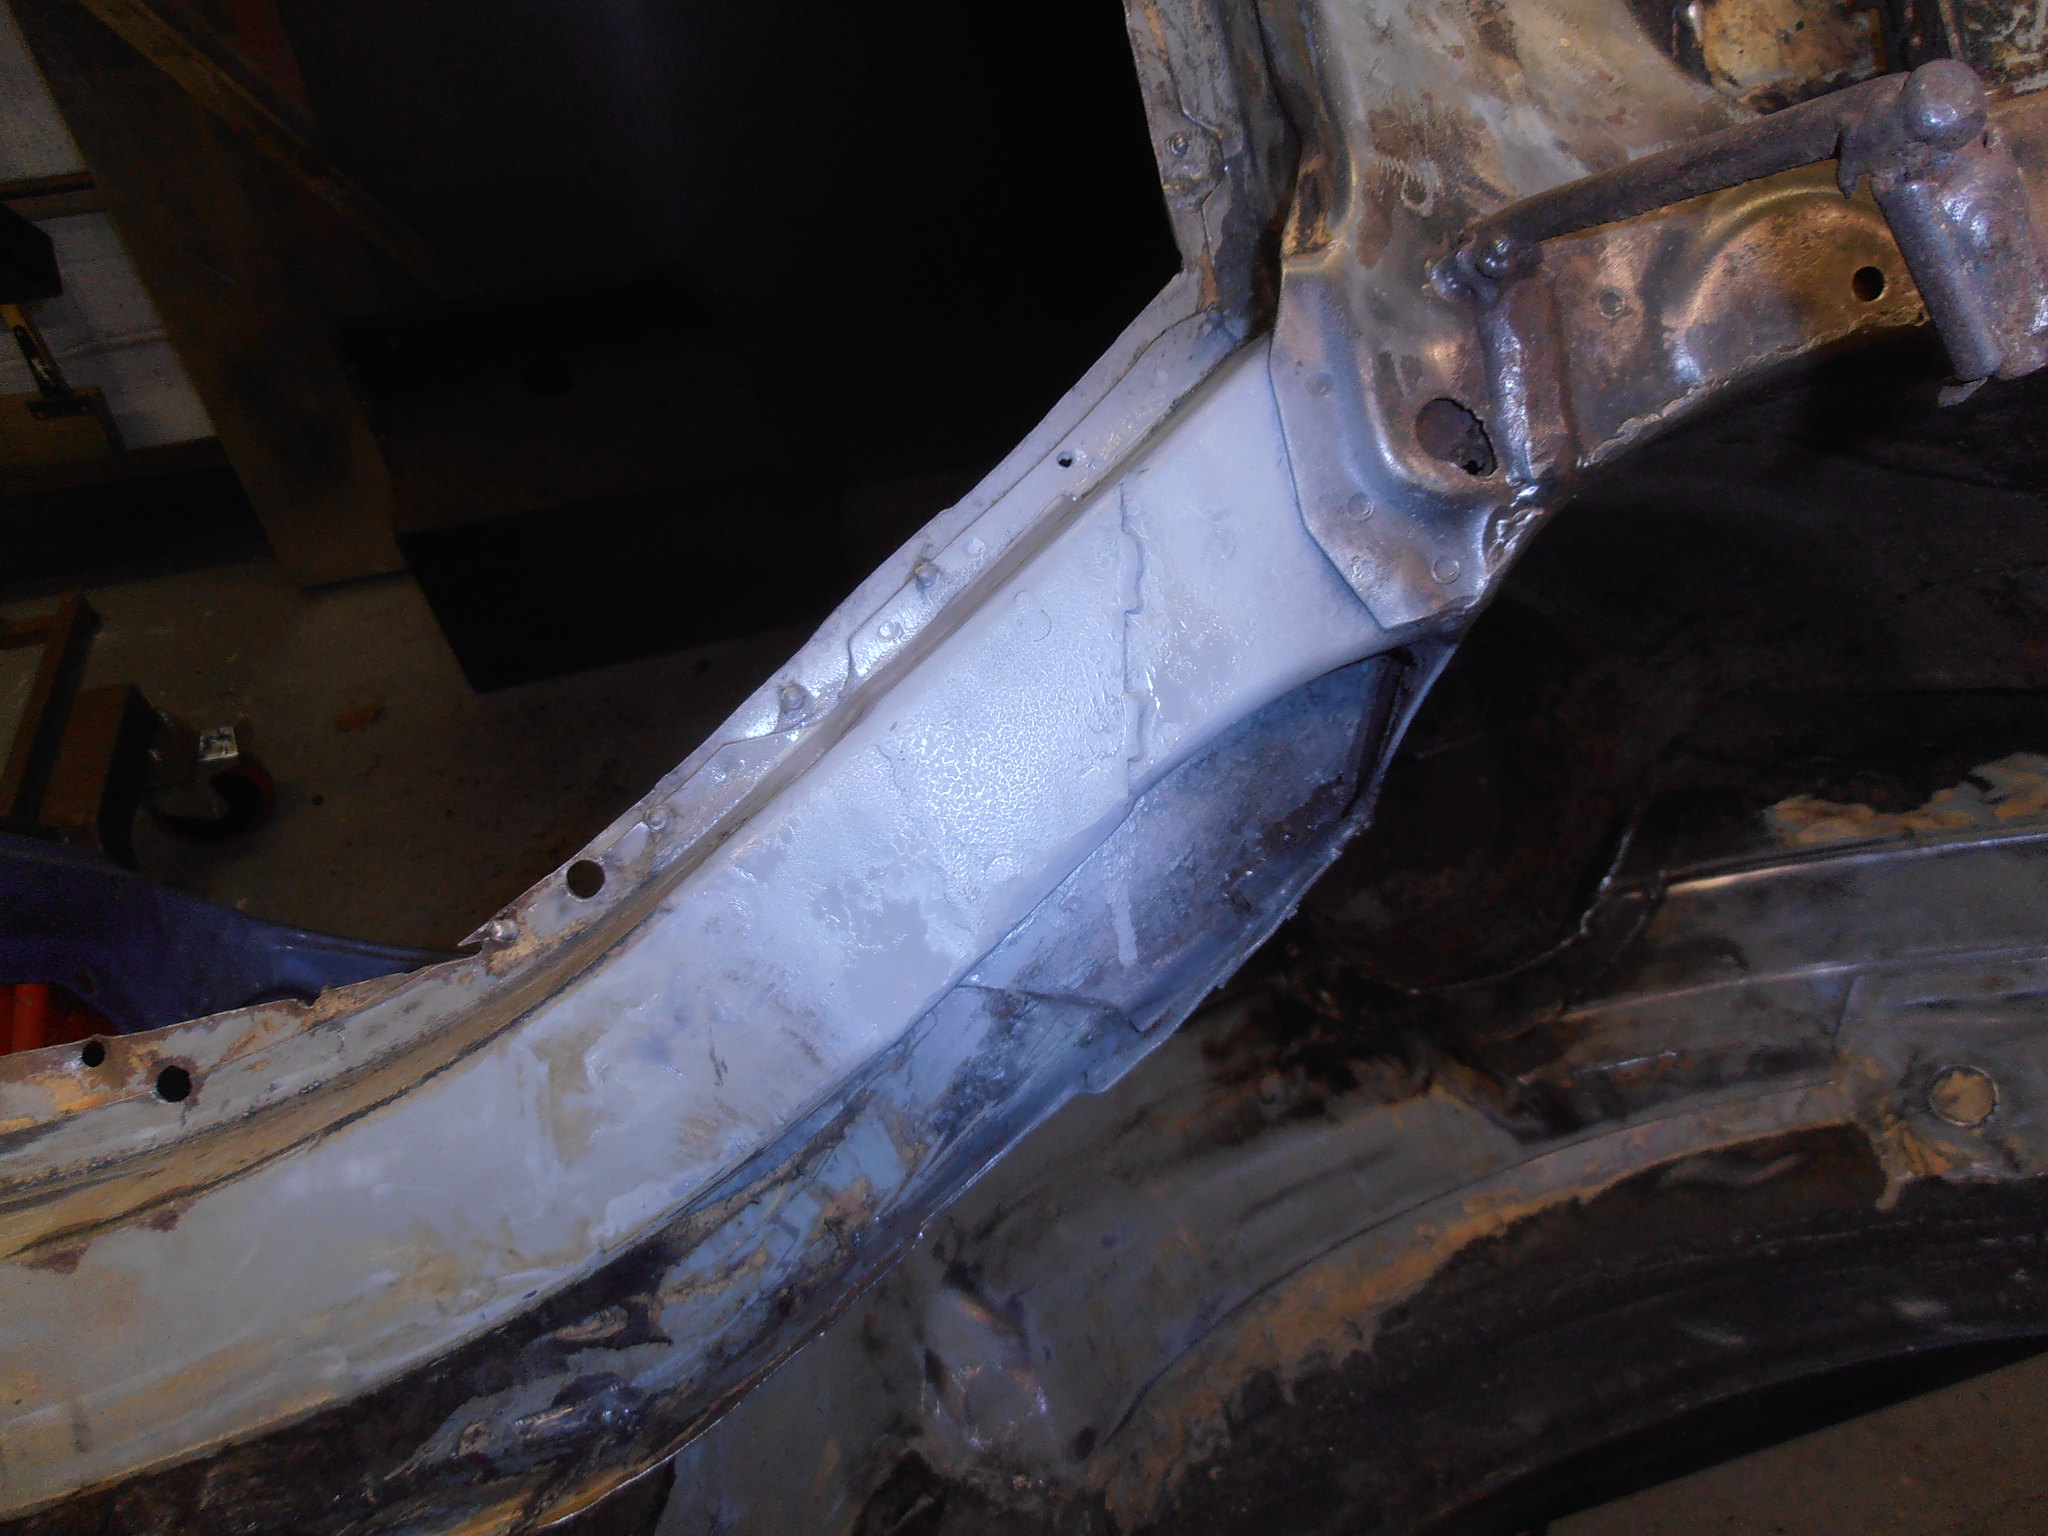 P4014524 P4014524 by jono_misfit, on Flickr To try and get progress i'm just going to do the odd bit now and again. |
| |
|
|
jonomisfit
Club Retro Rides Member
Posts: 1,790
Club RR Member Number: 49
|
|
|
|
continuing with doing a bit on the escort each chance i get. Diff mount cross beam. This side doesnt look too bad, but I can see through the drain hole there's some rust in the leg. 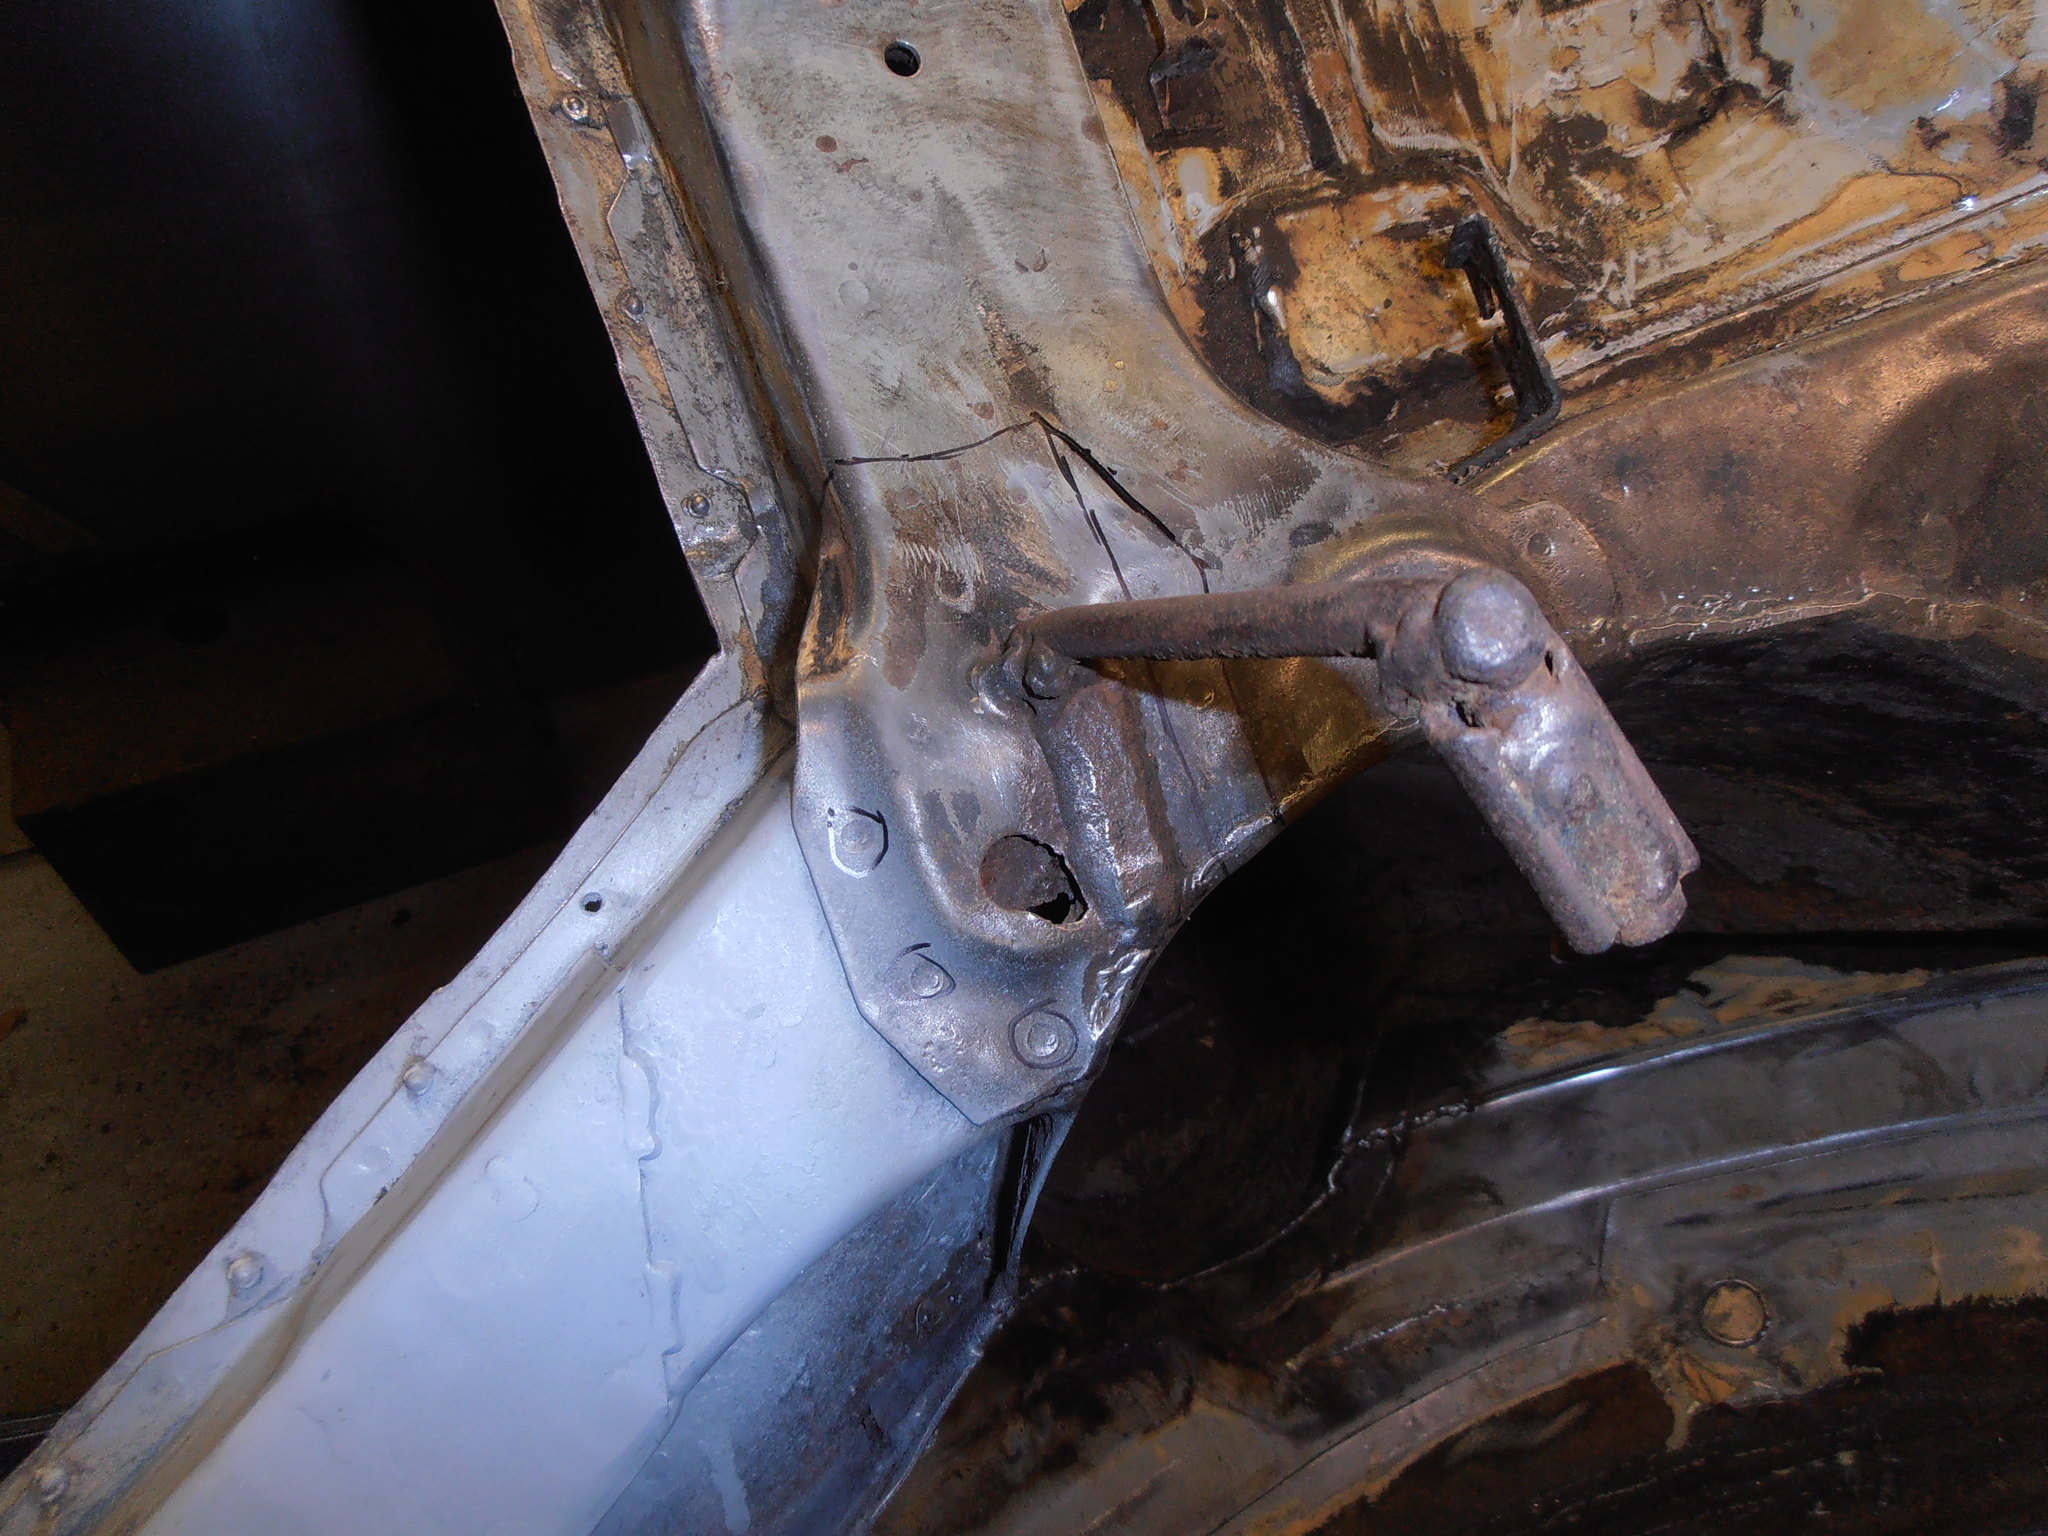 P4064541 P4064541 by jono_misfit, on Flickr cut out part of the strengthener. Looks really grotty, but isnt actually that bad. 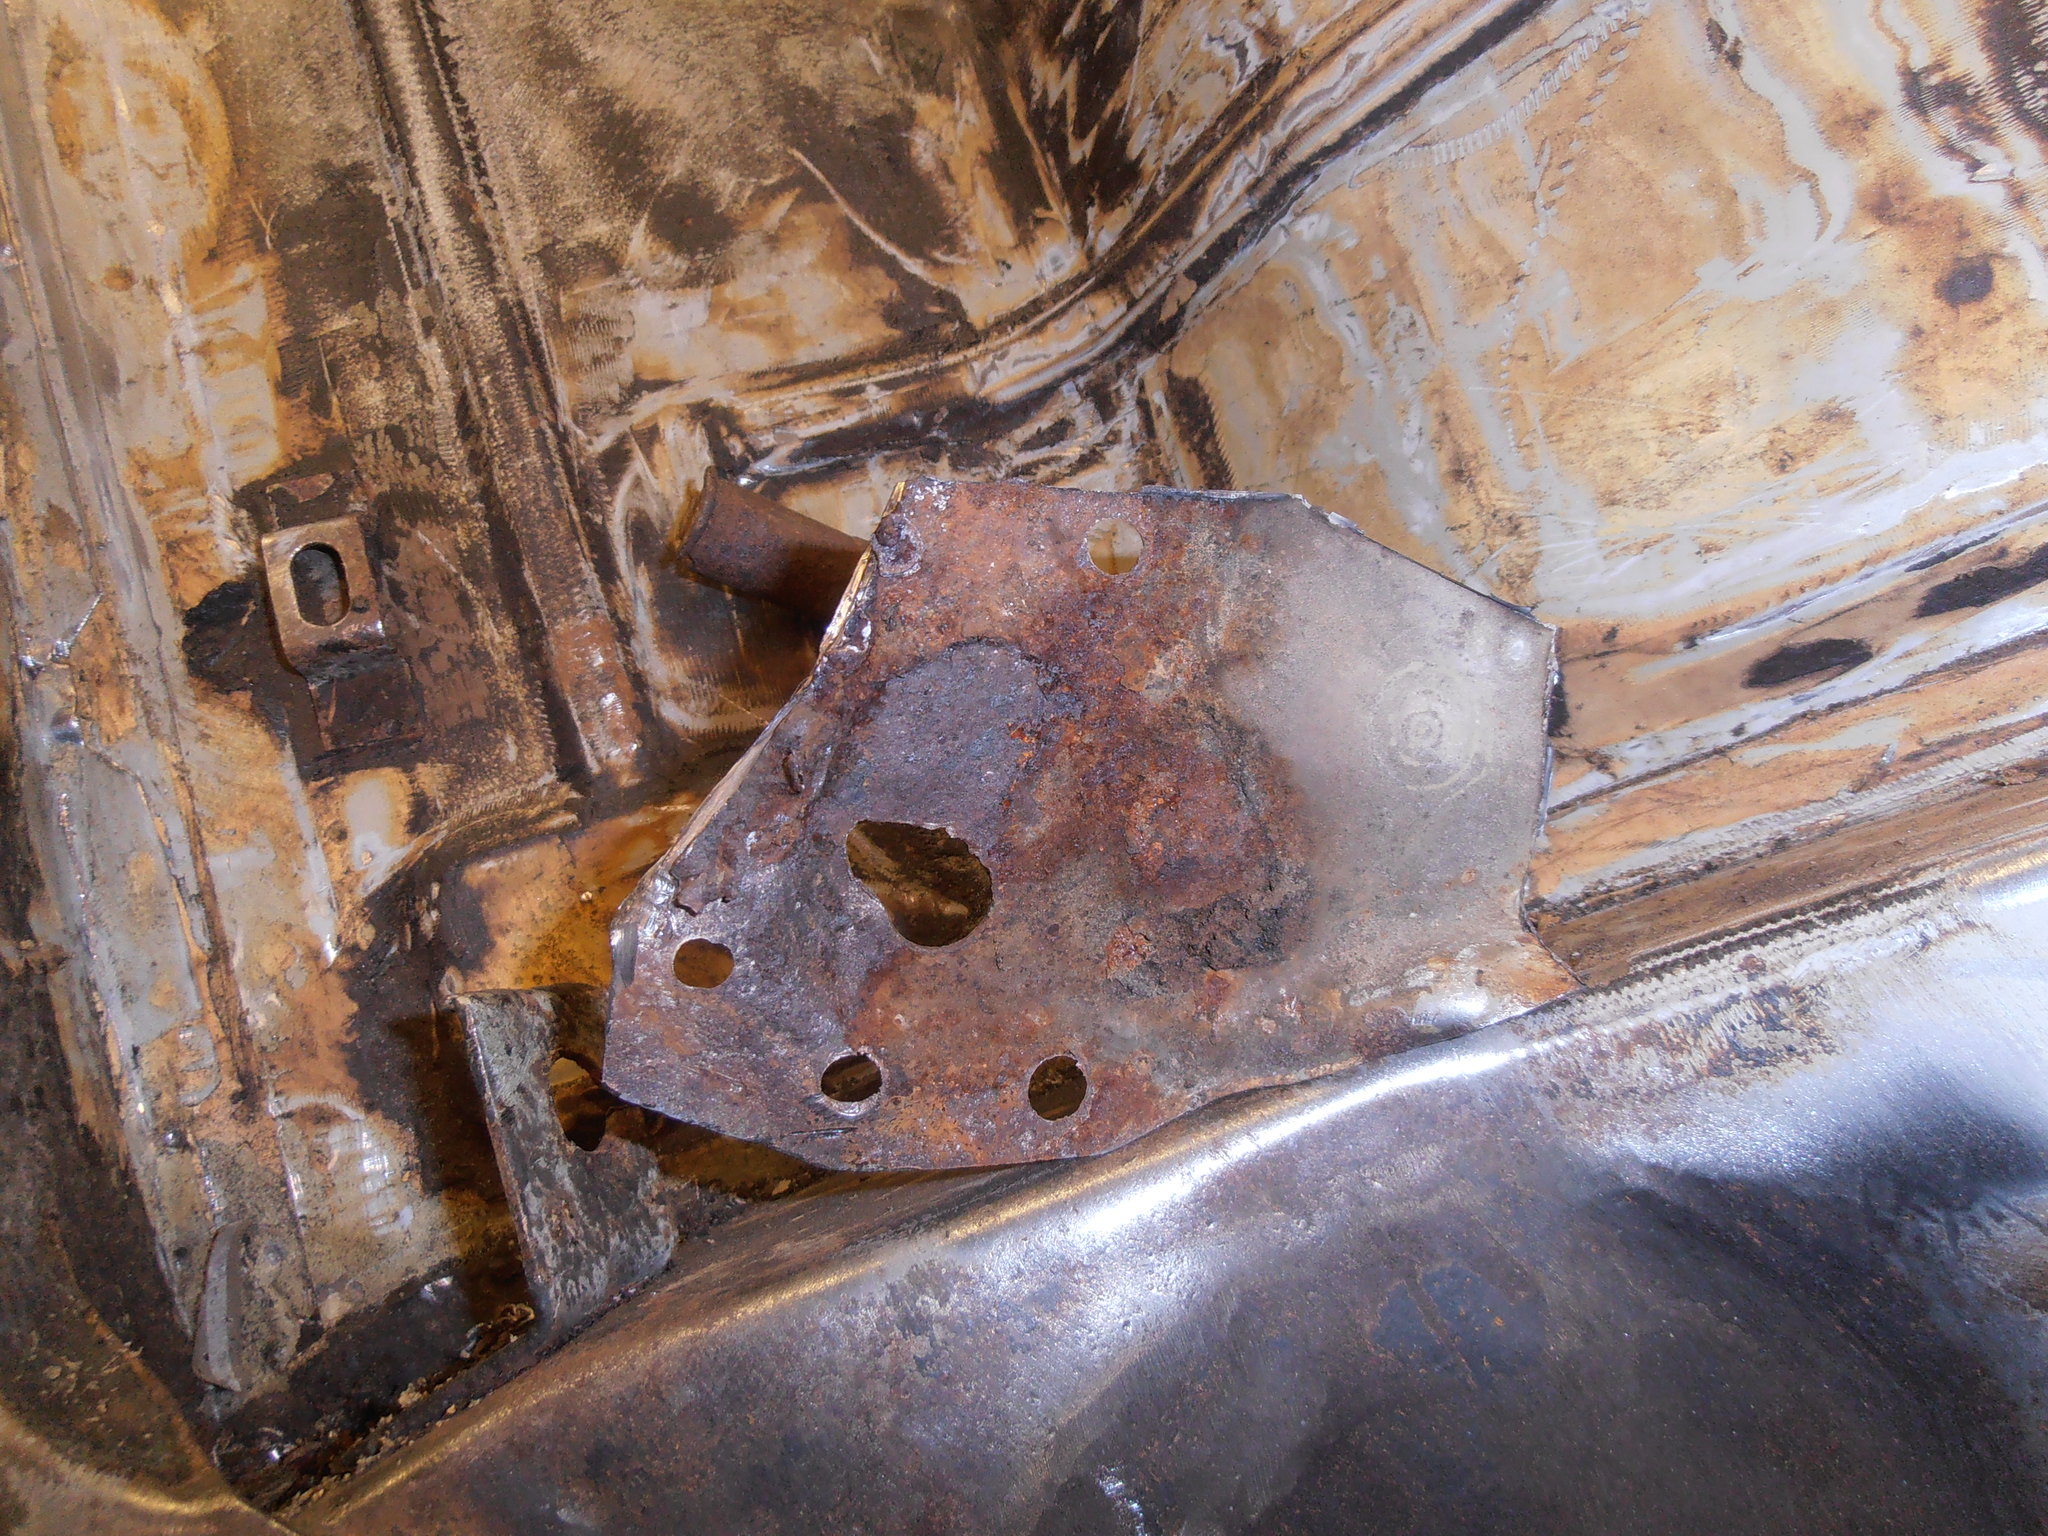 P4064542 P4064542 by jono_misfit, on Flickr leg underneath. 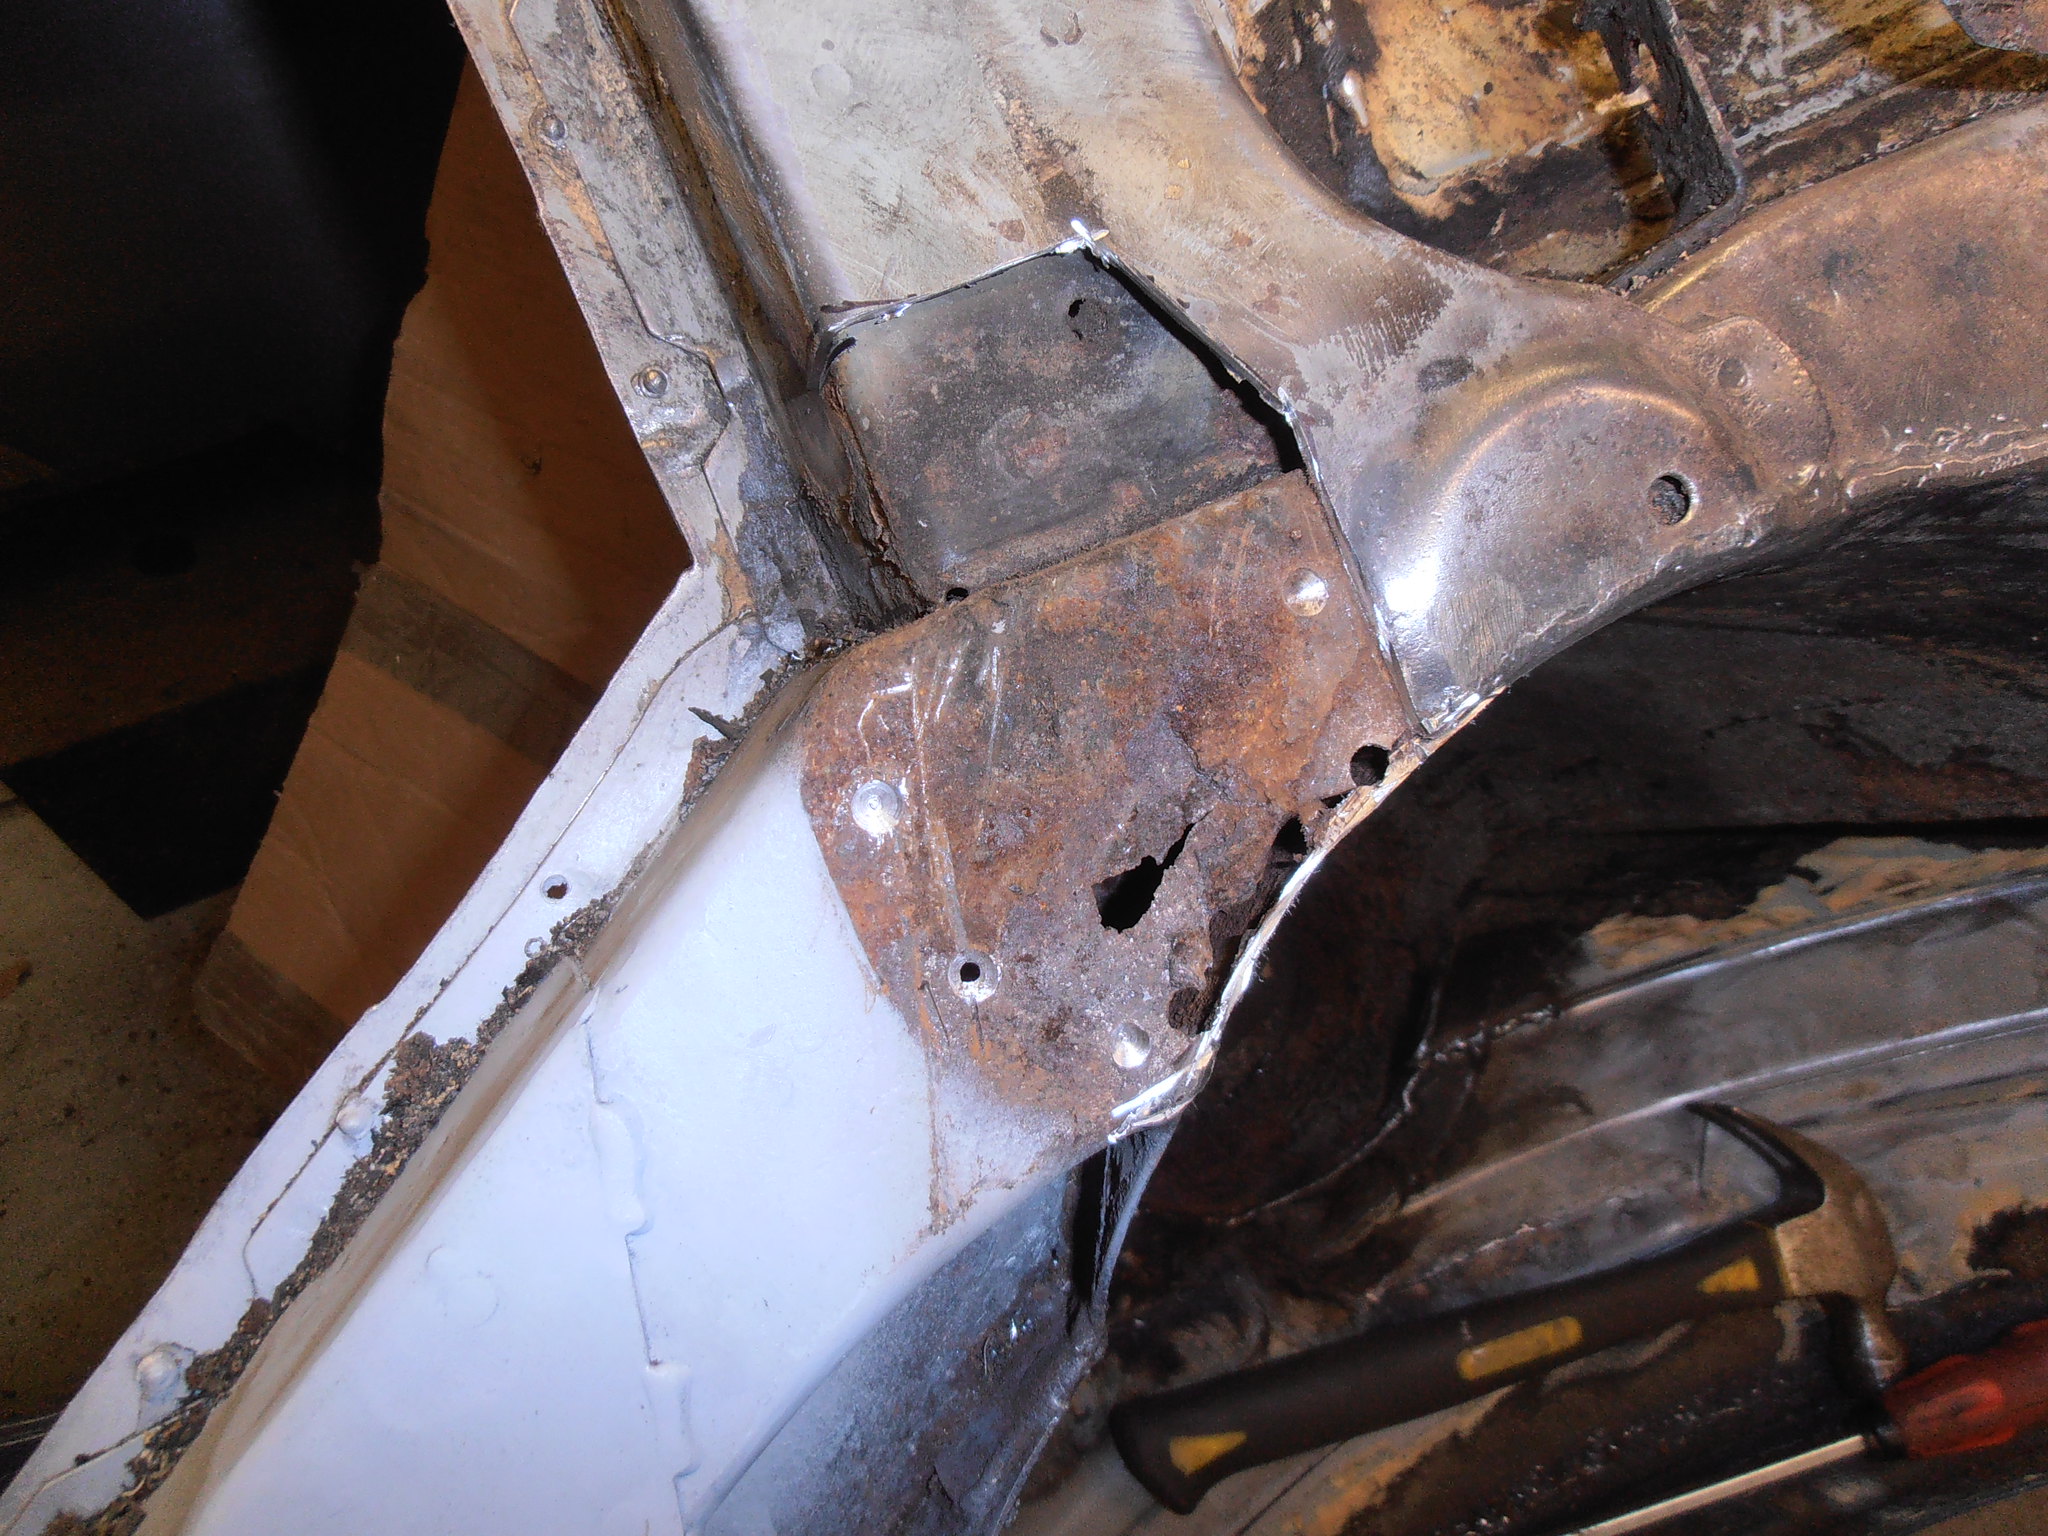 P4064543 P4064543 by jono_misfit, on Flickr Again looks bad, but isnt really that bad. What's mainly the issue is the butchery where the leg was trimmed for the rear turrets. Looks like it was gas cut, and no attempt made to clean up and protect. Trim out the rust bit and zinc prime. 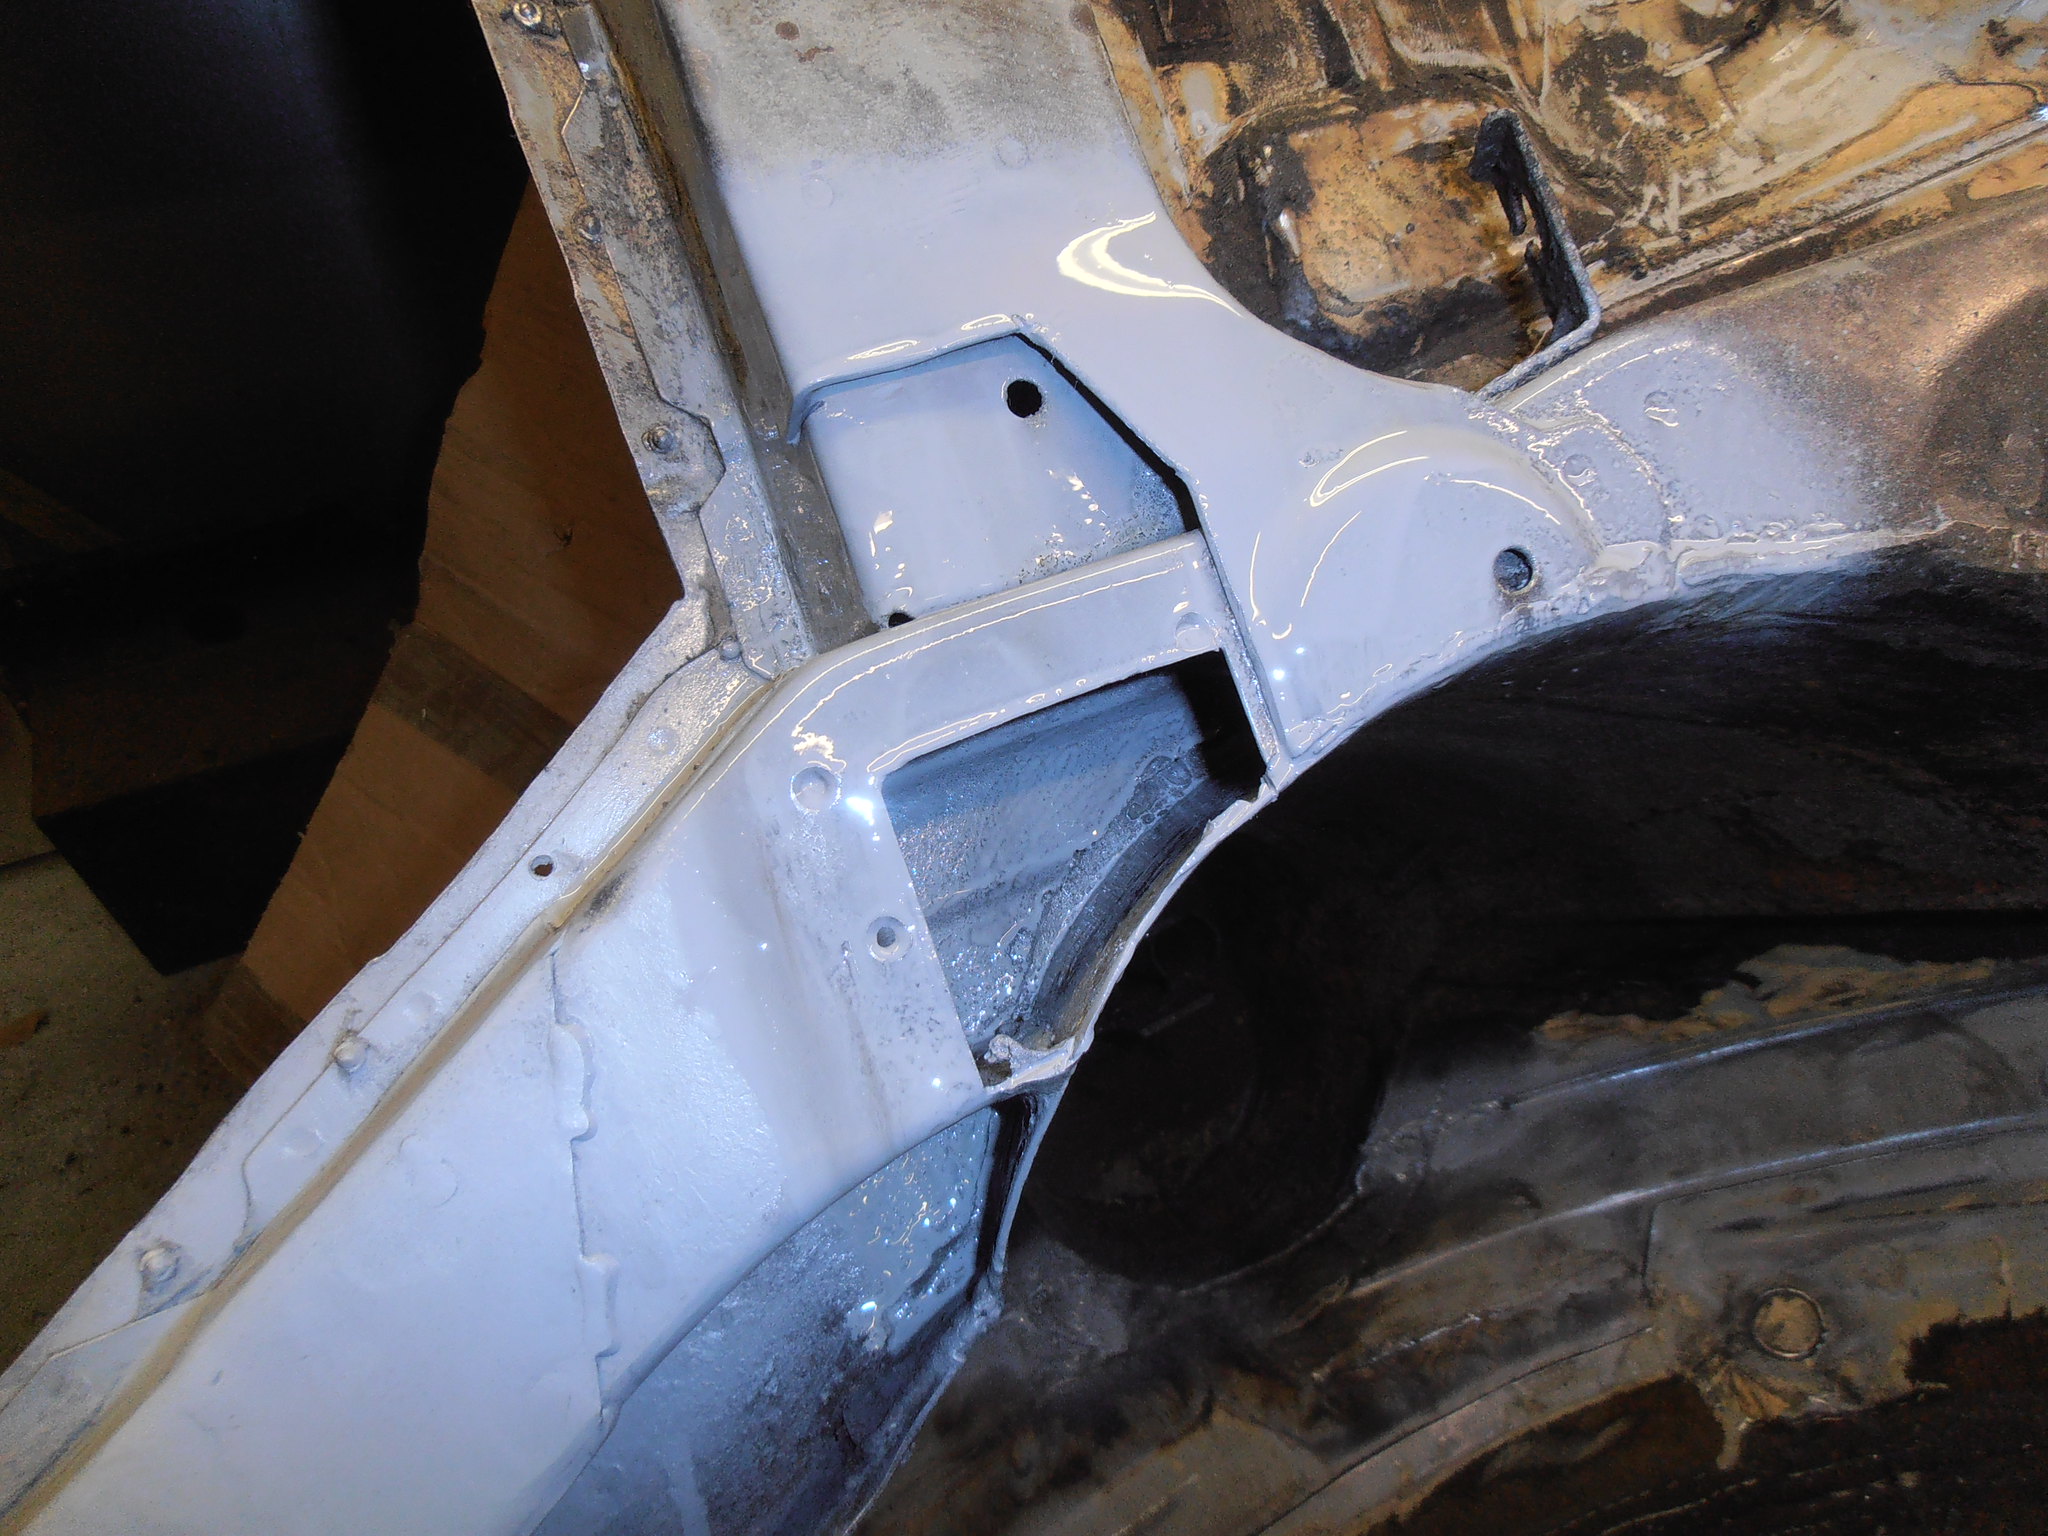 P4064544 P4064544 by jono_misfit, on Flickr the piece removed showing the gas trim and what looks like a lot of thinning from grinding. 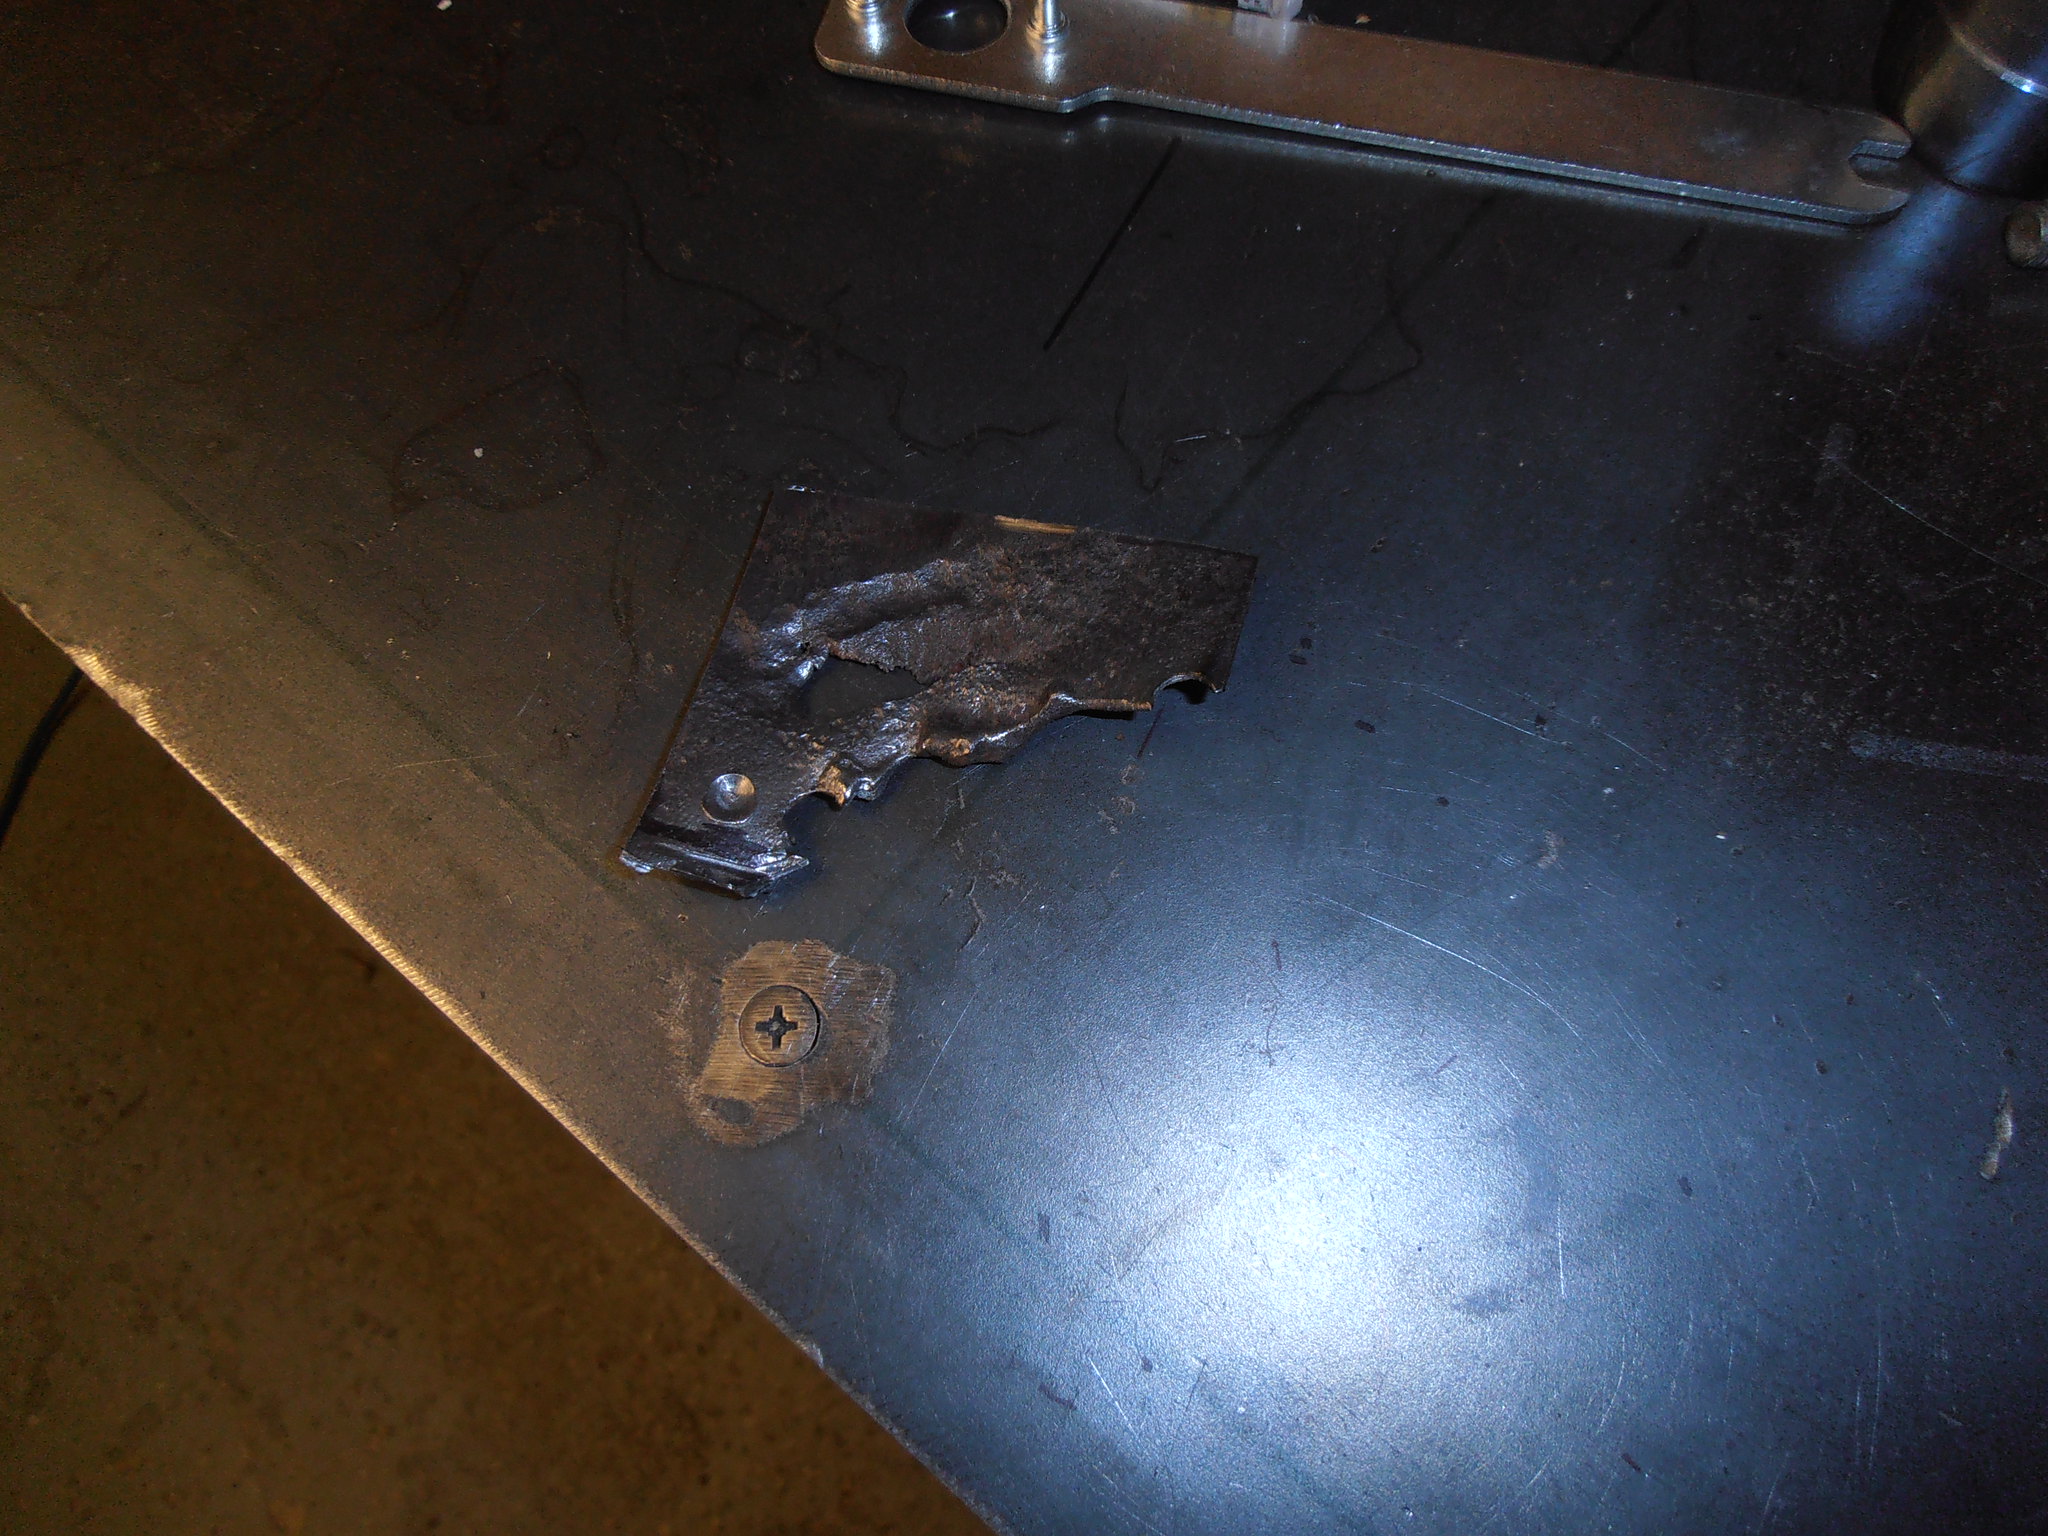 P4064545 P4064545 by jono_misfit, on Flickr used as a template to make a patch 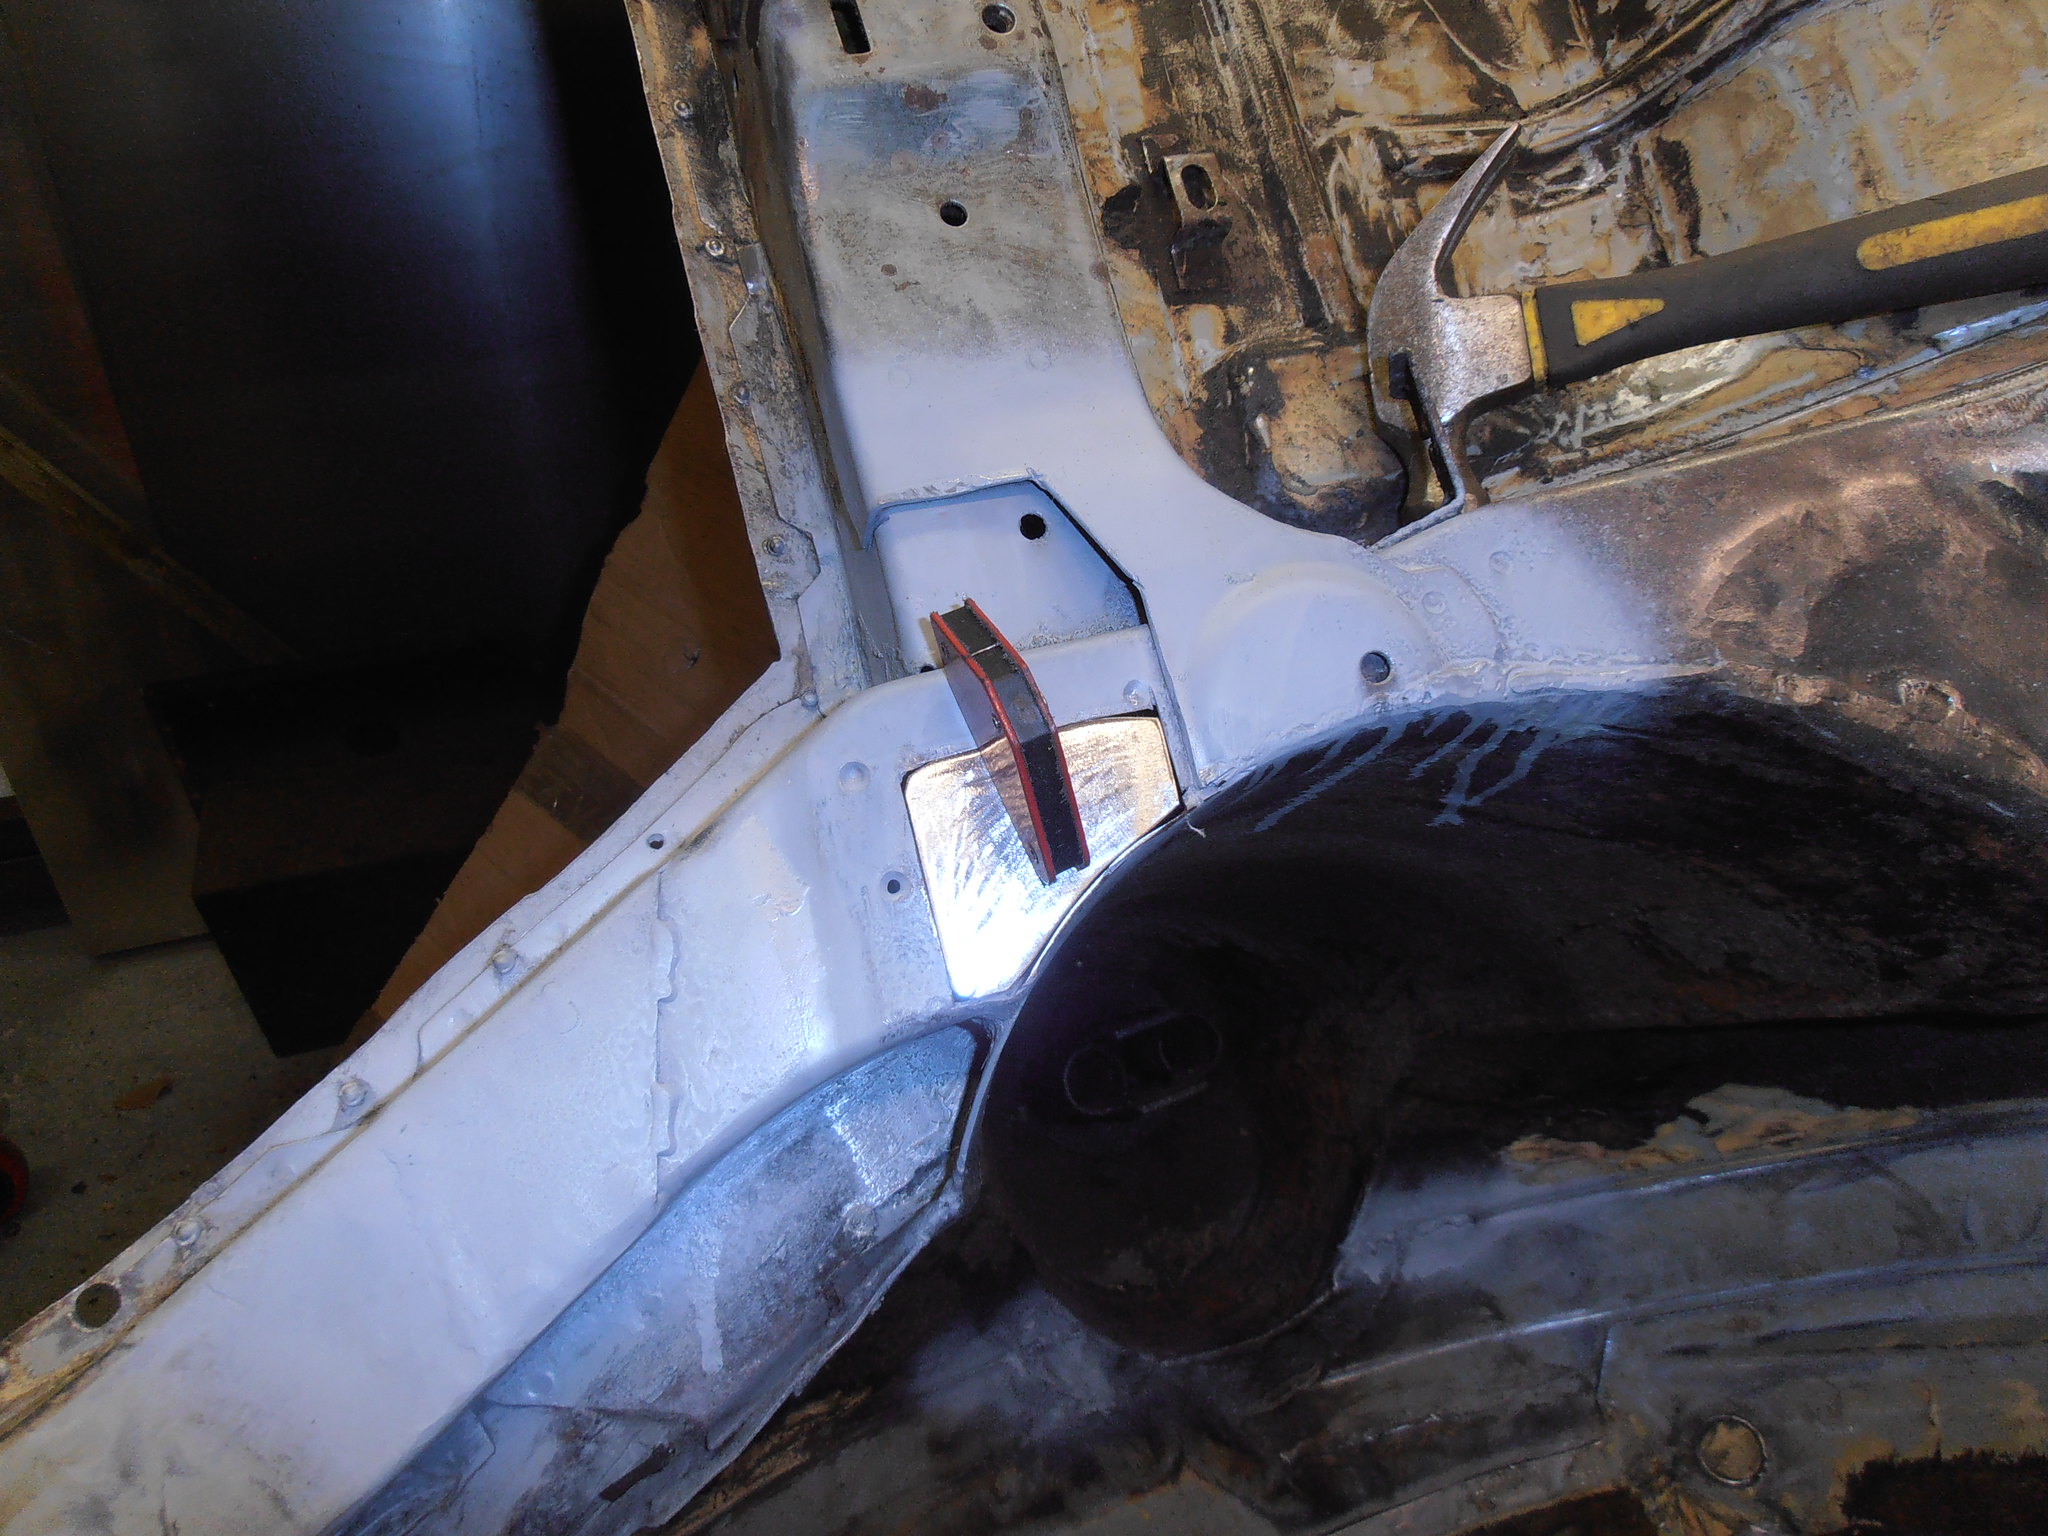 P4064546 P4064546 by jono_misfit, on Flickr then cleaned up the strengthener piece and filled in the hole. 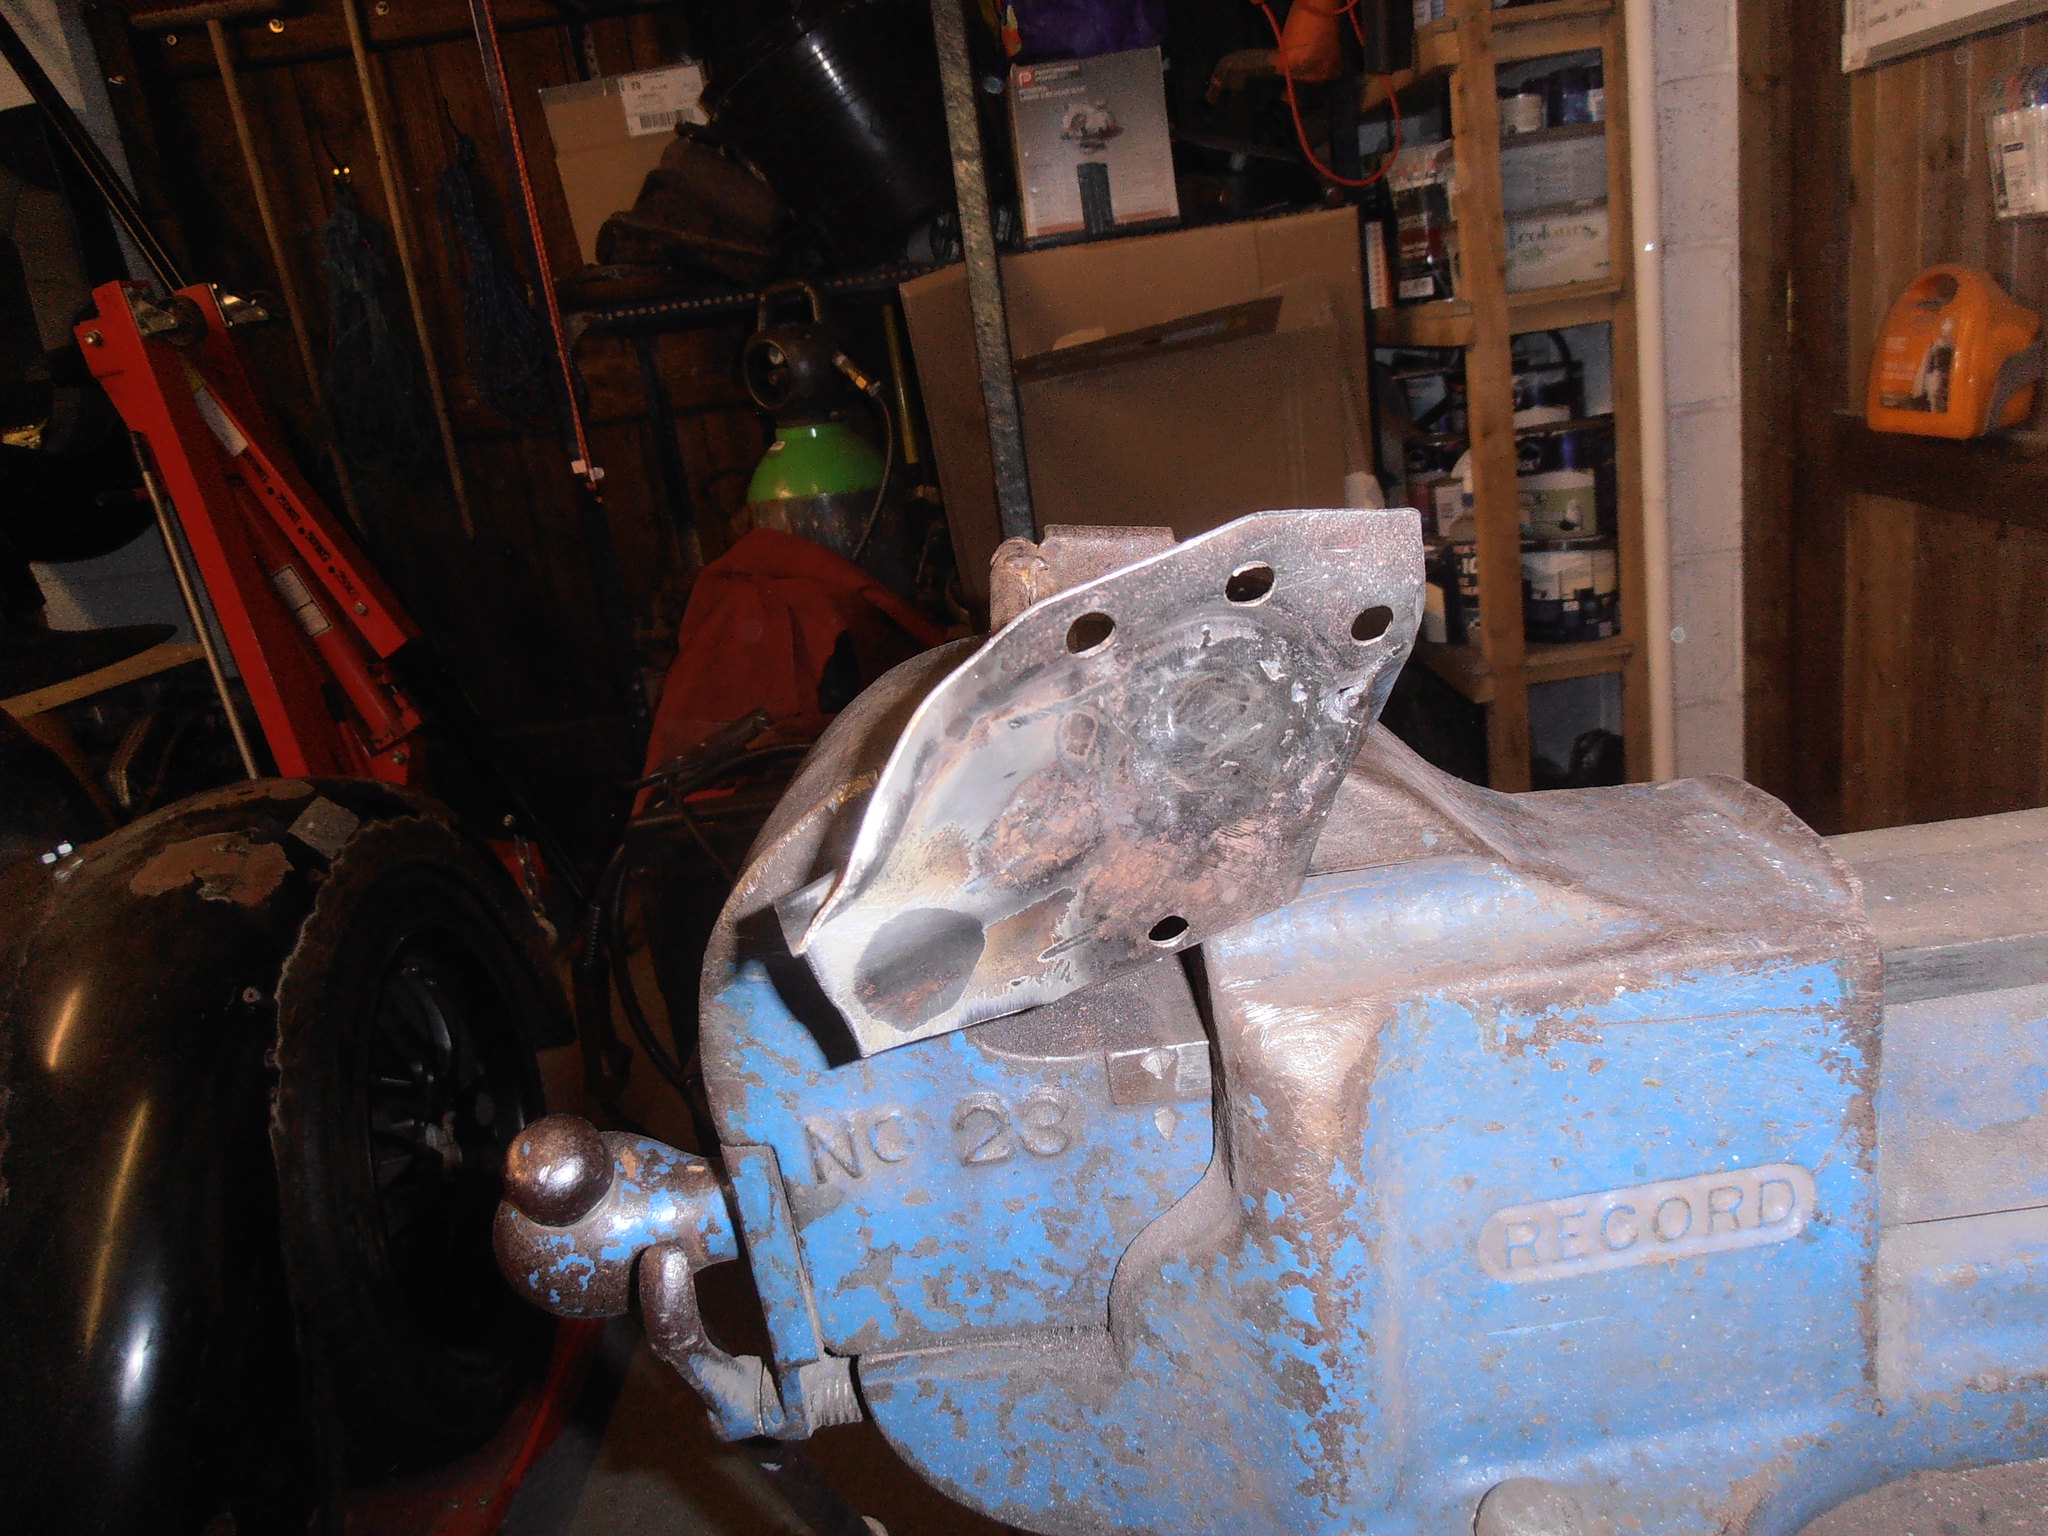 P4064547 P4064547 by jono_misfit, on Flickr re-marked to put the drain hole back in 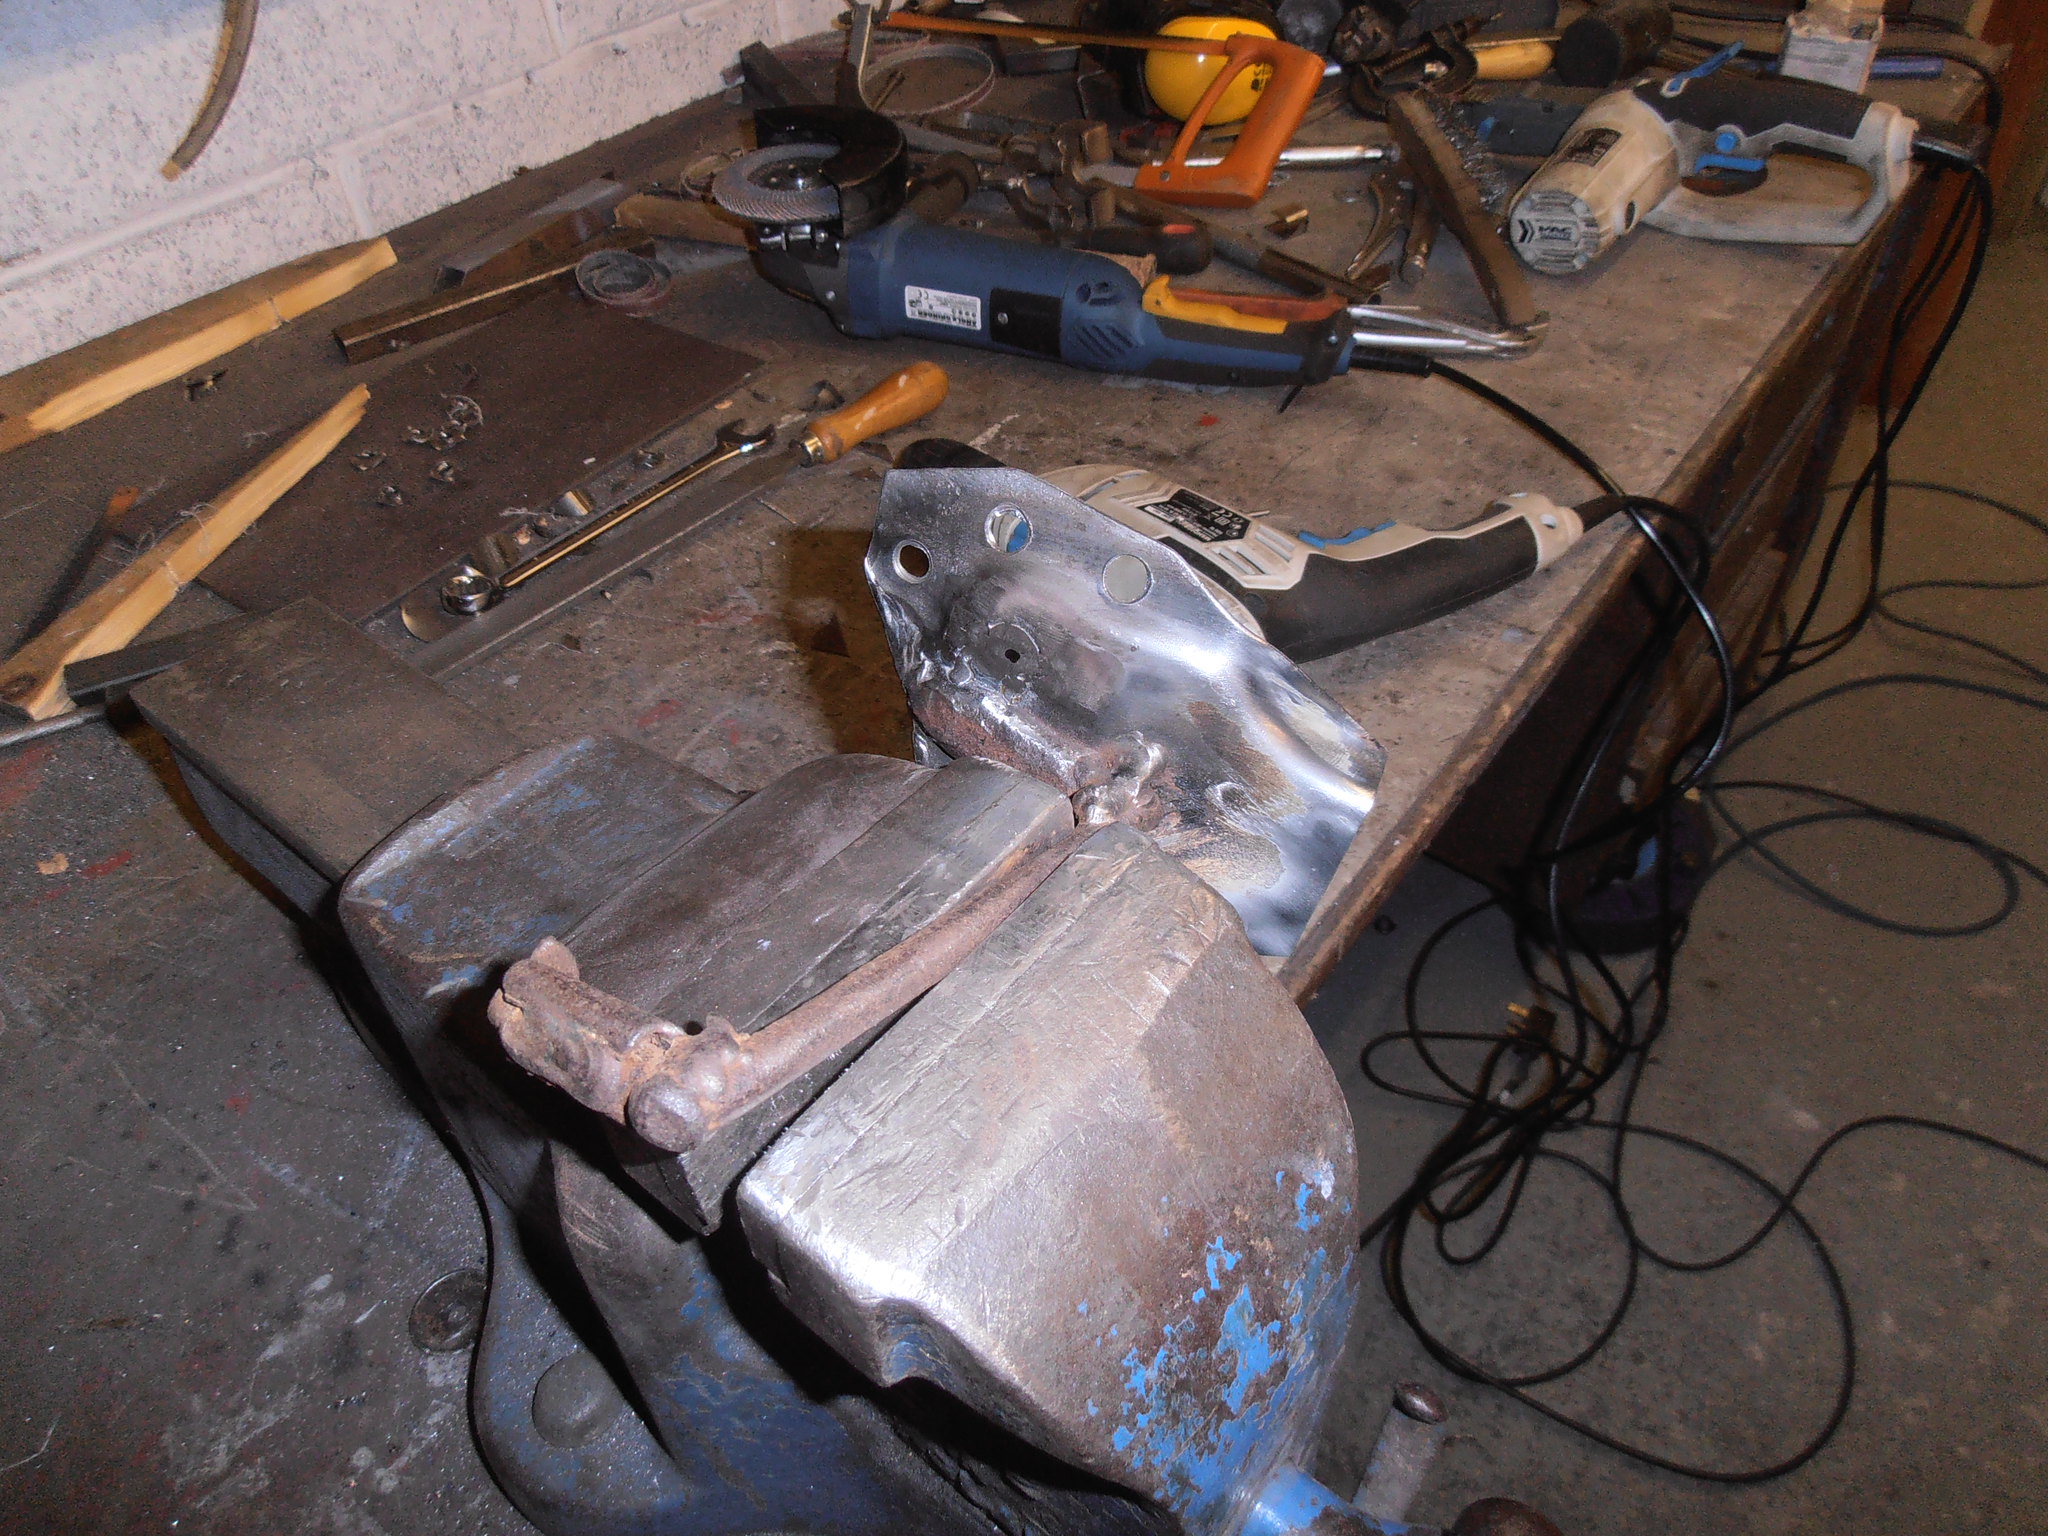 P4064548 P4064548 by jono_misfit, on Flickr 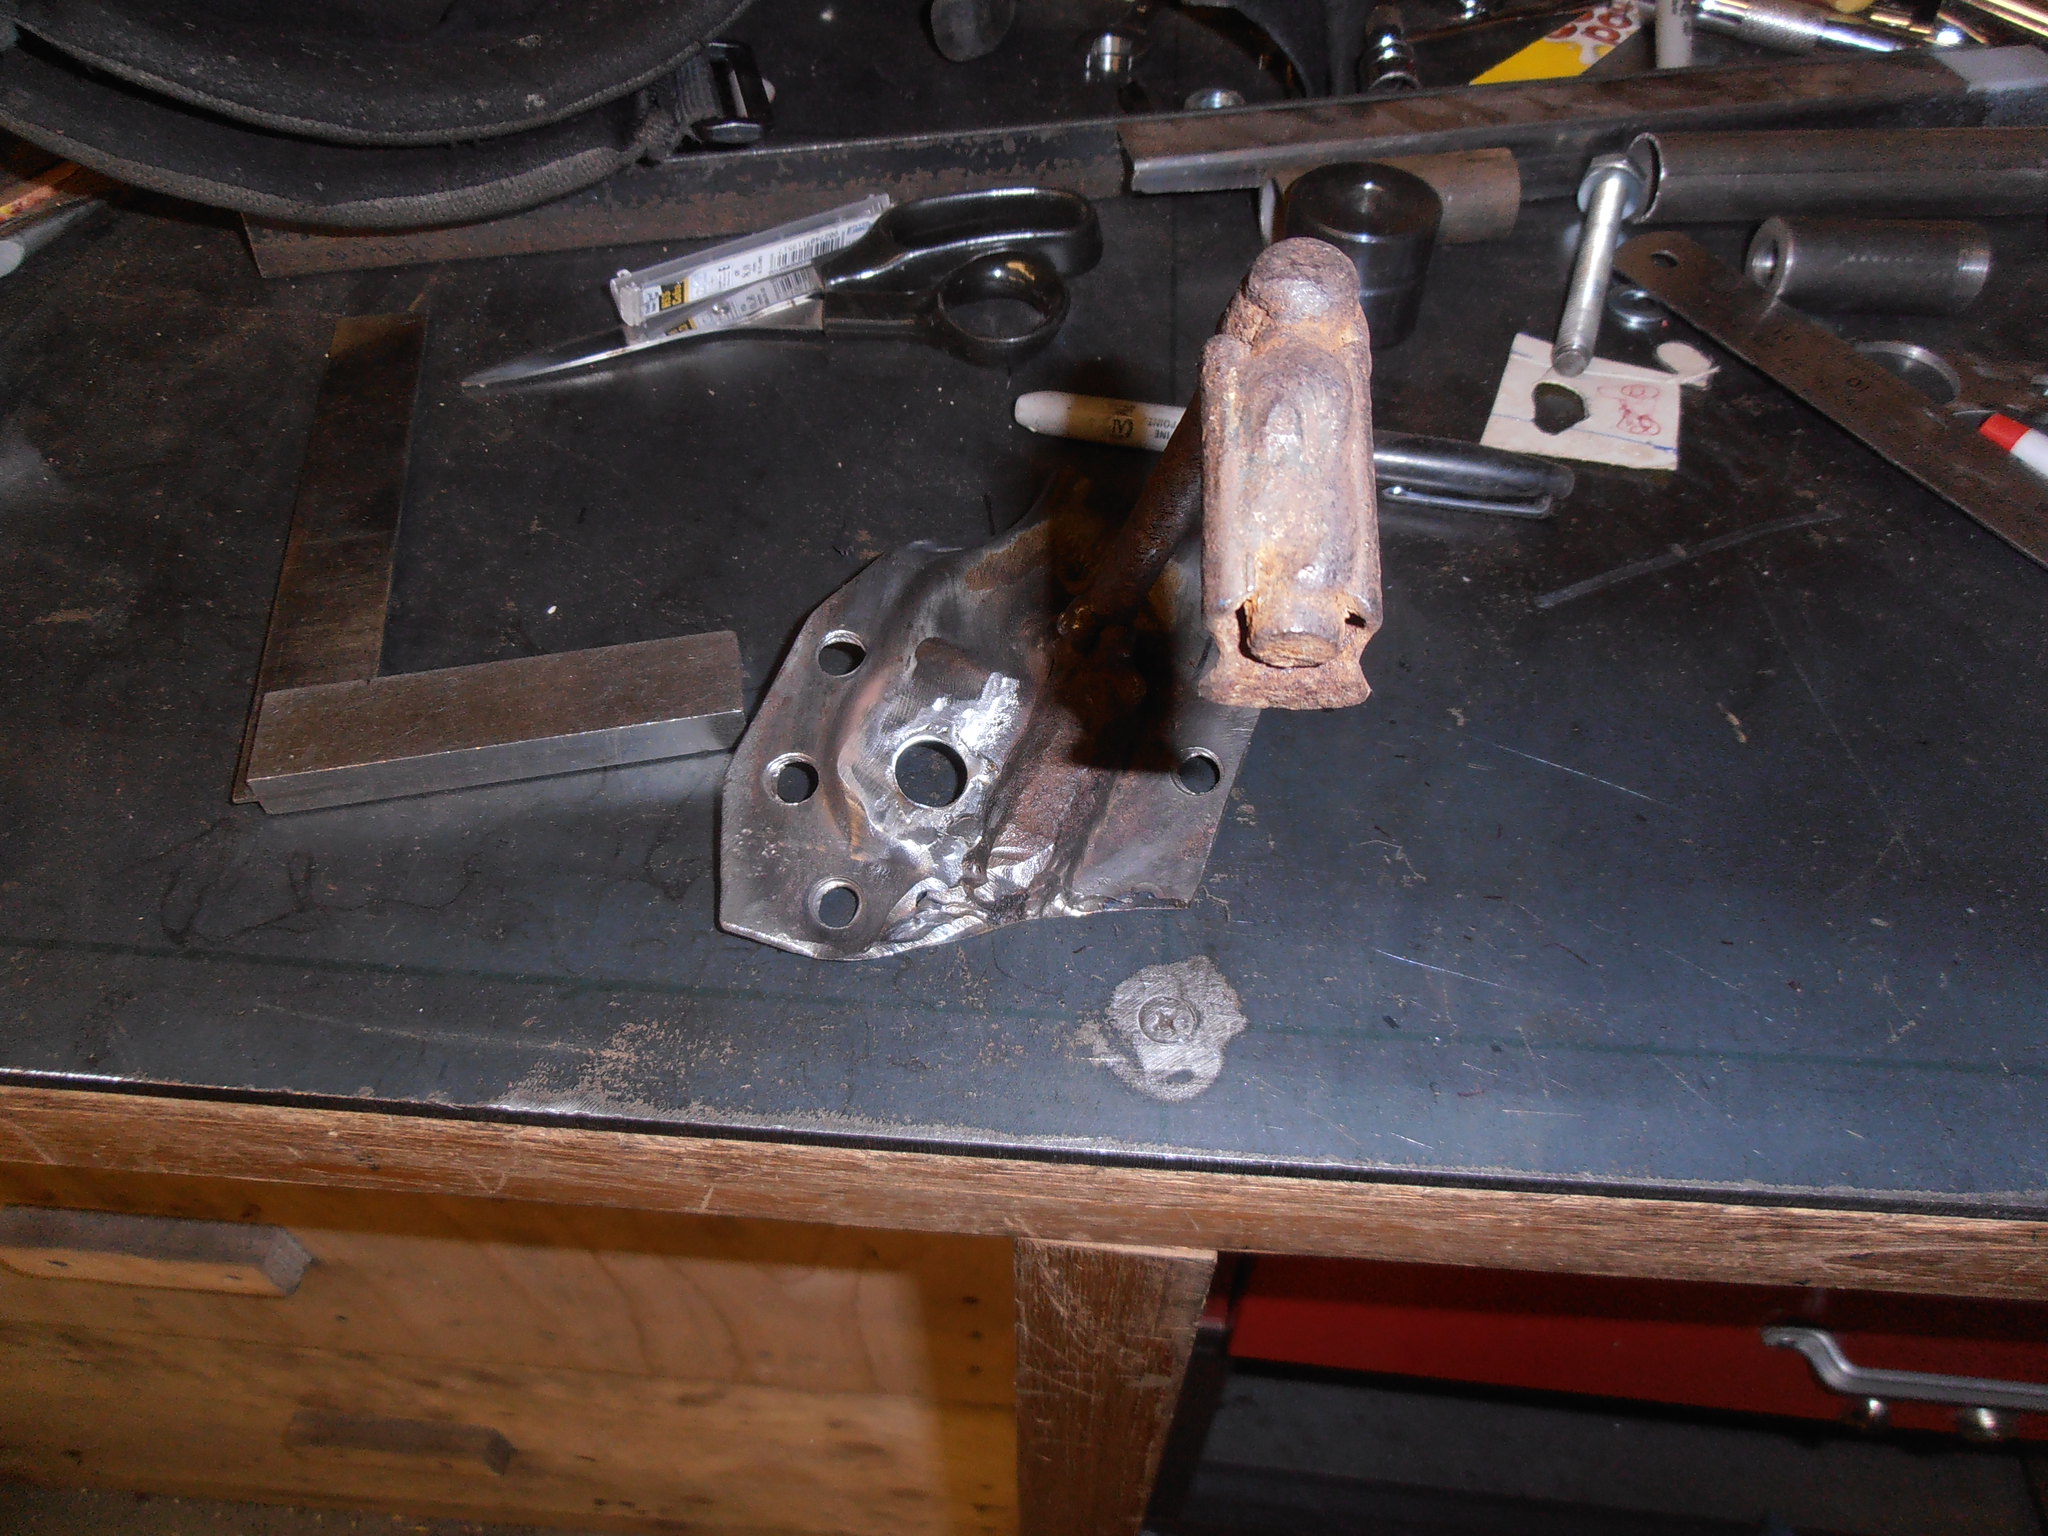 P4064549 P4064549 by jono_misfit, on Flickr weld the leg patch in. 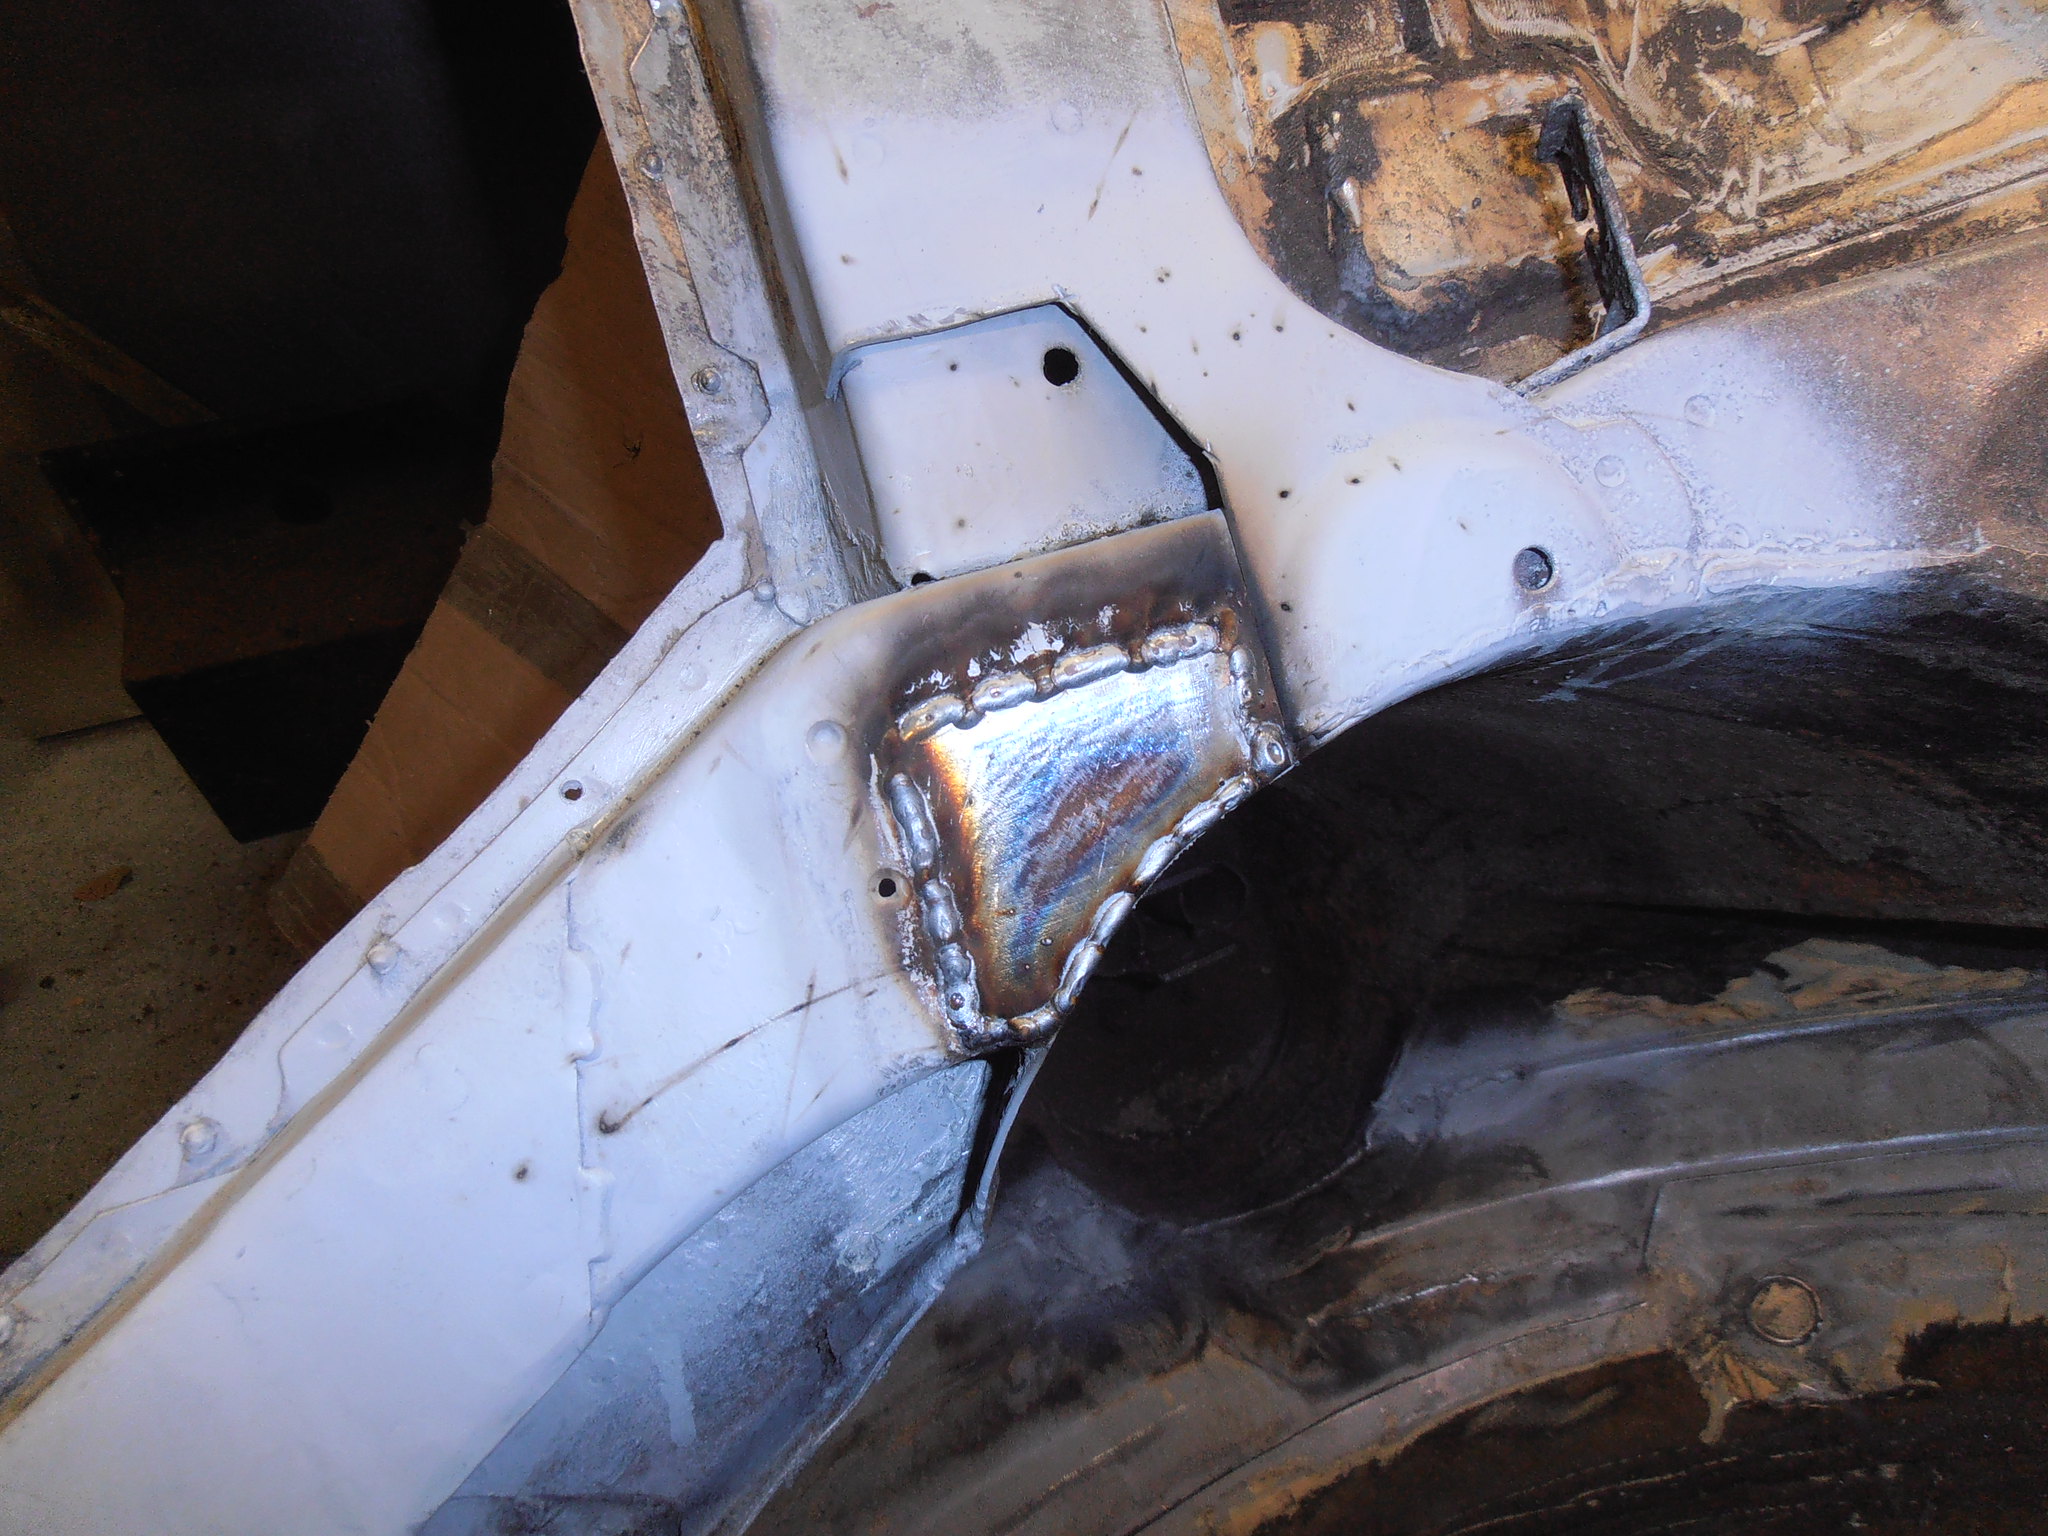 P4064550 P4064550 by jono_misfit, on Flickr clean and zinc prime 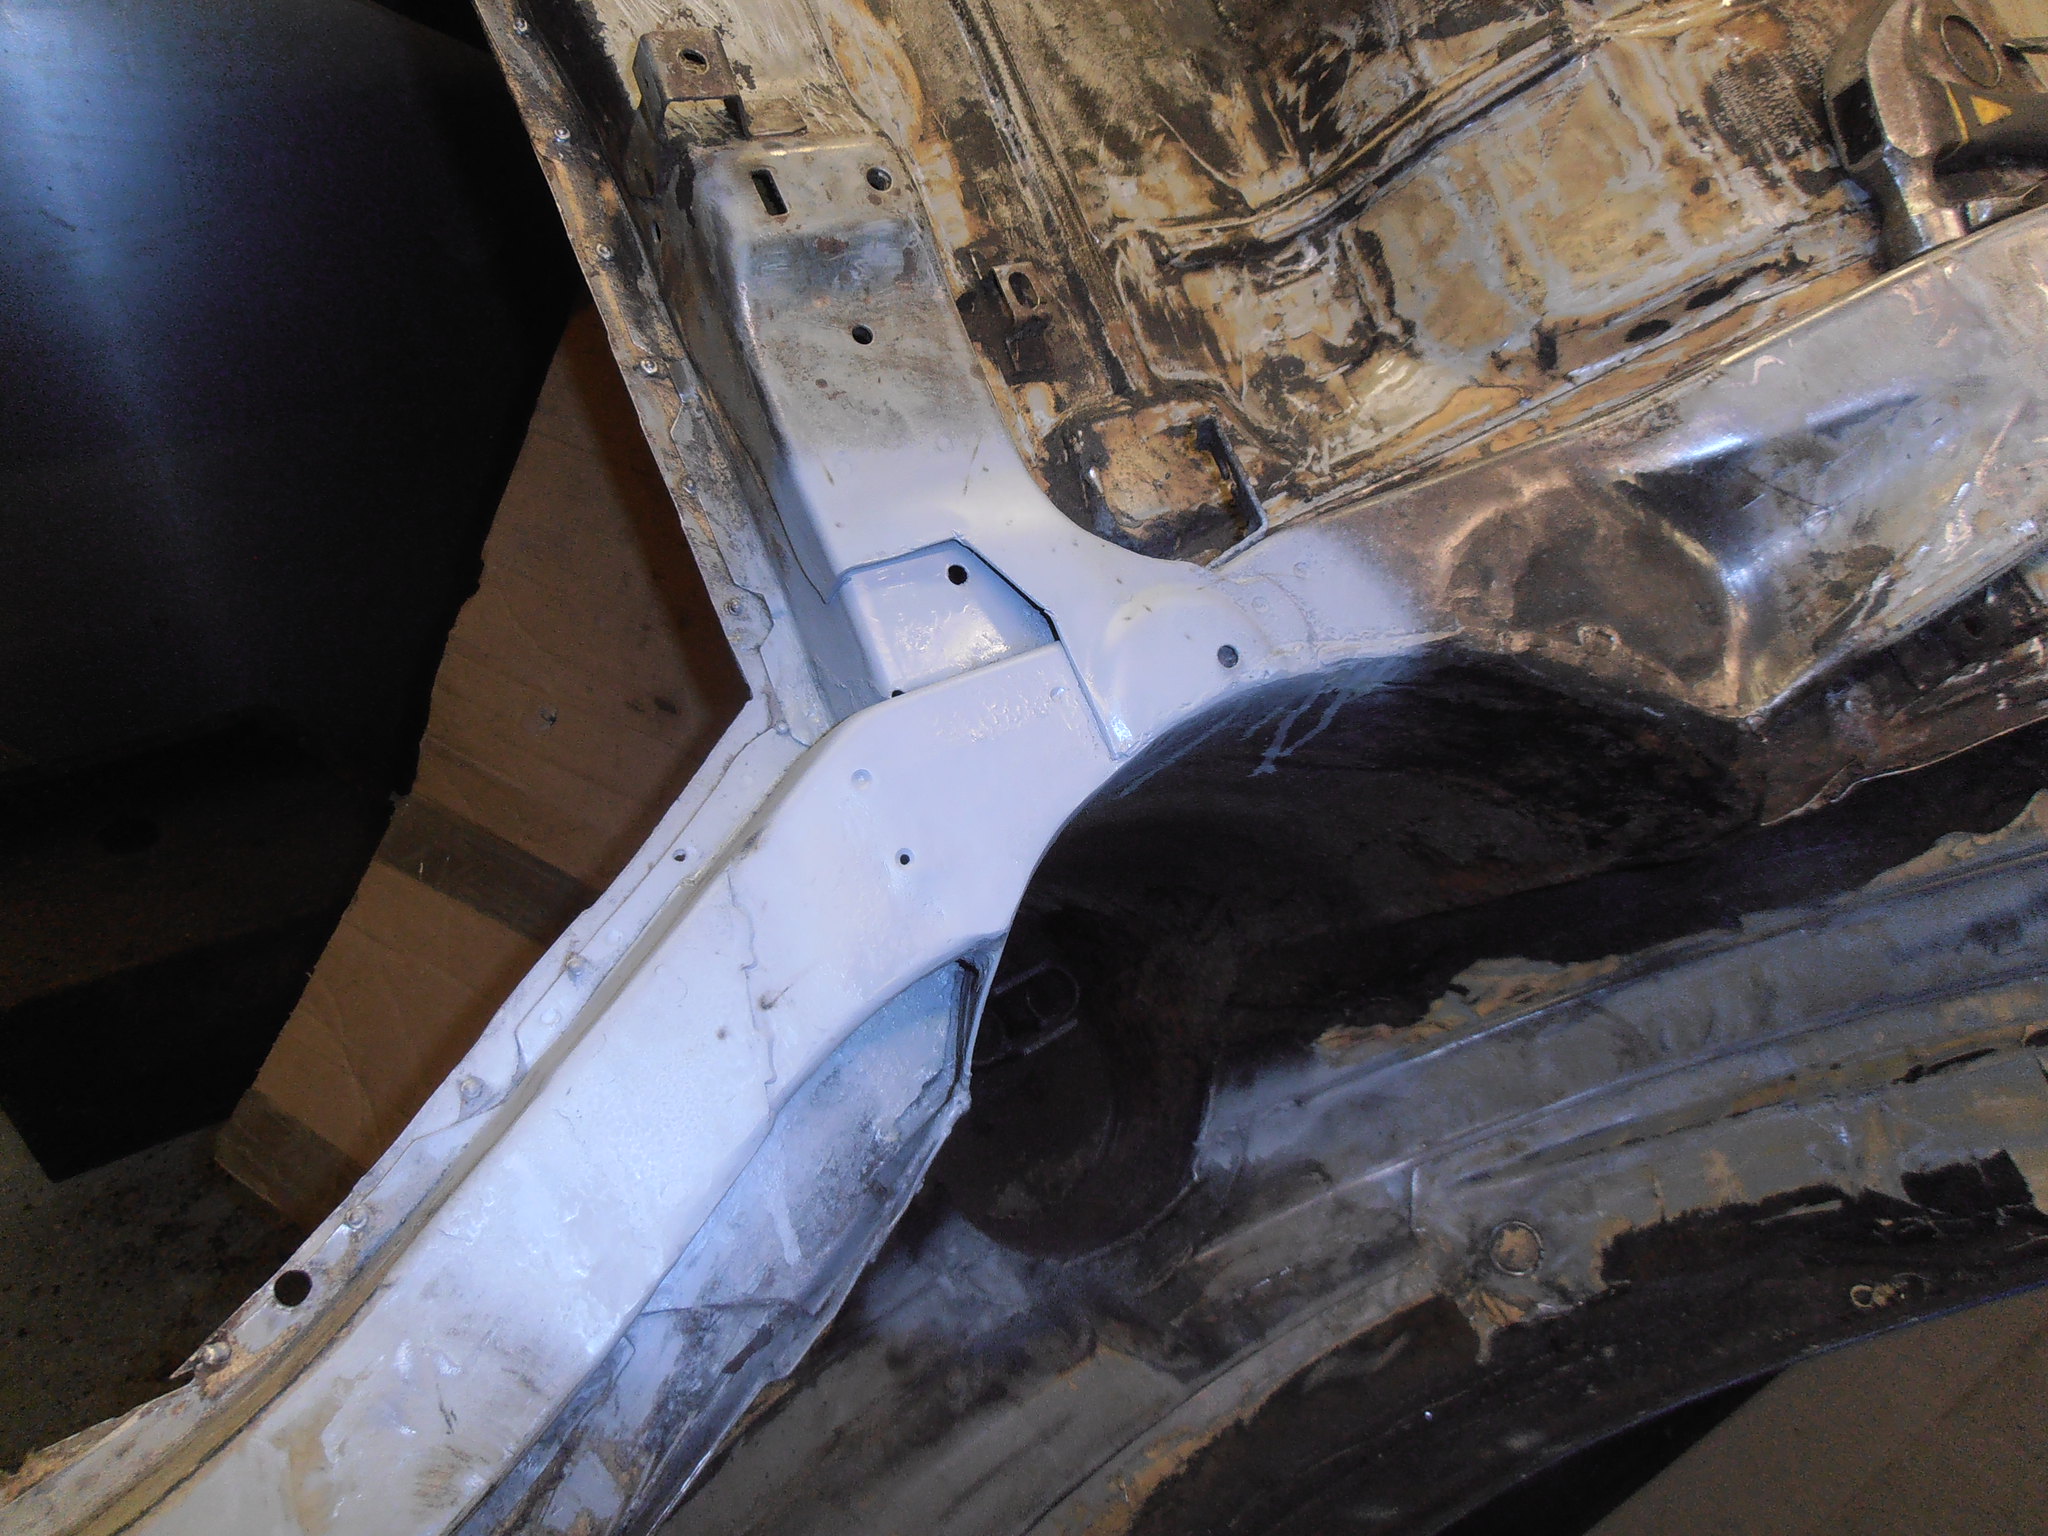 P4064551 P4064551 by jono_misfit, on Flickr position the strengthener again 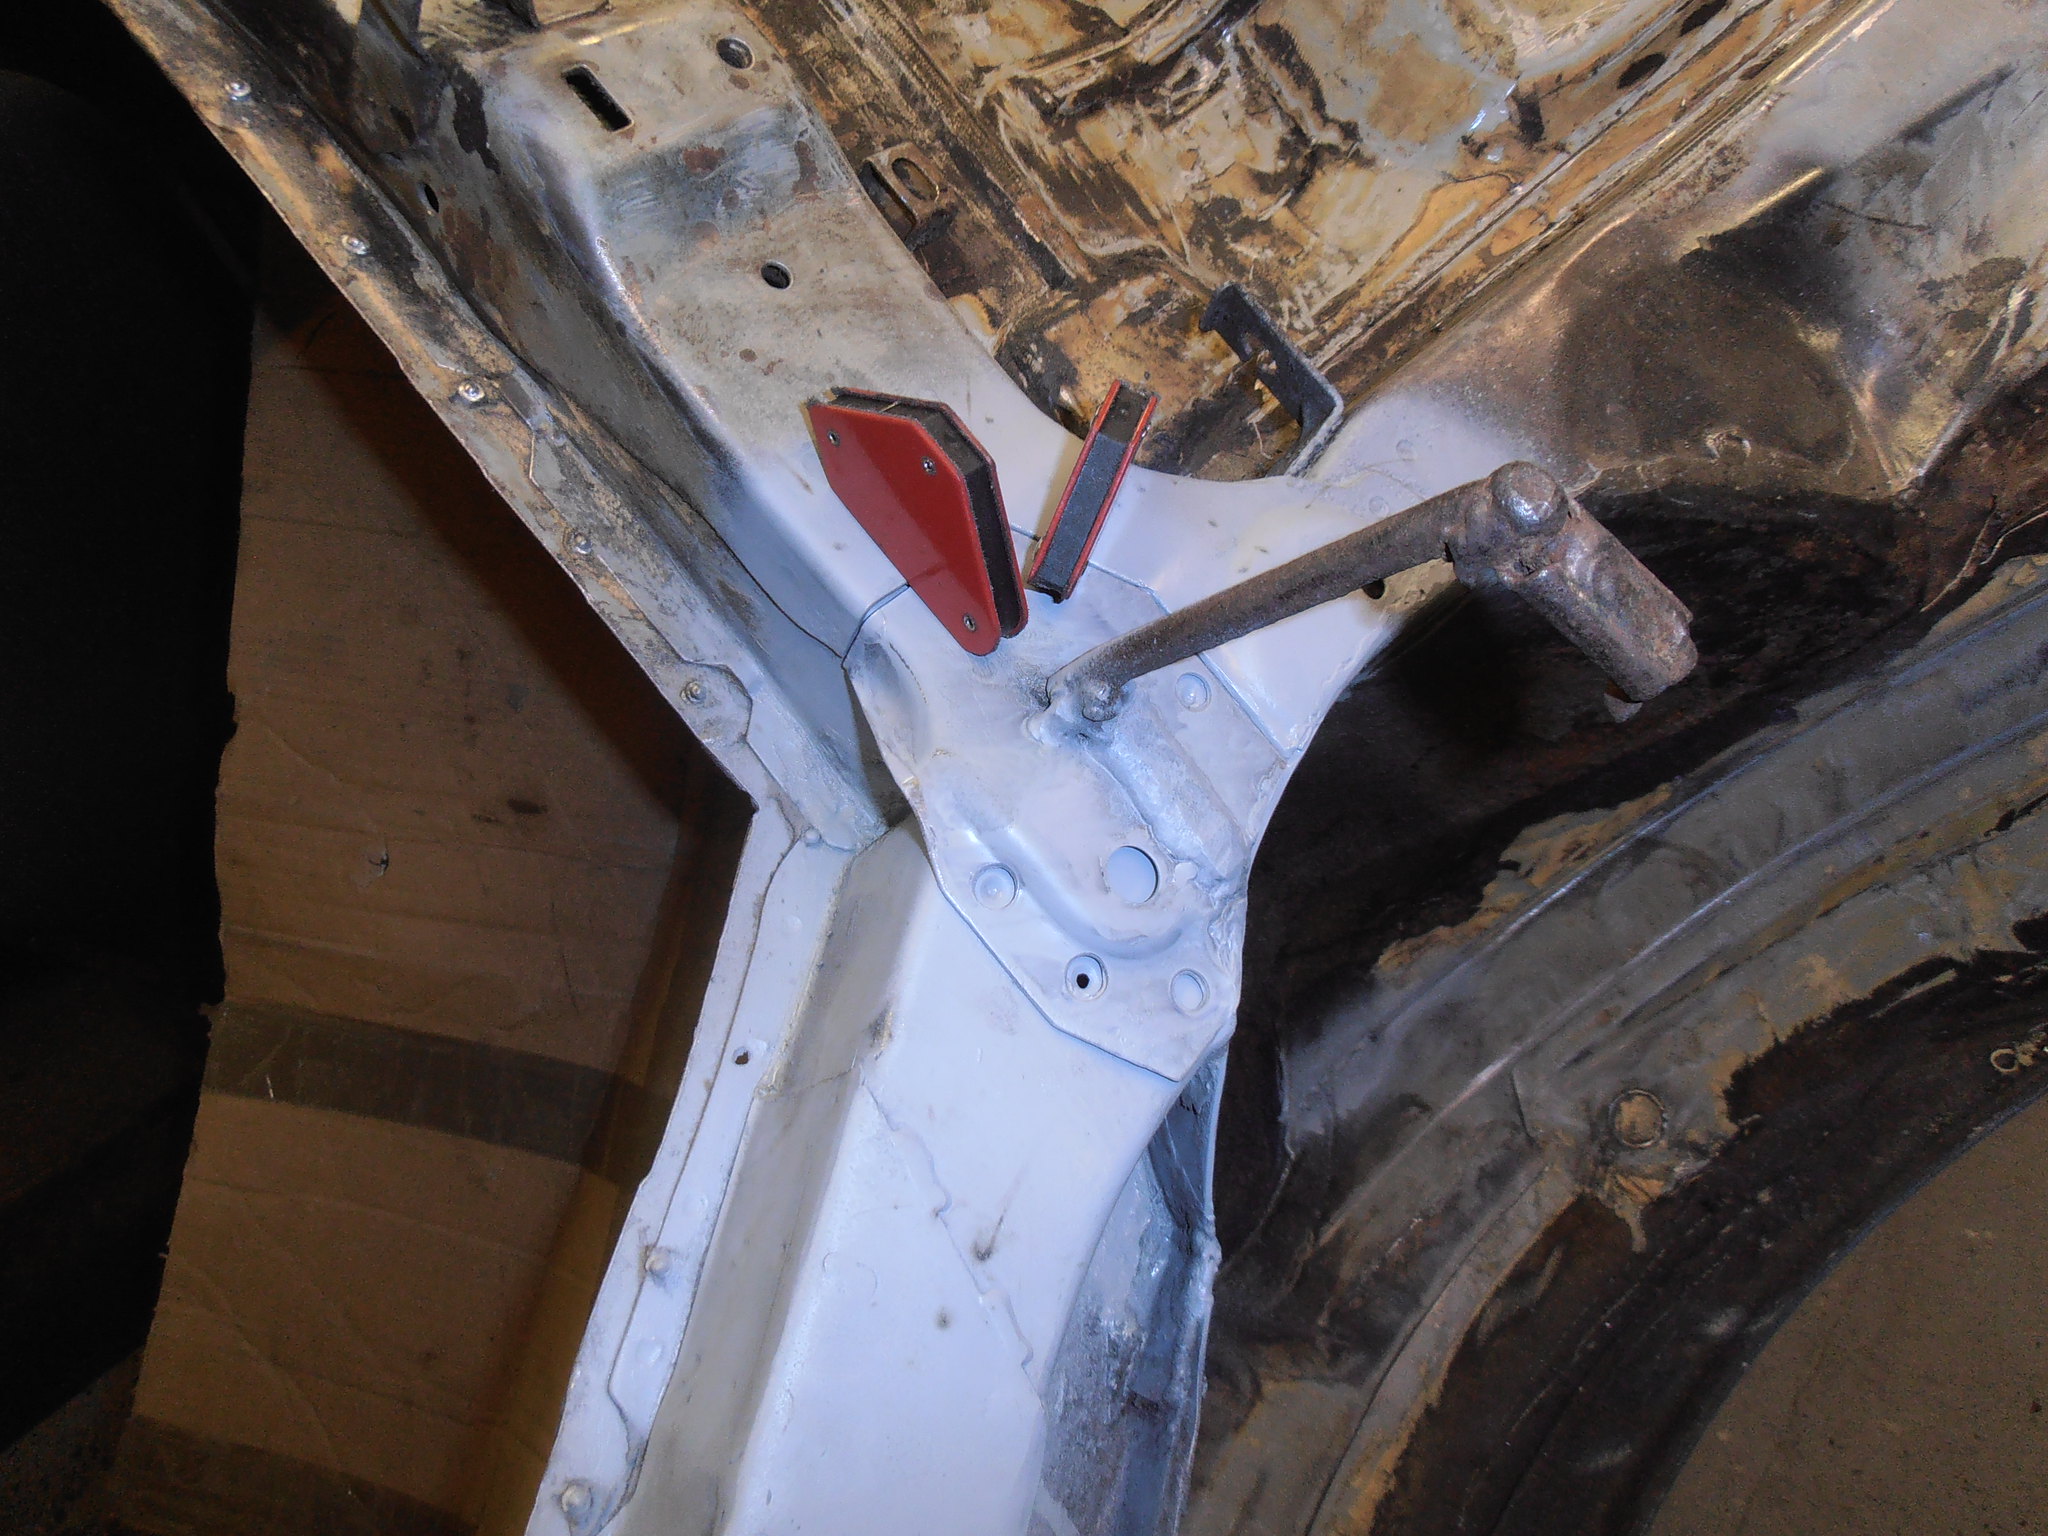 P4064552 P4064552 by jono_misfit, on Flickr weld on 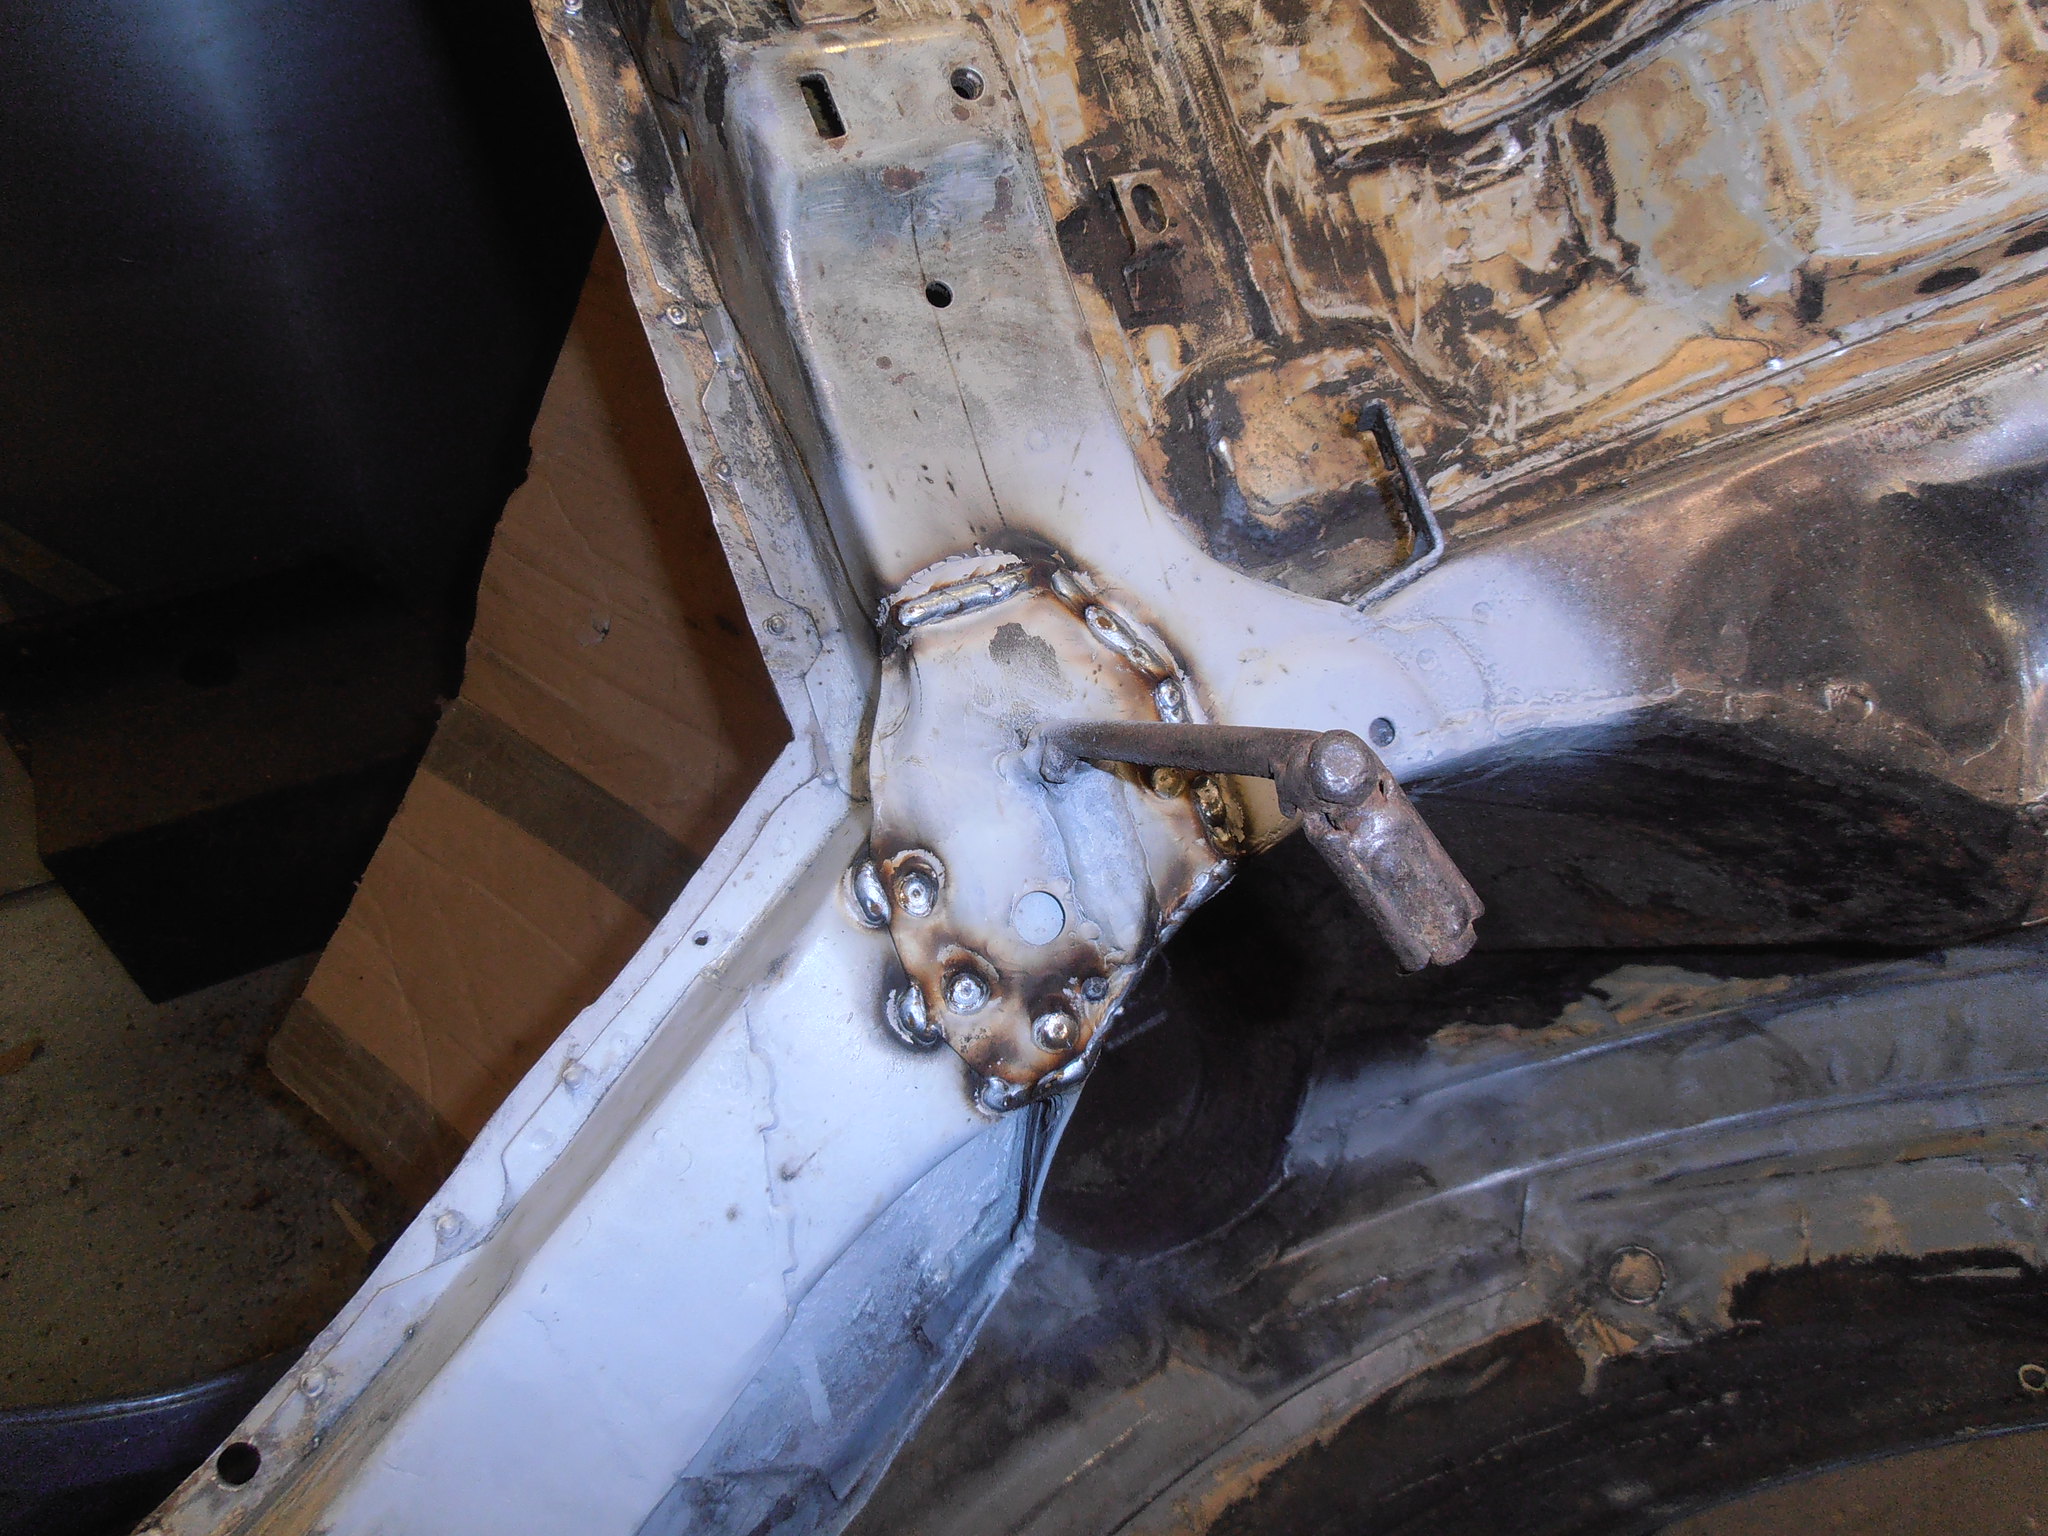 P4064553 P4064553 by jono_misfit, on Flickr quick clean up 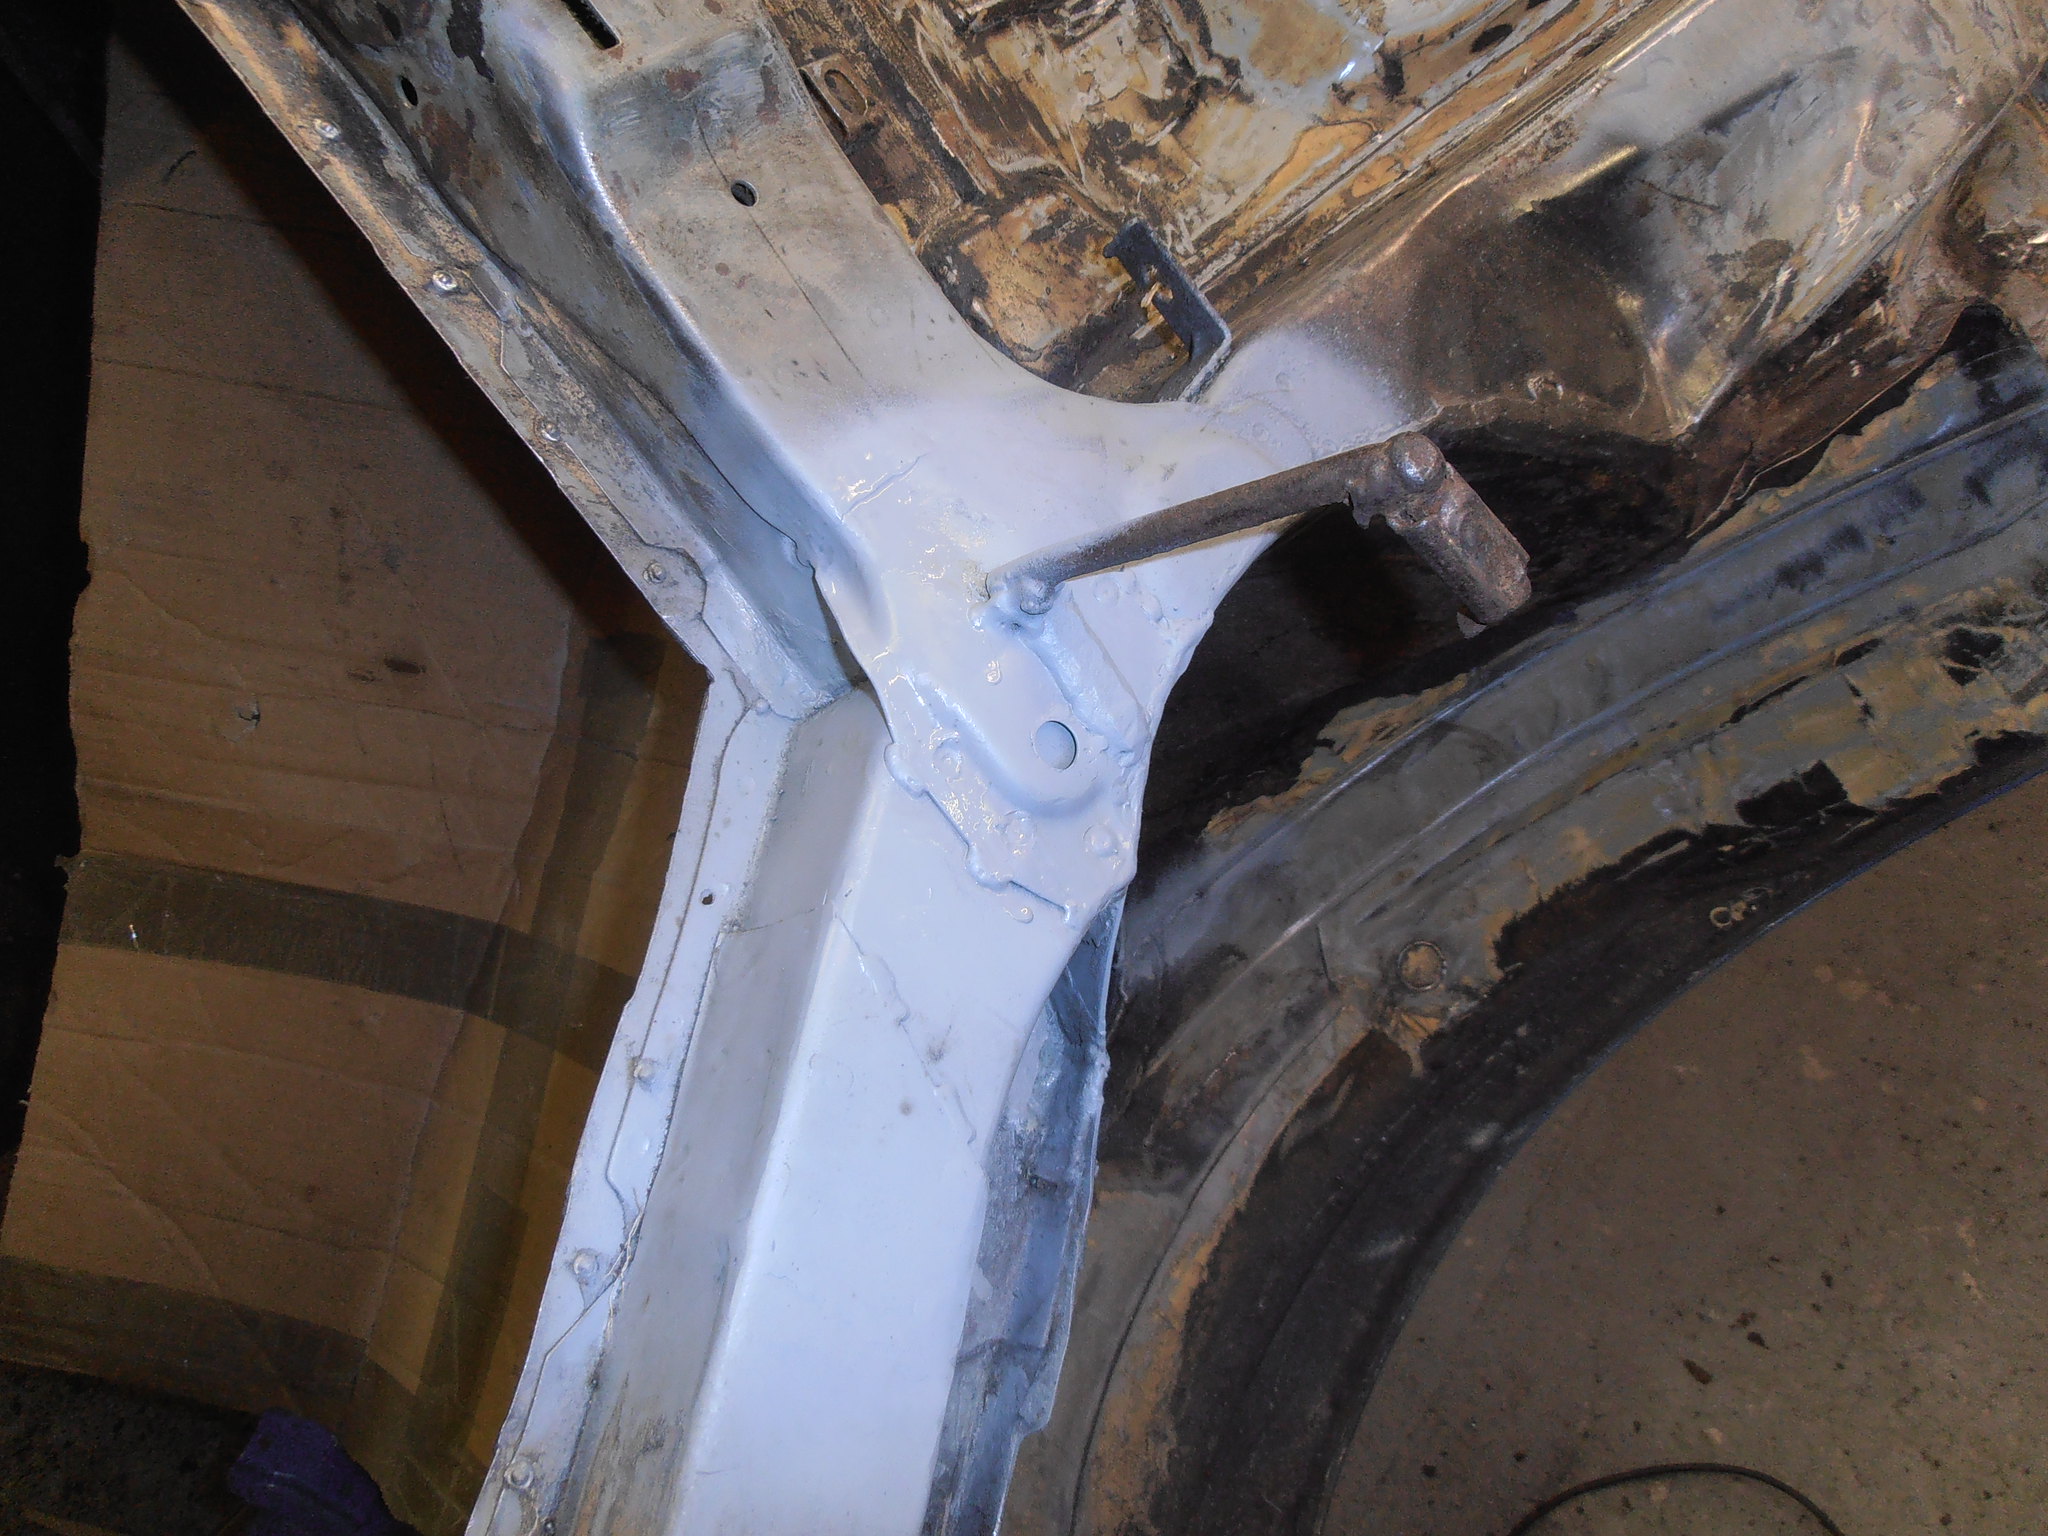 P4064554 P4064554 by jono_misfit, on Flickr 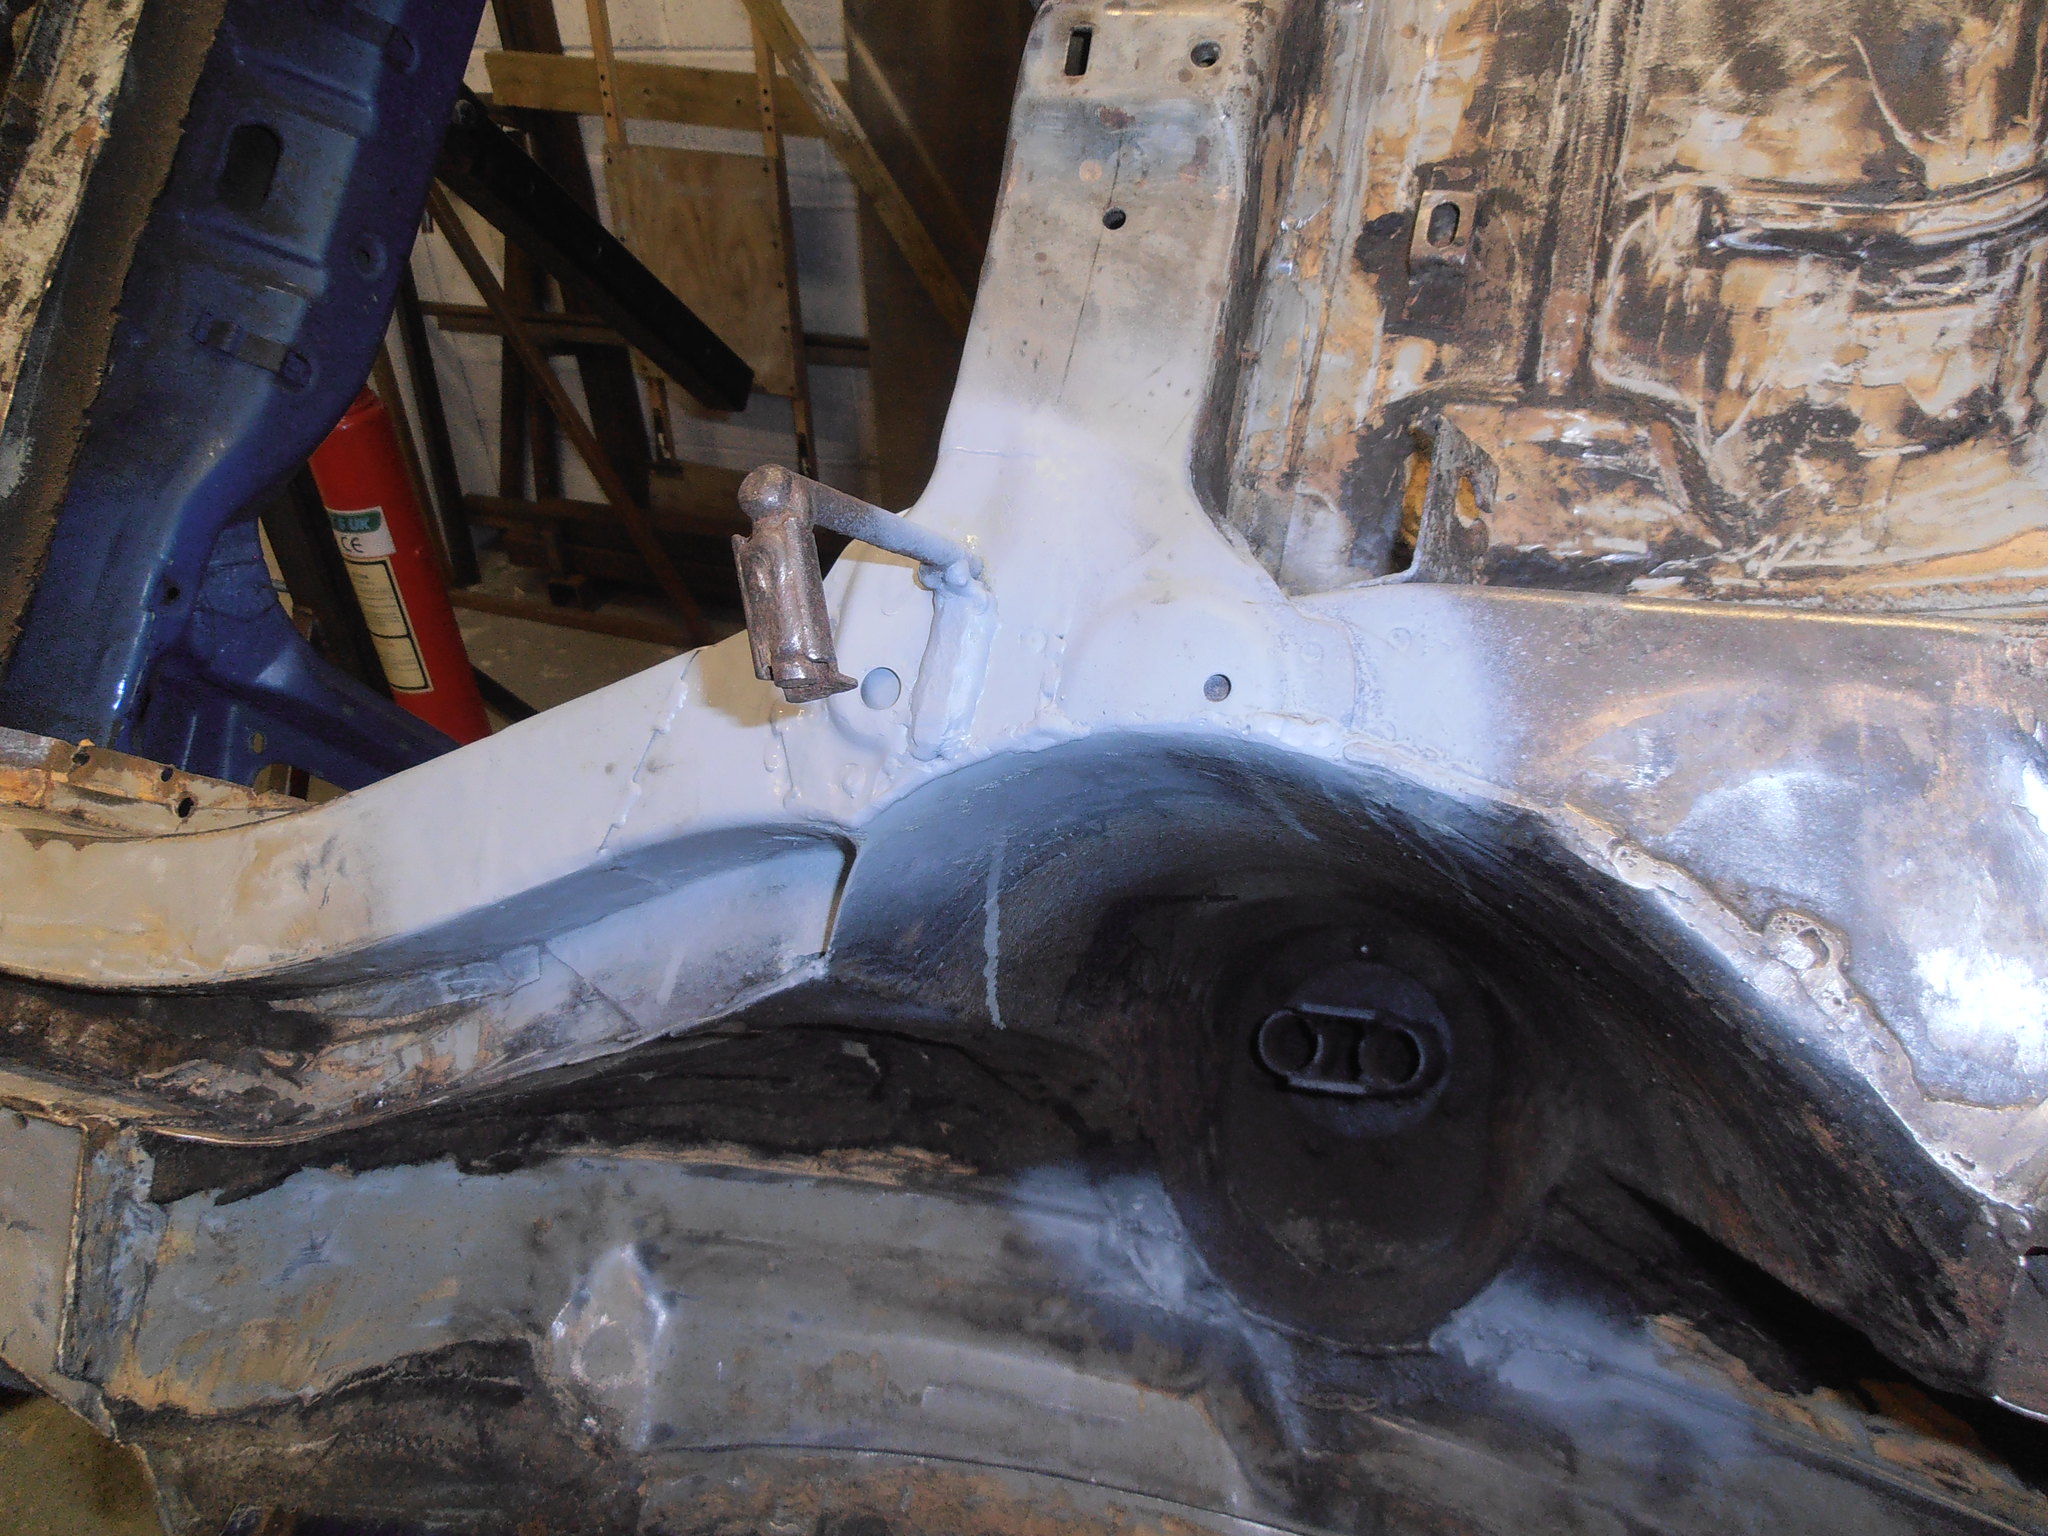 P4064555 P4064555 by jono_misfit, on Flickr I stuck the mirror and light inside the leg when open and the rest round here looks fairly good. This side is the easy side though. The drivers side looks like swiss cheese from the rust in the same places..... |
| |
|
|
bstardchild
Club Retro Rides Member
Posts: 14,976
Club RR Member Number: 71
|
|
|
|
A hot air paint stripper gun would work well with that scraper. I initially thought hot air paint strippers were great for tar pads - however in melting the tar it leaves some stuck to the shell then you get high on solvents needed to remove it - it was much easier to chisel off great big chunks with minimal residue left stuck to the bodyshell |
| |
|
|
bstardchild
Club Retro Rides Member
Posts: 14,976
Club RR Member Number: 71
|
|
|
|
What are you using zinc primer wise - I've never had any success with weld thro primers but it appears you have something that doesn't affect the weld at all? |
| |
|
|
jonomisfit
Club Retro Rides Member
Posts: 1,790
Club RR Member Number: 49
|
|
|
|
If it's going to be welded I use bilt hamber etchweld. www.bilthamber.com/etchweldIf it's not going to be welded I use bilt hamber electrox www.bilthamber.com/electroxThey cost more than others but they work really well. As an example I cleaned the rust off the spare wheel of my van ( which hangs in protected under the van) sprayed it with electrox and 3 years later it's still pretty much rust free. Electrox is meant for protecting steel on oil rigs. |
| |
|
|
|
|
|
|
|
|
Jon's choice of primers is a wise one - the cheap weldthro' / zinc / etching primers are cheap for a reason - they don't work - good stuff like Bilt Hamber is a high quality - use once and forget it fix
|
| |
|
|


