jonomisfit
Club Retro Rides Member
Posts: 1,788
Club RR Member Number: 49
|
|
|
|
I took a break from workshop work and did some bits on the escort. I split the alternator which has had a lot of oil through it  P1070177 P1070177 by jono_misfit, on Flickr then started cleaning it up  P1070178 P1070178 by jono_misfit, on Flickr I got a lot of the gunk off it and put it back together.  P1070179 P1070179 by jono_misfit, on Flickr We'll see if it works ok when I run the engine. The bnrushes are fairly worn and there are fairly significant grooves on the surfaces they run on. bolted it on  P1070180 P1070180 by jono_misfit, on Flickr  P1070181 P1070181 by jono_misfit, on Flickr after much gnashing of teeth i finally managed to get the head drain pipe fitted.  P1070182 P1070182 by jono_misfit, on Flickr 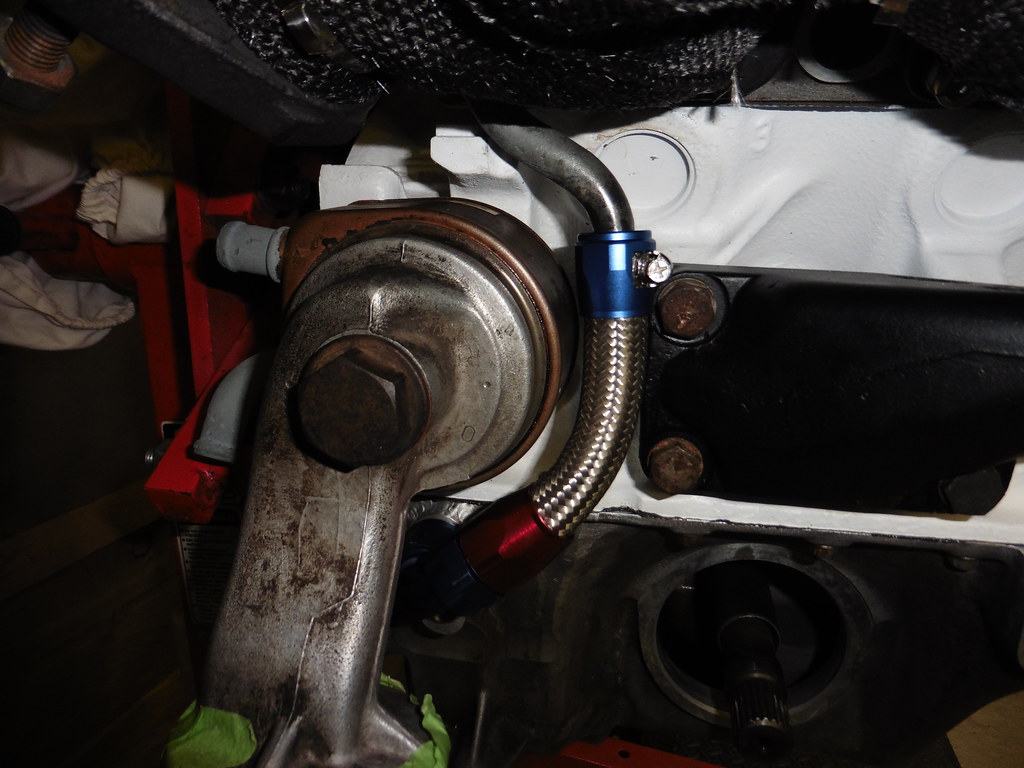 P1070183 P1070183 by jono_misfit, on Flickr I dug out the front diff and started cleaning it up  P1070184 P1070184 by jono_misfit, on Flickr  P1070185 P1070185 by jono_misfit, on Flickr It looks clean enought, but I cant get the drain plug out, and I think i'll drop the bottom plate to check it beofre I fit it. |
| |
|
|
|
|
melle
South West
It'll come out in the wash.
Posts: 2,010
|
|
|
|
|
Alternator bushes, slip rings (200W soldering iron required) and bearings (puller required) are easy enough to replace and you can test the diodes with a multimeter. I can email you a guide (that I've downloaded from the internet) if you're interested, or just do a quick google yourself.
|
| |
www.saabv4.com'70 Saab 96 V4 "The Devil's Own V4" '77 Saab 95 V4 van conversion project '88 Saab 900i 8V
|
|
jonomisfit
Club Retro Rides Member
Posts: 1,788
Club RR Member Number: 49
|
|
|
|
|
Much appreciated. I'll try running it and see if it works. If not I'll look to give it a rebuild
|
| |
|
|
16grit
Part of things
 
Posts: 215
|
|
|
|
|
Good to see you kicking on with this, looking forward to seeing you fire up the big V.
Seeing your white engine block has rekindled a memory for me. Spectating on a forest event in the mid-80s, shortly after the Peugeot 205T16 had been revealed and raised a few eyebrows with its all-white interior. In the service area, looking around, and there was an Escort sporting a BDG with a white engine block. Two guys had looked stupidly fast that morning, a certain Pat Doran, relatively unknown at that point, and John Cross of Autocross fame. Can't remember which of the two had the white block, but certainly one of them.
|
| |
|
|
jonomisfit
Club Retro Rides Member
Posts: 1,788
Club RR Member Number: 49
|
|
|
|
Thanks. I'm looking forward to it all being finished and running so I can get onto the next project. Dropped the sump off the diff. generally in reasonable condition with no obvious signs of wear. backlash felt limited as well 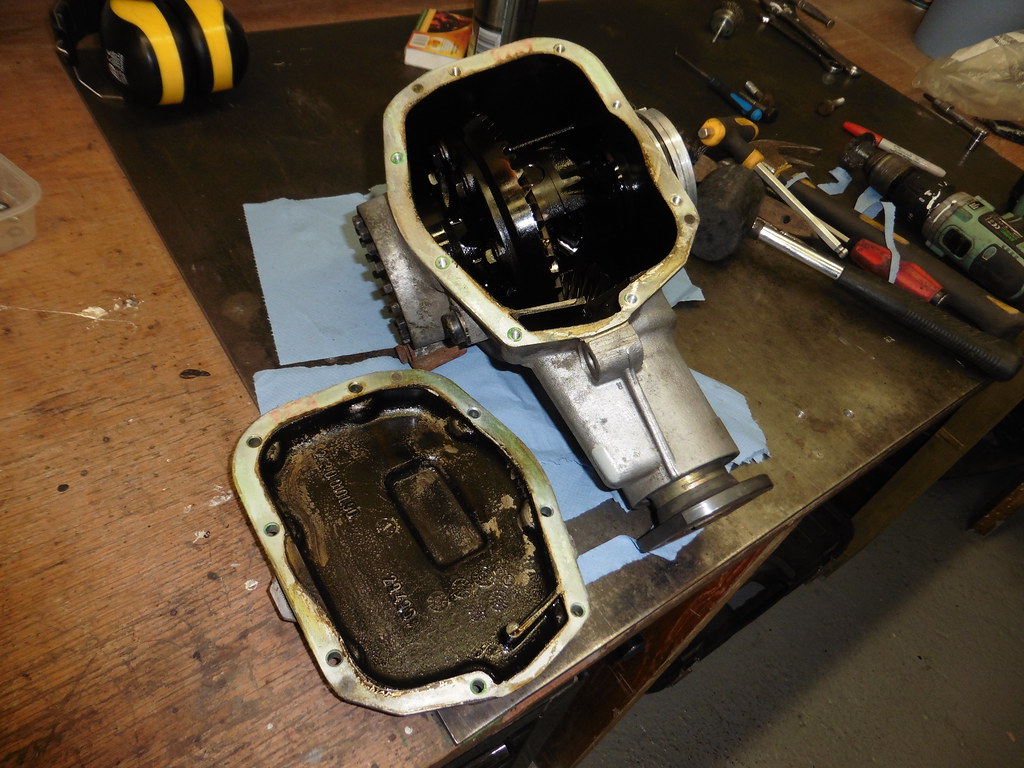 P1070186 P1070186 by jono_misfit, on Flickr running a finger nail over the CROWN wheel and pinion teeth I couldnt feel anything  P1070187 P1070187 by jono_misfit, on Flickr I protected the internals of the diff, then gave the mating faces a clean up  P1070188 P1070188 by jono_misfit, on Flickr sealed and buttoned back up  P1070189 P1070189 by jono_misfit, on Flickr and bolted up to the sump  P1070190 P1070190 by jono_misfit, on Flickr I added a very obvious piece of tape to it to remind me to fill it with oil before I put the driveshaft in. engine is starting to get quite busy (and heavy) 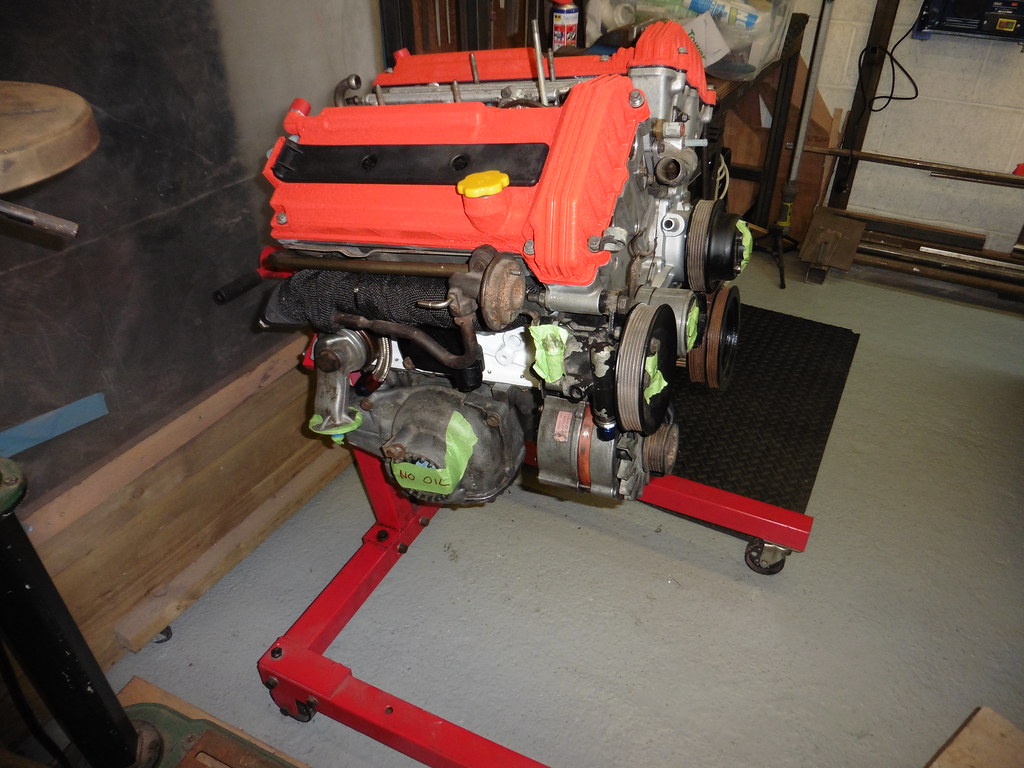 P1070191 P1070191 by jono_misfit, on Flickr then made a start on the other head drain  P1070192 P1070192 by jono_misfit, on Flickr this is the oil pipe type hose, which is a "cutter" and clamp arrangement  P1070193 P1070193 by jono_misfit, on Flickr The red nut goes over the hose end, then the blue bit screws in and the whole arrangement "bites" preventing the hose pulling out  P1070194 P1070194 by jono_misfit, on Flickr hose pushed in  P1070195 P1070195 by jono_misfit, on Flickr screwing the fitting in  P1070196 P1070196 by jono_misfit, on Flickr Tightened.... and aligned  P1070197 P1070197 by jono_misfit, on Flickr hose back in at the head end  P1070198 P1070198 by jono_misfit, on Flickr The fittings work by a differntial cone seal, meaning the angle on the male part and female part are slightly different so there is high contact pressure and the seal achieve. This contact pressure is high, but is still in the elastic range of the material which is why the fittings are reuseable.  P1070199 P1070199 by jono_misfit, on Flickr female part  P1070200 P1070200 by jono_misfit, on Flickr hose on  P1070201 P1070201 by jono_misfit, on Flickr |
| |
|
|
jonomisfit
Club Retro Rides Member
Posts: 1,788
Club RR Member Number: 49
|
|
|
|
then onto the engine wirring as the old loom had cooked badly I thoguht i'd fit some heat barrier to try and help 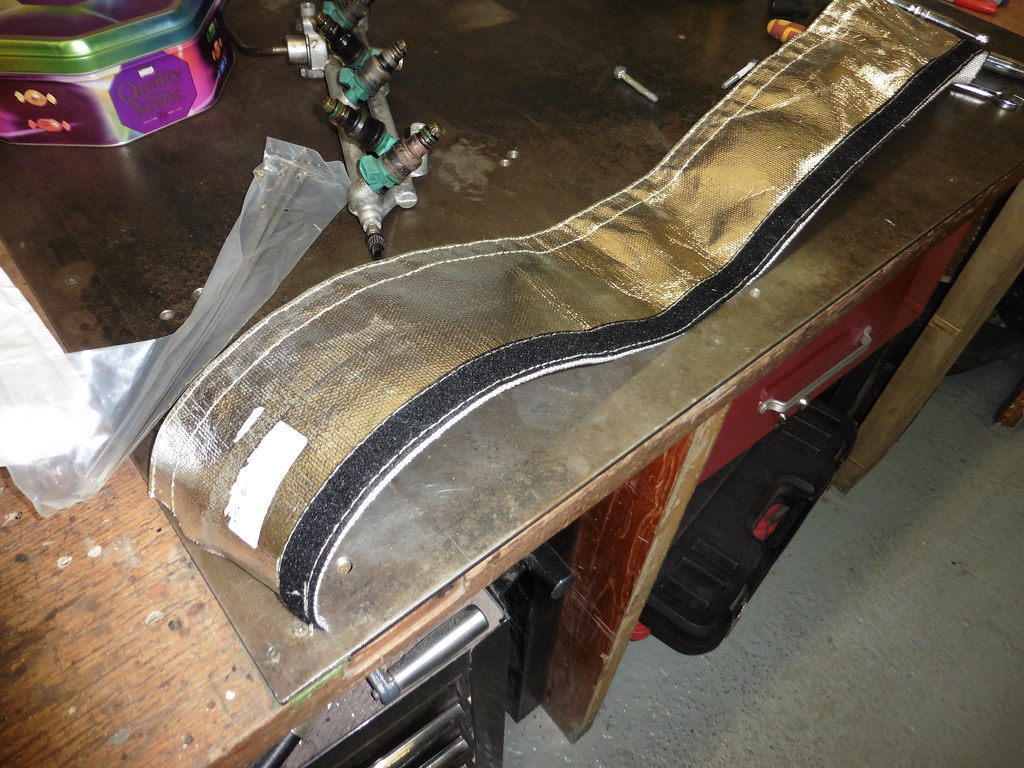 P1070202 P1070202 by jono_misfit, on Flickr making holes for cable drop outs  P1070203 P1070203 by jono_misfit, on Flickr goes down the bottom of the valley 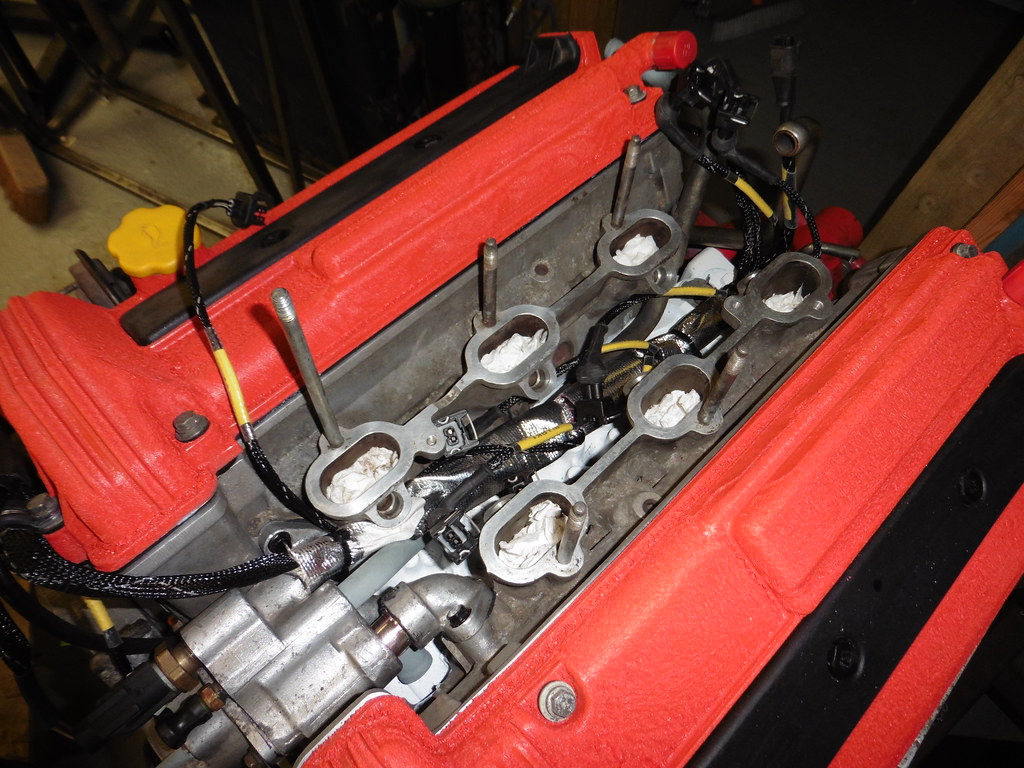 P1070204 P1070204 by jono_misfit, on Flickr trial fit the inlet manifold (first of aboiut 50 fits....)  P1070205 P1070205 by jono_misfit, on Flickr it is all tight  P1070206 P1070206 by jono_misfit, on Flickr back end is a bit less tight  P1070207 P1070207 by jono_misfit, on Flickr Next job is the fuel rail fittings.. if only it fitted with teh fittings and I didnt need to mod it. hmmm what if I do it this way.  P1070208 P1070208 by jono_misfit, on Flickr maybe  P1070209 P1070209 by jono_misfit, on Flickr maybe  P1070210 P1070210 by jono_misfit, on Flickr Hmm. its just too tight here. The fitting elbow is pushing on the edge of the cam cover  P1070211 P1070211 by jono_misfit, on Flickr well..... the lip isnt doing too much......  P1070212 P1070212 by jono_misfit, on Flickr it clears! and If I add a washer under the fuel rail mount then I can get the fitting turned like so.  P1070213 P1070213 by jono_misfit, on Flickr and there's just enough space to put the blank in as well on the return line (i'm using a dead head fuel pressure regulator)  P1070214 P1070214 by jono_misfit, on Flickr need to try it with some hose on. As its fuel hose it uses the PTFE type hose  P1070215 P1070215 by jono_misfit, on Flickr which have a ferrule that pushes onto the PTFE line and then pushes onto this barb  P1070216 P1070216 by jono_misfit, on Flickr like so  P1070217 P1070217 by jono_misfit, on Flickr then the nut winds up the back and compresses the ferrule and bits onto the hose  P1070218 P1070218 by jono_misfit, on Flickr and some out like this, however i'm going to have to raise the coil back by 20mm to clear the hose.  P1070227 P1070227 by jono_misfit, on Flickr Next job the injectors need cleaned and re-sealed Stripped injector  P1070219 P1070219 by jono_misfit, on Flickr the little filter looks fairly manky  P1070220 P1070220 by jono_misfit, on Flickr my janky injector cleaner set up. Carb cleaner blown through the injector and a 9v battery (via a lightswitch) to turn the injector on and off  P1070221 P1070221 by jono_misfit, on Flickr this works well, up until the carb cleaner softened the hose and it blew off mid test. Just as well I had my full face mask on as it blew carb cleaner all over me injectors all cleaned up 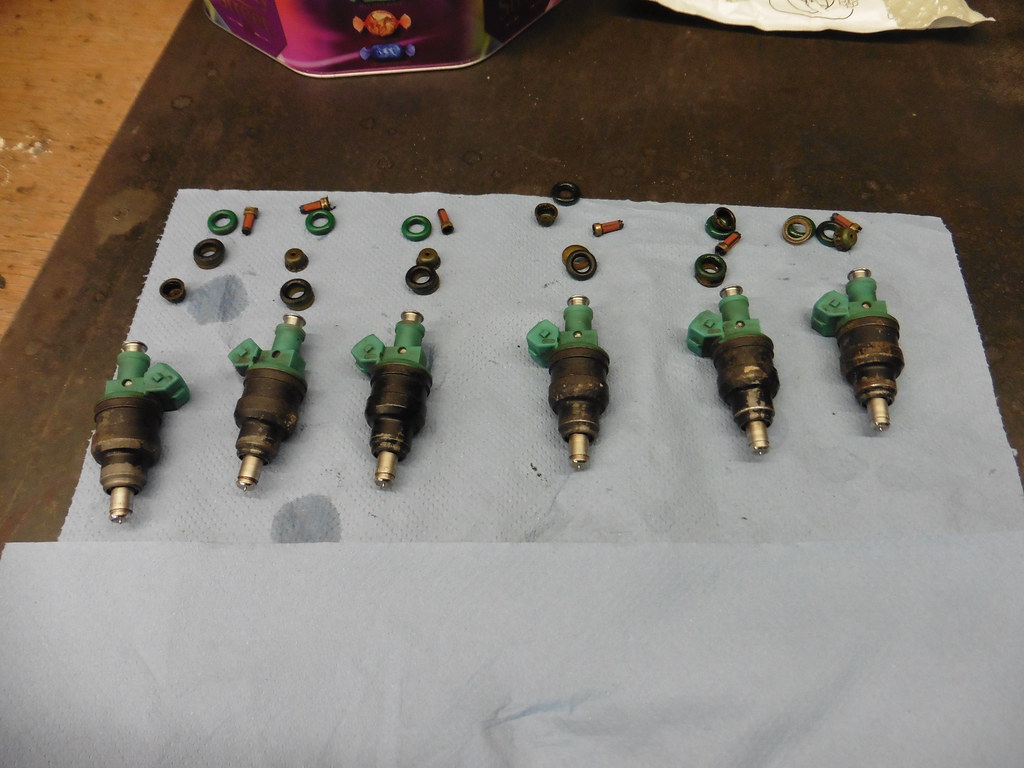 P1070222 P1070222 by jono_misfit, on Flickr and built back up with new seals, pintle caps, etc  P1070223 P1070223 by jono_misfit, on Flickr in the injector rail and wirring connected to them  P1070224 P1070224 by jono_misfit, on Flickr which were a right pain to fit  P1070225 P1070225 by jono_misfit, on Flickr and mannifold back on ready for beind bolted up some point later in the week 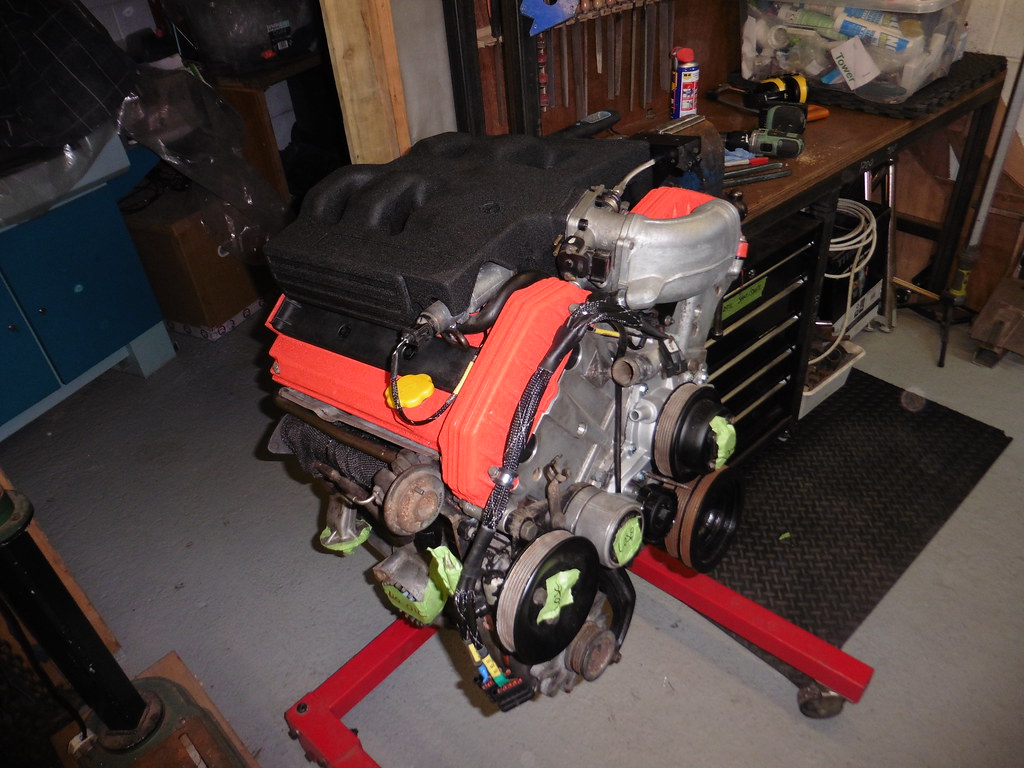 P1070226 P1070226 by jono_misfit, on Flickr its all very tight, but it does all fit, just. |
| |
|
|
jonomisfit
Club Retro Rides Member
Posts: 1,788
Club RR Member Number: 49
|
|
Jan 14, 2023 21:26:51 GMT
|
I had the inlet back on.... then remembered I hadnt bought and fitted the cooling hose which you have to do from under the inlet manifold. So i've unbolted it again and put the engine to the side until i have it.  P1070228 P1070228 by jono_misfit, on Flickr Better start on this then  P1070229 P1070229 by jono_misfit, on Flickr the donut adaptor has torx fittings on the end to allow the bolts to be tightened removed.... except being 30 years old they are solid... que double nutting and using that plus turning the torx fitting to get them to crack  P1070230 P1070230 by jono_misfit, on Flickr which worked.... after a lot of swearing  P1070231 P1070231 by jono_misfit, on Flickr  P1070232 P1070232 by jono_misfit, on Flickr I cleaned it all up and refitted it to check how the front piece of the prop would fit  P1070233 P1070233 by jono_misfit, on Flickr  P1070234 P1070234 by jono_misfit, on Flickr cleaning up parts  P1070235 P1070235 by jono_misfit, on Flickr pulled the centre bearing carrier housing off  P1070236 P1070236 by jono_misfit, on Flickr you cant tell the prop came from a rally car.....  P1070237 P1070237 by jono_misfit, on Flickr most of which was packed into the void between the bush and the housing ... and in this void here  P1070238 P1070238 by jono_misfit, on Flickr I spun the centre bearing and thought.... my... that sounds like it has been cooked hard and has no lubrication left. I needed to use the bearing puller to get it off.... but it didnt have enough rear... so had to mod it it a bit with extra holes.  P1070239 P1070239 by jono_misfit, on Flickr it was TIGHT..... but came off  P1070240 P1070240 by jono_misfit, on Flickr it had definately got hot 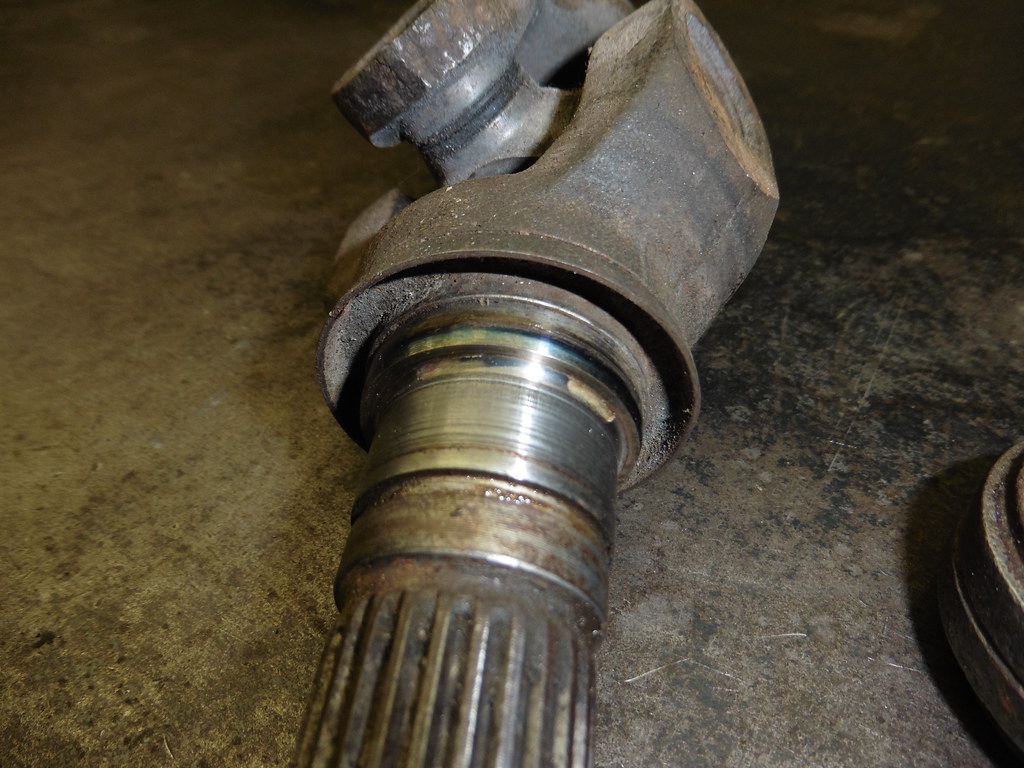 P1070241 P1070241 by jono_misfit, on Flickr I cleaned up the prop pieces ready for a paint  P1070242 P1070242 by jono_misfit, on Flickr I'll see how useabale this prop is when I shake down the car as there are a couple of slight dents on it (red circle) I may need to get it rebuilt be recoprop etc. I went over the whole gearbox and cleaned it up a bit. top  P1070244 P1070244 by jono_misfit, on Flickr and bottom  P1070243 P1070243 by jono_misfit, on Flickr It turns out it was a recon box at some point as its been painted (in ali colour) and all the joints show signs of non factory rtv silicon I removed and cleaned up the reverse gear indicator switch  P1070245 P1070245 by jono_misfit, on Flickr which goes in here  P1070246 P1070246 by jono_misfit, on Flickr gears look used but I cant see any pitting or chips  P1070246 P1070246 by jono_misfit, on Flickr I need to swap the connector to something I have a pair of, so will use junior power timer ones  P1070248 P1070248 by jono_misfit, on Flickr added  P1070249 P1070249 by jono_misfit, on Flickr |
| |
|
|
jonomisfit
Club Retro Rides Member
Posts: 1,788
Club RR Member Number: 49
|
|
Jan 14, 2023 21:46:00 GMT
|
Then onto the bit I was fairly aprehesive about.... starting the hydraulic clutch conversion this needs these 2 ribs removed to gain access to the back of the clutch arm box  P1070250 P1070250 by jono_misfit, on Flickr I drilled out the corners, them used a reciprocating multi tool to cut the ribs, then gave it a rough clean back  P1070251 P1070251 by jono_misfit, on Flickr I coated the face with red sharpy pen, then filled it to a consistent flat face with the sharpy cleaned off. I then gave it a sand off  P1070252 P1070252 by jono_misfit, on Flickr I also smoothed the transition into the rib to try and prevent it being too big a stress raiser. clutch cylinder and template to drill the mounts  P1070253 P1070253 by jono_misfit, on Flickr taped in place so I can mark out punch drill points  P1070254 P1070254 by jono_misfit, on Flickr drilled  P1070255 P1070255 by jono_misfit, on Flickr the clutch arm was very rusty, so threw it in the blast cabinet and gave it a quick tickle.  P1070256 P1070256 by jono_misfit, on Flickr I refitted the clutch arm and lined it all up, but i need to have a boss for it to push on and extend out in order to get full range on the clutch movement I made up a quick boss and tacked it on ..... which was too short so cut it off and made longer.  P1070257 P1070257 by jono_misfit, on Flickr  P1070258 P1070258 by jono_misfit, on Flickr Its in the right position but needs some adjustments on length as now its too long.... |
| |
|
|
jonomisfit
Club Retro Rides Member
Posts: 1,788
Club RR Member Number: 49
|
|
Jan 20, 2023 21:02:37 GMT
|
My bits turned up Difficult to see, but I managed to get the through head hose on and the jubilee clamp in.  P1070259 P1070259 by jono_misfit, on Flickr comes out and goes on here  P1070260 P1070260 by jono_misfit, on Flickr swapped out the old plugs for new ones. They are sooty....  P1070261 P1070261 by jono_misfit, on Flickr new plug leads  P1070262 P1070262 by jono_misfit, on Flickr and fitted  P1070263 P1070263 by jono_misfit, on Flickr I bought these HT leads as they were listed as slightly longer than the originals which is good as I will need to relocate the coil pack  P1070264 P1070264 by jono_misfit, on Flickr inlet manifold on and bolted down finally 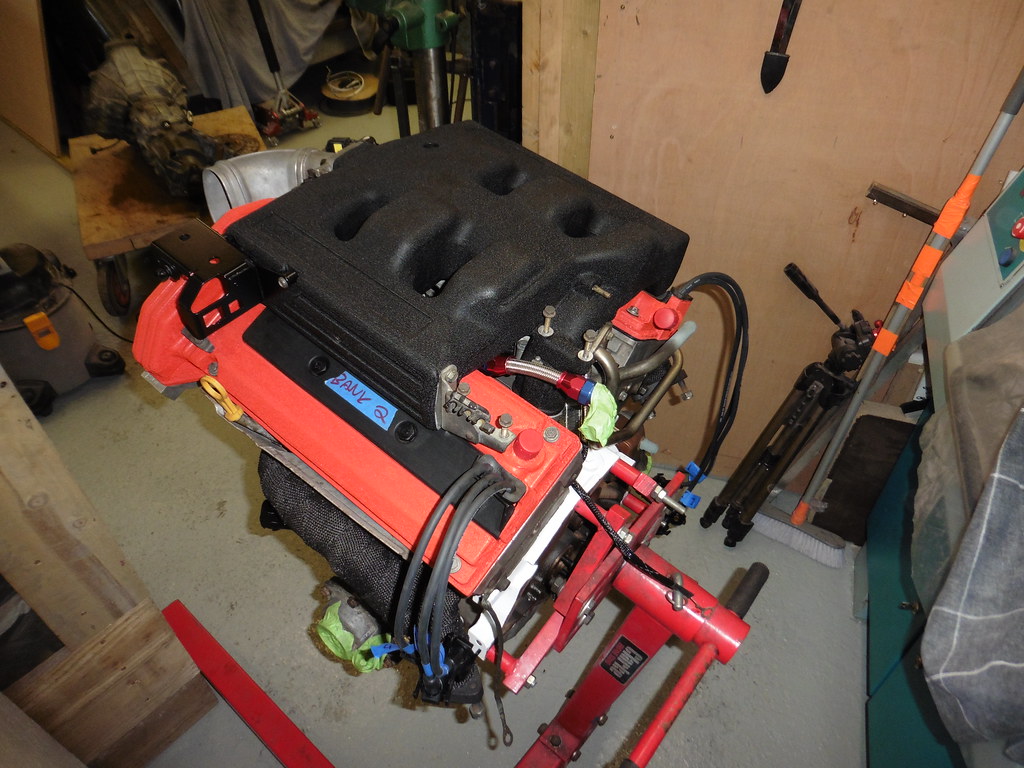 P1070265 P1070265 by jono_misfit, on Flickr  P1070266 P1070266 by jono_misfit, on Flickr then back onto the hydraulic clutch mounting  P1070267 P1070267 by jono_misfit, on Flickr I tweaked the push nose mounting point  P1070268 P1070268 by jono_misfit, on Flickr lines up nicely  P1070269 P1070269 by jono_misfit, on Flickr  P1070270 P1070270 by jono_misfit, on Flickr I bought one of these to allow easy fit removal of the box 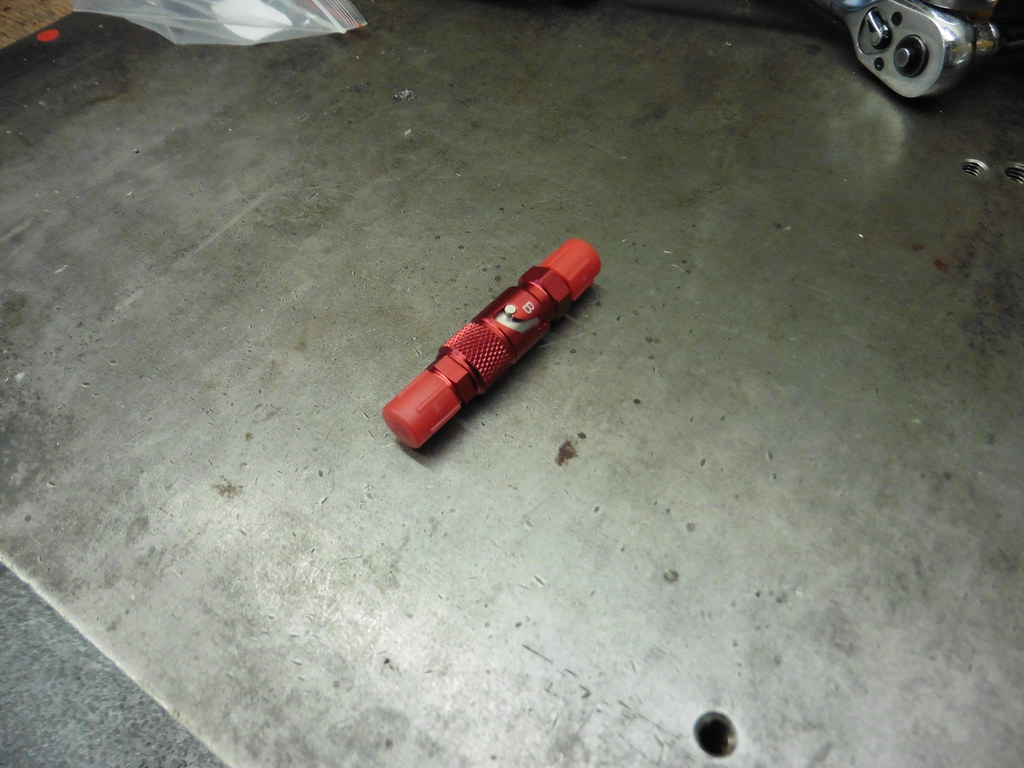 P1070271 P1070271 by jono_misfit, on Flickr dry break coupler splits like so  P1070272 P1070272 by jono_misfit, on Flickr which will be attached to the hose that come off this banjo  P1070273 P1070273 by jono_misfit, on Flickr and the fitting nicley sneaks up between the body and the gearbox casing 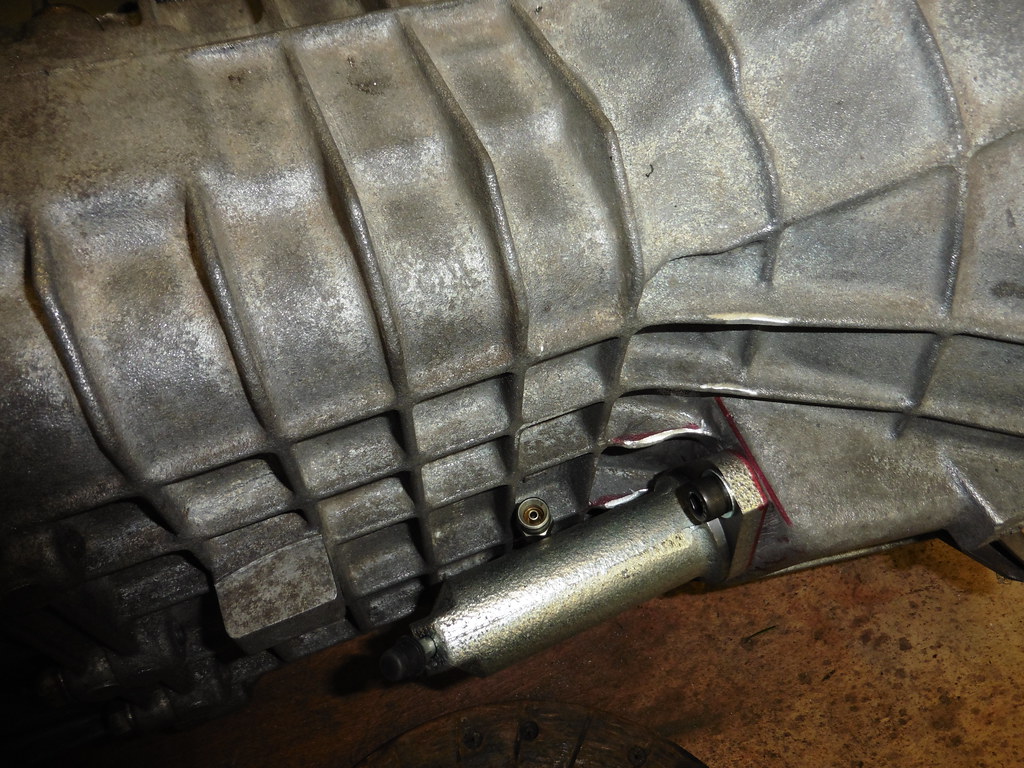 P1070274 P1070274 by jono_misfit, on Flickr |
| |
|
|
|
|
|
Jan 21, 2023 13:27:08 GMT
|
|
what size dry break coupler is that -3 or -4 ?
|
| |
|
|
jonomisfit
Club Retro Rides Member
Posts: 1,788
Club RR Member Number: 49
|
|
Jan 21, 2023 14:09:24 GMT
|
|
Its an AN4 dry break.... however...
It turns out the slave cylinder only has a 3/8" thread for a banjo fitting and I'm now struggling to get an AN4 banjo for a 3/8 bolt.
I may need to go to AN3 hose and buy an AN3 dry break to get it to work.
That seems like the least resistance at this point, but if I have clutch actuation issues I may need to re-visit it.
|
| |
|
|
jonomisfit
Club Retro Rides Member
Posts: 1,788
Club RR Member Number: 49
|
|
Jan 21, 2023 14:17:20 GMT
|
|
My Google fu must have been weak yesterday.... 5 minutes just found me some....
I've ordered them
|
| |
|
|
jonomisfit
Club Retro Rides Member
Posts: 1,788
Club RR Member Number: 49
|
|
Jan 22, 2023 20:57:11 GMT
|
I was going to strip down, blast, and paint the gear shift cradle as its pretty rusty. But i found this in my stocks instead.  P1070276 P1070276 by jono_misfit, on Flickr much better, will use this. Just need to swap over the mounts and the quick shift selector out  P1070277 P1070277 by jono_misfit, on Flickr bushes out. used two sockets and the press  P1070278 P1070278 by jono_misfit, on Flickr both all stripped down  P1070279 P1070279 by jono_misfit, on Flickr swapping over the shift mechanism  P1070280 P1070280 by jono_misfit, on Flickr bushes in  P1070281 P1070281 by jono_misfit, on Flickr cradle test fit 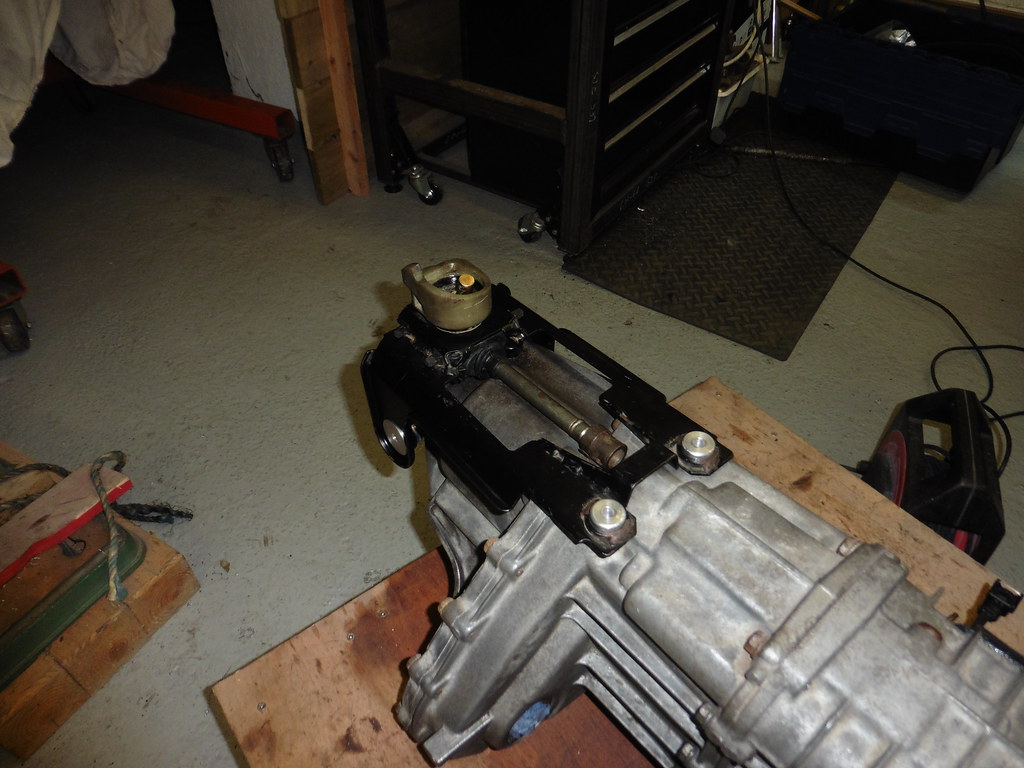 P1070282 P1070282 by jono_misfit, on Flickr when I started bolting up the cradle this bolt just spun... that'll be why. stripped.  P1070283 P1070283 by jono_misfit, on Flickr nothing a helicoil cant fix  P1070284 P1070284 by jono_misfit, on Flickr cradle on  P1070285 P1070285 by jono_misfit, on Flickr  P1070286 P1070286 by jono_misfit, on Flickr then got the flywheel out and gave it a quick clean over with the wire brushes 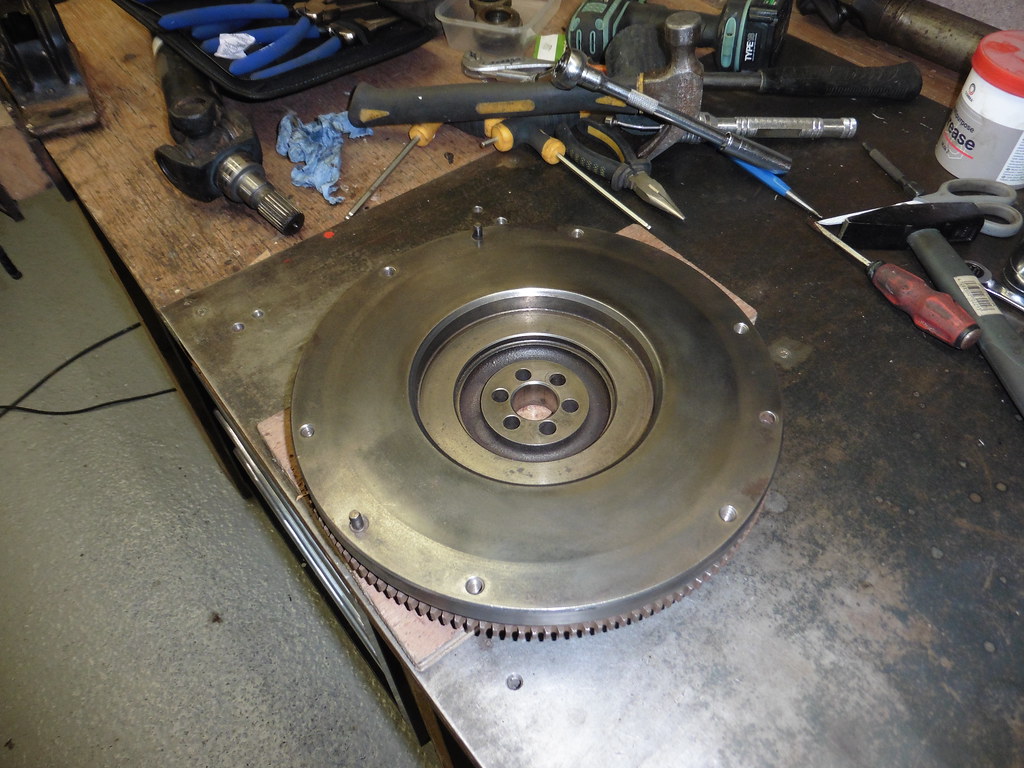 P1070289 P1070289 by jono_misfit, on Flickr and eventually found the clutch cover plate  P1070290 P1070290 by jono_misfit, on Flickr I gave it a quick clean and assemble to check it all. |
| |
|
|
jonomisfit
Club Retro Rides Member
Posts: 1,788
Club RR Member Number: 49
|
|
Jan 22, 2023 21:10:05 GMT
|
then dug out the starter motor. I wasnt hopeful of this working due to how long its been sat  P1070291 P1070291 by jono_misfit, on Flickr  P1070292 P1070292 by jono_misfit, on Flickr It turns, and the connections look useable. So bolted it onto the gearbox to give it some stability for a test 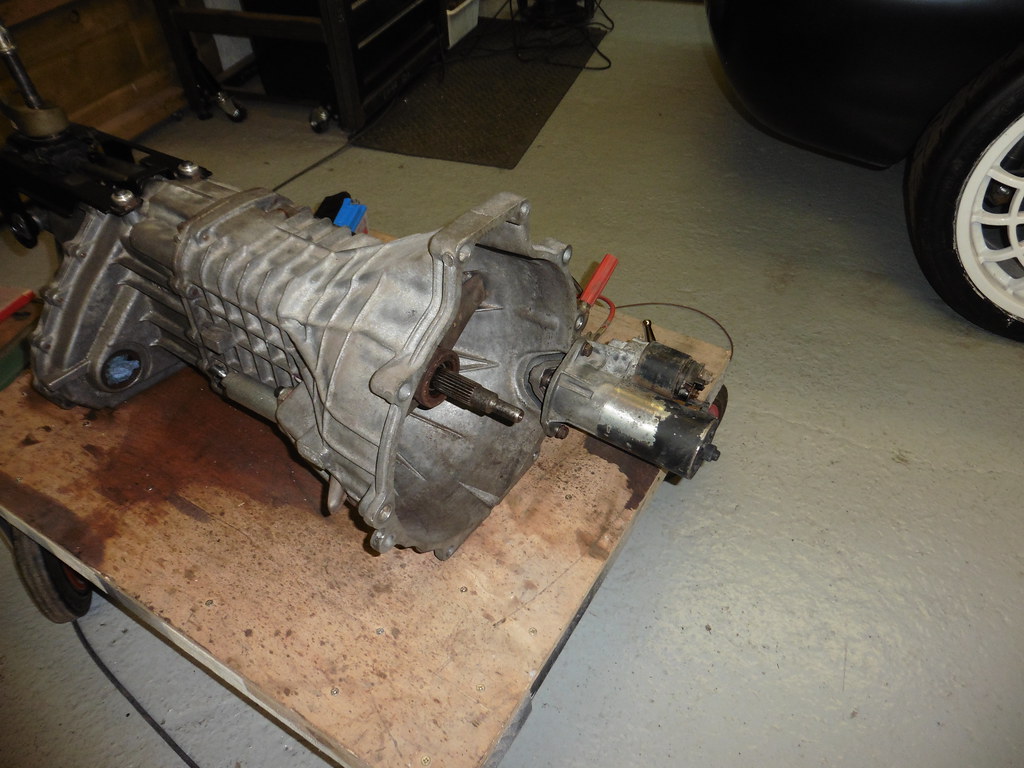 P1070293 P1070293 by jono_misfit, on Flickr Applied jump leads and a bridge to the solenoid input.... and nothing. Even bypassing the solenoid of the starter didnt get that turning. Let see what its guts look like looks remarkably like a motor :-) 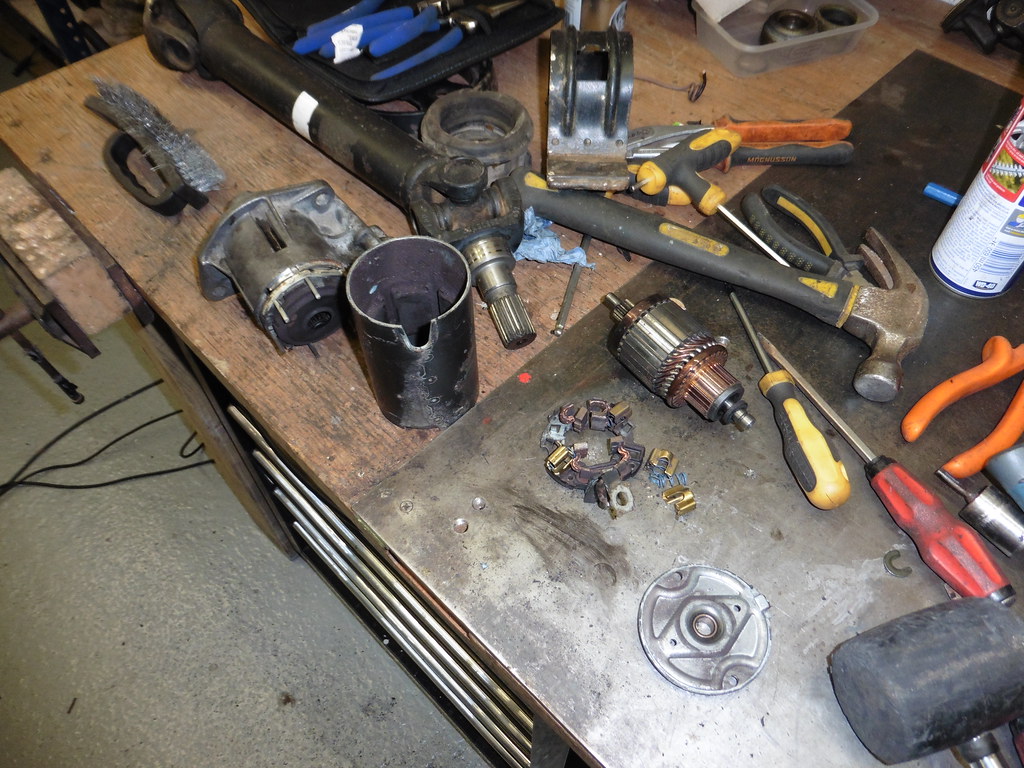 P1070294 P1070294 by jono_misfit, on Flickr The brushes still have a fair life in them, no signs of shorting, reduction gearbox is very sticky, and bearing are ok. Gave it all a clean down and reassembled it. then bolted it back onto the gearbox. Success, spins and the solenoid throws again.  P1070295 P1070295 by jono_misfit, on Flickr Gave the clutch fork a clean down and paint with high temp paint. 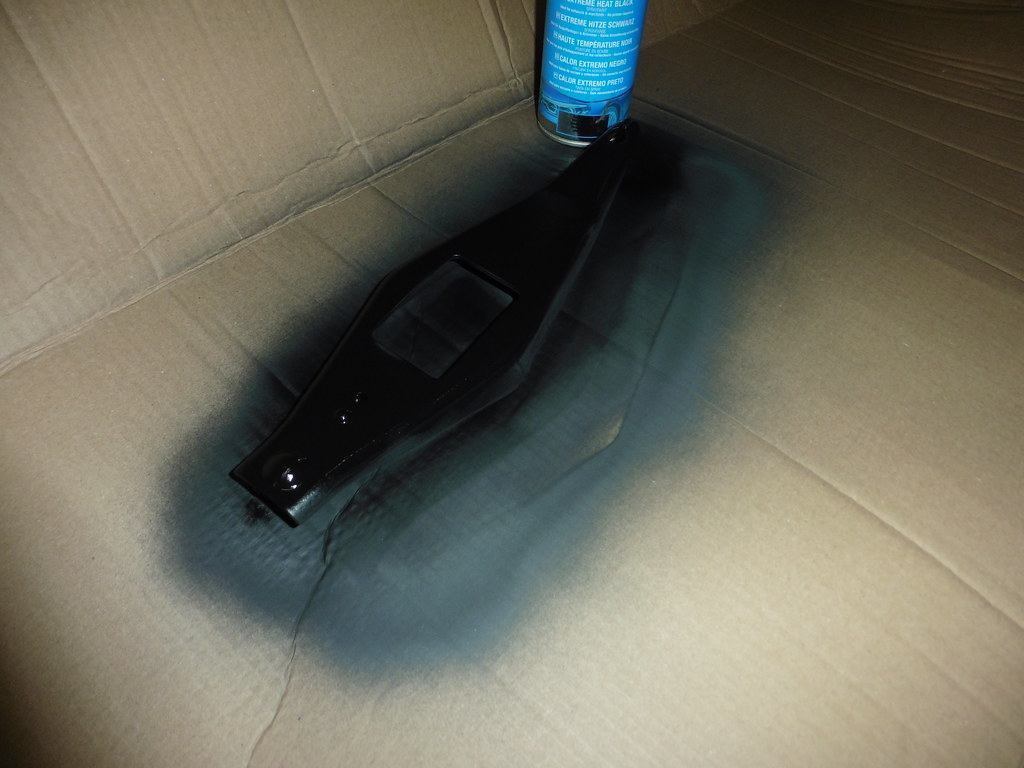 P1070296 P1070296 by jono_misfit, on Flickr then decided the workshop was looking too clean so gave the subframe a clean over and got dust everywhere  P1070297 P1070297 by jono_misfit, on Flickr Dug the mounts out from a box  P1070298 P1070298 by jono_misfit, on Flickr bolted in  P1070299 P1070299 by jono_misfit, on Flickr then bolted the subrame to the engine.... which was not easy as the new mounts are "competition" spec and are very still. But got there 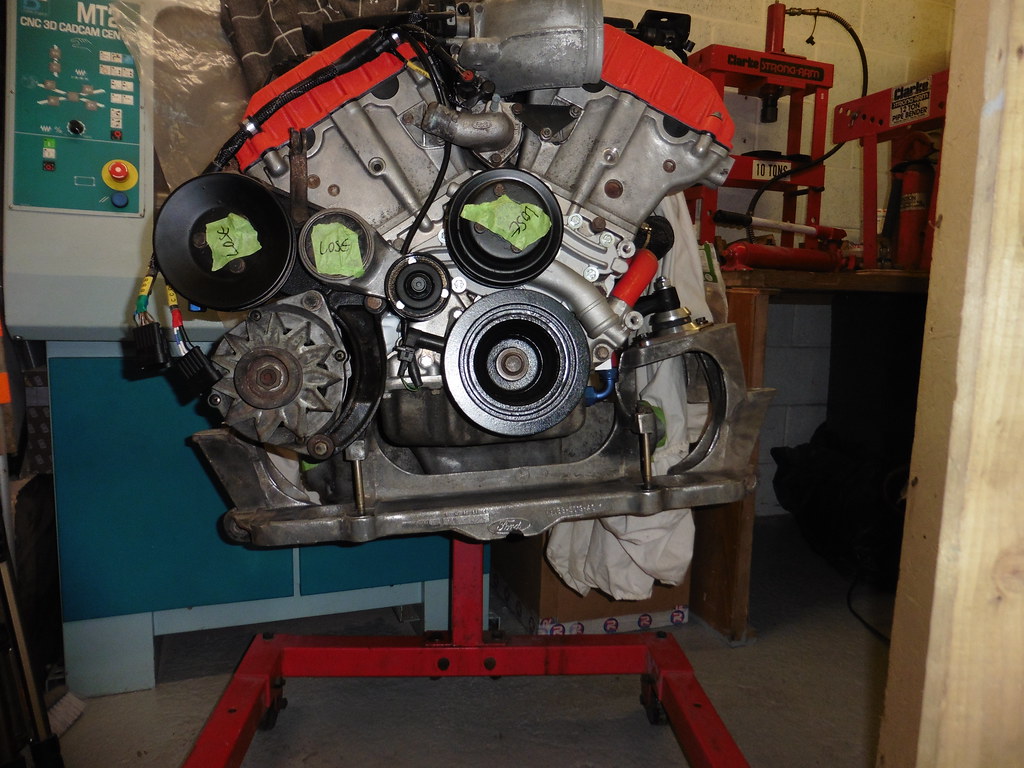 P1070300 P1070300 by jono_misfit, on Flickr and bolted in the gearbox mount  P1070301 P1070301 by jono_misfit, on Flickr and as I had a spare 5 mins I gave a few bits a rough prep ready for some paint. 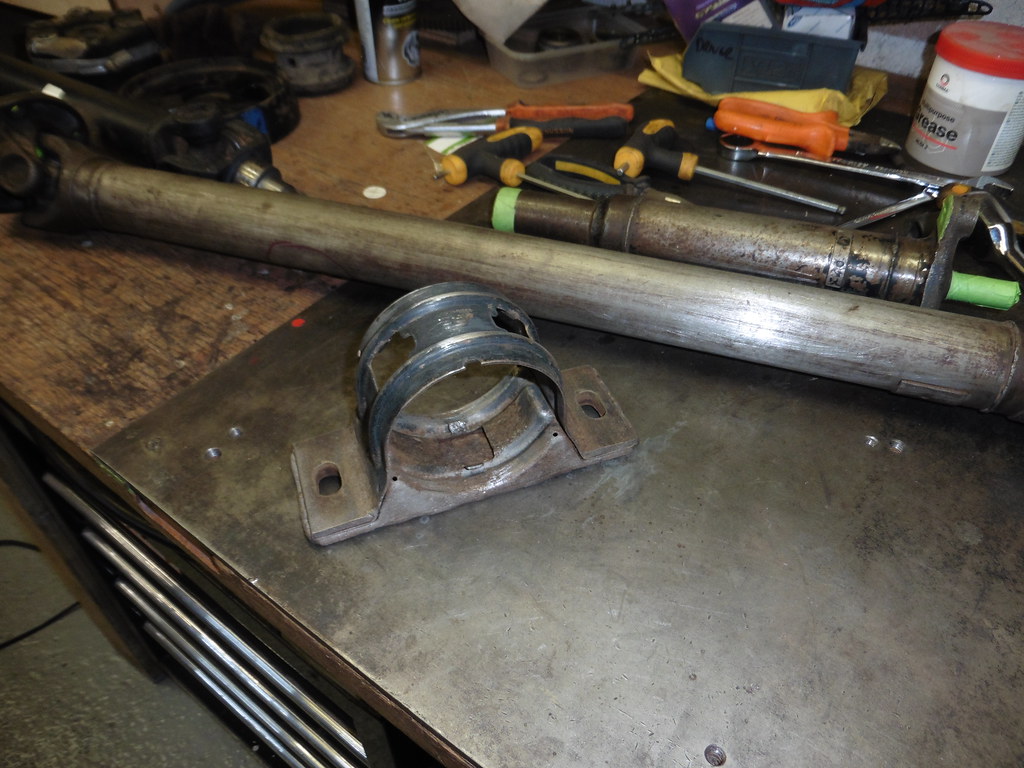 P1070302 P1070302 by jono_misfit, on Flickr |
| |
|
|
jonomisfit
Club Retro Rides Member
Posts: 1,788
Club RR Member Number: 49
|
|
Jan 27, 2023 21:49:33 GMT
|
My 3/8 AN4 banjo fittings turned up so i test fitted one  P1070303 P1070303 by jono_misfit, on Flickr  P1070304 P1070304 by jono_misfit, on Flickr clutch arm (painted in high temp paint) fitted back in plus a new clutch release bearing  P1070305 P1070305 by jono_misfit, on Flickr gave the prop parts a flat, then a go over with etch primer  P1070306 P1070306 by jono_misfit, on Flickr whilst waiting for that to dry I test assebled the compression struts for the car 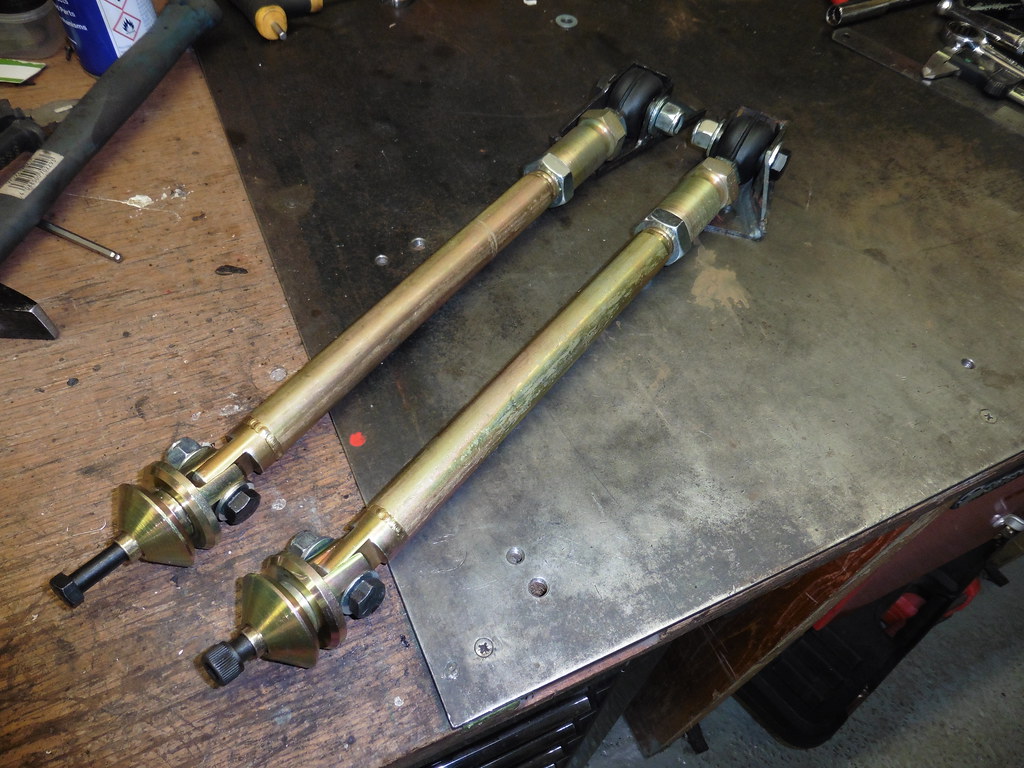 P1070307 P1070307 by jono_misfit, on Flickr What didnt help was one of the brackets was made 3mm too narrow to get the rod end fitted, so i needed to reform it a bit.... primer had dried, so gave a go over with some black.  P1070308 P1070308 by jono_misfit, on Flickr At this point I was doing something at the bench and looked up to see a little colum of smoke rising.... hmmm.... what could that be.... oh... its a socket burning up a bit. I had the 2.5KW heater on, plugged into one of the sockets i'd fitted.... which happened to be the old one... my assumption is there was corrossion inside causing a high impedence, which caused it to heat up with the heater on. I swapped out to a new socket and replaced the plug on the extension. All sorted other than the rank smell in the workshop all afternoon. back to the gearbox. Making up the hose for the gearbox  P1070309 P1070309 by jono_misfit, on Flickr it'll run over the top here  P1070310 P1070310 by jono_misfit, on Flickr and down to here 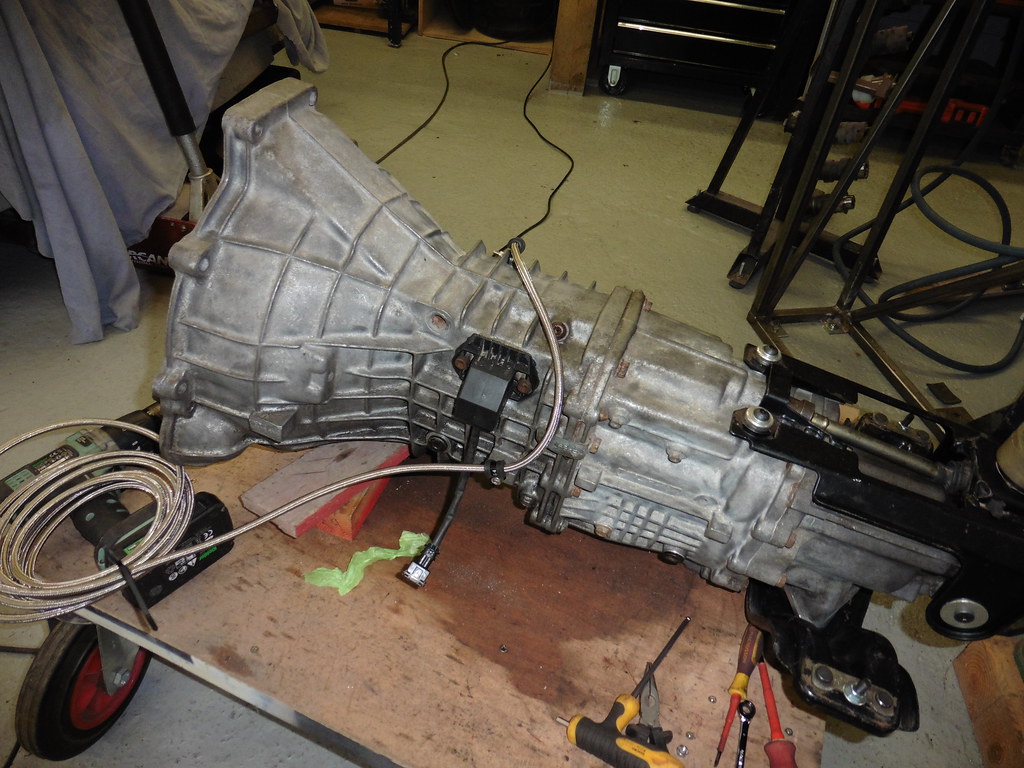 P1070311 P1070311 by jono_misfit, on Flickr one of the machining reference points makes a handy point to thread for a clip  P1070312 P1070312 by jono_misfit, on Flickr The braided hoses have the ability to saw their way through aluminium quickly with the slightest level of movement, so have put wrap on it to stave it off  P1070313 P1070313 by jono_misfit, on Flickr  P1070314 P1070314 by jono_misfit, on Flickr and fitted the receptacle side of the dry break connector. painted prop parts ready for reassembly  P1070315 P1070315 by jono_misfit, on Flickr |
| |
|
|
|
|
|
Jan 28, 2023 12:11:21 GMT
|
|
nice work I'm going to do the same on my gearbox i may put the dry disconect on the bulkhead i have seen them that are a bulkhead fitting.
|
| |
|
|
jonomisfit
Club Retro Rides Member
Posts: 1,788
Club RR Member Number: 49
|
|
Jan 28, 2023 13:03:35 GMT
|
|
I though about doing that as well, but I don't really want anything sticking out as it's all getting quite tight.
|
| |
|
|
jonomisfit
Club Retro Rides Member
Posts: 1,788
Club RR Member Number: 49
|
|
Jan 29, 2023 20:58:20 GMT
|
I found a piece of tube the right size and gently tapped in the centre bearing  P1070316 P1070316 by jono_misfit, on Flickr fitted the circlip and detritus deflector  P1070317 P1070317 by jono_misfit, on Flickr then fitted the bush into the housing and slid over the bearing  P1070318 P1070318 by jono_misfit, on Flickr bolted the donut to the front piece of the prop  P1070319 P1070319 by jono_misfit, on Flickr then lifted the engine off the engine stand  P1070320 P1070320 by jono_misfit, on Flickr cleaned round the rear crank oil seal and removed  P1070321 P1070321 by jono_misfit, on Flickr and fitted the new one  P1070322 P1070322 by jono_misfit, on Flickr cleaned up and painted the bellhousing steel shim gasket  P1070323 P1070323 by jono_misfit, on Flickr then fitted and torqued up the flywheel  P1070324 P1070324 by jono_misfit, on Flickr to do the next job i needed to have a quick session on the lathe  P1070325 P1070325 by jono_misfit, on Flickr i really really need to clean the lathe area and put the rear housing back on and ended up with this.  P1070326 P1070326 by jono_misfit, on Flickr A clutch plate aligning tool  P1070327 P1070327 by jono_misfit, on Flickr and clutch cover on  P1070328 P1070328 by jono_misfit, on Flickr with a bit of swearing I got the gearbox on.... 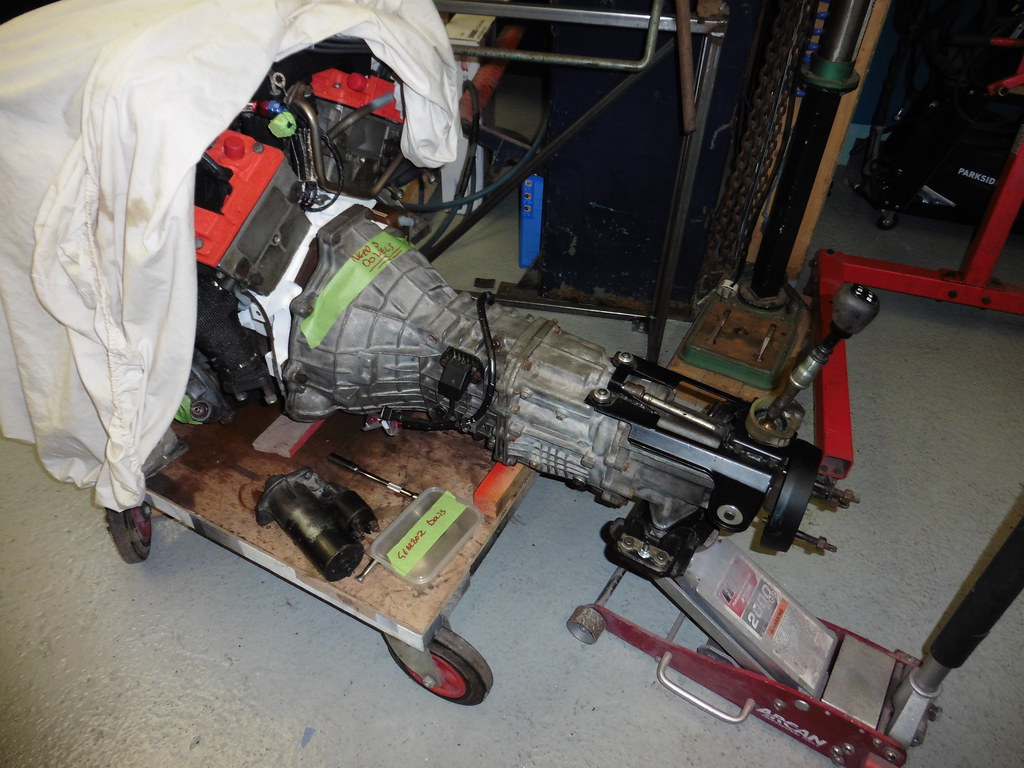 P1070329 P1070329 by jono_misfit, on Flickr The realised there were no dowels on either the engine or the gearbox.... Doh.... ordered. So box will need to come back off As it will become inaccessible once the gearbox is in continued on with fitting the heat shielding on the gearbox tunnel 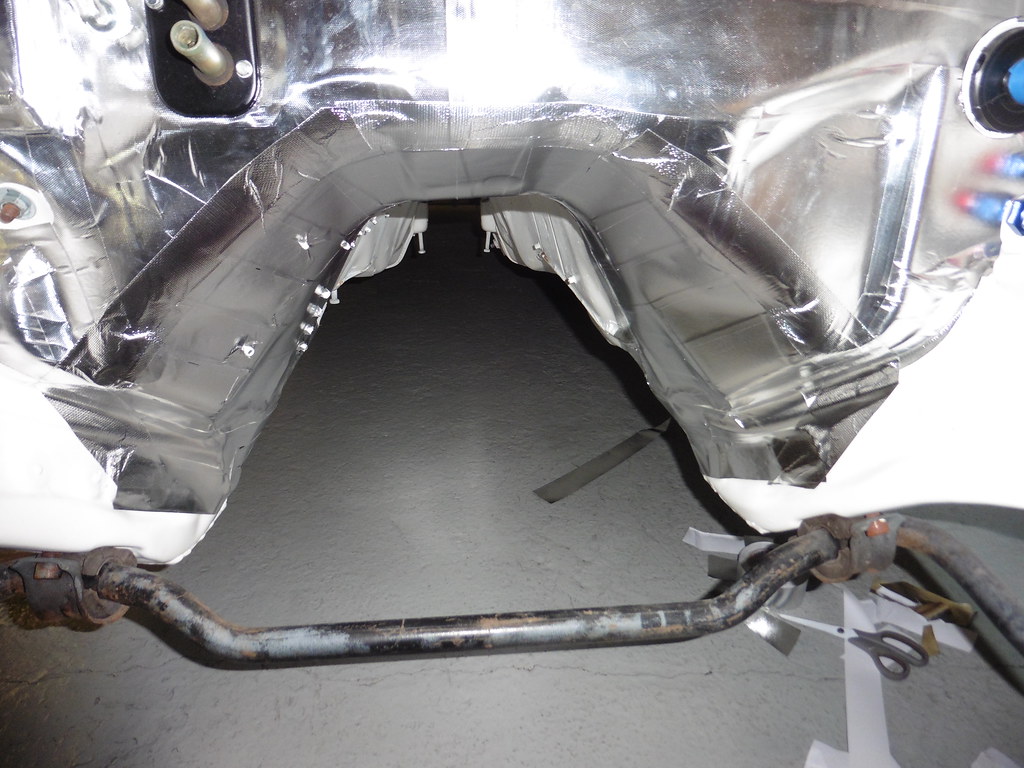 P1070330 P1070330 by jono_misfit, on Flickr still quite a way to go.  P1070331 P1070331 by jono_misfit, on Flickr As its just multiple double curvature I reverted to using 50mm wide strips and fitting that rather than the big sheet. Still a long way to go.... Hopefully i'll get to have fun putting some more of that on during the week. |
| |
|
|
jonomisfit
Club Retro Rides Member
Posts: 1,788
Club RR Member Number: 49
|
|
|
|
After quite a fight I managed to get the transfer box to prop seal out  P1070332 P1070332 by jono_misfit, on Flickr fitted the new seal  P1070333 P1070333 by jono_misfit, on Flickr Despite a lot of looking and a gamble ordering up what "could" have been the right dowels I couldnt find any I need them to go here to align the engine box  P1070334 P1070334 by jono_misfit, on Flickr I need to make something like this then  P1070335 P1070335 by jono_misfit, on Flickr some EN24T in the lathe  P1070336 P1070336 by jono_misfit, on Flickr ended up with these  P1070337 P1070337 by jono_misfit, on Flickr nice tap in fit  P1070338 P1070338 by jono_misfit, on Flickr  P1070339 P1070339 by jono_misfit, on Flickr and it all lined up and pulled up tight nicely Bolted the front prop in  P1070340 P1070340 by jono_misfit, on Flickr  P1070341 P1070341 by jono_misfit, on Flickr I tried the starter motor, however its about 20mm too long to fit past the pasenger side front output shaft support. Hmm i'll measure it up tomorrow, then my dad is going to check his collection of starter motors. The original one must be there somewhere. i then thought i'd check what mods i'm going to have to make to the exhaust down pipes as its designed for RWD, not AWD so will clash with the front prop Passenger side fits easily  P1070342 P1070342 by jono_misfit, on Flickr and there's plenty of room to make it fit tighter in the tunnel as well  P1070343 P1070343 by jono_misfit, on Flickr this is the side that has no chance of fitting.... what the  P1070344 P1070344 by jono_misfit, on Flickr looks like its touching, but its 20mm clear  P1070345 P1070345 by jono_misfit, on Flickr the only bit that clashes is this where its just touching the bottom of the transfer box case  P1070346 P1070346 by jono_misfit, on Flickr I should be able to adjust this to get a decent down pipe. |
| |
|
|
jonomisfit
Club Retro Rides Member
Posts: 1,788
Club RR Member Number: 49
|
|
|
|
I need to rebuild the steering rack. Which has been living in a shed for a long time. I have an XR4x4 rack rather than a cosworth rack. From what I can find online it turns out a cosworth rack is 2.3 turns lock to lock, and an xr4x4 rack is 2.5 turns lock to lock. However From what I can find it also looks like cosworth racks have lock stops to reduce the angle you can turn the strut to. So the 2.5 turn rack may not be too bad.  P1070347 P1070347 by jono_misfit, on Flickr get the track rods off.. which was a pain as there is a peined over part  P1070348 P1070348 by jono_misfit, on Flickr wind out the retaining clip ring  P1070349 P1070349 by jono_misfit, on Flickr official ford tool used..... end support  P1070350 P1070350 by jono_misfit, on Flickr preload adjuster.... which has no threads left on the cap so not sure how effective its been  P1070351 P1070351 by jono_misfit, on Flickr retaining nut off  P1070352 P1070352 by jono_misfit, on Flickr pinion out  P1070353 P1070353 by jono_misfit, on Flickr rack out  P1070354 P1070354 by jono_misfit, on Flickr and pressed out the rubber bushes as I'll be making aluminium bushes to solid mount the rack  P1070355 P1070355 by jono_misfit, on Flickr I'll give it a blast, clean, and paint tomorrow. |
| |
|
|
 P1070177 by jono_misfit, on Flickr
 P1070178 by jono_misfit, on Flickr
 P1070179 by jono_misfit, on Flickr
 P1070180 by jono_misfit, on Flickr
 P1070181 by jono_misfit, on Flickr
 P1070182 by jono_misfit, on Flickr
 P1070183 by jono_misfit, on Flickr
 P1070184 by jono_misfit, on Flickr
 P1070185 by jono_misfit, on Flickr
 P1070177 by jono_misfit, on Flickr
 P1070178 by jono_misfit, on Flickr
 P1070179 by jono_misfit, on Flickr
 P1070180 by jono_misfit, on Flickr
 P1070181 by jono_misfit, on Flickr
 P1070182 by jono_misfit, on Flickr
 P1070183 by jono_misfit, on Flickr
 P1070184 by jono_misfit, on Flickr
 P1070185 by jono_misfit, on Flickr


