|
|
|
Oct 12, 2019 19:50:39 GMT
|
So a short term job on a clients car but a fair list to get through 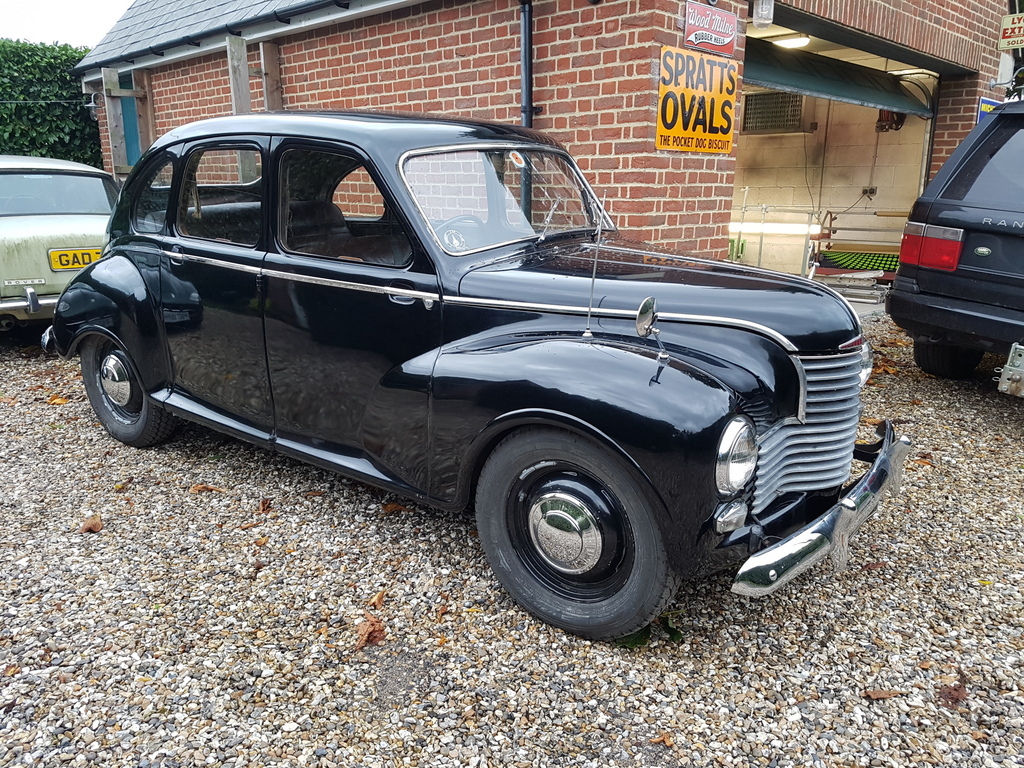 The car has been in regular use but it now requires some TLC in some of the structural areas along with some of the cosmetics 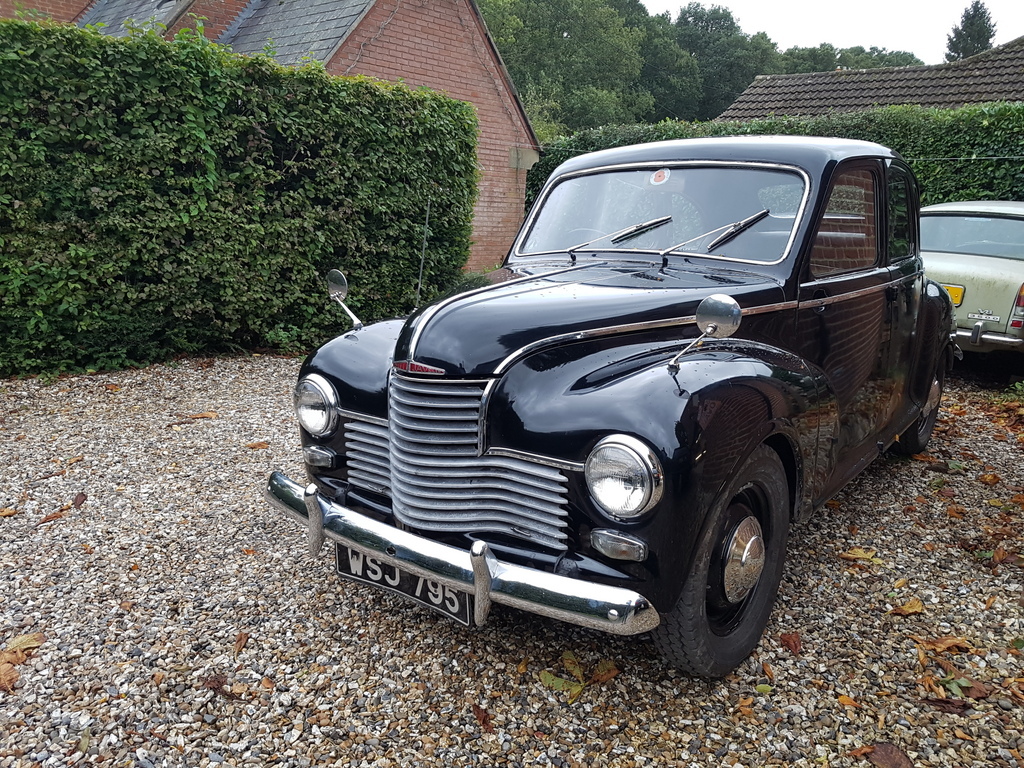 Said list and I keep finding more to add to it 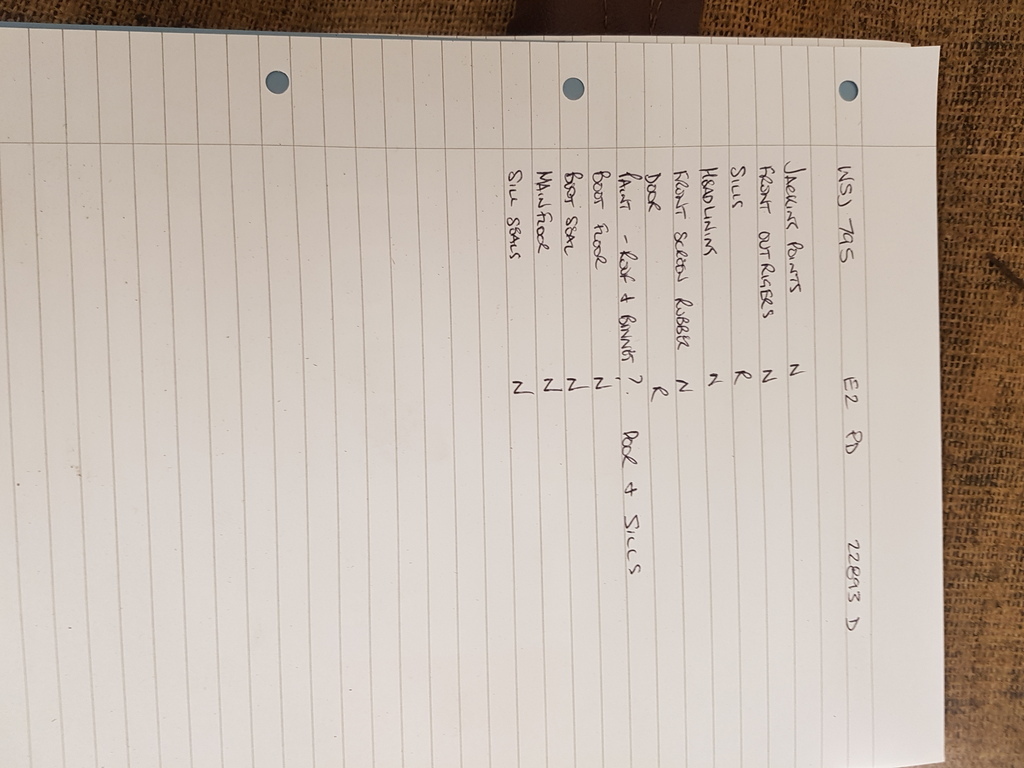 First job is to take the front bench seat out (not easy by any stretch of the imagination and its very heavy) 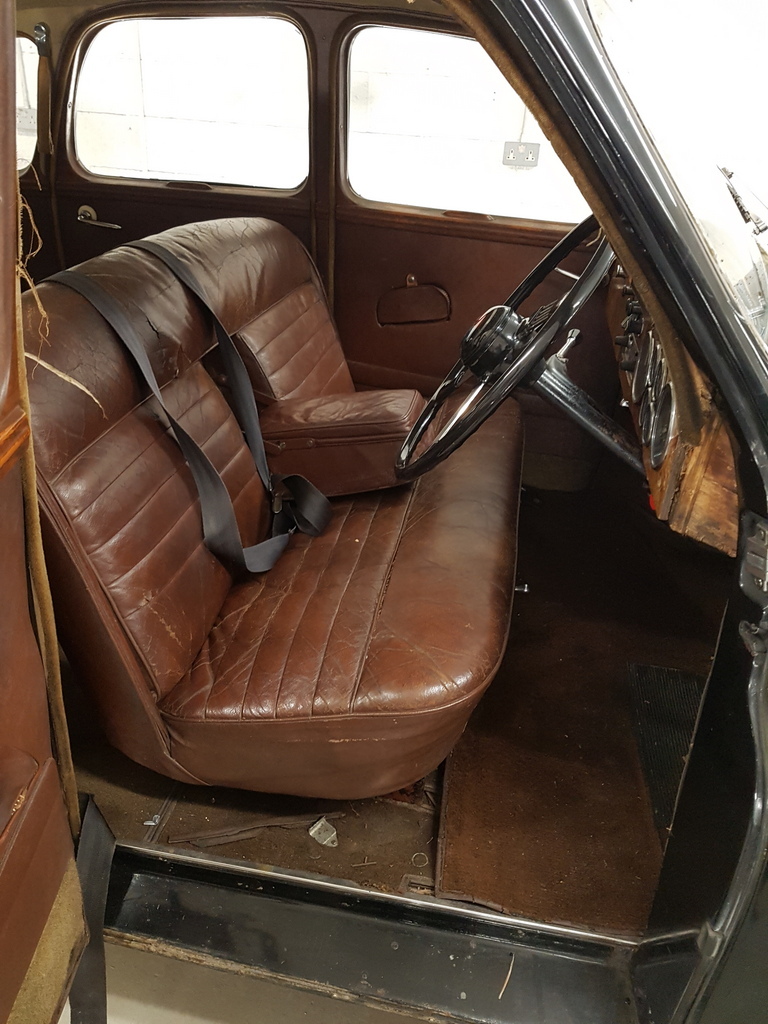 Some of the inner trim gets removed at the same time along with the well worn carpets Which in turn reveals this 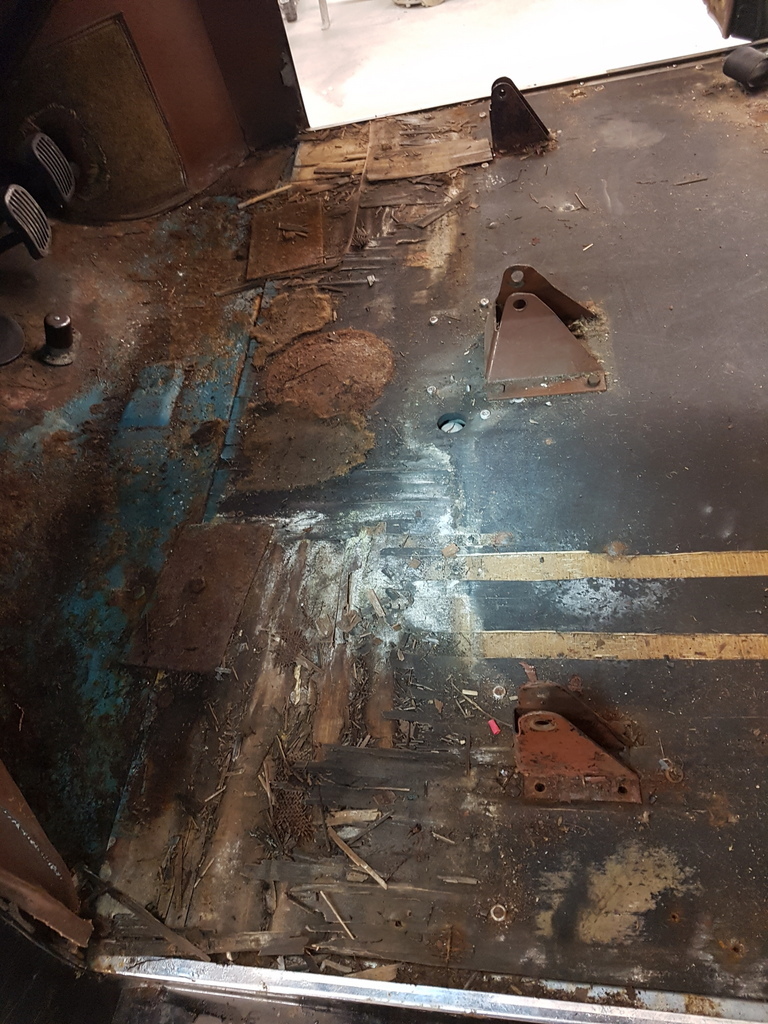 The ply floor is original to the car - when these cars get to a certain age the windscreen & rear window start to leak like sieves - front screen is a nightmare to fit and avoided by most windscreen companies let alone owners of the cars - so a screen refit with a new rubber is avoided by the vast majority of owners - to be fair the fitting of curved glass windscreens was in it's infancy when the Javelin was launched - in fact it was the worlds first production car to have a curved glass windscreen - hence the fitting of it was not perfected by any stretch of the imagination - So Javelin windscreens are left to leak and the rest of the car suffers around it - One very rotten ply floor - which has to come out to allow the structural welded repairs required underneath it - more tomorrow |
| |
Last Edit: May 26, 2020 17:39:19 GMT by Deleted
|
|
|
|
|
|
|
Oct 13, 2019 16:28:28 GMT
|
 Rear footwell on its way out 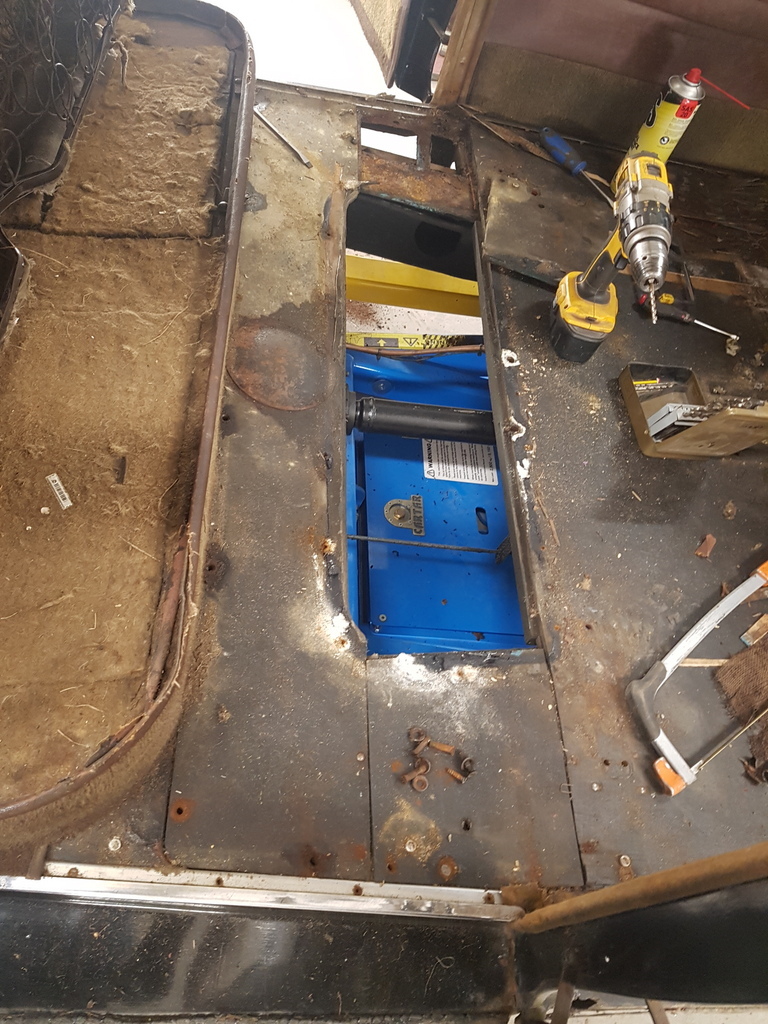 Although some of the countersunk screws that retain the ply floor came out I had to drill the heads off the vast majority of them has they were seized 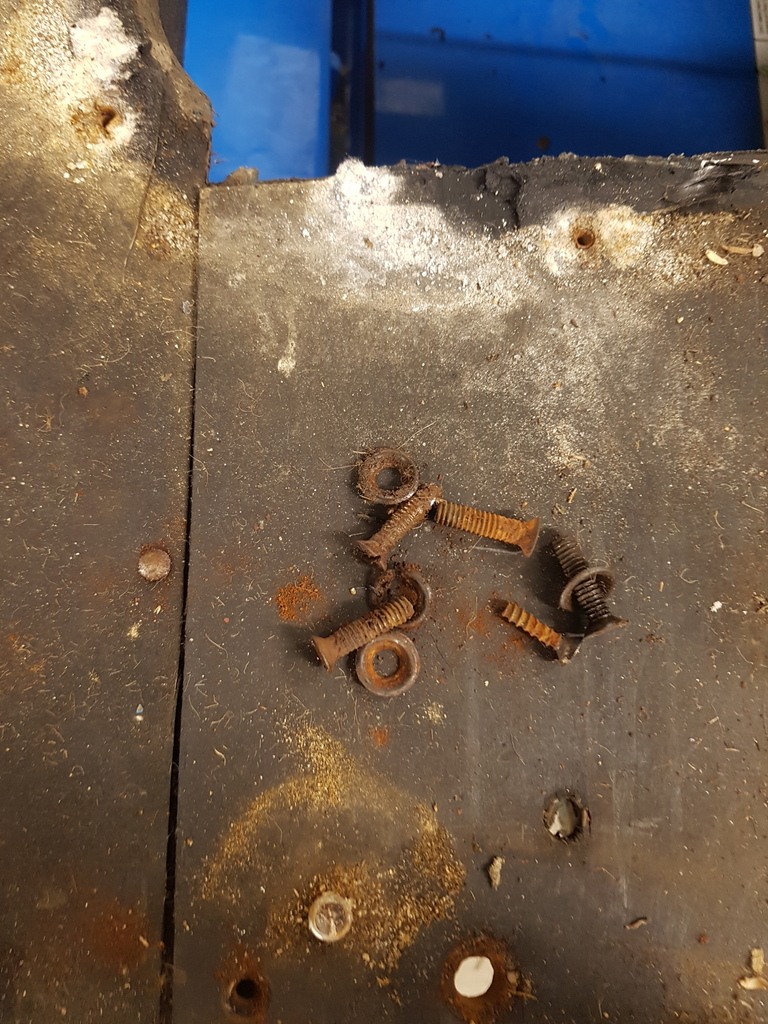 Then out with the floor 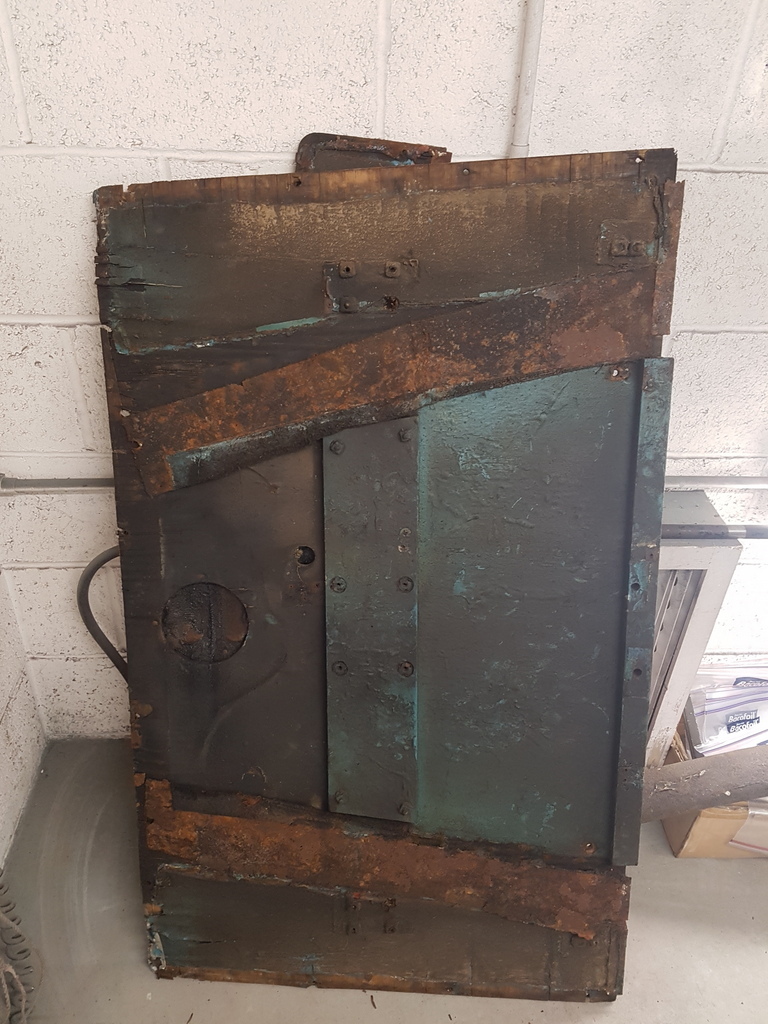 Direct from the book of 'Stupid Ideas Utilised in Car Production' is this - lets just place a water absorbent felt between the floor and the metal box section chassis 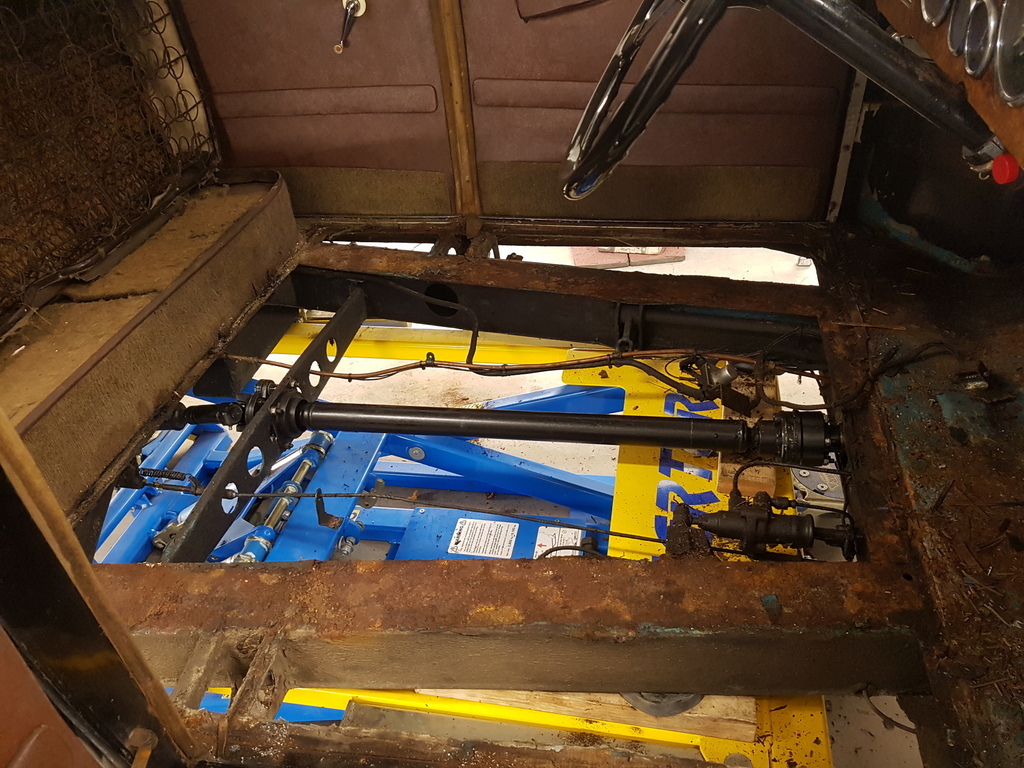 Net result - very rusty chassis rails - however still sound and should clean up ok  The Javelin is a unitary body construction which was pretty new to the automotive industry when the car was first launched in 1947 - the majority of other manufactures were still using a separate chassis & body construction 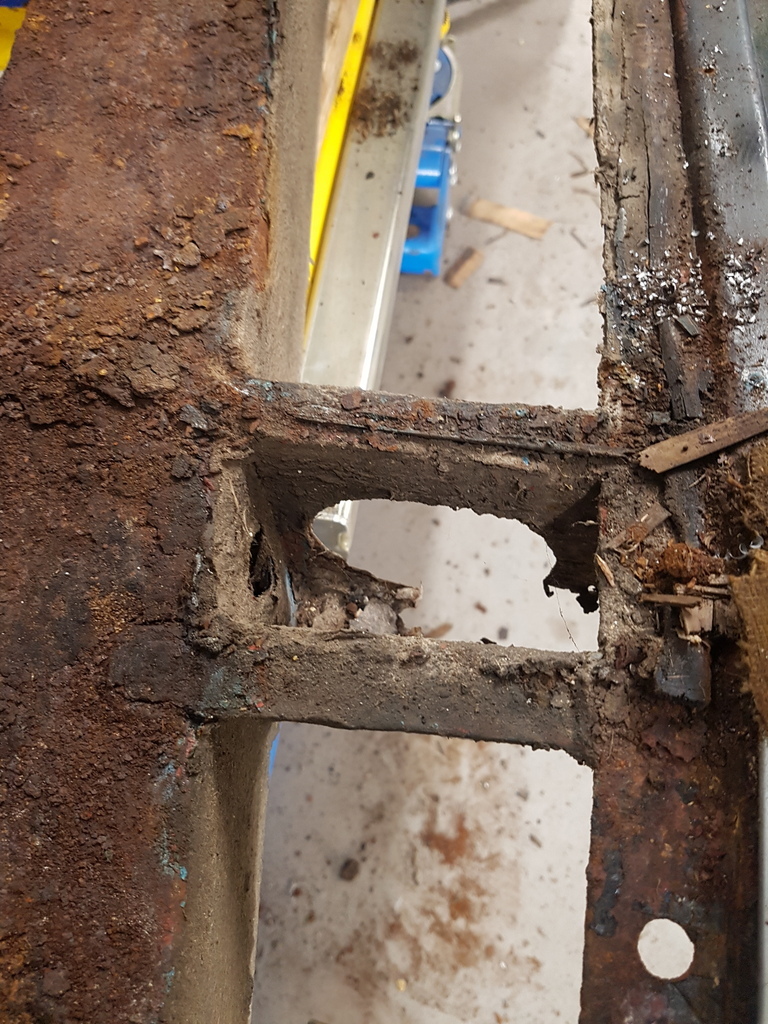 I can now access the out riggers & jacking points 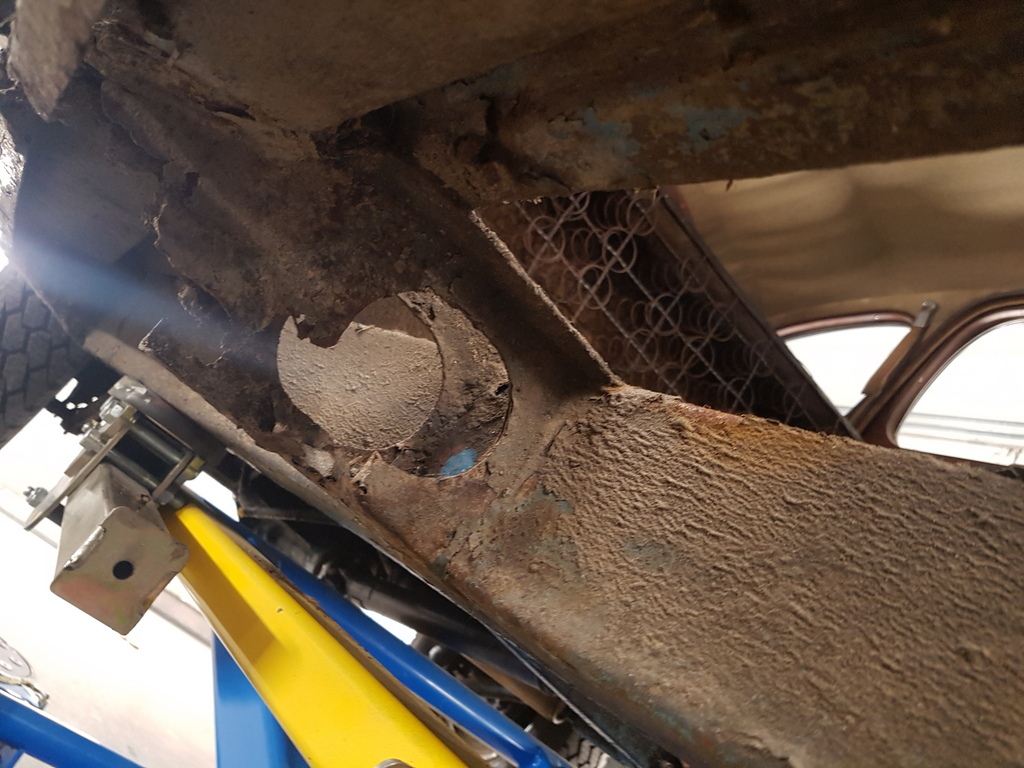 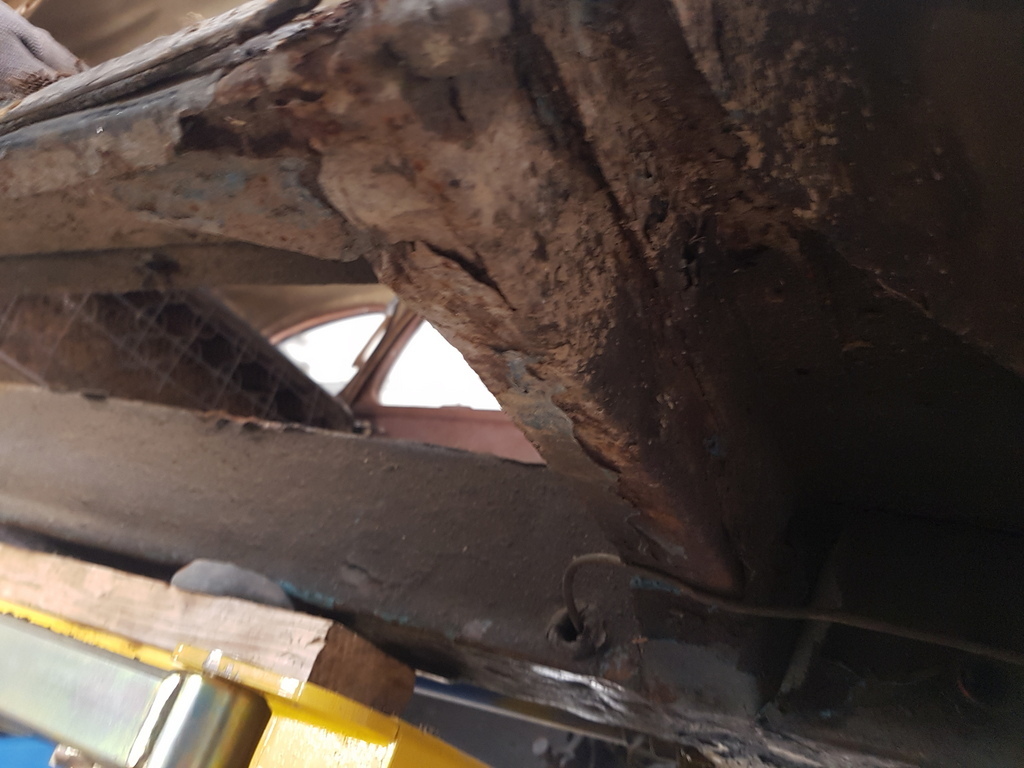 There is also some work required on the offside front sill panel 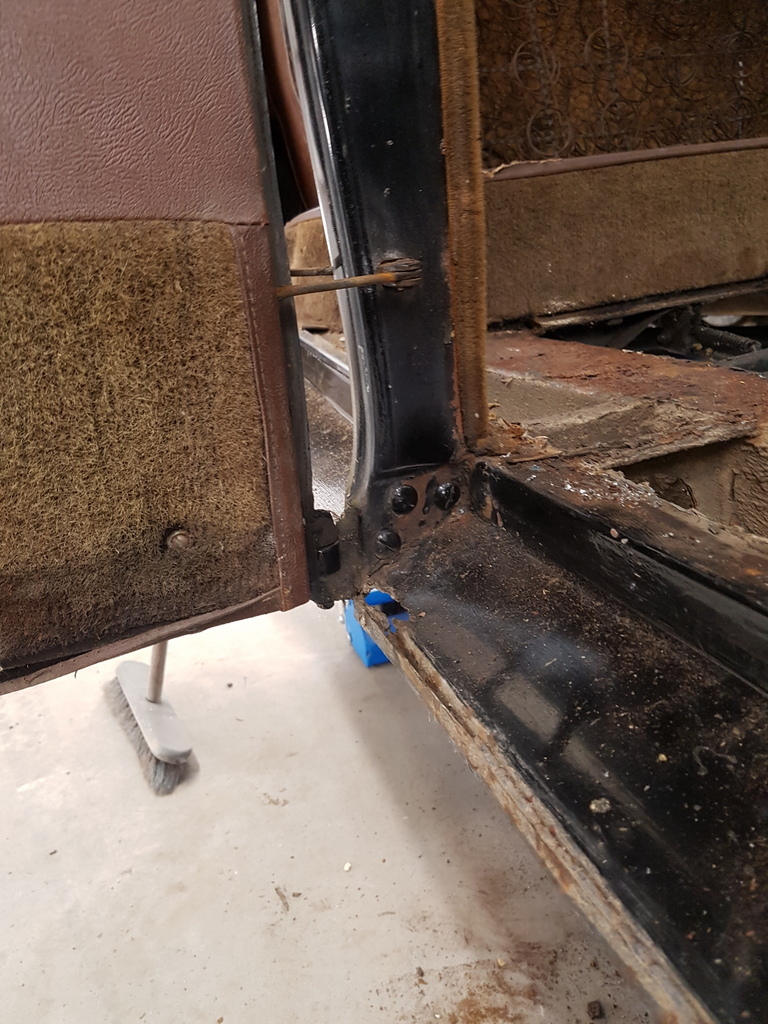 Along with some work on the front floor / toe board - this looks like someone has been at work with a sheet of metal which is retained with pop rivets 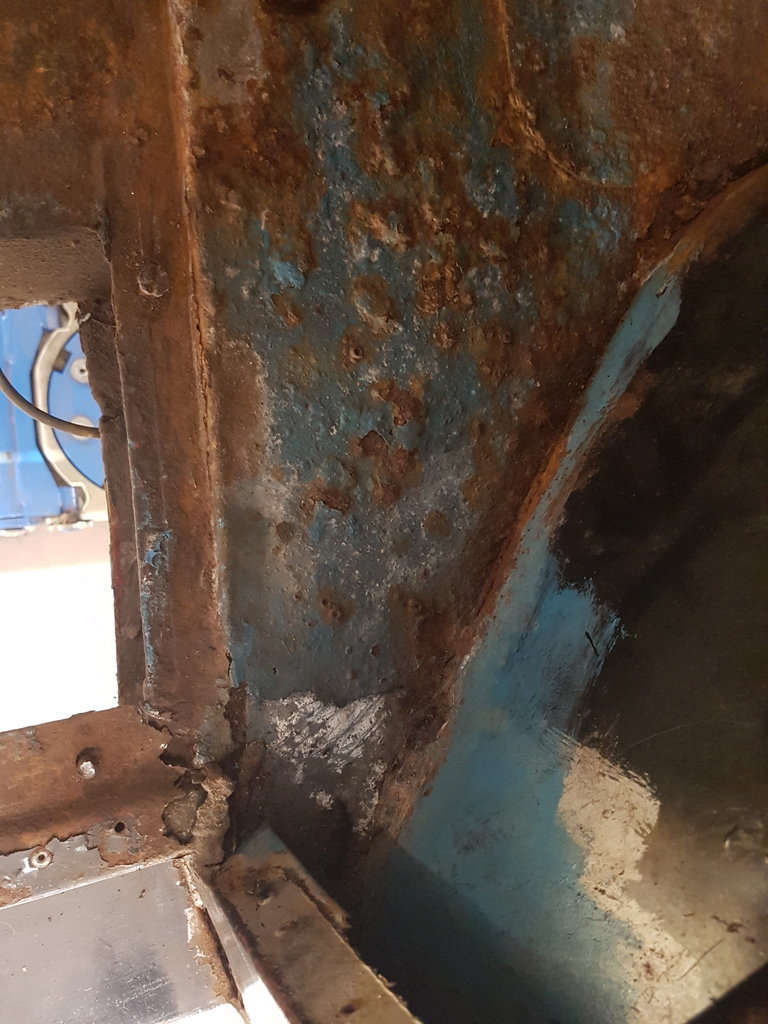 Outriggers & jacking points are available has a replacement unit 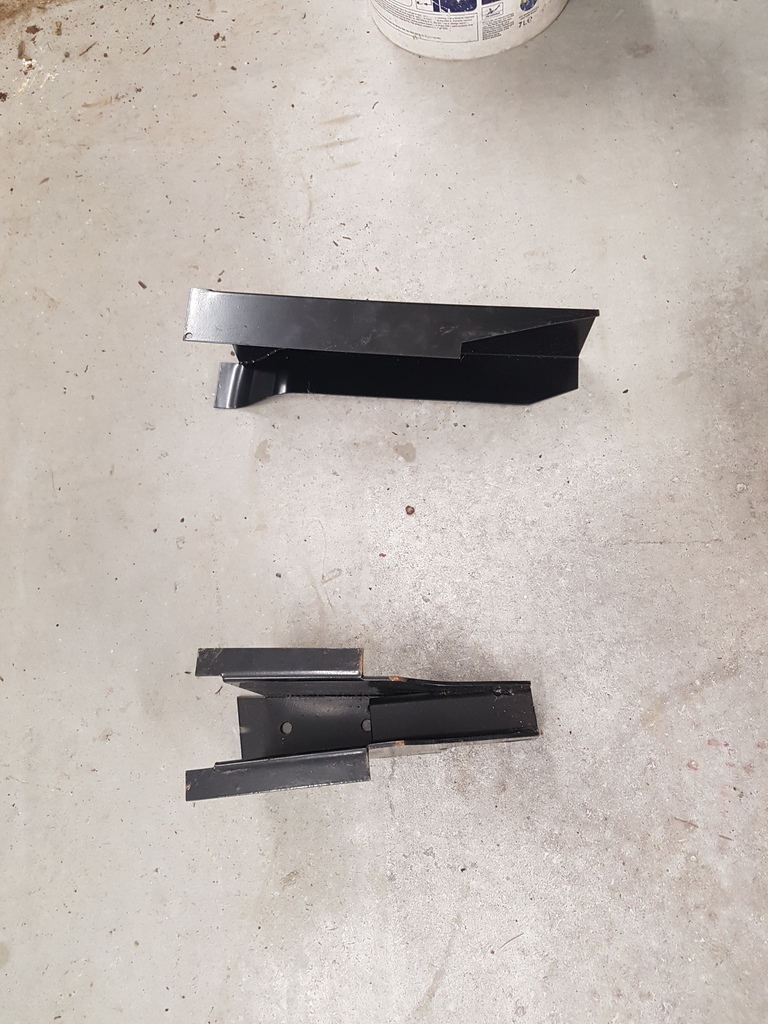 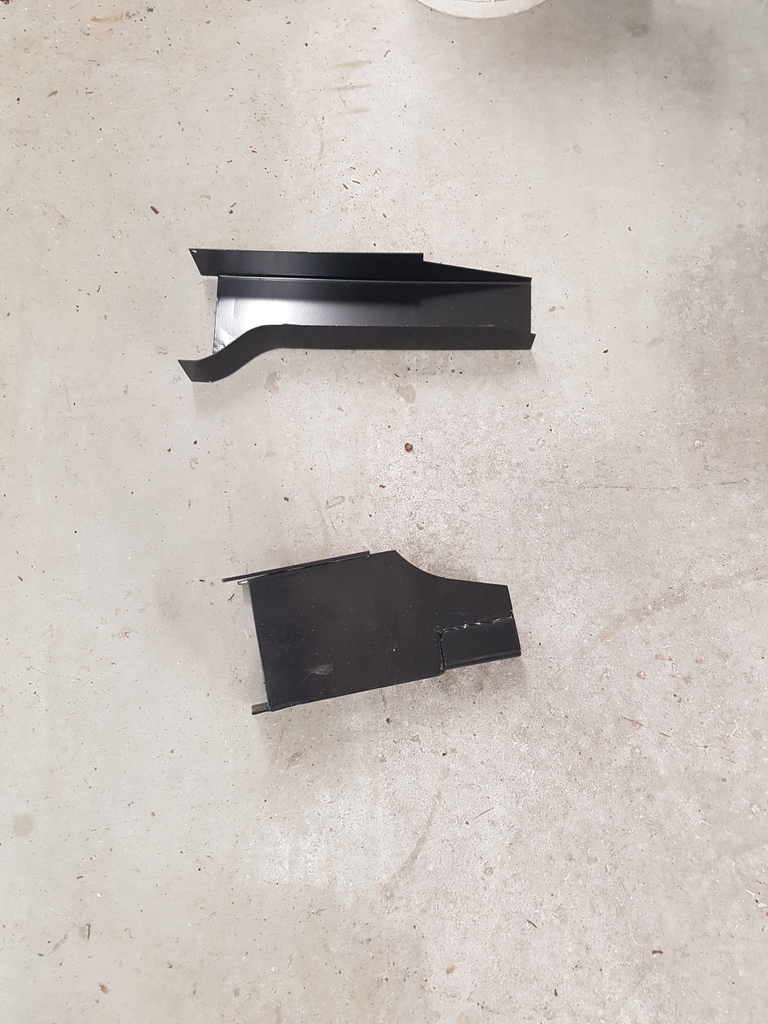 Good news is that the vast majority of the welding work appears to be confined to the offside - the nearside looks pretty good & original - but I will get it cleaned up first and ensure that there is no structural weakness hiding behind the road dirt & paint 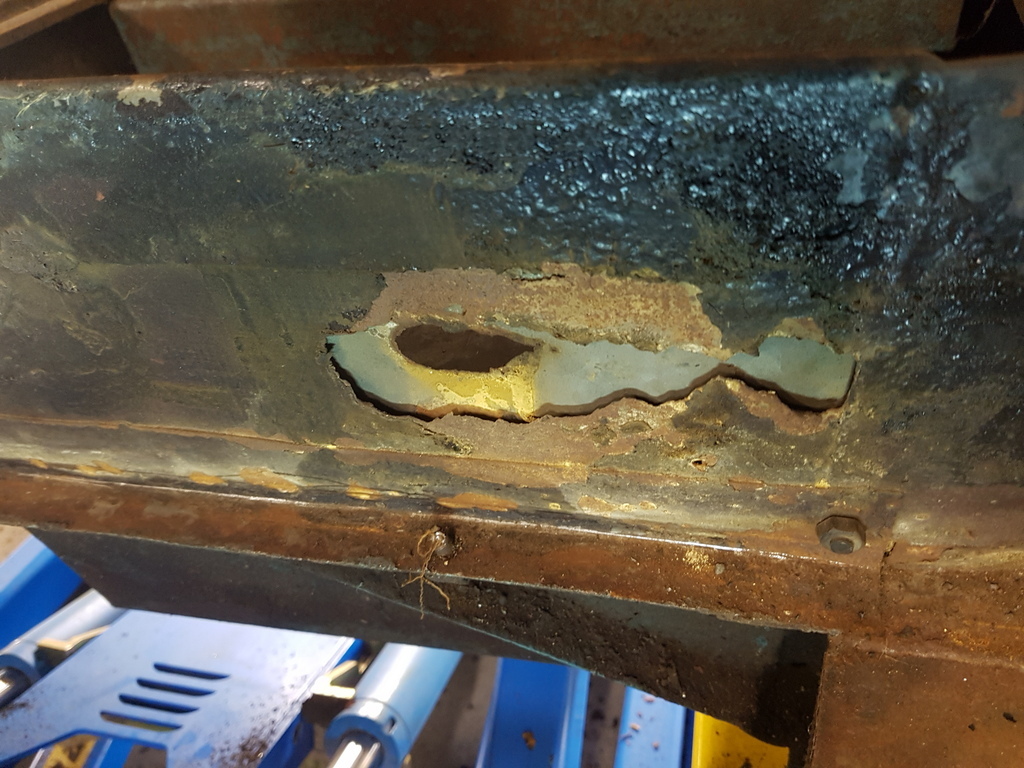 Rear seat upstand has suffered and been bodged with a plate though - this is because the battery is housed on the other side of this - damaged batteries leak acid and hence the burn through 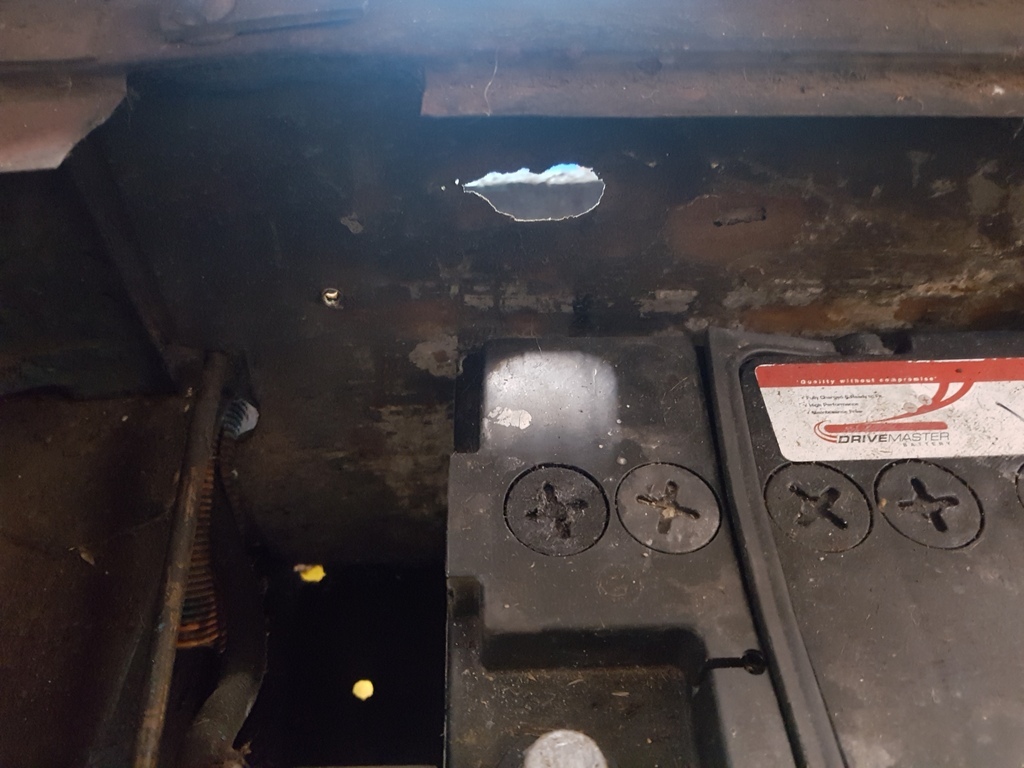 I removed the plate retained by 2 x self tapping screws and will effect a proper welded repair to the area 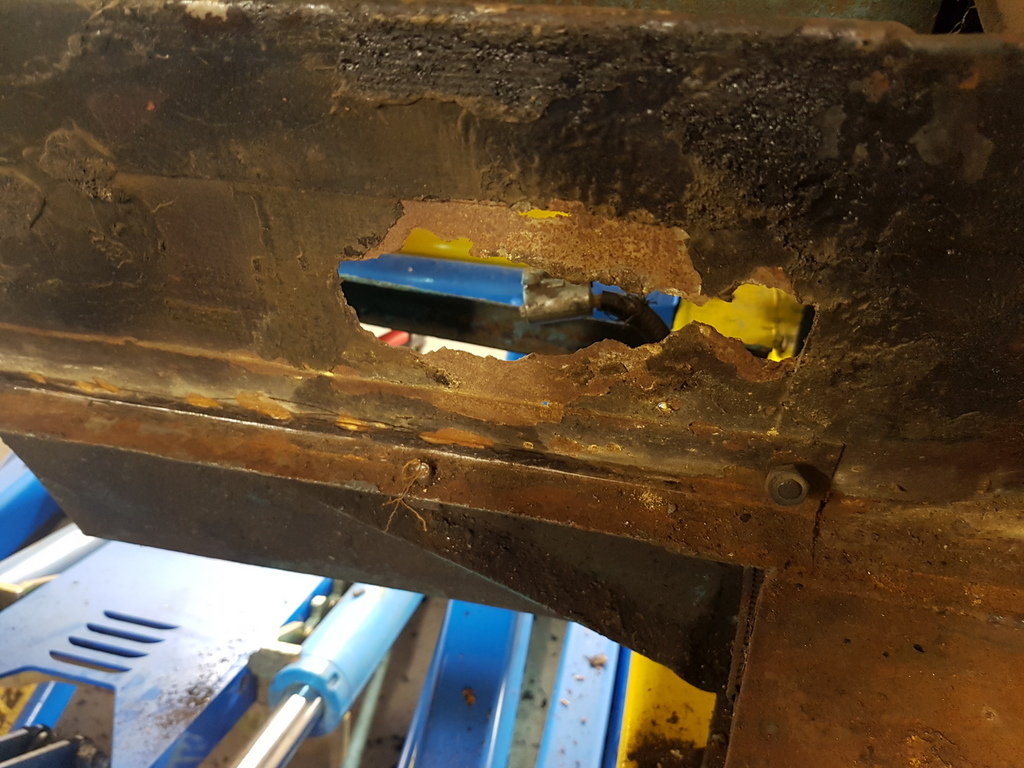 Scraped all the loose debris / rust of the rails etc 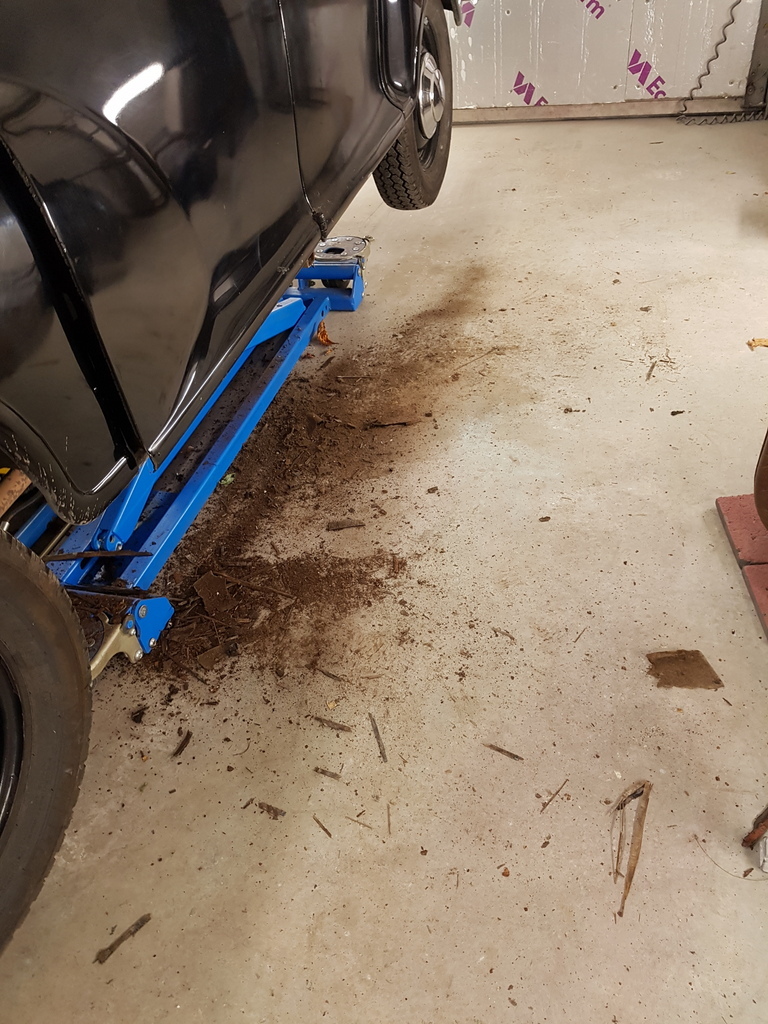 This will all get cleaned back with a flapwheel where possible and treated with Hydrate 80 prior to being primed 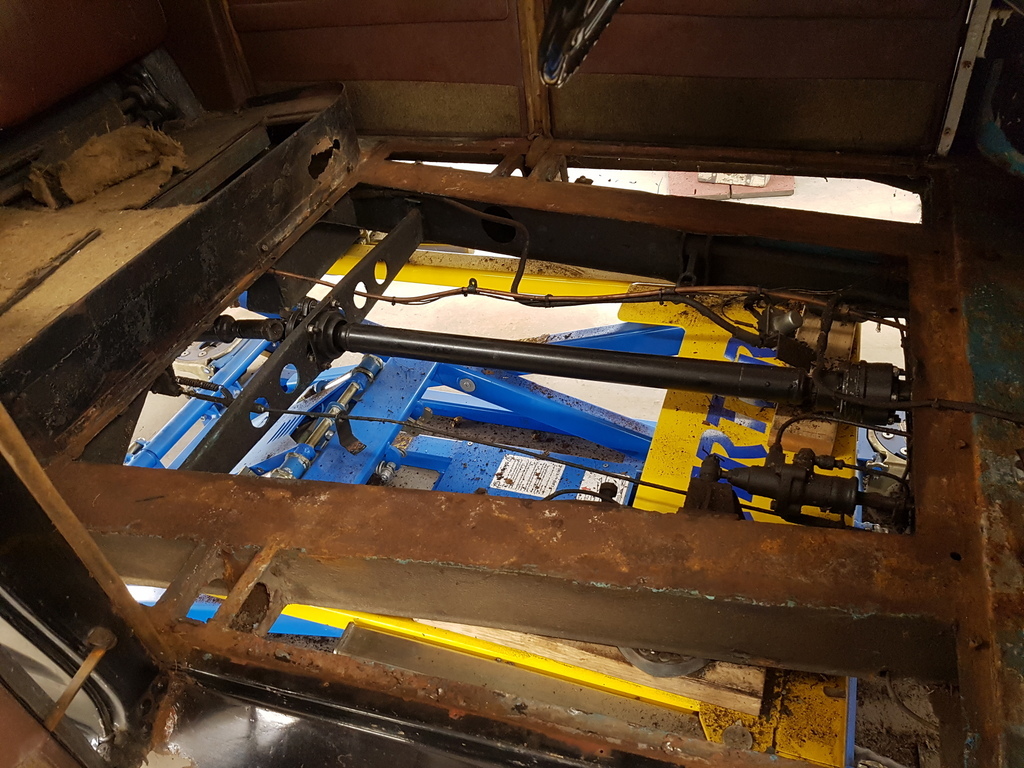 Although scruffy the box section chassis rails are in good condition 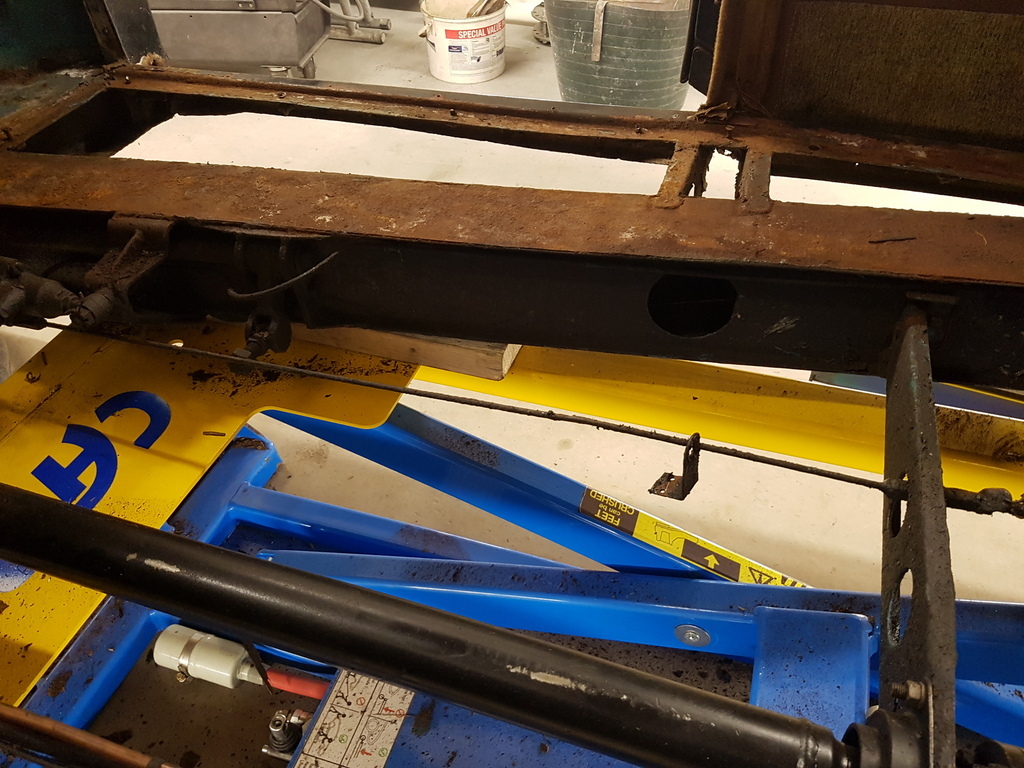 Which is just has well has the front torsion bar suspension is mounted directly off the rails 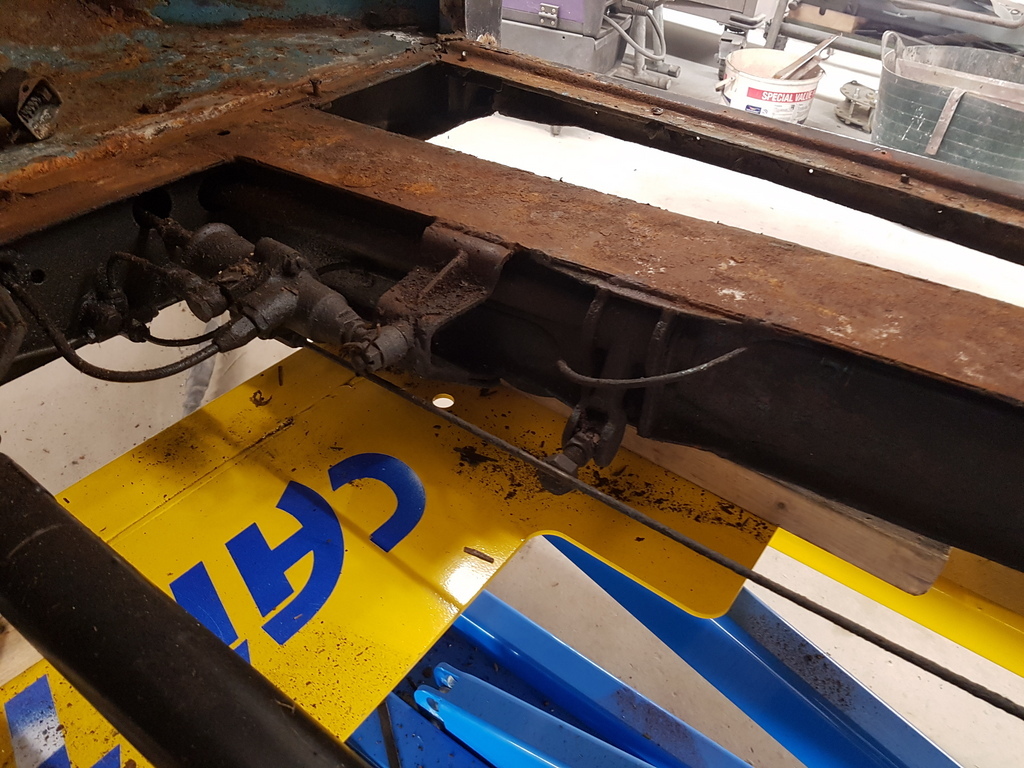 Both of the doors hang off what is a thin 'B' post that joins the sills which is in turn supported by the jacking point 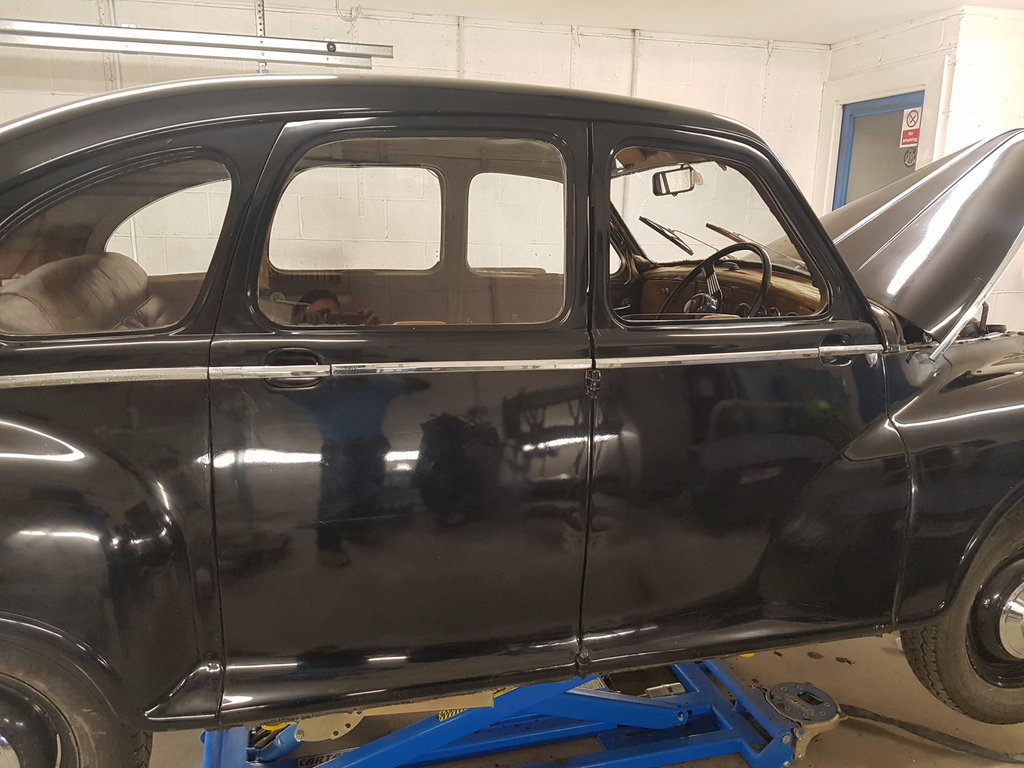 Which is why it's critical to brace & support the B posts before attempting to remove what's left of the jacking point 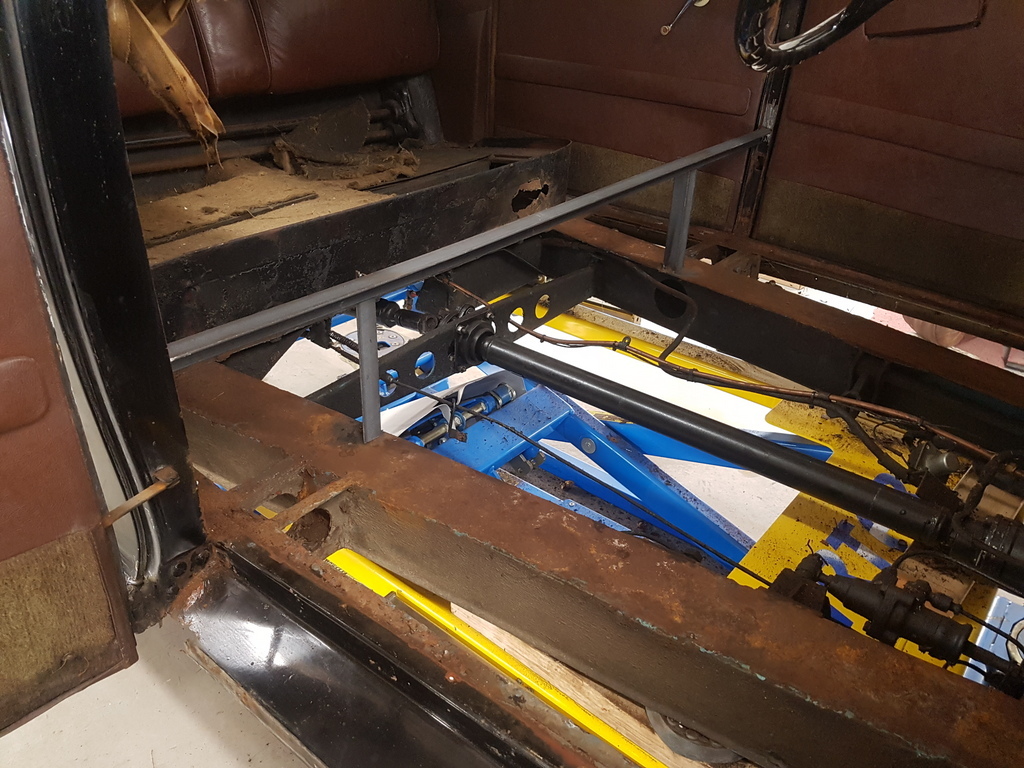 Fail to undertake this simple task then remove / replace the jacking point - Then scratch your head has to why the doors will no longer fit or close / open in the apertures  |
| |
Last Edit: Oct 13, 2019 16:33:37 GMT by Deleted
|
|
|
|
|
Oct 13, 2019 16:58:46 GMT
|
|
mission creep...or were all issues expected?
|
| |
'80 s1 924 turbo..hibernating
'80 golf gli cabriolet...doing impression of a skip
'97 pug 106 commuter...continuing cheapness making me smile!
firm believer in the k.i.s.s and f.i.s.h principles.
|
|
Rich
Club Retro Rides Member
Posts: 6,320  Club RR Member Number: 160
|
1952 Jowett Javelin - 'DELIVERED'Rich
@foxmcintyre
Club Retro Rides Member 160
|
Oct 13, 2019 17:32:11 GMT
|
in fact it was the worlds first production car to have a curved glass windscreen Really? Internet claims it's the 1934 Chrysler Imperial Airflow CW. Still, Like you say, not fun to fit. I did the glass in my MGB GT, and suffice to say I won't be doing ANY glass with a curve again in a hurry! Enjoy reading your threads, Jowett's are a wonderfully engineered car, and seeing the work you carry out on them (and others) is nothing short of awe-inspiring, seeing the fit and finish you achieve. Carry on! |
| |
|
|
|
|
|
Oct 13, 2019 18:00:28 GMT
|
in fact it was the worlds first production car to have a curved glass windscreen Really? Internet claims it's the 1934 Chrysler Imperial Airflow CW. Still, Like you say, not fun to fit. I did the glass in my MGB GT, and suffice to say I won't be doing ANY glass with a curve again in a hurry! Enjoy reading your threads, Jowett's are a wonderfully engineered car, and seeing the work you carry out on them (and others) is nothing short of awe-inspiring, seeing the fit and finish you achieve. Carry on! Internet: 0 - Jowett 1 Duff info from the internet I'm afraid Rich - This is a 34' Chrysler Imperial Airflow 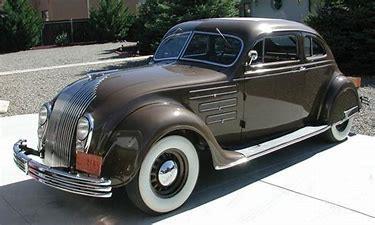 And that's not a curved windscreen but a 2 piece screen created from two flat pieces angled from the centre vertical joining rail - windscreens are not has easy has most people think - the MGB GT is a fairly simple screen to fit but the chrome covers & corners are another thing entirely Many thanks for your comments though - much appreciated  |
| |
|
|
|
|
|
Oct 13, 2019 18:07:06 GMT
|
mission creep...or were all issues expected? Pete - Swings & Roundabouts - its worse than expected on the offside but much better than expected on the nearside - this could be down to the fact that the exhaust travels down the nearside - in fact through the jacking point so it could be argued that the nearside is kept drier than the offside - At this stage it looks like very minor welding works on the nearside when in fact we had planned to replace both the jacking point & the front outrigger - I think that isn't doing bad at all for 65 year old motor to still be running on its originals - I fully expected the floor to be U/S - the boot floor is the same but all sortable |
| |
|
|
Rich
Club Retro Rides Member
Posts: 6,320  Club RR Member Number: 160
|
1952 Jowett Javelin - 'DELIVERED'Rich
@foxmcintyre
Club Retro Rides Member 160
|
Oct 13, 2019 18:44:36 GMT
|
Really? Internet claims it's the 1934 Chrysler Imperial Airflow CW. Still, Like you say, not fun to fit. I did the glass in my MGB GT, and suffice to say I won't be doing ANY glass with a curve again in a hurry! Enjoy reading your threads, Jowett's are a wonderfully engineered car, and seeing the work you carry out on them (and others) is nothing short of awe-inspiring, seeing the fit and finish you achieve. Carry on! Internet: 0 - Jowett 1 Duff info from the internet I'm afraid Rich - This is a 34' Chrysler Imperial Airflow  And that's not a curved windscreen but a 2 piece screen created from two flat pieces angled from the centre vertical joining rail - windscreens are not has easy has most people think - the MGB GT is a fairly simple screen to fit but the chrome covers & corners are another thing entirely Many thanks for your comments though - much appreciated  See, I did wonder what it looked like and it seemed maybe the 1935 onwards model had one piece curved glass but I did see the model with the split screen, so wasn’t overly sure. Pretty car though! I remember realising I even had the ‘easy fit’ screen in my mg and even then it was torture. And yes, the chrome parts made some choice language torrent forth. |
| |
Last Edit: Oct 13, 2019 20:42:15 GMT by Rich
|
|
|
|
|
Oct 13, 2019 20:06:29 GMT
|
|
It might be small to you, but its a regular dose of seeing it done right that so many here enjoy incl me !
Righ, now I've licked yer boots clean, I'll be off.
|
| |
|
|
nze12
Part of things
 
Posts: 191
|
|
Oct 13, 2019 20:32:58 GMT
|
Quoting GN... "So a short term job on a clients car but a fair list to get through"
"Said list and I keep finding more to add to it" Perversely I like to see your lists growing - a bit like getting your favourite novel in instalments!  |
| |
1986 BMW E30 refreshed to original spec
1973 BMW E12 520 converting to Motorsport 530
1982 XJS V12 converting to 5 speed manual
Many landscaping projects overriding above!
Cogito cogito ergo cogito sum!
|
|
|
|
|
Oct 14, 2019 20:25:36 GMT
|
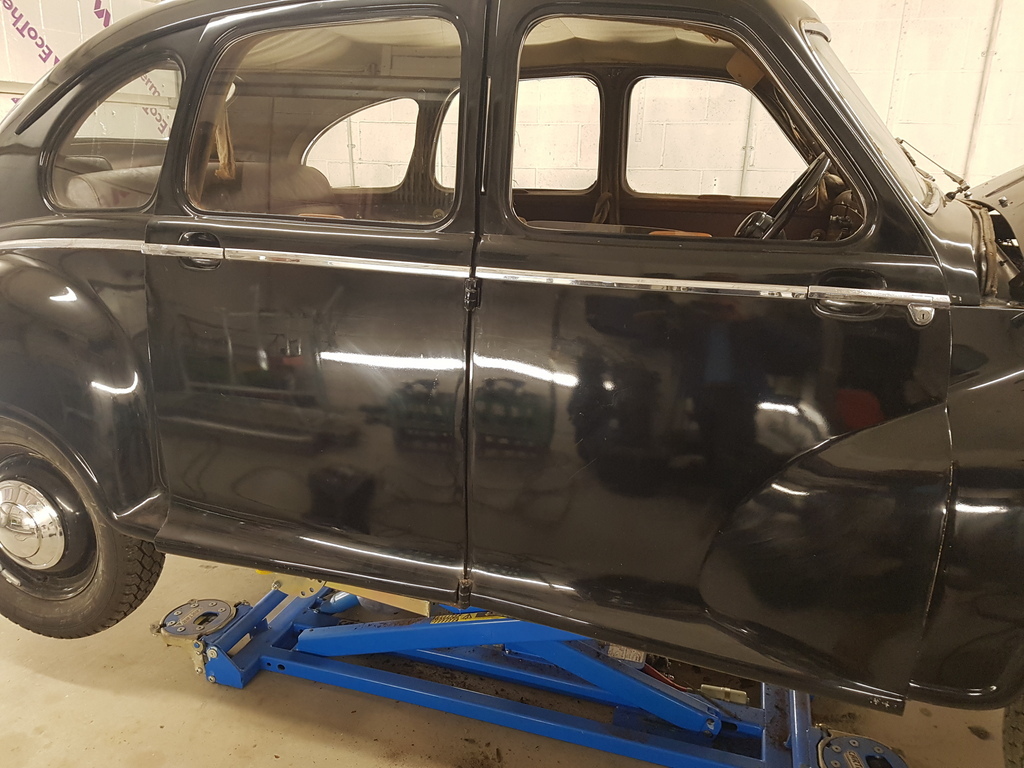 First job today was to remove the doors to allow better access for the sill / jacking point repair 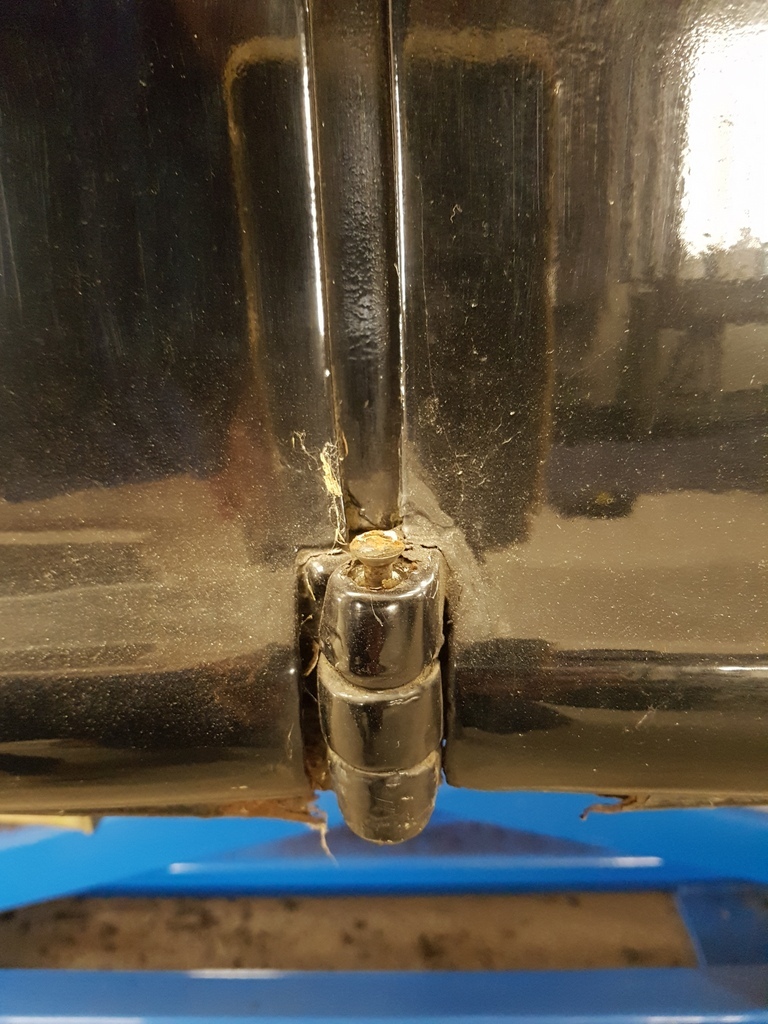 Both doors are hung off the same hinge plates on the B post - just a matter of removing the check strap pins then the hinge pins 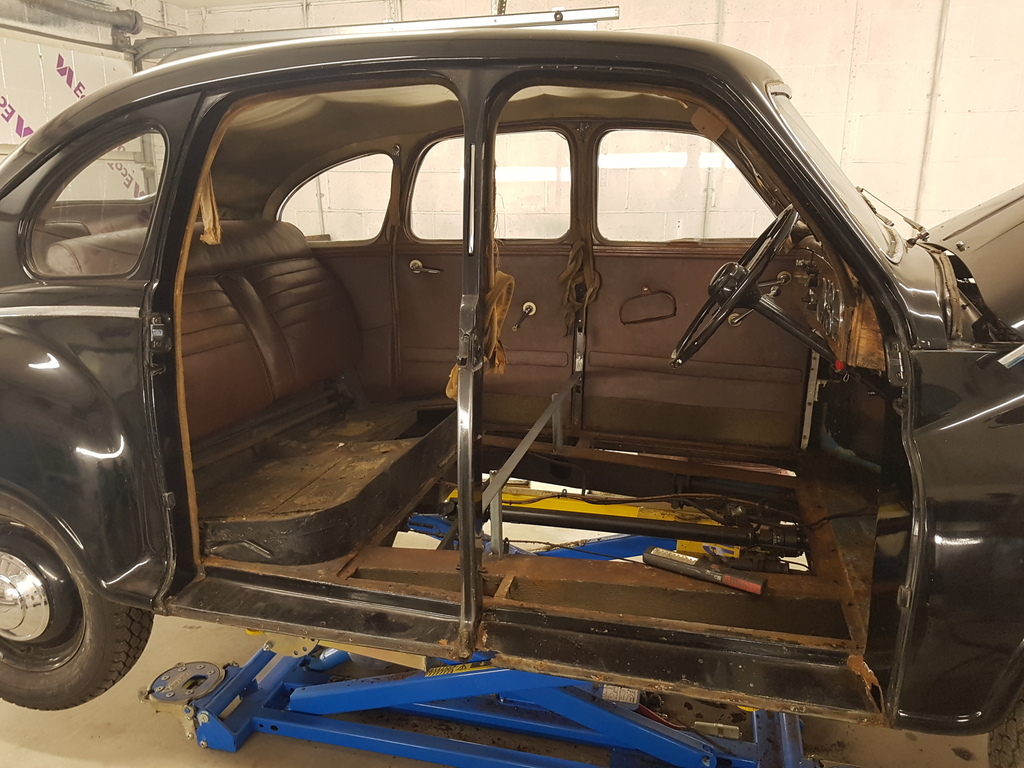 The area is pretty localised that requires replacement 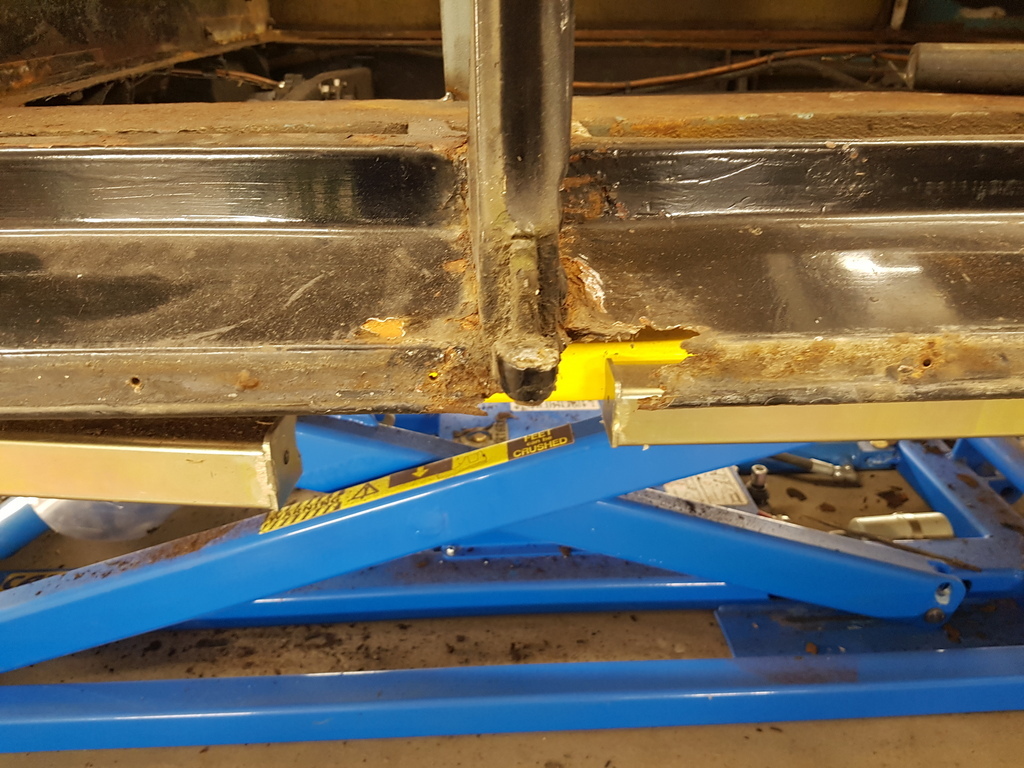 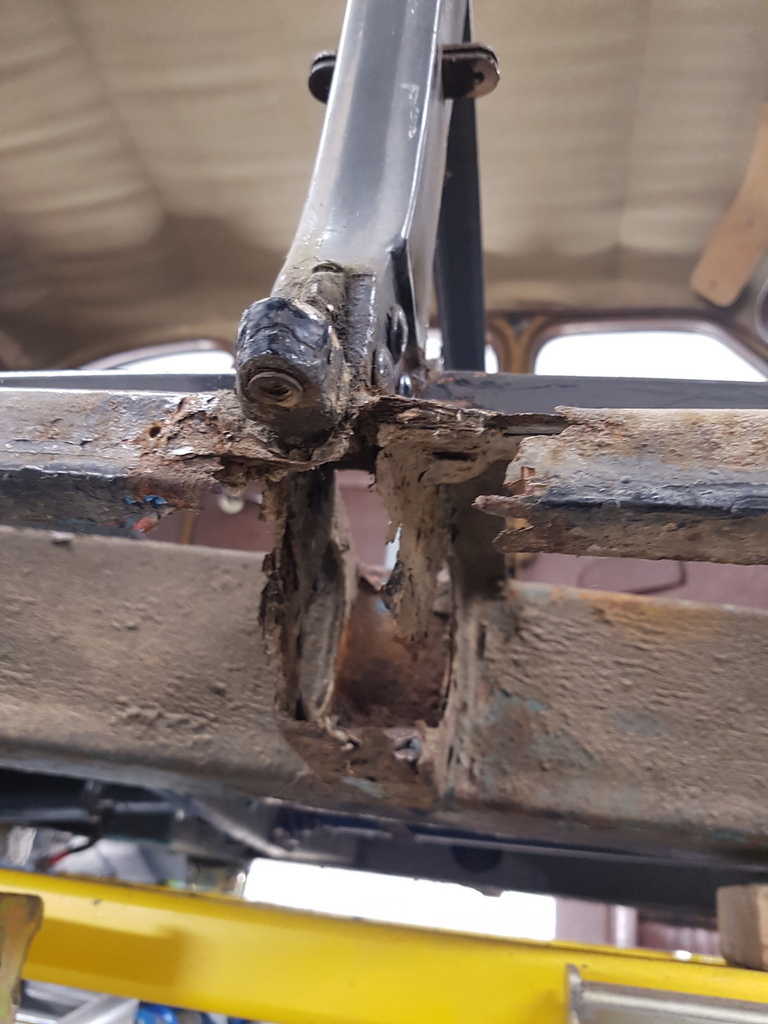 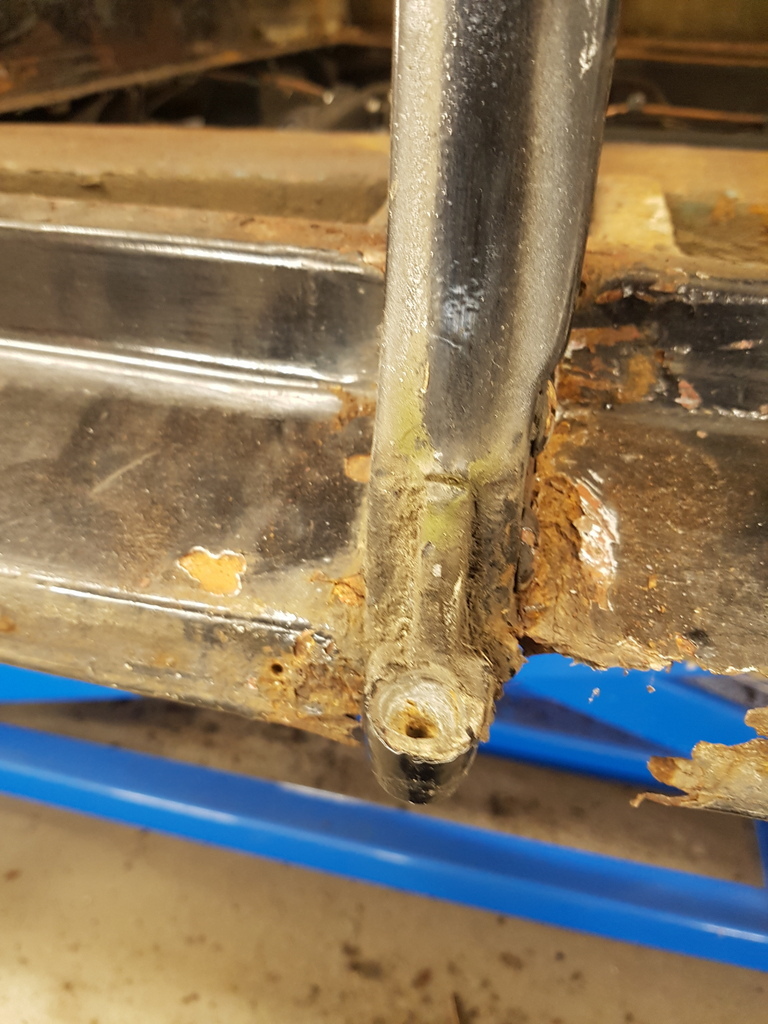 But first I have to remove the hinge plate 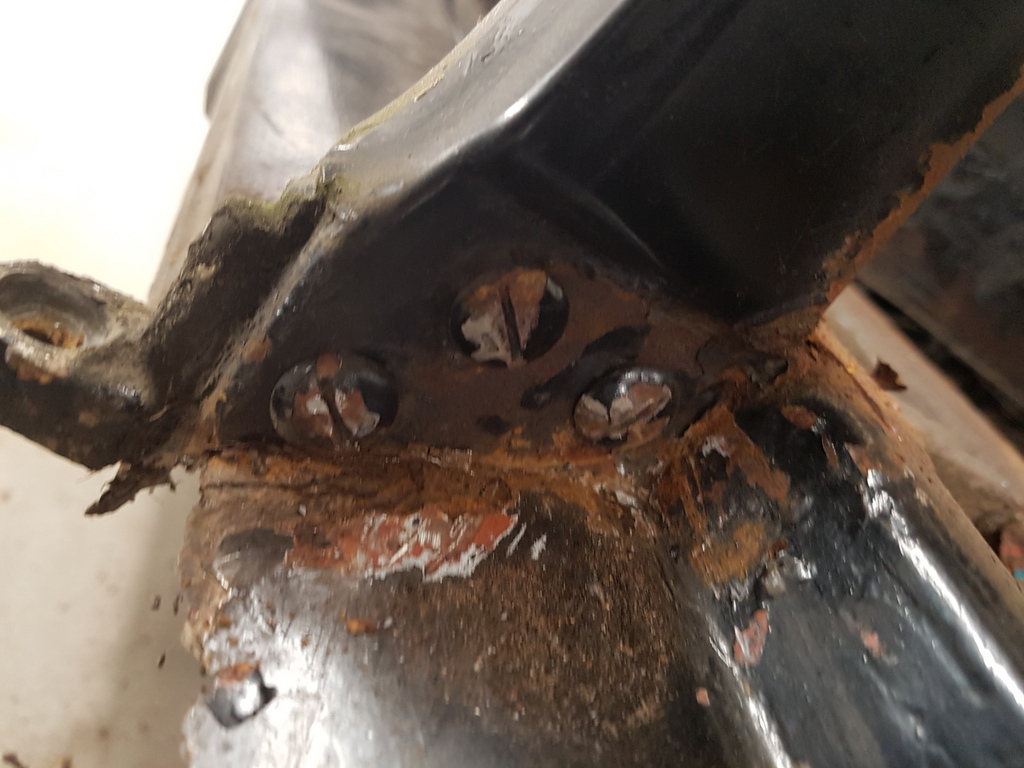 Which are pigs to remove - you always end up drilling the screws out has best that you can 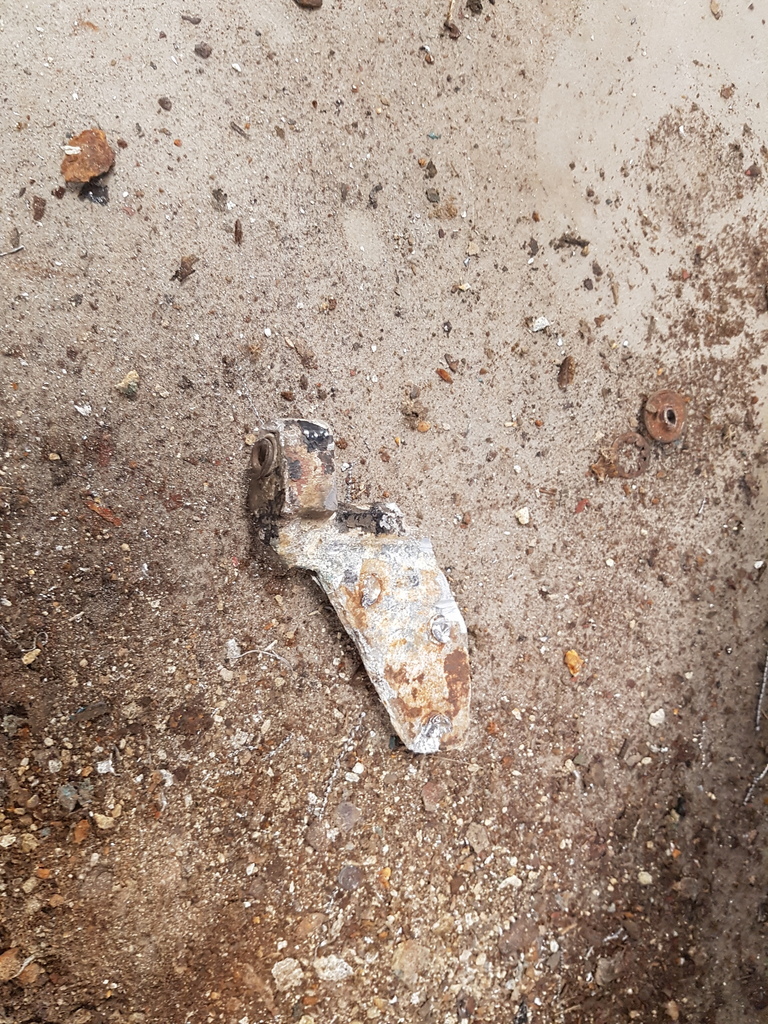 Then just some careful force here & there to persuade it out of its home for the last 65 years 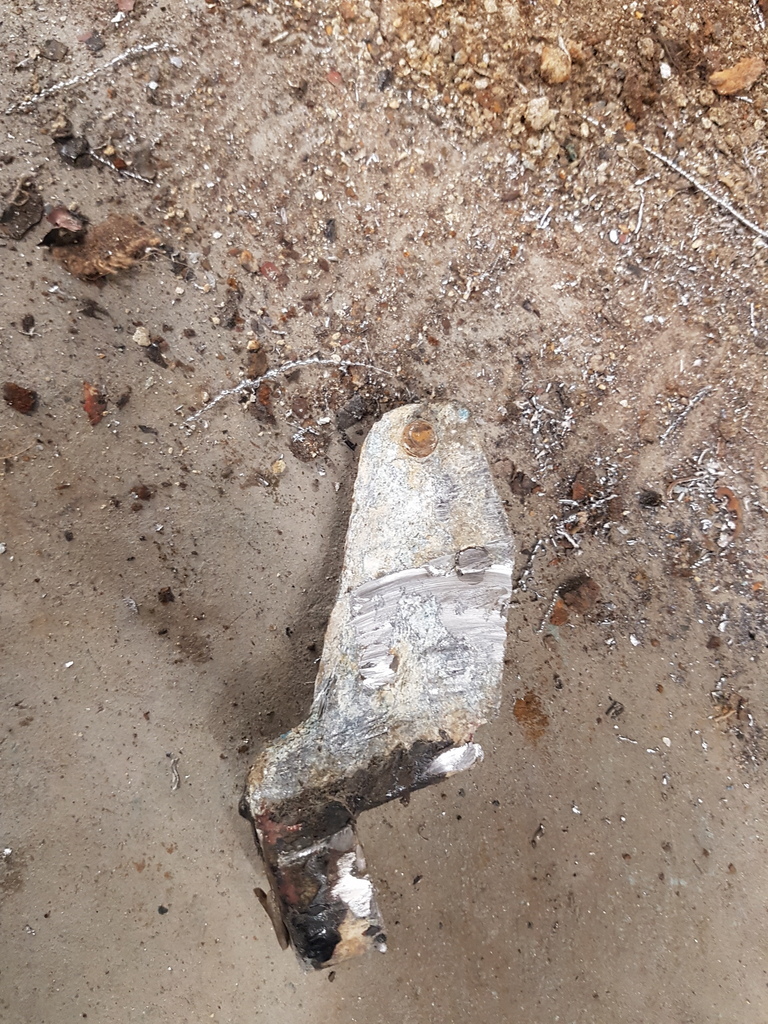 I have a new one on order complete with the correct screws 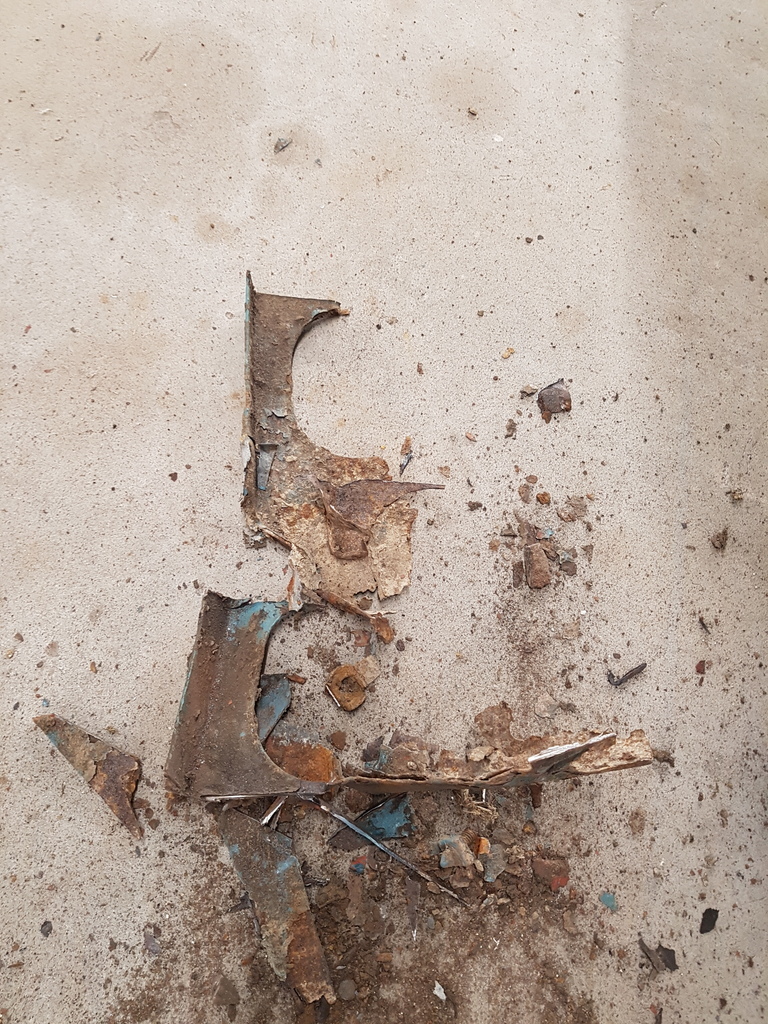 Jacking point did not take a lot of effort to remove 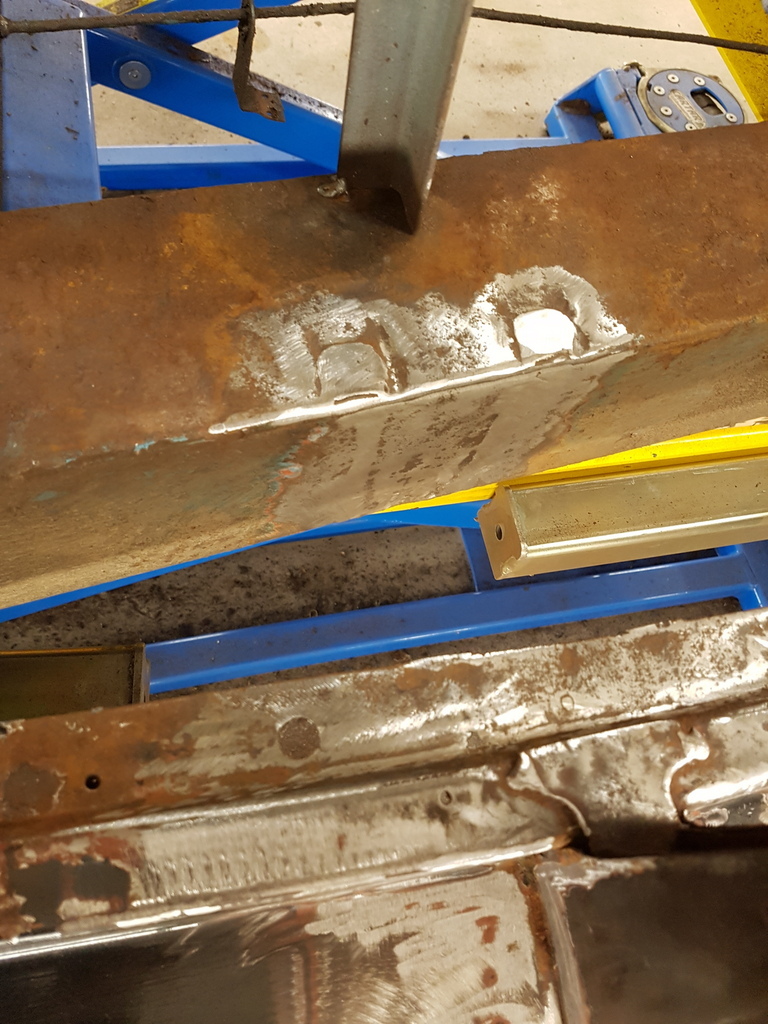 Then cleaned everything back 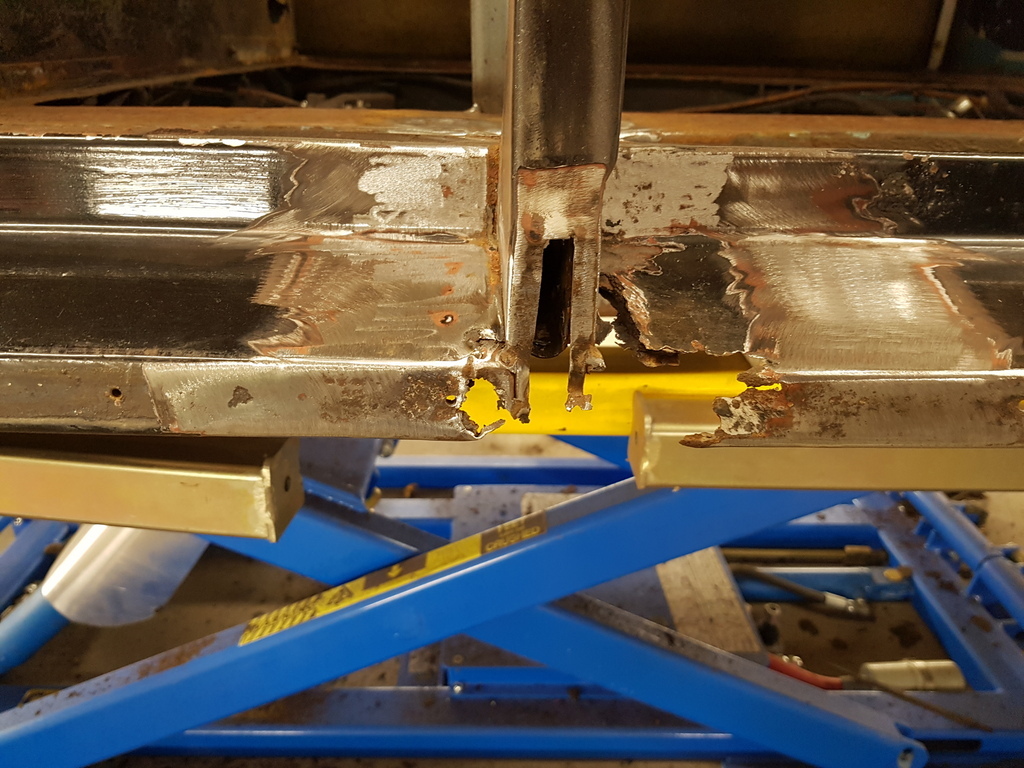 Sill surgery 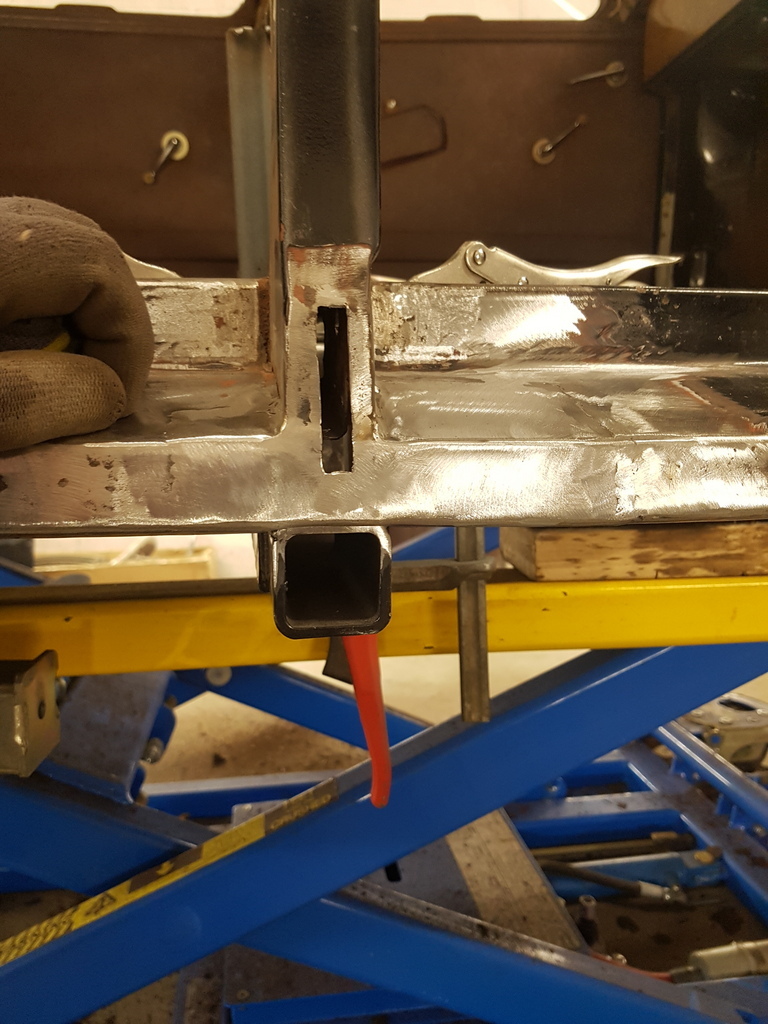 Sill completed and the jacking point trial fitted 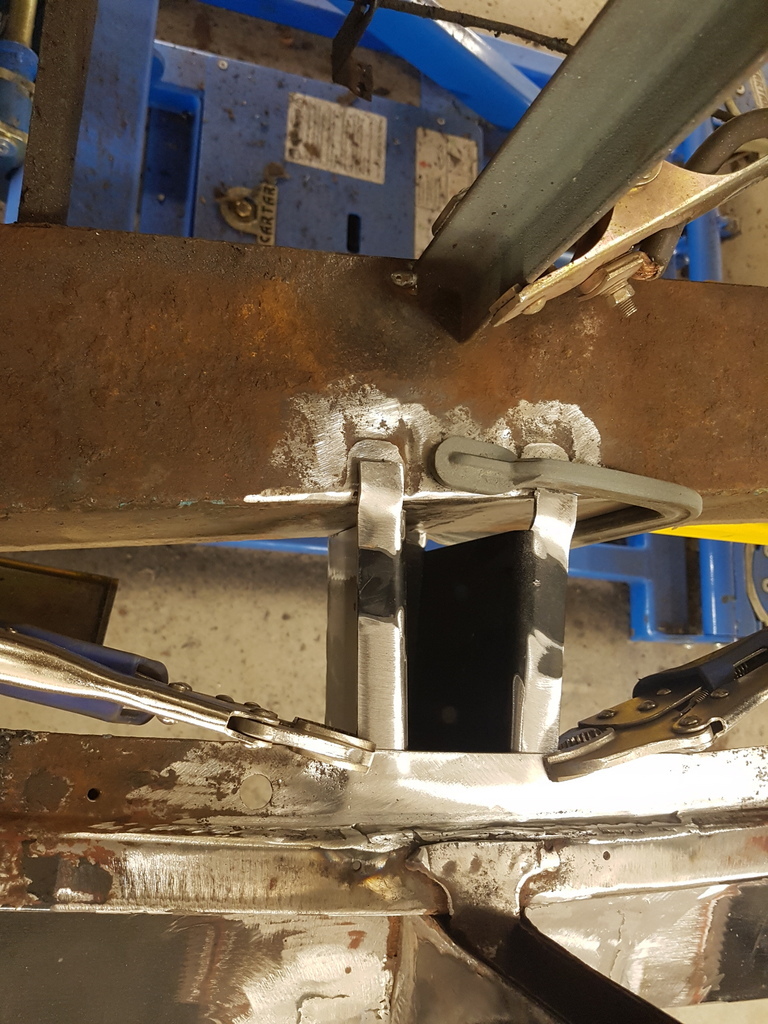 And although it fits - its not that good of a fit in the respect that one of the side faces has been trimmed short - probably to ease fitment without having to remove the sills - I will make up a angle bracket to bridge the gap - My MIG has been playing up all day - tried & adjusted everything all to no avail - its has though it was short of mains power and was surging - towards the end of the day the workshop lights started to flicker (brand new LED battens just fitted before I went on hols) - then has I started to tack the jacking point on the workshop was plunged into darkness has the whole lot tripped - workshop RCD is ok so its tripped in the house - go to reset the house RCD and can hear a distinct crackle & fuzz coming from the main incoming fuse on the electricity supply side of the meter - call them up - engineer attends and reports that incoming feed is loose in the main fuse - tightens it up - power back on - no faults with the MIG (It's a invertor MIG and therefore does not draw the same load has transformer based MIG - however invertor based MIG's don't like a fluctuating mains supply)  |
| |
Last Edit: Oct 14, 2019 20:29:22 GMT by Deleted
|
|
|
|
|
|
|
Oct 14, 2019 20:36:20 GMT
|
|
At least it was just the connection as you could of been waiting for days to sort it out.
|
| |
|
|
|
|
|
Oct 15, 2019 20:35:06 GMT
|
Not a lot achieved today - my invertor MIG still deciding to play up - so after another round of checks - it was packed up and loaded into the P38 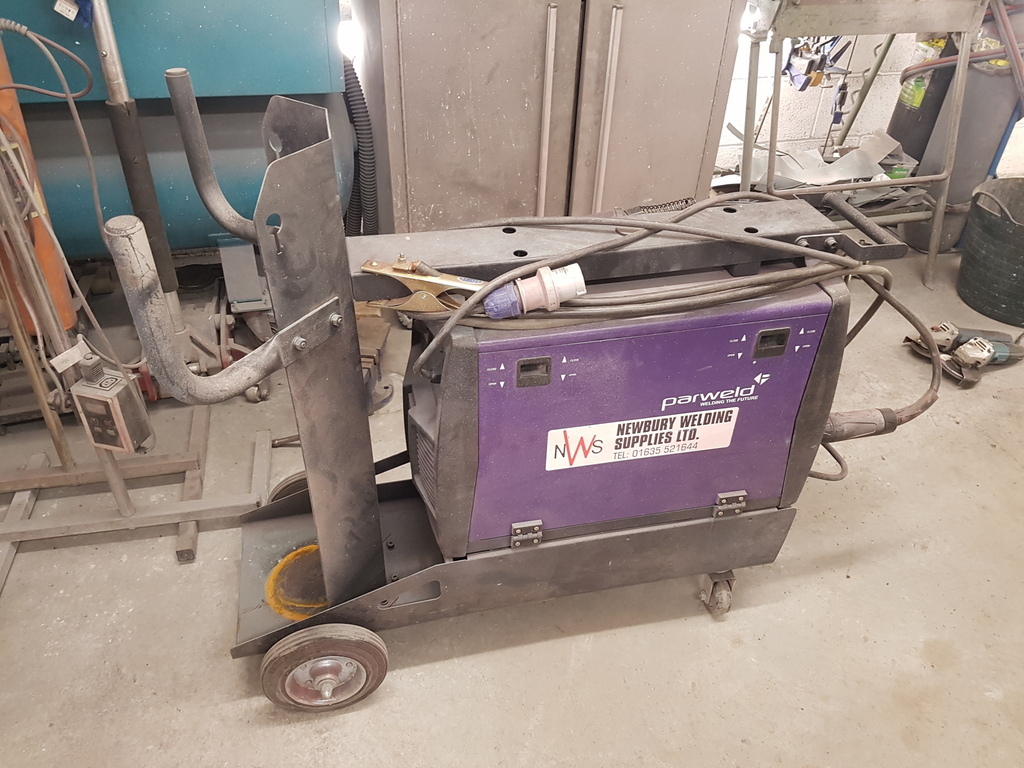 Dropped off with my welding supplier who is very, very busy with repairs currently - so it's a 2 - 3 week turnaround - they could have hired me one of their demo machines but I just so happen to own this 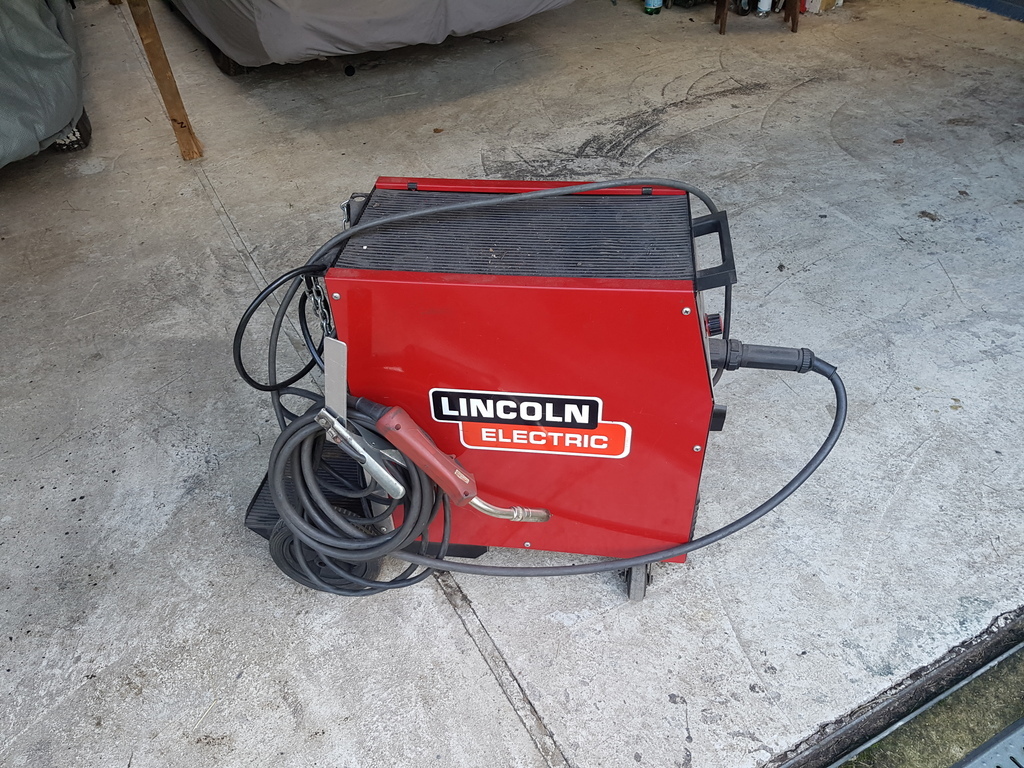 Lincoln Compact MIG 185 - its a transformer based machine and nowhere near has versatile has the Parweld Invertor Synergic that I have just left for repair 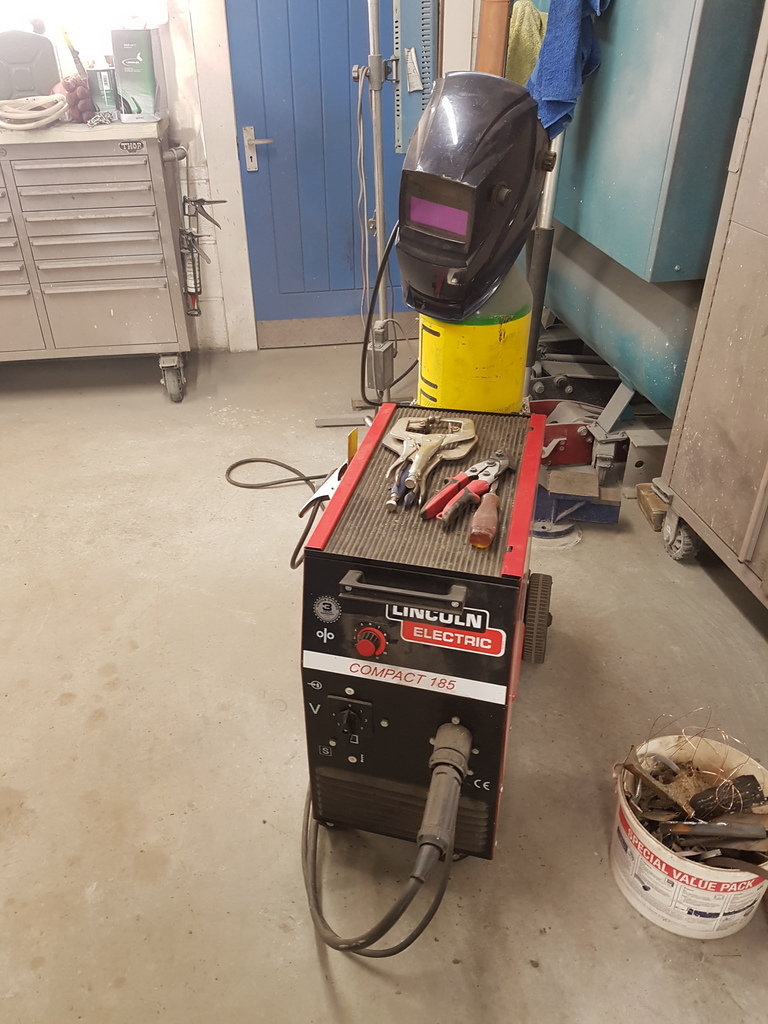 But it will keep me going for now - just the 5 hour M4 / M25 round trip to go and collect it from a fellow Jowett owner & friend where its been on permanent loan since I replaced it with the Parweld 3 years ago - hence not a lot done on the Javelin 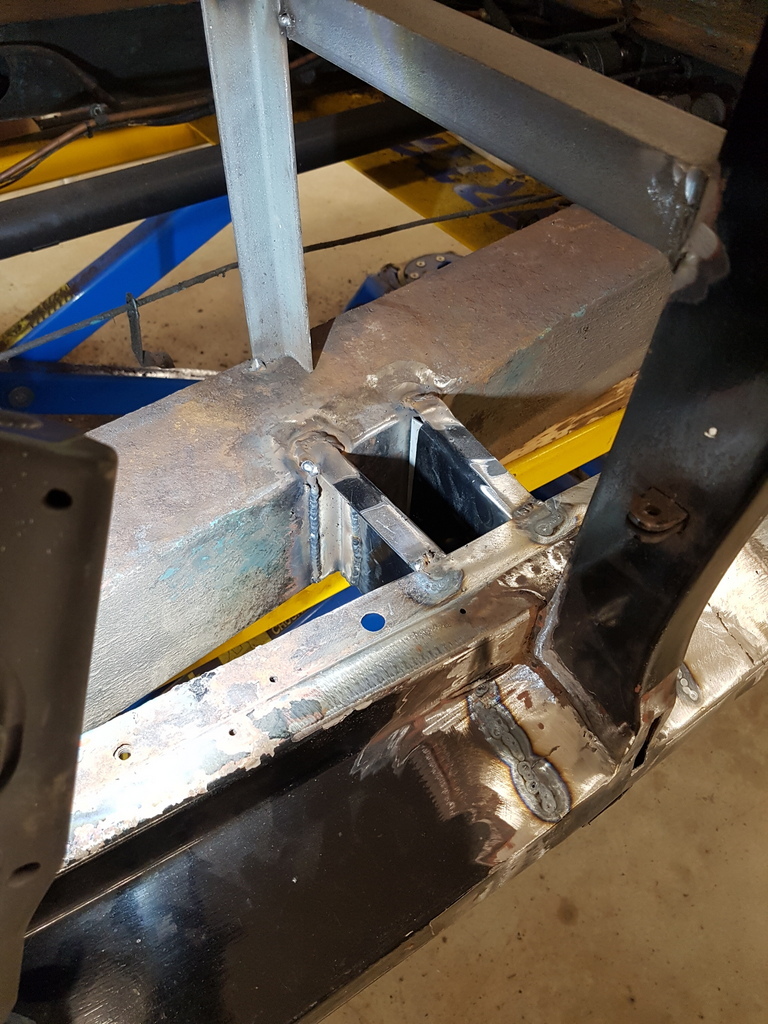 Managed to get the welder set up & offside jacking point welded up though - more tomorrow |
| |
|
|
teaboy
Posted a lot
   Make tea, not war.
Posts: 2,113
|
|
|
|
|
What is the difference, from a usability point of view, between the inverter ant transformer sets?
|
| |
|
|
|
|
|
|
|
|
PITA when tools play up.
Time and more effort to use.
Looking good as always though.
Little lists........
|
| |
|
|
|
|
|
|
|
What is the difference, from a usability point of view, between the inverter ant transformer sets? Transformer based MIG's are old technology and the amps / power that you weld with goes up in steps / stages - I think that there is 6 on the Lincoln in the pics - so steps stages probably start at 60 amps and then go up in fixed increments Invertor based MIGs are new technology and provide for step less control of the amps - you can set it to whatever amps you wish within the range of the machine So where this can help is on thinner metals - My Lincoln on step 1 is fixed at 60 amps but on thin sections you may well get burn through that you want to avoid - you have no control on this with a transformer based MIG - the only thing that you can do is adjust the wire speed and that's not going to prevent burn through - next step up is probably circa 90 amps but if you have a weld that you only need 75 amps for the 90 amps is probably going to leave a compromised weld with undercuts to the edge of the weld - power is not always everything in welding The invertor based machine can just be dialled into what ever setting that suits the welding that you are undertaking - hence if you want 75 amps you can have it - if you need 42.5 amps again it can be dialled in - Should the machine have a Synergic function it makes life even easier has this function alters wire speed & current automatically when you select what amperage you require basically making the machine plug & play and saves no end of time in setting up the machine - According to my welding supplier the Parweld model that I use is his best selling machine at the lighter fabrication end of the market and has sold this model to just about every bodyshop in the region |
| |
Last Edit: Oct 16, 2019 7:52:07 GMT by Deleted
|
|
|
|
|
Oct 16, 2019 18:54:03 GMT
|
So in-between many other tasks today 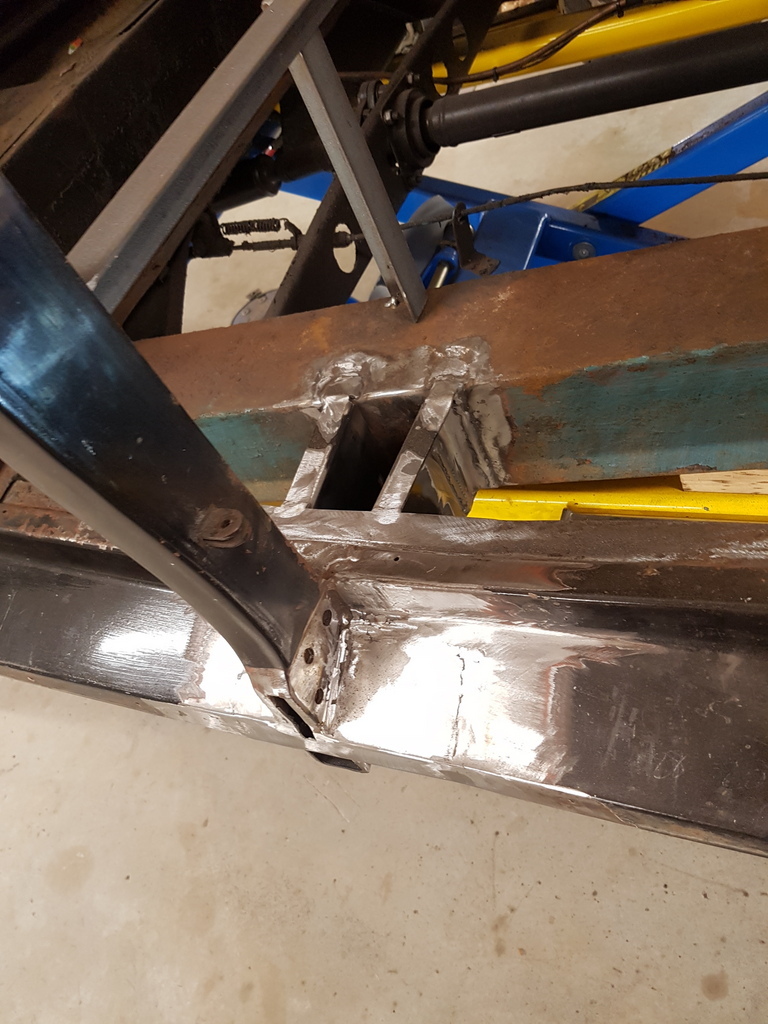 Jacking point welds now cleaned back 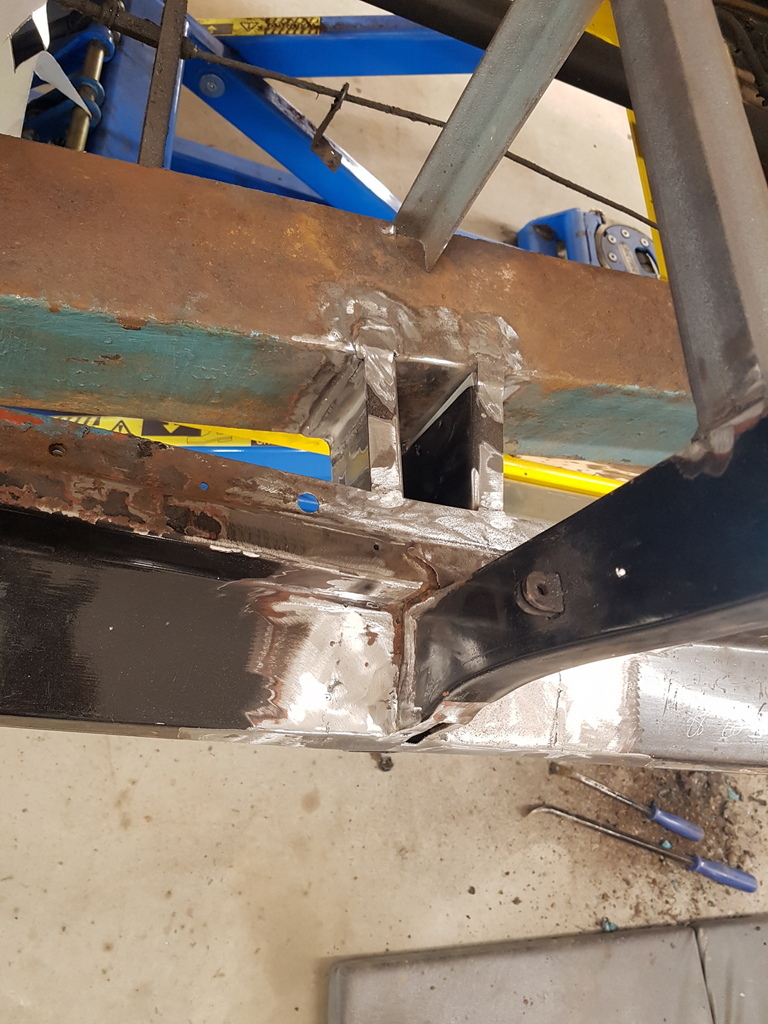 Then on to the front outrigger & floor pan 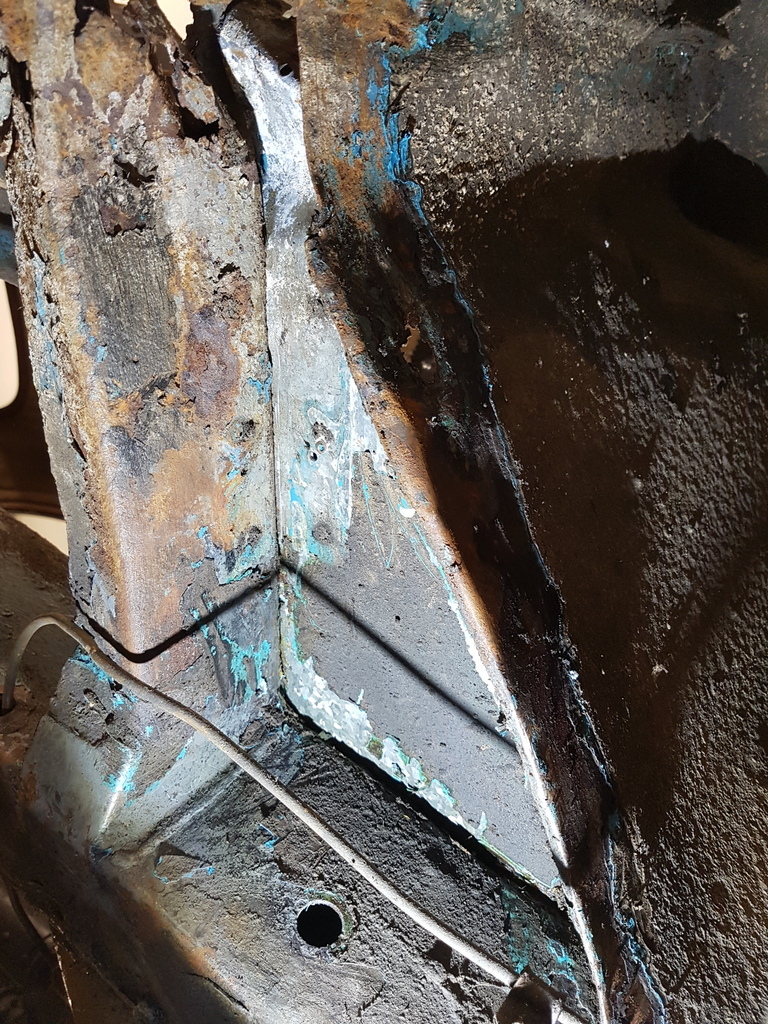 Which had a loose plate just bodged into place with 4 pop rivets 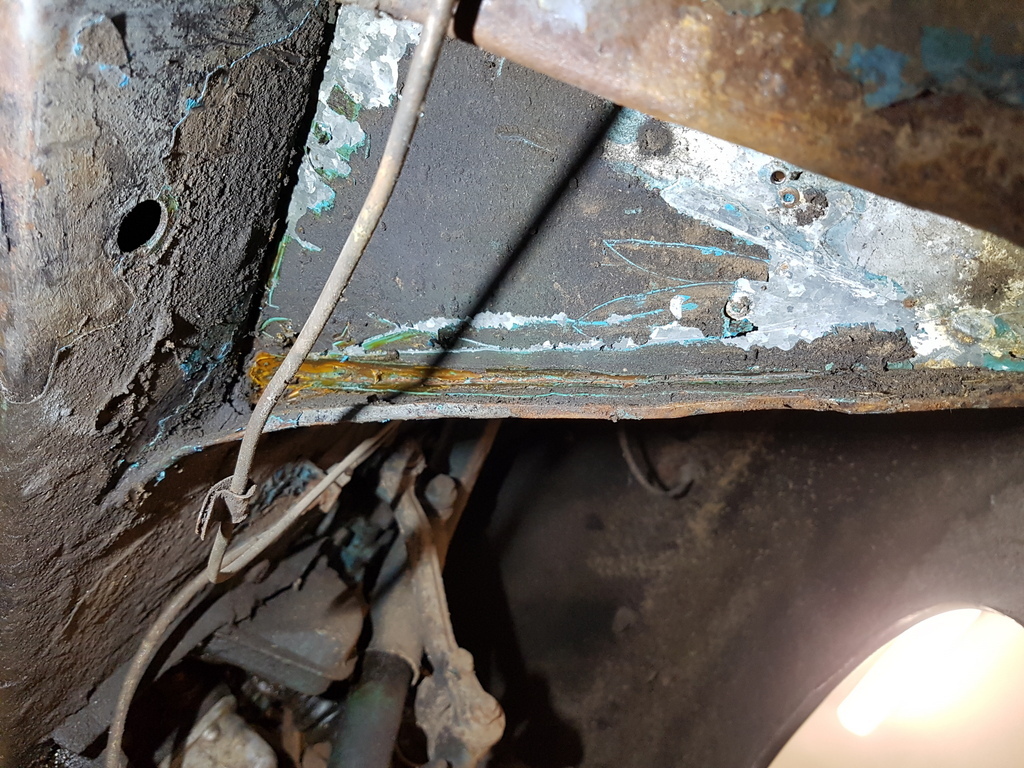 And a completely new one on me to hide the fact that the pate edges were not attached or welded - 'grease' - loads of it just slathered around the edges of the panel  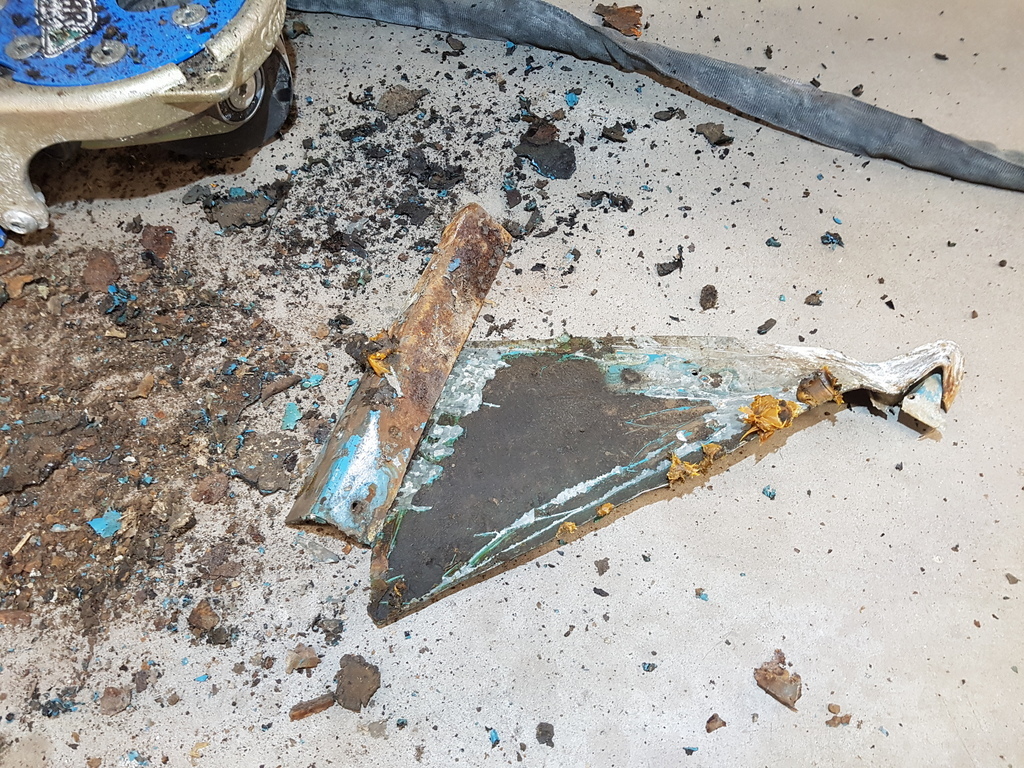 Removed 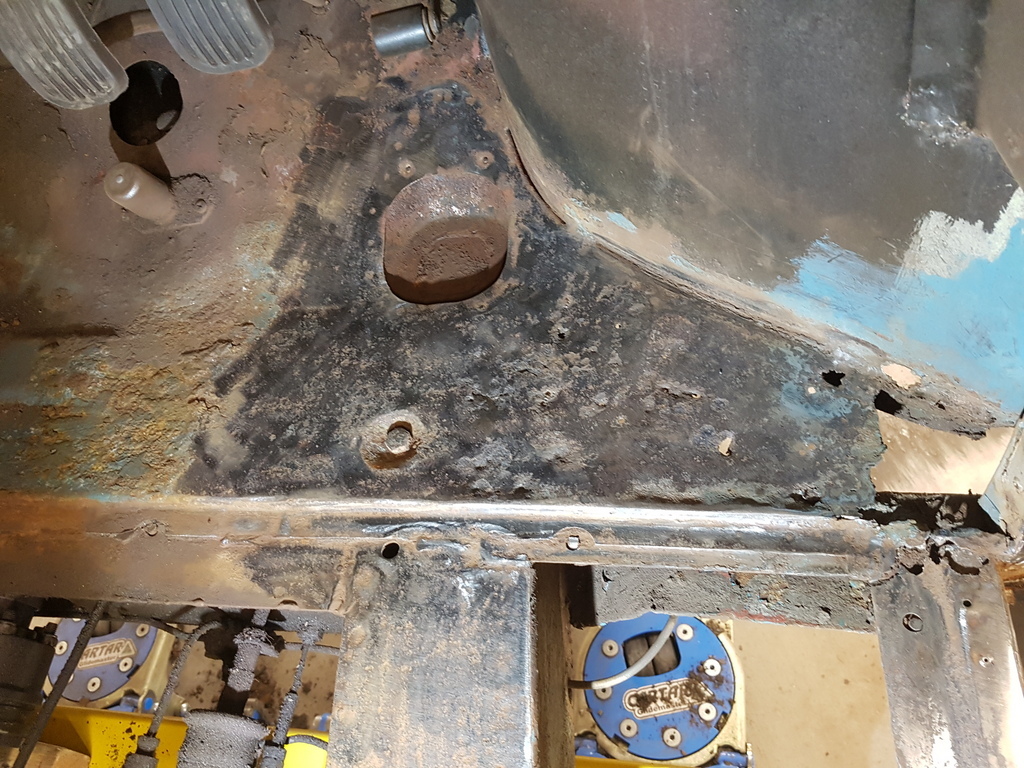 Floor pan section is perforated 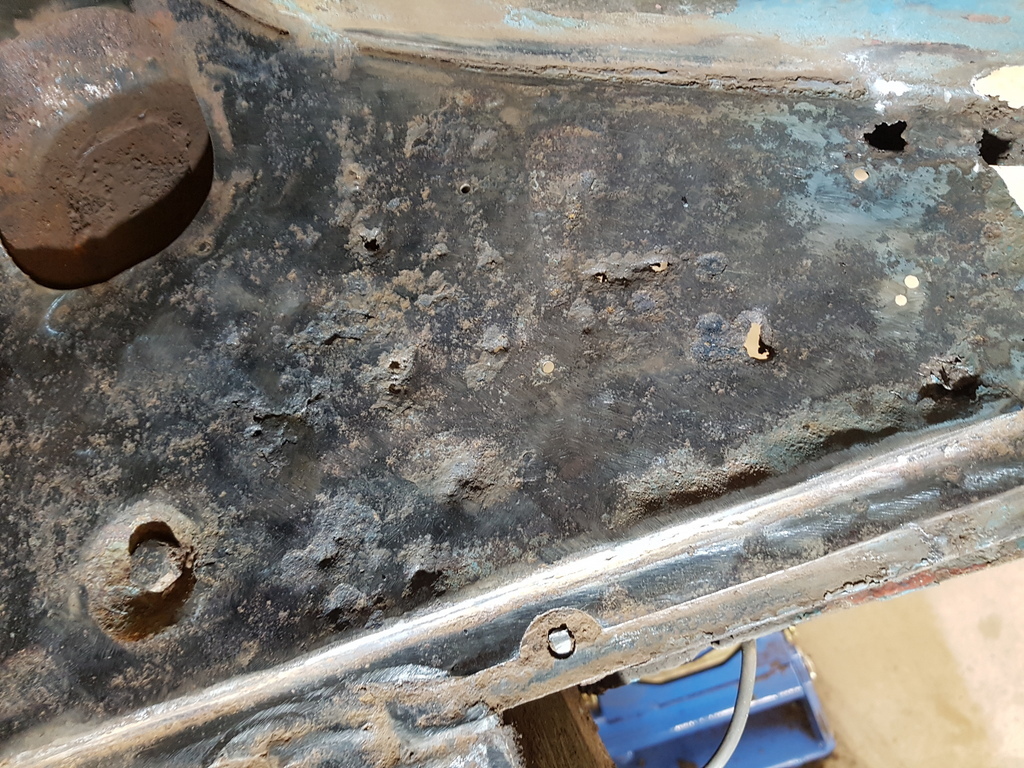 Removed along with the outrigger 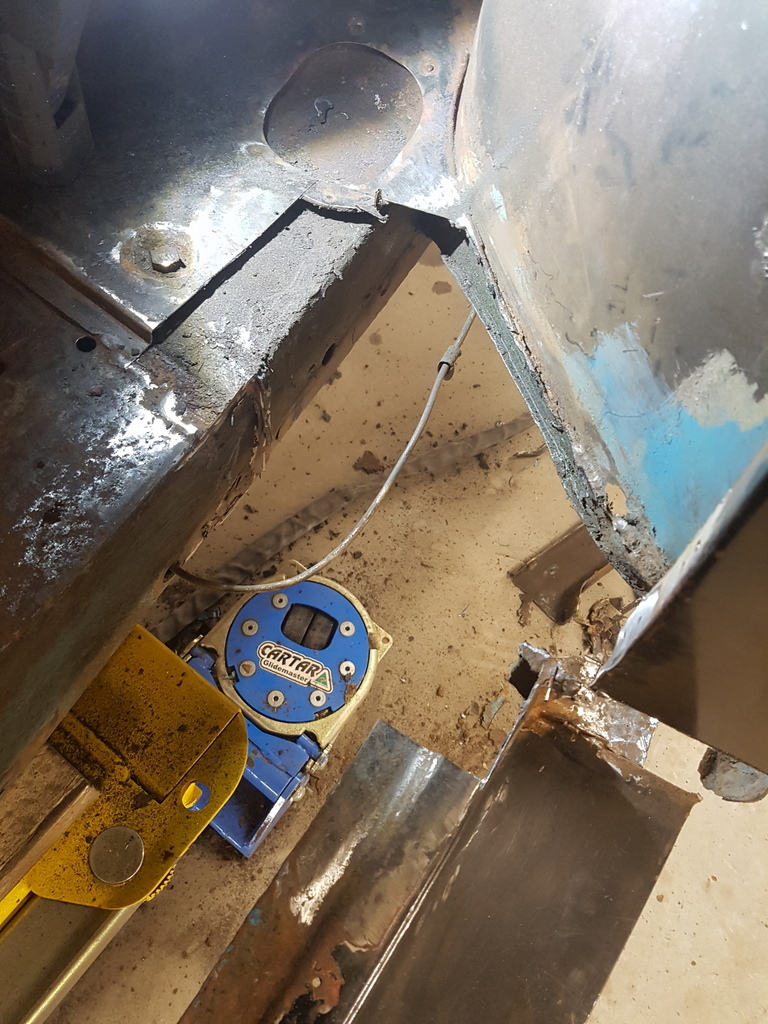 First new repair sections going in 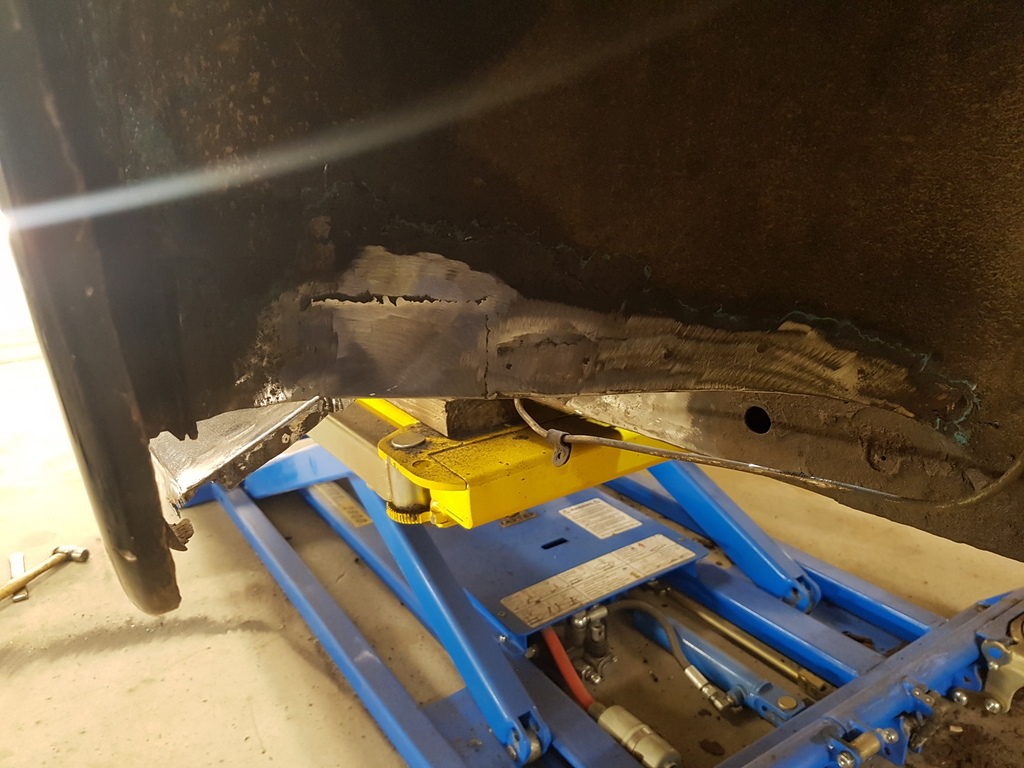 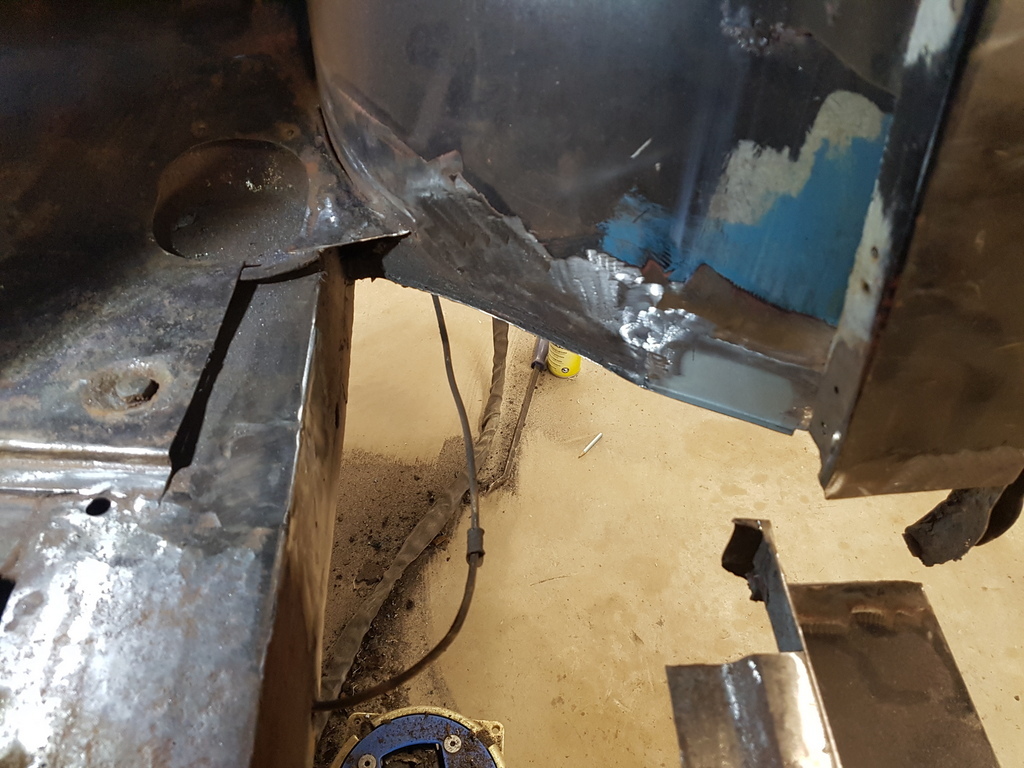 And the new outrigger trimmed ready for fitting 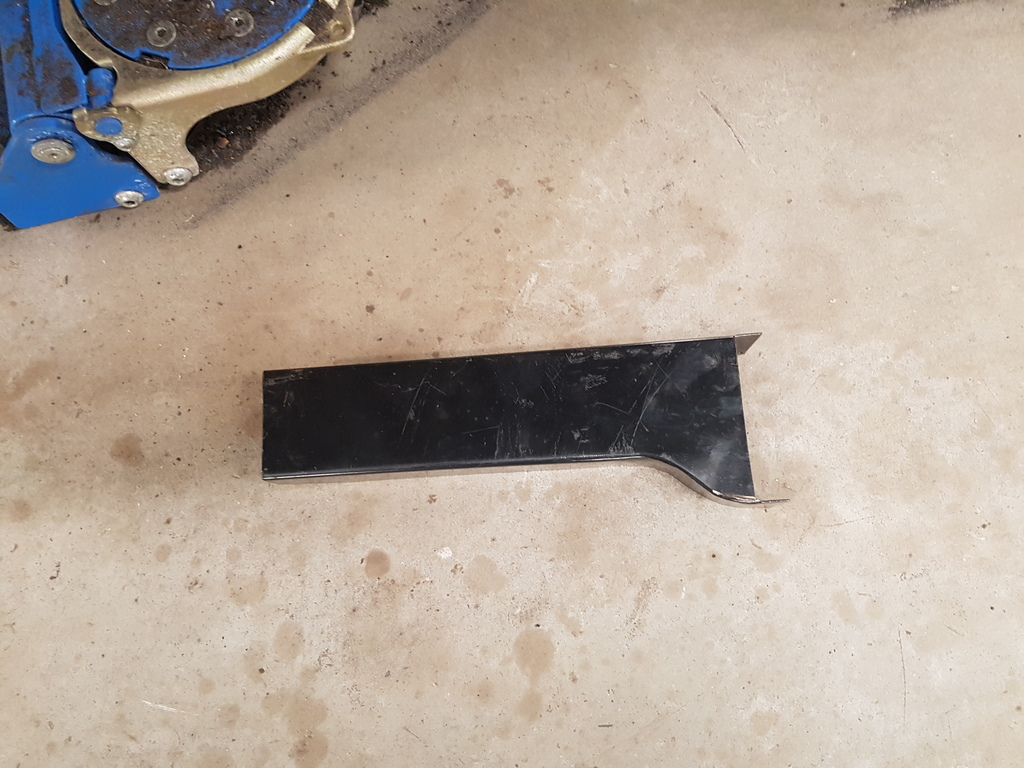 More tomorrow |
| |
Last Edit: Oct 16, 2019 18:58:01 GMT by Deleted
|
|
|
|
|
Oct 17, 2019 19:23:53 GMT
|
Other things to do this morning so did not make a start on this until the afternoon 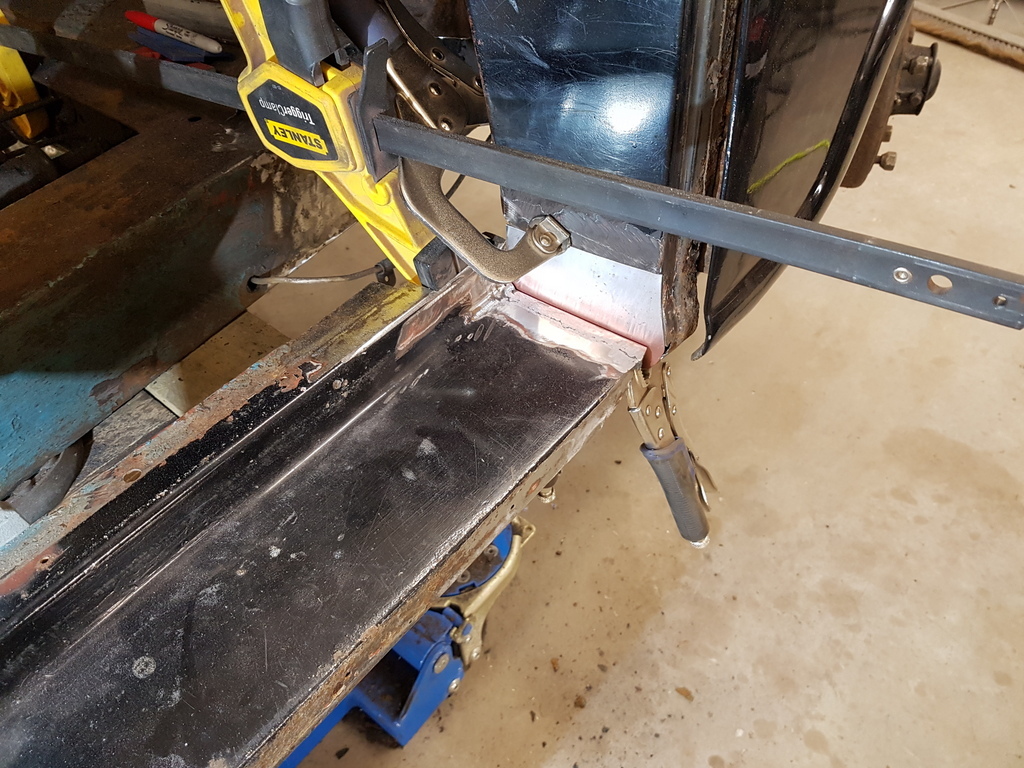 First job was to let in a fresh steel to the bottom of the A post inner face along with a small section to the end of the sill 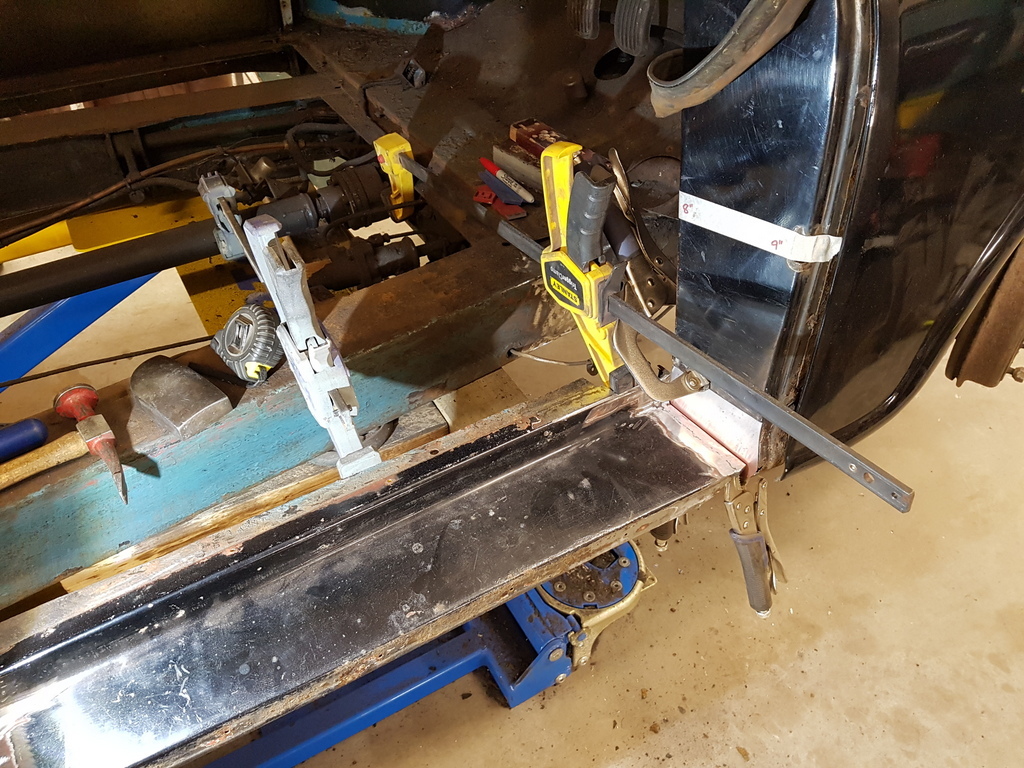 Sometimes you just need to be creative when aligning panels and getting them to stay there whilst you get them tacked up- Note the offset datum measurement on the masking tape for getting the sill in the correct position 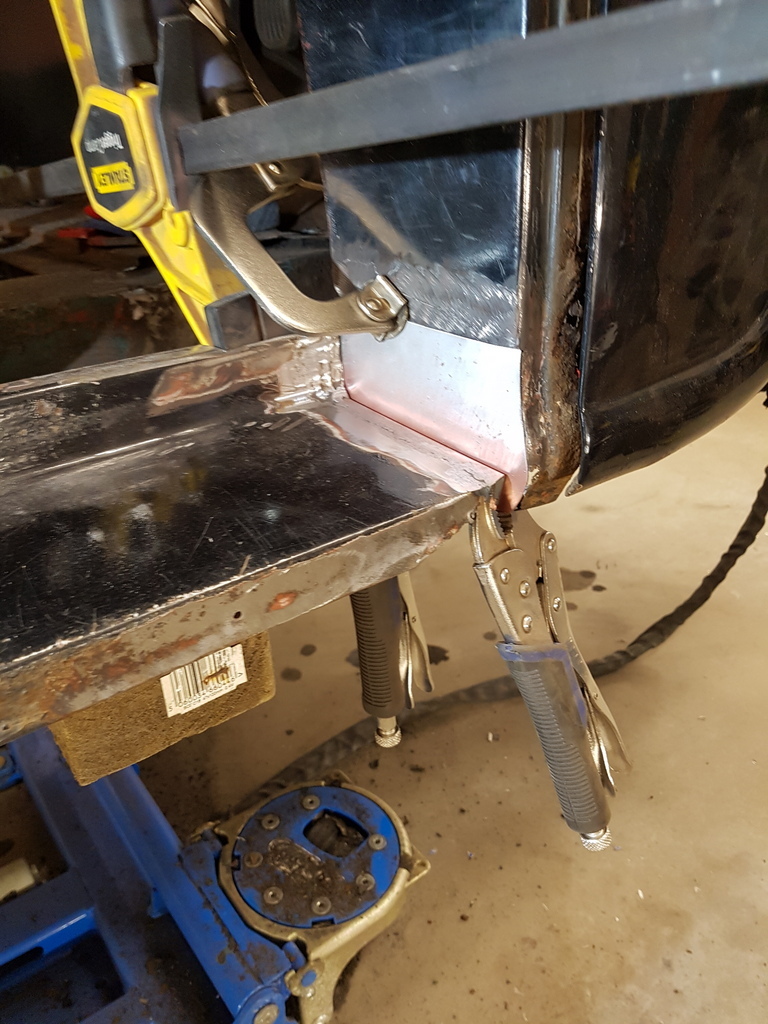 Fresh steel let into the inner wing / wheel arch along with a new bracket for the bottom of the front wing 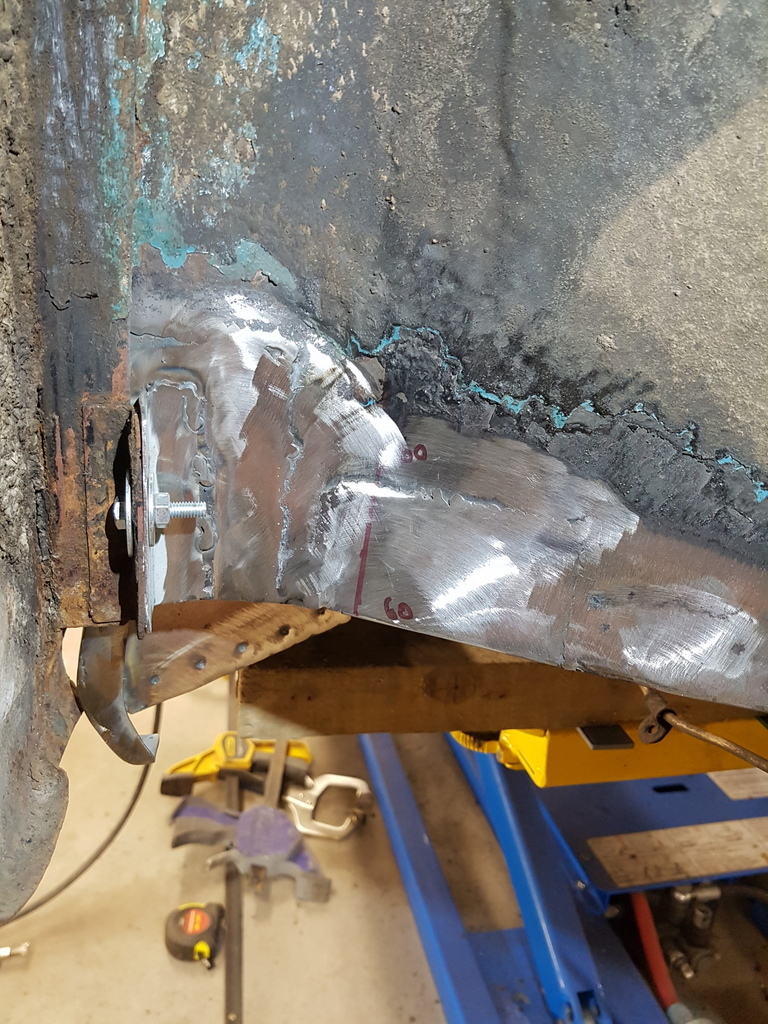 New edge section to the A post (behind the wing edge - fabricated in several sections due to its shape 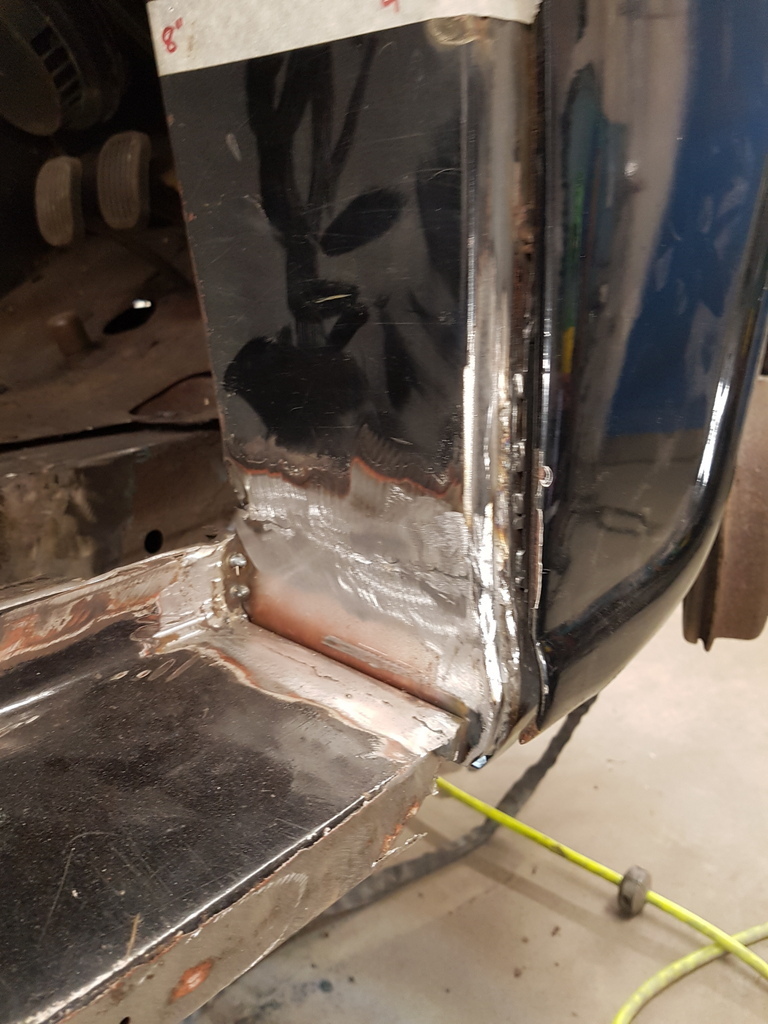 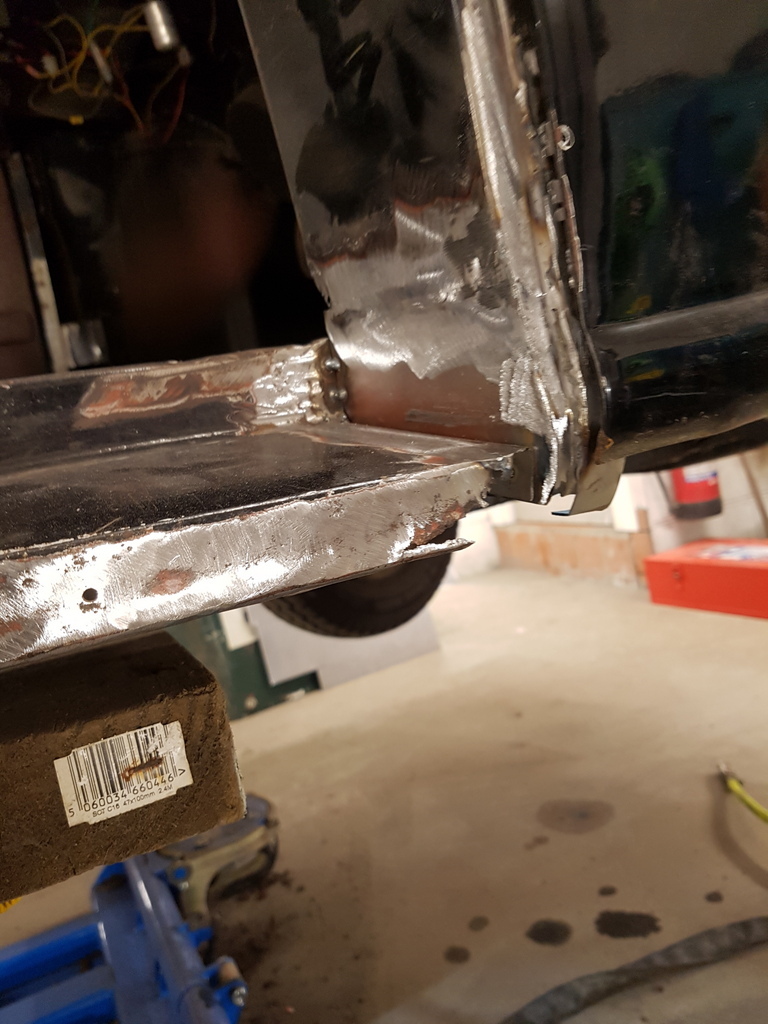 Front outrigger going in - you will often find that the fiddly / complex small areas of fabrication take much longer than the larger sections to replace - hence the outrigger was fitted, checked & welded in under 20 mins - prior to this I had spent a fair few hours forming, welding in & dressing back all the small fiddly sections 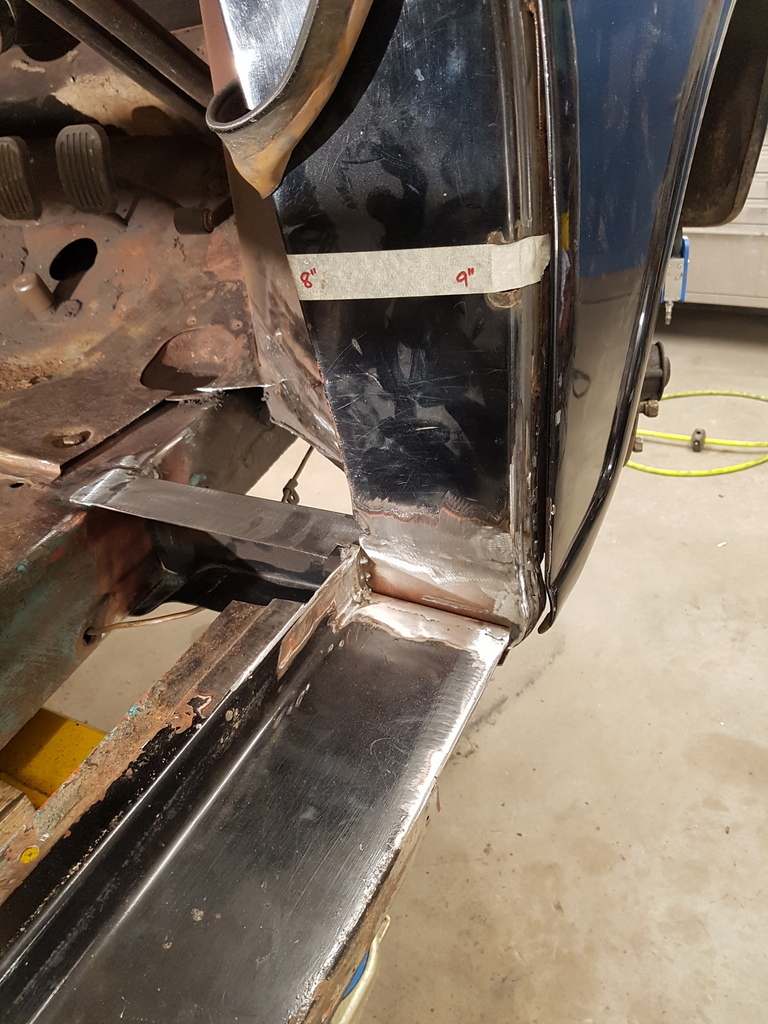 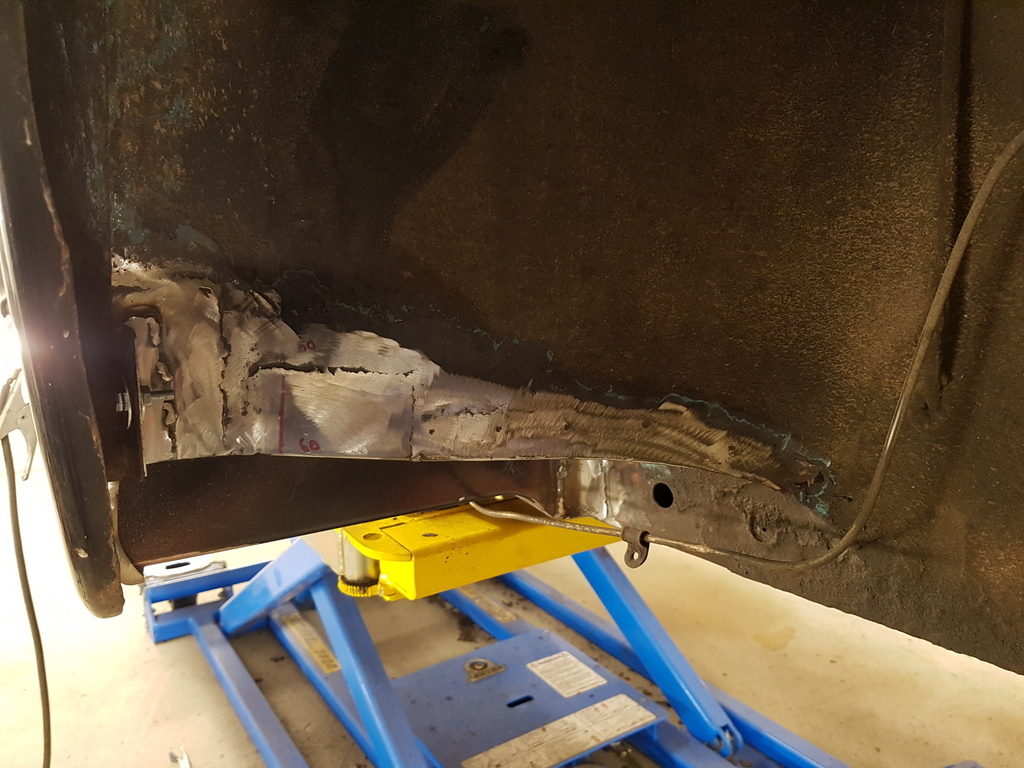 New floor pan in the making along with several other small sections that are required to finish this corner 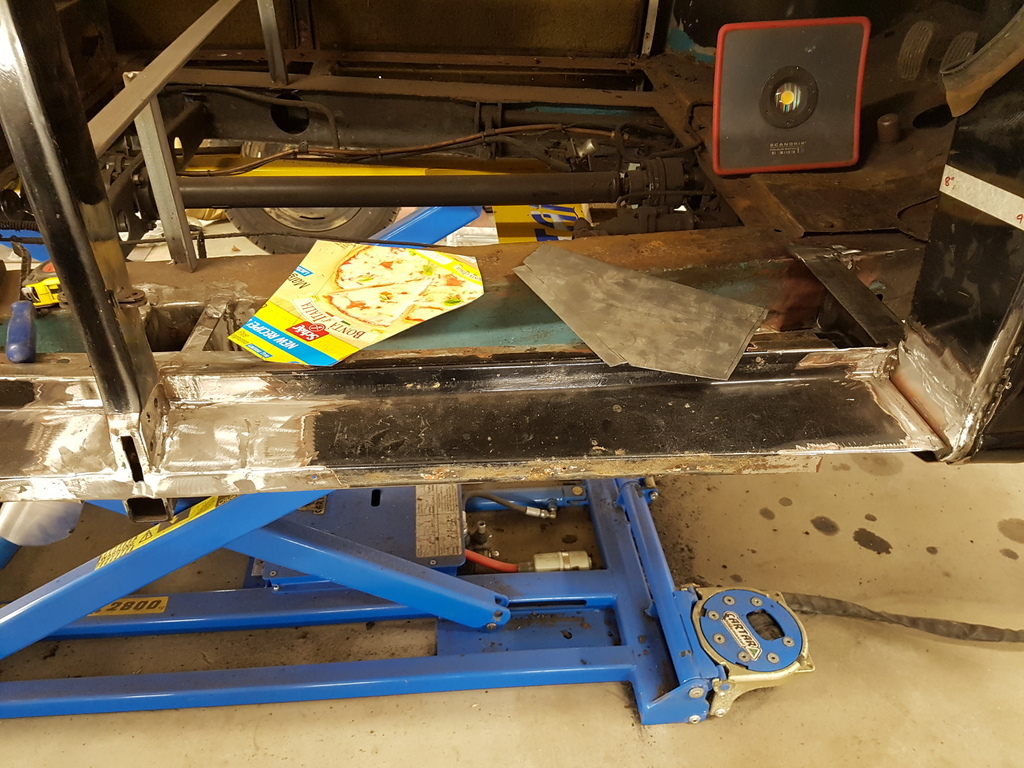 More tomorrow |
| |
|
|
|
|
|
Oct 17, 2019 21:01:59 GMT
|
|
Maybe the bodger with the river gun used grease in order to form a 'realistic' looking weld out of grease?
|
| |
|
|
|
|
|
|
|
Really? Internet claims it's the 1934 Chrysler Imperial Airflow CW. Still, Like you say, not fun to fit. I did the glass in my MGB GT, and suffice to say I won't be doing ANY glass with a curve again in a hurry! Enjoy reading your threads, Jowett's are a wonderfully engineered car, and seeing the work you carry out on them (and others) is nothing short of awe-inspiring, seeing the fit and finish you achieve. Carry on! Internet: 0 - Jowett 1 Duff info from the internet I'm afraid Rich - This is a 34' Chrysler Imperial Airflow  And that's not a curved windscreen but a 2 piece screen created from two flat pieces angled from the centre vertical joining rail - windscreens are not has easy has most people think - the MGB GT is a fairly simple screen to fit but the chrome covers & corners are another thing entirely Many thanks for your comments though - much appreciated  If you are reading the Autoglass website, it says the Chrysler Imperial was the first to use curved glass in two pieces. Panoramic one piece curved screens came later. It is a bit vague thereafter as alot of websites suggest the Corvette from this era was the first to have curved panoramic but also had problems. The Jowett unfortunately probably gets overlooked. Were Jowetts ever popular in the USA? |
| |
|
|
|
|
|
Oct 18, 2019 10:19:26 GMT
|
|
" checked & welded in under 20 mins - prior to this I had spent a fair few hours forming,"
And this is where the photos don't tell the full story. The way the B pillar and the jacking point looked so scary and crumbly to begin with, then a few photos later and all looks well. It's easy to think it wasn't such a big job in the end but in actual fact several hours are spent on the smallest of tasks.
Brilliant to admire again!
|
| |
|
|
|
|


