|
|
|
Feb 18, 2021 10:10:09 GMT
|
So I managed to get out into the workshop and did a bit more. I've had various bits of advice, the main one being to turn up the power on my welder a bit. This has improved the weld noticeably, producing a fatter bead that sits into the metal better rather than standing proud. 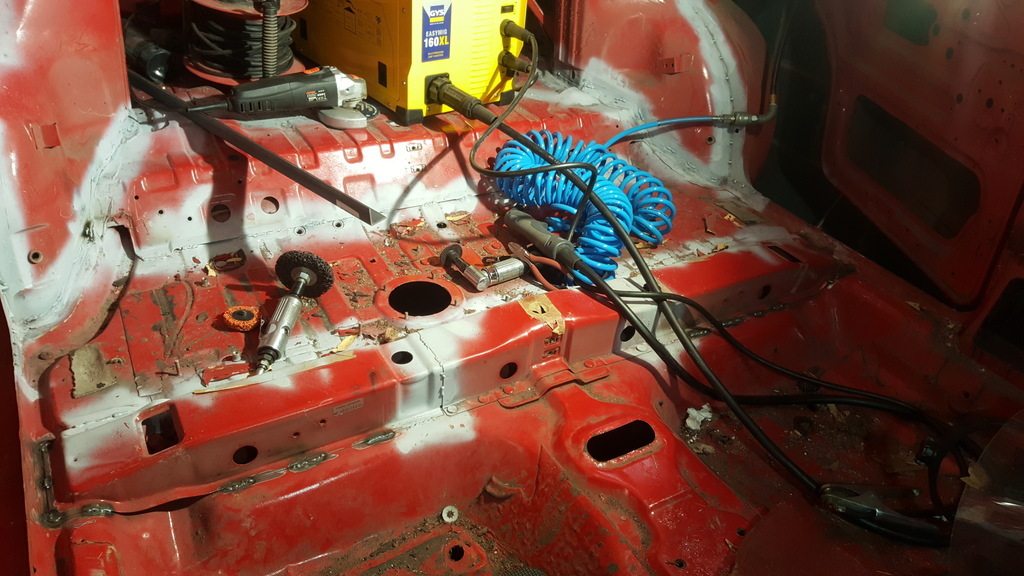 As such I've been switching between spots and stitches still as some people recommend spots to reduce the propagation of cracks whereas others state 20-30mm stitches are much stronger. 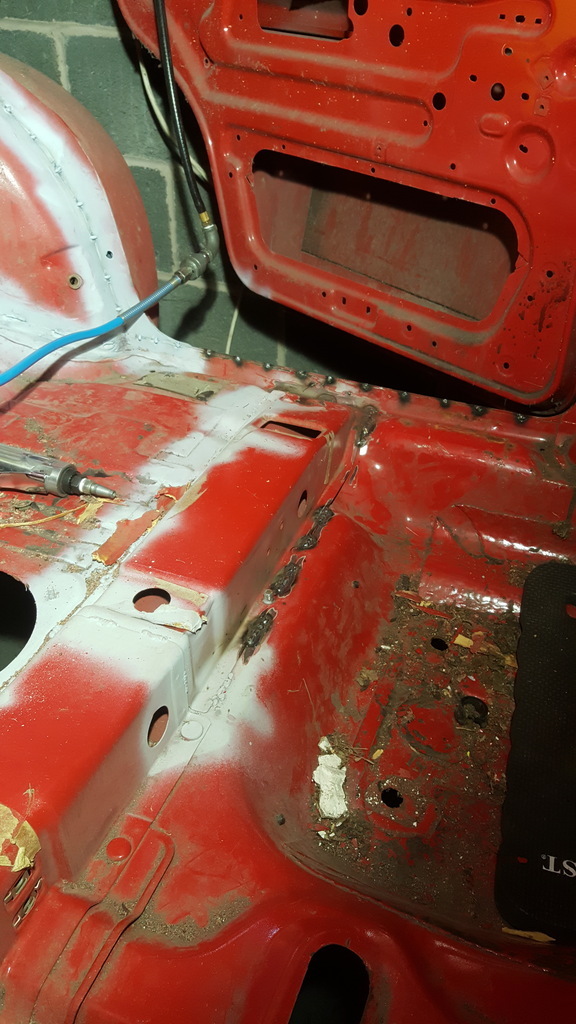 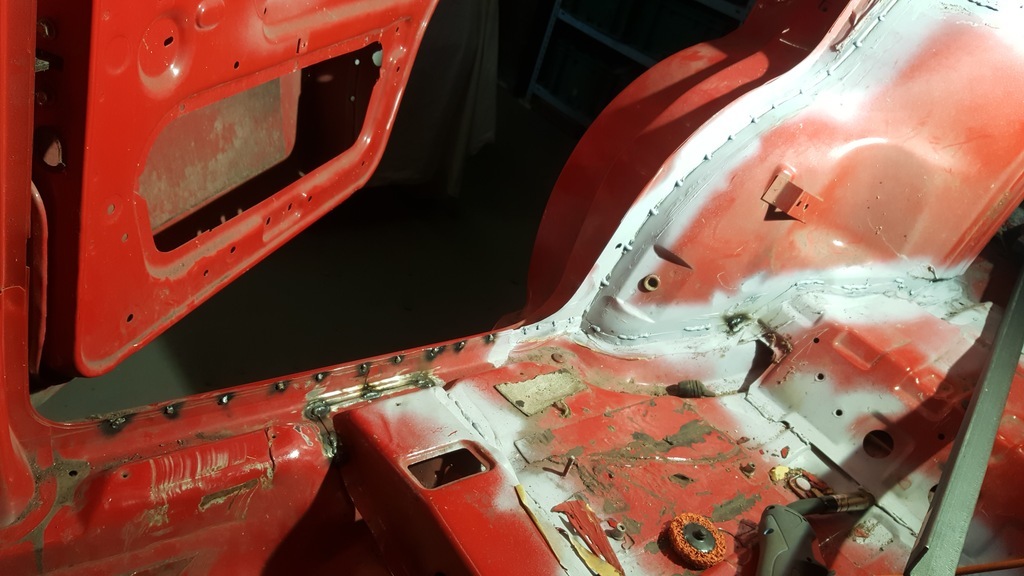 Been to the local steel merchants and bought some 1mm sheet which I'm going to use to fabricates some plates for the problem areas. |
| |
|
|
|
|
|
|
|
Feb 18, 2021 23:55:33 GMT
|
Looking good! If you're making some gussets, I'd recommend getting some swage dimple dies/hole flaring tools. If only because gratuitous swaged holes in gussets just make something look proper  |
| |
Last Edit: Feb 18, 2021 23:55:47 GMT by biturbo228
|
|
jonomisfit
Club Retro Rides Member
Posts: 1,791
Club RR Member Number: 49
|
HF integrale rebuildjonomisfit
@jonomisfit
Club Retro Rides Member 49
|
Feb 19, 2021 12:48:30 GMT
|
|
Everyone loved swagey holes.
Plus they make everything go faster
|
| |
Last Edit: Feb 19, 2021 12:48:51 GMT by jonomisfit
|
|
|
|
|
Feb 19, 2021 13:34:21 GMT
|
|
Only if they're triangular.
|
| |
|
|
|
|
|
Mar 11, 2021 21:42:17 GMT
|
|
Hi,
I'm watching your thread with interest. I bought my 16v a couple of years ago as a stripped project.. and sadly that's still how it sits today.
I have now built a garage for it so that I can work in it, but there's a lot to learn about them. Any advice you have I'd be interested in listening to..
Good luck with your project.
|
| |
|
|
|
|
|
Mar 12, 2021 12:42:32 GMT
|
|
There's one of these comes out early in the morning when it's dry when I'm riding my bike down by the lake in Berlin. It's red, funnily enough. Sounds fantastic when the driver gives it some welly. It's an inspiration.
I'll be watching your thread with interest. Thanks for sharing.
Mike
|
| |
|
|
|
|
|
Mar 30, 2021 15:59:58 GMT
|
I've spent a couple of weekends brushing up on my welding skills to the point where I'm a lot happier with the bead profile. Penetration is still good so I'm happy to be making progress. Moving forward I did the front crossmember under the seat area. 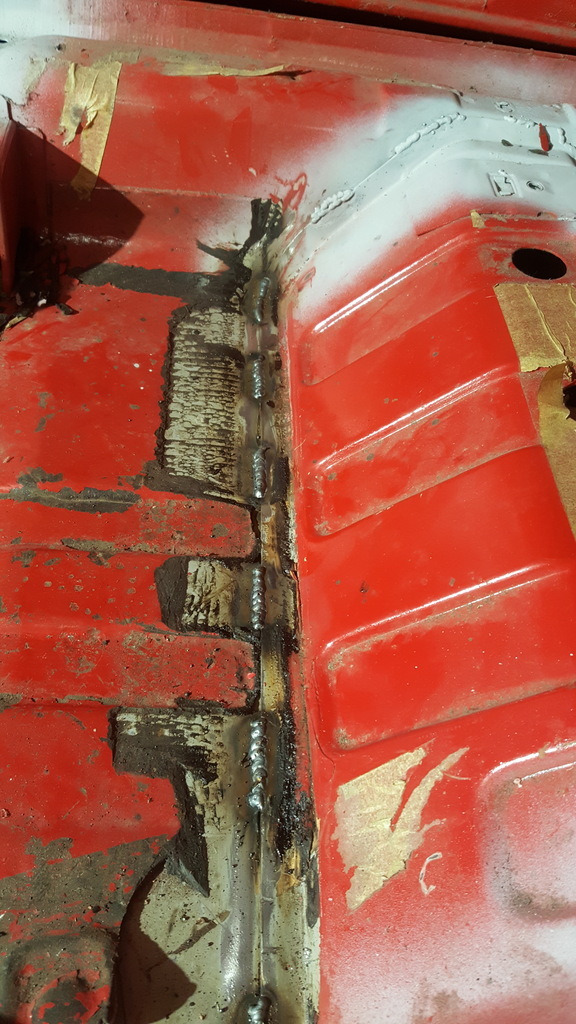 Then moving on to a bit of Cardboard Aided Design.... 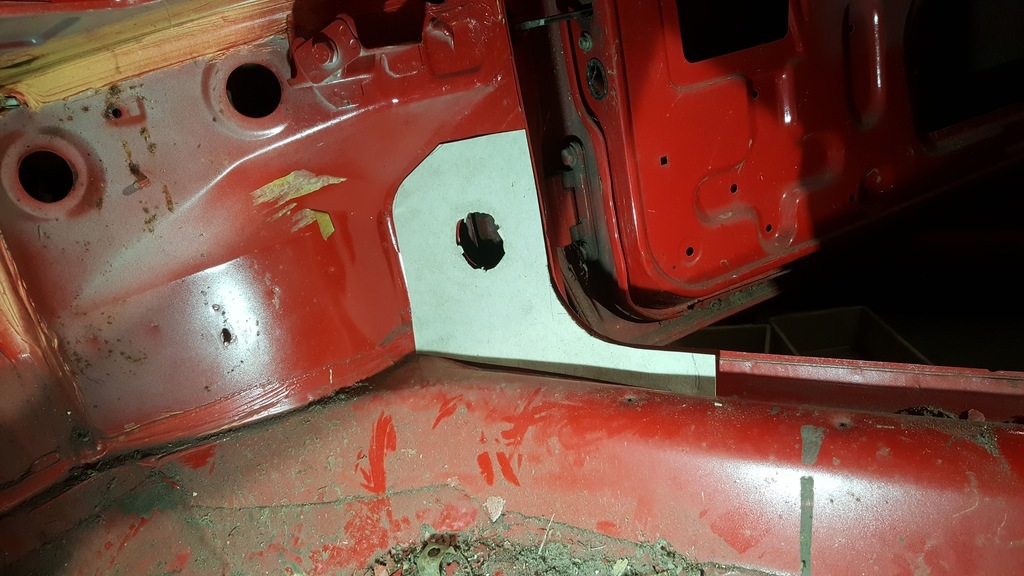 This is the bottom of the A post where stress cracks can occur. There's a bit of discussion over whether the plates need to extend so high but I'm not trying to finite engineer anything so if in doubt, go big! 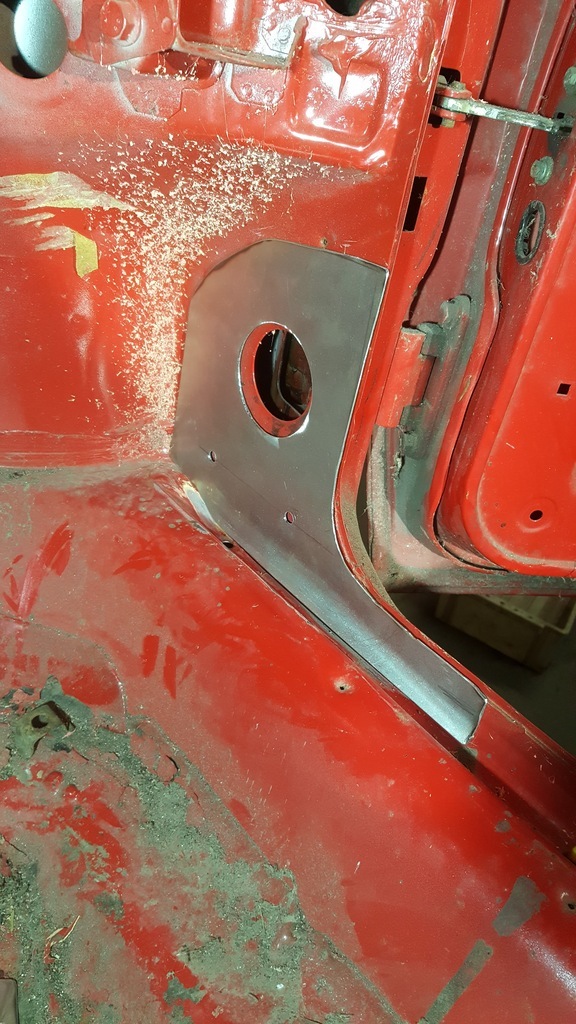 I put in a couple of 8mm holes to plug weld the plate at the maximum distance from an edge so there's a fixing point at least every 50mm Moving forward, in front of the A post is a weak area - especially on the offside (UK). A guy in Italy who has been involved with preparing integrale's since they were new shared this modification. 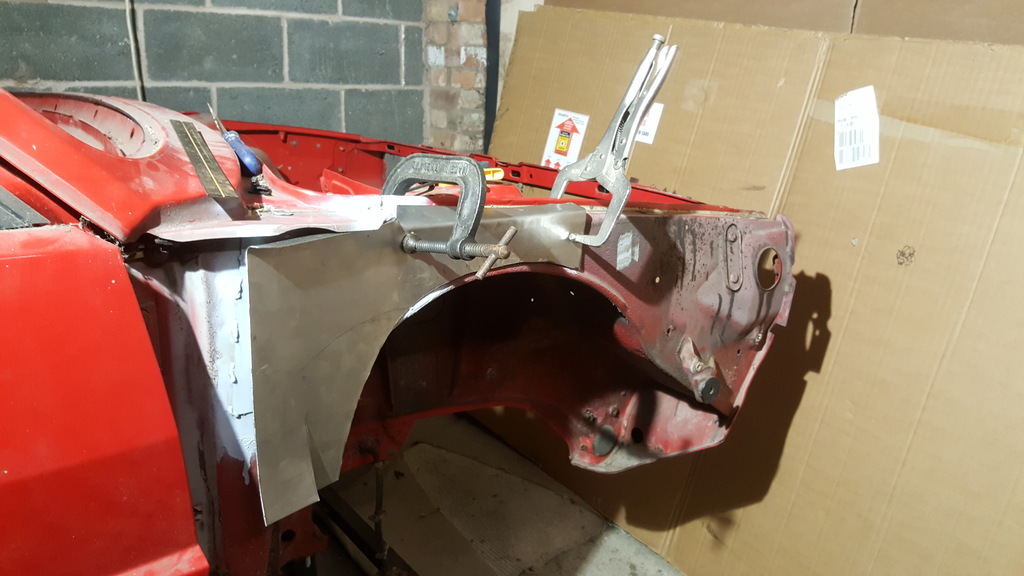 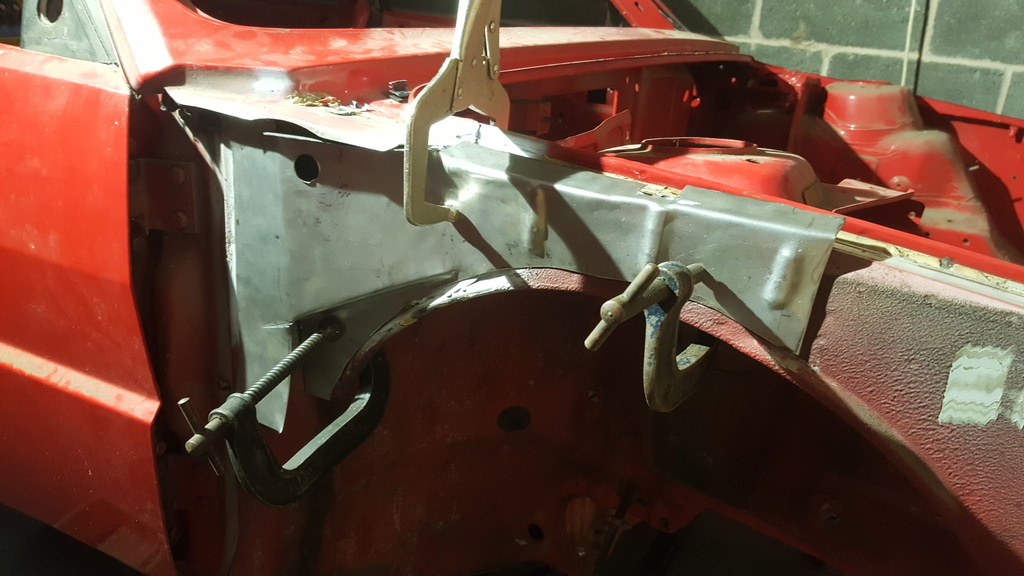 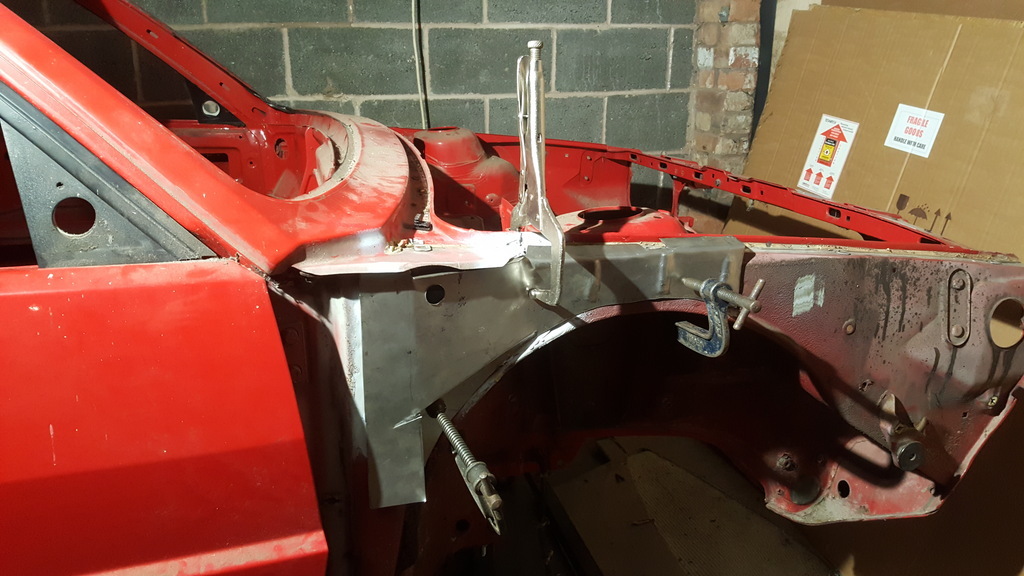 It took a fair bit of patience but with just some rudimentary tools I managed to achieve a reasonable fit. They'll require some fettling when I come to weld them in place but that's to be expected. I'll give them a good covering of Zinc182 primer on the reverse sides before hand. 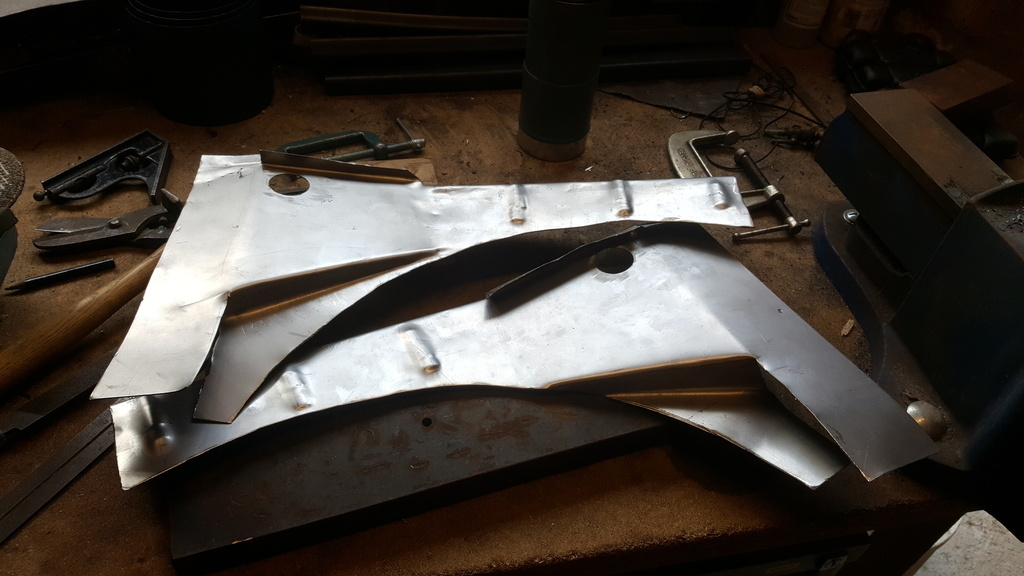 Thanks for reading. |
| |
|
|
|
|
|
Mar 30, 2021 16:33:10 GMT
|
|
Excellent work,
These are such a beautiful car,
Nigel
|
| |
BMW E39 525i Sport
BMW E46 320d Sport Touring (now sold on.)
BMW E30 325 Touring (now sold on.)
BMW E30 320 Cabriolet (Project car - currently for sale.)
|
|
jonomisfit
Club Retro Rides Member
Posts: 1,791
Club RR Member Number: 49
|
HF integrale rebuildjonomisfit
@jonomisfit
Club Retro Rides Member 49
|
Mar 30, 2021 18:28:42 GMT
|
|
I'm sure you're already thinking this, but where i've put some double skinning and boxing on cars before I always make sure there is a drain hole at the lowest point, and the bottom of the seam has an opening to let anything that does get in drain out.
On my escort I've also purposely left gaps in the seam sealer on the bottom edges of seams, again to encourage to drain.
90s cars like any excuse to rot
|
| |
Last Edit: Mar 30, 2021 19:22:35 GMT by jonomisfit
|
|
jonomisfit
Club Retro Rides Member
Posts: 1,791
Club RR Member Number: 49
|
HF integrale rebuildjonomisfit
@jonomisfit
Club Retro Rides Member 49
|
Mar 30, 2021 19:33:23 GMT
|
|
Also.
It looking good. Its great seeing it progress and how another 90's rally car is put together :-)
|
| |
|
|
|
|
|
|
|
Mar 30, 2021 21:19:53 GMT
|
Also. It looking good. Its great seeing it progress and how another 90's rally car is put together :-) Thanks, I’ve been following your build and taken many ideas and inspiration from it. Planning to put together a rotisserie once I’m finished with the easy to reach bits and scrape off all the underseal like the escos and see what’s revealed. Noted re drain holes, cheers. |
| |
|
|
|
|
|
May 24, 2021 15:54:21 GMT
|
It's been a few weeks so it's time for a quick update. I fitted the A post strengthening plates that I'd made up. Firstly cleaned back the paint and then gave a coat of weld through primer 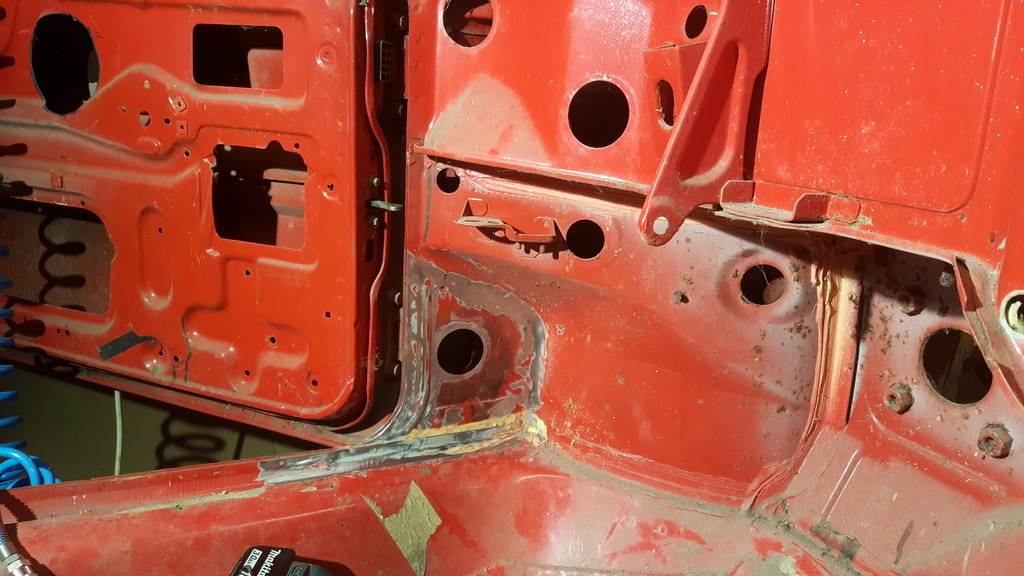 I'd put in some plug weld holes so the maximum distance between welds is around 50mm 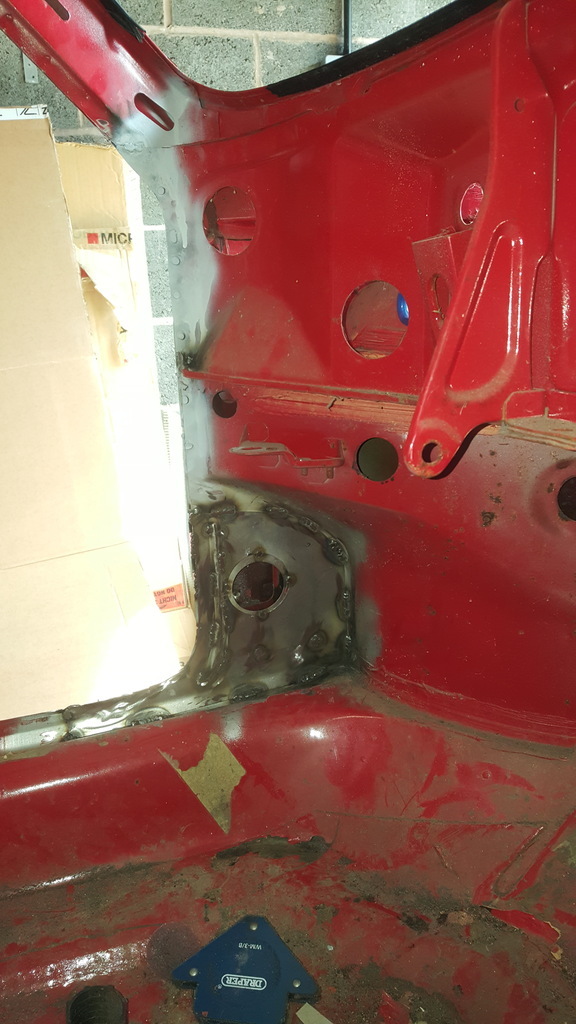 Found a crack at the bottom of the front door opening which is quite common so cleaned it up and very gently filled it with weld before grinding it back again. 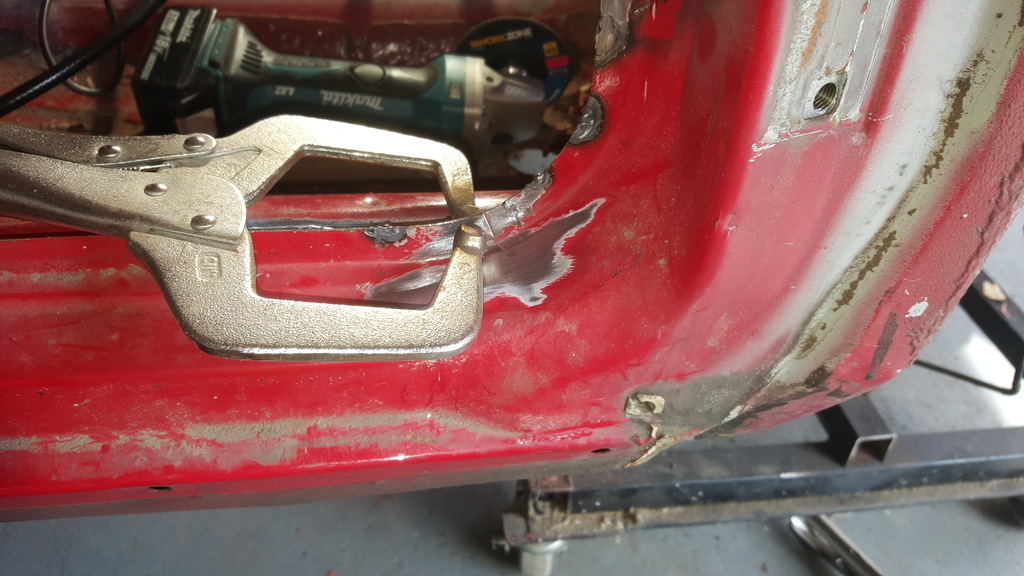 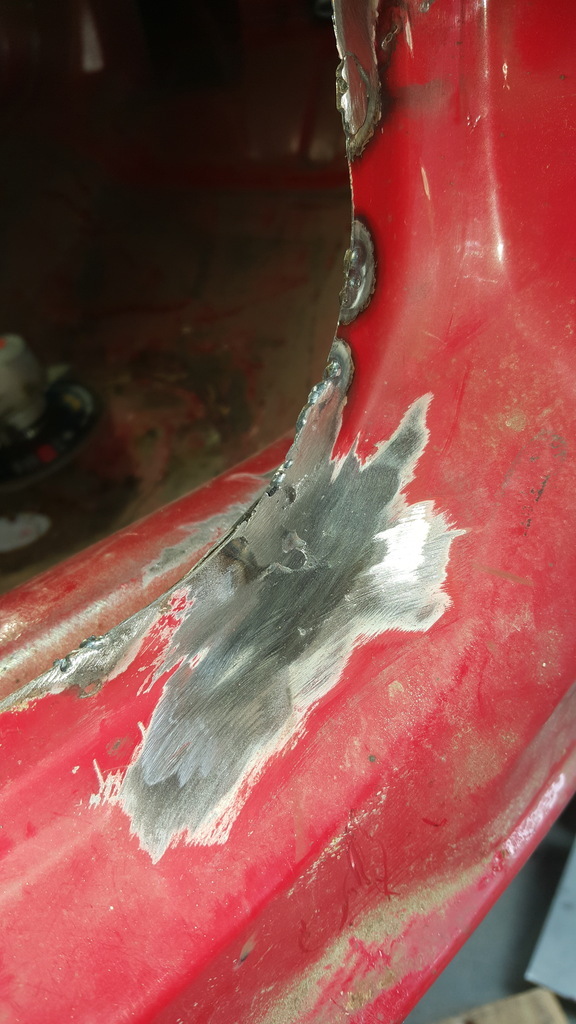 I'm starting to find some patches of surface rust (yes, I know as a 90's Italian car I really should be pleased it's so light). When I find any I'm cutting back with a clean & strip disc then treating the area with Kurust before a good coating of zinc primer. 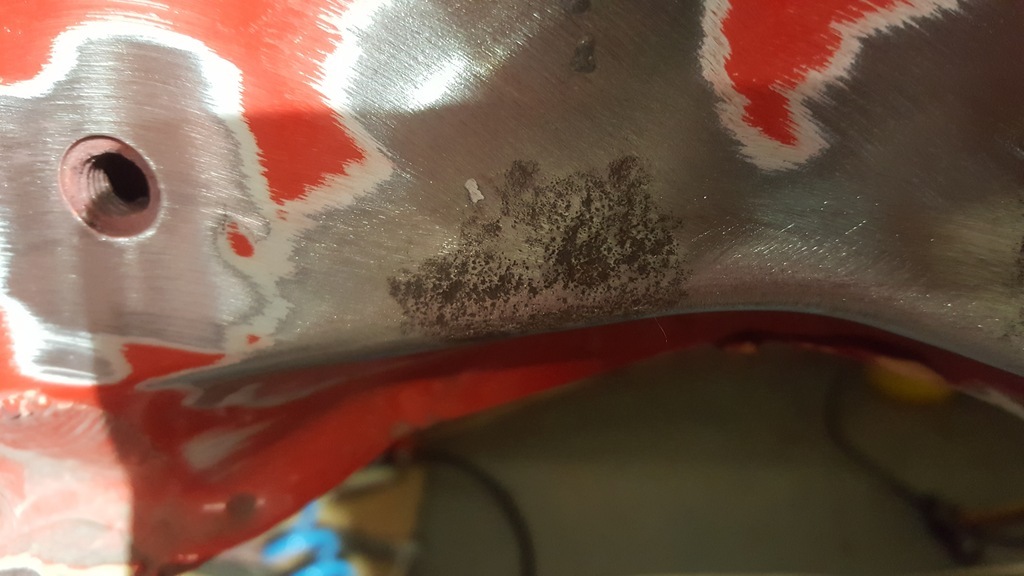 Progress is pretty glacial as I get at most a day a week on the project but I'm just taking it easy and enjoying the process. 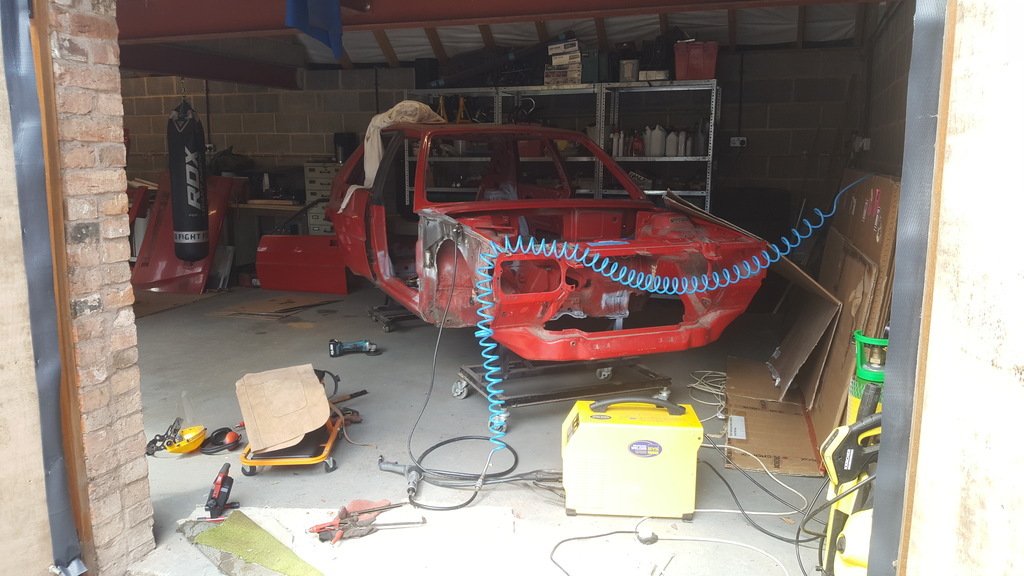 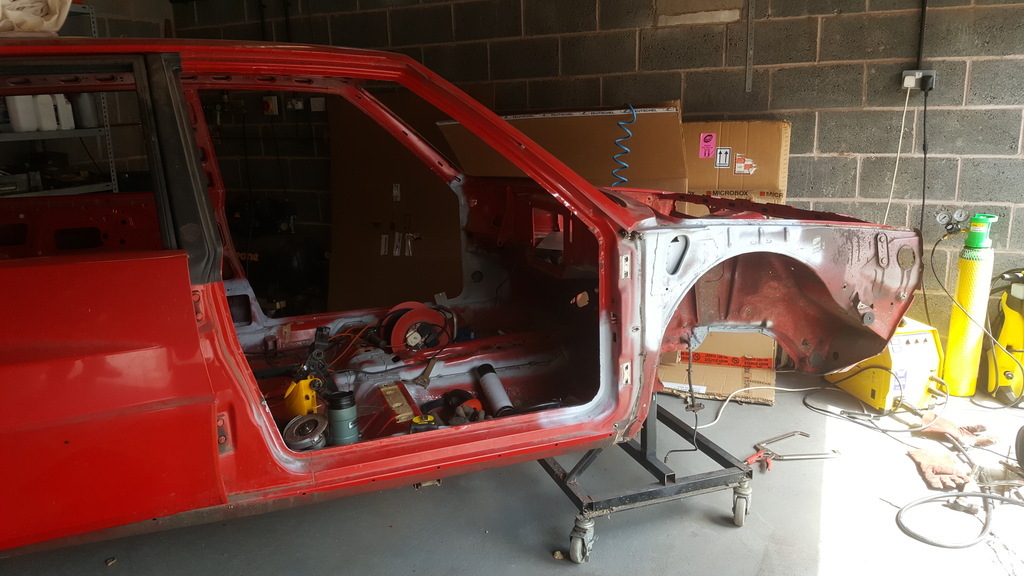 |
| |
|
|
|
|
|
May 25, 2021 11:16:37 GMT
|
Looking good! With the a-pillar/forward chassis leg panel, it would be worth thoroughly seam sealing around the edge of the panel once it's welded on and primered. Multi-skinned panels like that on ungalvanised cars (and even on galvanised ones!) are a real point of weakness for rust. It probably won't materialise for a decade or so, but if the car's a keeper it's not a great deal more effort to try and stop it getting behind the panel  Zinc primer is useful in slowing rust, but at least the stuff I've used isn't wholly waterproof. |
| |
Last Edit: May 25, 2021 11:56:45 GMT by biturbo228
|
|
|
|
|
May 27, 2021 21:06:37 GMT
|
|
Thanks biturbo228. Still finding my way with bodywork as I’ve not really done anything like this in many years. I realise I need to seal every seam but in these hidden areas I was going to finish with Raptor then seal. Are you saying I should seal then Raptor? Thanks
|
| |
|
|
|
|
|
May 27, 2021 21:35:56 GMT
|
Thanks biturbo228. Still finding my way with bodywork as I’ve not really done anything like this in many years. I realise I need to seal every seam but in these hidden areas I was going to finish with Raptor then seal. Are you saying I should seal then Raptor? Thanks Haven't really worked much with raptor myself, but is it a sort of rubberised underseal paint? I'd probably go primer->seam sealer->raptor in that case, although I'm not sure there would be a great deal of difference if the last two were flipped around. The benefit of seam sealer first is you can inject it into the gaps a little and get a better seal. What you want is mainly to make sure water can't get between the two layers of steel. How you get there I supose doesn't overly matter! Although I do kow it's not best practice to put seam sealer directly onto bare steel. |
| |
|
|
jgtr
Part of things
 
Posts: 270 
|
|
May 27, 2021 22:09:20 GMT
|
|
I used Bilt Hamber Deox Gel to treat rust as I found the Kurust stuff just holds it at bay for 6 months before it comes back. Takes a few applications but will completely remove the rust back to clean metal👍 Would be perfect for that bit in the picture above
Decent application of cavity wax will help keep the water out of the seams
|
| |
Last Edit: May 27, 2021 22:11:38 GMT by jgtr
|
|
|
|
|
|
|
Thanks biturbo228. Still finding my way with bodywork as I’ve not really done anything like this in many years. I realise I need to seal every seam but in these hidden areas I was going to finish with Raptor then seal. Are you saying I should seal then Raptor? Thanks Haven't really worked much with raptor myself, but is it a sort of rubberised underseal paint? I'd probably go primer->seam sealer->raptor in that case, although I'm not sure there would be a great deal of difference if the last two were flipped around. The benefit of seam sealer first is you can inject it into the gaps a little and get a better seal. What you want is mainly to make sure water can't get between the two layers of steel. How you get there I supose doesn't overly matter! Although I do kow it's not best practice to put seam sealer directly onto bare steel. Raptor is a truck bed lining paint which is very tough. Quite a few resto companies use it for the underside of rebuilds, I've seen a few guys on here use it too with good results. I'll do a bit more research before applying final finishes but thanks for your input. |
| |
|
|
|
|
|
|
|
I used Bilt Hamber Deox Gel to treat rust as I found the Kurust stuff just holds it at bay for 6 months before it comes back. Takes a few applications but will completely remove the rust back to clean metal👍 Would be perfect for that bit in the picture above Decent application of cavity wax will help keep the water out of the seams Thanks. I'm thinking of switching from upol primers to Built Hamber as I'm hearing a lot of good things about their products. I'll give their Deox Gel a try when I'm placing an order. Cheers |
| |
|
|
|
|
|
|
|
|
|
I'm going to post a full update soon but in the meantime I'm after a bit of advice from the community.
I've got the shell turned over and the underside is pretty good with most of the factory underseal intact.
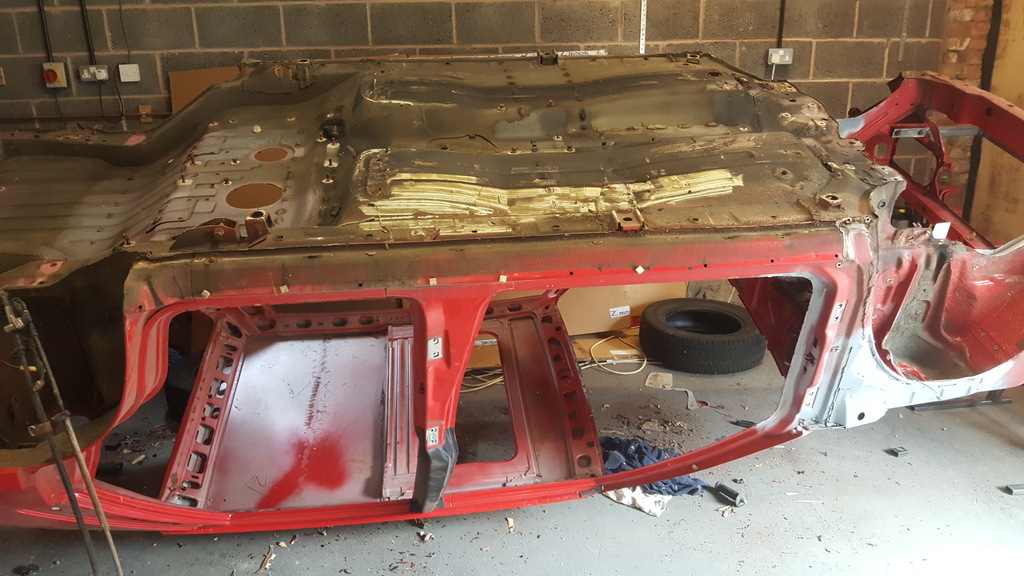
I've started some exploratory stripping and am wondering the best way to proceed on these parts that are looking good? Current thinking is to strip it all off then apply some primer then Raptor. Does this seem like a reasonable approach seeing as on the whole it's looking pretty rust-free?
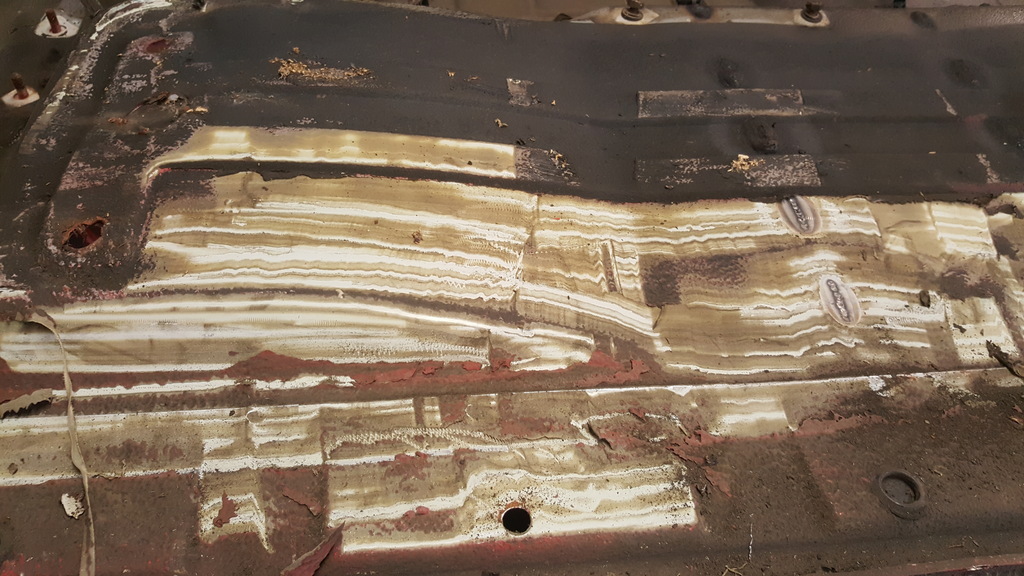
The weld marks are the penetration from the seam welding done inside the cabin. Obviously there are rusty parts which I'll address but looking for a bit of feedback regarding the good bits.
Many thanks.
|
| |
|
|
|
|


