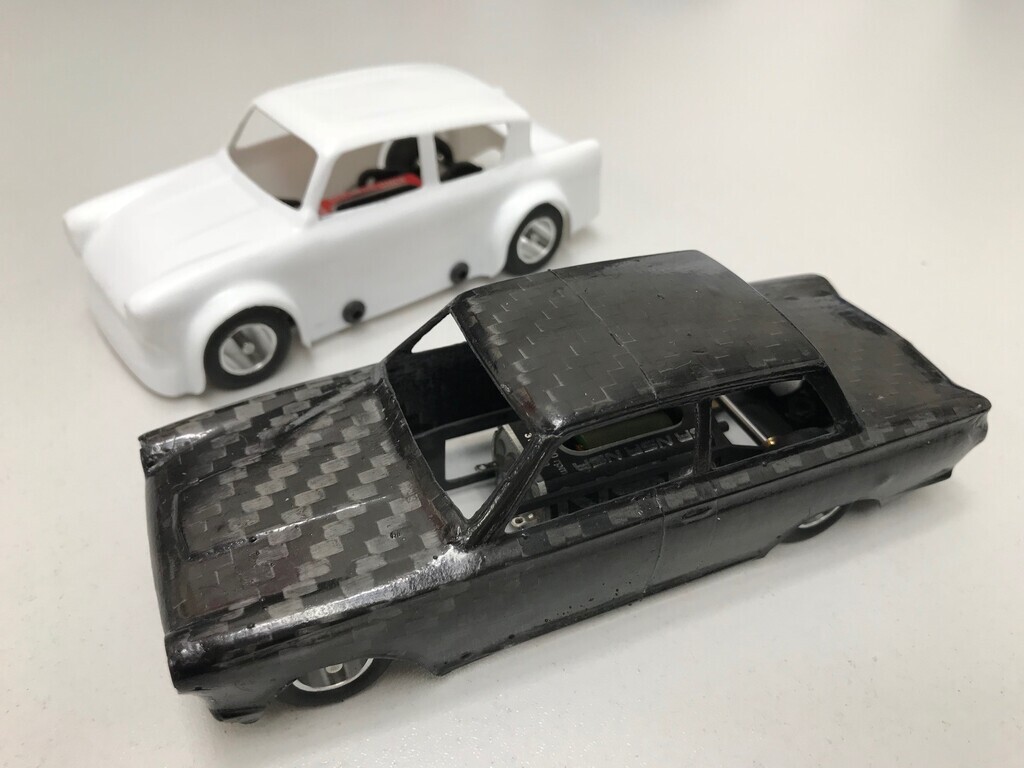
Hi, I'm Jonny69 and these are my silly carbon fibre Scalextric cars.
There's a back-story to this. When I was a kid, I inherited my dad's soldered brass tube spaceframe Scalextric car, complete with monster-size Mabuchi motor. It was incomplete and really I was a bit too young to ever get it back in one piece and running. I don't know exactly what happened to it, but it either got lost or broken. I always felt a bit bad about it and thought it would be cool to be able to build him a replacement one day.
Fast forward 25 years to late 2017 and I was now working in R&D at a top Formula 1 team. I had unmonitored access to the autoclaves. markbognor on here had started making composite Scalextric chassis called FibreSlots. A few lightbulbs started to light. I asked the question if he'd be able to cut one out of experimental F1 carbon fibre. Of course the answer was yes, so that's where this started. Decision was made for Dad to get a carbon fibre Mk1 Cortina Scalextric race car for Christmas. A very, very mad one. Gotta work with what you've got, eh?
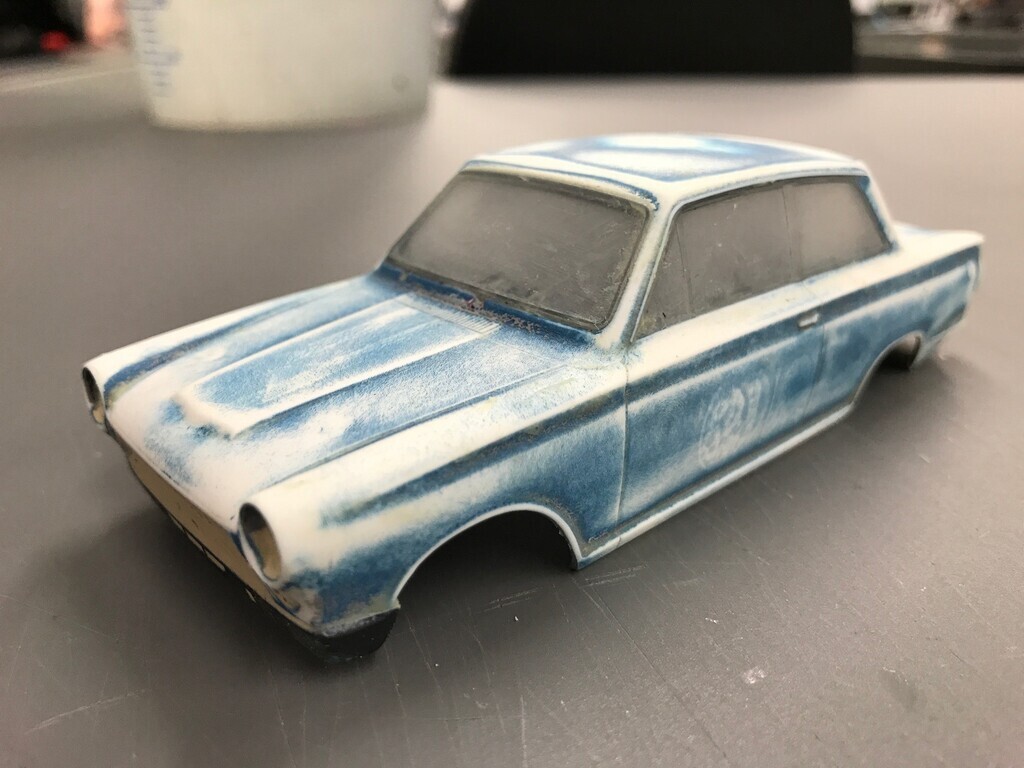
Starting point was this, a brand new 1/32 scale Scalextric Cortina:
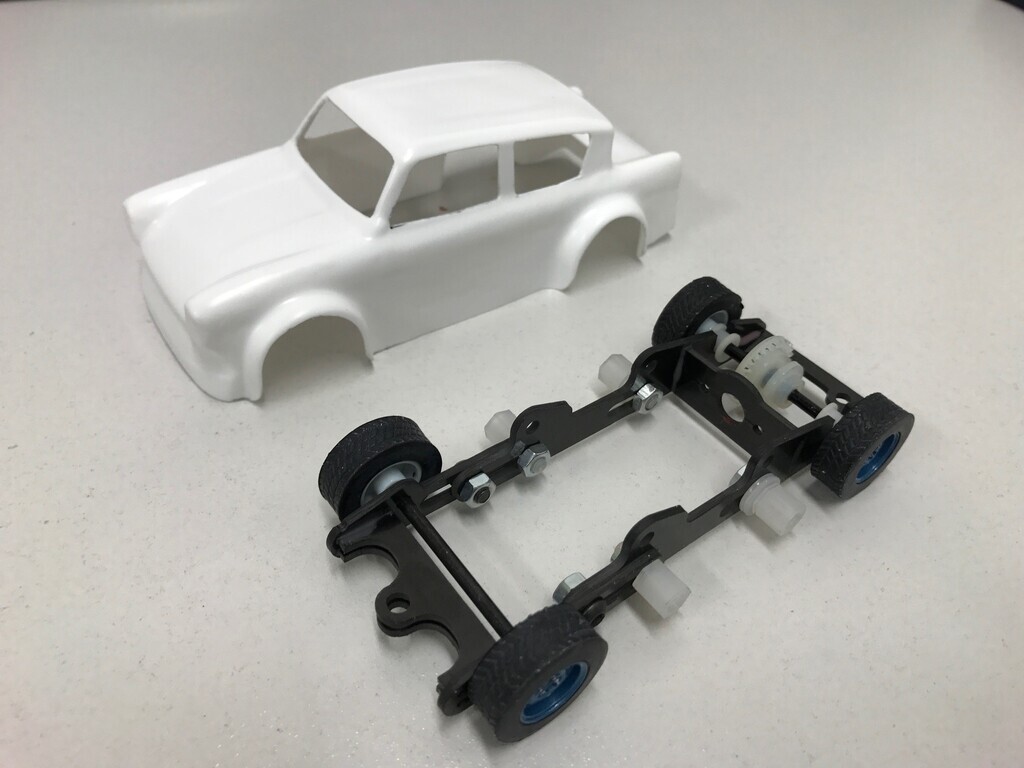
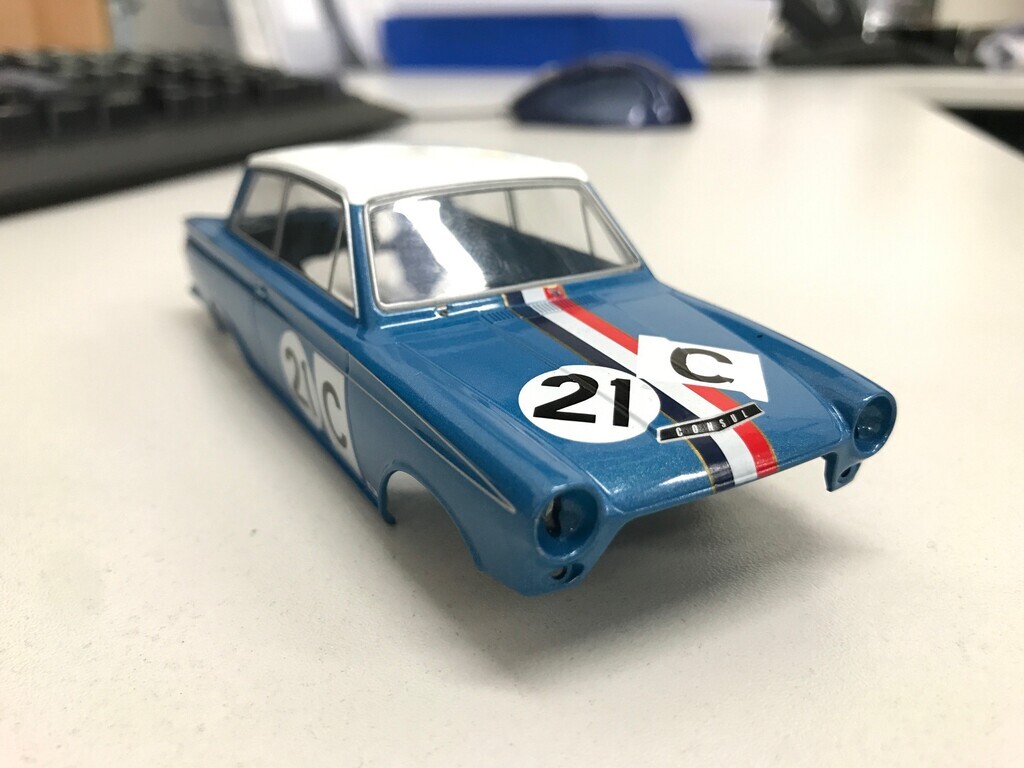
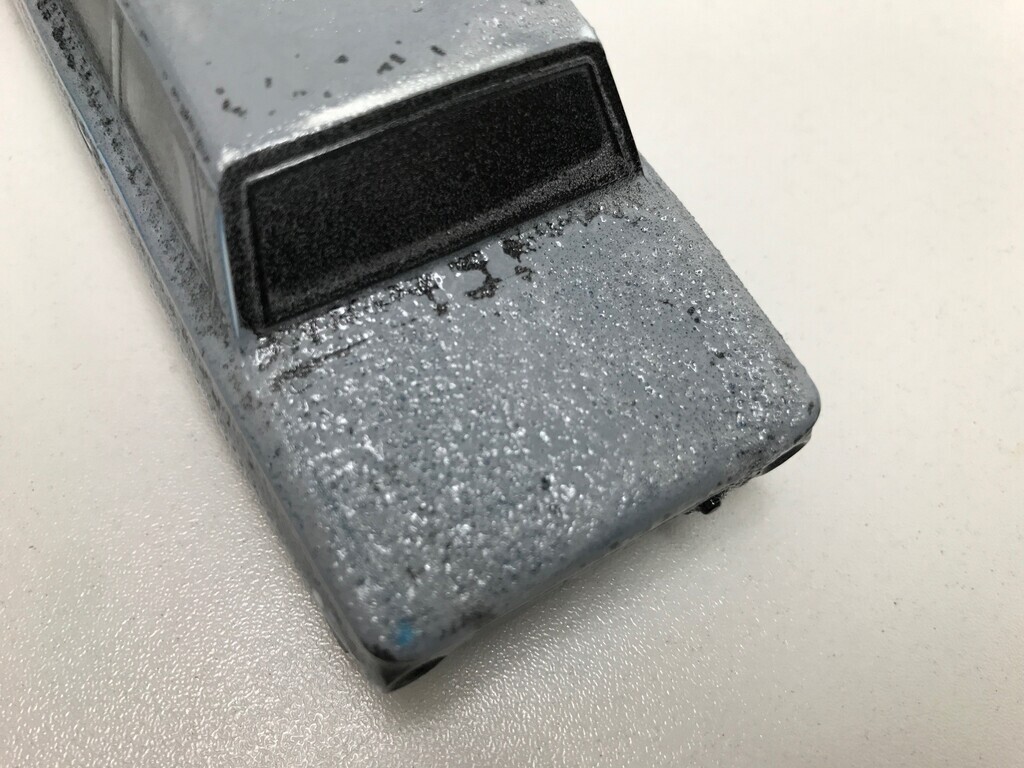
I specifically wanted a narrow body, true to scale. This model provided that and potentially some parts to steal for the final build e.g. lights, grille etc:
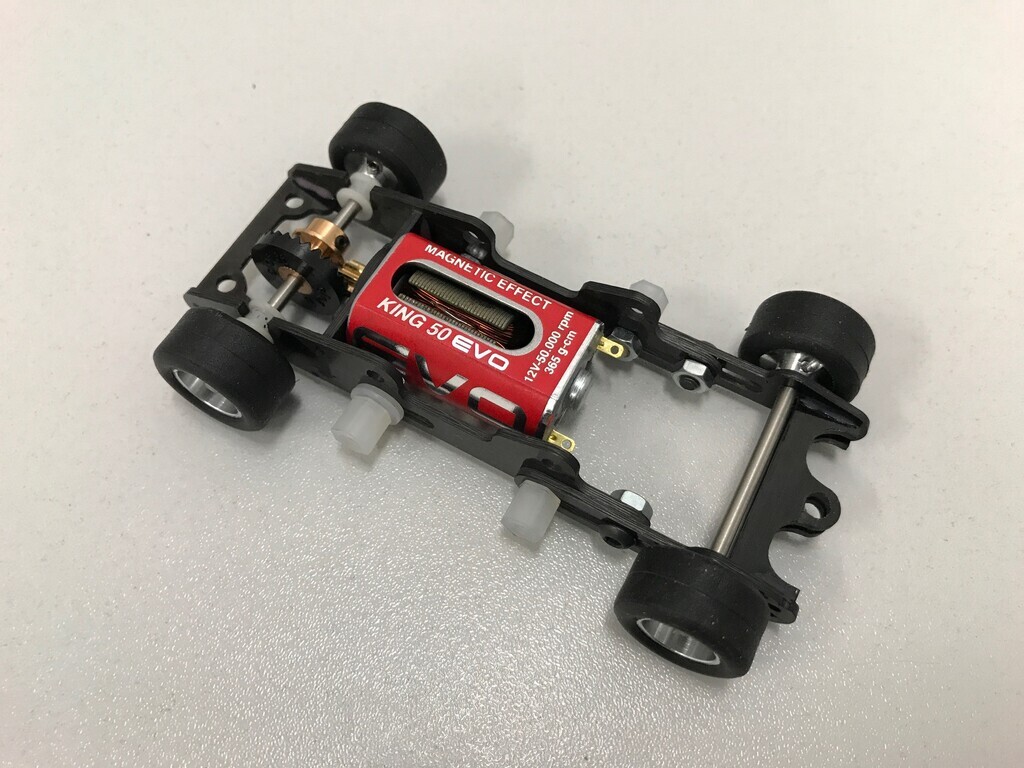
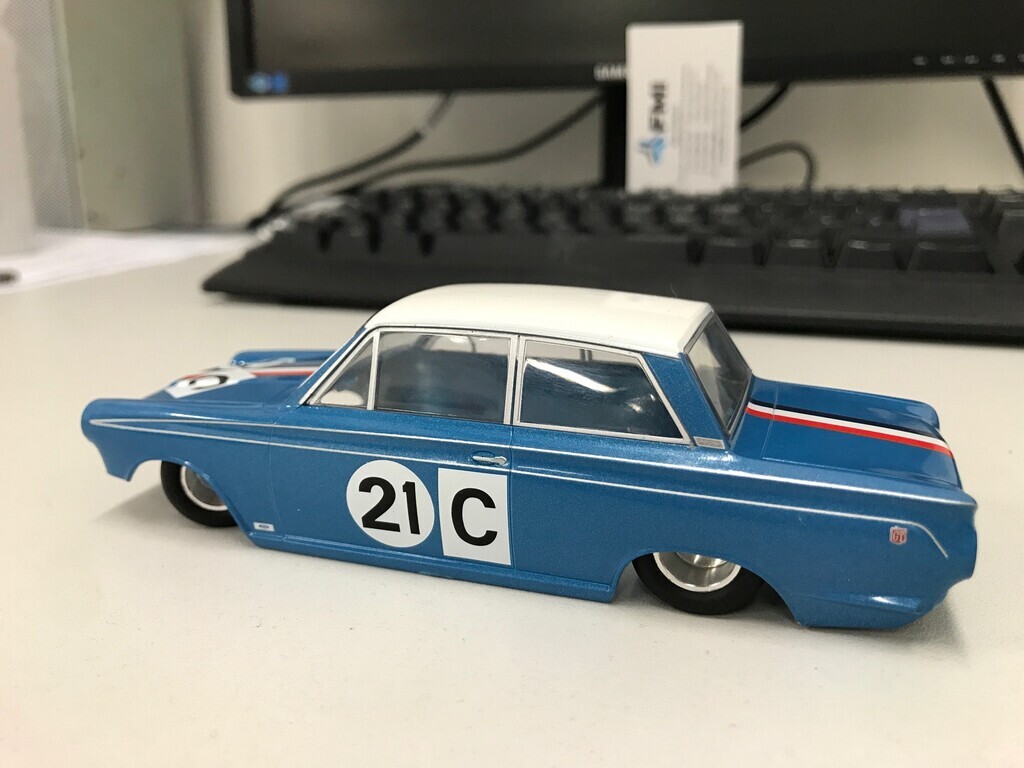
Compulsory to do this, right:
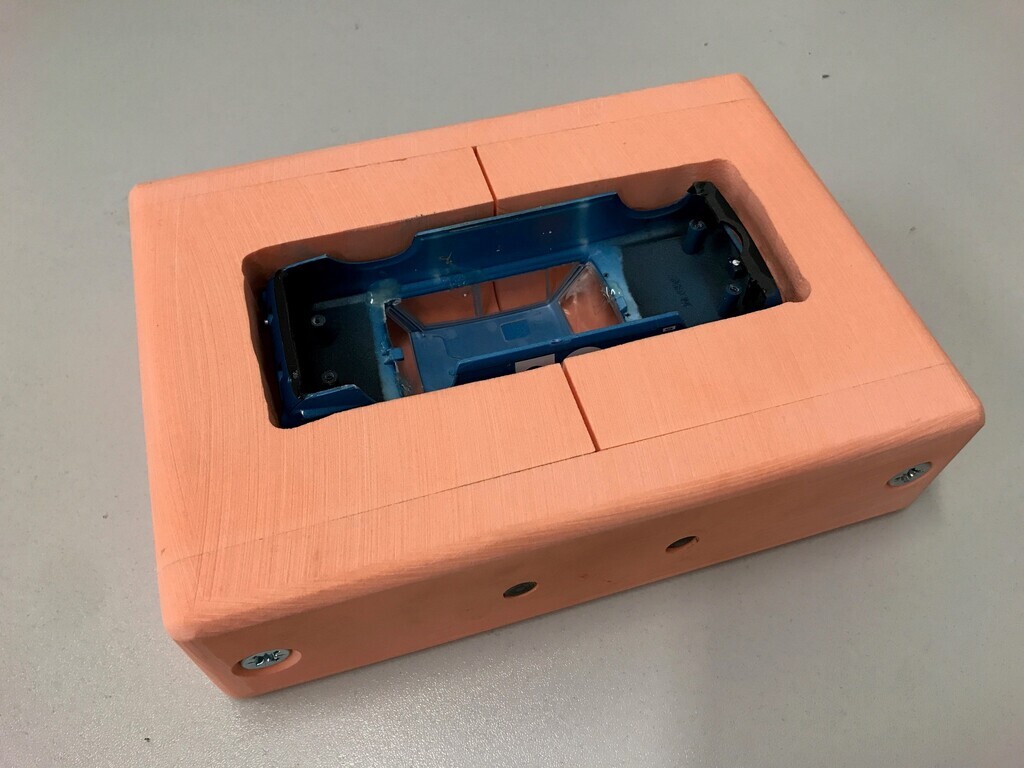
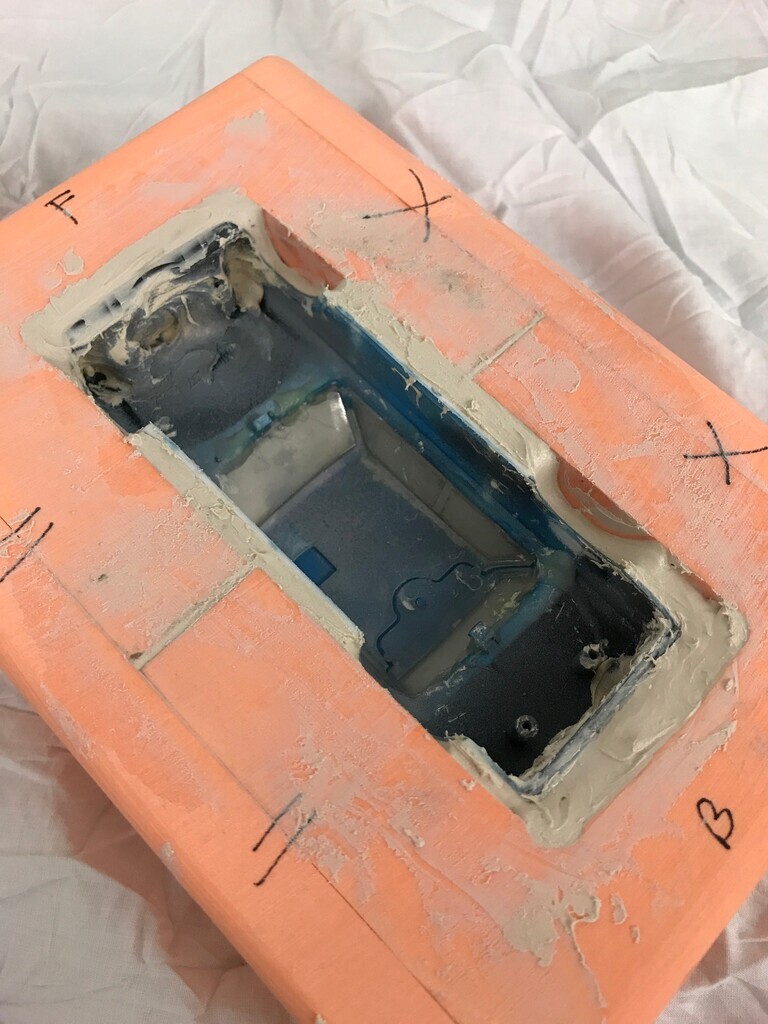
I needed to make a mould for the carbon fibre body. My colleague was way more experienced at this than me and gave me a hand with this. He quickly whipped up a mould box out of some scrap tooling block. We'd worked out that the mould could be made in two parts split front-to-back and the body would come back out. The side plates were dowelled for location and the gap between the two middle parts were space to put PTFE tape in so that it would release:
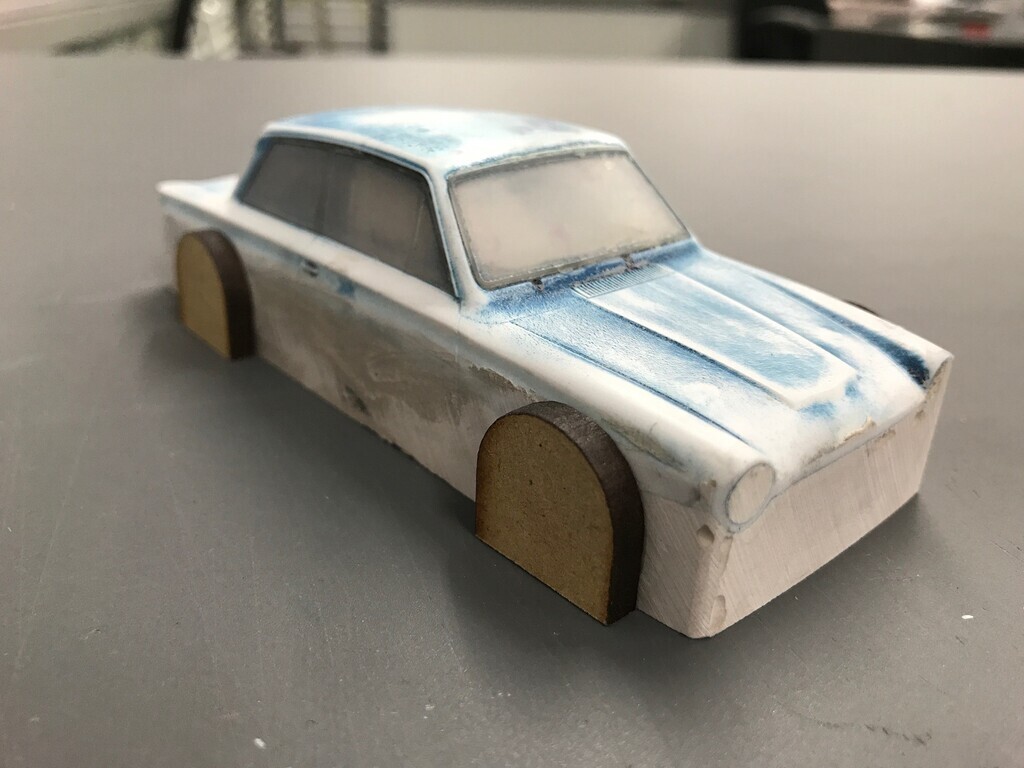
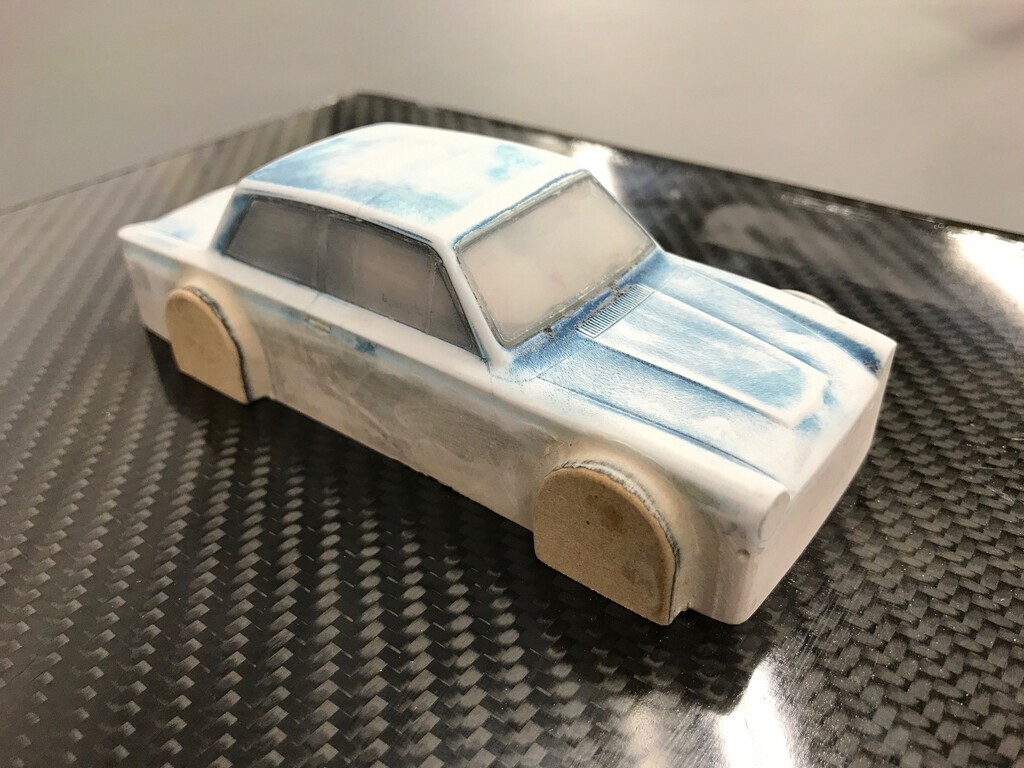
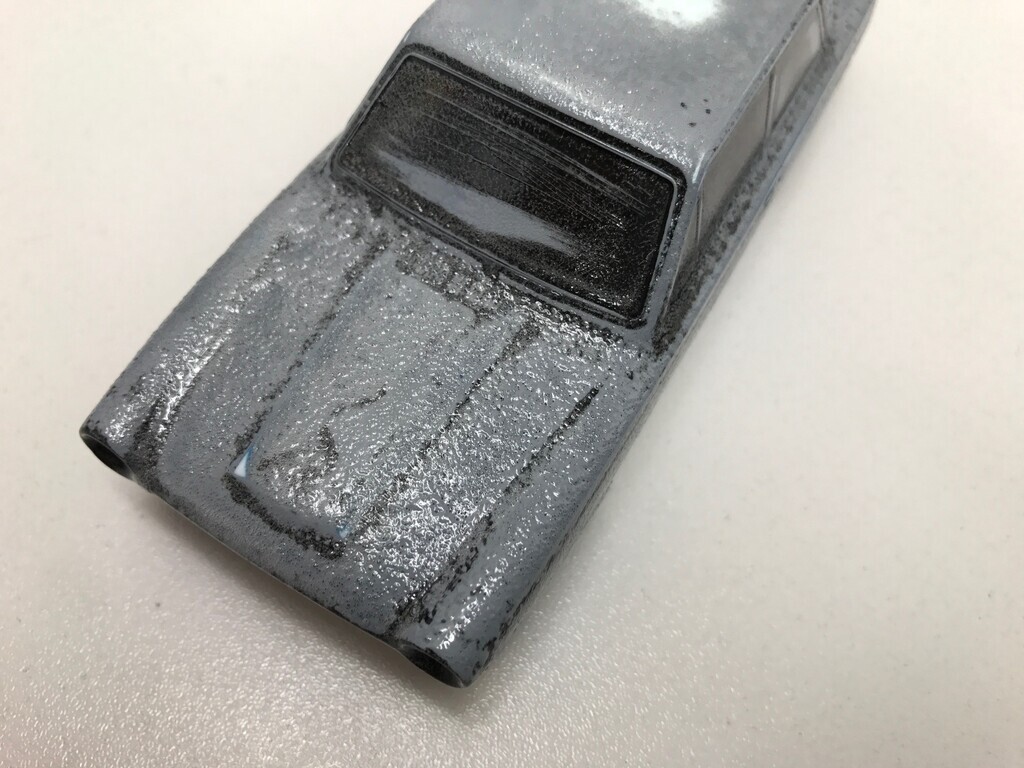
I wanted to smooth off some of the features to give the carbon fibre a better chance of getting into the corners etc. That meant bonding on the bumpers and windows to make the body one piece, filling the grille shell, a light sand to take things like the door handles down, then light primer and clear lacquer for the mould release to go onto. Unfortunately the lacquer reacted badly:
I actually managed to wet blast all that paint back off. Once back down to the plastic, I re-filled everything, smoothed it all off again and it was good enough to take the mould:
This was done with 2-part body filler in two, er, parts. The back half of the mould was filled with filler and the body squished into it. Once cured, the body was popped out and the excess filler was linished off that side. PTFE tape was put over the ends of the mould halves. Then the body was put back into the back half, the front half filled with filler and all the parts brought together like so:
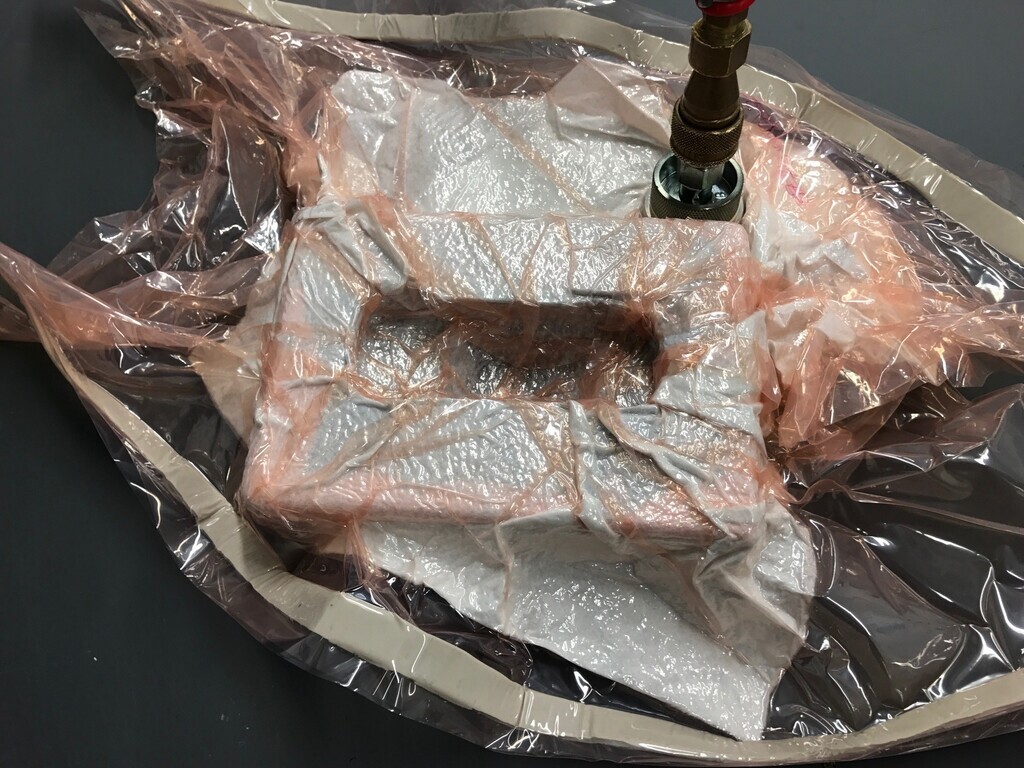
Then it's just a matter of take it all apart, tidy up the mould, seal the surface with mould sealer and release aid and it's ready to use. Unfortunately I didn't take any pictures of the laminating, but it's a matter of cutting out small paper templates, checking for fit, then transferring to carbon pre-preg. Here it is de-bulking, where you leave it in vacuum bag to squeeze the carbon into all the corners and remove any air:
I then bagged it up properly and put it in the clave queue with some other parts which were scheduled to go in on the same cure.
In the meantime, I'd taken a load of measurements off the body.
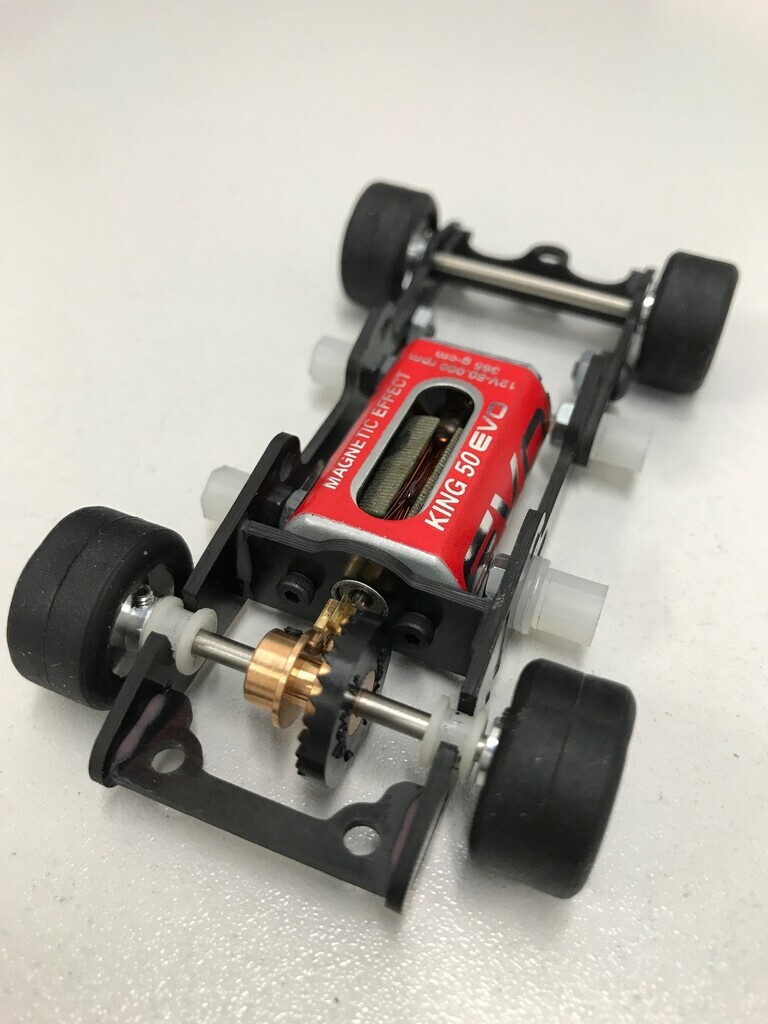
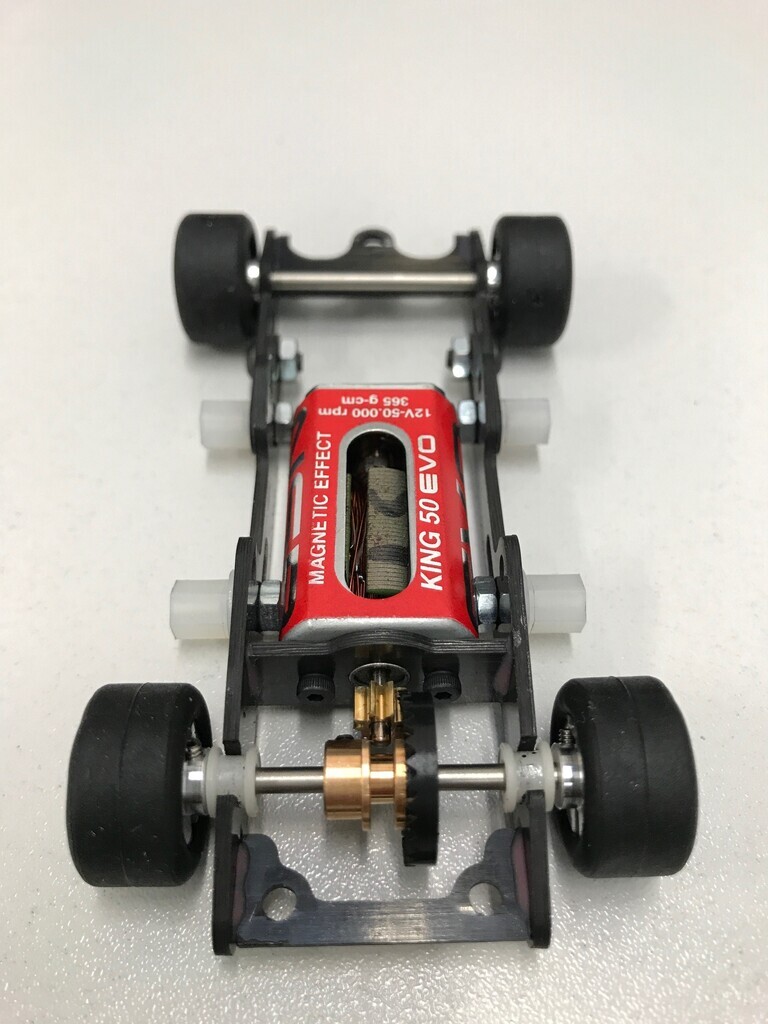
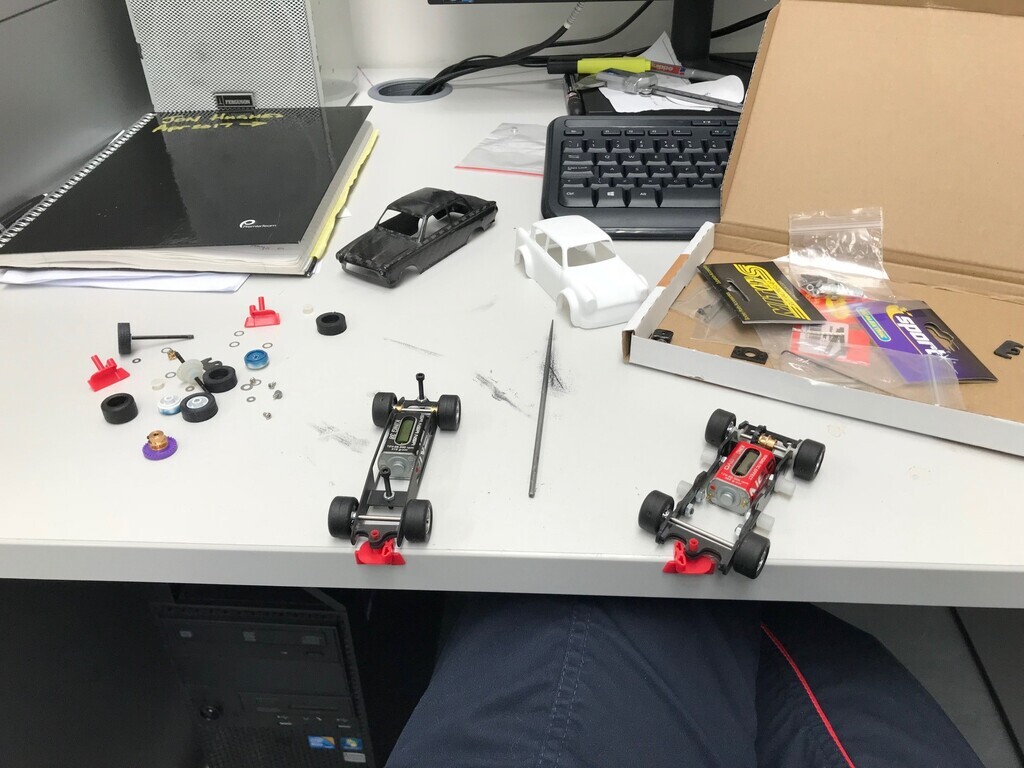
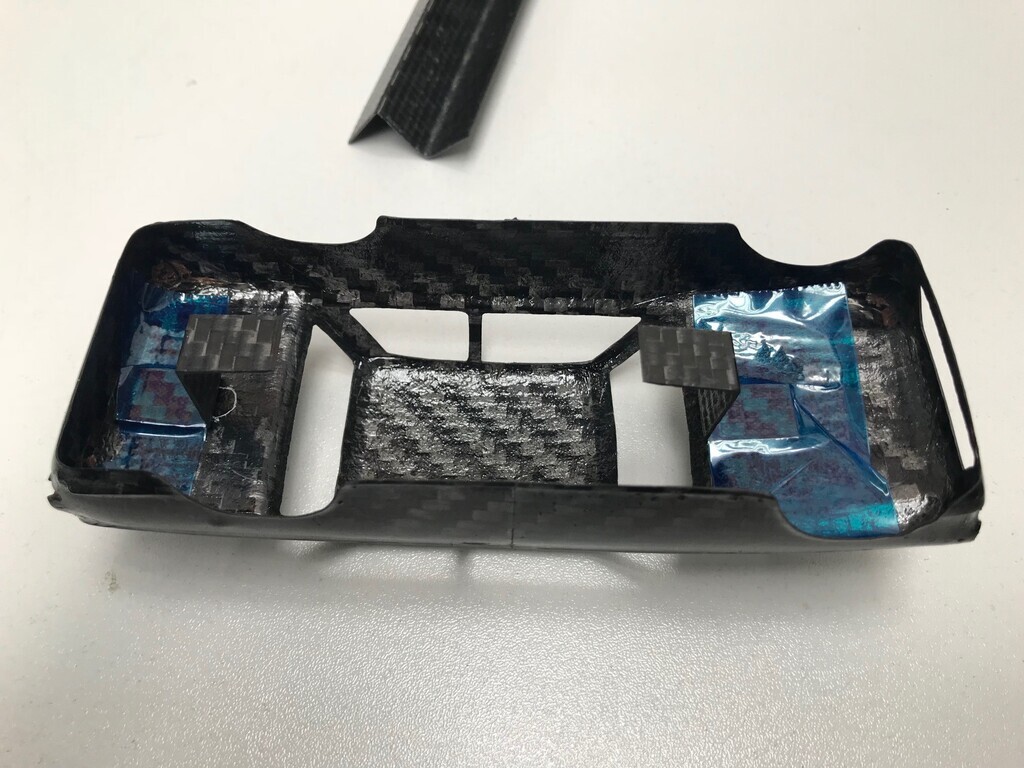
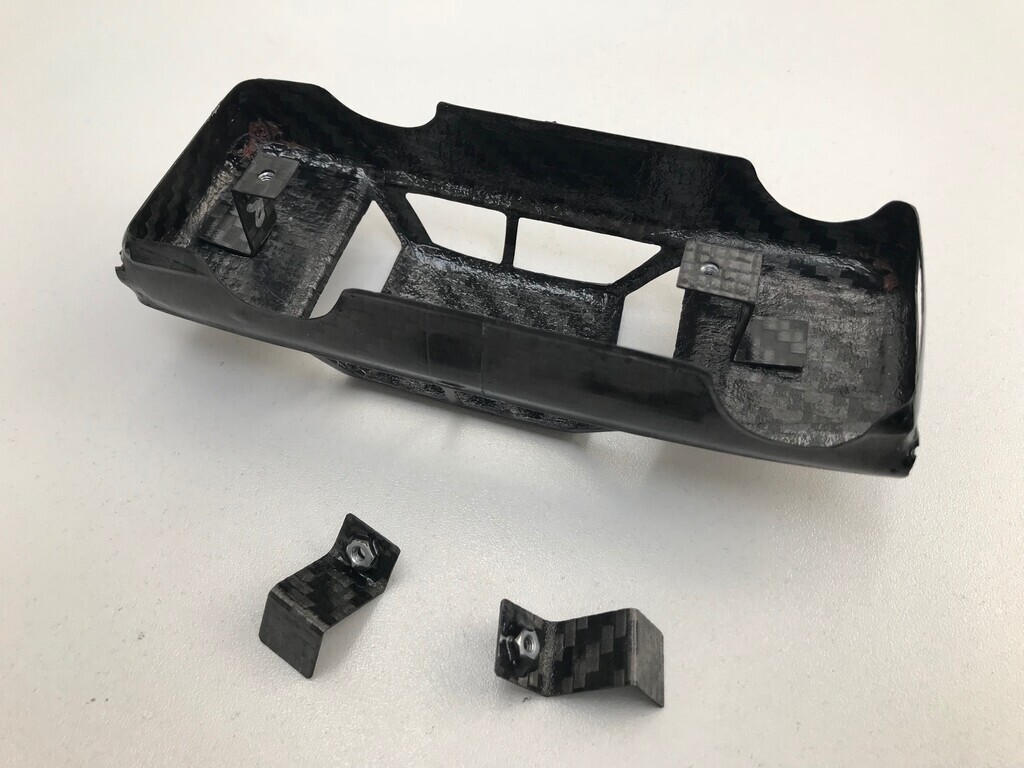
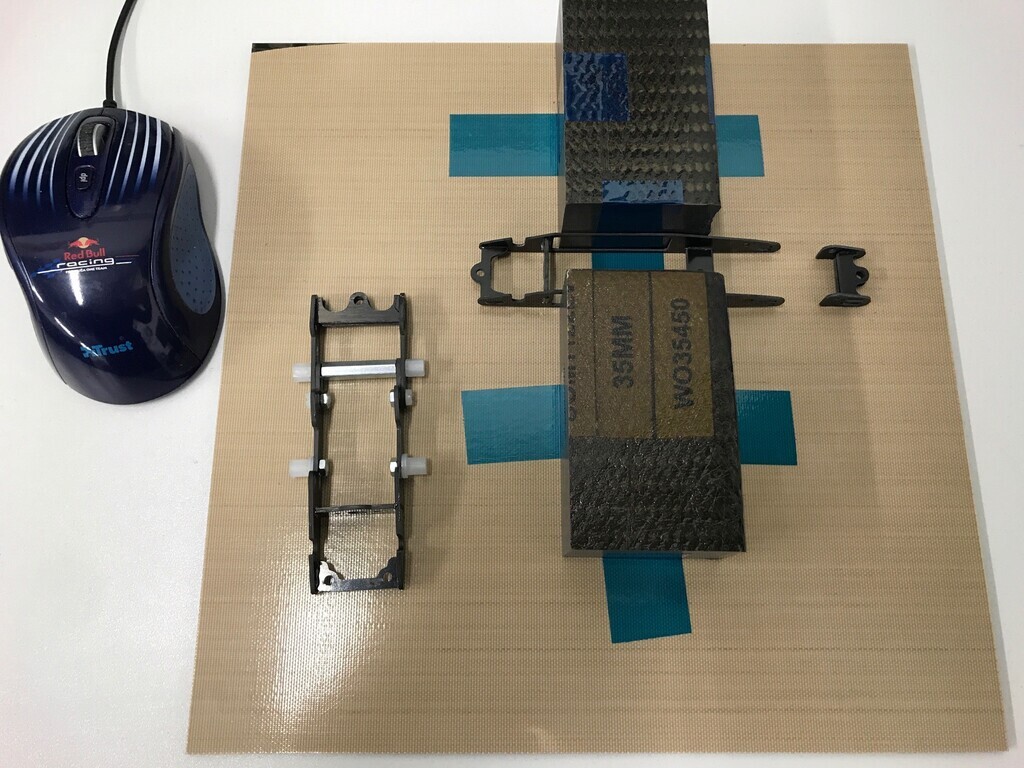
I wanted to do a few things differently to stock FibreSlots. The FibreSlots chassis was cut from glassfibre sheet and bolted together with off-the-shelf parts, for easy assembly at home. I knew from F1 that you don't bolt things together when they can be bonded or made in one piece. I had access to what was the world's strongest 2-part aerospace adhesive. Markbognor was keen to design a completely one-off custom chassis. I laminated him a couple of 300x300mm carbon fibre plates from R&D carbon, stuff that wasn't on the race car yet. One for the Cortina and another for general purpose use. From memory, the Cortina plate was 3 plies of T1000 fibre, 5H weave in an experimental resin and 0.9mm thick total. T1000 was the second strongest fibre in circulation at the time, approximately 3x stronger than steel in this application. The other plate was normal FibreSlots chassis thickness, but made up of a T1000 woven core and 0.1mm thick M55J UD skins on the outside for extreme stiffness. M55J is the stiffest fibre allowable in F1. There are stiffer fibres, but they are not permitted for use in F1. Mark made me up a couple of iterations of chassis for the Cortina and cut me a couple of standard FibreSlots chassis out of the other plate. Here they are on my makeshift bonding jig:
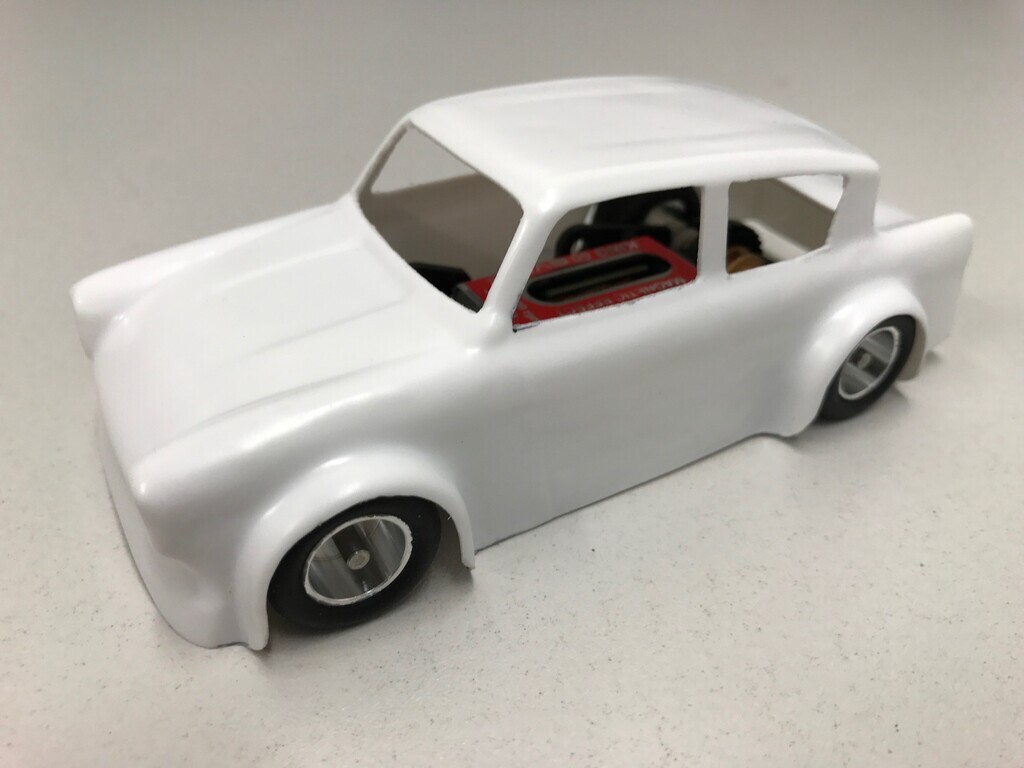
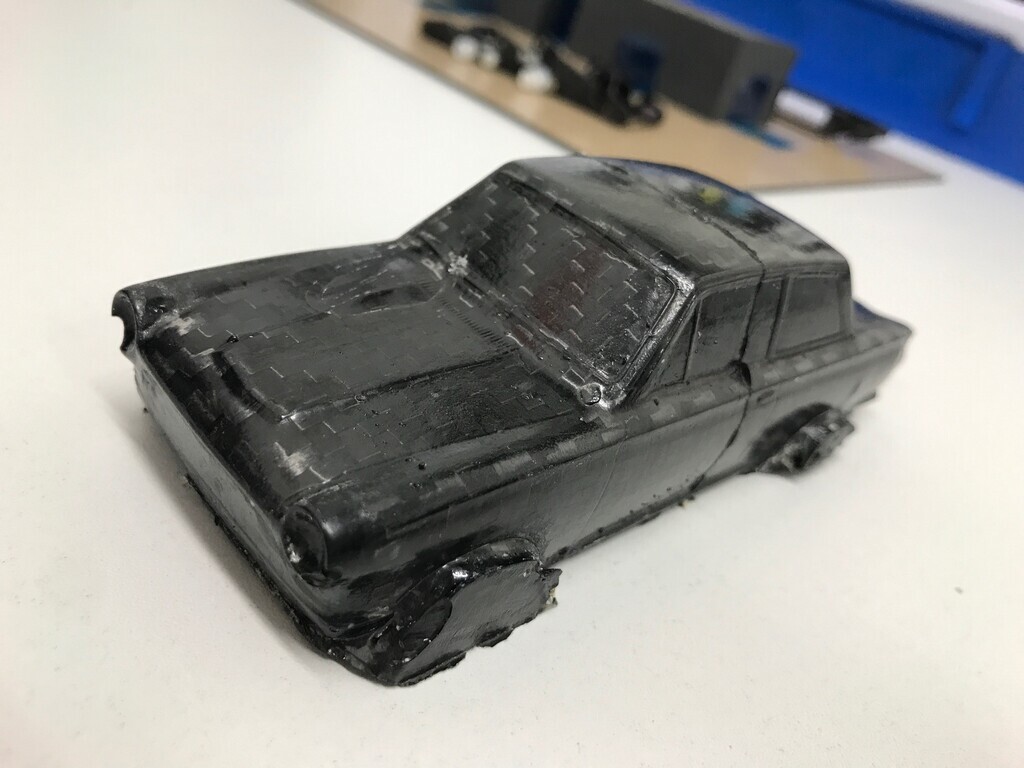
While that cured, the body was ready to remove from the mould. This is what it looked like straight out the mould ready for trimming. Not exactly F1 quality out of the mould, but we were just making this at lunchtime out of offcuts and stuff otherwise found in the bin:
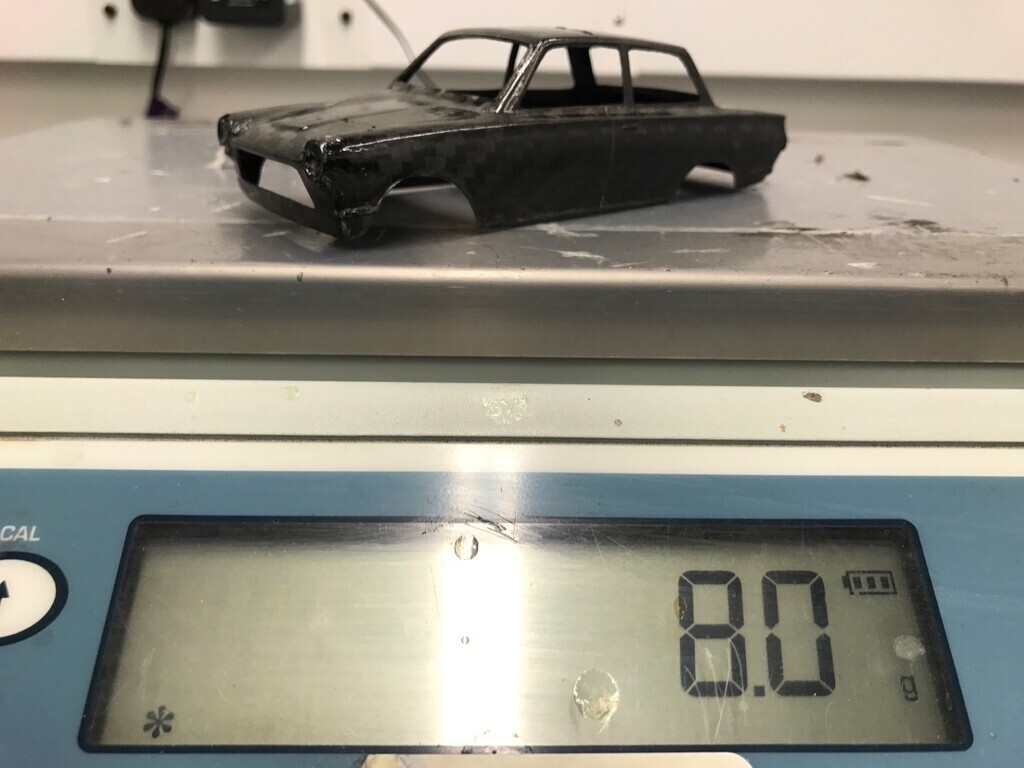
Bit of trimming with the Dremel and knock the flashing off and have a look on the scales:
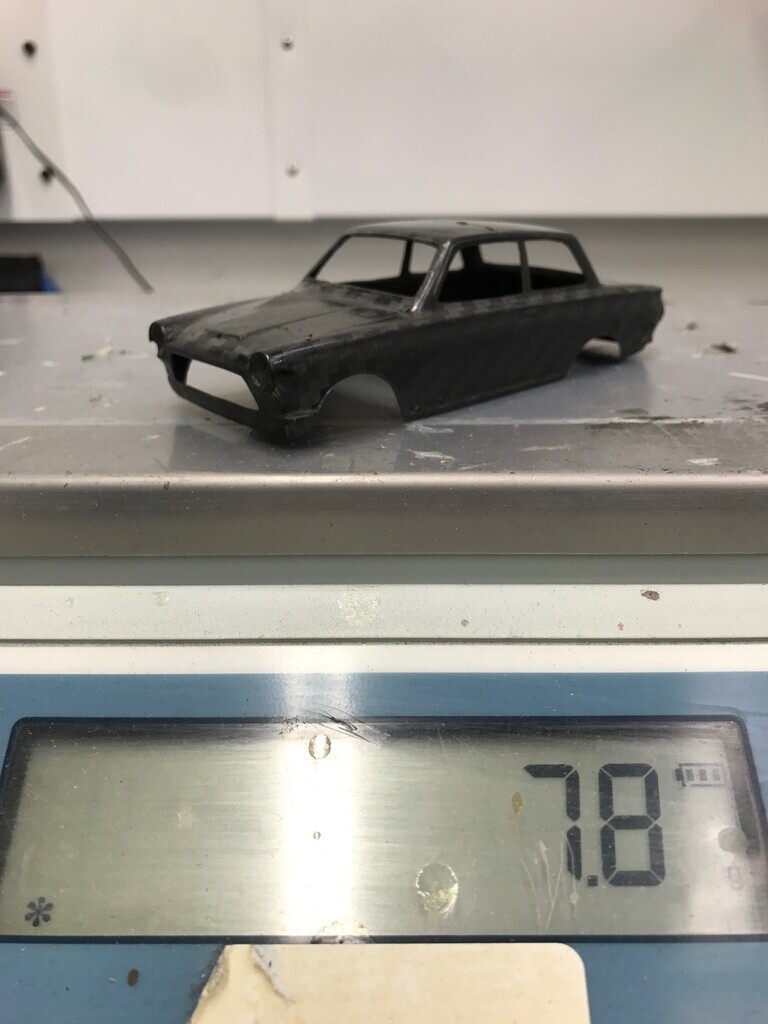
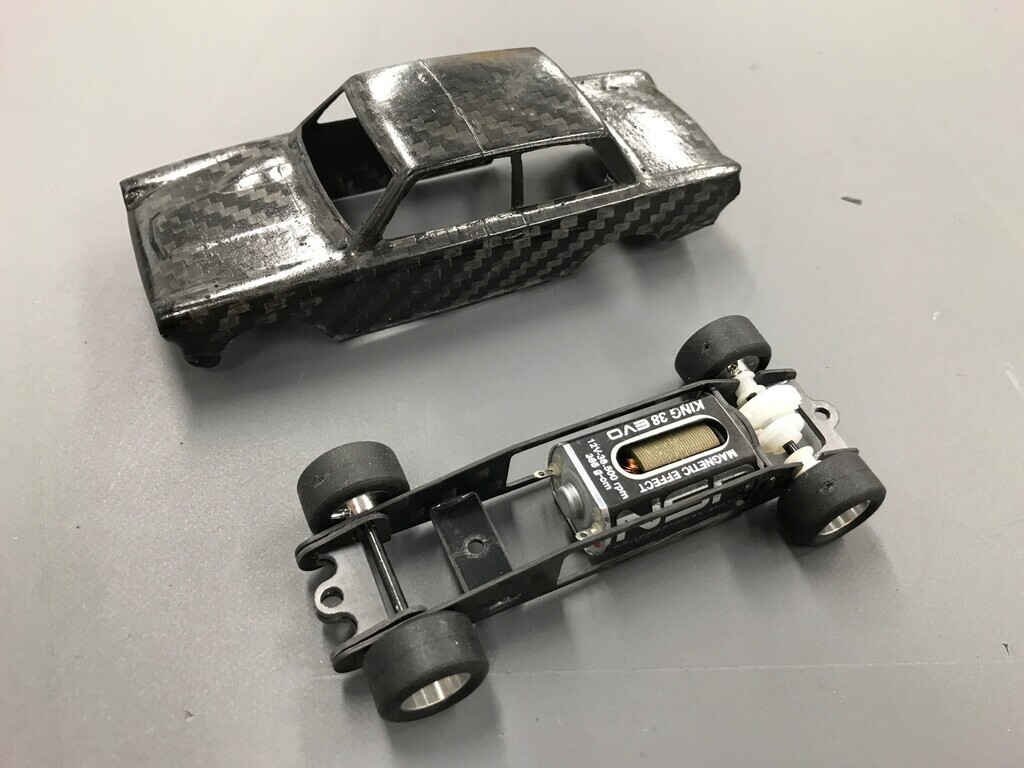
Yeah I'm happy with that. The body is made of two plies of IM7 fibre in a 6k 2x2 weave which was an intermediate modulus general purpose chassis material. Ok at everything basically. It's about 0.4mm thick, similar stiffness to aluminium but almost twice as strong as steel. The pillars are reinforced with two 0.1mm thick plies of M55J UD, as mentioned above. In UD form, it's just under 4x as strong as steel and around 50% stiffer. I didn't want the pillars to break.
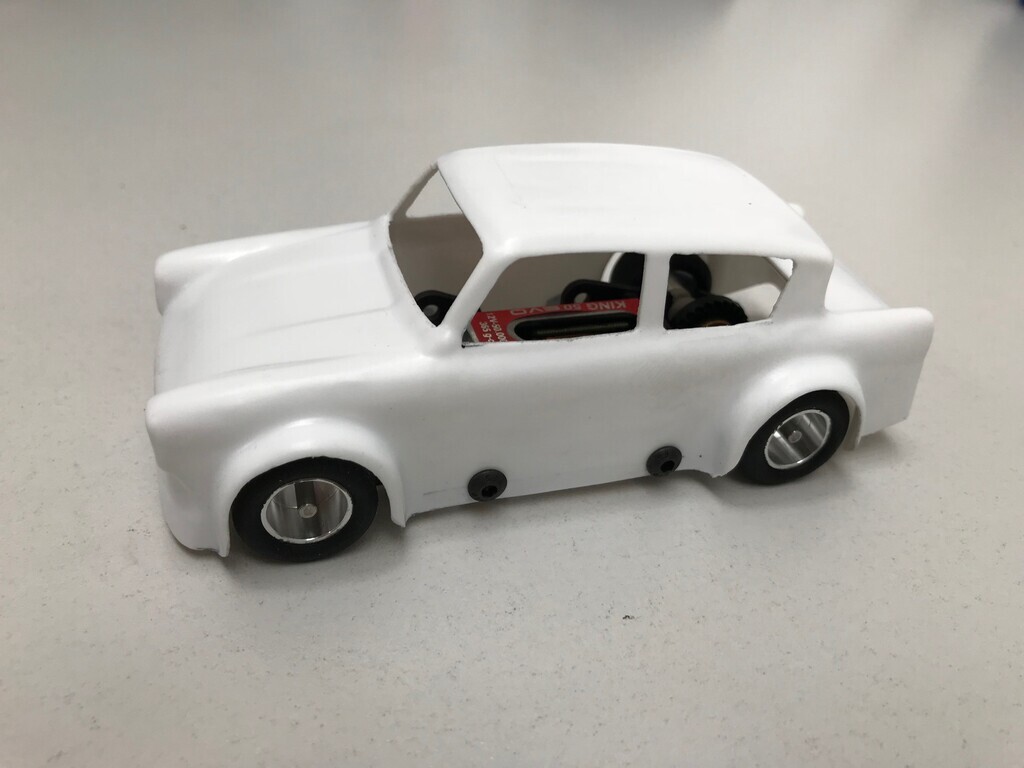
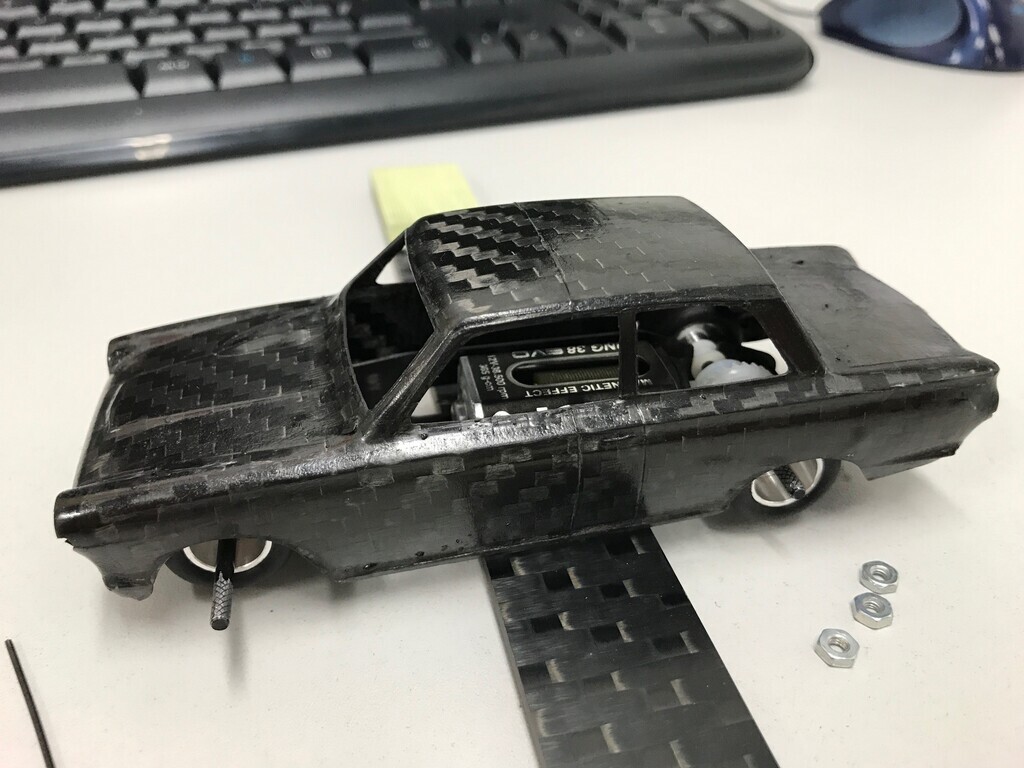
Quick mock-up on its wheels using a standard composite tensile test specimen as a rest and I'll post a bit more later:
There's a back-story to this. When I was a kid, I inherited my dad's soldered brass tube spaceframe Scalextric car, complete with monster-size Mabuchi motor. It was incomplete and really I was a bit too young to ever get it back in one piece and running. I don't know exactly what happened to it, but it either got lost or broken. I always felt a bit bad about it and thought it would be cool to be able to build him a replacement one day.
Fast forward 25 years to late 2017 and I was now working in R&D at a top Formula 1 team. I had unmonitored access to the autoclaves. markbognor on here had started making composite Scalextric chassis called FibreSlots. A few lightbulbs started to light. I asked the question if he'd be able to cut one out of experimental F1 carbon fibre. Of course the answer was yes, so that's where this started. Decision was made for Dad to get a carbon fibre Mk1 Cortina Scalextric race car for Christmas. A very, very mad one. Gotta work with what you've got, eh?
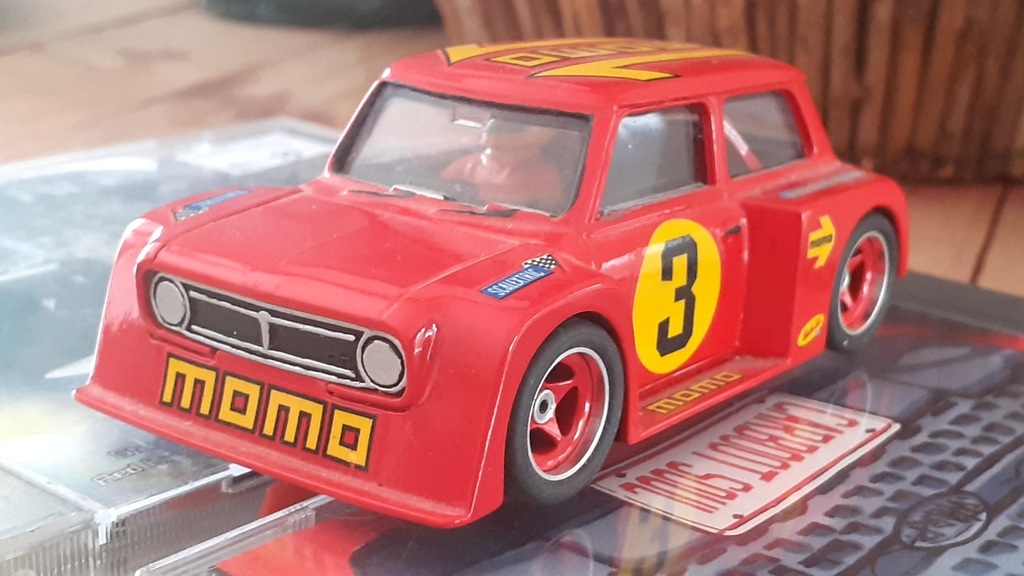
Starting point was this, a brand new 1/32 scale Scalextric Cortina:
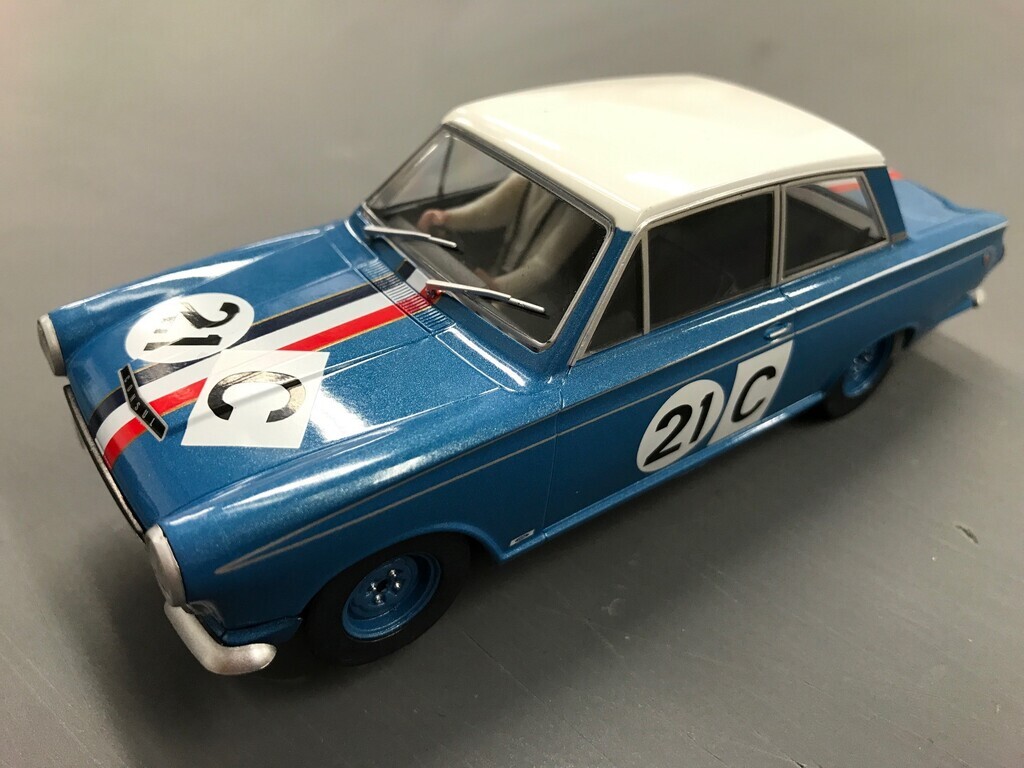
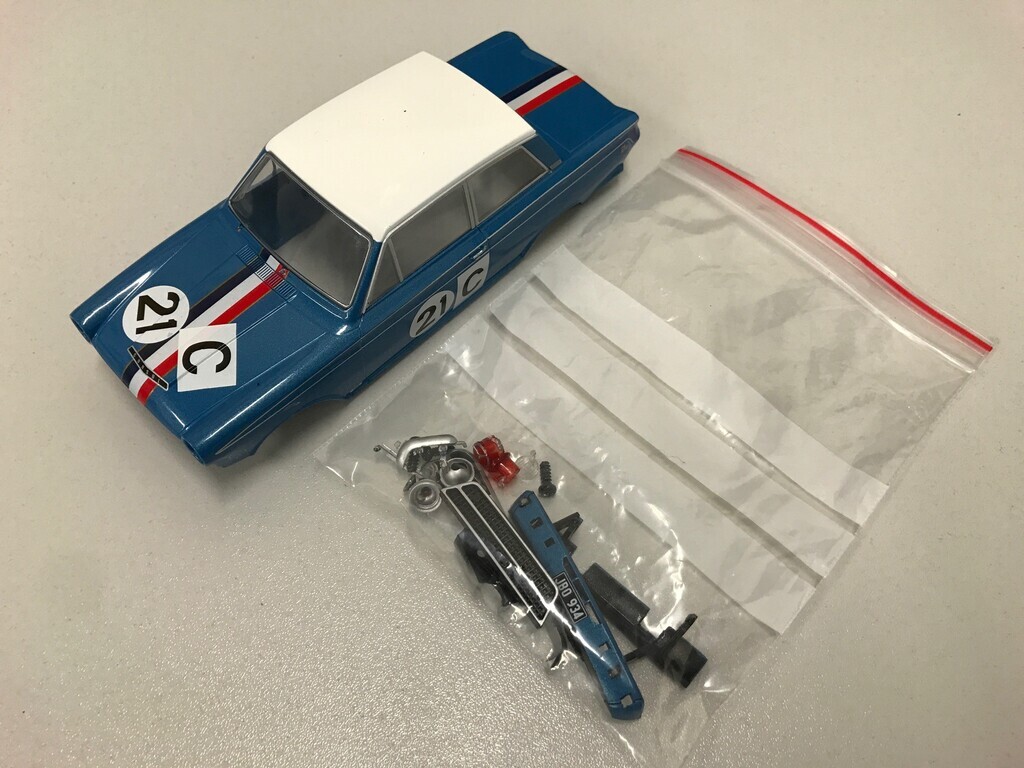
I specifically wanted a narrow body, true to scale. This model provided that and potentially some parts to steal for the final build e.g. lights, grille etc:
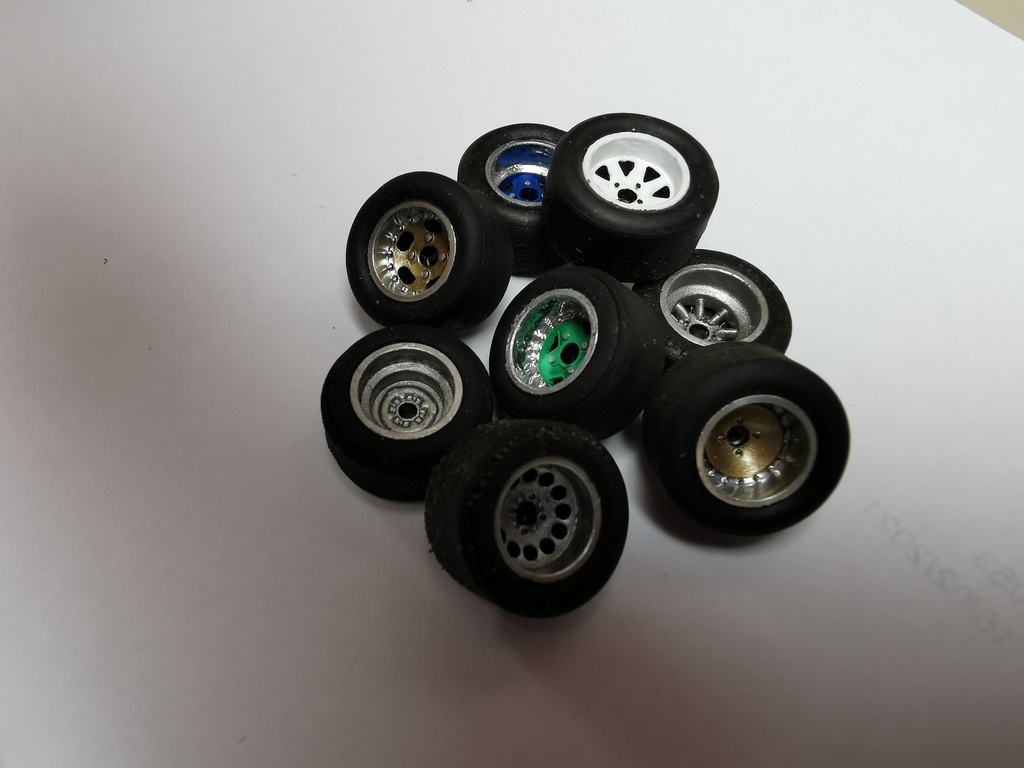
Compulsory to do this, right:
I needed to make a mould for the carbon fibre body. My colleague was way more experienced at this than me and gave me a hand with this. He quickly whipped up a mould box out of some scrap tooling block. We'd worked out that the mould could be made in two parts split front-to-back and the body would come back out. The side plates were dowelled for location and the gap between the two middle parts were space to put PTFE tape in so that it would release:
I wanted to smooth off some of the features to give the carbon fibre a better chance of getting into the corners etc. That meant bonding on the bumpers and windows to make the body one piece, filling the grille shell, a light sand to take things like the door handles down, then light primer and clear lacquer for the mould release to go onto. Unfortunately the lacquer reacted badly:
I actually managed to wet blast all that paint back off. Once back down to the plastic, I re-filled everything, smoothed it all off again and it was good enough to take the mould:
This was done with 2-part body filler in two, er, parts. The back half of the mould was filled with filler and the body squished into it. Once cured, the body was popped out and the excess filler was linished off that side. PTFE tape was put over the ends of the mould halves. Then the body was put back into the back half, the front half filled with filler and all the parts brought together like so:
Then it's just a matter of take it all apart, tidy up the mould, seal the surface with mould sealer and release aid and it's ready to use. Unfortunately I didn't take any pictures of the laminating, but it's a matter of cutting out small paper templates, checking for fit, then transferring to carbon pre-preg. Here it is de-bulking, where you leave it in vacuum bag to squeeze the carbon into all the corners and remove any air:
I then bagged it up properly and put it in the clave queue with some other parts which were scheduled to go in on the same cure.
In the meantime, I'd taken a load of measurements off the body.
I wanted to do a few things differently to stock FibreSlots. The FibreSlots chassis was cut from glassfibre sheet and bolted together with off-the-shelf parts, for easy assembly at home. I knew from F1 that you don't bolt things together when they can be bonded or made in one piece. I had access to what was the world's strongest 2-part aerospace adhesive. Markbognor was keen to design a completely one-off custom chassis. I laminated him a couple of 300x300mm carbon fibre plates from R&D carbon, stuff that wasn't on the race car yet. One for the Cortina and another for general purpose use. From memory, the Cortina plate was 3 plies of T1000 fibre, 5H weave in an experimental resin and 0.9mm thick total. T1000 was the second strongest fibre in circulation at the time, approximately 3x stronger than steel in this application. The other plate was normal FibreSlots chassis thickness, but made up of a T1000 woven core and 0.1mm thick M55J UD skins on the outside for extreme stiffness. M55J is the stiffest fibre allowable in F1. There are stiffer fibres, but they are not permitted for use in F1. Mark made me up a couple of iterations of chassis for the Cortina and cut me a couple of standard FibreSlots chassis out of the other plate. Here they are on my makeshift bonding jig:
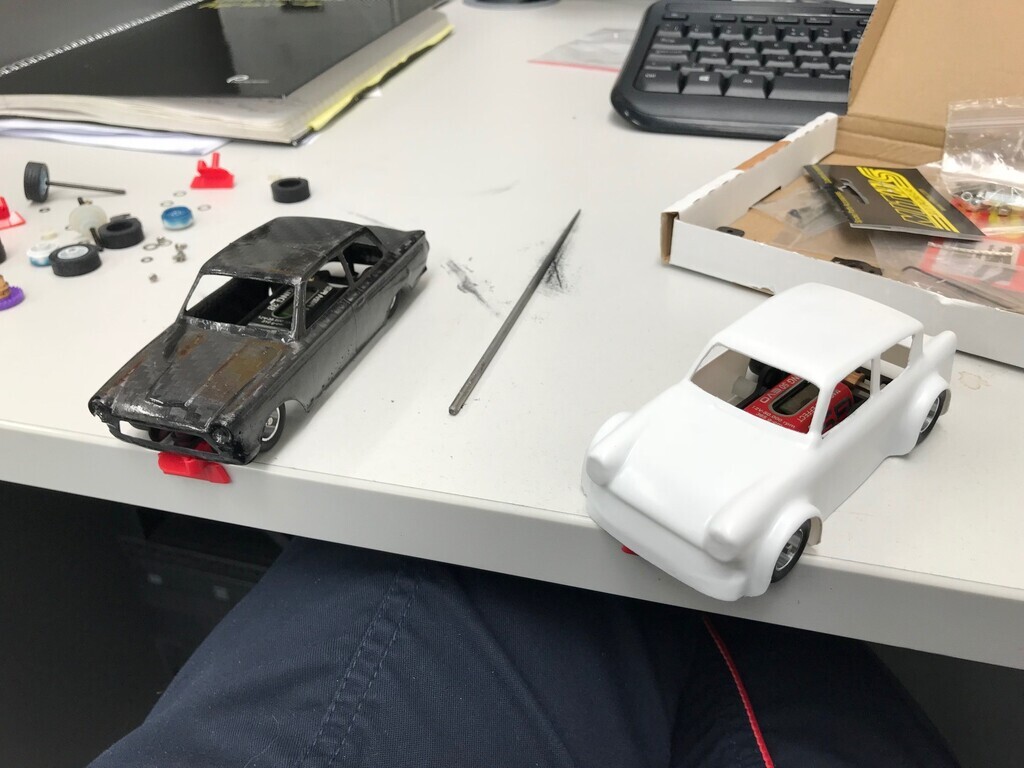
While that cured, the body was ready to remove from the mould. This is what it looked like straight out the mould ready for trimming. Not exactly F1 quality out of the mould, but we were just making this at lunchtime out of offcuts and stuff otherwise found in the bin:
Bit of trimming with the Dremel and knock the flashing off and have a look on the scales:
Yeah I'm happy with that. The body is made of two plies of IM7 fibre in a 6k 2x2 weave which was an intermediate modulus general purpose chassis material. Ok at everything basically. It's about 0.4mm thick, similar stiffness to aluminium but almost twice as strong as steel. The pillars are reinforced with two 0.1mm thick plies of M55J UD, as mentioned above. In UD form, it's just under 4x as strong as steel and around 50% stiffer. I didn't want the pillars to break.
Quick mock-up on its wheels using a standard composite tensile test specimen as a rest and I'll post a bit more later: