Enbloc
Part of things
 
Posts: 399
|
|
Sept 25, 2022 17:08:25 GMT
|
I'm admiring your detailed work with your axle, the safety issue is something I'm concerned with as I use this type in my 47 pickup and currently have an issue with the outer roller bearings and am thinking a change would be good for me. Are the modified parts available as a kit or something you have created? Great work keep it up. Cheers. Thanks. There are no modifications to the axle itself, that’s all as stock. The “safety hub” retainers are an aftermarket part. The design of this style goes back the ‘50s and the idea/function goes back a lot further than that. They basically consist of a ring within a ring. A narrow steel ring is welded to the hub and the large cast part, that you can see in the picture above, slides over the inner ring and is bolted to the axle case via the back plate bolt holes. The safety hub casting doesn’t move but the hub with the steel ring spins inside it. If a halfshaft breaks, the wheel/hub can only move a predetermined amount before the inner rear ring hits the casting stopping the wheel moving any further. You still lose drive but you don’t completely loss a wheel! They are really simple things but really hard to explain!  |
| |
|
|
|
|
|
|
|
Sept 25, 2022 18:33:33 GMT
|
[quote author=" Enbloc" source="/post/2750202/thread" timestamp="1663637933". 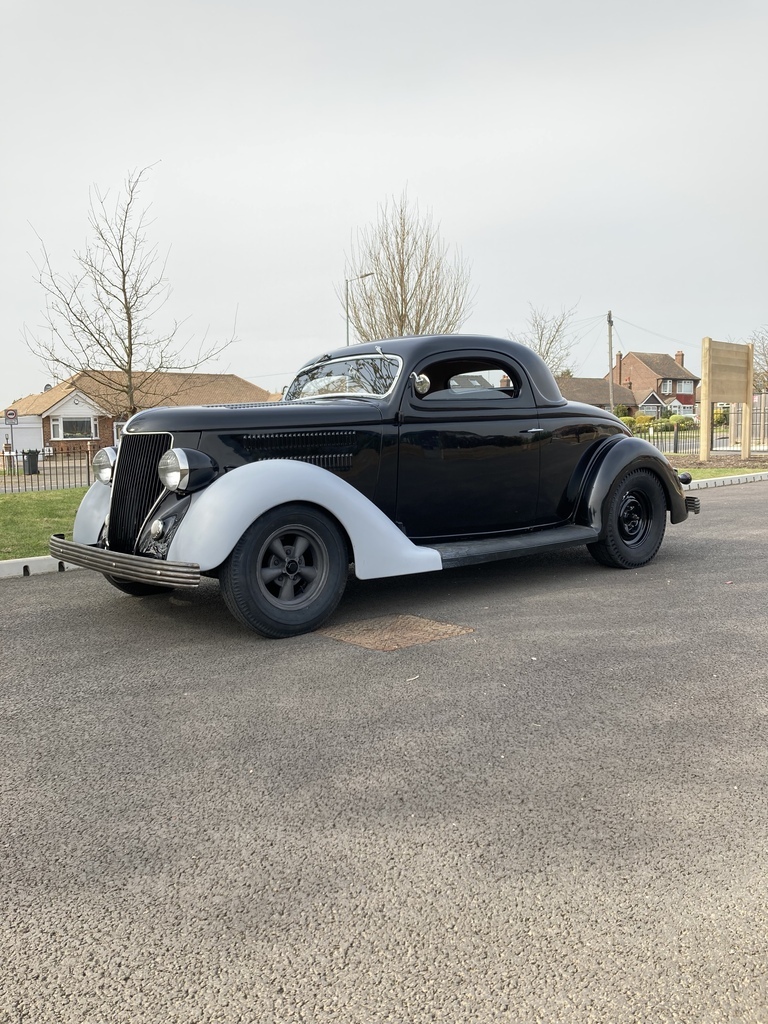 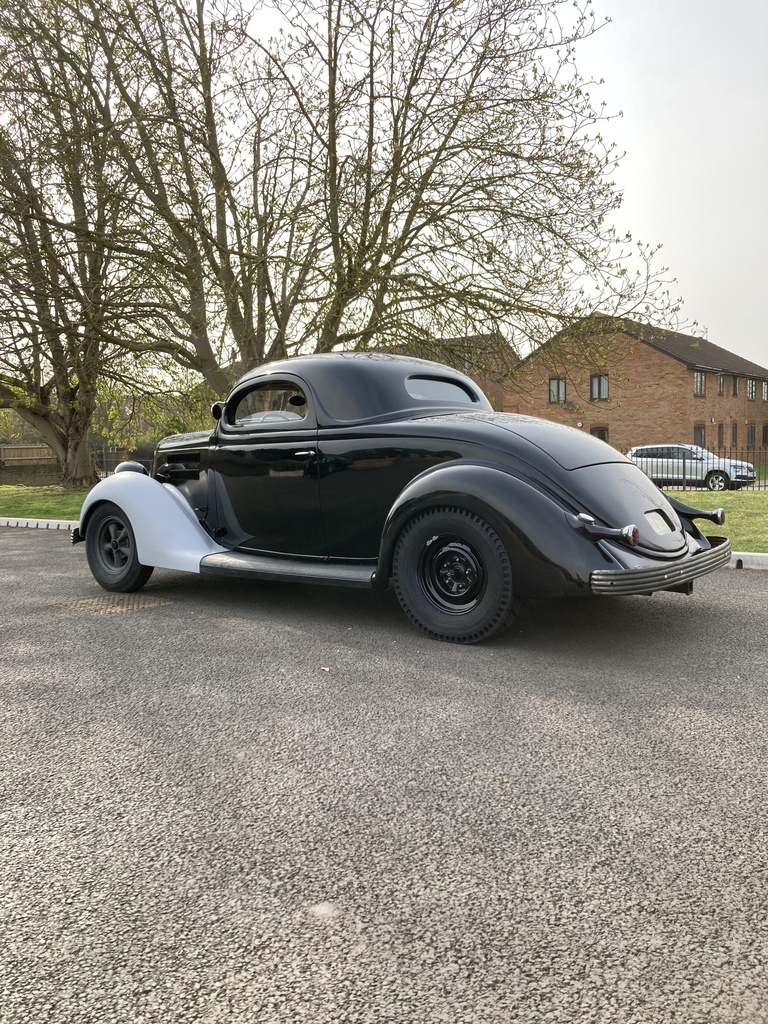 [/quote] This………. Made me jealous and happy in equal measure. |
| |
|
|
|
|
|
Sept 26, 2022 17:28:37 GMT
|
|
Ok got that, clever idea. Many thanks
|
| |
|
|
Enbloc
Part of things
 
Posts: 399
|
|
|
|
One area I really wanted to get on top off was the cosmetics. After 12 years of use, abuse, racing and living a lot of that time in the elements as I had no garage the body was starting to become a little shabby. I’m sure you can’t help notice the grey primed wings and wondered why? It was originally just the passenger wing because this one had received a couple of knocks which had opened up a stress crack in the centre of the arch, a common fault on these as the wing lip is single skin. Another stress crack, considerably larger, had formed where the fender bolts to the underside of the A post. A short time after repairing the passenger wing the drivers one fractured as well…. And the passenger side fractured a second time. 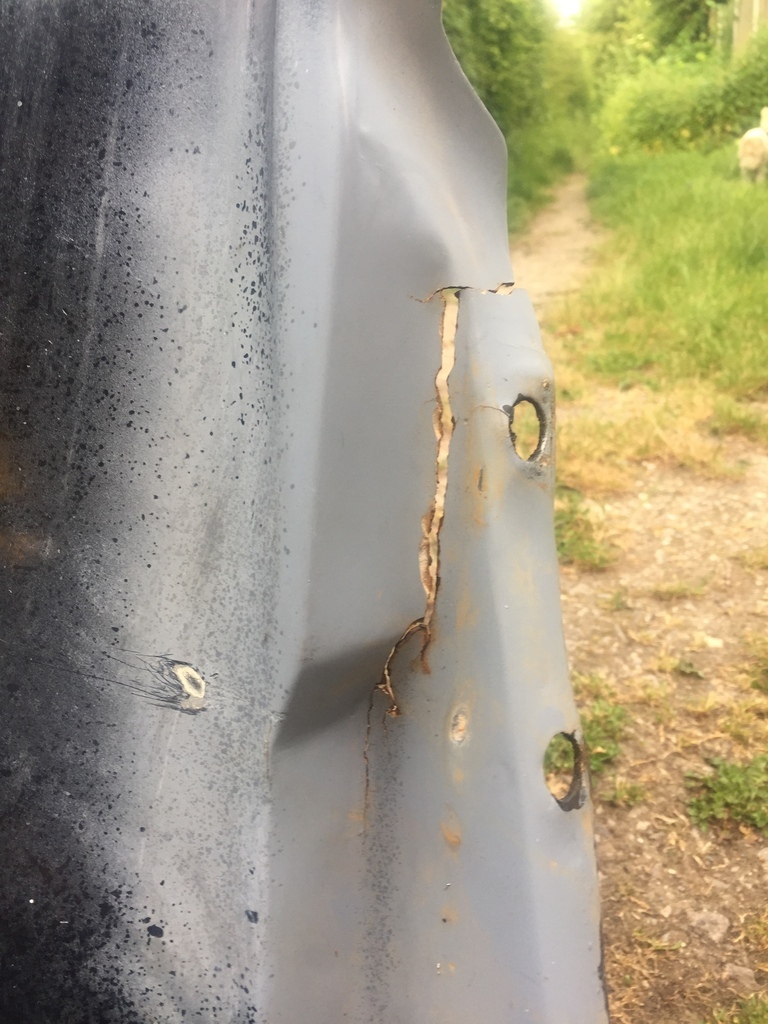 Both wings were repaired properly this time with added support to hopefully get on top of this recurring problem. 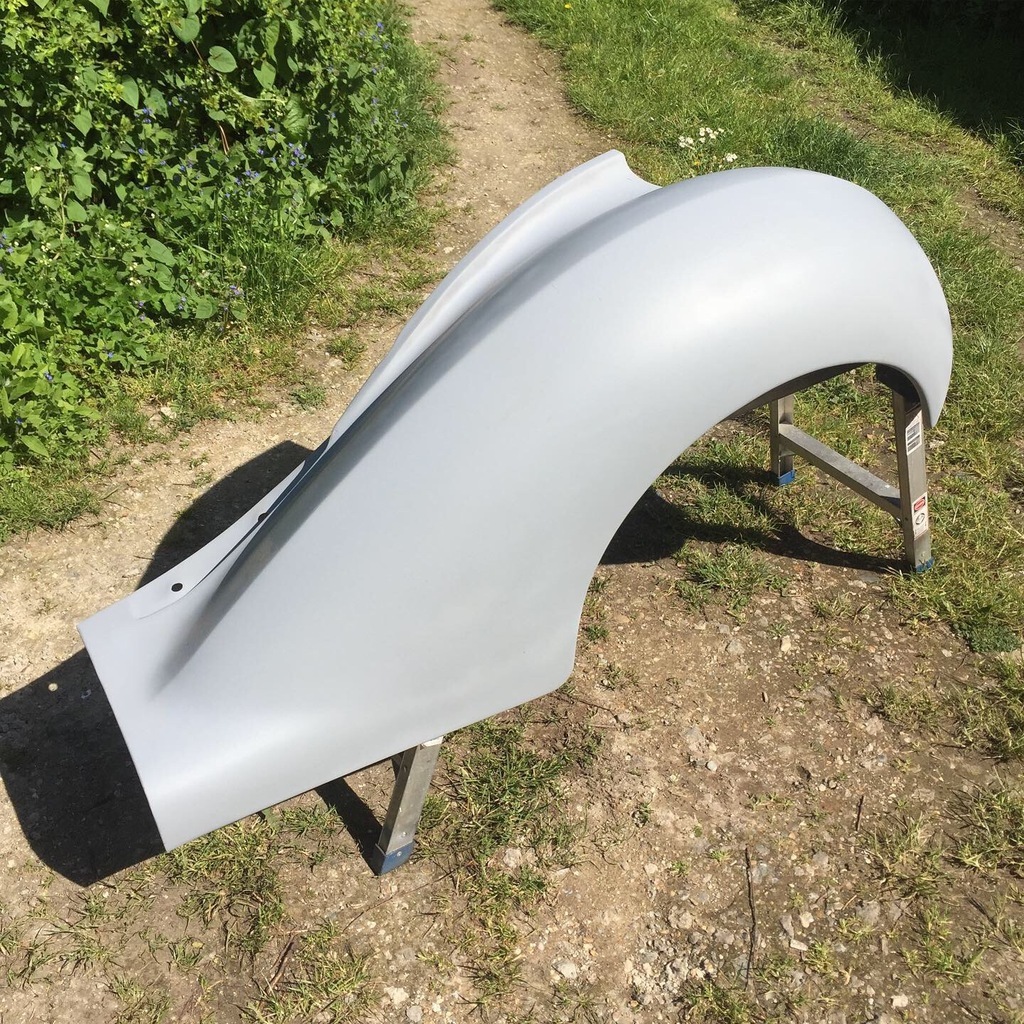 That’s now two primered fenders and the reason they stayed this way was because I had grand plans of repainting the whole car, a complete colour change no less. Then reality hit with bodywork and paint being pretty low on my list of enjoyable activities plus the sheer of enormity of it the whole idea got canned. First job was to strip the front sheet metal off. Notice the primer spotted firewall? From a later addition of a battery box. Paint on this will have to wait until the engine is removed. 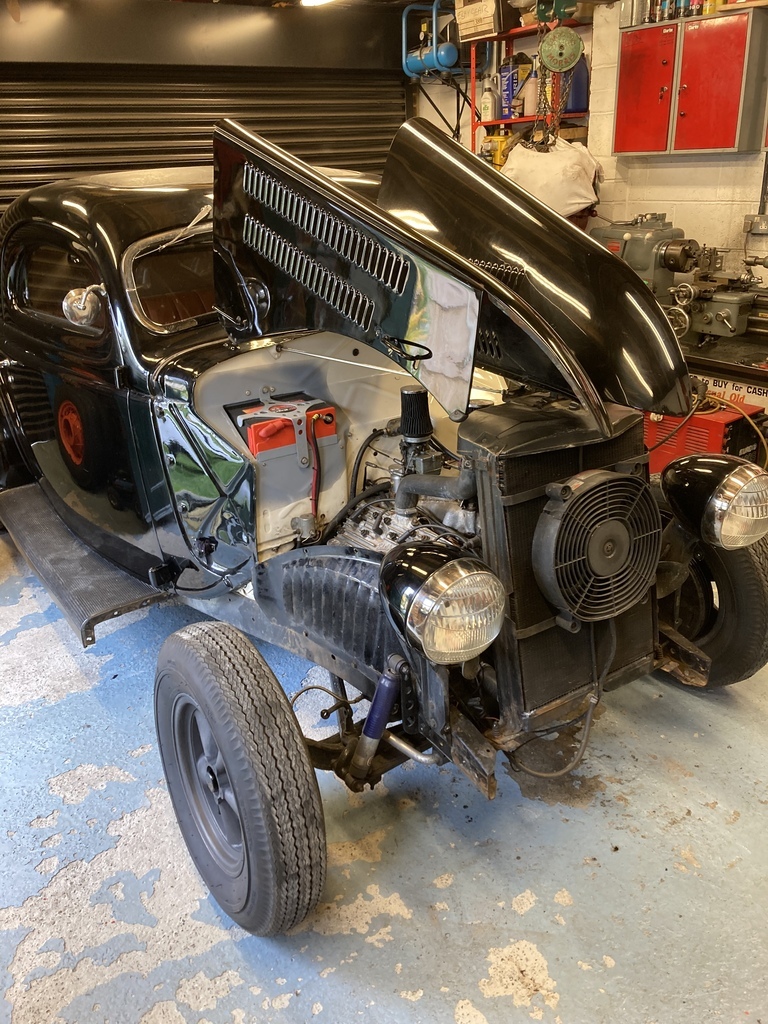 This is actually a pretty fast job for me as I’ve lost count the number of times the front sheet metal has been off. It’s actually not as bad as it seems as the whole front clip can be removed whole when the appropriate bolts are undone. The wings were separated plus one horn grille panel. Why? Because grot! The small horn panel is double skinned around the bumper recess seen in the lower left of the panel. Water had obviously got between the two and blown out the outer skin. The other side was perfect. 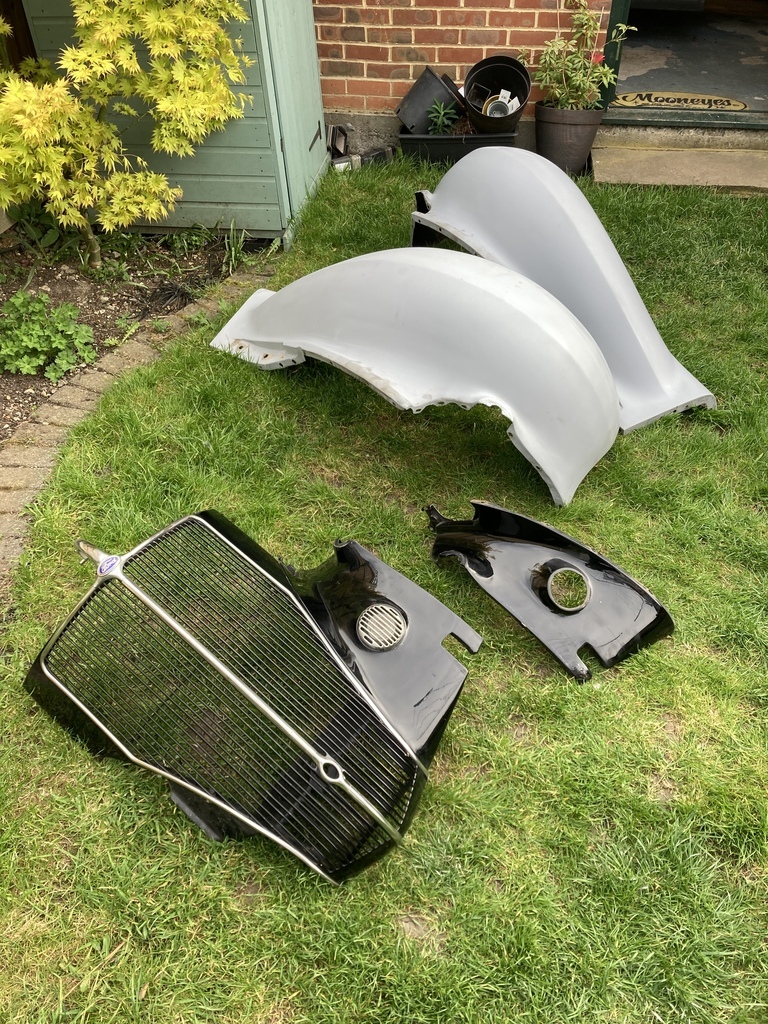 Just need to be sent off to the painter now? Eeerrr.. no. There is a brace that goes from the chassis to the corner of the wing, this had broke. 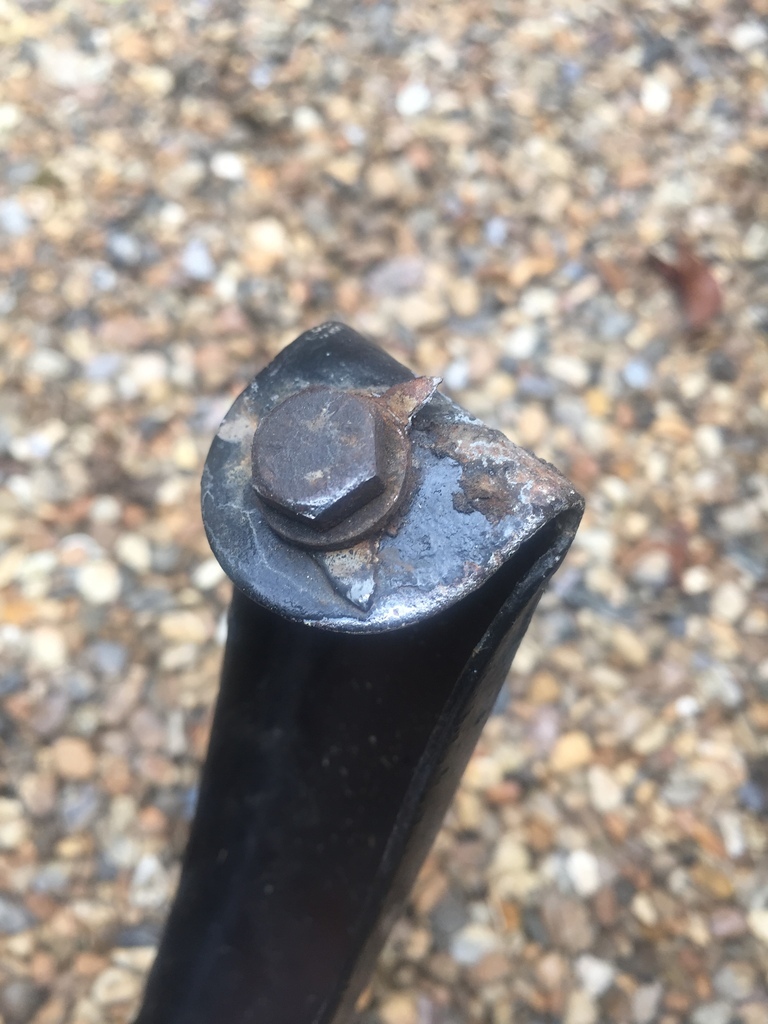 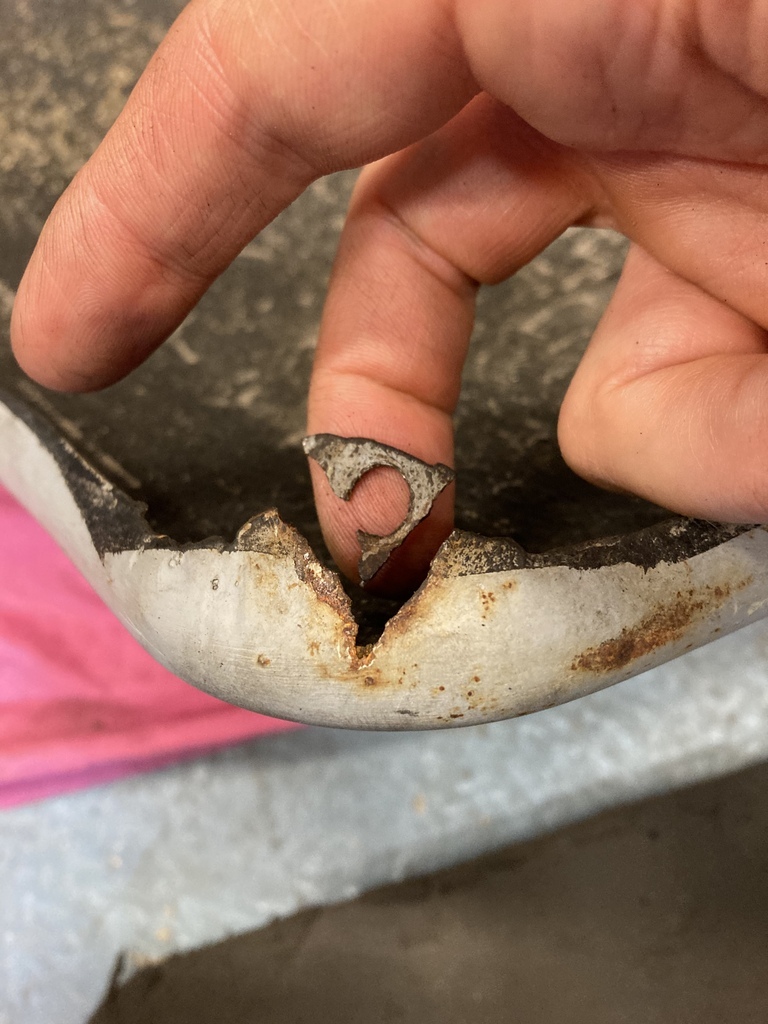 A quick repair. 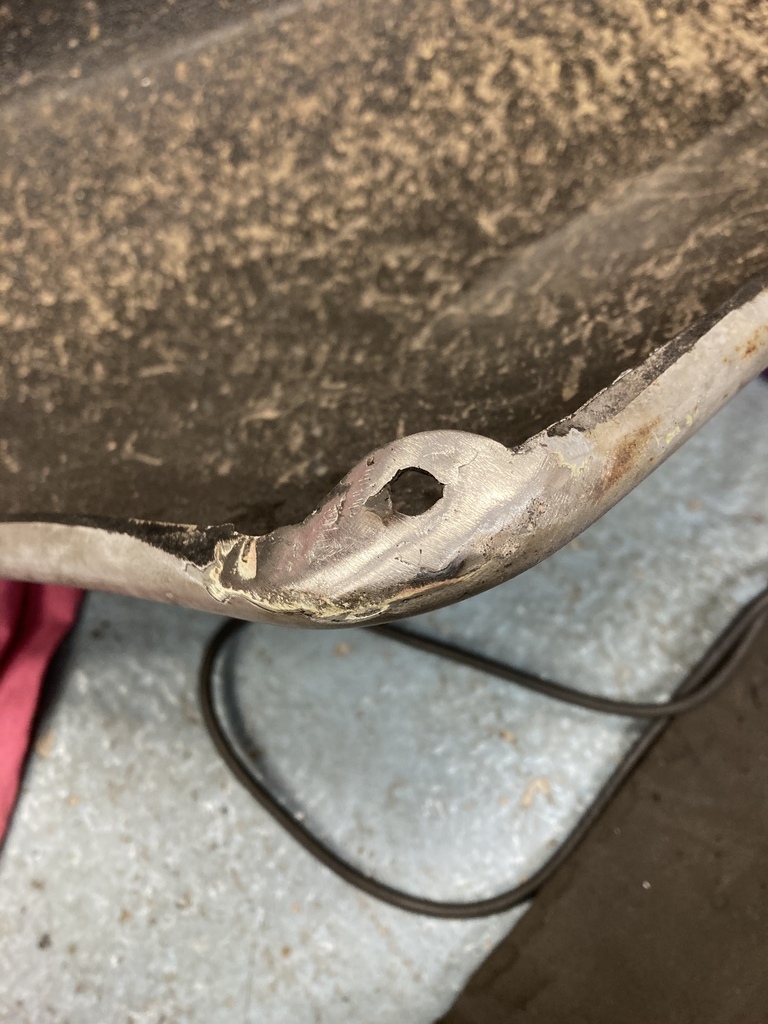 The brace mount must have been broke for a while because the wing was starting to fatigue crack around the bolt holes again… For the third time… F*!#^?& Welded. 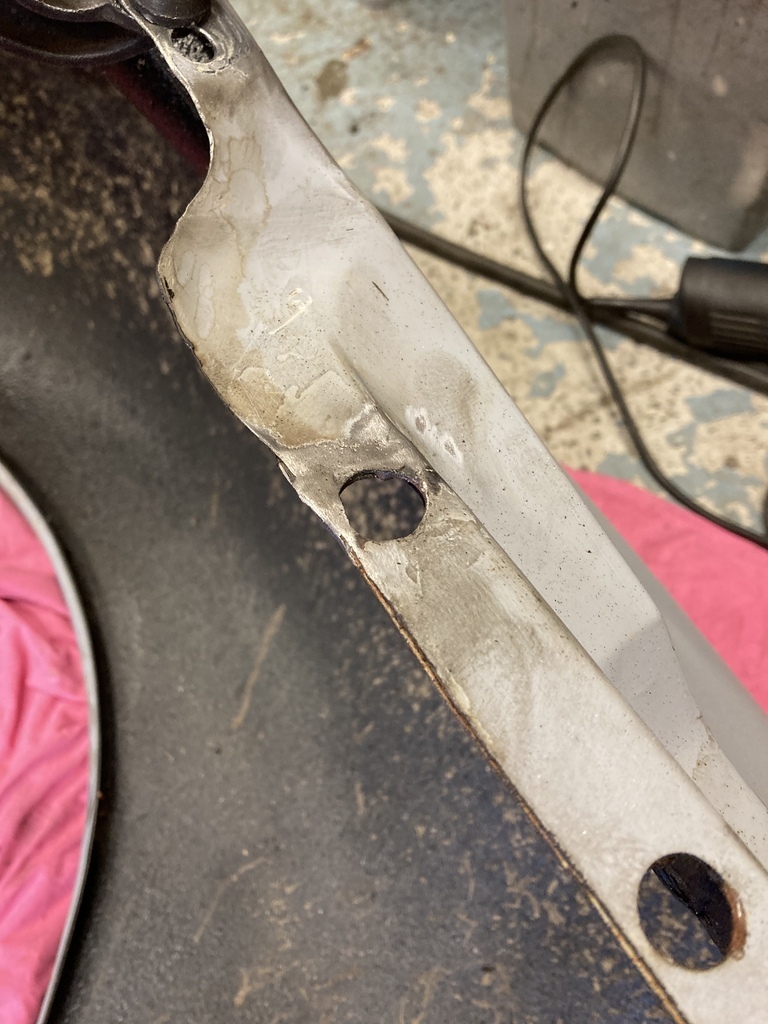 Now it’s ready to be sent off for paint. I already knew there was grot in the drivers door… 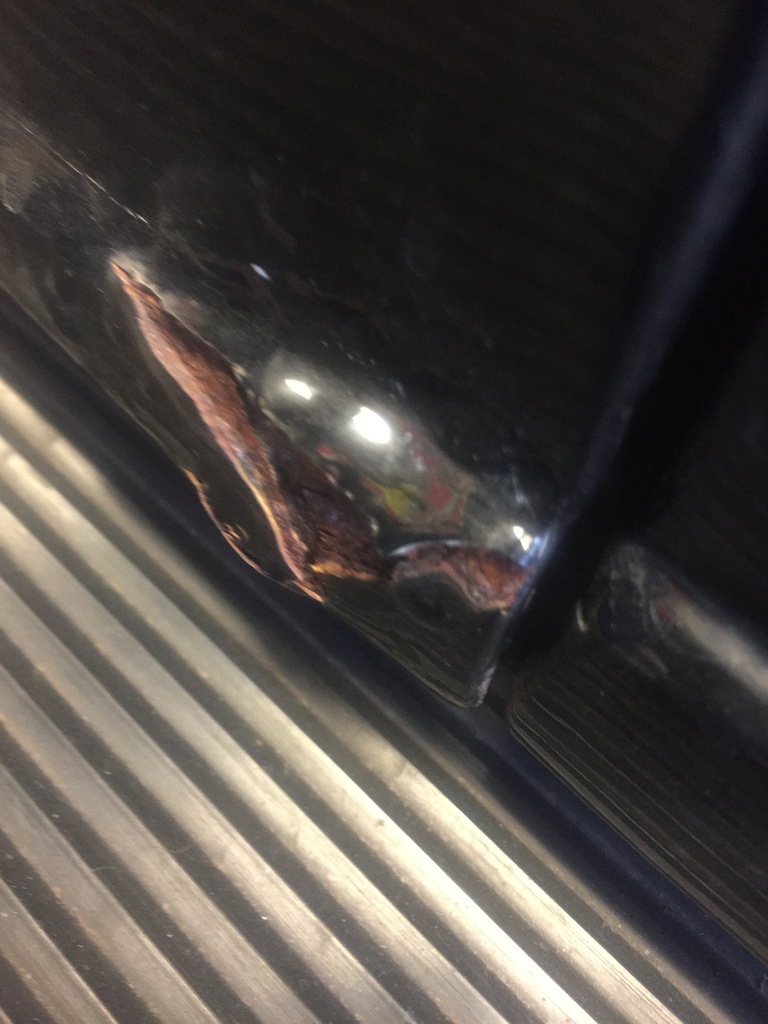 … then I picked at a bubble in the A post and it escalated rather quickly. 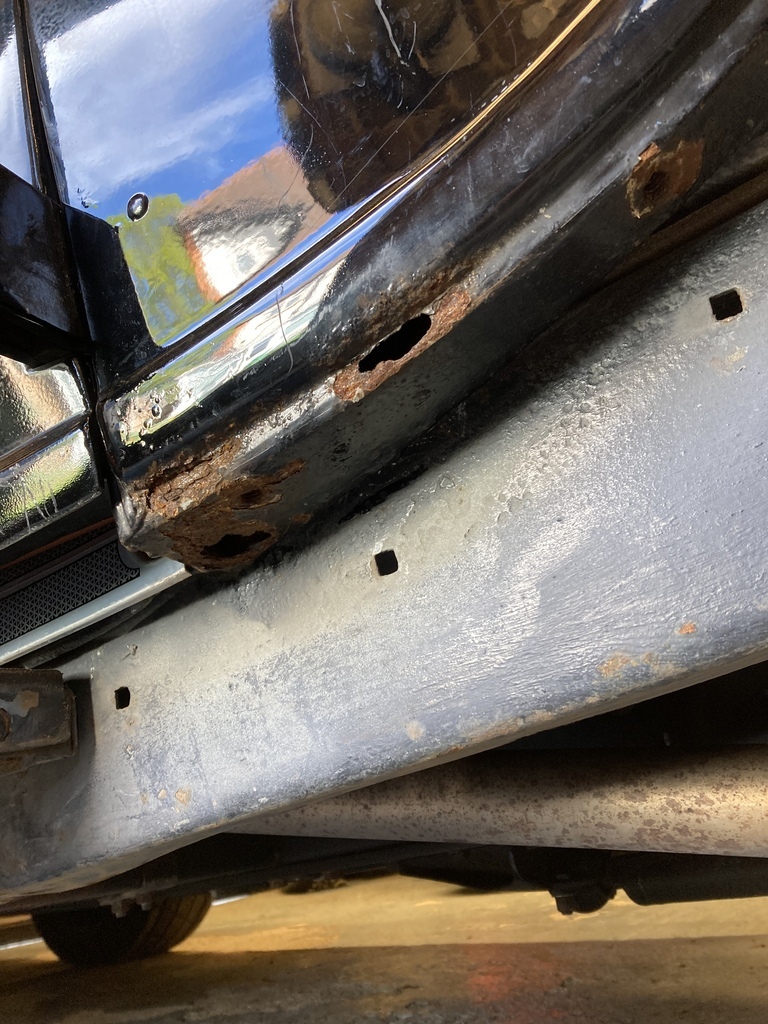 Time for reinforcements. |
| |
Last Edit: Oct 2, 2022 16:58:10 GMT by Enbloc
|
|
|
|
|
|
|
|
A bucket list car of mine you have there. Chopped '36 3w.
|
| |
|
|
Enbloc
Part of things
 
Posts: 399
|
|
|
|
With the newly discovered rust I decided to the best course of action was to just ignore it. Pretend it wasn’t there. A more pressing job was the twin horns, they were looking a little scruffy! I unbolted them from the inner wings, knocked the dents out the covers and re-made the brackets in aluminium, drilled and countersunk the bolt heads for added lightness and finished off with a fresh coat of satin black. 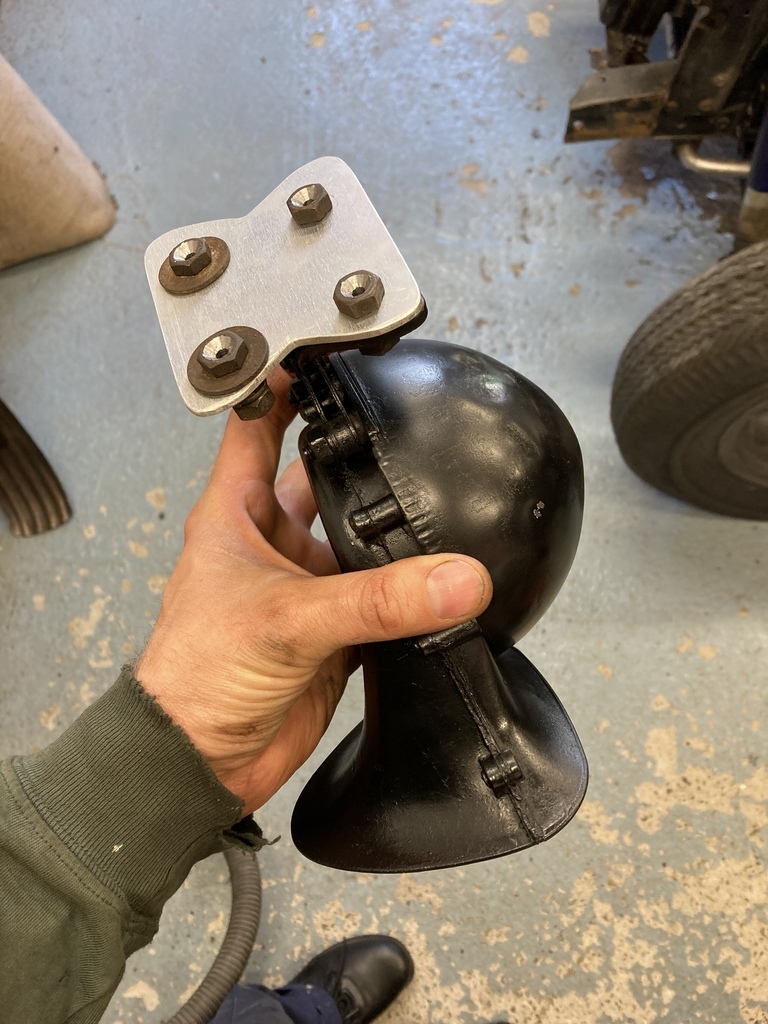 I suppose I better crack on with this rus… Oh, look. Alternator! I’ve always had this Powergen dynamo lookalike alternator fitted. They are significantly bigger than a stock dynamo and it’s always been tight getting it to fit within the engine bay. 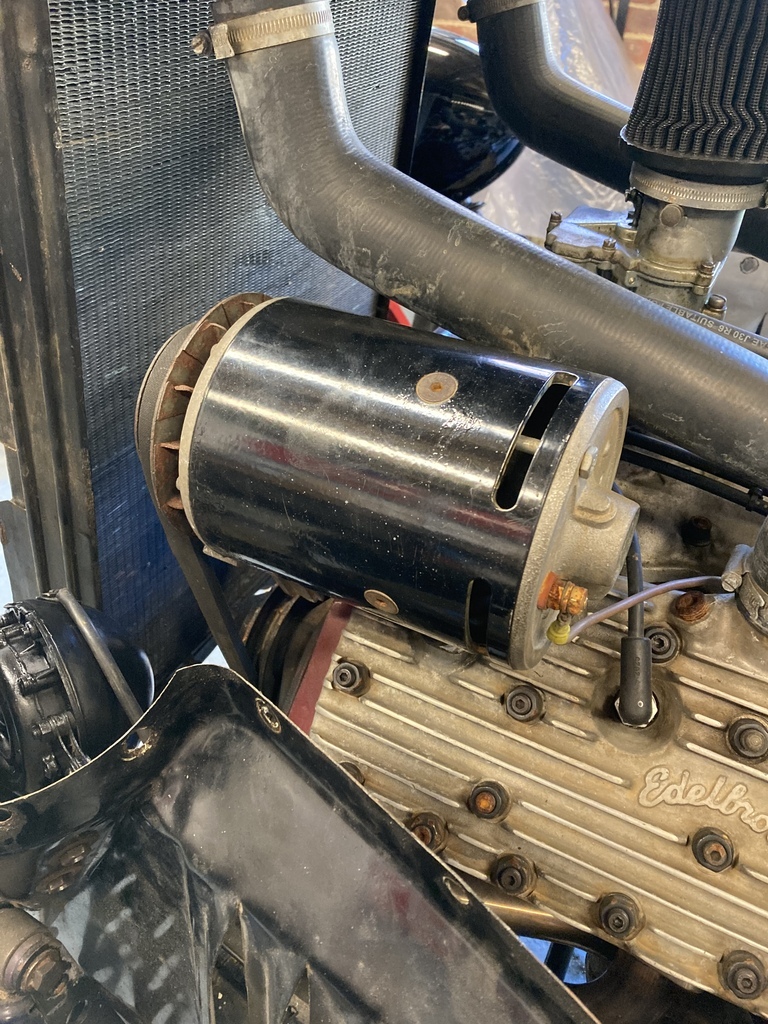 What really bugged me was the fact that a 1/3 of the overall length was just empty case. I had this great idea. I’ll just remove the alternator from its decorative casing, shorten and reassemble. Easy. 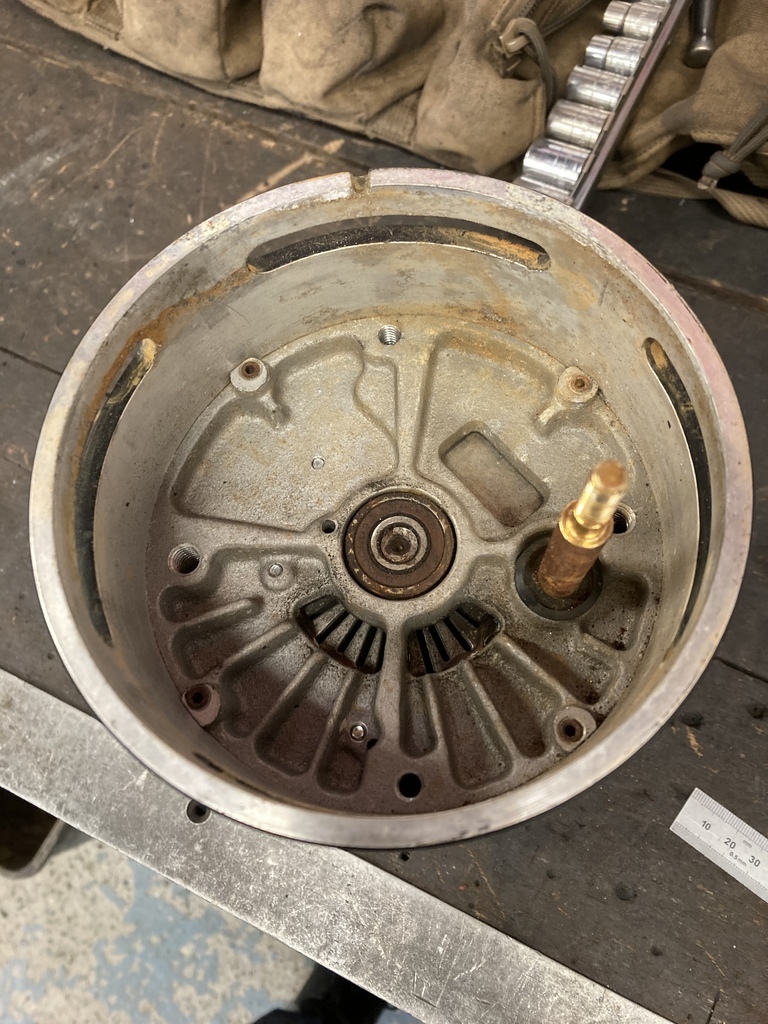 Unfortunately, for me, the Powergen was way more complex than I presumed and the whole thing is integrated. After much fighting and head scratching I eventually got it apart. The magnets and windings had to stay in the casing as they were hard wired in.  There was a casualty in all of this as the brushes got hung up on the armature and broke the brush holder. 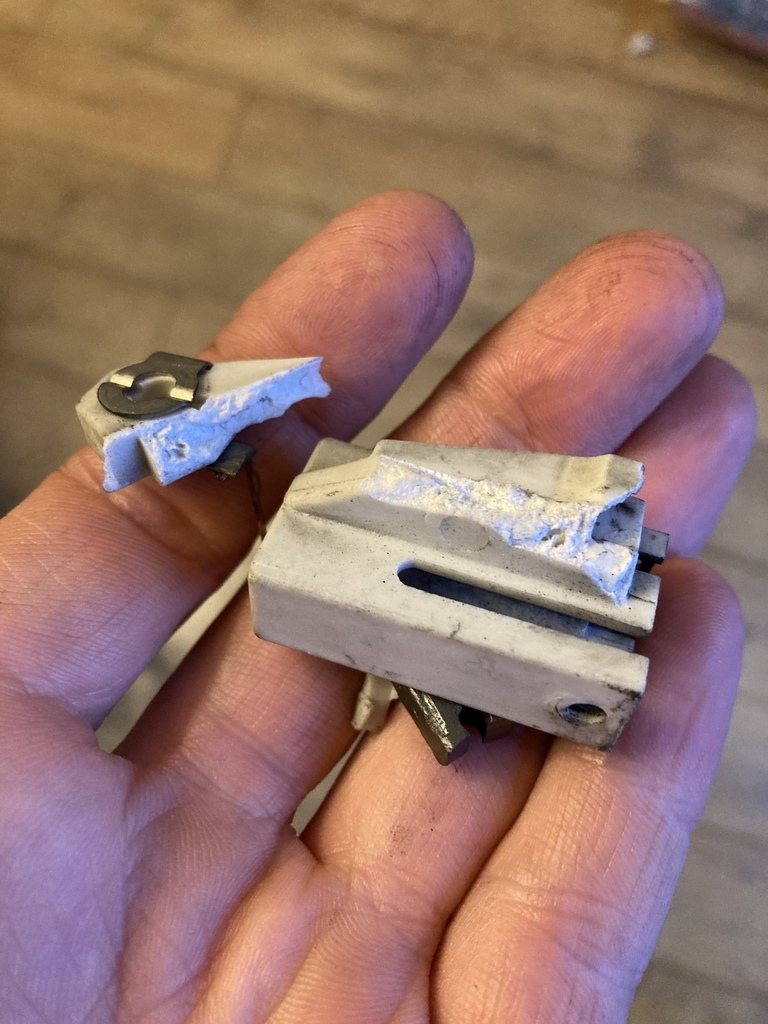 At this point I was ready to put it in the bin and rack it up as a life experience but I had nothing to lose at this point so carried on regardless. The brush holder had a clean break so my first thought was to just glue it back together. I’ve had some good luck with the modern 2-part epoxy glues but was concerned because I wasn’t sure it would take to the plastic that had been used. It very hard, almost brittle with a rough texture to it. I need not worry as after letting it cure for 24hrs and some generous twisting it stayed firmly attached. 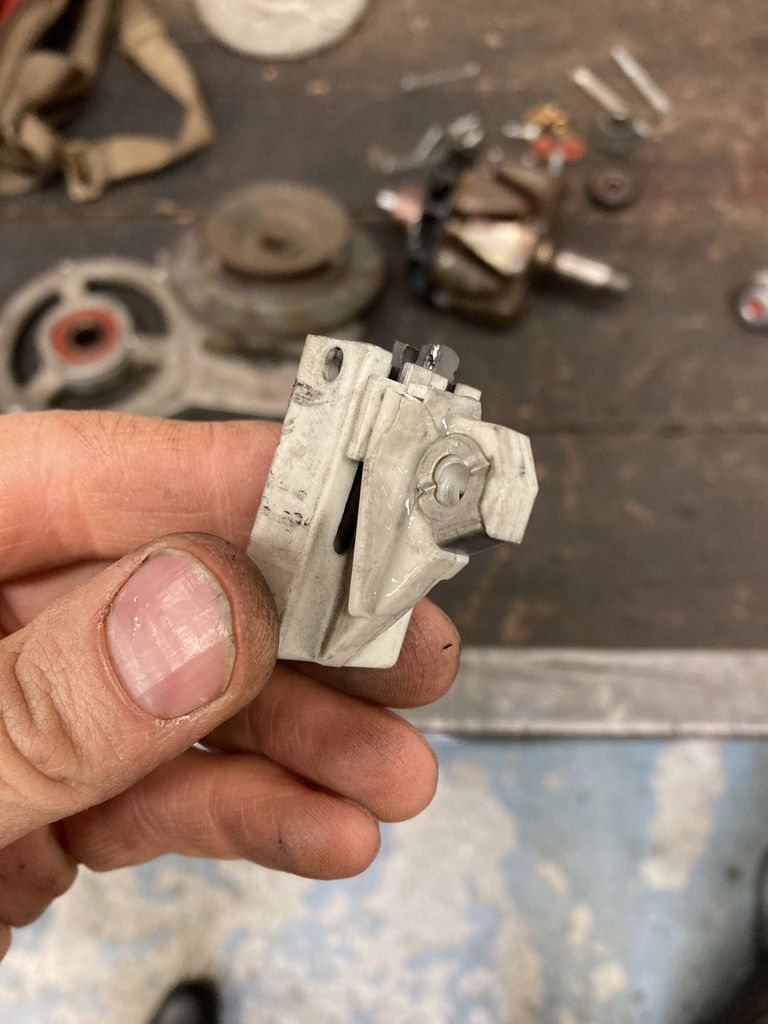 With that out the way it was time to shorten the case. This was the easiest job of the whole experience. Simply chucked up in the lathe and a parting tool used to reduce the length. 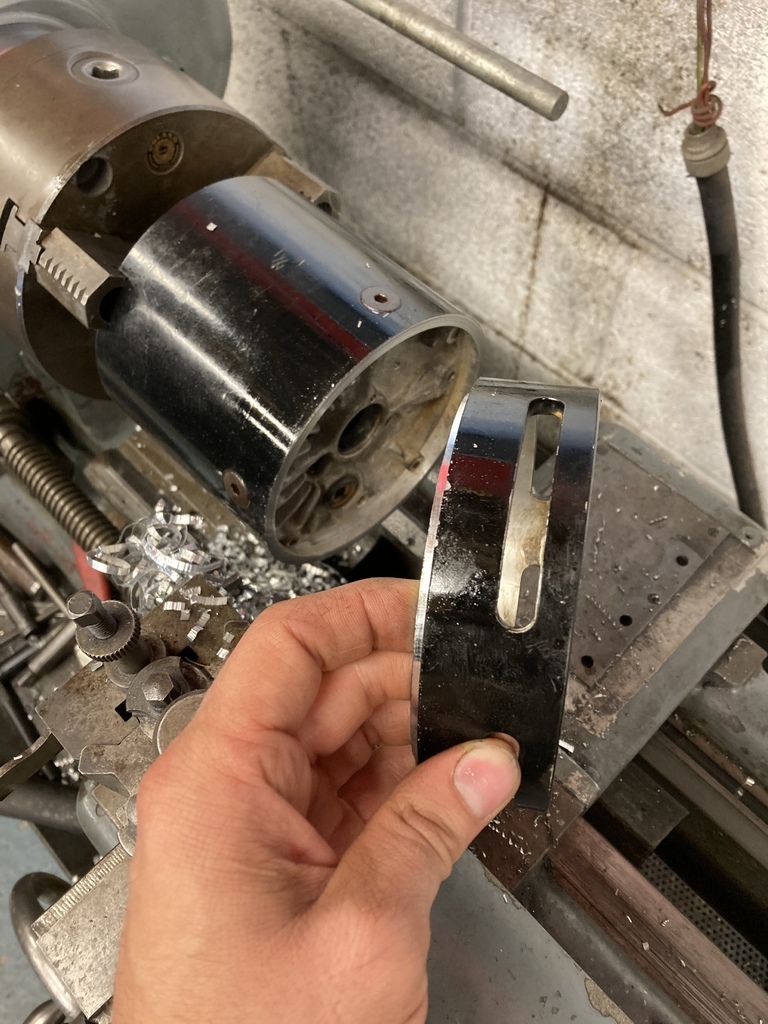 All the original hardware had to be shortened the same amount and re threaded the original 1/4 UNC thread. 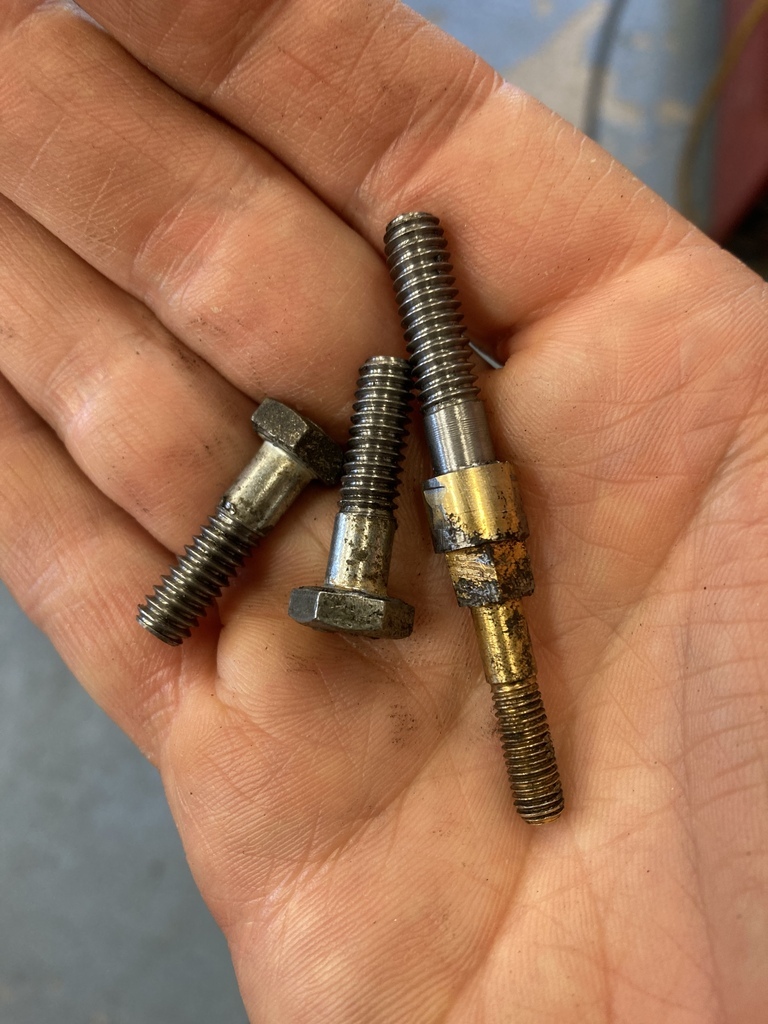 Just a matter of reassembly now but I couldn’t work out how to hold the brushes back to allow the armature to drop back in. The whole time I kept noticing a hole in the middle of each brush, then a small hole in the back plate. Light bulb moment. 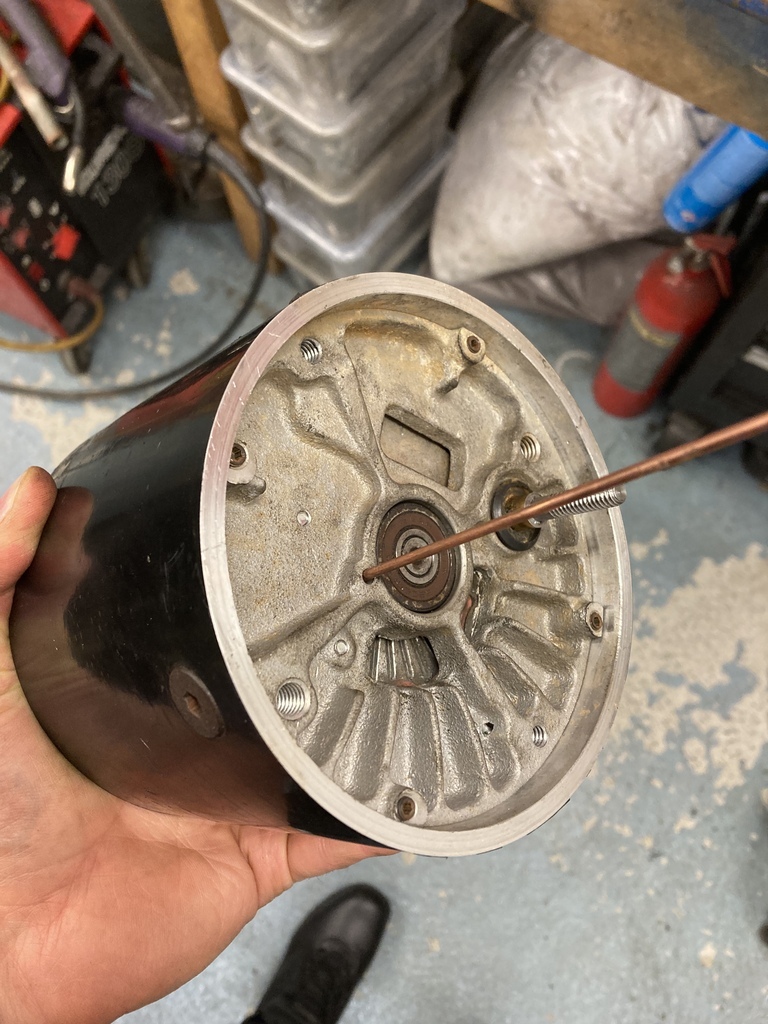 A length of rod dropped through the hole holds the brushes back. Drop in armature and pull the rod out so the brushes spring back into place. Clever. In shortening the case I lost the cooling intakes. I opened up a dead area in the fake rear cover. I guess I could fit some mesh over the hole but probably won’t. 😆 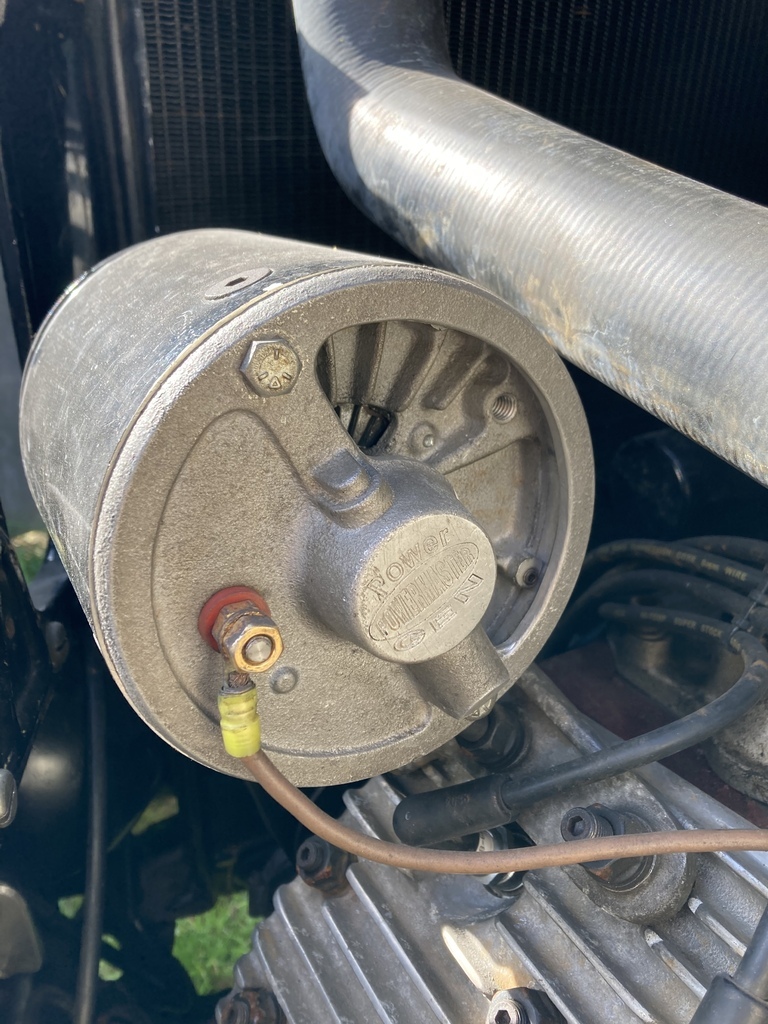 To prove I didn’t make a complete mess, it does still charge. 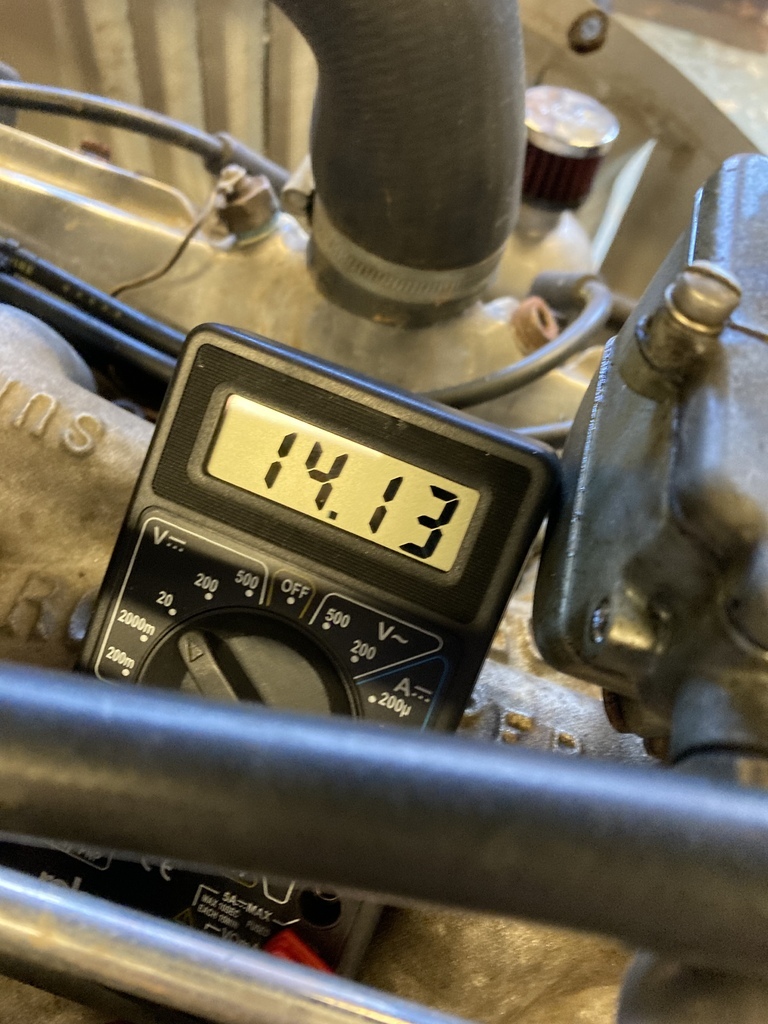 I seem to have completely missed taking a picture of the finished item so here it is hanging off a hoist. 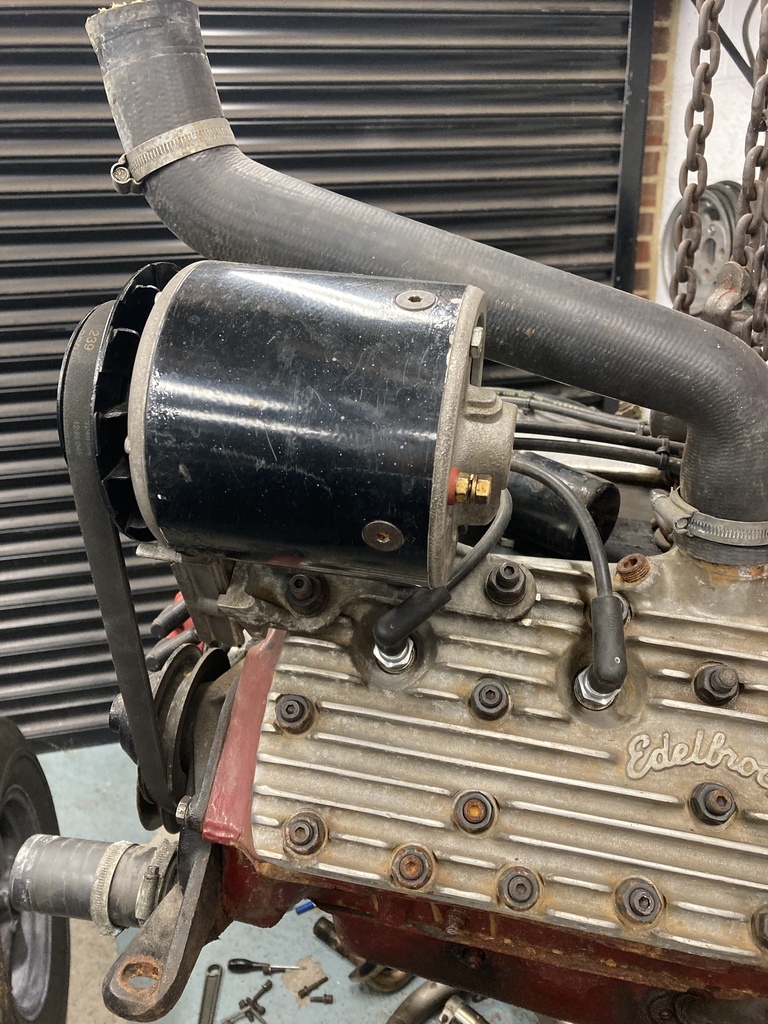 |
| |
Last Edit: Oct 6, 2022 16:23:38 GMT by Enbloc
|
|
jimi
Club Retro Rides Member
Posts: 2,233 
|
|
|
|
|
Nicely done 👍 Is the 14.13v at idle ?
|
| |
Last Edit: Oct 6, 2022 16:31:42 GMT by jimi
Black is not a colour ! .... Its the absence of colour
|
|
Enbloc
Part of things
 
Posts: 399
|
|
|
|
Nicely done 👍 Is the 14.13v at idle ? Thanks. No, that is with a raised rpm. |
| |
|
|
jimi
Club Retro Rides Member
Posts: 2,233 
|
|
|
|
|
Nice voltage to be at, somewhere round 13.5/6 at idle ?
|
| |
Black is not a colour ! .... Its the absence of colour
|
|
|
|
|
|
|
|
Imlove these sorts of repairs still being done, rather than binning and buying new.
Nice job.
|
| |
|
|
|
|
Enbloc
Part of things
 
Posts: 399
|
|
|
|
Nice voltage to be at, somewhere round 13.5/6 at idle ? Err.. Not quite! Long story but basically the pulley got changed out and is a fair bit bigger than the original pulley so the alternator is basically under-driven now and sees low 12V at idle. Never been an issue so never bothered to correct it. |
| |
|
|
jimi
Club Retro Rides Member
Posts: 2,233 
|
|
|
|
Bit low, it's unlikely to be charging at that needs more like 12.9v, but as you say plus you how to address it if it ever does  |
| |
Black is not a colour ! .... Its the absence of colour
|
|
Enbloc
Part of things
 
Posts: 399
|
|
|
|
Running out of pointless jobs to occupy my time I finally admitted defeat and cracked on with the bodywork. My dad got involved at this point as bodywork is more his forte and we devised a plan of attack. Unfortunately I don’t have a lot of photographic records so it’ll move through quite fast. Straight to the finished A post! 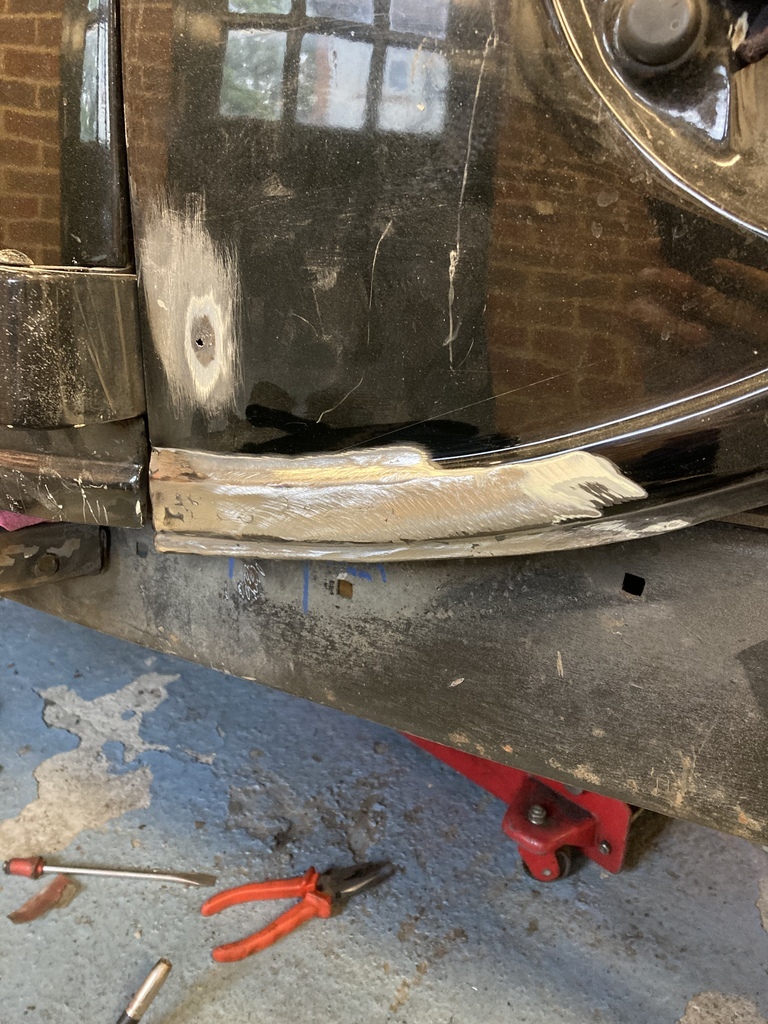 With my face up against the A post I noticed a bubble under the paint and picked it. 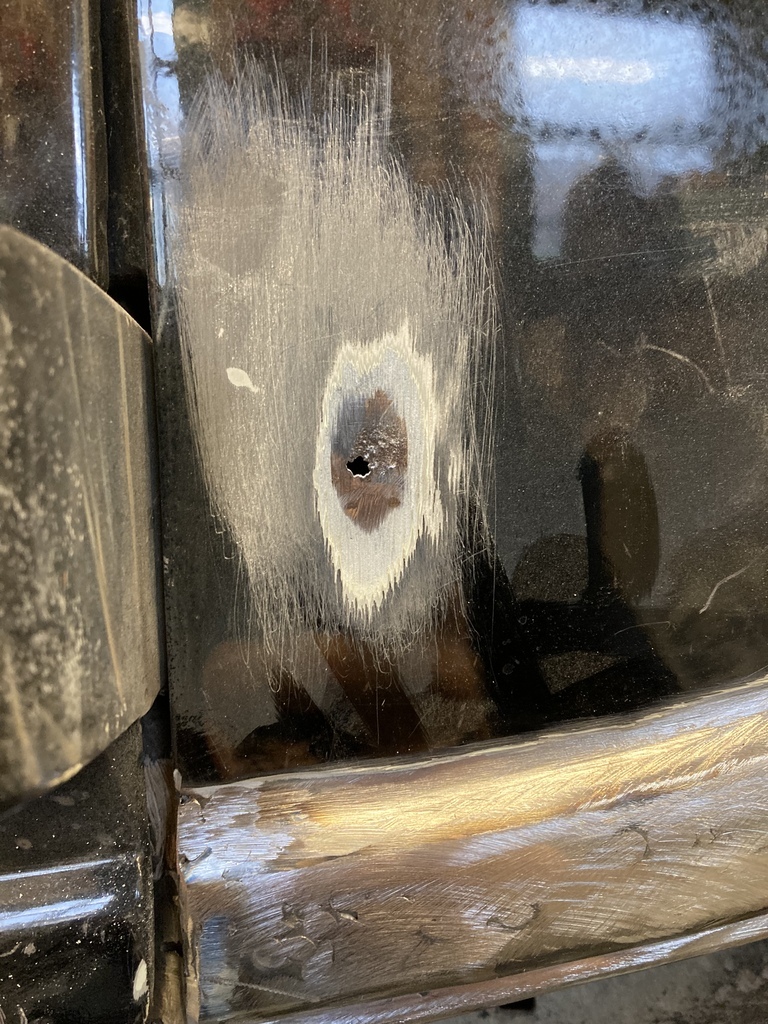 I total random hole in the middle of panel. This got cut out and patched as well. 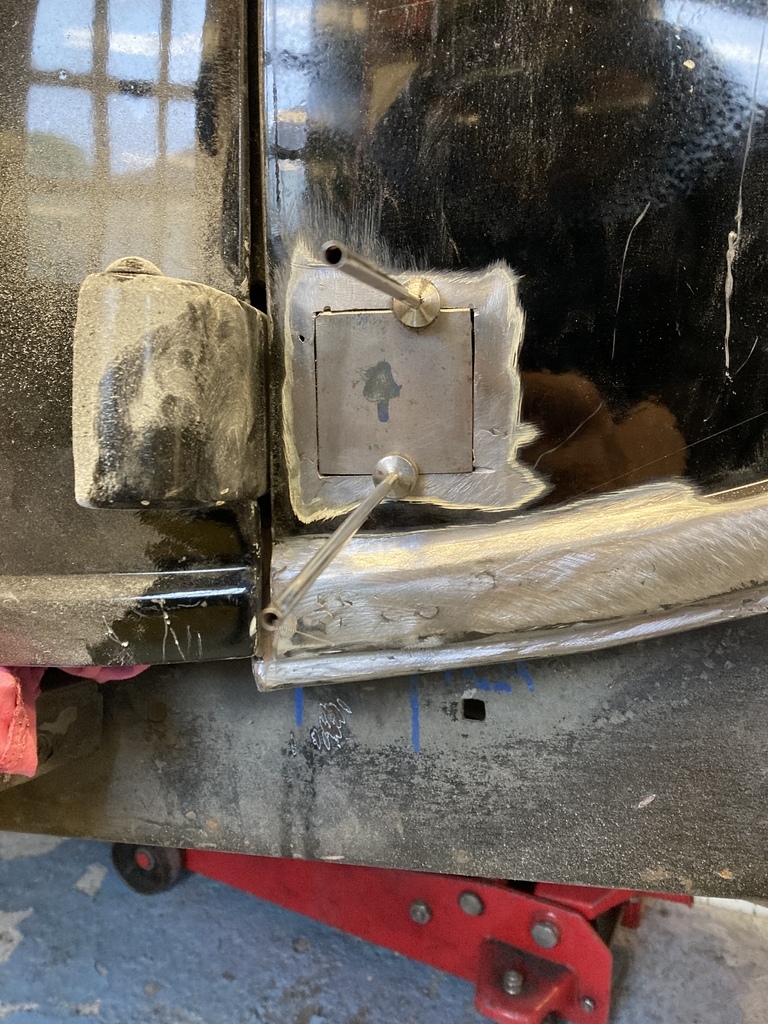 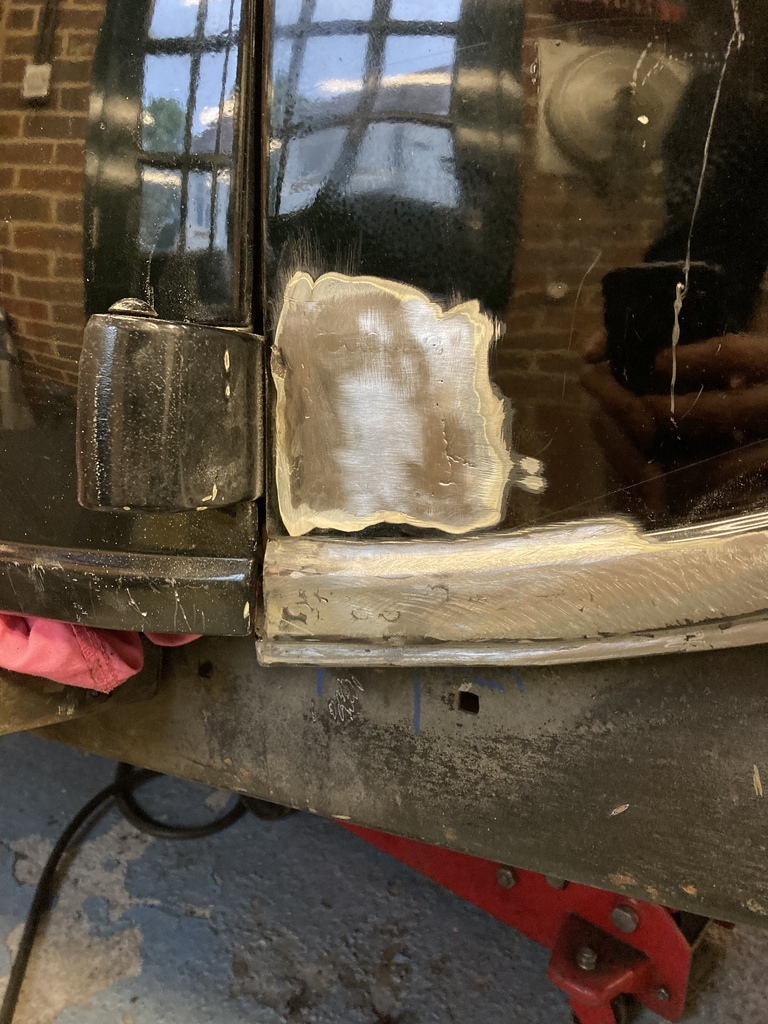 Moving onto the drivers door, the crusty area was hit with the angry brush leaving this. 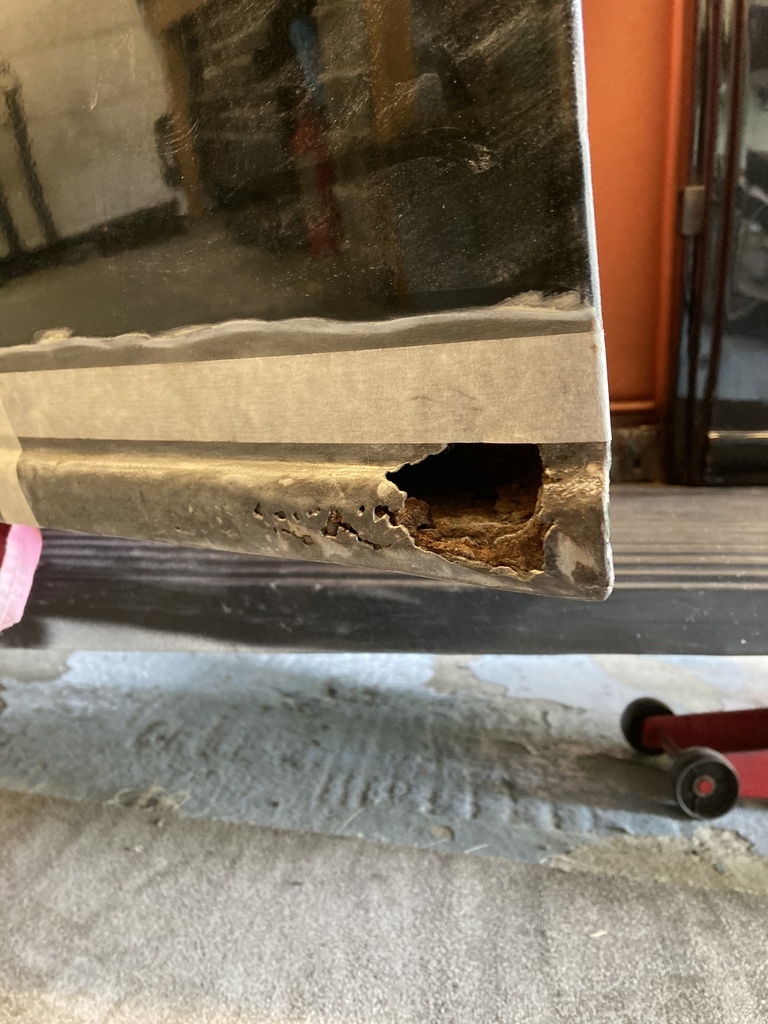 Chased it back to clean metal…. 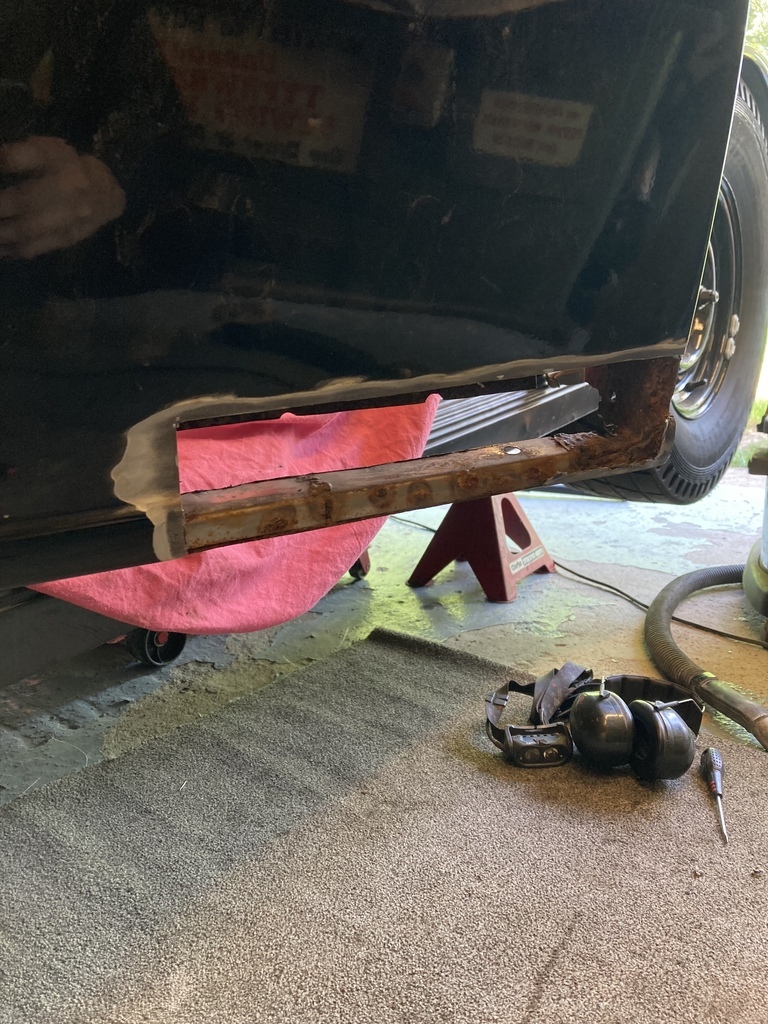 … and the inner skin. Tip of the iceberg and all that. 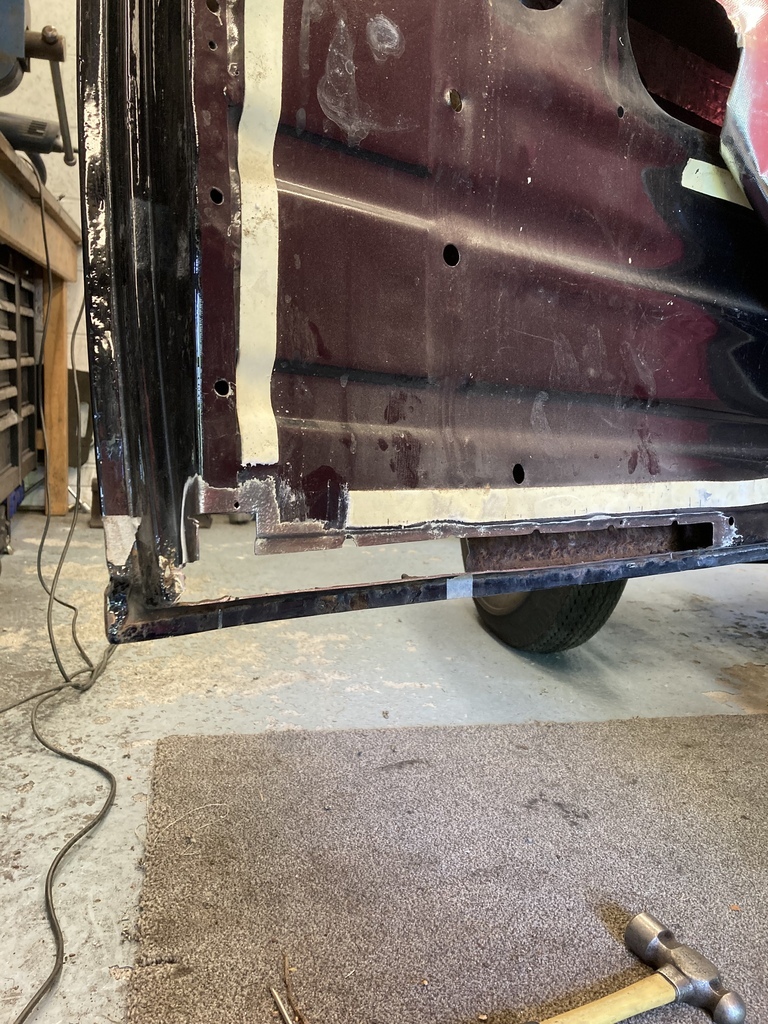 Then it was a matter of building it back up. Starting with door edge. 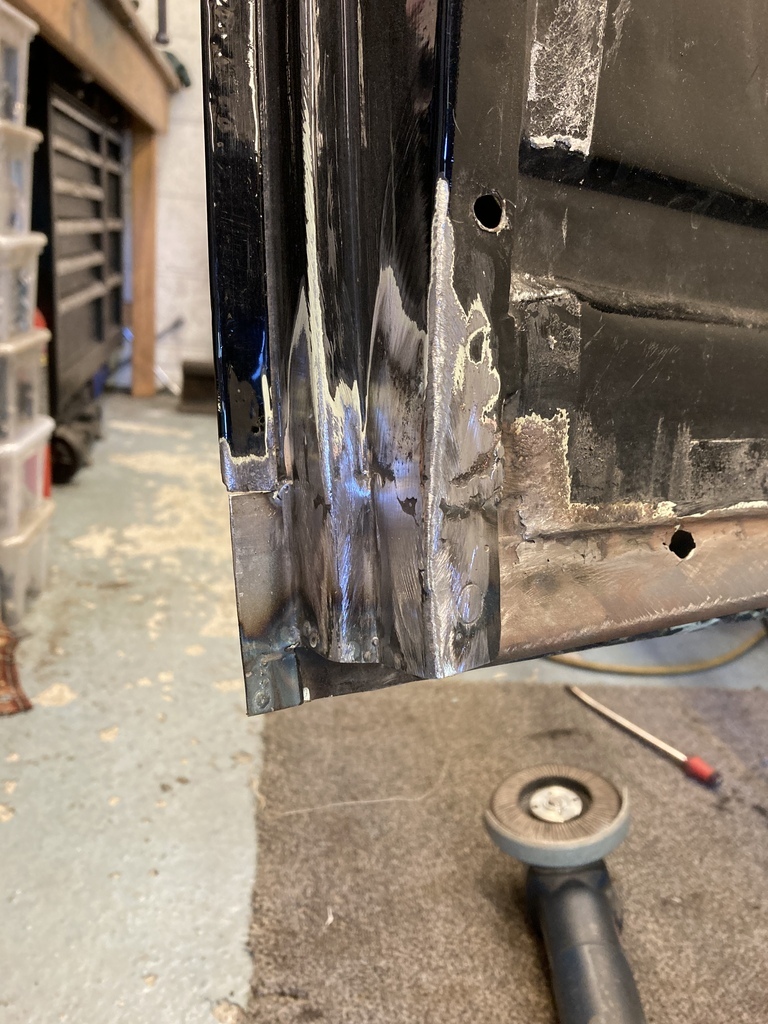 Inner skin next making sure the trim panel holes go back in the right place. 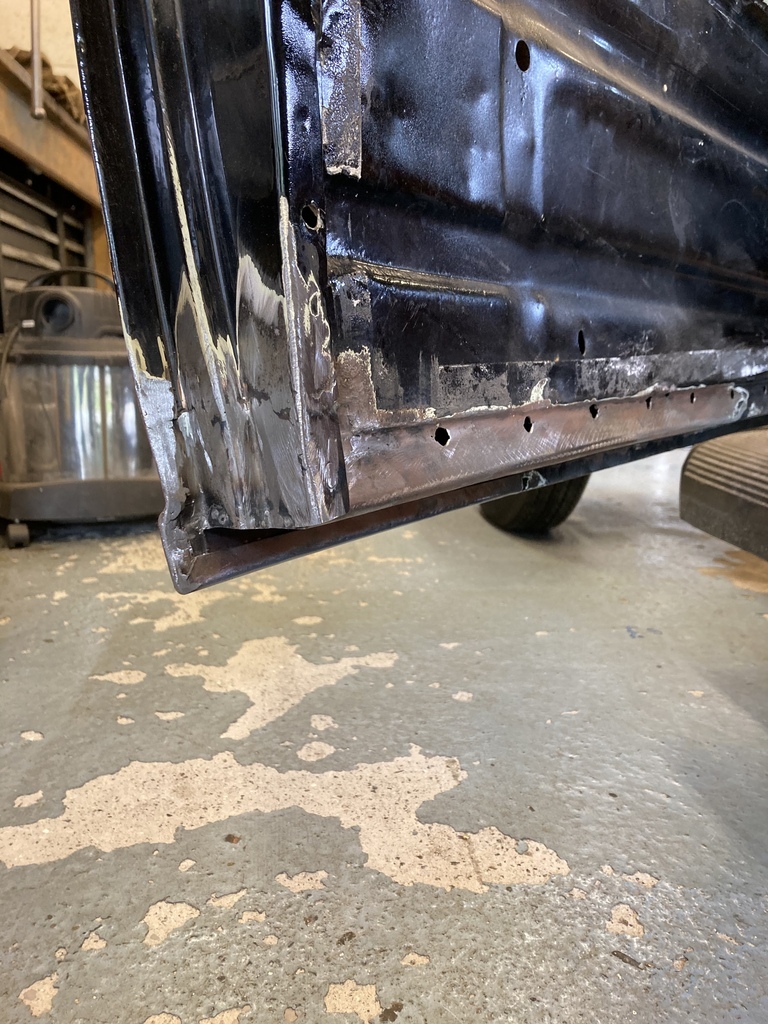 Finish on the outer skin as this is crimped around the inner skin as original. We struggled to create the correct profile in the replacement patch so in the end my dad ended up making a hardwood former (he is a chippie by trade) to create the correct bead profile to match the original. 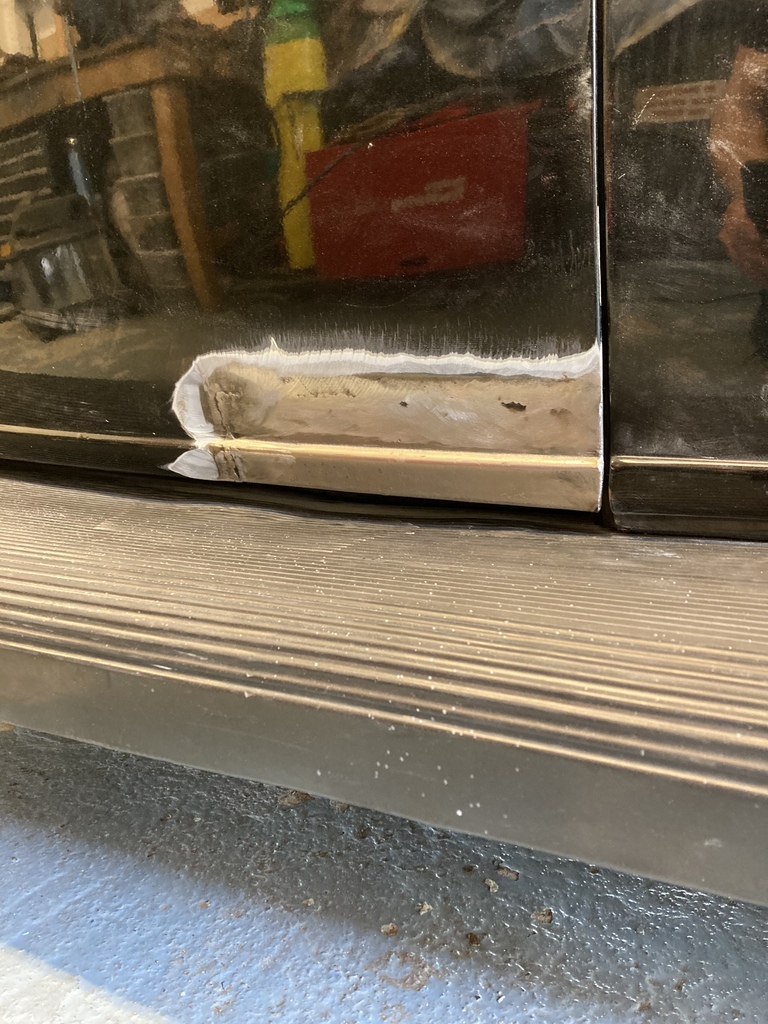 After going through some options it was decided to finish and paint in my garage. This meant moving over the big compressor, sheeting up as much as possible because of the dust and gathering up all the painting paraphernalia. The repairs were plodded over and a few areas around the roof were ground out and redone. 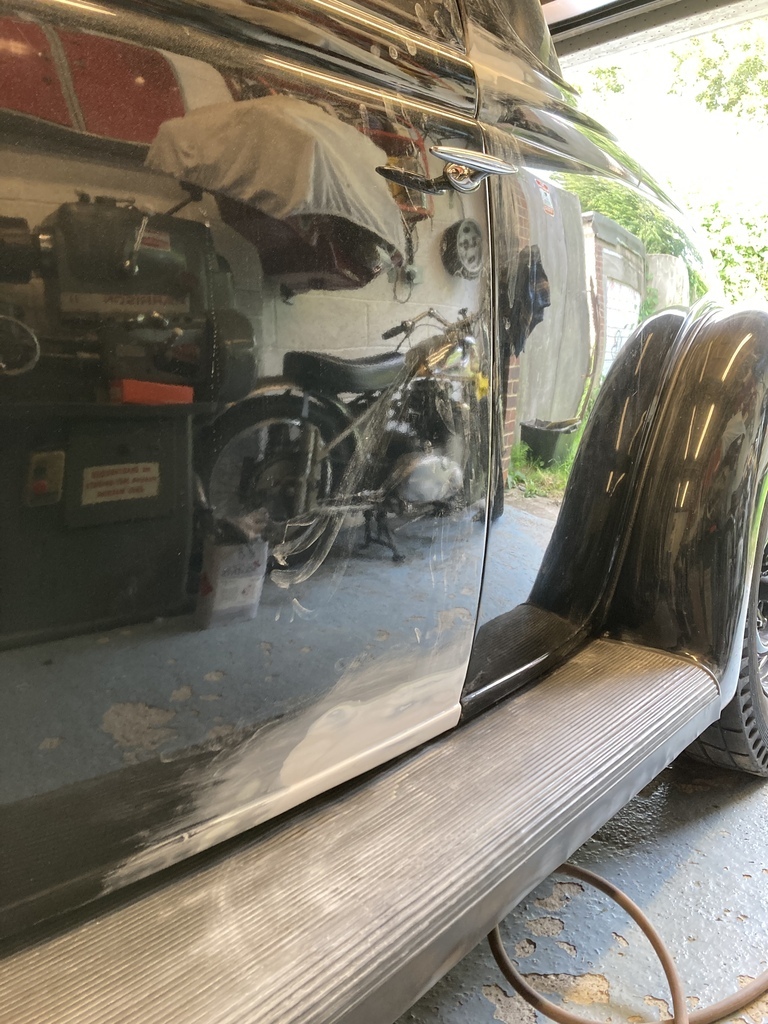 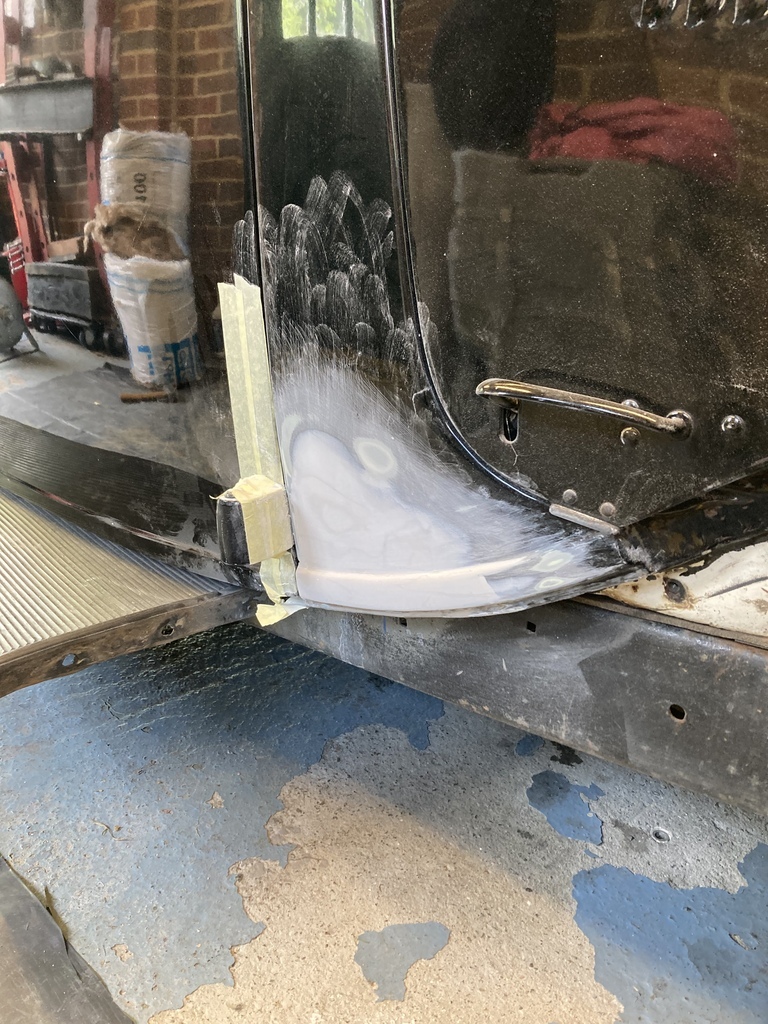  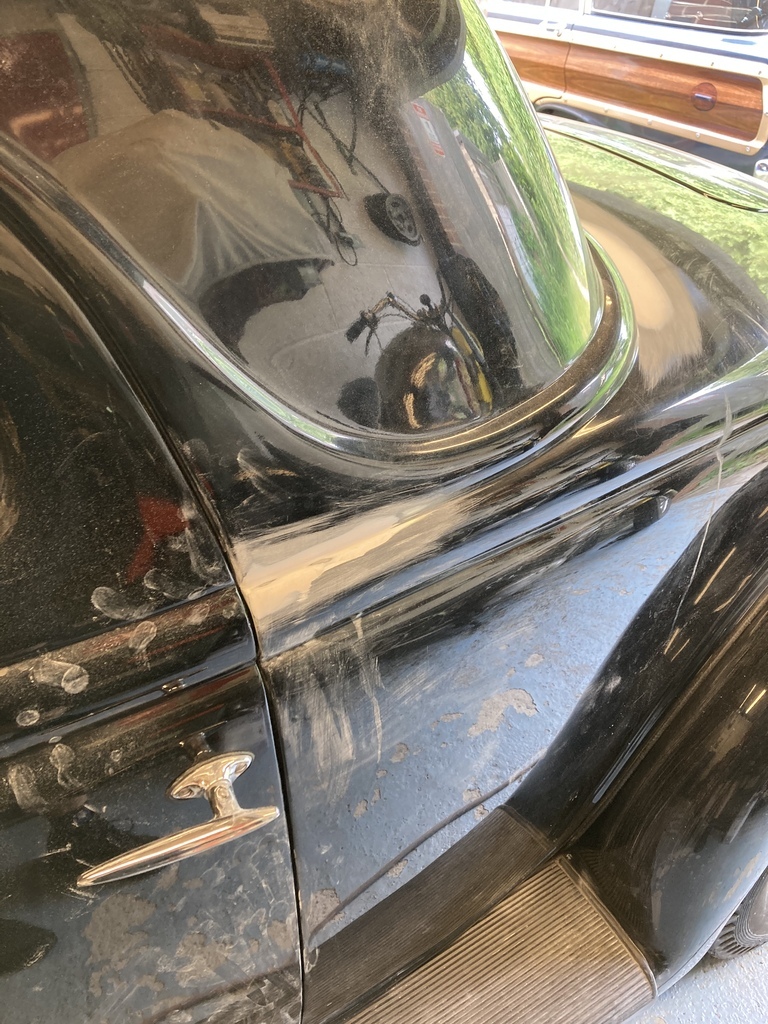 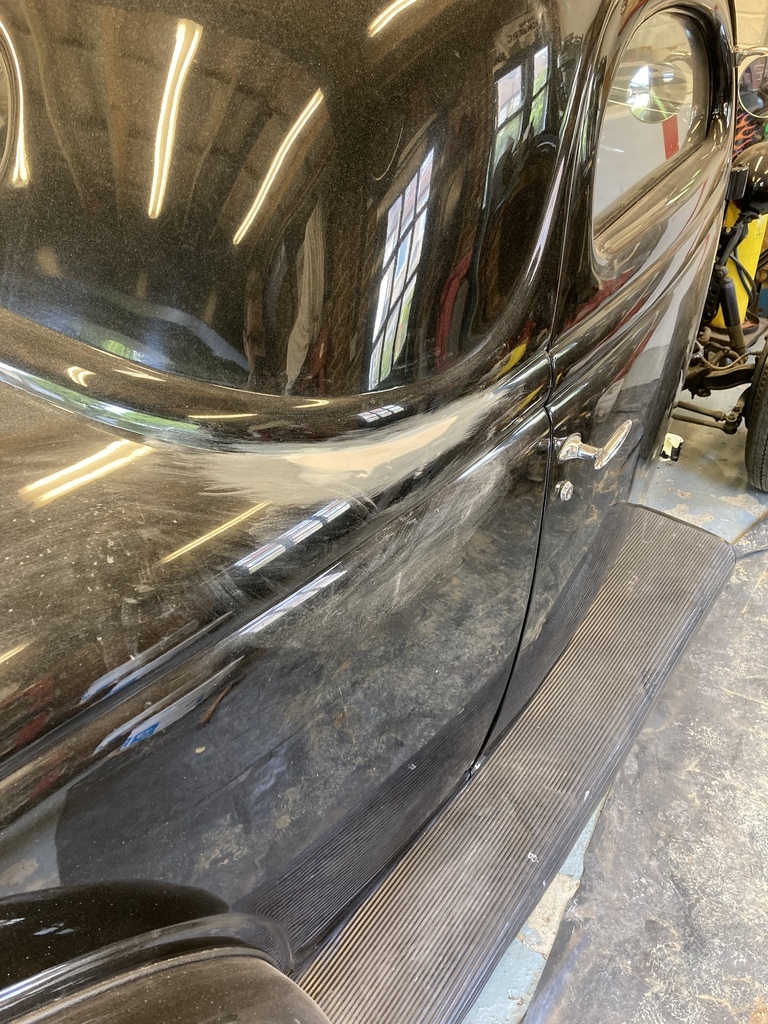 This time I made sure it got a good coating of Waxoyl. Something that I never got around to doing the first time. 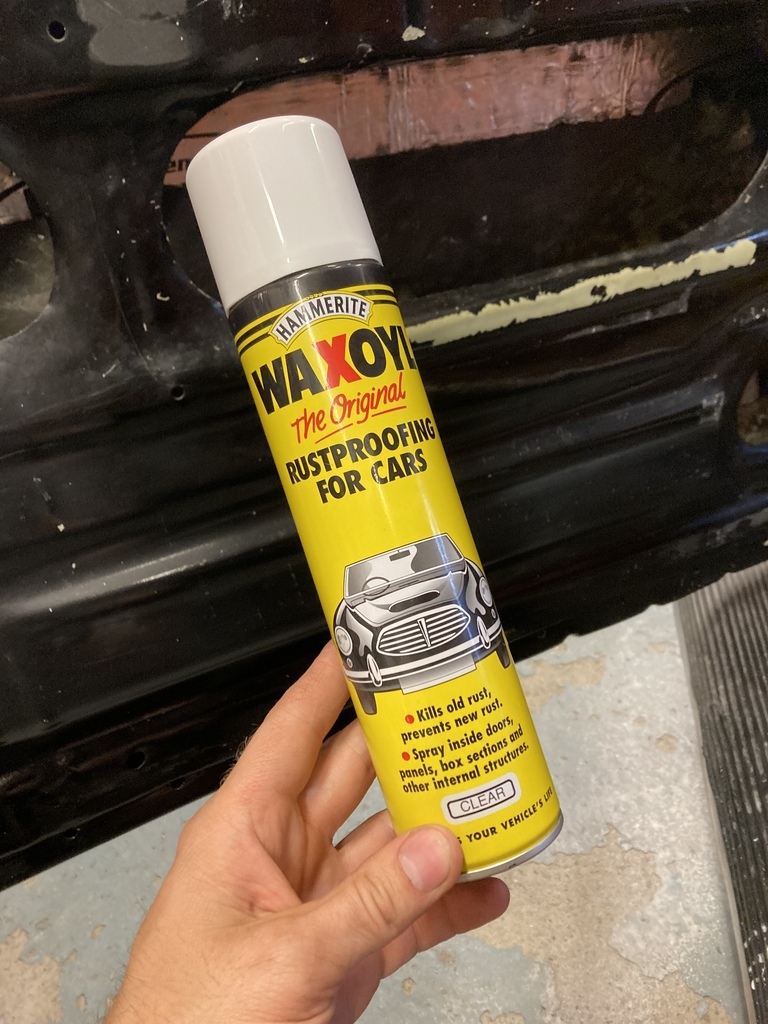 By the time this was all done I had got my front panels back from the painter, so these could now go on. The front grill section alone is held together with something like 12 5/16” bolts, nuts and washers. Obviously these got drilled out to match all the other hardware that is now holding the front panels together!  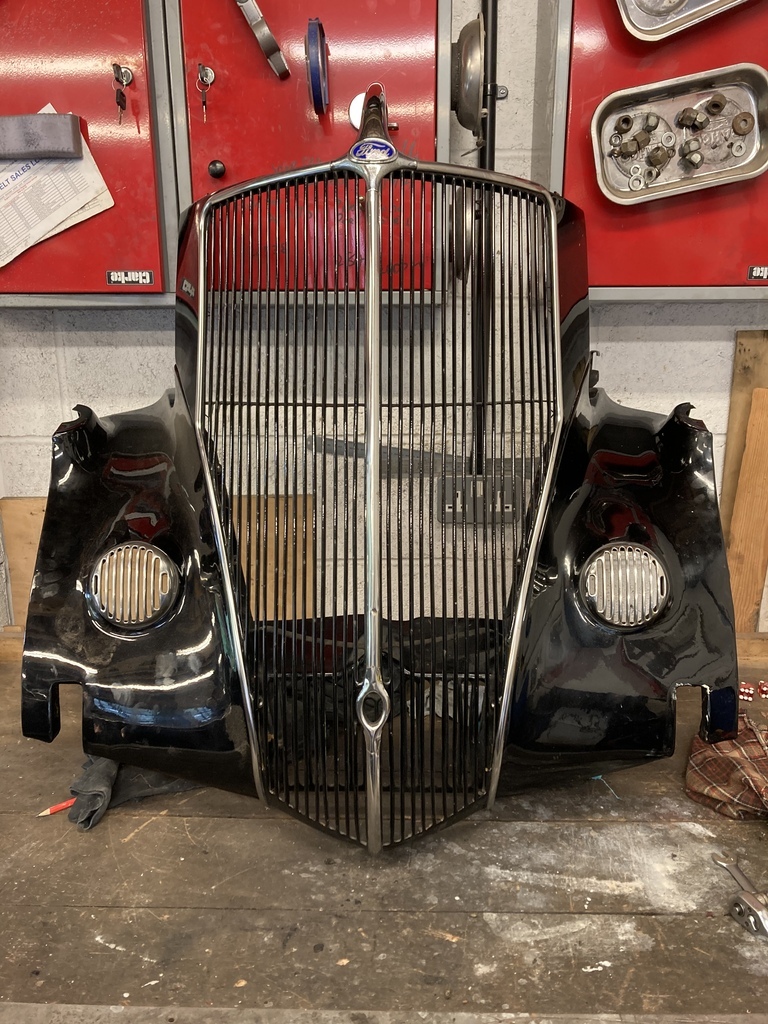 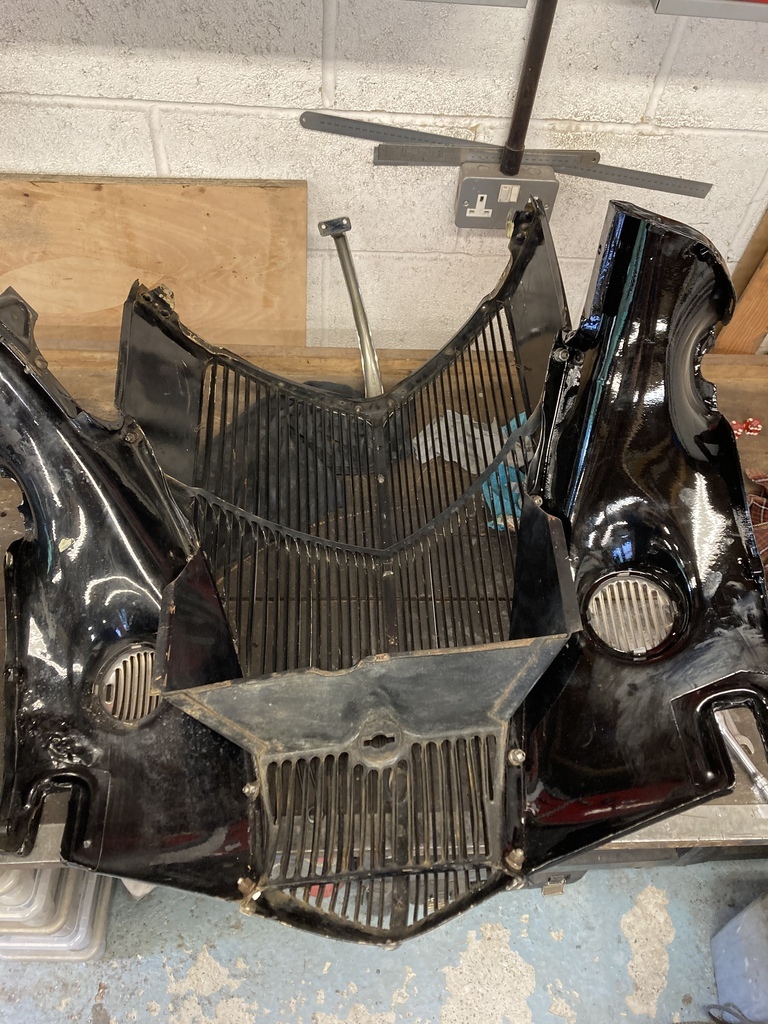 Grille section on followed by the front wings. 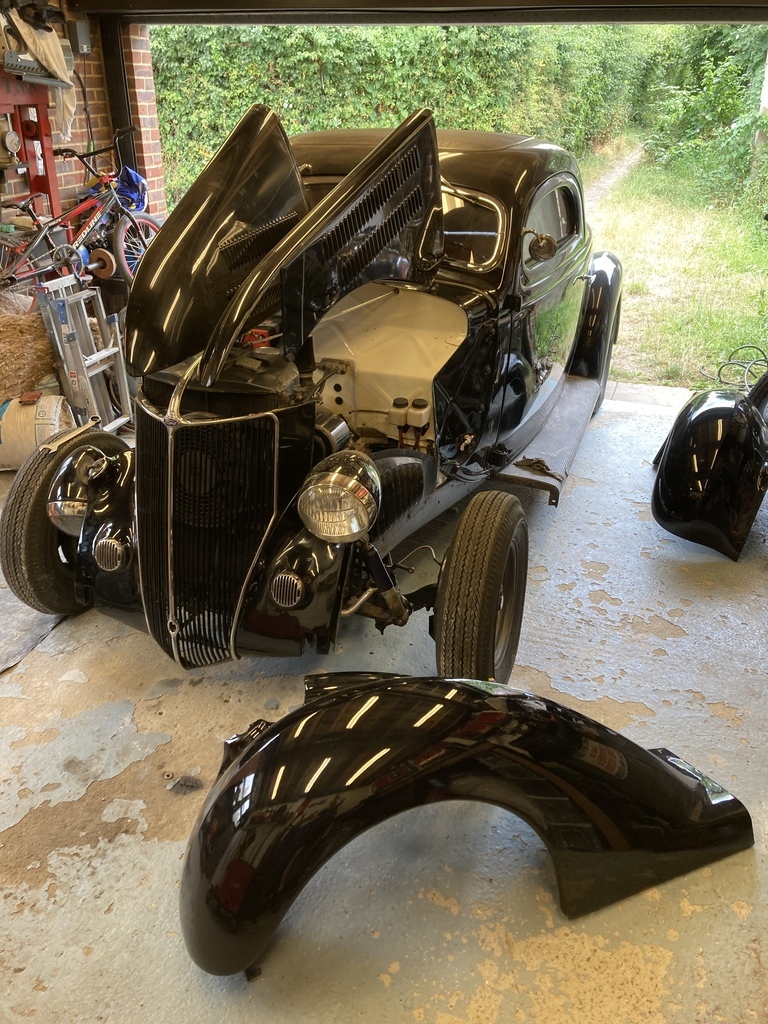 Finished. 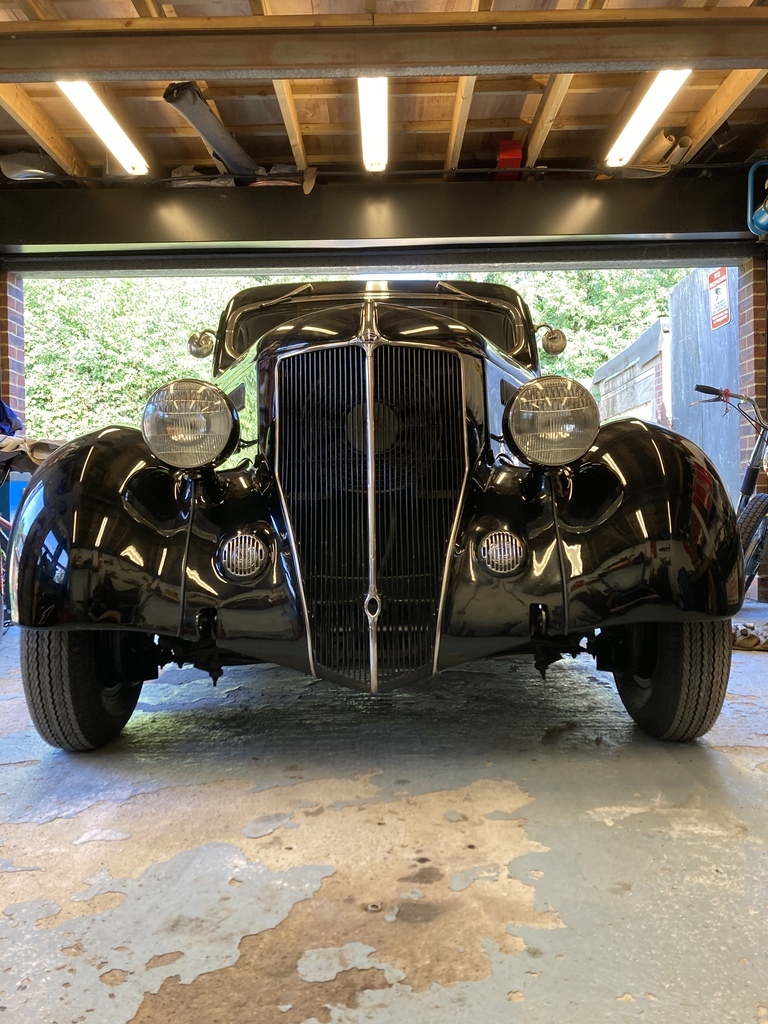 |
| |
Last Edit: Oct 9, 2022 16:39:12 GMT by Enbloc
|
|
|
|
Enbloc
Part of things
 
Posts: 399
|
|
Oct 13, 2022 17:12:08 GMT
|
I had the front bumper off to make it easier to get the front sheet metal on and off. With the front panels all bolted back on without the bumper, I thought to myself that this kinda works with the current race inspired look the car currently wears. I’ve run without bumpers before over the years but I usually quickly tire of the look. This time I thought I’d go a little further with it. Out came the archives and a couple of inspirational pictures led to the idea of bracket stubs poking through the bumper slots and a push bar on the back. Originally the front brackets were for bolting on a ‘A’ frame for flat towing, mine would be purely cosmetic. The bars on the rear were used for push starts in period. I believe I built my push bar stout enough to be used but doubt it will be! I suppose it could be described as all show, no go! 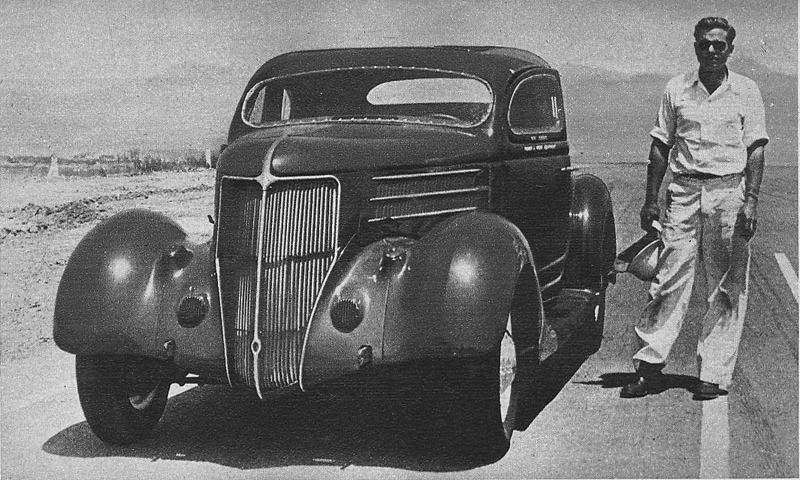 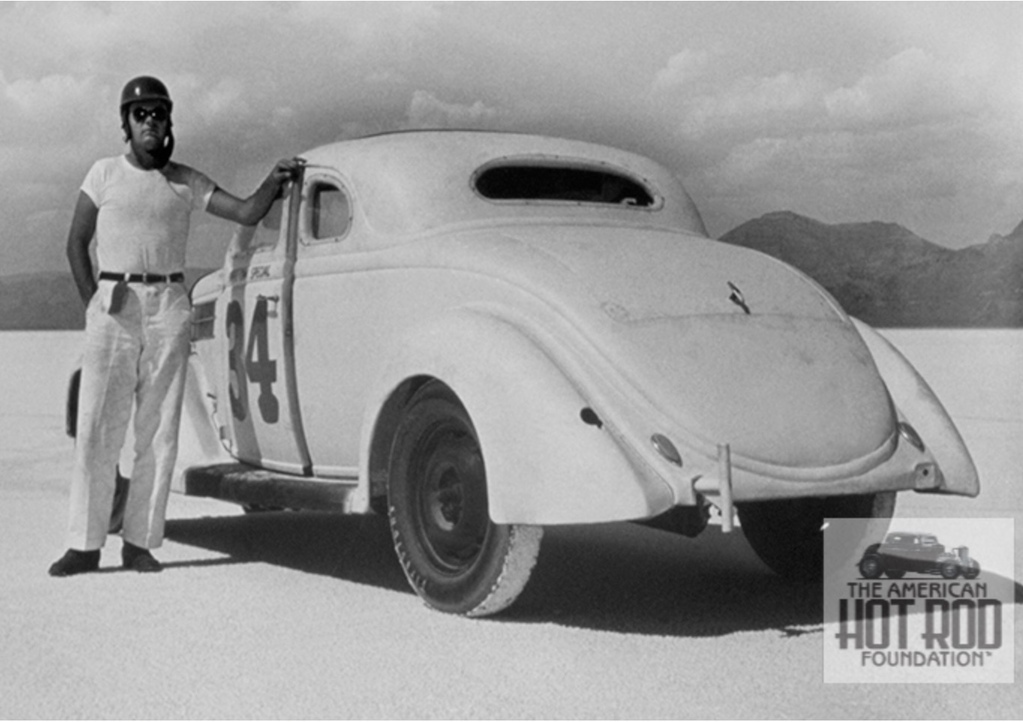 The front brackets were easy. Just some scrap 50x6mm flat, which is pretty close to the dimensions of the original bumper irons. 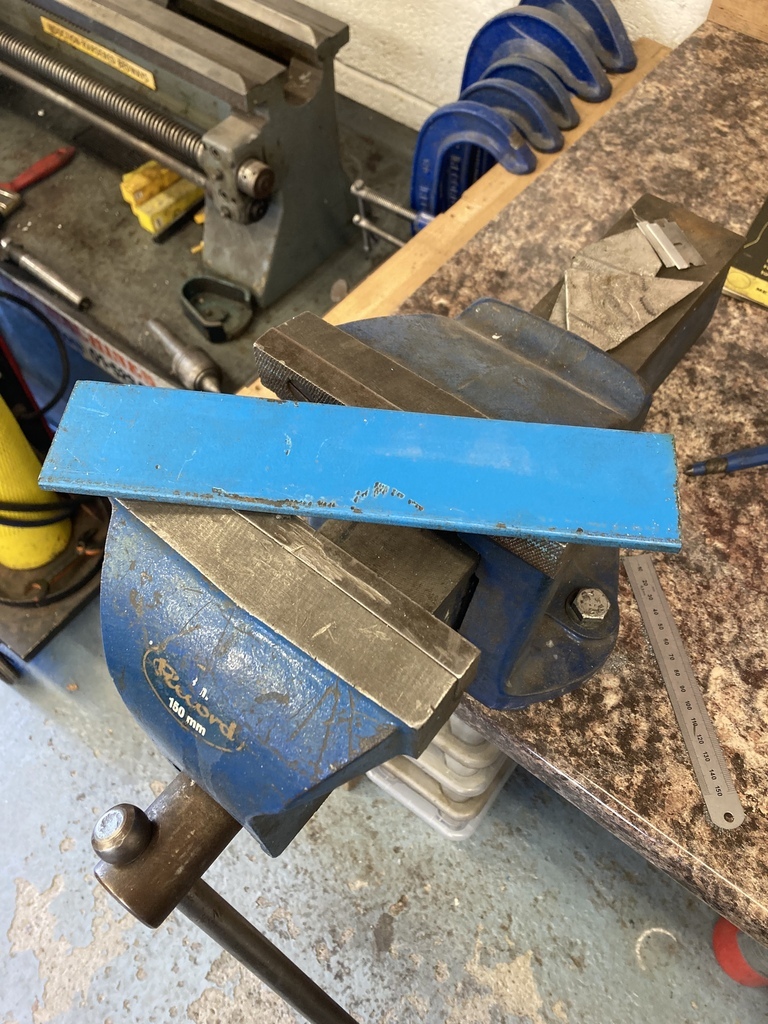 Drilled for the original bumper mounting holes and the ends shaped to match the factory bumper irons. 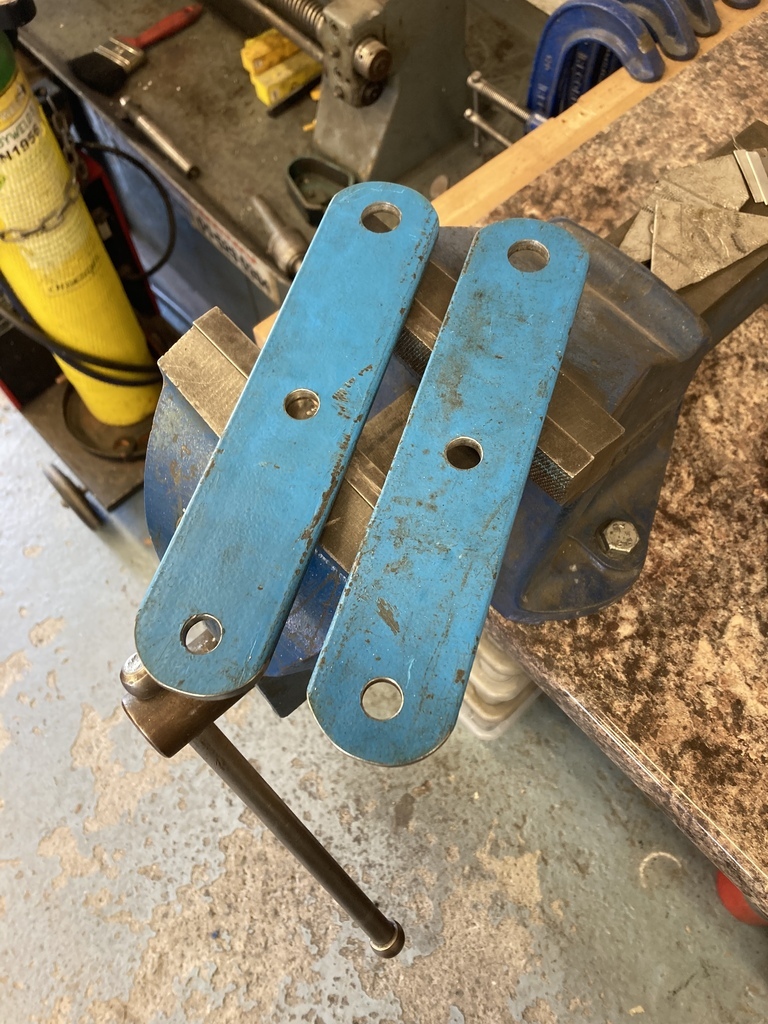 Painted and mounted. 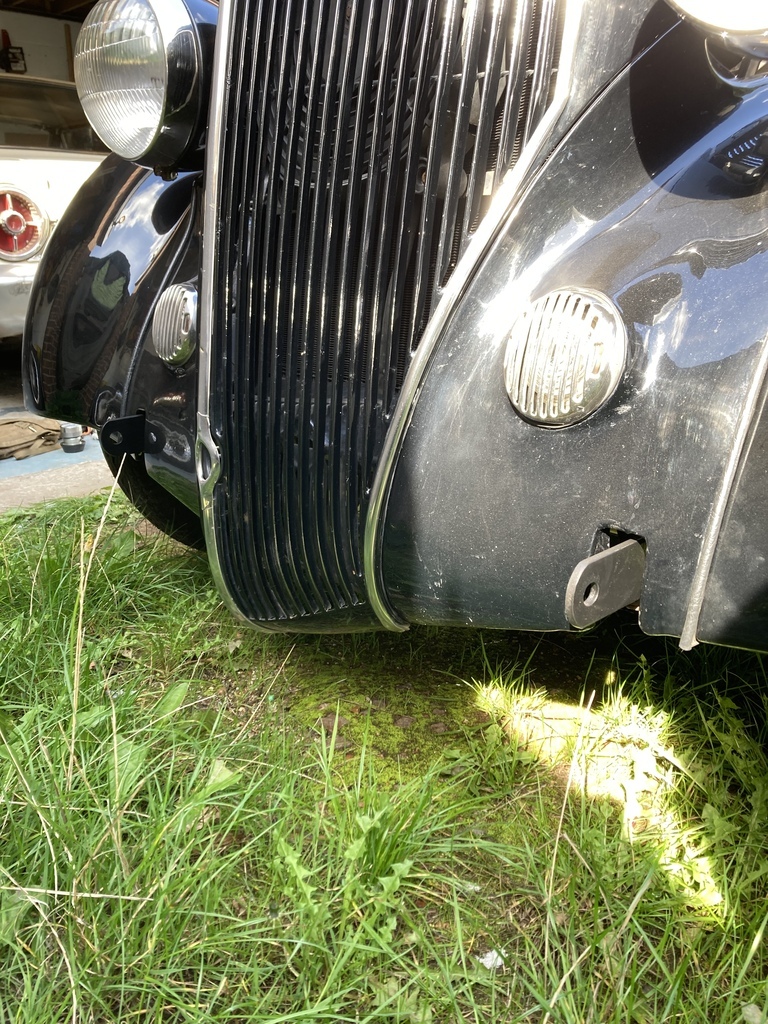 On to the rear, first job was to notch some heavy wall tube.. without a notcher. I cobbled this setup in the drill press which worked quite well. 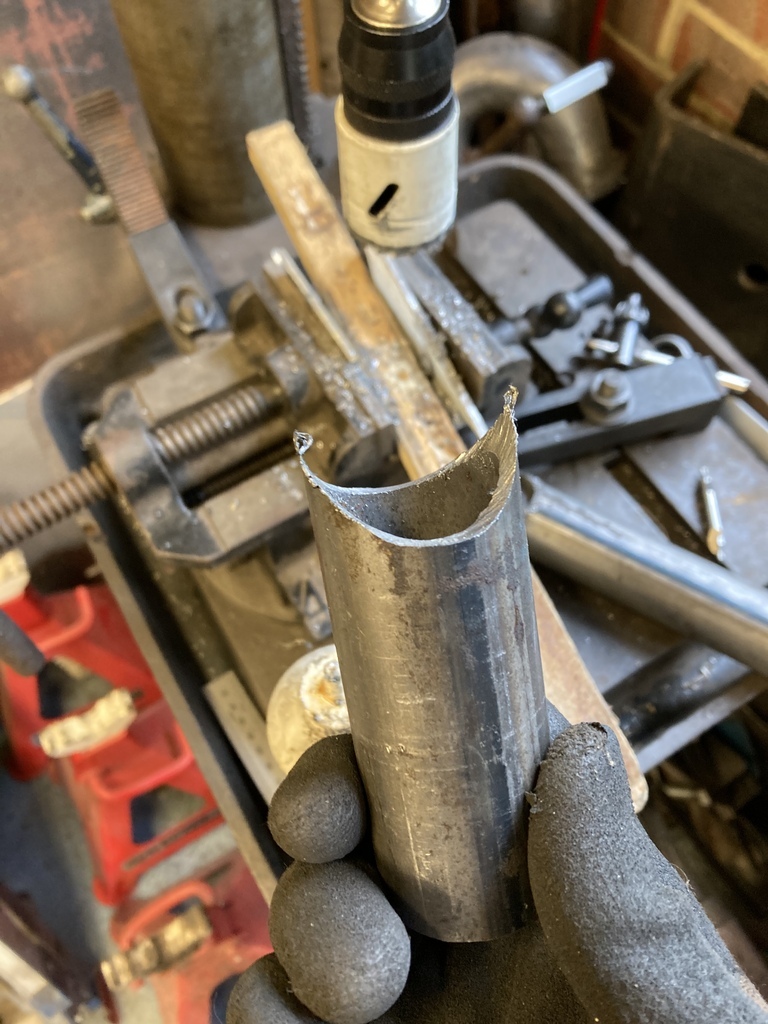 Cleaned up the end and checked for fit. 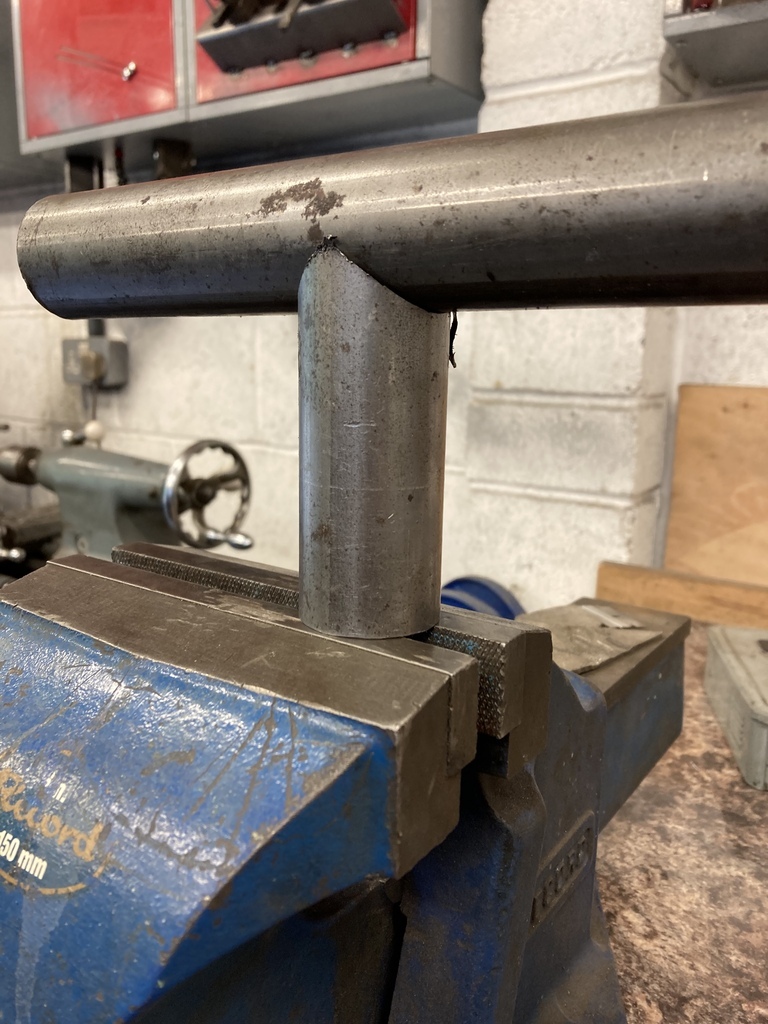 I turned up an aluminium cap as a finish piece that would be pressed into the end of tube. 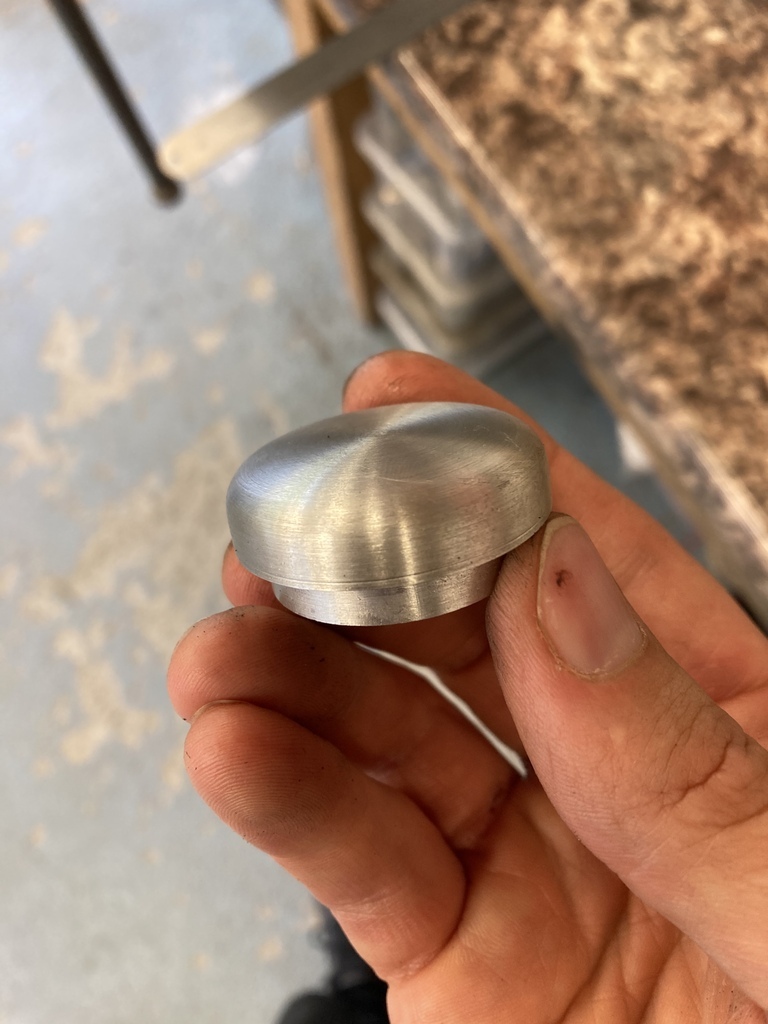 All the pieces ready for welding.  The 1/2 UNF bolt was welded to the thick washer to create a captive stud for mounting to the car through the original bumper hole on the rear of the car. 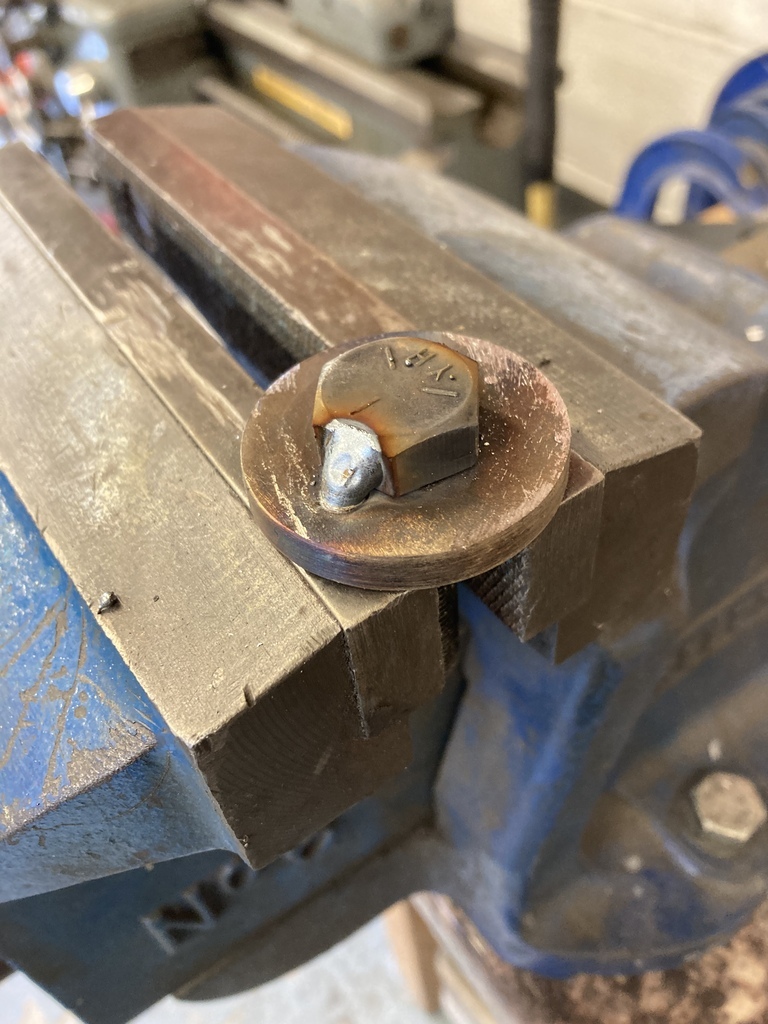 Everything welded together. 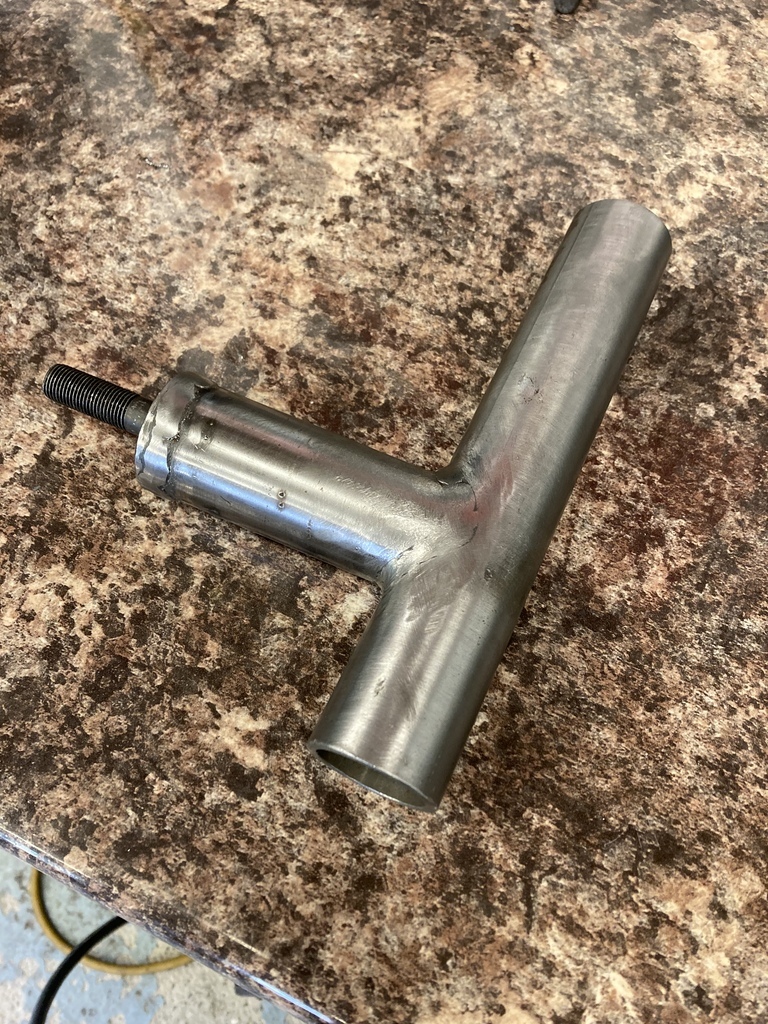 Again painted, end cap pushed home and mounted up. 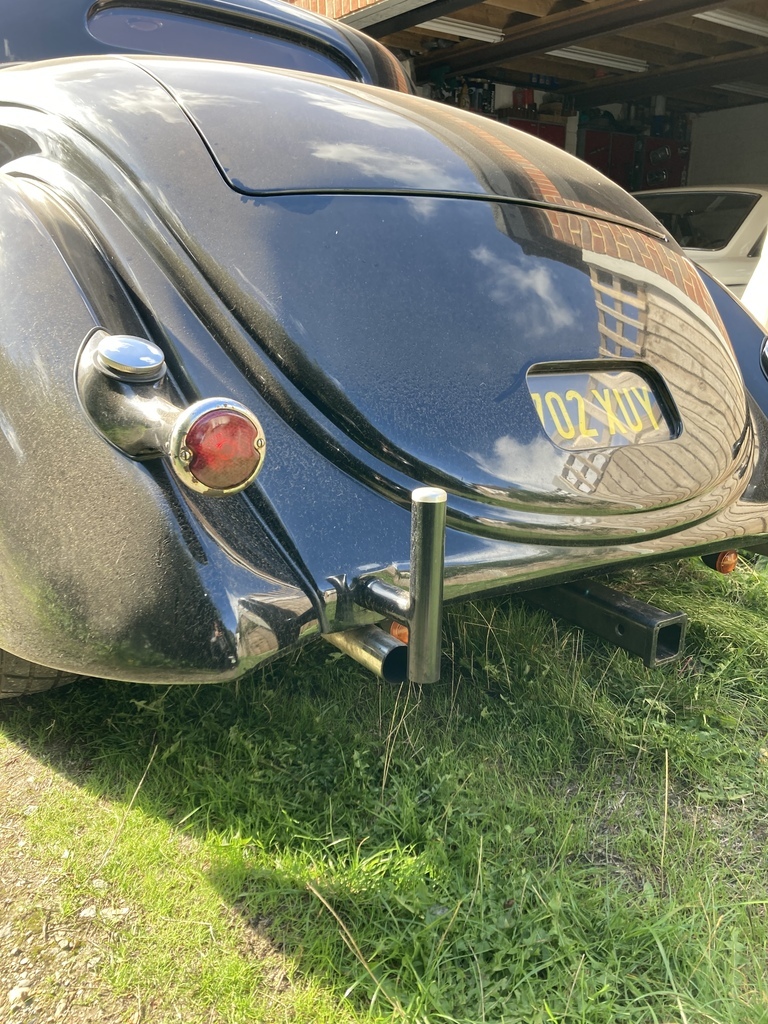 |
| |
|
|
jimi
Club Retro Rides Member
Posts: 2,233 
|
|
Oct 13, 2022 18:51:18 GMT
|
Back in March when I first came across this thread, I said 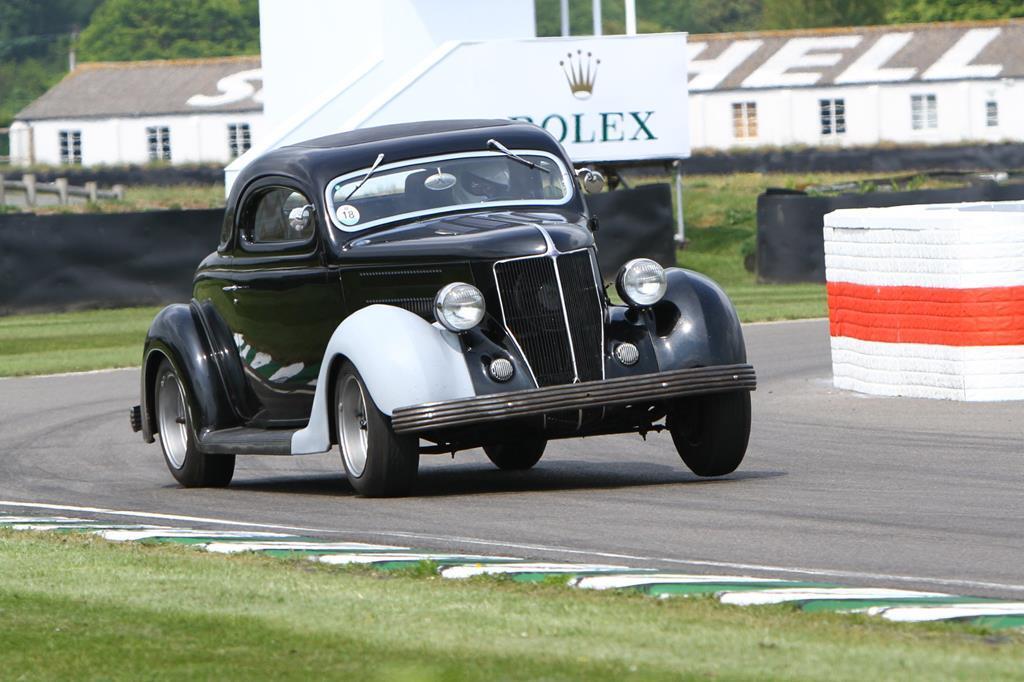 That is so cool  Haven't changed my mind  this is so so cool 😍😎 |
| |
Last Edit: Oct 13, 2022 18:54:22 GMT by jimi
Black is not a colour ! .... Its the absence of colour
|
|
Enbloc
Part of things
 
Posts: 399
|
|
Oct 13, 2022 23:53:26 GMT
|
Haven't changed my mind this is so so cool 😍😎 Glad to hear you’re still coming back! |
| |
|
|
|
|
|
|
|
|
Looks great, I'd be proud to have that in my garage.
|
| |
Proton Jumbuck-deceased :-(
2005 Kia Sorento the parts hauling heap
V8 Humber Hawk
1948 Standard12 pickup SOLD
1953 Pop build (wifey's BIVA build).
|
|
Enbloc
Part of things
 
Posts: 399
|
|
|
|
I try and keep this thread to a vague chronological order, more for my own sanity than anything else! With that being said it’s time to give the Falcon some air time. I very briefly mentioned it on the first page. It’s actually the car I’ve been most active with in the last few years being on track at the Retro Rides Weekender and competing at the Quick60/Gathering. It’s pretty much the sole reason the ‘36 got mothballed. Not my finest moment on the Weekender Autosolo course. After the ‘36 was back together it got driven straight back into storage again as I needed to get back on the Falcon in preparation for our family trip to Italy. That’s 2 adults, a 7y/o, a 5 m/o, driving, in the Falcon, 2000 miles… Not including general maintenance the area I wanted to address was the rear leaf springs. The back was too low, lower than the front, which meant it was constantly bottoming out without any weight in it and it just looked wrong. The leaf springs have been a battle since I bought the car in ‘17. A story which I will relay now. When purchased the car was still on its factory 4-leaf leaf springs. As these are US spec springs they have the poundage rating of a biro pen spring and nearly 60 years of use meant they had also sagged a good 2”. They were so ridiculous that if someone sat in the rear or anything with weight was placed in the boot the rear would noticeably sag and the suspension would hit the bump stops. 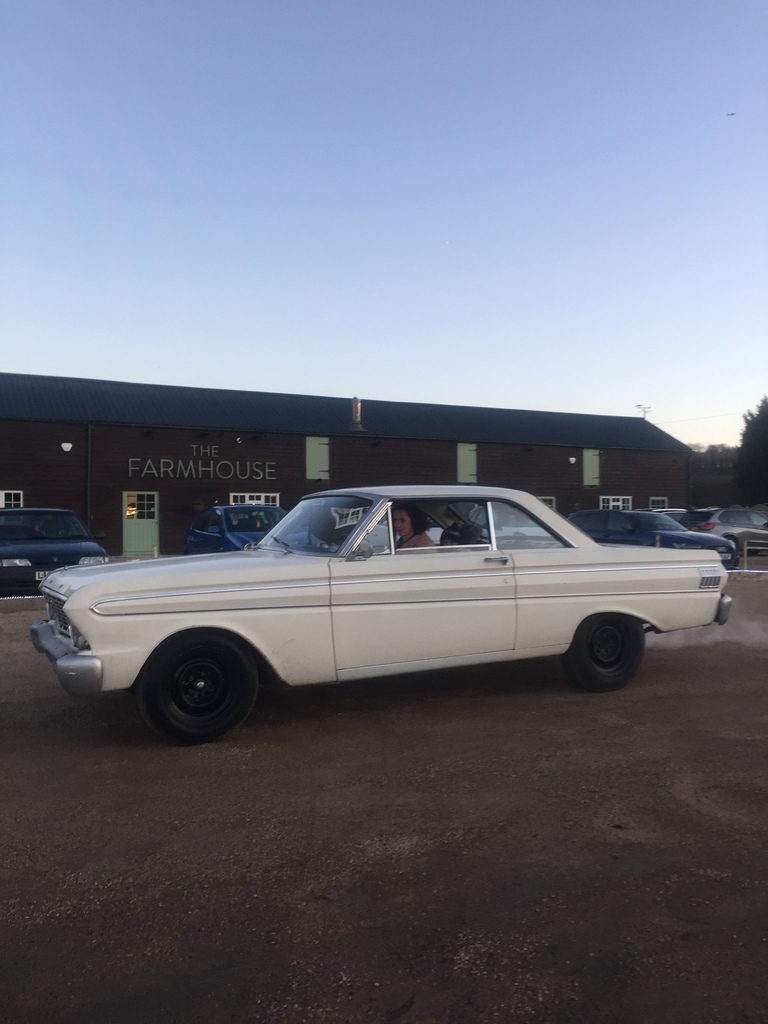 So I did the right thing to cure the situation and fitted some 1” lowering blocks! 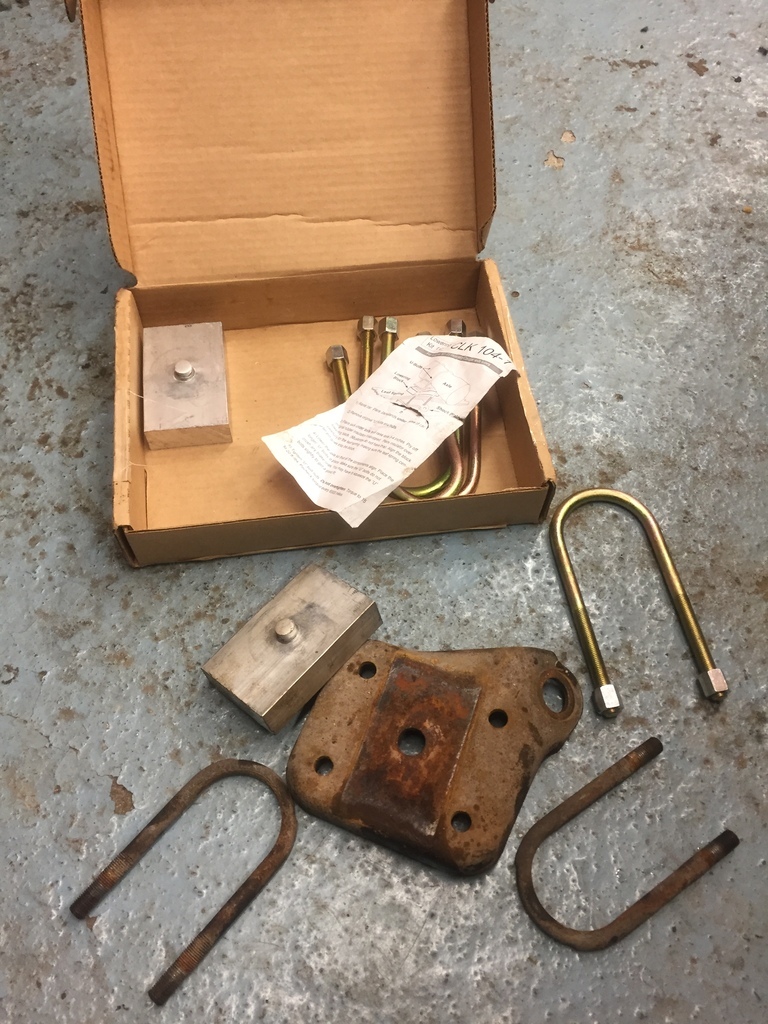 I also fitted some poly bushes in the front spring eye and to the shackles at the rear while I was in the area. Replacing the original factory rubber bushes which were still like brand new, the beauty of a low mileage, California car. I small part of me felt bad binning them. I bought Mustang ones because they were cheap and available off the shelf. Of course they didn’t fit because everything Mustang fits the Falcon but doesn’t. Thay stayed like that for about a 2 years, while the car got loads of work to the front suspension, new interior and converted to a manual ‘box. If I ever catch up I’ll go back over what was done. Then the 'rona hit. |
| |
Last Edit: Nov 22, 2022 2:55:54 GMT by Enbloc
|
|
Enbloc
Part of things
 
Posts: 399
|
|
|
|
As the lock down kicked in I found I was running out of projects to keep myself busy and so thought I’ll get on top of the rear leaf springs. You can buy new leaf springs off the shelf and luckily they were stocked by Mustang Maniac who is only 40min up the road to me. Leaf springs are always hideously expensive to ship from the US as they are very heavy and oversized. These would be Falcon specific Springs as again Mustang ones fit but they don’t. Which ones? Available are stock 4-leaf, HD stock 5-leaf and HD 5-leaf mid eye. The mid eye is what the Mustang/Falcon world calls a lowered spring. It’s basically a kink in the main leaf to give a 1” ish drop.  The car was sitting right with a 3-4” drop on the knackered original leafs with lowering blocks. A 1” drop wasn’t going to cut it and the mid eye style main leaf could potentially cause further issues. The decision was made to go with a stock style 5 leaf replacement which would give me a blank canvas to work with to get the required ride height. Doing some research (old forum threads) on these HD 5 leafs the general opinion from mainly Americans were that they were a “race spring” and were “undriveable” on the road. Having fitted and used them I can say they would be on par with an acceptable factory road spring! 😆 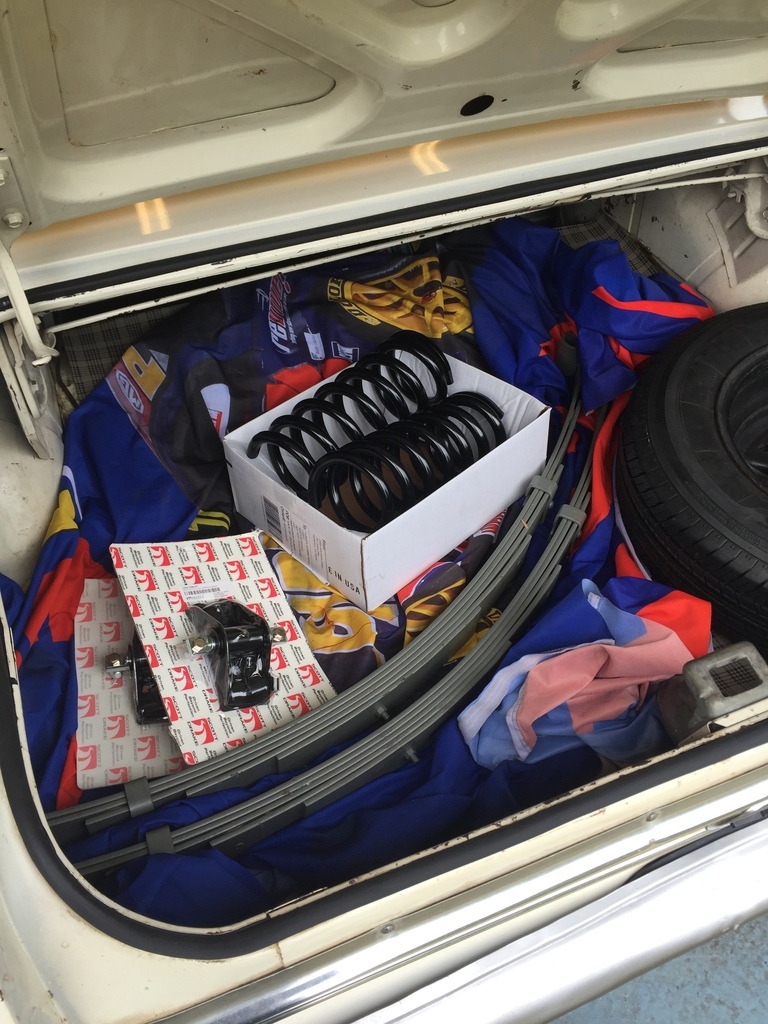 First job on getting them home was to pull them apart! I needed to get the spring pack apart to leave me with a bare main leaf. The reason for this was so I could “reverse the eyes”. Reversing the eyes is basically flipping the arch of the main leaf the opposite way so the eyes fold into the leaf pack rather than away which lowers the physical overall height of the leaf spring by about 2”. 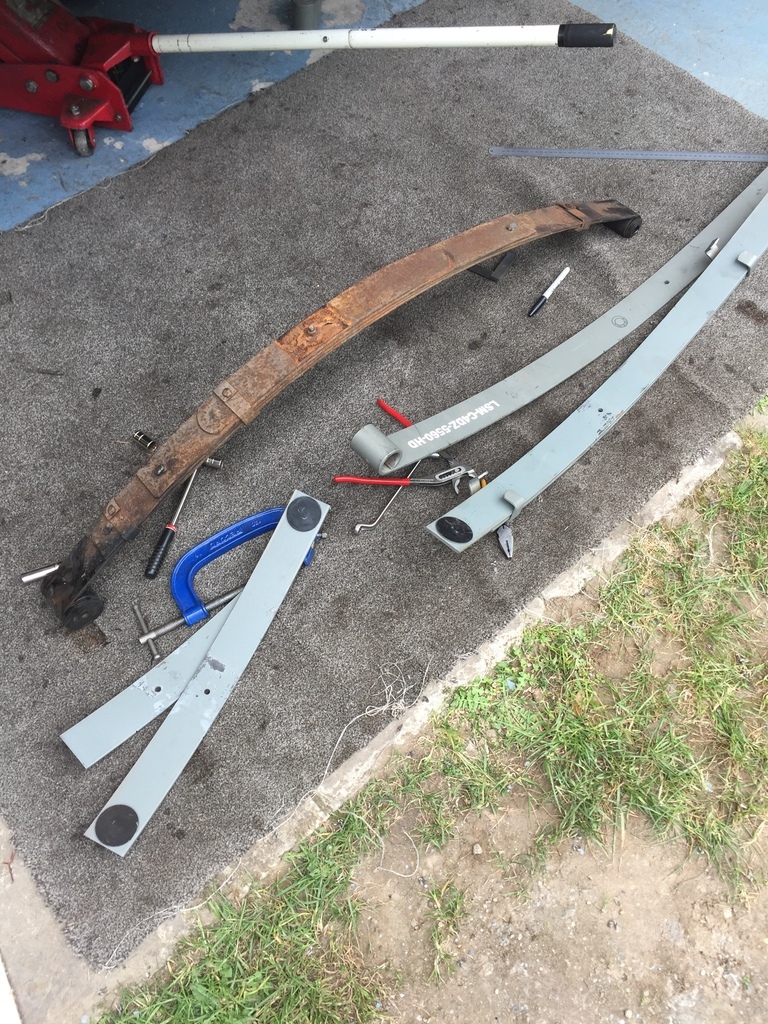 The main leaf is marked at equal intervals along its length. 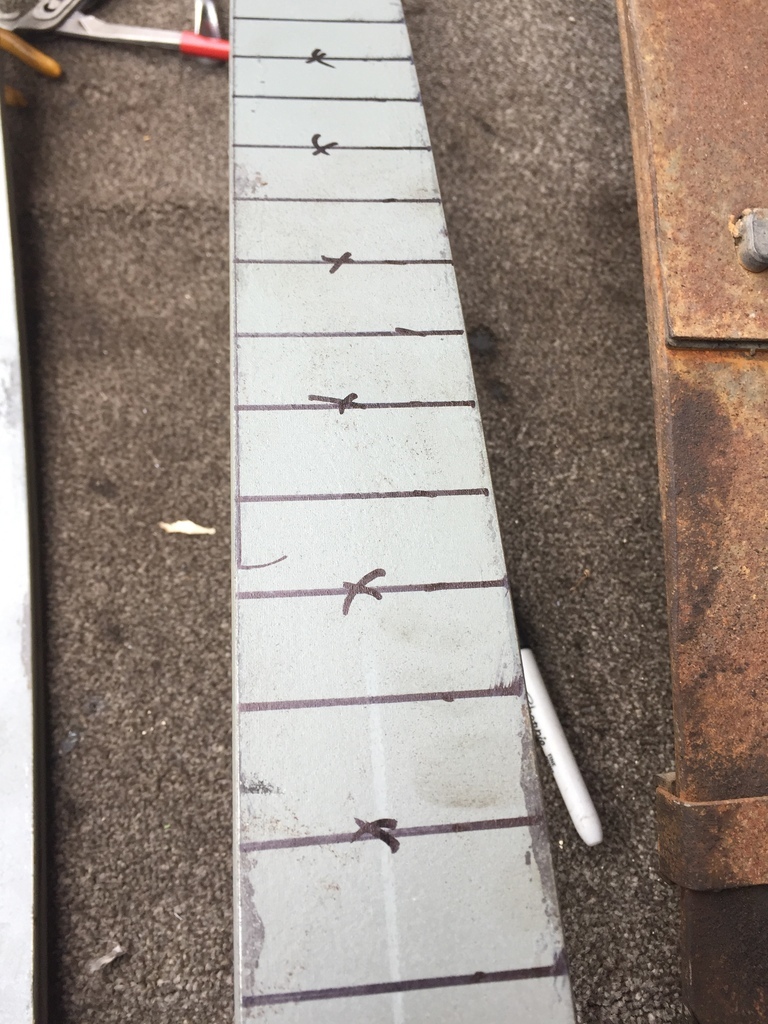 The idea is to start bending the leaf back to flat and then to its new reverse position. Working from one end to the other in small increments at each mark. I used a press but the same thing can be achieved in a decent vice. You’ll be surprised how little force is needed. 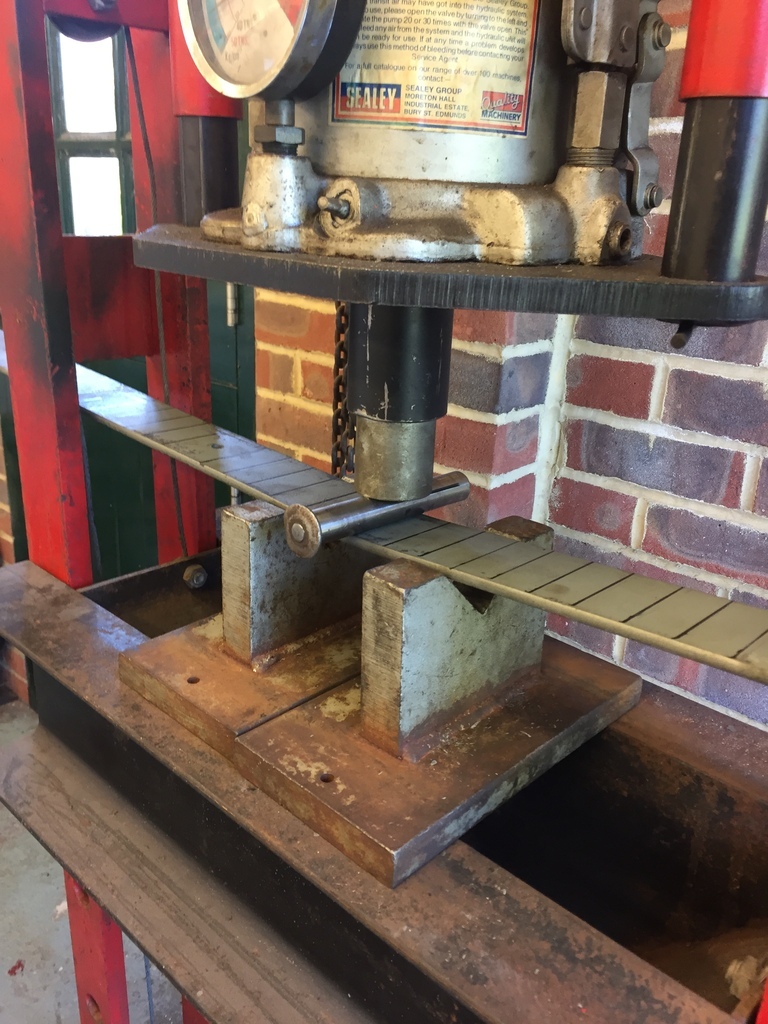 Here it is after a single pass through the press. The original arch is marked out on the board so I know where I need to return to. 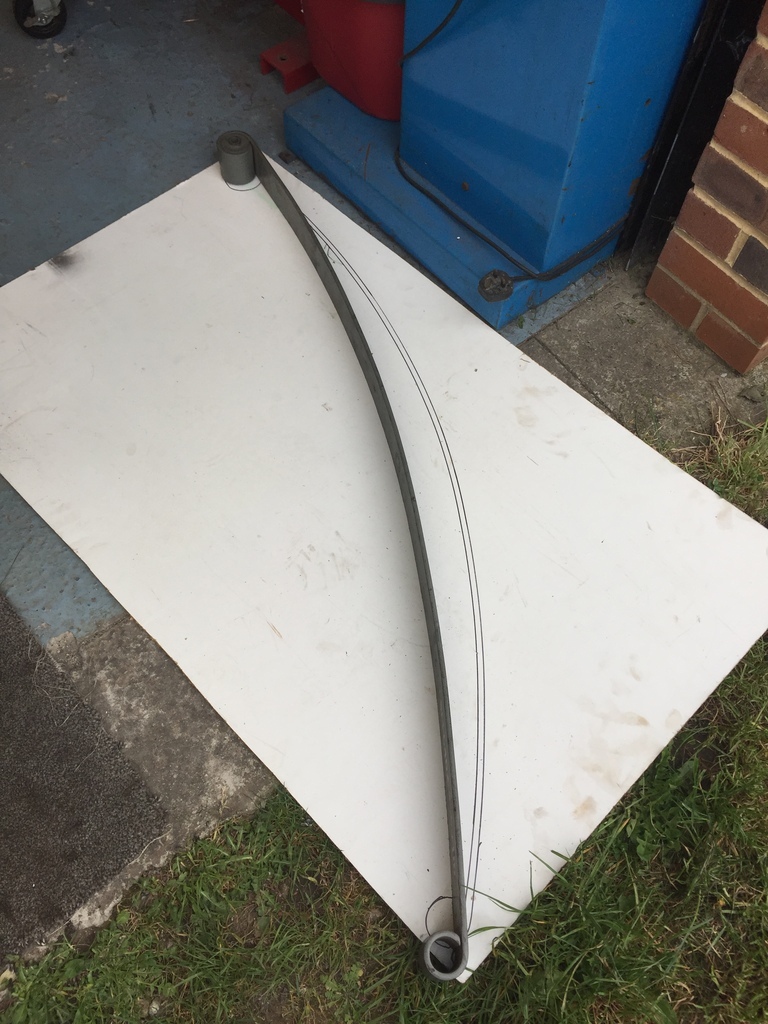 A second pass and so on and so on. 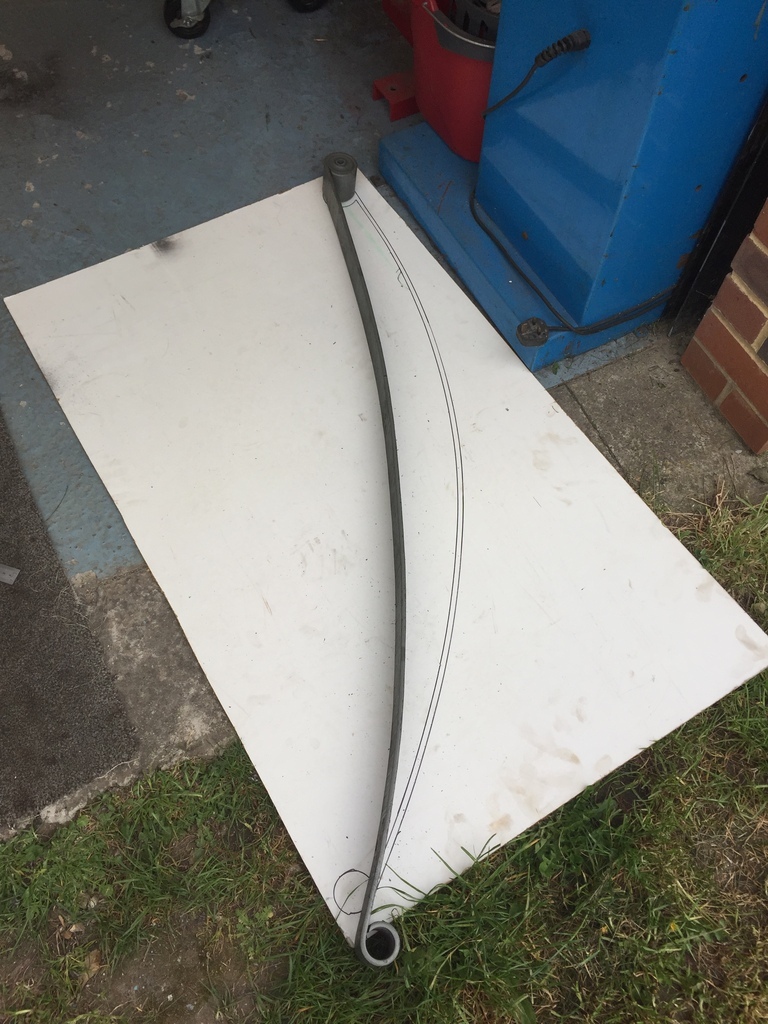 The finished process. The arch is back to where it started but as can be seen the leaf eyes are now above their original position. 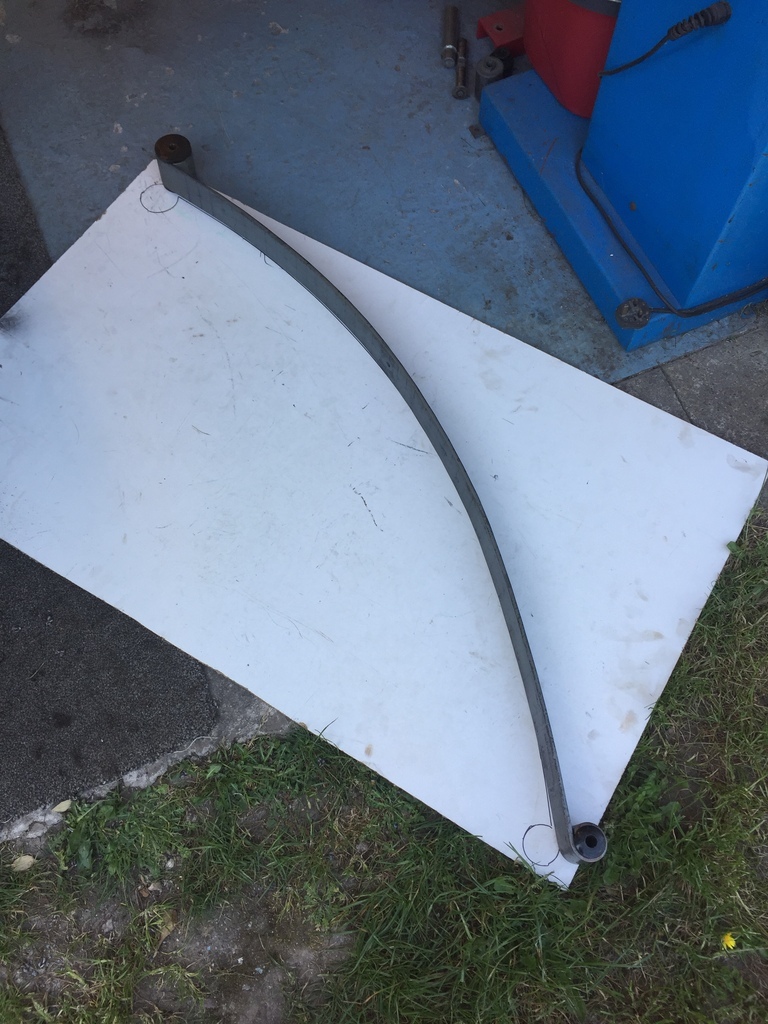 With the spring pack built back up here is your 2” drop. 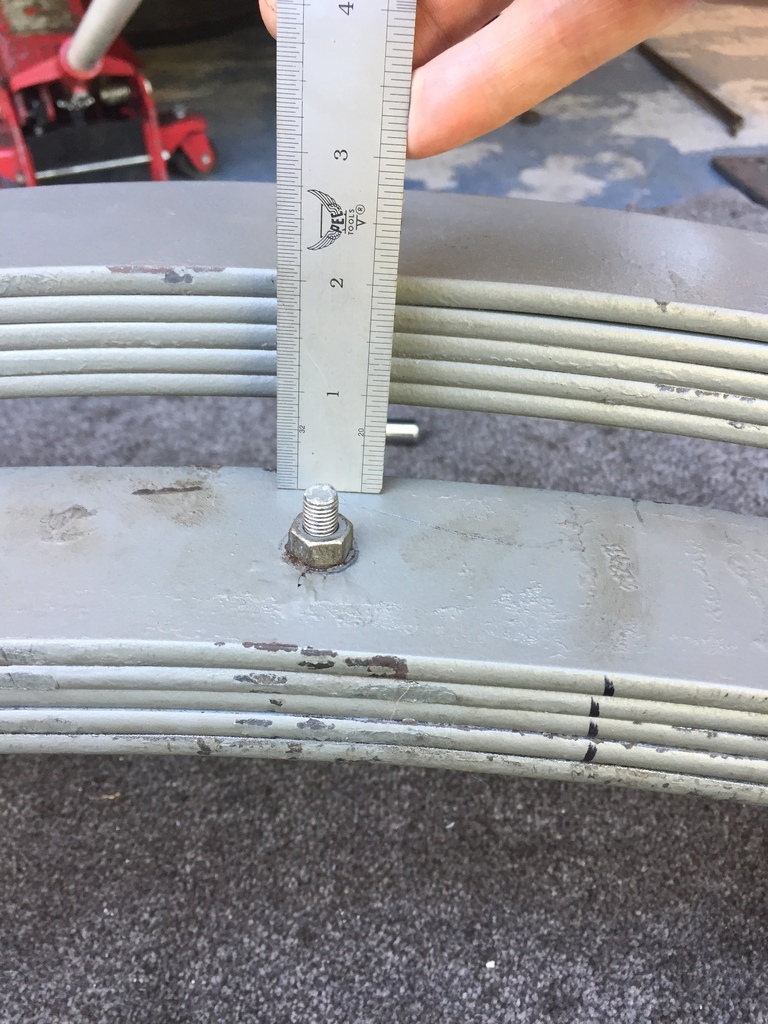 The new springs were fitted with the old lowering blocks for, on paper, a 3” drop over stock. I think I ended up 1/2” higher than previous but after a couple of journeys the new springs settled I ended right where I wanted it. Win. 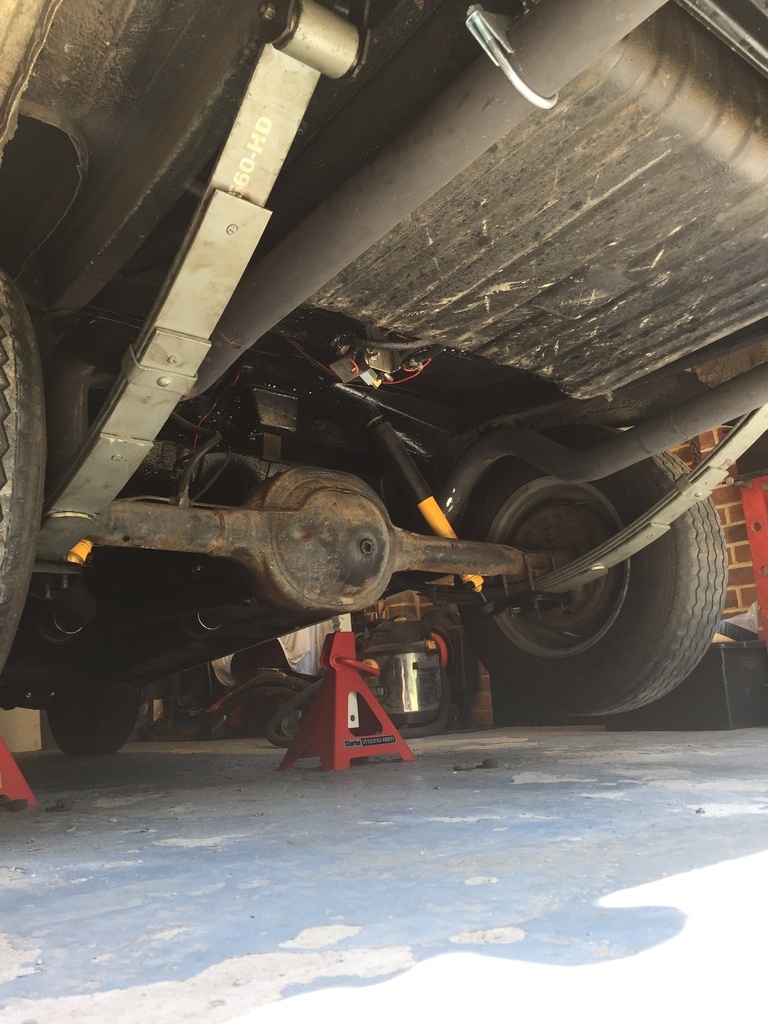 |
| |
Last Edit: Nov 22, 2022 2:54:39 GMT by Enbloc
|
|
|
|


 [/quote]


