|
|
|
|
|
Probably high time i started a thread about this old thing, since I'm in the middle of making a bunch of changes to it. 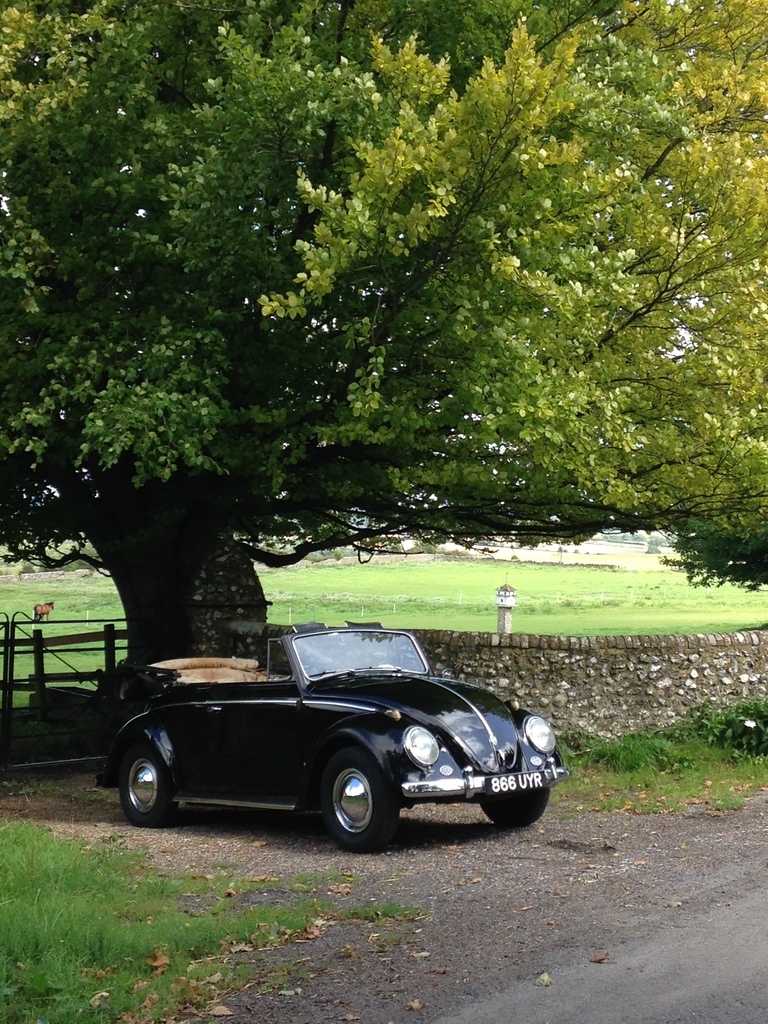 I bought this car years ago, from a friend, who got it from a small collection the first time I lived in Germany and eventually took it back to the UK with me for a few years. Now I'm back in Germany again and so this will be the diary of my futile attempts at getting it past the TüV and registered over here, with a "hot" motor and a few other mods. I'm probably already in trouble, as I drove it over 18 months ago and AFAIK you're meant to register any imported car within six months. Still, I have the excuse that it needed lots of work to get it legalized with an "Historic" registration. I asked around and found that the best bet would be to swap in the motor I intend to use, so that the registration is done with that engine number and all the mods are written up correctly in the paperwork. Better than changing the motor after the fact and then having to jump through all the hoops again. I'm lucky that there's a local guy who not only runs a workshop, but collects and tunes Beetles, so hopefully I can get this sorted out eventually. I also had the good luck to take over a small workshop space from a friend. It's a few miles from home, but there's electric and water and even a toilet at an affordable price. Not sure how they'll feel about me grinding or welding in there, but I dare say we'll find out. So 'what modifications?' I hear you ask. The car is by and large very original and it had the AFAIK original motor in it when I got it, though it was very tired. Now for those who don't know all about Beetles, not all VW motors are the same. The early cars, up to around 1960, had a 30hp motor, which shares nothing with the later type. A long time ago, I was offered a long stroke crank from an early Porsche 356 (74mm stroke, instead of 64mm and forged) and because reasons, I thought it would be a great idea to have this built up as a hot 30hp type motor. It was not. I had the motor built with repro Okrasa dual port cylinder heads and twin carbs (which turned out to be dreadful quality) and it came out at around 1500cc. Installed in the car, it made very little power and as it turned out, the guy who built it hadn't cleaned out the case properly and consequently, it made no oil pressure. Nothing dramatic happened, but it was removed and returned. In the mean time, I'd installed a 1967 1500 motor that has been doing sterling work pushing the car along. Several years went past and eventually I got the motor back again. I again dragged my feet over installing the 30hp motor, as despite what everyone will tell you, fitting or removing a later motor into an early car is something of a nightmare. I just got done taking the 1500 out, but only after I'd had to strip the exhaust, heat exchangers, distributor, carb & dynamo and fan shroud off the engine. 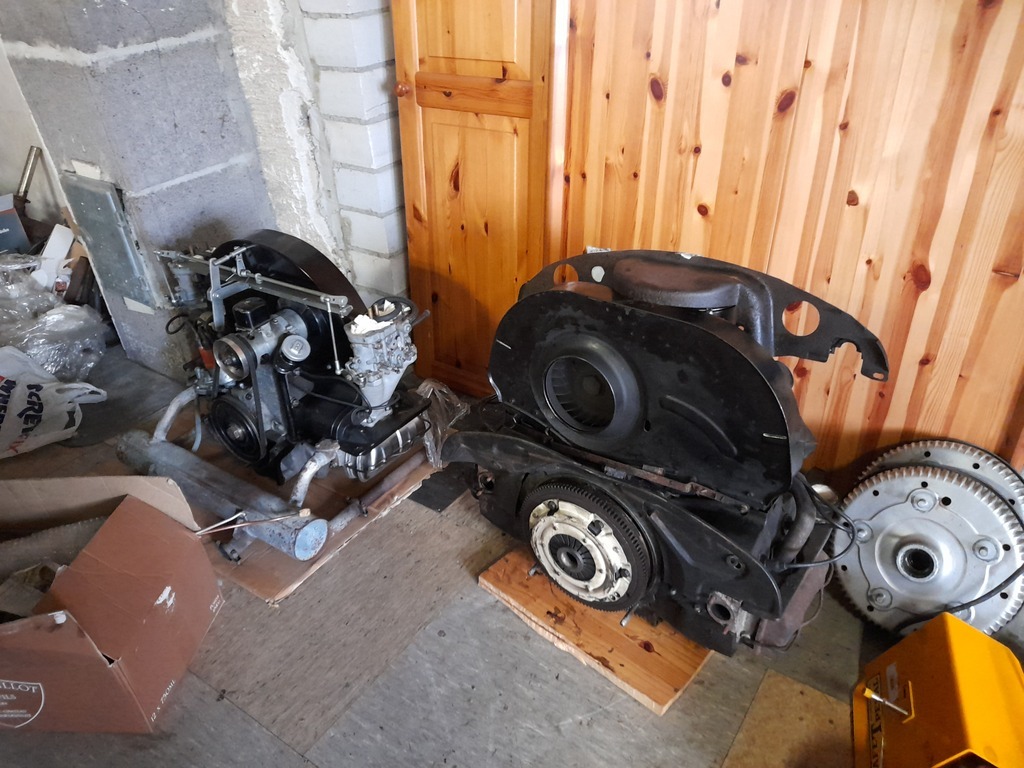 So that's sort of where I am now. The old (though it's newer) motor is out and the tuned, original style motor is being prepped to go it. I hope it makes some oil pressure this time. I have a set of 36 Dellorto carbs on some manifolds I found, though I don't know if I'll get away with these. Current hassles (that I`m aware of are that the carb linkage is too wide), to the point where it overlaps the carbs and won't allow me to fit air filters, so that will need narrowing. I need to sort out some sort of breather box too as I have vented valve covers. I need some new heat exchangers too, as inexplicably, heating is a requirement. The Porsche 356 drums in the photo will hopefully help me as a way of persuading the TüV that the car will stop with a few more hp. I`ll try and keep this updated. 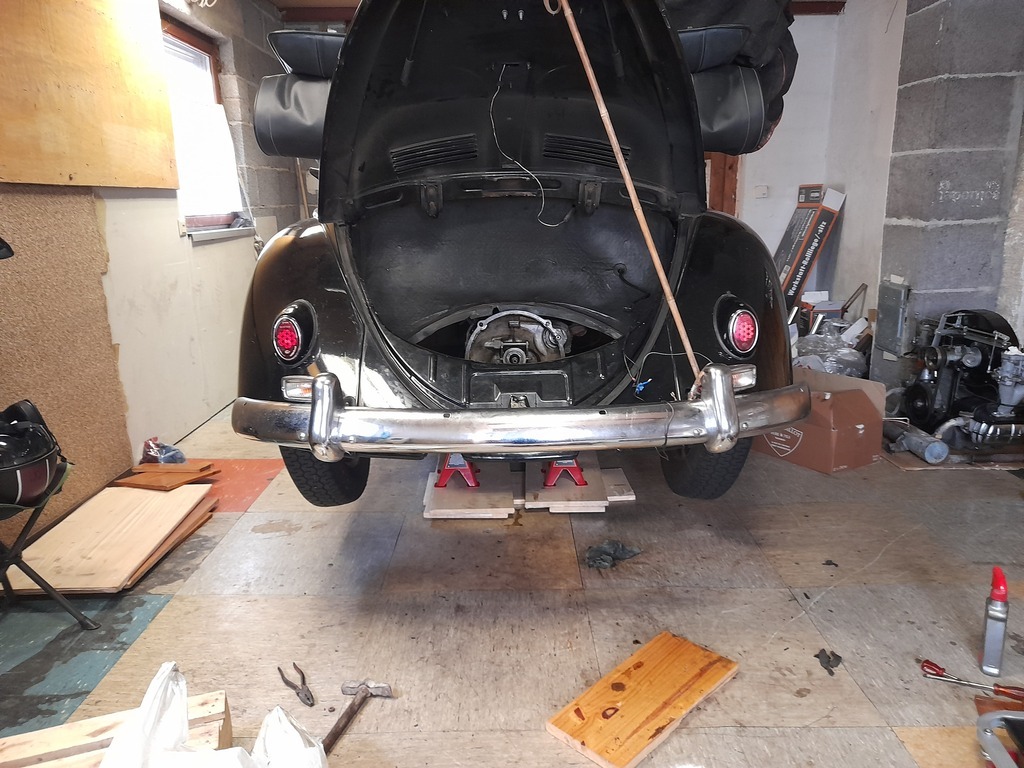 |
| |
Last Edit: Aug 12, 2024 8:14:35 GMT by horrido
|
|
|
|
|
|
|
|
|
|
wow, that´s a lovely Beetle, especially i like the single chamber rear lamps as most have been changed back in the 70ies to dual chamber ones (at least in my country-Austria).
i m actually a Ford man since early childhood (the better quality and better looking english line of course), though i had a 1952 T1 Bus (24hp) when i was young and i dismantled many of the 30hp and 34hp engines in the mid seventies, when i earned some pocket money besides school).
good luck with the work and i ll watch your thread with interest!
|
| |
|
|
|
|
|
|
|
wow, that´s a lovely Beetle, especially i like the single chamber rear lamps as most have been changed back in the 70ies to dual chamber ones (at least in my country-Austria). i m actually a Ford man since early childhood (the better quality and better looking english line of course), though i had a 1952 T1 Bus (24hp) when i was young and i dismantled many of the 30hp and 34hp engines in the mid seventies, when i earned some pocket money besides school). good luck with the work and i ll watch your thread with interest! Yes it had the updated rear lights on it when I got it, so I had to put them back. I'll put the semaphores (winker?) back on it one day too. I like an old Ford too, thought I never had one. Yet. |
| |
|
|
glenanderson
Club Retro Rides Member
Posts: 4,348
Club RR Member Number: 64
|
|
Apr 20, 2022 13:51:10 GMT
|
|
Lovely. I am quite jealous.
So it's going to have a tweaked "30 hp" motor rather than a later one?
|
| |
My worst worry about dying is my wife selling my stuff for what I told her it cost...
|
|
|
|
|
Apr 20, 2022 13:54:38 GMT
|
Lovely. I am quite jealous. So it's going to have a tweaked "30 hp" motor rather than a later one? Thank you Glen! Yes, a hot 30hp is the idea - though probably not one of my best in retrospect. I have a few more bits on order now and I'm part way through narrowing the carb linkage to fit the motor. |
| |
|
|
glenanderson
Club Retro Rides Member
Posts: 4,348
Club RR Member Number: 64
|
|
Apr 20, 2022 14:16:57 GMT
|
|
Cool. I love a Q car, and it’s great to see period mods on something that so many people would just stick a 1641 in. 👍👍
I will definitely be following your progress.
|
| |
My worst worry about dying is my wife selling my stuff for what I told her it cost...
|
|
|
|
|
Apr 20, 2022 18:37:12 GMT
|
|
I'm hoping for about 60+ hp, which will be fine in this thing.
I was going to do all the usual stuff when I first bought it - lowered and a big motor, but I eventually realised that you don't really ever see these cars in this sort of slightly scruffy, but useable condition. They all seem to be either minty restorations or total ratters. And aside from the crappy state of the roof, I don't really fancy either of those options. I like it just how it is, where I don't have to worry about it too much. It's not like I need to lower it to make it stand out either.
I have had some bodywork done on it, as some of the filler was falling out of the front quarter panel (it wasn't pretty) and while there's much more that could be done, but I'm in no hurry to go down that rabbit hole.
The best things I've done to the car so far were the change from some ancient Pirelli cross plys (think about it....when do you reckon was the last time Pirelli made a cross ply...?) to Michelin 165 XZXs and added some of the amazingly good Protech shocks and a heavy duty front anti roll bar. It just transformed it from something that was actually really scary to a car that just drives like a modern car under normal driving conditions - and actually gave a more comfortable ride than my modernish Audi. Clearly it's still an old car, with swing axles and no roof to prevent a headasectomy if I roll it, so I don't go mad, but it's amazingly pleasant for such an old car.
|
| |
Last Edit: Apr 21, 2022 9:08:48 GMT by horrido
|
|
glenanderson
Club Retro Rides Member
Posts: 4,348
Club RR Member Number: 64
|
|
Apr 20, 2022 21:12:28 GMT
|
|
I have never liked the whole “lowered” or “scene” thing. It’s really nice to see a car that’s obviously cared for, but not obsessed over. 60hp will make it fly.
And yes. Radial tyres. There’s probably no single improvement out there that makes a bigger difference for less money than throwing away the ancient crossplies and fitting decent tyres. The only thing I’d fit crossplies to is something that there’s no physical alternatives for. Even then, it’d be new ones not ropy old ones that are best suited for making kids’ playgrounds from. 👍👍
|
| |
My worst worry about dying is my wife selling my stuff for what I told her it cost...
|
|
|
|
|
|
|
Heat Exchangers. I've been told that I need to reinstate heating on the car in order to get through the TüV. Don't know why it's required, but anyway, this opened a bit of a can of worms. The 30hp heat exchangers that I had were a bit ropey and also a mismatched pair, one even being a very early version from a split window Beetle. You can buy new heat exchangers for the 30hp motor, but they aren't cheap (and I am) and the early units are quite simple in comparison to the later ones. Really they're just a J shaped pipe with a tin box around one end, that is held together with some small tabs, folded over. You can buy repair pipes to slip over the ends to fix them, but it's a bit of a lash up, but you can also get complete new J tubes to fit, though you have to weld the flanges on yourself. As well as some better heat exchangers, I needed (or thought I needed, as I later found a pair in a box of parts) the under cylinder tins too, so I figured I should go and visit my pal Thomson, who has a barn full of VW bits and can usually be relied upon to come up with the goods. I took a trip down there. He'd just bought a rather expensive Oval Beetle, which was some old (and now deceased) engineers project, fitted with all the mechanicals from a Porsche 356. Even came with a spare motor and lots of funky home made touches like clap hands wipers and a rear demist hot air blower. 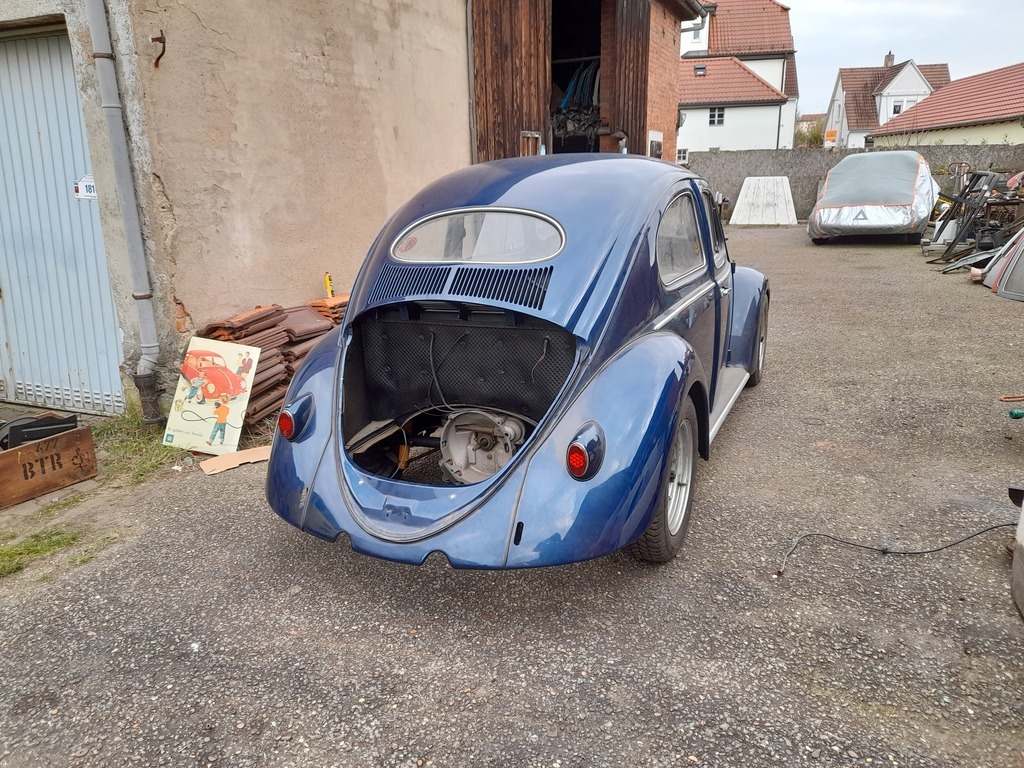  Sure enough, a ropey pair of heat exchangers and tins were found. 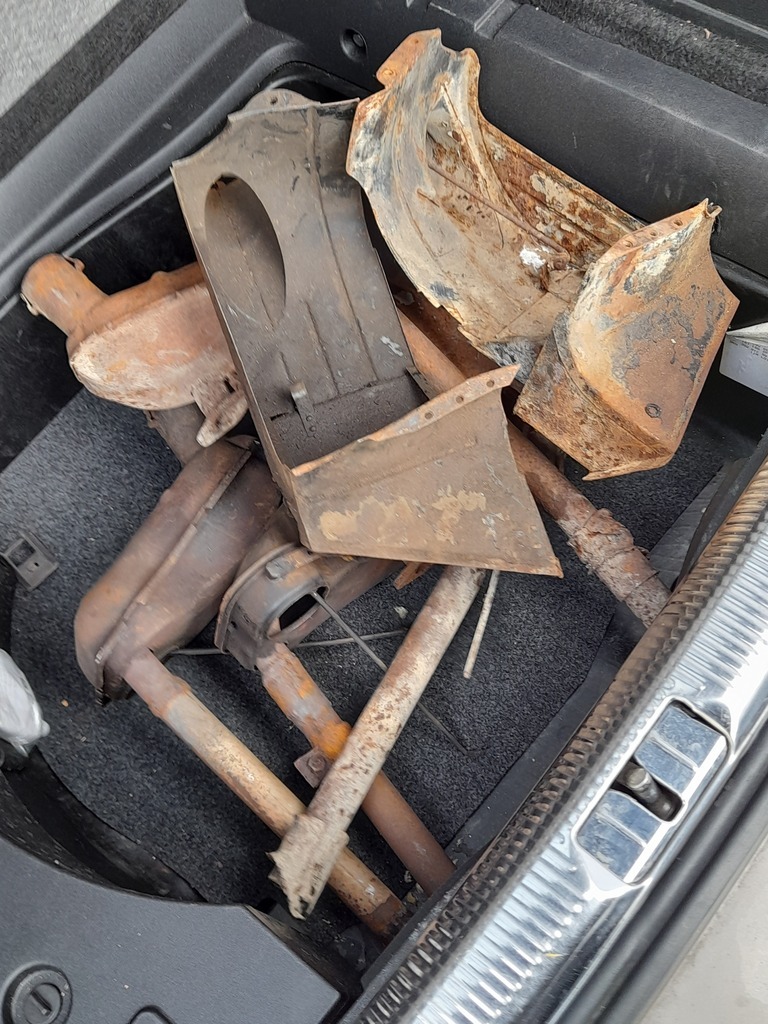 These are quite easy to pry apart. They aren't welded, aside from the pipes and the sabre saw made quick work of those. I dropped them in a tub full of vinegar for a few days and gave them a scrub with a pan scourer and they came out pretty well. The pivots to open the heating flaps up were really rusted solid, but they getting looser now. I'll oil them up after they're back together. 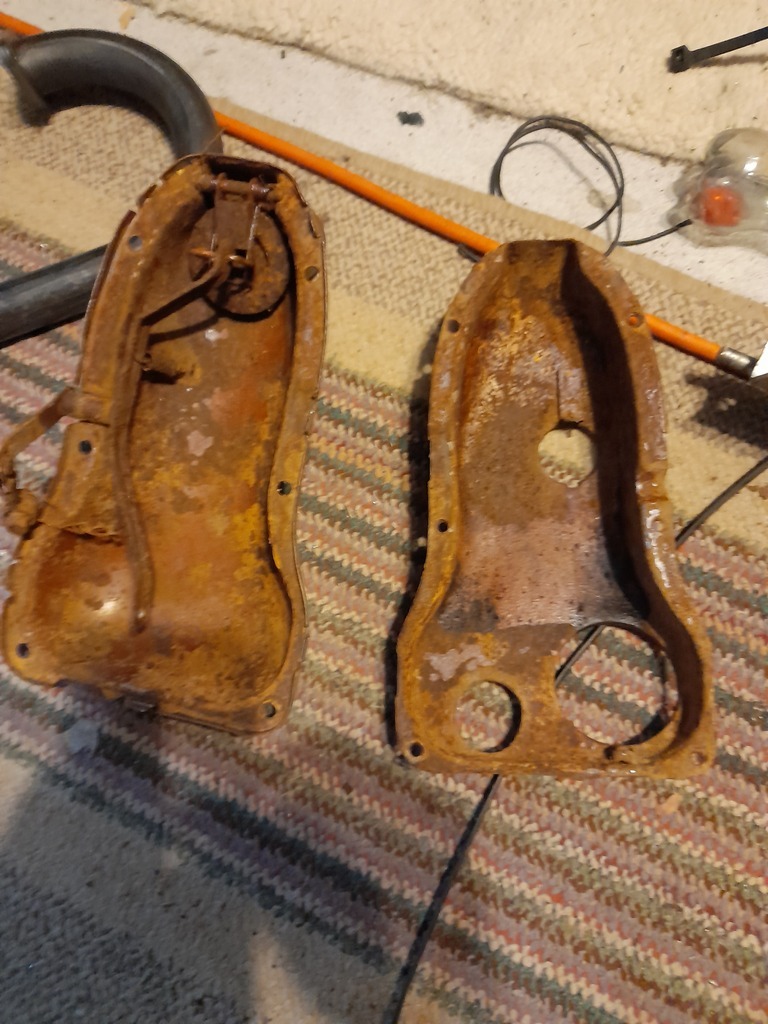 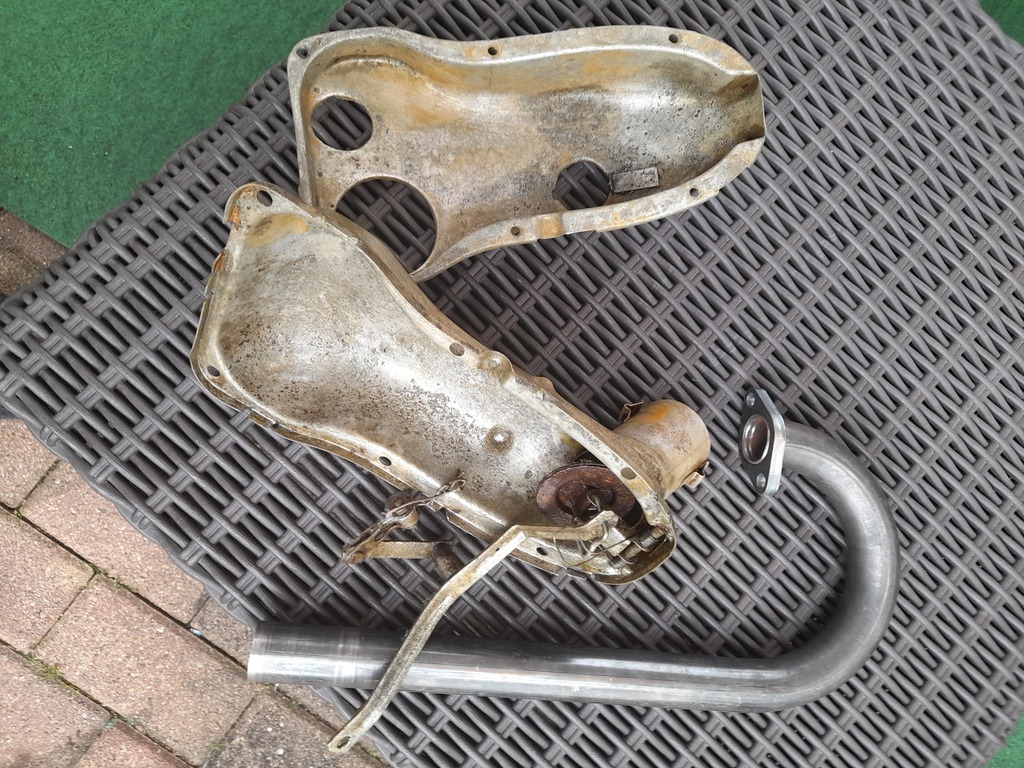 Then I was over at the garage, fitting it all up to the motor, since I didn't really know how it all goes together and had to line it all up and mark everything, to bring it home to weld. 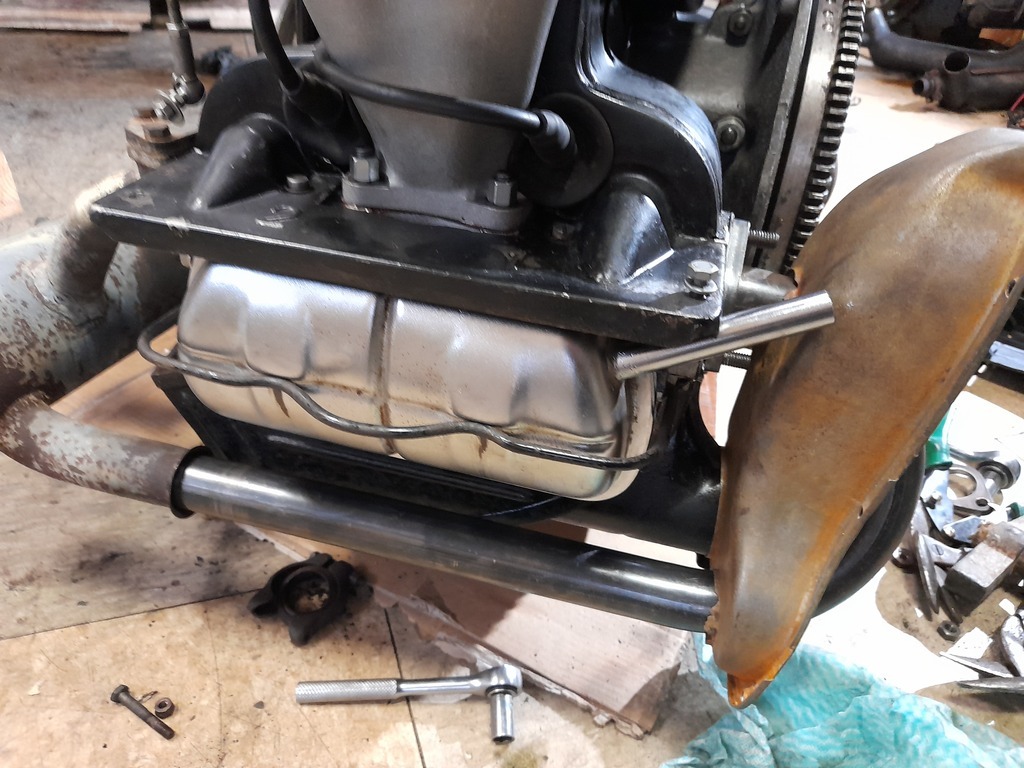 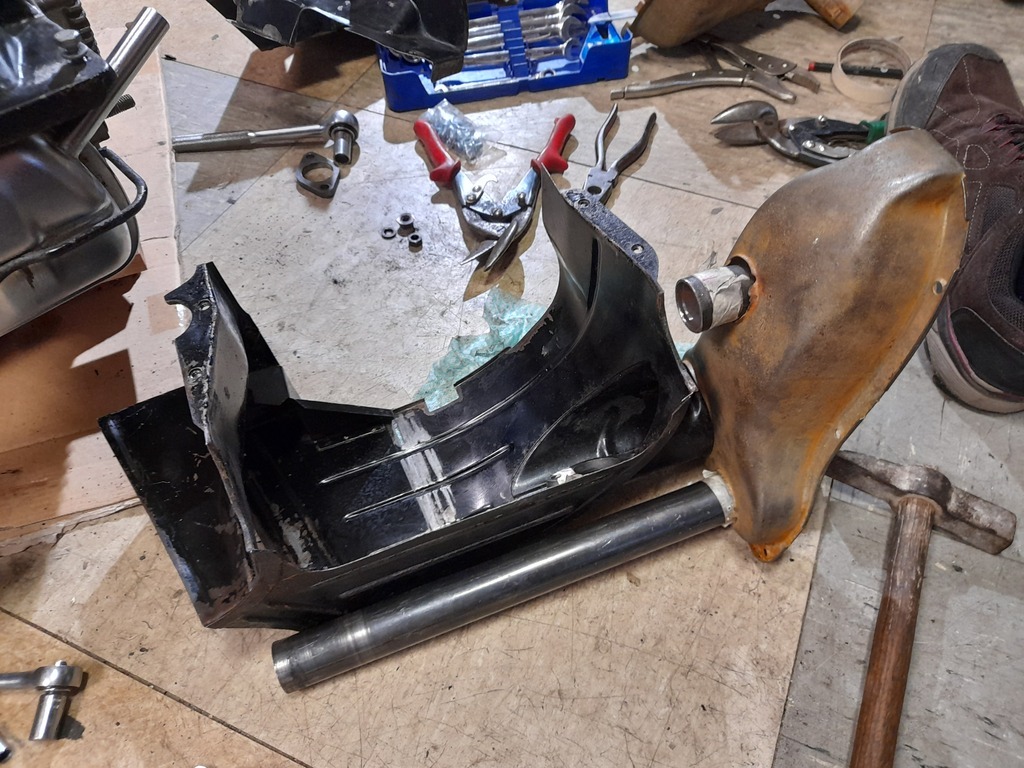 Also the breather tubes on the rocker covers needed a bit of persuasion to clear the heater boxes. I may yet cut them off a little shorter. I'm trying to add a large air tube on the other side of the heat exchanger too, as since it's a cabrio, with only a few slits in the engine lid, it's a bit lacking in fresh air for the motor cooling/breathing. I'm not sure it's the best idea to draw it from under the car. but there aren't a lot of options. |
| |
Last Edit: May 3, 2022 18:03:20 GMT by horrido
|
|
|
|
|
Sept 27, 2022 18:05:45 GMT
|
I got involved in tiling the store room at home, which took forever, but I have been back working on this thing lately. The heat exchangers were restored and even fitted the motor fairly well after the surgery, though the control rods that open the internal flaps were suddenly 5cms too long. How that hell that could have happened I don't know, but it was an easy enough fix. Maybe I over think things, but even something like "mount the breather box" turns into a really long winded job. You can buy breather/enlarged oil filler necks for these motors, but they cost hundreds. All for a small metal box that mimics the one on a Porsche 356. Yeeeaaah....that ain't happening! I looked for a cheaper alternative and ended up with the cheapo EMPI breather box. What the hell, it should work and was about a tenth the price. Now the car has all its original sound deadening in the engine bay and I didn't want to disturb that and mount the box on the bulkhead, as is usually the way. Which obviously meant finding somewhere else for it. Mounting it to the motor, it needs to go as high as possible and also not block airflow to the cooling fan. I found a spot on top of the "dog-house" oil cooler on the back of the fan shroud. The trouble was that also meant mounting the box backwards, which sent the front pipe straight into the bulkhead. This meant drilling an extra hole in the back of the box and blocking the other side with a spare bolt in tube, with the centre tapped out, and a bolt stuck in it. Seems to have worked. Then I needed something to support the box on the other end, as I needed to have the tube poking around the corner of the fan shroud. I employed my usual trick of walking all the aisles in the local DIY place until I found something suitable - in this case a shelf support bracket that looked the part. I also needed some way to attach this all to the fan shroud, so I bought one of those rivnut pliers things, which seems like a really handy thing to own. Managed to fit it all up today, with some extra brass right angle fittings, just to stop the hoses from kinking up on the tighter bends. 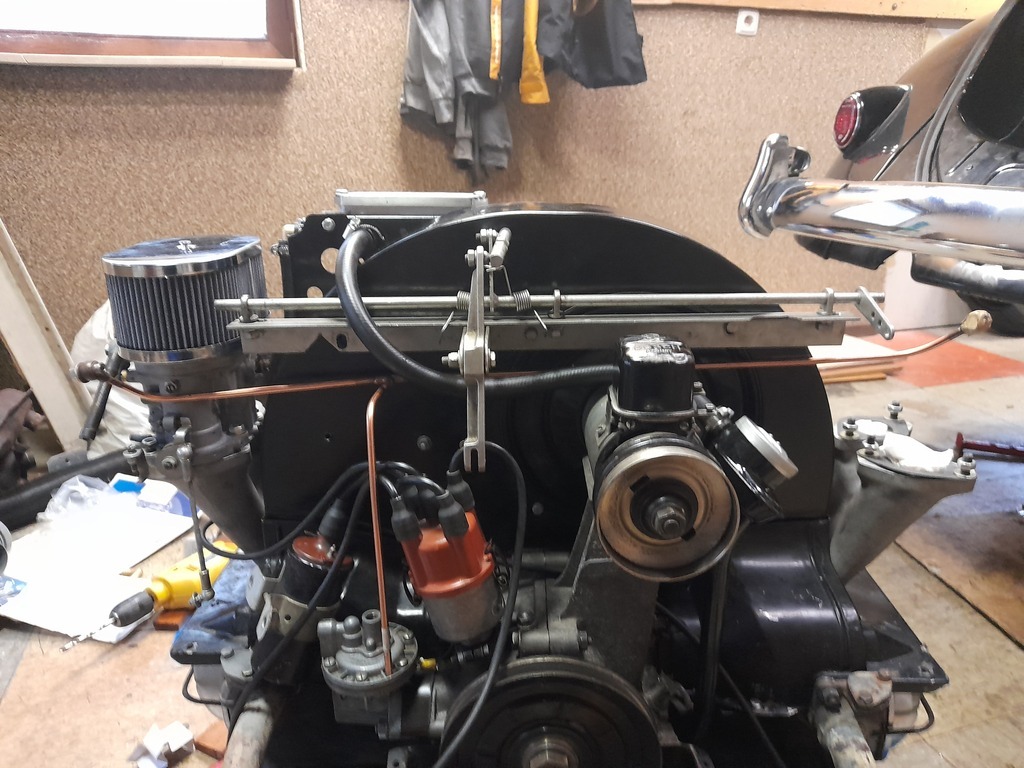 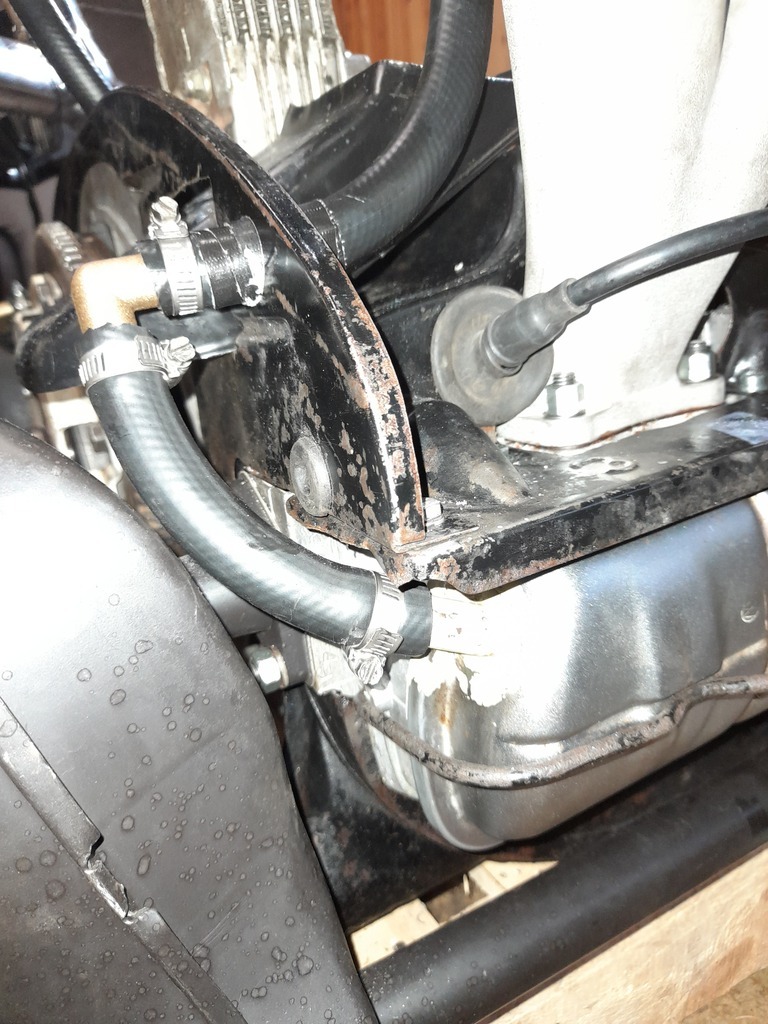 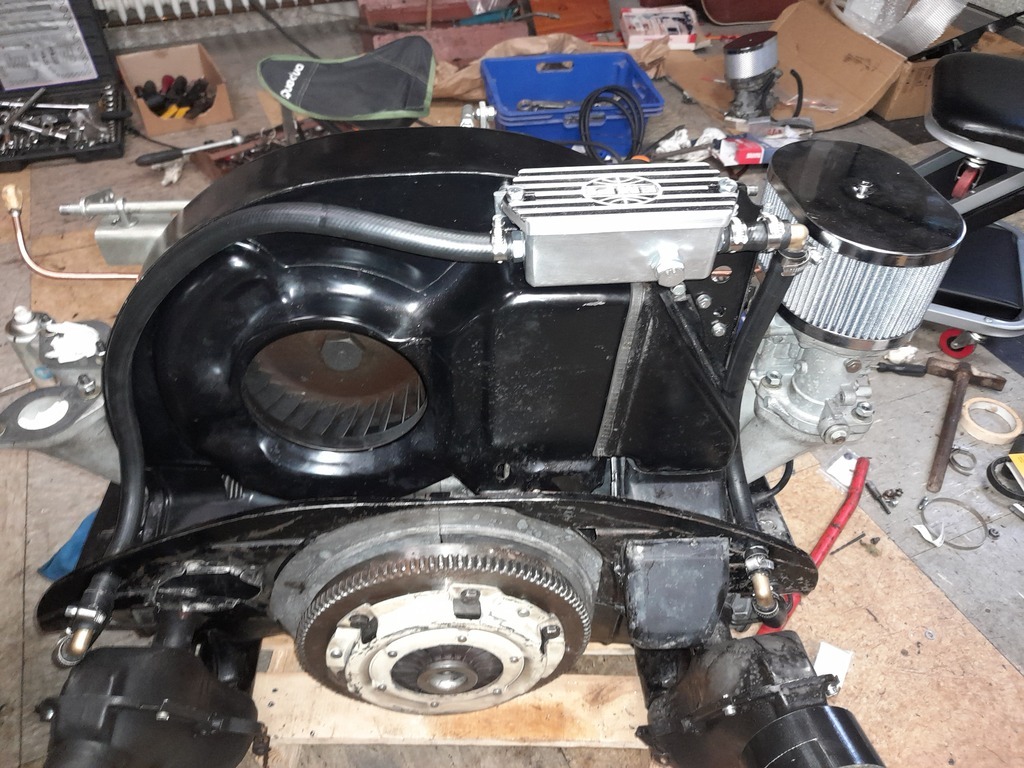 I also had to weld a small tube onto my oil filler neck, as a return from the breather, as unlike later cars, these old motors don't seem to have the tube originally. It came out okay, eventually and I could put it just where it needed to go. 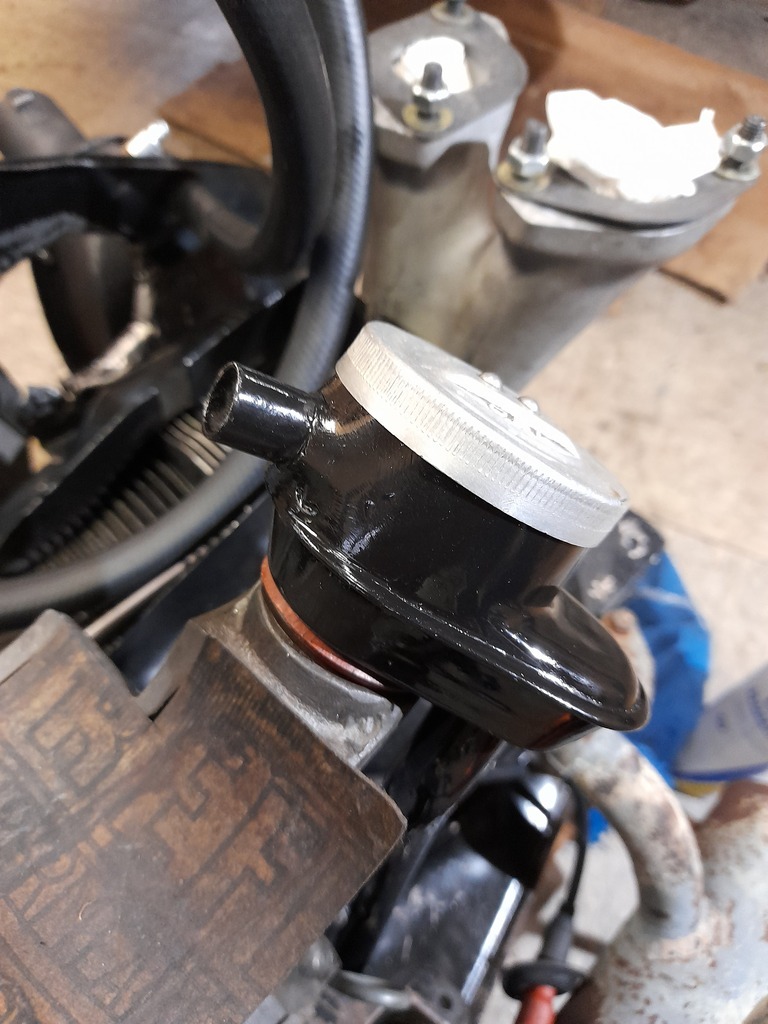 Also, in the quest for making it look more vintage, I snipped a couple of cms off the filter element, so I could squeeze some ally mesh inside as well. I shall paint the tops and bottoms silver, when I get the chance to blast the chrome off. Porsche 356s used similar looking Knecht air filters, but you can guess how expensive those are. 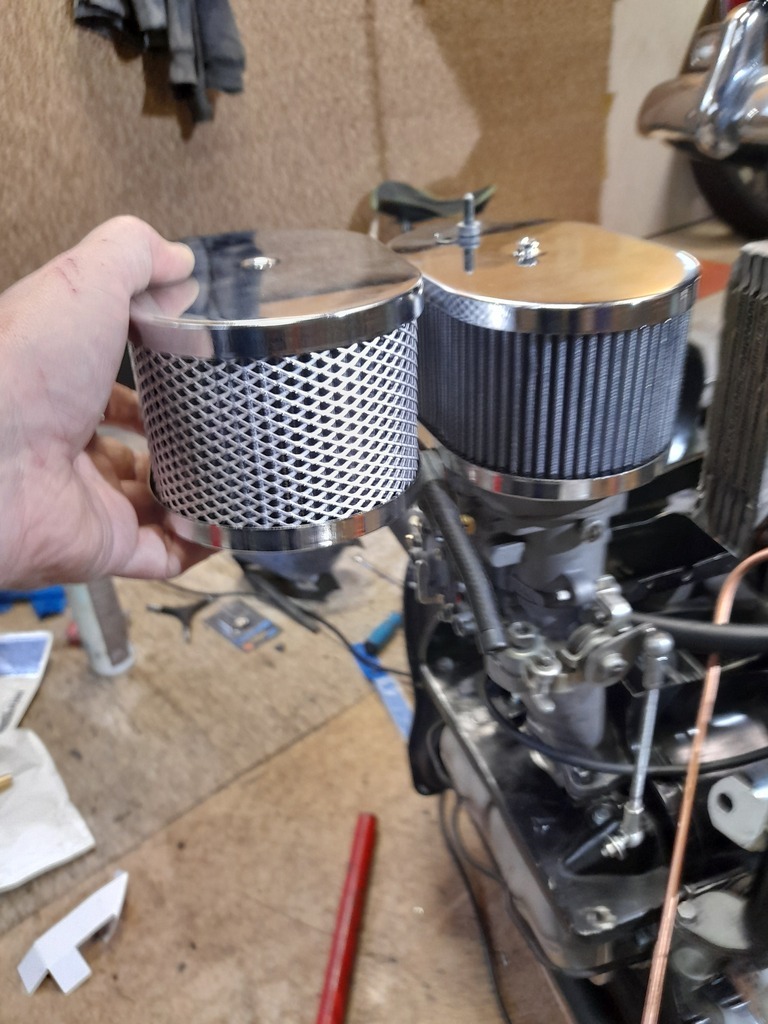 |
| |
Last Edit: Sept 27, 2022 18:16:44 GMT by horrido
|
|
|
|
|
|
|
Oct 21, 2022 16:30:38 GMT
|
I'm still fiddling with this, though i seem to work very slowly, trying to get it how I want it. I finished my backdate job on my air filters. Sanded the chrome and painted them silver. Added mesh, so they look like 356 air filters. I had a Knecht air filter in my hand at the Veterama swap meet. Didn't even bother to ask the price, though they seem to ask for 600 euros on ebay. Chopped up my metal fuel lines and bent them to work with the Dellortos and the dodge the carb linkage. Had to buy some 6mm to 8mm hose adapters to step up the size for the carbs. Also bought a load of fuel hose clips. Not sure how effective these are, but they sure look a lot more proper than a million jubilee clips on everything. 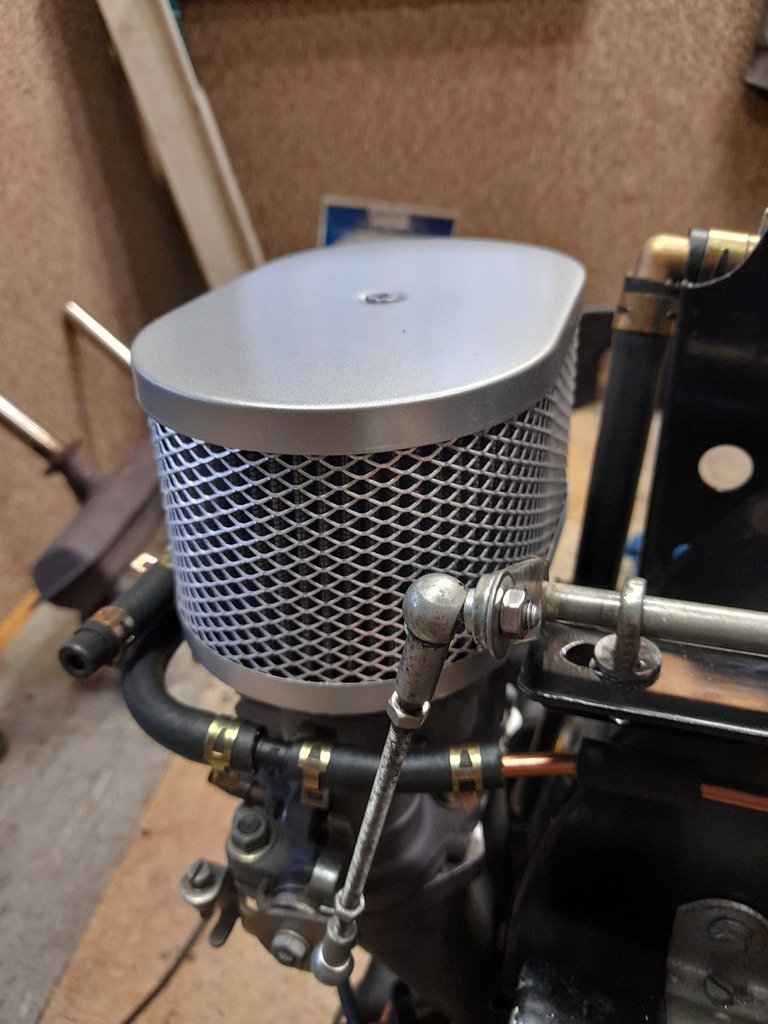 Then came the nerve racking part. I realised that I needed to fit a captive nut into the crank case, as the top left hand engine bolt is impossible to get a nut onto, when you are using the later "dog house" oil cooler. This sits outside the fan shroud at the back. They offer better cooling but do nothing for ease of access. It's hard enough getting your hand down the back of one of these motors at the best of times, but with this cooler, you've no chance. The factory came up with a solution though. A captive nut. To fit it you have to drill out the hole oversize and then pull the nut into the case by doing up a bolt to draw it in. The issue is that if you don't make the hole big enough, you can break a chunk out of your engine case and there's no coming back from that, without rebuilding the motor in a new case. I also don't know how big the hole is supposed to be. So I measured the nut up and then went looking for a 14mm drill bit. Found a 13mm. Close enough (I'm not spending 20 euros a 14mm drill bit for one job!). This worked out really well. I drilled it through and then worked the drill back and forth to slowly open the hole out. The magnesium crankcase drills really easy and any movement makes a big pile of metal flakes, so it was quite easy. Some guesstimation and a dab of JB Weld on the nut and it went in without any drama, though I was holding my breath and making sure that it didn't ever feel too tight. 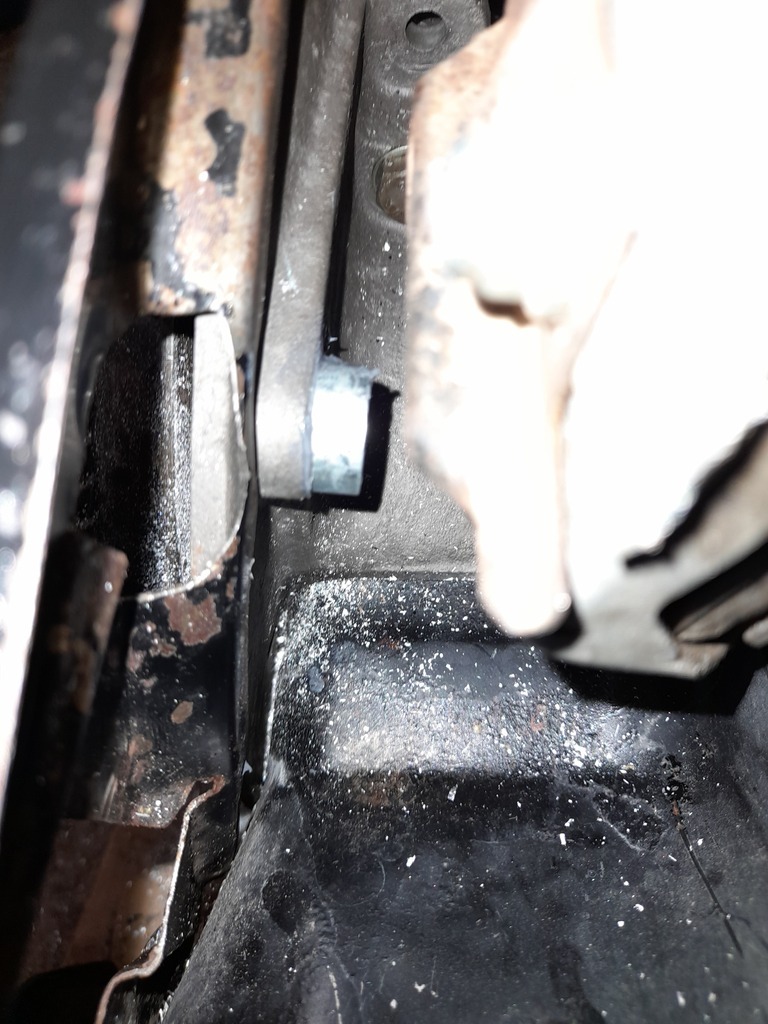 I narrowed and welded my carb linkage, to make it fit between the filters (30hp motors are narrower than the usual Type 1). Painted the cross bar part black , to hide that fact that it's basically a bit of angle iron. I'll remake the drop links to the carbs too, as they're all thread currently, and it looks really shoddy. Hmmm...maybe I do know why this is all taking so long. 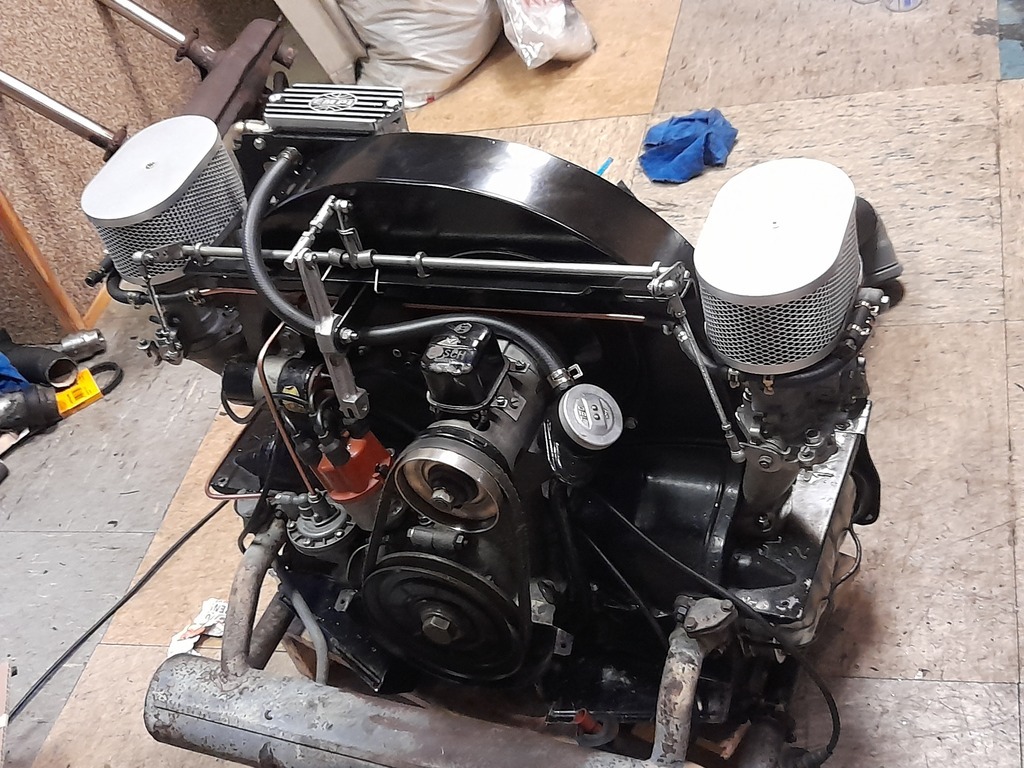 |
| |
|
|
|
|
|
|
|
Yay! I finally got the motor in the car - though not without a fight. Got a few more things done first though. Fiddled with the carb linkage, so that it now has left hand/right hand threads for easy adjustment. Painted the exhaust white, with heat proof paint, in the style of old race cars. Also the exhaust I'm using is a Vintage Speed (name of the manufacturer) item that's polished stainless and was much too blingy for my liking. It's also pretty tubby compared to the stock item. More on that later. 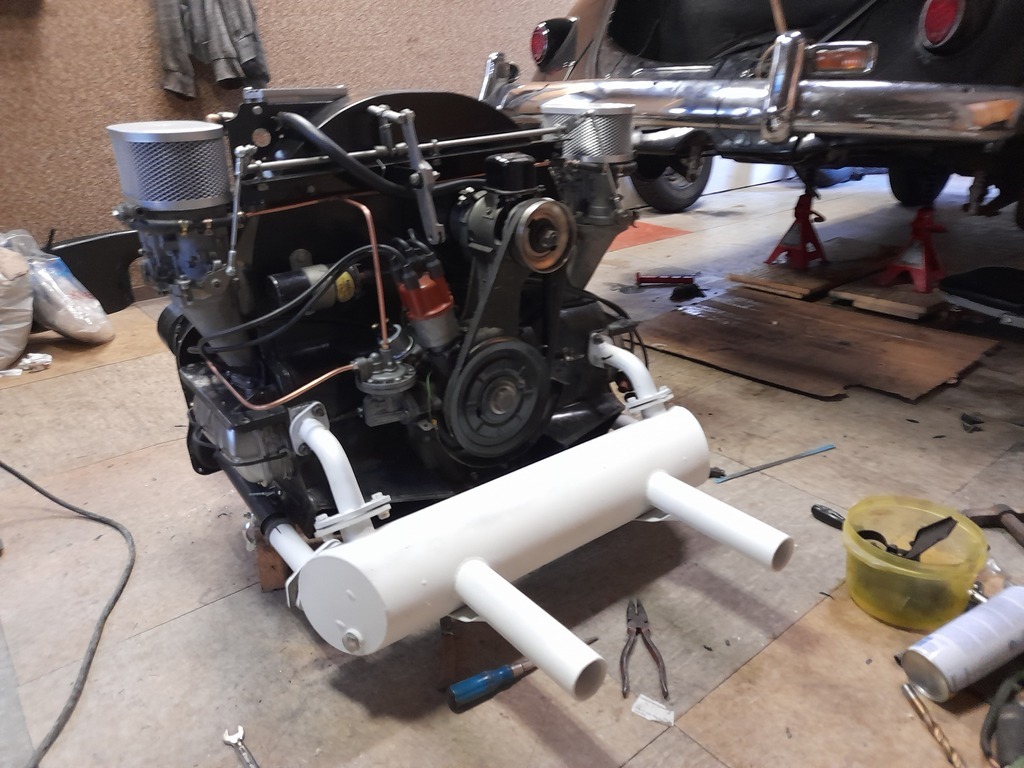 I would have said something about hoping that the white paint holds up, but swathes of it got scratched off in the fight to get the motor in. The fat exhaust didn't help any, as it restricts the wiggle room you have even more. I had to jack the car up some more, in order to get the motor under the rear valance. Since I don't have a super high lift jack, this involved piles of planks to get the height I needed and me being very careful not to launch the car off the axle stands and though the garage door. So car up, motor into the bay, car down onto axle stands again. Then I had to heave the motor onto the jack by myself. Those motors are light, but they're not that light! Then jack the motor into place, while trying to slalom the inlet manifolds into an engine bay that they're wider than. I removed the carbs, as I'd have had no chance. Can't say I'm relishing the thought of putting them back on either. Beetle motors have two studs in the bottom of the four bolt holes of the motor, which are a massive help when fitting one. I thought I was probably close enough to where I wanted to be, that I could have a look under the car and see if they were close to going into their holes. They weren't there. This was a bit of a blow. Luckily I robbed them from the 1500 motor, after some doubled up mole grip action to remove them. Try again. The motor was getting pretty far in, but no further. After some poking about, it seemed that it was my fault. The holes I'd drilled for the breather hoses were too high up and interfered with the engine bay seal. Drop the motor again. Redrill the holes. Reroute the hoses. Bingo. It actually went in pretty easily after all that. 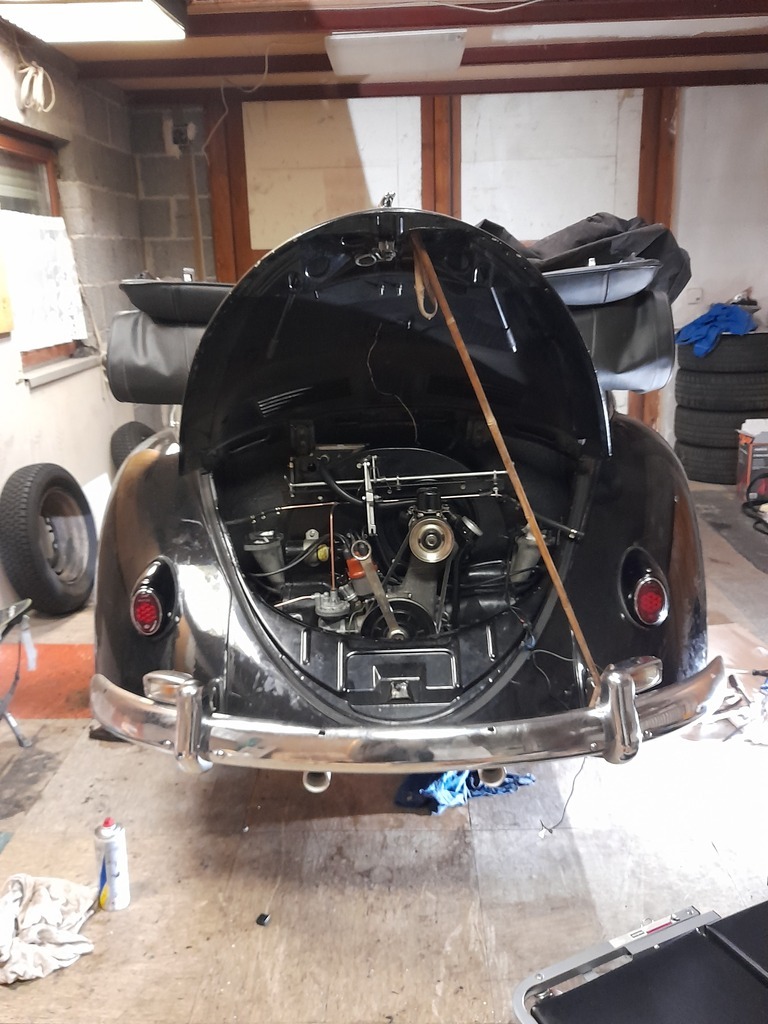 While I was delving under the back of the car, I noticed the rear torsion bar caps were looking a bit crusty. I started poking about...hmmm.... 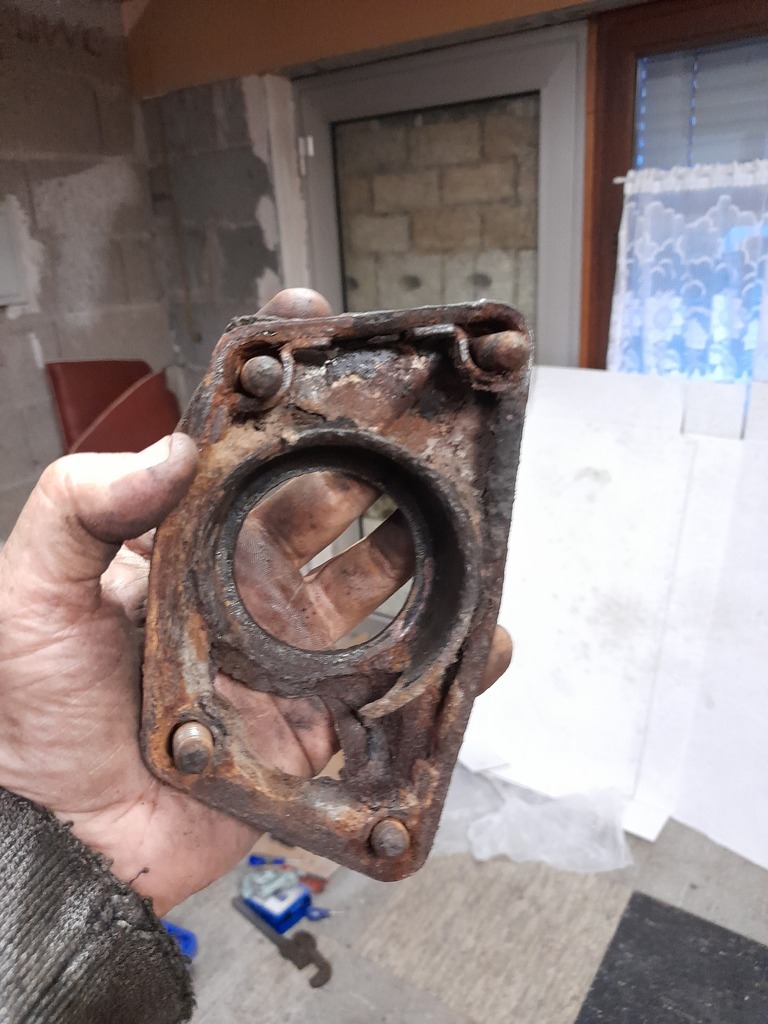 Naturally, they're the goofy, slightly different ones that were used from '52 to '59 only. But hey, it's a Beetle and I'm in Germany, so i got myself some more easily enough from ebay. The rubbers that the torsion bars pivot on are pretty - er - "bushed" too. (It's a play on words. You'll laugh about it later). I suppose I should add those to the list as well. Certainly it might improve the rear handling. |
| |
Last Edit: Nov 1, 2022 19:03:01 GMT by horrido
|
|
glenanderson
Club Retro Rides Member
Posts: 4,348
Club RR Member Number: 64
|
|
|
|
|
Good work. Having spent many a happy hour taking VW engines in and out, I sympathise entirely with your efforts. I got pretty adept with jacks, blocks and wedges. 🤣
|
| |
My worst worry about dying is my wife selling my stuff for what I told her it cost...
|
|
|
|
|
|
|
|
Yeah, I can see why people often make the rear valance removeable. Life would be so much easier! I'd be tempted to do it myself if I ever had to do some rust repair back there. I hadn't anticipated having one of the heater controls getting snagged up on the gearbox support either. It's all a very snug fit. I even had to take the top off the breather box, to clear the engine lid hinge, when fitting the motor. The top is less than a cm thick.
|
| |
Last Edit: Nov 1, 2022 21:05:09 GMT by horrido
|
|
glenanderson
Club Retro Rides Member
Posts: 4,348
Club RR Member Number: 64
|
|
|
|
|
My method involved having the car up on ramps at the back, a trolley jack and two stacks of blocks to make a controlled descent or ascent, and some thick cardboard on the floor to slide the engine out/in on once it was sat on the floor. A removable rear valence would have made the job a doddle, and I simply cannot understand why the factory didn’t make them that way.
|
| |
My worst worry about dying is my wife selling my stuff for what I told her it cost...
|
|
|
|
|
|
|
|
So I'd taken the top off the breather box, to be able to get the motor in. When I went to put it back on, it wouldn't fit, as the box was squished into the sound proofing on the firewall. I hadn't reckoned with the top of the bulkhead starting to curve at that point. A bit of persuasion to the sound proofing got it on there eventually, but I wonder what it'll do long term. Hmmm...guess we'll find out. I might be able to move it forward a few mm, but not without taking the motor out again. Understandably, I'm not falling over myself to do that.
Also I needed to get the exhaust pulled down a bit, to clear the valance. This should be reasonably easy, but the original style clamps I'm using won't hold with enough force, so I ordered some (hopefully) more robust clamps from ebay.
Also ordered up the rear suspension bushings and a couple of fan belts.
Sometimes feels like I'm only going down there to find new stuff that I have to buy for the car, interspersed with tiny bouts of actual work. Meh. I did at least get all the engine bolts in and the throttle cable threaded through the fan shroud and it looks long enough.
|
| |
|
|
|
|
|
|
|
Tired of doing motor stuff and as I'm easily distracted, I thought I should have a look at the rear torsion bar bushings. This could and should be very simple, but it never quite works that way. I already had the spring plate covers and the outer bushings off, but getting the inner ones out is a bit more challenging. I probably should have just left well enough alone, but deep down, i do want it to be right and if I don't do it now, it'll never get done. Also the spring plates were quite crusty with some heavy millscale on the outside, so I thought I ought to check them and paint them to stop it getting worse. Getting the plates off is a bit of a chore though. Undo the shock. Undo three bolts at the back of the spring plate where the axle tube bolts to it. Slide the tube back and out of the plate. Except you can't as the handbrake cable stops you. Loosen that off and you can just about get it free with some prying. Getting the plate off the torsion bar was more tricky. These are the slightly odd, longer torsion bars and the ends are hidden behind some caps, presumably to stop rust getting in. But they stop you from being able to tap the end of the torsion bar, to stop you pulling it right out of the car. The other problem is that the back wings are in the way. See how theses jobs snowball! I rather nervously undid about two thirds of the bolts holding the wing on, as these are somewhat prone to tearing the captive nuts out of the body, if there's any hidden rust. Then you're in a world of pain/welding/messed up paint. Luckily, they all came out and I could twist the wing out of the way enough to make some space. This also gave me abit of a look at some of the old repairs. Might not be quite as bad as I suspected. 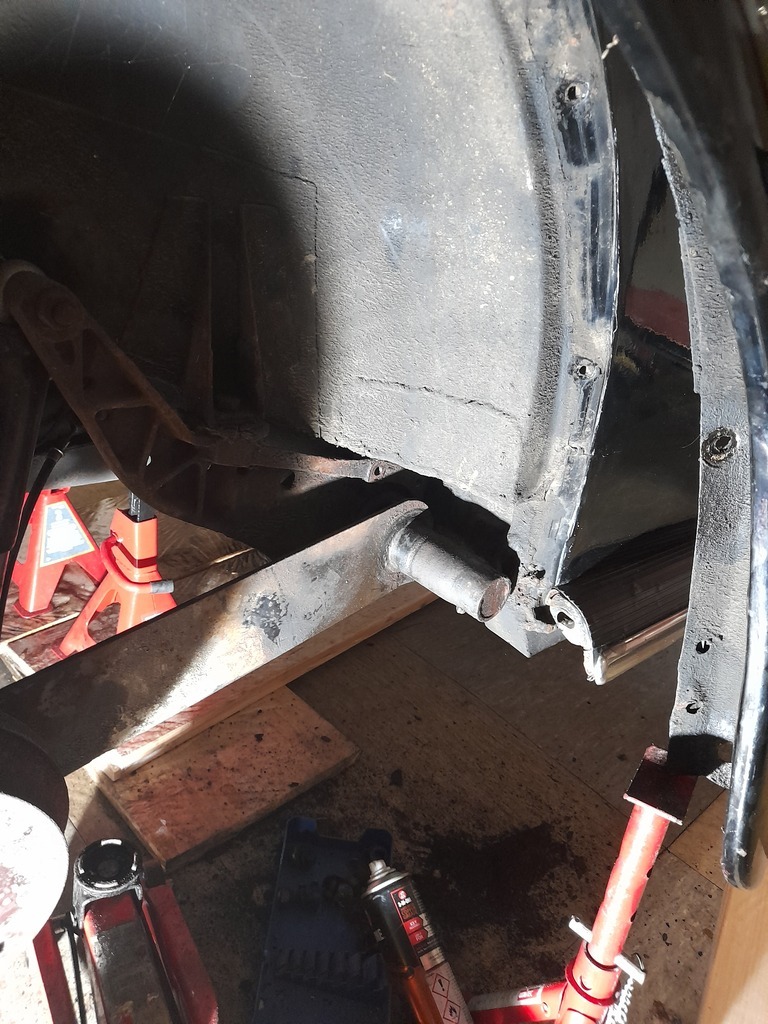 I tried some hammering on the end of the torsion bar to see if I could get it loose, but no joy. There was no room to pull the whole thing out and you really don't want to ever take the torsion bars out of the chassis, for fear of losing the correct ride height. In the end I had little choice, but to drill the cap in the end of the spring plate off, so i could tap the torsion bar back in and get the plate free. Hate to have to wreck stuff like that, but I think I might stick a small bolt in the hole and try and tap it back on. Presumably VW put it there for a reason and it's very much in the firing line of crud off the road. 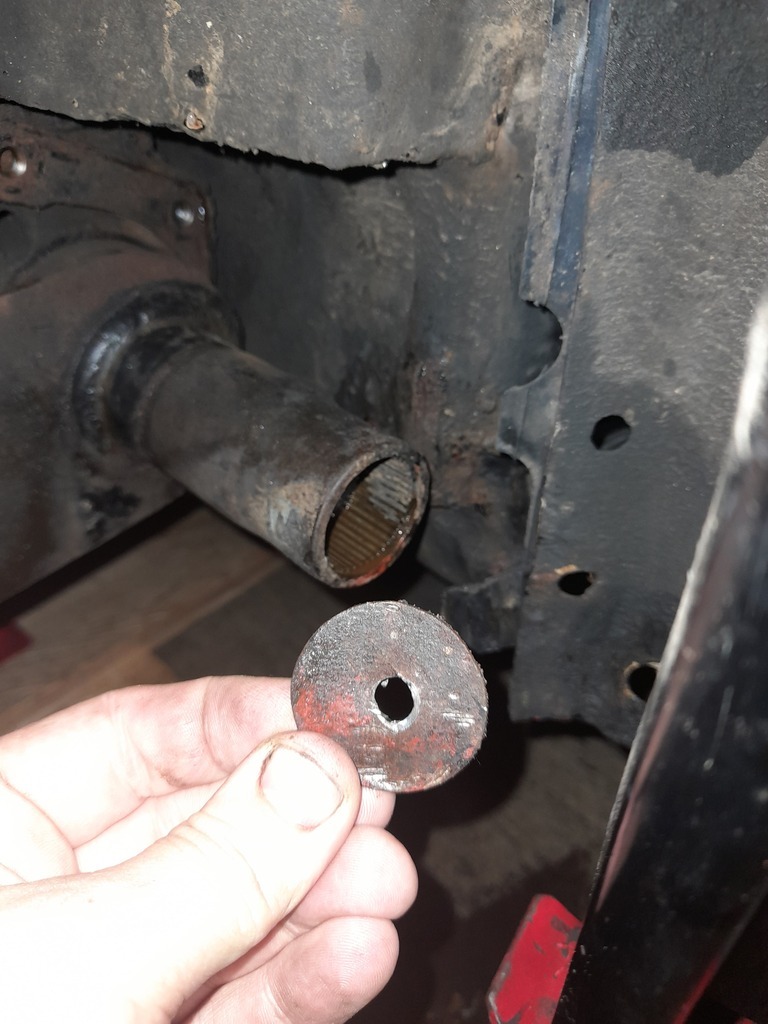 Had to leave it there for the day, as I needed a paint pen to mark the splines, so I can get it back on the correct way. Don't want to have the car end up higher on one side than the other. |
| |
|
|
|
|
|
|
|
Got it apart. There were clumps of millscale stuck to the rubber bush, which was well past it's best. 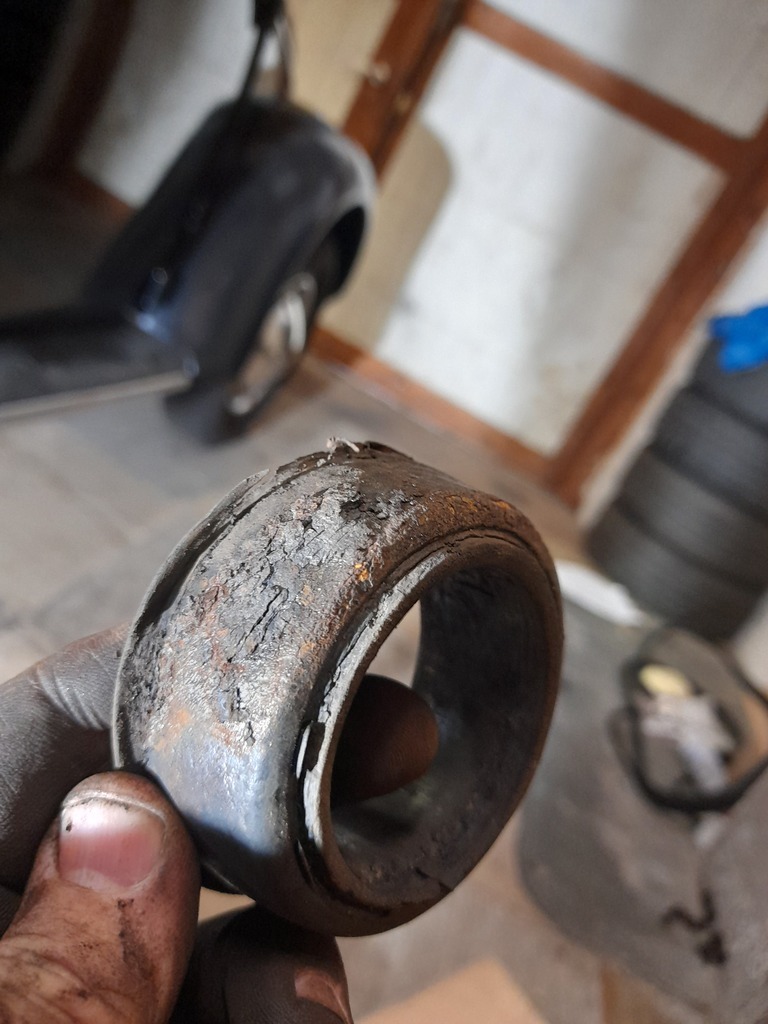 The millscale on the suspension end plate was a sight to behold and really on there. I ended up spending about an hour chiselling it off as best I could and applied some paint. 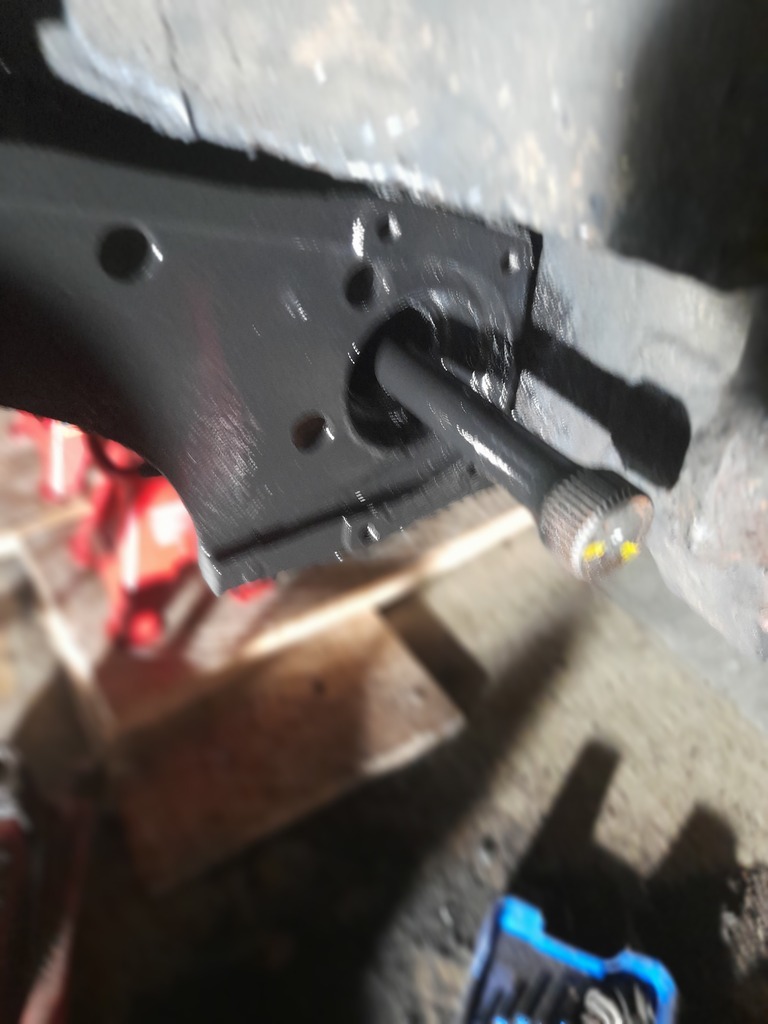 The end of the spring plate that was buried at the back of the cover, where the wet dirt all ends up, was really suffering too. It's meant to be 3 or 4 mm thick, and it was down to a bit of a knife edge. I judged it to be generally still solid enough, after I chiselled the rust off. That got some paint too. 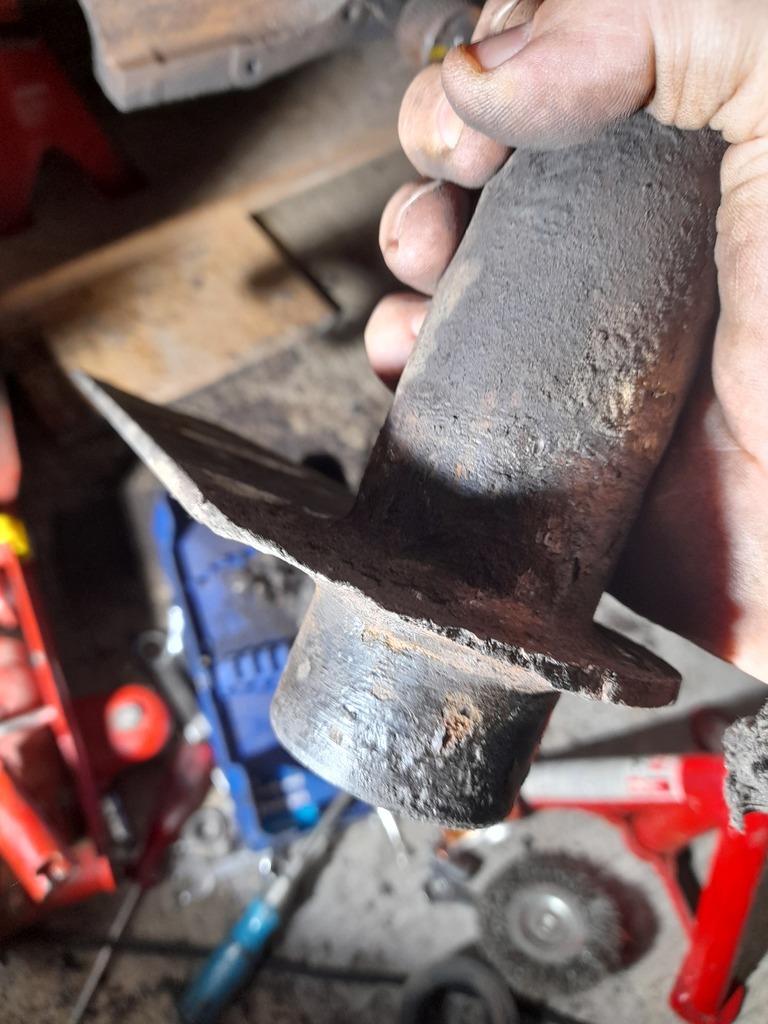 Glad I delved into this now, having seen the state of it. I only hope the drivers side is less crusty. Think i might pack the spring plate cap with grease before I fit it too, so try and stop it rotting out again. I'd add some grease to the rubber bushings too, but I don't want them to squeak. |
| |
|
|
|
|
|
Nov 17, 2022 19:20:48 GMT
|
Where were we? I got the motor in the car and all put together. 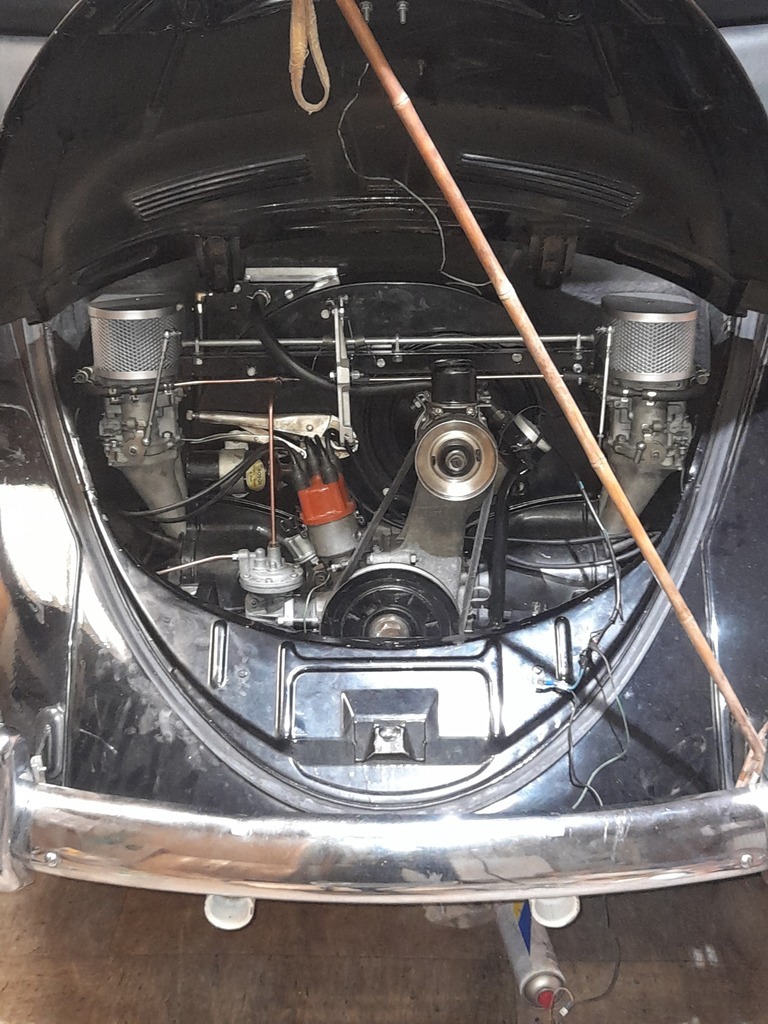 Made some little plates to cover the holes in the rear engine tin. These are for the heat riser pipes for the single carb inlet manifold. They bolt to the exhaust usually, but my exhaust doesn't have the provision for them anyway. You shouldn't be leaving holes in the engine tin anywhere, but especially not right above the hottest part of the exhaust. You'd draw in hot air, which would do your motor no good at all. I made the plates to slip under the tinware and they're just held in place by the usual tinware screws. Didn't want to drill any extra holes. 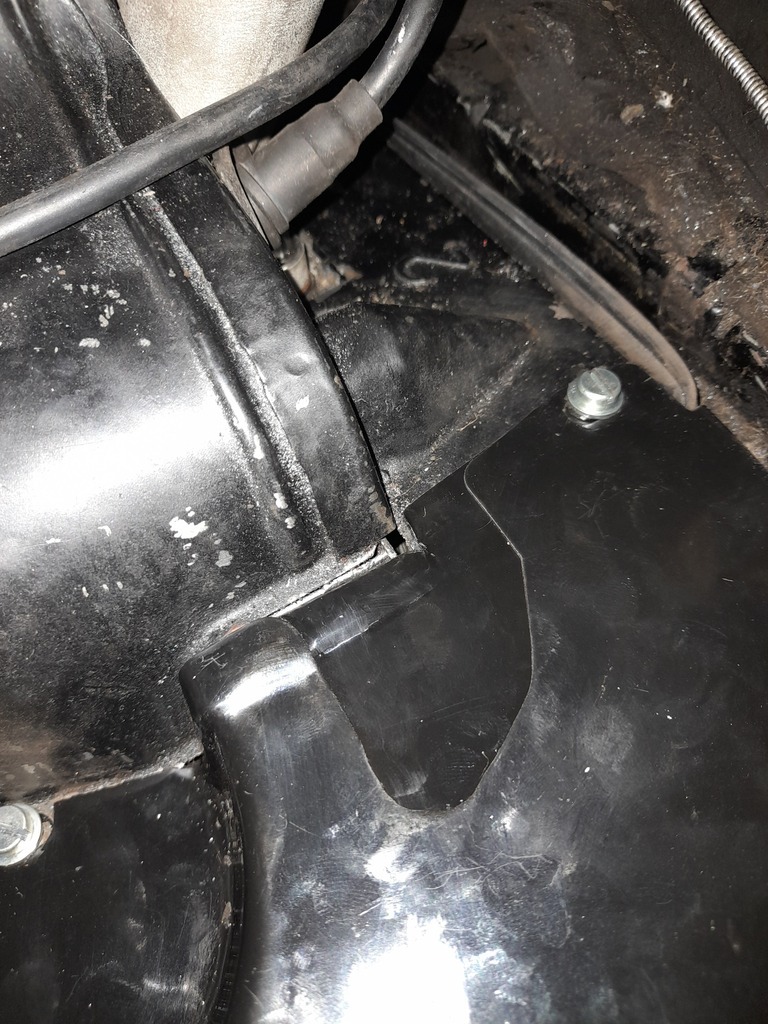 I rebushed and cleaned up and painted the rear suspension and spring plates. Discovered a couple of rust holes that will need plating up, which wasn't entirely unexpected. 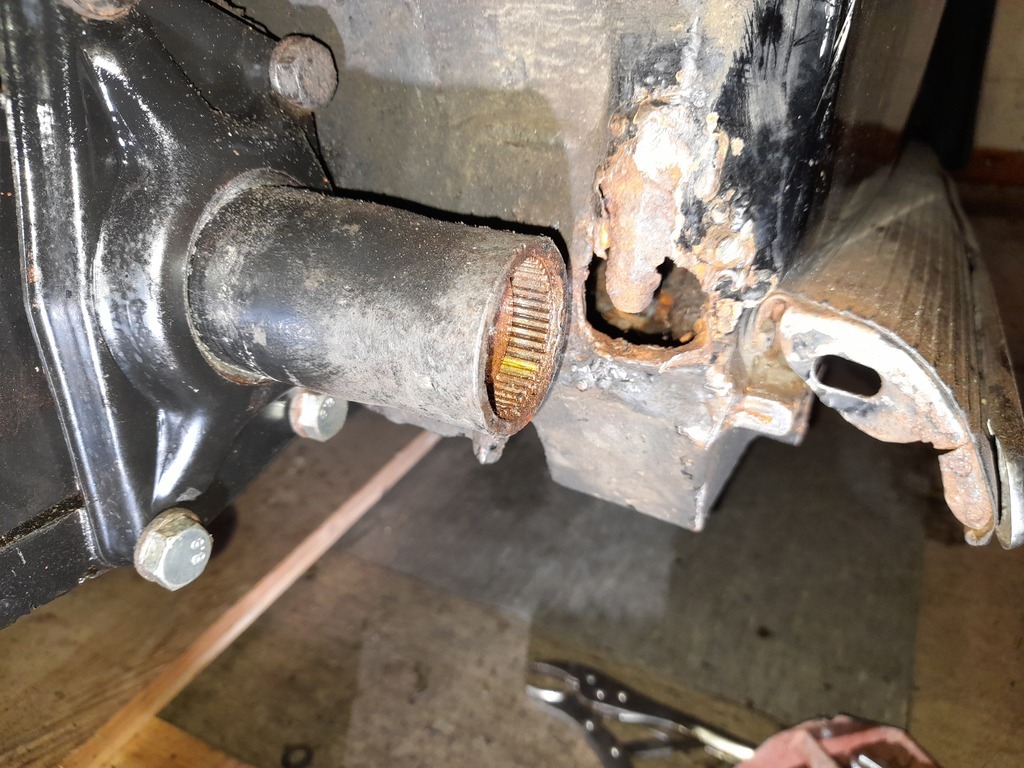 After the previous fiasco with the motor not making any oil pressure, for my sanity, I need to be really certain that it's making some this time. I have a set of gauges for the car - mid sixties, six volt VDO gauges. Not sure if they're aftermarket or actually from some old German car, but they're what i have. 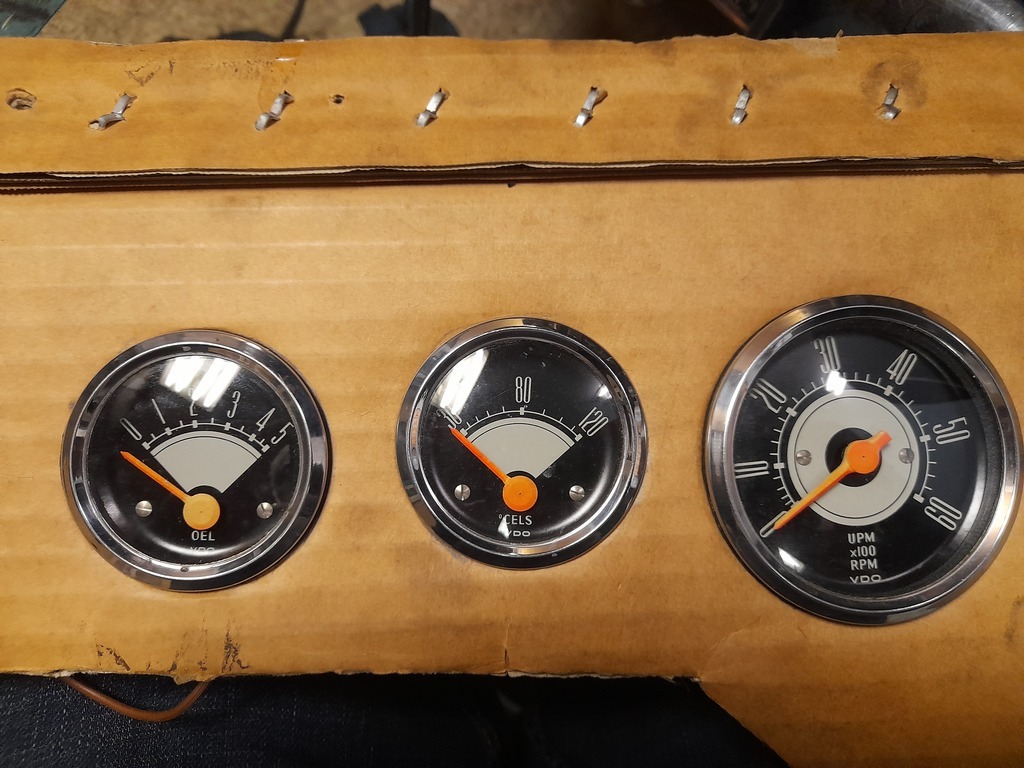 Did once see a matching clock (IIRC) on ebay, but got outbid. Wiring is really not my strong suit (it's more like whatever the polar opposite of a strong suit is), so I've spent quite a while trying to suss out how to fit these. Forked out for a very expensive VDO sender for the pressure gauge and a temp sender dipstick. Got the required wiring figured out and hooked it all up. Finally turned the key today....so, I guess i can at least be sure they're getting power, as the needle on the temp gauge went hard over, but from the other two, not a twitch. Fox picture. Don't really know what to do now. Is there an alternative way to measure oil pressure? That's the one I really need. Any ideas? Also the motor was turning over very slowly. I think the battery needs a charge. |
| |
|
|
|
|
|
Nov 29, 2022 20:14:27 GMT
|
So I'll just cut back to good metal to add this patch....oh....damn it.... 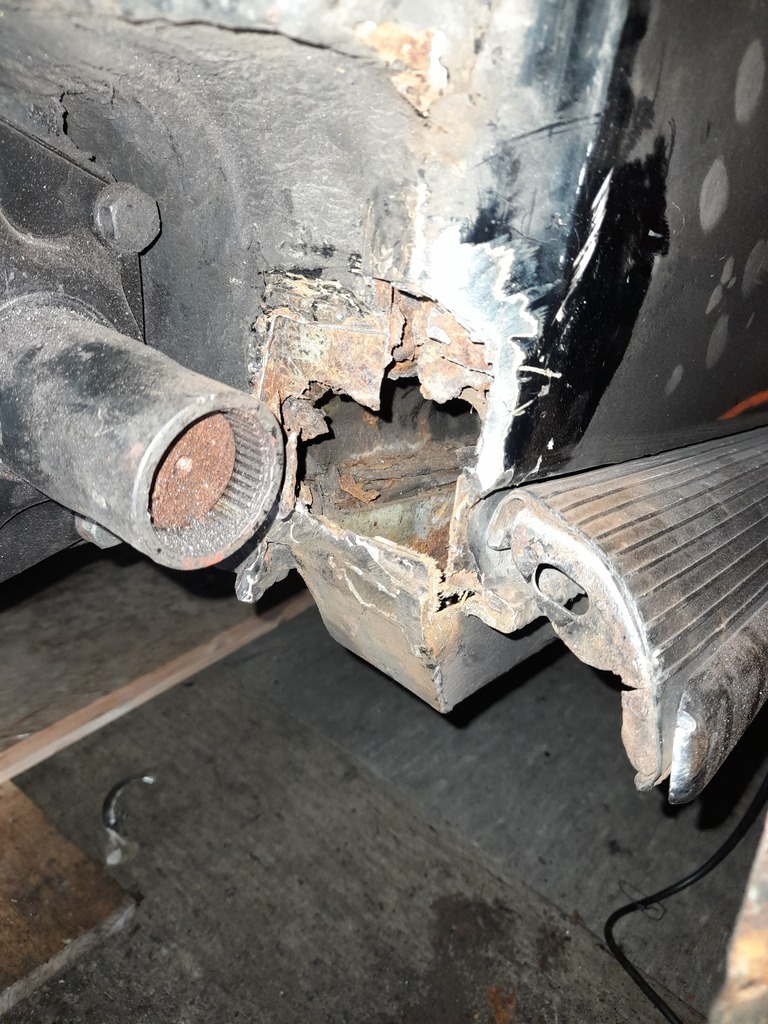 I mean it could be worse I suppose. There were a couple of layers of old plates and the trouble is, all the bits that need welding are tucked in behind the torsion bar, which is a horrible area to get into. I used the sabre saw for some of it, but I ended up ordering one of those finger sanders, so I can grind down some of the welds that are already there. With any luck that'll show up this week. The heater channel had a lot of loose rust kicking about in the bottom of it too. I might drill a hole in the bottom to let it out. I keep looking at it and thinking that I really is approaching the time where it needs doing properly, but I do need to get it registered first. I found a really handy web page with a lot of classic car businesses on it and there was a gauge repair place a fairly short drive away. I decided to drive down there. Unfortunately, the guy was really busy with regular car type work and was in the process of moving, so he had no chance to look at anything old/odd/six volt until approximately April. He gave me the name of another place though, so the gauges have been posted off to them to look at, for repair and maybe calibration. Apparently they'll give me a quote for repair when they've looked at them. I have a sneaking suspicion that they'll tell me there's nothing wrong with any of them and that I'm clearly an idiot and have wired them up wrongly! |
| |
|
|
|
|


