|
|
|
|
|
Just a note, some early ZF 4HP22 from XJS 3.6 had a mechanical speedo drive, it was only later that they started switching to the electronic version, as the speedometer transducer was then mounted in the differential. Mostly you'll find mechanical drives on auto boxes used in LDV vans, they were the most common variant. You have a number of options really. You can either hunt down an early gearbox (or find a broken one) and rob the tailpiece and necessary parts, find a box from an LDV, fit the rather good 3.54:1 or 3:31 PowrLok back axle off a later car for the speedo pickup; but as always, how far do you want to go when a little black box and a hall sensor will give the same result? Part of the attraction for me was always using Jaguar components - seeing what I could make with what came out the factory.  |
| |
"You're about as likely to come across a fully functioning old Jag, as you are a taxicab that smells agreeable." - James May
|
|
|
|
|
|
|
Managed to get a few hours in today. I finally managed to hang the left front door properly after some fiddling with the hinge bolts. The bigger news is that I now have the speedometer working! I used a Speedbox, which is powered by a GPS signal and drives a cable into my original speedo. It's not the cheapest way to do it but a great result with minimal effort, and it lets me use my original speedo. I routed the cable along the same path as the original speedo cable, so the actual box itself is now neatly under the glovebox. Here was it looked like halfway through installation: 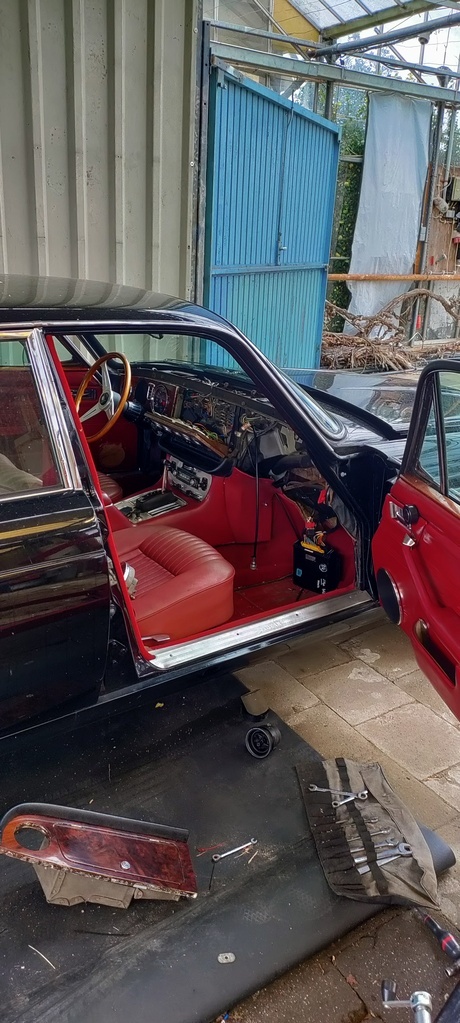 It was a very easy process really, just draw a ground wire and a switched live and you're good to go. I put the GPS receiver under the speaker grille in the middle of the dashboard, so it's an invisible install. Afterwards it's an simple matter of calibrating and Bob's your uncle. With this done I now officially have all my gauges working! |
| |
|
|
|
|
|
|
|
|
I love that interior colour (also the black exterior). Mine has a red interior originally (dark blue outside), but unfortunately our cat (real cat) ruined the front seats, mistaking them for a scratching post... I am planning to fit the XJ40 seats, but these are blue... I know you painted the seats in your car. What paint did you use? Any specific recommendations?
Great to have all gauges working like they should... it's always the small jobs like that that take up a lot of time!
|
| |
Last Edit: Aug 9, 2024 20:33:15 GMT by opwxj6
|
|
|
|
|
|
|
I love that interior colour (also the black exterior). Mine has a red interior originally (dark blue outside), but unfortunately our cat (real cat) ruined the front seats, mistaking them for a scratching post... I am planning to fit the XJ40 seats, but these are blue... I know you painted the seats in your car. What paint did you use? Any specific recommendations? Great to have all gauges working like they should... it's always the small jobs like that that take up a lot of time! Dark blue and red is a luscious combination! I used Angelus paints (Scarlet Red) for the recoloring, however I didn't use them on high wear places like the seats. However, with the minor use they have had, painted items like doorhandles and armrest haven't suffered at all - not scratches or peeling as of yet. |
| |
|
|
|
|
|
Sept 6, 2024 17:44:25 GMT
|
Today I finally finished the headliner. It had been looking like this for quite a long time: 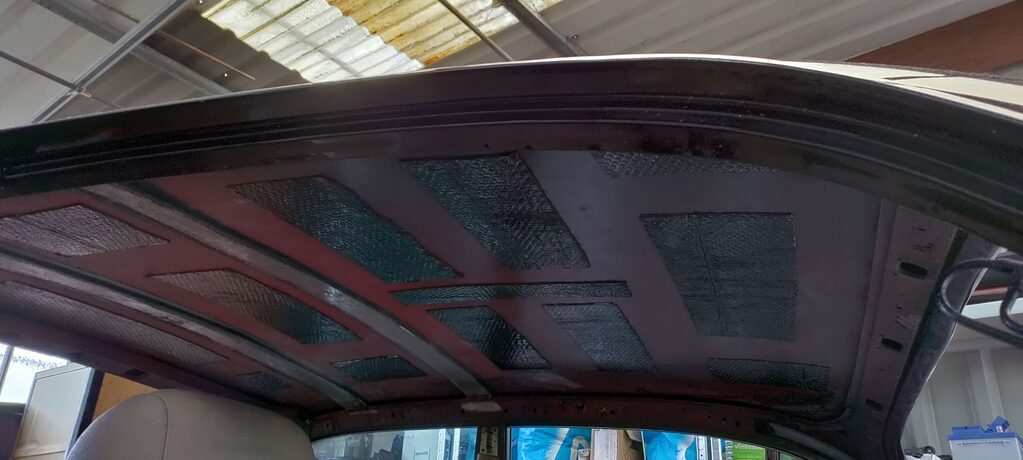 It was not a tidy look, but I managed to delay fixing it by simply not looking up when I drove the car. When I got the car it had a sunroof installed, which was dealer installed somewhere in the US by some that was obviously in a hurry. After removing the sunroof there were extra supports put in, which meant that the factory solution of having a separate headliner on a board wouldn't fit well. On top of that all Series 1s only had a greyish headliner from the factory, which wasn't the look I wanted. Because of these things I chose to tackle it differently. 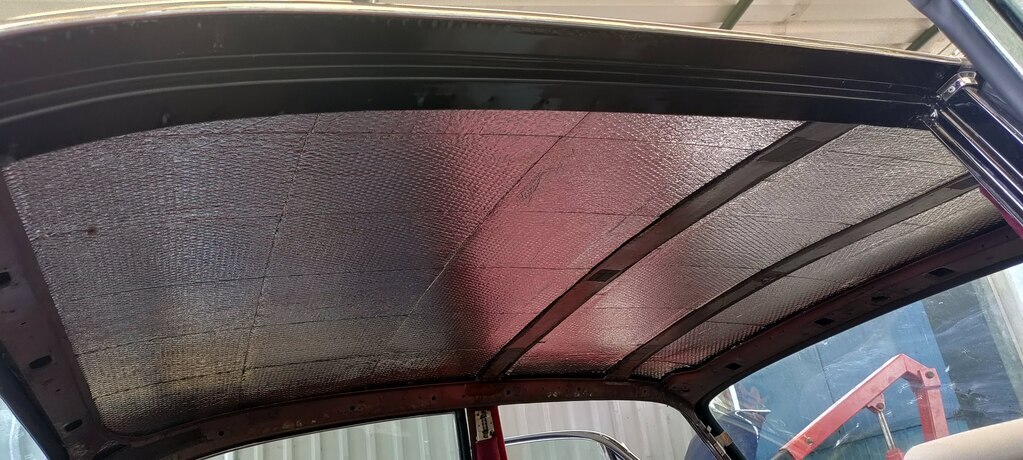 I took away the old soundproofing and covered the entire roof in a new layer of butyl mats. 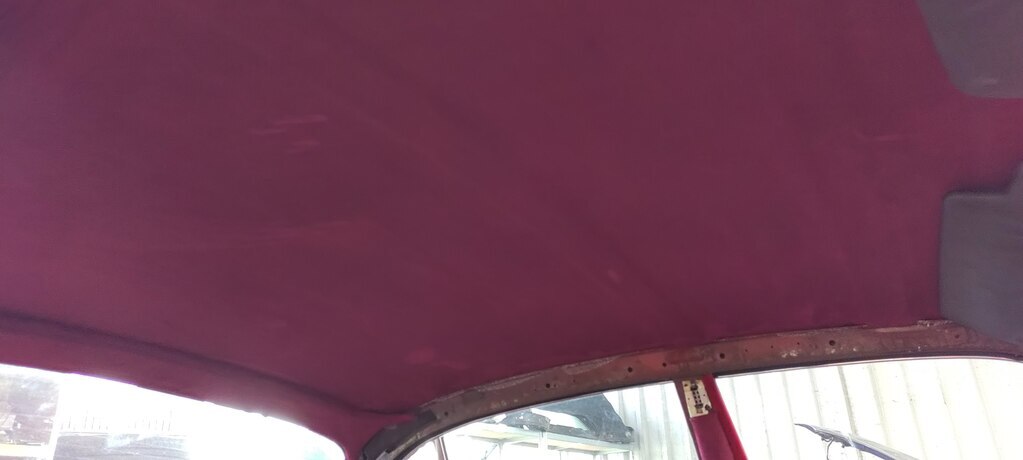 Onto which I stuck the same (Ron) burgundy foam backed alcantara I used for the other upholstery bits. This left the matter of covering the C pillar and the area above the door. As you remember I'd made these pieces a while ago from new hardboard: 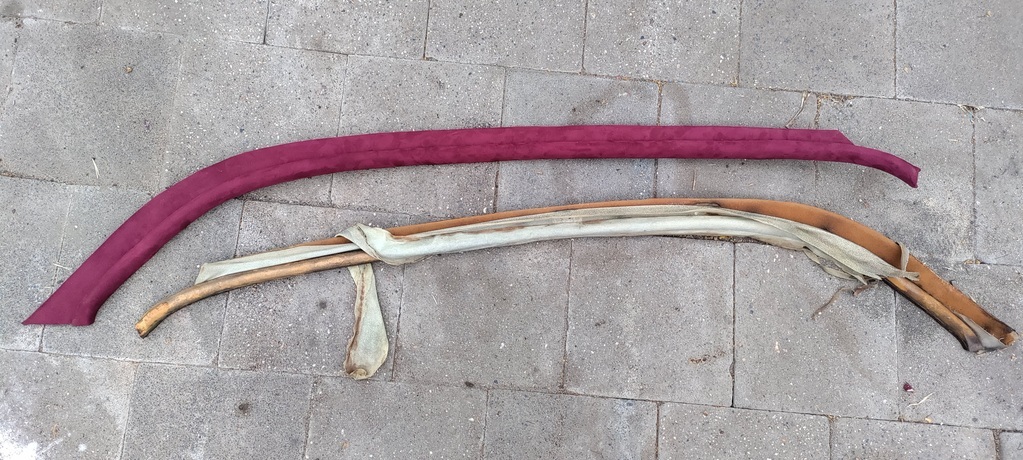 Sadly it wasn't a matter of just fitting them up. The pieces attach with clips which fit into little brackets. In the photo below you can see on the right how they are supposed to look, and to the left the ground off remains of when the sunroof was fitted in 1971. 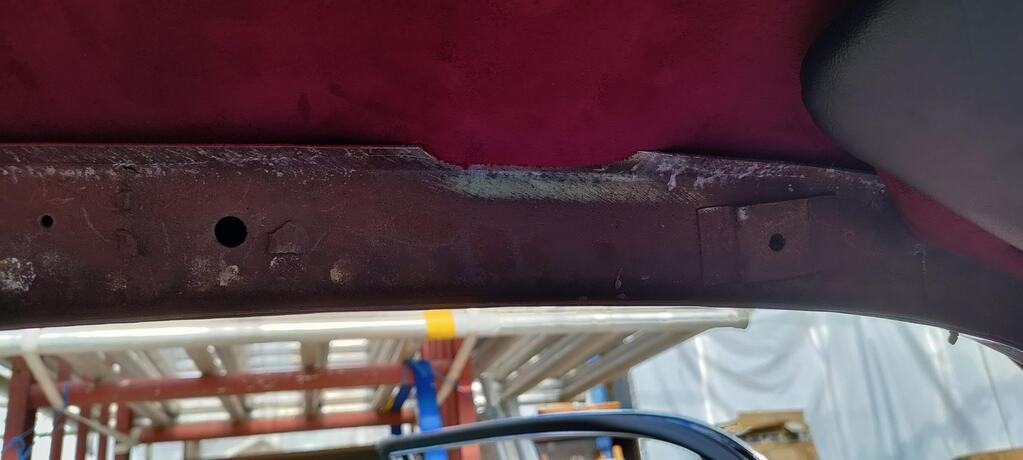 This meant I had to make some new brackets. I recycled steel from the car's original bonnet (this will definitely give me concours points) to whip up a few new ones. 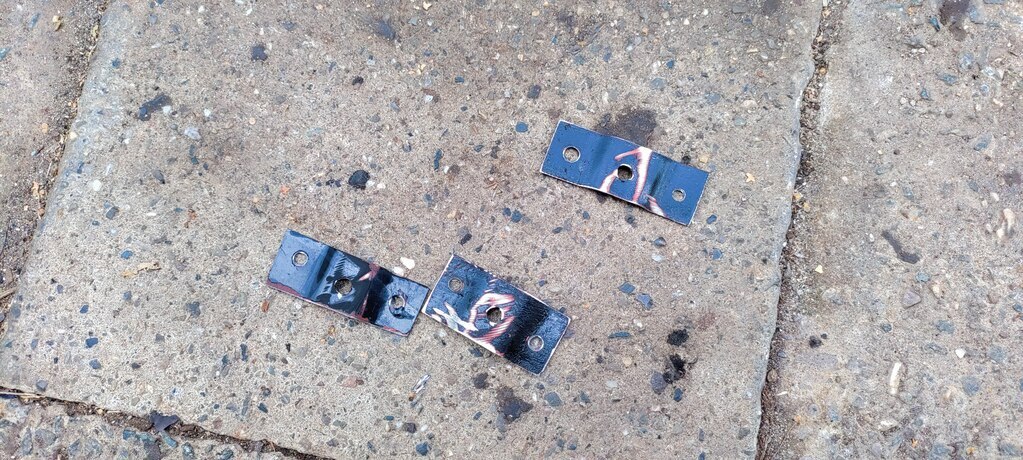 I didn't fancy welding so close to my fancy new upholstery so I popriveted them into place. After a bit of fidget I managed to get both pieces into place, turning this: 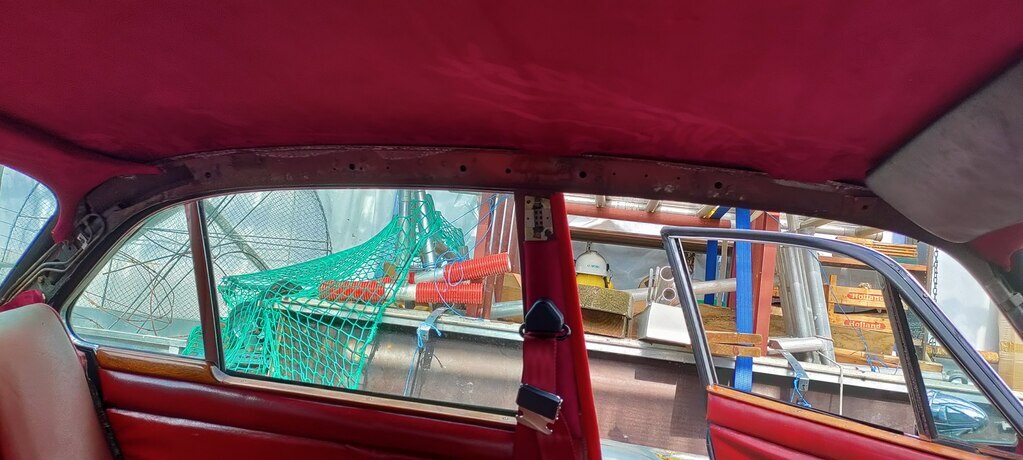 Into this. I also felt the grab handles would be a nice touch, so I found some second hand ones and fitted them in the original place. 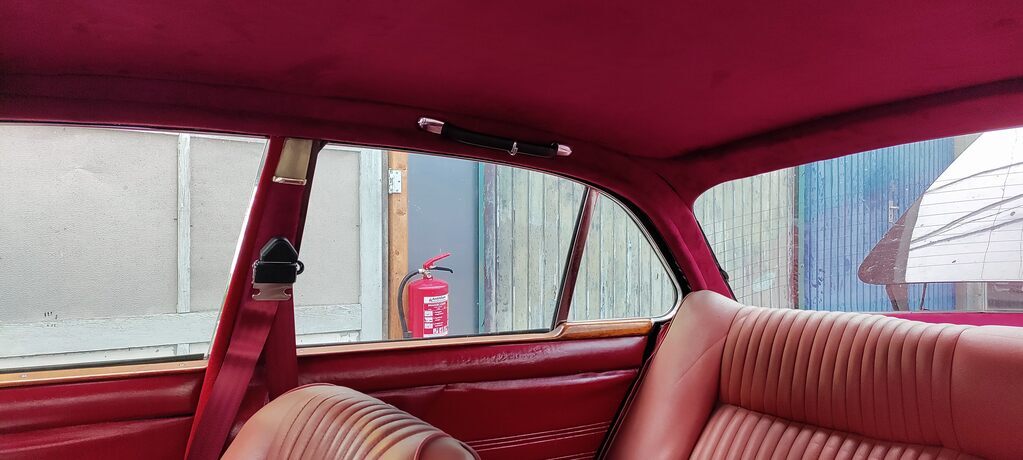 Because as you can tell the interior of the car isn't quite red enough, I finished it off by redoing the A-pillar covers. These were originally black vinyl, which had peeled significantly and rusted beneath. On top of that I damaged the vinyl when I welding the window opening years ago. So I decided to cover them in the same red vinyl I used for the parcel shelf, leaving a bit of black below where the pieces meet the dash. Here you can see the new version to the left, and the manky vinyl and original covers to the right. 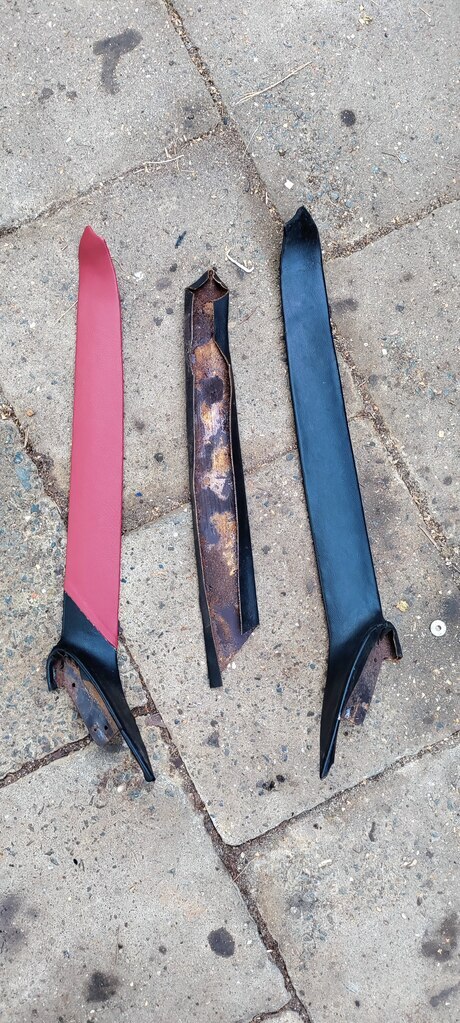 And fitted it looks like this, quite tidy if I do say so myself. I even doubled up the red bit where it meets the black bit so you don't see the unfinished edge of the vinyl. 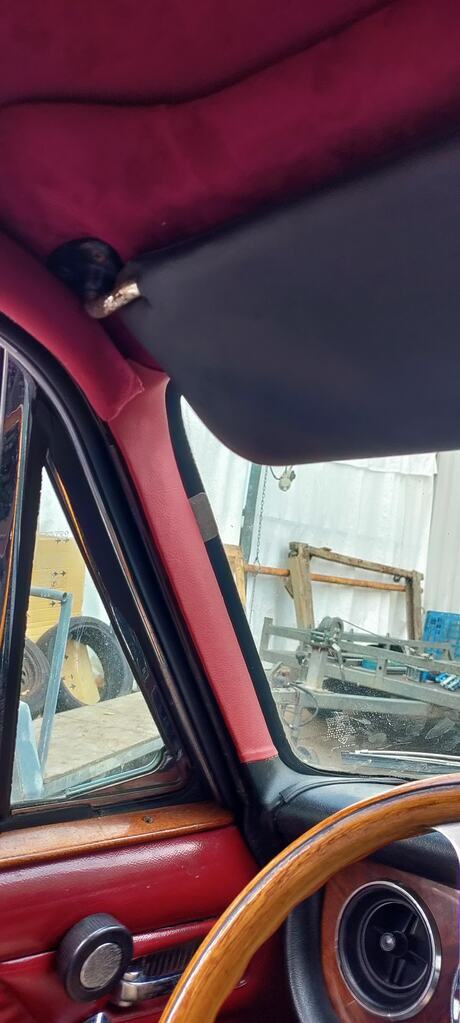 The eagle-eyed among might have notificed I still need to fit the draught excluders (Furflex). To do so I first need to finish wiring up some speakers in the doors, so that will be a job for another day! |
| |
|
|
teaboy
Posted a lot
   Make tea, not war.
Posts: 2,126
|
|
Sept 6, 2024 22:28:18 GMT
|
|
That headlining looks excellent, well done.
|
| |
|
|
|
|
|
Oct 18, 2024 18:31:33 GMT
|
As winter is closing in indecided to get my heating in order. My blower motors were loud, gave little air, and drew enough current to blow fuses constantly. Not really useful so instead of replacing I decided on an upgrade. The popular upgrade is to use Opel/Vauxhall Astra F motors, so I got two of them and modified them to fit. 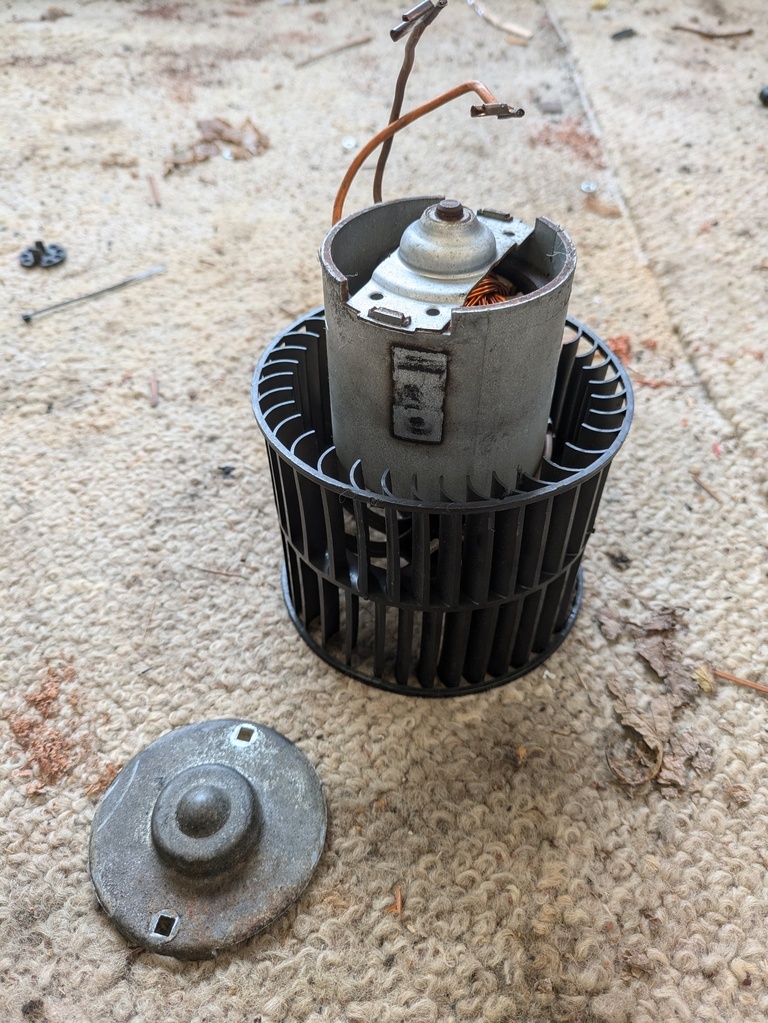 The GM motors are open at the back, which would cause me to suck in a lot of dirty air from the engine compartment. I didn't want that, so I welded the ends of the original motors to the new motors and placed them on the original mounting with new rubber buffers. 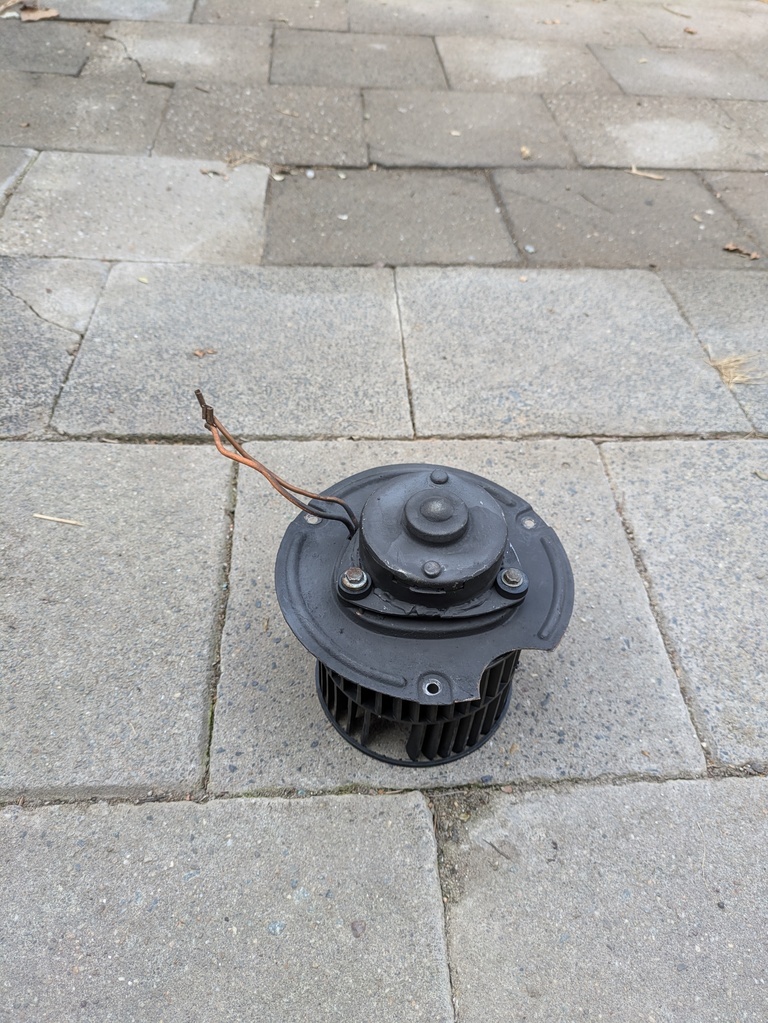 This is what it looks like, almost like the originals. With a bit of adjusting everything fit neatly into place, and now a good amount of air comes out as well Unfortunately one of the fan blades is out of balance so I will have to replace it with a good one in the future as it vibrates quite a bit. Is the conversion worth it? Sure, but it's not as easy as taking the old one out and putting the new one in. But for a job that I will never have to do again, I am happy that I did it right the first time. |
| |
|
|


