|
|
|
Oct 11, 2009 20:26:45 GMT
|
Love the look of this thing, had similar plans for my 242 (a 78 , last year with round headlights and 'brick' taillights) but I removed the spare wheel wells on mine, as I think they are quite fugly tbh. Just weld in some sheetmetal please  Other than that it looks ace so far  |
| |
Sierra Lover
|
|
|
|
johnrh
Part of things

Posts: 958
|
|
Oct 12, 2009 16:19:15 GMT
|
Nice to see this progressing well! This is a very neat bit of cutting... 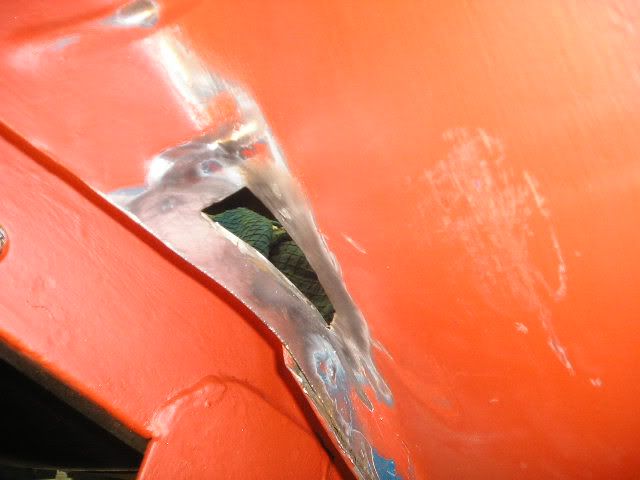 What tool did you use? If that was my work I'd have grinder marks all around it and bubbling, scorched paint... ;D Just used the grinder and a small square file. Actually, the hardest part was getting the right curved profile on the repair piece. Cheers John |
| |
|
|
johnrh
Part of things
Posts: 958
|
|
Oct 12, 2009 16:23:35 GMT
|
Love the look of this thing, had similar plans for my 242 (a 78 , last year with round headlights and 'brick' taillights) but I removed the spare wheel wells on mine, as I think they are quite fugly tbh. Just weld in some sheetmetal please Other than that it looks ace so far The wheel wells are certainly a bit wierd looking, but I quite like them... part of the Volvo character IMO. So they're staying, I'm afraid! You'll have to photoshop them out when it's finished! Still got your 242? Is there a thread on here? Cheers John |
| |
|
|
|
|
|
Oct 13, 2009 14:21:40 GMT
|
Sadly it was rusted to death, and I bought a Sierra to drive while I was fixing it, and it ended with me giving the 242 away, and now, I've had 14 Sierra's (I think  ) Still miss it a bit though  |
| |
Sierra Lover
|
|
johnrh
Part of things
Posts: 958
|
|
Oct 20, 2009 20:08:59 GMT
|
Hi... here's the next instalment: Rear suspensionThe new, prefabricated Panhard rod mounting being welded to the axle 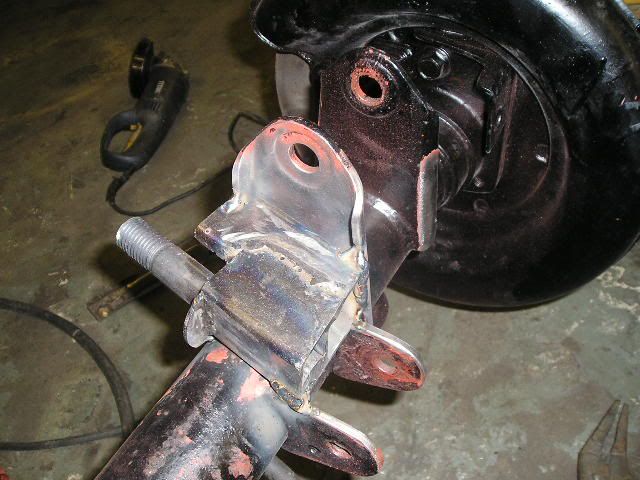  Lower strengthening piece (on top in this photo... working with the axle upside down)  Rear strengthening piece 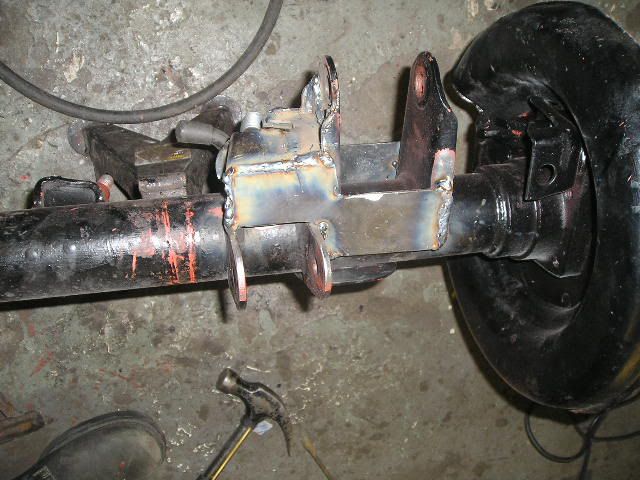 Front strengthening piece 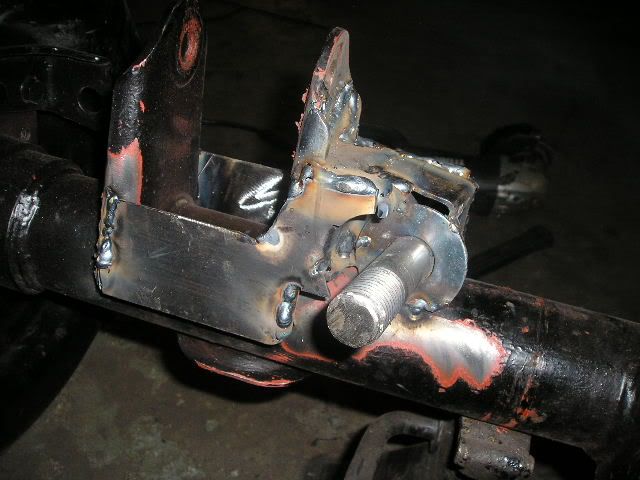 Original Panhard rod mounting cut off (hope the new one works!) 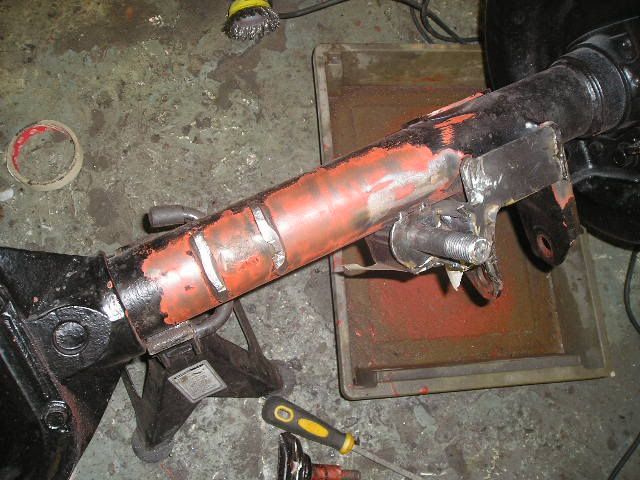 Cleaned up and primed  Steve found the polybushes I had lost. Here I'm fitting them to the trailing arms 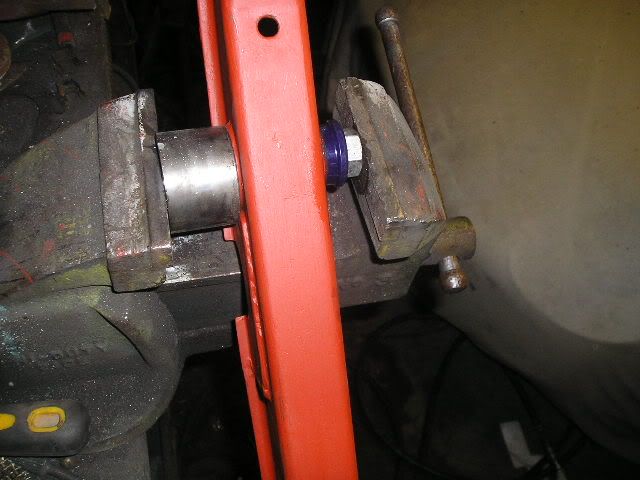 Painting... 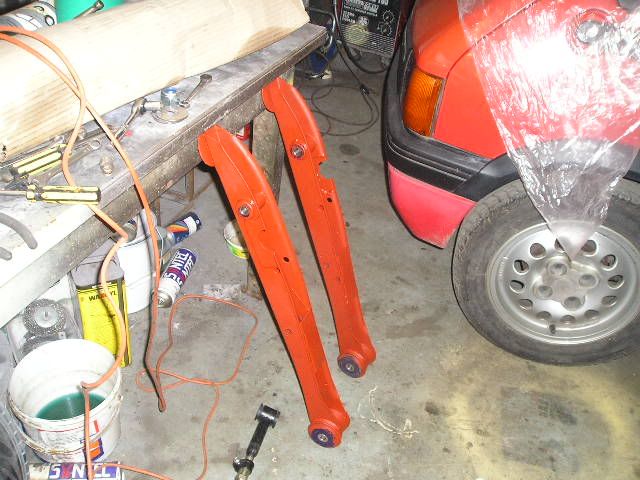 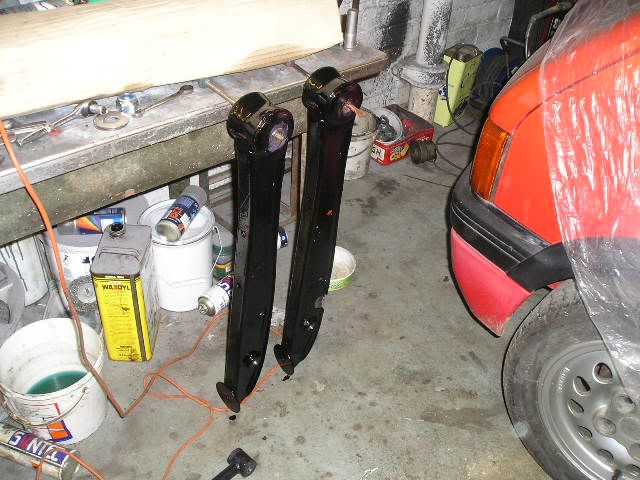 Bodywork BodyworkAfter measuring carefully, cutting out my rear wheelarch... quite scary!   Well that's all this time, cheers John |
| |
|
|
luckygti
Posted a lot
I need to try harder!
Posts: 4,912
|
|
Oct 20, 2009 20:42:47 GMT
|
|
Amazing work. What's the plan for the arch? Is this to widen it?
|
| |
|
|
johnrh
Part of things
Posts: 958
|
|
Oct 22, 2009 20:16:02 GMT
|
Amazing work. What's the plan for the arch? Is this to widen it? No my wheels will just about fit within standard arches. With a couple of mm to spare if I'm lucky. I will fit the new arches to give me a touch more clearance, but the main reason for replacing them is because they've been badly repaired in the past. I want to do it properly because I'm trying to aim for A1 body and paint, or as close as I can get. This is a period shot of one the same year and colour as mine; what a cool barge she is! My target is to get mine looking as good as that, but sportier of course! 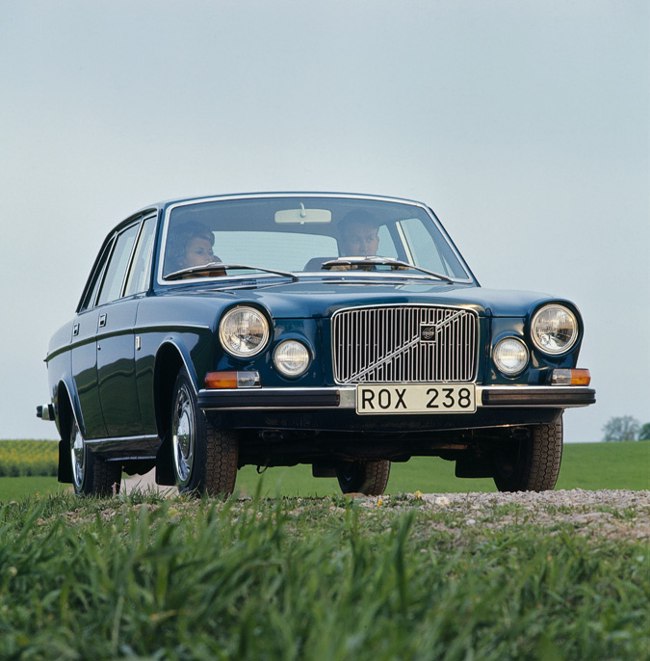 Cheers John |
| |
|
|
mirafioriman
Posted a lot
My next project.......
Posts: 1,361
|
|
Oct 22, 2009 21:23:15 GMT
|
|
Nice photo and great for inspiration!
|
| |
|
|
Speedle
Posted a lot
Need a Country Rock band in the Hampshire Area? https://www.facebook.com/DirtRoadDiaryUK
Posts: 2,221
|
|
|
|
superb work! watching this one with interest! |
| |
|
|
johnrh
Part of things
Posts: 958
|
|
Oct 24, 2009 18:44:30 GMT
|
Hi, Some good news and bad news on the project today... Rear suspensionThe good news... the new Panhard rod mounting fits and works as intended. It's been painted, but already it's got dusty  Test fitting to check the mounting angle (luckily, it turned out right) and measure the length required 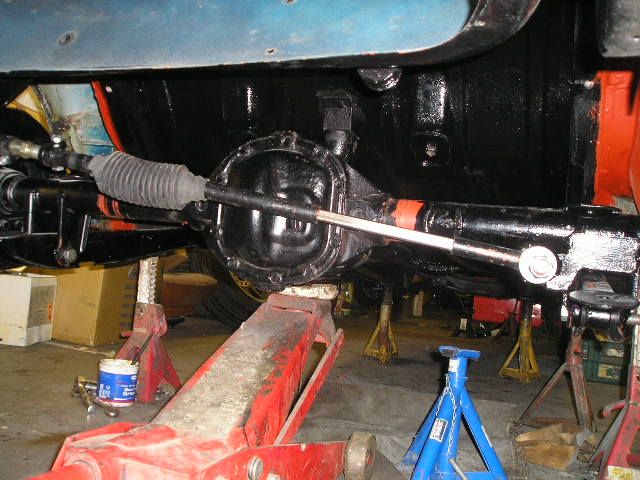 Ready to weld in an extra section to get the right length 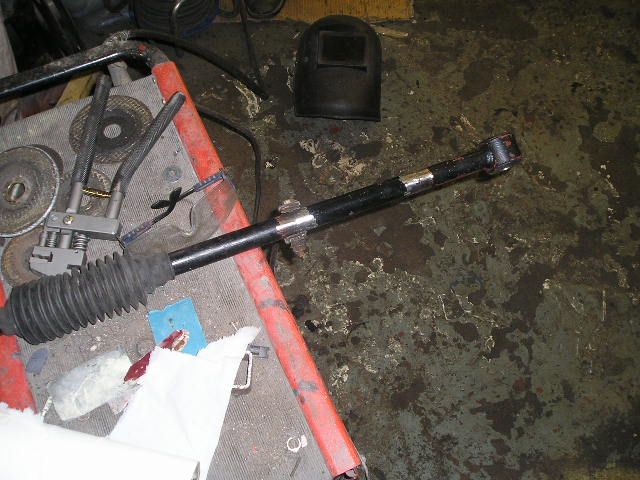 Bodywork BodyworkAnd the bad news is.... once again, we found more bodged old repairs, which need to be undone. I knew the right sill had been replaced and from the outside it looked like a reasonable job. However, now that I can look inside the sill from the rear wheelarch, I have discovered that the new panel was welded on top of the old, rusty sill. That means I have to cut off the mess and replace it all properly. But looking on the bright side, it's better to find out now than after we have painted the car. We also found evidence of accident damage. The right rear door shut panel, next to the rear wheelarch, has been replaced and, judging by different internal rust treatment, both right doors were also replaced. This is a quality repair and not a problem; I guess it was an insurance job much earlier in the car's life. Nothing to do with the later rust bodging on the sill! The sill, seen from the rear wheelarch 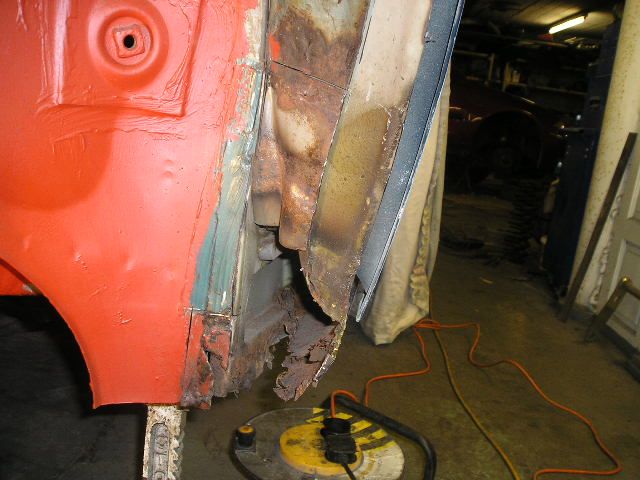 Peeled back and removed some of the repair to reveal the original, rusty sill... 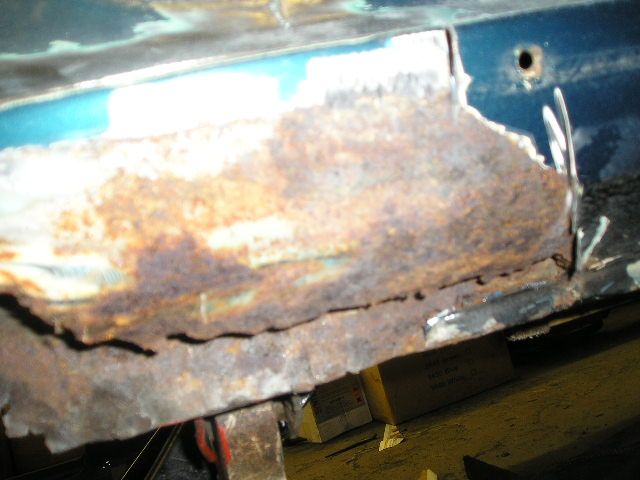 ... the bit I removed, nasty! 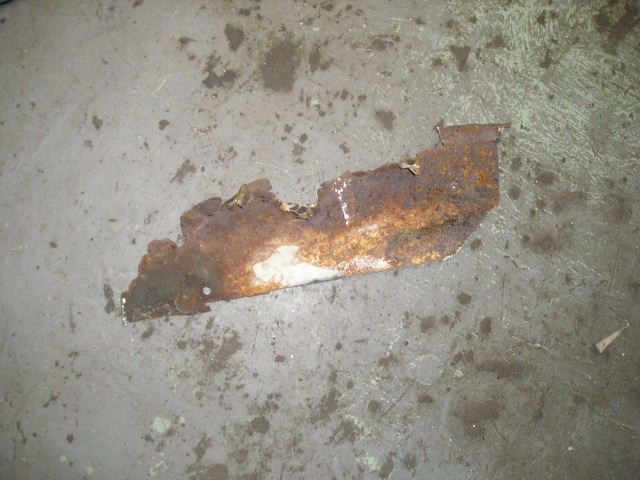 I have ordered the new sill and we removed the doors. 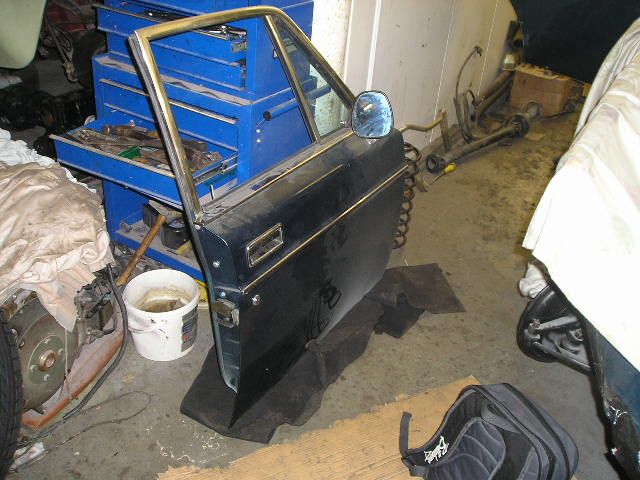 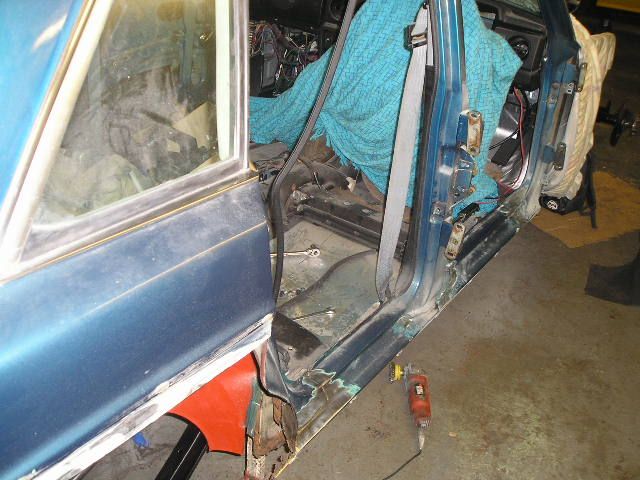 The sill gives the body a lot of strength. The floor and the inner sill are rock solid, so cutting off the outer panel should not weaken it dramatically. But, to be on the safe side, we braced the shell to avoid it bending when the sill is cut off. The steel tube is temporarily welded across the door openings, the floor is supported on 3 well-fitting axle stands and the B-pillar is braced against the ceiling (this is the ground floor of a large, old and very substantial Yorkshire mill). 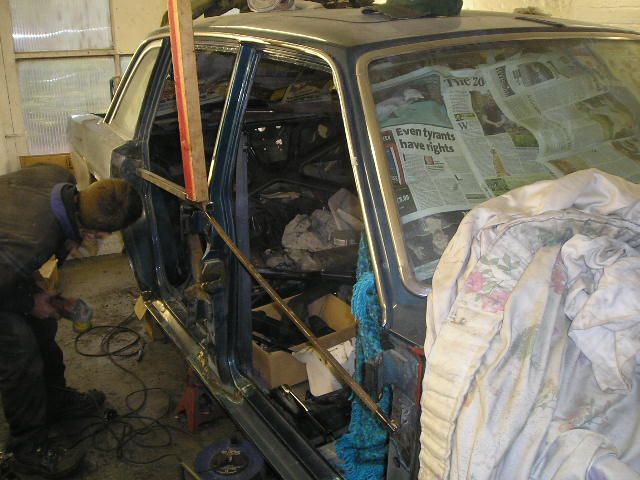 I've taken time off work next week, so hopefully some more progress soon. Finally, does anybody know the function of the curved plastic pieces screwed to the rear doors? All they do is slide against part of the front door latch when the rear door is open and shut, but what's the point? 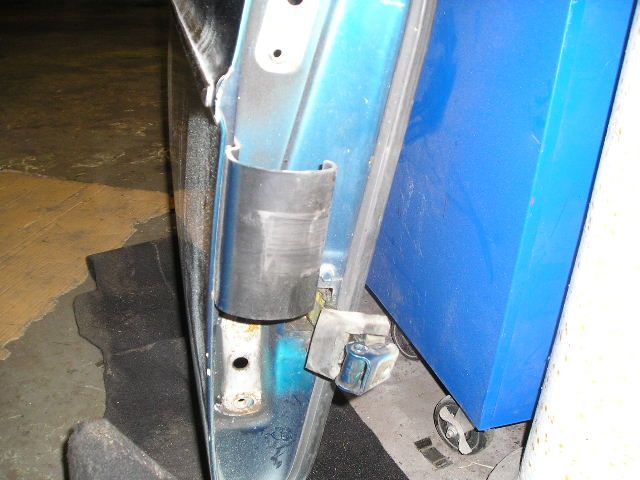 Cheers John & Steve |
| |
|
|
|
|
|
|
|
Oct 24, 2009 21:25:56 GMT
|
|
Tough Luck with the sills, but as you say best to find out now
|
| |
|
|
mirafioriman
Posted a lot
My next project.......
Posts: 1,361
|
|
Oct 24, 2009 22:06:43 GMT
|
|
Lucky you can get a new one though. That definitely makes the job quicker and simpler to do it to original quality.
|
| |
|
|
johnrh
Part of things
Posts: 958
|
|
|
|
Lucky you can get a new one though. That definitely makes the job quicker and simpler to do it to original quality. Yes, it was quite cheap too. Parts availability for these old Volvos is very good. Although they are quite rare on the UK classic scene, the have a much stronger following in Northern Europe/Scandanavia and the US, so most parts are available whether for resto or tuning & modification. John |
| |
|
|
|
|
|
Oct 25, 2009 19:54:28 GMT
|
|
A tip: If not already done, change to 240 door hinges. They have the door stop built in, and that are much sturdier than the worthless separate door stops on the 100 series.
|
| |
194? Willys Jeep MB 1965 Volvo 544 Special 1968 Opel Rekord 1975 Opel Kadett Estate 1985 Mercedes-Benz 230E 1985 Datsun 720 King Cab 4x4 diesel 1997 Volvo S70 2.5SE (ex. "Volvo544special65" - changed to more reader friendly username. ) |
|
johnrh
Part of things
Posts: 958
|
|
Oct 25, 2009 21:36:28 GMT
|
A tip: If not already done, change to 240 door hinges. They have the door stop built in, and that are much sturdier than the worthless separate door stops on the 100 series. Thanks for the tip. Are they a direct swap? John |
| |
|
|
|
|
|
Oct 25, 2009 21:38:47 GMT
|
|
Bolt-on. And rear door hinges do fit up front but are always less worn.
|
| |
194? Willys Jeep MB 1965 Volvo 544 Special 1968 Opel Rekord 1975 Opel Kadett Estate 1985 Mercedes-Benz 230E 1985 Datsun 720 King Cab 4x4 diesel 1997 Volvo S70 2.5SE (ex. "Volvo544special65" - changed to more reader friendly username. ) |
|
wuvvum
Part of things
Posts: 547
|
|
Oct 26, 2009 20:37:52 GMT
|
Wow, this is going to be one impressive beast when it's done! Makes me feel bad reading this thread - my 164 has been on axle stands for the past two months waiting for me to rebuild the brake calipers.  |
| |
|
|
|
|
|
Oct 26, 2009 20:49:21 GMT
|
|
looking good john good to see a lot of progress
|
| |
Current Fleet:
2004 Audi A4 1.9tdi Sport Avant
2014 Ford Fiesta 1.25 (wifes car, curse word box)
1987 Volkswagen Polo CL
|
|
|
|
|
|
|
|
Looking good John. Some nice work as usual.
It was good to meet you the other week as well. Hopefully James will get on with his 164 now.
|
| |
|
|
johnrh
Part of things
Posts: 958
|
|
Oct 28, 2009 23:19:42 GMT
|
Hi folks, Thanks for the kind comments (and good to see you too Ryan). The 164 saga continues… all bodywork this time: Right sill panelThe new sill arrived on Monday 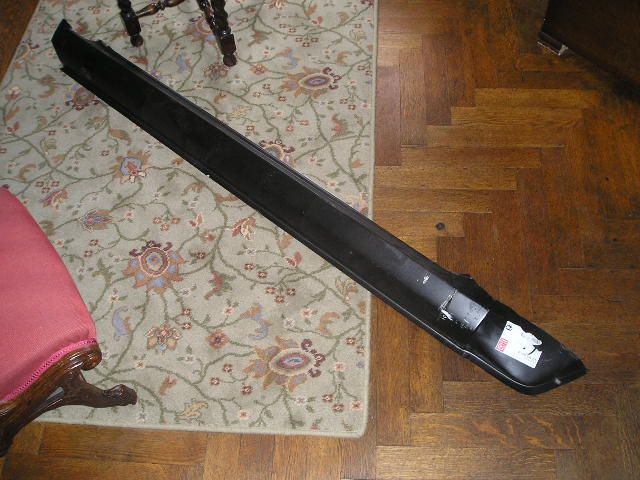 Cut the old one off 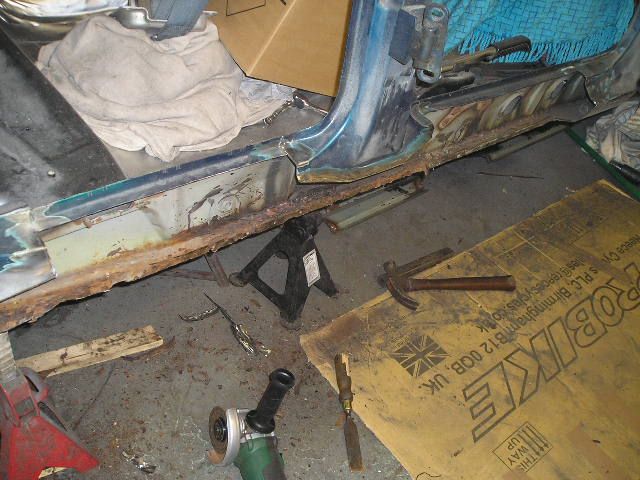 Chiselling off the old sill mounting flange, I had to remove this, rather than weld the new sill on top of it, because there was surface rust behind which I wanted to deal with  Cutting off a rust section of the inner sill; I made a repair section  Cleaned up  Two other small rusty sections cut out to be fixed with repair sections  Rust killer  Early test fit of the new sill, cut approximately to shape. I am retaining the first few inches of the old sill because: there is no rust here; this part is double-skinned with a reinforcement plate from the A-pillar; and the profile of the sill flares slightly near the join with the front wing – the replacement panel did not have this flare. 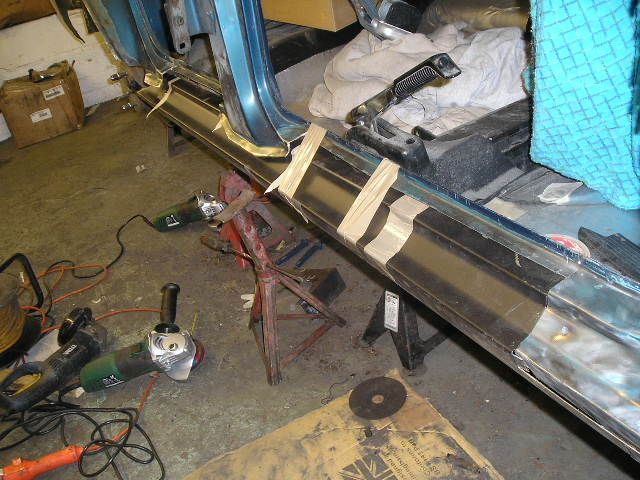  The right sill which I removed had been fitted badly. It was too high at the back, which meant the door shut lines were all wrong. I took many careful measurements from the left side of the car which, luckily has the OE sill (but even that does not fit perfectly!) Getting a better fit after adjusting the B-pillar flange (with a big hammer). There was a couple of hours of fitting, removal, adjustment, measuring, refitting, etc to get it spot on. 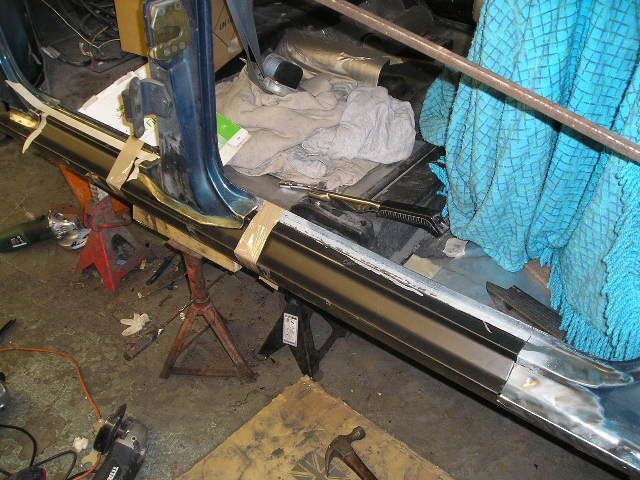 Removing the storage paint…  Priming inside the sill (weldable zinc primer near the edges)… 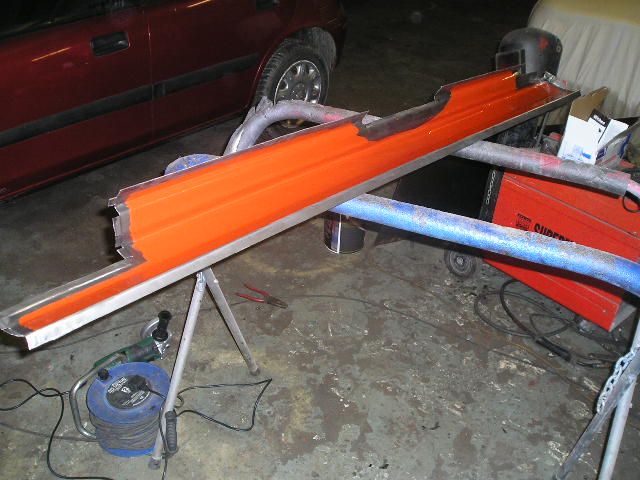 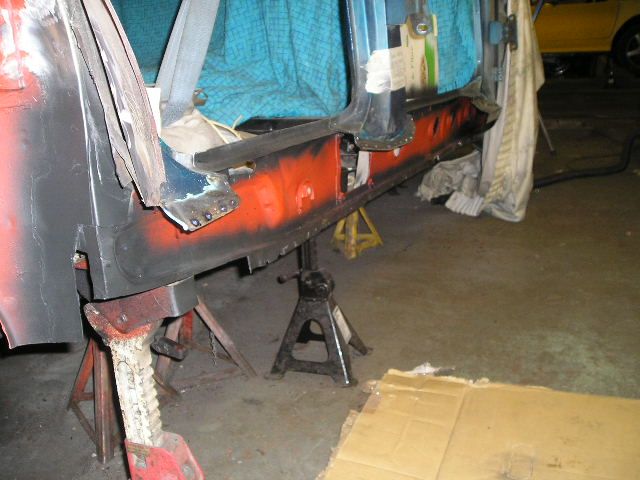 ... then chassis black 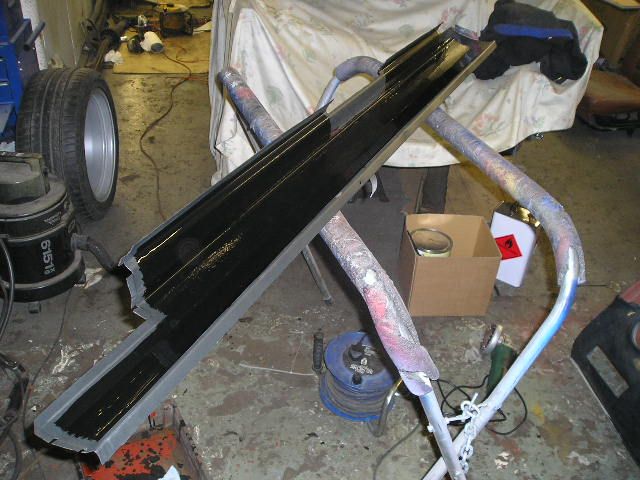 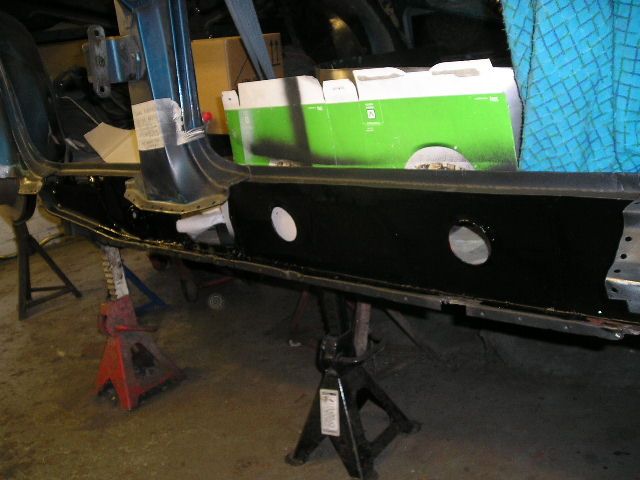 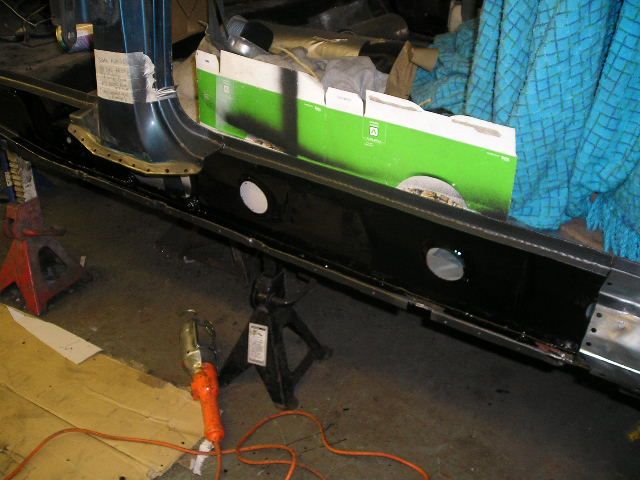 Drilled drain holes to avoid a water trap at the base of the B-pillar  The inner sill repair sections were welded in (no photo) then the new sill tacked in place  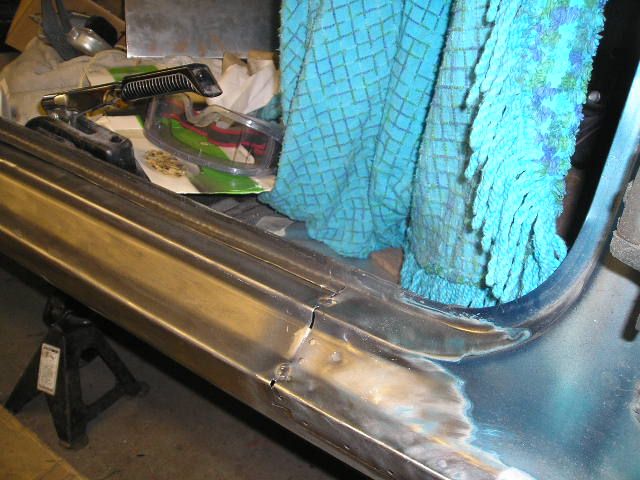 Refitted the rear door to check the shut lines. Spot on, I’m glad to say. 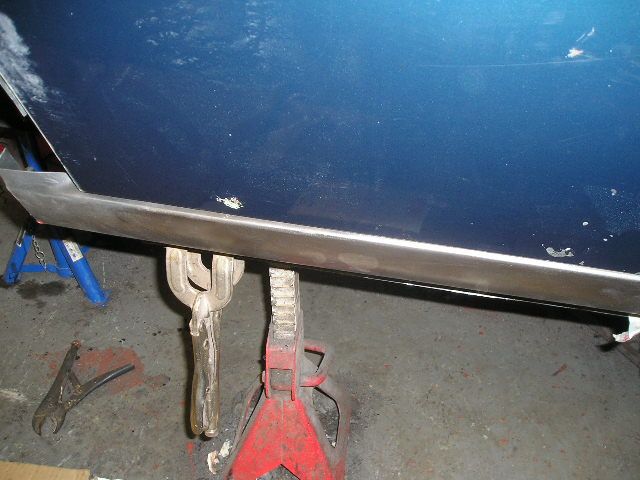 Right spare wheel well Right spare wheel wellCleaned off the storage paint  The initial test fit doesn’t look promising. This because the wing is deliberately spaced out at the lower edge, to enable my wheels to fit. I am using the wheel well to push out the wing, then we bent the inside edge of the well to meet up with the chassis rail and welded it in place.  Right rear wheelarch Right rear wheelarchFirstly, I cut the rim off the new panel (again, for wheel clearance) 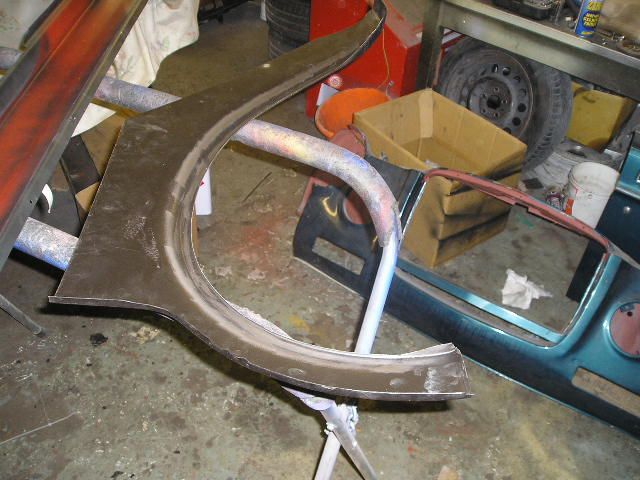 Then fitted the Panhard rod and centred the axle to allow test fitting of the wheels during welding 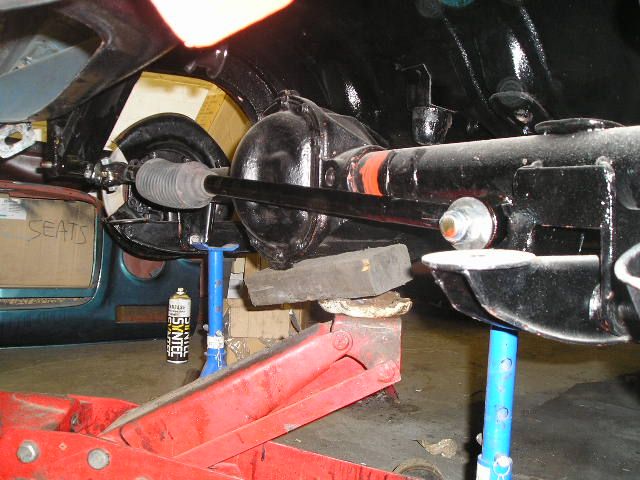 We test fitted with screws, once again making small adjustments and refits, to get it as good as possible. I’m very happy with the fit we eventually achieved  Tacked in place 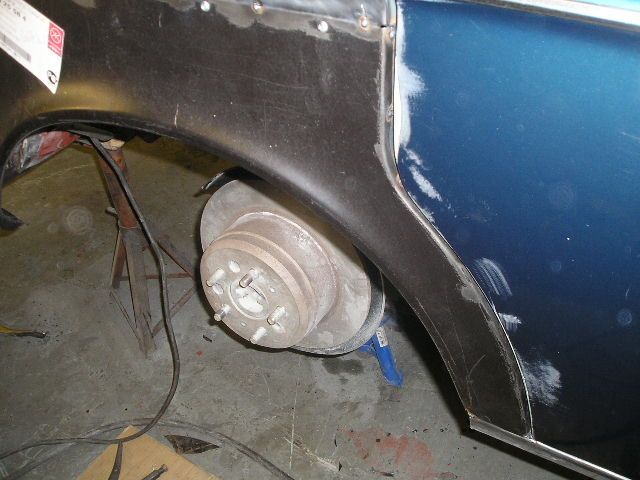  Welding in a plate at the corner and a closing/reinforcement panel joining the sill and inner and outer wheelarch (no photo yet)  All for today... the work continues tomorrow! Cheers John |
| |
|
|
|
|


 Other than that it looks ace so far


 ) Still miss it a bit though


