|
|
|
Nov 22, 2009 16:22:34 GMT
|
I love the custom sanding block - what a clever idea! I'll be stealing that I think! ;D Nice to see this progressing, I've nominated it for Most Anticipated Car 2010!  |
| |
|
|
|
|
johnrh
Part of things

Posts: 958
|
|
Nov 22, 2009 17:22:36 GMT
|
I love the custom sanding block - what a clever idea! I'll be stealing that I think! ;D Go ahead, it does work well Nice to see this progressing, I've nominated it for Most Anticipated Car 2010! Err, better make that 2011 I think! John |
| |
|
|
johnrh
Part of things
Posts: 958
|
|
Nov 24, 2009 20:40:18 GMT
|
And some more: The corners of the boot opening were swollen and seemed to have rust between the layers, so they were cut out 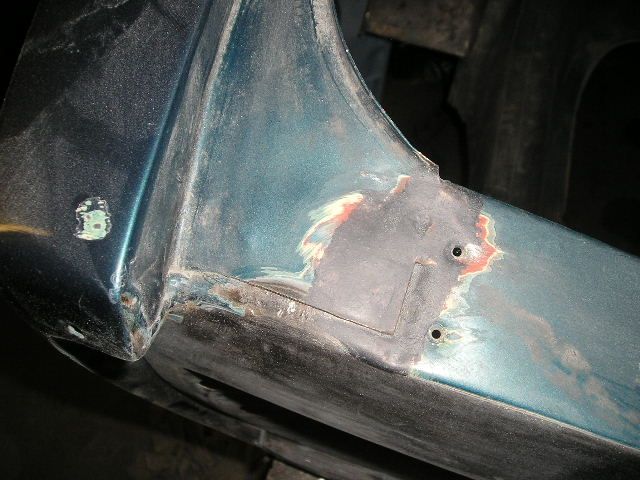 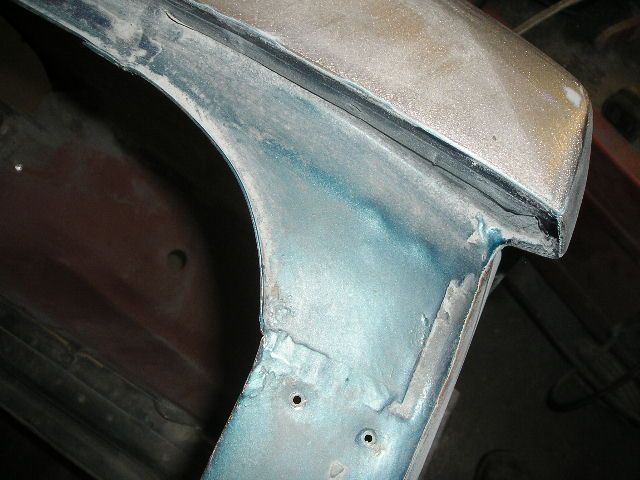  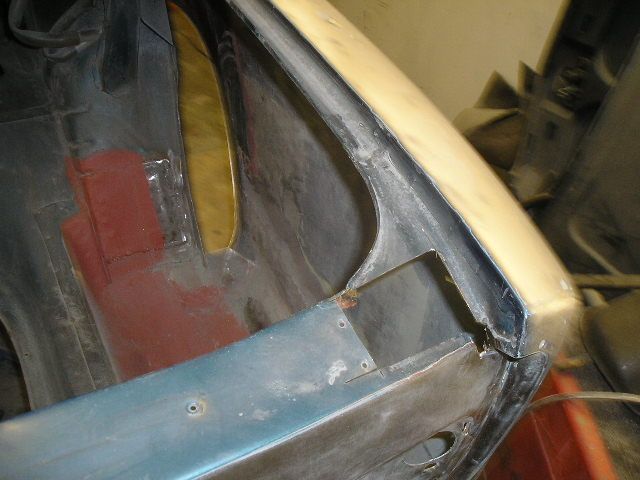 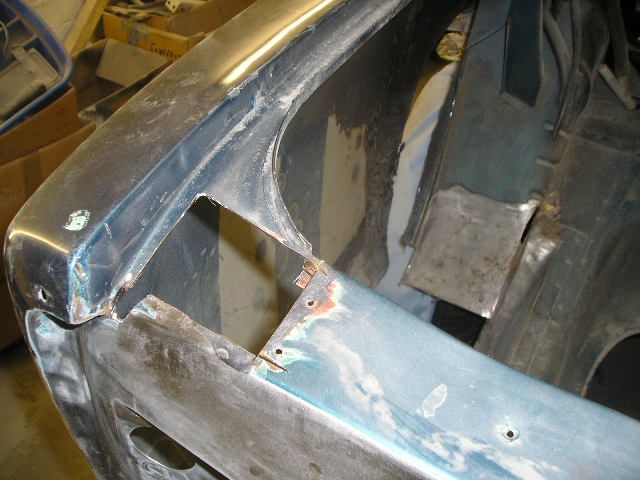 The parts removed. Definitely rusty, so I'm glad I did this. I'll make repair sections later 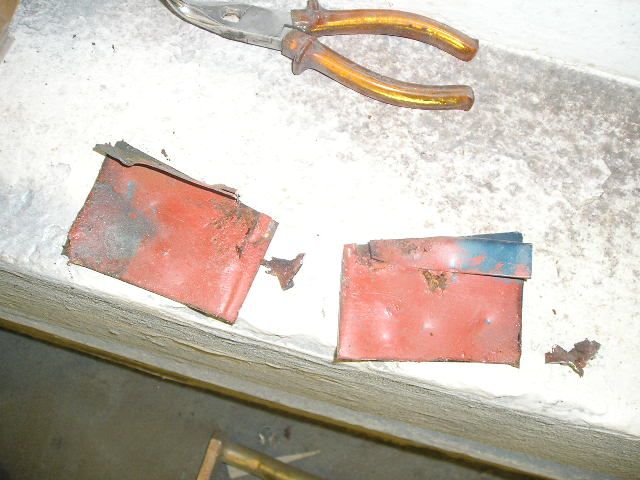 I cut out the rusty part of the rear panel, behind the light 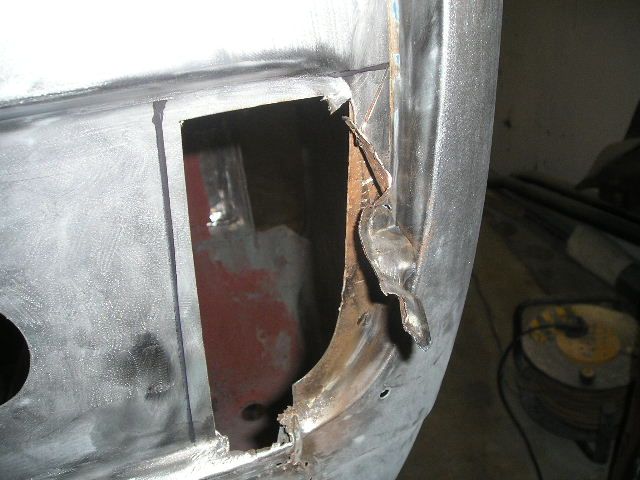 Making a repair section  There is some light rusting in the seam between wing and rear panel above the light. I have drilled out the welds and carefully prised it apart to deal with the rust, but I might need to replace the end part of the rear panel. The rust below the light will be fixed when I de-seam the rear panel. 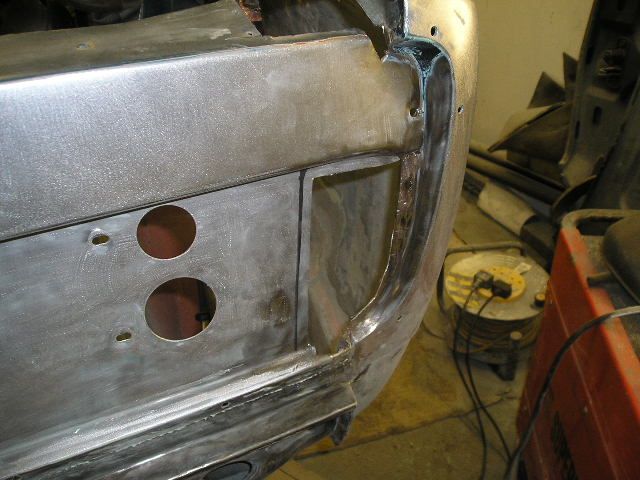  That's all for now! John |
| |
|
|
johnrh
Part of things
Posts: 958
|
|
Nov 29, 2009 13:51:43 GMT
|
Hi, A bit more progress on the rust repairs. It's only one small area of the car, but it's surprising how much work is needed and how long it takes! Upper rear cornerI decided to cut out the end section of the upper rear panel. Glad I did because there was rust inside the joint. 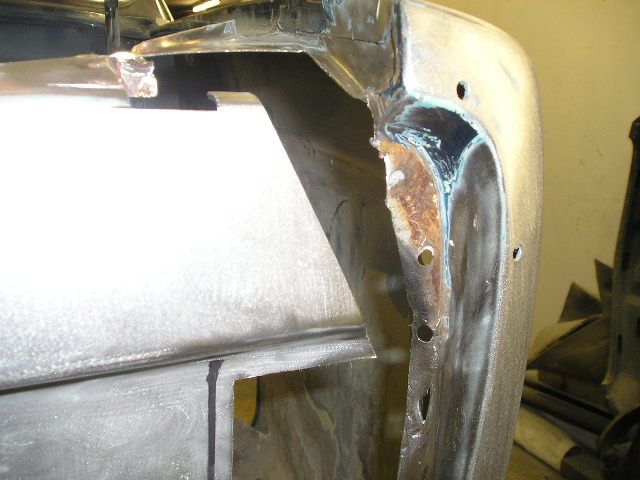 Here's that part I removed 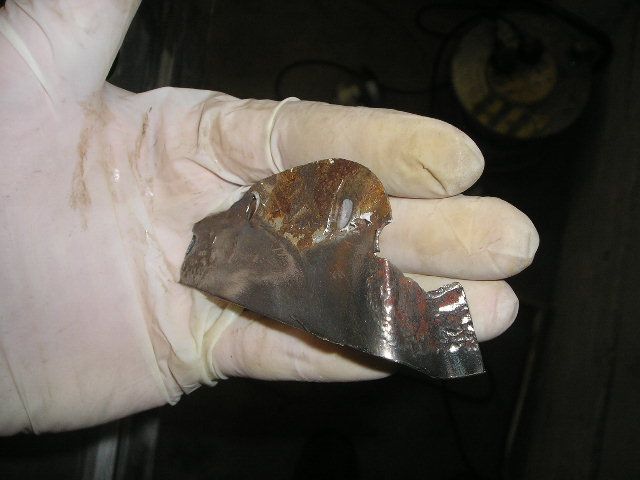 Made a repair section...  ...which fits like this. 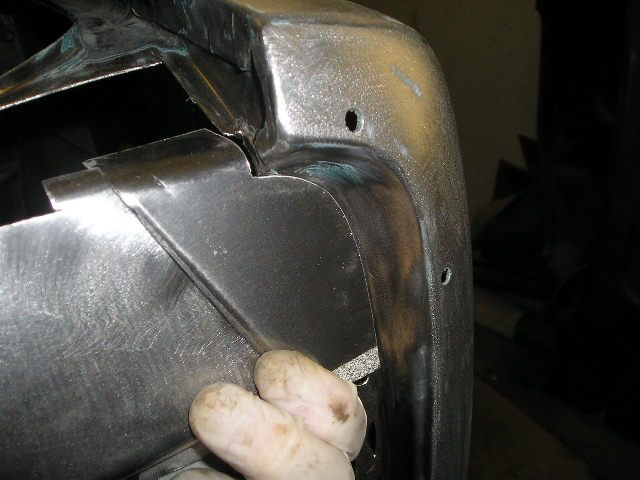 This is the repair piece for the top surface. 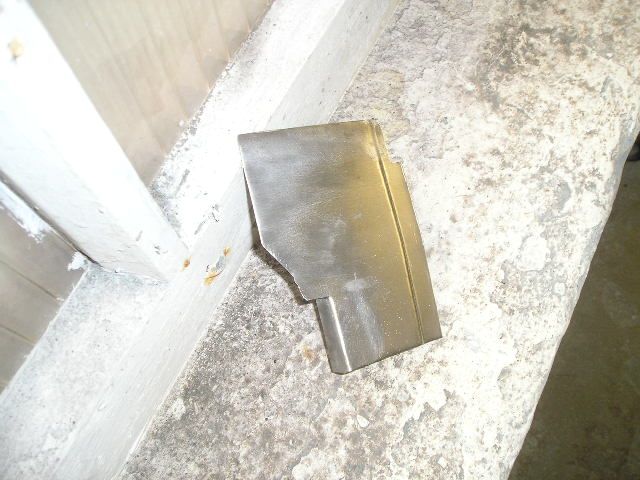 Here they are welded in. The outer end joint (the curved edge of the repair panel) is only welded from the back because this joint is visible when the car is finished and painted; it would be impossible to finish and disguise welds on the outer surface in this tight corner. Also, I cut down mounting flange from the rear wing, the surface that the rear panel joins onto. The flange was only rusty on the last few millimetres and I didn't need this part to attach my panels so I cut it off. 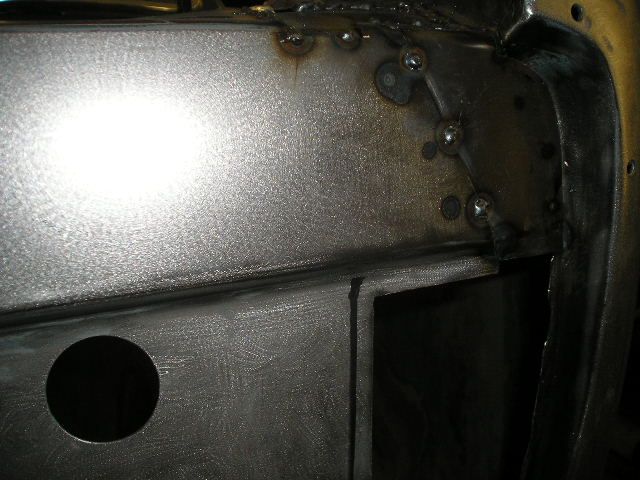 Bridging filler applied to the gaps 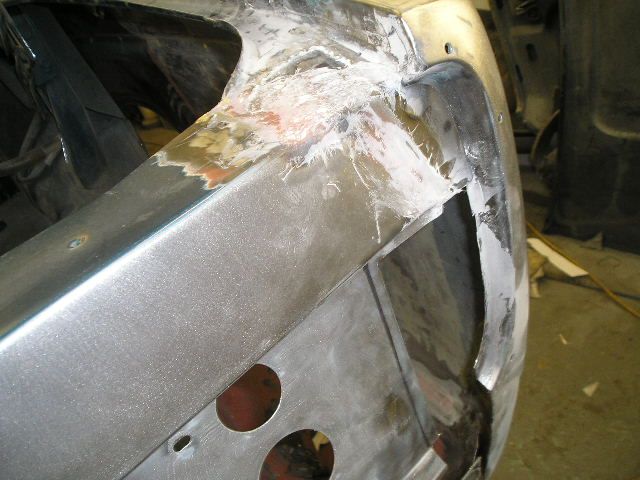 From inside the boot (looking back) 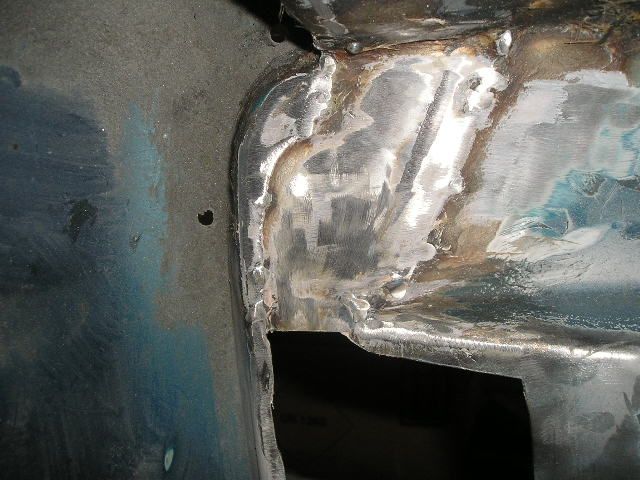 Looking up 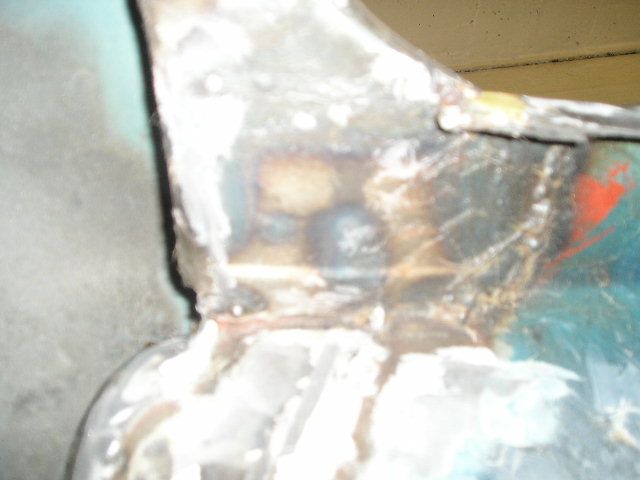 Surface filler slapped on... 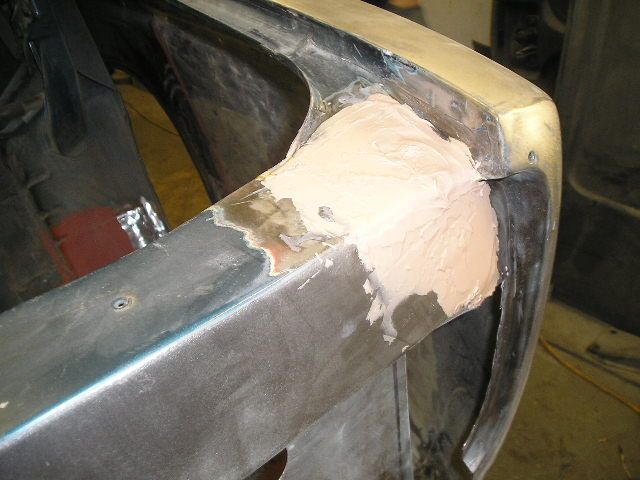 ... and sanded 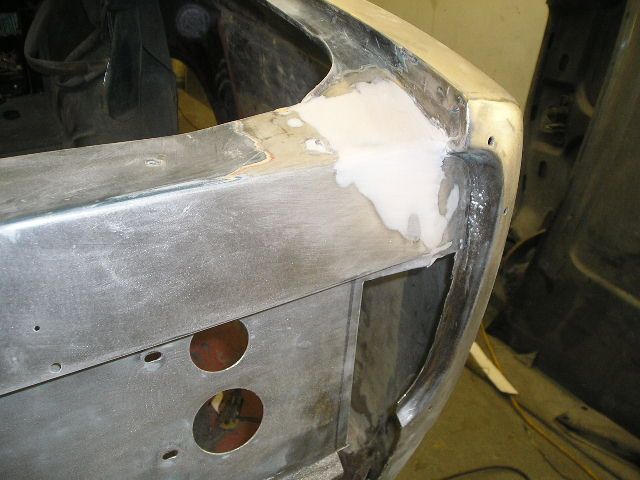 All the edges will have seam sealer applied when all the welding is done. Lower rear cornerAs part of my repairs, I am de-seaming the rear panel. I accept that it won't look original by in my opinion the seams here are ugly and they certainly provide far more opportunities for rust than a flat, smooth panel. My priority is to engineer out the rust traps so the car will last a long time before any more bodywork is needed. I have cut out the rear seams, and a previous repair 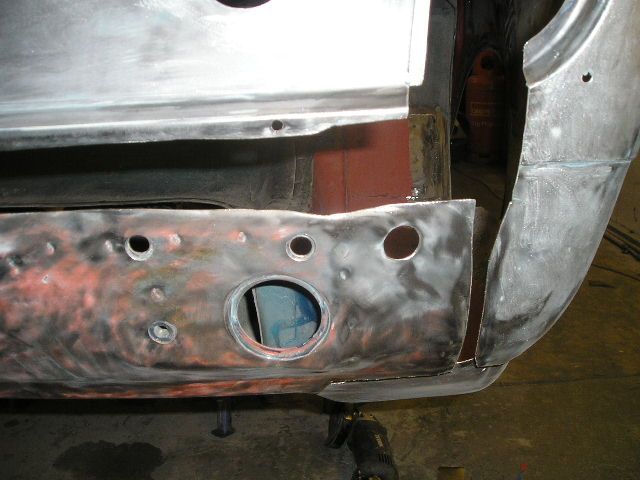 Here is the horizontal seam I removed 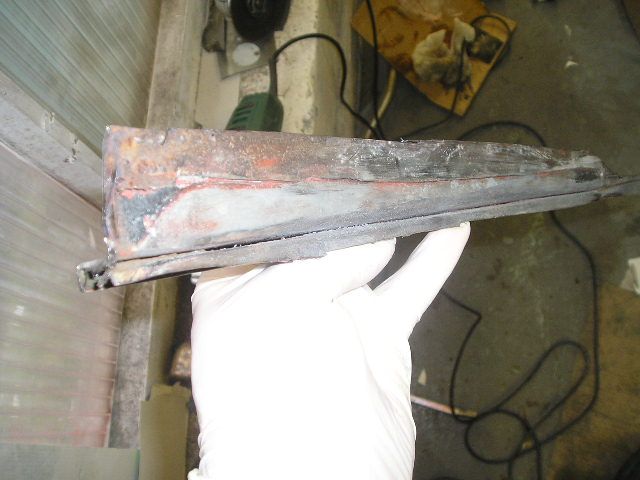 And the vertical seam. This one is not rusty, so the bad wobbles must be from when Volvo built the car. 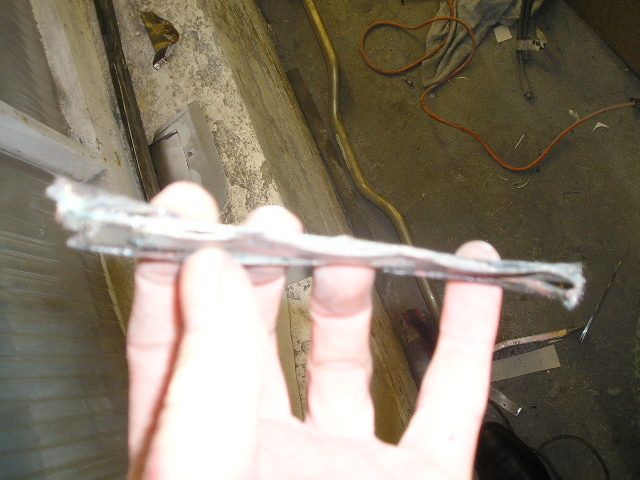 The view from inside 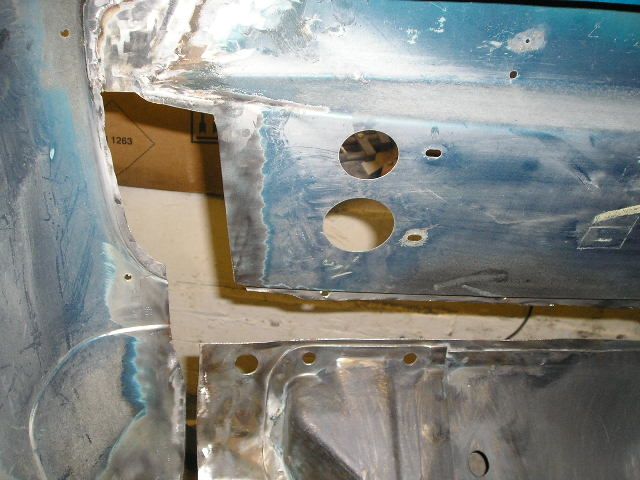 Here is the repair section to replace the seams. I will repair the ends first, then cut out and repair the central section of the seam 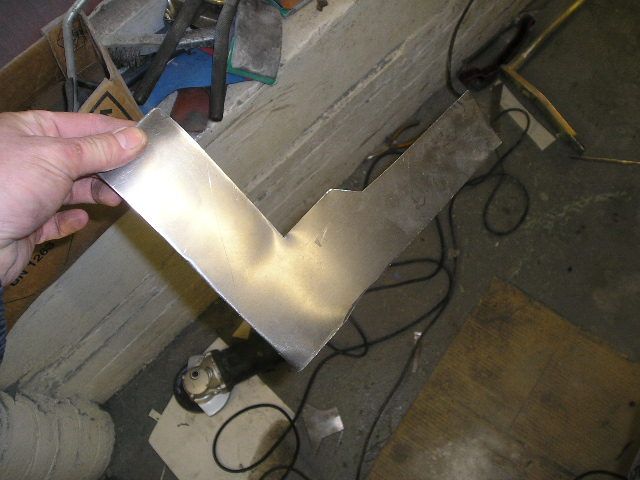 It will fit like this (still needs tweaking) 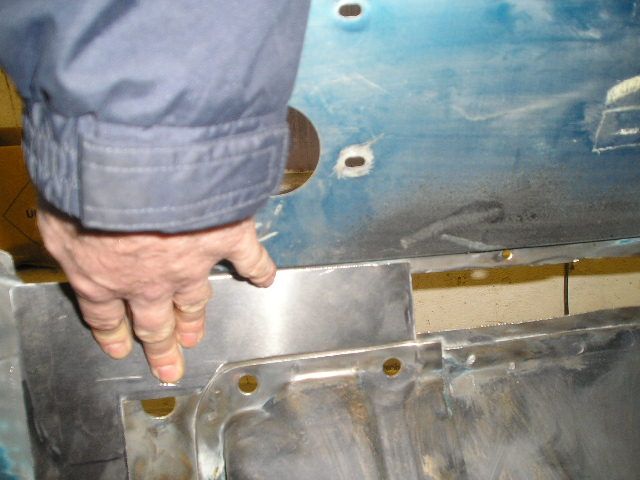 And this is the repair section for the lower edge of the rear panel 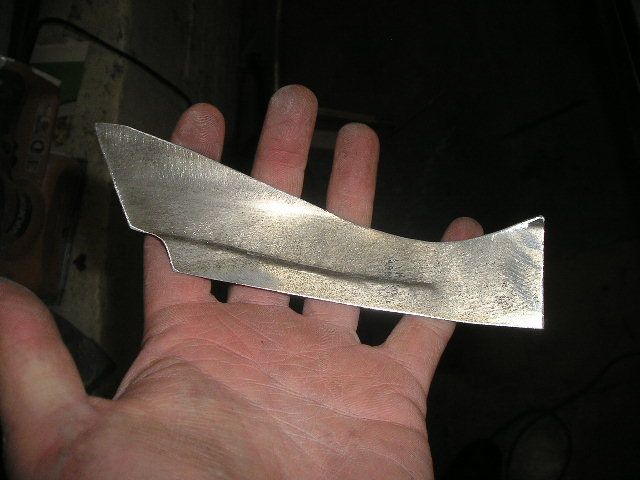 Test fitting the repair panel for the light mounting 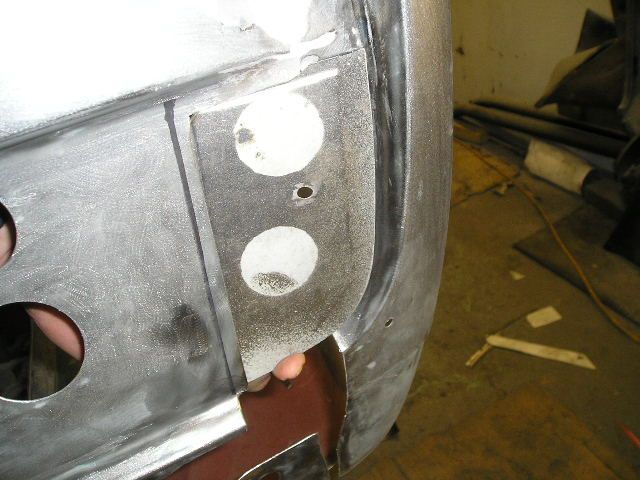 Hopefully, we'll get these parts welded in tomorrow evening Bye for now John |
| |
Last Edit: Nov 29, 2009 13:55:52 GMT by johnrh
|
|
johnrh
Part of things
Posts: 958
|
|
|
|
Hi, Moving forward with the metalwork: Right rear cornerDe-seam panel welded in 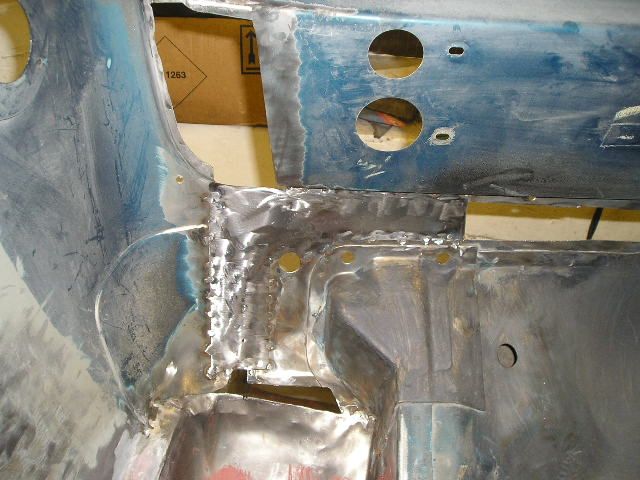 After this photo was taken, I shaped the top edge correctly... 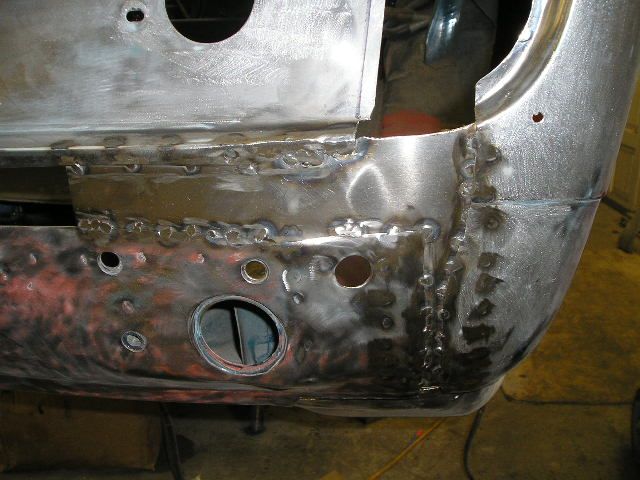 ... then the light panel repair section was welded in 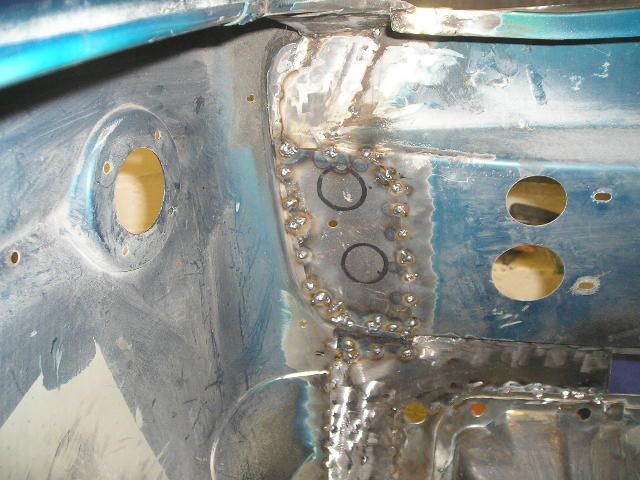 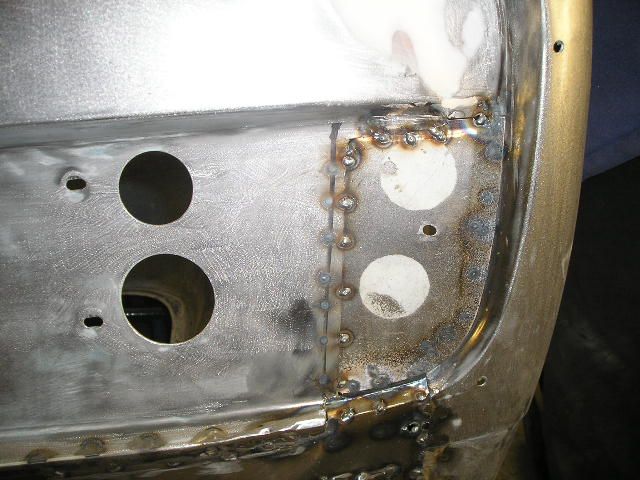 I made a small bridging piece, below the light panel 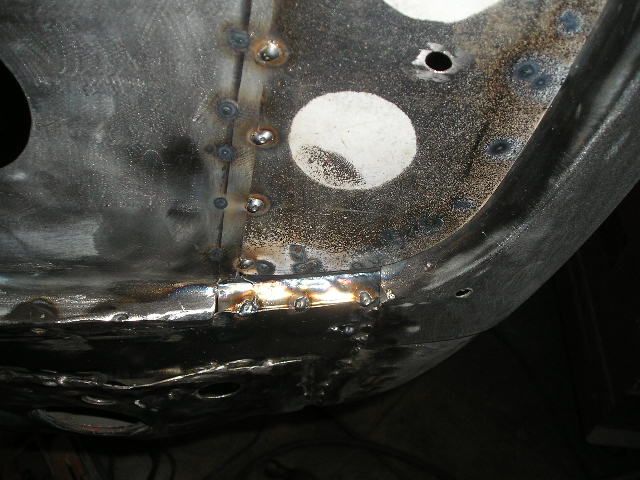 Lower edge repair panel welded in 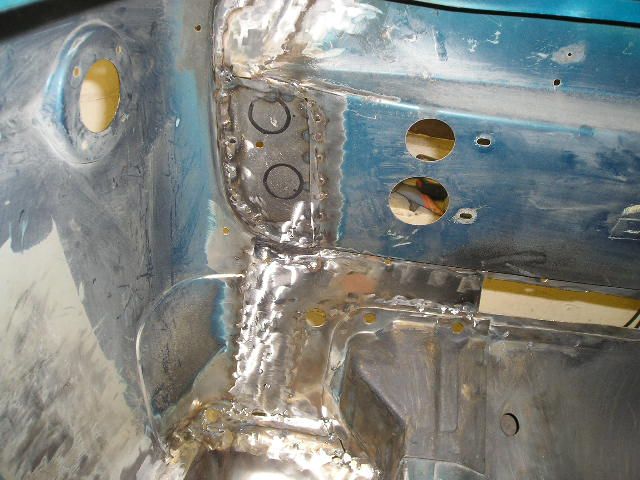 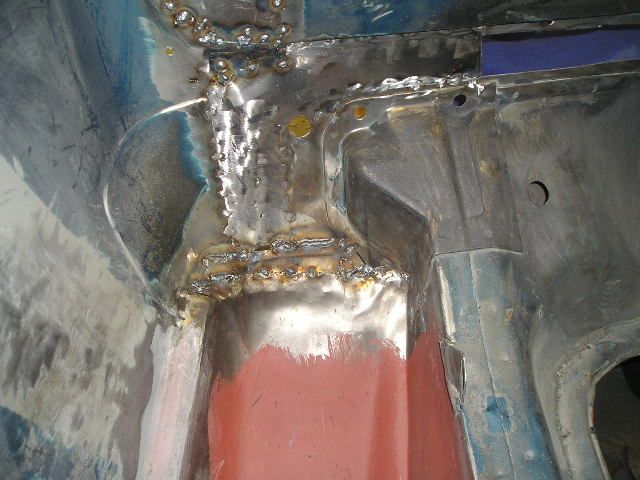 Welds cleaned off 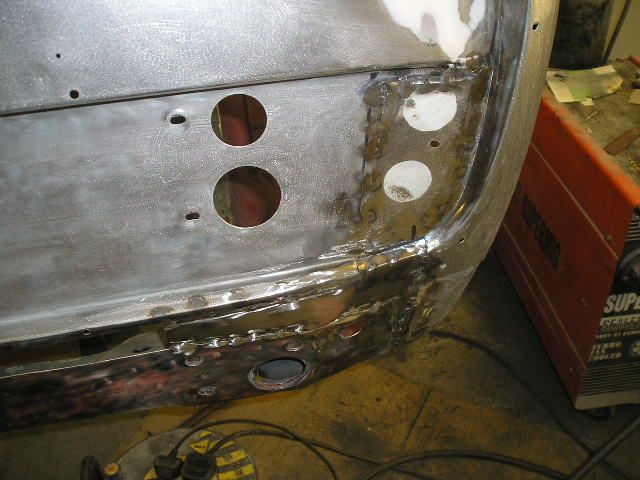  Bridging filler applied on all the joints, and sanded off 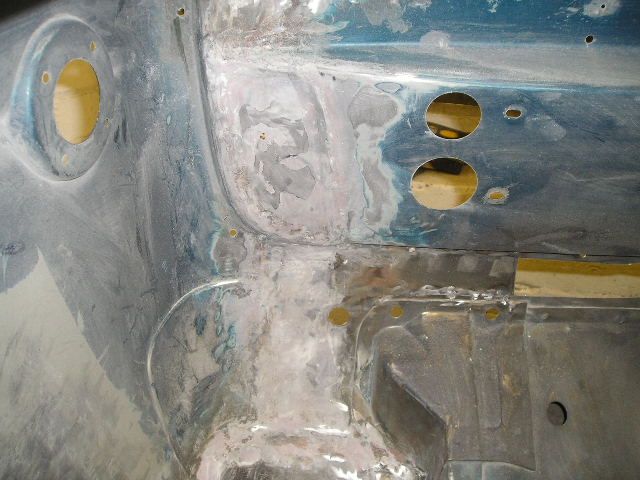 Some surface filler added 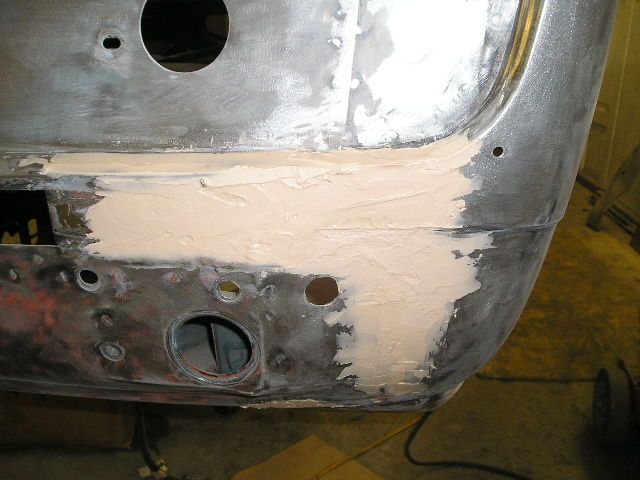 Left rear corner Left rear cornerRust cut out 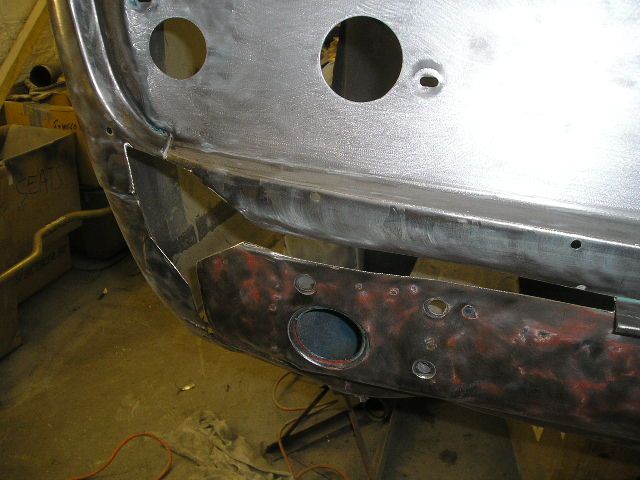 At the bottom of the seam is an older repair, very visible and ugly on the outside. I left it in place to hold the panels square whilst the repairs above were completed, now I'll cut it out and replace with something neater 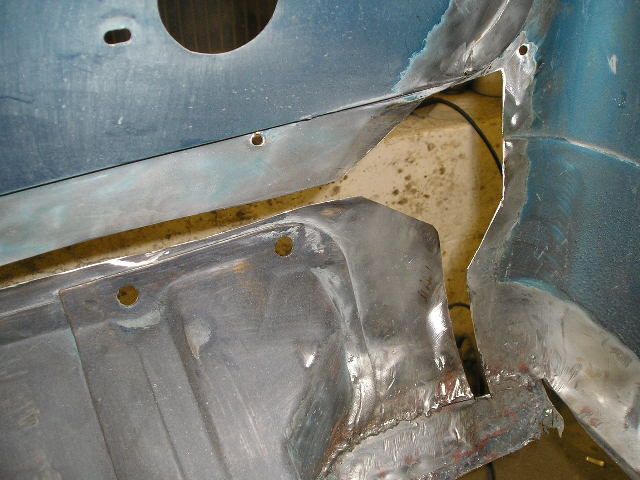 This is what came out just below the light panel... nasty! 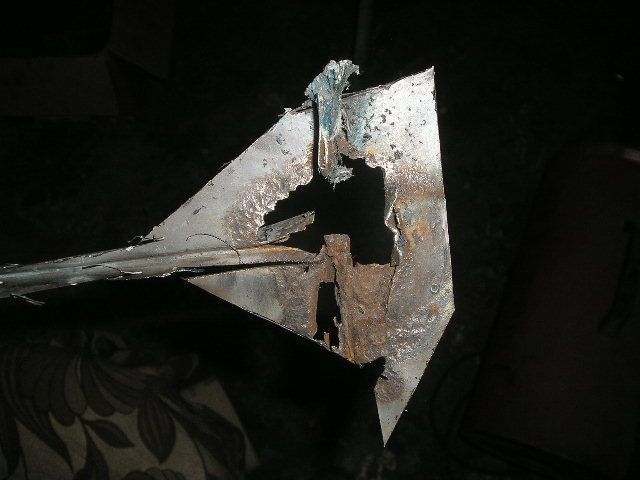 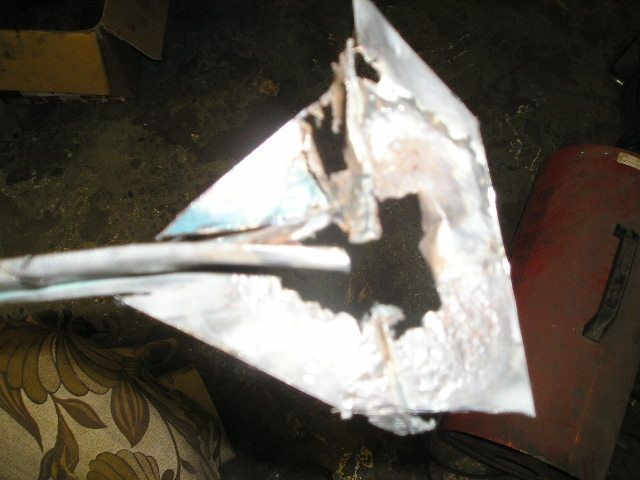 Repair piece welded in 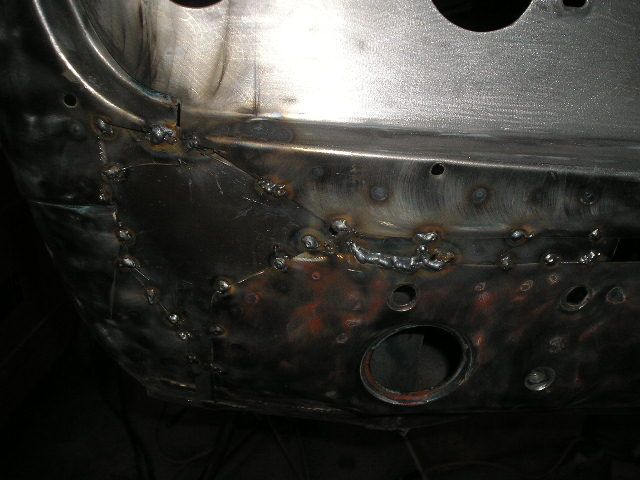 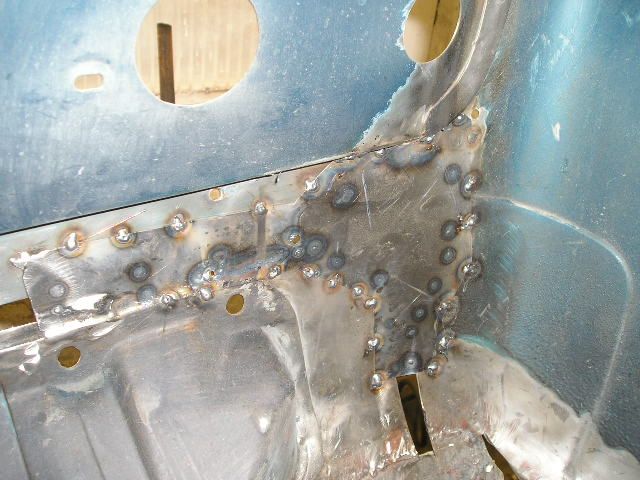 Top corner repair welded in 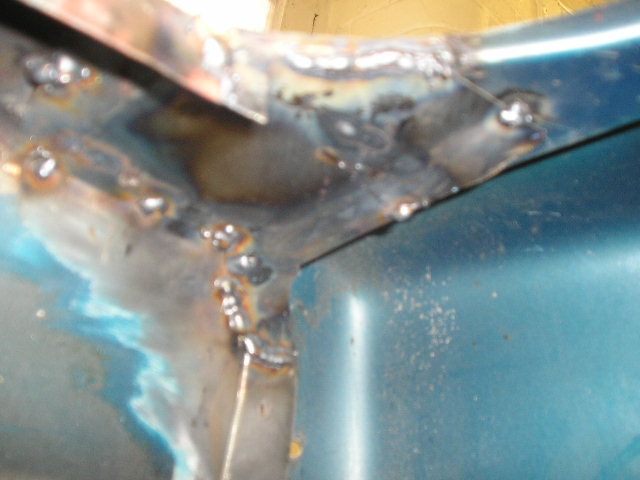 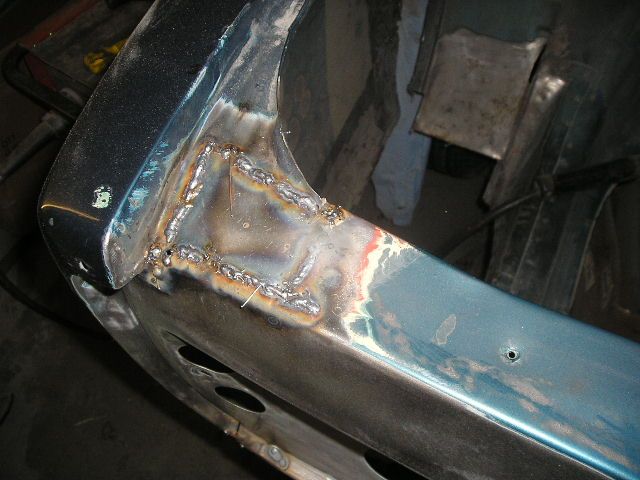 Rear panel Rear panelI cut out the horizontal seam and welded in a flat panel. The central strengthener was cut at the bottom, temporarily bent out of the way, then welded back onto the repair panel. (The "in progress" photos did not save) 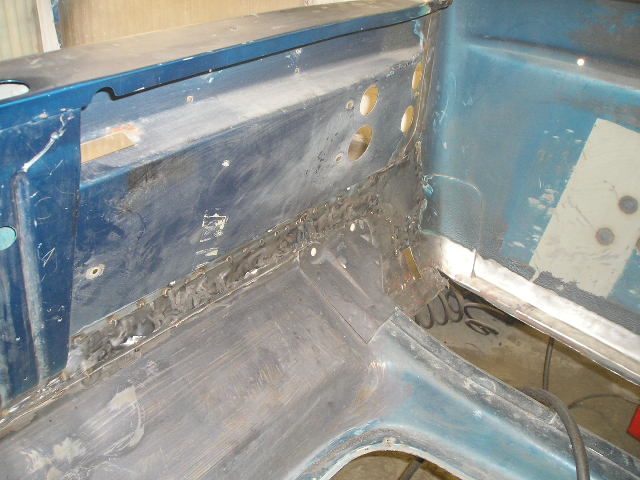  After some panel beating to line things up better, I am ready to put bridging filler in the joints 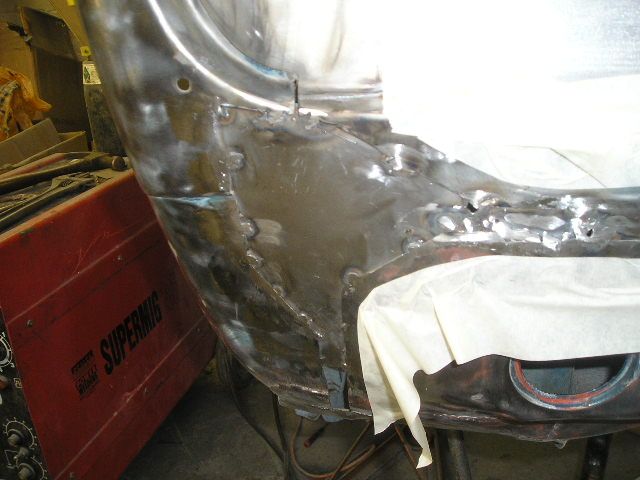 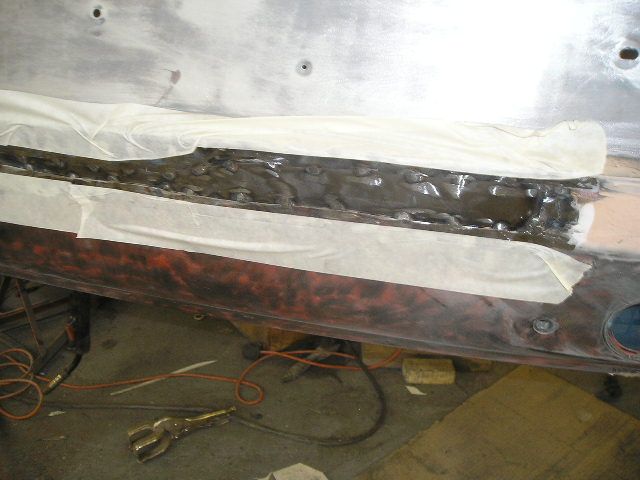 That's as far as I got today. I decided to spend the afternoon rustproofing the BMW before the winter weather takes hold. Bye for now John |
| |
|
|
Chris™
Part of things
This is clearly filler material.
Posts: 519
|
|
|
|
|
Great progress being made here! It's great to see that you're taking your time and making a proper job of everything, and even making it better where possible. Quick question - in the photos you show some of the panels tacked in place and then later on ground off, in between those stages are you basically going round the panel and adding small welds until you get a continuous weld?
Cheers,
Chris
|
| |
1989 Volvo 340
1986 Suzuki SJ413
2000 BMW 318ti
2006 Lexus IS250
|
|
|
|
|
|
|
|
I've just read this build from start to finish and can only say one thing - really impressive!! This is real quality workmanship - I can't wait to see how it turns out. Keep up the good work.
|
| |
Ian Campbell
'64 Morris Cooper S Traveller
'65 Morris Mini Pickup
'83 Austin City E
'84 Sinclair C5
'87 Austin "Seven S" 1000 (Retro Rally / Autotester)
'04 MG ZR
'07 Vauxhall Astra GTE
|
|
johnrh
Part of things
Posts: 958
|
|
|
|
Great progress being made here! It's great to see that you're taking your time and making a proper job of everything, and even making it better where possible. Quick question - in the photos you show some of the panels tacked in place and then later on ground off, in between those stages are you basically going round the panel and adding small welds until you get a continuous weld? Cheers, Chris Hi, thanks for the feedback. Most outer panels are fitted by small welds about 1cm apart; two lines for each joint - one at each edge of the overlap. I don't seam-weld (continuous) on large, thin panels because the heat warps the panel and the line of weld then holds the panel in the wrong shape. I reinforce the joints with the fibgreglass bridging filler. Strong, thick sections, like sill edges and chassis rails, are seam welded: they need the extra strength and they won't warp as easily. John |
| |
|
|
johnrh
Part of things
Posts: 958
|
|
|
|
I've just read this build from start to finish and can only say one thing - really impressive!! This is real quality workmanship - I can't wait to see how it turns out. Keep up the good work. Many thanks. Trying hard to do it as well as I can, even though it takes a long time! I have a clear mental picture of what I want the finished product to look like. Cheers John |
| |
|
|
asn
Part of things
Posts: 41
|
|
|
|
Big hat-tip to you Sir, this is really nice to see and inspiring as well as educating. Thank you  |
| |
1951 SAAB 92 a
1969 Triumph TR6
1972 Citroën D special
1977 Matra bagheera S
1978 Fiat 131 Mirafiori Speciale
1983 Suzuki TS180ER
1985 Citroën CX 25TRI Break
1986 Alfa Romeo GTV6
1996 Maserati open cup evo
1997 Citroën XM ct Berline
|
|
|
|
johnrh
Part of things
Posts: 958
|
|
|
|
Hi folks, A short update today. I wasn't really in the mood, so didn't stay at the garage long. Bridging filler in the seam and left corner, sanded 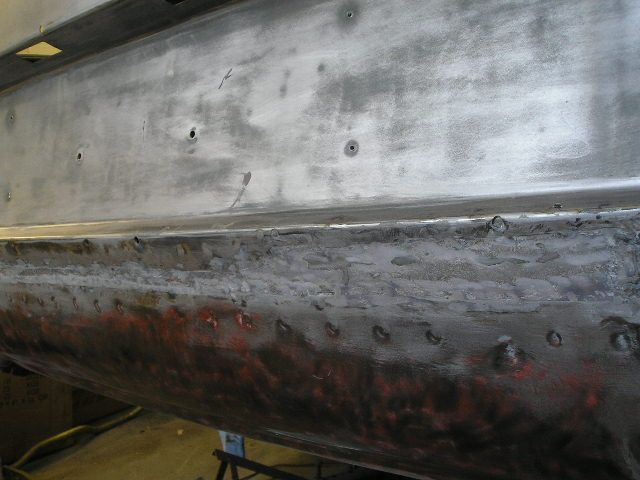 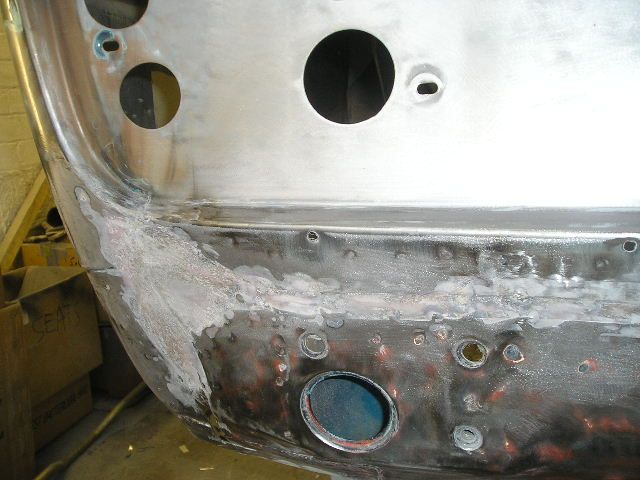 Some more filler... and I cut the holes for the light and trial fitted it 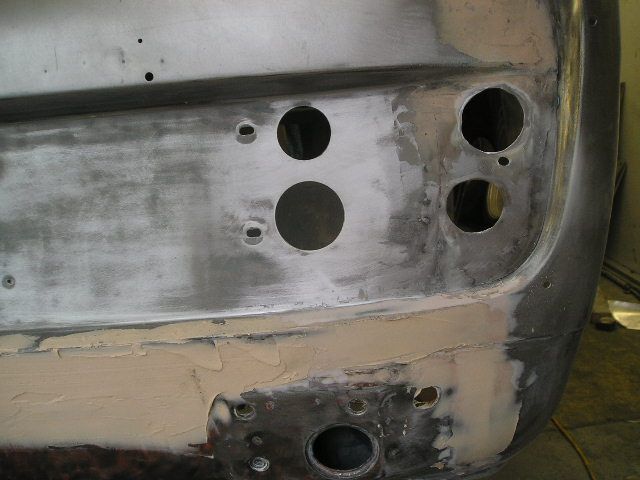 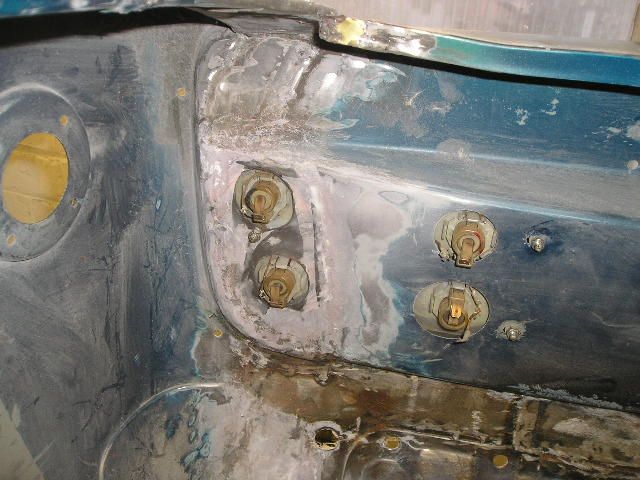 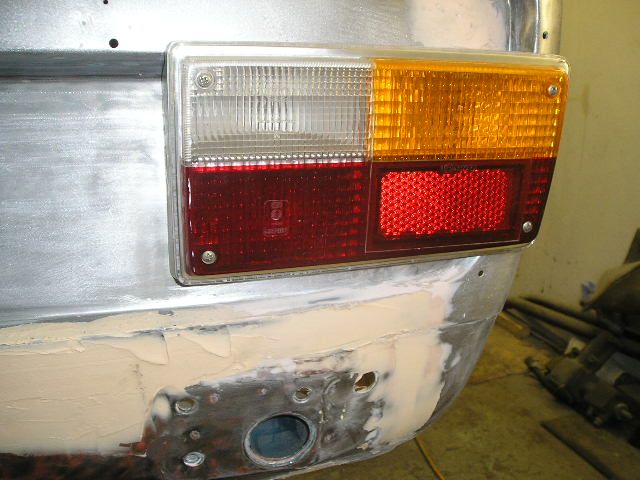 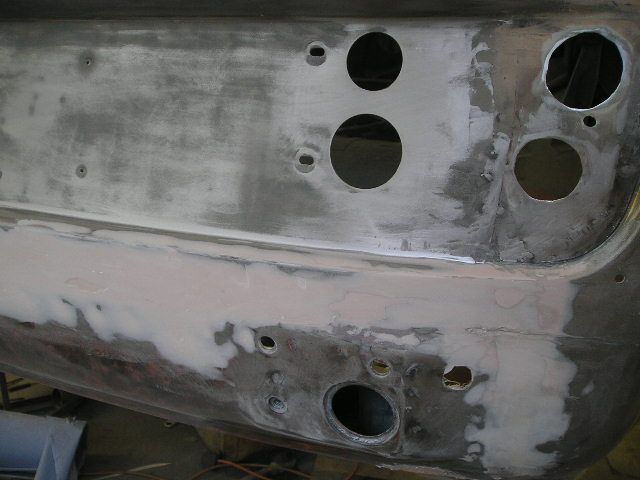 There might be a delay before the next update because my computer screen is faulty and I'll need to get it fixed soon. Have a good week, cheers John |
| |
|
|
johnrh
Part of things
Posts: 958
|
|
|
|
Hi, Did a bit more this evening Primed most of the inside of the boot 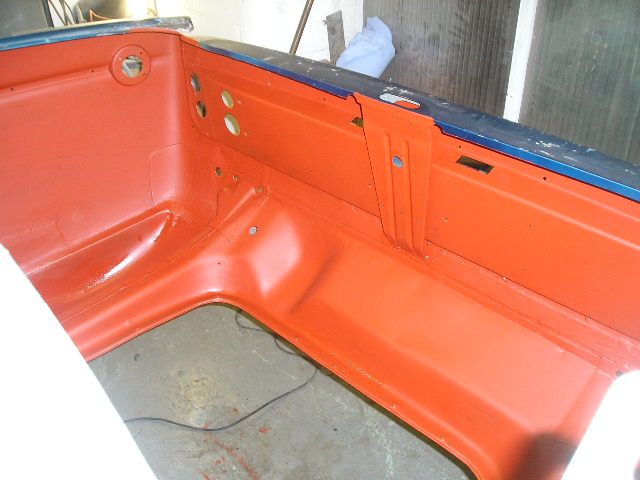  The left wing will be primed after the welding 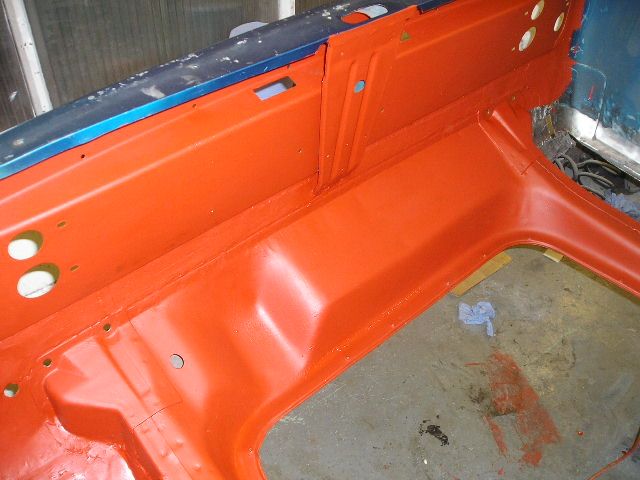 Some more filler outside 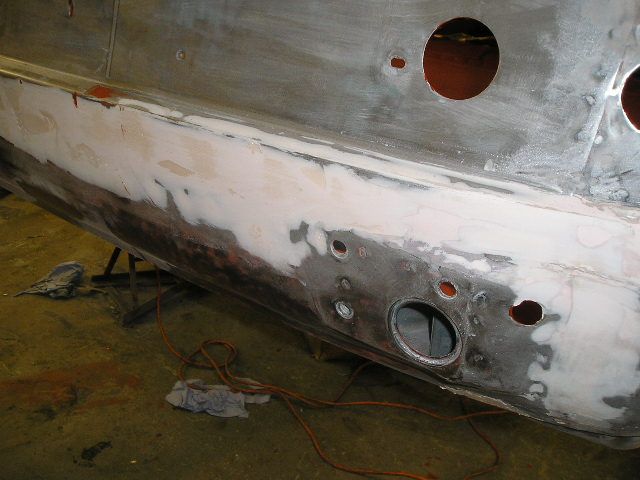 That's it, cheers John |
| |
|
|
johnrh
Part of things
Posts: 958
|
|
|
|
Forgot to mention, I got these on ebay... 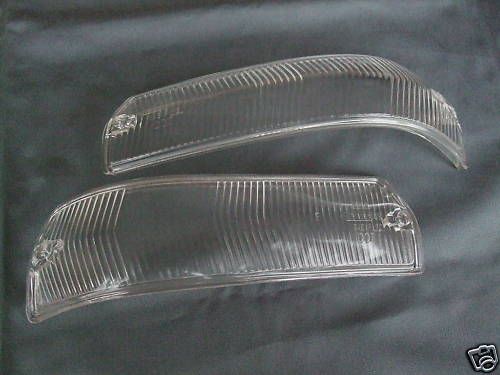 ...I like the "clean" look of the Italian market 164, with white lenses  John |
| |
|
|
Chris™
Part of things
This is clearly filler material.
Posts: 519
|
|
|
|
Thanks for clearing that one up John, car body repairs is not something I have really done yet but i'm hoping to learn soon enough. Everyone has a different approach to it too, so it's really handy to get the views of quite a few different people  Some more excellent work going on - I admire the amount of hours you put in! It's going to be worth it in the end, you'll be the the proud owner of a beautiful car! |
| |
1989 Volvo 340
1986 Suzuki SJ413
2000 BMW 318ti
2006 Lexus IS250
|
|
johnrh
Part of things
Posts: 958
|
|
Dec 12, 2009 21:59:01 GMT
|
Hi, Time for an update... Rear panelSome more filler. The shape is getting there now 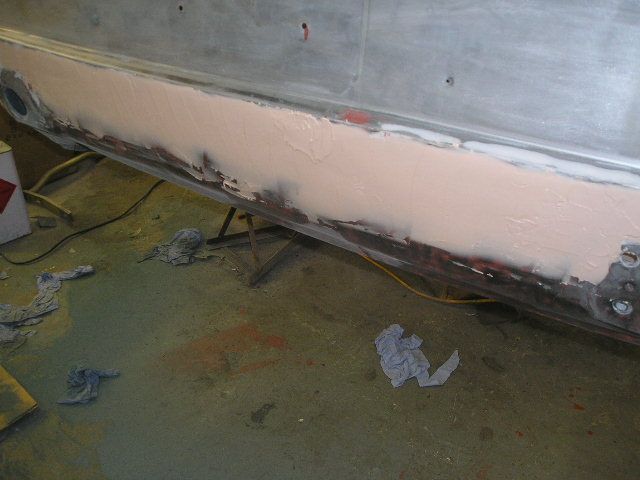  Left rear wing Left rear wingRemoving paint 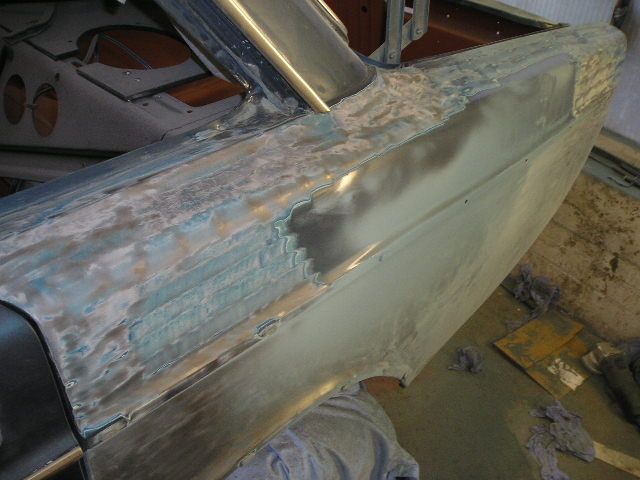 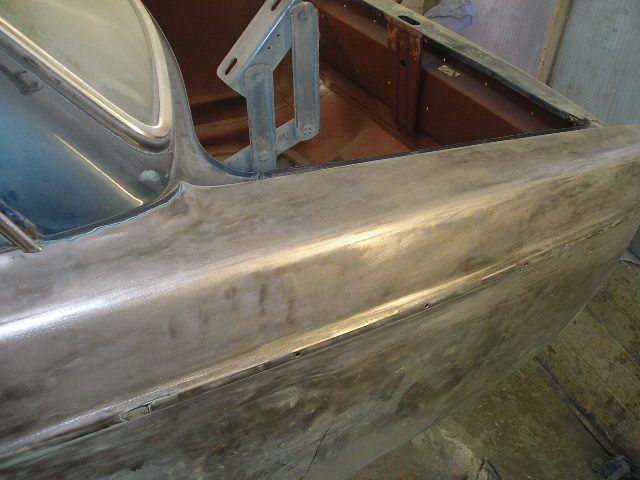 Cut off the wheelarch 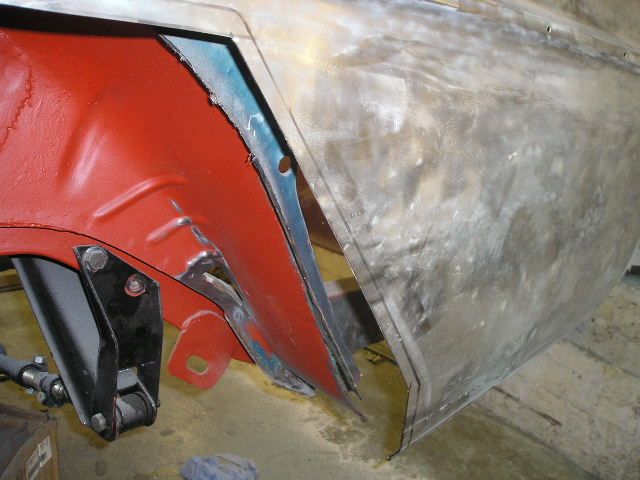 Here's the old one 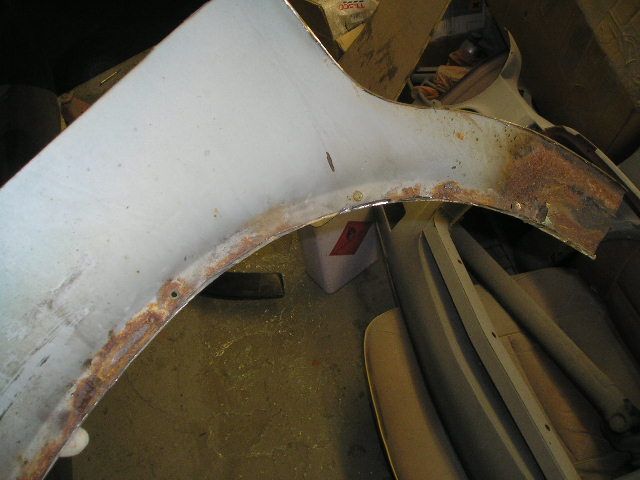 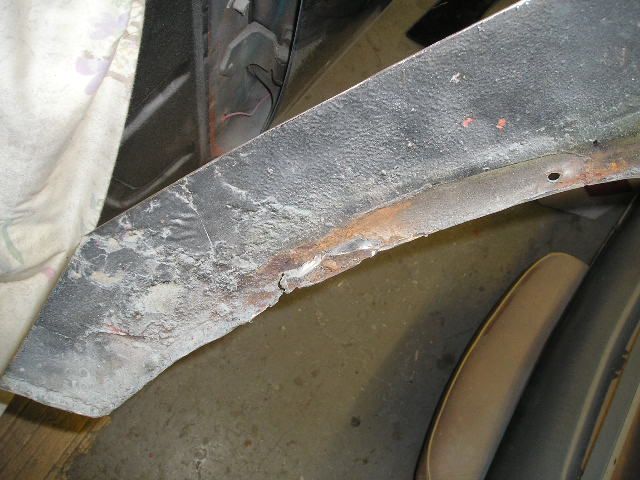 Cutting out the remaining parts of the inner arch and the end of the sill, both of which have some rust 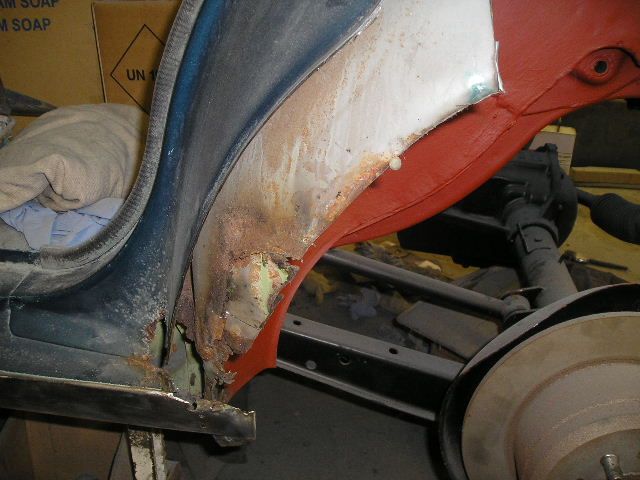 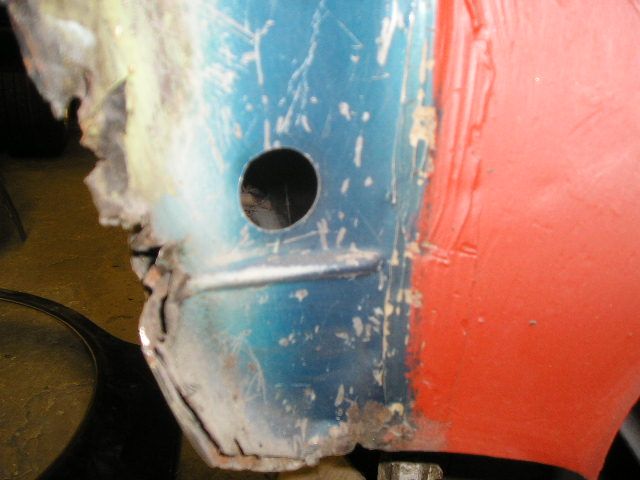 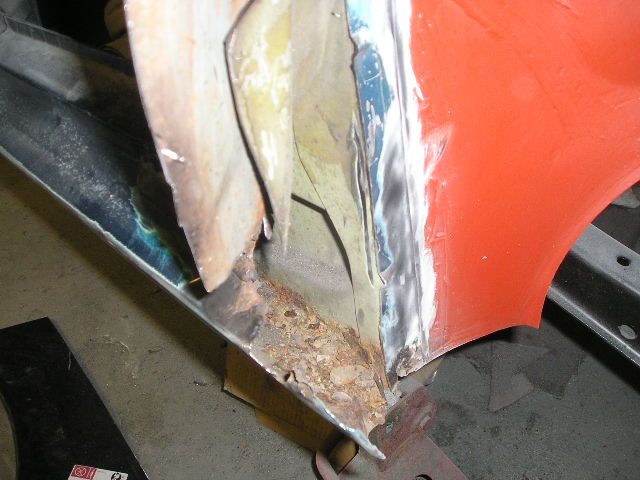 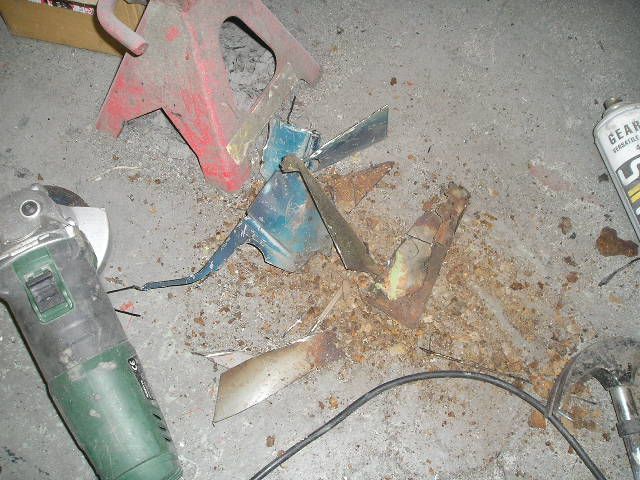 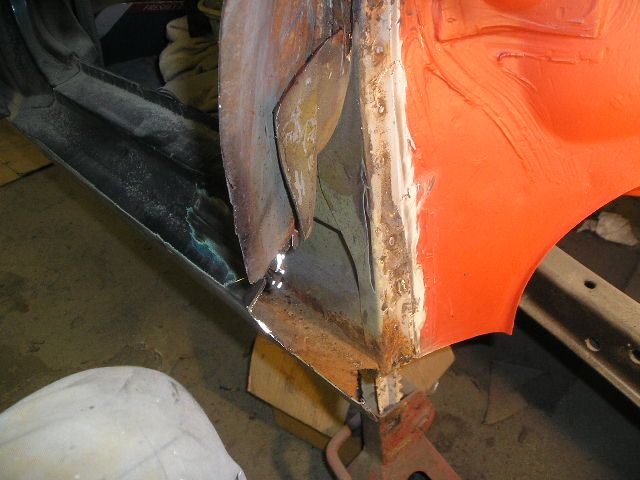 As on the other side, there's rust under the C-pillar joint. I am peeling it back to deal with the rust. I have not decided whether to bend the metal back down and re-weld it, or make a repair panel. 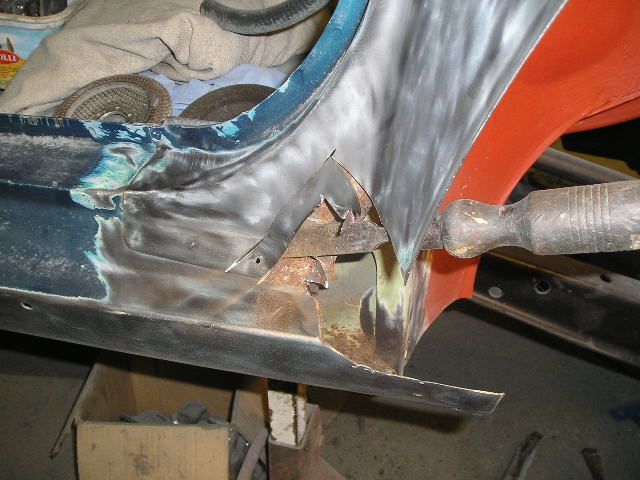 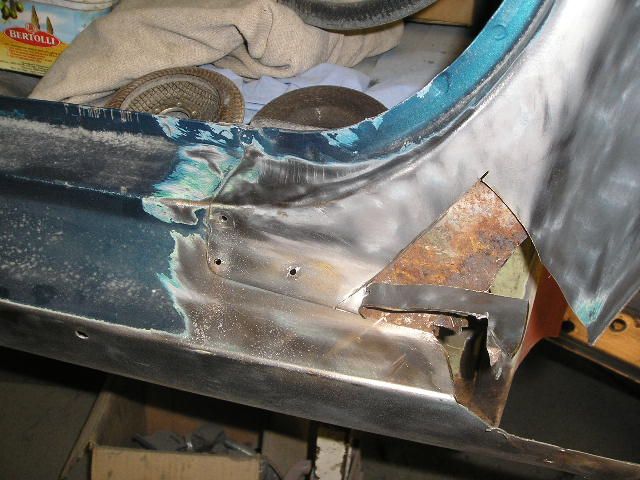 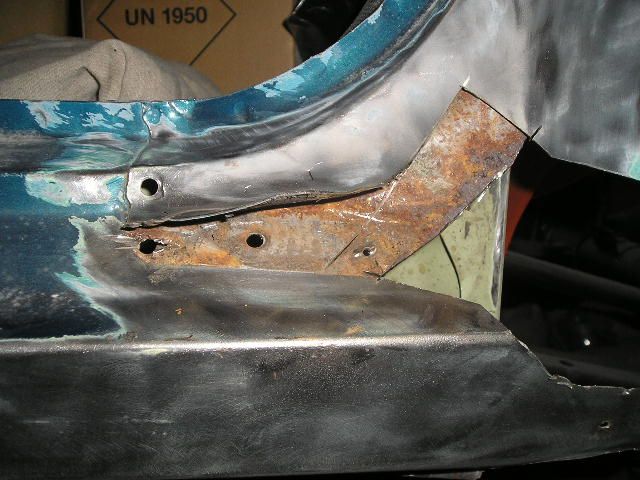 Rust killing. But after I did this, I decided to cut more of the end of the sill off and make a repair section. 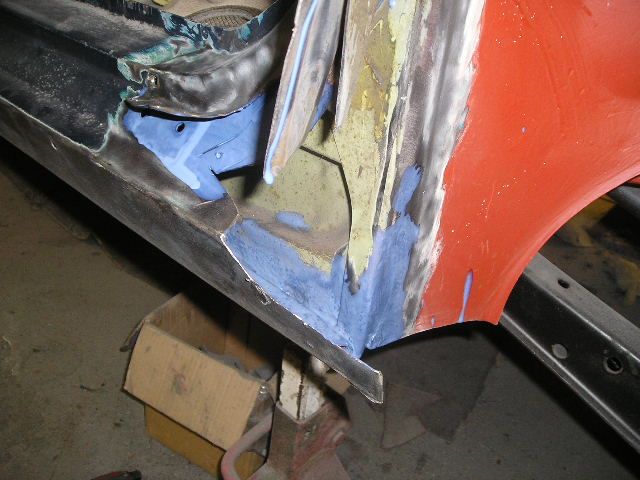 Making the sill section   A curved piece to add strength and give the radiused lip needed at the end of the sill  Sill repair with end piece tacked on... it will need a little filler of course  Cut the lip off the new wheelarch 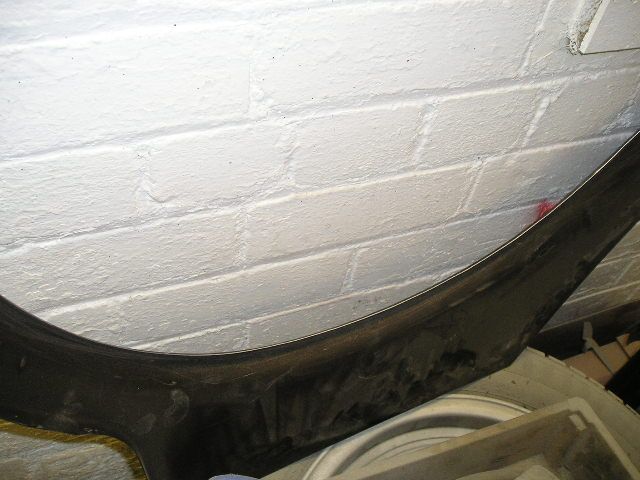 Cut the end of the sill off  Test fit of the sill repair and wheelarch. Volvo's original sill did not fit right near the back. With the door correctly adjusted, the sill edge sloped inwards by a few mm at the rear i.e. it wasn't parallel with the door all the way along. That's why I am fitting the repair piece on the outside of the original sill, to get the line right. 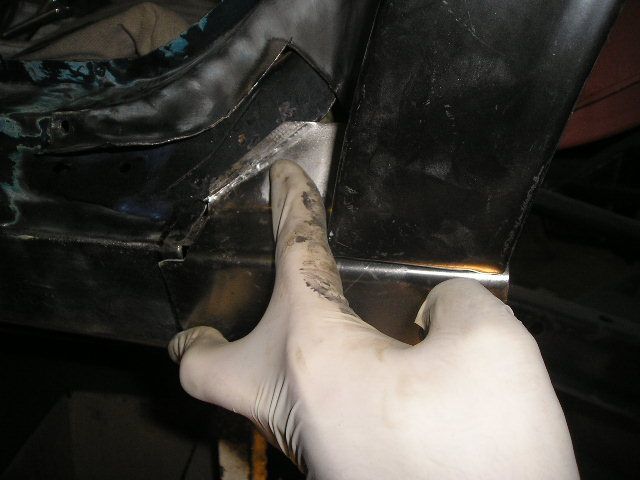 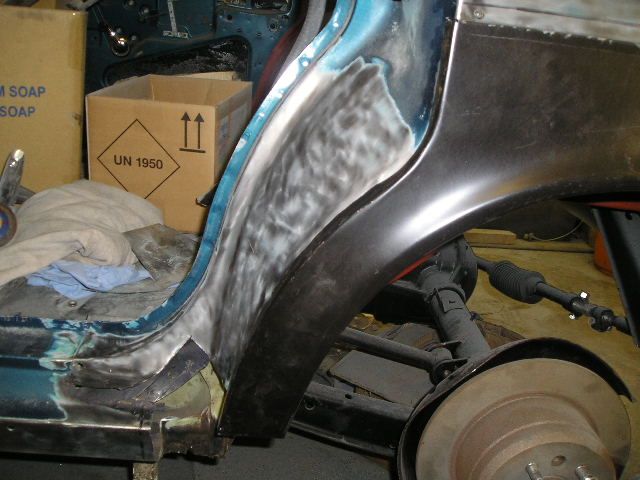 The upper rear part of sill repair will be trimmed down to meet the new inner wheelarch section 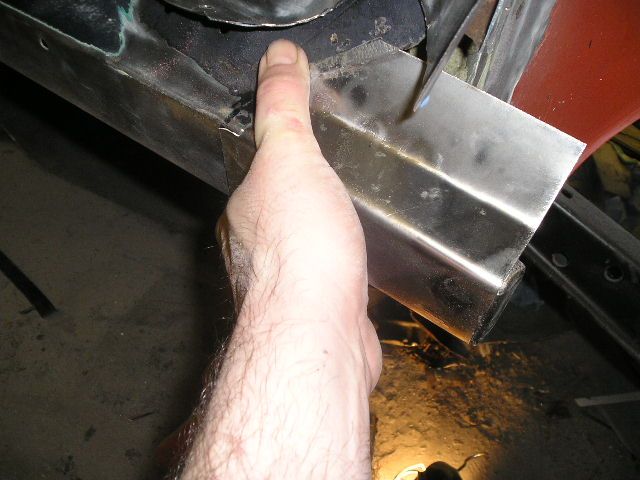 Cleaning underseal and stonechip off the inner wing 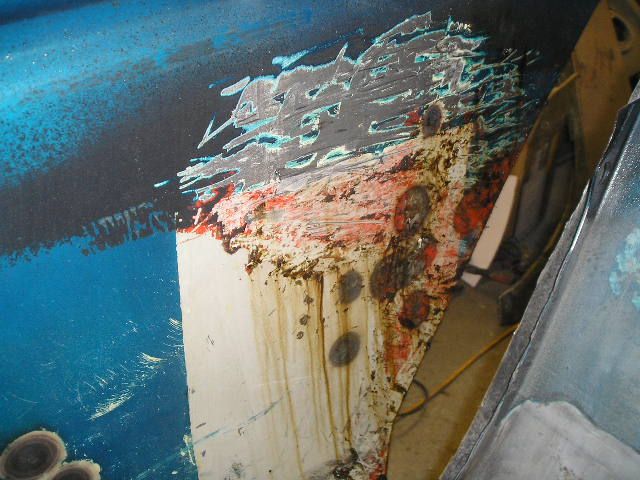 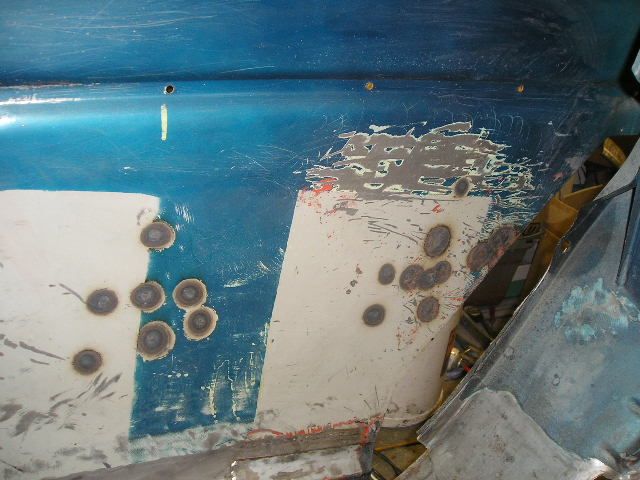 Cut some pitted metal off the corner of the inner sill 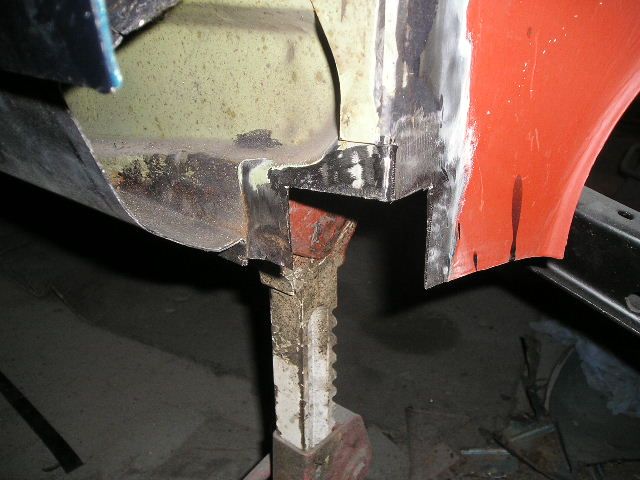 Made a repair section, trial fitting here 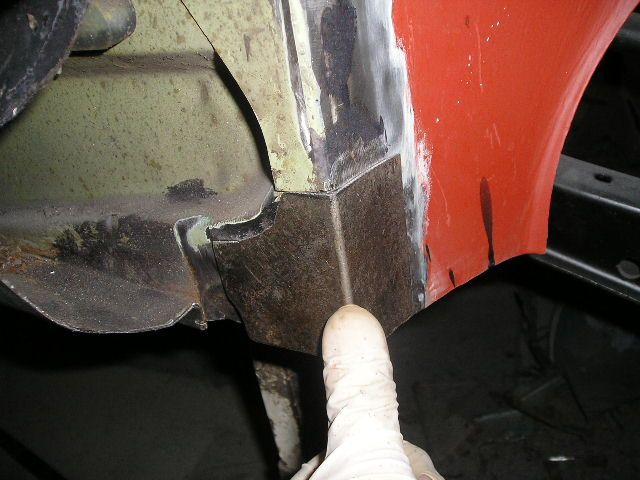 Rust killer on some light surface rust the inside of the wing panel, above the wheelarch 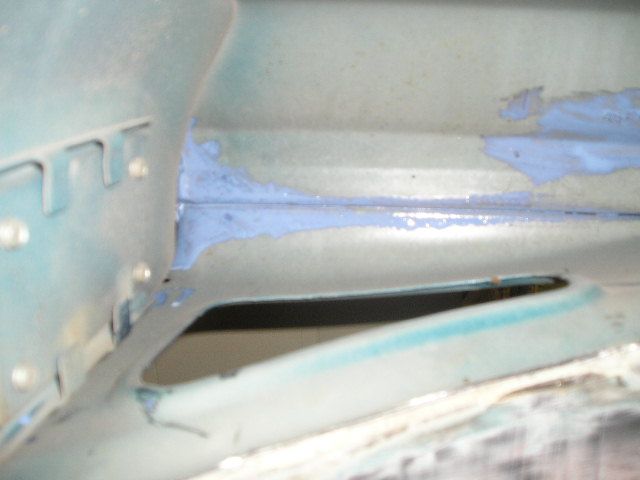 That's all for now Cheers John |
| |
|
|
johnrh
Part of things
Posts: 958
|
|
Dec 14, 2009 21:38:32 GMT
|
Hi, A quick update: Cut off a pitted section of the outer sill lower flange 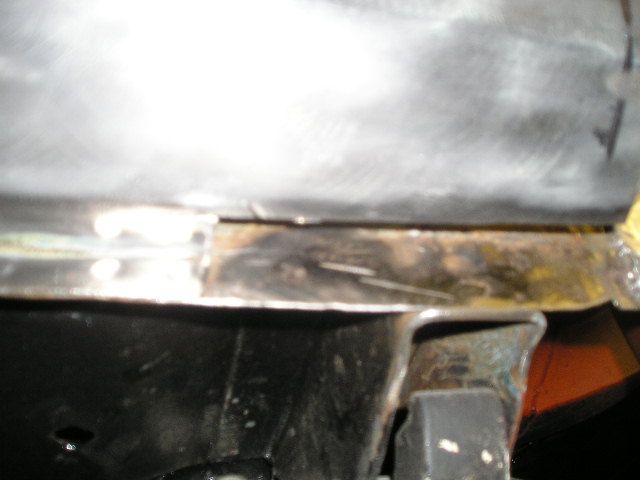 Welded in the inner sill corner piece 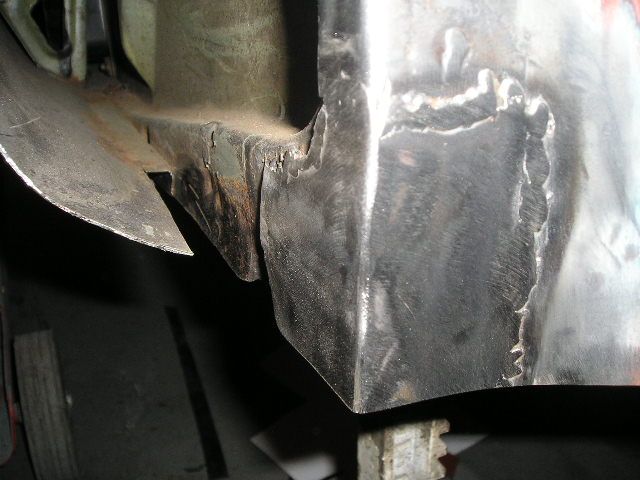 Made a lower repair section... 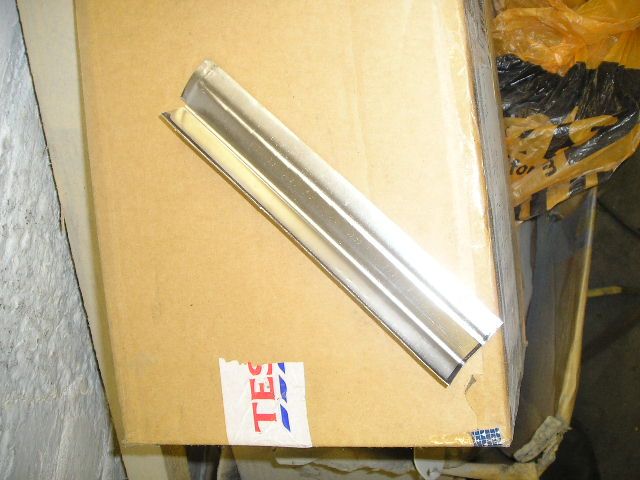 .... to fit like this 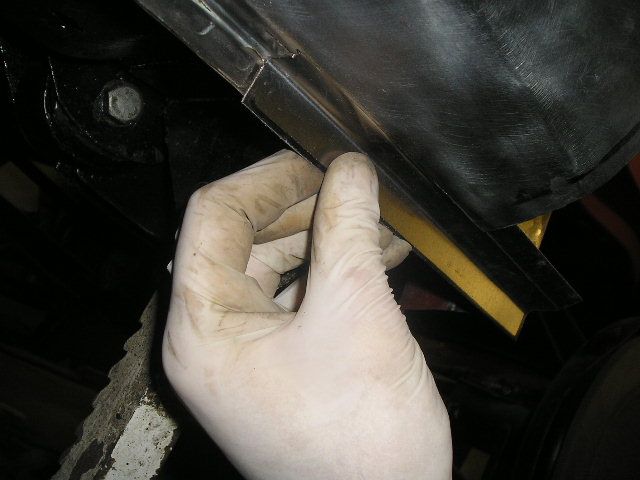 Rust killer on surface rust inside the sill 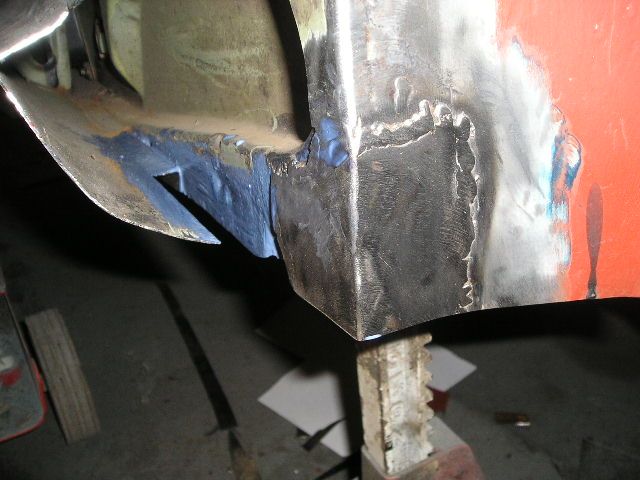 That's all for tonight Cheers John |
| |
|
|
johnrh
Part of things
Posts: 958
|
|
Dec 31, 2009 18:26:19 GMT
|
Hi, Over Christmas, I have not done much work on the car. I felt like having a few days off, and some of the time up here in the Pennines it was too cold/snowy to get to the garage or think about working on cars. Did a bit today... I cut out a rusty seam in the left rear wheelarch. I kept cutting out a little more until I found the extent of the rust. 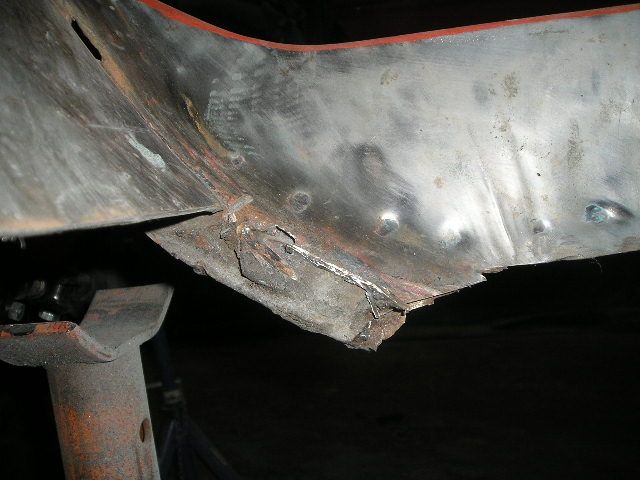 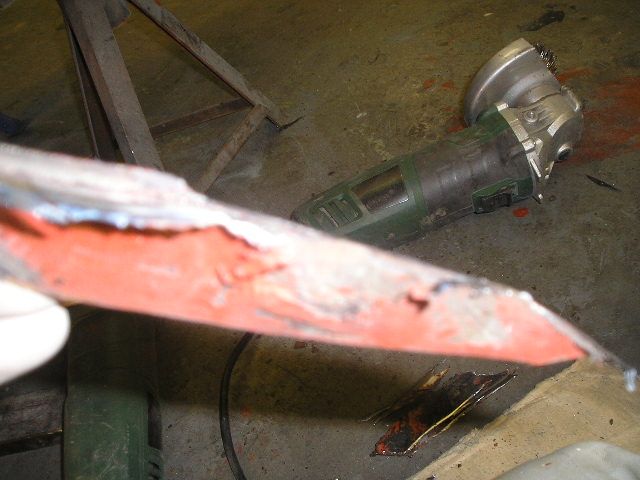 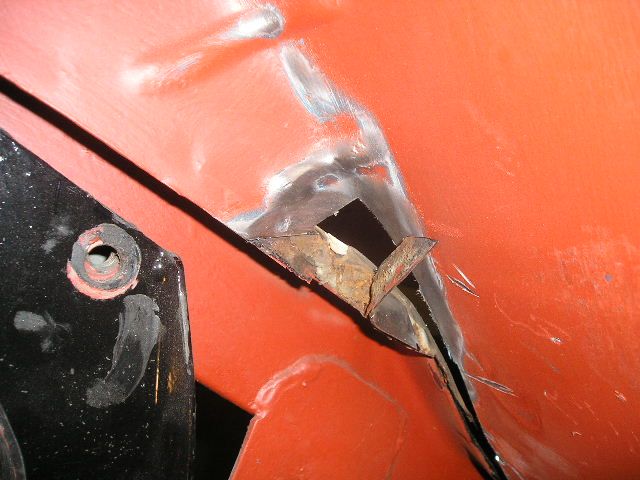 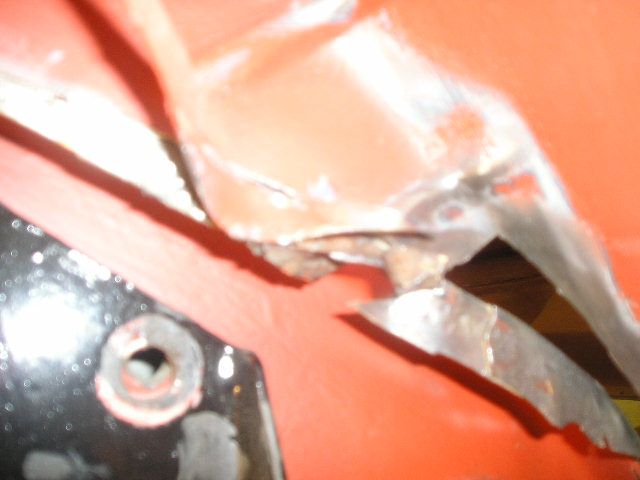 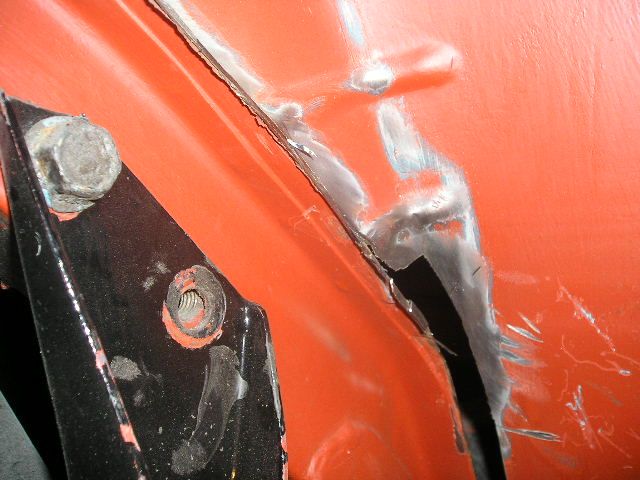 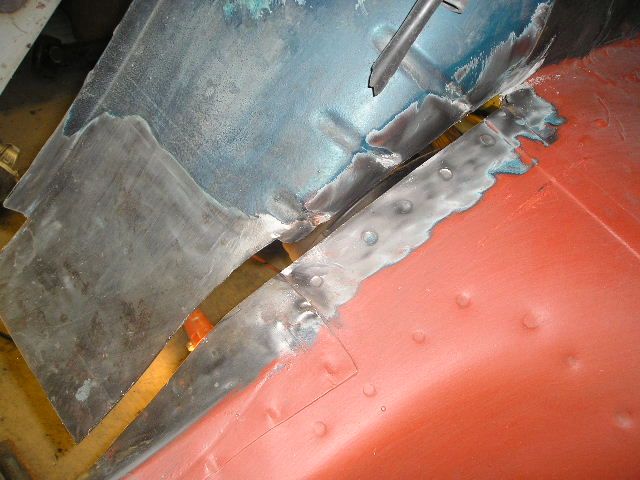 I made the first repair panel, re-cycled some of the outer panel that I cut off 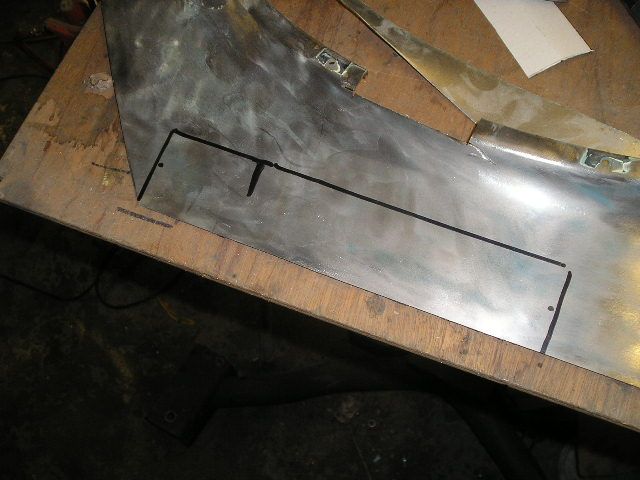 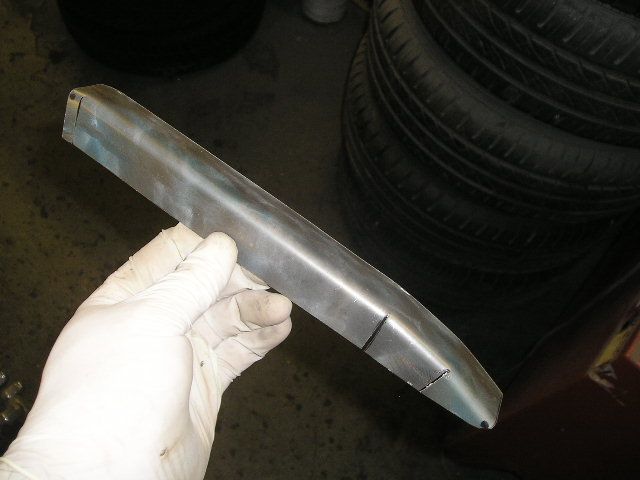 Test fitting. The lower part will be repaired with a flat piece 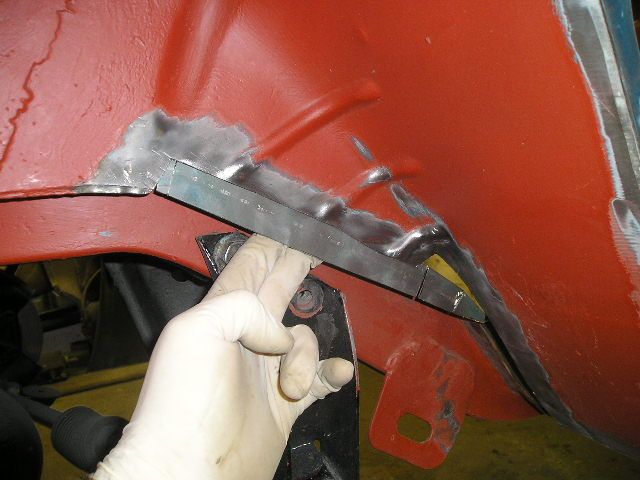 I also cut old an old repair from the base of the outer wing. It's a shame because it had been shaped OK and welded securely, but it was not fitted level with the wing bottom, so the repair was very obvious and it had to go 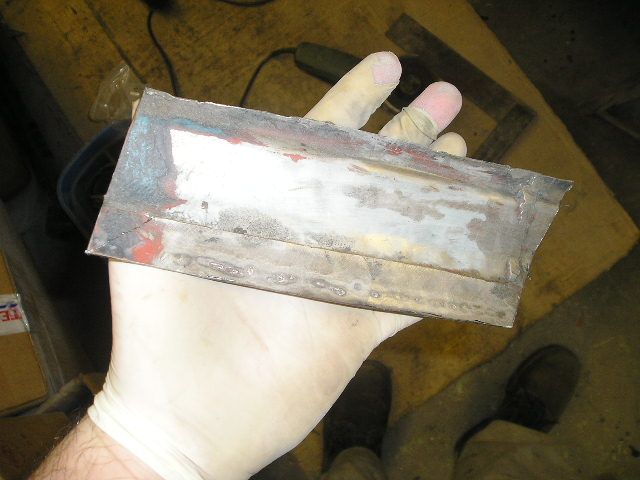 I may cut some more away and use the lower wing repair panel all the way to the back, I have not decided yet 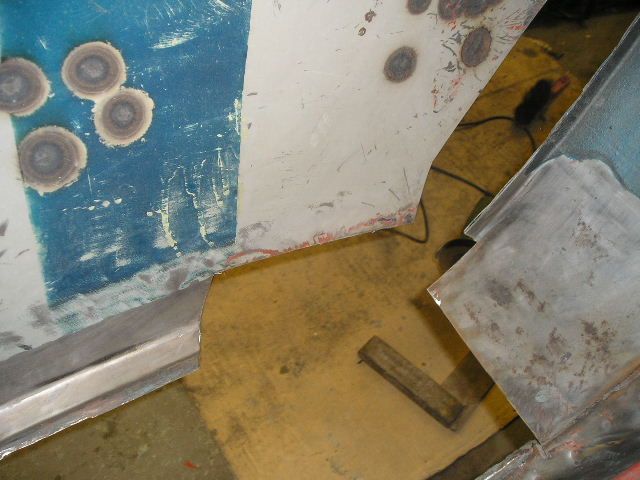 I also had a go at getting a snapped screw out of one of my front side-lights. Failed; broke it off lower down, so I'll have to carefully drill and tap. 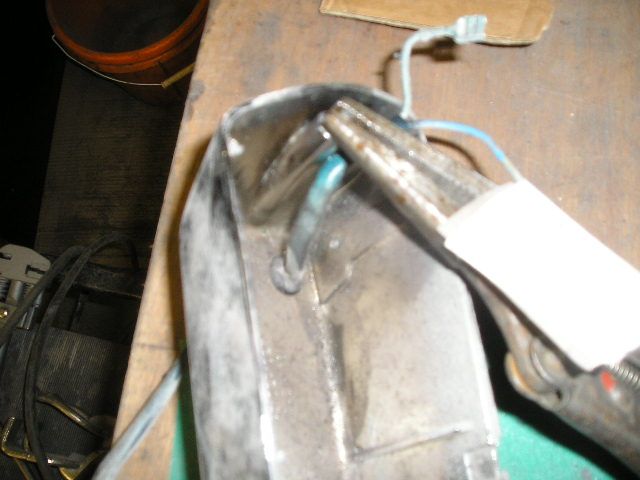 That's it for today. Hope everybody has a fun New Year's Eve! Cheers John |
| |
|
|
mirafioriman
Posted a lot
My next project.......
Posts: 1,361
|
|
|
|
|
Good progress being made I hope you are able to continue the good work at the start of 2010!
|
| |
|
|
johnrh
Part of things
Posts: 958
|
|
|
|
Good progress being made I hope you are able to continue the good work at the start of 2010! Thanks; I'll try John |
| |
|
|
|
|
|
|


