johnrh
Part of things

Posts: 958
|
|
|
|
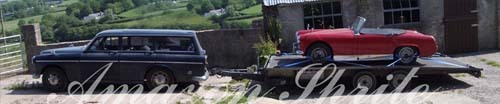
Hi, The next update... I decided to correct the sill fitting as much as possible by cutting and welding, to reduce the amount of filler needed. The "before" shot... Volvo's original effort (and this is with the door closed and correctly adjusted). 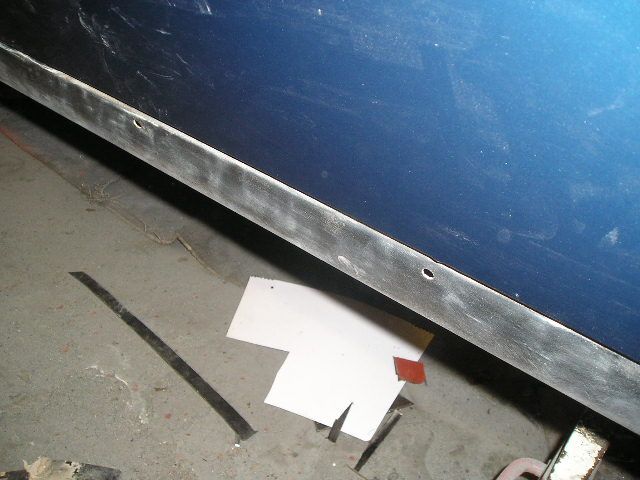 After: 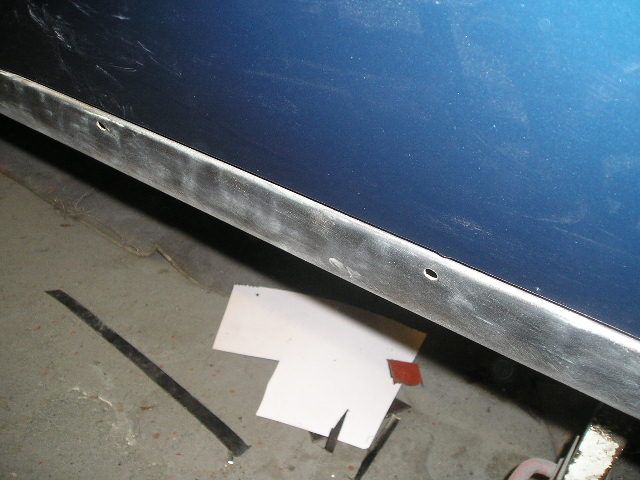 We cut the sill, moved the edge outwards to improve the fit, then rewelded, although it will still need some filler to get it right. Welded on the lower sill flange repair. This was put on a few mm higher than the original, to get the bottom of the sill straight as it should be. The outer surface of the sill was the pushed upwards and welded on (no photo). 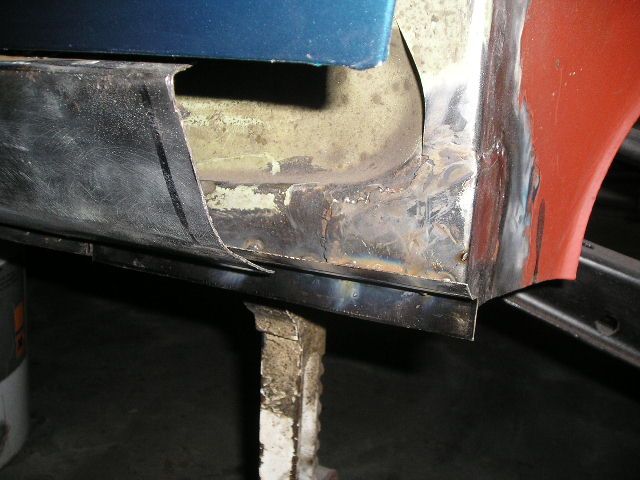 Sill end repair tacked in place. 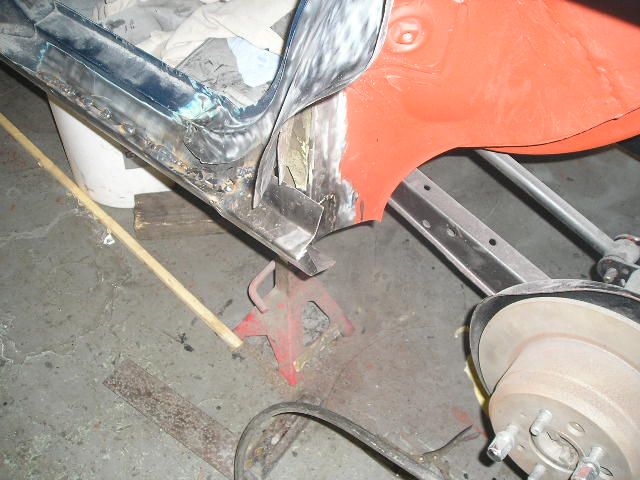 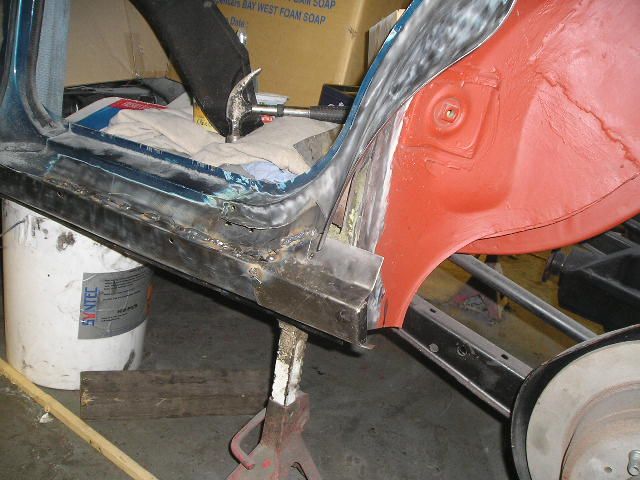 At that point, the gas ran out on the welder. All the suppliers were closed, so no more progress there. I did some more filling on the rear panel 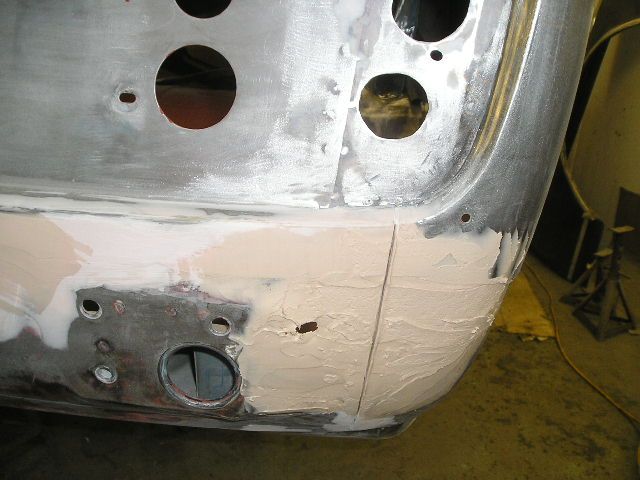 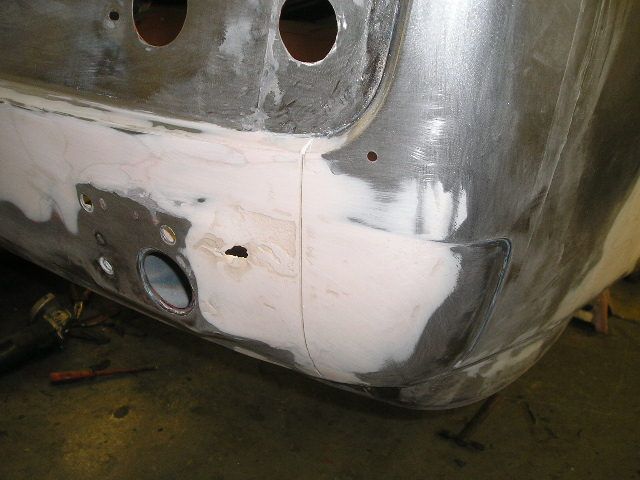 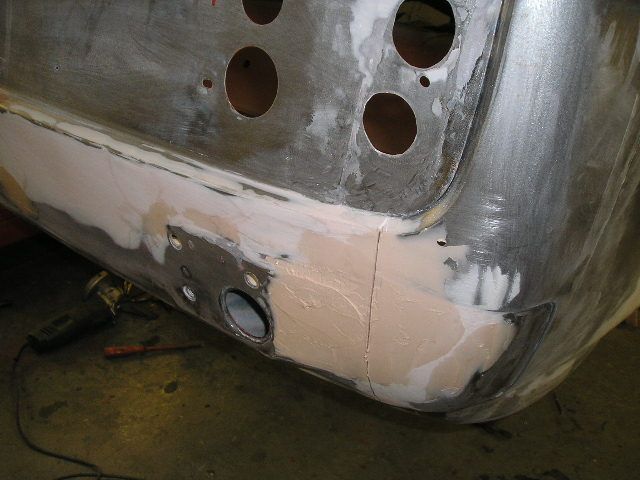 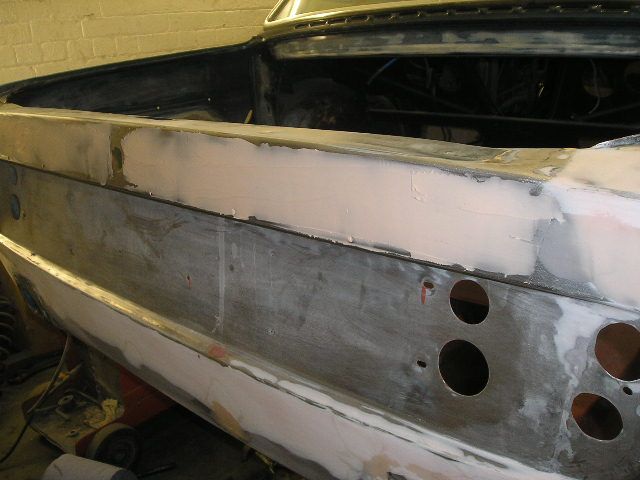 I removed and cleaned up the boot hinges. They came up well, and will not need to be resprayed 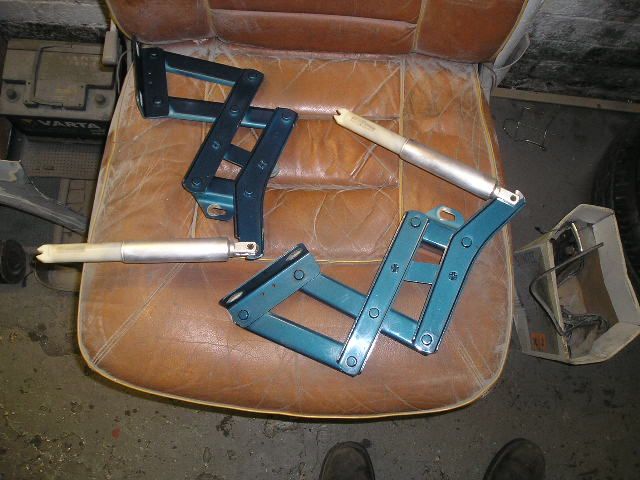 Did some prep for repainting inside the boot 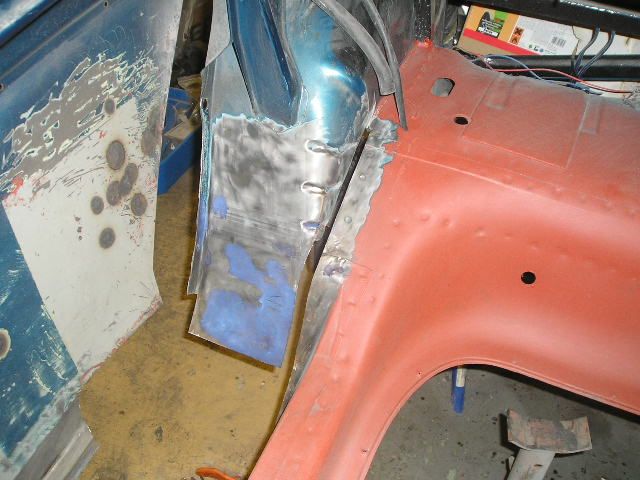 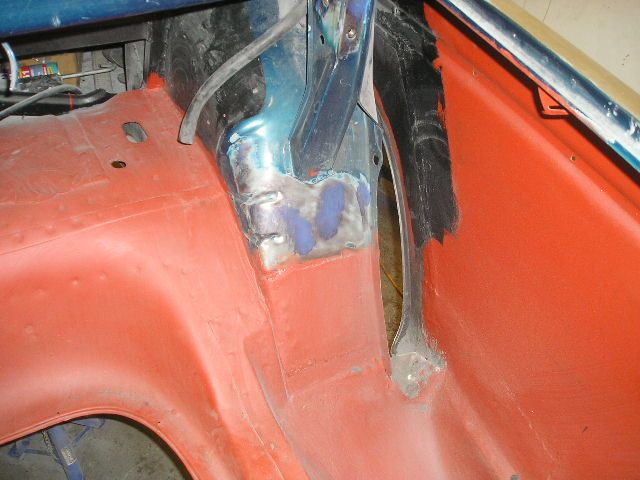 I primed the right rear jacking point, which had been missed earlier 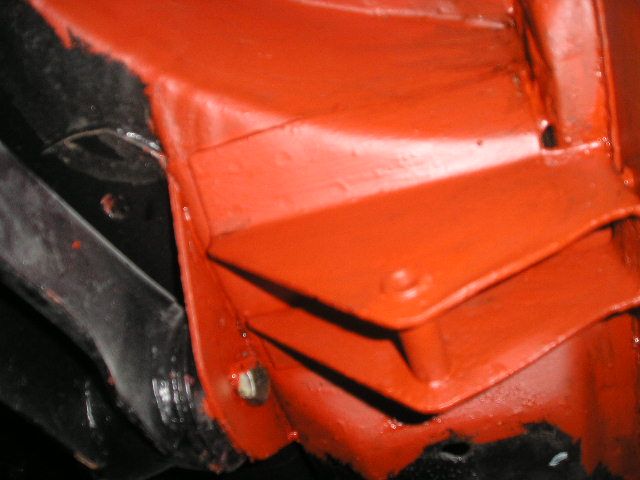 As a break from bodywork, I'm having a go at getting this nasty, rusty foglamp back to looking "as new". These lamps are rare and expensive in good condition so when it's finished, I'll do this as a separate "how to" article because it may be useful to other 164 owners. 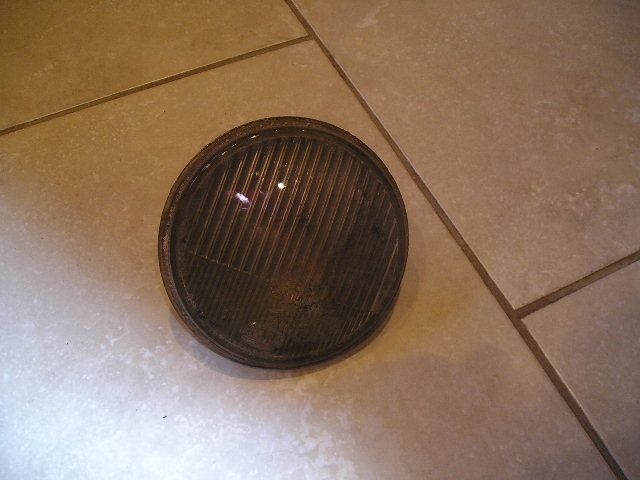 Not really part of the update, but for old Volvo fans like Steve and I it's interesting to have the 244 and the 164 in the same garage. We keep seeing small, strange differences between the cars, even on parts of the shell which at a glance look the same. For example, lower C-pillar: 164 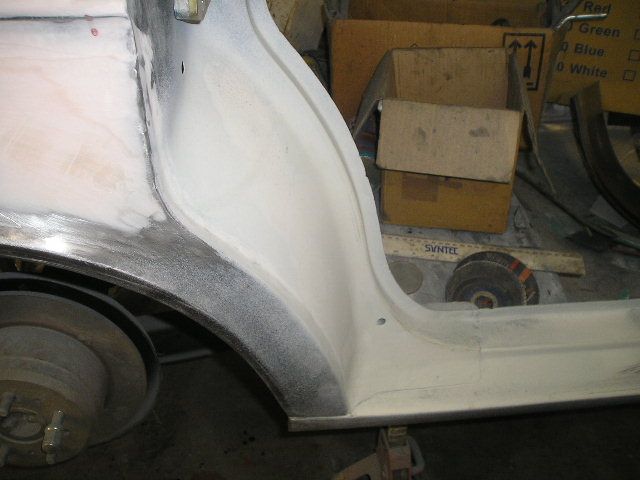 244 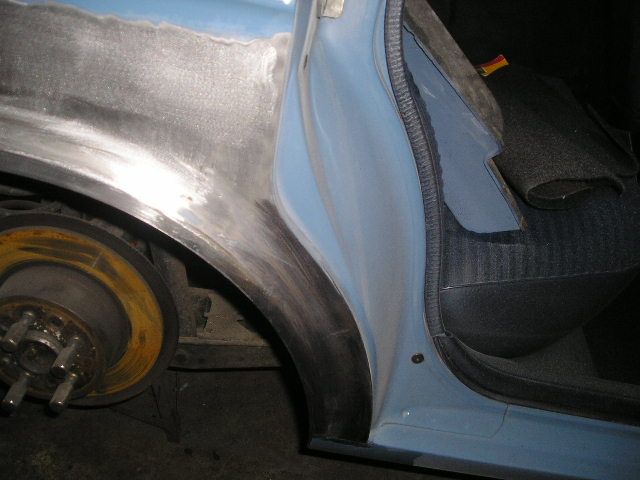 The rear doors have the corresponding shape, so could not interchange either. Well, that's all for now, Cheers John |
| |
|
|
|
|
johnrh
Part of things
Posts: 958
|
|
|
|
Thanks Tony, I'll give them a try. Any good ebay supplier you could recommend? John |
| |
|
|
|
|
|
|
|
|
John
Non in particular, I just buy from who ever is advertising at the time.
Although I have bought them for £1.00 each at Autojumbles in the past
Tony
|
| |
|
|
|
|
|
|
|
I concur with Tony, I gave up on wire wheels after I bought one at an inflated price out of frustration.. Nice to know you can get them cheaper  |
| |
...proper medallion man chest wig motoring. |
|
johnrh
Part of things
Posts: 958
|
|
|
|
Hi, The next update... Early this morning, Steve and I were in a scrap-yard in the snow at minus 3 degrees, getting leather seats out of a 240 GLT for Thor! Later on, I did some work on the 164 Making a repair piece for the left rear door shut 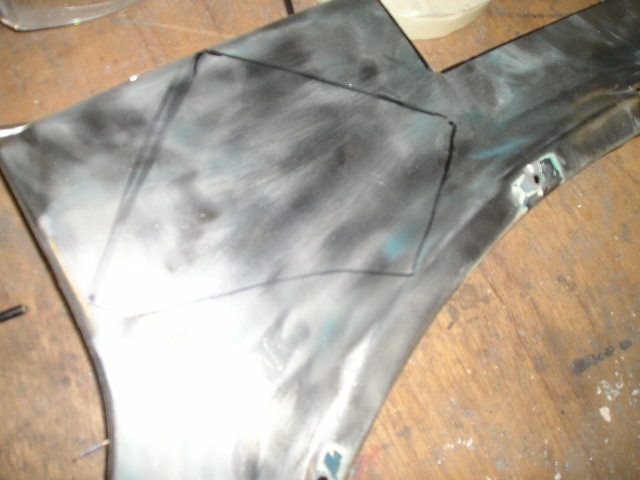 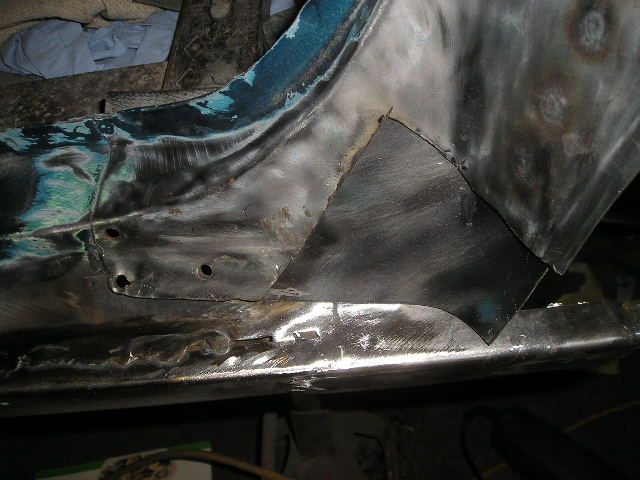 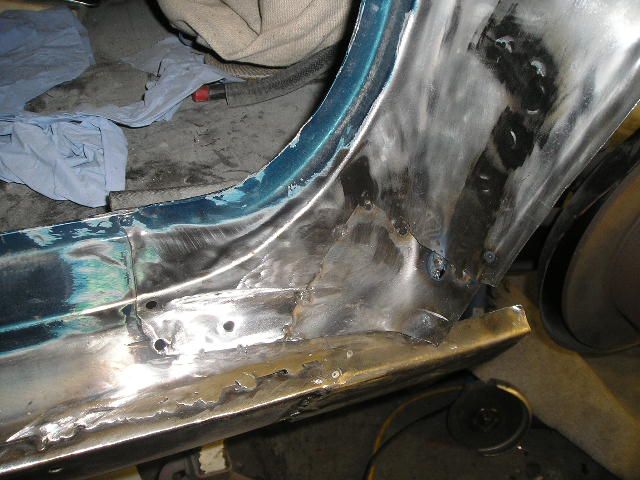 Progressing work on the sill/wheelarch area  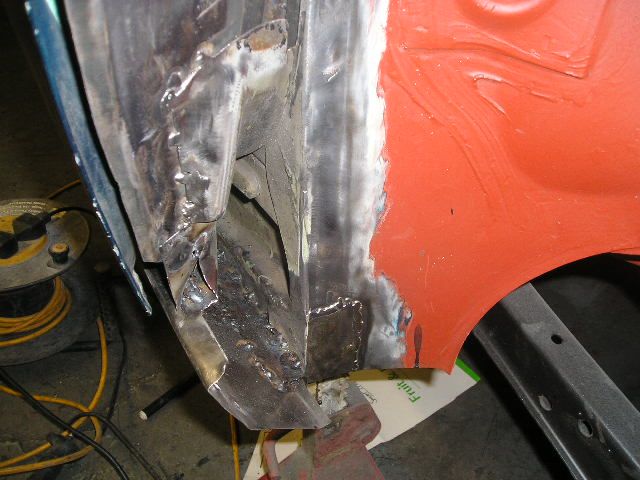 Repairing the inner wheelarch seam. The lower section will be done later when the spare wheel well is fitted 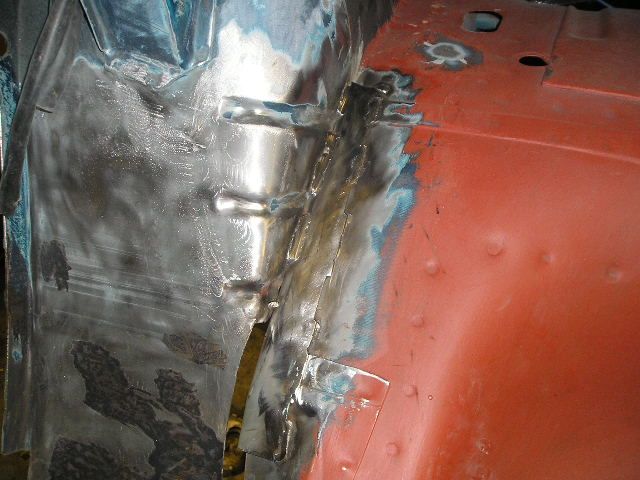 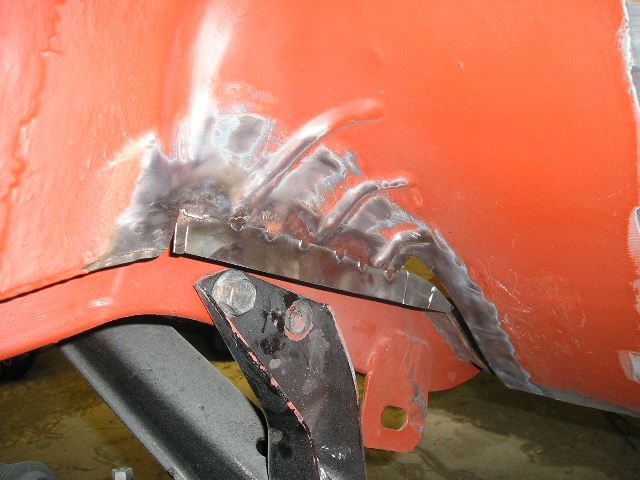 Before and after shots of my foglamp repair 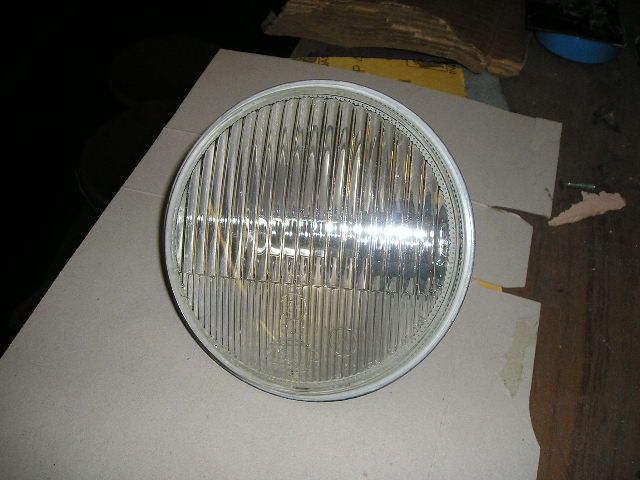 The "how to" article is here if you need it: www.volvoforums.org.uk/showthread.php?t=87314Helping Steve with his interior meant I could have the 244 rear seat base that he no longer needs - thanks Steve. So the 164 will always have a bit of Thor in it! Checking it fits, which it does 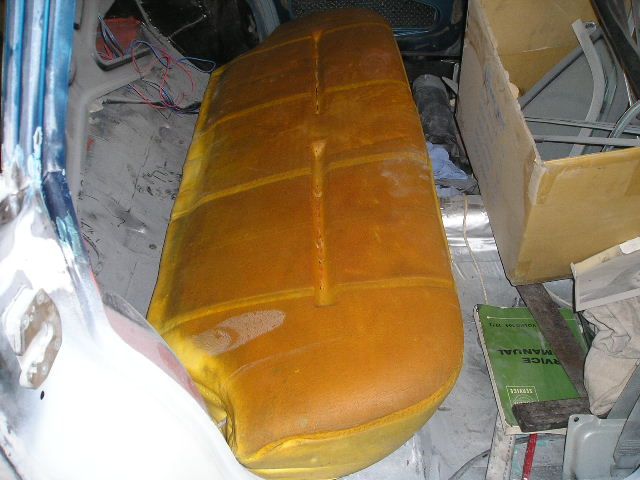 Hopefully, some more work on the car on Monday. Cheers, John |
| |
|
|
|
|
|
|
|
|
John
Excellent write up re the fog lamp rebuild, great tip about the aluminium tape, I would never have thought of that
|
| |
|
|
johnrh
Part of things
Posts: 958
|
|
|
|
John Excellent write up re the fog lamp rebuild, great tip about the aluminium tape, I would never have thought of that Thanks Tony. I've used it before on headlights to pass an MOT when I've been short of money. Having said that, it's safe to use on a headlight if there is rust only at the bottom of the reflector - that part doesn't do very much because it's the top and back of the reflector that direct light forwards and down onto the road. Cheers John |
| |
|
|
johnrh
Part of things
Posts: 958
|
|
Jan 11, 2010 17:11:05 GMT
|
Hi I had a day off work today, so did a few hours on the 164. Working on the sill repair. It's not pretty at the moment, but I'm confident it will turn out OK 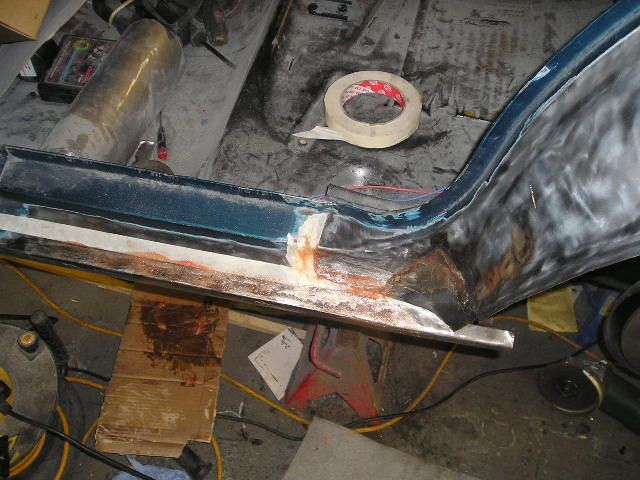 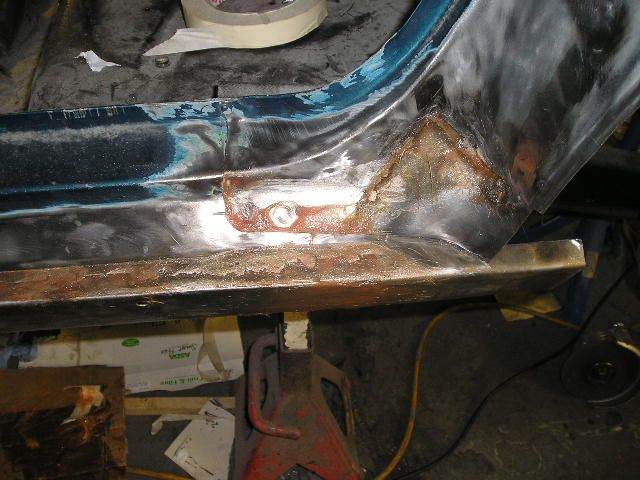 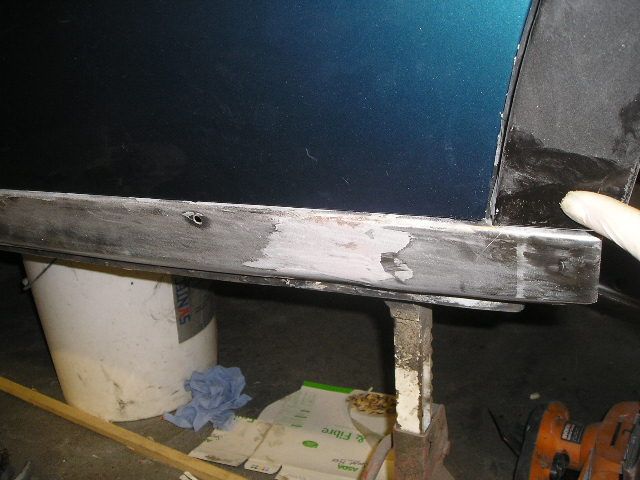 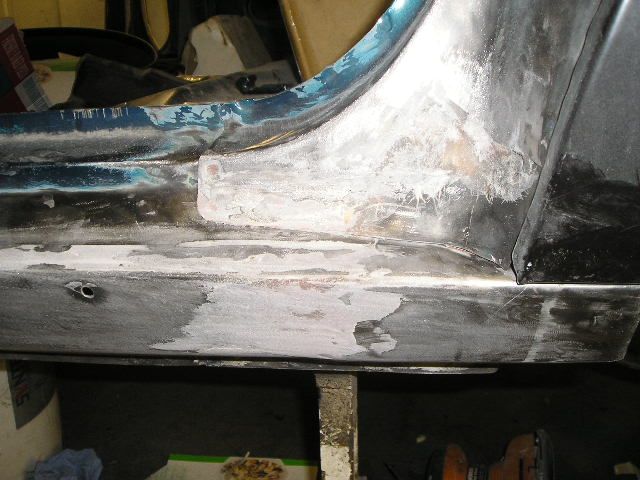 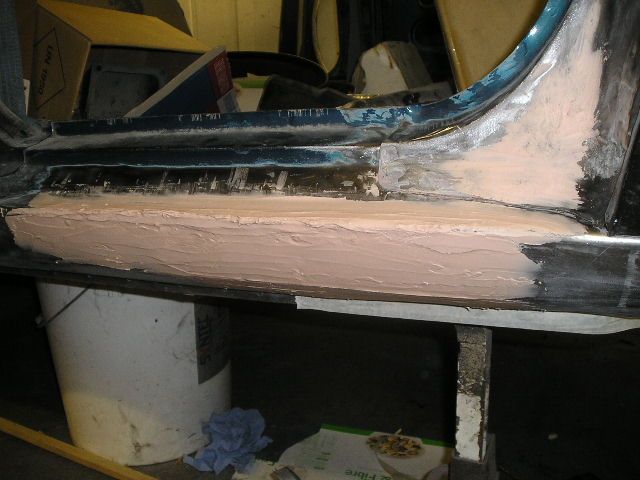 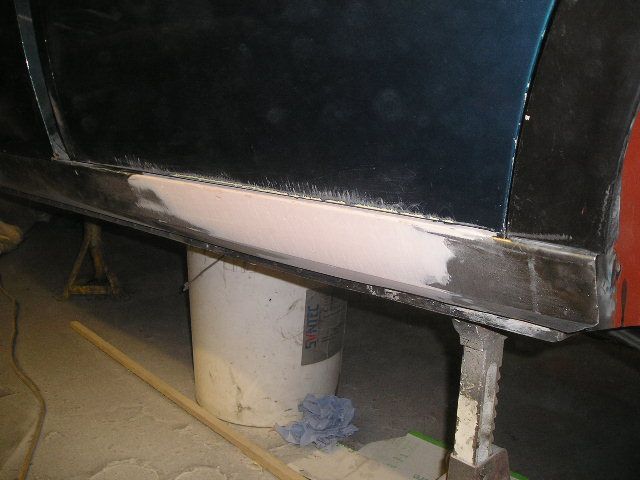 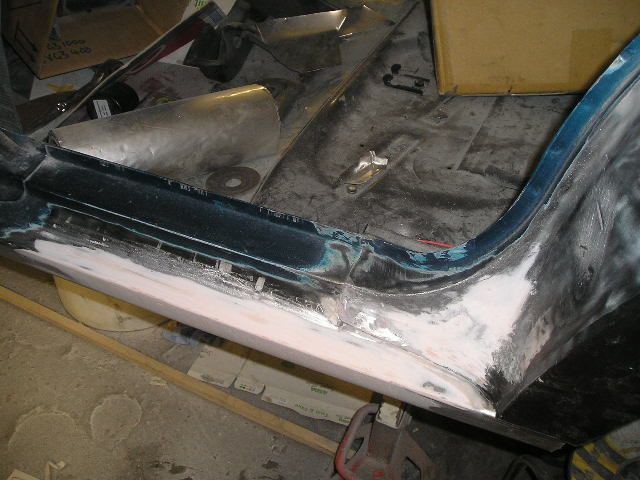 Measuring up to cut off the lower section of the wing, with wheelarch test fitted. Unlike on the right rear wing, I am using all of the repair panel on this side because it's the right shape, whereas the wing is dented. 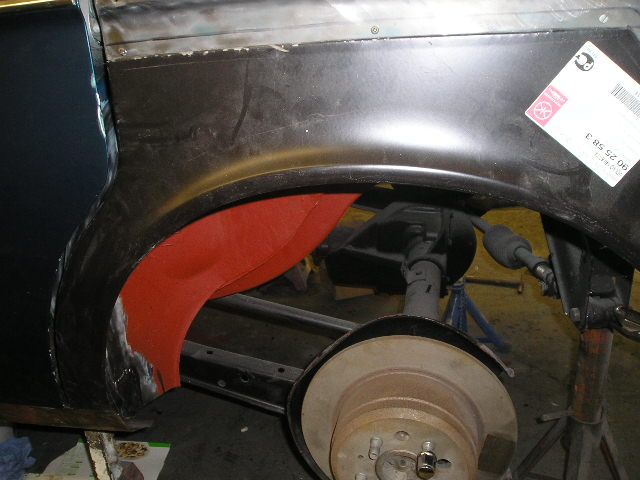 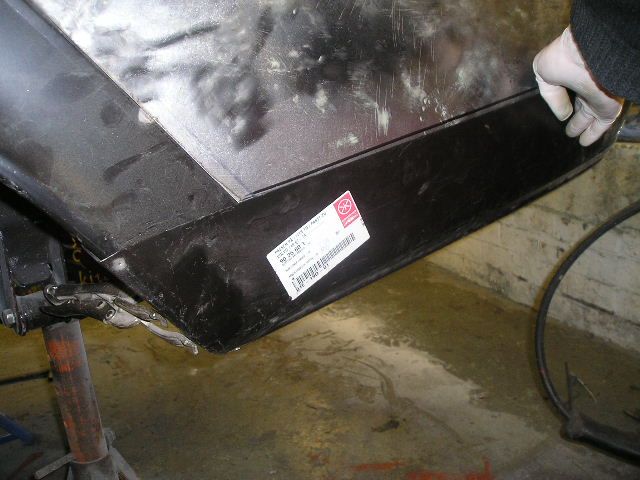 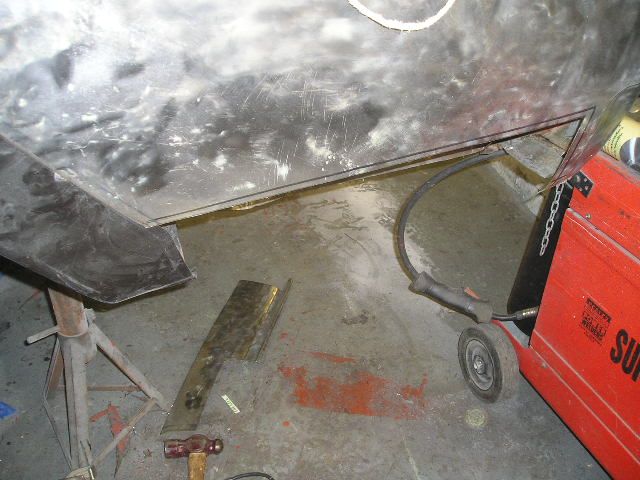 I also did some work on the join between the chassis rail and the rear panel, but the photos did not save. All for now Cheers John |
| |
Last Edit: Jan 11, 2010 18:28:06 GMT by johnrh
|
|
|
|
|
Jan 12, 2010 12:04:17 GMT
|
John Excellent write up re the fog lamp rebuild, great tip about the aluminium tape, I would never have thought of that Thanks Tony. I've used it before on headlights to pass an MOT when I've been short of money. Having said that, it's safe to use on a headlight if there is rust only at the bottom of the reflector - that part doesn't do very much because it's the top and back of the reflector that direct light forwards and down onto the road. Cheers John Ditto - hopefully your method will enable me to salvage the extremely manky pair of 123GT spotlights that I have!  So, will it be ready for this year's BKV? ;D |
| |
|
|
|
|
|
Jan 12, 2010 17:16:10 GMT
|
|
Hi John, good to see you keeping this retro on the road and modifying it so well.
The company rightlines that Tonybmw said was a good place to get strip and clean wheels from is actually in Huddersfield, they have an office in town and the warehouse is over in elland so. I have bought off them and if you ring them up they can arrange for stuff to be collected from the office if you want. I am in Almondbury by the way and guessed you might be pretty local from the pic you posted of the Scimiter you did that was taken at castle hill.
All the best and keep up the good work (you put the time i put into my projects to shame)
Mikey
|
| |
|
|
|
|
johnrh
Part of things
Posts: 958
|
|
Jan 12, 2010 19:32:30 GMT
|
Ditto - hopefully your method will enable me to salvage the extremely manky pair of 123GT spotlights that I have! It should work. Even if parts of the reflector are missing altogther, you can take a mould in fibre-glass filler from the good part (use a polythene bag to stop it sticking) then, when set, move the mould round to the dodgy part and use it to shape the missing part, again using polythene as a barrier. Then cover with aluminium tape. Years of bodging has it's uses!! So, will it be ready for this year's BKV? ;D Err, no. Possible for 2011, but even that's not certain. Time and money are the barriers (as ever) but I'll keep at it and get there in the end. And (mostly) I'm enjoying the journey, just wish it wasn't so c-c-c-cold in the garage! I'd love to take in to Adenau in August 2011 for the Oldtimer GP at the Nurburgring, but obviously need a decent amount of running in and test mileage in Britain before exploiting the Autobahn network! Cheers John |
| |
|
|
johnrh
Part of things
Posts: 958
|
|
Jan 12, 2010 19:40:26 GMT
|
Hi John, good to see you keeping this retro on the road and modifying it so well. The company rightlines that Tonybmw said was a good place to get strip and clean wheels from is actually in Huddersfield, they have an office in town and the warehouse is over in elland so. I have bought off them and if you ring them up they can arrange for stuff to be collected from the office if you want. I am in Almondbury by the way and guessed you might be pretty local from the pic you posted of the Scimiter you did that was taken at castle hill. All the best and keep up the good work (you put the time I put into my projects to shame) Mikey Hi Mikey, Many thanks. Yes, that was Castle Hill and I live in Huddersfield (Birkby); current garage is at Milnsbridge but I've requested planning permission to build one at the back of my house. I didn't realise I had not put the location in my profile; that's fixed now. So what projects do you have on the go? Are there any other RR people locally that you know of? John |
| |
|
|
|
|
|
Jan 14, 2010 12:59:43 GMT
|
My current projects are a Honda engined Mini, somewhere between 4 and 5 yrs in and its still not in paint. The newsest one is a Fiat X19 that needs a little bit of work and then a resray and bolting back together. I have only just got this one but i have some bits at work and i will try and do the work needed on these there then paint it there too. I work in Leeds at a motorvehicle college. No other RR specific people that i know locally, i meet up with some guys who are into kit cars down at the three nuns some times. www.northernroadsters.co.uk/ that is their web page, i don't go every month though. Me and my mate Jim are ones without kit cars though. I'll let you know next time i'm off down there it would be good for a chin wag. Mikey |
| |
|
|
johnrh
Part of things
Posts: 958
|
|
Jan 14, 2010 19:31:35 GMT
|
My current projects are a Honda engined Mini, somewhere between 4 and 5 yrs in and its still not in paint. The newsest one is a Fiat X19 that needs a little bit of work and then a resray and bolting back together. I have only just got this one but I have some bits at work and I will try and do the work needed on these there then paint it there too. I work in Leeds at a motorvehicle college. No other RR specific people that I know locally, I meet up with some guys who are into kit cars down at the three nuns some times. www.northernroadsters.co.uk/ that is their web page, I don't go every month though. Me and my mate Jim are ones without kit cars though. I'll let you know next time i'm off down there it would be good for a chin wag. Mikey OK Mikey, that would be good. My friend has a Ginetta G27 project that's going backwards (recently sold the Pinto engine to someone who blew theirs up!). Also a couple of TVRs amongst local car friends, plus Rover P5B (RR 3.9efi to go in), tuned Scimitar SE5a and some Volvos of course mint 244, supercharged Amazon estate with Porsche brakes. Cheers John |
| |
|
|
|
|
|
Jan 14, 2010 22:32:46 GMT
|
|
old volvo's are very cool, keep up good work!
|
| |
|
|
johnrh
Part of things
Posts: 958
|
|
Jan 17, 2010 12:19:28 GMT
|
Hi there, Some more progress to report... Rear panel/chassis railI cut out some pitted metal at the base of the strengthening piece. I will fit a repair section later. I also removed an ugly older repair from the bottom of the rear panel. 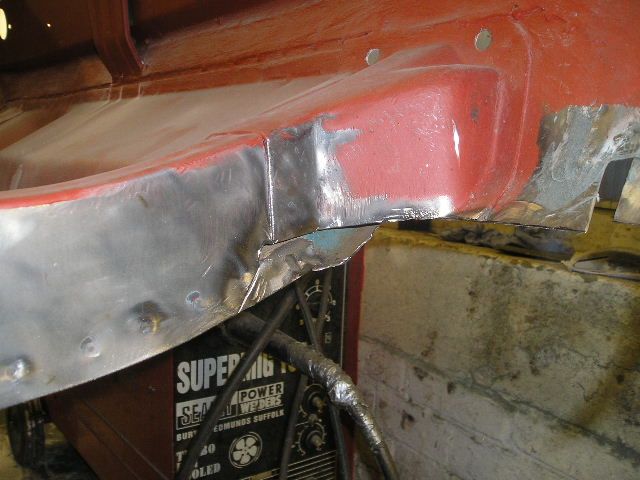 Left rear wing Left rear wingFor extra protection, I painted areas inside the wing which I can't access when the wheelarch repairs are complete 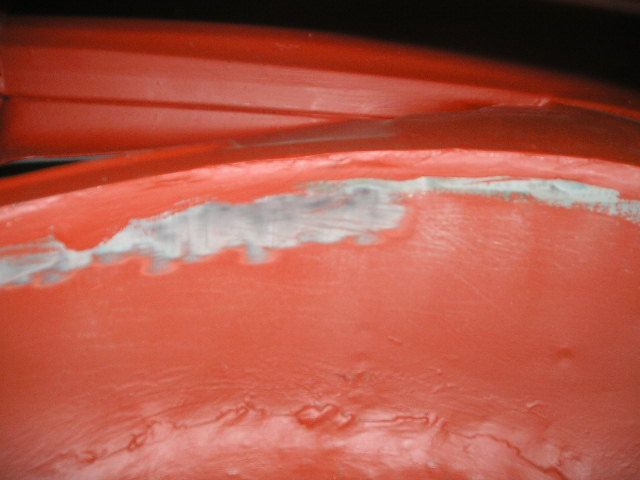 The outer wheelarch partly fitted 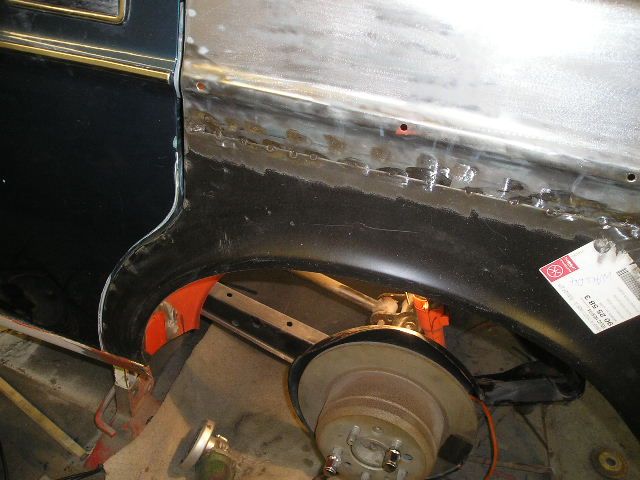 The sill joint will be cleaned up then a strong closing plate welded on, as I did at the other side of the car 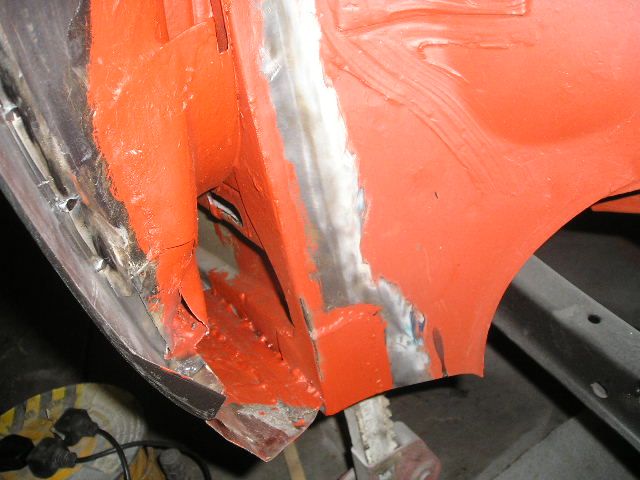 Cleaning welds and removing the storage paint 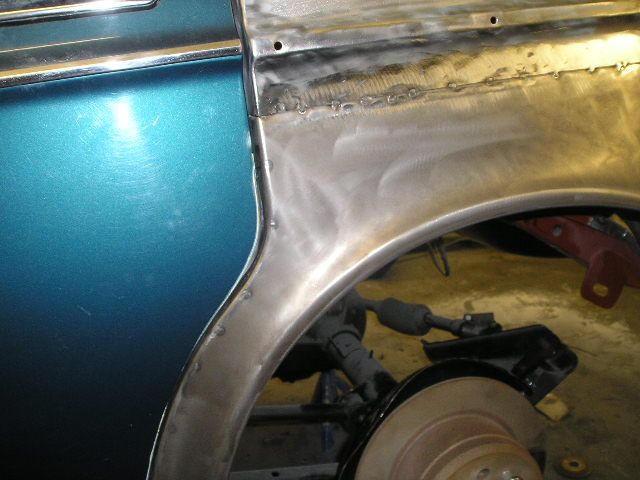 Reinforced with bridging filler. There is a big dip in the wing (previous accident damage) next to the wheel arch join. We were able to beat it out to some extent, but it still needed extra filler as you can see! 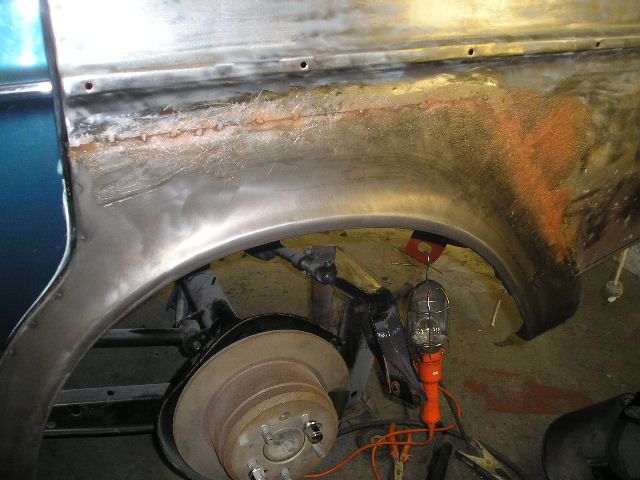 Some filler slapped on to address an original equipment Volvo wavy panel gap. 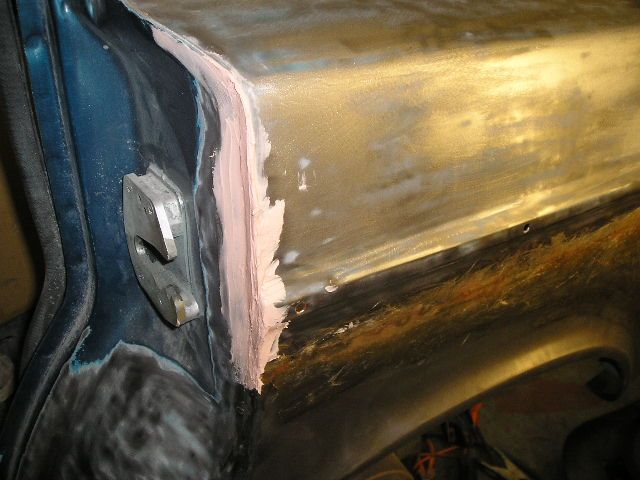 Carrying on with the repair on the inner seam 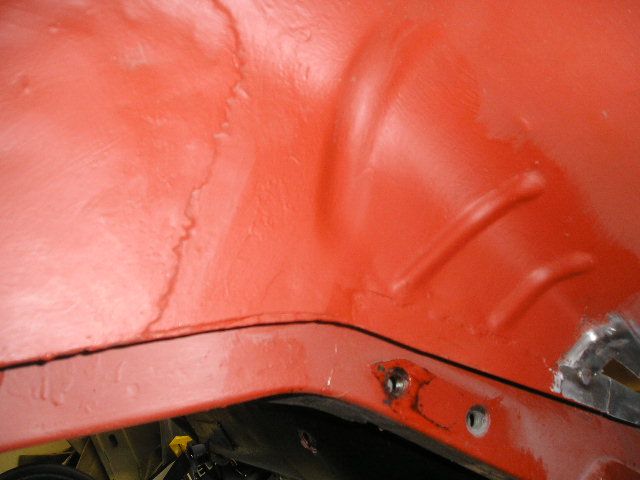 Not sure when I'll be able to get more done... might be today or during the week. Cheers John |
| |
|
|
johnrh
Part of things
Posts: 958
|
|
Jan 17, 2010 12:29:26 GMT
|
old volvo's are very cool, keep up good work! Thanks. I'm sure plenty of UK enthusiasts don't really give old Volvos much thought (except the Amazon perhaps). I'm not sure why, because they are well engineered, but simple enough for DIY, good to drive, tunable and have lots of Scandanavian charm. Surely most petrol heads would smile at this... [it's a repost, sorry, but I couldn't resist] Cheers John |
| |
Last Edit: Jan 17, 2010 12:29:46 GMT by johnrh
|
|
johnrh
Part of things
Posts: 958
|
|
Jan 17, 2010 17:38:14 GMT
|
I just did an hour today, to keep things moving forward Door gap is getting better 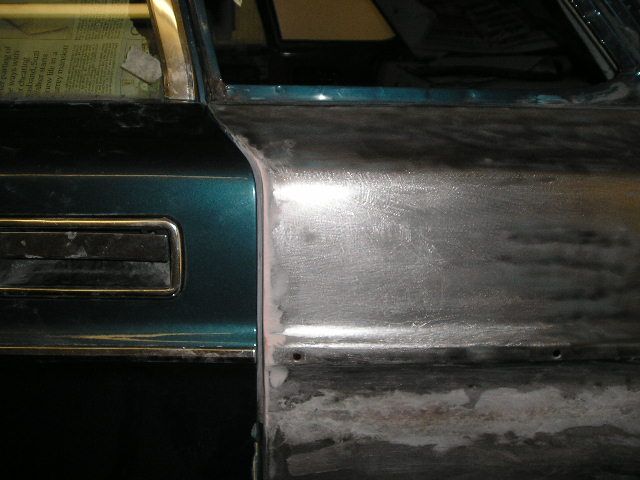 After sanding the first layer, I put some more bridging filler on the inside of the wing 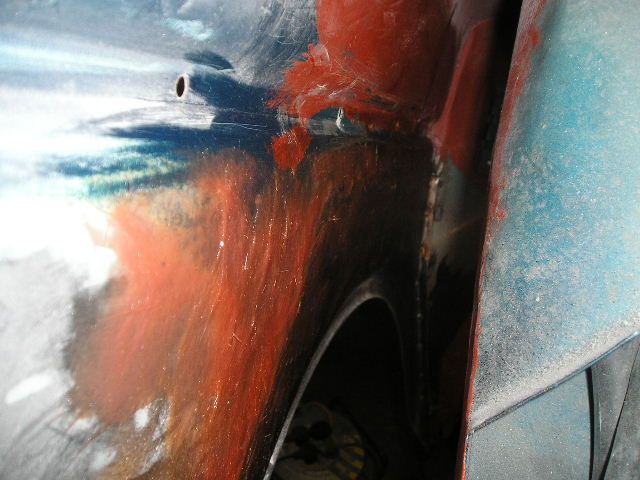 Sanded the outside... 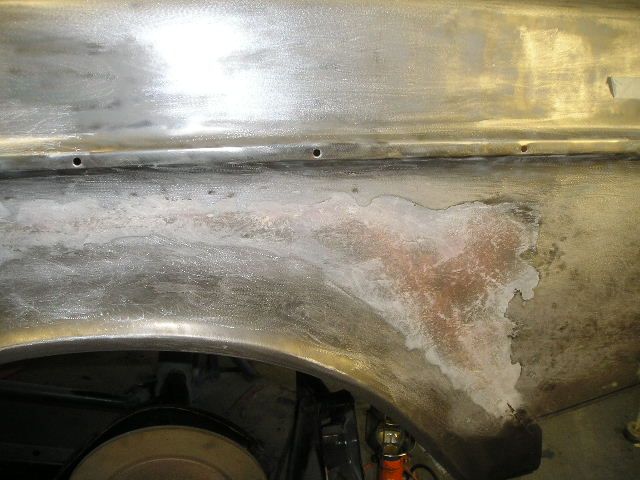 ... and put on some surface filler 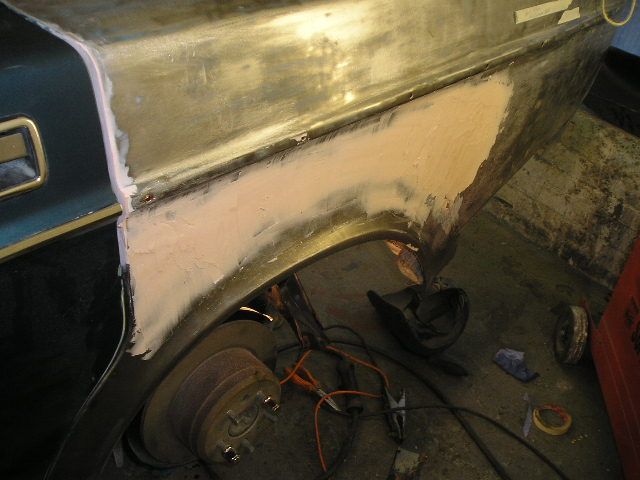 This is my measuring kit. Learned from past experience to measure panels carefully before cutting them off! 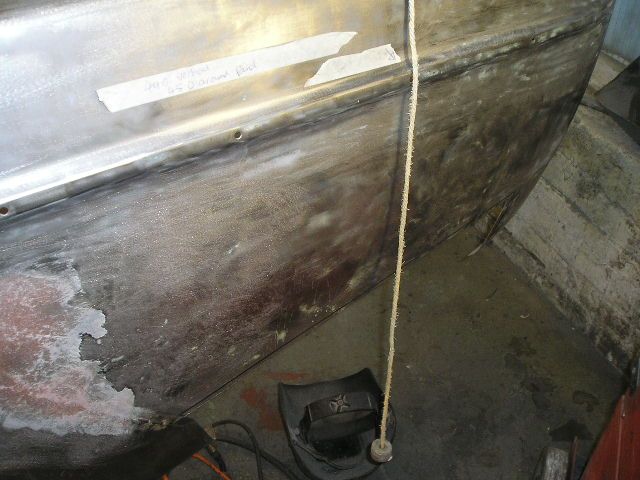 Last week, I found some bargains at a backstreet engineering supplies company (well, much cheaper than I've been paying before) and it's all good quality stuff. 50 metres of good quality 40grit for £19. So thats less than 9p a sheet for the orbital, and it lasts for ages 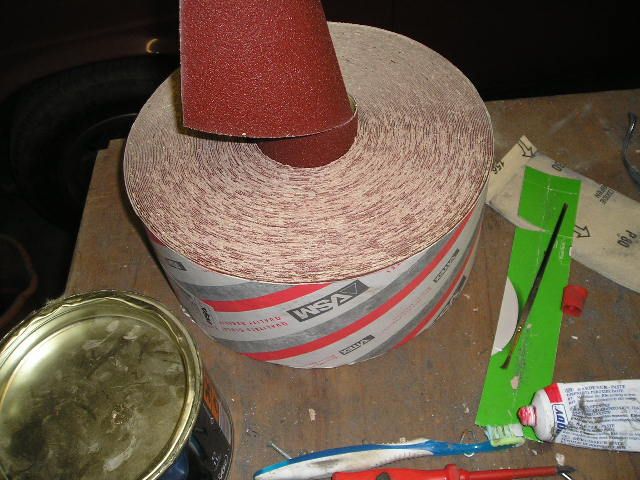 5 flap wheel discs for less than £10, and thin cutting discs were 50 pence each with discount (he was keen on the project when I told him about it, so I think that helped the prices I was charged!) 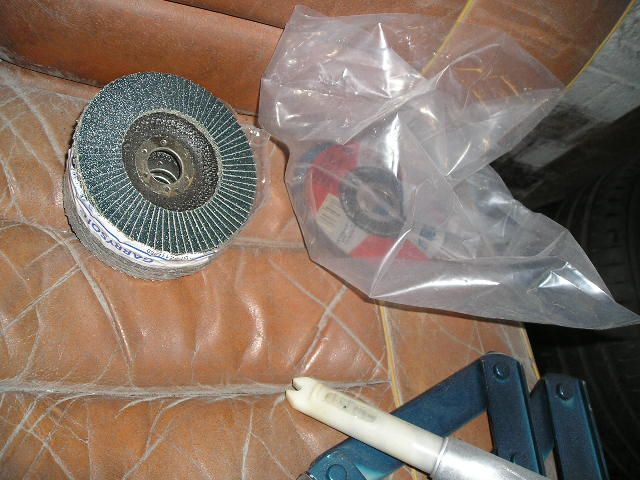 That's all for today Cheers John |
| |
|
|
|
|
|
Jan 17, 2010 18:45:04 GMT
|
|
John
definitely best to buy in bulk when you can, rather than pay Halfords prices when you have no option
I often stock up when I go to an Autojumble or Sunday Market
|
| |
|
|
johnrh
Part of things
Posts: 958
|
|
Jan 24, 2010 17:57:37 GMT
|
Hi, Some more to report... BodyworkMaking the closing panels for the inner wheelarch 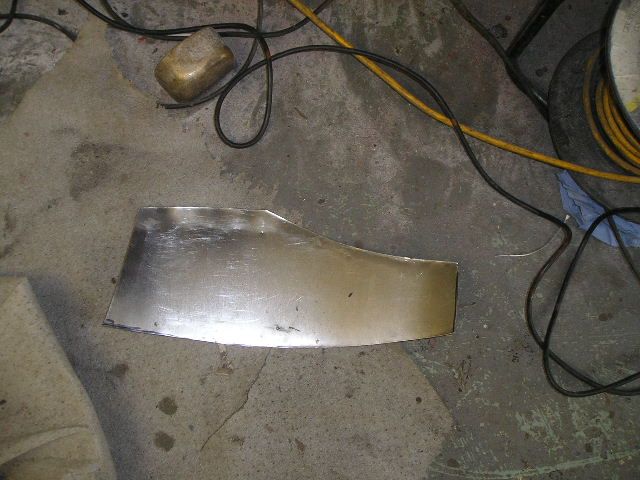 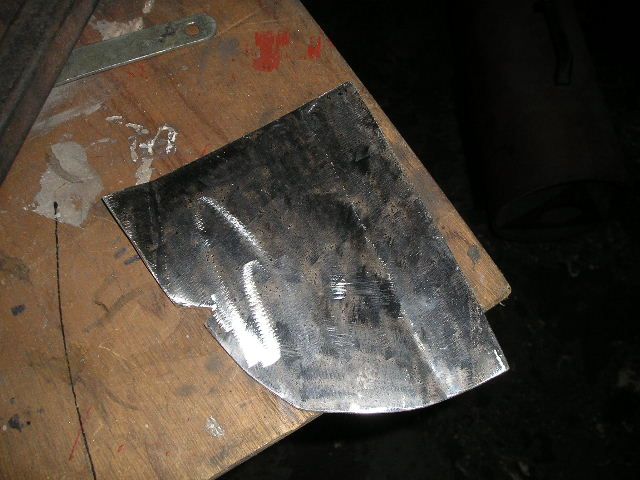 Sanding filler on the rear panel. I don't know why it's so wobbly along here. Maybe resting heavy items on the top edge, as they are being loaded, distorts the panel? It's not accident damage.  I found some more rust. Although this seam looked fine, a rust stain appeared on the filler below it, so I cut it out and I'll make a repair piece.  Carrying on with the outer wheelarch 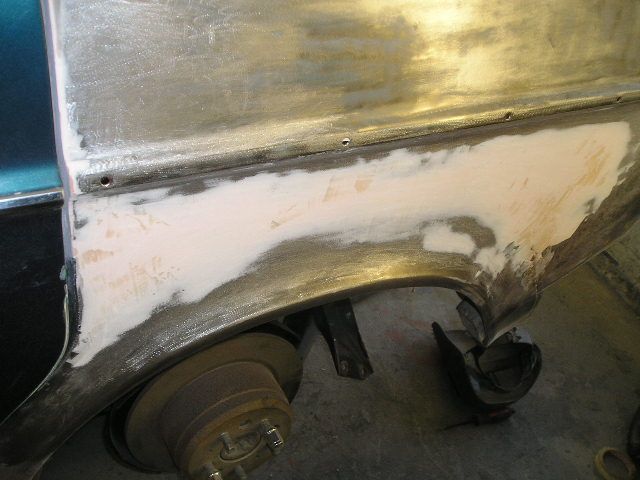 Rear suspension Rear suspensionI need my friend Ellis to do some welding for me before I can progress much more on the bodywork, but he has a backlog at the moment. So, I moved on to suspension work. Original springs, before... 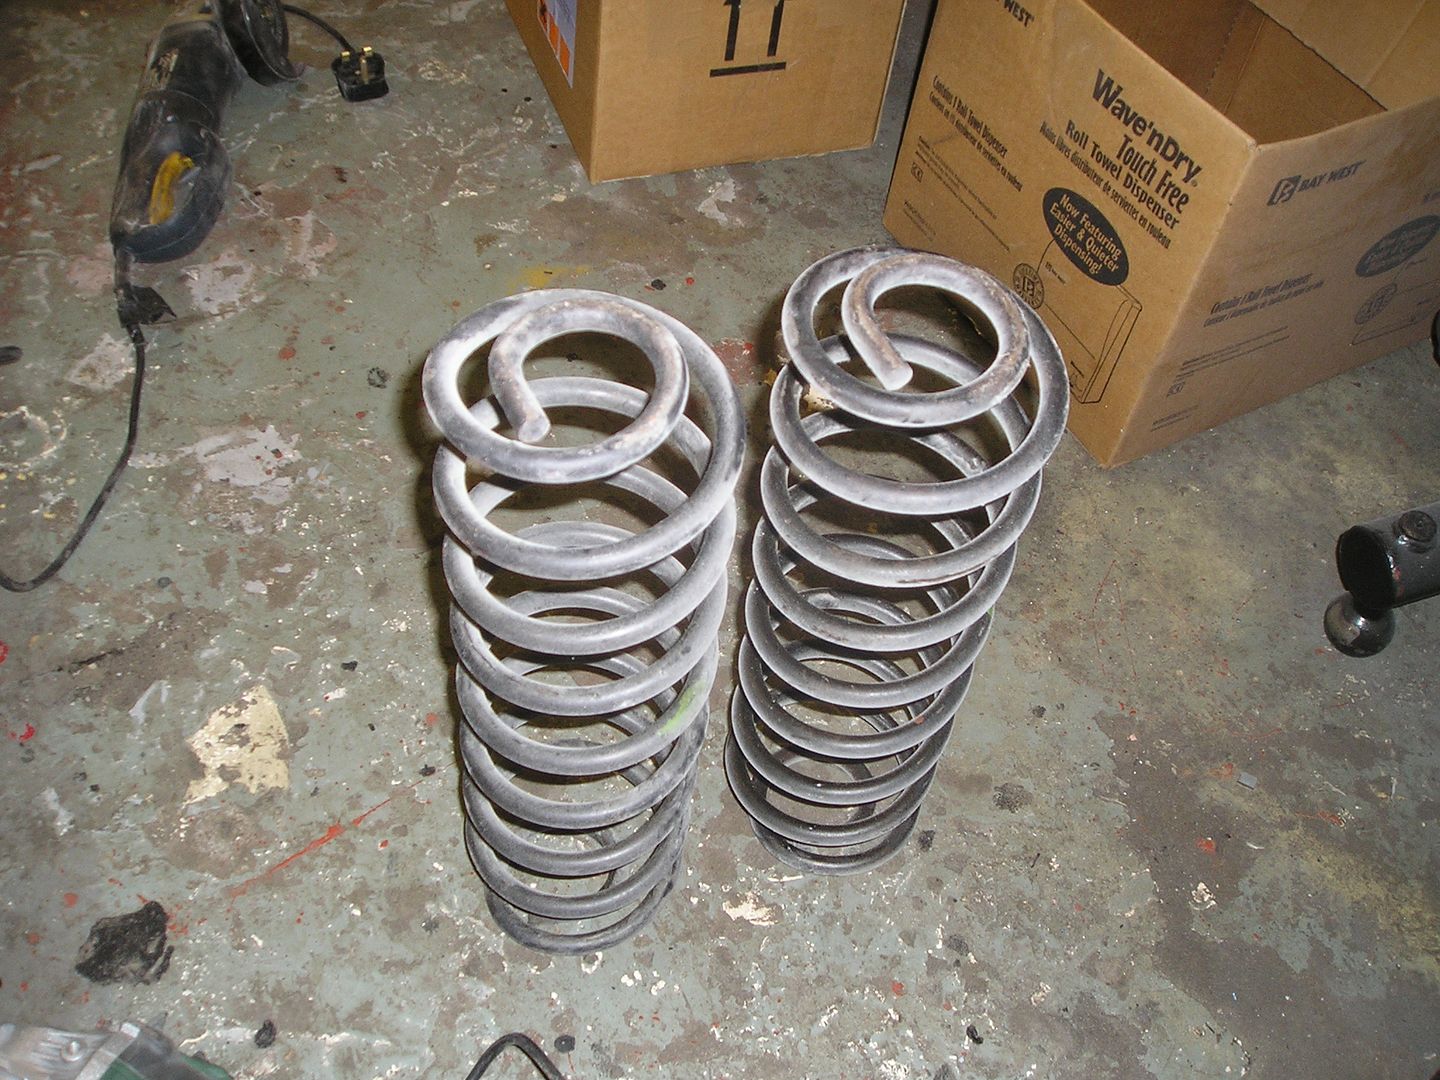 ... and after cutting. I didn't cut too much off; can always do some more later if I need to. Trial fit of the air springs 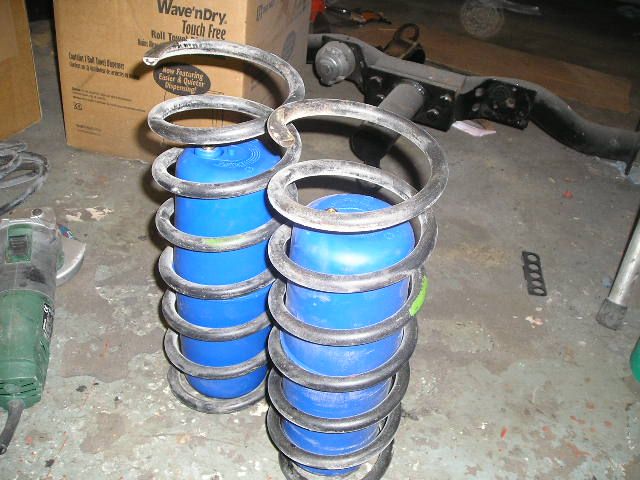 Removing the spring taper means I need to modify the spring seat to make it wider. Work in progress on that 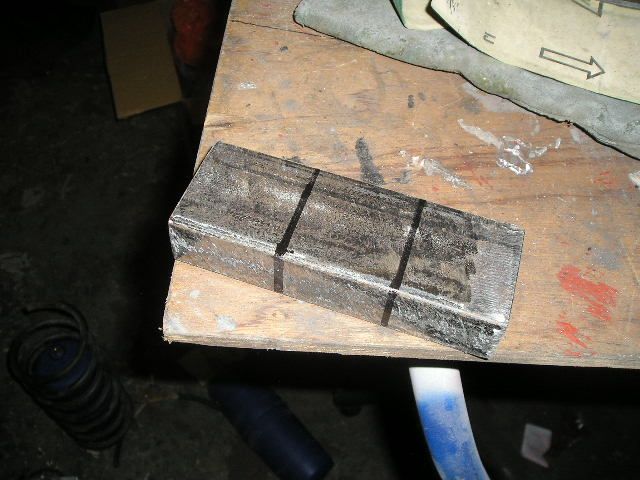 This is a hefty piece of steel, about 5mm thick. I cut it carefully so it's a tight push fit onto the chassis rail. The upright side pieces will feed the load into the rail and stop the seat bending; well that's the theory 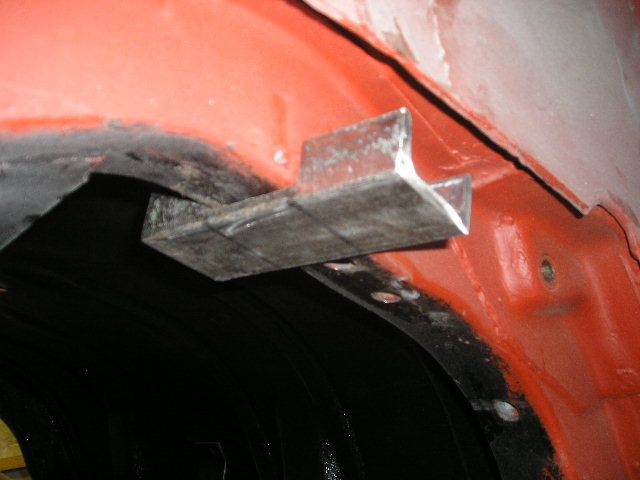 Part way through making a spring retainer. This shows how it will all bolt up, using the original captive nut in the rail. I can't test fit the spring yet because I need to get a longer bolt. 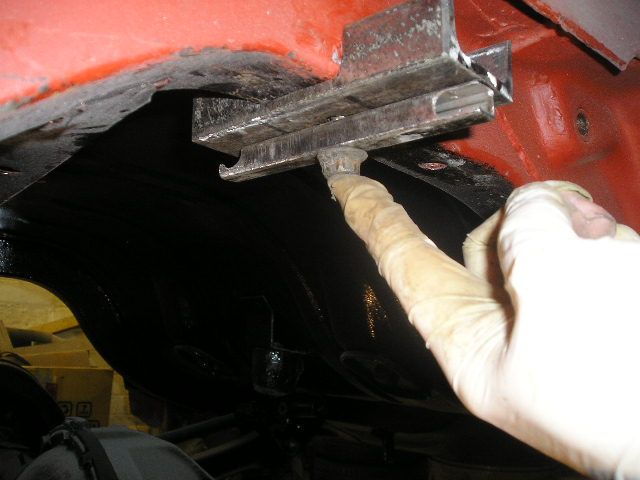 The retainer design still needs modification because there's a 10mm thick poly "washer" that goes above air spring, and that ideally needs a flat surface above it... still working on that. Front suspensionNo pictures yet, but I have bought some modified front uprights from Sweden, with shortened spindles which narrow the track by 32mm. This is to get the steering scrub radius back close to the original spec with wider wheels in order to avoid the "torque steer" instability under heavy braking that can be happen with a positive scrub radius. Having said that, I will not fit them yet. I'll see how it drives first with the wider track because using the new uprights means I need to fit different hubs & bearings (both early Volvo 240) and discs from a Ferrari! That's all for now Cheers John |
| |
Last Edit: Jan 24, 2010 18:00:45 GMT by johnrh
|
|
|
|