|
|
|
May 19, 2012 19:19:02 GMT
|
Lately I've been trying to get my battery tray off. I don't get on with spot weld drill bits, never have and this slightly more expensive one I just bought doesn't change things. But anyway, after a while struggling it eventually came off. The metal underneath is solid, although quite rusty, however I now have 3 drill bit sized holes to weld. Could be worse I suppose. I also made a start on getting the washer bottle bracket off the wing, but rather than a few spot welds its a few little bits of overlap weld. Whats the easiest way to break these welds? I started by carefully grinding away the weld and the endue of the bracket but it wasn't breaking. Got the dremel involved but still no luck. I eventually broke it by mullering the welded flange of the bracket and using a crowbar, hammer and brute force. It left the wing without any damage so that's fine by me but the weld the other side will be a right pig to break. And now I'm faced with the thought of needing to remove the servo and M/C to clean up that side properly, annoying but ok as the M/C needs a rebuild and the servo could do with a lick of paint. But then I'm left with one nice, resprayed wing and the other 3/4 of the engine bay a bit of a mess. So is it worth hoiking the engine out and cleaning up and respraying the whole bay bit by bit? Otherwise it'll just look odd. Goes to show how a simple bit of tidying and welding snowballs into a full on strip and clean up though  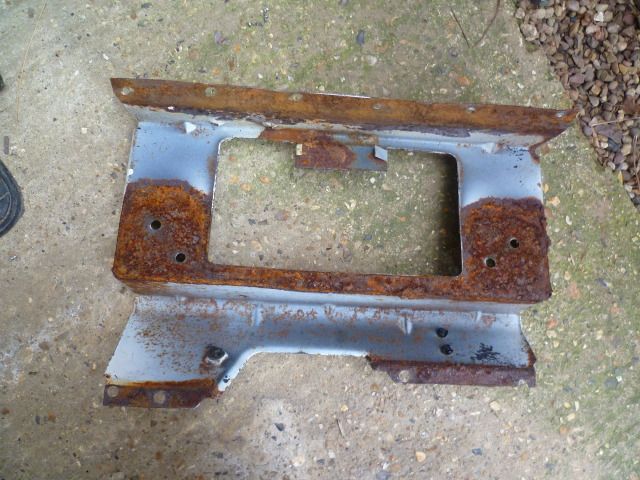 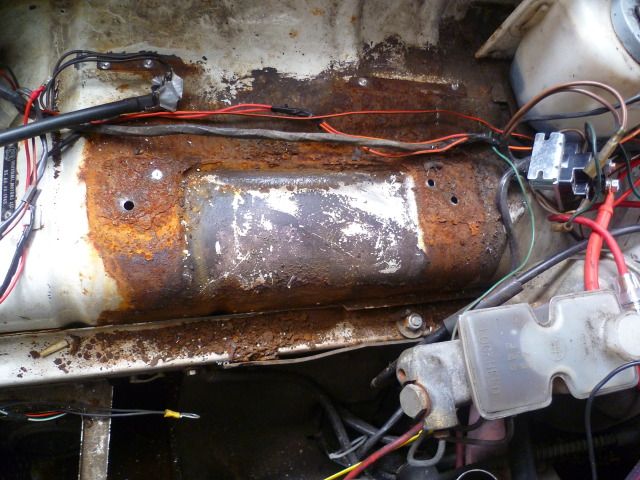 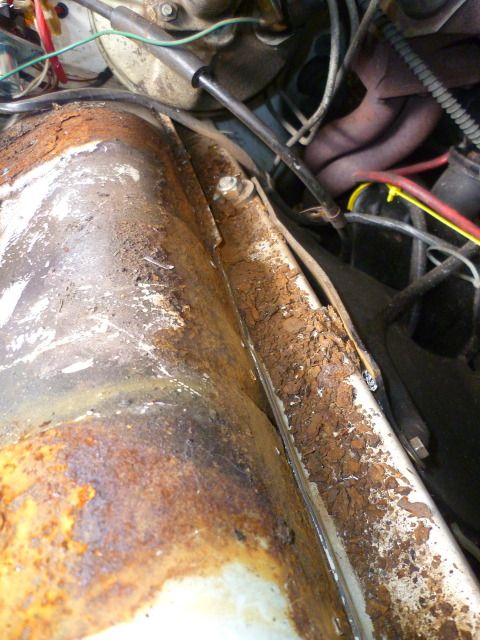 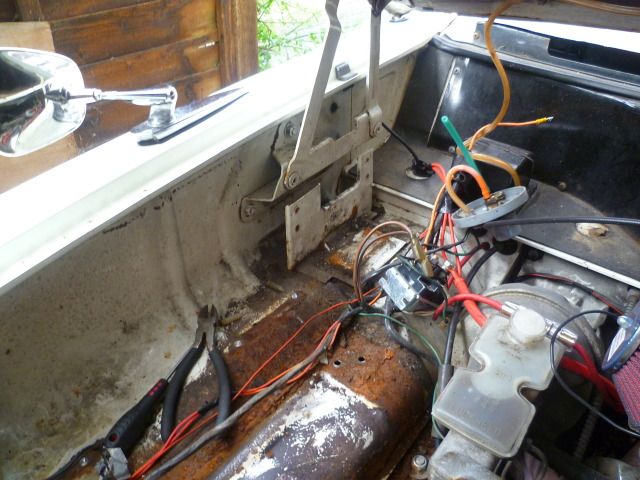 And the bracket, you can see my grinding and destroying of the nearest side, the far side is a lot more tucked away. 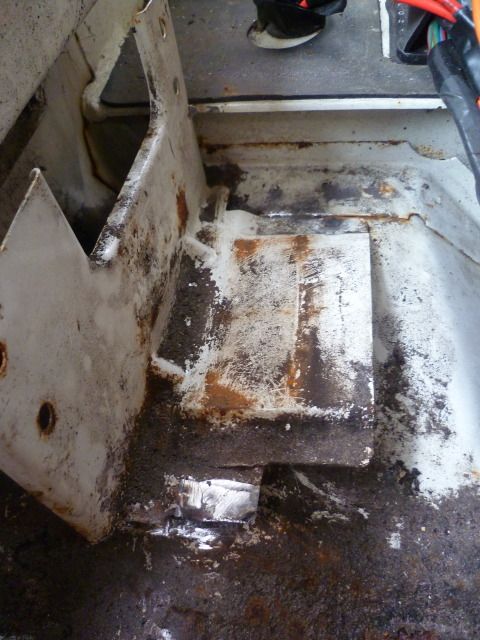 The far side 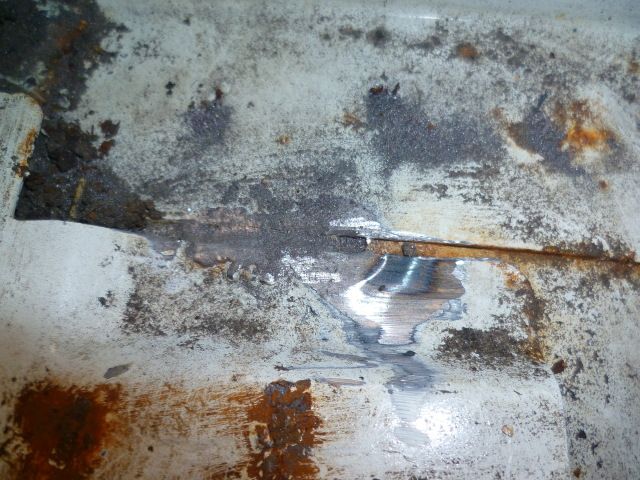 My plan with refitting is to make a mirror image of the battery tray to fit to the other wing so that I can fit a bigger battery and clean up the bay a bit. I'm also wondering whether to use the same washer bottle/pump in the same place or to find a modern one with better pressure and fit it somewhere else to aid the 'cleaning'. Don't want to stray too far from originality though. |
| |
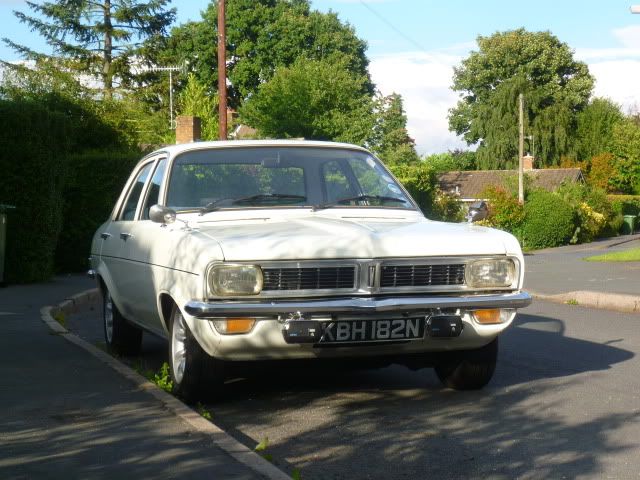
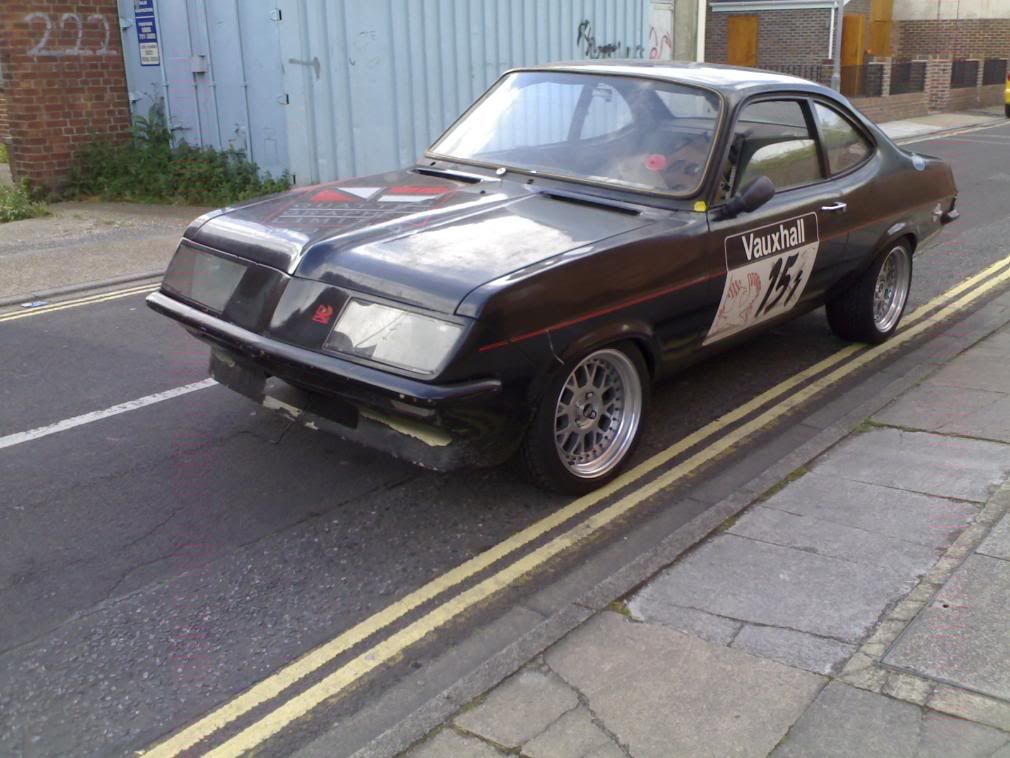
Project Diary1975 Viva / 1988 T25 Camper / 1989 Mini / 1991 MX5 / 1992 Mini / 1994 Saab 9000 / 1997 Saab 9000 / 2008 Saab 9-5
|
|
|
|
|
|
|
May 19, 2012 19:56:38 GMT
|
Mine had similar surface rust hiding under there. Very satisfying when you catch early on before it takes hold. I used a washer bottle with built in pump off a mazda b2000 ute. Neat and not looking at all out off place with great pressure.?.  |
| |
|
|
djefk
Part of things

Posts: 844
|
|
|
|
|
Glad to see you're back in the game!
Why not move the battery to the boot now you're in this far? It would help the car's balance / handling on the road and would allow your engine bay to look a lot cleaner.
Love the new washer setup - Again makes the engine bay look cleaner.
|
| |
|
|
|
|
|
May 20, 2012 18:58:20 GMT
|
My dad asked the same question. I did think about it a while back but for some reason dismissed it. I may still do, I'm looking into battery boxes, don't want to alter things too much though and thought putting it on the other side of the engine bay would keep it looking natural and original and not out of place. I'm not after a super clean and cutter free bay, just somewhere to put a bigger battery  |
| |
Project Diary1975 Viva / 1988 T25 Camper / 1989 Mini / 1991 MX5 / 1992 Mini / 1994 Saab 9000 / 1997 Saab 9000 / 2008 Saab 9-5
|
|
|
|
|
May 22, 2012 23:23:27 GMT
|
Took a trip up to Dartford to see the engine man again today, which somehow ate up most of the afternoon after a wasted morning. So I thought against getting stuck in to the rust on the wing for today and got stuck in with the drivers floor instead. I keep getting distracted by other things so it keeps growing spots of surface rust. This time I'm going to get it done! To keep it manageable on a limited time scale I've split the floor into front and rear, left and right footwells, and the transmission tunnel. Now the drivers floor should be done by the end of the week, and I can move on to the next area. So, drivers floor prepped, old seam seal fully removed, and a coat of zinc primer. Tomorrow I'll put new seam sealer down, coat of high build primer, wet n dry down so it's nice and smooth and relatively faultless, and then the top coats. Can't wait for some gleaming white. 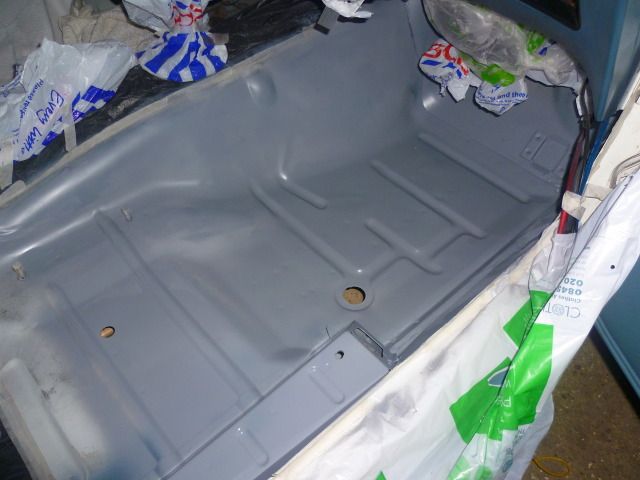 |
| |
Project Diary1975 Viva / 1988 T25 Camper / 1989 Mini / 1991 MX5 / 1992 Mini / 1994 Saab 9000 / 1997 Saab 9000 / 2008 Saab 9-5
|
|
|
|
|
May 25, 2012 16:07:52 GMT
|
High-build primer 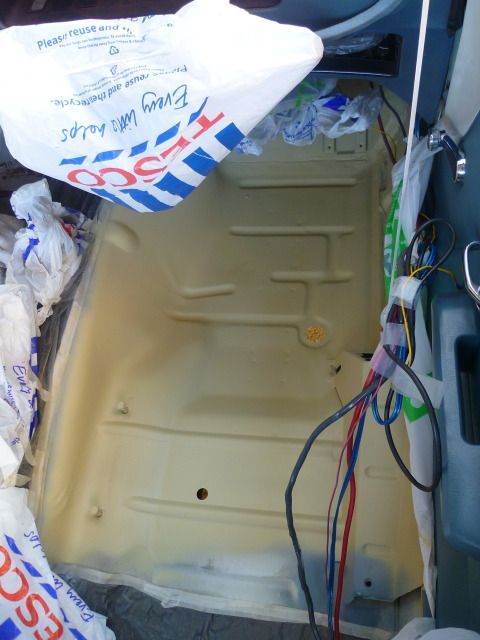 And the second coat of white 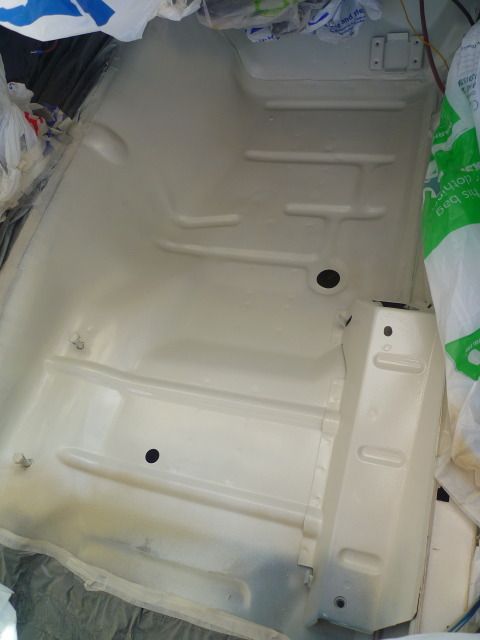 Not sure if I should do 3 or 4, and if I should do a fine grit wet sand after, in-between coats or not at all? It doesn't look like a particularly great finish as it is, although I wasn't expecting it to be and it's not done yet. Also some bad news, other than wind and dirt getting on my nerves, a call from the engine shop to say that no.3 cylinder is heavily scored and my only option with that block is to spend £100 boring it to +60" and £240 on the only set of +60" pistons around. So as I don't have more money than sense I'm on the look out for another block to try, or I might be forced to use the original. |
| |
Project Diary1975 Viva / 1988 T25 Camper / 1989 Mini / 1991 MX5 / 1992 Mini / 1994 Saab 9000 / 1997 Saab 9000 / 2008 Saab 9-5
|
|
|
|
|
May 29, 2012 21:03:25 GMT
|
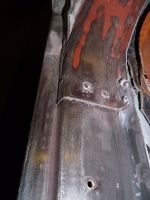
Sooo, I started the day wondering where to start, thought I'd have a crack at replacing the ignition wire to fix the old running problem finally. I've been advised multiple times just to run another wire and tape it to the loom, but that's not very me. So I stripped that part of the loom, replaced the white wire, and taped it back up again hoping for the best. It actually worked really well and looks great. So, I've decided tomorrow I'll be doing the rest of the engine bay loom as there's odd bits of wire around from wiring in fog light and sidelights etc. 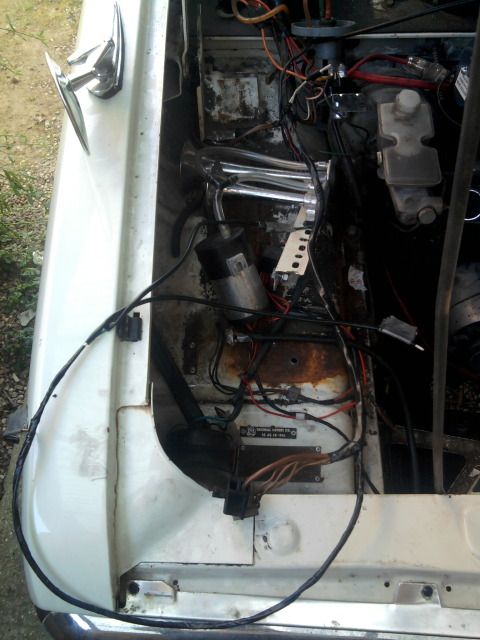 I then thought I'd make a start with the welding by plugging the holes in the inner wing. Cleaned the area up, sandwiched some copper plate up against the underside and began to weld. It wasn't going too well, and figured it was because I turned down power and wire speed to deal with the thinner metal, so I fiddled with the settings a bit. After filling the holes I knew it wasn't right, and noticed I was getting a fair bit of spatter, which made me think of gas. It was only then I noticed I didn't hear the hiss of the gas and on checking my bottle had run out. A 3 week old bottle, hardly used, gone. And my welds were like pigeon curse word. So from this I was put in quite a bad mood, which made me do this.  Back to being a stripped shell again :roll: this time however I AM going to conquer this rust. I'm sick of patches of orangy brown and primer. So, with my back on the road target being the beginning of next summer, I'm going to get a crack on and dive into it rather than do my best without going too far. As I'm getting the engine build underway too, I want the engine bay done in time for that to drop in, so that's first and I'll be going front to back. The only bit I'm undecided about is whether to stick with rattle cans or splash out on an electric spray kit, which may prove to be cheaper in the long run and that way I can buy enough paint to do the car so it will all be the same colour, rather than Halfords iffy cans. I know the finish won't be amazing but surely it'll be as good as cans and easier to apply? The other question mark is what to do with the exterior. Do my own prep work and get a pro to paint it, get a pro to do it all, or do the best I can borrowing a garage. If I'm lucky I might be able to borrow a compressor too. And how the hell to a get rid of the rust from the crevices? 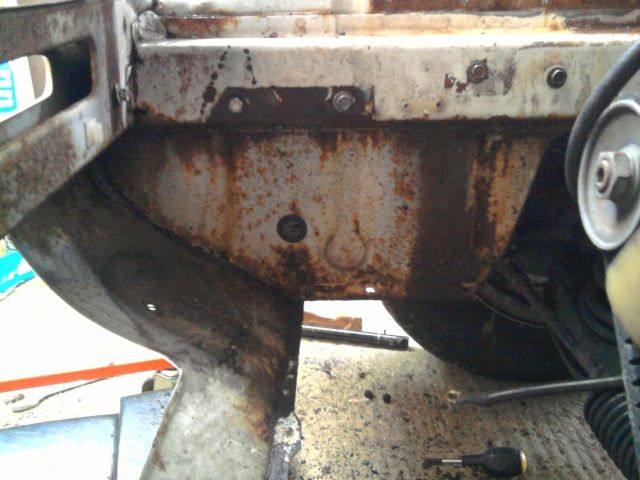 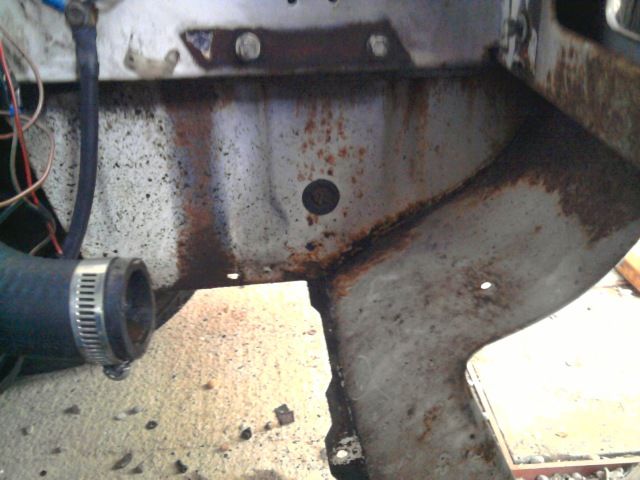 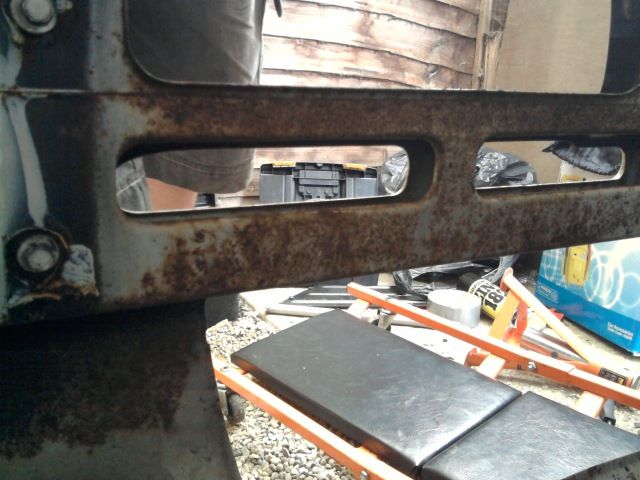  Tomorrow I'll strip more, ready for the engine to come out at some point in the near future. I'm now also thinking about taking out the dash board and tidying up the interior wires as it could really do with it and would make getting the interior painted much easier. |
| |
Project Diary1975 Viva / 1988 T25 Camper / 1989 Mini / 1991 MX5 / 1992 Mini / 1994 Saab 9000 / 1997 Saab 9000 / 2008 Saab 9-5
|
|
|
|
|
May 30, 2012 22:03:54 GMT
|
Today's progress: Other half of the engine bay wiring loom, looking a bit of a mess. 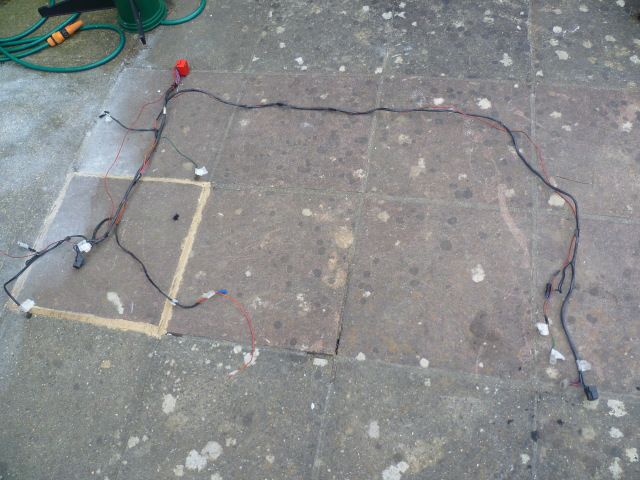 All stripped down 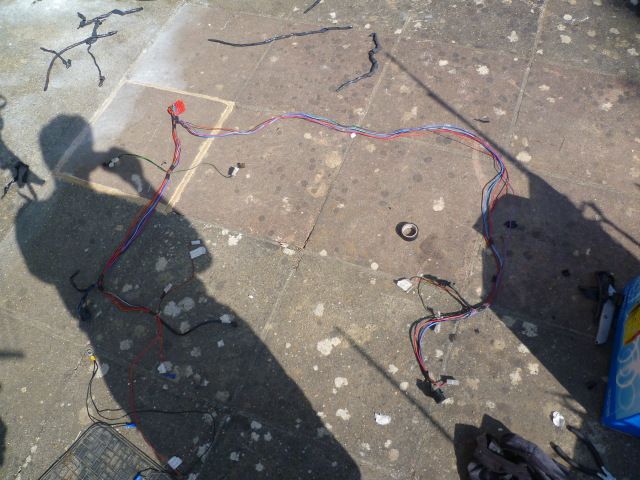 Tidied and retaped and with the half I did yesterday. 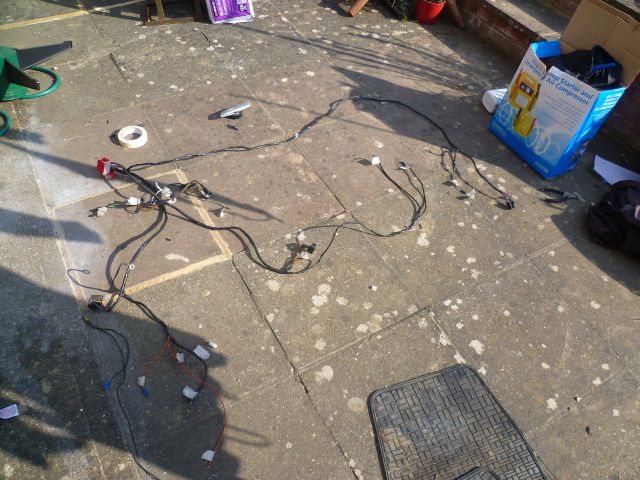 And now put into careful storage. I haven't taped up the last sections of the fog wiring as I have a feeling I did something odd, so I'll tackle that when the time comes, and I've left out the wiring for the air horns, as I think I'll be retiring them More stripping of the engine bay 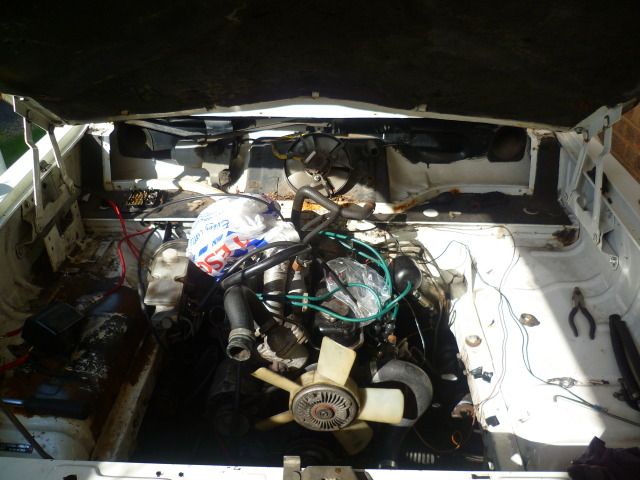 A Leaf History of England: 1975 to 2012 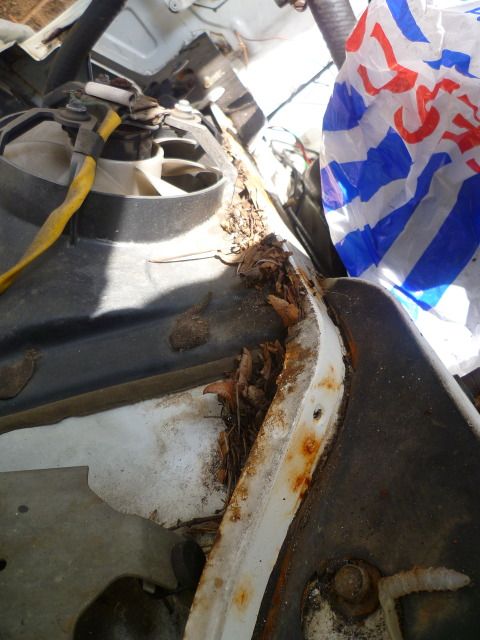 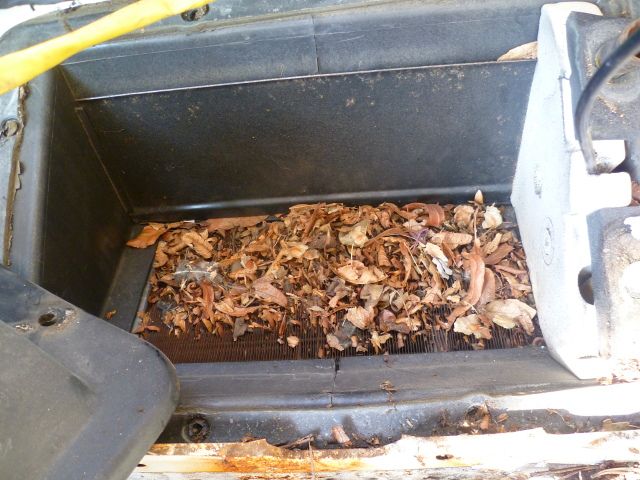 How do you take the plastic tray and the matrix out? Do you have to go through the dashboard? 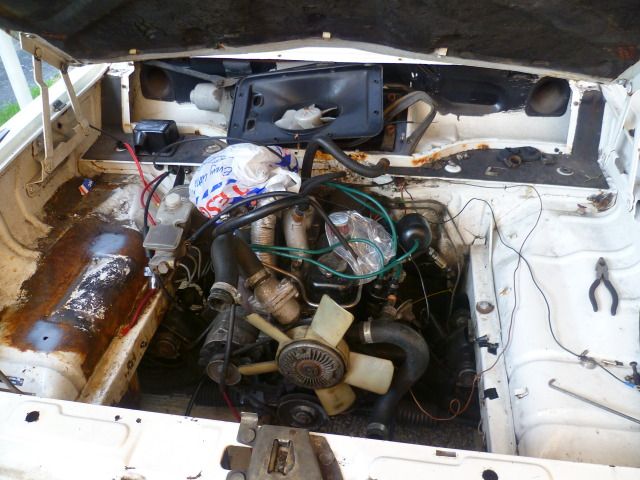 |
| |
Project Diary1975 Viva / 1988 T25 Camper / 1989 Mini / 1991 MX5 / 1992 Mini / 1994 Saab 9000 / 1997 Saab 9000 / 2008 Saab 9-5
|
|
|
|
|
|
|
Some progress of sorts Dash out 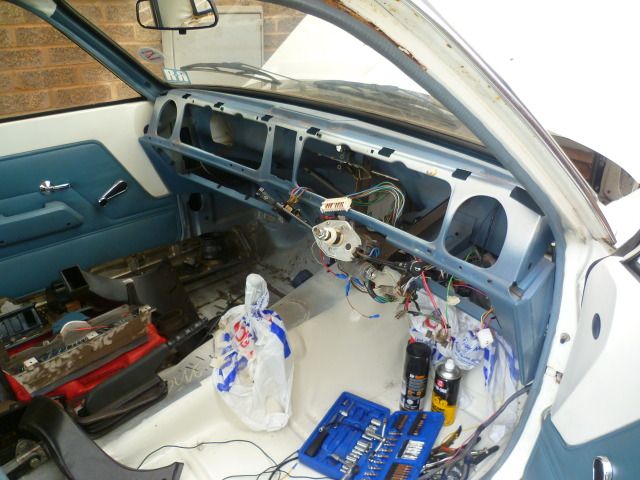 Heater unit out 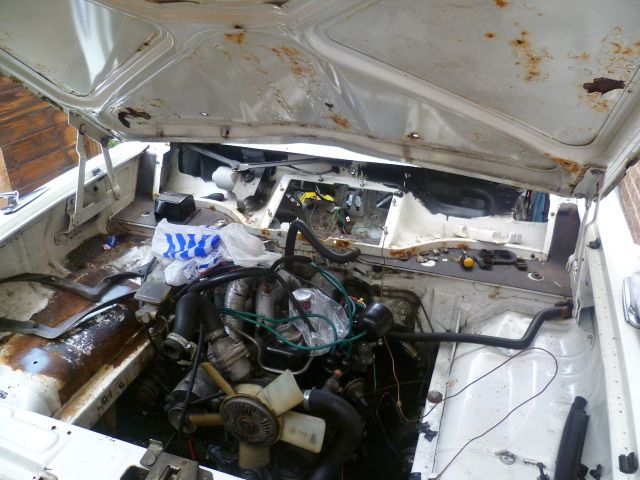 The leaky culprit 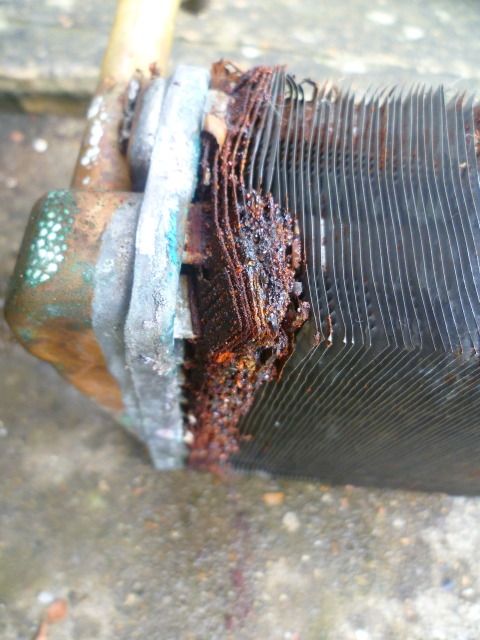 And does anyone know where this little square bit fits in? 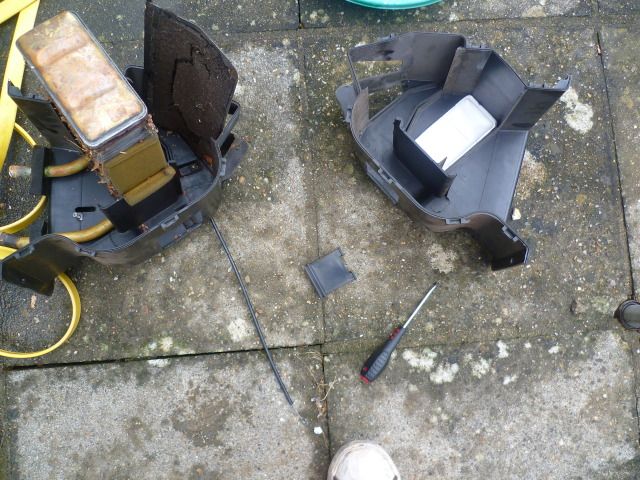 Now I'm getting the valves modified and put in the head (should I go for steel seats?), will be getting one of the radiators and the heater matrix to be refurbished, also picking up a Mk2 Escort boot and RS2000 spoiler that I won on ebay for a very good price. Going to see how well the spoiler fits, and tidy up the boot lid to flog it for a profit. Arrange the trip to Nuneaton to see Paul and get the block and bottom end done, could have been this week Paul but I've been messed around by someone on Ebay :evil: won't be long I promise! Deciding where to put the relays and the alarm unit and tidying up/modifying/redoing the wiring - need to map it out, order some wire, connectors and loom wrap and get on with it. Will be making arrangements for an engine hoist to get the old lump out of there. Chasing up Adams Gas for my big cylinder to start the welding again and chasing up my dad's friend with the compressor. Hopefully I'll then be able to get on with some proper work, weather permitting (unless I can blag moving it to the nice big garage of my Grandad's I used last time it came off the road). So a fair bit coming up. These are the two radiators I have, one on the right from the white car, one on the left from the red. They're slightly different, is one genuine and the other aftermarket? Or one early and the other late? Is either better than the other? I doubt there's any difference but though I'd ask before one goes back to being new and shiny. 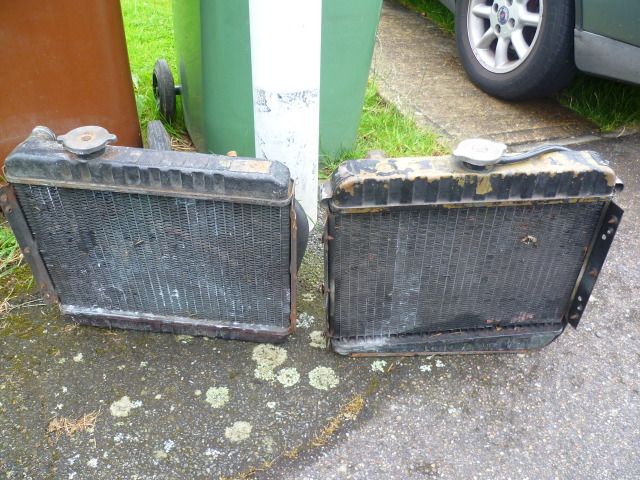 Was also wondering if anyone knows if you can get a modern version of the foam stuff you find all over classic cars that fill up gaps, like on top of the heater matrix, on the back of the directional flaps, around the fresh air vents etc. |
| |
Last Edit: Jul 3, 2012 19:23:08 GMT by oli8925
Project Diary1975 Viva / 1988 T25 Camper / 1989 Mini / 1991 MX5 / 1992 Mini / 1994 Saab 9000 / 1997 Saab 9000 / 2008 Saab 9-5
|
|
|
|
|
|
|
|
Just dropped the matrix and radiator off at Bryans & Son Car Radiator Repairs in Tunbridge Wells. A proper old school little place, down an alleyway between two old shops. Really nice guy and very helpful. Said he'd find out what he can do and to call him in a week to see if they've been done and how much it was. Needs doing so it's fine by me. He was also telling me tales of a regular customer he had 20+ years ago that owned a really battered old Viva with a patchwork of paint, but this guy also ran a Machining and Fabrication shop in Maidstone and had dropped a Mustang engine in the Viva. Said his hobby was pulling up behind Porsches and all the top motors and flashing his lights so they'd put their foot down, then not letting them get away.
Any ideas on the best place to stick the relays and alarm unit? Needs to be water tight, and ideally ot too hard to get to. Not sure where there'll be enough space when the dash is all back together.
|
| |
Project Diary1975 Viva / 1988 T25 Camper / 1989 Mini / 1991 MX5 / 1992 Mini / 1994 Saab 9000 / 1997 Saab 9000 / 2008 Saab 9-5
|
|
|
|
jpsmit
Posted a lot
Posts: 1,254
|
|
|
|
|
"Was also wondering if anyone knows if you can get a modern version of the foam stuff you find all over classic cars that fill up gaps, like on top of the heater matrix, on the back of the directional flaps, around the fresh air vents etc."
This side of the pond I have had good success with foam weatherstripping. Various thicknesses and densities. I just buy a roll and make what I need.
|
| |
|
|
|
|
|
|
|
|
Thanks, I'll see what I can find.
Today:
How am I supposed to wire in an alarm without any fitting instructions of any kind :roll: have emailed Toad/Scorpion, but they seem to be all about going to 'one of our authorized fitters'. Bah.
I think I will fit the box behind the glovebox, fits very snugly there. The other option is to fit it upside down on the passenger side in front of the glovebox, but I'm not sure drilling holes on a horizontal surface into the cabin is a particularly good idea where rust and water leaks are concerned.
I'll keep the Indicator and flasher relays on the drivers side and mount them to the side under the dash. I need to work out what other fused relays I'll be using (dipped beam, full beam, ignition and fog lights that I can think of) and find the best place to mount them, I'm currently thinking in the second bulkhead next to the wiper motor if there's space. The current headlight relays have hefty power cables going in straight from the battery, not sure if that's really needed or not, but it would make running those cables easier if it stayed on the engine side.
|
| |
Project Diary1975 Viva / 1988 T25 Camper / 1989 Mini / 1991 MX5 / 1992 Mini / 1994 Saab 9000 / 1997 Saab 9000 / 2008 Saab 9-5
|
|
|
|
|
|
|
Copy & paste of updates from the past weekish. Just taken the plunge and cut unwanted wires off the alarm loom (keeping them to solder back on if I do need them). Nice to finally feel confident that I know what I'm doing with it. Just one wire I'm unsure about that, although on the wiring diagram, isn't mentioned in detail. It's the green/brown fused 'indicator input' wire which just uses a provided connector to connect to the inline fuse on the permanent live wire. For now I haven't cut this wire but folded and tucked it into the box out of the way. Here you can see what's left and the mass I've chopped out. 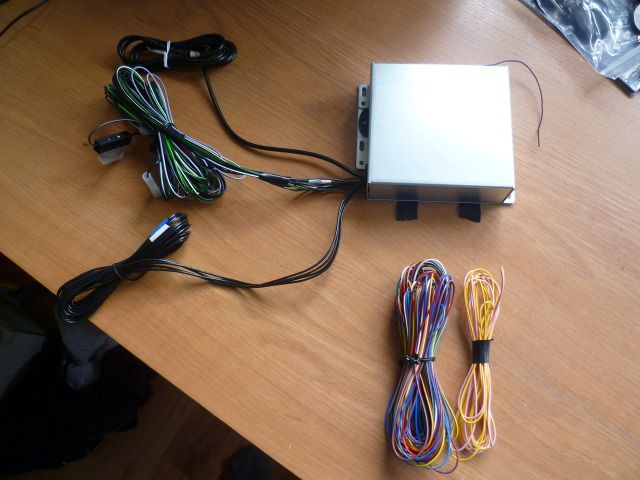 I'm going to get some small rubber spacers to damp the cars vibrations a little bit, and I've got some M4 bolts and nylocs to use to secure it to the bulkhead. I've also finished stripping down my sump that I bought off Paul. The sump from the red one had a few nasty looking repairs so thought it best to get another. This had a few knocks and dents but I've hammered them out. I've got a POR-15 engine painting kit so I'm trying that on this first. Here it is stripped of paint and rust. 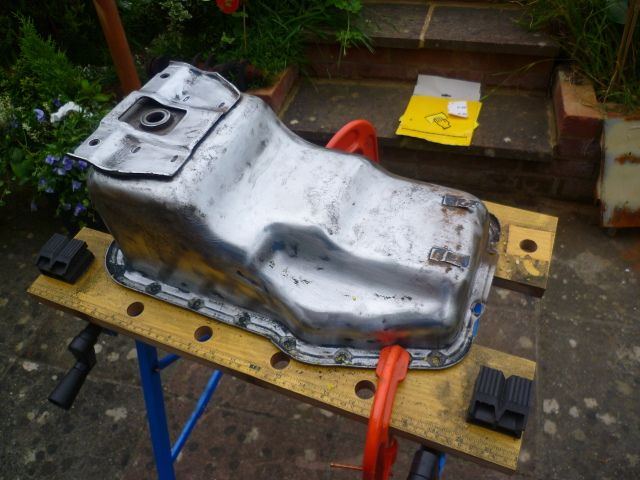 Work on the car will slow now, I'm on 6 night shifts followed by the weekend away at Billing (providing it's not rained off), last night I ordered £100 worth of wire, washers, clips etc etc, made me feel a little sick so I've decided to not buy anything unless it's really needed for the next two months. Obviously excluding the refurbished rad and heater matrix, head and valve work, block and lightening and balancing ;D ah well who needs money. Offered the RS2000 spoiler to the boot as well and it looks like it'll fit really well which surprised me. 3 of 4 studs have snapped and will be a pain to cut out and weld back in so I'll think I'll grind all the studs off and seal the spoiler to another boot lid so I can change it as I wish. Finally, a question to the people that put a relay into their ignition circuit to save the ignition switch. I was trying to work it out with my dad last night but all we came to was that on cranking all the ignition switch does is pull in the solenoid to change the circuit to a 12V feed straight from the battery, so the switch isn't under much strain that we can see. I'll be removing the resistance wire and making it 12V feed to the coil at all times, so I guess that might be a good reason to include a relay. When doing this is there anything else I should change? Like replace all the white wire on the the engine side with heavier wire? Decided what to do about relays. Hazards and flasher relay will be kept seperate (as they're incompatible with anything) and mounted underneath the drivers dash tray on a little lip. The rest of the relays will get power from a fused distribution box, situated in the engine bay (probably), with the relays housed neatly to the right of the drivers feet. This satisfies my OCD in keeping it neat and tidy. I just need to do some measuring as the current front speaker location makes things tight, but it should be ok. Quite happy with that. Drilled holes, mock mounted the control unit. Fits very snug behind the glovebox and is actually in a really good position for wires. I can run the alarm loom above the heater unit to join it to the rest of the loom which looks very neat, and it's in the perfect position for an earth and a grommetted hole in the bulkhead to feed the siren loom through. Mocked up the wires and held them to the existing loom with tape to the points at which they'll all be soldered in. Should be fairly neat when done and not look like someone's been messing around with some wires and a crimping kit. Still a mess at the moment, just a more organised mess 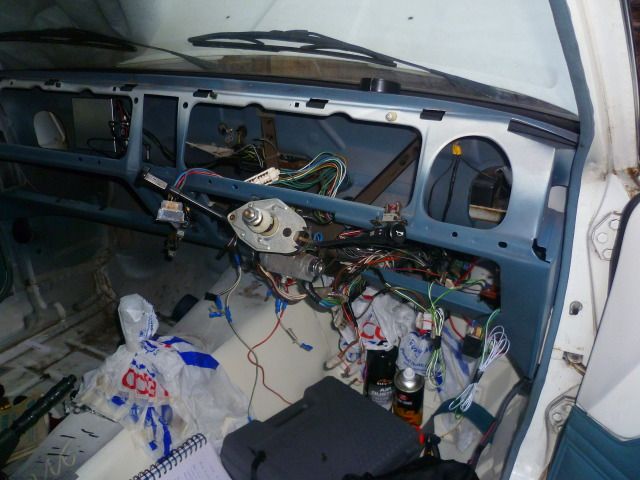 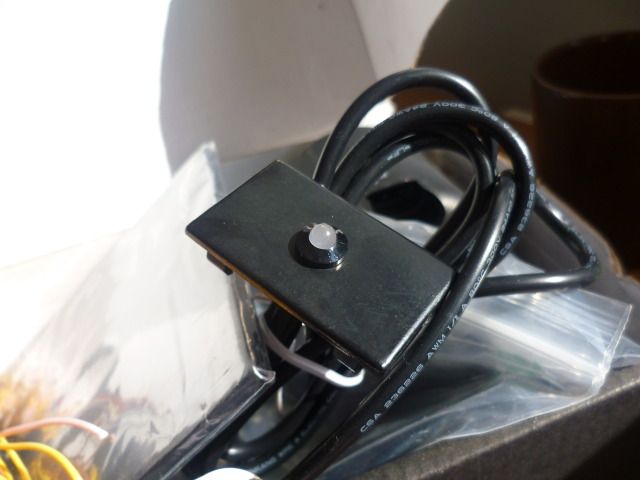 New dilemma, where to put the ultrasonic sensors? Screwed on or Tigersealed on top of the dashboard in the corners, Screwed on or Tigersealed to the underside of the dash (in the footwells more or less) looking up at the seats and doors, or get some of the earlier style 'push in' sensors and fit them to the plates I may or may not be making to replace the dash trays. Now I've thought of the Tigerseal option, plan 1 or 2 seems better, I just didn't want to drill holes in visible areas. 1. 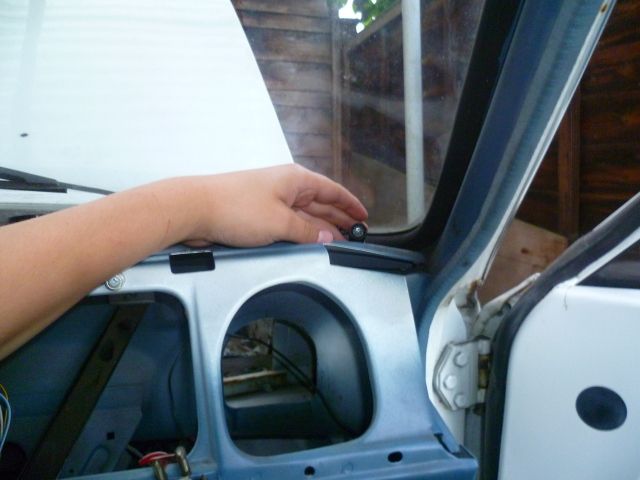 2. 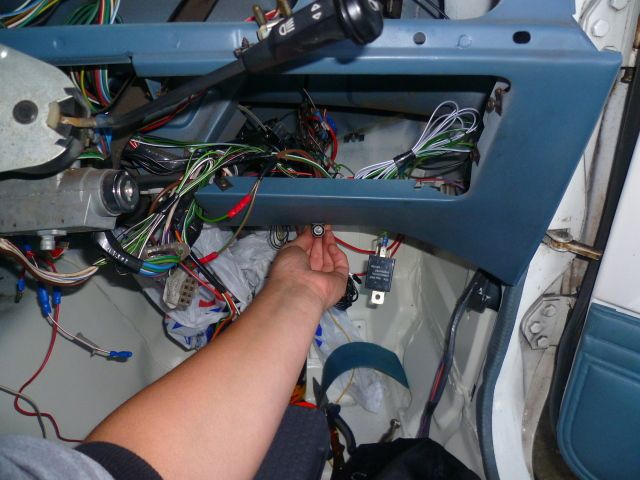 3. 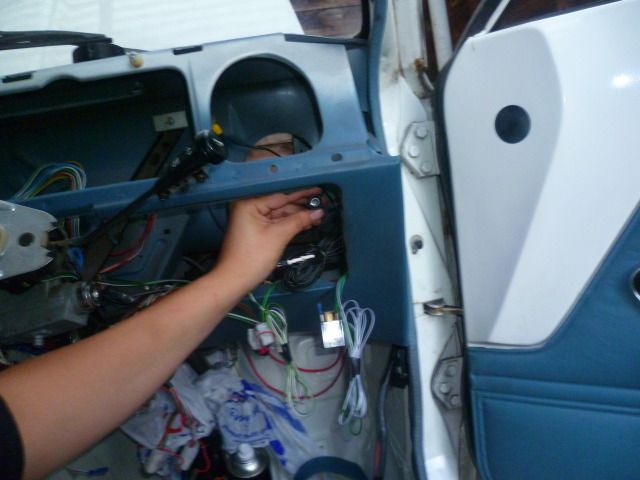 |
| |
Project Diary1975 Viva / 1988 T25 Camper / 1989 Mini / 1991 MX5 / 1992 Mini / 1994 Saab 9000 / 1997 Saab 9000 / 2008 Saab 9-5
|
|
|
|
|
Sept 19, 2012 21:46:51 GMT
|
Not got too much done lately but I took some holiday from work with the intention of getting cracking. I wanted my gas bottle to get on with the welding but I've still not got round to it I've now sold the remaining bodywork of my old Mini, and with that gone (and all my spare bits on Ebay) I can move the Viva interior from my leaky shed to my Mum's garage :twisted: so I now have somewhere nice and dry for all my bits, and stuff that need painting I've kept here so I can get on with it. Makes life so much easier being organised. I've further stripped the Viva, pedal box, brake servo and master cylinder are out, as is the hand brake. Old engine is further stripped ready for removal, need to find a hoist to borrow. I had planned to stick the Weber on so I knew how much room I had to play with to build a plenum/fit an air filter. Turns out, I don't 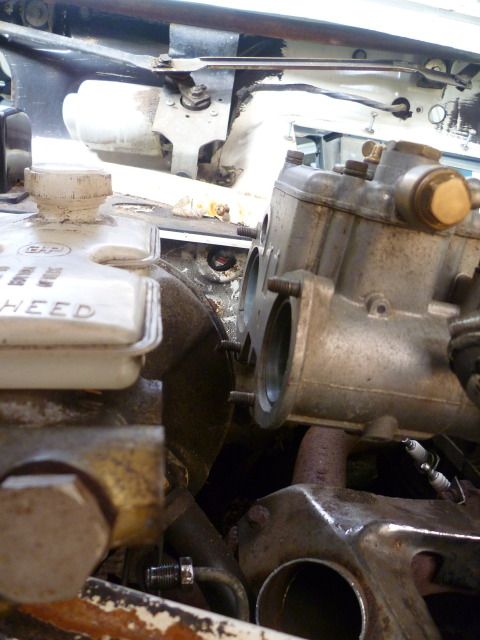 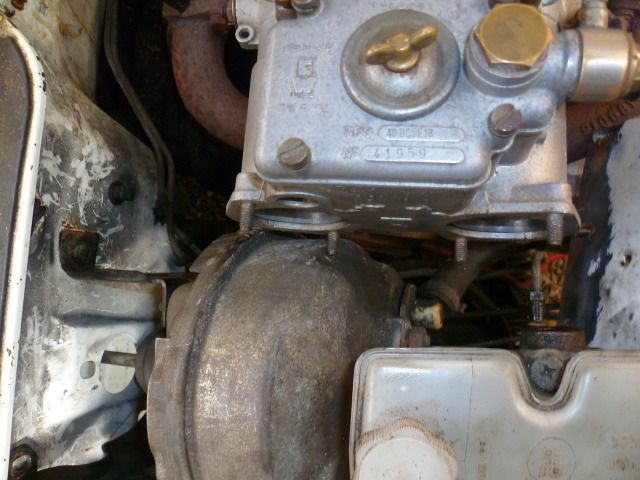 So I'm now on the look out for the rare and expensive Blydenstein inlet manifold/rocker cover. Have also only got a few bits left to finish the wiring, one of which being the bigger bullet connectors for the top row of the bulkhead connector which is turning out to be elusive. Anyone know where to get one? One of the additions I've made is a live for a bulb for an illuminated heater control panel. I've bought a few of these panels over time and was sure one of them had the casing for the bulb on the back but I couldn't find it. In the clearouts I found a few and stuck the casing on a NOS panel so I'm happy. The sidelight bulb holder I'd put aside didn't fit, but a rummage in my magical bag of electrickery bits found me the correct loom. Luck! 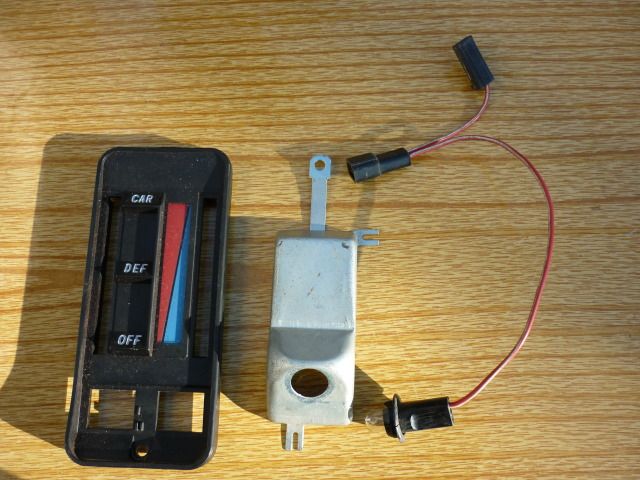 With my remaining week off I shall be stripping and painting bits under the bonnet, brackets and the pedal box, hopefully get some gas for the sparkle stick and a big sheet of metal. Would like to get some black paint (for the bulkhead cover) to see how well the compressor I've been given. It's a tiny 20L, 0.75HP thing so I'm dubious but should be ok for the smaller jobs. |
| |
Project Diary1975 Viva / 1988 T25 Camper / 1989 Mini / 1991 MX5 / 1992 Mini / 1994 Saab 9000 / 1997 Saab 9000 / 2008 Saab 9-5
|
|
MonzaPhil
Posted a lot
Think like a man of action, act like a man of thought
Posts: 2,456
|
|
Sept 19, 2012 23:03:32 GMT
|
|
Enjoying seeing your efforts, keep up the good work!
|
| |
This is now a clicky linky!  |
|
foxy99
Posted a lot
Posts: 1,384
|
|
Sept 20, 2012 1:43:54 GMT
|
Floorpan from a few posts back is looking great ;D Gonna have to sit down and read this whole thread when I have time. As above.... keep up the good work  |
| |
1974 Daimler Double-Six VDP
1965/67 Hillman Imp pick-up
1984 VW Polo breadvan
1970s Yamaha Twins (4)
1976 Honda SS50ZK1
|
|
|
|
|
Sept 20, 2012 9:16:54 GMT
|
Thanks  Probably better to read this one - www.vauxhallviva.com/forum/viewtopic.php?f=23&t=14808&start=280. Despite starting it after this one I tend to update it more. This thread is starting to get gaps in the progress. To tie in the last few months...I'll get the welding done first, then the whole floor will be painted in one go using proper paint and a compressor/spray gun. Spraying it with cans was too expensive, taking too long and the finish was poor. The new engine is mostly done and the block painted. Need to paint the head and buy the little bits like cam bearings and gaskets and fit it all. Biggest cost left is sorting the Weber and the dilemma with the inlet. The wiring loom is 99% finished too, 3 bits left then I can wrap it. My big problem is money, and having none of it. All the money I'd saved for it has been spent keeping the family afloat following my OH's extended maternity leave. I'm now looking to get a loan, even though I can't really afford one, because the spreadsheet I've made brings the remaining work (inc. full respray) up to nearly £4k |
| |
Project Diary1975 Viva / 1988 T25 Camper / 1989 Mini / 1991 MX5 / 1992 Mini / 1994 Saab 9000 / 1997 Saab 9000 / 2008 Saab 9-5
|
|
|
|
|
|
|
Finally got a new gas bottle, hoorah! Man sized too. 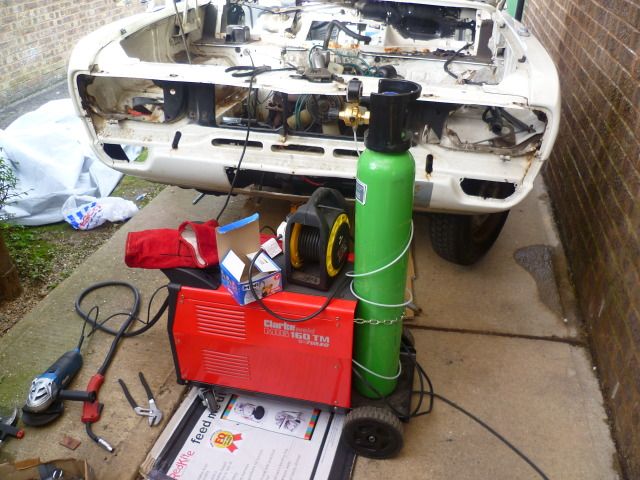 Spent the next 4 hours getting angry, fiddling with settings and making holes. Eventually filled more than I made, and ground them down a bit before the light went. It's not quite perfect, I'll go over it again with a light flap disc when I come to clean up the entire wing and get it smooth and flat. 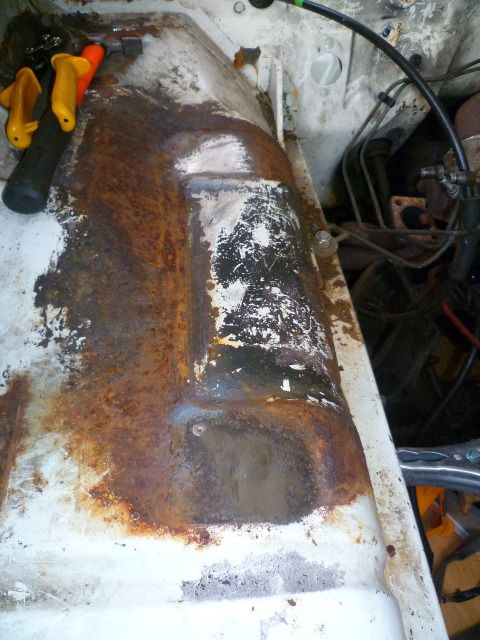 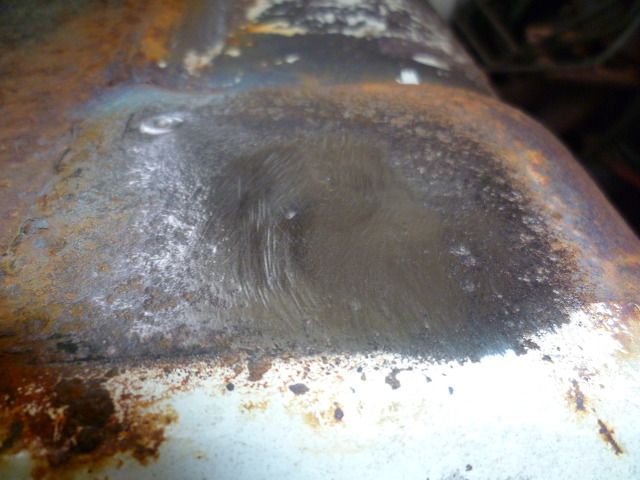 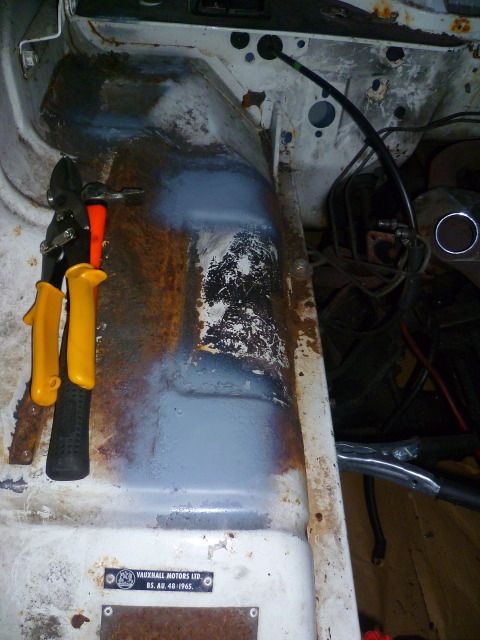 I then had a first attempt at making a template for the speaker/switch panel that will replace the dash tray on the drivers side. Ran into a few problems here, my first choice plan was to go vertically straight up front the front edge of the bottom lip, and then extend out to the top and sides to secure...just look at the photos. Problem here is I can only fit a 10cm speaker there, at a push, and I'd rather not give up the 13cm Phonocar speakers I already have. Not only this but the speaker is directed at my midriff and has a 95mm 'roof' above it. 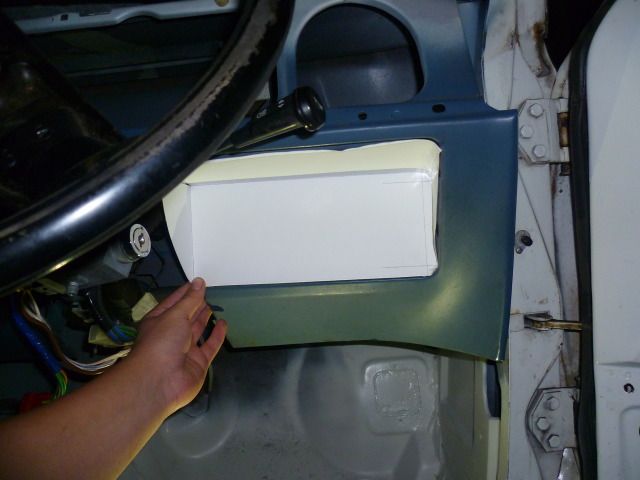 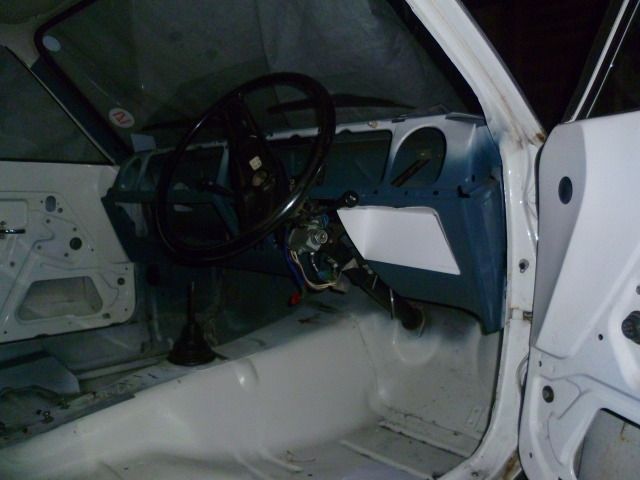 The other option is to follow the line of the dash panel. This would allow me my 13cm speakers and there'd be no 'roof' over the speaker, but it will then be angled down at my legs. Either option will be better than the old set up of them being tucked under the dash pointing straight at the floor though. |
| |
Project Diary1975 Viva / 1988 T25 Camper / 1989 Mini / 1991 MX5 / 1992 Mini / 1994 Saab 9000 / 1997 Saab 9000 / 2008 Saab 9-5
|
|
|
|
|
|
|
|
coming along nicely mate......keep at it.......lol
|
| |
|
|
|
|
|
|
|
|
i was trying to calculate it the other day and worked out a disposable would last 10-15 minutes if you sellotaped the trigger down (depending on regulator setting) pitiful when they cost 12 quid, and hobby sized bottles like yours cost about 30-40 for refills, and lasts 2.5 hours in same test.
keep up the good work mate.
|
| |
|
|
|
|