Hi all! lots of little updates rolled into a big one

(sorry about the copy&paste - the smileys may have got messed up too lol).
++++++++++++++++++++++++++++++++++++
Have a fairly hefty update this time
.
Since receiving this bloody annoying hand-crane attatched to my arm, the progress has been difficult, but progressed nonetheless.
Tackled the handbrake - basically i joined an escort van handbrake cable (was cheap and strong off ebay) to the bm's handbrake cables that were coming out of the back of the hubs, and then made bracketry for it all and attached everything on. Still have the slackness adjustment under the car, have another individual adjuster on one of the cables to balance both the corners, and more adjustment if needed where the cables join.
So, bracketry:


there are 4 bolts going through the cars floor. The reasons why i went with the 'crossbrace' idea:
> extra stiffening for chassis :rolleyes:
> removable
> will catch the prop if it was to snap
> lots of adjustment possible for the handbrake cables
> welding overhead is pain in the ass lmao
i don't have any more pics of joiners in action but will get some so its clear how it works.
So, handbrake works - though it seemed to be dragging the whole time i was doing "back-end-on-axle-stands" testing, i think it had been on for so long before the car was broken for bits that it's stuck on most the time and needs cleaning and freeing up.
my part of the handbrake works flawlessly though :cool: i gave it lots of "jank the **** out of it" testing and no slippage. GRATE!
+______________________+
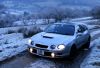
then, the old girl got taken away

. You've been good, car, only broke down on me twice, rest in peace you cube-shaped bundle of hairdresser joy.


then, purchased a bailey blow off valve off a mig-member, since my plastic scooby valve wasn't blowing off much more than 7ish psi or so causing chatter.

looked a bit mucky inside so opened it up and cleaned and re-oiled it:


then, more fibreglass work:
added more strengthening ribs round the front:

the cereal box is there to make the brackets.
then lots of painfull one-hand sanding/filler/sanding/filler/sanding.....
gave up after a while as it was just too difficult, so will have to be a bit patchy for now:

then, a rough coat of brush-on white hammerite lmao. Again - will do for now:

where brackets sit:

then - weldy weldy some angle brackets:

HOLY **** I'm ON FIRE:

Cutting metal with thick discs near your t-shirt - FAIL.
that was a close one! My mate was curse word himself with laughter lmao!!
(check out my funky hand-crane :doh:)
et voila!:


then headlights in, quick panel mockup (was getting exciting):

two-tone white kadett lmao. It kinda looks ok if you stand back and squint - the paint finish is awfull lmao. But will do for now. Will be sanded back later and sprayed, along with the rest of the car probably.
you can see the first casualty on the tip of it's nose - was funny. Took it for a quick spin last night round our private track, did a brakes test forgetting it was only just sitting on the front of the car - the whole front
flew forward and down, tipped on it's nose and we ended up pushing it forward about a foot before stopping lmao. Came out unscathed apart from the nose. So you could say it's quite robust lmao:doh:
and this morning's testing:

observations:
> needs a brake bias valve. The fronts don't seem to be doing much braking atm :doh:
> i put my hands up and admit i love the sound of the bailey blow off lmao
> ride is very smooth (still)
> the heavy snatchy clutch is a lot easyer to use with a normal diff.
> drives in a straight line, everything is perfect in that respect.
> nothing came off or broke doing the "lets see if i can get the back end to step out and control a small 1st gear drift with an open diff like initial D does" test. The surface was pretty loose so all was well, it stepped out a little and was controllable with no rattles/banging/crunching etc.
> fibreglass didn't mind the heat of the turbo&manifold too much. (had to have the fan on most the time.
> needs to be mapped.
> my big tacho is awesome lmao
> handbrake shoes need free-ing.
> need to do a nut&bolt inspection yet underneath, after todays quick session.
> no vibrations from the prop with a small counter-weight in the correct place but of guesstimated mass. (confidence in it is low however, need to make a 1-piece one.)
it all seems promising
:beer:
+++++++++++++++++++++++++++++++++++++++++++
Completed a 160 mile journey today
. Car was loaded to the extreme, camber was spectacular lmao..Made it without too much fuss, apart from losing one of the caliper bolts on the front brakes :eek:. Thankfully had all my tools in the car and an assortment of bolts etc etc, put it on full lock and stuck another bolt in.
Then, turns out my ignition issues are far from over :mad::mad:. The arcing came back, so most of the 160 miles was done on 3 and a half cylinders lmao. Sounded like a scooby, upon closer inspection the arc was very strong and obvious.
Will have to read up on how to weaken the coilpack's output as it's too strong, there's just no stopping it :eek:. I think it will hopefully be as simple as cutting down the coilpack's charging time in megasquirt.
It was arcing
through the leads own insulation, then 3mm wall thickness rubber heater pipe, and another 3mm's of air to the exhaust manifold.
ridiculous!.
observations:
> rear hubs free'd up, but the wheels are coated in brake dust and handbrake no longer works :rolleyes: dissasembly time!
> wobbly prop didn't produce any audible vibrations after diy balancing, though i didn't take the speed over 60mph. Still making a one-piece item though. Cant go wrecking gearbox/diff bearings.
> The car did 30mpg on very rough mapping, 12:1 afr everywhere and 3&a half cylinders :eek:
. Compared to 22mpg on what i thought was a good map 3 months ago. Whatever i did to it, it's worked wonders!!
> Cruised at 60mph in 5th pulling about -10 to -15psi vacuum :eek:
. Compared to positive map on the previous setup. That's the data right there! Was SO much nicer to drive.
I think this was mostly to do with the accelerator pedal's increased travel after i modified it to give me finer control.
> The front splitter seems to have done magic. Not really sure what caused the efficiency improvements but i think the plough & the splitter is the biggest factor with all its smooth lines etc.
More neg camber on the back must have reduced the rolling resistance a bit, maybe the diff is more efficient than the manta one, who knows!. But i'm very happy
shows great potential!
> Engine still very difficult to start when hot. Even on a full battery, when you crank it, as soon as the compression stroke comes it almost stops dead. Then lots of pop/bang/flood. Compression readings have always been very high. Not sure what to do about that yet, apart from getting a stronger starter. Will play about with cranking ignition advance but the issue seems to me hadware not software related.
Maybe my lower CR pistons will reduce the compression a bit.
Are the 16 and 8v starter motors the same??
> Brakes got much much better towards the end :cool: - the fronts seem to be bedding in now.
hoorah!
++++++++++++++++++++++++++++++++++++++++++++
.... But first things first - new prop time. My DIY balancing efforts got me quite far (literally), but the prop was very shonky.
Got home for the summer while uni's out, and said to myself i'll have a well deserved rest and let the hand heal up, but it's more difficult saying it than doing it - just couldn't sit still :rolleyes:.
So, the old man acquired some 2" diameter 4mm wall (:eek:) mild steel pipe from work and this was ideal. It's straight! :Dlmao A little too heavy for my liking since it's part of the rotating assembly, but it's relatively small diameter, therefore doesn't take much effort to turn it.
Anyway, car up (gotta love lightness lmao, being jacked on the BM beam):

Diff down:

Prop out (over the top of the diff):

Then chopped the ends to figure out the best way of doing it.
The ford end was almost fitting, needed maybe about 1/2 a mm turning down on the new tube.
So rigged up a jig which let me grind the end of the pipe very accurately. Sort of like a poor man's lathe lmao. Kept a very small angle - running the pipe almost parallel with the surface of the grinding stone, worked perfec!


The ford end just slotted over the new pipe with a little persuasion, was a lovely interference fit.
The BM end was a little more difficult, had to cut 3 different 1" widths of bigger pipe, slice a section out and tap it into the BM end like you would when fitting pistons into bores - you'd squash the piston rings and tap it in.
Then these got tacked to the BMW uj so they don't slide in and get lost when inserting the prop tube. Again, it was a lovely interference fit and it all fitted true and straight. This was measured by rotating the prop in the vice, with a file clamped so it was a hair's thickness away from touching the side of the UJ, and then was rotated. No deflections, hoorah!
Both ends had 1" of overlap inside the UJ ends.
Then,many layers of thick high-amp beads. Then lots of grinding/welding/grinding/welding, and dipping it in/out of the water to cool it so the grease doesn't boil inside the UJ's.


And the result after painting:

I'm very confident it will last, this thing's a beast


 ..
.. . All my neighbours are donating me their scrap metal, it's awesome haha! Probably thinking to themselves "when is he going to finish this sodding eyesore" xD..


 ..
.. . All my neighbours are donating me their scrap metal, it's awesome haha! Probably thinking to themselves "when is he going to finish this sodding eyesore" xD..

 [*]
[*] [*]
[*]


 ).
).
 looks like there's some good progress been made

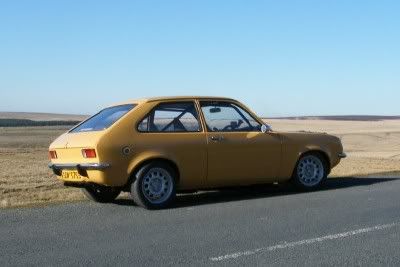
 the gf's retro ride failed its mot due to a holy backbox, so this one cost me £2 from a skip and a hand lmao
  .
.


 ..
..


 . Was it ever a popular car over there? i seemed to come accross a few aussie gemini forums
