|
|
|
Jan 18, 2010 23:50:26 GMT
|
I'm doing a bit of welding and panelwork on this MGB for my uncle...Ive picked up a few tips from this site (eg.tonybmw), so I thought Id throw up some pics... as bought/landed in my back garden last year (i didnt do much to it/pretty mush ignored it for 6 months-had too much on...lol)# 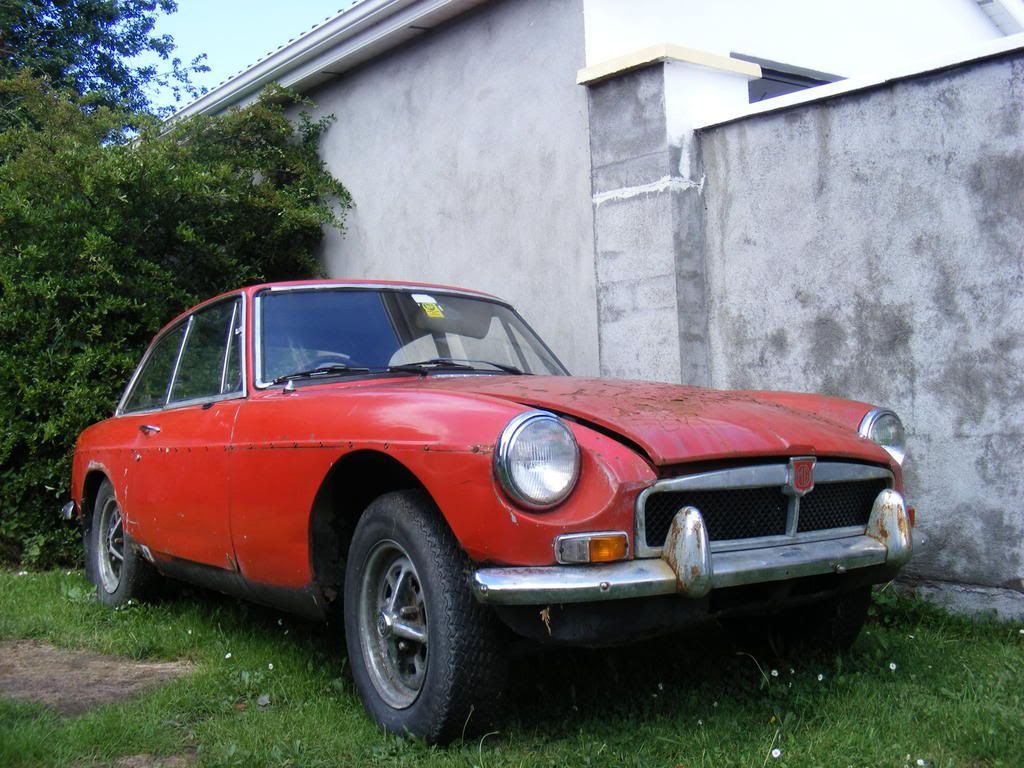 Sills and part of the rear quarters were shot, from what I could see... more was to come... Prev. owner sold the engine after a protacted 'restoration' which saw him remove said engine, but not much else... I whipped off the driverts side wing and revealed some holes to the tops of the inner wings...these were patched up after suitable repair patches were made up... 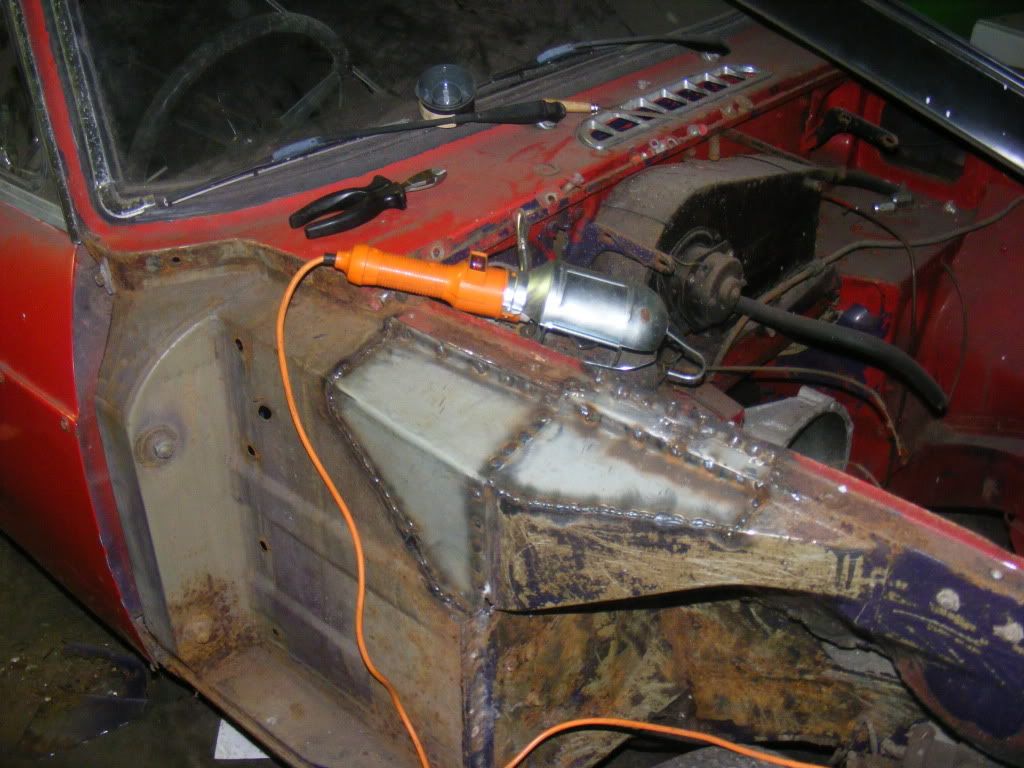 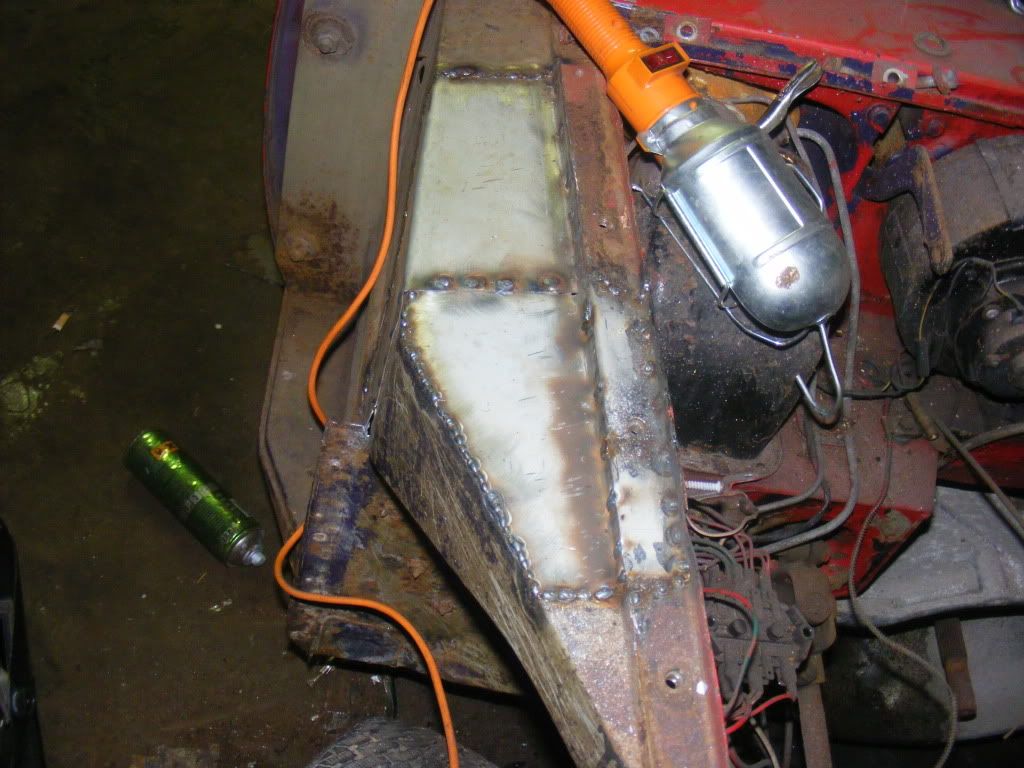 Inner wings were butchered off -inner and outer sills needed... 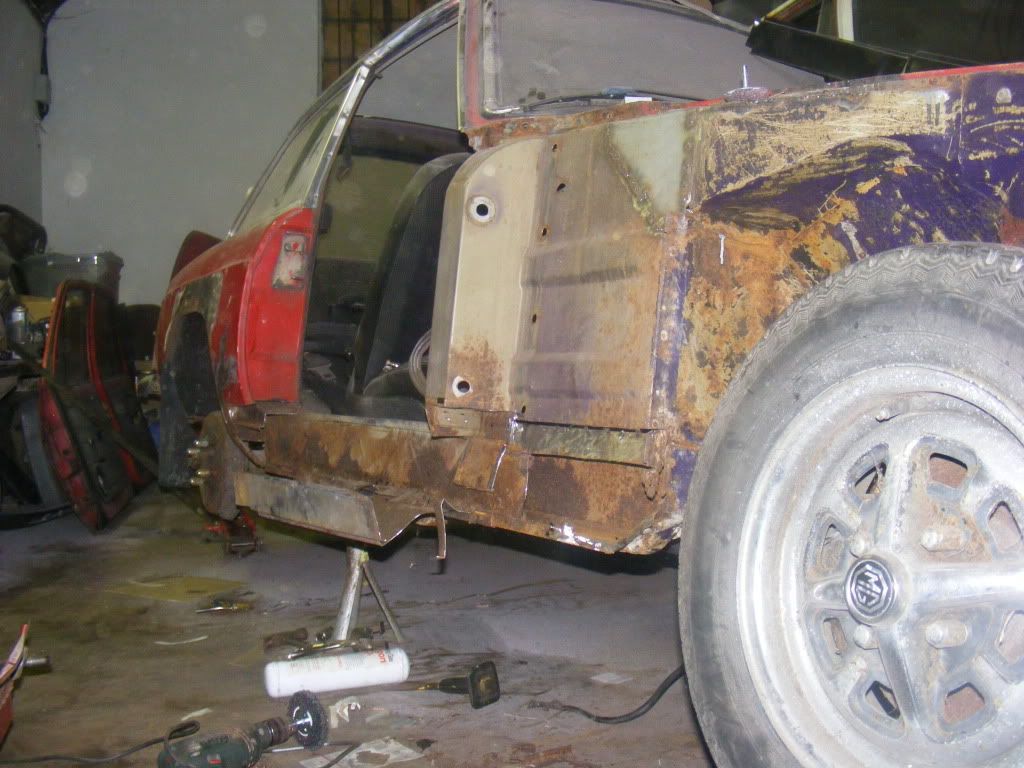 Before doing this I made up a patch for the rear quarter/sill end using zintec steel a few of Tonybmw's tips... 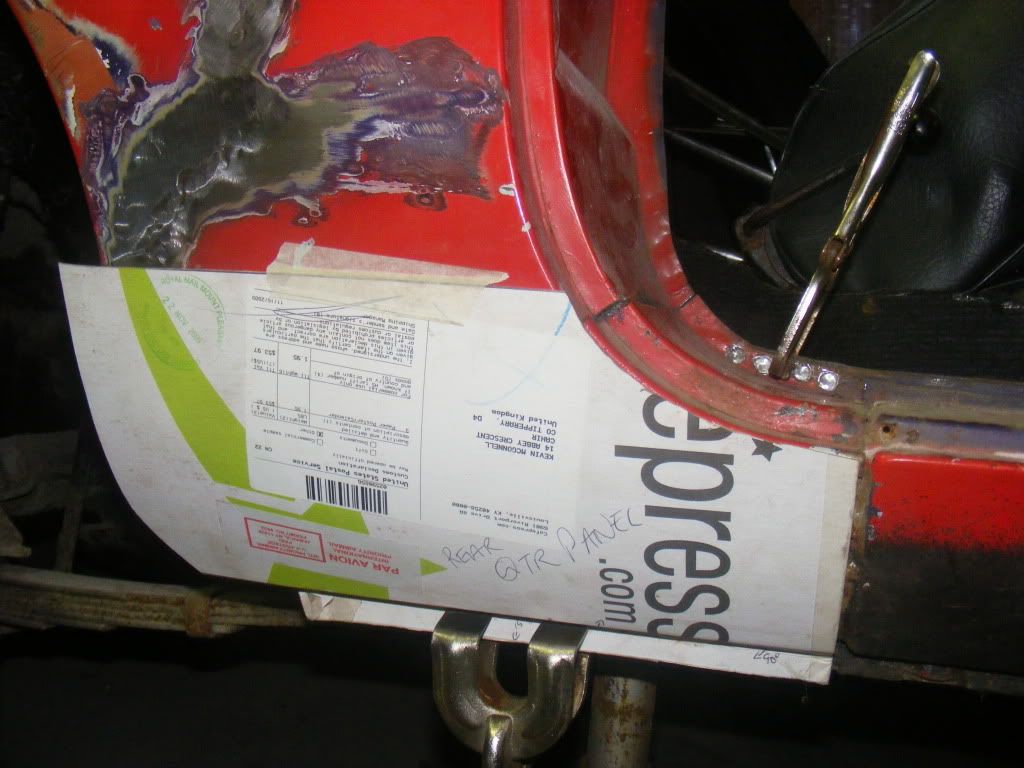 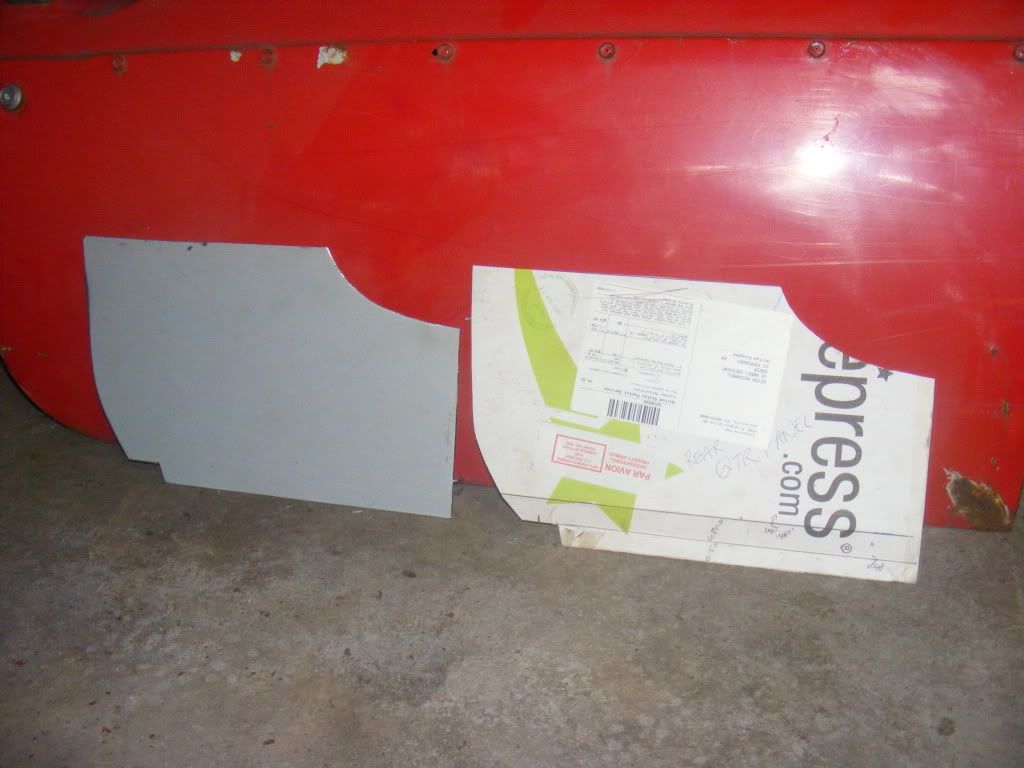 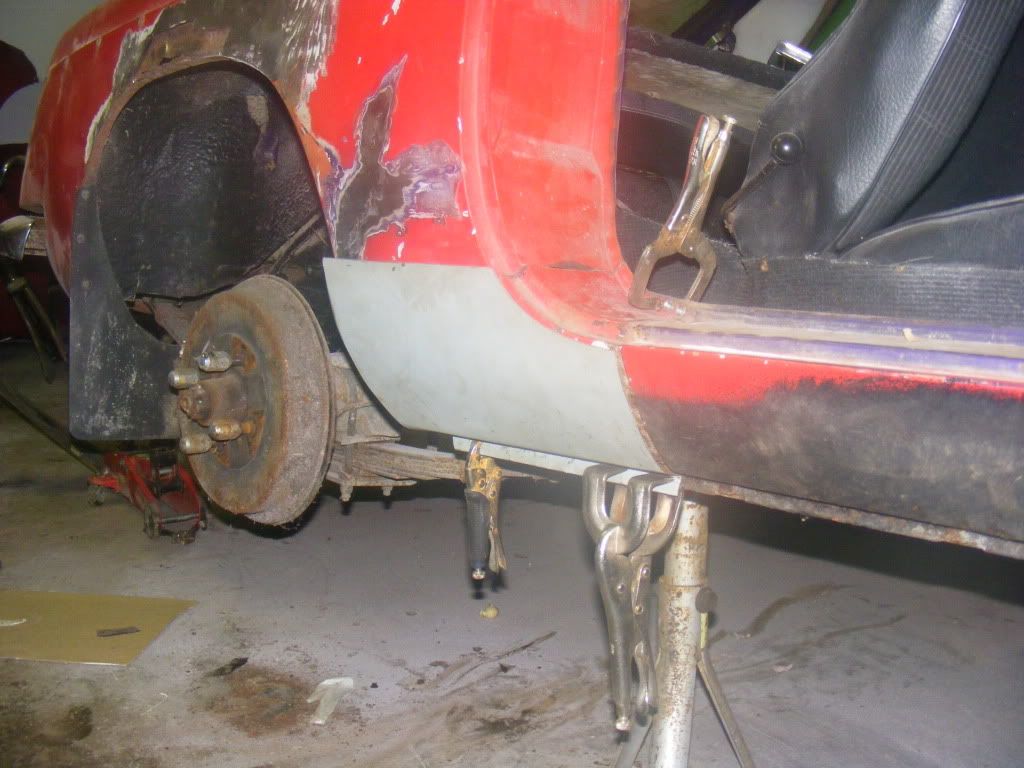 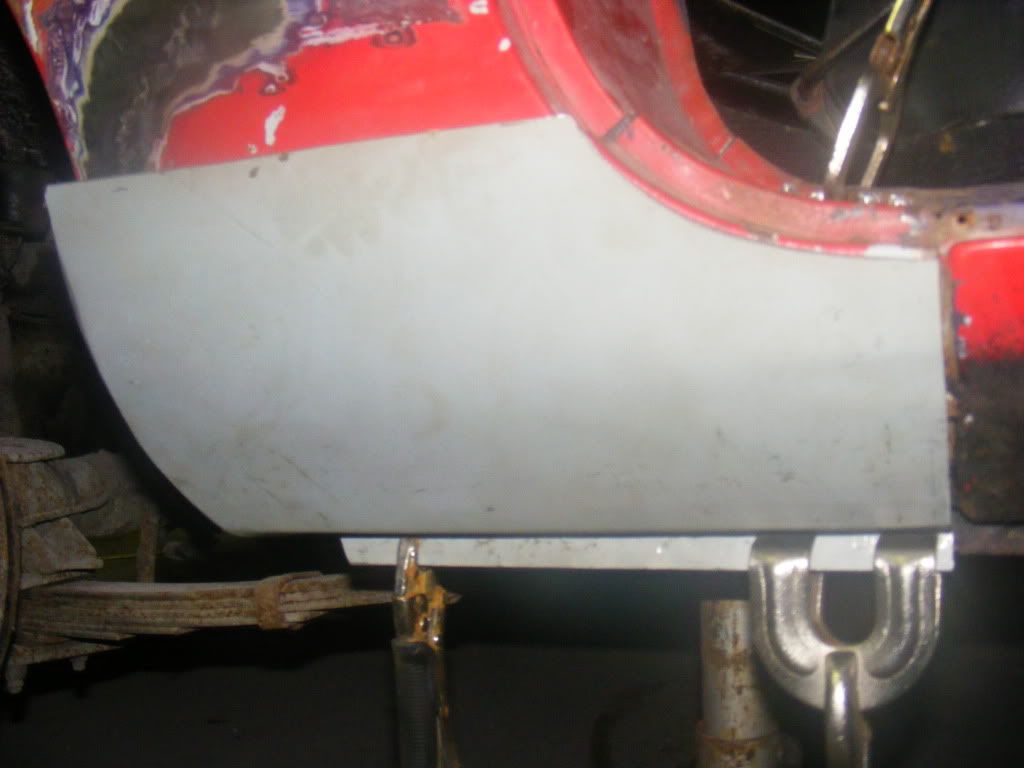 inner sections cleaned up well, though the castle rail needed a patch at the front (no pics-messey overhead welding-turned out okay tho) 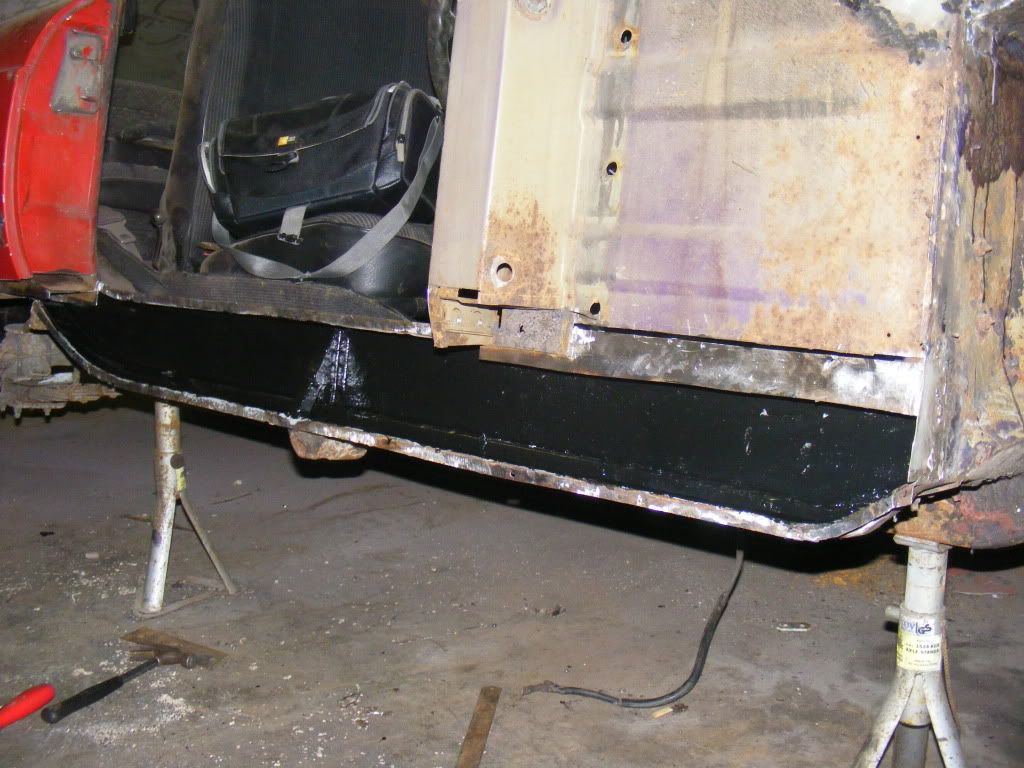 Lots of coats of hammerite like stuff here (cant remember the name) sill all drilled up for plug welding and 'weld through/splatter through' primer... 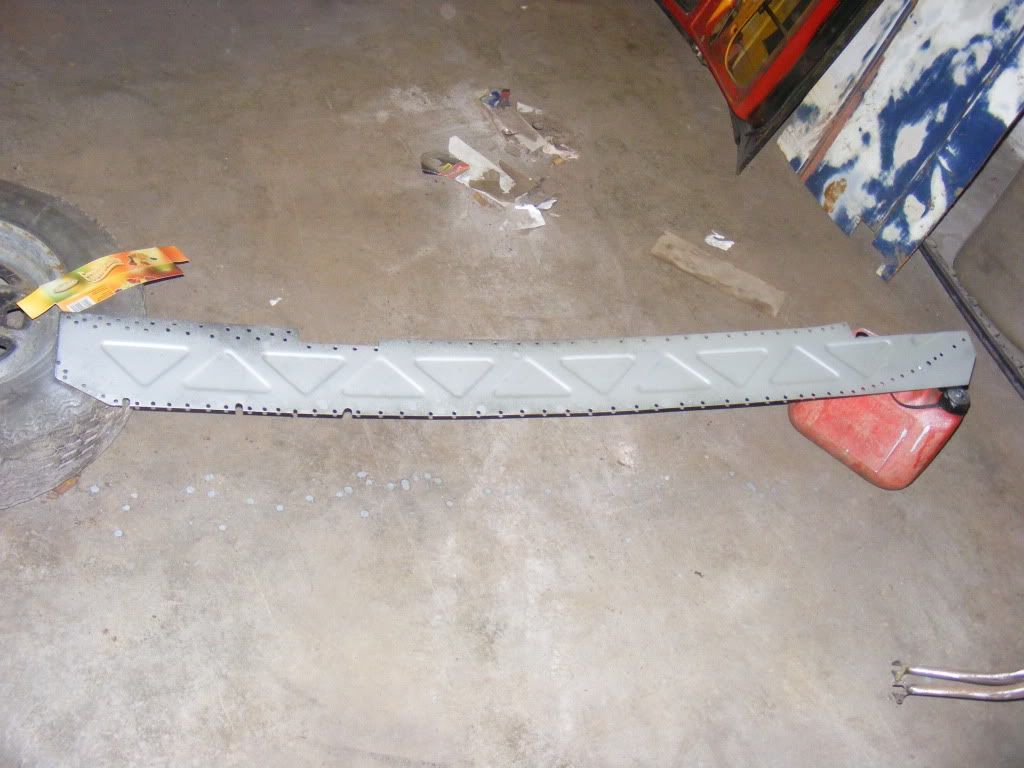 ...and welded in/on 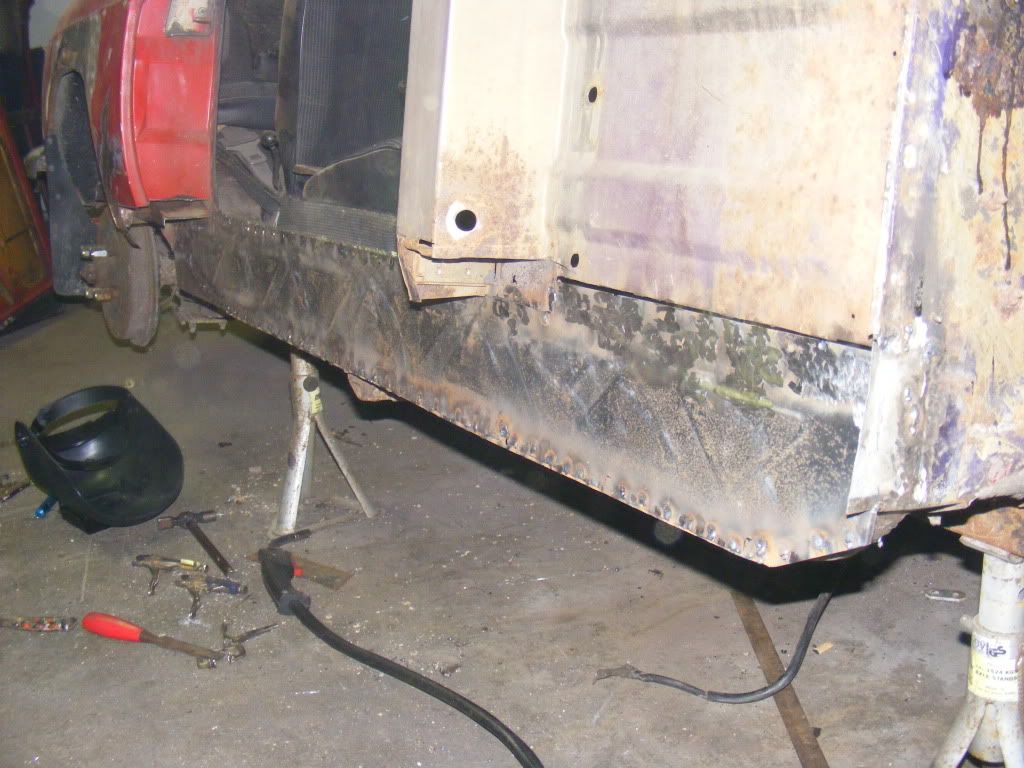 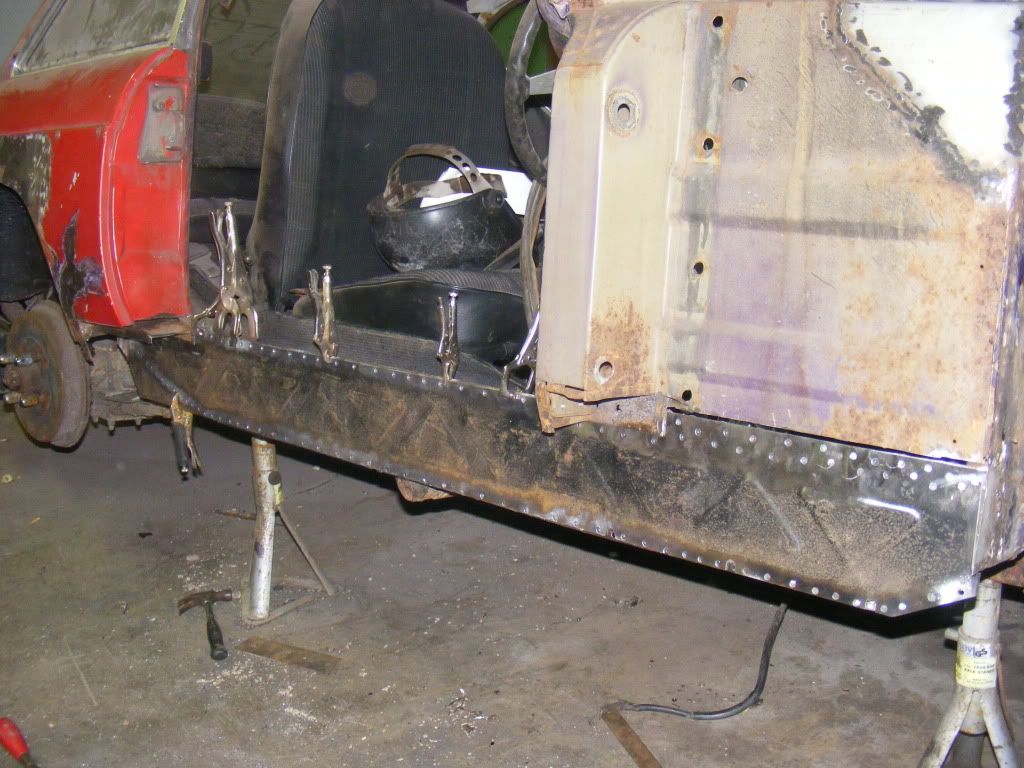 I started this 'project' the first week of december, didnt get much done over Xmas, and only 'got back into it today... welded the outer sills on; 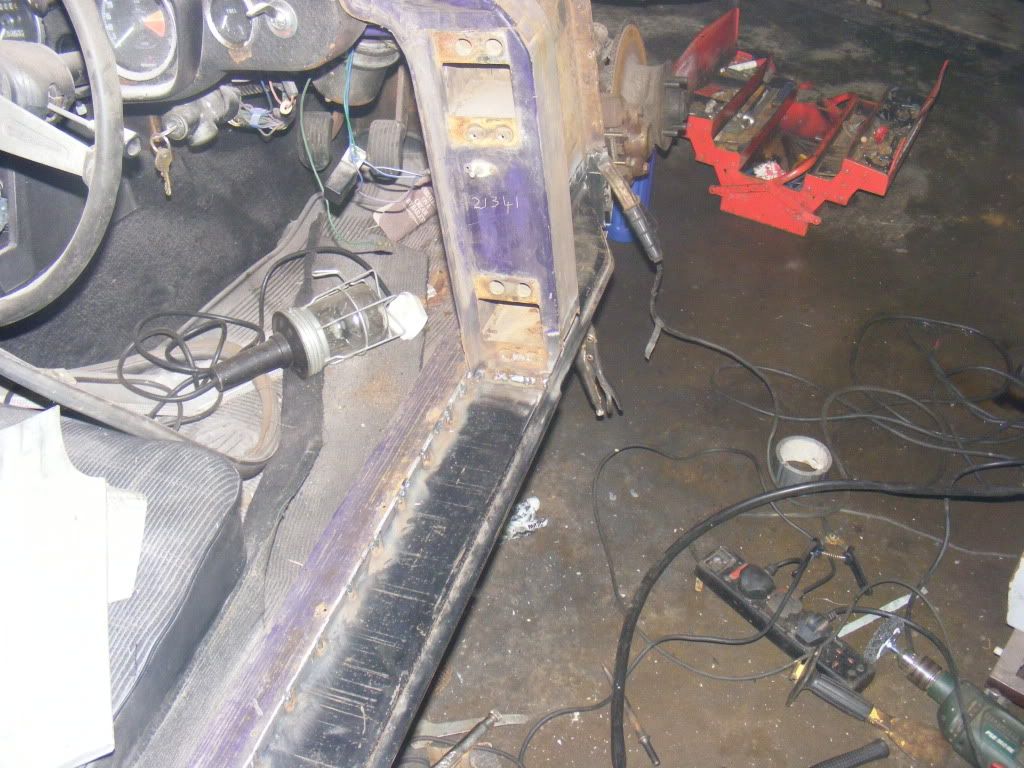  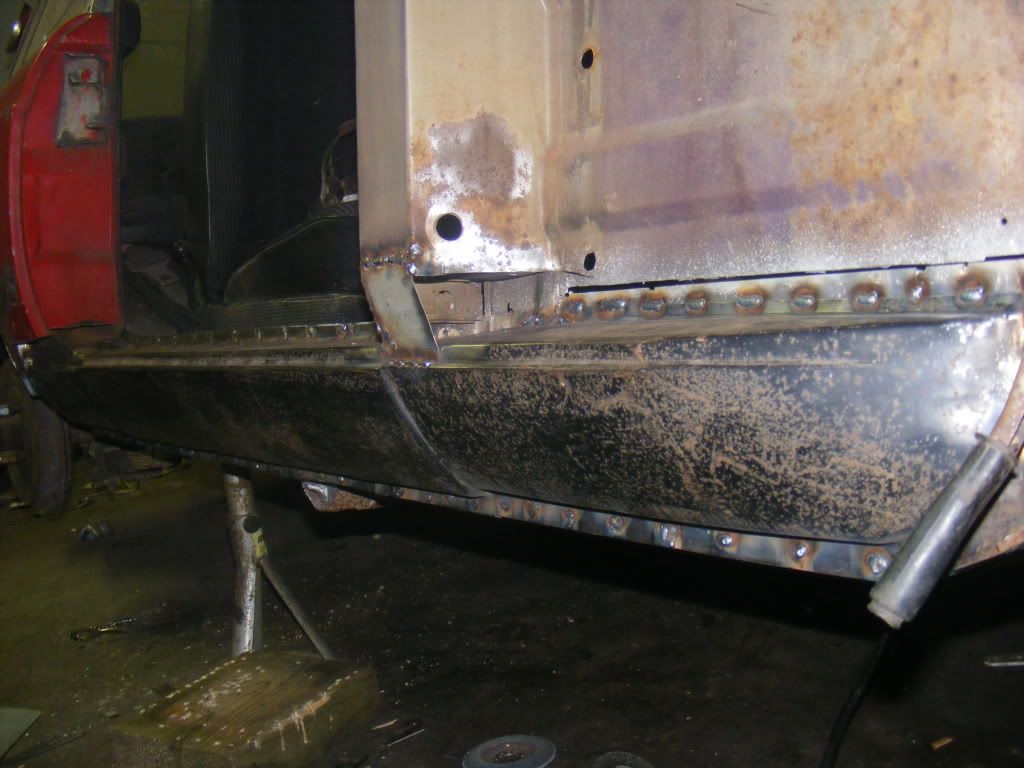 made a whole pile of 'wee' patches out of zintec, before I cut off all the lacey stuff - heres the first going back on after the outer sills were fully welded... 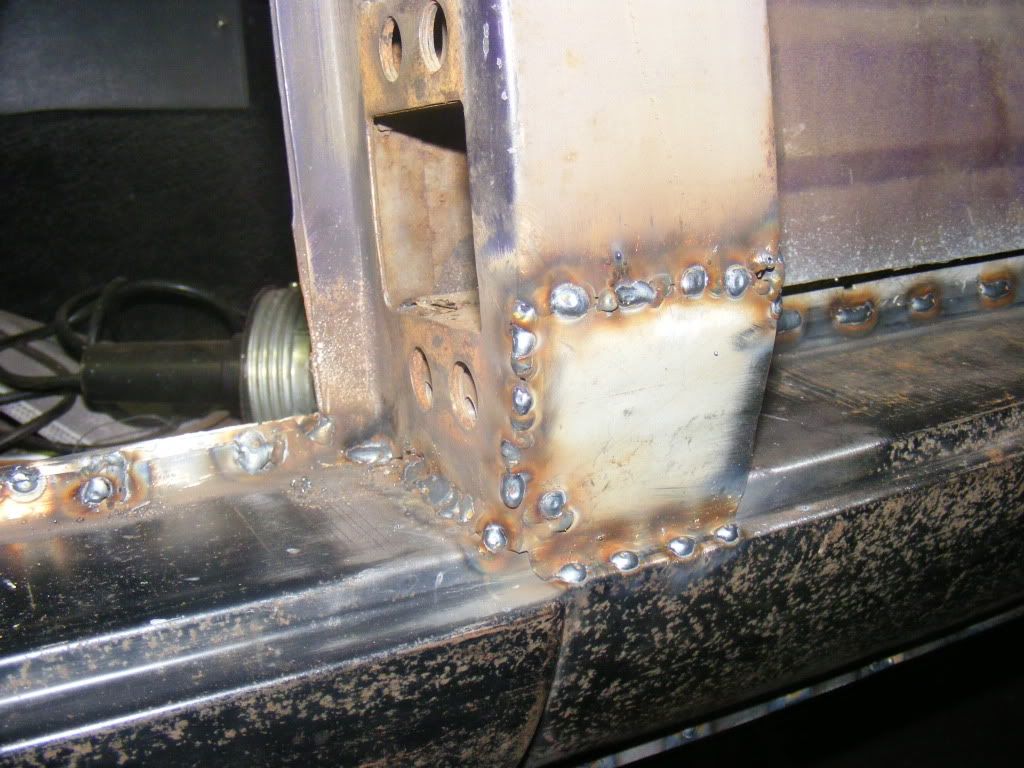 ...that about brings me up to date with this. sills the otherside are equally as perferated, but need to finish up all the metalwork on the driver side before I 'turn it around' -I have a small lock-up with a 77VW bay window already in there, so space is tight... |
| |
Last Edit: Jan 22, 2010 15:59:46 GMT by rmad
|
|
|
|
Seth
South East
MorrisOxford TriumphMirald HillmanMinx BorgwardIsabellaCombi
Posts: 15,538
|
|
|
|
Great looking work going on there.  |
| |

Follow your dreams or you might as well be a vegetable. |
|
|
|
|
|
|
|
Cheers mate. I see you have one yourself; do you have a tread on it? I'm a bit stumped by the bottom of door to sill 'alignment' gap; the doors on this have a long scrape/dent about 3/4 way down-all along the door, and the door skin has seperated at the bottom from the frame (due to the scrape and rust) so its more than a bit 'proud' of the sill line - presumably it should be a flush 'transition' but it looks like the door needs to come in a lot.... no MGB's round here (bar more rotten ones) to compare....
|
| |
|
|
Nathan
Club Retro Rides Member
Posts: 5,650
Club RR Member Number: 1
|
19?? MGB-Rust repairNathan
@bgtmidget7476
Club Retro Rides Member 1
|
|
|
|
Yes the door should be flush, if the skin is coming away I would recommend changing it (simple job).
|
| |
|
|
Seth
South East
MorrisOxford TriumphMirald HillmanMinx BorgwardIsabellaCombi
Posts: 15,538
|
|
|
|
Thread on ours is here though I haven't really taken that many pictures of it. retrorides.proboards.com/index.cgi?board=readersrides&action=display&thread=67623Door line should flow into the sill as you say. A scrape and distortion through rust could certainly pull the door bottom about. Could you find a straighter second hand one? Might be easier to fix a straight but risty door than try to get a bent one into any decent alignment.  |
| |

Follow your dreams or you might as well be a vegetable. |
|
chip83
Part of things
  One day at a time....
Posts: 357
|
|
Jan 19, 2010 14:54:28 GMT
|
|
Coming along nicely, good to see another one back on the road.
|
| |
Quashqui and Yeti (needs must currently)
SAAB 93 EST (Sold)
Volvo S40(sold)
Volvo V40(sold)
MK2 astra aka "THE SHED"(sold)
Mgb GT (crashed)
Peugeot 405(sold)
Orion 1600i (sold)
Metro (scrapped)
Mk1 Fiesta (Broken for spares)
Mk5 Cortina (crashed)
|
|
|
|
|
Jan 19, 2010 22:07:09 GMT
|
Excellent another Zintec Convert   Top work going on there, I will be watching with interest Tony |
| |
|
|
|
|
|
|
|
Cheers Tony et al! @ Tony- Ive been using Zintec for quite awhile having bought a sheet of 8ft x 4ft, 2 years ago- I chopped it into two manageable 4ft x 4ft sheets, and I'm nearly 50% through the second sheet; I never found it that 'malleable'/easy to persuade (i often used 'used' steel - from a vw golf mk3 roof I chopped up years ago), but your tread 'inspired' me to look at it in a new light and perserve it with... A very wet day here, and after a bit of a delay today (meeting a chap to give him a free solid mk1 golf door-it all comes round full circle in the end, doesnt it -I hope), I got a bit more done with the 'GB; only took one pic of the rear inner arch, where it meets the sill... 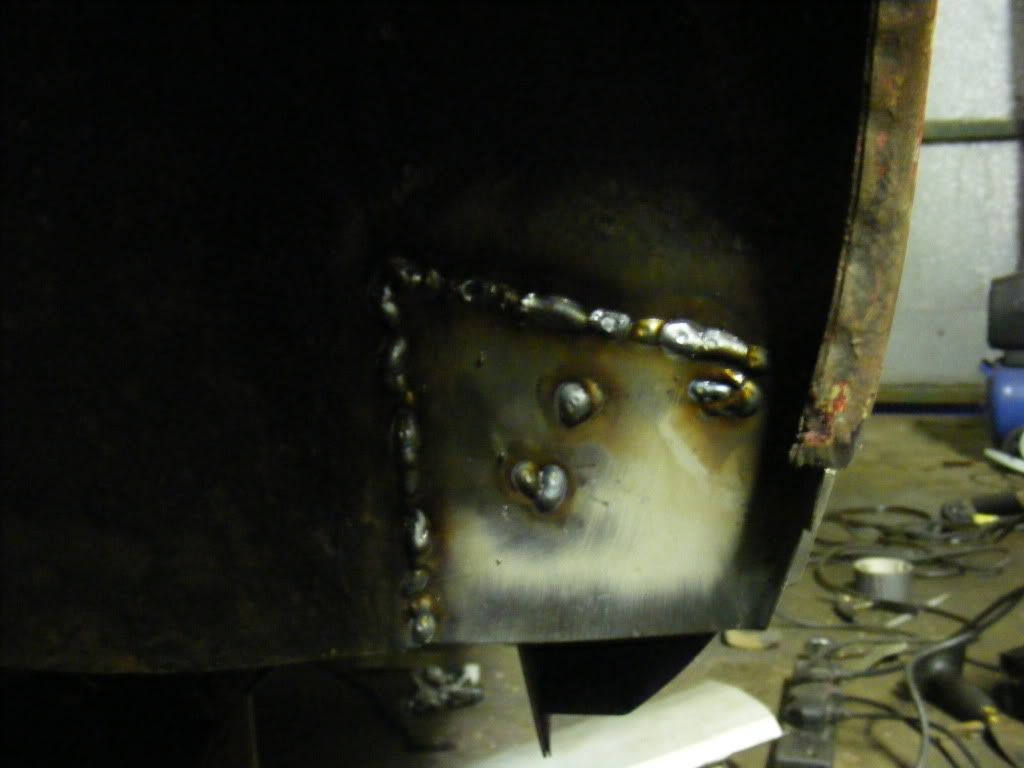 ...trimmed up the rear quarter to fit that I made earlier (decided to paint up the bit of the outer sill that is hidden behind this, and as the paint takes 24 hours to dry -and about 3 hours to 'touch dry', I decided to call it a day... I also did patched up the inner front wing where it meets the sill -no pics again; TBH the rain was coming in the steel doors, or dribbling down onto the floor, so had to move the grinder, welder, compressor further in, and as a result, forgot to take any more pics... I have started a tread on a vw forum (other makes section) but interest seems to have 'tailed off' -I'm glad I started a tread on here; lots of words of encouragement to keep the motorviation up!! Cheers guys! |
| |
Last Edit: Jan 20, 2010 1:16:04 GMT by blzeedub
|
|
|
|
|
Jan 20, 2010 16:32:02 GMT
|
Nice project, looks a lot like mine! Keep it up as these are underrated cars. I note you have an ignition barrel by the column not by the radio, is this an add on or is the car a chrome bumper conversion (not an expert on MGs myself!). Door fit should be a bit like this (although mine is hardly perfect):  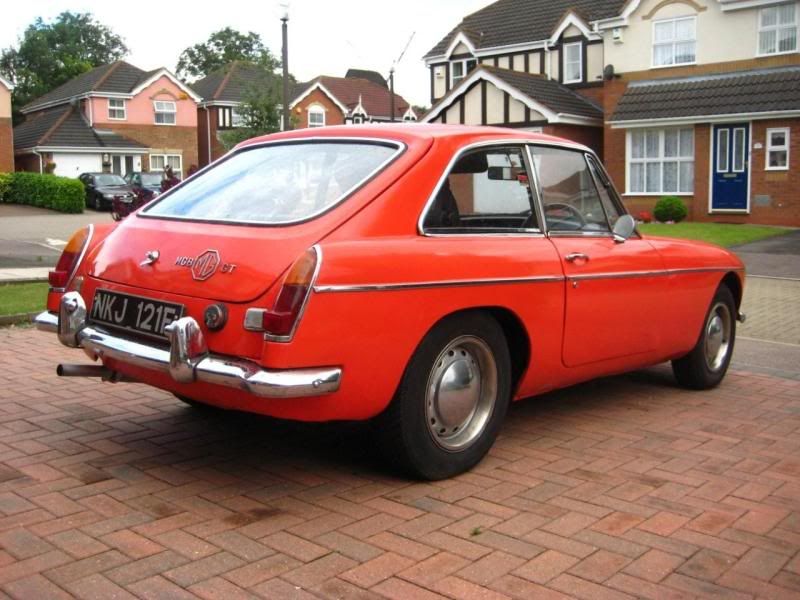 |
| |
|
|
|
|
|
Jan 20, 2010 17:49:26 GMT
|
|
Ahhh another Tipp man like myself! Will be keeping an eye on this.....nice welding!
|
| |
'86 E30. '86 E28. '92 E32. '97 Laguna. '98 March. '00 A4. '05 Focus.
|
|
|
|
|
|
|
Jan 20, 2010 18:05:38 GMT
|
|
Looking good. Much better metal work than mine.
|
| |
|
|
|
|
|
Jan 20, 2010 19:27:17 GMT
|
Some good fabrication and welding ,well done...  |
| |
|
|
Nathan
Club Retro Rides Member
Posts: 5,650
Club RR Member Number: 1
|
19?? MGB-Rust repairNathan
@bgtmidget7476
Club Retro Rides Member 1
|
Jan 20, 2010 20:35:07 GMT
|
Nice project, looks a lot like mine! Keep it up as these are underrated cars. I note you have an ignition barrel by the column not by the radio, is this an add on or is the car a chrome bumper conversion (not an expert on MGs myself!). Door fit should be a bit like this (although mine is hardly perfect):   Your is an early car mate, hence why you have the ignition near the Radio. I think 73 ish they changed to column type onwards, I have seen a few bleed over into Late 74's etc though. |
| |
|
|
|
|
|
Jan 20, 2010 23:10:08 GMT
|
thanks for all the ecouragement, and 'montythemole' for the pics of a 'clean' MGB... I got a bit more 'new metal' on the MG today .... I did a bit more like trimming the rear quarter patch panel I made up, at the start; it needed more careful trimming when offered up- patience being the key here (and 10-12 JohnPlayer Blue for me!) - I tacked in the original 'door shut corner-quarter panel to sill transition piece-a me-bob to check how much needed trimming.... 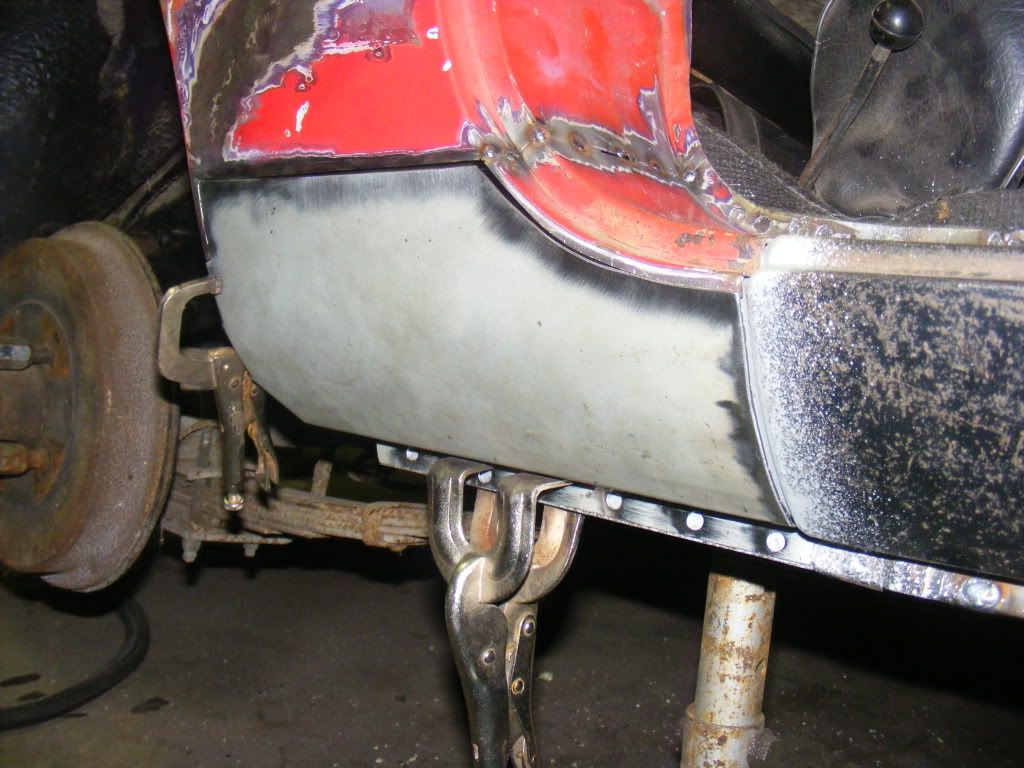 Lots of trimming/sanding filing down later to give a 1mm (ish tho no less) gap for butt welding... Tacked in here finally 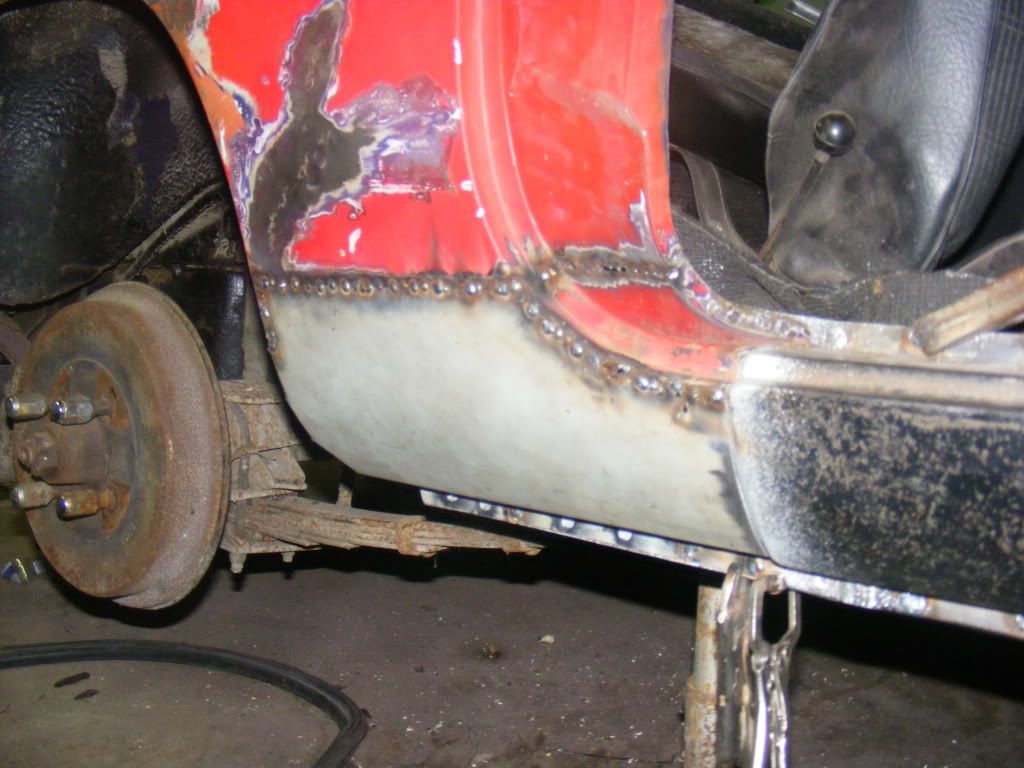 - patience again waiting for each 'spot' to cool - if you rush a butt weld on an outer panel, and one you can get to the back of the weld 'sinks' due to heat build up (meaning lots of nasty filler later)- it does sink a bit anyway no matter how careful you are but its a good idea to keep a slow pace if you want to mininise sinkage...I find at least... 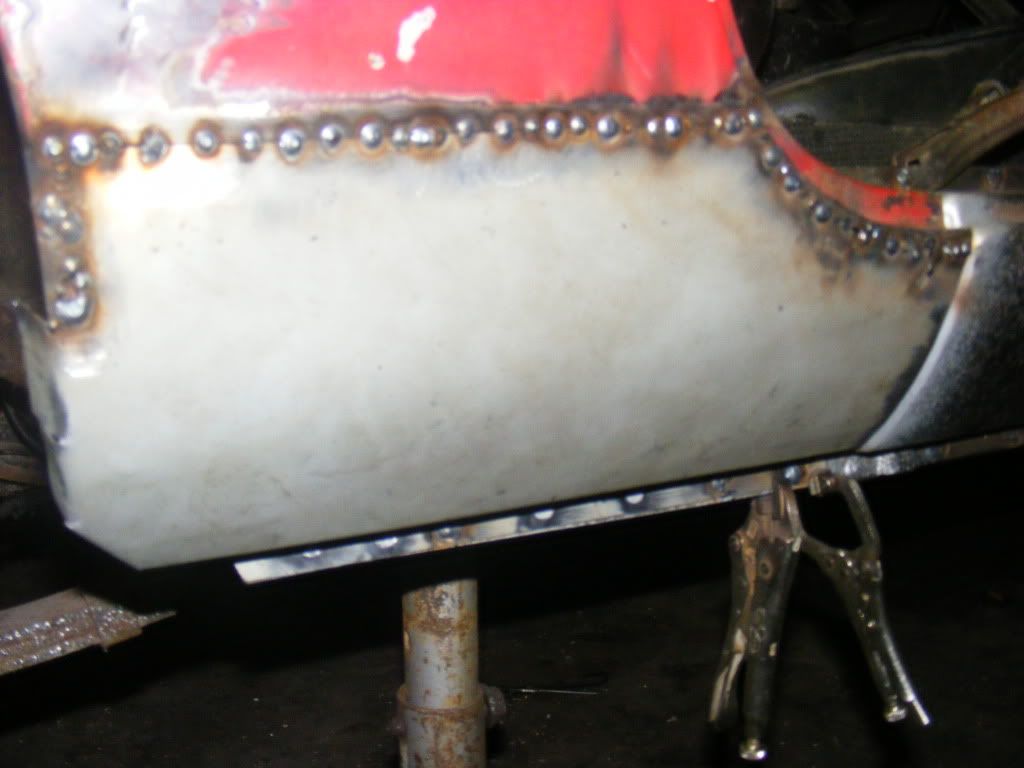 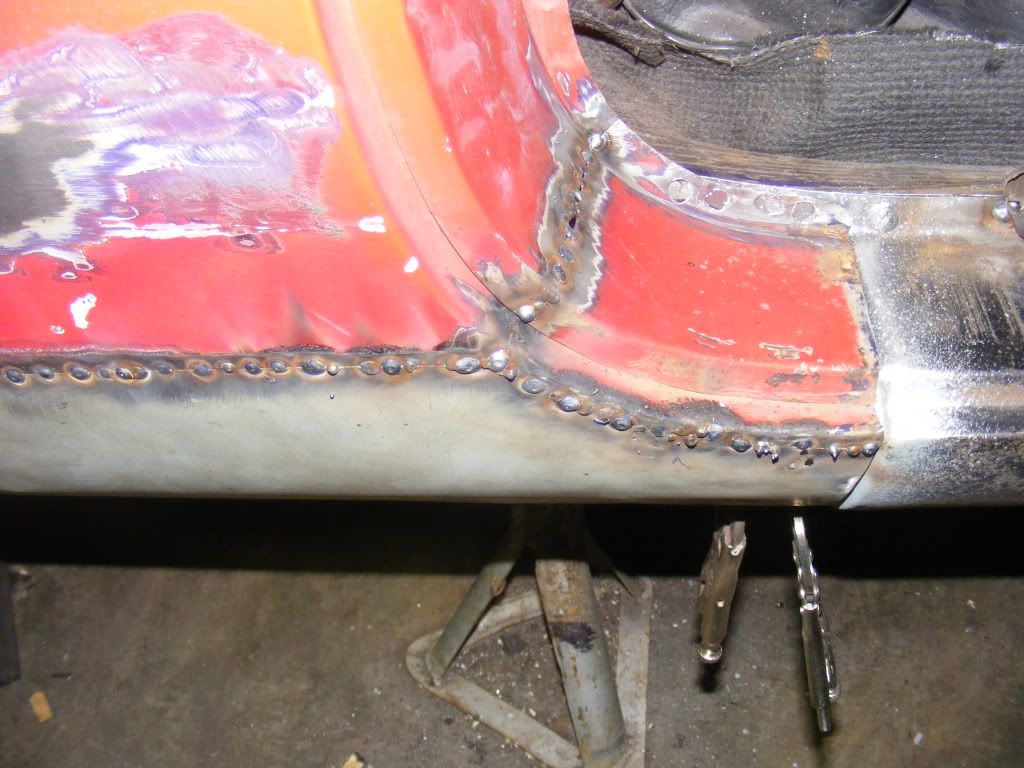 'joining the dots' (spots)... 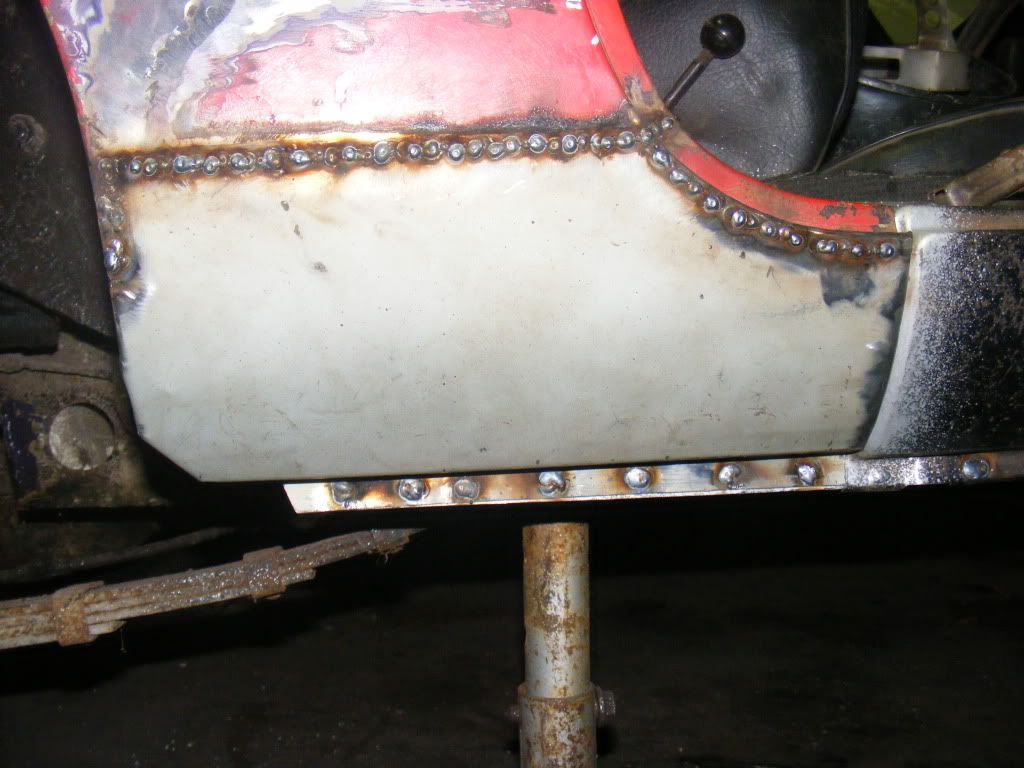 Ive a bit more hammer and dolly work to 'define' the corner edge along the bottom of the patch, but did enough to join/weld to the existing arch edge... 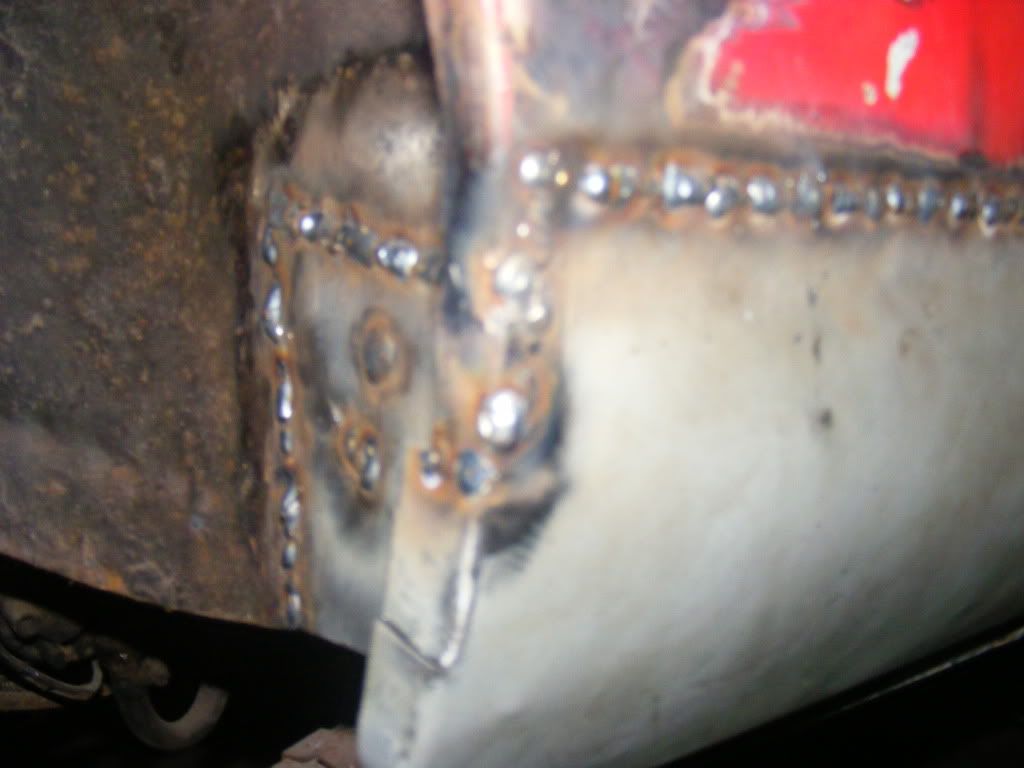 A bit of linish up with a sanding pad to clean down the weld to reveal any gaps in the 'join the dots' technique'.... 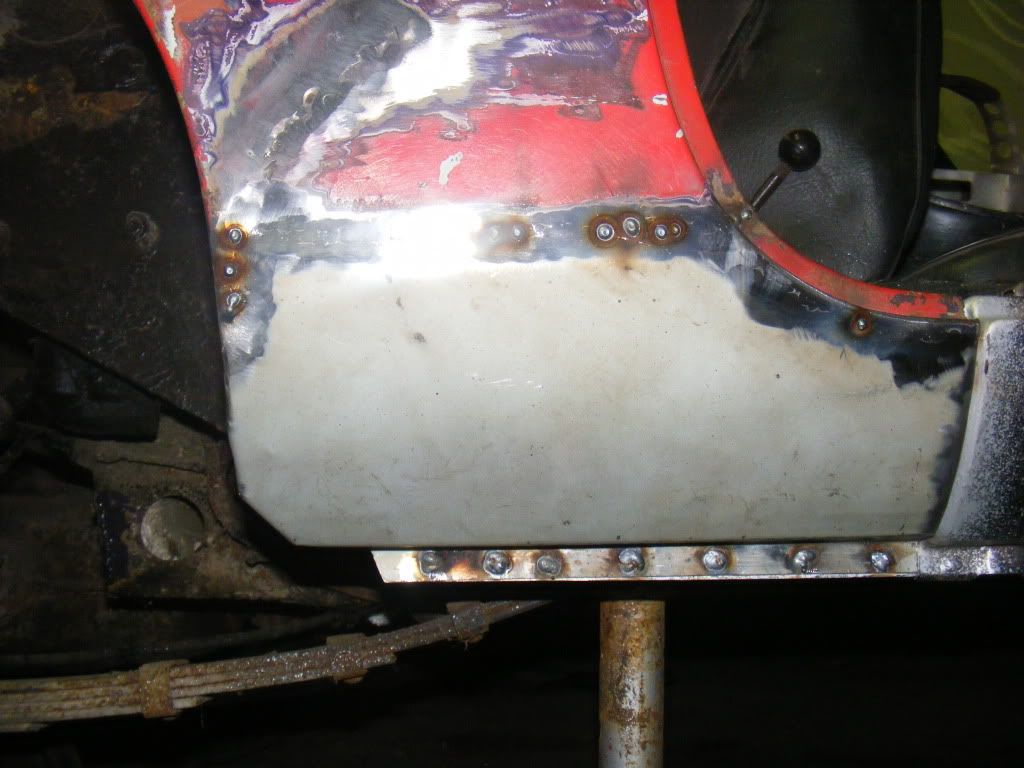 Was a bit 'concerned' over this bit as its an outer panel I made/beat up myself, and theres no one else to blame (eg repair panel suppliers)...theres a bit of finishing up to be done re; The arch edge 'definition', also for some reason the quarter to outer sill line isnt that 'continous - it was 'proud' when I made it up 'on the original sills - either I trimmed too much or the 'replacement' sills differ from the original MG stuff in terms of pressing; or a combination of the two; still its preferable to being proud; maybe some thich underseal will have it 'flush' - In all I am happy with the results tho... Ive a small patch to put in at the front of the door pillar, and a patch to the top of the rear arch and then its the boring 'grinding down of welds' on this side -loveley, then turn the 'B' around and do it all again t'otherside (which aint as bad as this side....I reckon...lol) |
| |
Last Edit: Jan 20, 2010 23:12:42 GMT by blzeedub
|
|
|
|
|
Jan 20, 2010 23:15:32 GMT
|
Nice work , you should be pleased with that   |
| |
|
|
|
|
|
Jan 20, 2010 23:35:53 GMT
|
|
Cheers; I'm happy enough Tony; That whole quarter had a nice bit of filler over some old dents--where the paint has been scrubbed off is where I welded on some nails to pull them out flush, so the quarter will need a skim of filler again before paint... as I said I'm a bit disappointed with the very bottom of the 'quarter patch- panel to sill 'transition that its not that flush -I 'butted up' the patch to the bottom of the outer sill (which is 'hidden' behind the quarter; as per original -tho in rust; I suppose the rep. outer sill panels must be too deeply 'pressed' in this area in comparsion the original MG stamping/pressing; as I said a tick coat of shultz there migth make up the gap that only small animals and earth worms might notice....
|
| |
|
|
luckygti
Posted a lot
   I need to try harder!
Posts: 4,912
|
|
Jan 20, 2010 23:47:47 GMT
|
All looks pretty good to me  and if Tony says it's good ^ then I don't think you have anything to worry about! |
| |
|
|
mirafioriman
Posted a lot
   My next project.......
Posts: 1,361
|
|
Jan 20, 2010 23:59:07 GMT
|
|
Nice neat fabrication and welding there!
|
| |
|
|
|
|
|
Jan 21, 2010 23:05:03 GMT
|
I got about seven hours in down the lock-up with the 'B- not many pics of welding 'in progress', as I was parked up in town on a mission to the bank, on the way to the lock-up; and had the camera in the cab, but decided to move it into the rear load area so it wouldnt be 'bait' for thieving scum... as a result I forgot I had the camera till packing up at 9.30pm tonight when I spotted it and took a few pics... earlier-Nasty 'rust scab' was revealed to be a little more extensive after I 'investigated with a 1mm disc on the grinder,,, 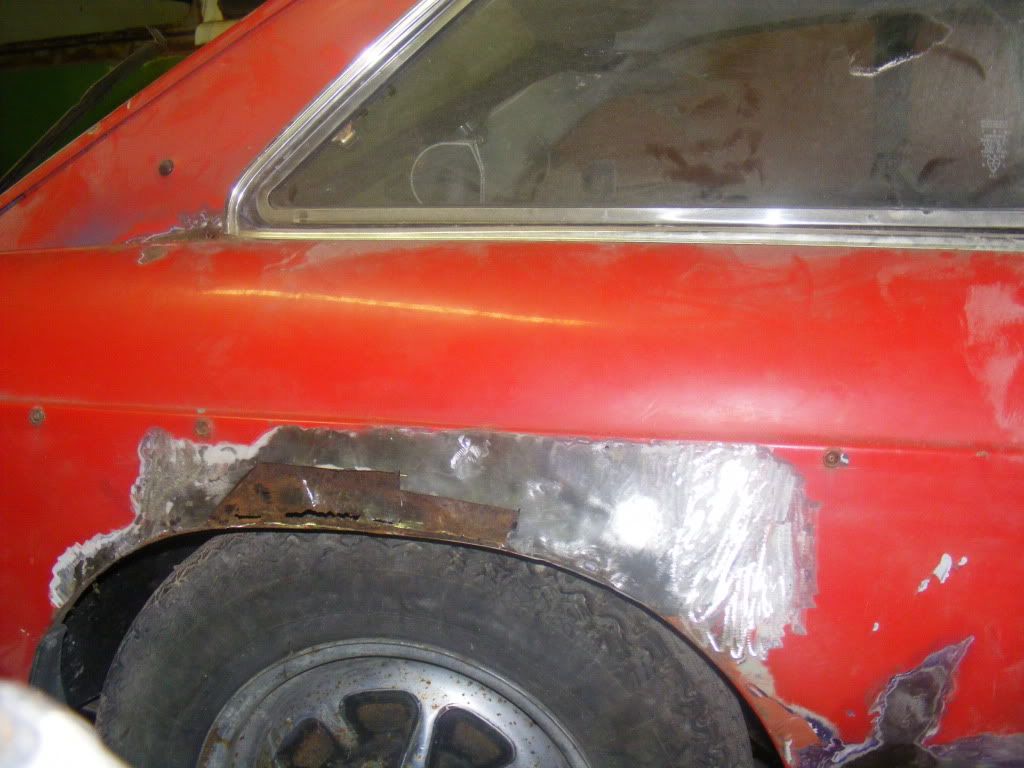 Inner tub was lacey and neede a patch; much the same way as making the 'outer', but less time consuming in terms of 'hammer time' -I was like that automotive designer/lash up artist 'Lipo@ from the chop-shop (hope it doesnt turn out as sheite as some of his 'creations) hammering away at the outer arch edge to increase 'definition of the patch I made... 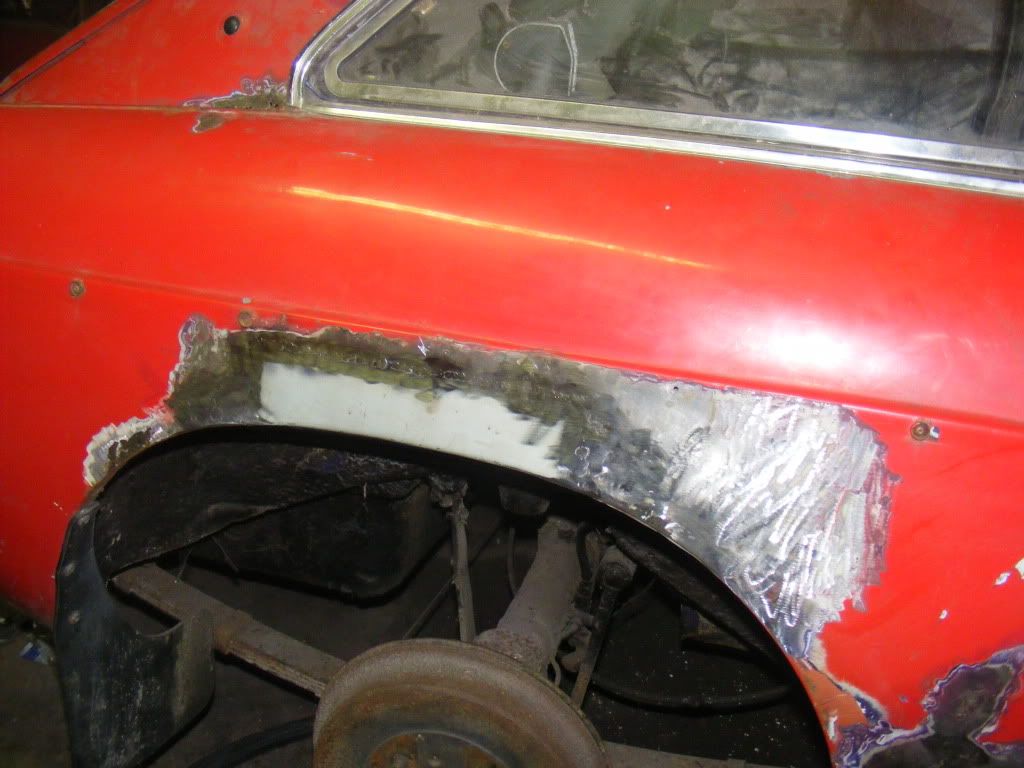 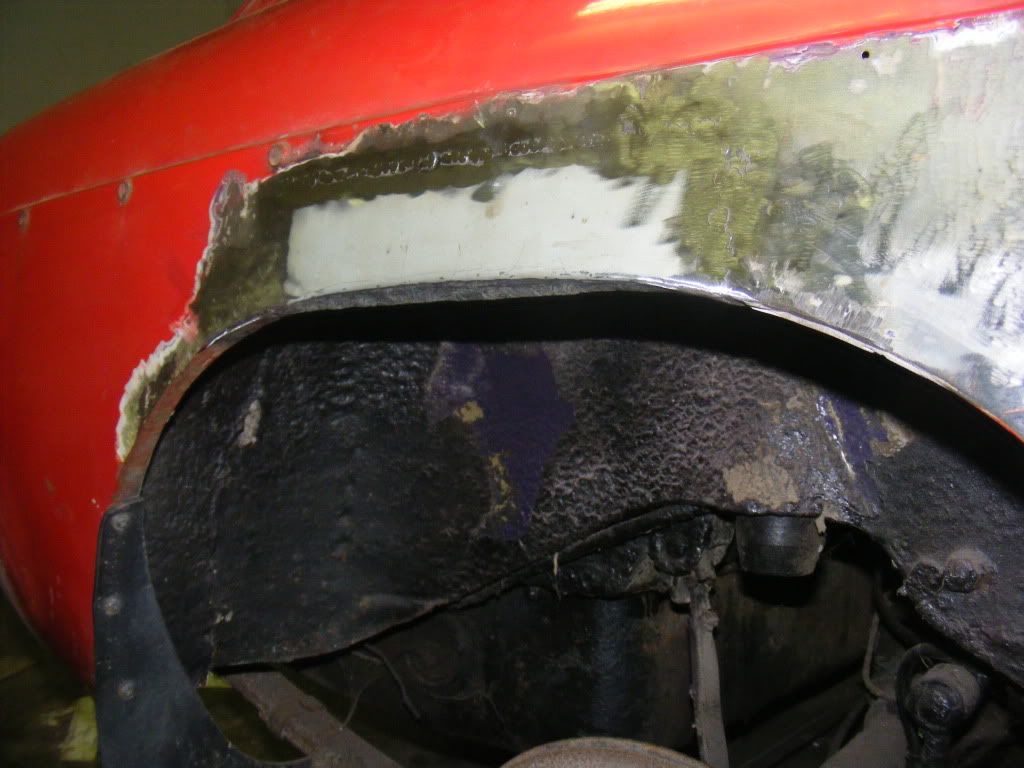 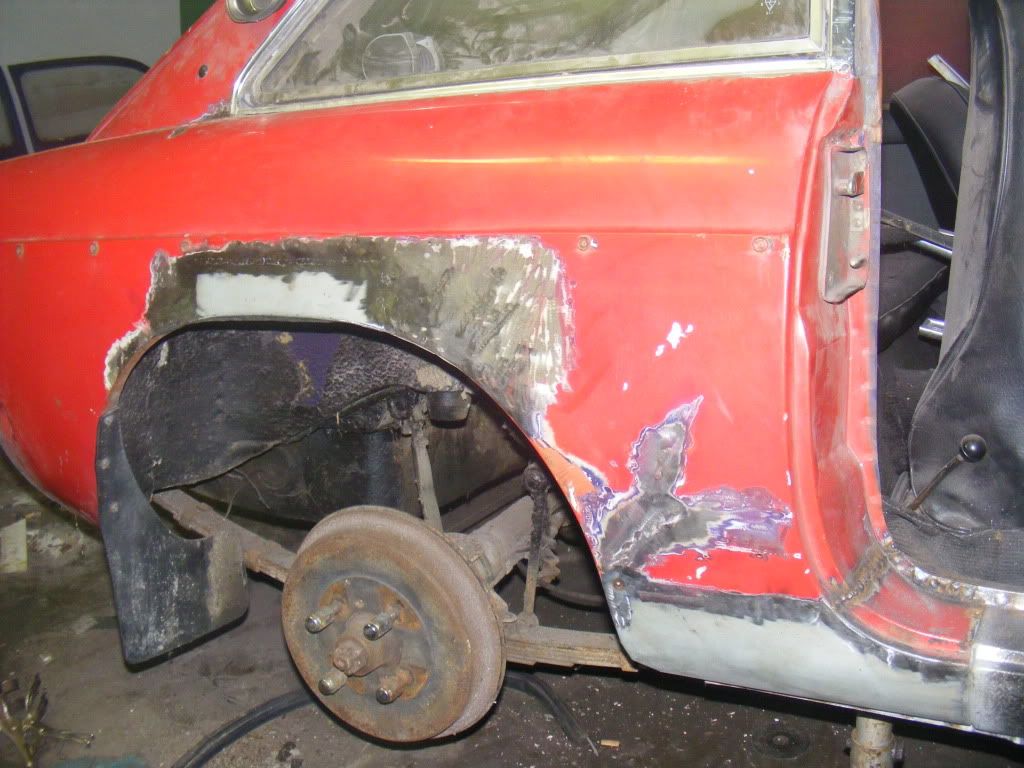 Need to tack inner to outer once I feel all the hammering is out of me and I'm pleased with the profile... had a nice wang of filler on it this quarter before I started- scrubbed most of it off and pulled some of the dents that were buried beneath... it'll need a lashing or two of filler again; Yes I proberly would be better fitting/sourcing/getting the uncle to pay for, a 'new' outer rear wing, but it takes ages for stuff to be delivered from the UK and IMO some of the repair panels are very thin metal gauge wise.... its done now anyway, mostly.... |
| |
Last Edit: Jan 21, 2010 23:12:39 GMT by blzeedub
|
|


