|
|
|
Sept 29, 2010 16:13:35 GMT
|
This is another part where I didn't get any photos....fitting the coilovers. I really should remember to get shots of everything in future!! For the MX5 I had set a budget of £1,000 including the purchase price. This means I have to be careful what I spend and what I save on. This budget does not include service items so the two rear wheel bearings and complete set of pads don't affect the budget (the F&R pads and rear bearings came to £50 for the lot but who's counting?) First expense was the coilover kit at £162. This is the Raceland NA kit. The cheaper (but identical) version from Rokkor was out of stock of the £117 kits but I didn't want to have to wait the 2 months they were proposing, so that was £45 down on the budget to start with but I got the coilovers when I wanted them! I also decided to spend big and splashed out £142 on a Garage Vary splitter. I could have got a fibreglass copy for around £50 cheaper but knew it wouldn't last long with the way I drive so decided a decent, orignal ABS one would be worth the extra expense. Purchase price: £375 Raceland coilovers: £162 Garage Vary splitter: £142 Hard top: £130 TOTAL SO FAR: £809.00 Cost of having the sill welded: FREE!! Awesome. Anyway, have some shots of Rich making my exhaust....at some point in the past, someone left a stainless silencer in the unit. It had been there for a while, no one knew whose it was or where it came from, so Rich decided to chop it up and make me a nicer rear exhaust than the 'faint fart in a can' one currently fitted. He quickly removed my rear silencer and armed with a grinder, welder and hammer cut & shut the original pipework onto the stainless silencer to make a new rear section. The tailpipe of the stainless silencer was removed and refitted in the correct position for the MX5 along with the silencer being made to run transversely across the back. It didn't take him long and it was a really neat job including new hangers made from square bar I had lying around 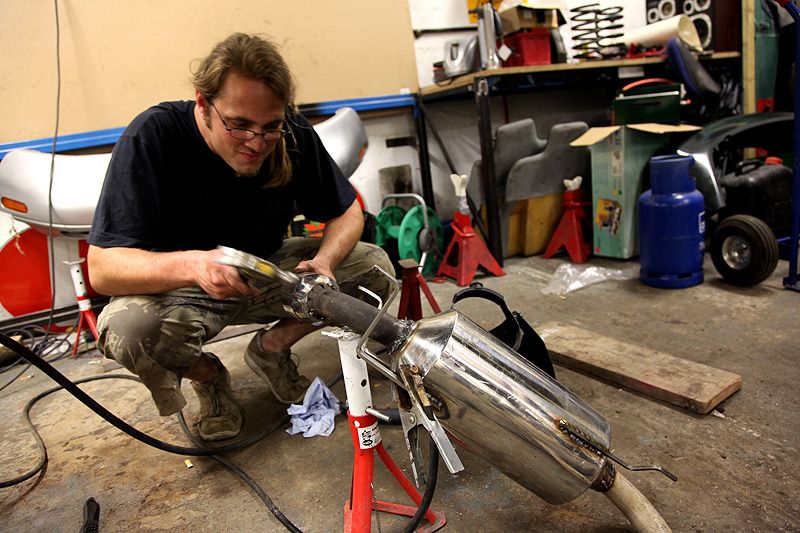 The difference in pipe/tailpipe size was dealt with through a neat solution of slitting then flaring the pipework, tacking the tailpipe on then filling with weld. Looks a bit messy but the finsihed thing looks very neat. (guess who didn't get any pics of the finished article?!) 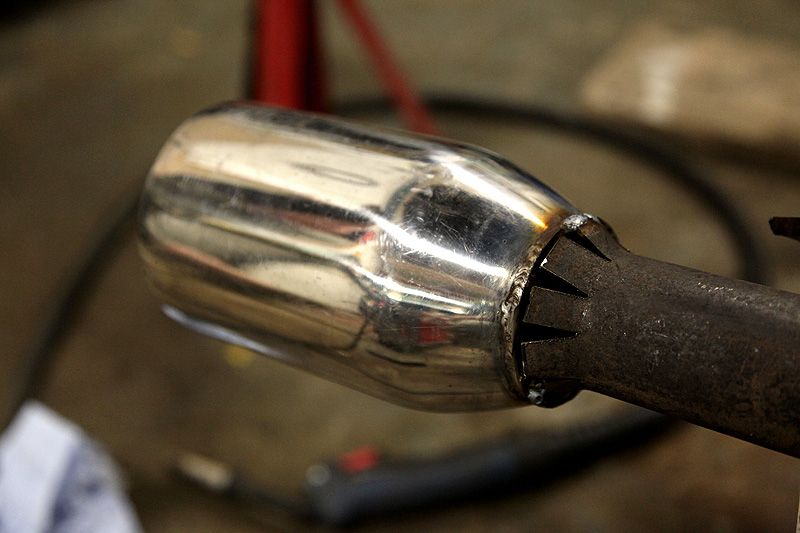 Cost of new rear exhaust: FREE!! Sure, it's not a complete stainless system but it's unique, sounds fapping ACE and will last long enough until I source enough parts for another freebie exhaust. |
| |
|
|
|
|
|
|
|
Sept 29, 2010 19:04:43 GMT
|
|
i love that word.........FREE!..
i would rather make somthing,than pay for it!..
its coming togther now.. and nice to see an update.
was only thinking last night about your rascal van.. hows that coming on?
|
| |
|
|
Rich
Club Retro Rides Member
Posts: 6,341  Club RR Member Number: 160
|
|
Sept 29, 2010 19:15:07 GMT
|
Forgot about this thread, bookmarked dude. Good to see you are still alive at least  Loving my makin' bacon pic, L O L  |
| |
|
|
luckygti
Posted a lot
   I need to try harder!
Posts: 4,912
|
|
Sept 29, 2010 19:47:34 GMT
|
Bruce, loving the work your getting done on this mate, I have a feeling this is going to be another much talked about Area 52 creation  I have some pics of it on track at the Gathering, I'll get them up later. Look forward to seeing it in the flesh on my next trip down to the unit, whenever that might be  |
| |
|
|
|
|
|
Sept 29, 2010 20:53:29 GMT
|
Thanks for the comments guys - not much has happened to it since the Gathering but that's all going to be changing soon  Pete, please can you hang fire on the pics of it on track until I get to that stage myself? Just trying to get this build thread in 'chronological' order (continuity & all that  ) Thanks mate. Anyway, next installment: LOWS! As you will know, I didn't get any shots of Steve fitting the coilovers, nor of the fitting of the Garage Vary splitter....or even the finishing/fitting of the exhaust  Bloody typical! Now for the moment of truth: coming off the 2 post lift having fitted the Raceland coilovers, the Garage Vary splitter and Rich's hybrid exhaust. Wooden blocks needed to stop it bottoming out on the lift. This is a good sign  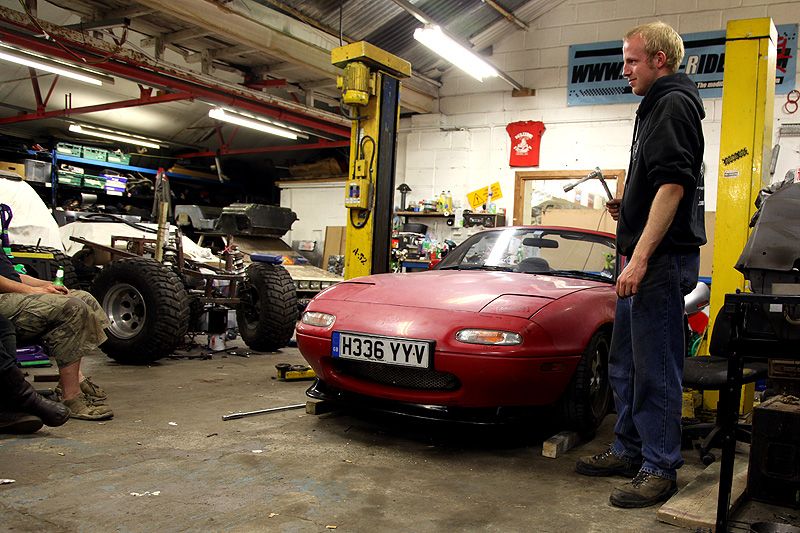 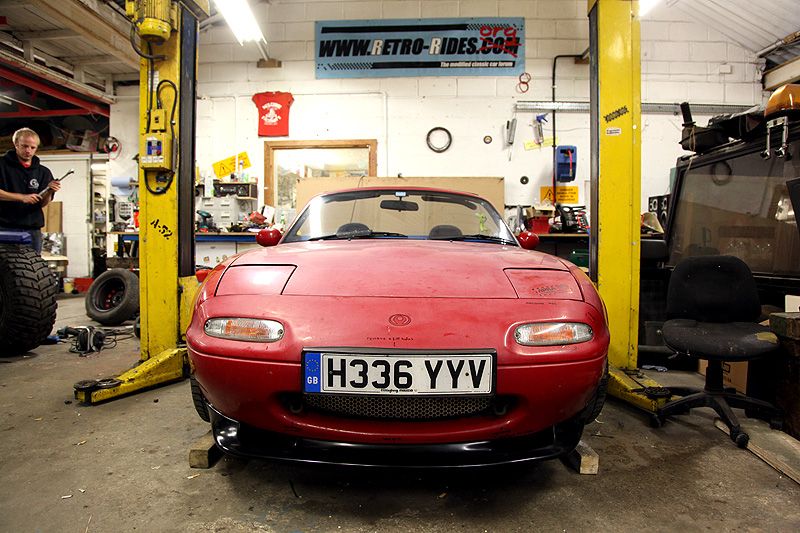 Before I get some pics of the new ride height it's time to go for a spin and let the suspension settle a bit. The exhaust is awesome - the sound just begs you to drive it hard. The suspension is absolutlely amazing considering the cost and also the fact I'd come from driving a car with some rear suspension that resembled jelly on a pogo stick. To say that drive was fun would be a massive understatement. It was an absolute blast. Steve enjoyed it too I think....and so did Dave who was following. Back at the unit with a big grin on my face I finally get some shots of the new look Teenage Dirtbag: 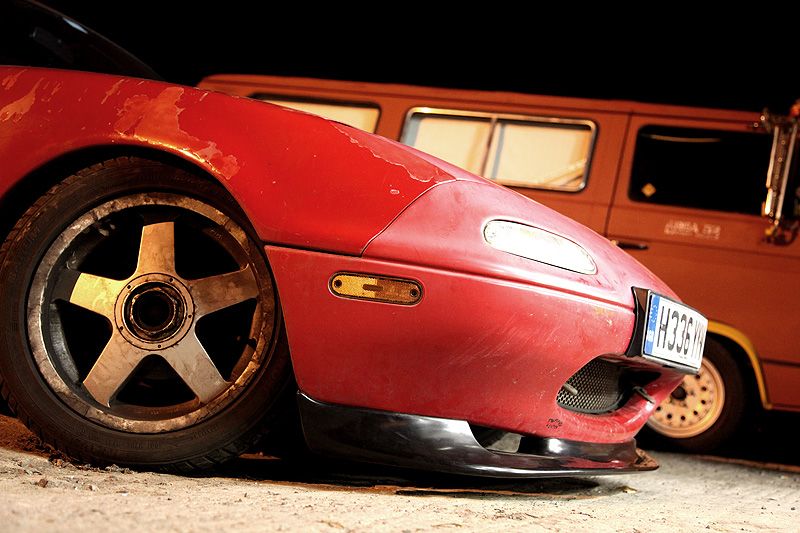 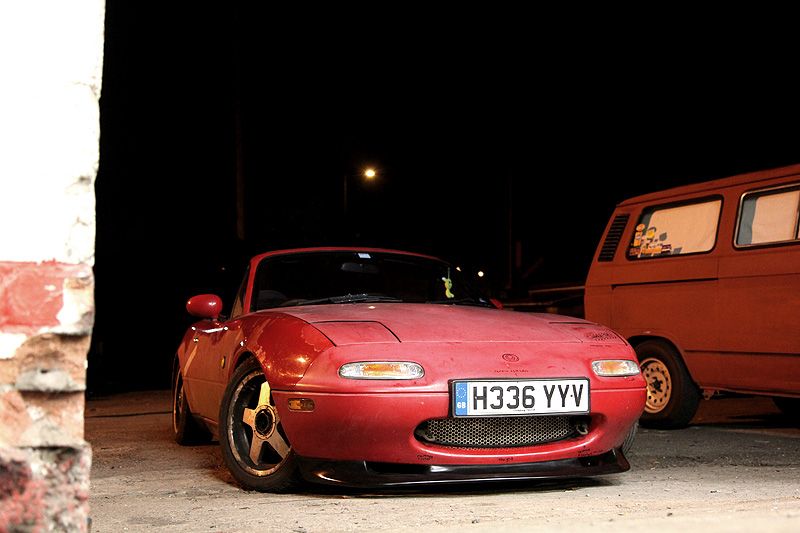 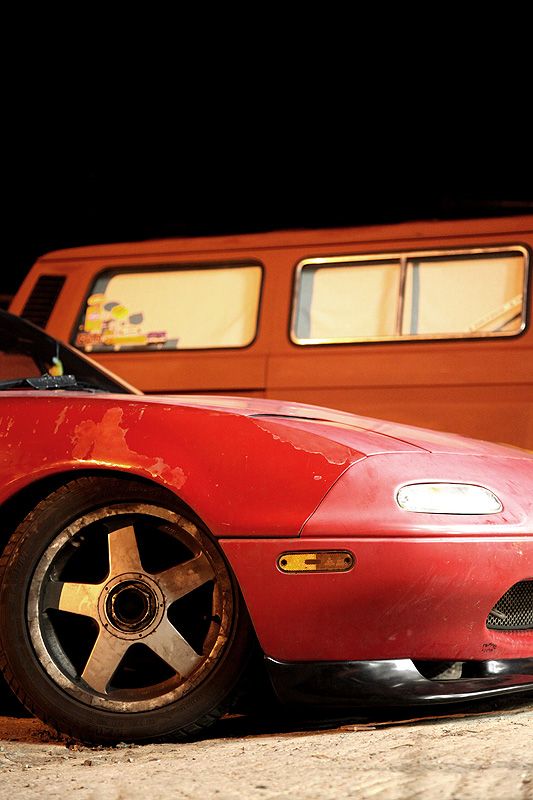 Not staged....not a 'scene' shot. I accidentally kicked this empty bottle across the floor and it landed in a place that perfectly explained the ride height. It made me happy. 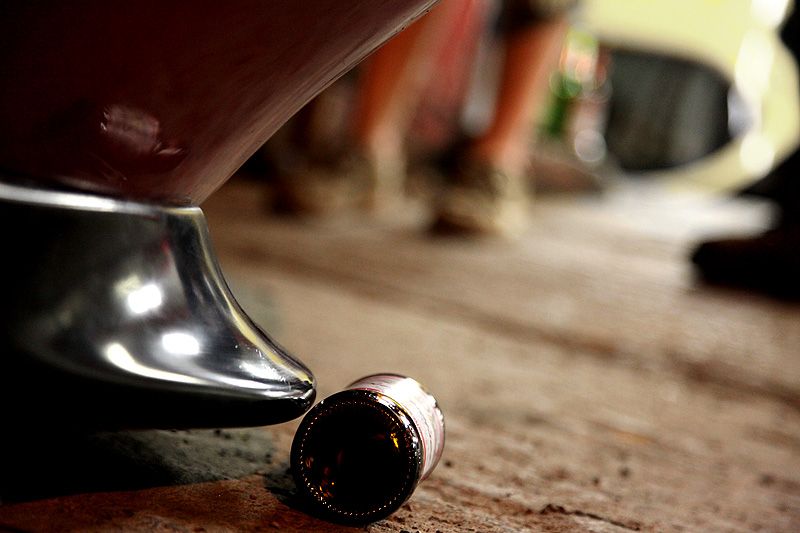 Steve had turned up earlier in the day with some tape saying that I might be able to find a use for it. I don't think he had this in mind for a minute. 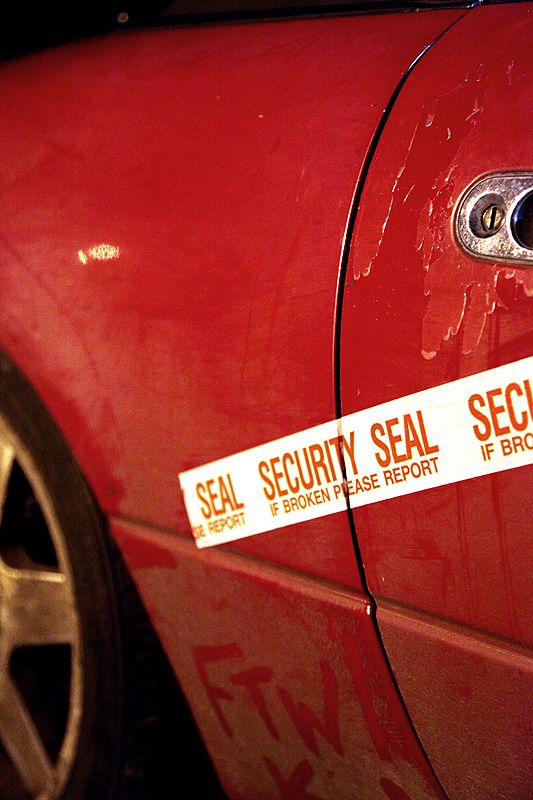 Couldn't resist a moody shot 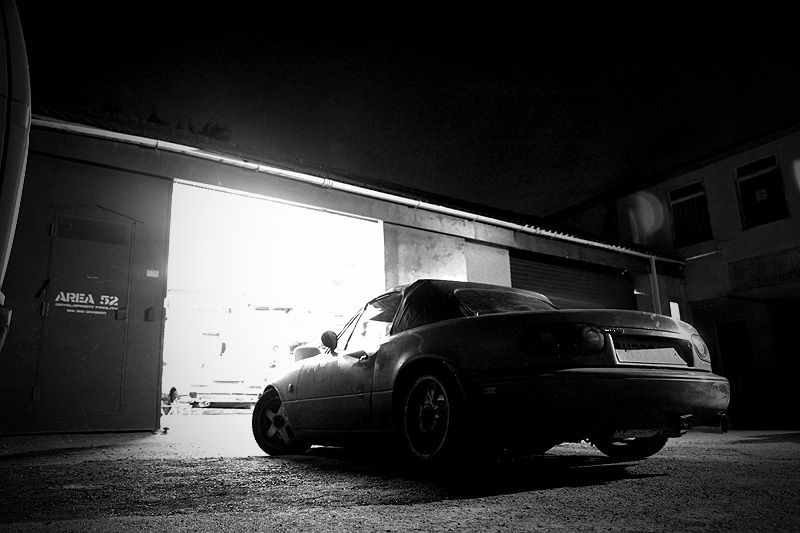 One thing I forgot to mention - the Crystal headlights I bought and fitted. The original lights were curse word poor and I knew I want to eventually fit some air intakes where the sidelights/indicators are, so took the opportunity to not only upgrade the light output, but also move the sidelights to the headlight. Rewiring was pretty easy and I spent a bit of extra time trying to make the new wiring look neat & factory (proper solder, heatshrink and flexi conduit all the way) Trying to work the headlights to pop up on the sidelights took a fair bit of tracing, trial & error (signal wire from the relay under the NSF wing) and I also ditched the dim-dip regulator unit while I was at it thanks to BiAS for pointing that one out. 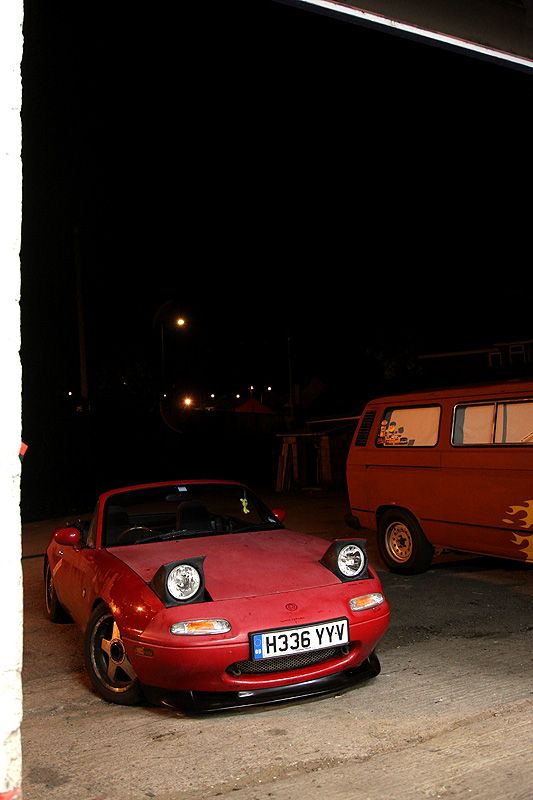 This means I only need to figure out a place for the indicators but I'm pretty sure I have a neat solution for this. Anyway, here is the new lights fitted. £24 to add to the budget so the total now looks like this: Purchase price: £375 Raceland coilovers: £162 Garage Vary splitter: £142 Hard top: £130 Crystal headlights: £24 TOTAL SO FAR = £833 |
| |
|
|
|
|
|
Sept 29, 2010 21:04:06 GMT
|
|
Bruce, I am both impressed and chuffed to bits with this car.
Trust you are well.
I hope to chat to you some time, interesting changes in my life coming up.
|
| |
|
|
|
|
|
Sept 29, 2010 21:15:39 GMT
|
I'm really enjoying this thread, Bruce. Also, I need to drive this car. Y'know, just to compare...  |
| |
|
|
|
|
|
Sept 29, 2010 21:16:52 GMT
|
|
Looking good Bruce!
I think the side markers have a deep back that you could drill a hole in and stick a bulb in to use as indicators. That's what I'll be doing when I get round to it!
|
| |
|
|
luckygti
Posted a lot
   I need to try harder!
Posts: 4,912
|
|
Sept 29, 2010 21:17:56 GMT
|
Don't worry mate, it'll take me a while to track the pics down anyway  It's looking good mate, and looooooooooooooow  |
| |
|
|
|
|
|
Sept 29, 2010 21:21:02 GMT
|
|
I was mega impressed with how well your car drove, particularly the ride, which was surprisingly good. Yours rode better on those coilovers than mine does stock. I've now bought a set of those Raceland coilovers to go on mine as they seem the perfect compromise between ride and handling IMO.
|
| |
1962 Datsun Bluebird Estate - 1971 Datsun 510 SSS - 1976 Datsun 710 SSS - 1981 Dodge van - 1985 Nissan Cherry Europe GTi - 1988 Nissan Prairie - 1990 Hyundai Pony Pickup - 1992 Mazda MX5
|
|
|
|
rtlkyuubi
Posted a lot
   Low and Slow
Posts: 2,922
|
|
Sept 29, 2010 21:21:09 GMT
|
looking good and lows ftw  Would love to get a passenger ride in it some time (never been in a soft top before  ) How was it getting out of the unit? lol I think mine will scrap quite alot now that the coilovers are on! |
| |
|
|
|
|
|
Sept 29, 2010 21:24:48 GMT
|
looking good and lows ftw  Would love to get a passenger ride in it some time (never been in a soft top before  ) I'll take you out in mine at the mhall meet if I manage to actually turn up. |
| |
|
|
|
|
|
Sept 29, 2010 21:40:11 GMT
|
Bruce, I am both impressed and chuffed to bits with this car. Trust you are well. I hope to chat to you some time, interesting changes in my life coming up. Hi Rian, Sorry for not being in touch - been having some R&R time since the Gathering along with a lovely holiday with Amanda & Jed  Will give you a call soon I promise. I'm really enjoying this thread, Bruce. Also, I need to drive this car. Y'know, just to compare...  You're more than welcome to Dan. I think most of RR have driven it so I might as well aim for the complete set! Last count was 26 RR people who'd driven the thing! Looking good Bruce! I think the side markers have a deep back that you could drill a hole in and stick a bulb in to use as indicators. That's what I'll be doing when I get round to it! I was going to go that route.....you can even get some US spec ones with the bulb holders already in place but a dremel and some patience was going to be my route. I also want to wire them in as running lights (federal spec) so they will illuminate all the time then blink when the indicators are turned on. Thought it would look quite cool. Obviously have an overide switch to turn the running lights off for the MOT  Don't worry mate, it'll take me a while to track the pics down anyway  It's looking good mate, and looooooooooooooow  It looks slightly lower in the pics that in reality because the nose was just poking over the start of the slope into the unit. The actual clearance is 2.5" - I could come lower if I took the helper springs out but it scrapes enough as it is (I always let out a childish laugh when it scrapes) I was mega impressed with how well your car drove, particularly the ride, which was surprisingly good. Yours rode better on those coilovers than mine does stock. I've now bought a set of those Raceland coilovers to go on mine as they seem the perfect compromise between ride and handling IMO. Thanks Ed, I was very sceptical how it would ride myself. I had driven Craig1010cc's Eunos previously but didn't really pay too much attention to the ride & handling at the time. I was worried that it would be really crashy and harsh set so low, but quite the opposite.....it impressed me a lot how compliant it felt. Stable, planted yet with a decent amount of ride comfort...far more than its low looks would suggest. I'm glad you got yourself an MX5 and look forward to seeing it low. A growing bunch of RR people getting these now  looking good and lows ftw  Would love to get a passenger ride in it some time (never been in a soft top before  ) How was it getting out of the unit? lol I think mine will scrap quite alot now that the coilovers are on! You're more than welcome to have a ride in it. You'll love it! Getting it in & out of the unit involves scaffold planks and it still scrapes. This always makes me smile. |
| |
|
|
rtlkyuubi
Posted a lot
   Low and Slow
Posts: 2,922
|
|
Sept 29, 2010 22:22:26 GMT
|
I'll take you out in mine at the mhall meet if I manage to actually turn up. Ill be in bristol on the 4th so wont be at the october meet :/ Getting it in & out of the unit involves scaffold planks and it still scrapes. This always makes me smile. haha mates said that scraping everywhere will soon loose its novilty, but I still chuckle every time the micra scrapes lol |
| |
|
|
|
|
|
Sept 30, 2010 16:36:17 GMT
|
Another instalment: With the amazing welding complete on the offside sill, Ian (BiAS) didn't have time to do the nearside the same day due to the amount of fabrication work needed on the OS. I couldn't ask him to come back to Bristol again but he was more than happy to do the welding for me so I booked an evening and headed down to Torquay where he lives. 4hrs stuck on the M5 thanks to a big accident which closed the motorway I finally got there albeit a bit later than originally planned! Without further ado Ian had the MX5 on the drive and jacked up ready for some cutting/welding. 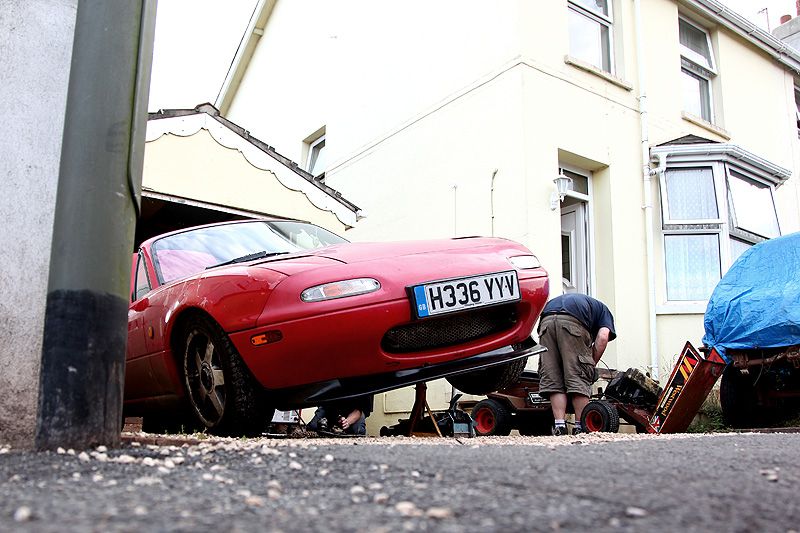 Within seconds, Ian's second fave tool was brought into action to remove the previously patchy repaired sill 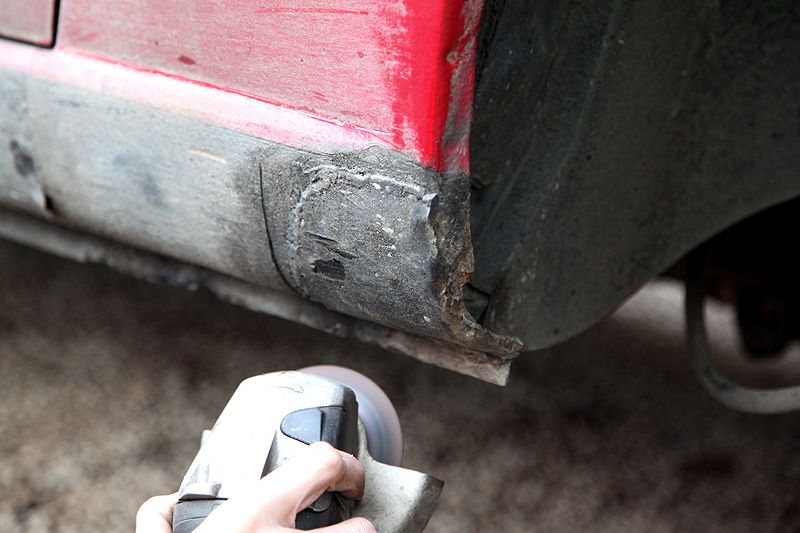 The rust was nowhere near as bad on this side....about 1/4 of the size of the rot on the offside. Just a small patch plus some surface rust in the seam under the door. The rot on the otherside extended past this seam! 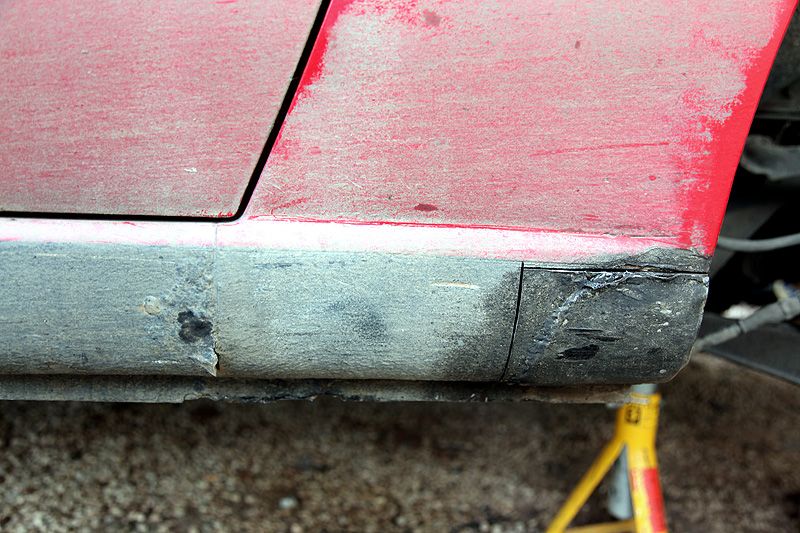 Getting stuck in 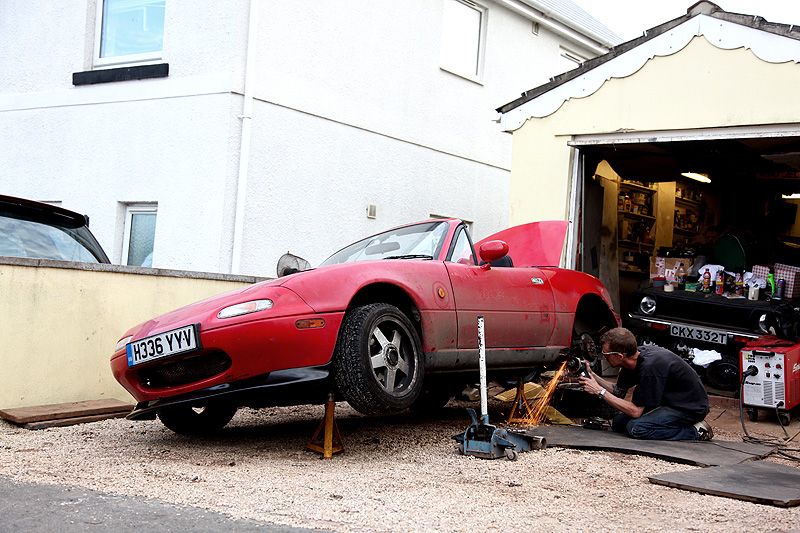 Outer skin removed and the internal rot is minimal. Very little needed.... 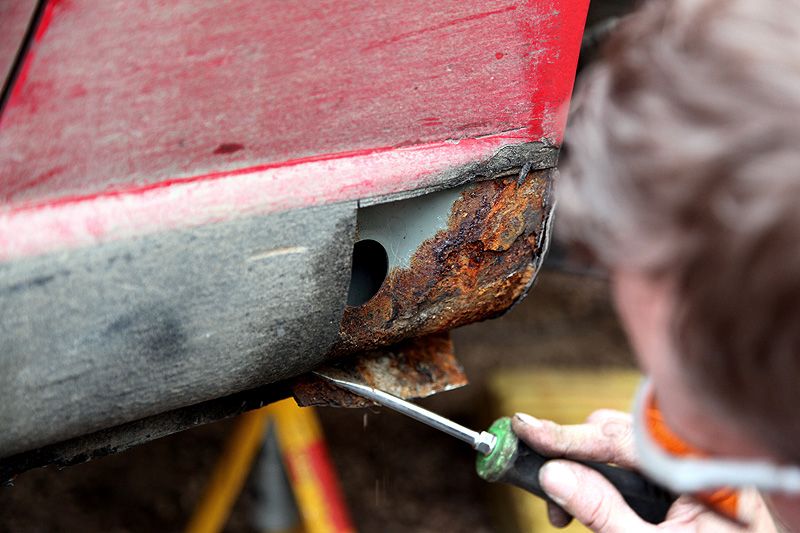 Only a small section needed to be cut out 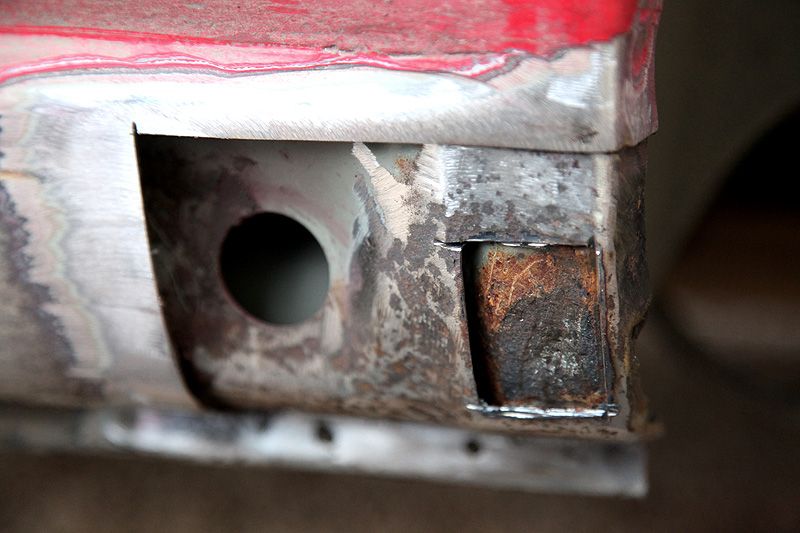 Liberal dose of rust killer applied to the surface rust and seemed to be very effective 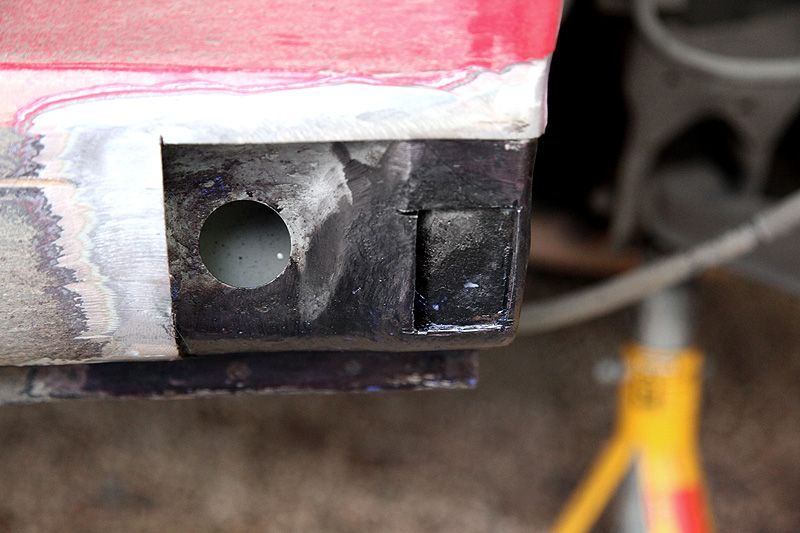 Area around the seam cleaned up 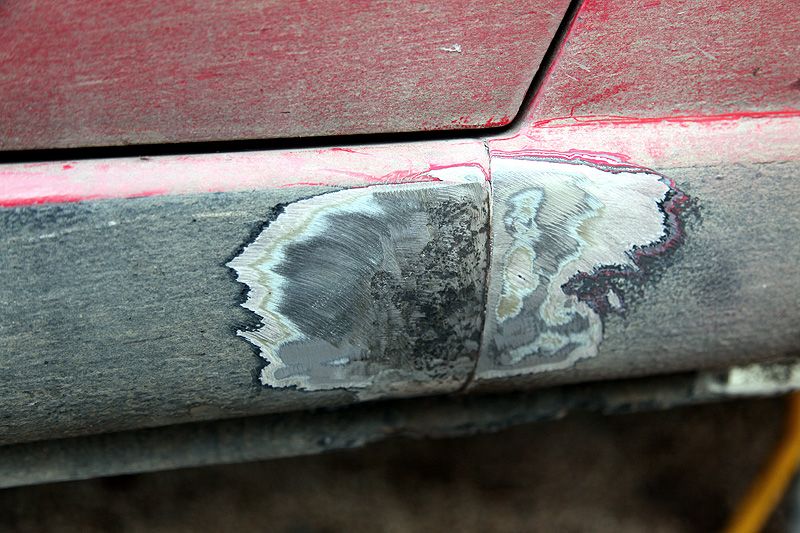 ...then rust treated 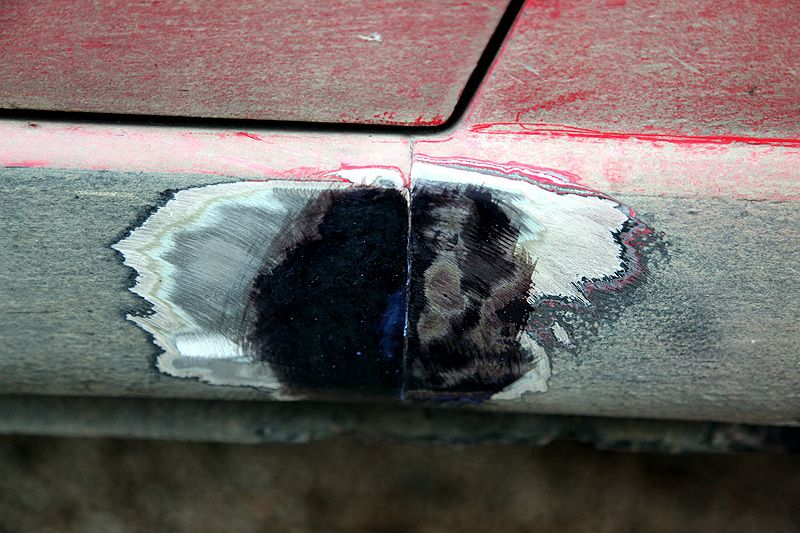 Clean metal welded into the inner skin then dressed 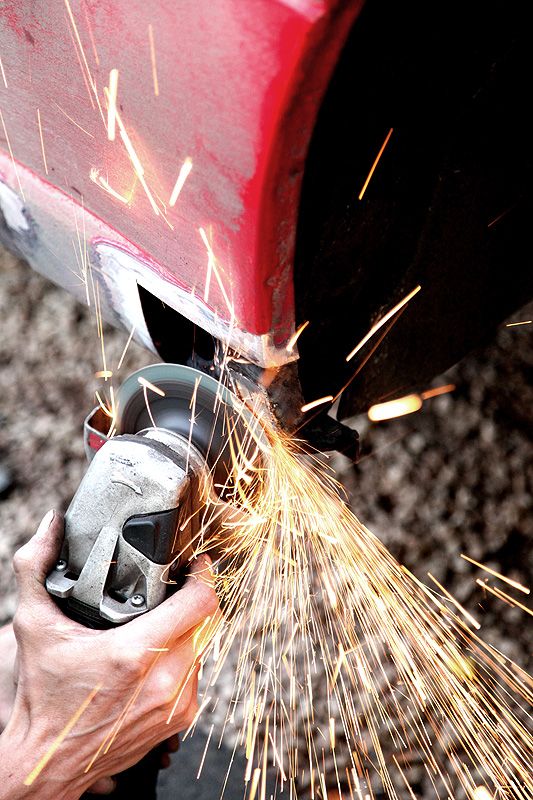 Outer skin cut from some flat sheet (Zintec steel), bent to shape and offered up... 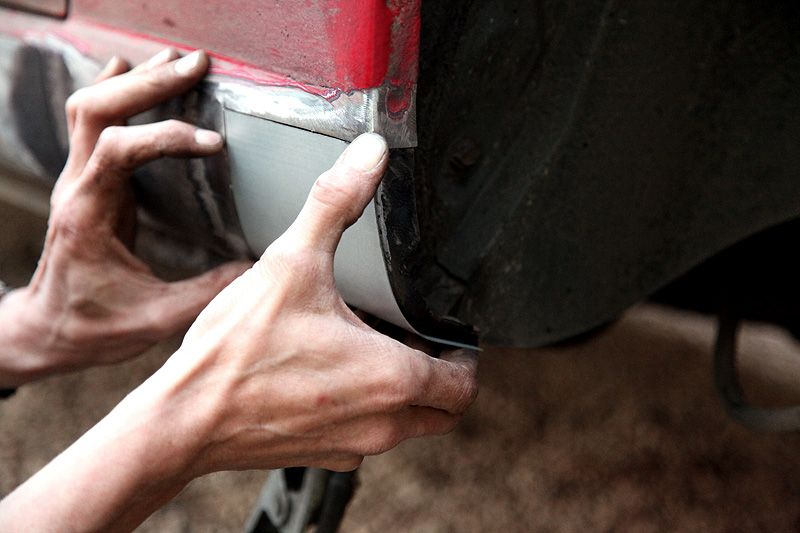 ...then welded 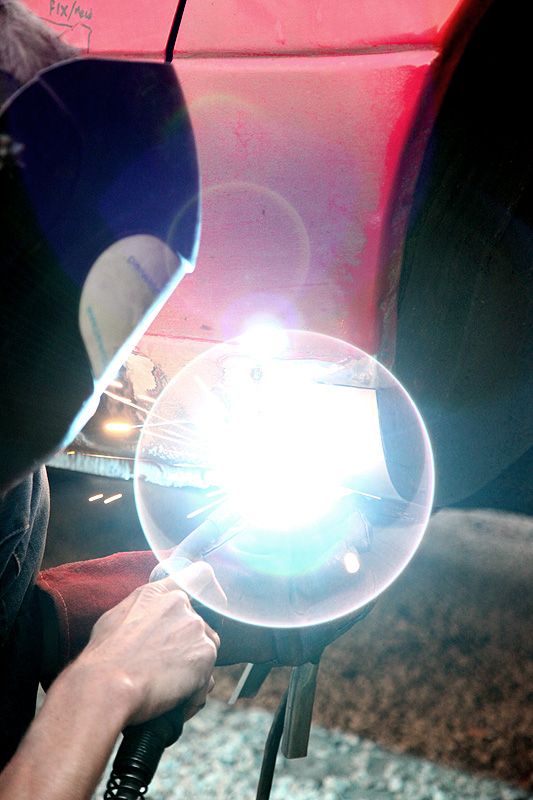 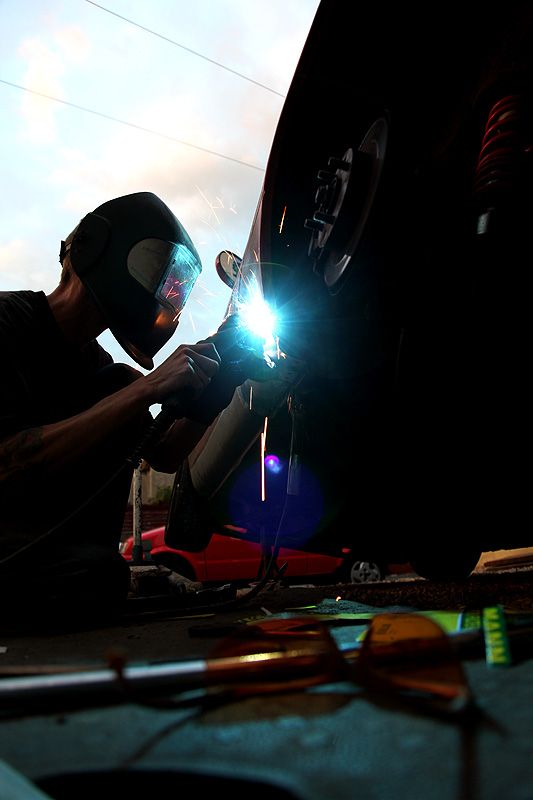 The profile is spot on and the welding finished on this bit. 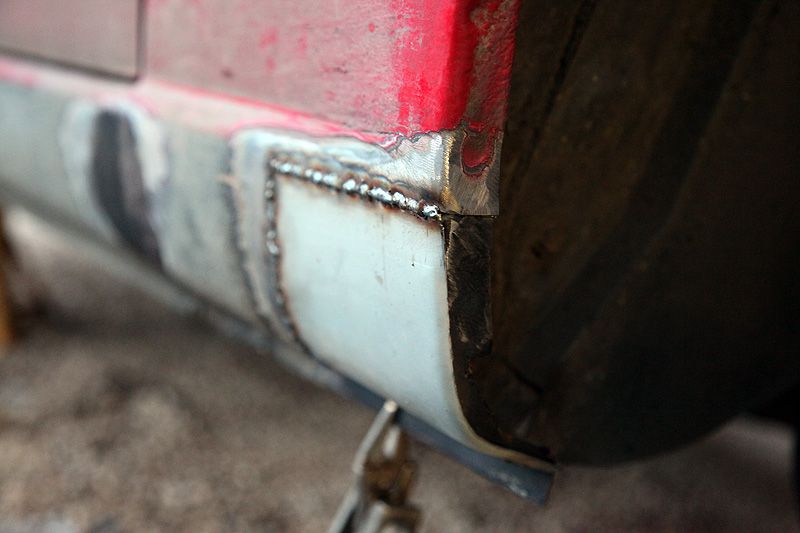 Starting to get dark but Ian just carries on 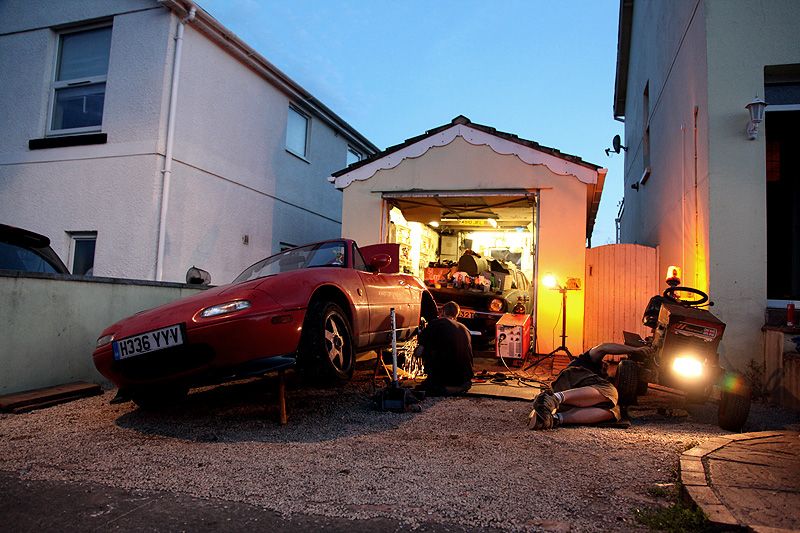 ...and on 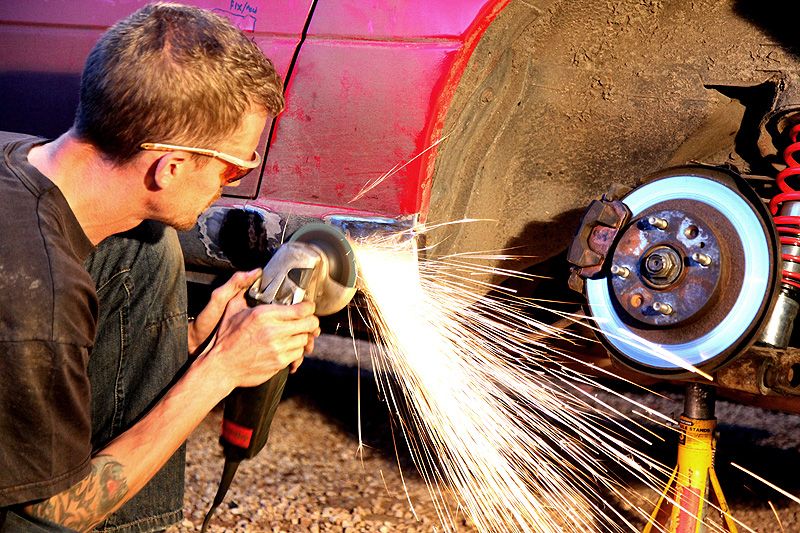 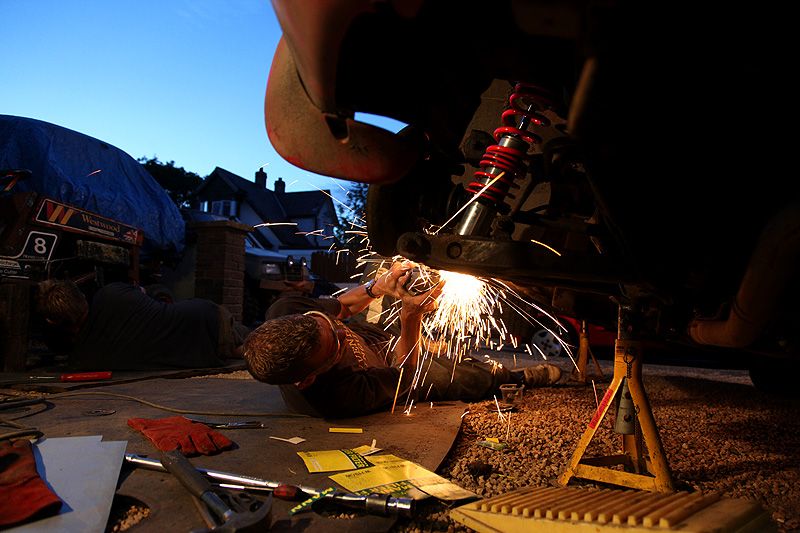 All dressed and looking great! 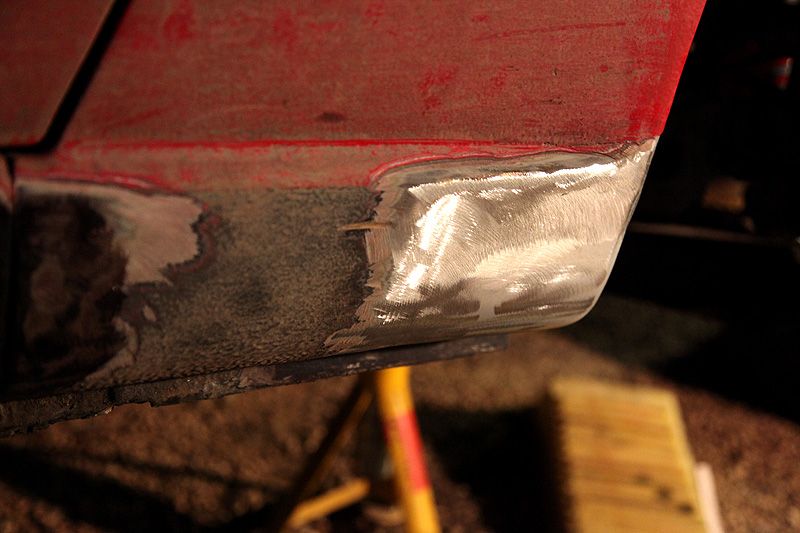 Just the return edge to do 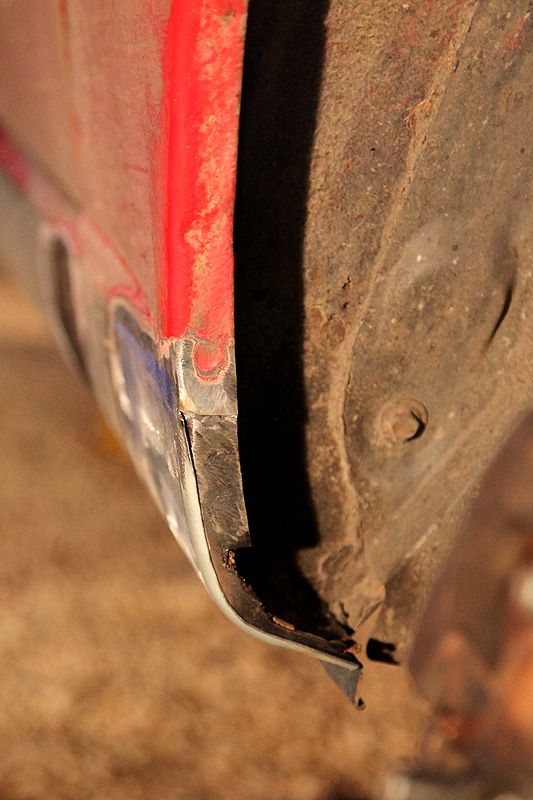 It's getting late and he takes a break to chat to Jodie who is building a modified ride on mower of all things for the Gathering! 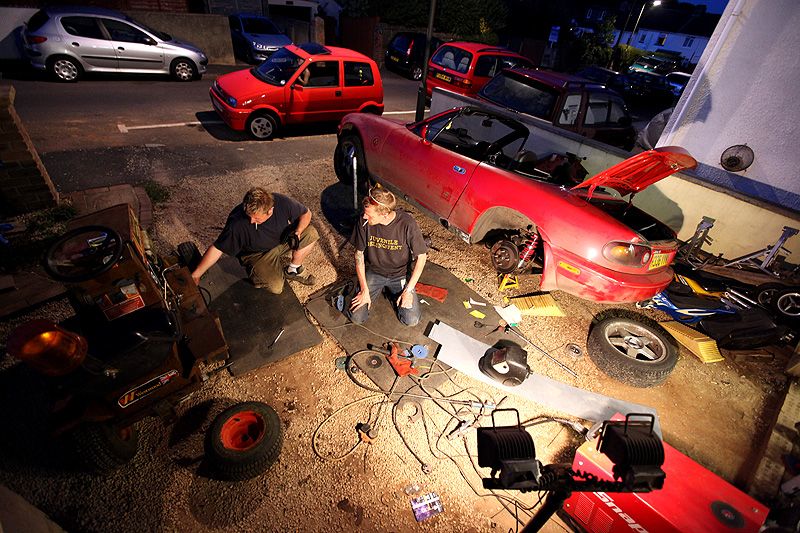 Seeing as it's break time, Ian's GF (Coleen) decides to head down to the supermarket to get some food for everyone. She's just passed her driving test and wants to take me for a drive in her pride & joy....a very tidy little Cinquecento Sporting (LOVE these things....I've had a few myself in the past) 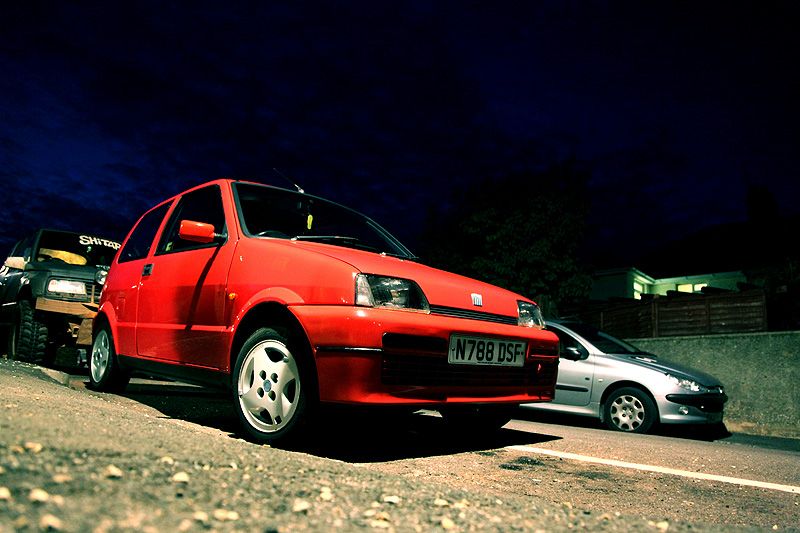 She drives there, I drive it back. Brings back memories of my old ones! 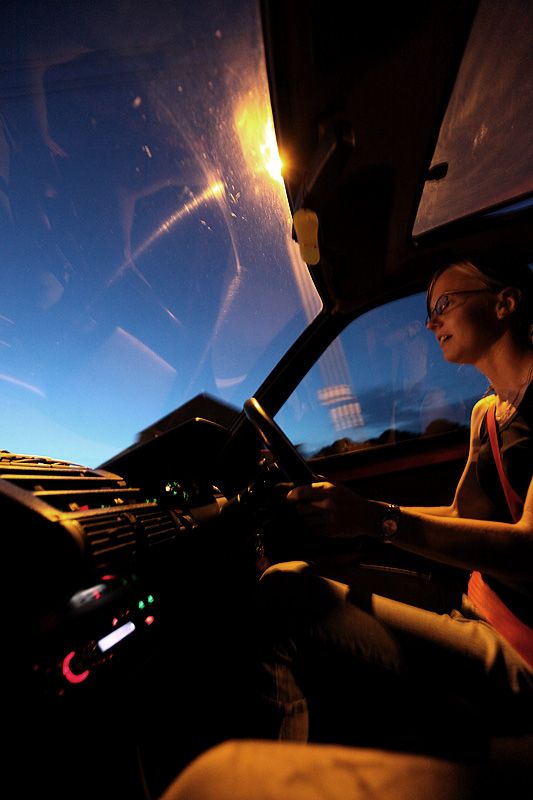 More to come in a little bit.... |
| |
|
|
rysz
Club Retro Rides Member
Posts: 2,559
|
|
Sept 30, 2010 19:17:39 GMT
|
Bruce, it's another great thread!  ^^This is possibly up for pic of the year from me! Rysz. |
| |
|
|
|
|
|
|
|
Coleen & I get back from the supermarket to find Ian had finished the return edge and it was looking sweet! 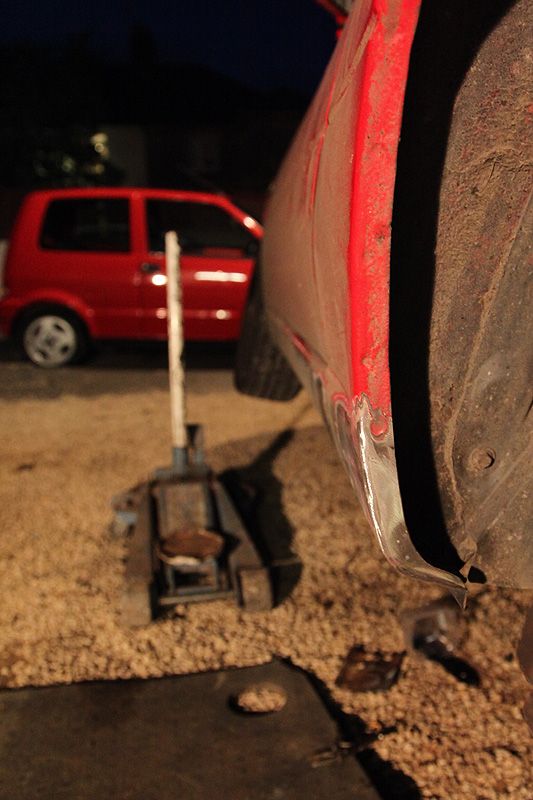 Seam sealer then some zinc primer shows how neat the welding is 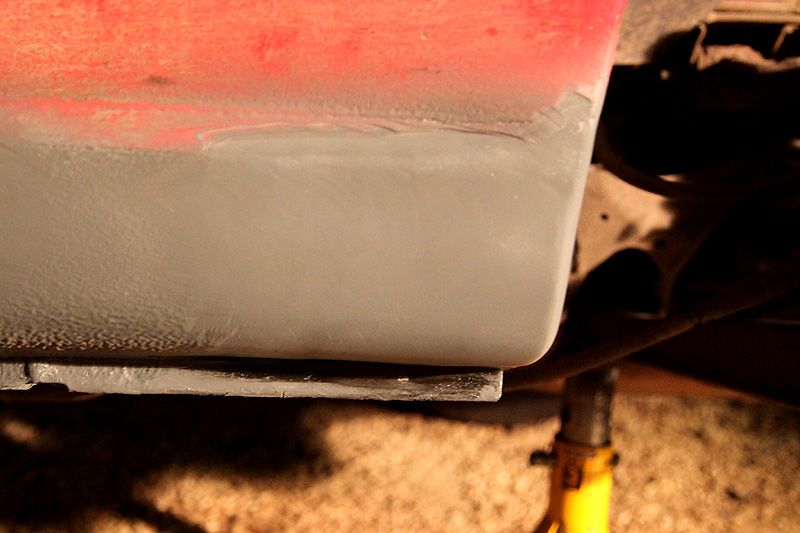 A few coats of black to give some protection and all is done. Nice one Ian  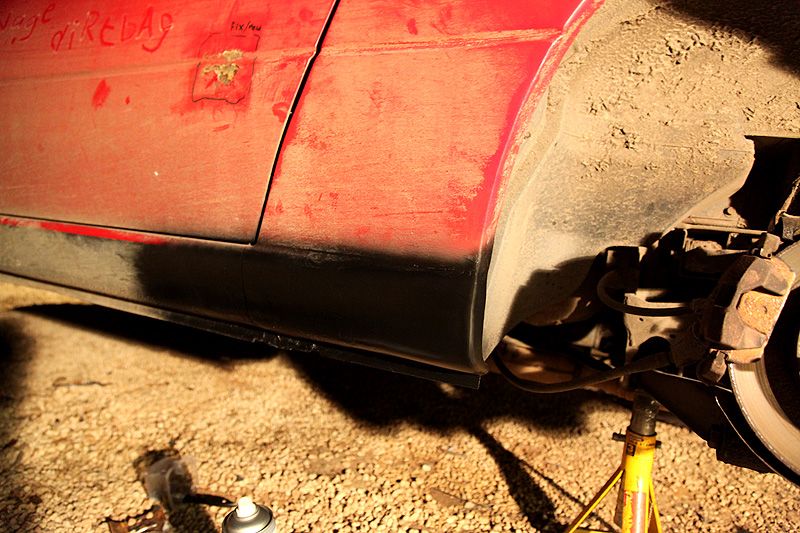 It's nearly 11pm and I feel bad that I've kept Ian until this time! I'm about to thank him and head home when he says "lock your car, your coming out for a blast with me....." Not wanting to turn him down I jump into his Vitara (nicknamed Shitara) and within a few hundred yards I'm enjoying his local lanes: 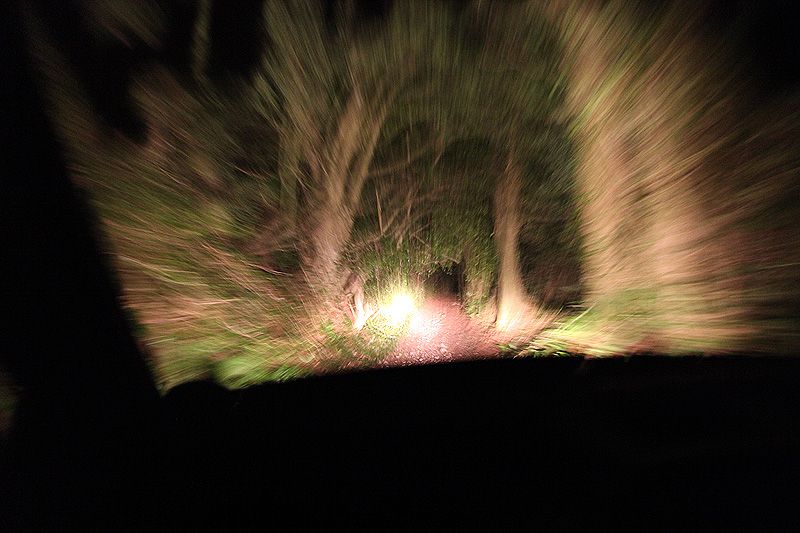 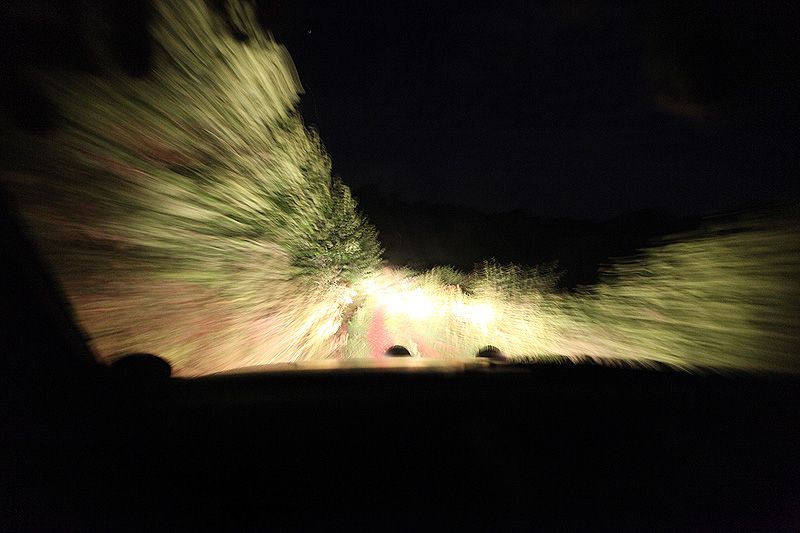 It's difficult to get any focus while constantly bouncing out of the seat and laughing like a loon!  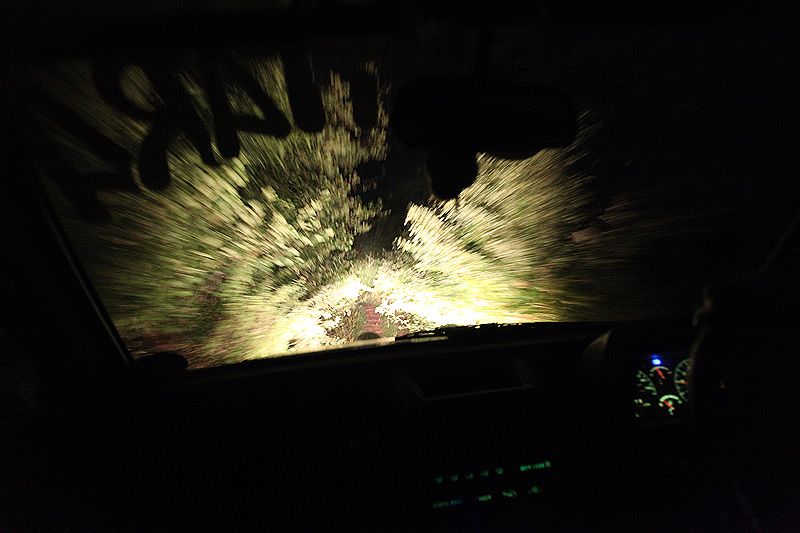 Just when I think we're heading back to his house, he pulls out onto the main road and heads to the seafront 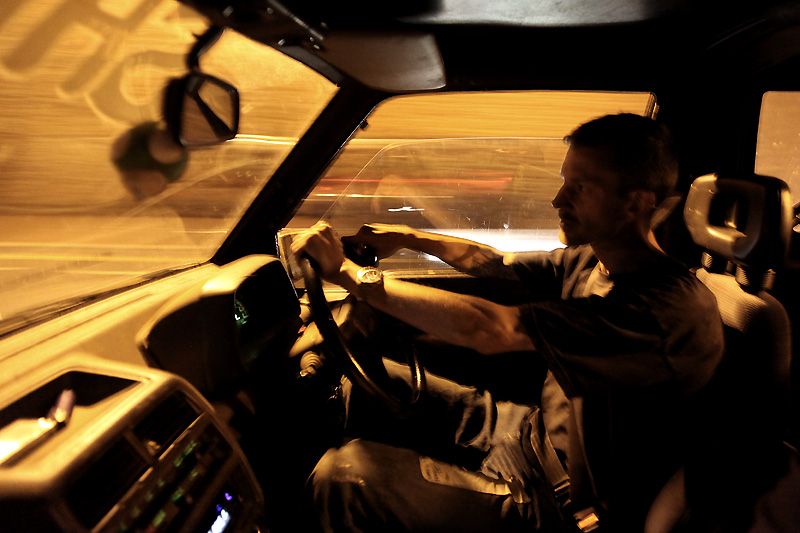 Literally! I take the chance to grab some pics of his fantastic motor (I know this is all slightly off topic....but it's all part of my mini adventure with the MX5) 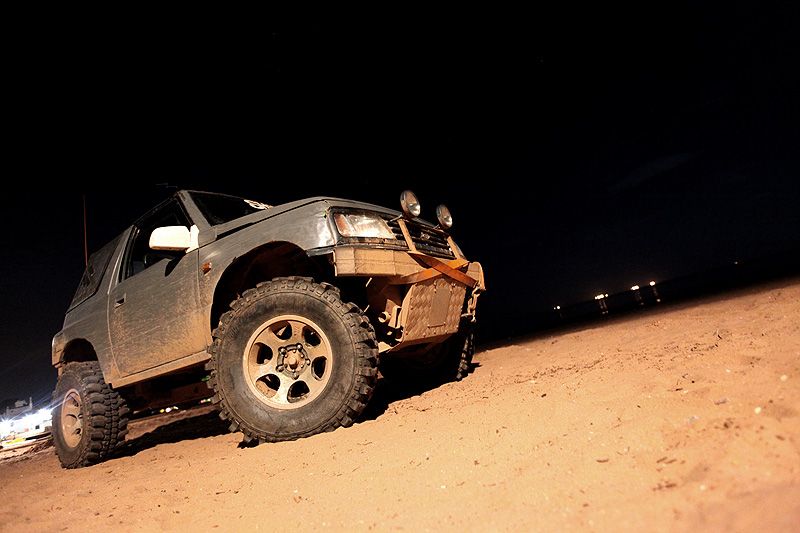 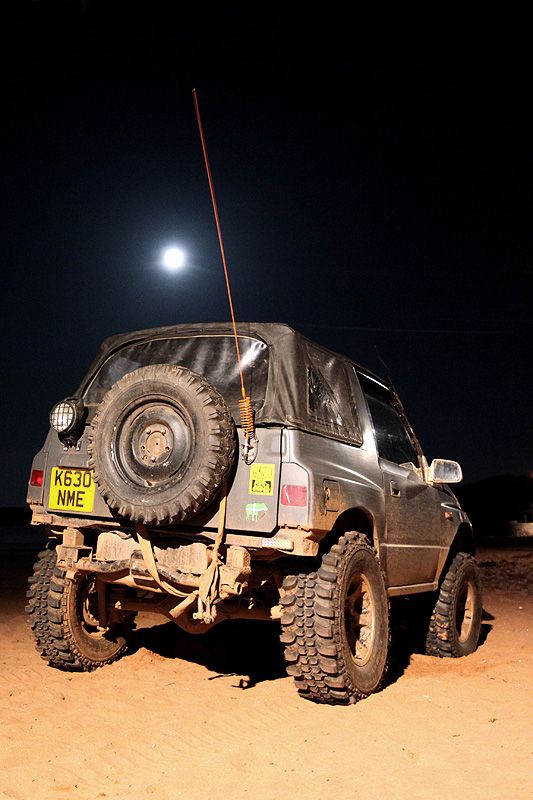 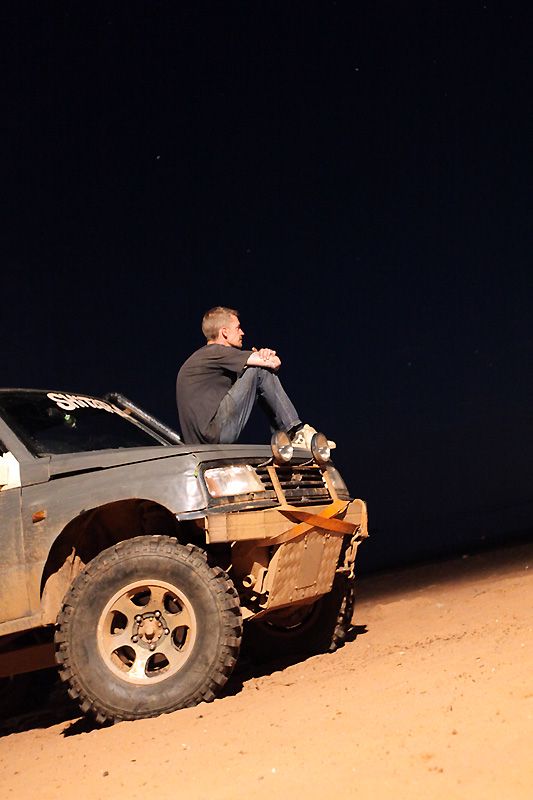 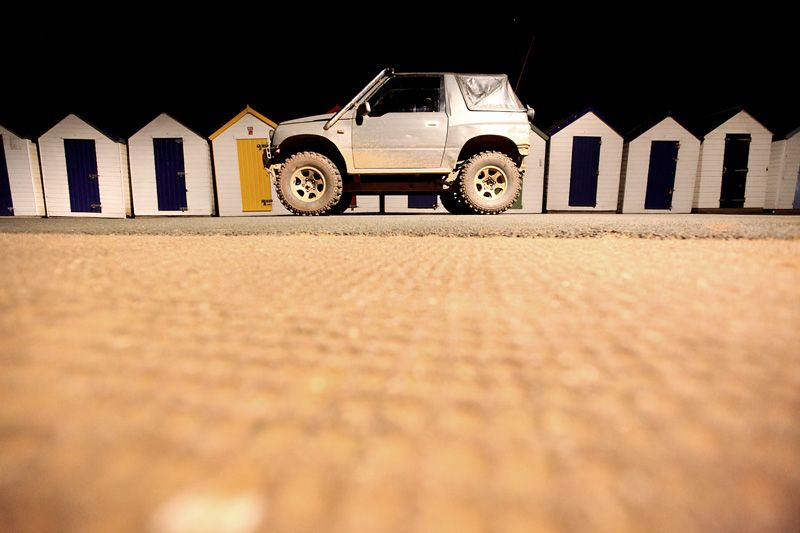 Brushing the sand off me, we head back to Ian's house and I say my thanks then head off home. What a great evening. It's 1am and I've still got a lovely drive home to look forward to. Time with great friends, progress on the car, some off roading....if this is what MX5 ownership is part of then I'm liking it a lot! There's something to be said about rusty cars LOL |
| |
|
|
|
|
|
|
|
On the way home I stop at Taunton Deane services to grab a drink. It's 2am, there isn't another car in the car park and I decide to grab some shots of the '5. Not actually taken any pics of it really since lowering it.... 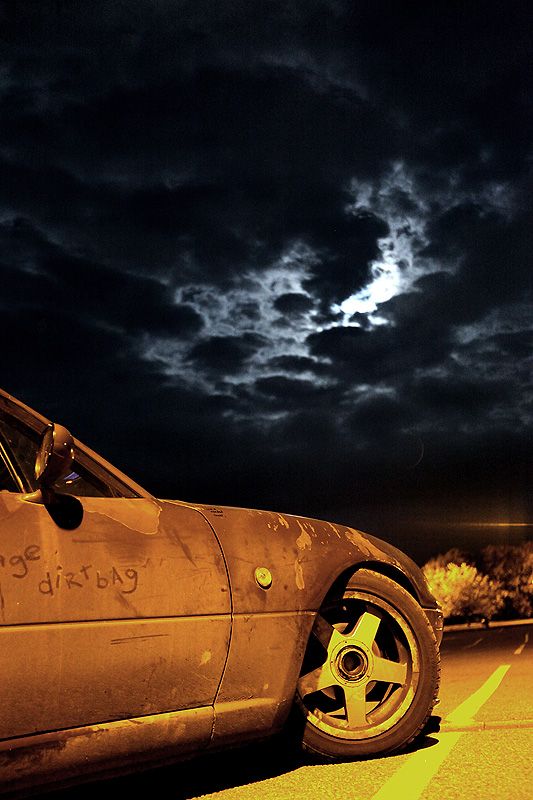 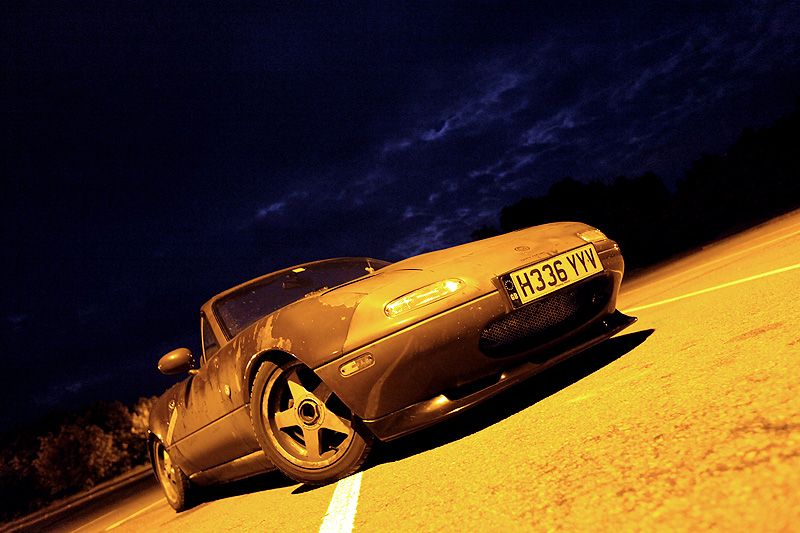 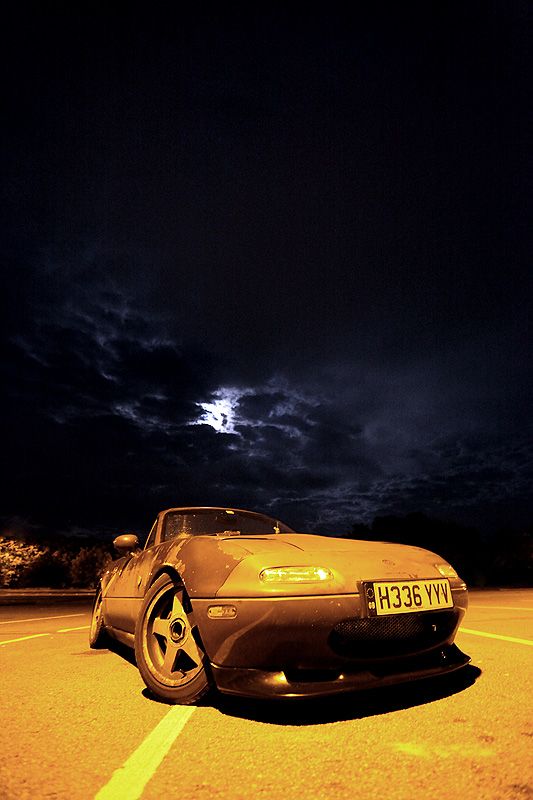 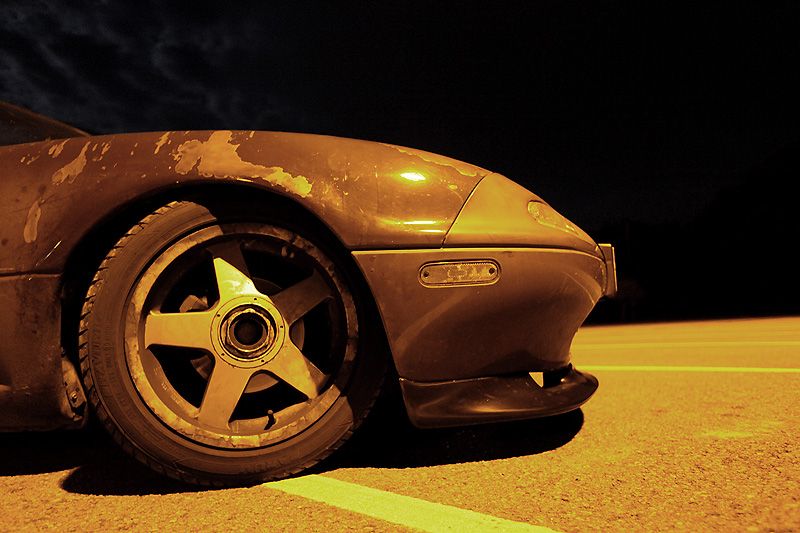 I take the A38/A370 for the rest of the journey home. 200+ miles covered on the new suspension and it feels brilliant! It drives so nicely on the motorway and even better on the A roads. Oh...and the 'homebrew' exhaust sounds so sweet too. Brings out the devil in me on the national speed limits LOL. The first real time spent driving the car and I love it! |
| |
|
|
eddbmxdude
Part of things
  Yeah, its a turbo!
Posts: 524
|
|
|
|
I love your photography Bruce!  Awesome thread, makes me want to get an MX5, even though I've never given them a second look before  |
| |
Old skool cool!
Signature image maximum height: 80 pixels
|
|
|
|
|
|
|
|
Have to say that i loved your mini adventure. Have really wanted a mx-5 for a while, but due to money constraints i have never been able to do so. Maybe when this recession flattens out in a couple of years i might purchase one. Love the pics of the local lanes, looks like you were going at lightspeed, and i agree with eddbmxdude and the pic in the car park, it looks deadly. Anyways i look forward to the next installment.
|
| |
|
|
|
|


 [*]
[*] [*]
[*]


 )
)


