|
|
|
Mar 30, 2011 22:19:29 GMT
|
I freaking love this car, but not a fan of Mx 5s... I'm so confused  Thanks Dude, that's quite a compliment. When the car was masked up for paint, I asked the guys doing the front end to make sure the slam panel was left unmasked because I wanted it painted NATO green too....along with the bonnet 'bump stop' mounts behind the headlamp units. Guess what? By the time I noticed, I couldn't be arsed to pull all the paper off and remask....espcially seing as the weekend was well behind schedule anyway. Having a quiet morning I decided to head down to the unit and get this dealt with. I know the engine bay is still BRG, but this doesn't bother me because it's all hidden under engine, wiring, pipework etc...and you really don't notice it - it's much better than having the bay red at the least. The slam panel and bump stop mounts, however, sit right next to areas that are painted NATO green, so this always bothered me because they were very obviously a different colour to the surrounding paint. 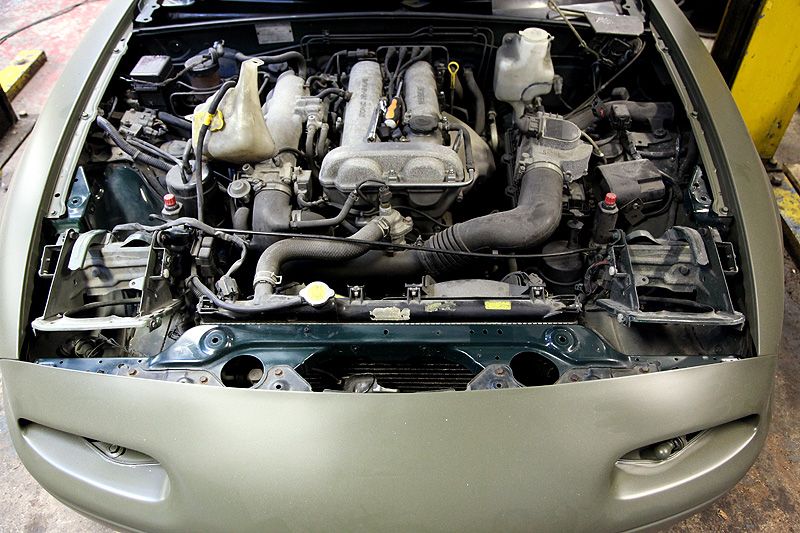 Masked up and rubbed down 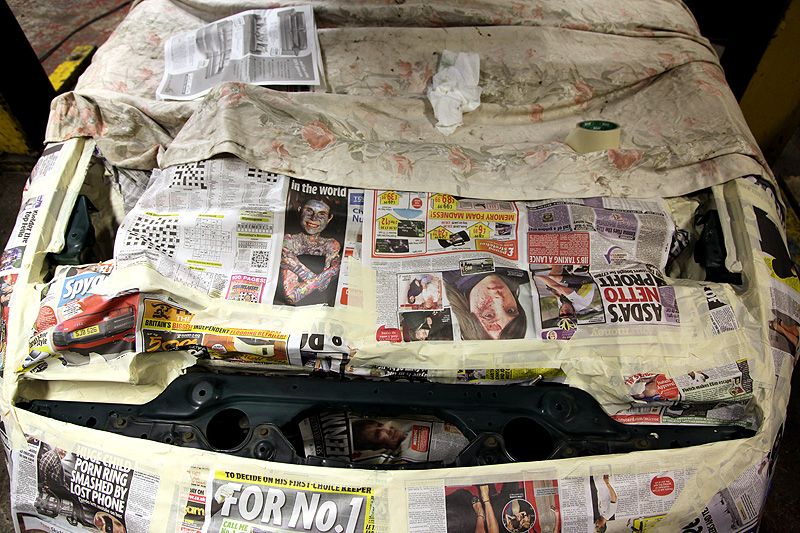 From BRG to NATO 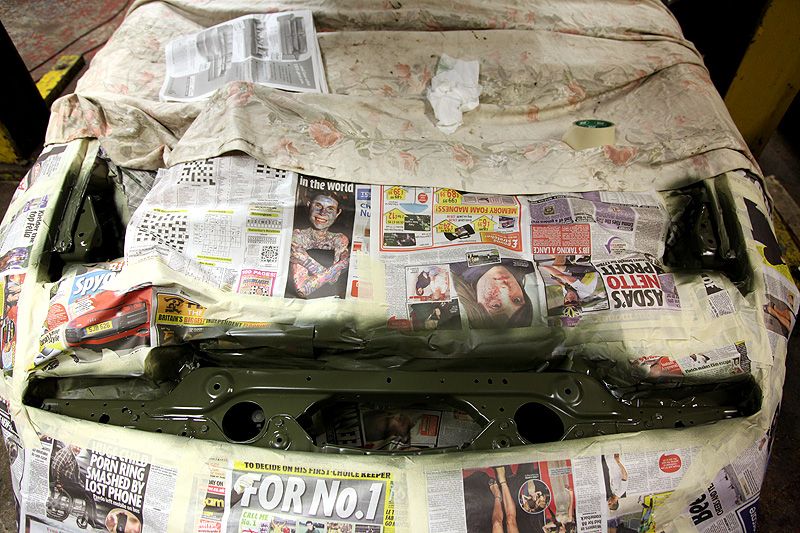 MUCH better. 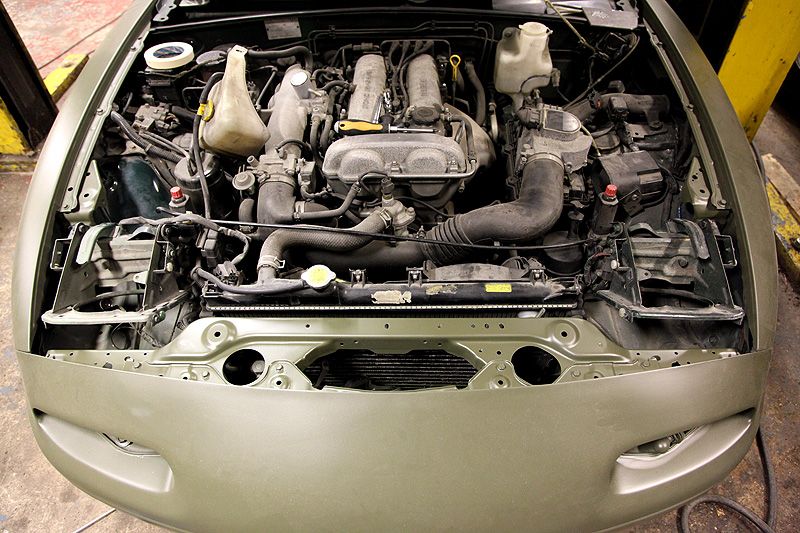 All put back together, you really don't notice the rest of the BRG and the bits that bugged me look so much better in NATO. Your eye is no longer drawn to the contrast on the slam panel or bump stops. Happy? You bet! 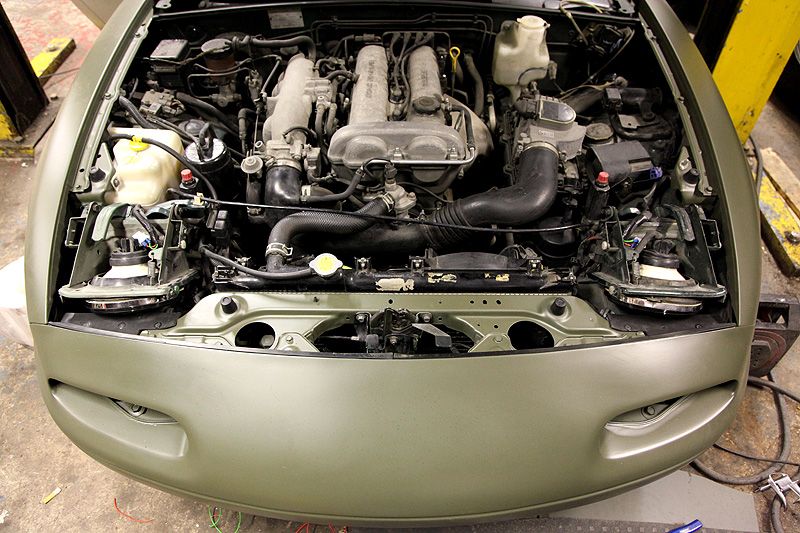 Strut brace needed to see some attention. The bases weren't in the best condition 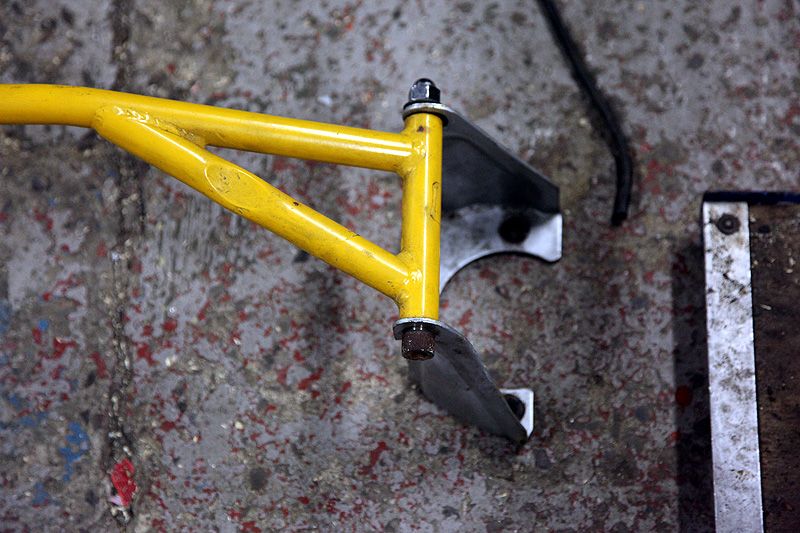 Rubbed down and acid etch primed 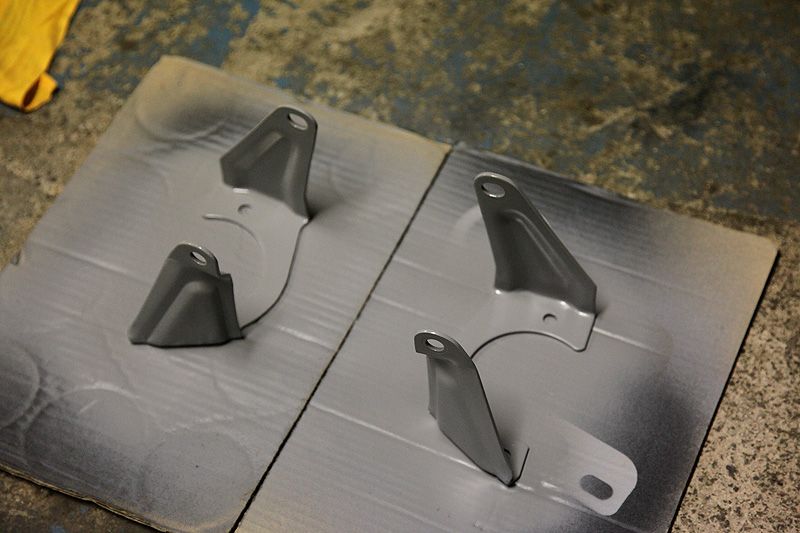 Once dry, they are joined by the rubbed down wiper arms 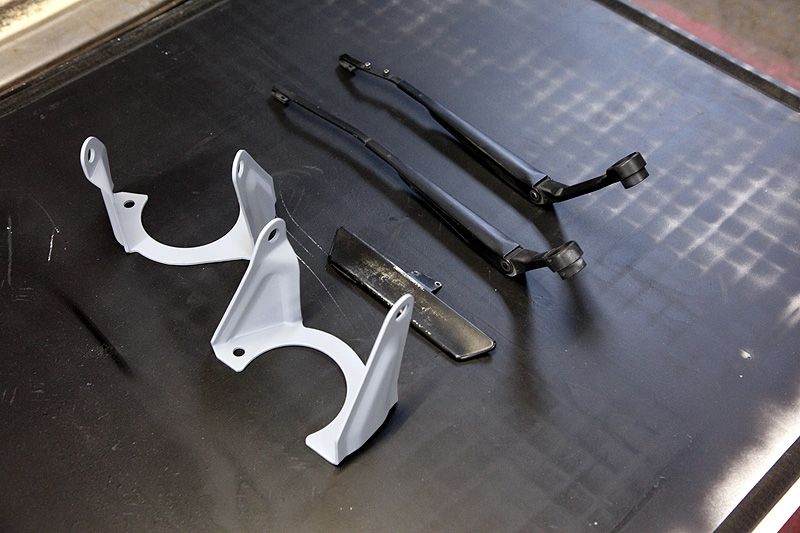 A few good coats of satin black 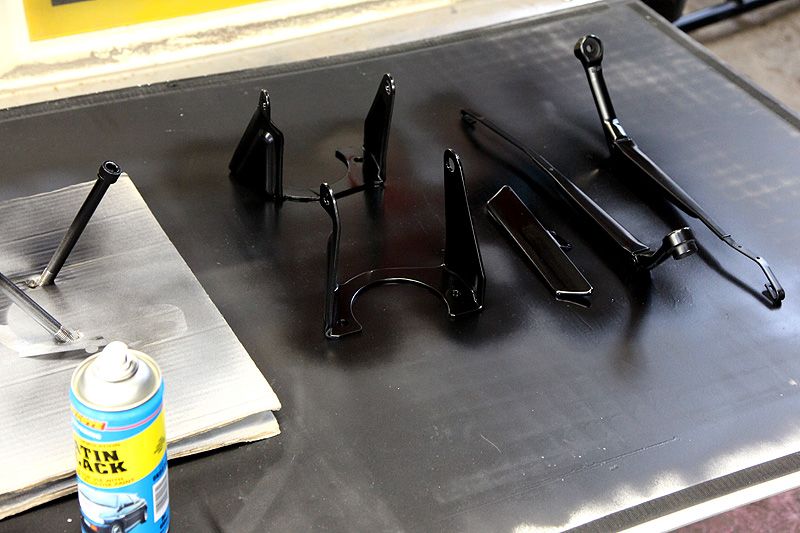 (can you see a theme emerging here?) |
| |
|
|
|
|
stealthstylz
Club Retro Rides Member
Posts: 14,962
Club RR Member Number: 174
|
|
Mar 30, 2011 22:20:21 GMT
|
It's alright I suppose  ;D |
| |
|
|
|
|
|
Mar 30, 2011 22:22:09 GMT
|
Not long after painting the slam panel, I got on with the job of wiring up the new headlights. Same as on the red car....crystal light units off eBay with the sidelight bulbs built into them so that I can ditch the sidelight/indicator units. Like all wiring I do, I try to properly solder/heatshrink everything where possible and this job was no exception, soldering all the joints where the wires were extended from the bumper area, up under the pop-up headlights, into the back of the light unit then a couple of crimp terminals to connect the wires to the plug on the back of the light unit. The trigger wire that goes up to the relay to make the lights pop up when the sidelights are turned on was even completely covered in heatshrink because I didn't have any black wire to hand and didn't want a piece of red cable running through the engine bay. I like everything to look as 'stock' as possible. The wiring to the sidelights was all run in conduit and everything was going well until the last solder joint. Just pulling the soldering iron away from the wire and a blob of solder falls off the iron and runs down the front bumper! It sticks to the paint and I immediately flick it off. There is a slight mark where it had bonded to the paint so I grab a piece of rag to wipe over the paint. As soon as I start wiping I realise my error...I've just picked up an acetone impregnated wipe which is great for removing dirt and grease from things, but not good on satin paint because it melts it! Suddenly my satin paint turns almost glossy where the surface has melted and gone all smooth and shiny. OHBOLLOCKS!!! One shiny patch on the bumper, still with the solder marks showing. If only this had happened before I painted the slam panel, but now it can wait until I finish the rest of the car just in case something else happens along the way. You can see the solder mark where it ran down the bumper and another blob landed just below to the right 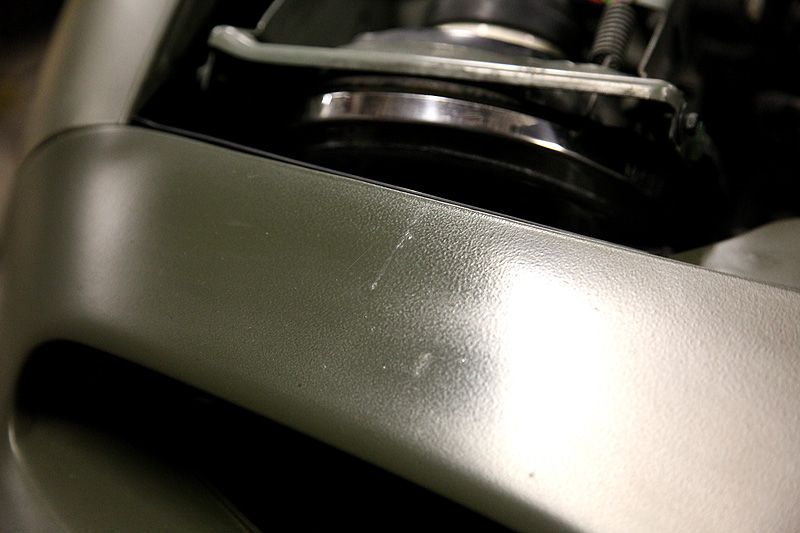 Most of the area above the indicator aperture is now shiny. Not happy  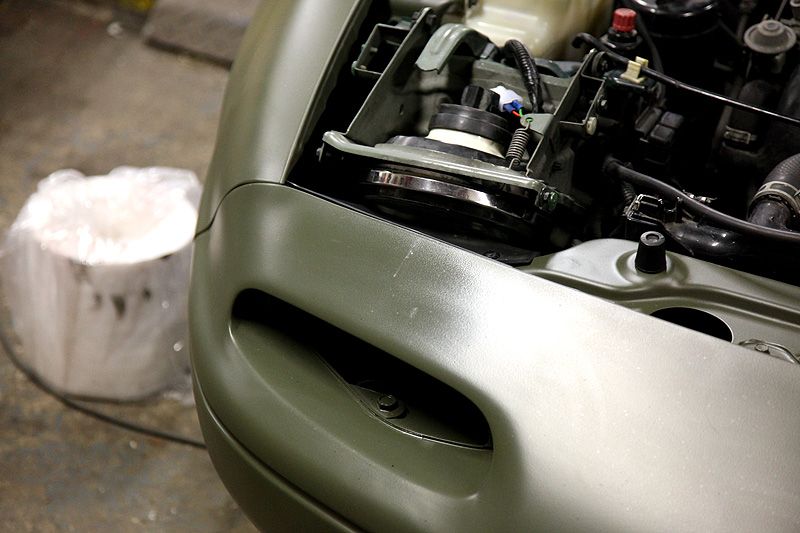 Oh well...what's done is done - time to get stuck into something else..... |
| |
|
|
stealthstylz
Club Retro Rides Member
Posts: 14,962
Club RR Member Number: 174
|
|
Mar 30, 2011 22:24:56 GMT
|
|
And as an aside, I wonder if wiping the entire surface of X with an acetone soaked rag would make it look even more like a plastic toy.
Matt
|
| |
|
|
|
|
|
Mar 31, 2011 10:13:34 GMT
|
It's alright I suppose  ;D Yeah....it's keeping me out of trouble which is the main thing really! And as an aside, I wonder if wiping the entire surface of X with an acetone soaked rag would make it look even more like a plastic toy. Only you could think of something like that! Knowing my luck it would melt all the paint off and leave it back as a bare fibreglass shell. I think after the Gathering this year we ought to get back onto 'X' to get it finished. If there wasn't already the new 'project for the Gathering' I'd be getting stuck back into it now... |
| |
|
|
|
|
|
Mar 31, 2011 10:14:11 GMT
|
Still bloody annoyed about the front bumper I decide to get stuck back into the stereo stuff. Speaker covers laid out on the parcel shelf - but their postion is kinda dictated by other things 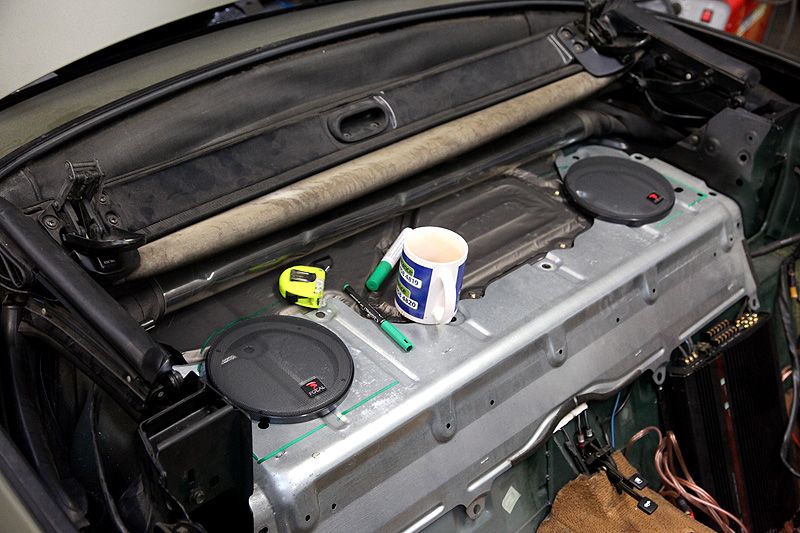 ....like where the roll bar sits. The green line shows where the roll bar mounts, so it needs to be within this area. 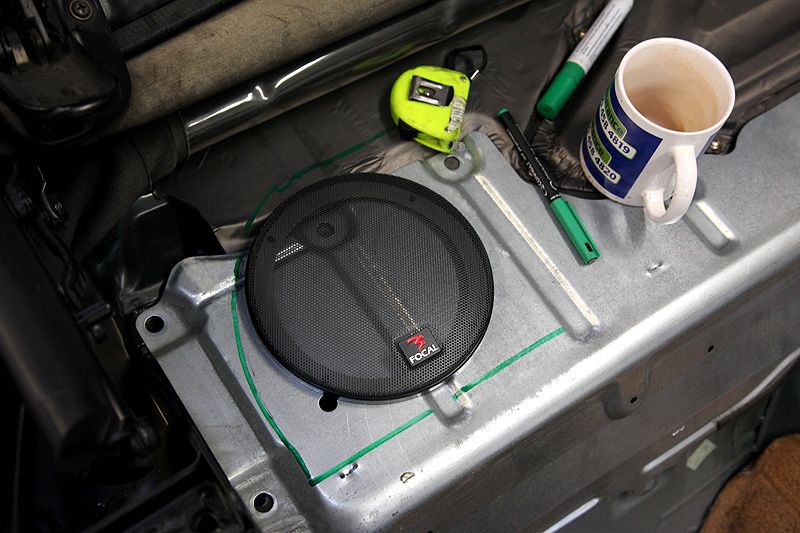 Next up, a nice even, solid mounting surface for the speakers rather than the tinny shelf. 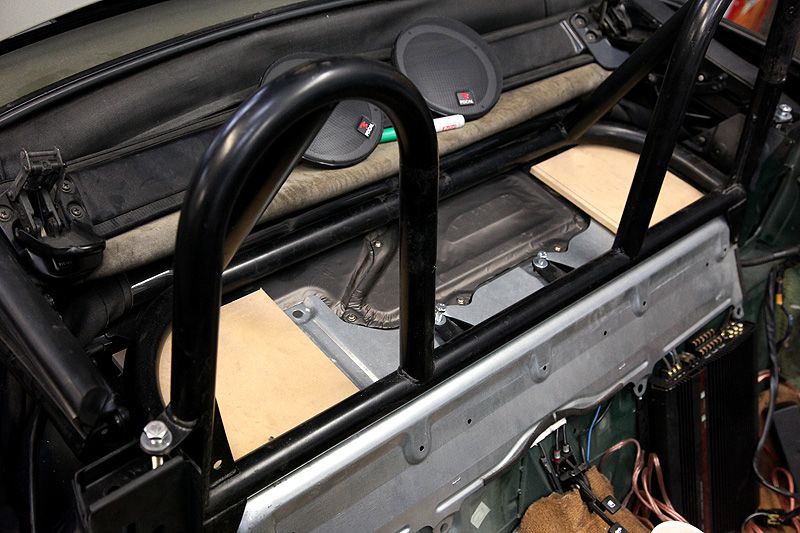 CHecking and double checking location and alignment before drawing the speaker cut-outs on the wood 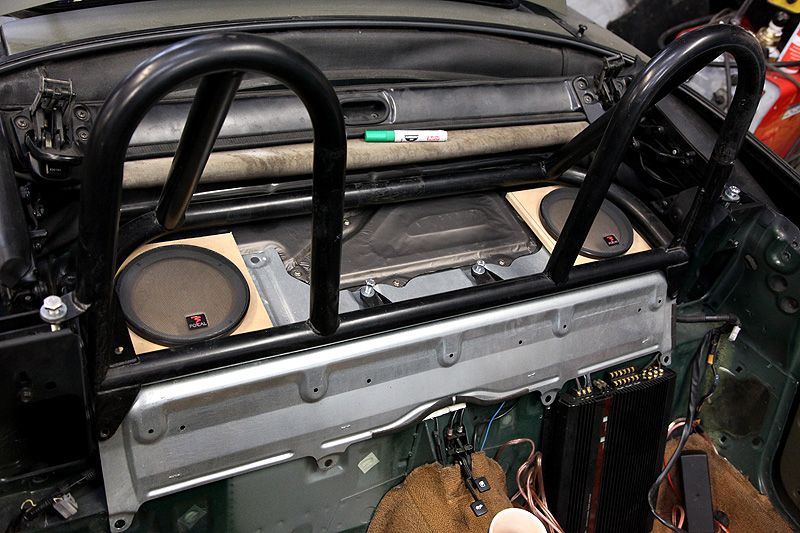 No going back now! 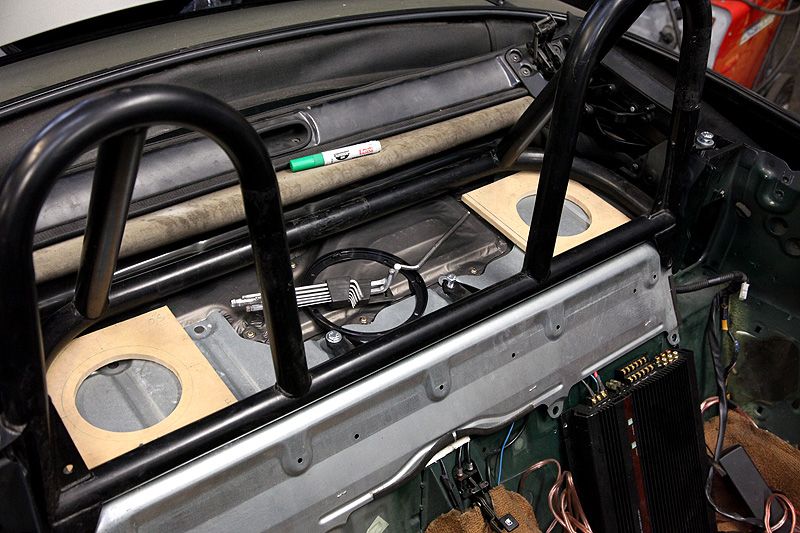 Parcel shelf cut to match, but spot the problem.... 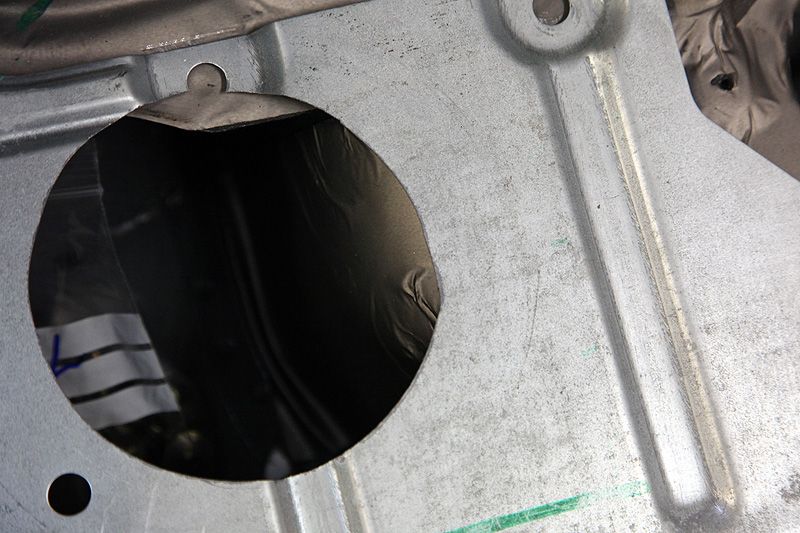 Yep, a small amount of metal will need to be cut away from the rear part of the opening, but I'll also need to sort something about the fuel tank housing sticking too far into where the speaker will sit Fuel tank housing on the other side is just as bad. 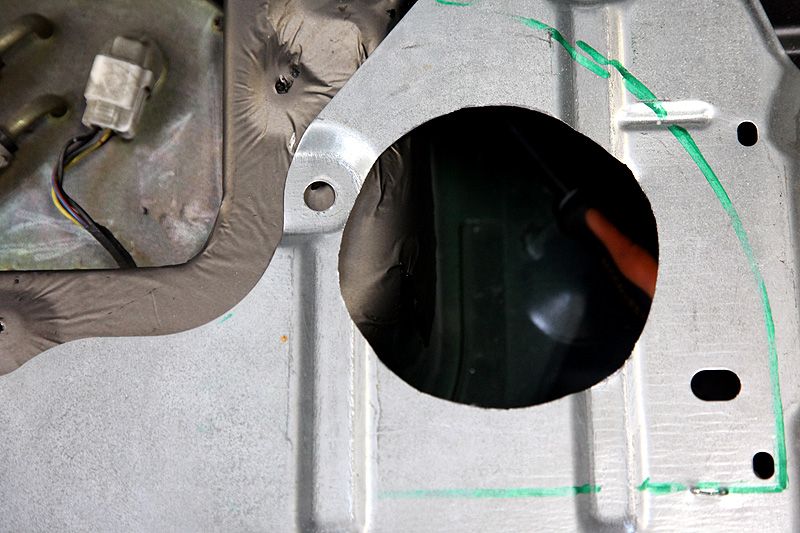 Some gentle tickles with the massage stick later and it's all nice & clear (an I did check that there was room to do this without affecting the tank itself) 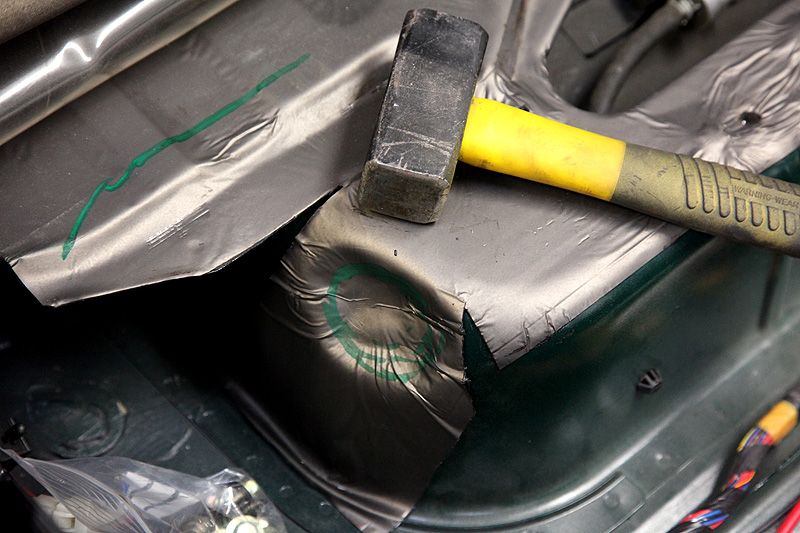 It was good therapy taking a BFH to your own car! 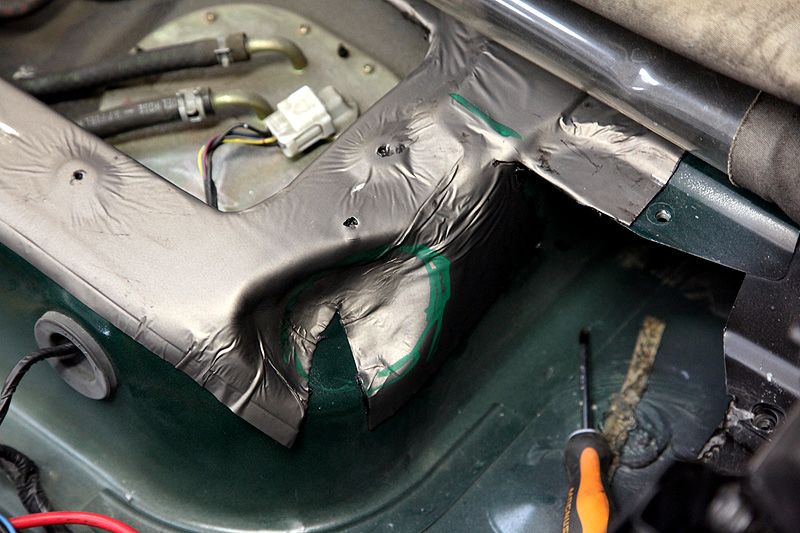 THEY FIT!! 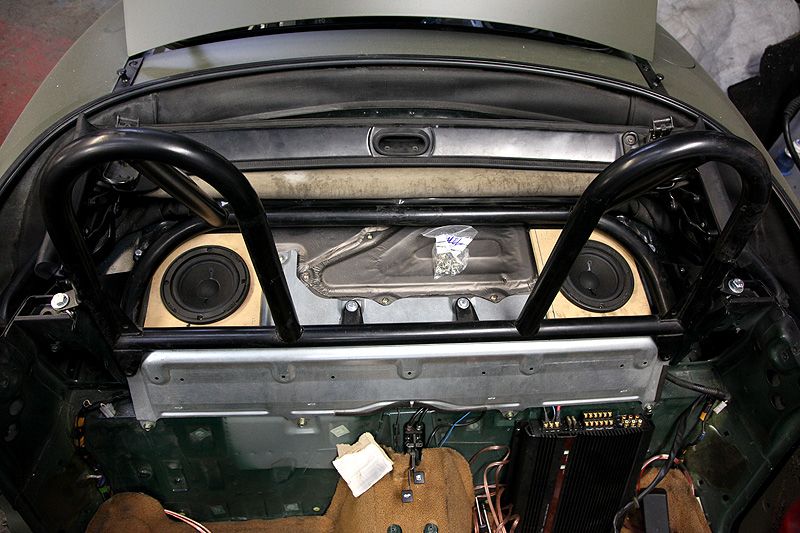 They also sit quite nicely inside the roll bar 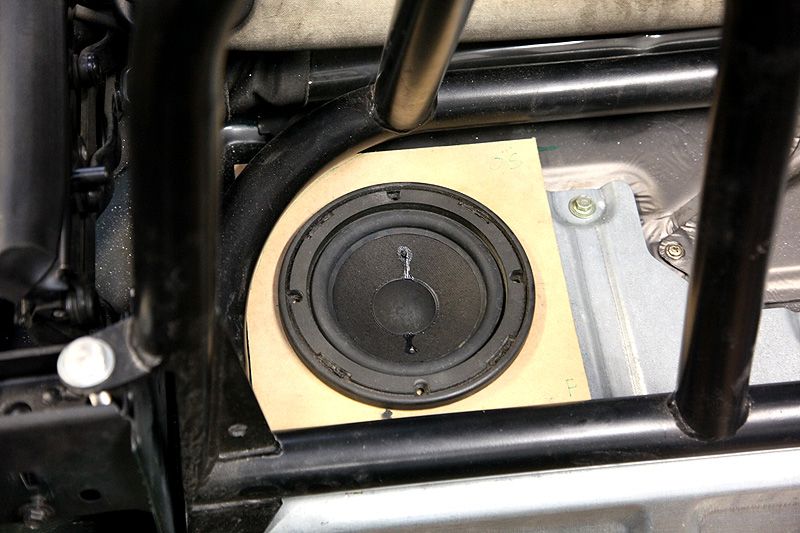 All screwed together 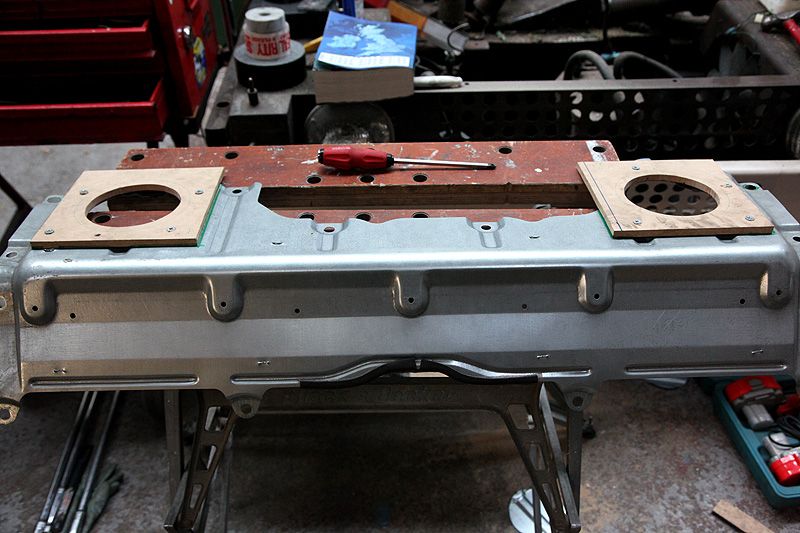 ...then pulled apart for a good dose of silicone to be added 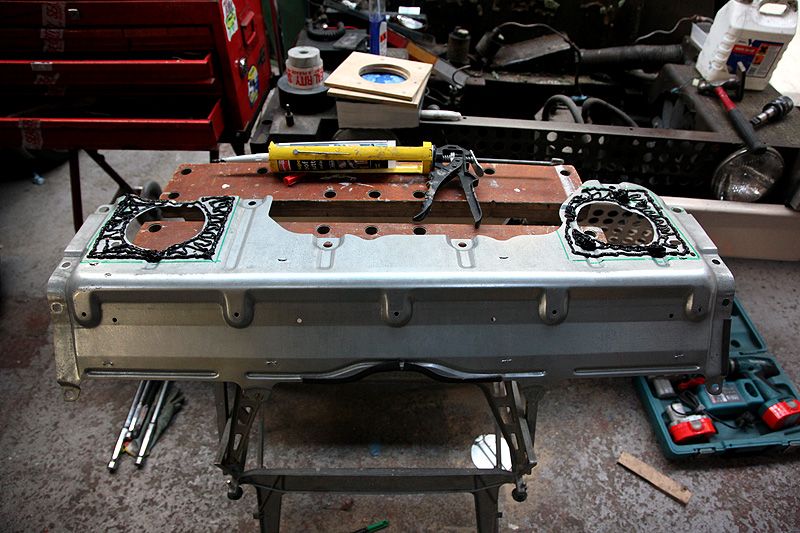 This should make a good bond between the wood and the thin shelf 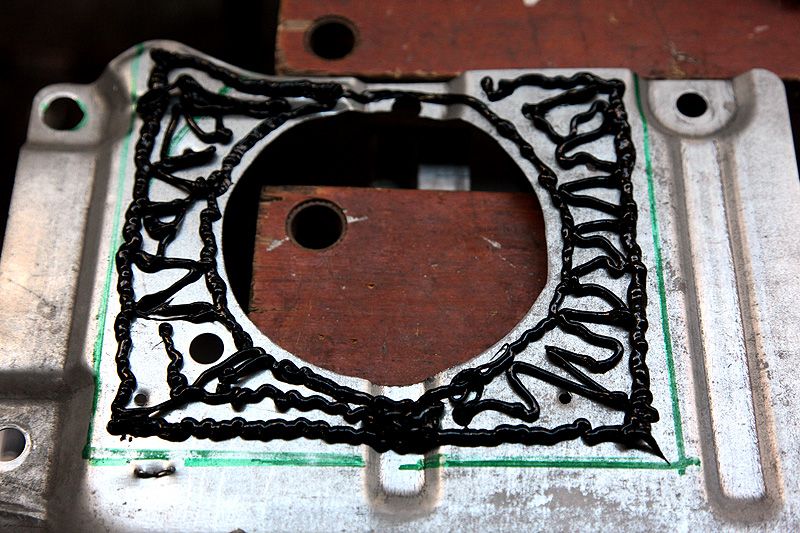 Fixed back on, screws tightened and excess silicone smoothed around the edges 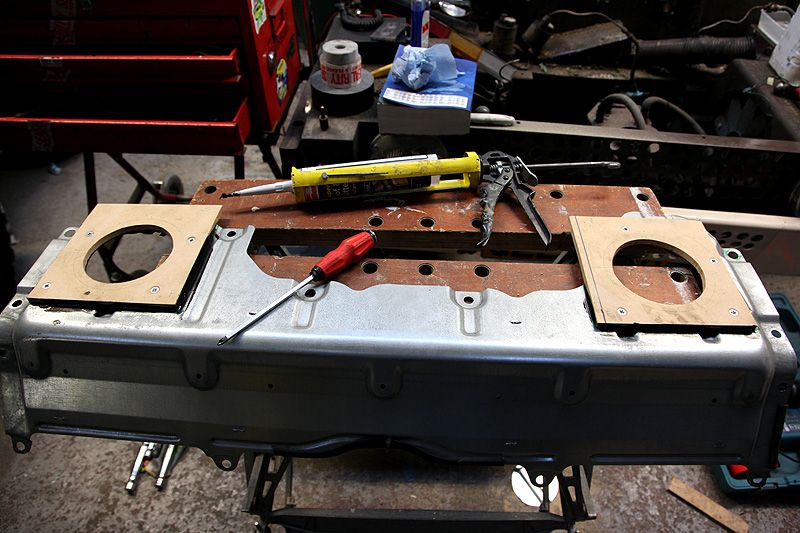 48hrs later 2 good layers of deadening added, plus another layer on the underside 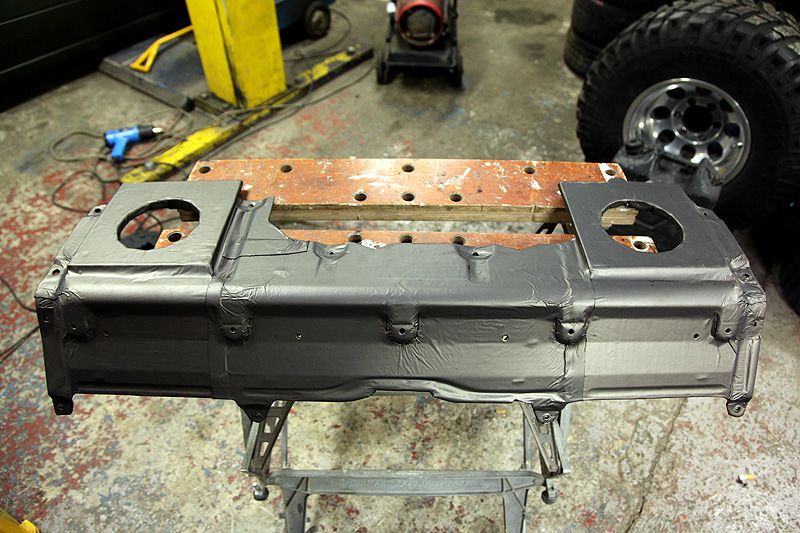 That should certainly help with the sounds.... |
| |
|
|
Loxlee
Part of things
  Ford Capri with 1600cc's of pure power!........
Posts: 887
|
|
Mar 31, 2011 14:45:16 GMT
|
|
I can't remember if I have commented on this yet but I am a big fan. The satin paint jobs your kicking out of the unit put my weak spraying skills to shame!
I love how 'proper' your doing this all, no shortcuts here and you can tell!
|
| |
|
|
|
|
|
Mar 31, 2011 18:30:04 GMT
|
Thanks Dude, I really appreciate the comments. ;D There is a homebrew metal folder at the unit, but it's a bit heavy duty and doesn't do crisp 90 degree bends on thin metal, so my trusty workmate and a rubber mallet are called into play 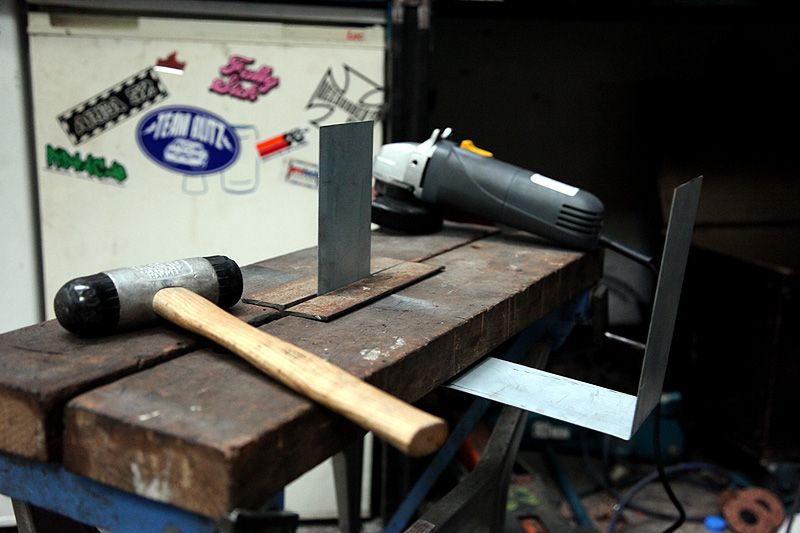 A bit a measuring and bashing later I'm getting there 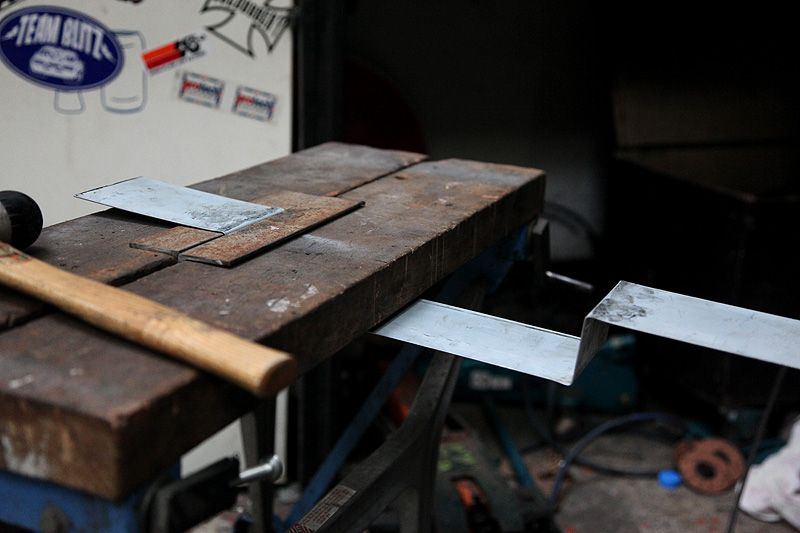 Hoorah - two brackets... 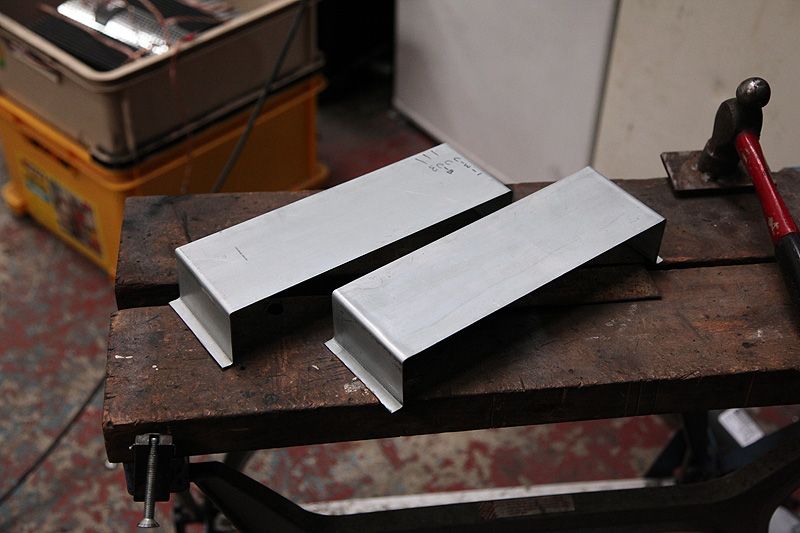 The 'special hammer' is used to get the areas around the folds a bit smoother 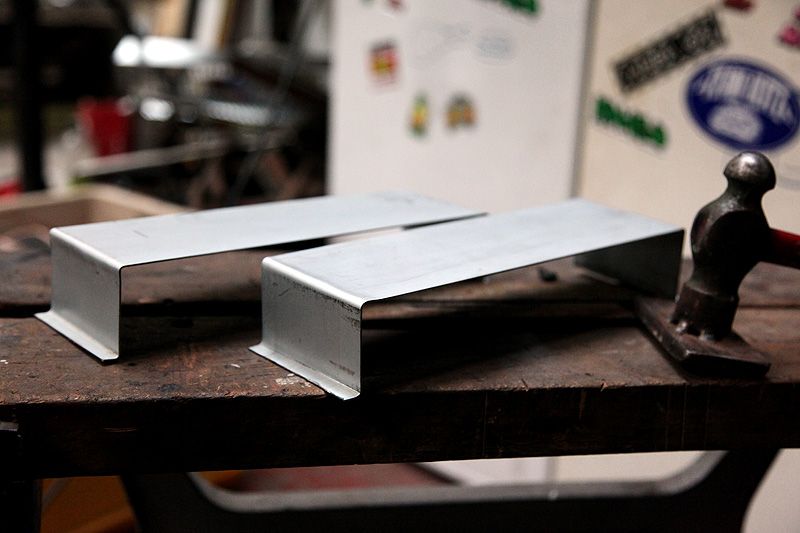 Looks like my measuring wasn't too far off...the brackets fit 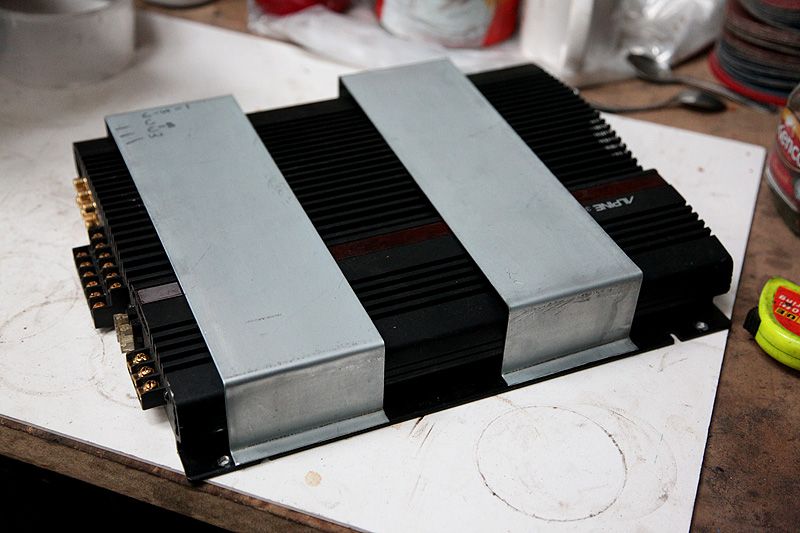 ...and the 2nd amp sits nicely on top 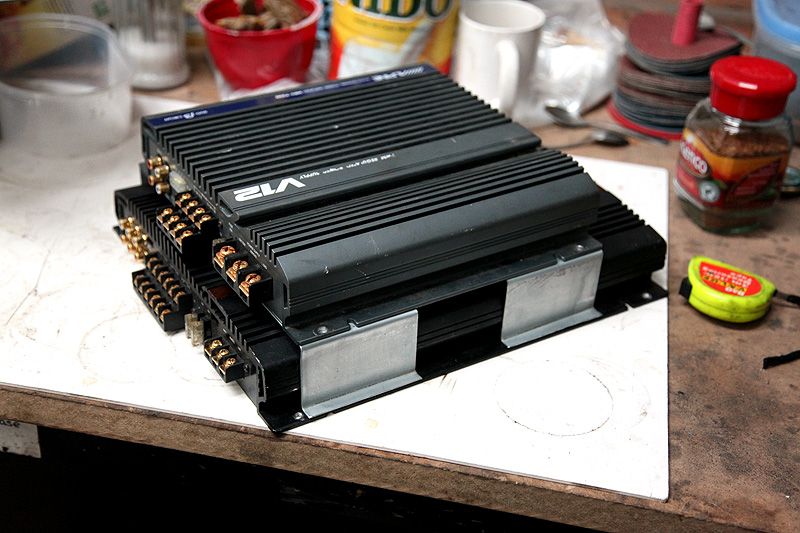 Drill, tap, drill, tap, repeat a few more times 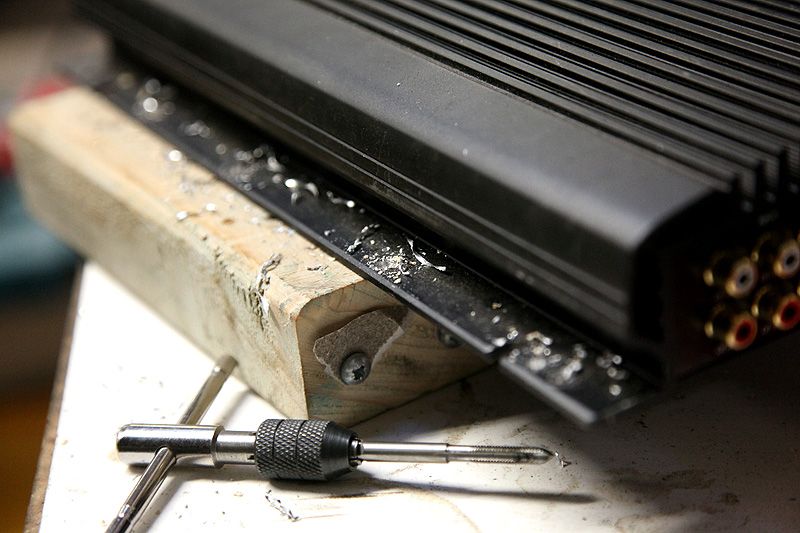 That's not going anywhere in a hurry 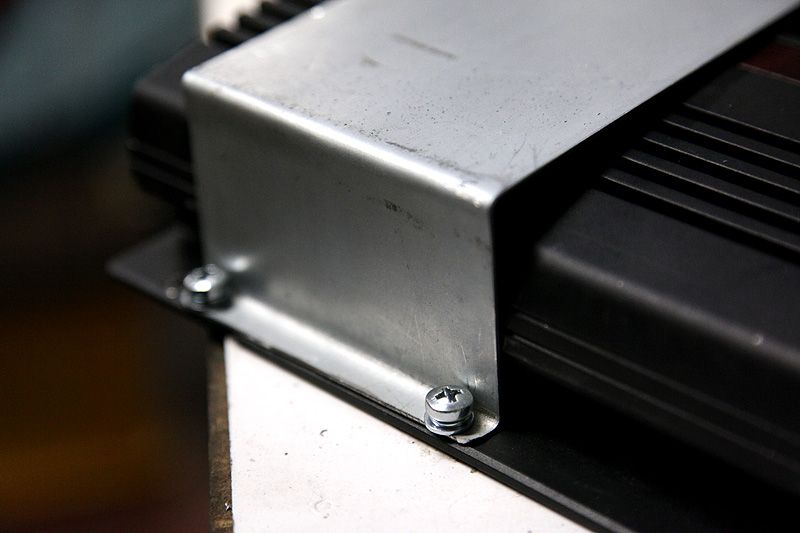 All fixed together 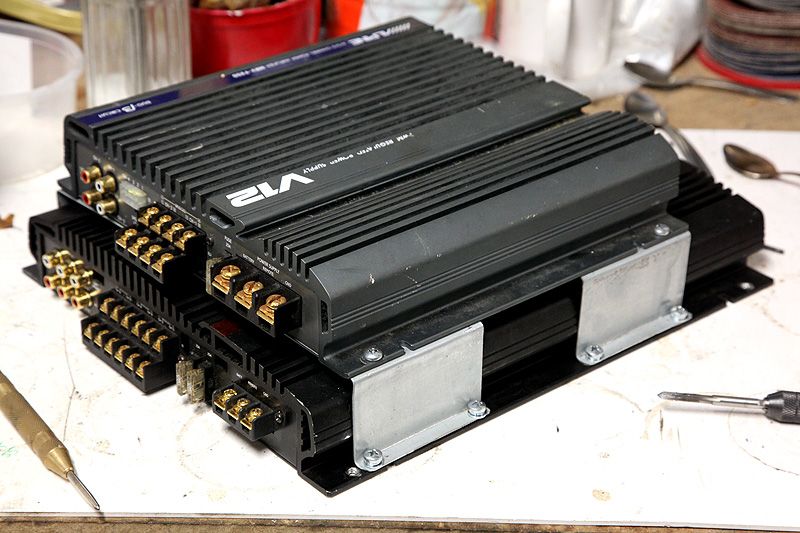 Despite sitting on top of each other, there is still room for air to flow between the amps - looking at it like this, I was suddenly aware of how many connections I'm going to have to make! All bar two of the terminals and plugs are being used. 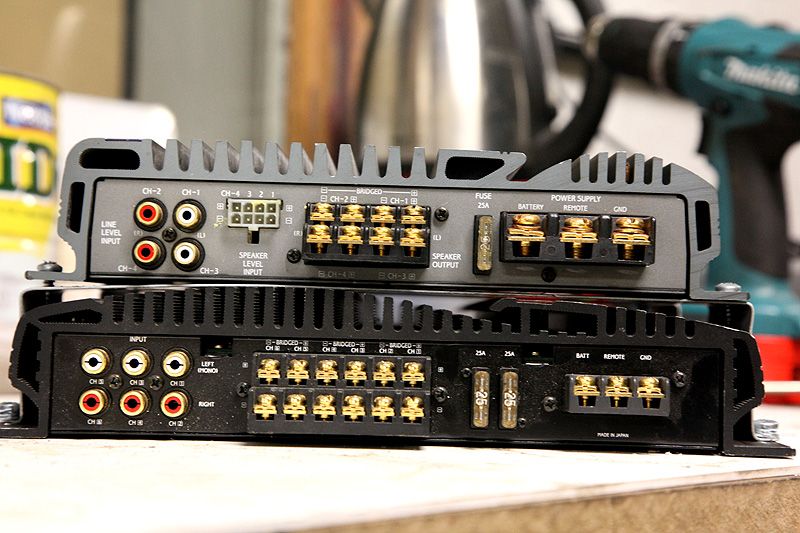 Spare wheel out, you see those three captive nuts? They act as a perfect locator for the edge of the amp to sit under to hold it in place on that side 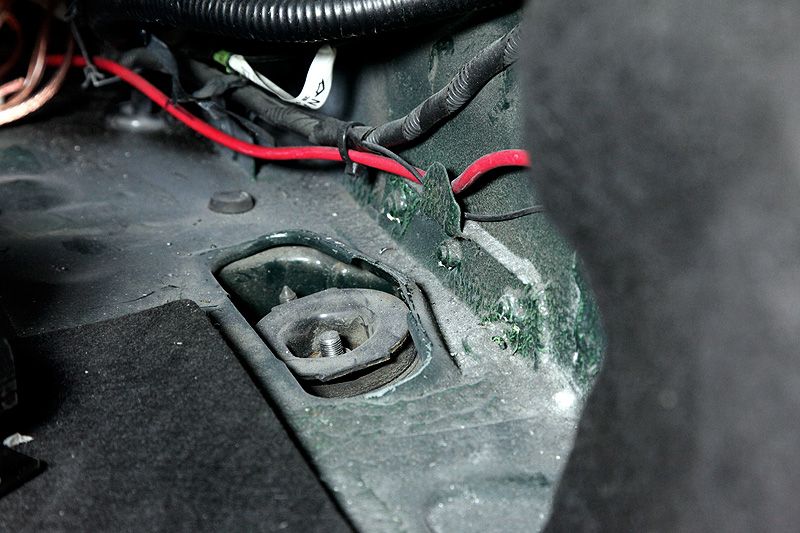 They fit really well and take up minimal space in the boot. Keeping as much space as possible is important to me 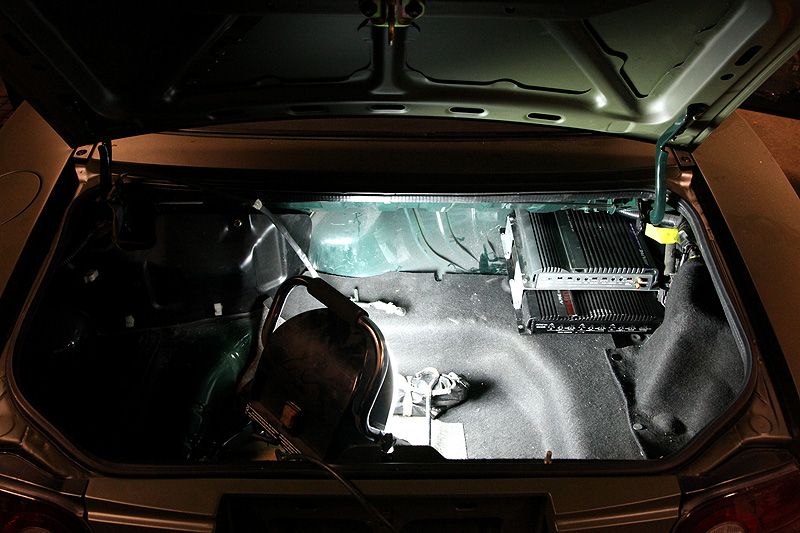 I just need to put some fixings on this side of the amp to secure it in place. With the other side wedged under the captive nuts, it really does mount very solidly 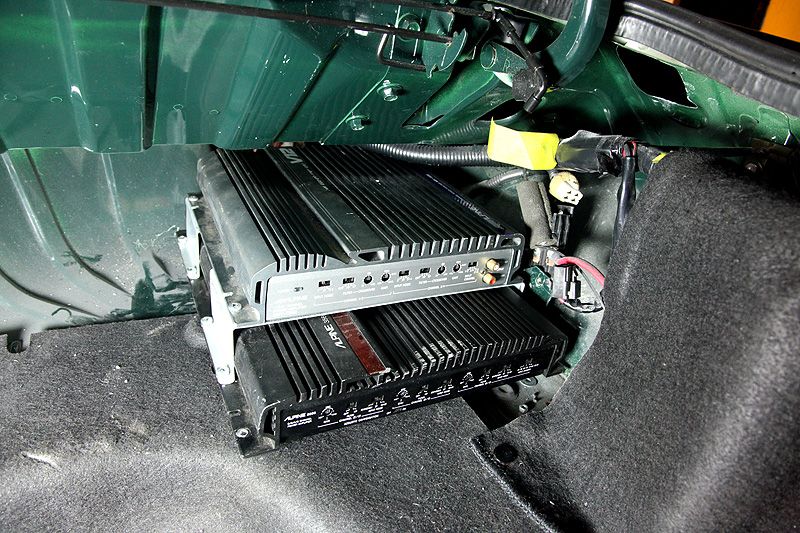 The amps are taken back out and the brackets removed and rubbed down 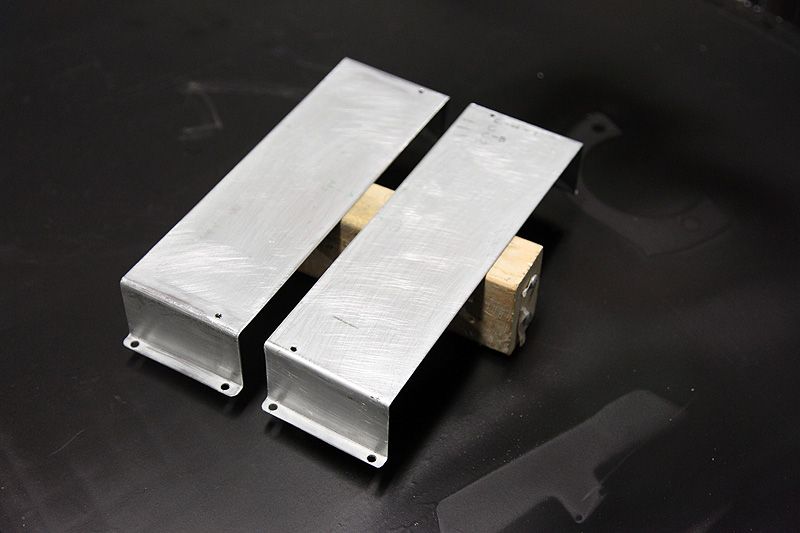 Then primed with acid etch followed by some liberal coats of....you've guessed it....satin black 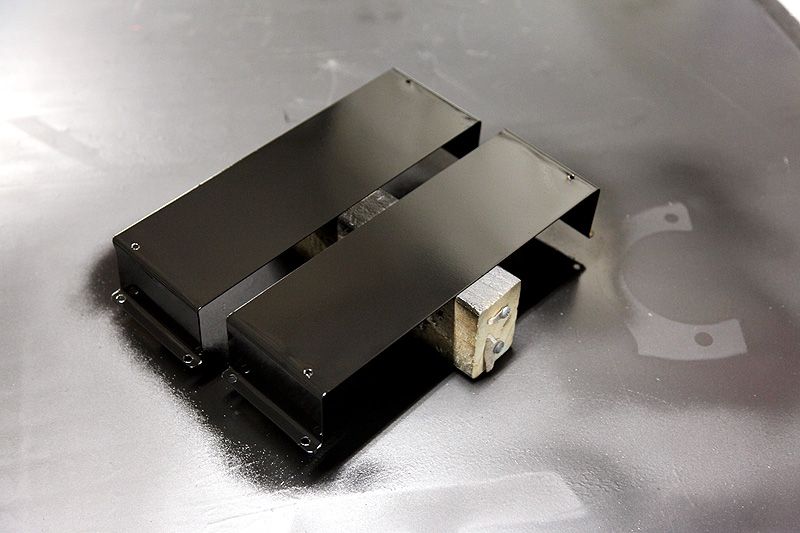 I feel I am starting to get somewhere with the install now. I'm still not looking forward to wiring it all up though! |
| |
|
|
|
|
|
Mar 31, 2011 18:44:49 GMT
|
It's a pleasure to look at your work  Great job, great car  |
| |
|
|
PhoenixCapri
West Midlands
Posts: 2,685
Club RR Member Number: 91
|
|
Mar 31, 2011 19:52:28 GMT
|
Yet another great car coming together, just love it  |
| |
|
|
|
|
|
|
|
Mar 31, 2011 20:42:09 GMT
|
Nice to have the gaps filled in from seeing this at the unit and hearing little bits. Inspiring stuff indeed. I think you will be responsible for boosting the mojo of a lot of people with this one  |
| |
...proper medallion man chest wig motoring. |
|
Seth
South East
MorrisOxford TriumphMirald HillmanMinx BorgwardIsabellaCombi
Posts: 15,543
|
|
Mar 31, 2011 21:01:29 GMT
|
Great attention to detail all the way through here Bruce. Nice!  |
| |

Follow your dreams or you might as well be a vegetable. |
|
|
|
|
Mar 31, 2011 21:15:26 GMT
|
Thanks again for all the comments guys. I've missed a lot of the details due to forgetting to take photos of things while I was mid-flow....I'm sure you've all been there, so wrapped up in making progress that you forget to record it. Here is a little 'sideline' job I did while waiting for some paint to dry: Take one set of amber reflectors plus a couple of 'spares' just in case (my original 'import' red rear ones swapped with RobinJI for amber ones) 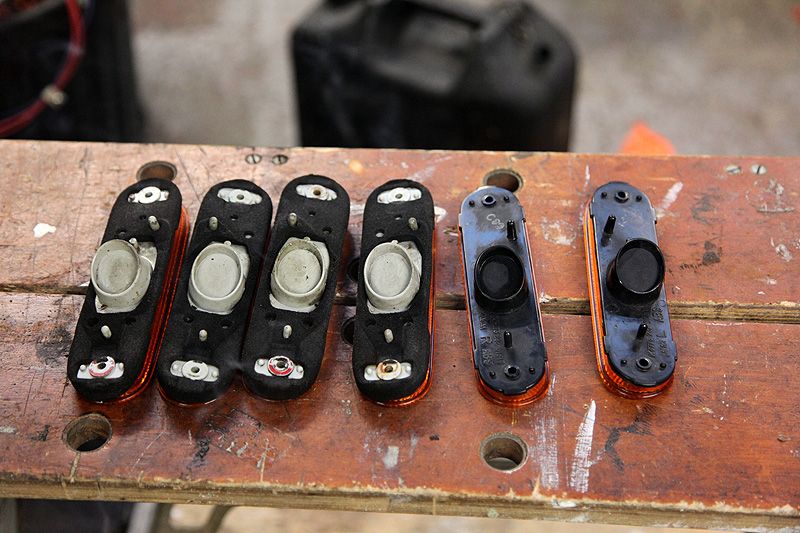 Some various bulb holders snaffled from a couple of the cars that have been broken for spares at the unit 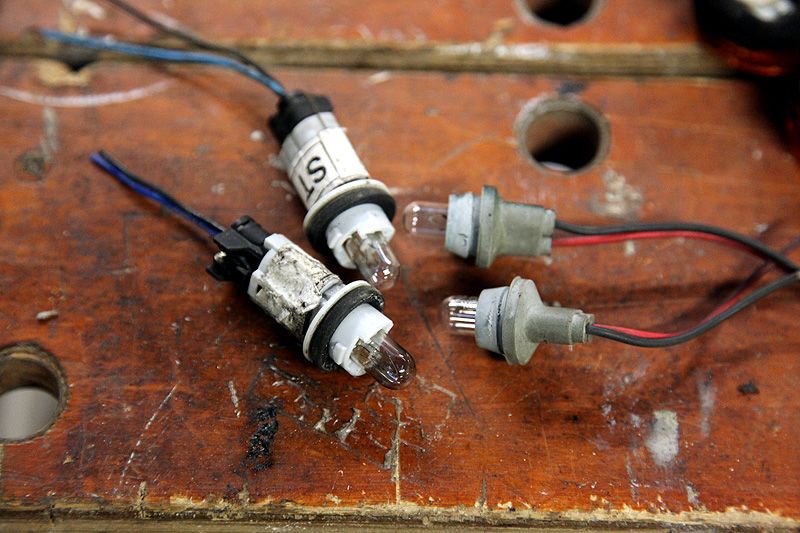 Drill & dremel action about to occur 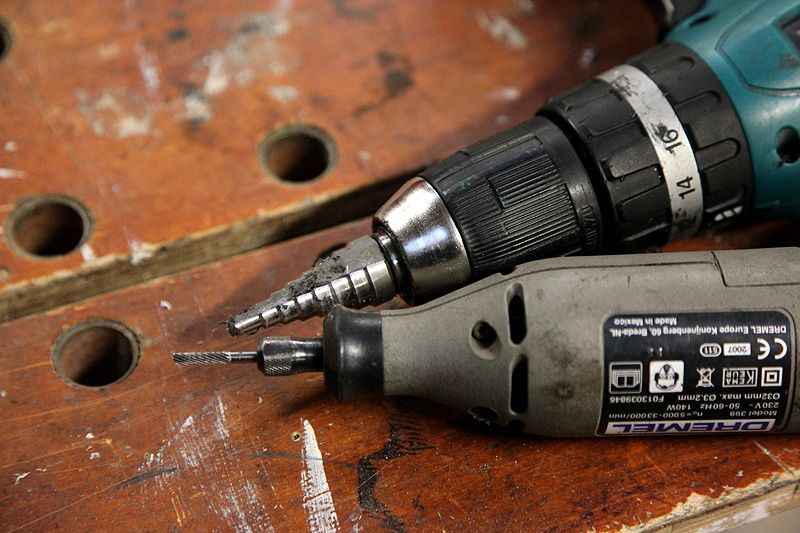 Drilling & dremelling done 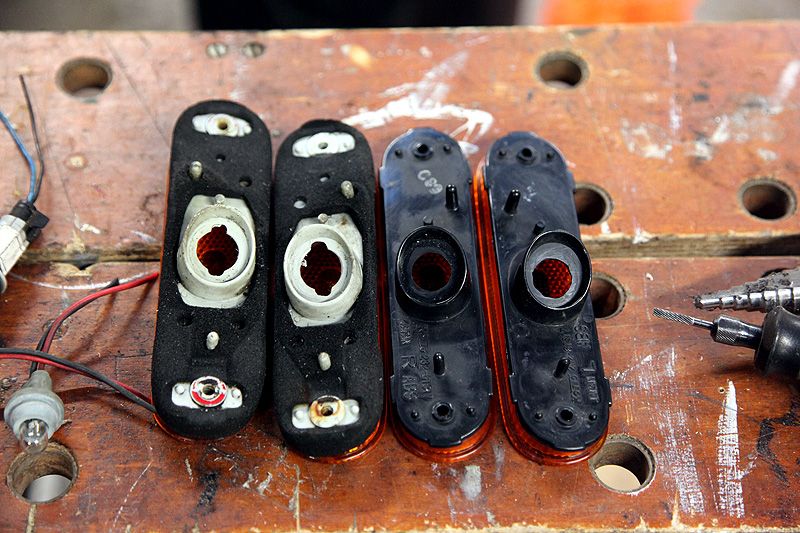 Unite the reflectors and bulb holders. Just a bit of wiring to do and I've got myself some side repeaters in place of the original ones I welded up. The ones in the front bumper don't reflect far enough back to meet MOT regulations, so the rear ones will also flash so that they can be seen from anywhere around the car 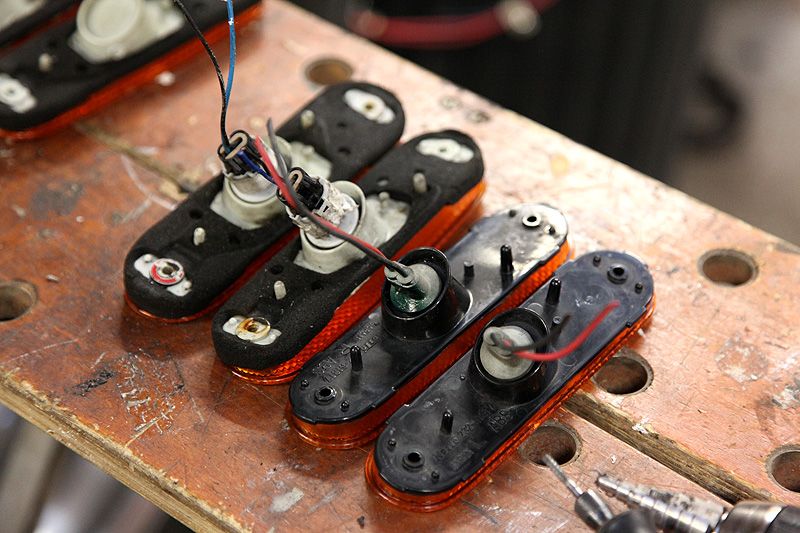 ....and this is where, thanks to many other things, progress on the Dirtbag kinda halts. These photos were taken at the very beginning of Jan and not a lot happened on the car between then and just a few weeks ago. It goes like that sometimes.... |
| |
|
|
luckygti
Posted a lot
   I need to try harder!
Posts: 4,912
|
|
Mar 31, 2011 21:15:37 GMT
|
You know what Bruce, I haven't looked at this for a while, but I am absolutely loving what you're doing to it now. I still have a massive hankering for one of these. I took your old one out when Joe had it and fell in love straight off. And that install is pimp  Can't wait to see more! |
| |
|
|
robbo86
Part of things
  Current Ride: 2018 Volvo V90 D4 , 1983 Rover SD1 Vitesse
Posts: 168
|
|
Mar 31, 2011 23:16:38 GMT
|
|
Good progress. Would cutting the metal shelf not compromise the rigidity of the shell or strength in a crash? I was looking at options to install 6x9s on my rear shelf in my BMW e30 and was advised strongly that whatever I did, I did not cut the rear metal shelf
|
| |
|
|
|
|
|
Mar 31, 2011 23:37:03 GMT
|
Good progress. Would cutting the metal shelf not compromise the rigidity of the shell or strength in a crash? I was looking at options to install 6x9s on my rear shelf in my BMW e30 and was advised strongly that whatever I did, I did not cut the rear metal shelf I think i'm yet to have seen a 80's car without holes for 6x9's brutally butchered into the rear shelf.  |
| |
|
|
|
|
|
|
|
Would cutting the metal shelf not compromise the rigidity of the shell or strength in a crash? I was looking at options to install 6x9s on my rear shelf in my BMW e30 and was advised strongly that whatever I did, I did not cut the rear metal shelf First thing to consider, the metal shelf is not in any way part of the structure of the car. It would make no difference in a crash if it was there or not. It's just a 'cover' to make the area behind the seats flatter so you can put things on there. You could happily run the car without it. If you look at how it's mounted, very little surface area actually contact the car itself, most of the shelf is raised from any contact. The tabs which the bolts pass through bend even from just putting the shelf on the floor under its own weight it's that flimsy. Lets imagine that it does play a structural part of the car (hypothetical). The amount I have cut out of the shelf is more than made up for by the much, much thicker MDF panels that are not only screwed onto the shelf, but are also bonded on over a very large surface area. This alone has added a huge amount of strength to the structure of the shelf compared to its flimsy original structure. Next add in the sound deadening (two layers of) which has made the whole shelf very rigid. If you tapped the 'stock' shelf it sounded very tinny and thin, but tapping it now, it's very dense and solid. The amount of flex is minimal compared to the original structure. Take all that into account and I have actually made it whole thing a lot stronger and more solid that before....but don't forget, it's not even a required part of the cars structure. Adding the speakers as I have done will have had no impact on the cars integrity in a crash. Then factor in all the work I did to make the roll bar fit, and how this is tied in very solidly to several key structural points on the car and the whole thing is a lot, lot stronger, more rigid and safer than it came out of the factory. A LOT stronger....even with my speaker cut-outs. Sorry if that comes across a bit condescening, I don't mean it that way, but I just want you to be assured that I'd not do anything to compromise the intergrity of the cars structure. Far from it  |
| |
|
|
|
|
|
|
|
Skip forward three months from the last update and we're now mid-March! In between I had been so busy working on other cars, ripping engines out of cars, putting time in on the Fairlane etc...that the Dirtbag did only one thing the whole time: sit in the corner getting dirty!  I decided to put a two week deadline on getting the car finished and there was still a LOT of work to do. Best get cracking then! My plans for the stereo involved making minimum impact on the interior/useable space, so some lateral thinking needed to be called into play. I had never been totally convinced that the airflow through the vents was as good as on the red car, the AC didn't work and I also wanted to make some space behind the dash....so killing three birds with one stone, I decided to remove the AC unit (the rest of the system will follow at a later date) The AC unit sits directly behind the glovebox and the back of the glovebox sits only a few mm away from it when it's closed, so I figured I could make some space there.... 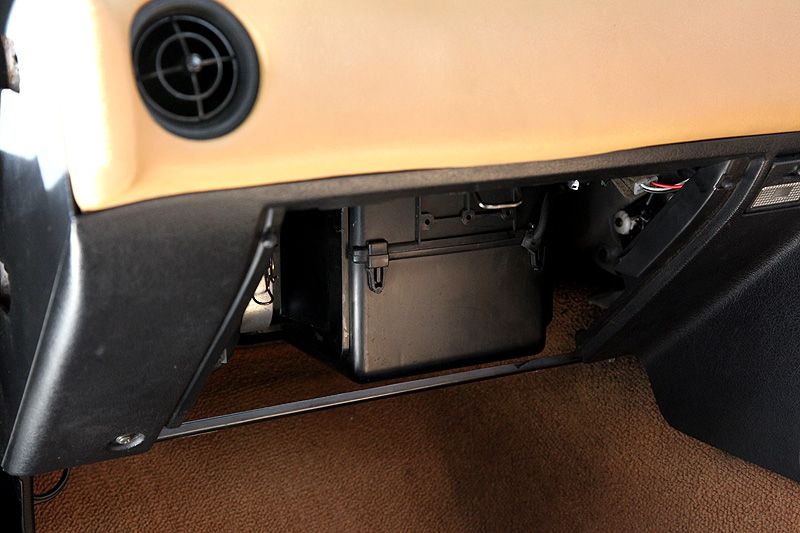 This meant removing the dashboard again! Now you see it 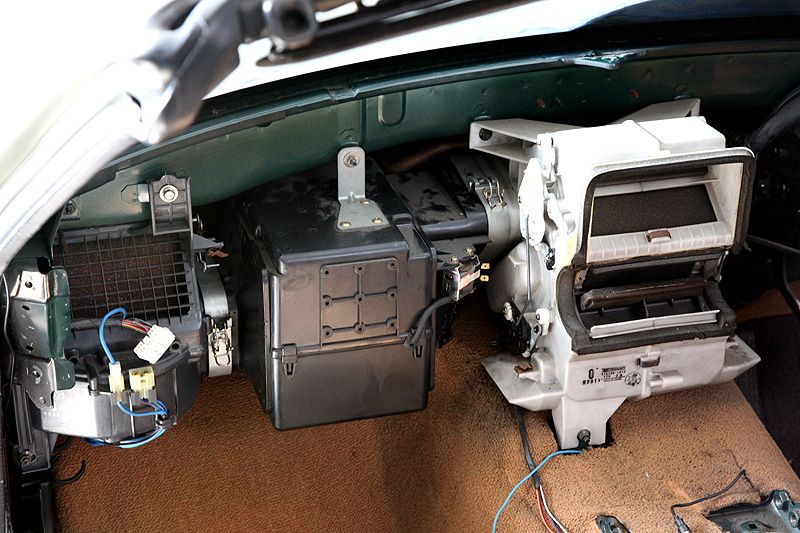 Now you don't 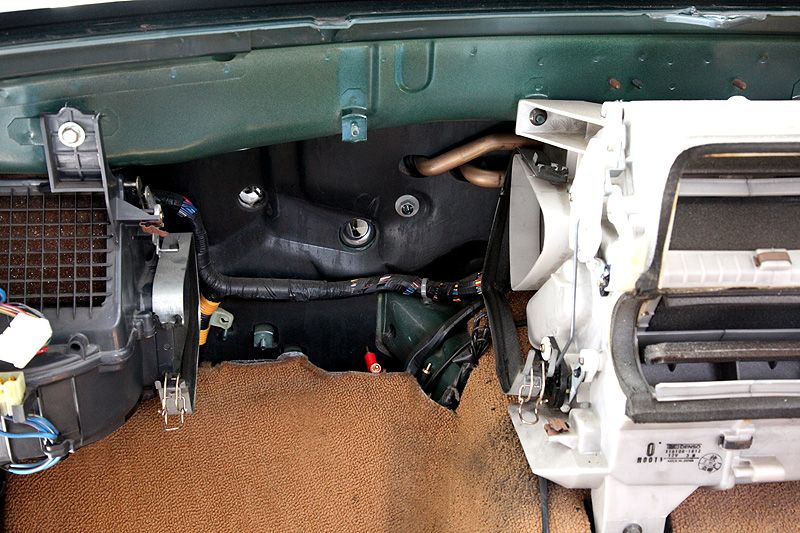 The only problem now was getting the air from the blower unit on the nearside 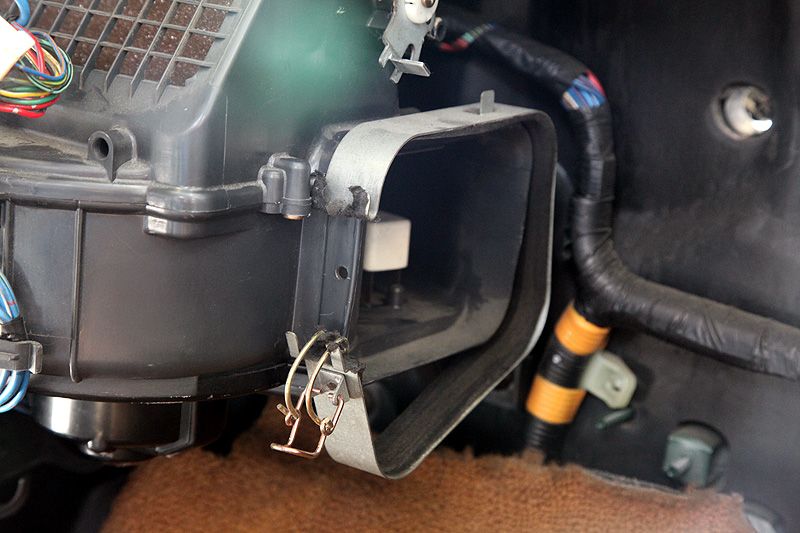 ....to the heater box in the middle of the car 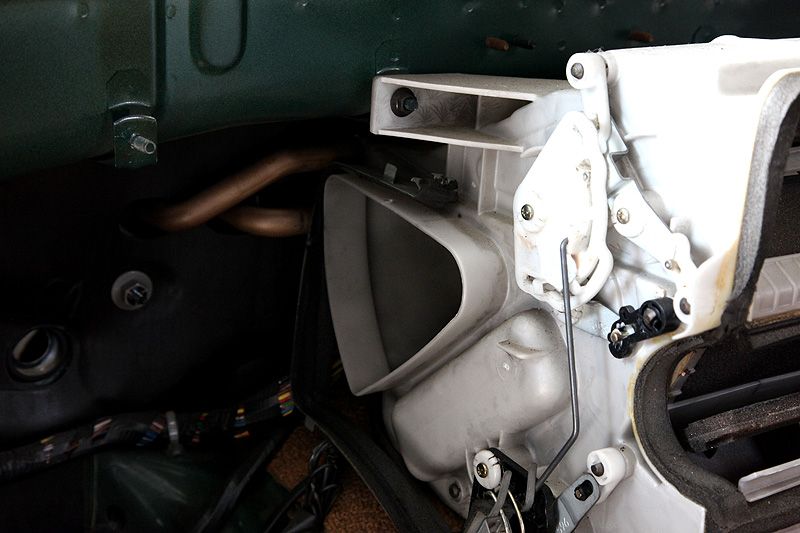 Blower motor side of the AC unit with the rectangular air duct 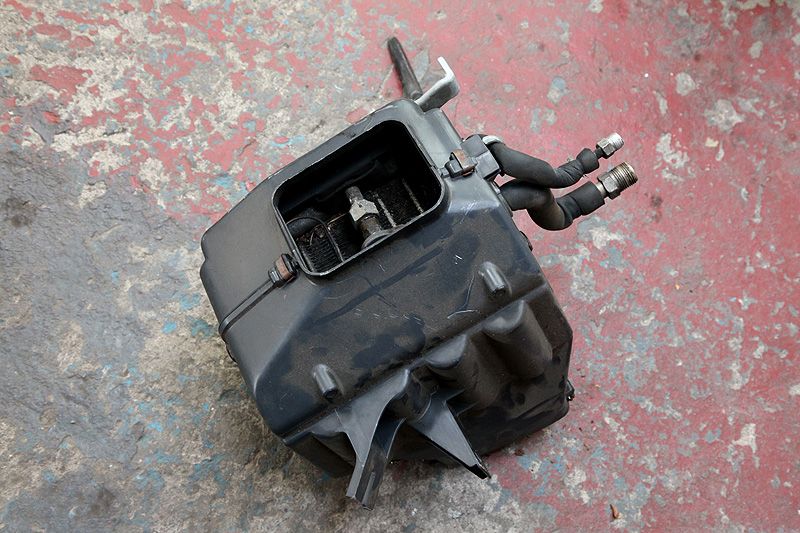 Heater box side of the AC unit with the triangular air duct 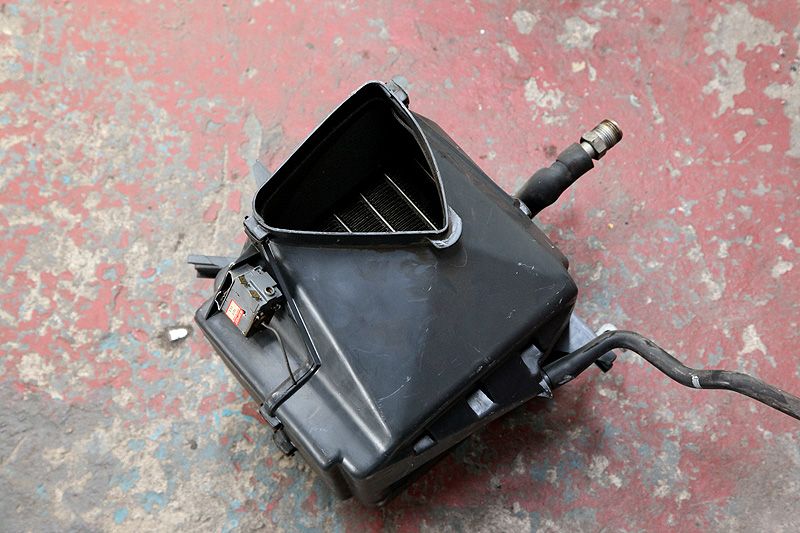 Some angle grinder action later, I have some bits of plastic 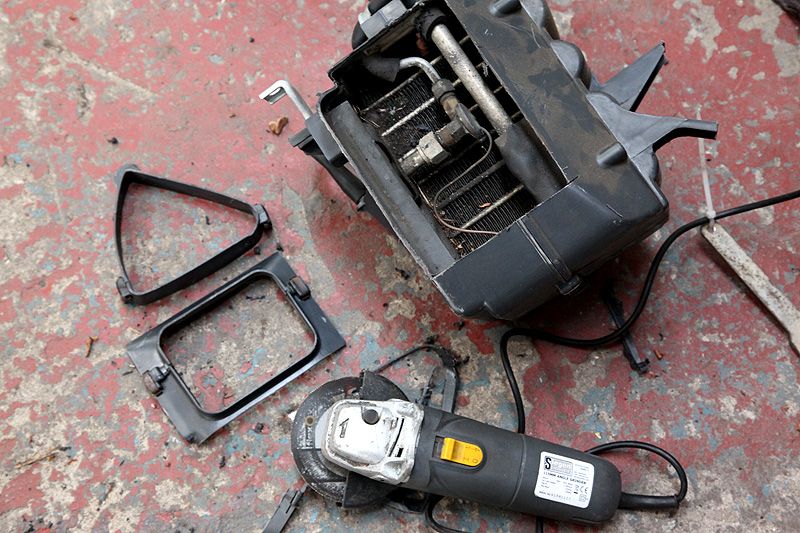 Clamp the pieces back in place and break out the glue gun & card! Very Blue Peter 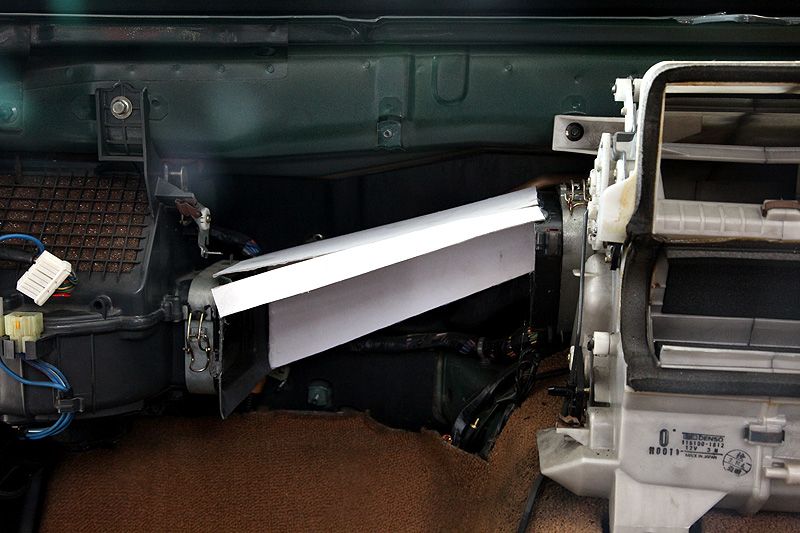 A few hours later I had a not very air-tight link pipe. This took quite a while as I had to wait for each bit of glue to go off before moving onto the next due to the card wanting to twist all the time. If it had been a rectangular to rectangular link, things would have been a whole lot easier! 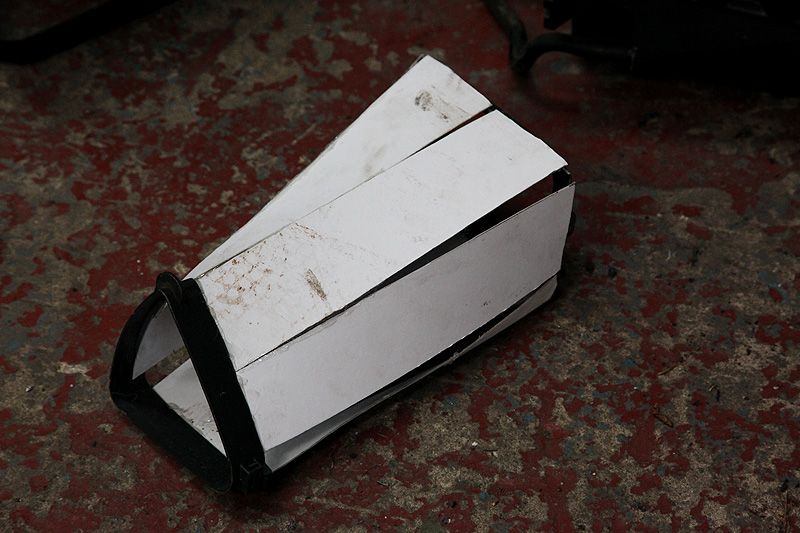 Time to make some mess and get the link pipe a bit less 'leaky' 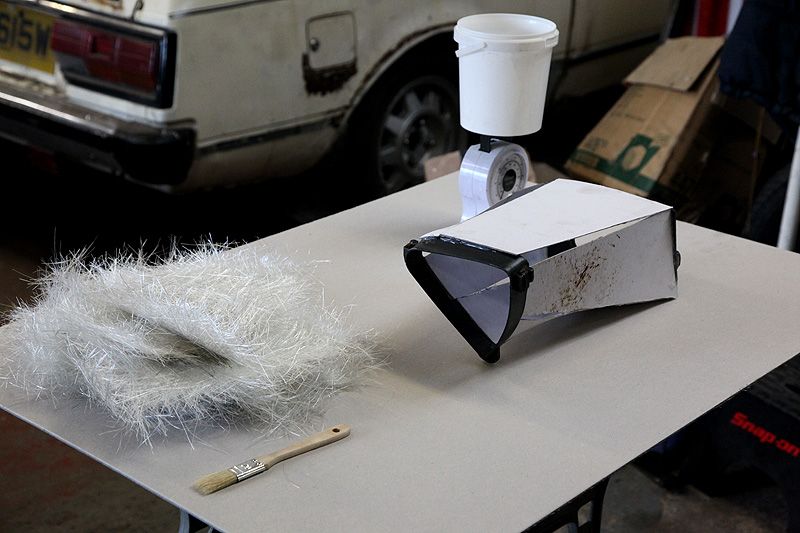 That should do....I'll just leave it to set overnight and see how well it fits tomorrow. 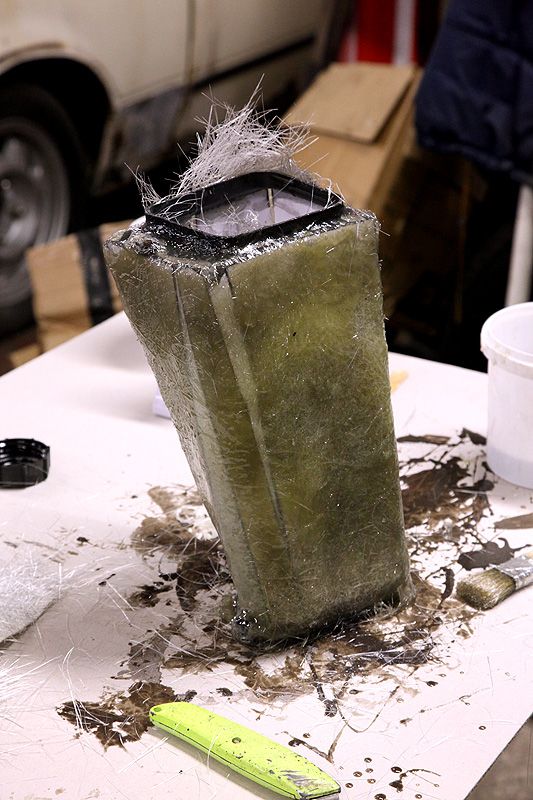 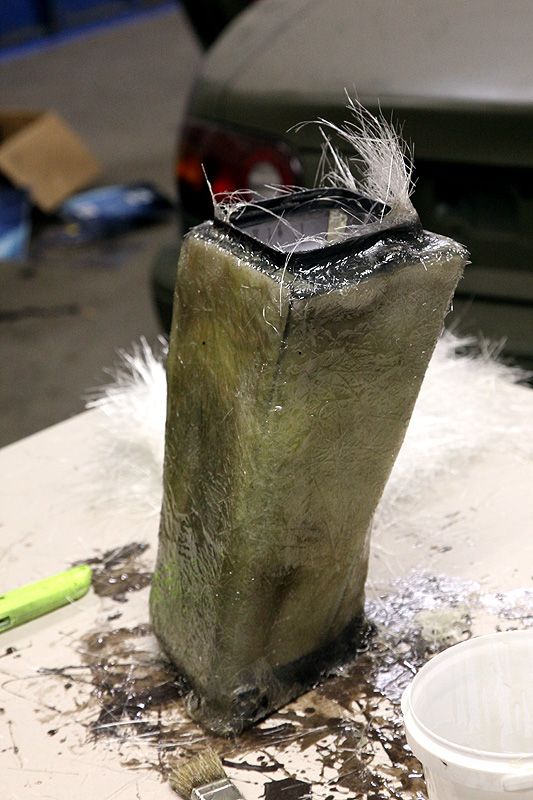 Before anyone comments, I am well aware that you can get a normal 'non-AC' link pipe off cars without AC, if I had known I was going to be doing this mod, I would probably have taken the one off Seth's breaker back in November. I could also have got one from one of you guys on here no doubt, or gone to a breakers yard and pulled one out, but where is the fun in that. This is all about 'having a go' and when I feel that extra flow of air coming through the vents, I know it was all my own doing. Far more satisfying than just buying the piece (and also very in keeping with the DIY build anyway  ) |
| |
|
|
|
|
|
|
|
|
haha MM, I was just about to post that you don't need to remove the dash to get the A/C out, but I guess when you are making up your own ducting it would help!
I've just removed all the A/C from mine as part of the turbo conversion, and you won't belive the weight of the pump and the bracket (cast iron - wtf) and as you mention the heater airflow is much better.
Rob.
|
| |
Last Edit: Apr 1, 2011 10:59:33 GMT by bobbygg
MX5 mk1 - now Turbo'd
Austin A35 van
Suzuki SJ 16v
|
|
|
|
|
|
|
haha MM, I was just about to post that you don't need to remove the dash to get the A/C out, but I guess when you are making up your own ducting it would help! Yeah, and there were a few other additional things I needed to do under there while it was back out (details of those to come). Some of which I just couldn't do with the dash in....so removing it made life easier all round. I've just removed all the A/C from mine as part of the tirbo conversiob, and you won't belive the weight of the pump and the bracket (cast iron - wtf) and as you mention the heater airflow is much better. I know what you mean, the compressor is huge and I am sure with the condenser, drier, pipework etc...all removed it'll be a reasonable amount of weight saved plus more room to access the other bits in the engine. On my first drive in the car at the weekend I immediately noticed a huge improvement in airflow. I guess the evaporator takes a fair bit of flow away between the blower and the heater box....plus all the ones I've seen tend to get fairly clogged on the blower side of the evaporator which I guess just compounds the problem? |
| |
|
|
|
|


 [*]
[*] [*]
[*]


 ;D
;D


 Great job, great car


