Hello reader, I speak to you from the future- the year 2009! If you can imagine such a thing.
I've travelled back through the cosmos to re-confgure the start of this thread to include an index, because back when I started this thread I didn't forsee this amount of interest or updating! The start of the thread is below the index, and hopefully it will make the project easier to follow and allow you to revisit parts of particular interest. Thanks!
THREAD INDEX:
PAGE 1-2: "INTRODUCTION" (The brief! The plan!)
PAGE 3: "MOCK-UP" (The theory! Headscratching! Measuring!)
PAGE 4-5: "THE POINT OF NO RETURN" (First cut! Rear inner wings!)
PAGE 5: "INVISIBLE CRUST" (Uncovering rot! Neglect! Cutting! Crying!)
PAGE 6-7: "TURRETS SYNDROME" (Inner wing test fit! More Cutting! Bonnet intro!)
PAGE 8: "THE DAILY GRIND" (More cutting! Rot! Panel making & replacement!)
PAGE 9: "CLASSY CHASSIS" (New rear chassis making! Inner wings! Bulkhead making! Geometry!)
PAGE 10: "THE OLD SWITCHAROO" (Rotating the gearbox! Modifying the bellhousing!)
PAGE 11: "DESTROY" (Cutting! Sparks! Brain damage!)
PAGE 12: "BILLY NO M.8's" (More gearbox modding! Cylinder head porting! Engine intro!)
PAGE 13: "CLASSY CHASSIS Pt2" (More rear chassis work! Welding!)
PAGE 14: "THE GRAND MOCK-UP" (Rear engine test fit! Standing back and grinning! Tea drinking!)
PAGE 15-17: "WHEELS" (Rims intro! Dish! Stance aspirations! Swooning!)
PAGE 18-19: "BULKHEADONISM" (Bulkhead redesigning! Rear radiator plans! Progress!)
PAGE 20-21: "ONE STEP FORWARDS, TWO STEPS BACK" (More inner wing building!)
PAGE 22-26: "AND REPEAT..." (More of the same! Panel beating! Panel making! Kevlar rear panel intro! Fibreglass bonnet modding!)
PAGE 27: "SAME 'OL SAME 'OL" (Even more inner wing building! More bonnet work!)
PAGE 28-30: "MIFFY'S FACE" (Bulkhead crss-bracing! Rear panel test fit! Topical chat!)
PAGE 31-34: "DEATHPROOFING" (Finishing the bulkhead! Rear end framework! Reae radiator test fit! Rear brake theorising!)
PAGE 34-38: "TURRETS SYNDROME Pt2" (Final turret welding! Completion! Sodoku!"
PAGE 38-39: "HANGING THE SUSPENSION PT1" (Rear suspension intro! Suspension point mount making! Mystery & intregue!)
PAGE 40-41: "SUSPENSION Pt2" (Reconfiguring the suspension! More suspension mount work! Jaffa cakes!)
PAGE 42-43: "SUSPENSION Pt 432" (New fangled suspension test fit! Suspension addjustibility! Tyres that are too small!)
PAGE 44-45: "SUSPENSION Pt4" (Adjustable top mount making! Lathe work!)
PAGE 46: "ALTERNATOR II: JADGEMENT DAY" (Modifying the alternator! Wire tucked engine bay plans! Modification!)
PAGE 47: "REAR END RECONSTRUCTIVE SURGERY" (Rear end framework! Kevlar panel fitting!)
PAGE 48: "LIKE, RAD, MAN!" (Rear raddiator final fit! Air intake plans! Electric fan mods!)
PAGE 49-53: "PHASE 2" (Extreme lowering plans! Front end chassis modification intro! Removing everything below sill level!)
PAGE 54: "OPERATION PHOTOSHOP LOW!" (Extreme lowering action! Major ground clearance work! Uncovering a bit of rot!)
PAGE 55-56: "HOW FAR CAN TOO FAR GO?" (Raising the front lower arm mounts! making new front chassis rails! The ravings of a lunatic!)
PAGE 57-58: "EXCUSE ME RUST, I'M AFRAID I'M GOING TO HAVE TO ASK YOU TO LEAVE" (Inner wing, floor, bulkhead and A pillar surgery! Panel replacement! LOL'ing!)
PAGE 59-60: "TANKED UP" (Fuel tank modification in the name of lowering! Recycling! Halving capacity!)
PAGE 61-62: "FINISHING WHAT I STARTED" (Fitting new chassis rails! New panels! Fresh steel!)
PAGE 63-65: "RECONSTRUCTIVE SURGERY" (Finishing the new chassis! Inner wing repairs! Creating problems!)
PAGE 65-67: "IT'S ABOUT TIME!" (Creating a matching pair of chassis rails! Freezing! Running out of wire!)
PAGE 67: "WITH A LITTLE HELP FROM MY FRIENDS" (Rescue mission! Moving into the workshop! Community spirited Retro Riders!)
Well, to celebrate the fact that my mk3 Escort has survived 10 years at the mercy of my lead foot, I think it deserves to be built into something fast. Something, a bit mad ;D
So, without further adue, ladies and genitals I give you.....
PROJECT: FAMILY DRAGSTER!
THE PLAN:
Take a 4-door mk3 Escort in dubious condition, put a second 1.6 CVH engine in the back to give it a massive power hike and 4 wheel drive BUT mounted far enough back to keep the rear seats and make it still possible to seat 4! Hence, project Family Dragster.
BUDGET:
As little as possible. This is an excersise in getting as much BHP/£ as I can! I reckon £300 should be plenty.
TIMESCALE:
Well, you know what they say about open ended projects, so i've given myself the hopelessly optimistic target of having it at least rolling with the 2nd engine mounted (although not neccesarily running) for the Retro Rides show in 3 weeks

METHOD:
How will I mount the engine far enough back to keep a back seat? How will I build this thing and expect it to still drive in a straight line when the most technical tools I own are a set square and a large mallet? Will I still be able to drive it every day?
All good questions, and all will hopefully become clear as this thread progresses (in other words, i'm not sure, but I have a plan!)
But before we get the grinder out, lets have a brief history lesson and get aquainted with our patient.
It all started when a gangly petrolhead youth wanted to make the transition from mountain bike to car after passing his test.
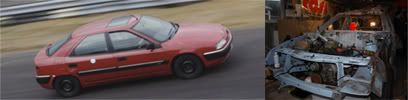
The year was 1997, and I had just started work at a bike shop. A work collegues' wife would pick him up every day in a rather clean mk3 Escort in Champagne Metallic. I loved that car for some reason, so when it came up for sale I snapped it up as my first car

Here it is wearing cloverleaf alloys that I added aswell as Ghia bumpers and other stuff:

The car served me very well for a number of years. I drove it hard, blew up the first 1300 engine, turned 2nd gear into a pile of iron filings (so I had to go from 1st-to-3rd for the last couple of years), then gave it a respray:


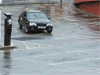
I drove it around for a few years more like that but it began to get very very smokey and was just plain tired. So, I did the sensible thing and dumped the car I loved so much down the side of my parents house and left it for 5 years:

Fast forward to last year, and the car was dragged out of its resting place, given a 1600 engine, converted to 5 speed and a few other mods like a 60mm drop and Sierra Cosworth wheels and brakes, got a fresh MOT and then drove it to Santa Pod for the Classic and Retro show the next day ;D :


And now, a year on, it developed some rear suspension issues while moonlighting as a removals van (not wise really), so rather than sort that out I decided it is time to address the BHP issue at the same time and get on with the build that i've been planning in my head for the last year or two. PROJECT FAMILY DRAGSTER BEGINS!
So, watch this space, let me know what you think and don't be too shy to give me guidence if you spot a better way of doing something or you spot a flaw- this is brand new territory to me so i'm open to suggestion

Time to get busy. Heres the car backed into my work space. Not much elbow room but I reckon it'll be okay

First job is to clear the area to make room for the engine.
My Jazz fuel cell, while very nice and all, has to go as its gonna be a bit tight for space in the boot:

And that goes for my alloy cradle that I made and riveted to the boot floor: (made that out of a road sign!)

Now all the clutter is out of the way I can get all the seam sealer off the joins so I can see what i'm dealing with:

Done! There was a little bit of rust hiding in these seams.... just aswell i'll be gutting it all out then really!
I also got rid of all the plastic trim in there. The parcel shelf plastic trim had long gone under opperation weightsaving, but the window surrounds remained and had to be discarded.
Now, I have a confession to make. When I took the offside trim off I wasn't too suprised to see a load of crusty rotten metal underneath it. Thats because about 9 years ago I got rid of the hobo-spec brown interior that the car came with and fitted a grey Ghia interior from a donor car. On swapping the rear window plastic surrounds I noticed a small patch of rust under there, about the size of a penny.
So I rubbed it down and nipped it in the bud right there and then, right? Wrong. Instead I pretended I didn't see it and put the new trim on and forgot about it

Now almost a decade later, look whats happened:

Who'd have thunk
Thats gonna need some surgery, but i'll save that for another day.With all the sealer off and the area de-cluttered it was time to start making some measurements. The most important measurement was to get an accurate centre-to-centre line through the rear axle. This will determine the position of the rear turrets and make the difference between it handling like a shopping trolley and bieng a nimble A-road weapon.
Once i'd determined the centre I screwed down a length of wood in place to the boot floor as a starting point for a crude wooden jig:

That'll do for now. Its all starting to take shape and i'm quite excited!
I will of course update as I go, so keep tuning in ;D


 but with help, less pain
 i'll shut up and say that i'm sure I saw that twin engine Alfasud guy in the retro rides show forum section, go grab him!!