|
|
|
Feb 11, 2012 18:13:35 GMT
|
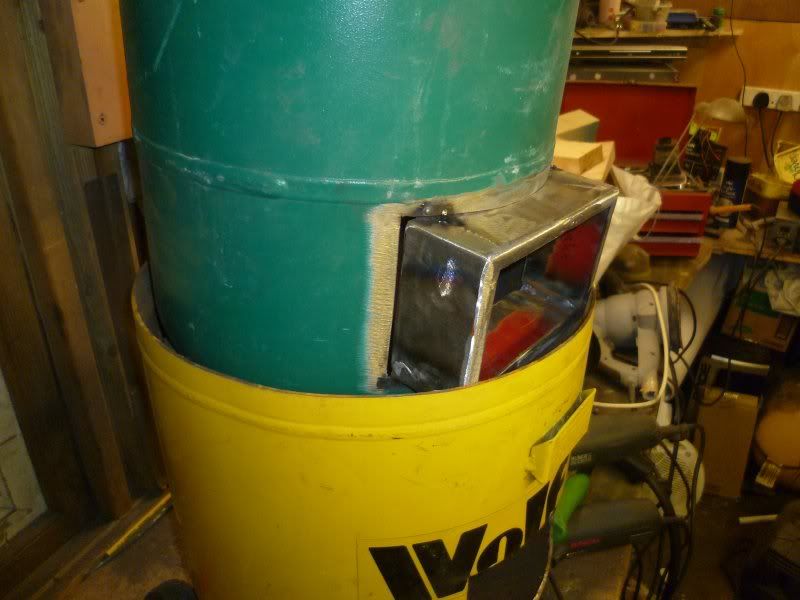
Hi gang I have had a couple of tanks knocking around for a while, and have been planning on making a wood burner, however, I don't really want to fit it into my shed because 1) my shed is well insulated and doesn't need much heat input to warm it up and 2) it is wood and I would be worried about leaving it un-attended. So, I have decided to make a wood burner that heats water. Now, not just a wood burner with a back boiler, I want a wood burner that puts all the heat energy into water. That way I can site the boiler outside of the shed in a safe place and then pipe the hot water into a radiator in the shed (or pool or house or whatever). I have made a quick start today opening up the two tanks. One is 50 ltr air compressor tank (spare) and the other is a gas bottle. I had been eyeing these guys up for a while due to the fact that one is larger than the other. Here are some pictures of what I have in mind Gas bottle (emptied, filled with water and then cut open) 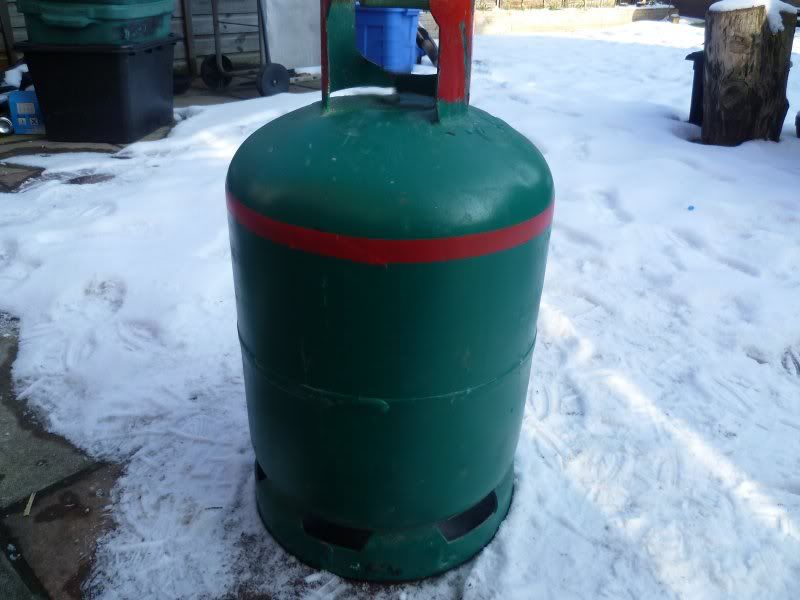 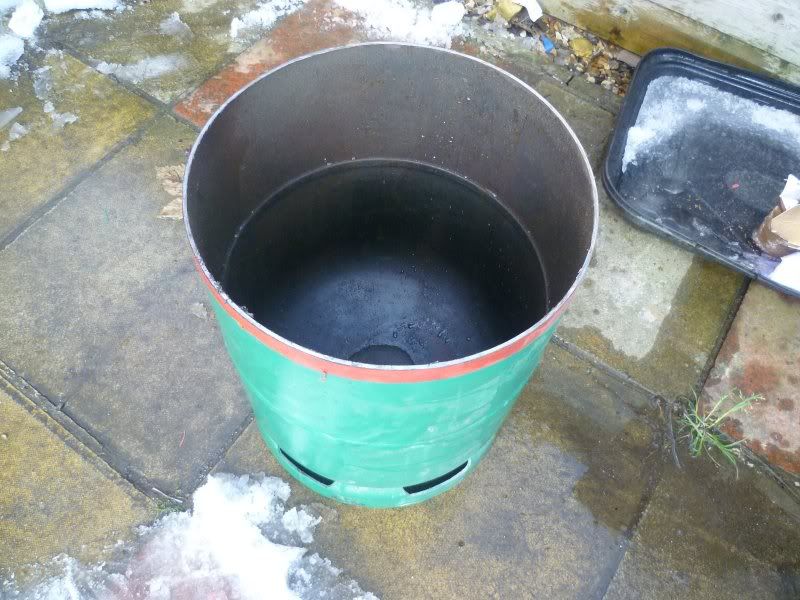 Here it is next to the air tank 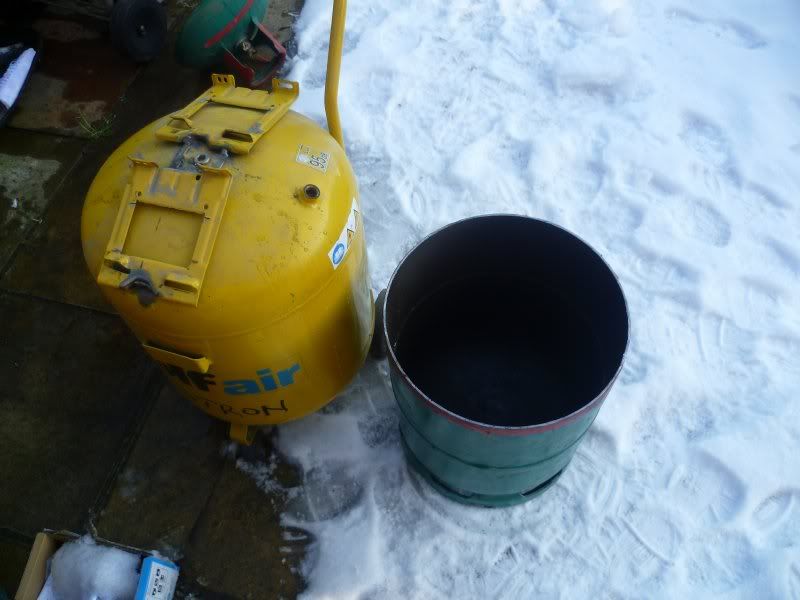  And placed inside (I havn't cut the legs of the smaller bottle yet, so it sit up proud of the air tank 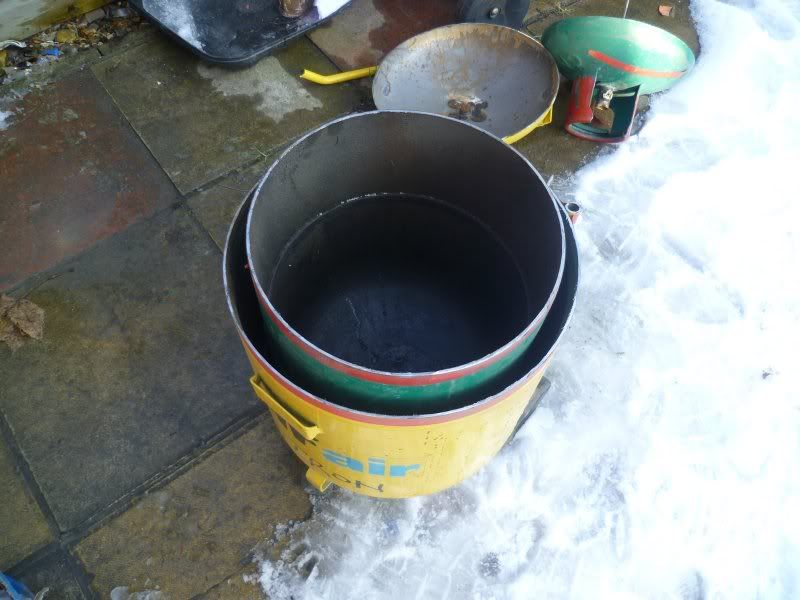 Once trimmed they should be about level at the top. Now here is where I have some questions. My first idea was to fill the gap between the two with water. This water is heated, and once up to temperature is then bled off into a radiator or storage tank. Now this is great because all the heat is put into the water. It is simple etc etc etc. But I am concerned that the boiler might not get hot enough to ensure a full and clean burn. I have plans for a secondary air inlet for a full clean burn, but the walls of the combustion chamber would be at 100*c max. I keep coming back to this plan as it seems cool. The second and less cool option is to just pack the gap between the two with insulation (seems a waste of the second bottle) and then run water pipes into the fire area. Now this will capture much less heat energy, and will need pipework bending, forming and fitting into the burner. The only up side (imo) is to allow the fire to burn a bit hotter. Ideas and thoughts are more than welcome. Lewis |
| |
|
|
|
|
|
|
|
Feb 13, 2012 20:57:34 GMT
|
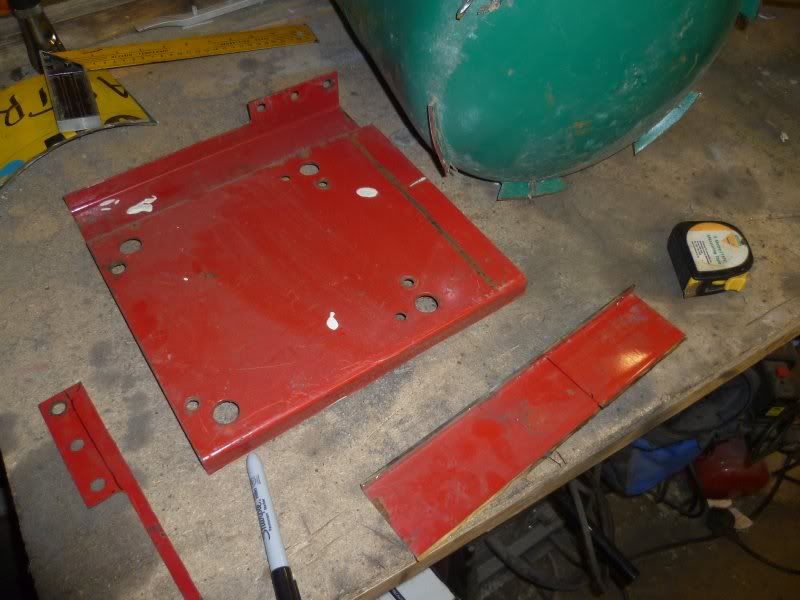
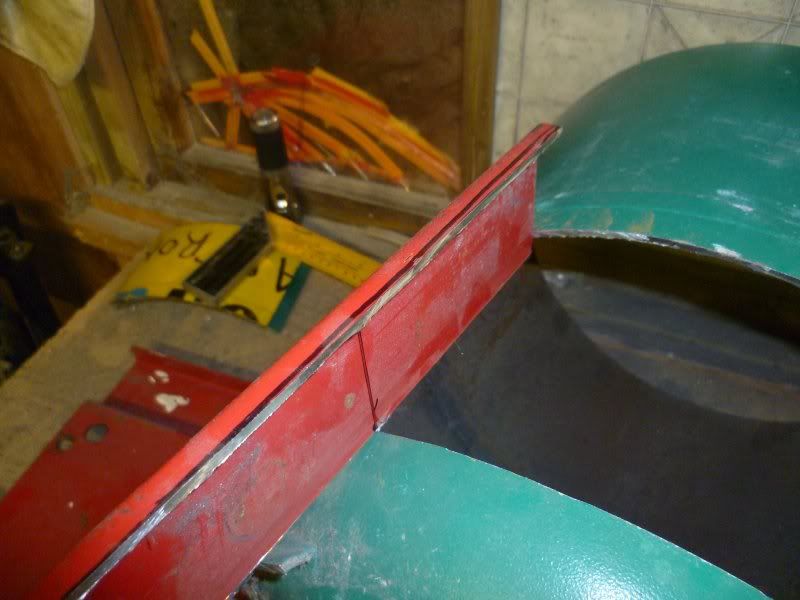
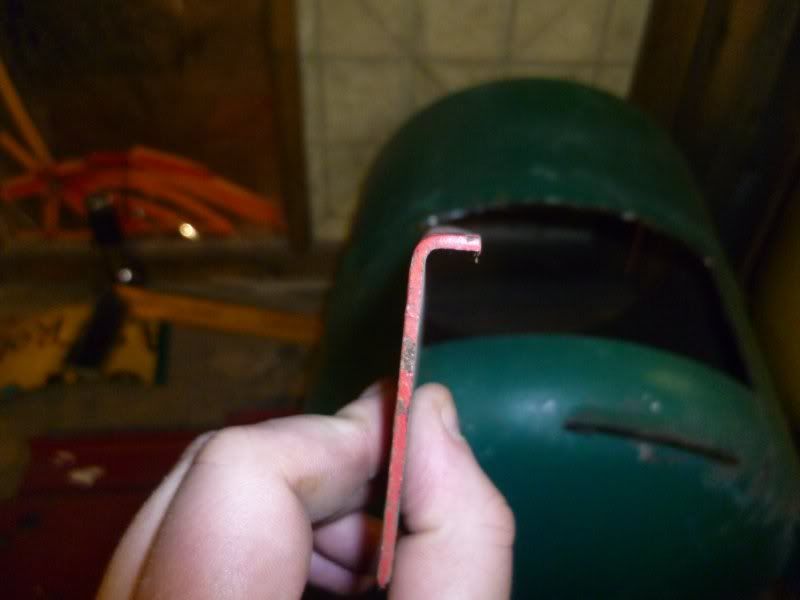
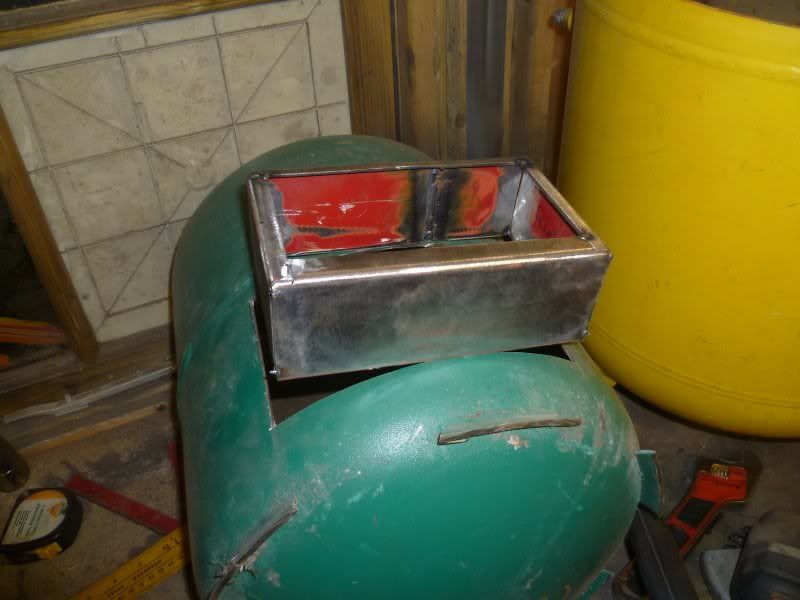
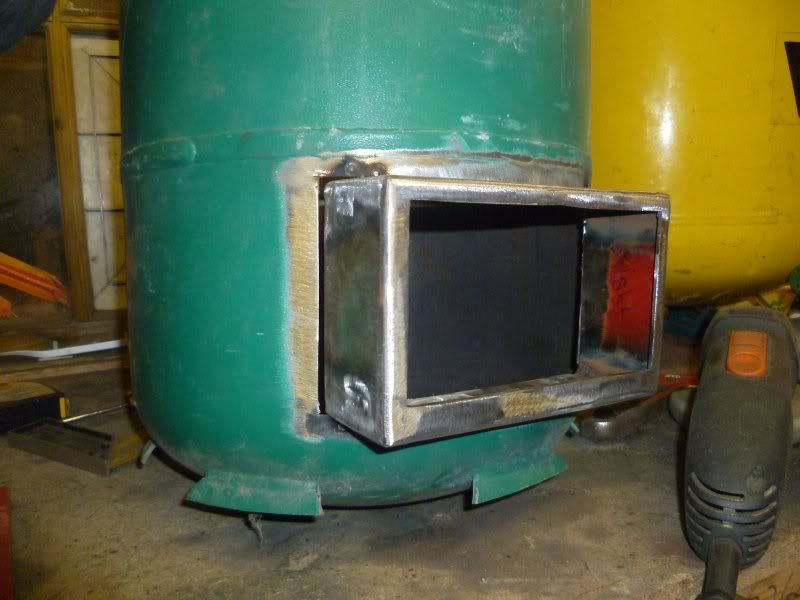
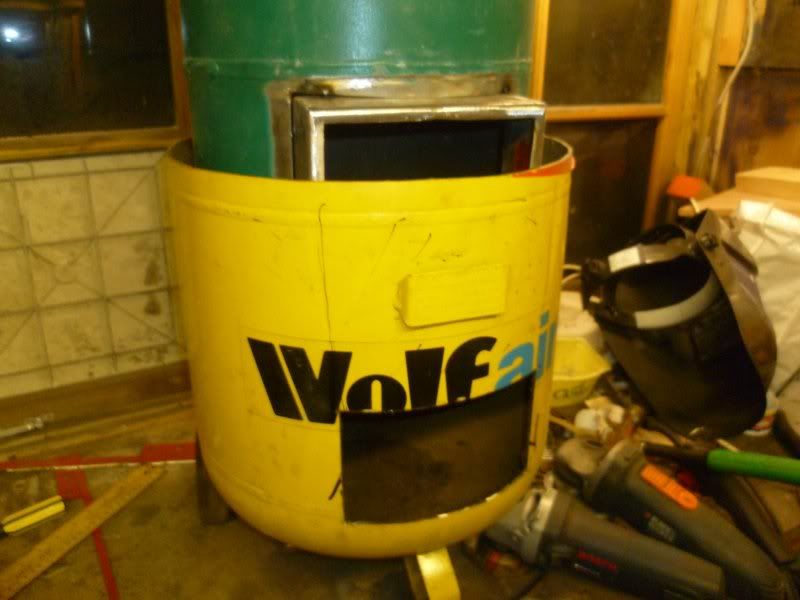
Well I forged ahead this evening and put an hour into the boiler. I trimmed the frame off the bottom of the smaller tank and tested it inside the larger one to make sure the tops were about level (this can be adjusted a bit as necessary). I left some little stubs on the smaller tank so that there is still a void between the bottoms of the tanks. Water will be fed into a fitting on the bottom of the air tank. 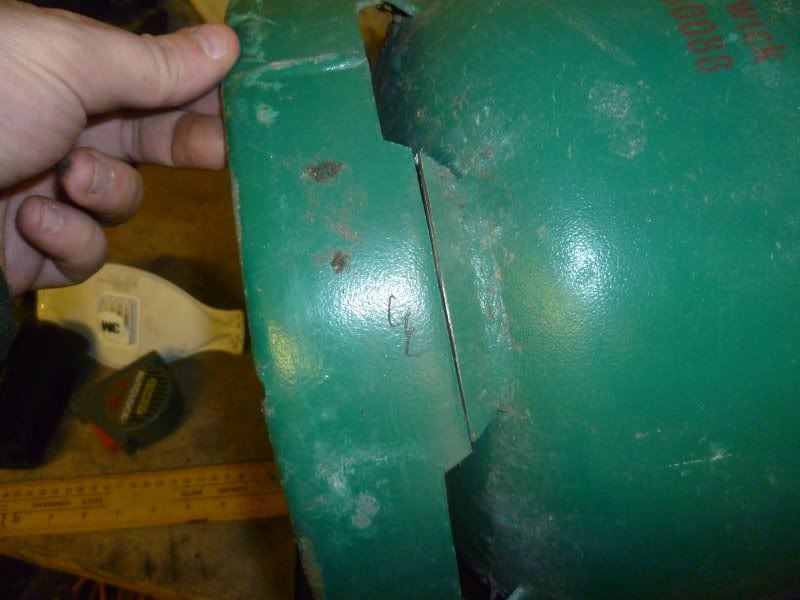  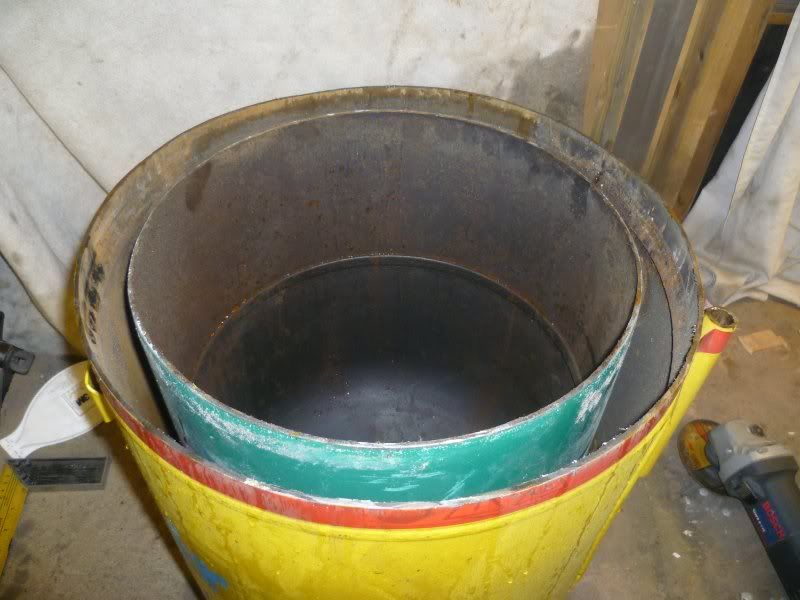 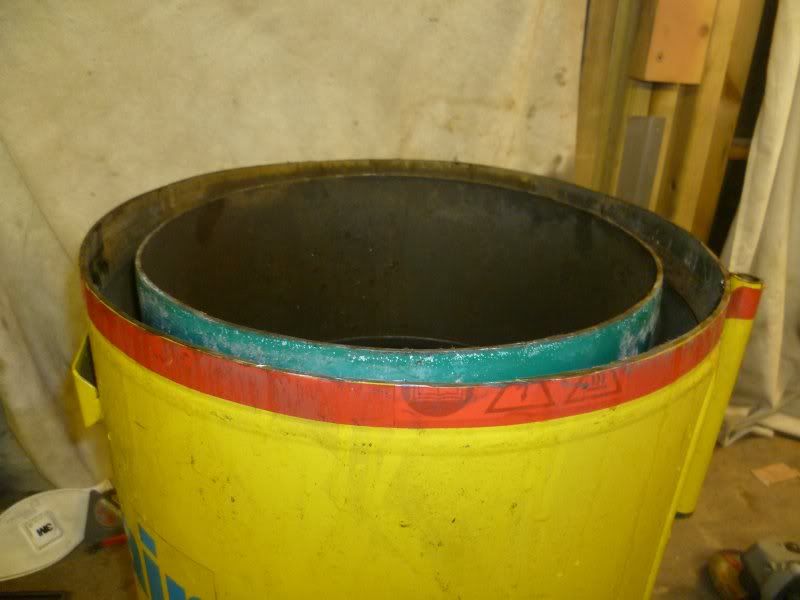 I then marked up and cut a small door out of the smaller tank 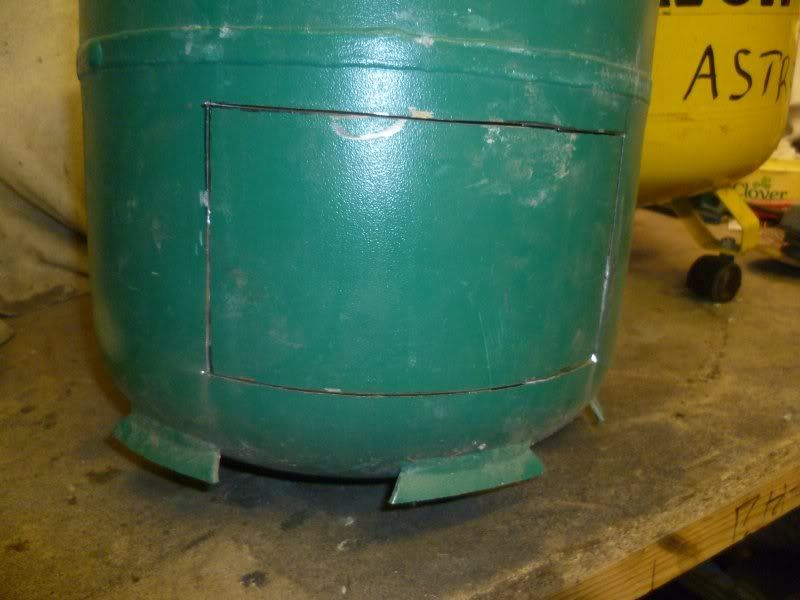 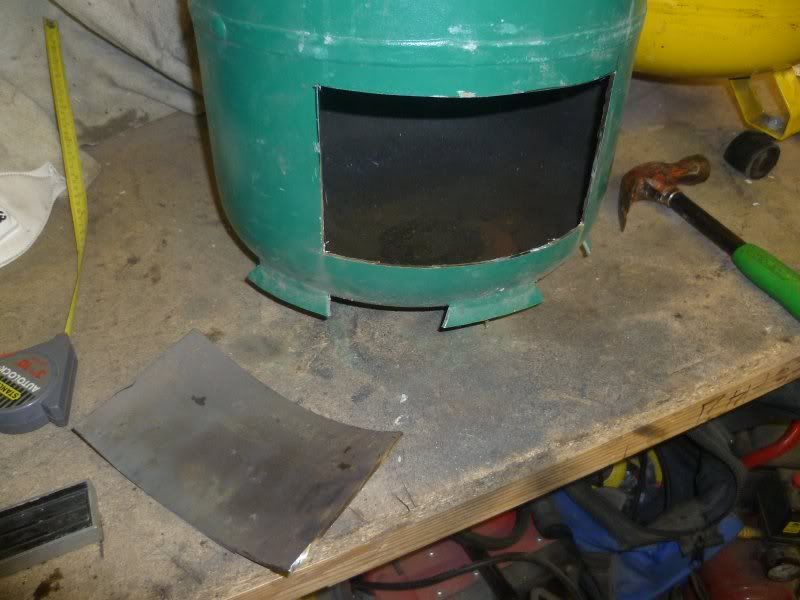 Then transfered the opening onto the bigger tank and cut it out too 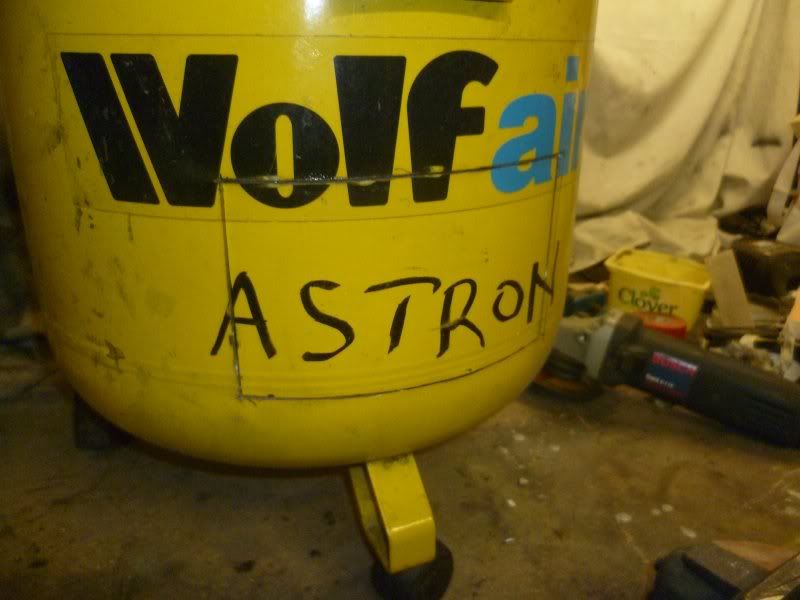 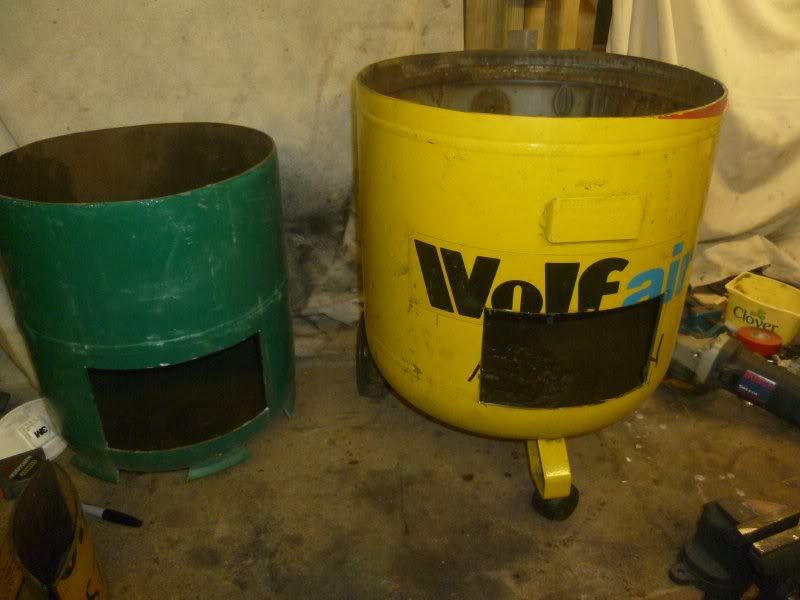 And that is all I managed to get done tonight. 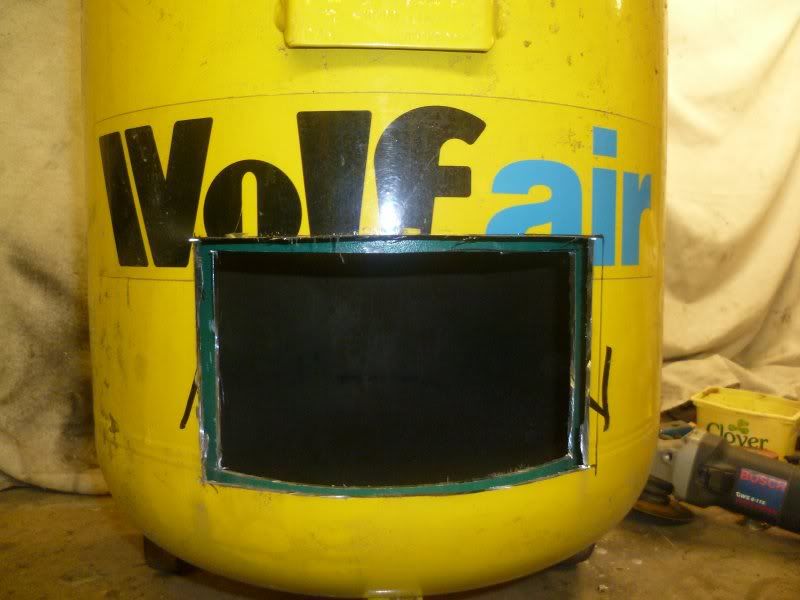 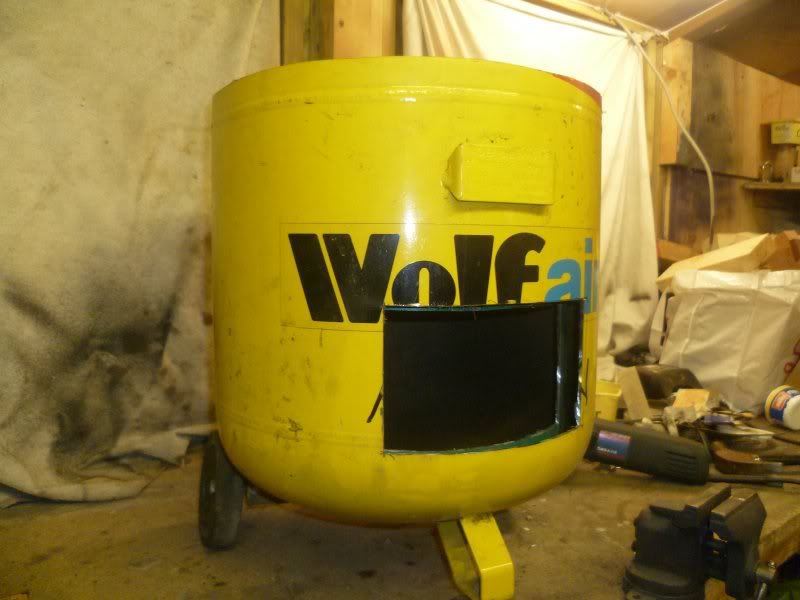 I won't get to do any more on this until the weekend now, as I am off to Belfast for a few days on work business. Lewis |
| |
|
|
|
|
|
Feb 13, 2012 21:28:51 GMT
|
|
where will the water go? in between the compressor/gas cylinder? wont hold much water, but if its on a continuous cycle maybe with a feeder tank, it seems like a very good idea!
|
| |
|
|
|
|
|
Feb 13, 2012 22:54:20 GMT
|
|
Yeah the water will go in the gap between the two tanks. I plan to rig up a thermostat to a pump. Once the boiler has heated up, the pump will kick in and circulate the water to either a radiator in my workshop, or into a storage tank for use later.
|
| |
|
|
|
|
|
Feb 18, 2012 21:28:24 GMT
|
|
|
| |
|
|
|
|
|
Feb 18, 2012 22:46:28 GMT
|
|
Another idea to consider, should this one fail:
Make/buy/find a normal style woodburner, and in the exhaust flue, add a length of coilled copper pipe. Pump water directly though this, to your radiator/s.
Fitting a thermostat to thepump, would mean it would take an EXTREMEMLY long time to warm up, as it'll warm up the water, thenas soon as it gets the next bit of water it'll close, by which point the "hot" water will go cold pretty quick!
Grab a waterpump, and have it on, for as long as there's heat in the burner (not just when the fire stops)
With your current setup, I'd keep it! Fill the outside skin with water, and have it constantly flowing. Should keep the inner skin cool enough to survive a reasonable time before it rots away
|
| |

You're like a crazy backyard genius! |
|
|
|
|
|
|
Fail? I don't know the meaning of the word!  |
| |
|
|
|
|
|
Feb 21, 2012 21:26:26 GMT
|
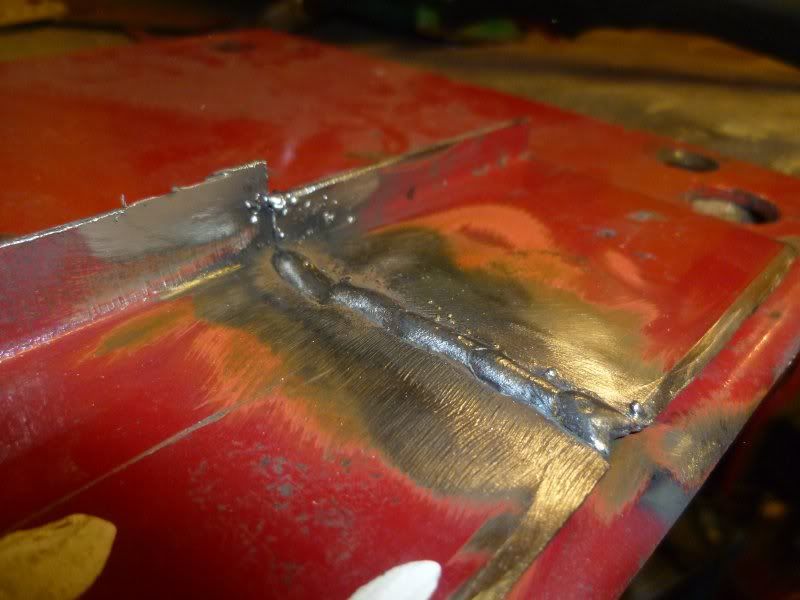
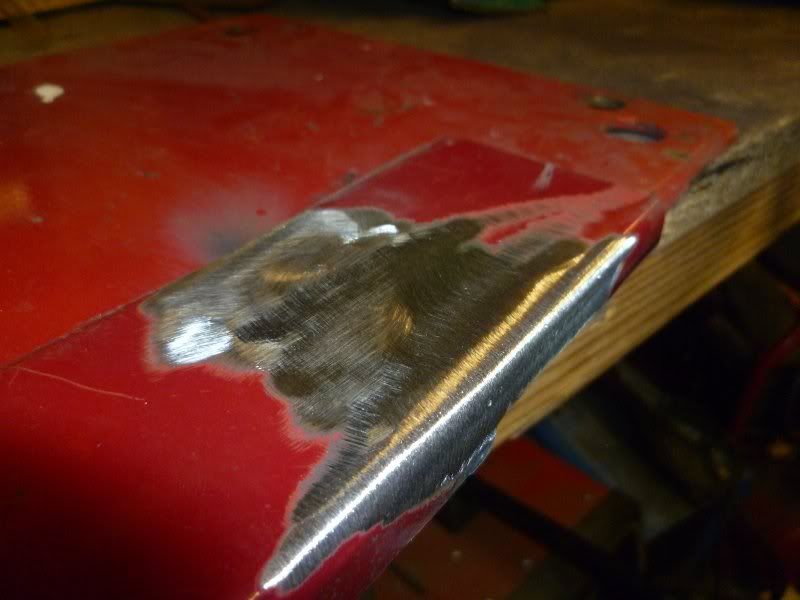
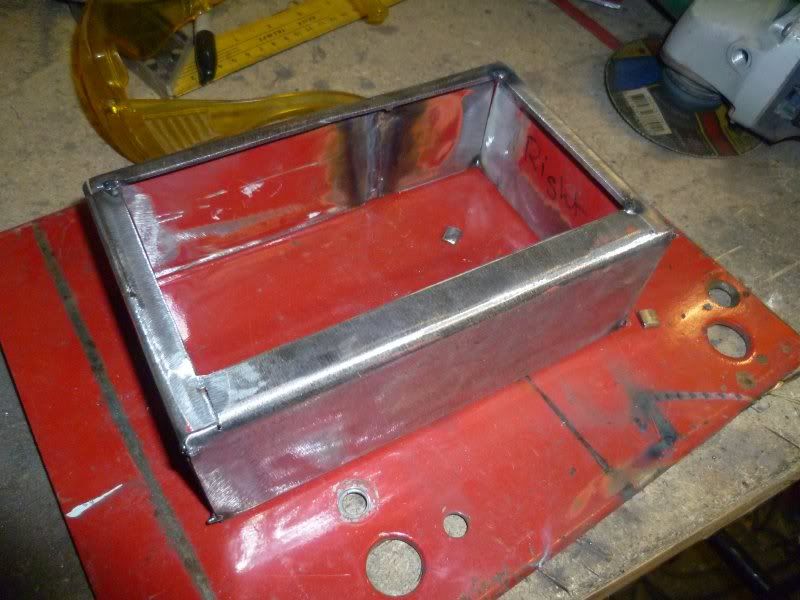
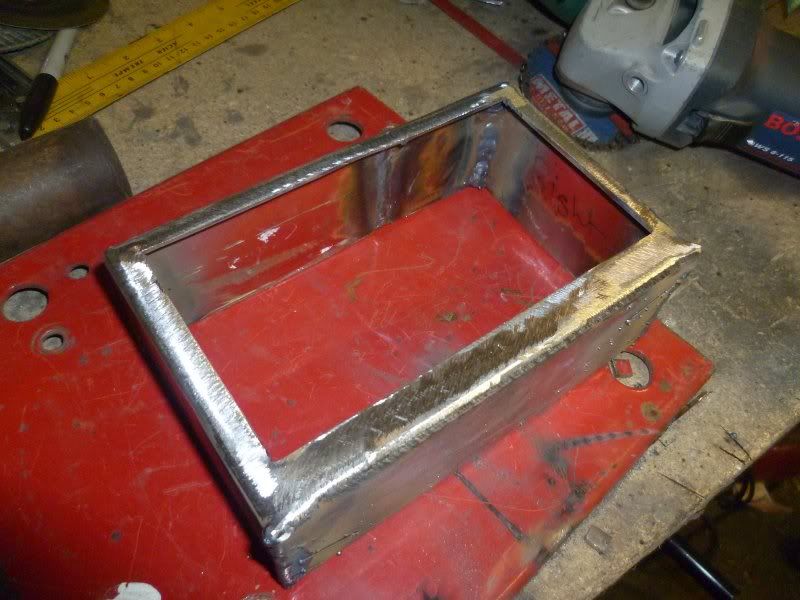
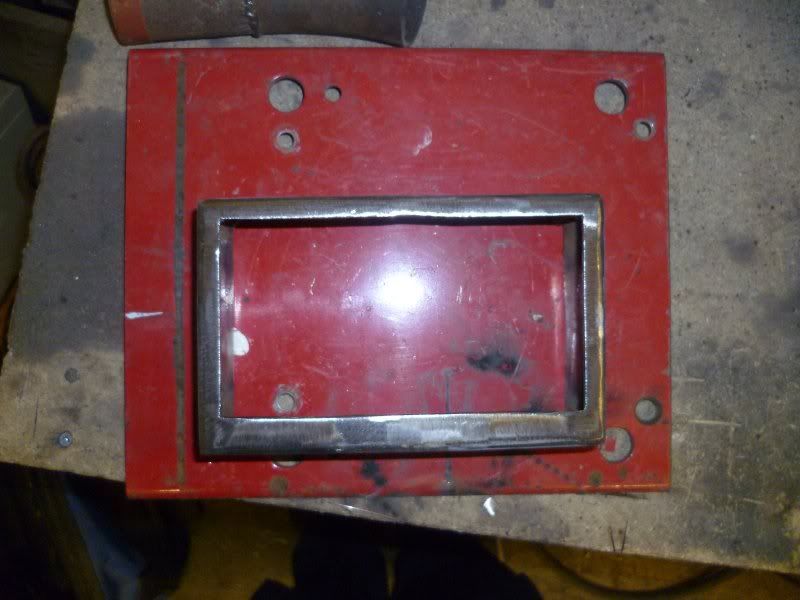
Here are some more pictures from last night. All I managed to do was line up and weld the door frame to the bottle. Here it is lined up and tacked into place. 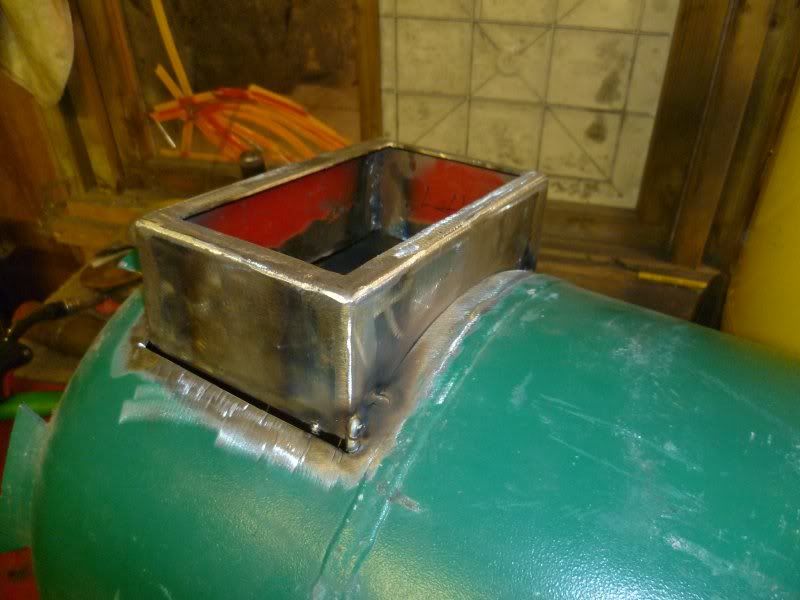 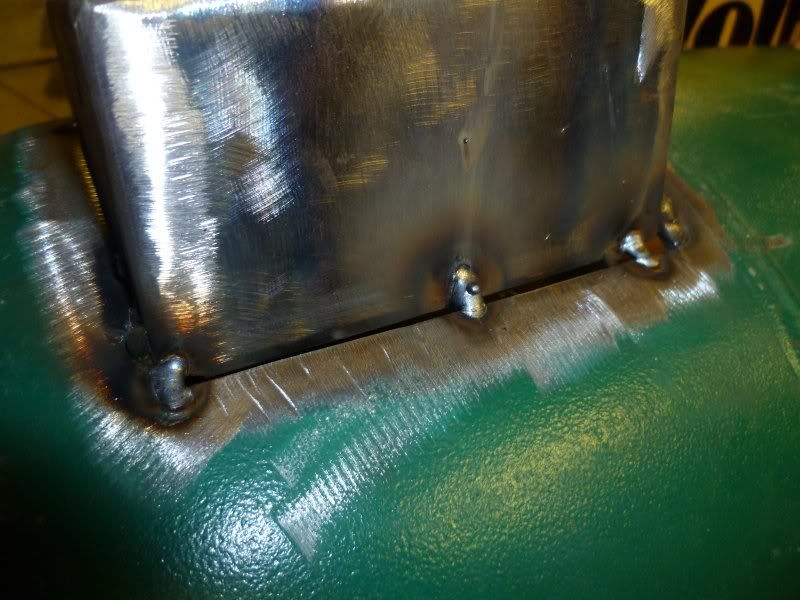 Once that was done I welded the sides into place. There was a fair bit of a gap, so bridged the joint first. 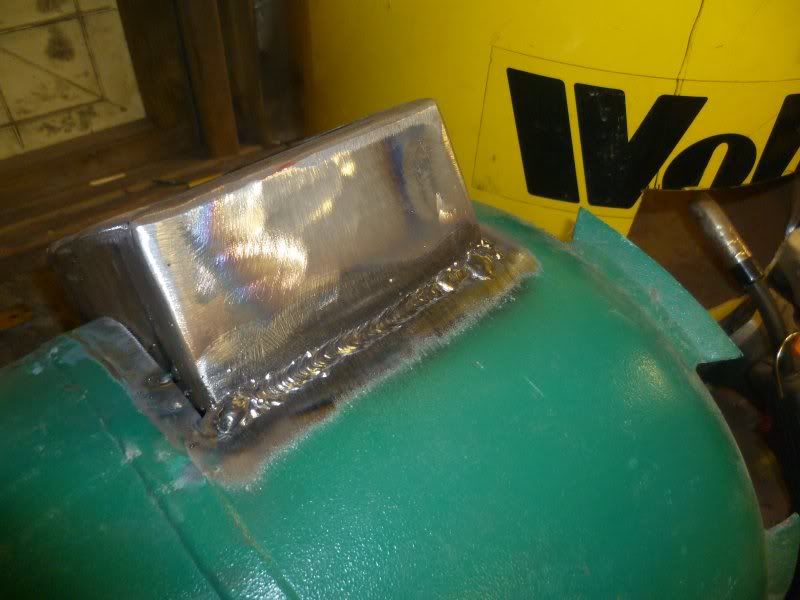 Scuffed that down and then welded again over the top to again help ensure water tightness 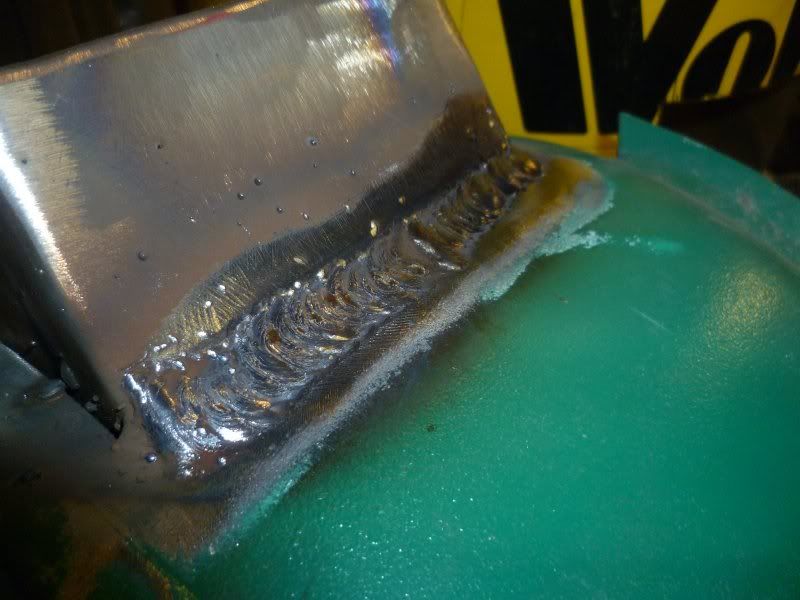 And the other side 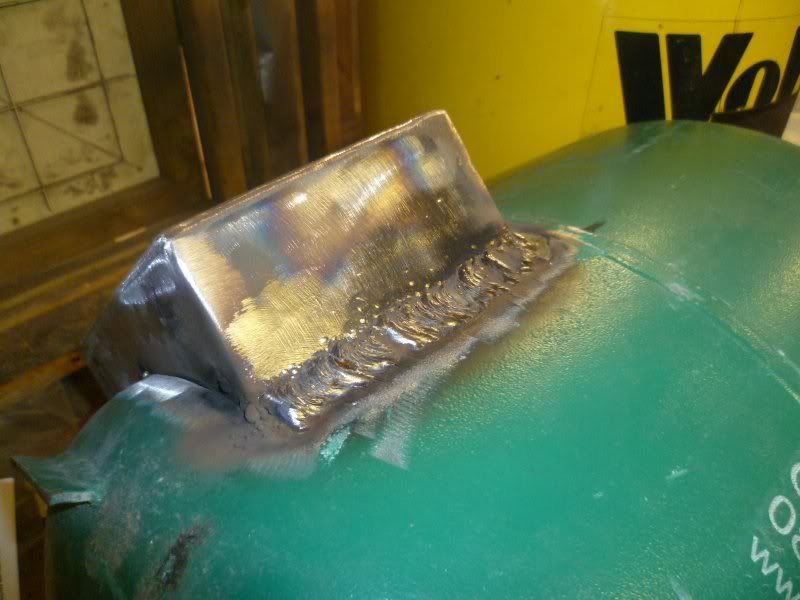 Then the bottom 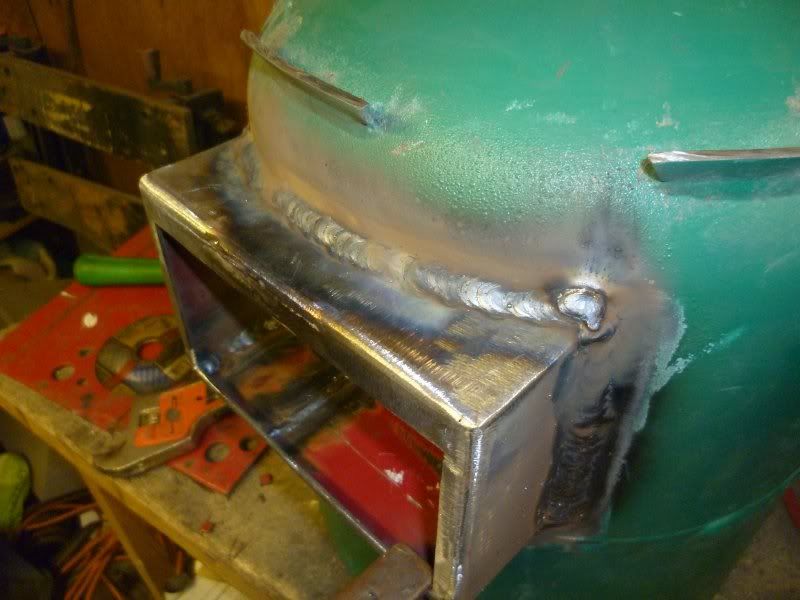 Then the top 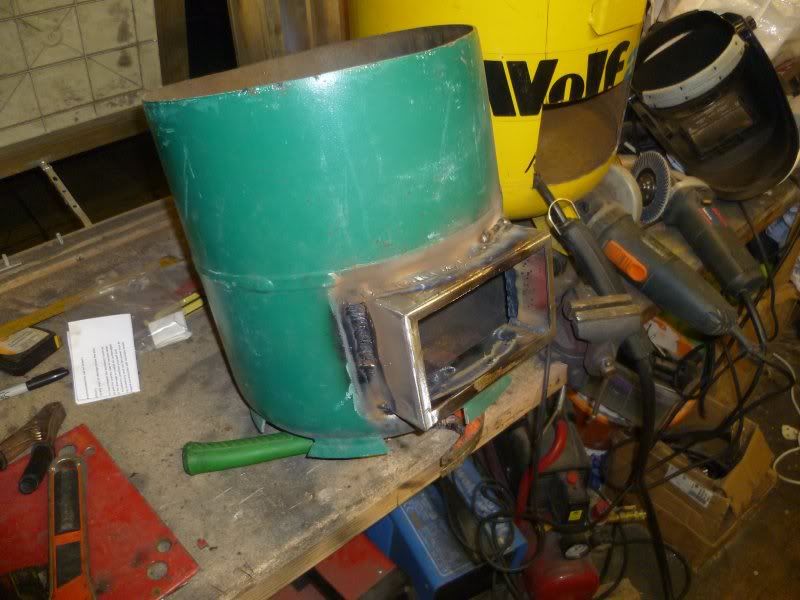 I am going to start work on the baffle and secondary air intake this evening. Lewis |
| |
|
|
|
|
|
Feb 21, 2012 21:26:47 GMT
|
Ok, I managed to put half an hour into the boiler this evening. I cut the hole at the top of the bottle to take the secondary air inlet, an then made a baffle plate. Not brillient, but I have a few questions. 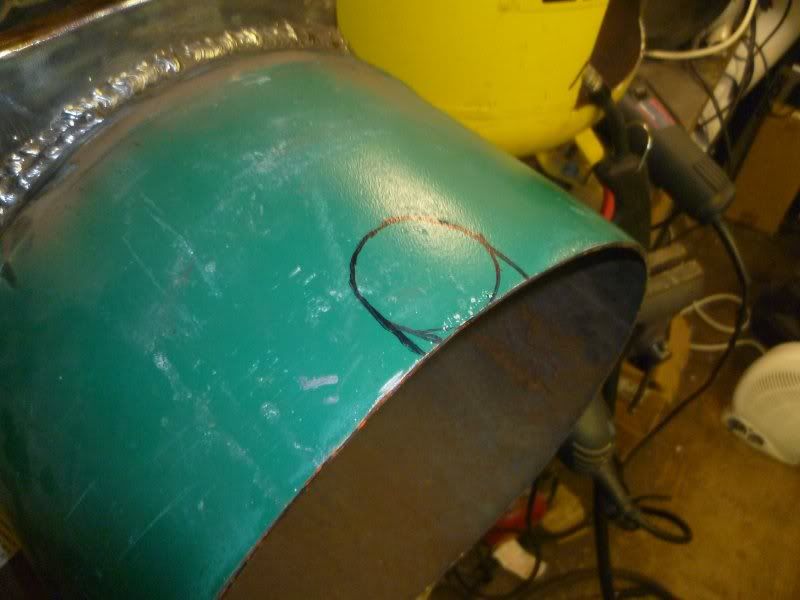 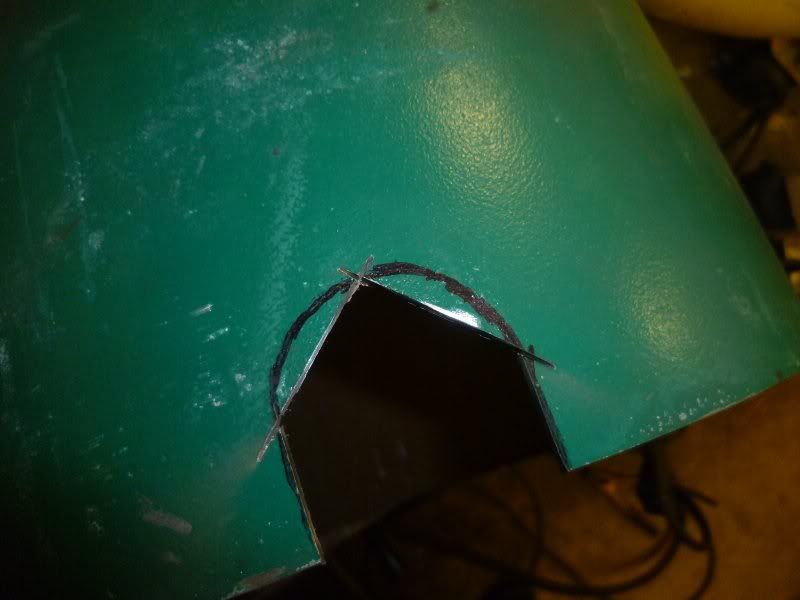 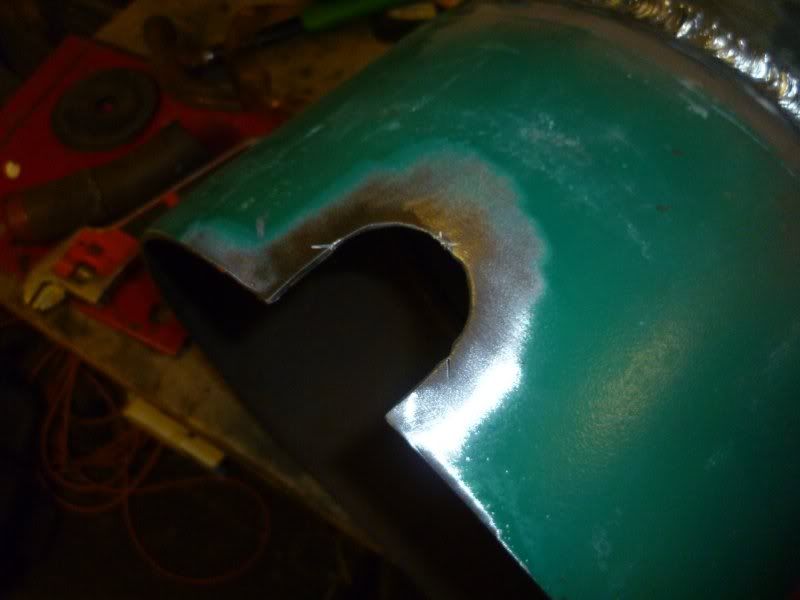 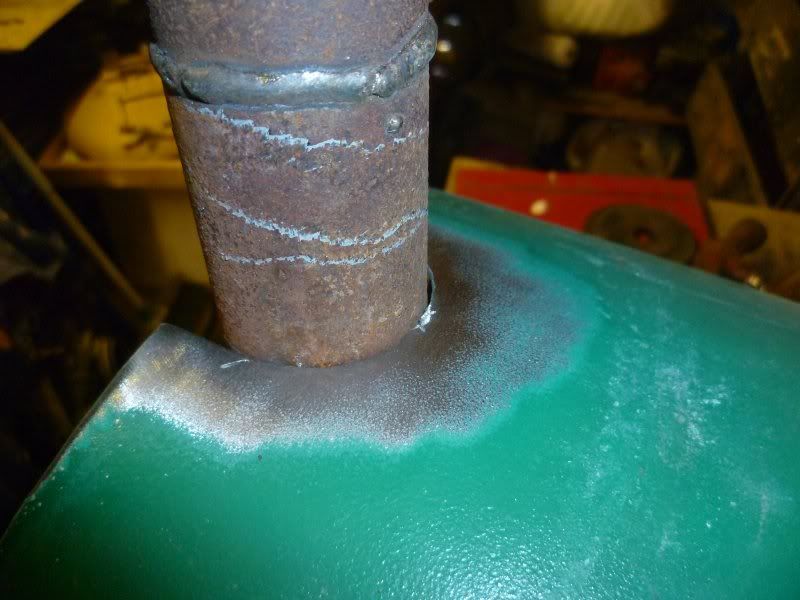 The baffle 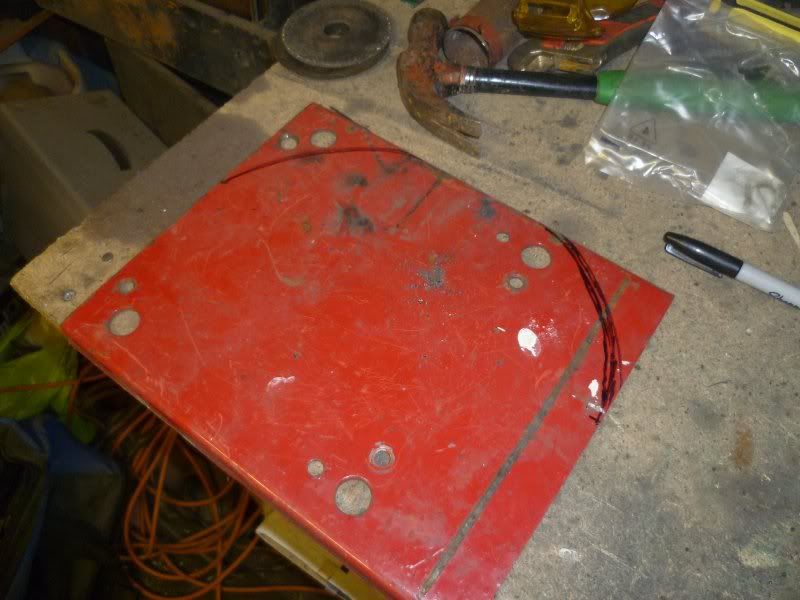  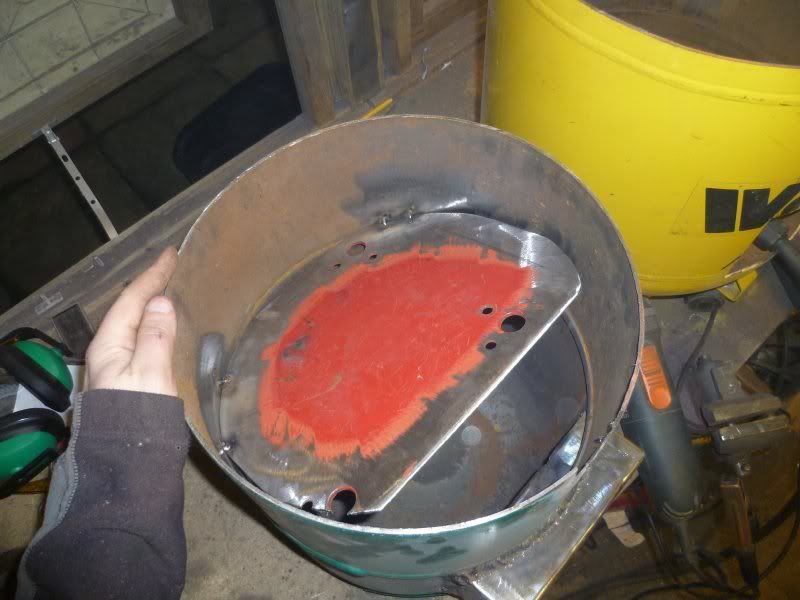 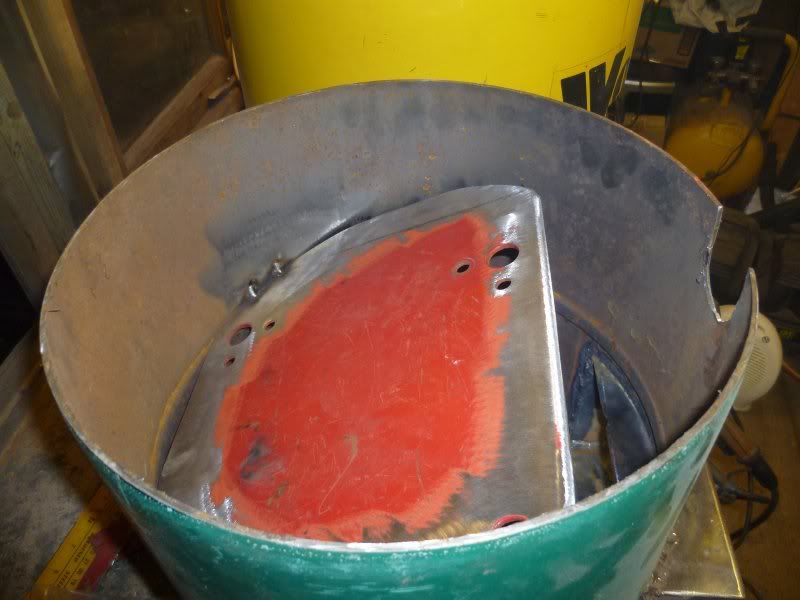 I will weld the excess holes in the plate up. Here is a bit of tube to illustrate the air inlet 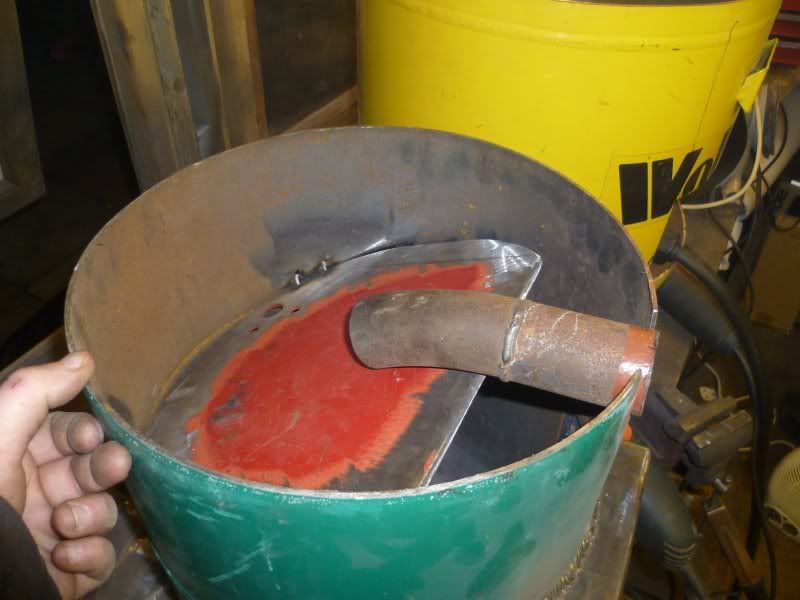 So, what do you think of the baffle? the flames and gas get deflected to the front of the bottle, up round the plate, then expand into the back of the bottle and baffle zone with the extra fresh air, then finally up the flue at back top. Think that will work? the plan is to make the burner section, tack the top on then test it. If it works well, then seal it all up and then put it in the air tank. Lewis |
| |
|
|
|
|
|
Feb 21, 2012 21:50:45 GMT
|
|
Very impressed Lewis.
|
| |
|
|
|
|
|
|
|
Feb 22, 2012 17:28:20 GMT
|
|
IMHO, its a great idea, the theory behind how it will heat up the water and power a rad or resevoir, should work, but, i think your workshop working time will be cut down cutting wood small enough to fire it, and keep it lit as the firebox are is small
|
| |
I don't WANT TO DIE A GROWN UP!
|
|
|
|
|
Feb 22, 2012 17:51:26 GMT
|
|
Lots of small sections of kiln dried tropical hardwood!!!
|
| |
|
|
L33 RWW
Part of things
 Kettle on?
Posts: 135
|
|
Feb 23, 2012 11:48:51 GMT
|
Not meaning to throw a spanner in the works but I had this exact idea but with 17kg and 47kg propane bottles and I was going to make the baffle into a wedge shape that filled with water from the jacket around the firebox as the baffle is where the heat concentration would be most intense. Love the secondary air inlet, should work a treat with pre-heating the incoming air too  Carry on with this as I'd like to see if my ideas would work  |
| |
|
|
|
|
|
Feb 25, 2012 21:00:11 GMT
|
|
Hey guys. I have been doing a couple of test burns of the inner bottle burner. I seem to be getting a bit of smoke. I was hoping that it would burn a bit cleaner than it does. I have messed about with the baffle and the secondary air intake, but without much change.
Talk to me about baffles. How does the baffle affect smoke production? My BBQ oven doesn't smoke at all when hot, but it doesn't have a baffle.
I am going to try a burn tomorrow without the baffle fitted and see what happens.
Lewis
|
| |
|
|
|
|
|
Feb 25, 2012 23:50:15 GMT
|
|
What are you burning - has it been treated with any preservative, most properly dry wood doesn't give much smoke at all.
|
| |
|
|
L33 RWW
Part of things
Kettle on?
Posts: 135
|
|
|
|
Where is the primary air feed? Wood fires, once started need air to be fed from the top of the fire so that the gasses burn rather than roaring through the fuel (the opposite to coal if you like) and producing excess gasses that can't be burned fast enough, hence the smoke. Ideally you want one full load to burn through as fast as possible to give you a good bed of embers (rather than burning down to fine ash) which will allow the next load of wood to gassify properly and burn from the top down. If you don't have a door on there yet there will be too much air getting in making the smoke exit the flue quicker than is necessary for a complete burn. Apologies for lack of clarity and paragraphs, it's been a long day! Welding looks good Oh... PICS Afterthought! When you make the door I think you would be able to place the primary air inlet at the top of it if you are too far along to weld a downward pointing tube below the baffle but above the door... Prize for the person that deciphers that correctly! |
| |
|
|
L33 RWW
Part of things
Kettle on?
Posts: 135
|
|
|
|
 This shows the primary and secondary inlets quite well, the only difference is the flue path is a lot longer on this stove but the principle is the same, I'd possibly leave the secondary as it is but if you look to the top left of the main firebox in the picture, the white area is where the primary inlet feeds in above the fuel. The picture also shows better than my description what I meant with the baffle full of water |
| |
|
|
|
|
|
|
|
|
Dodge - I tried uing well seasoned hardwood logs as well as untreated 2x4 softwood (kiln dried). It burned similarly with either type, although slightly better with the hardwood (as one would expect).
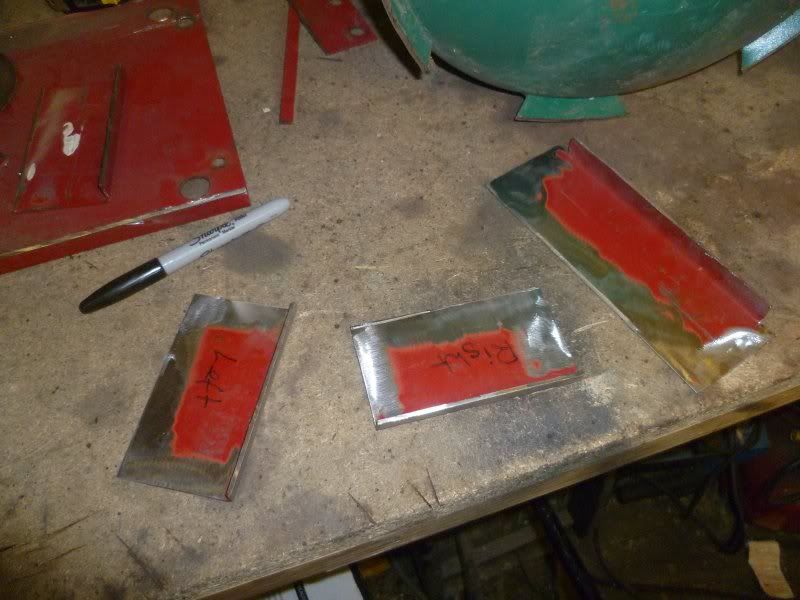
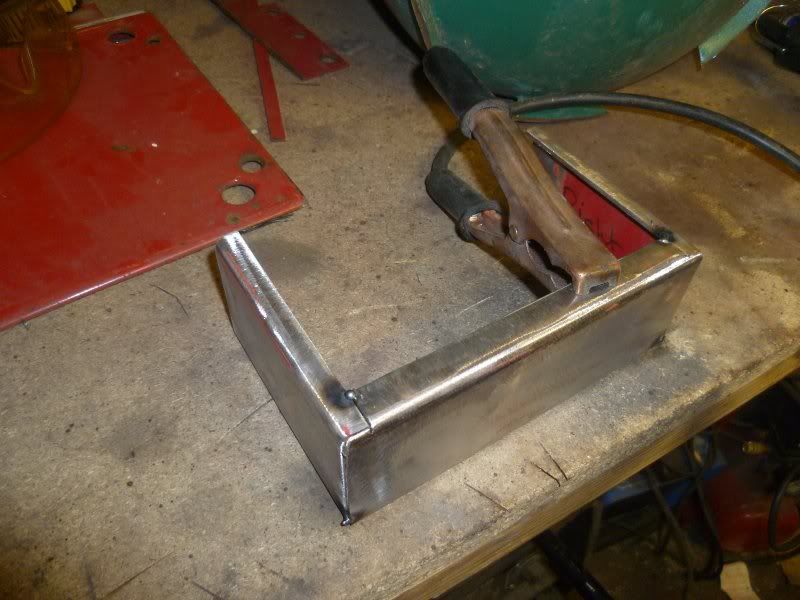
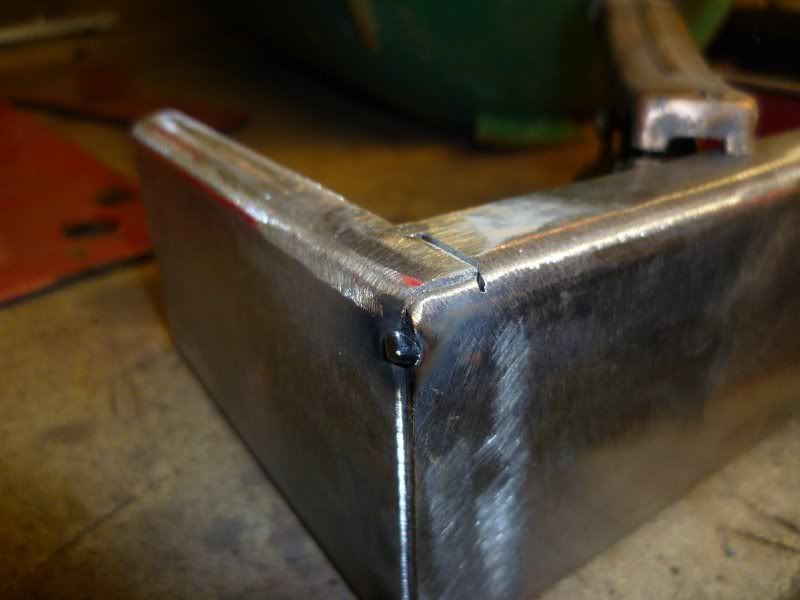
L33 - The primary air inlet is currently just blocking most of the door opening off. The door will be a air-cooled door like my BBQ oven. The door will be twin skinned with an air inlet in the outer skin at the top, with the air outlet at the bottom of the inner skin. There will also be a valve in there to control flow. The air is drawn into the door, passes down through it and then blows onto the fire above the ash bed.
The fire sits on a bed of ash.
Last night while playing with the controls, I could close the door completely, and get air washing in through the secondary air inlet. You could see the gasses burning below the baffle, The only time I get fire progressing round past the baffle is when I open the door up and get the fire really really cooking, the flames progress up round the front of the baffle into the upper area, but there is no further combustion of the gasses.
I will just upload some pictures now.
Lewis
|
| |
|
|
|
|
|
|
|
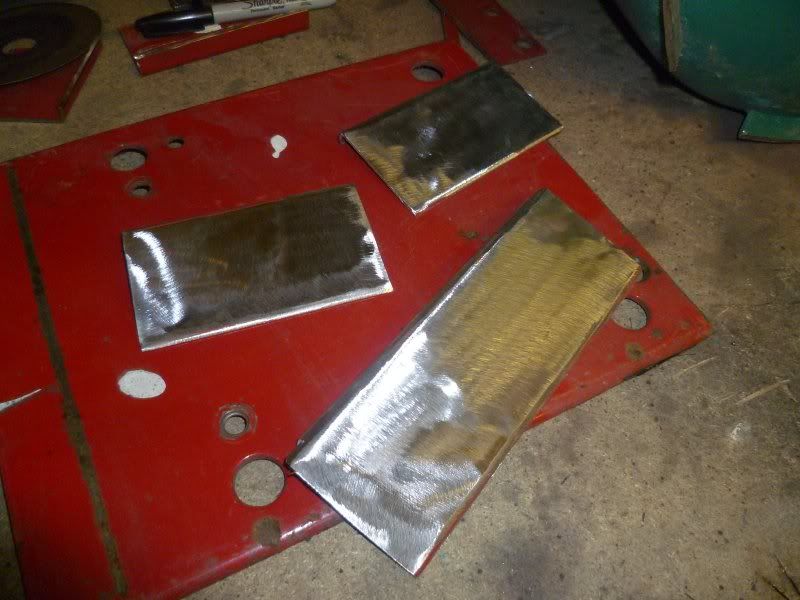
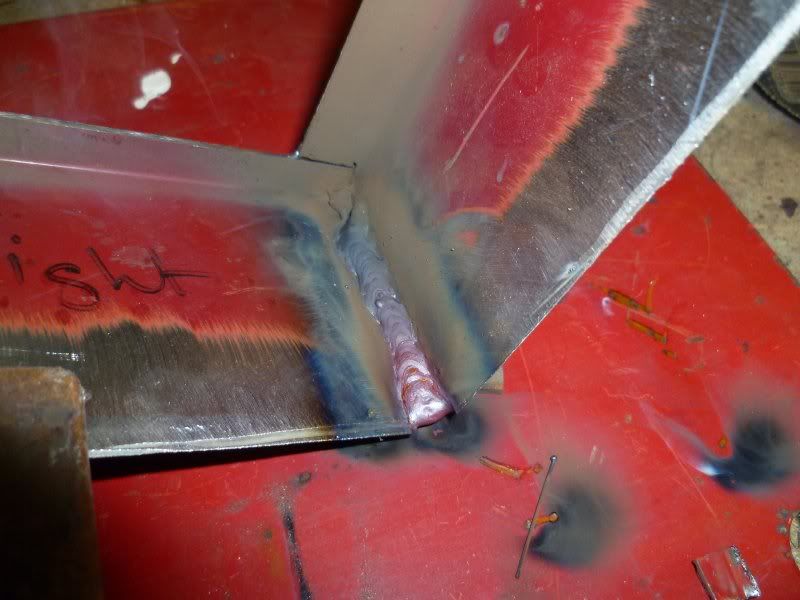
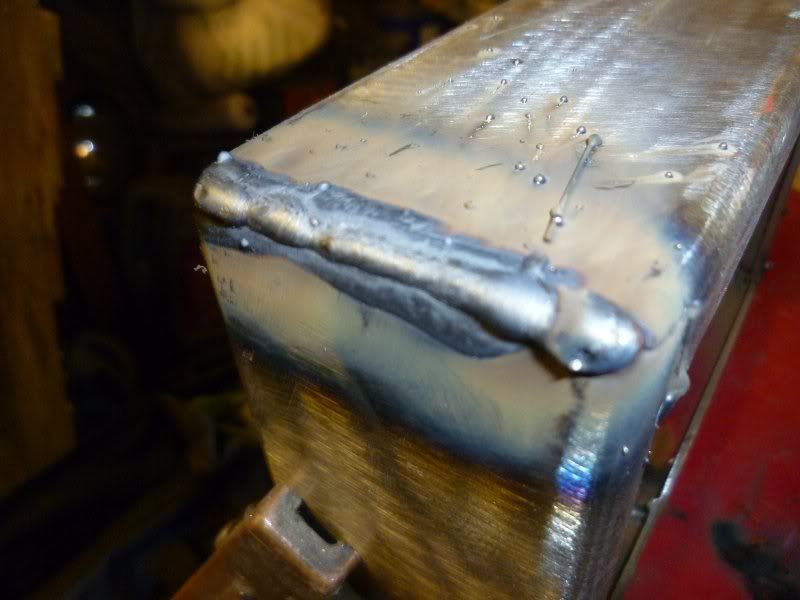
Here are some pictures of the flue and test burns 1 & 2. I made the flue by cutting 500 mm longx 100 mm wide strips of 3 mm steel and welding them up into a box section. 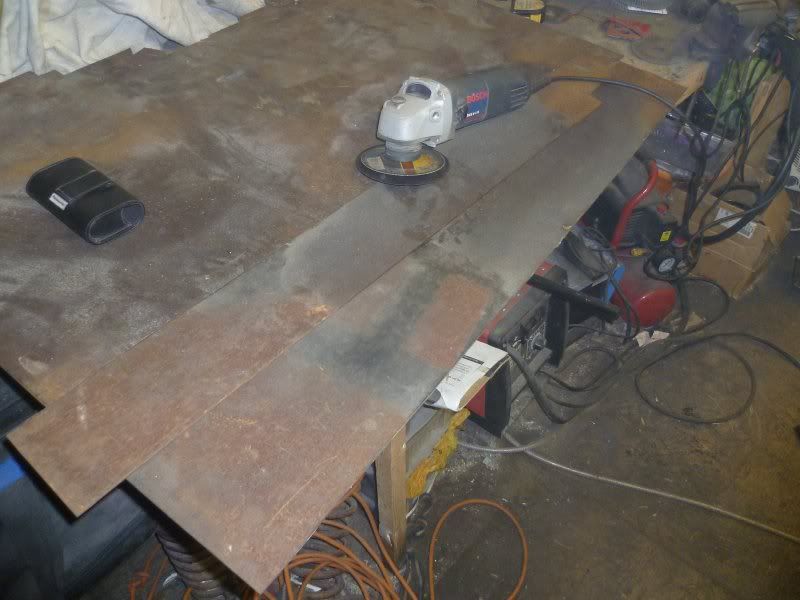 As an aside, these are my favourite cutting disks. Anyone found these good/anything better? 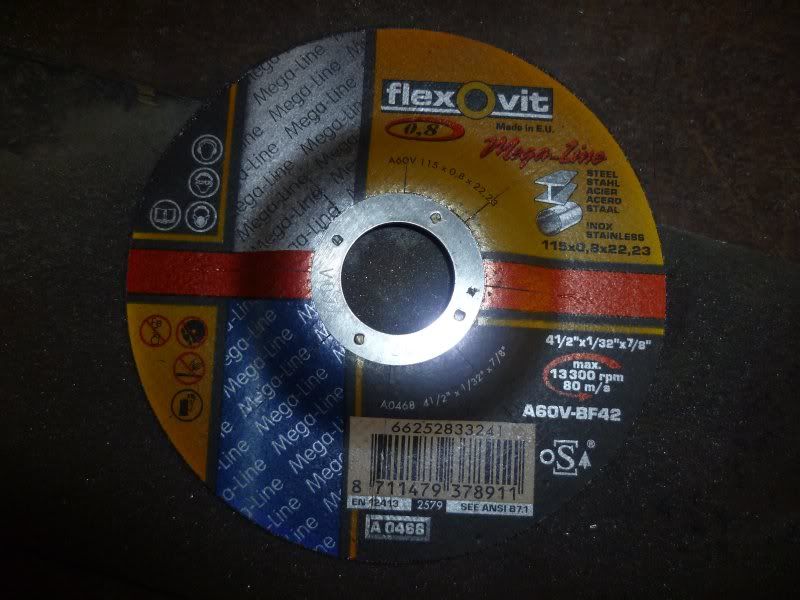  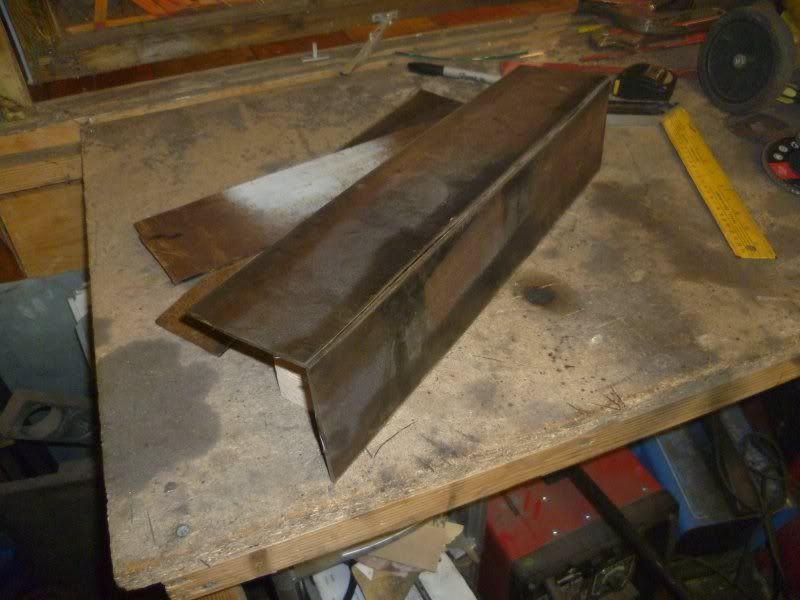 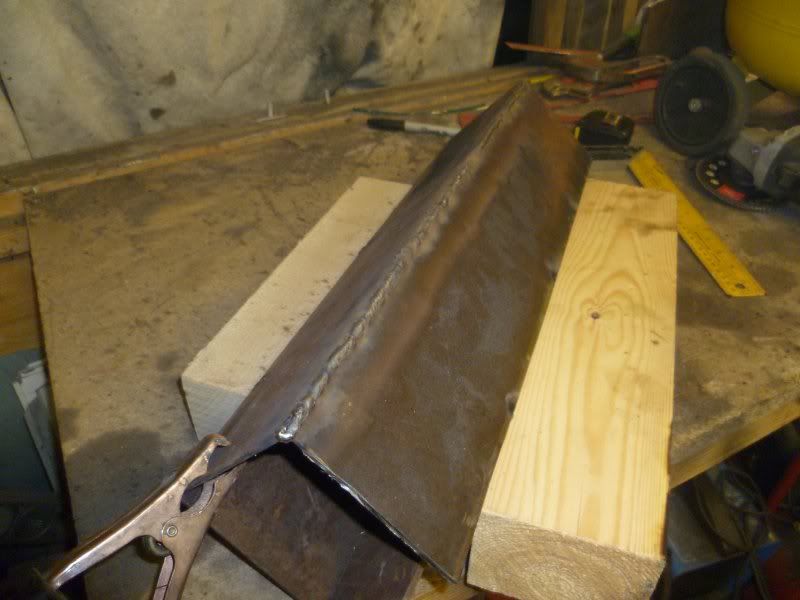 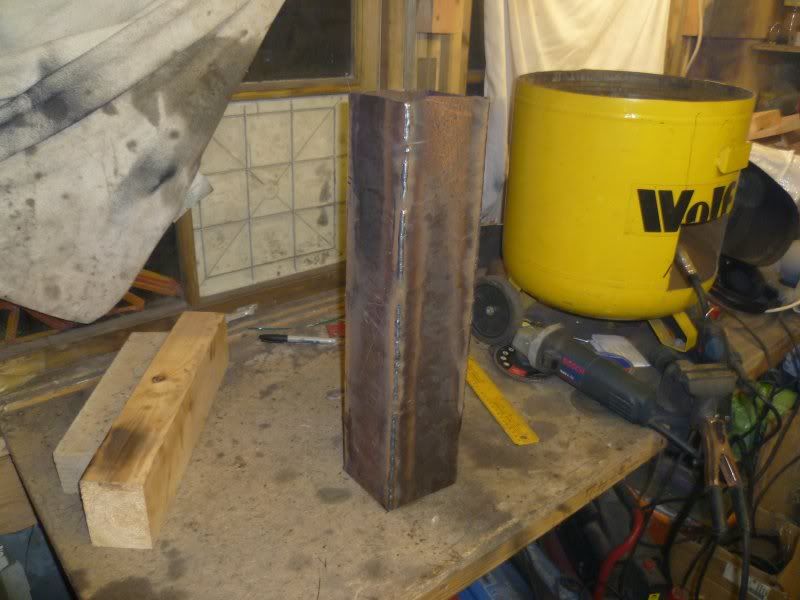 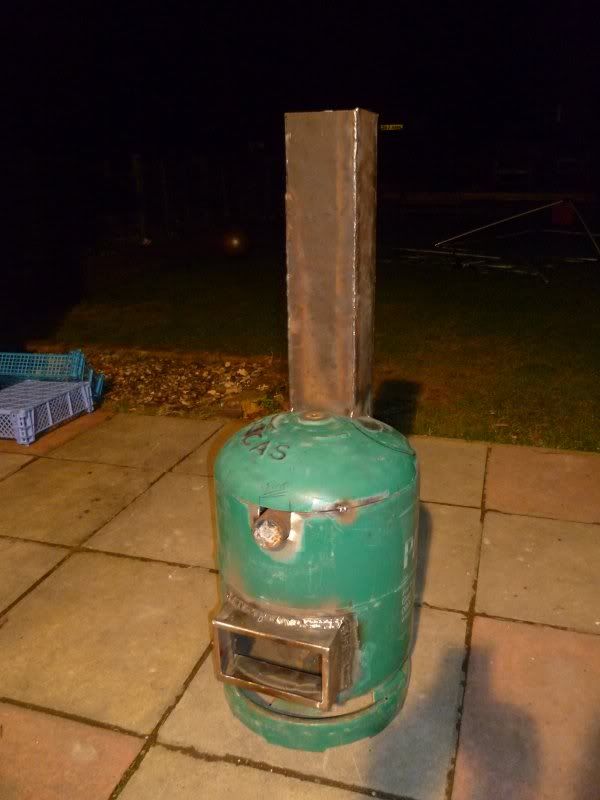 This is test burn 1 with the angled baffle and tube intake 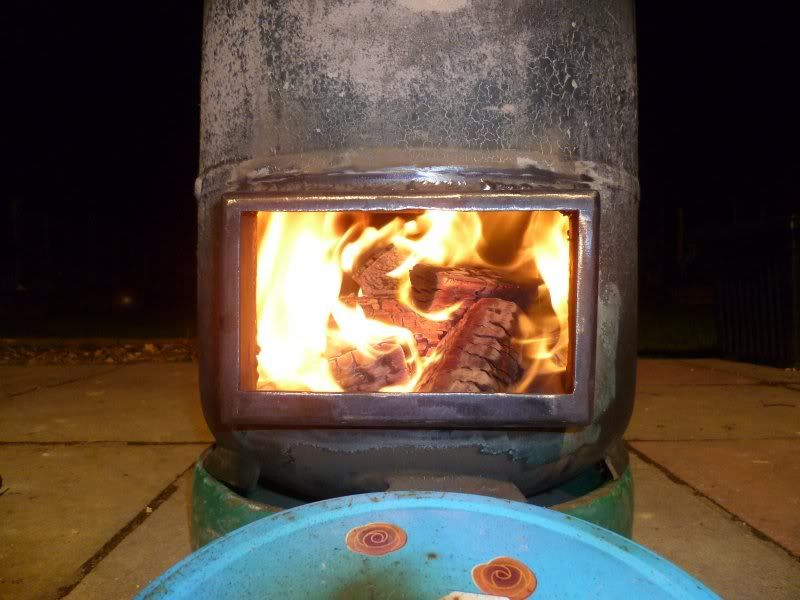 Here you can see fire licking past the tube and baffle, but no combustion within the baffle void. 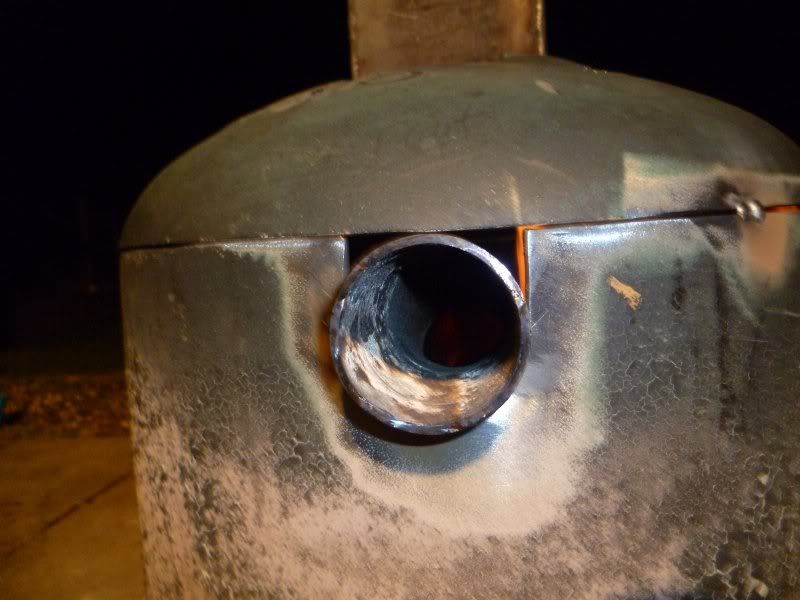 Here is a picture of test burn 2. I took the secondary air feed pipe off so I could see more what was going on inside Here is an attempt to photograph the smoke.... it doesn't really look bad at all, and it may be this is the best I can hope for. 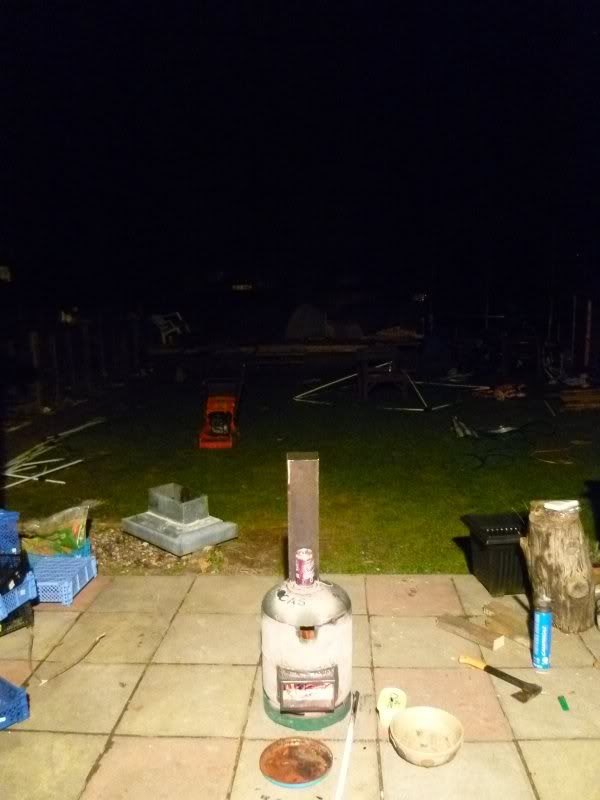 P.s. I have a video that shows the smoke MUCH better. In contrast, there is the BBQ oven running.  It is in a different league!! Lewis |
| |
Last Edit: Feb 26, 2012 9:38:44 GMT by lewist123
|
|
bl1300
Posted a lot
Posts: 1,678
|
|
Feb 26, 2012 10:43:16 GMT
|
|
Have you put a control flap in the flu?
|
| |
Current fleet.
1967 DAF 44
1974 VW Beetle 1303s
1975 Triumph Spitfire MkIV
1988 VW LT45 Beavertail
1998 Volvo V70 2.5
1959 Fordson Dexta
|
|
|
|