Hammy
Part of things

Posts: 60
|
|
|
|
...let's get creative and spend no money in the process. Time for a sitty down job. Take one centre console - bit tatty, one tombstone that has been hacked by careless previous owners out of car 19, and some tumble drier bits. Last year the tumble drier broke, so Mrs H decided...she wants when of those condensing type. Result, that means I didn't have to drill a hole in the wall to fit an extractor. The bits I bought previously from some diy place cost the princely sum of £3 - a blanking cover thingy and a hole... with inflation, the lacklustre economy, I guess they are worth nowt now  Add some nuts and bolts and...... ...let's get busy. 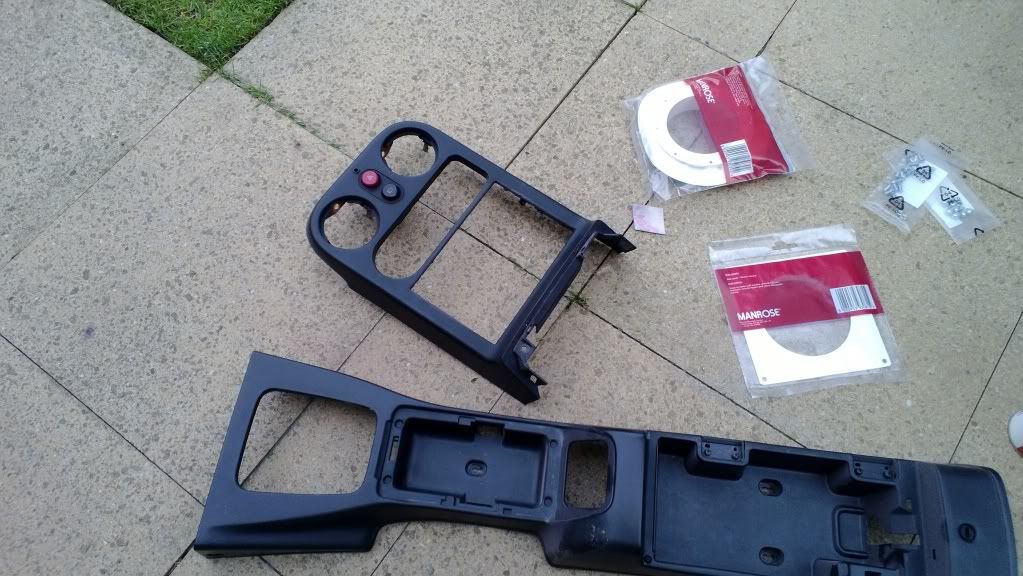 Hacked tombstone from constant radio removal...let's prep this with some sand on some paper  Let's prep the blanking plate (square thingy with hole), mask the console, and mark where the things will go: 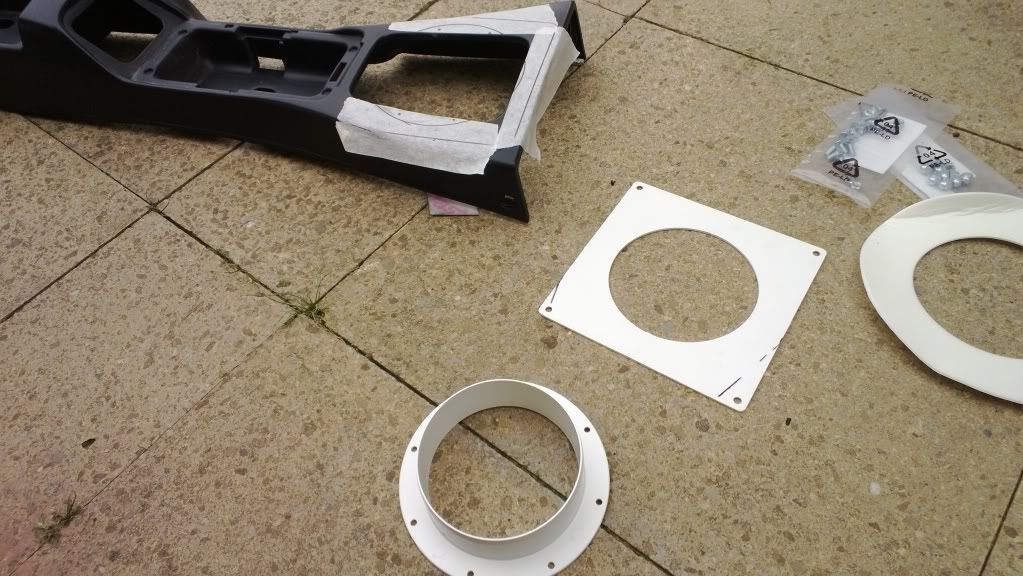 Carefully cut using luck and find that it lines up perfectly... glue in place with a hammer 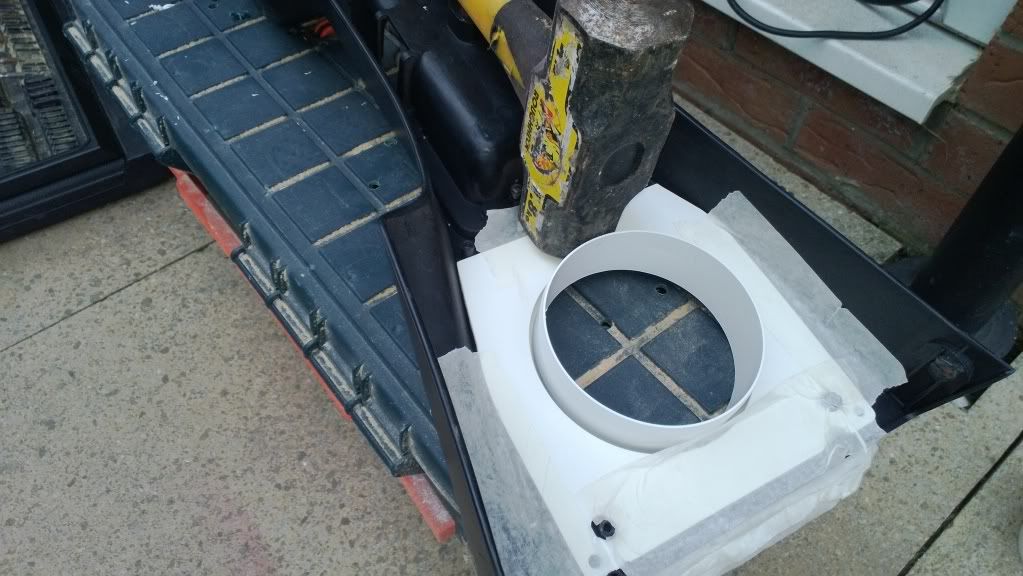 Done! 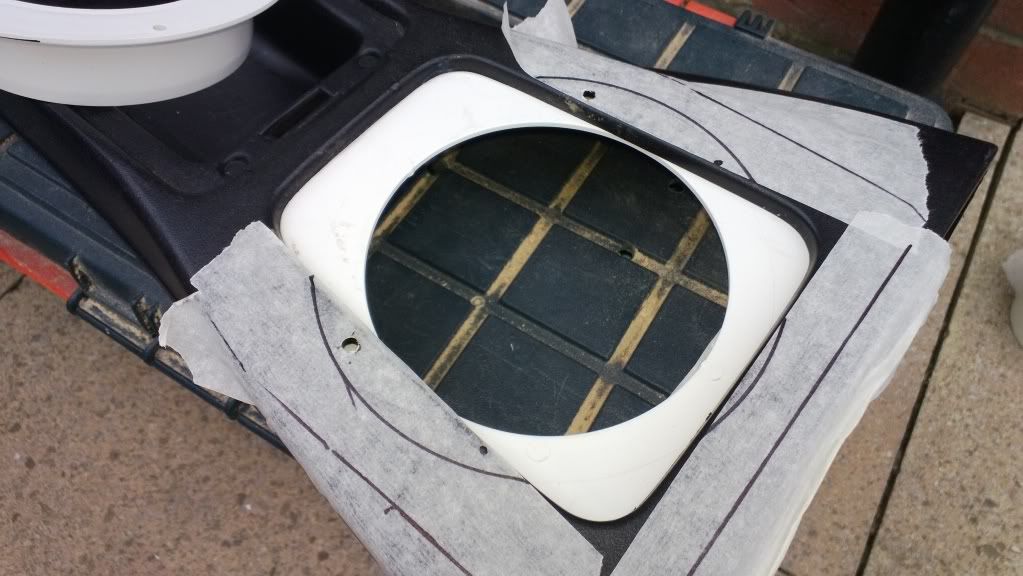 Get some old paper and with a dirty finger do the old primary school brass rubbing technique... on the square hole 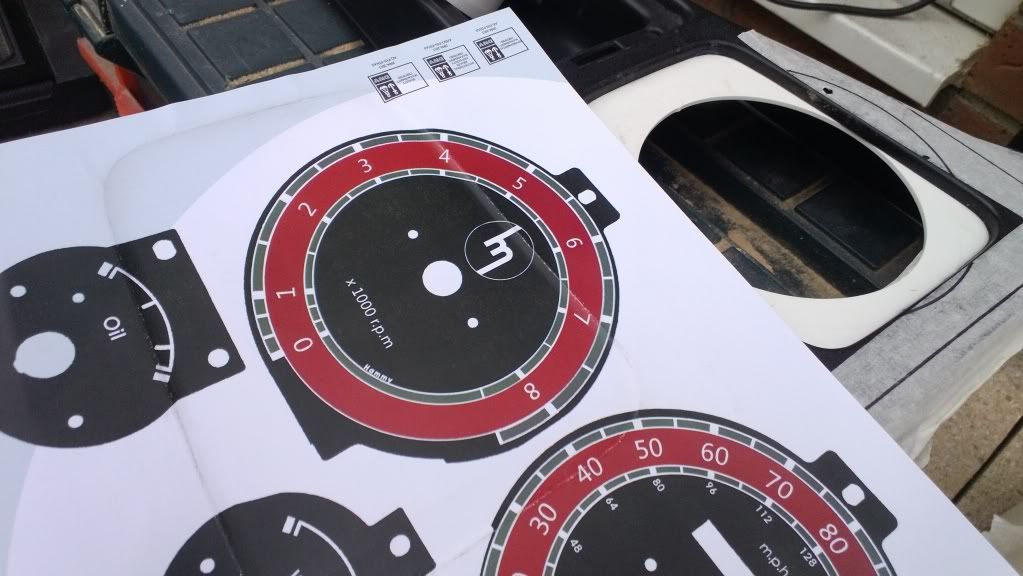 Cut out with scissors and fit in place: 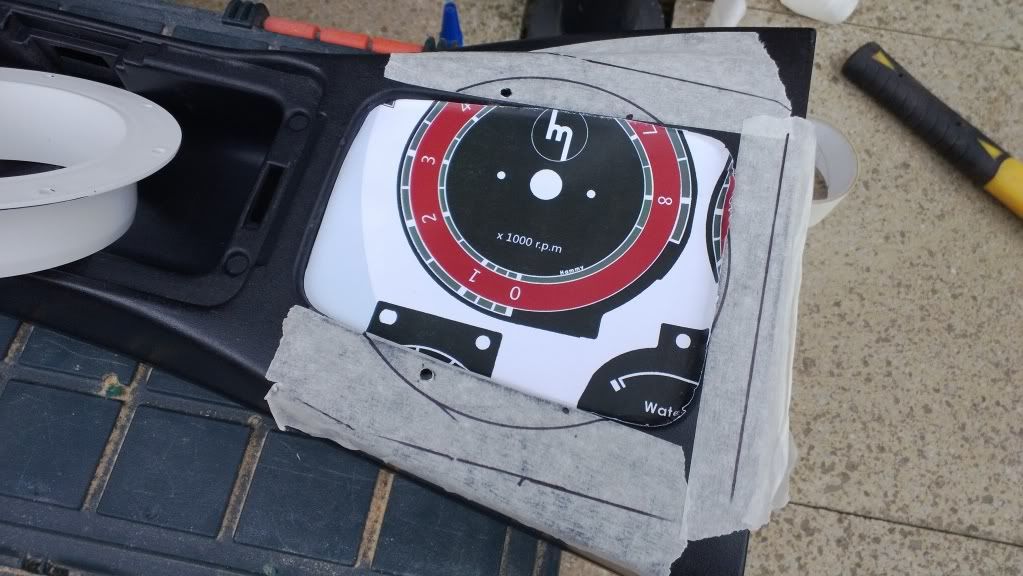 Turn it over and draw.. 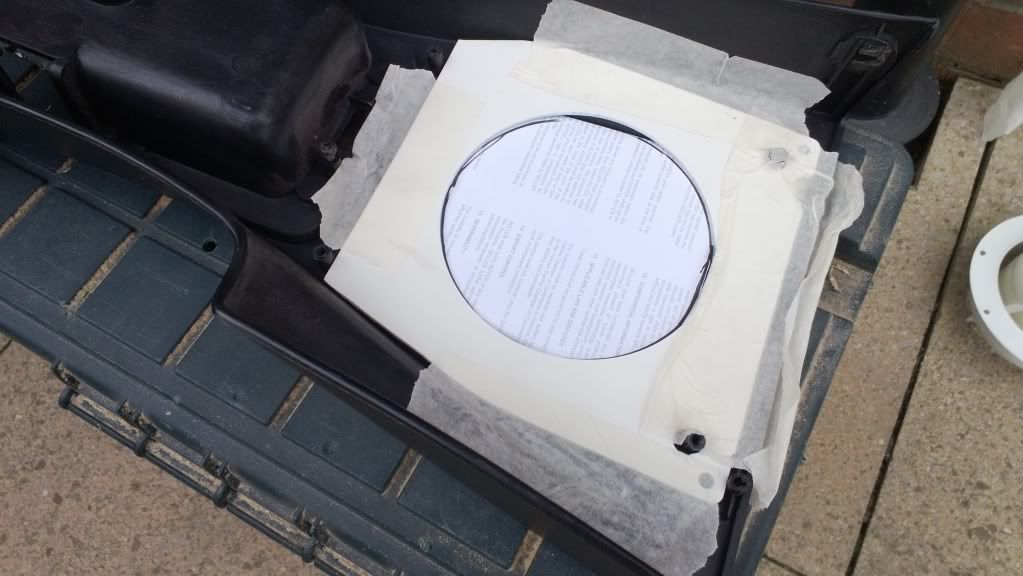 Result, we have drawn a circle 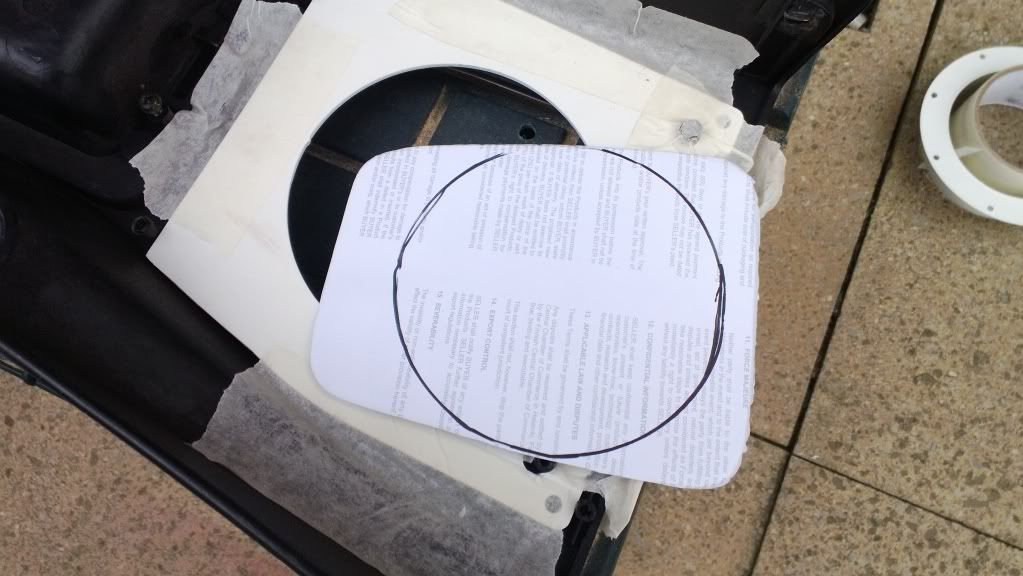 Cut out the hole and test fit again 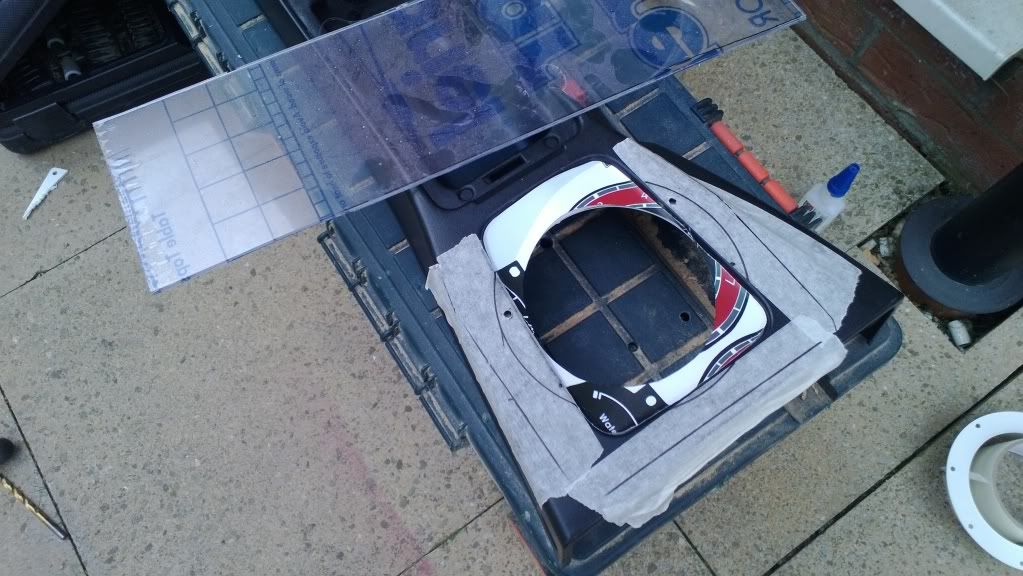 Hmmm.... distance between the top and the plate is 6mm.... 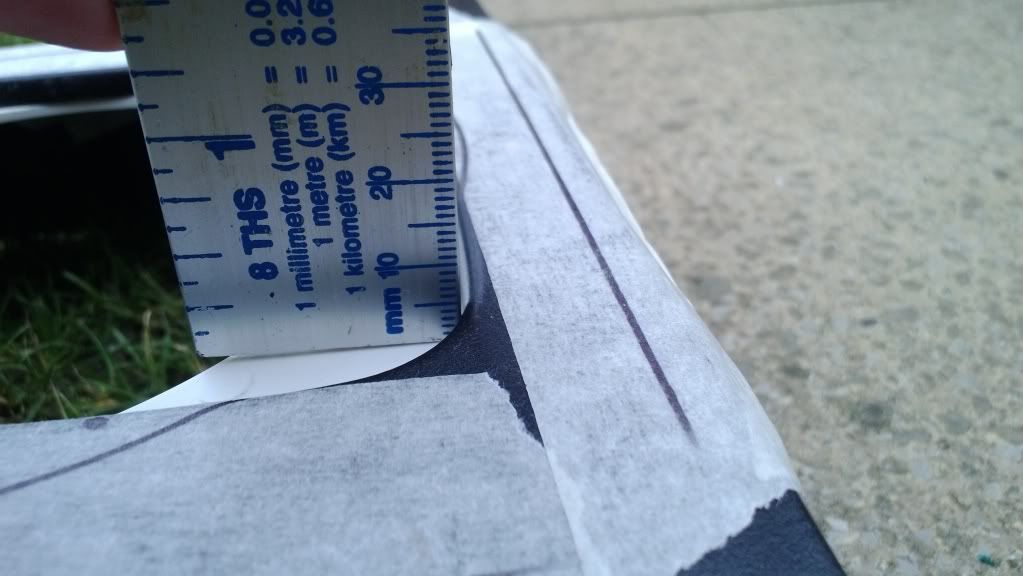 Think..... ah-ha, some thin laminate flooring cut-off will be perfect 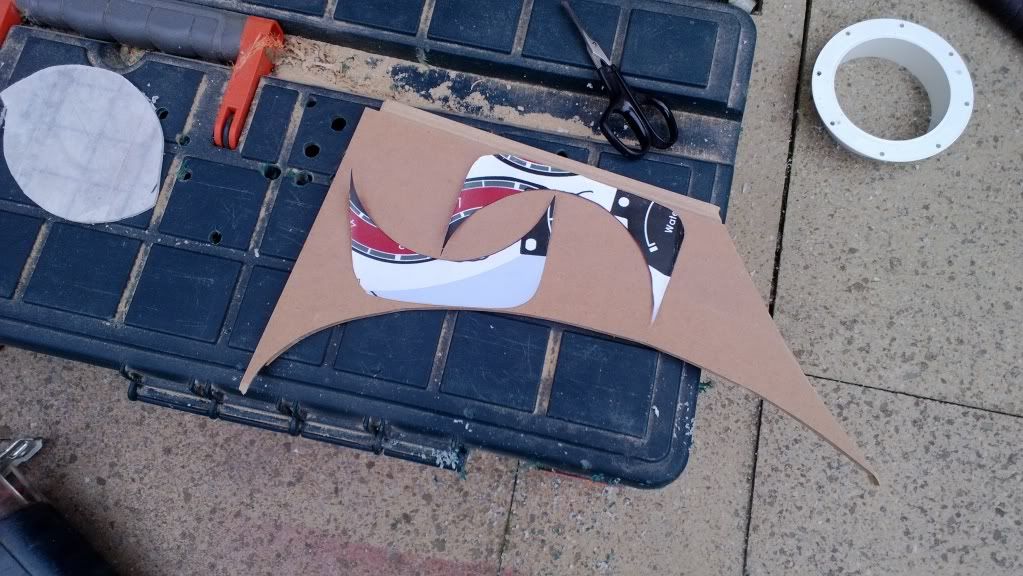 Let's get jiggy wit it... 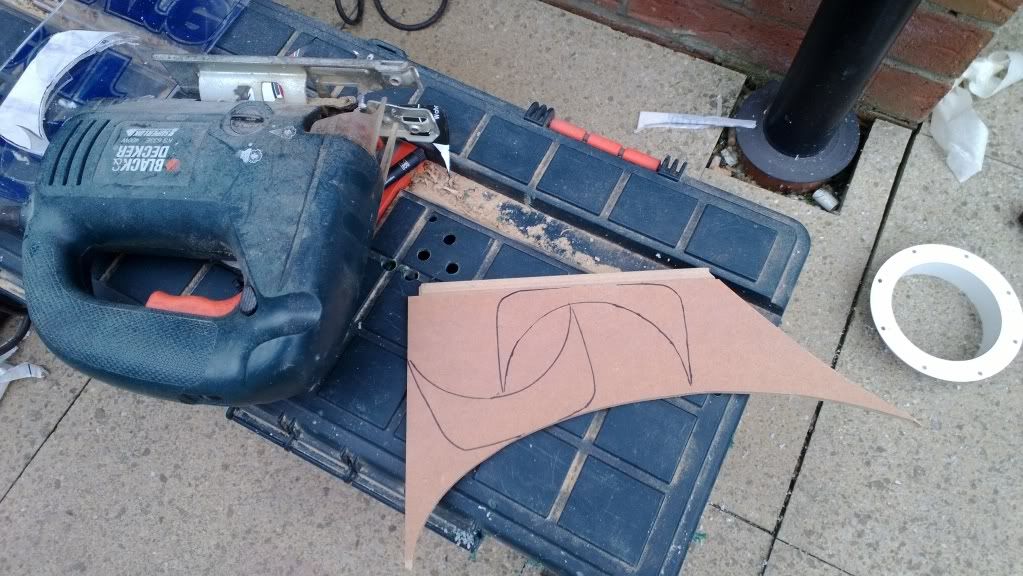 After you have cut off the ends of your fingers and dried the blood, you can test fit your flooring.. 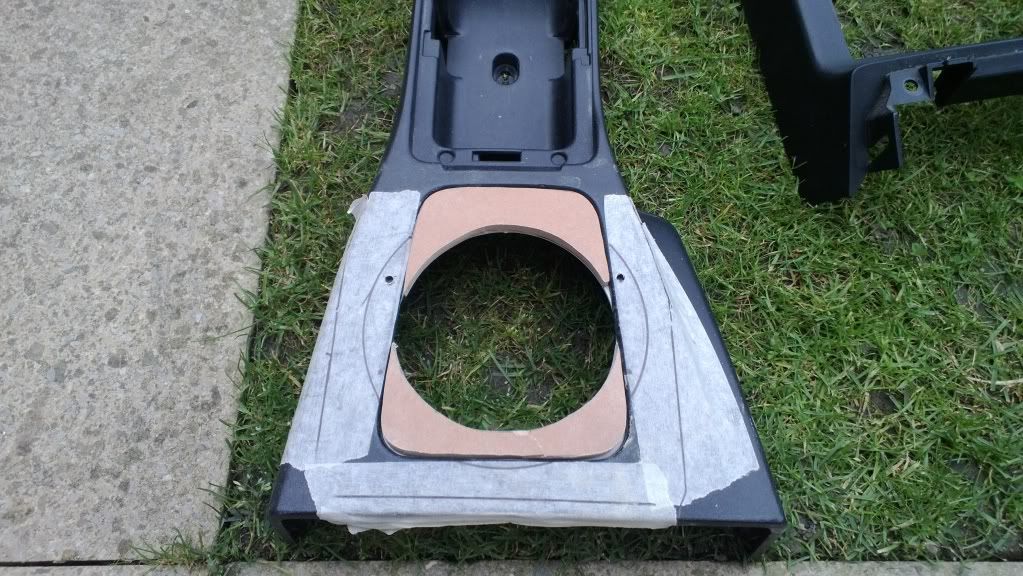 Waddya know... perfect.... 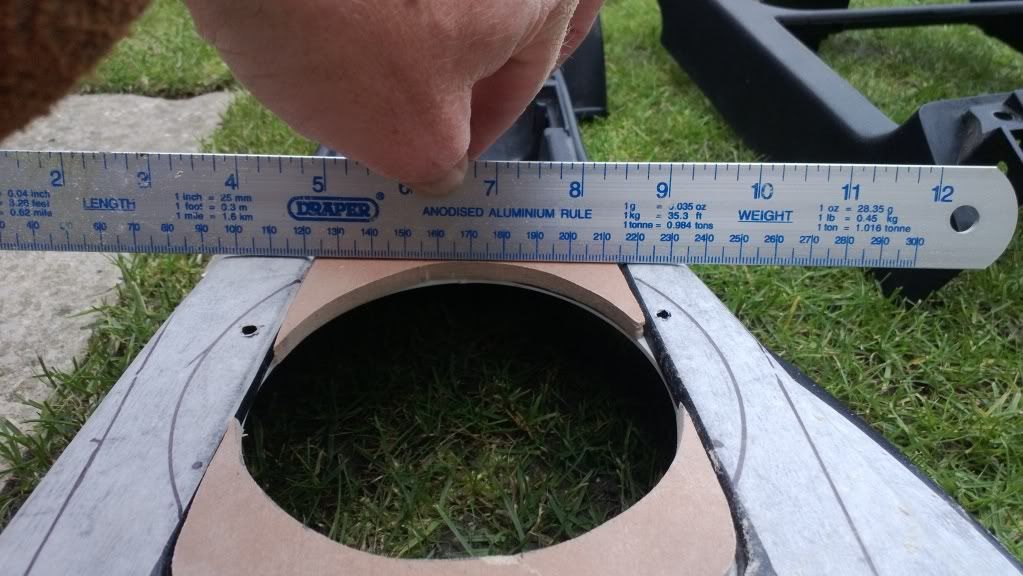 Test fit your hole and make sure your hole is where it should be.. 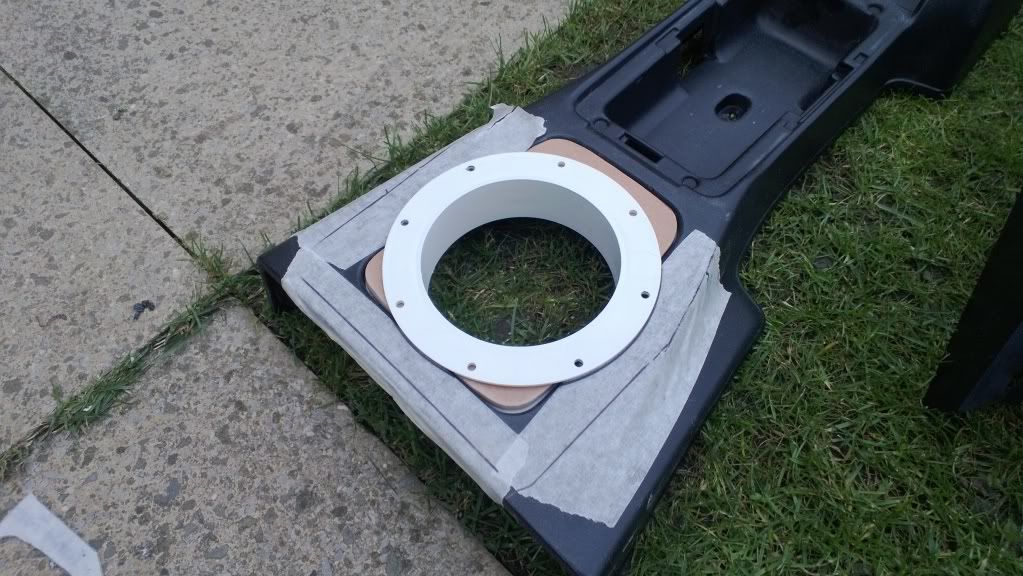 We're gonna need some lovely addictive smelling P38...time to flare the nostrils... 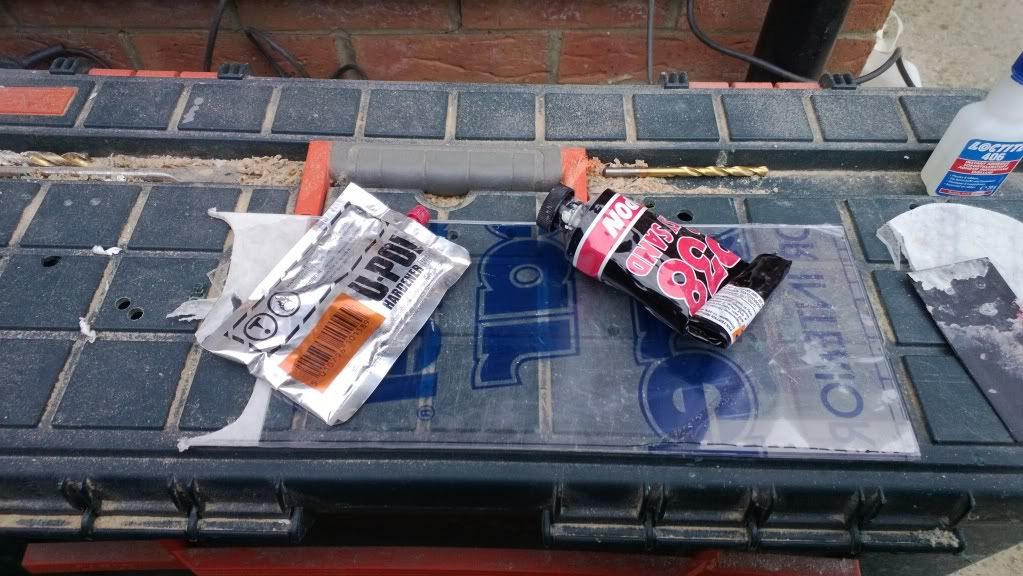 Fill your crack! 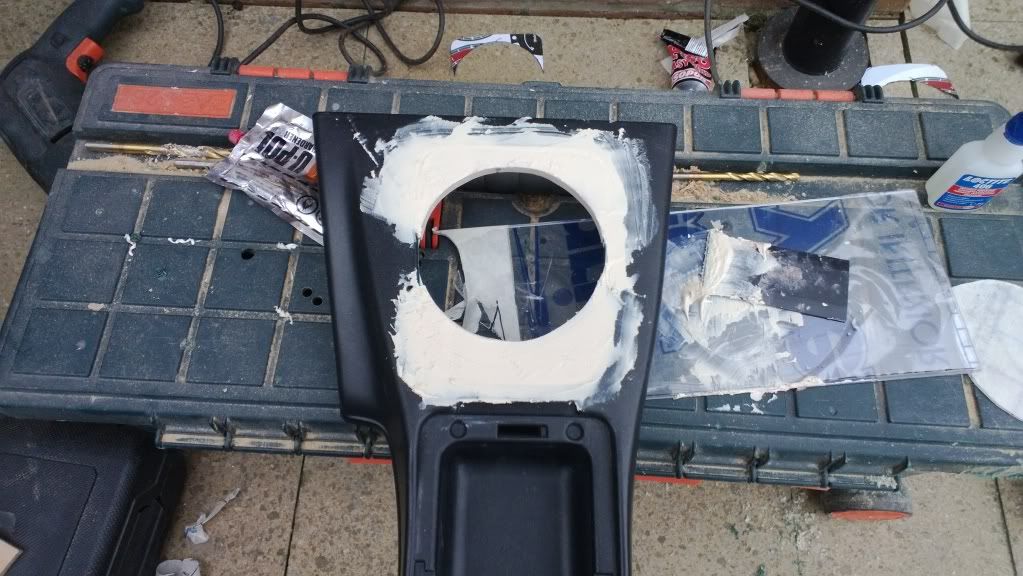 |
| |
|
|
|
|
Hammy
Part of things
Posts: 60
|
|
|
|
Whilst that ^ is drying, fill your other crack... 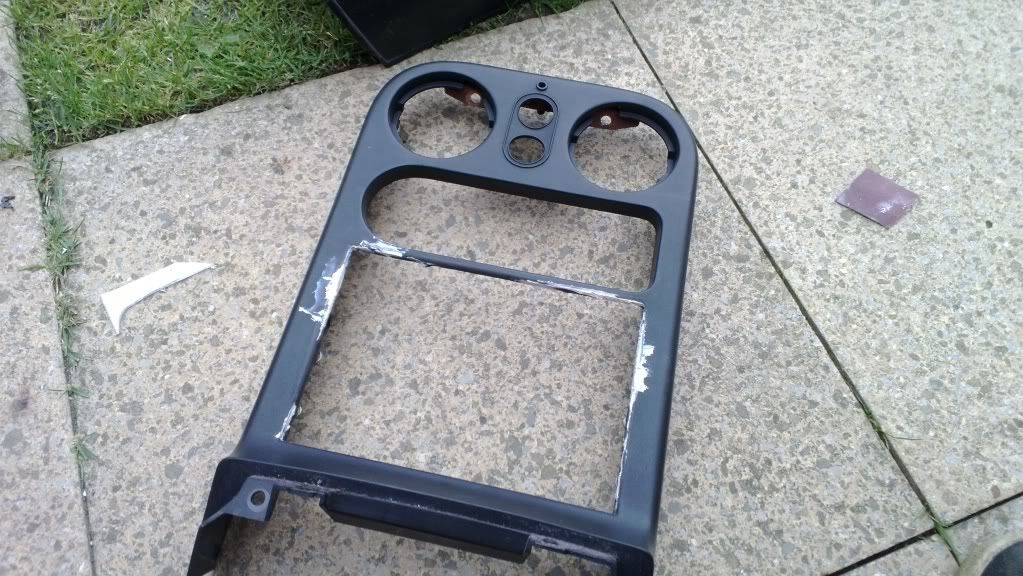 Whilst they ^ are both drying, trim your ring... 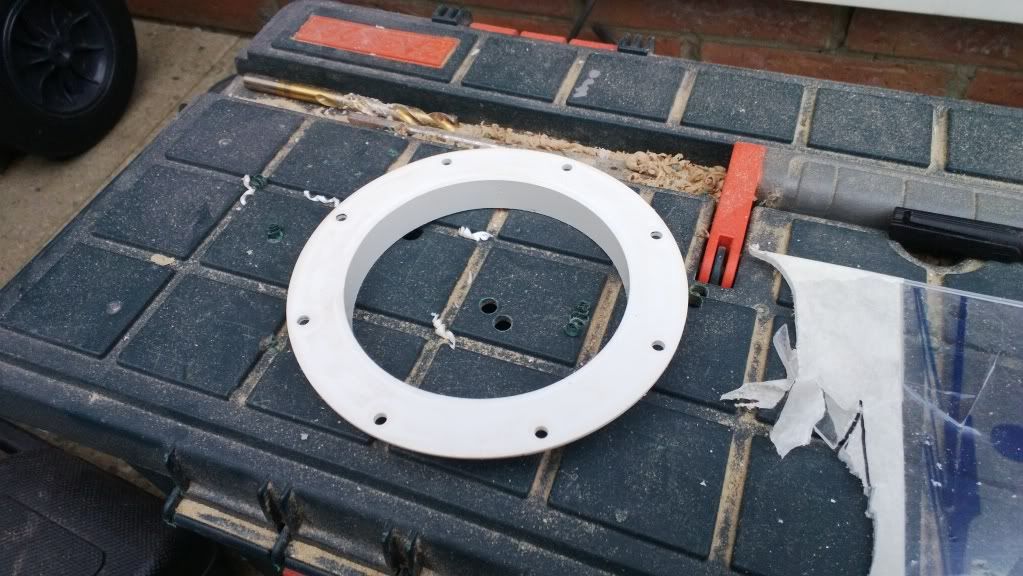 Test your hole..no reason, just test.. 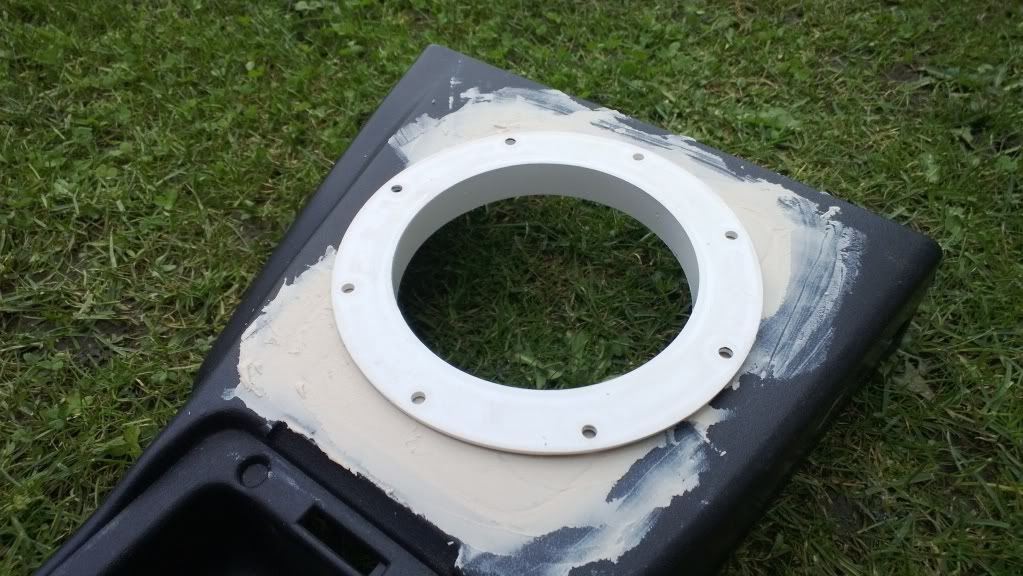 Sand....sand like the wind... 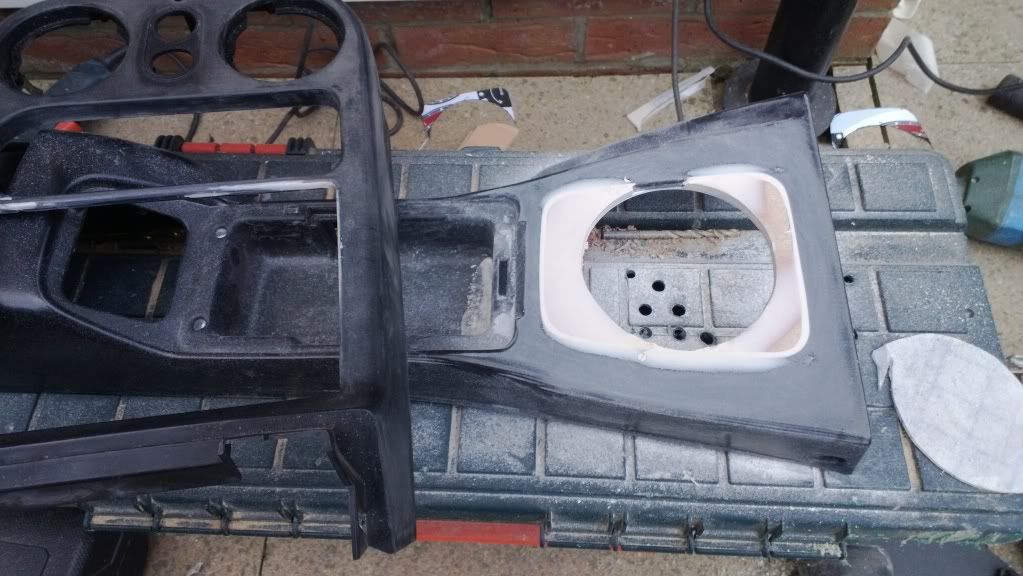 Fill your crack again... lot of crack filling going on here.... 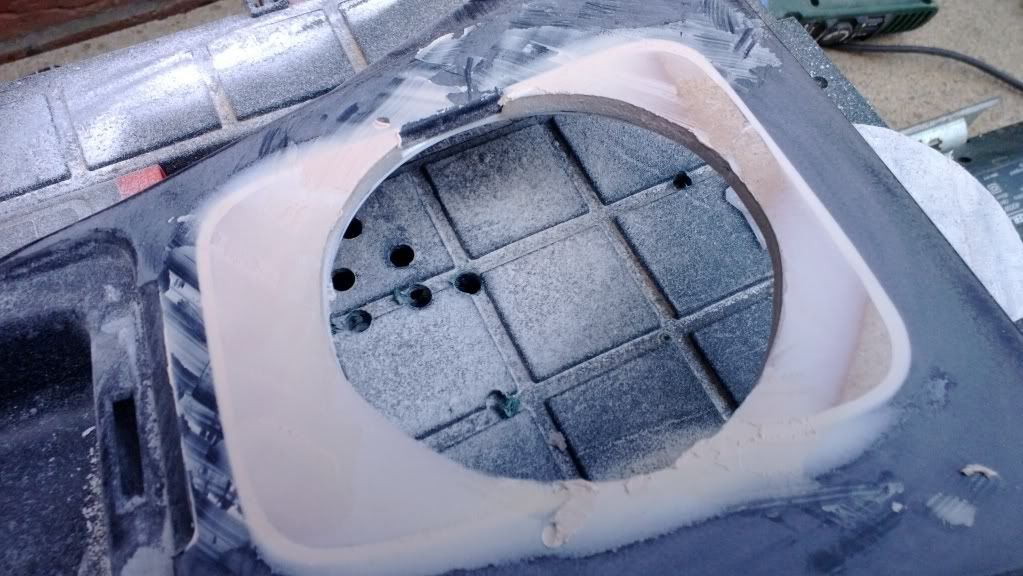 Be sure to keep your immaculate work area clear at all times... 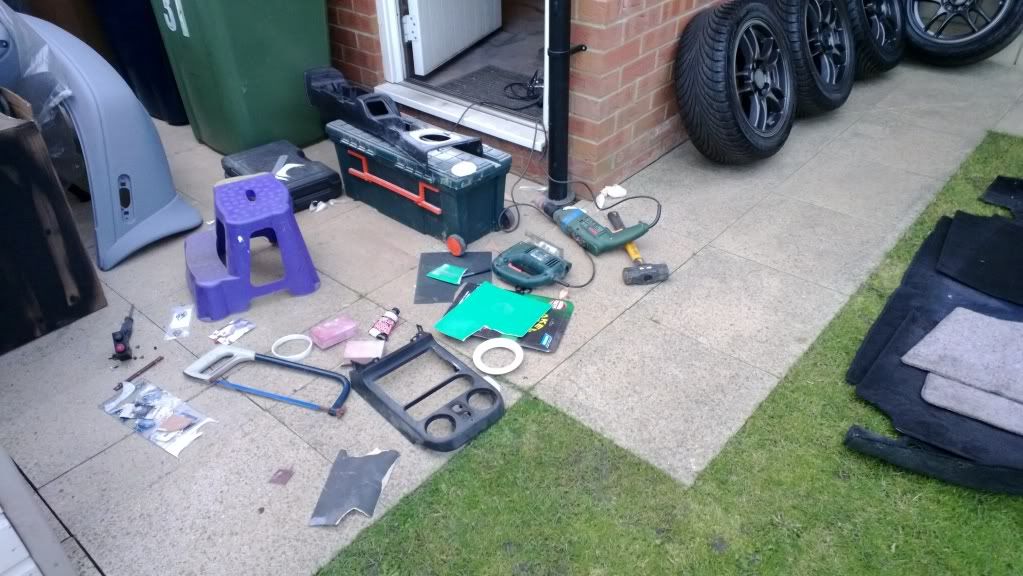 Sand...sand like the wind... 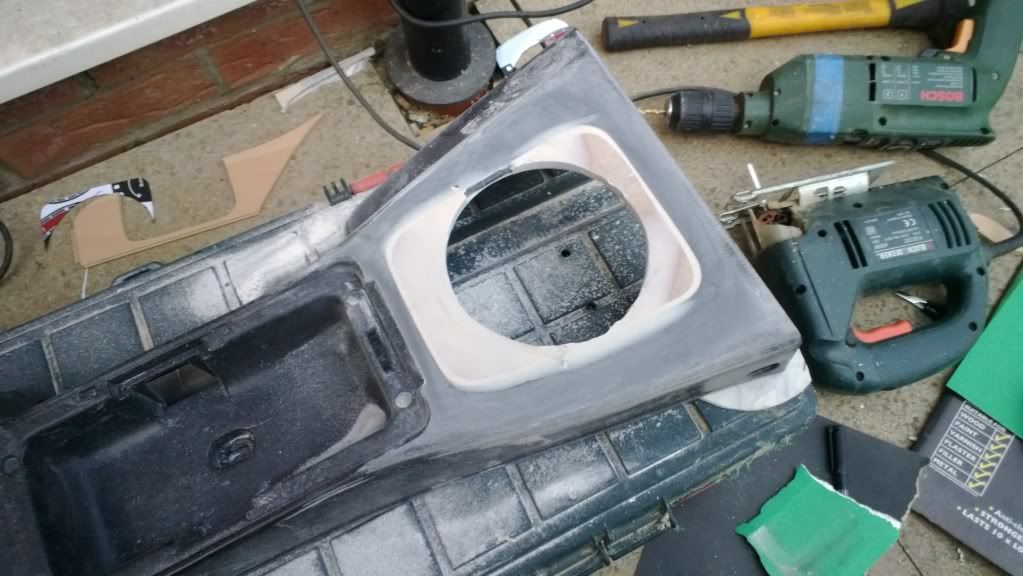 Test your hole again and draw some little circles... you are going to drill some new holes next to your big hole... 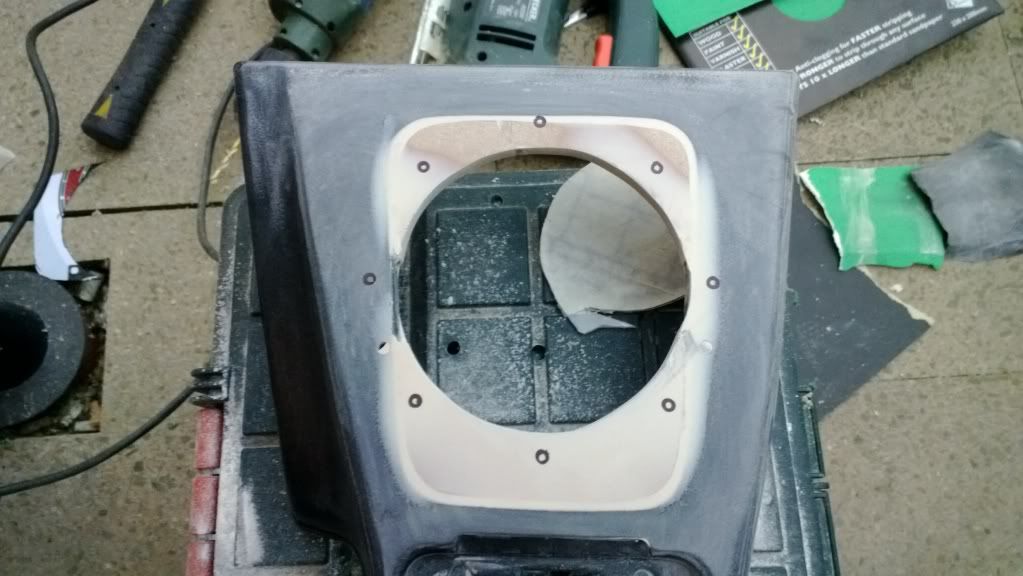 Holes drilled.. 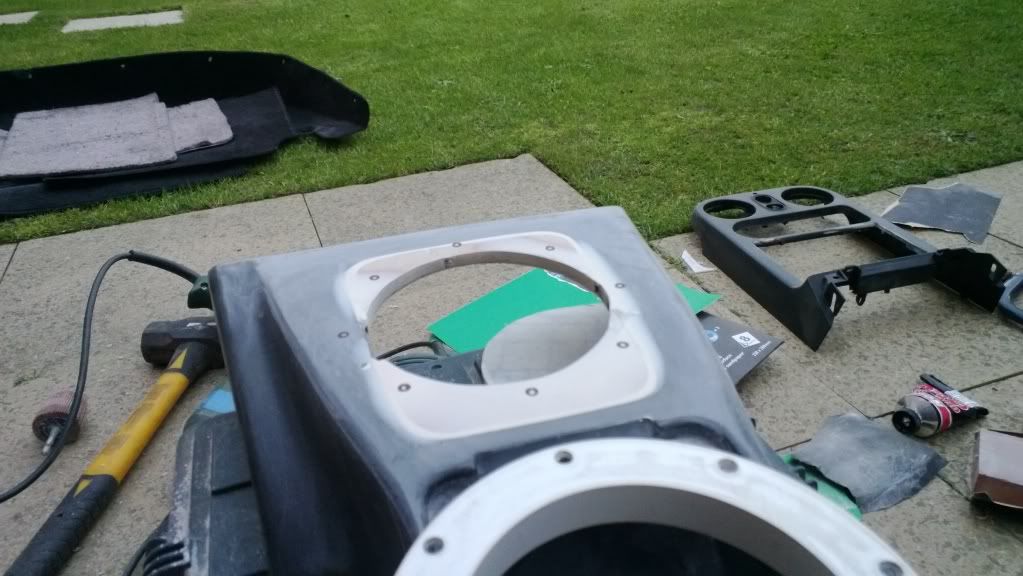 Now time to prep - not forgetting to sand smooth your little cracks... you can use a hammer to prep, but I would recommend meths.  ...continued.... |
| |
|
|
Hammy
Part of things
Posts: 60
|
|
|
|
Prep your other bit.... 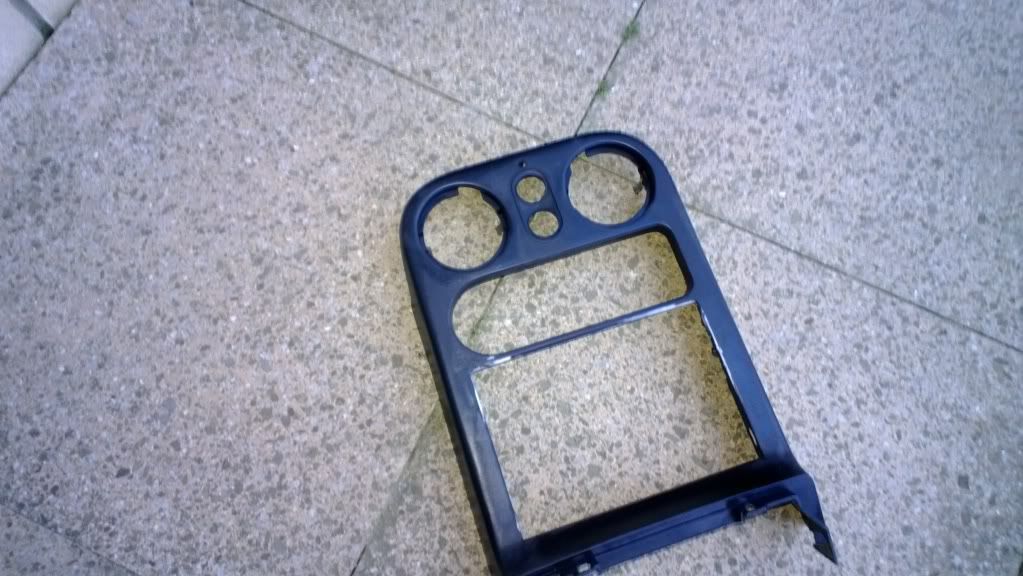 Go to the other end of your workshop and prepare for action. For this you will need clear base plastic primer...you must do this as this plastic is old... like really old, like ..anyway, spray your plastic primer all over - err, the plastic. 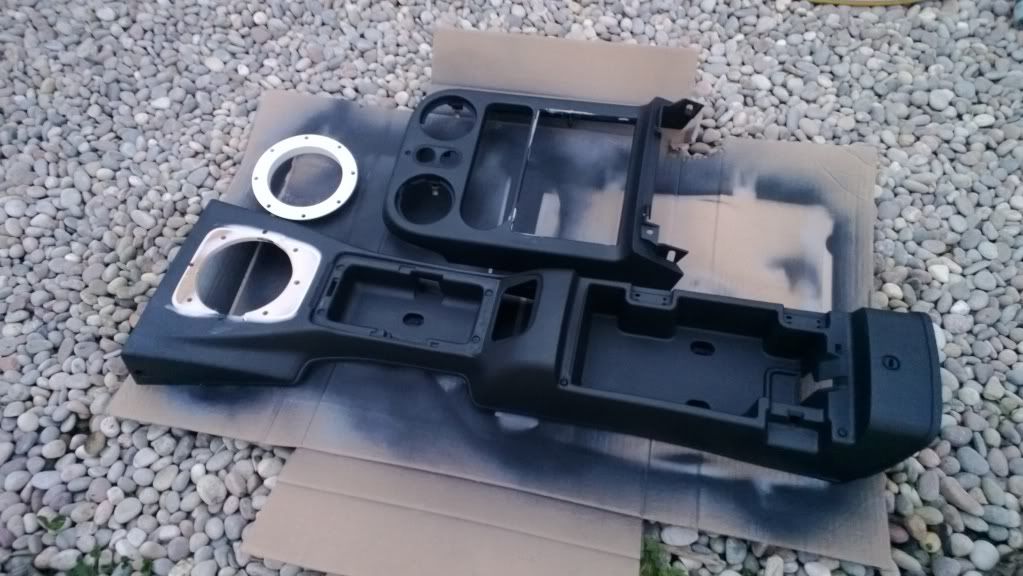 Allow to dry and realise the temperature is dropping, dampness will likely ensue, all the hard wotk will go to waste and you will ahve to start again...so move indoors, preferably a hamster cage.. and now prime, prime like you mean it, prime like it's.. err, just prime the things... 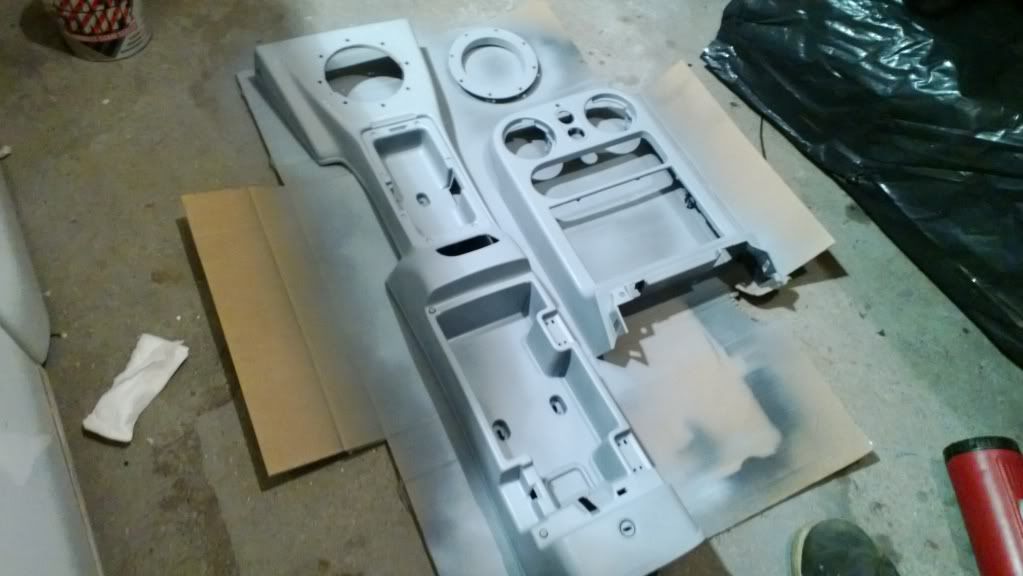 Now paint...paint like you mean it, paint like you never painted before.... now here's the technique. One light coat. WHilst that is still wet, apply another light coat. DO this from a distance of approx 12". This is important as you will see. Allow it to dry (touch dry) now give it another coat, this time heavier. Allow that to go tacky...now you need to.........................shoot from the hip. From approx hip height, spray a powder coat all over the things... this too is important as you will see.  Move to a safe area (bonnet of you five will do perfectly) it's no worry here cos this is yet to be resprayed.. 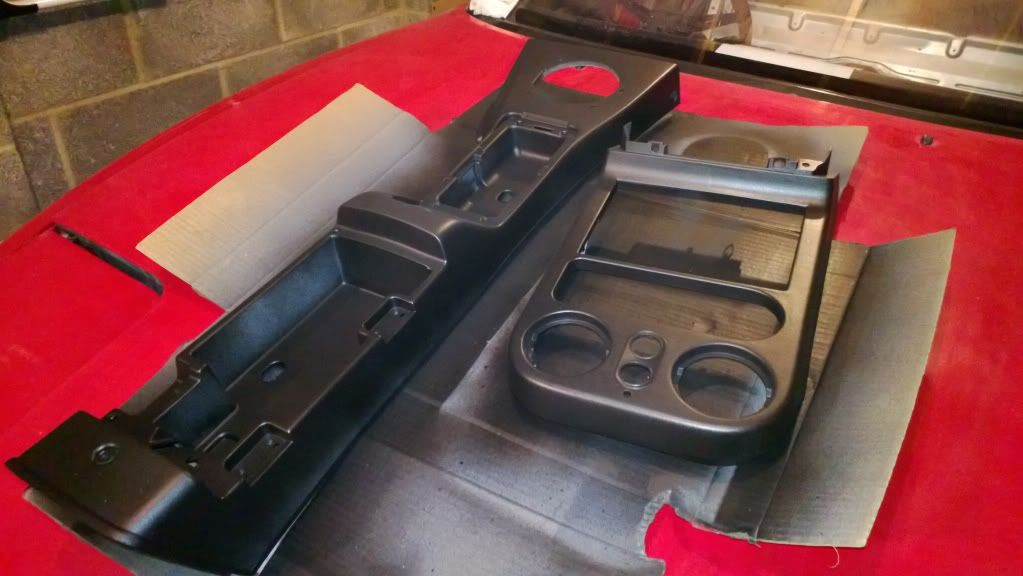 Now whilst that ^ is drying, go on a mercy mission to the shops for the missus Right now we are back...let's have a coffee and check this out... ooooh, nice factory kind of finish...woop. 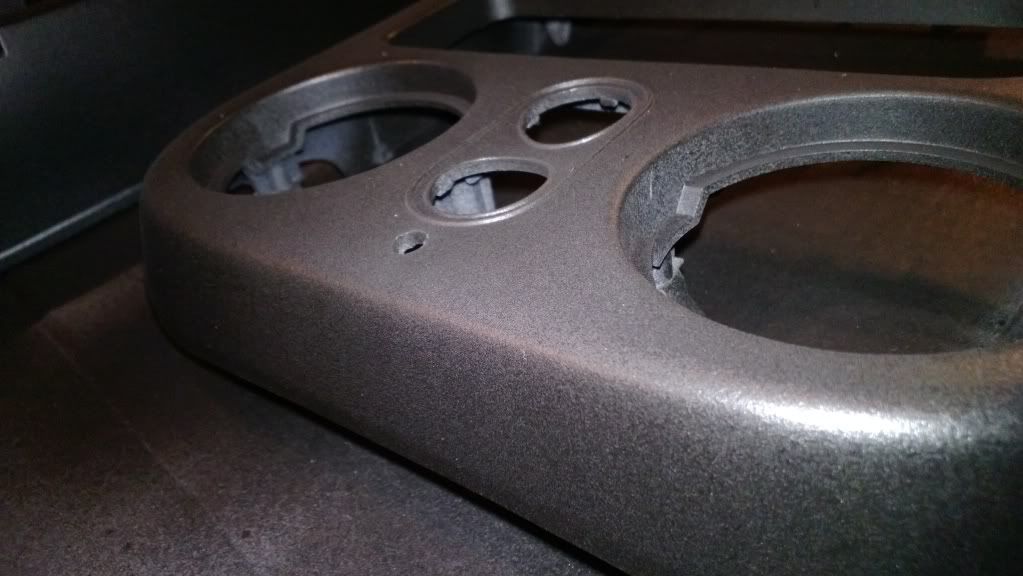  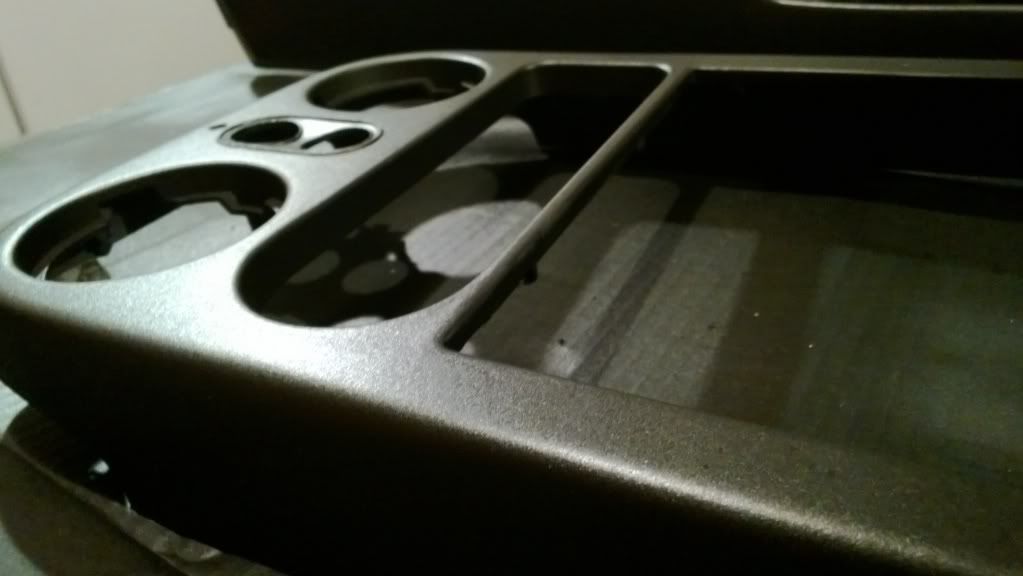 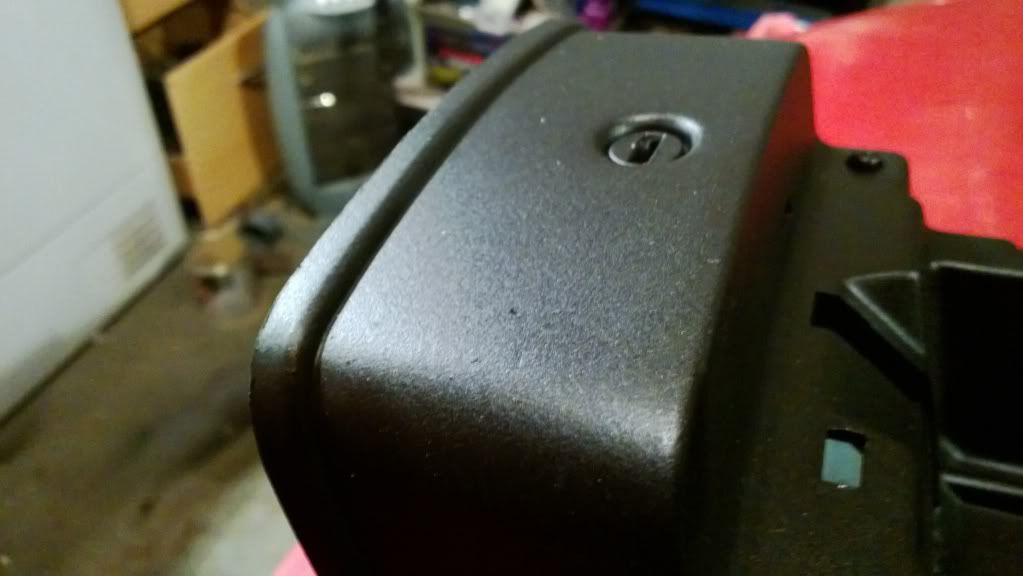 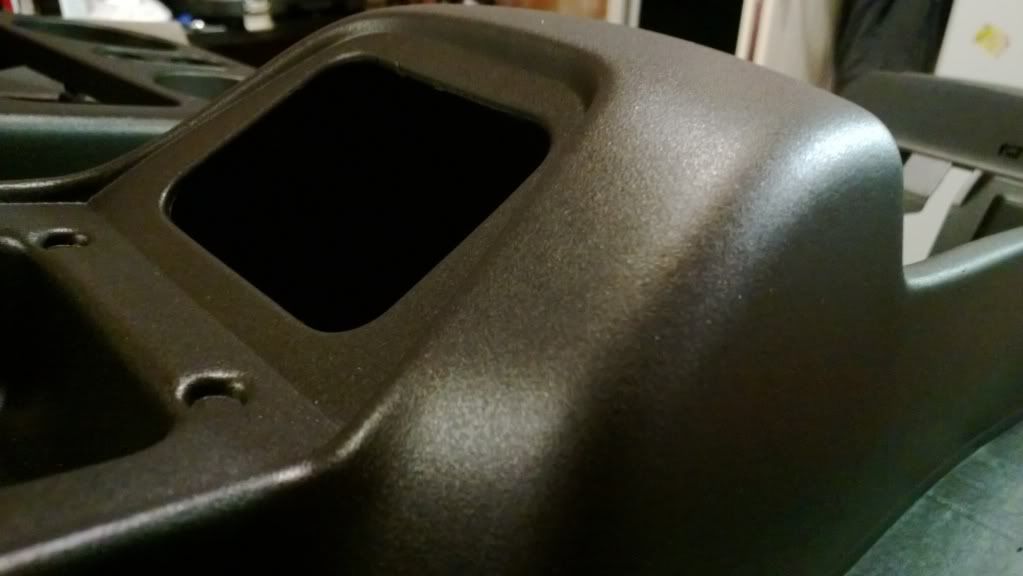 Now wait for the missue to go to bed, and move indoors to workshop number 3 - the kitchen. It's wise to move here as there is beer stored and food. Now it is time to aluminiumise (made up word) your ring....to match your KGWorks cluster... 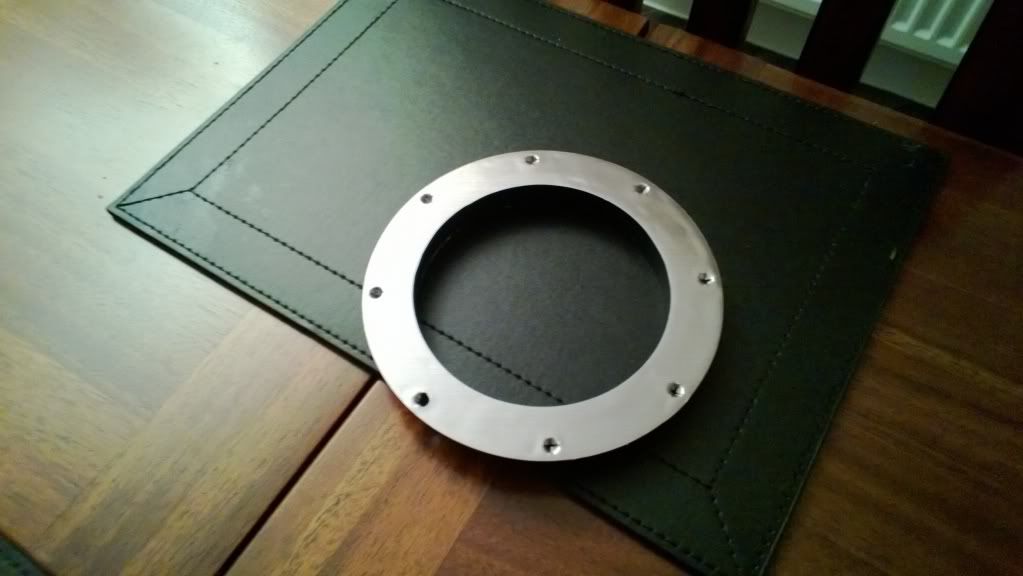 Now we are going to need our bolts...these match the same type used on the cluster...all very feng shway... 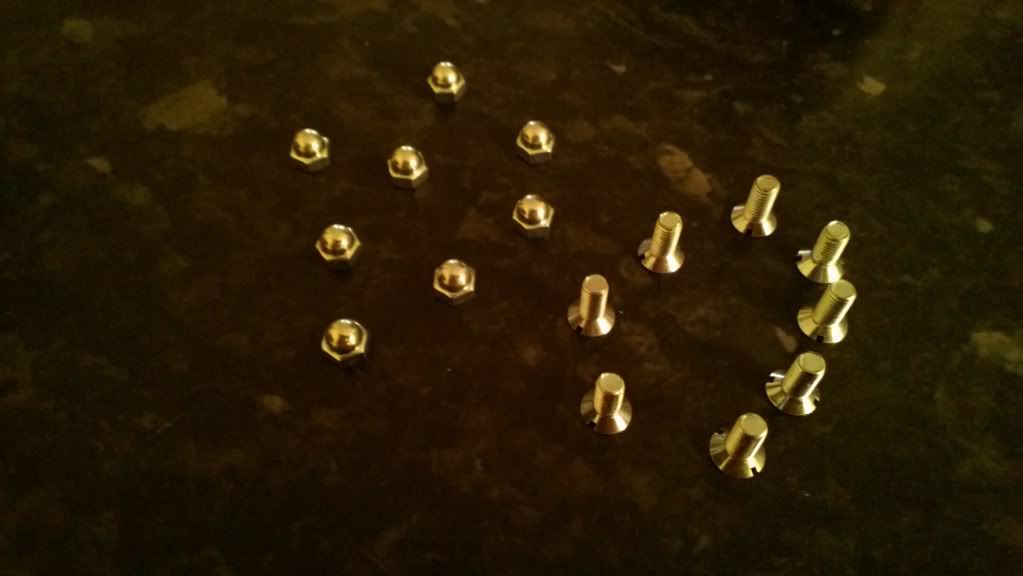 ...and there we have it - a retro ring...a retro gear stick surround...with a nice textured, very hard finish. This will get a dusting coat of matt lacquer tomorrow, doesn't need it, but it adds a layer of extra protection. Job done... I thankyou...and cost nothing 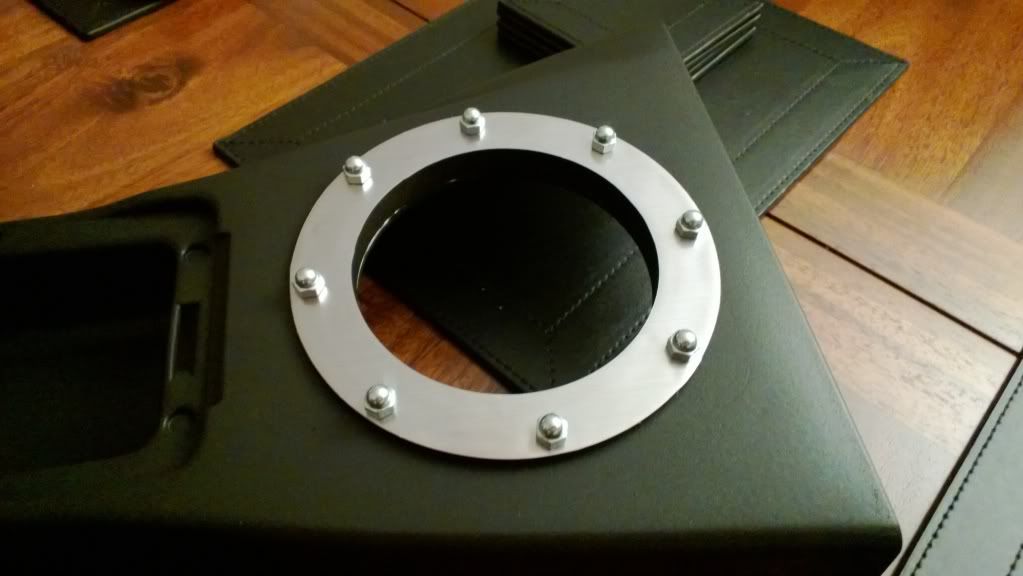 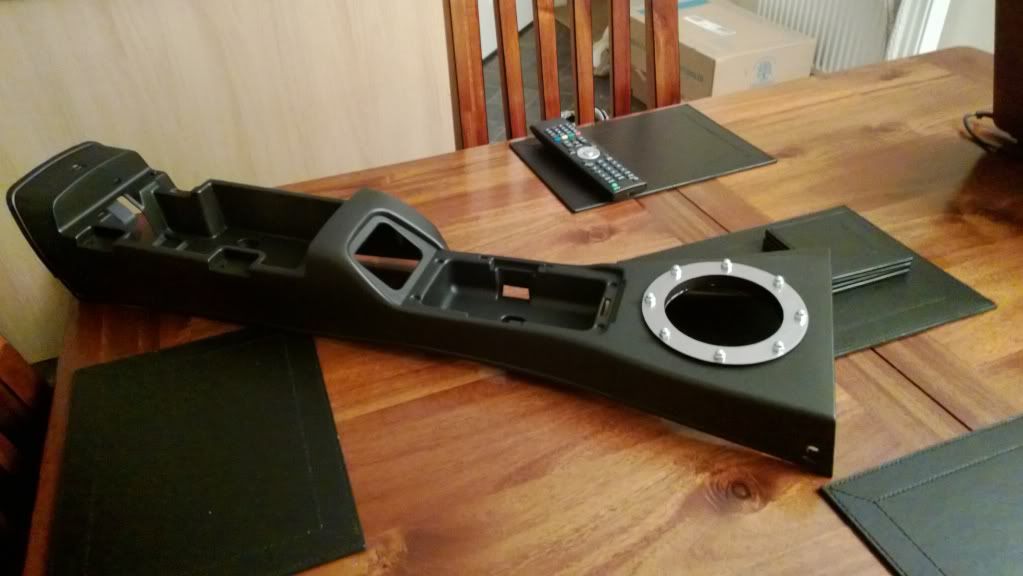 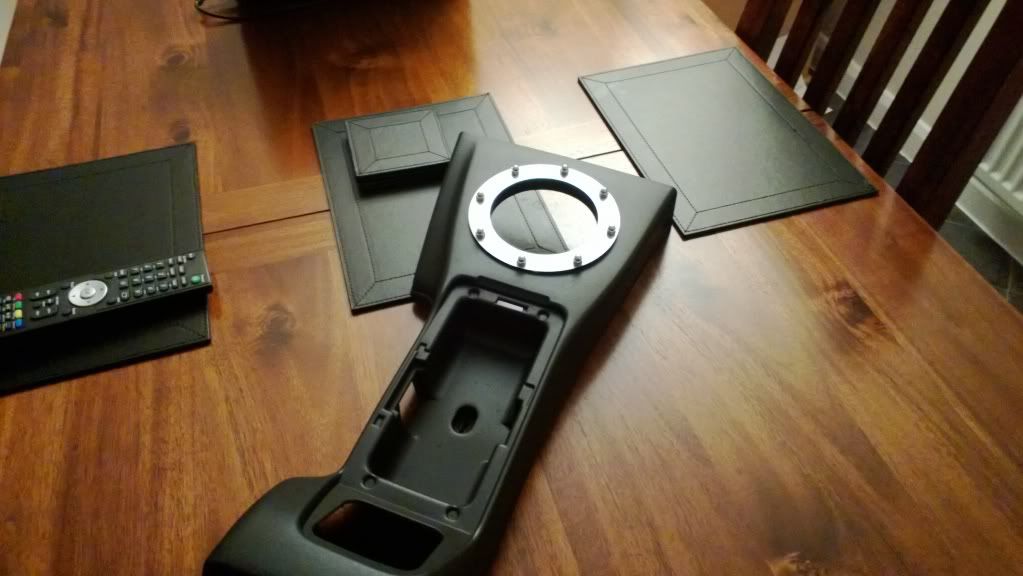 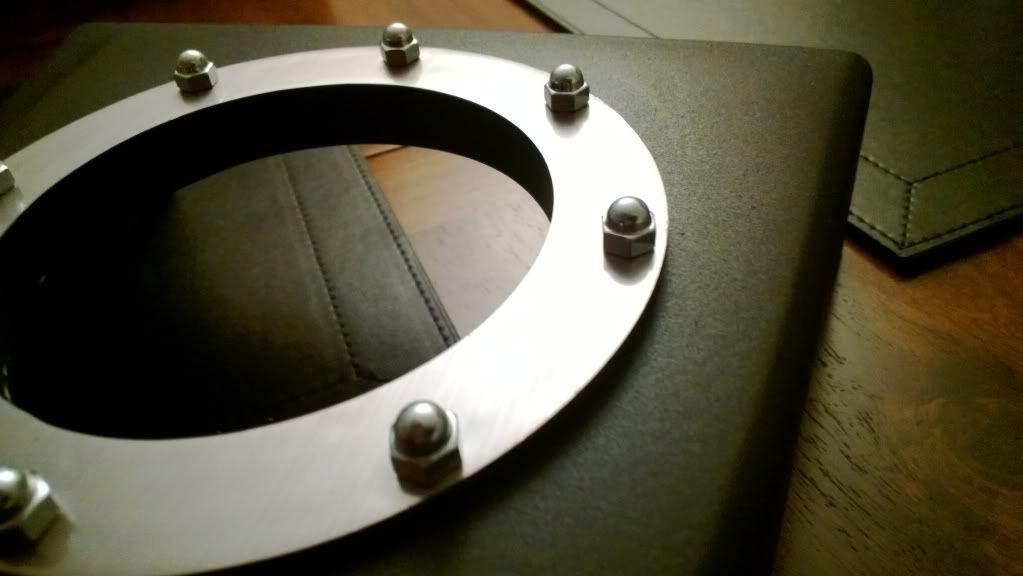 |
| |
|
|
Hammy
Part of things
Posts: 60
|
|
|
|
I continue with ill health and work on interior bits. Today I started work on a one piece hvac panel.  I will finish that up later. Here is the hvac panel finished... it will illuminate from the back... will make some coloured transparency. Started also making my new radio panel... this will house a retro style radio - well an amp - all you will see are some buttons. There will also be a retro analogue clock and two toggle switches. The material I used for the hvac and the radio panel was the interior plastic deadeaning from an old tower case of a pc. It was 1mm plastic, had a great texture and was perfect. For added strength on the radio panel this was stuck onto 2mm lexan. The aluminium is real aluminium on a roll.... Need to finish making the new light and hazard panel - this will also house two toggle switches. 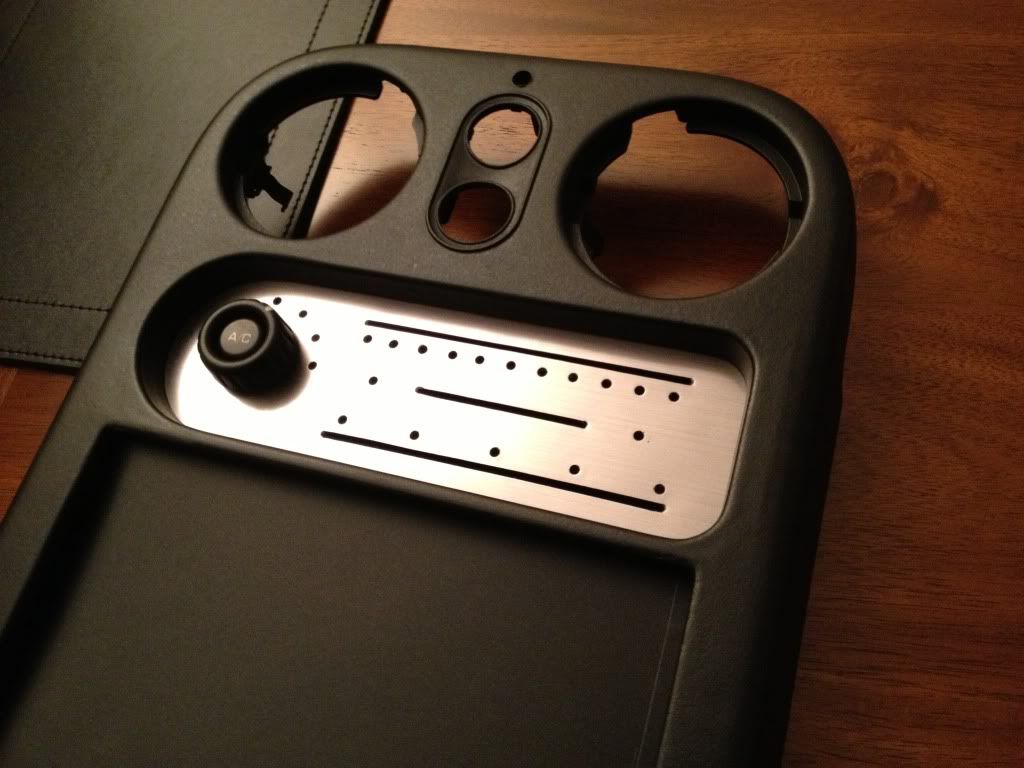 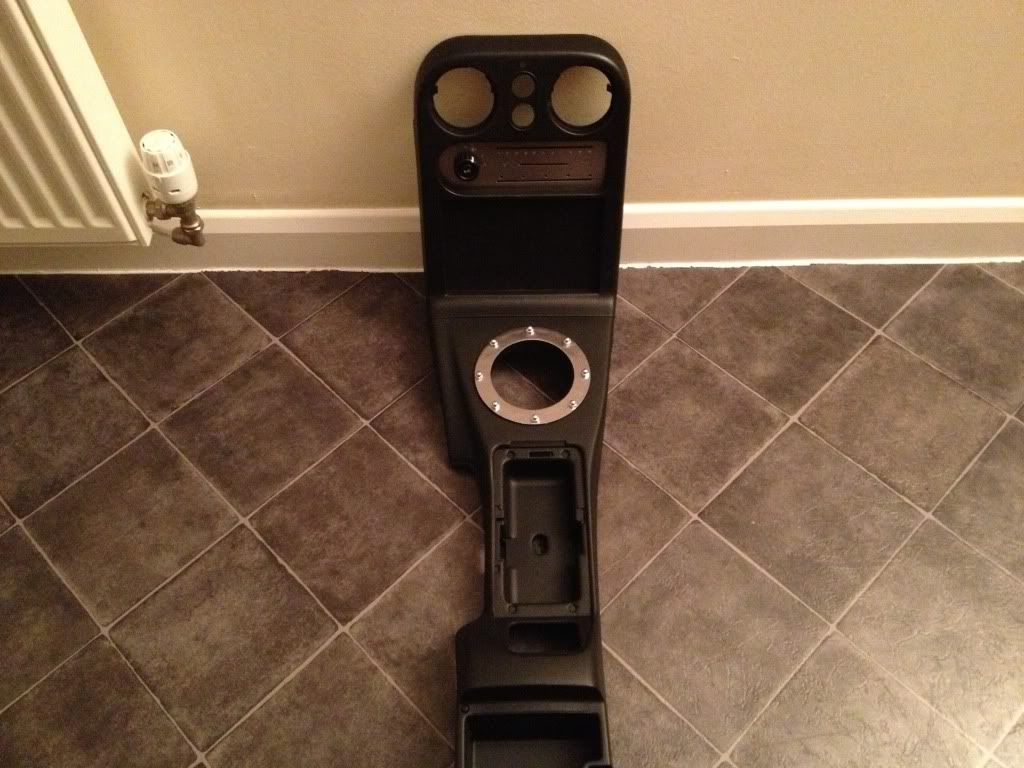 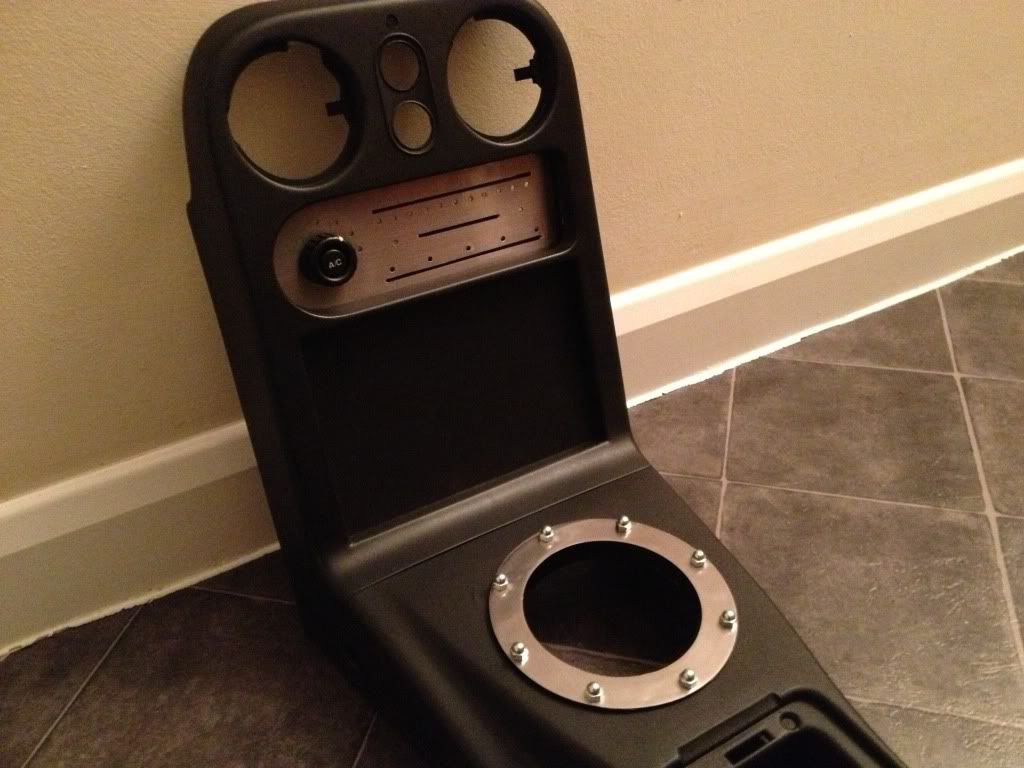  Next I start work on the radio panel... |
| |
|
|
Hammy
Part of things
Posts: 60
|
|
|
|
I started work on the radio panel. I say radio panel, there will be no radio, just a discreetly wired ipod. So measured drilled and cut and test fit everything....   Don't like the knobs for the amp, so i will fit something else.... from my guitar collection of spares. |
| |
|
|
Hammy
Part of things
Posts: 60
|
|
|
|
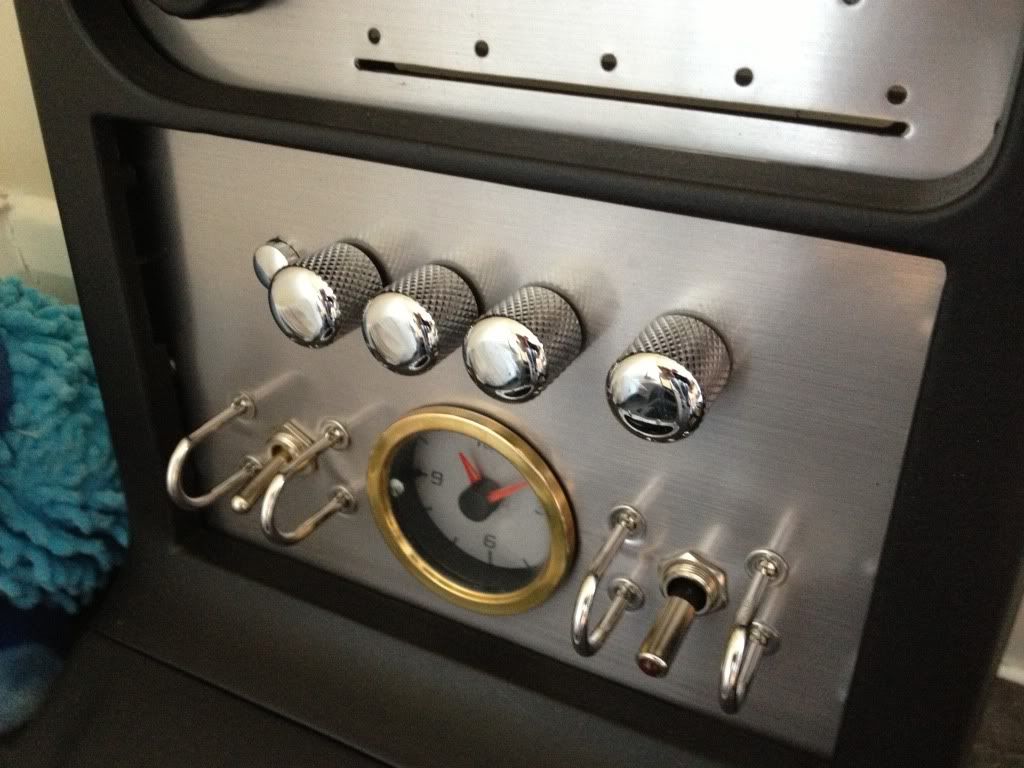
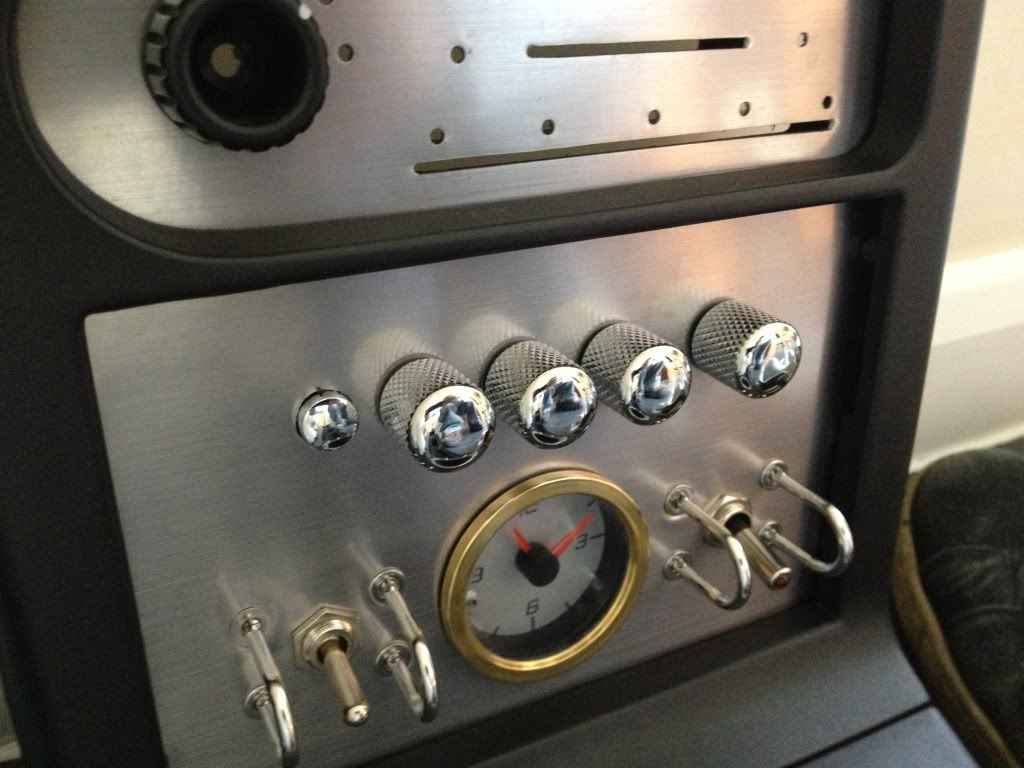
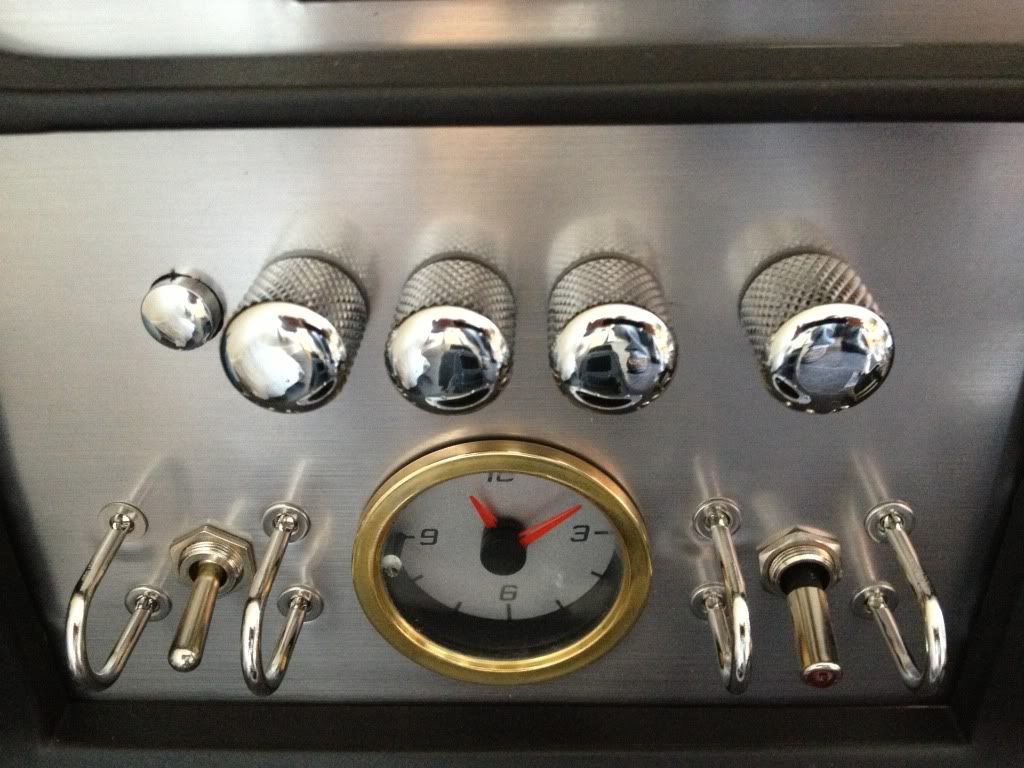
Panel finished, need to change the knobs yet. You may be wondering about the odd choice of the brass surround on the clock (which is from an MG-F). Well. whilst making one of the KGWorks clusters, I made, quite by chance a discovery with some parts - an accident if you like. I liked the effect it created and reminded me of steampunk: en.wikipedia.org/wiki/SteampunkSo that is where this is going, I like the effect. You will see a glimpse of one of the aluminium panels below... but more detailed pics later as they are on another computer at home. Done...nearly     ...and here's how it ties together. The cluster is not fastened to the housing yet..  |
| |
|
|
Hammy
Part of things
Posts: 60
|
|
|
|
|
|
| |
|
|
Hammy
Part of things
Posts: 60
|
|
|
|
So here are the KGworks clusters.. well, my version. Each one cost the princely sum of £7.50 to make. Here's how....just words but the next one I make I will take pics of all the steps. 1. I went to my hardware store and bought a couple of planks of laminate flooring - 5mm thickness. It's a strong stable material and the size of the planks makes for little waste. Each plank cost me £1. Out of each plank I can get 4 clusters. 2. I bought the LED's from the bay of E - 4 red, 2 amber, 1 blue and 2 green. Cost £5. 3. The big gauge rings..well here's where I could be accused of being a saddo. I trawled shops and all sorts of places - armed with a cluster and ruler. I was measuring all sorts of round things. Eventually, I went to a £1 store and bingo. plastic pint glasses. 91mm rim at the top. Perfecto. 20 cups for £1. That's enough for 10 clusters As they are rolled over they make the perfect dial ring. They are a very tough plastic. So I carefully lopped the tops off, keyed them, plastic primed them and painted them with liquid chrome. Job done. 4. The smaller rings - 45mm. This proved to be a problem sourcing material for these...eventually I had an idea - plant pots. So, I found some 45mm plant puts made out of really tough plastic. Same thing - lopped the top of etc and they fit perfectly. I must remember to take pics of these... they cost 7pennies each 5. The glass is made out of 2mm lexan - perspex whatever you call it. It's fastened on the back of the cluster, holes drilled for the bolts and bulbs and the outside cut to shape. Voila 6. The 'steampunk' bits. I was looking for what are called cup washers in steel for the led's to sit in on the front. I had trouble finding these where the inside hole was 8mm diameter - the diameter of the led shafts. Eventually I found brassed ones...£2 for 12 where the inside hole was a gnats hair too small. So I thought I would file these a little and make them silver. However, when fitting them - it struck me I like this brass/steel effect. And so steampunk clusters - and resulting rest of interior was born. I was fortunate with the clock - I acquired for £2. It was from and MG - F car. It had a black surround, but I didn't like this, so I sanded it back...and to my good fortune, it was brass. Deep joy beholden to me So here are some pics. Here are the cups made into dial rings:  Perfect fit  So I made a black one first and tested things...  Then by chance, realised I like this brass effect with my 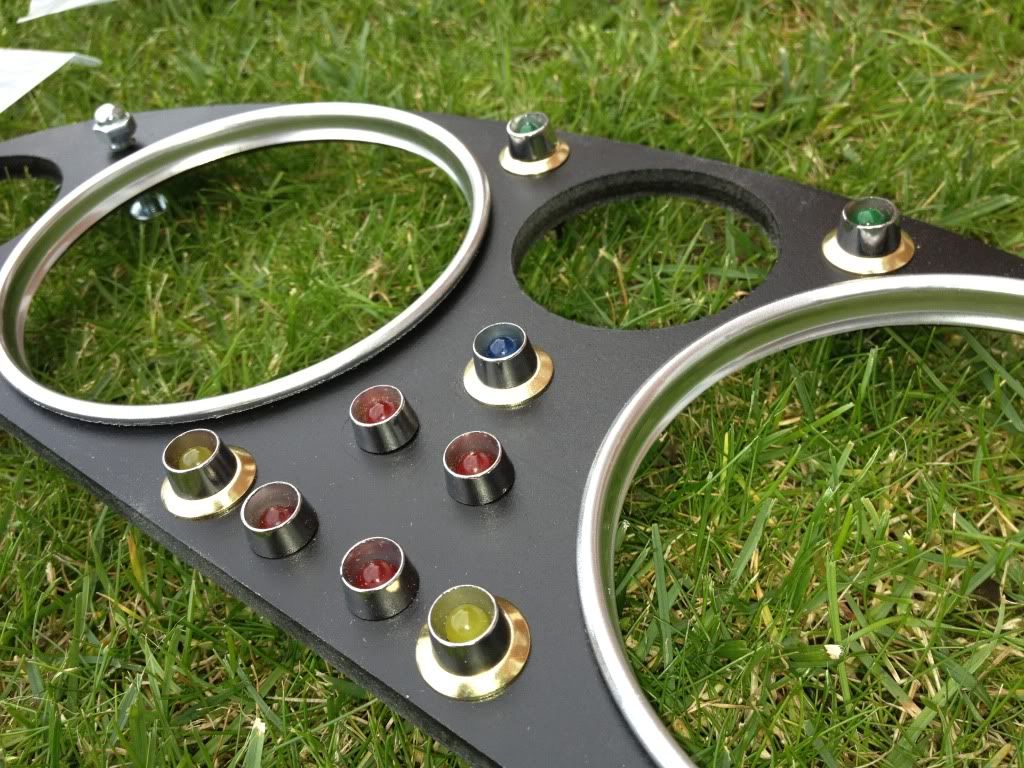 So I then made brushed aluminium ones to match the rest of the centre console: I like the steampunk effect even more - I like things that happen by chance  So here are some more pics  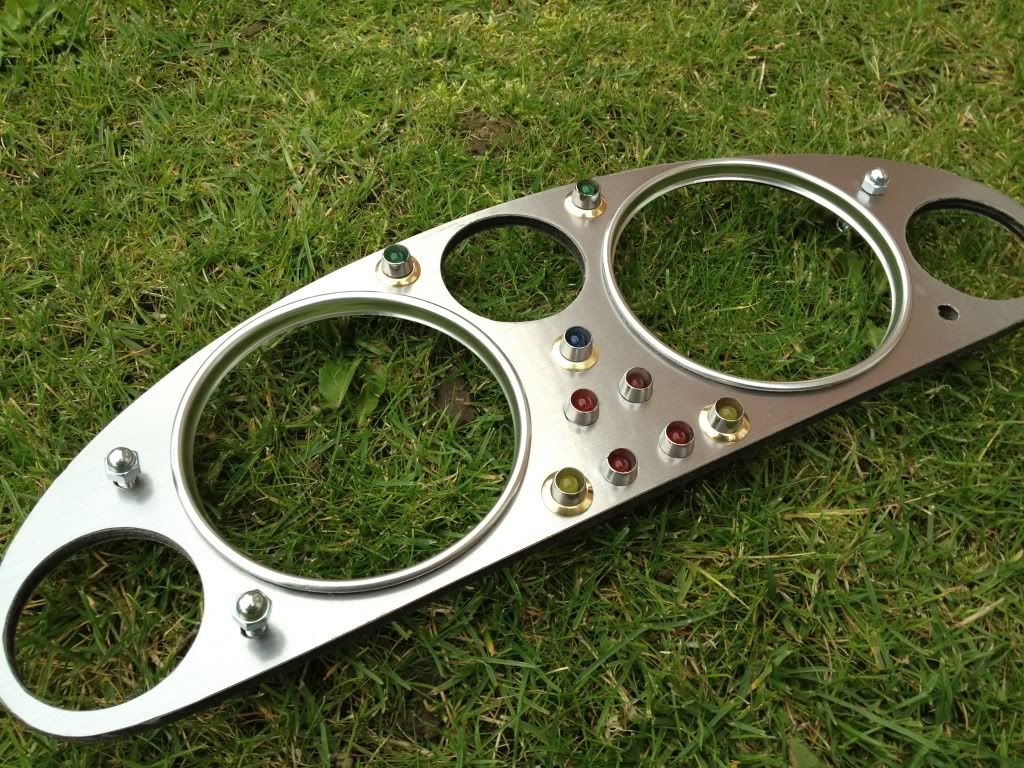 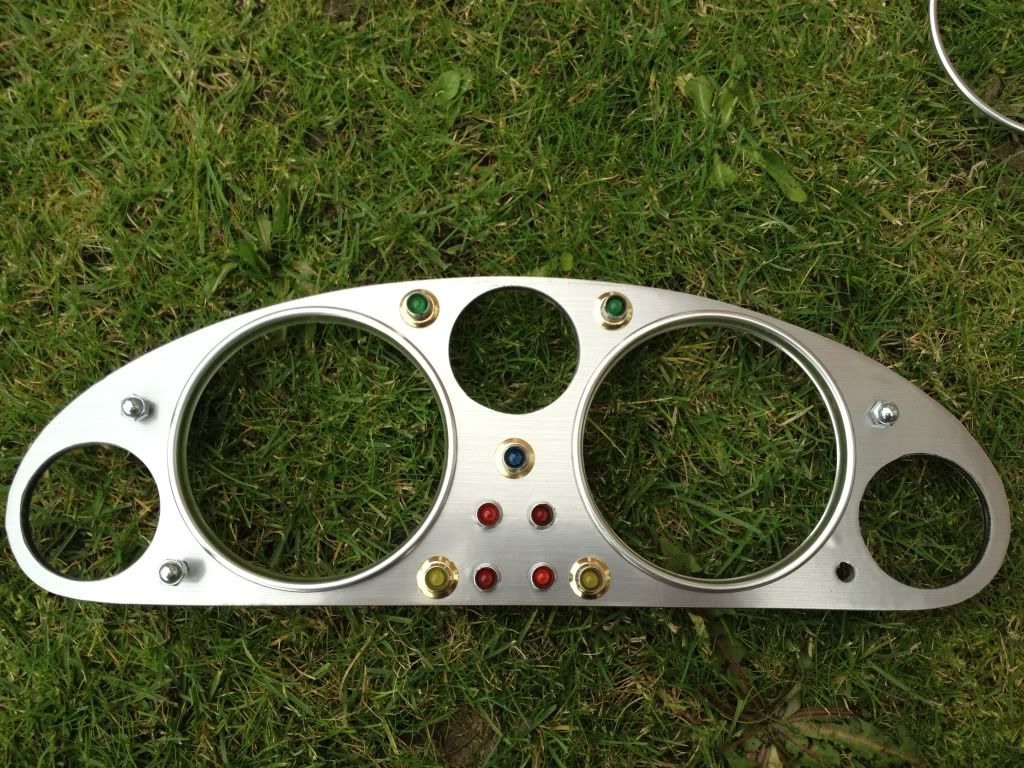 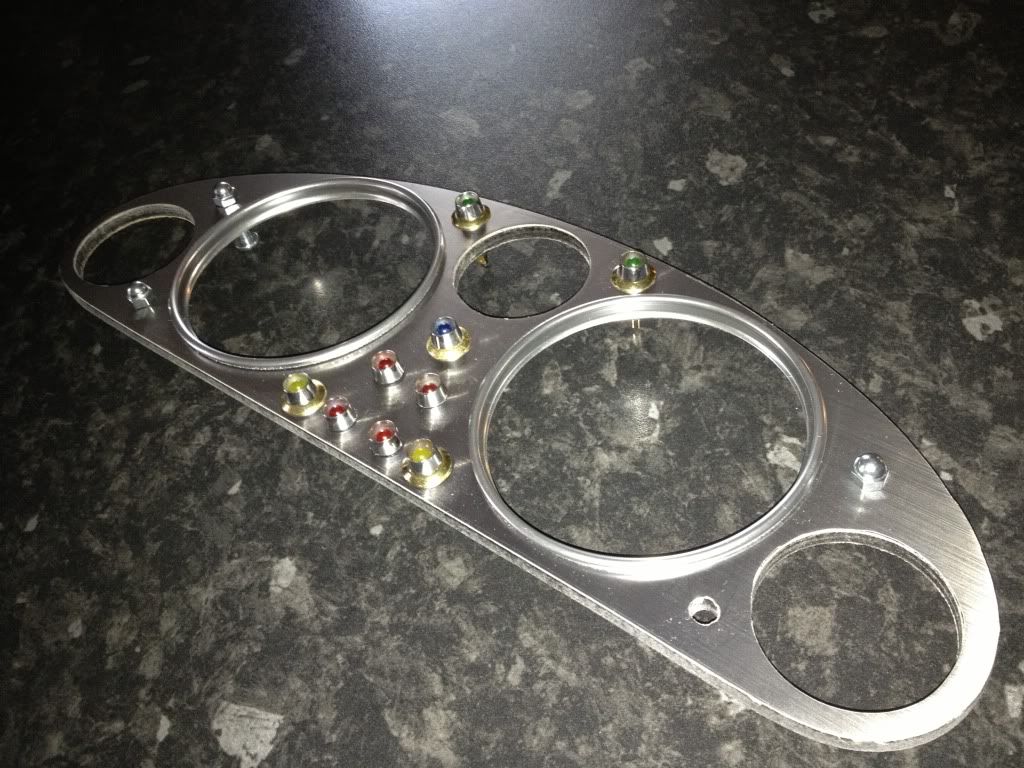 And finally test it in place....it's not bolted in place yet, so is sitting proud for now... but it all fits, now I can drill and fit properly and wire up the led's. 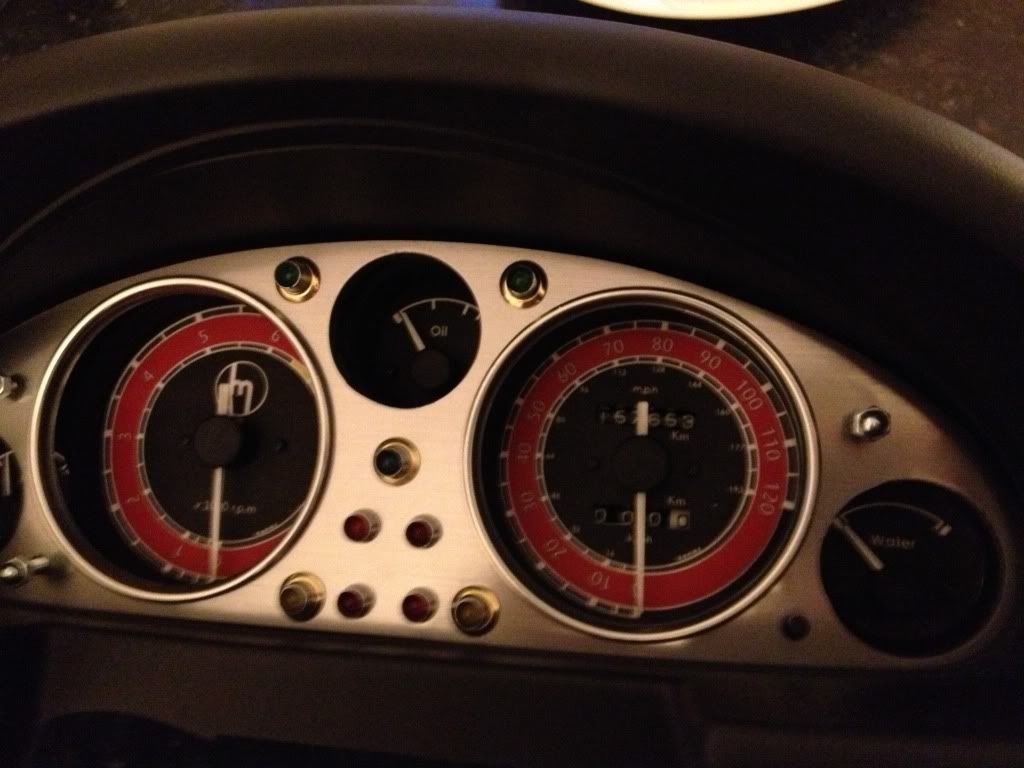  The last thing to do to these is to make the smaller rings and do the lettering on the warning lights in 3mm dry transfer letters. SO there you ahve it a cheap and hopefully effective way to make a KGWorks style cluster for approx $5 |
| |
|
|
Hammy
Part of things
Posts: 60
|
|
|
|
.....sewing machine  Then I cut some red and black leather... 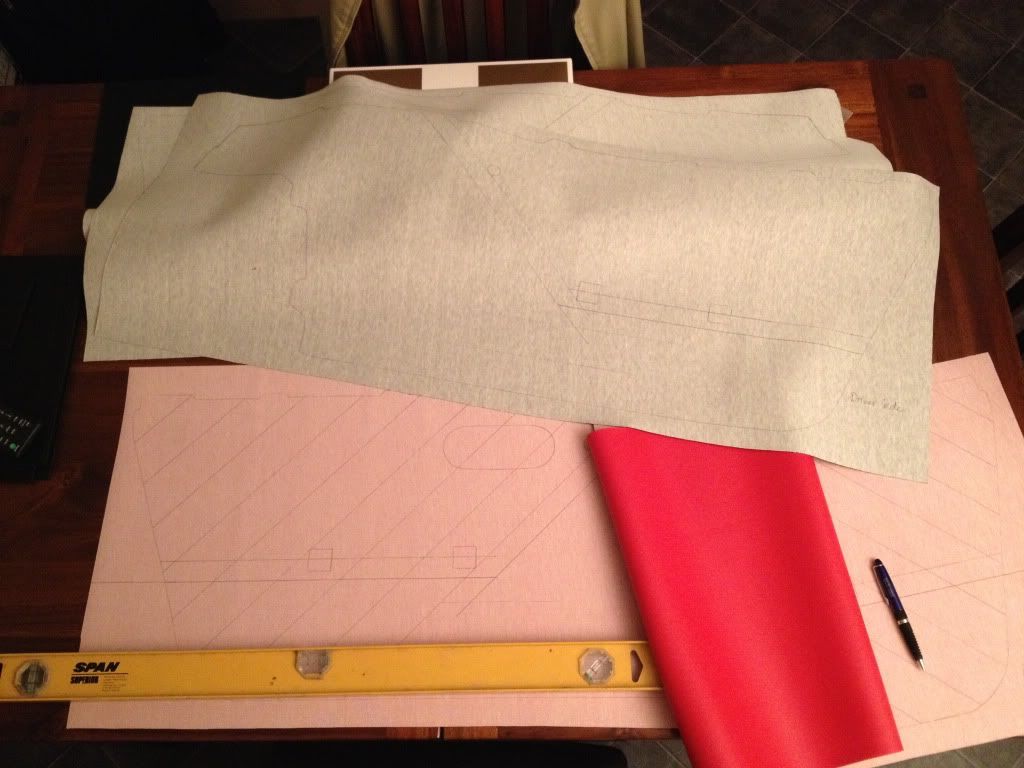 To make something like this... 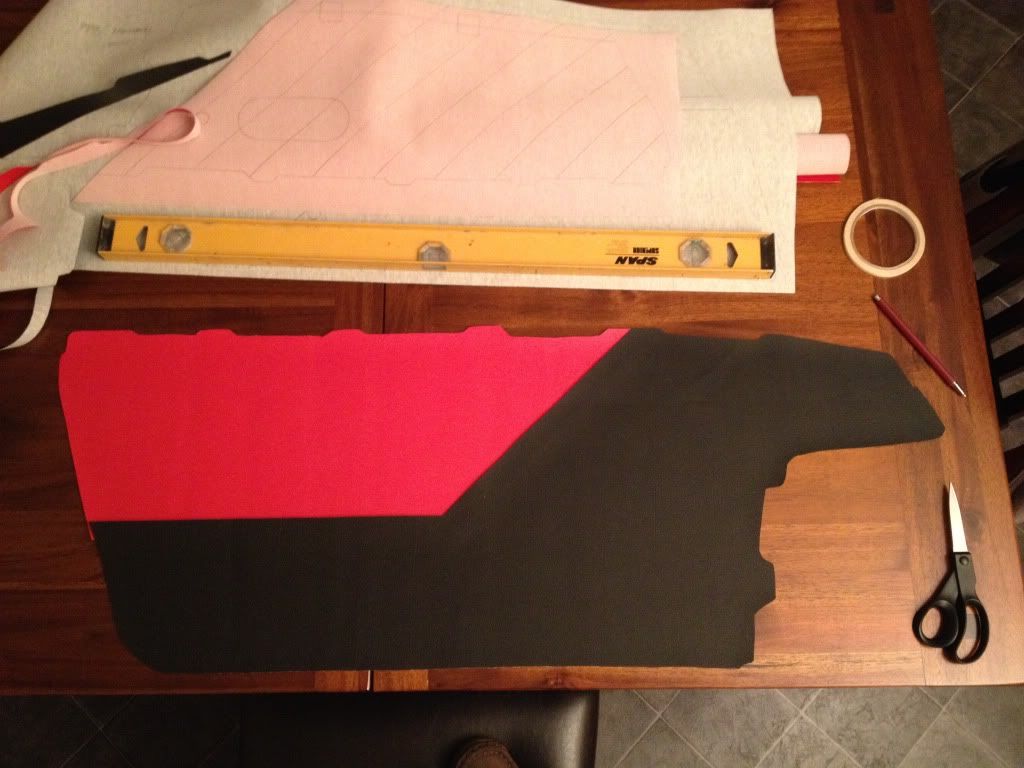 Then a little practice...  Which led to a bigger practice... 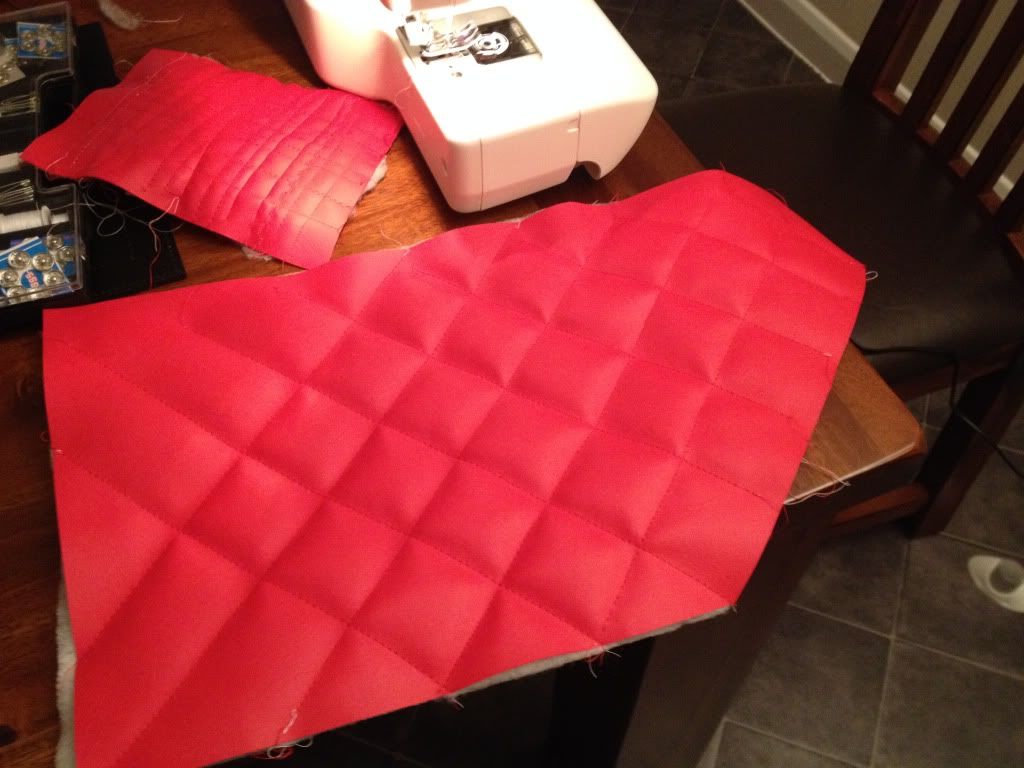 This is the first time I have done anything like this..... now I just need to build up the courage to sew the new door cards up.... |
| |
|
|
Hammy
Part of things
Posts: 60
|
|
|
|
Update 2: Started making the door cards (again). Fancied something different, just cos. SO done this... I am making a leather insert with diamond/quilt stitching.. All a bit fiddly, but pleased with it so far.  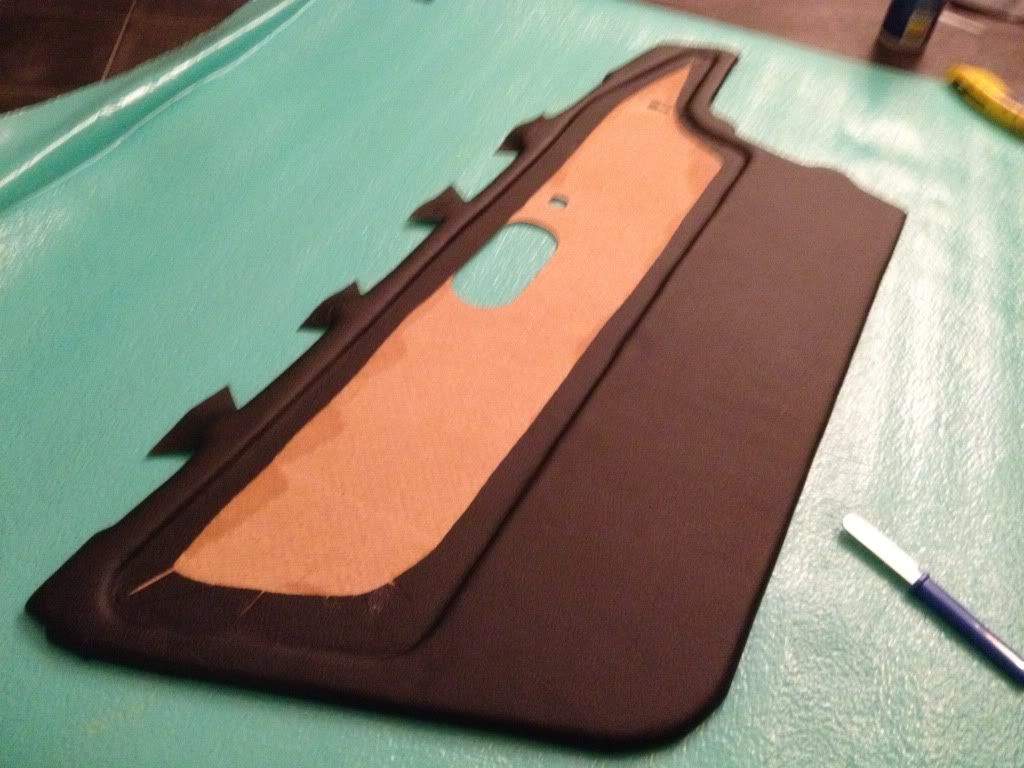 And to make sure it all lines up with the crash pad at the top 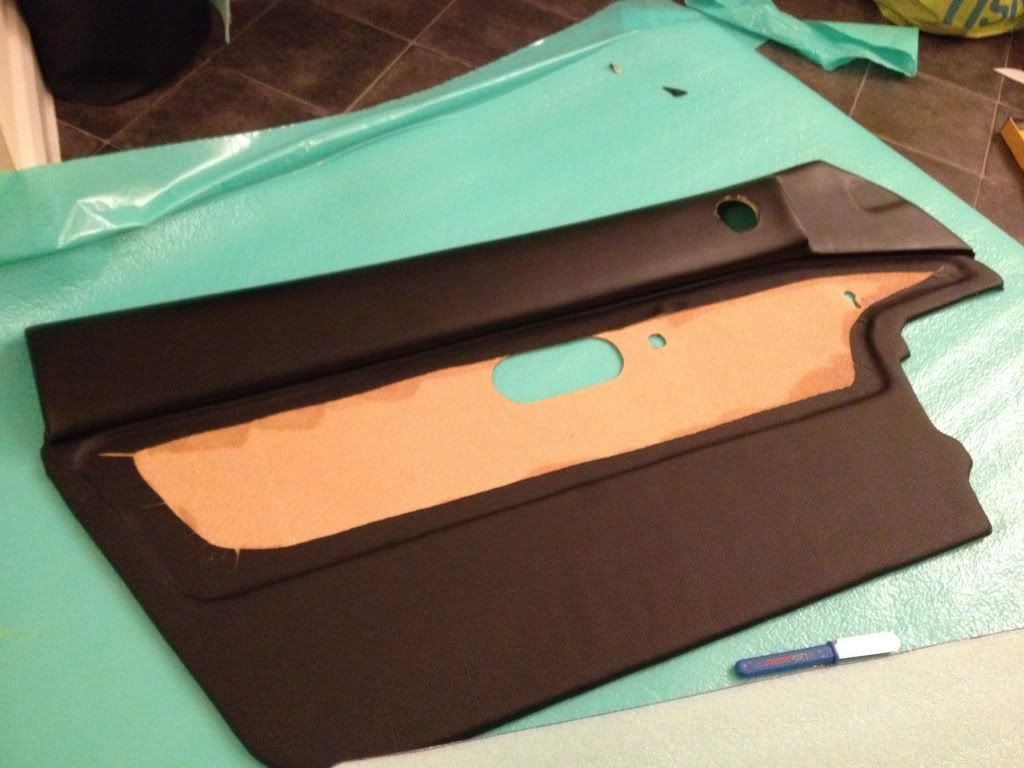 If anyone wants to know why I am doing it like that.... I did think about it. The inserts will be fastened in with velcro... it means I can make a variety of inserts if I fancy a change and just swap them around without making whole new door cards.. they should be a nice snug fit and will level with the rest of the door card. So far I am making black leather with quilt, red leather with quilt and black suede with quilt... |
| |
|
|
|
|
Hammy
Part of things
Posts: 60
|
|
|
|
|
|
| |
|
|
Hammy
Part of things
Posts: 60
|
|
|
|
...another update: First I made some new dials in plain black using a new sharper technique:  Then I did something to this, bit fiddly: Hard to tell 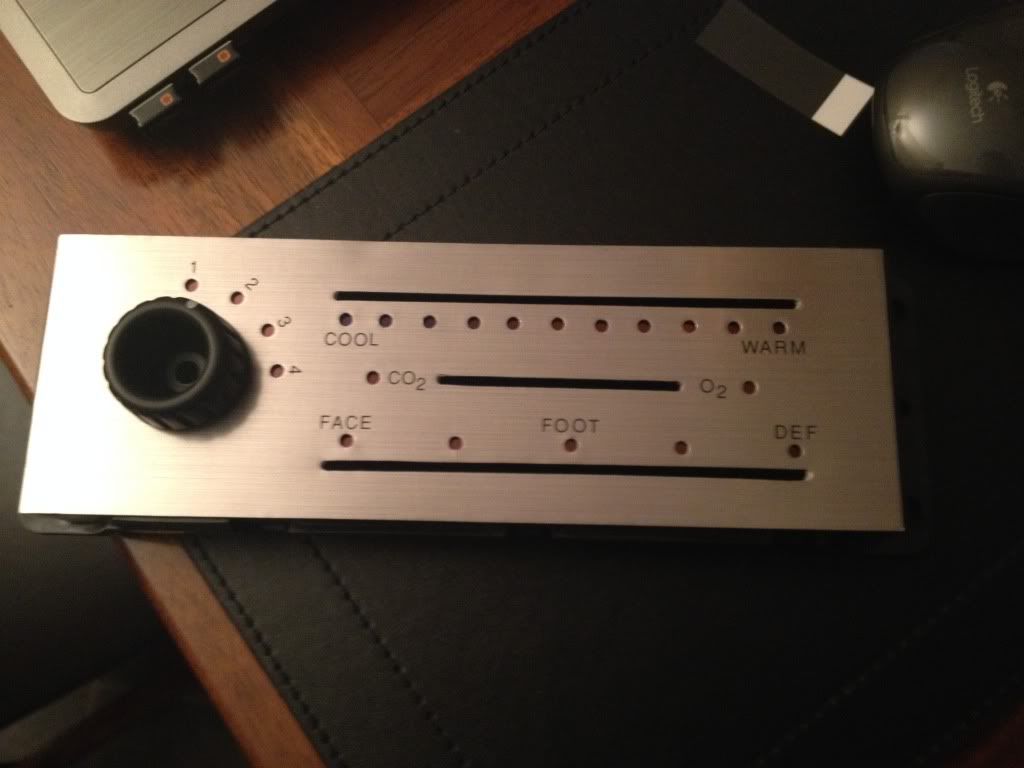 ...until the lights are turned on:  ...and this: My own worst enemy... not happy with layout so did it again. Better now...tempted to make the HVAC panel.....a geordie version now 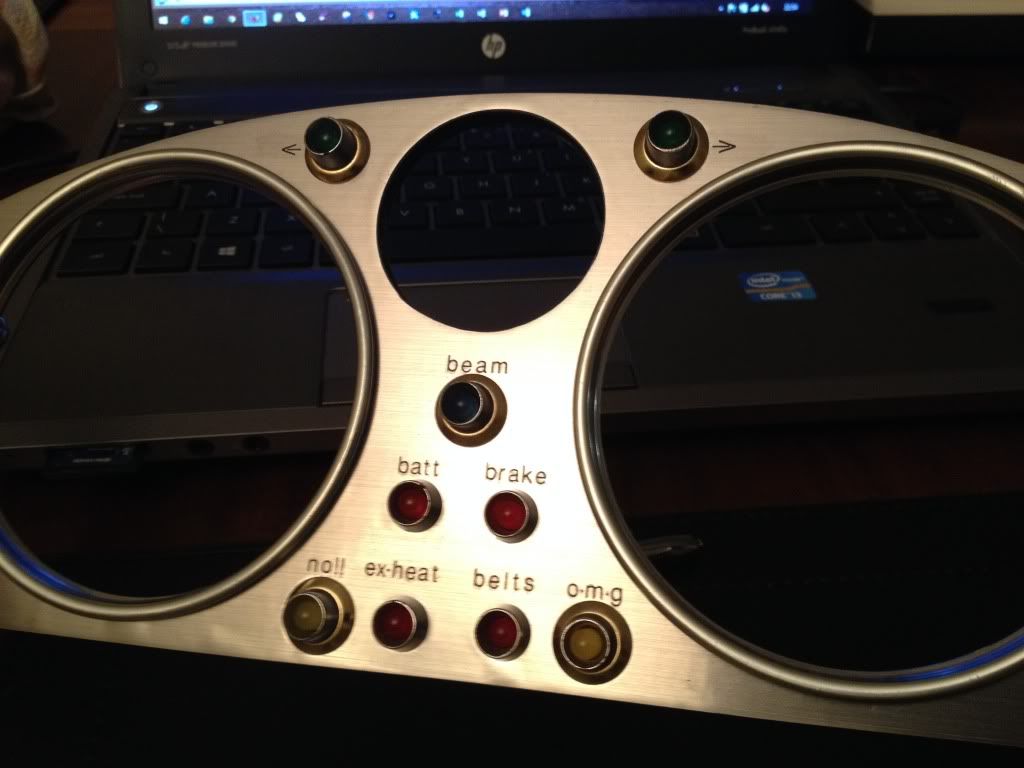 |
| |
|
|
Hammy
Part of things
Posts: 60
|
|
|
|
Oh and one last one.... sorry bit haphazard the last few posts, but think we are up to date now.. Been stuck at my screen with work, so whilst I felt the need to do something car wise, I knocked up some new gauges tonight.... much more vintage. These ones going to go in C-19: 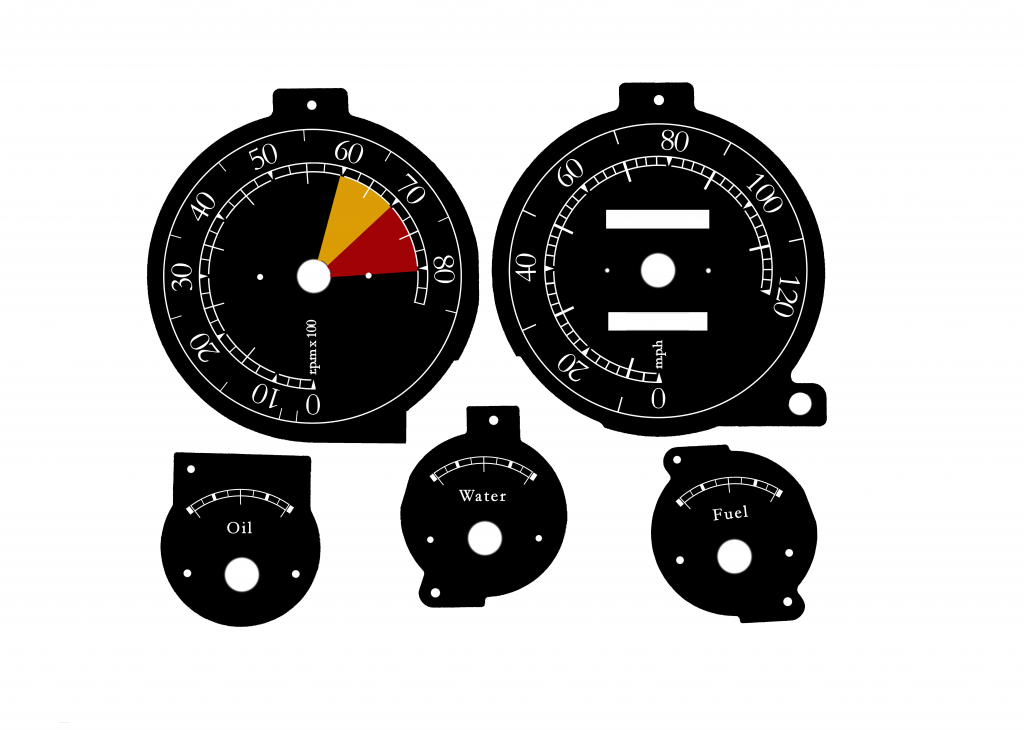 Made door cards with my new bargain vintage door pulls. The quilted bit is velcro'd in - means I can make several differnet inserts...so far making the squares below, same in red leather, diamond stitch in black and grey suede  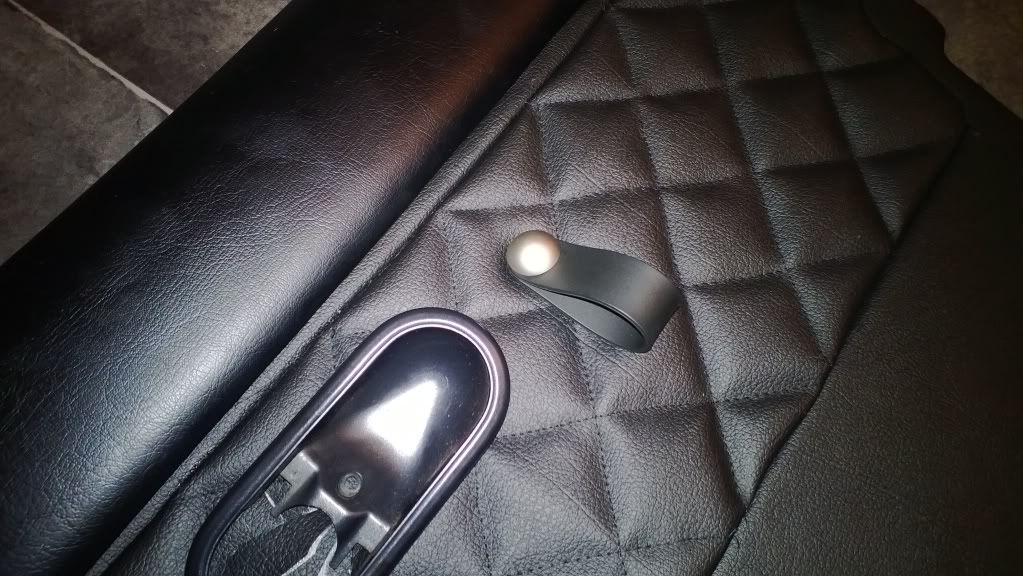 Right then...that previous attempt above... not at all happy with it as the edges were just not straight enough and it didn't sit right... but easy enough to take off and do a new panel. Trial and error I guess...would rather show my cack handedness than not... so that insert is going in the bin So changed the technique of manufacture and now I am happy, so all the other inserts will be done that same way now. This time, I sewed the leather with just wadding backing...in a diamond pattern this time and this was then all glued to a 2mm polycarb panel (lexan) in the same shape. So it is nice and stiff. Velcro on the back and because it is stiff, I don't need as much.... SO marked out where the velcro goes on a template and can now make all the other panels ready to chuck on Much prefer diamond pattern...I also used a thinker stronger thread. Finished piece... lines are very neat now and I am actually quite pleased with them sitting a little proud. Time for a beer I think  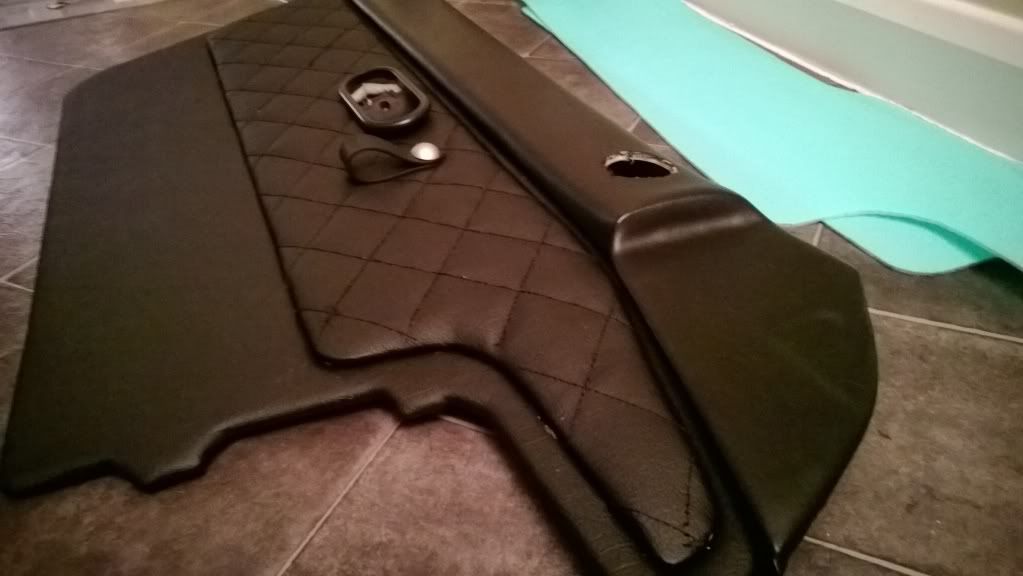  Hmm.. a little pulled thread...will sort that. 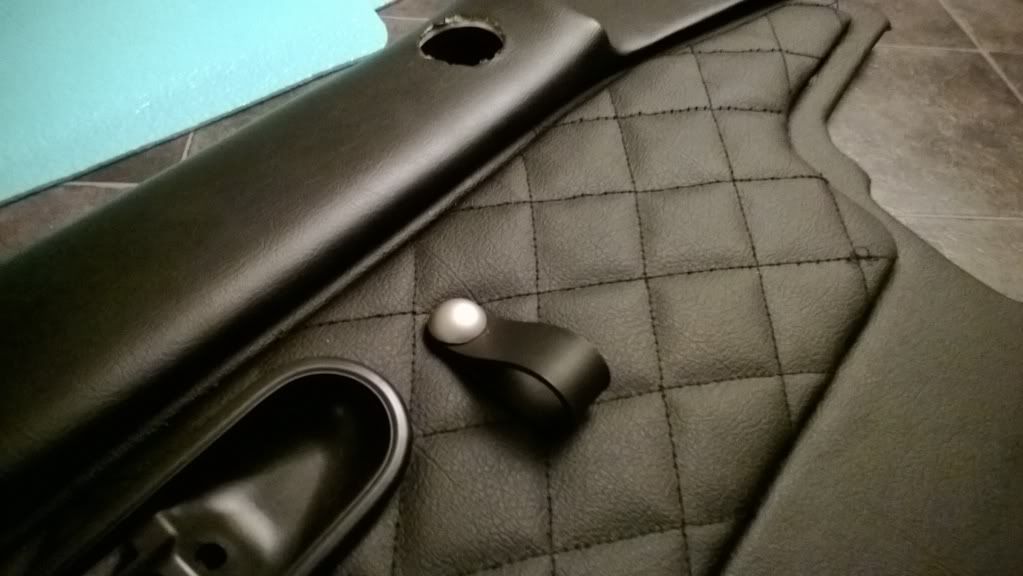 |
| |
|
|
Hammy
Part of things
Posts: 60
|
|
|
|
These...needle caps. Lovely aint they :yes: Expensive too :yes:  Let's make some :thumb-up: First up gonna need some foil tape and blue tack:  Then we gonna need an electric screw driver...not a drill cos that is too fast: 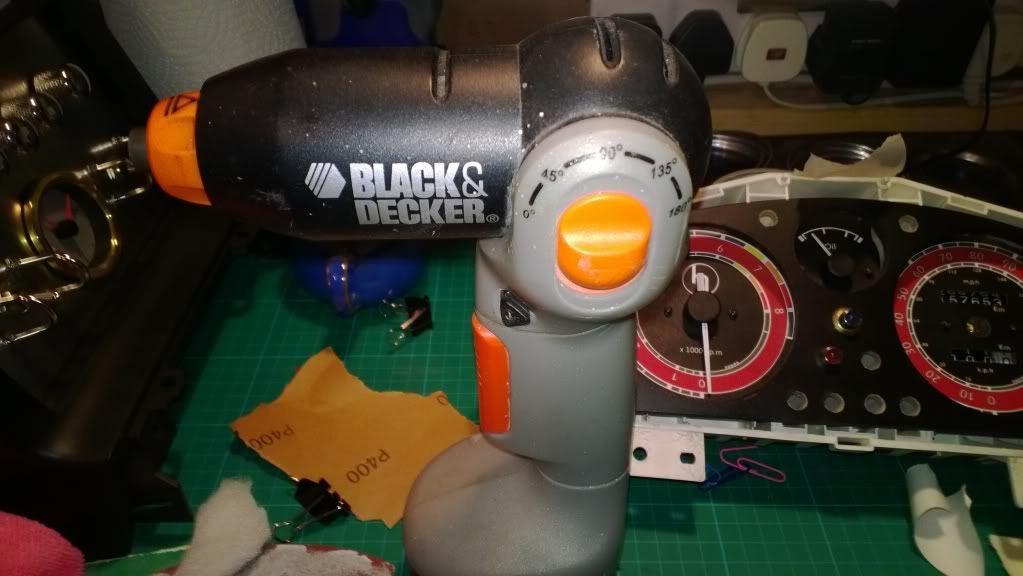 Cut a section off: 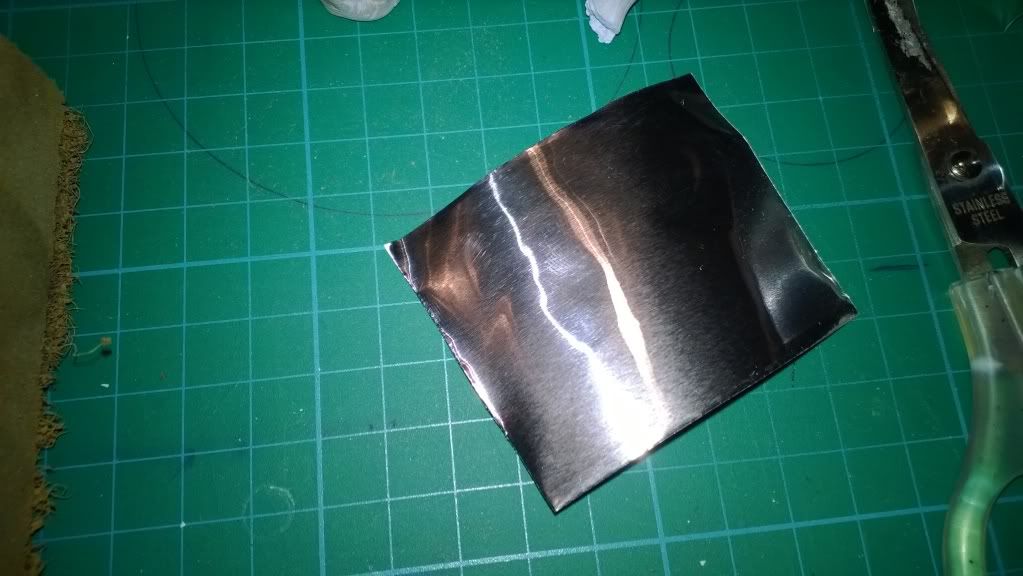 Cut into a circle bit larger than the black plastic cap on the needle, Press down and with a sharp knife trim off all the way round just above the pointers. Next, put a blob of blue tack on the back: 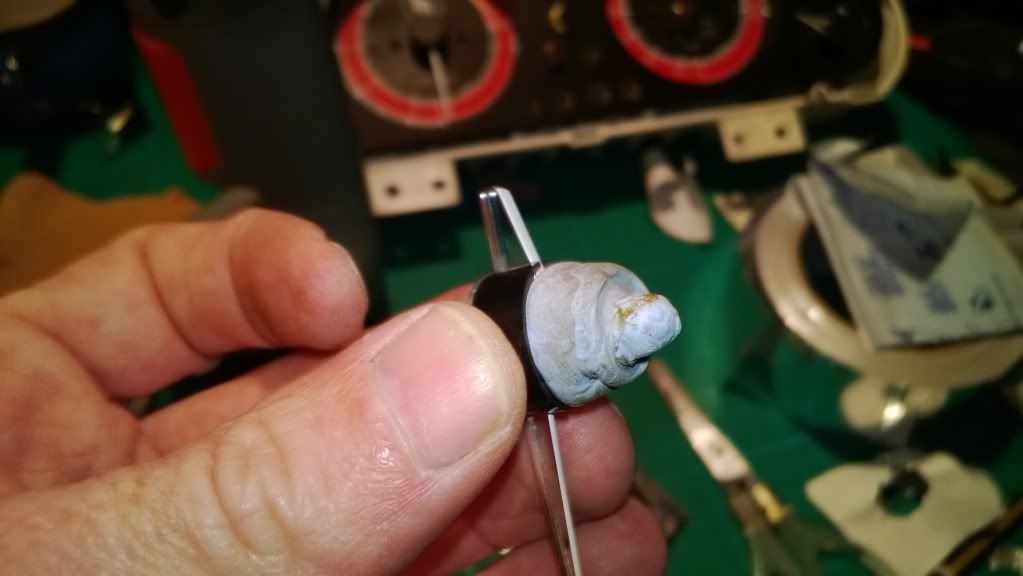 Now press it into the end of the screw driver. Press the trigger and check that it looks virtually centred... adjust accordingly: 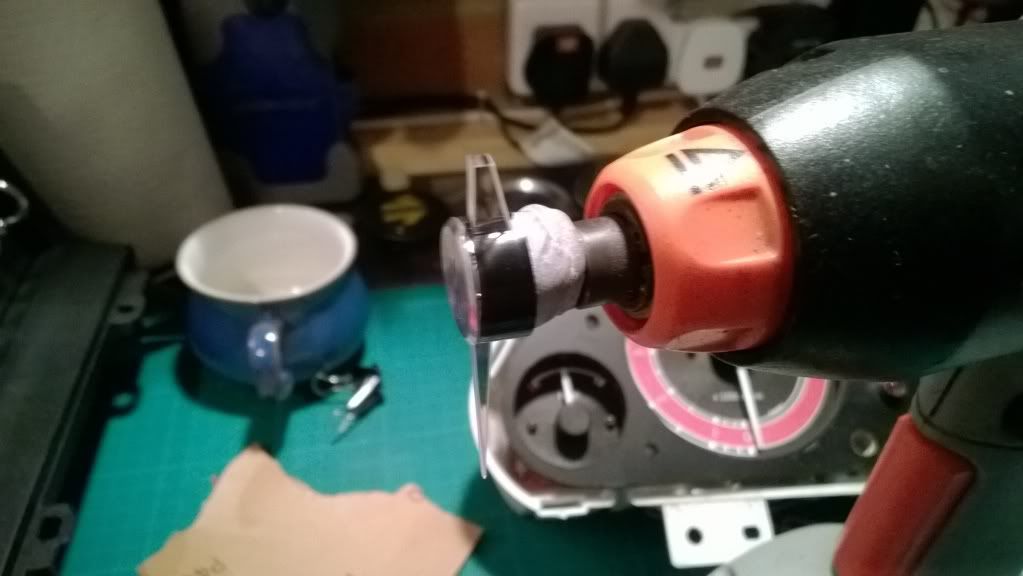 Here we go... get a scotch pad and press the trigger...slowly-ish. Keep checking.  It takes about 20 seconds. This is why we use an electric screwdriver as it creates that turned look and importantly, it is centred:. When satisfied take off...and check  Put a tiny bit of metal polish on a cloth, put needle back in screwdriver - holding the cloth agasint the foil, press teh trigger... as it is real metal foil, it will turn black: 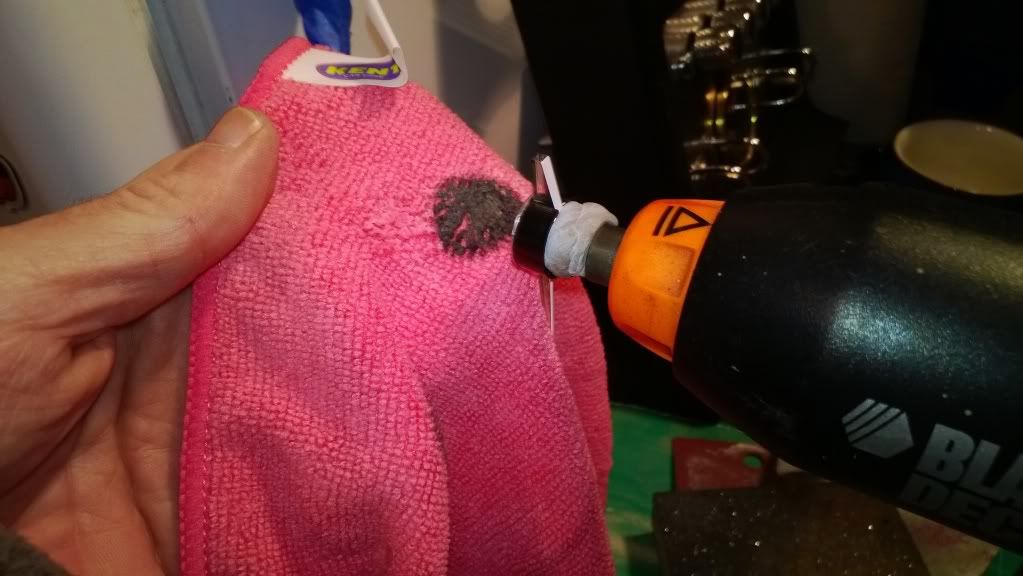 Takes about 20 seconds. Now use other parts of the cloth to buff up. Takes about 30 seconds:  Done :thumb-up: Admire your handy work 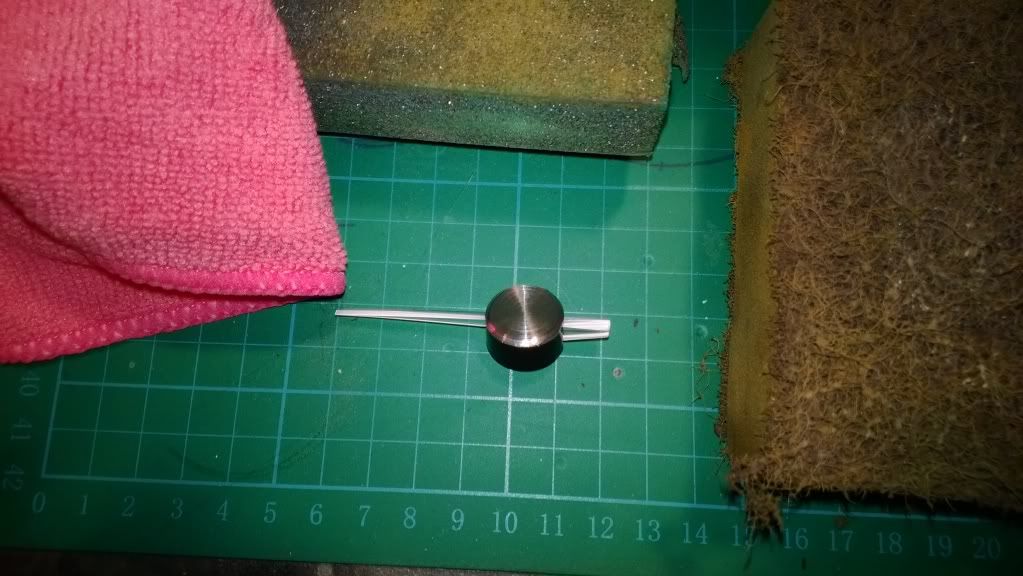  Put on cluster and enjoy 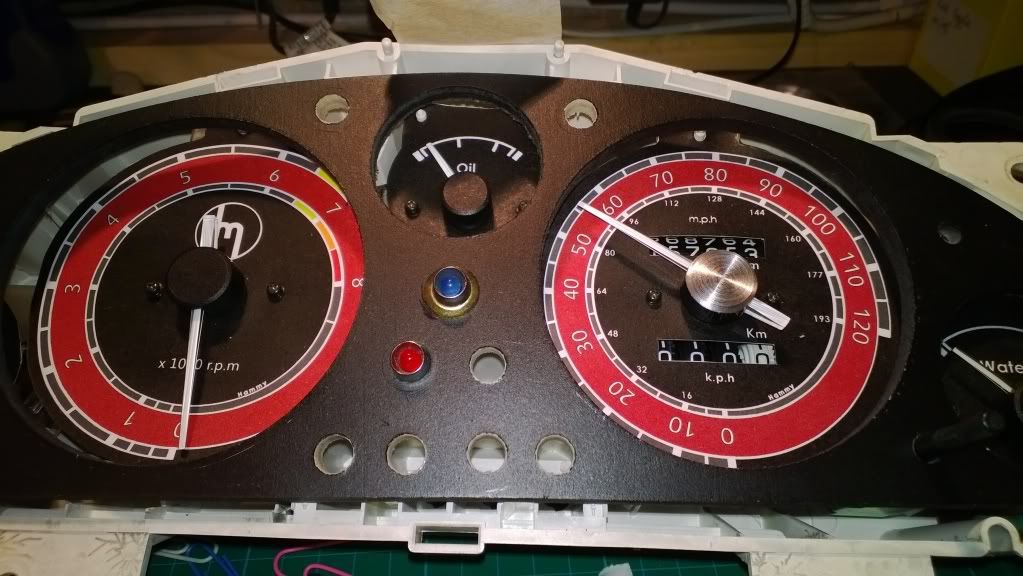 Now do the rest :thumb-up: That is where we are up to right now... will start putting suspension back together...then going to start respray. |
| |
|
|
Hammy
Part of things
Posts: 60
|
|
|
|
Just going to backtrack a little as this is something I should have posted earlier... To get rid of the rust that was on the brake calipers when I stripped them down, I decided to make a way to get rid of it all using a fun way...to save all the scrubbing, hacking, banging etc.. So start with one rusty part, caked and baked with brake dust..(take note also of the brake discs) 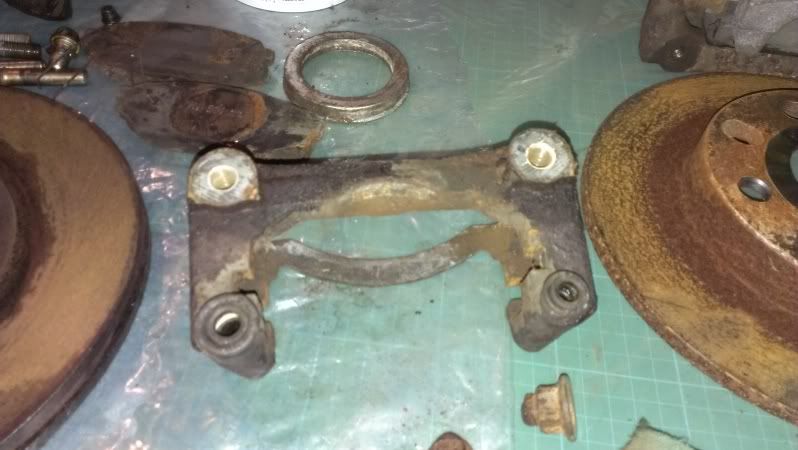 Get some of this: 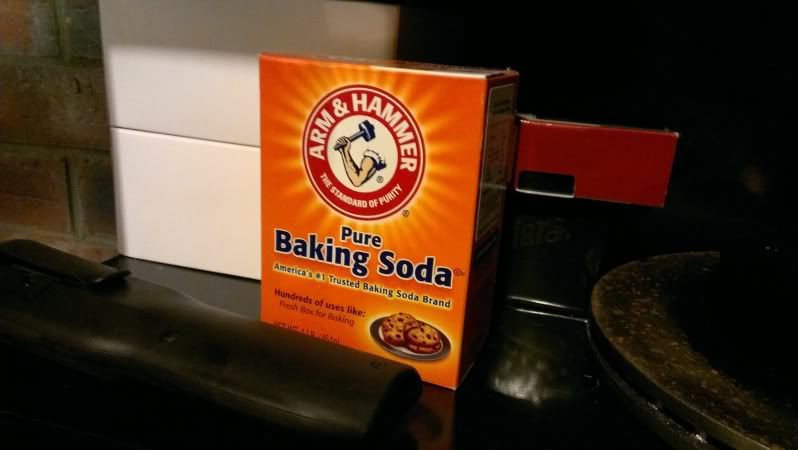 Get a bucket of water, a battery charger, a sacrificial piece of metal - the bigger the better and dissolve as much baking soda as you want in the water: 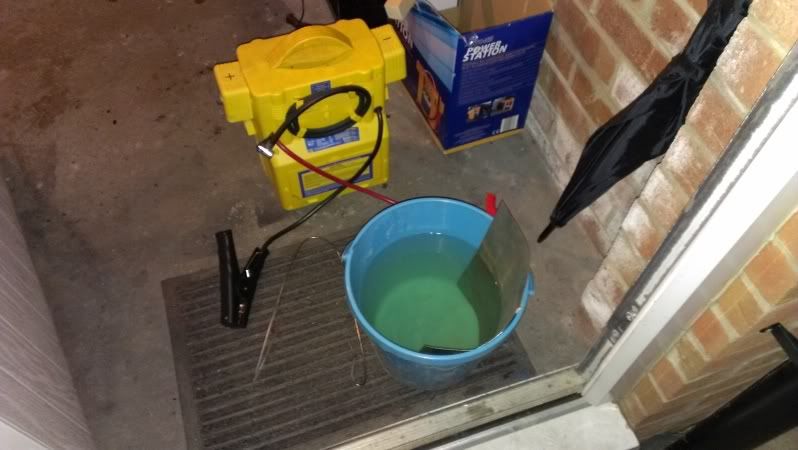 Connect the POSITIVE lead to the sacrificial metal and the negative lead to the part you want to de-rust - but way of a hook and suspend the part in the solution: it will start to fizz immediately.. 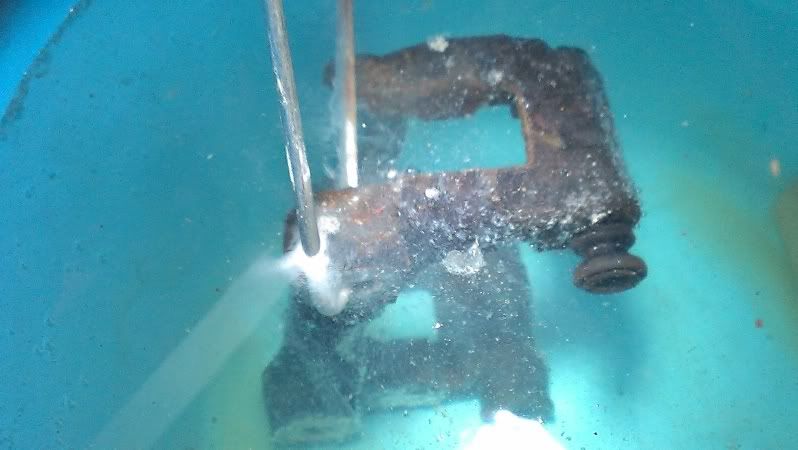 After a few minutes, the solution looks like this: 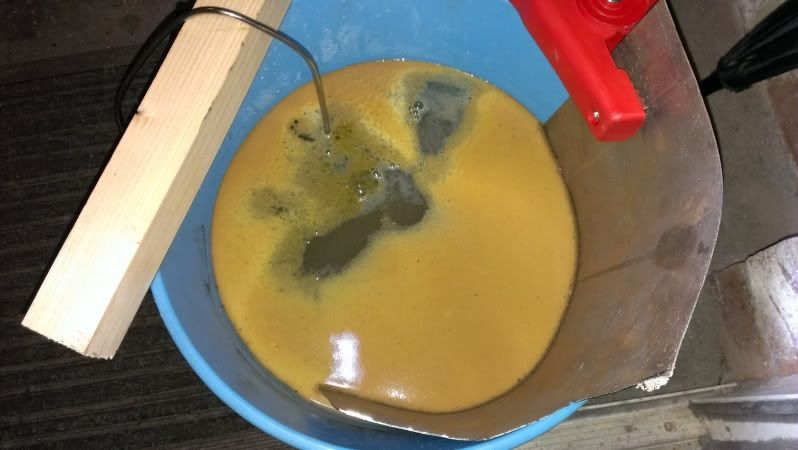 After 20 mins...the rusty part now looks like this: 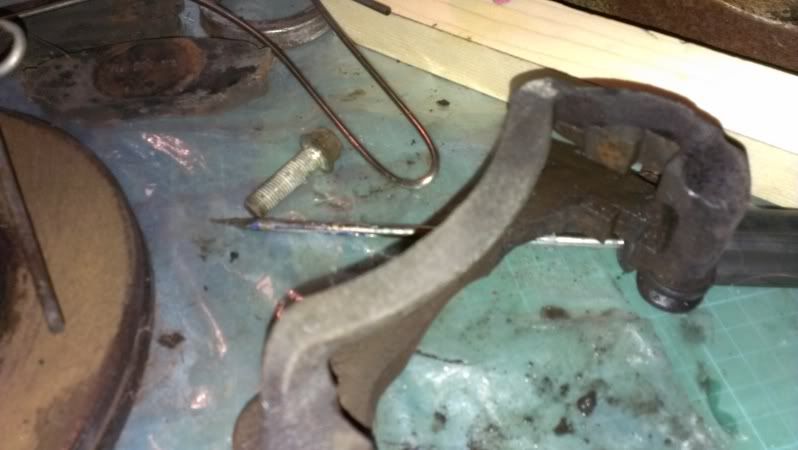 Dry it off and even with a bit of kitchen roll, wipe off any black oxide on the surface - it literally just drops off... now you can paint it accordingly and the good thing is, rust should not form again unless the painted surface and zinc primer is broken 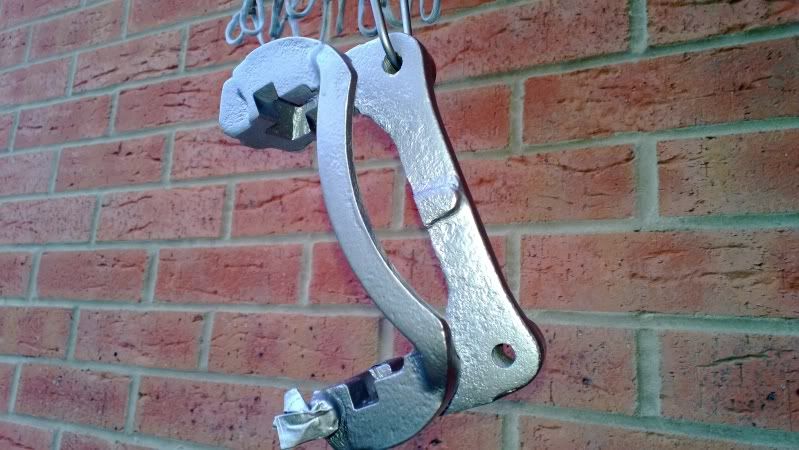 ...and with caliper which was done the same way:  Now remember the brake discs... I did them also...good as new  It's fun as well... I also did a lot of bolts like that by suspending them in a metal cradle and letting them cook I also made use of a bigger bucket and added metal all around the edges and suspended parts in the middle. It worked quicker this way as electrolysis works in straight lines. Plus it is more thorough. You can't damage any parts as once all the rust is removed, it just stops working... |
| |
Last Edit: Jul 1, 2014 14:25:32 GMT by Hammy
|
|
Hammy
Part of things
Posts: 60
|
|
|
|
Ah, right... just remembered. Here is another use for baking soda. I used to gently clean some bits.... I did this because I was after a super smooth finish and given baking soda is really fine and not harsh, it's perfect. Take one pack of baking soda: 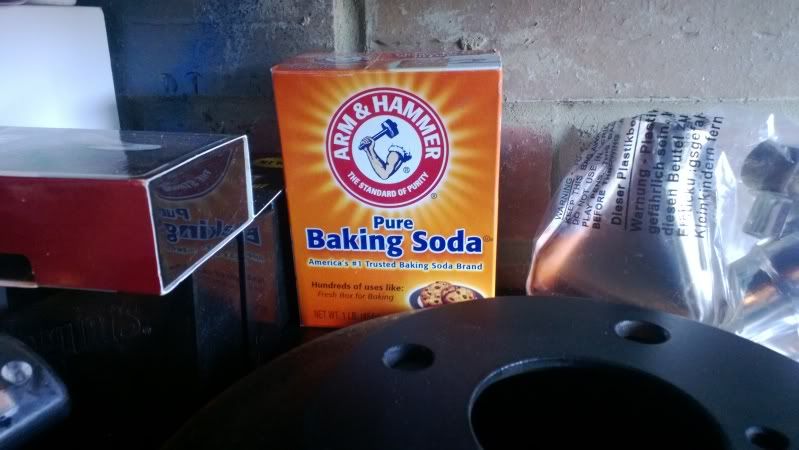 Will need some rubber tube, tape and an air gun for compressor: 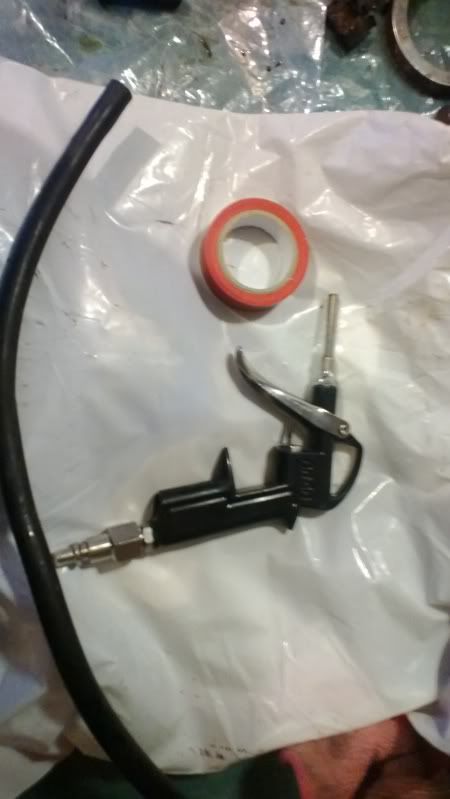 Cut a little slit about 1 inch from one end of rubber tube: 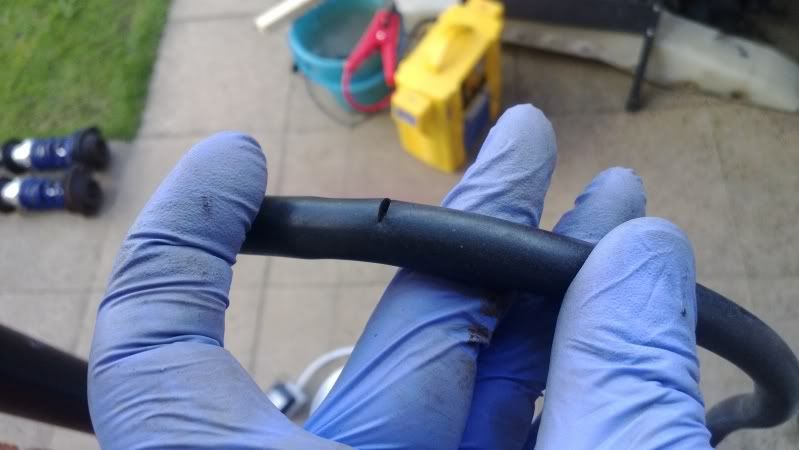 Tip of air gun will go in this: 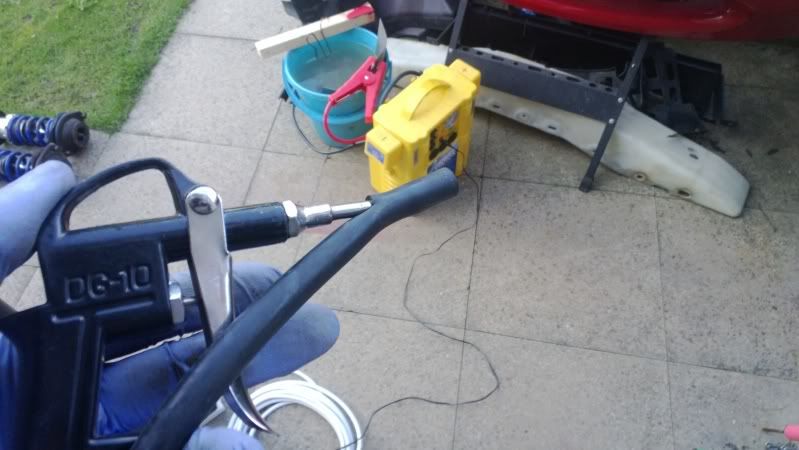 Use the tape to seal the slit and tape it to handle of the air gun: 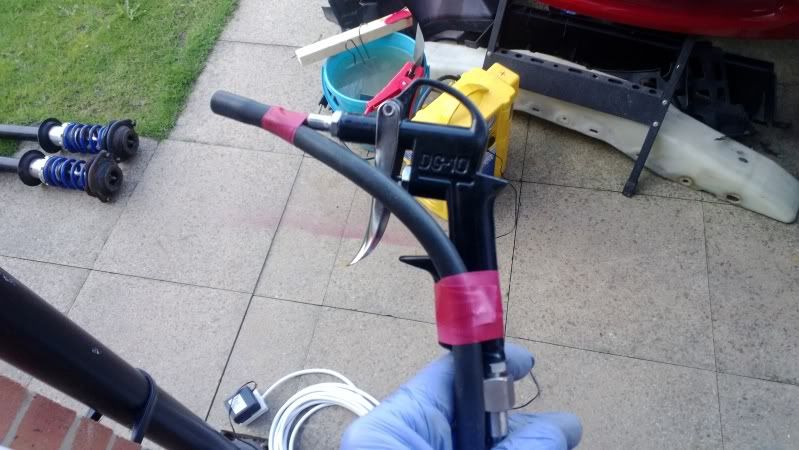 Cut the other end at and angle and about 6 or so inches of tube remaining. This tube will go into the box of baking powder - it's angled like that so it doesn't clog up: Now you have made a venturi 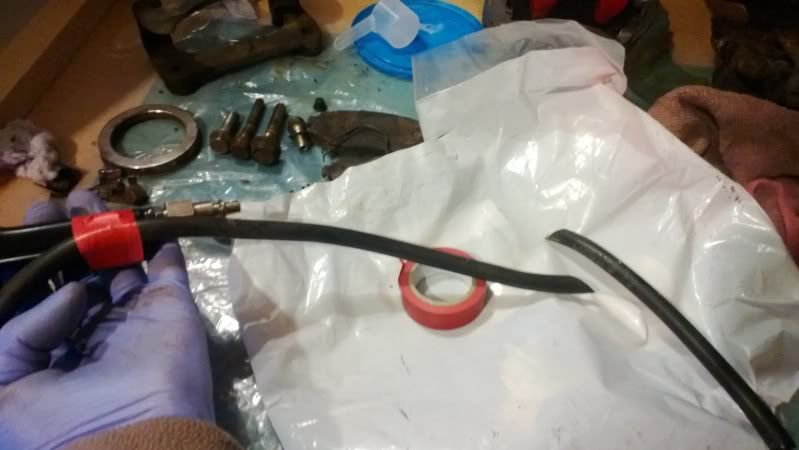 Attach air hose and plug into compressor: 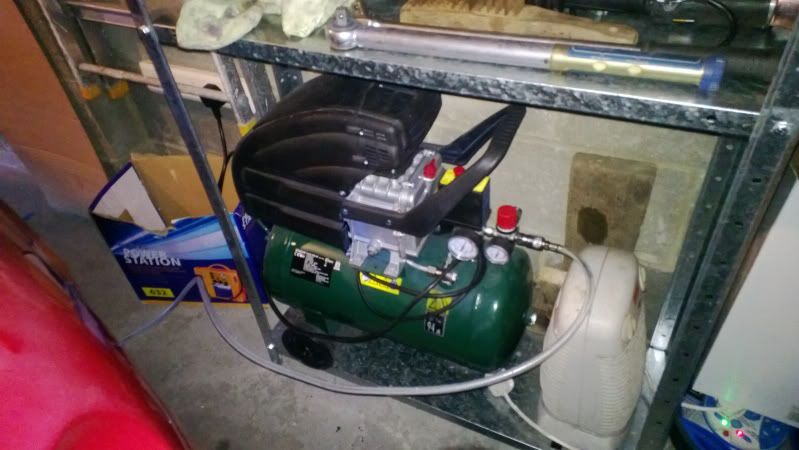 Now you have made a super fine shot blaster A pack of baking soda costs about 30p This is what I wanted to gently clean away - the corrosion on the wheels: All nice and safe and a perfect finish to pain on So tested...this:  ...to this:  This: 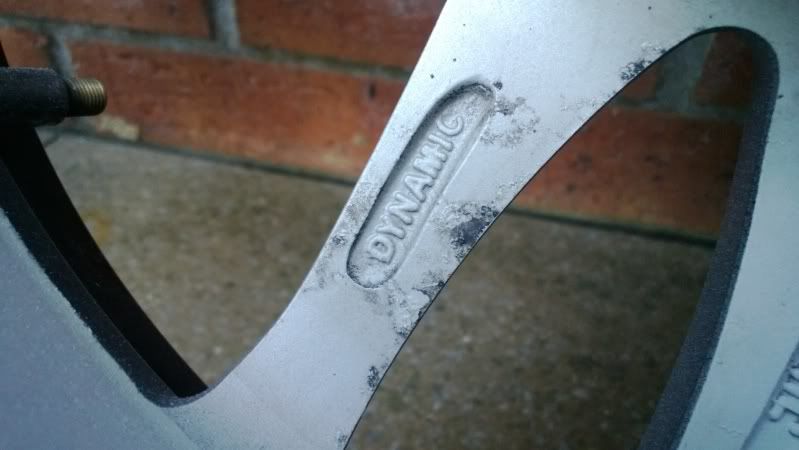 ...to this: 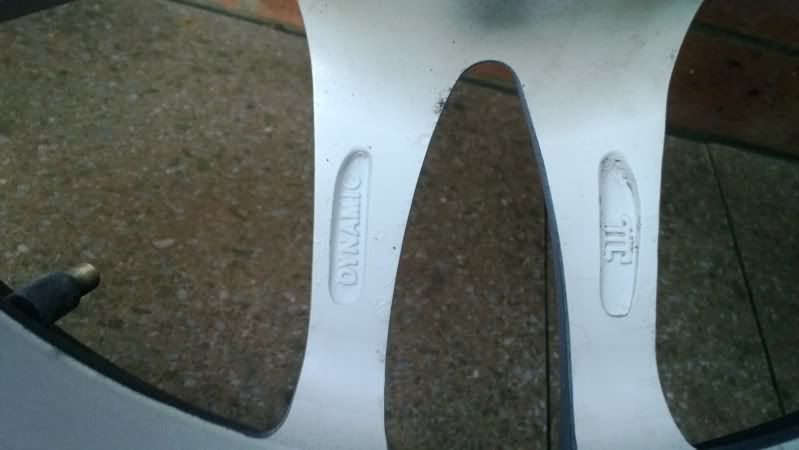 Now of course I could have sanded, but I wanted no marks at all... and doing it this way left no marks - just a perfectly flat and clean finish....and no need for paint stripper. So I did all the wheels like this front and back |
| |
|
|
Hammy
Part of things
Posts: 60
|
|
|
|
Hello. Long time since update, but work has been hectic. I have done a few things and will backtrack to bring it up to speed. But to bring it immediately up to present day, I did this - finishing at 5am the other morning. Continuing with the theme of not buying anything Turned the standard Momo wheel which is a bit flat and big looking: 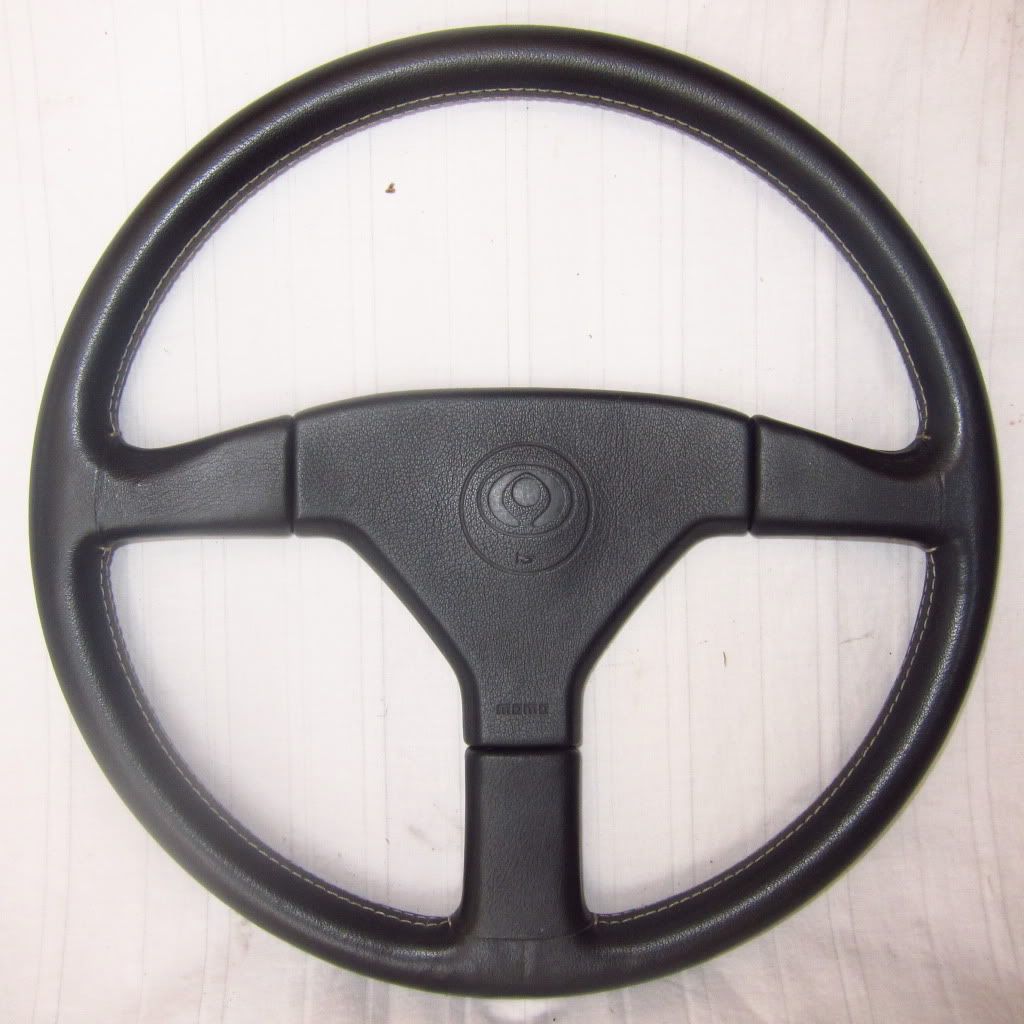  ...Into something unique, modern and vintage (by using heavy grained leather and splines). It gives the illusion of being smaller by accentuating the lines of the dish to make it also appear deeper. It was by careful shaving of the foam spokes, and cutting splines to give that neat finish. The rim itself is now a lot more chunky to hold and the spokes for thumbs I spent ages shaping till they were really comfortable and much thinner. 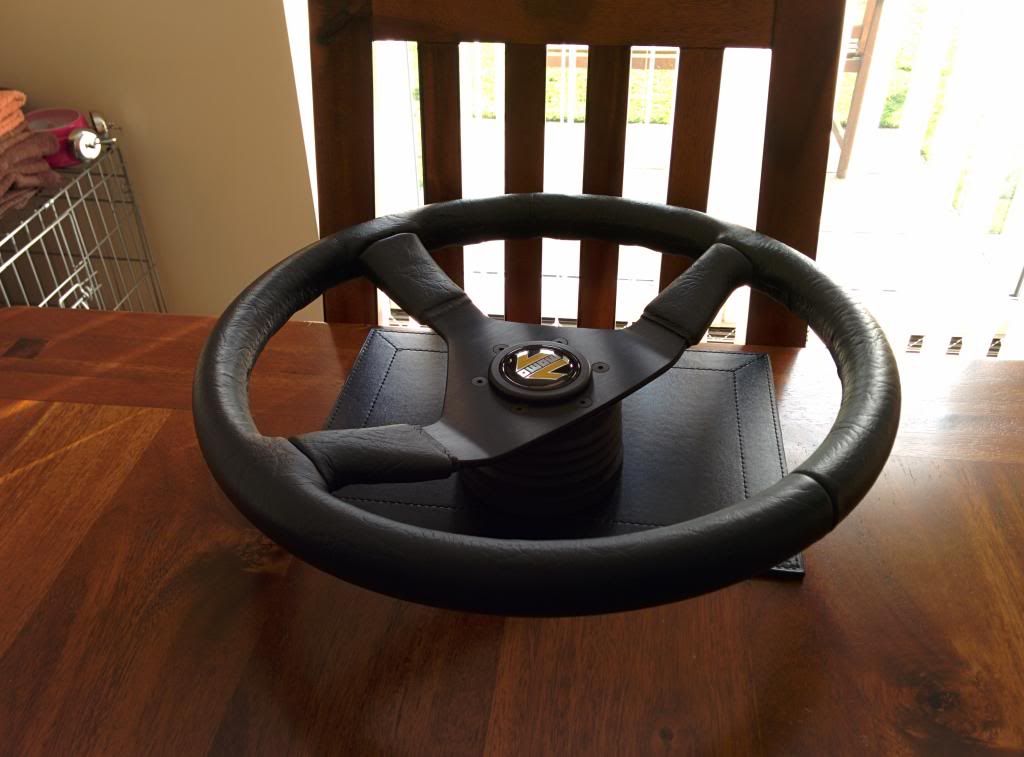 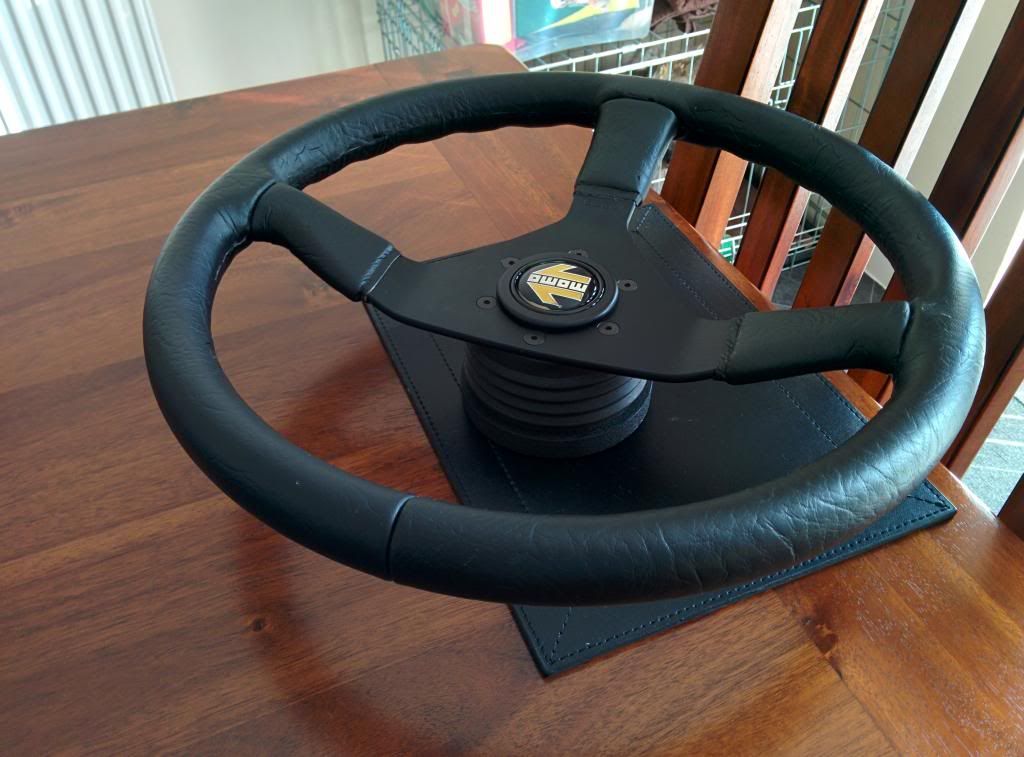  |
| |
Last Edit: Jul 1, 2014 14:27:49 GMT by Hammy
|
|
Hammy
Part of things
Posts: 60
|
|
|
|
Oily updates... I got to spend some time in my cage today. In fact been there all day and most of the evening. Lots of jobs done. Makes a nice change to spend some time back on the oily bits and spanners. The other day I had the car started for the first time in nearly 16 months. Tappety - and a little too loud on one of the hla's I figured. So, lets strip it down. I needed to do it anyway as I suspected the cam seals where leaking. As I could'nt get the cam caps off, I had to resort to doing this to get the cam seals out so I could them get the cam caps off: Worked a treat...drill a small hole - very slowly just to break through the metal and put a self tapper in: 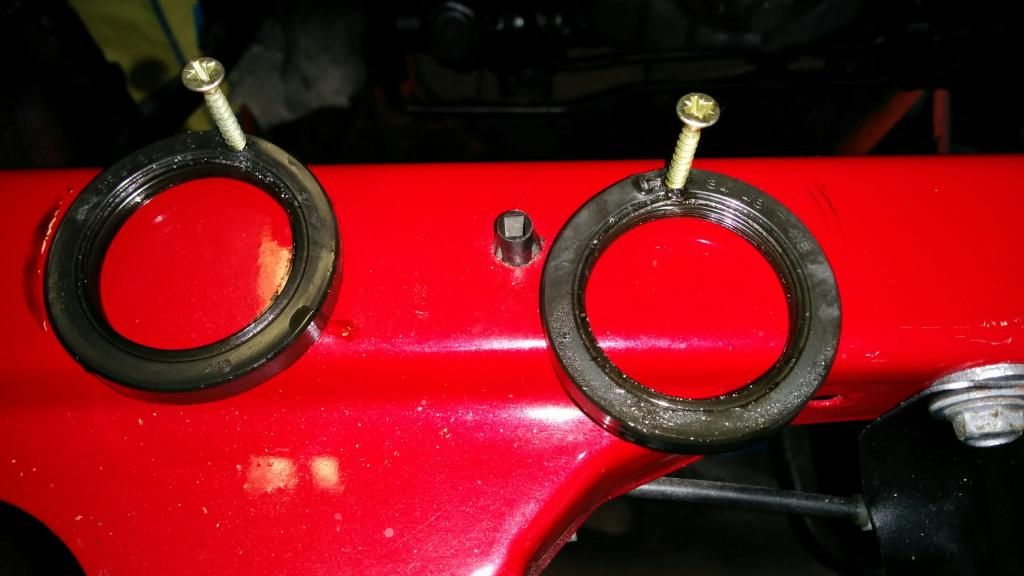 Cleaned the gears up and gave them some gold treatment 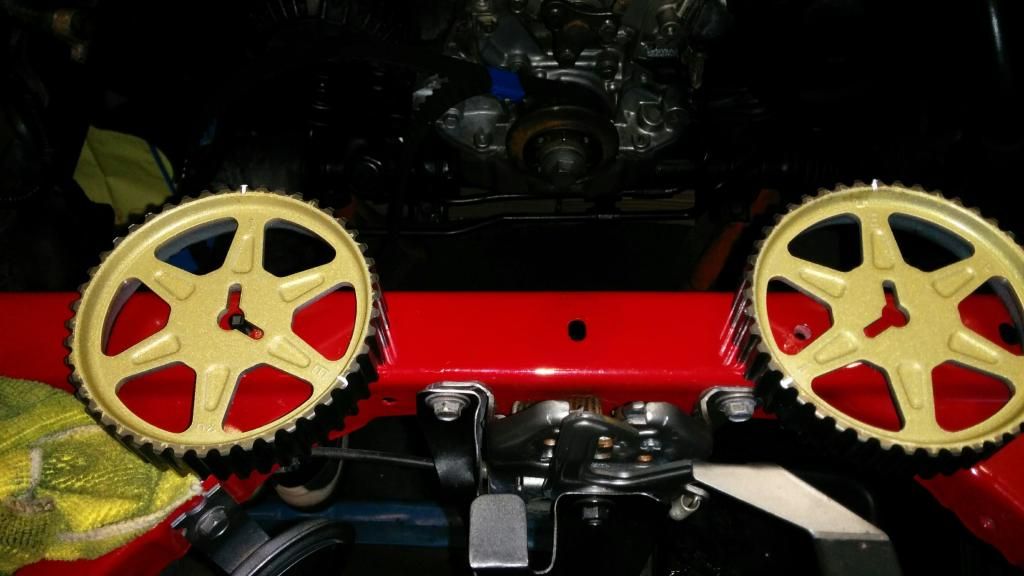 Head looks good for 169K Km. Sorted out the mess that was the front of the engine - all covers have been sanded and painted and timing marks painted.... Pulleys done - spit and polish. Water pump and timing belt are already done, so not replacing them. 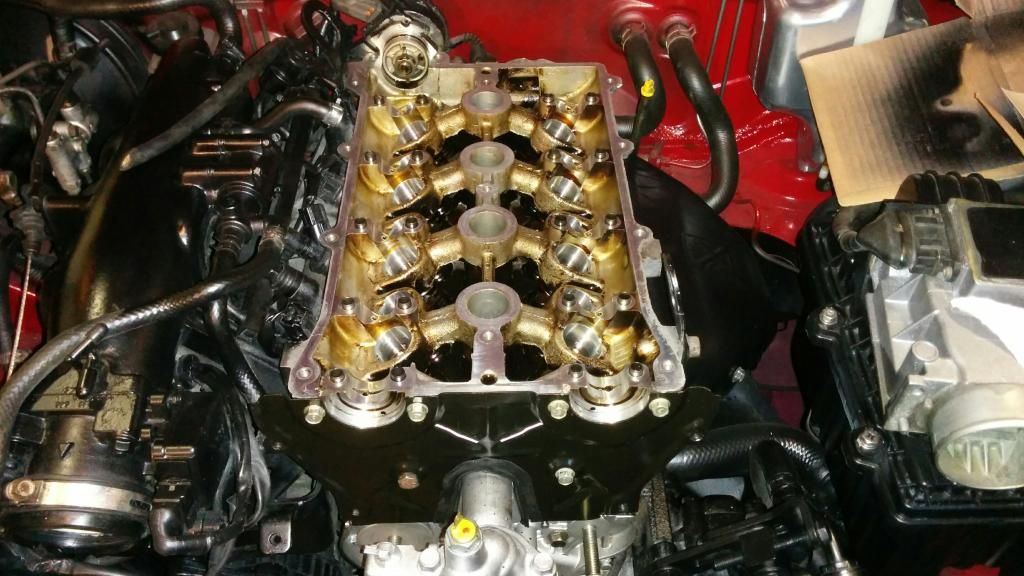 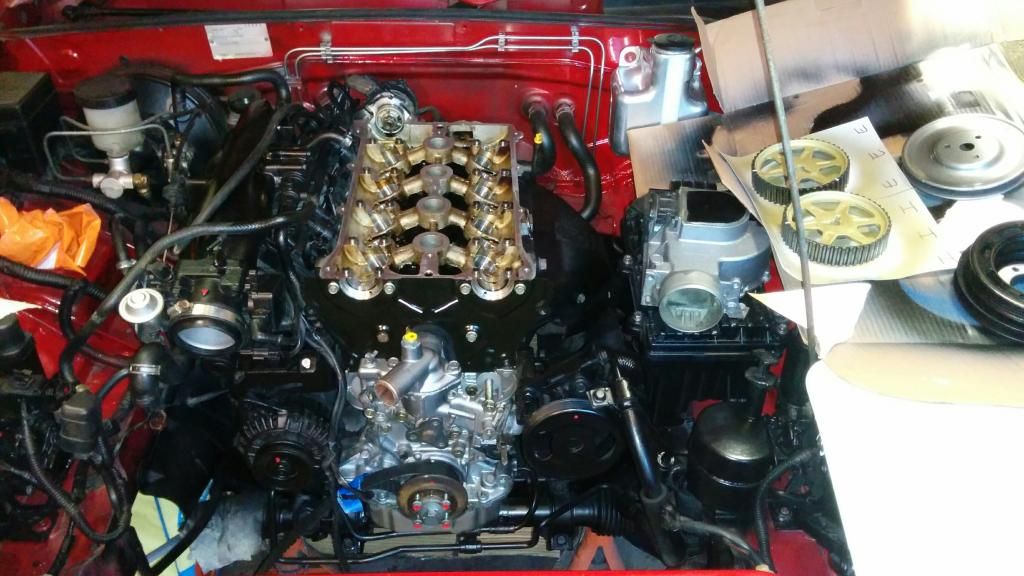 So onto the HLA's..... |
| |
|
|
Hammy
Part of things
Posts: 60
|
|
|
|
...HLA's. Well once removed all but 3 were solid. One of the three had lots of plunger movement and the other two had a little movement. Strip them down and whilst I am at it...we'll clean up all the other parts. Step in Wynns: 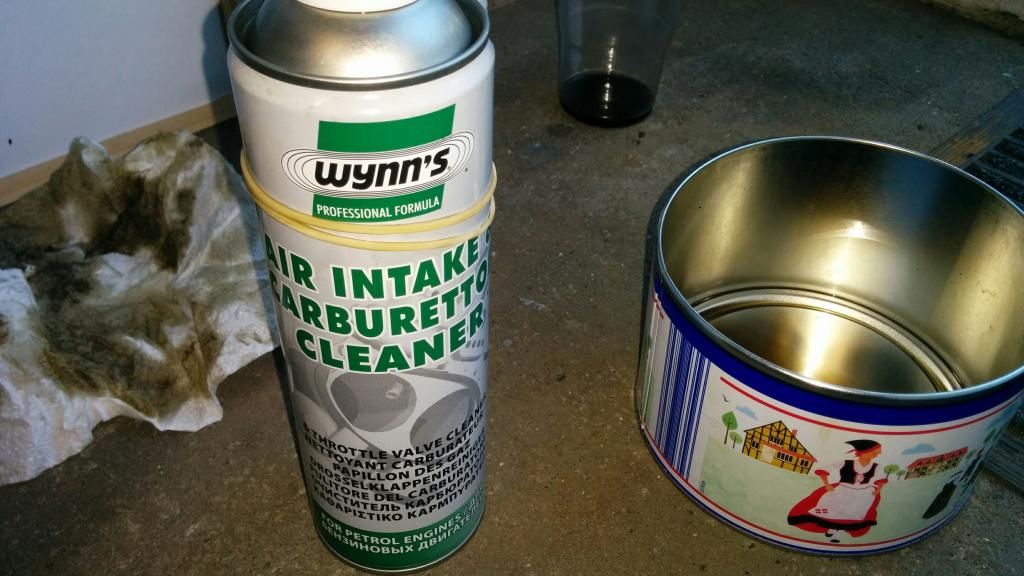 Potent stuff this...MUST use this in a well ventilated area...preferably outside. Luckily back door of my garage on a nice day day provides a good working area. Gunky parts in containers - all marked ready for cleaning: 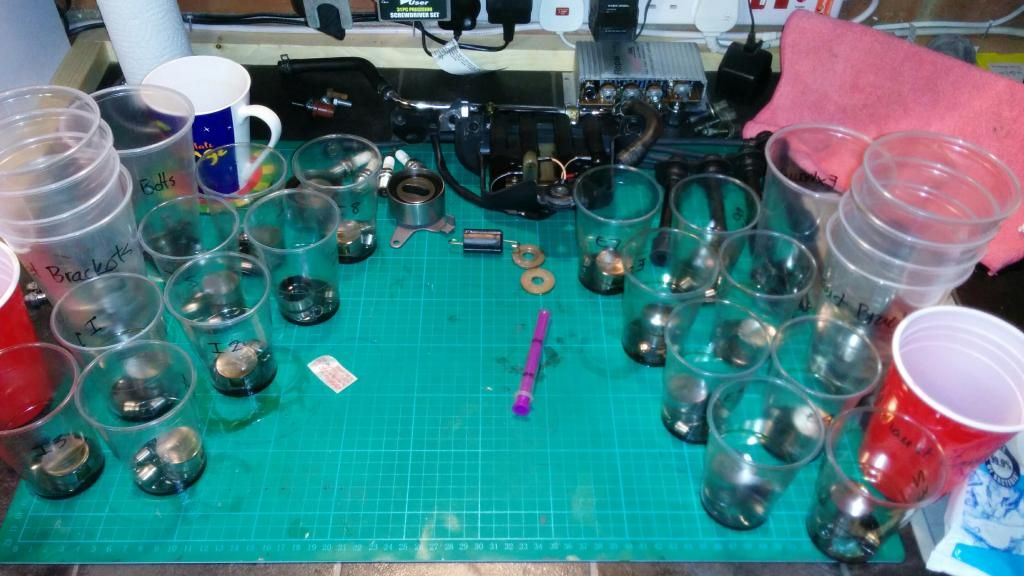 Nasty! 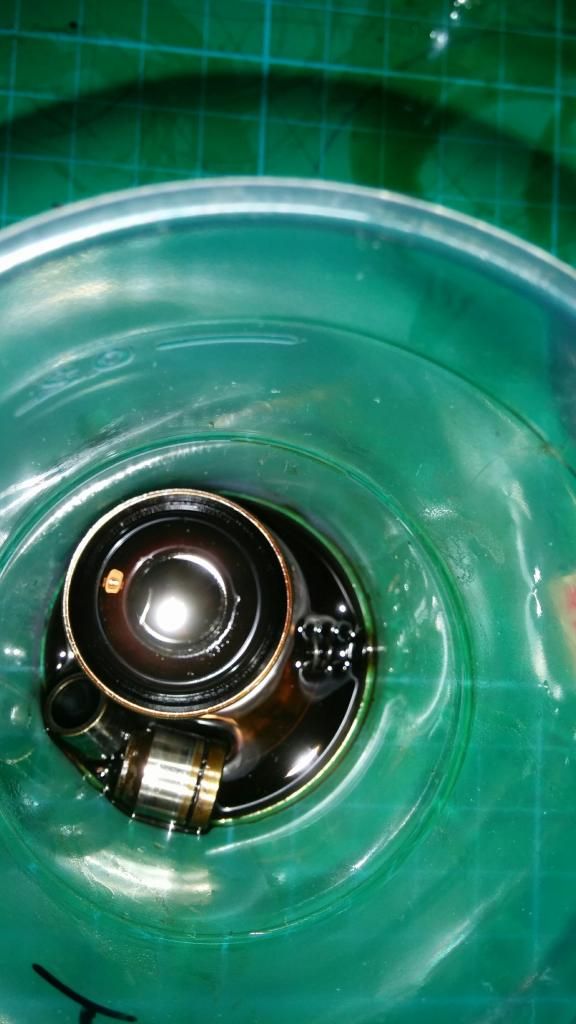 They took some getting apart....and full of black gold. 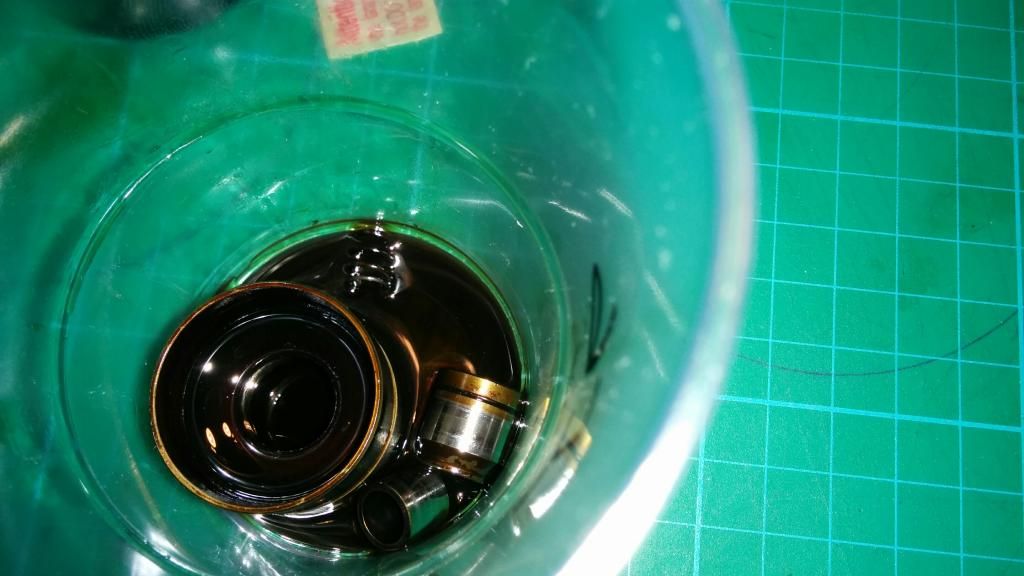 So I had a think. See that purple syringe thing on the bench above? - well anyone with small kids knows where that is from. Drugs - drugs for kids.... smile.png SO with some fresh Magnatec 10w40 I syringed really fast the holes that feed the HLA's in the head - this was to see if the channels are clear - if they are...oil should shoot out of other nearby hla oil feed holes. I did them all and they were all clear...oil shot out of adjacent holes and the oil in the galleries looked good too...so that means oil pressure is OK. Which means just the HLA's need doing - they probably haven't been done ever. IN the tin they go...one by one.... let them soak for a while then clean then with Wynns soaked mf cloth. This was just the first one and you can see how discoloured the solution is already: 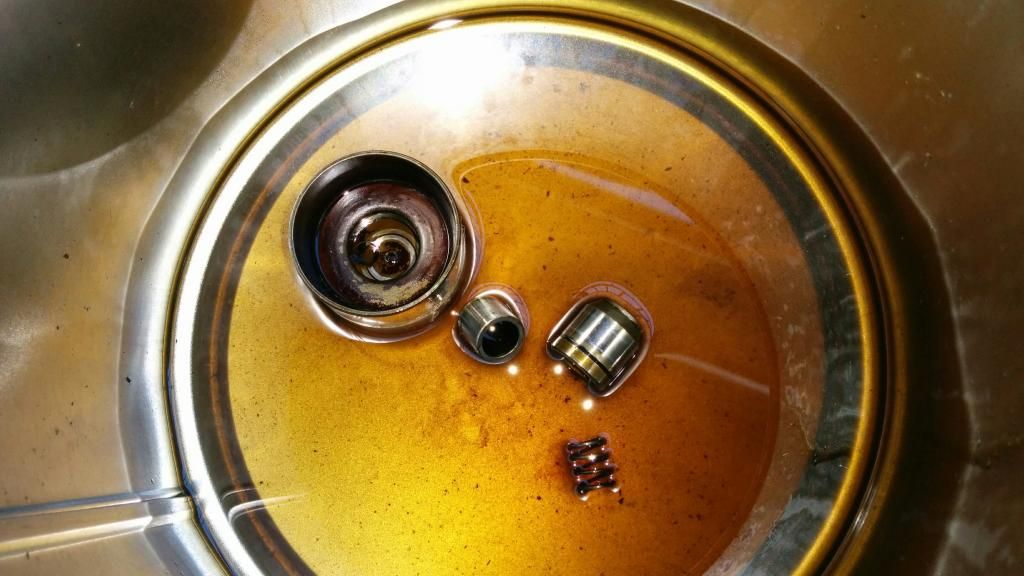 Clean and more clean of all the parts: 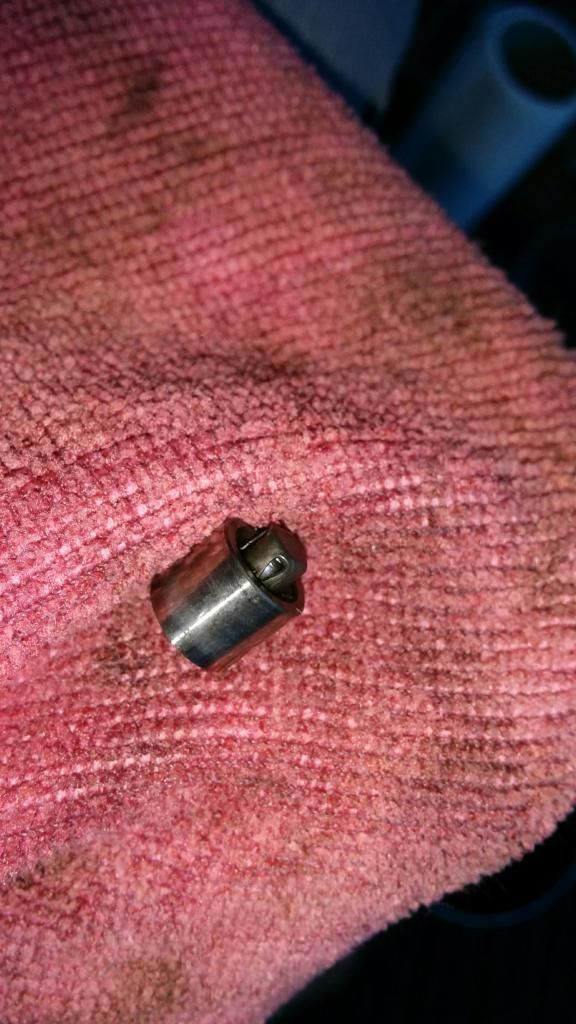 As new... 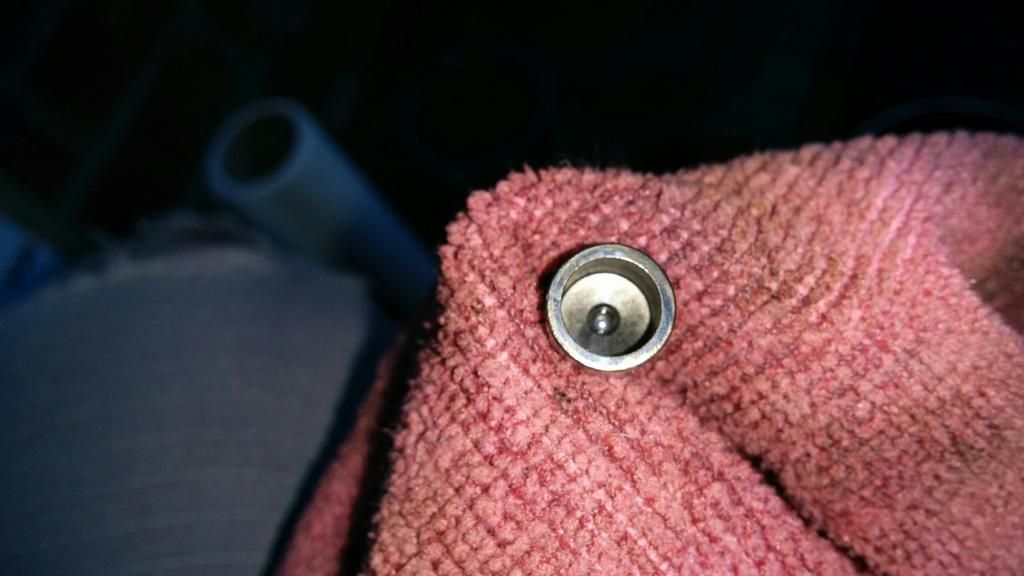 One done.....15 more to to go! 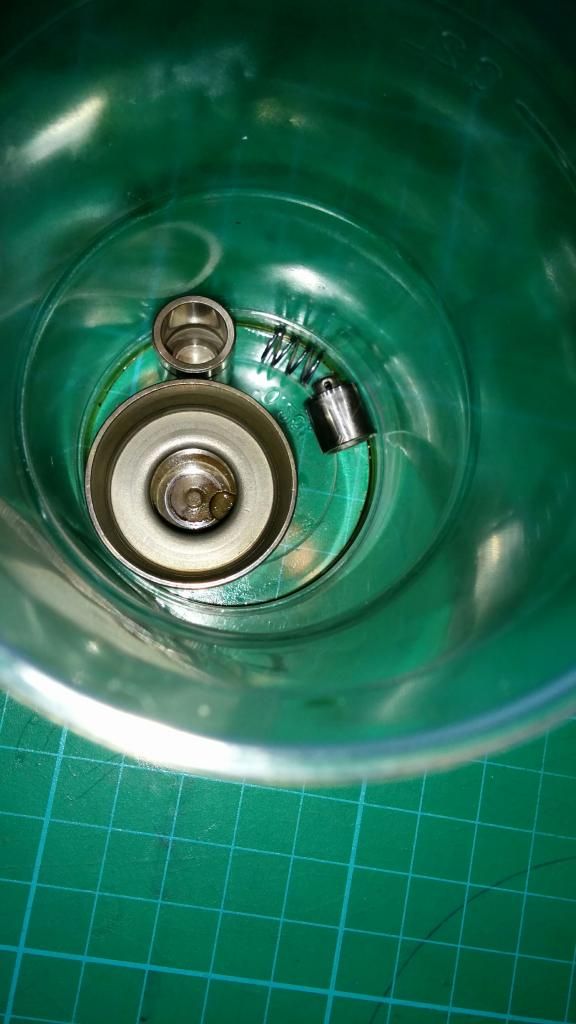 Other parts done....we;re getting there...but this takes a long time.... but the Wynn's stuff does work a treat smile.png 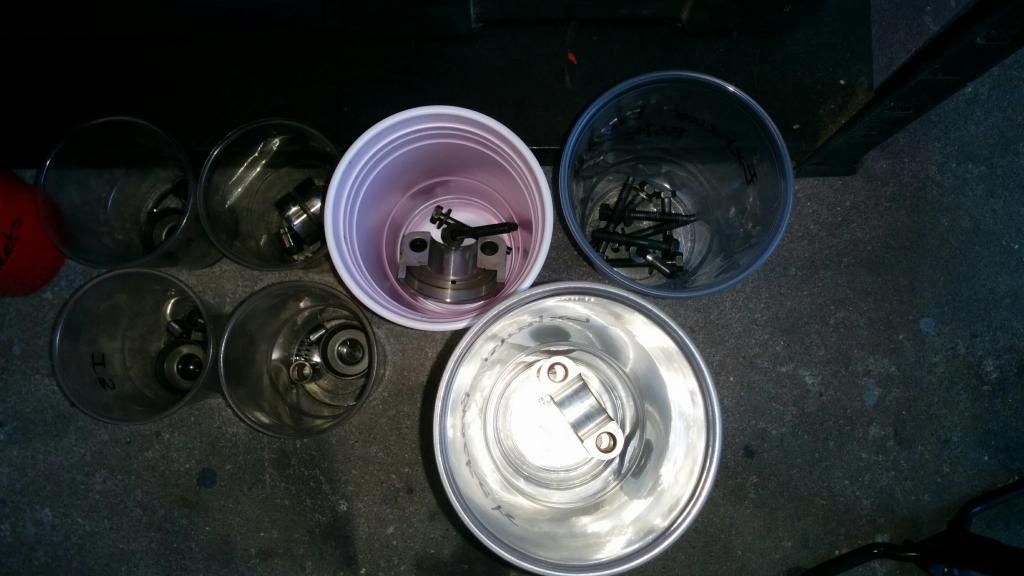 Four done.....dried off and evaporating 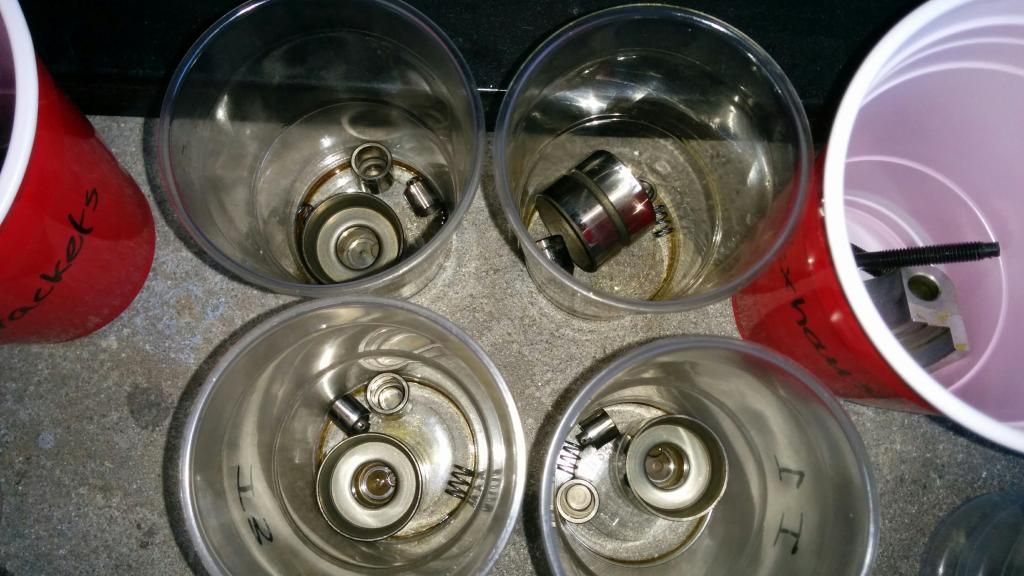 Yay...just three more to go... 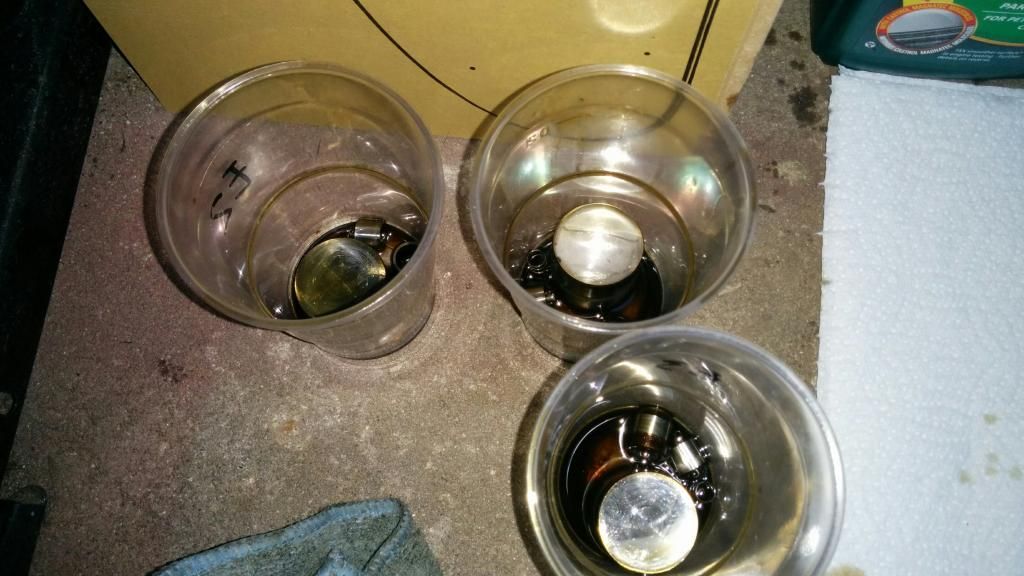 Give the freshly done ones a couple of syringes of magnatec to bathe in 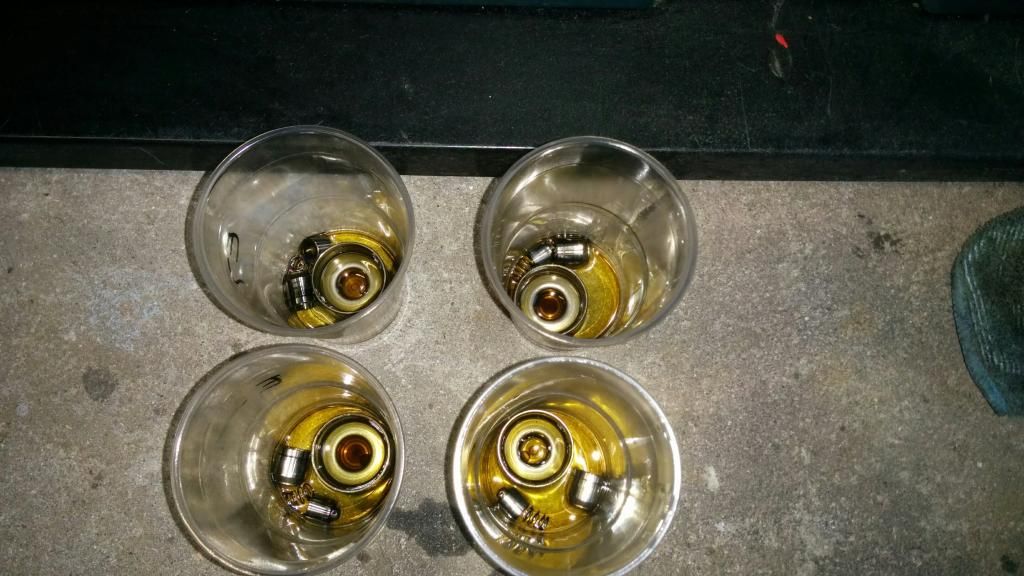 Solution is looking like...well, you know blurgh! 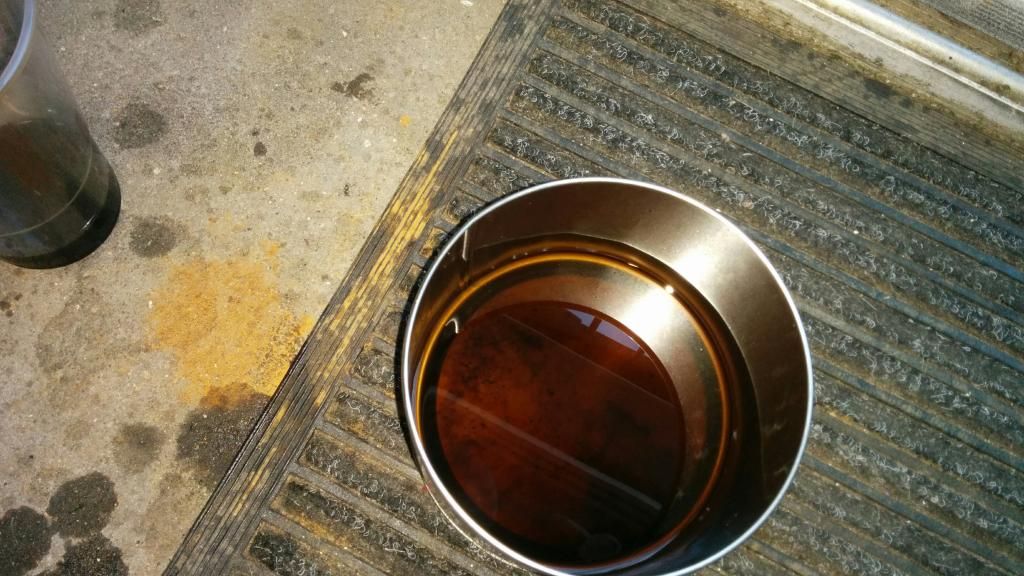 ....and several hours later, all done - nice lovely clean engine parts smile.png 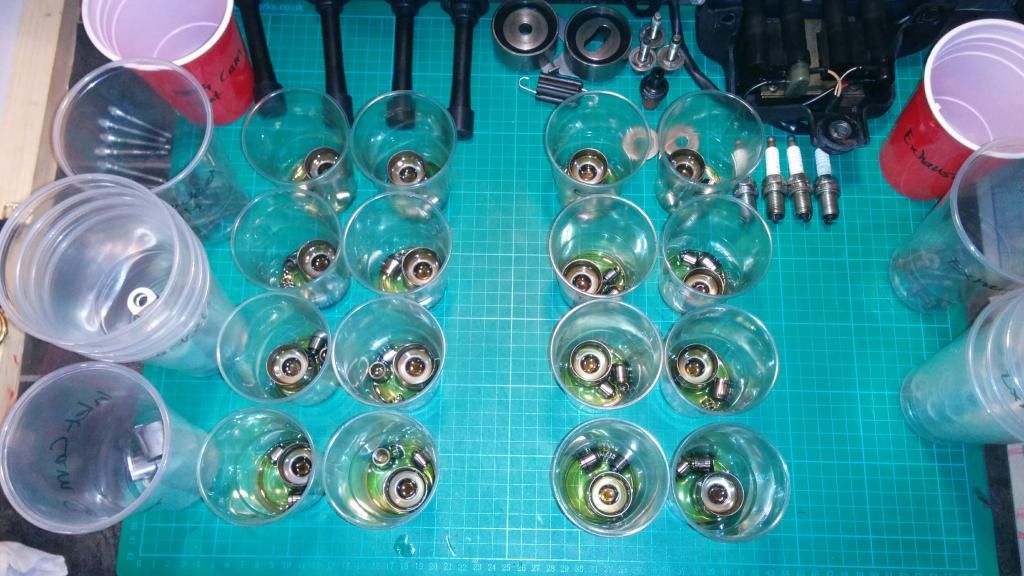 So with that done, I finished the front hubs. I already had them stripped down to their components and painted and now cleaned the bearings, rea-greased and assembled. Will torque them once fitted. The face plate of the hub that goes behind the break disk has only been stripped back and painted with zinc etch primer. Not wise to paint them as they will glues themselves to the brake discs..and besides they get a smearing of copper grease first smile.png 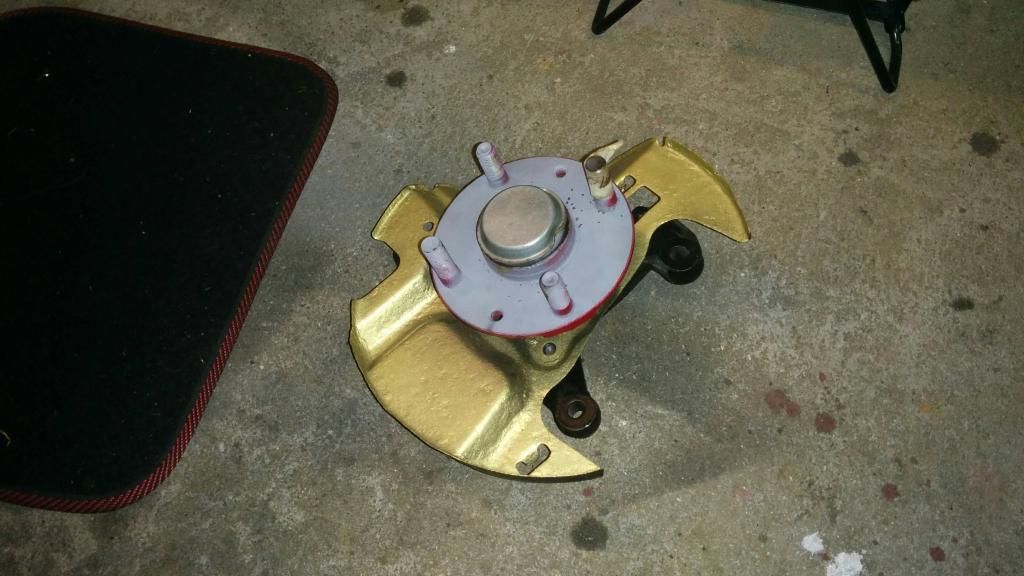 Hmmmm...what to do next, oh yes, lets tart some of the bolts up for the front of the engine...just because smile.png  Continued.... |
| |
|
|
Hammy
Part of things
Posts: 60
|
|
|
|
WHilst the HLA's were bathing... it was time to tackle the manky CAS... Well past it's best... 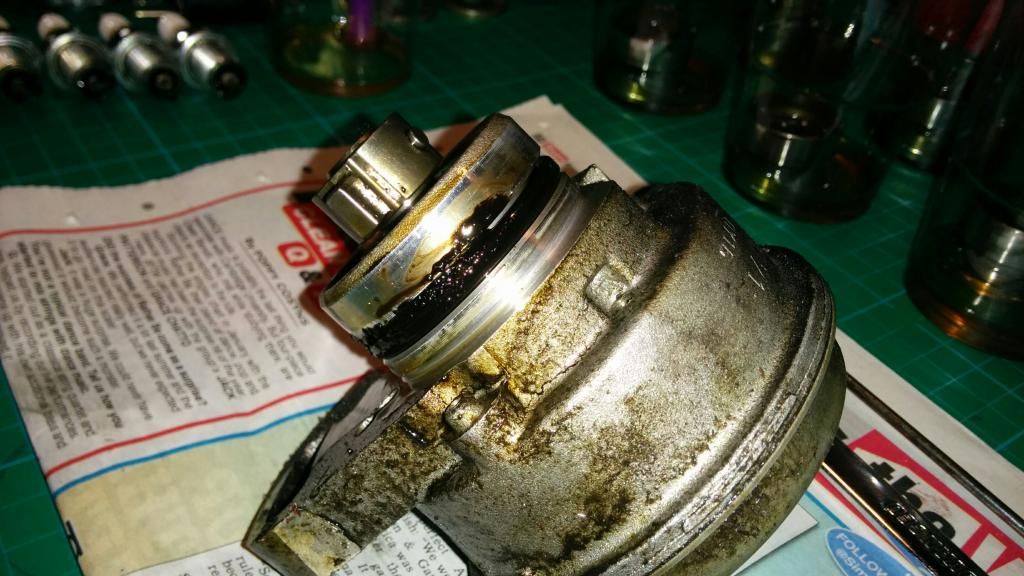 Hmm...explains a lot! 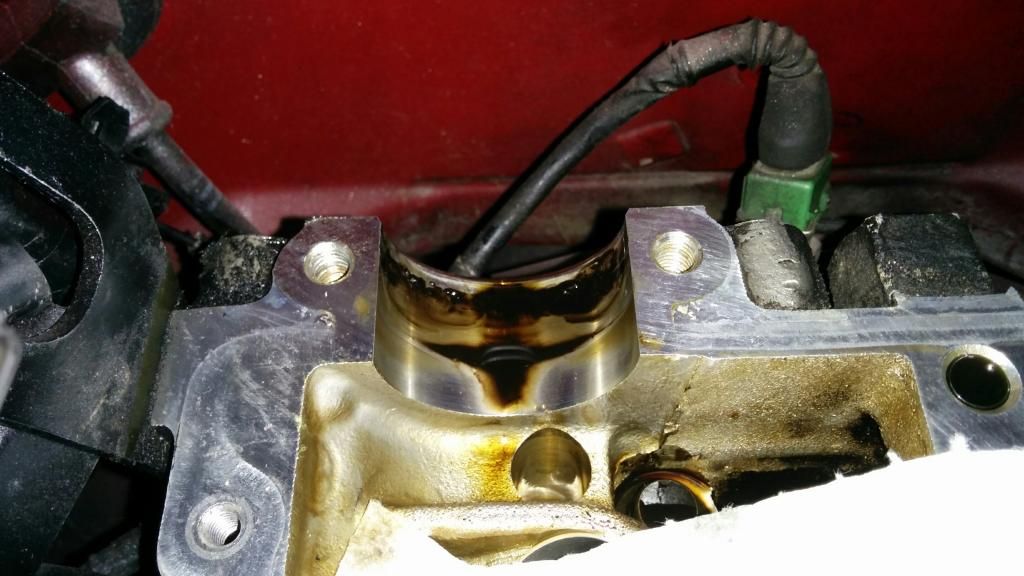 All cleaned up.... 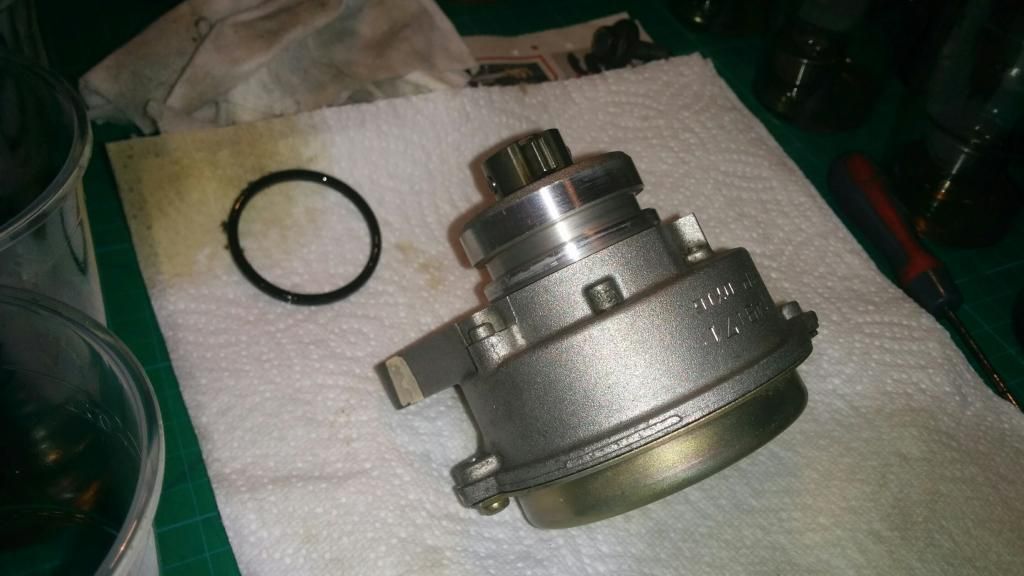 ...and fresh o'ring 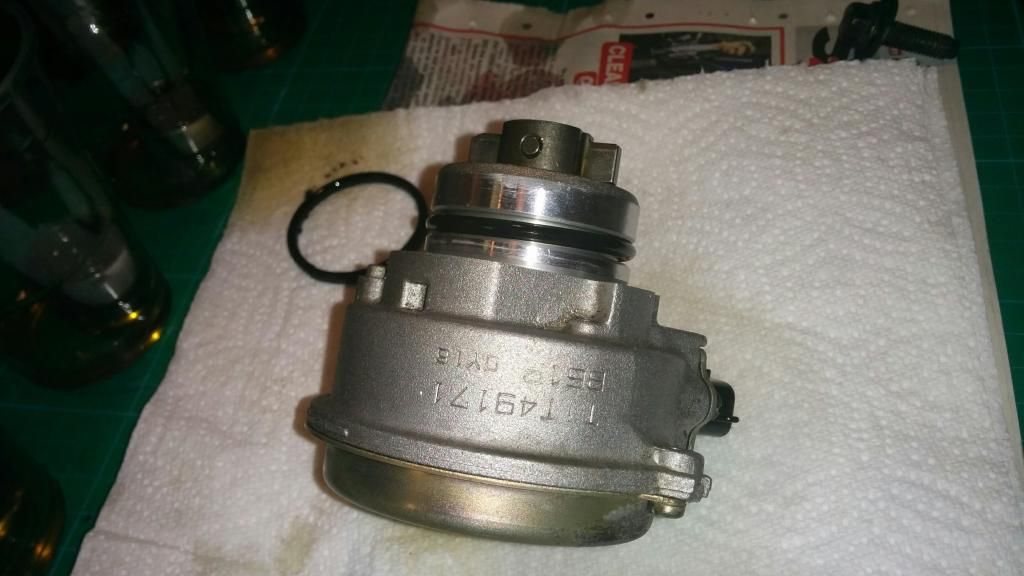 Continued... |
| |
|
|
|
|