|
|
|
Mar 29, 2016 21:30:31 GMT
|
So bought a new car on the weekend from a lovely chap, only one year older than me! ha but that means my hunter is going to take even longer  Apparently there's only 3 of these SC autos left on UK roads... which is cool, but spare parts are gonna be a b*St**d to get hold of!!!! Anyway it's pretty tidy tbh, and has Every MOT certificate, and receipt of anything bought or done to it in the 32 years it's been trundling along in its smooth German mafia like groove How it looks ATM:   Picked it up from Sussex, spent the night in Hertfordshire and had a Sunday road trip through Wiltshire with my partner   So I think the next port of call is to slam it Haaa which is proofing to be more difficult than I had hoped! Ultimately would love some crime wore spoke wheels with white wall tires, but have some black deep dish BBS reps that will do for now Also if anyone could tell me what type of engine this is, it'd be very much appreciated? I think it's the same as the B1 passat? The intake and exhaust are on the same side of that helps? Hope to post progress very soon! Craig |
| |
Last Edit: Apr 3, 2016 21:18:00 GMT by code109
|
|
|
|
|
|
|
|
|
|
Nice motor.
Pretty much the same as a Passat yes IIRC.
Is it a 1.8 ?
|
| |
|
|
stevietuck
Posted a lot
 Never argue with idiots,they drag you down to their level then beat you with their expertise!
Posts: 1,348
|
|
|
|
You can never have too many boxy, square old cars. Good on ya  |
| |
|
|
|
|
|
|
|
1.8 yeah Just having trouble finding ways to get the floor pan scraping every stone and leaf on the road.... The rear drivers arch had a lot of rust, so I've repaired that to the best of me ability, still needs blending in, but now I'm wondering if bolt on arches would be good, or look weird??? |
| |
|
|
|
|
|
|
|
Okay, first things first, had an incident and the side of the car got a bit smashed But the whole ordeal spurred me to just buy a similar, stripped out shell of an Audi, just the same as mine that I'd been keeping my eye on for a while, so hired a transporter and picked it up Now that means I have loads of spare body panels, and most importantly spare suspension stuff to mess around with!!! I've also bought some MK1 golf coilovers which will be the subjects of this experiment Got the suspension off today, and have started to mod it *ehem* OPERATION NEW AMAZING AUDI COILOVERS!! 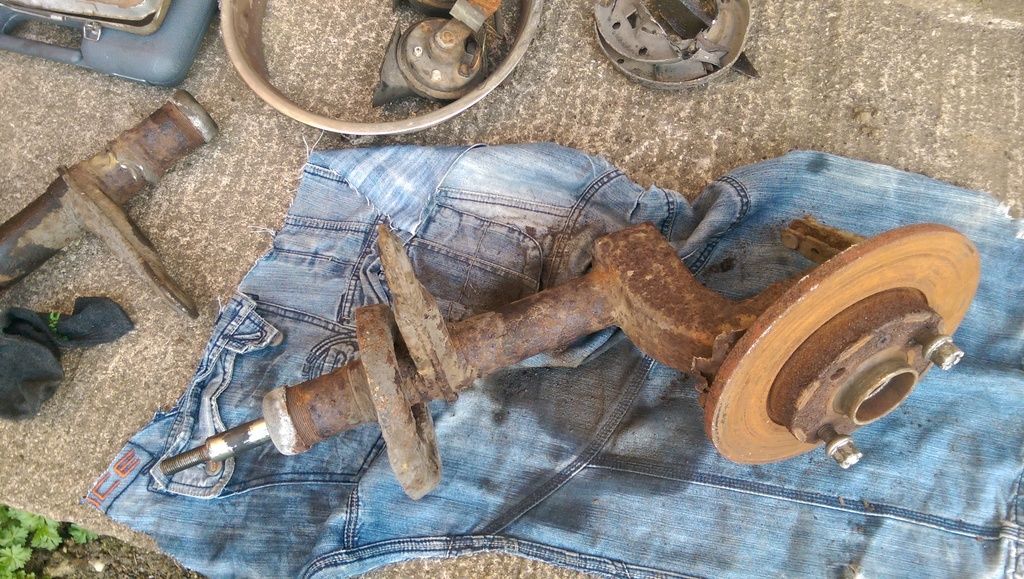 Cut that off, and maybe grind a bit there and.... 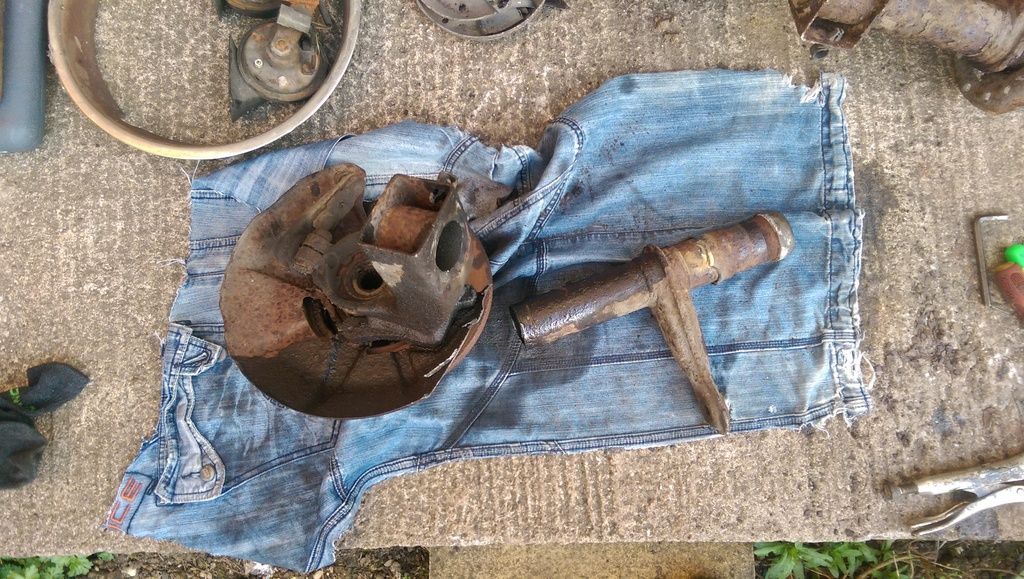 Then just take that little piece out and... 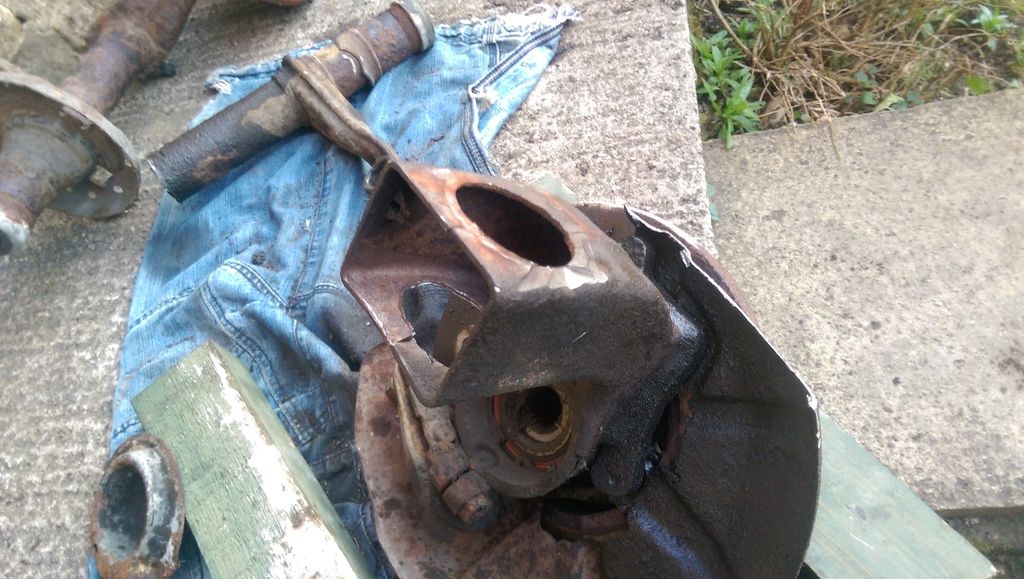 That's as far as I've got today really, more tomorrow no doubt! My overall plan is to use the golf coilovers, just cut off all the bracket bits, and then slide them into Audi bearing houses and steering arms, and weld it all together. Should leave me with shorter, adjustable, custom, Audi friendly units I can just swap over and hey presto!!!!! But that's all for now |
| |
Last Edit: May 4, 2016 11:06:42 GMT by code109
|
|
|
|
|
|
|
|
Haha- reminds me of seeing an old yellow B1 Passat fastback at a show a few years back that was sitting really nice and low. when I asked how he had done it, he replied "spring clamps"
When I had a look, there was indeed a set of Halfords spec spring clamps wound right up on each spring :-O
I'd like top think he took them off before driving home but I'm not convinced he did.
While the Audi front suspension is the same as a Passat, I think the rears are different- the Audi used a coil spring-over-shock while on the B1 Passat the shock and spring were separate. B2 (type 32) Passats used a coil over shock but the axle beam is different to the Audi.
|
| |
|
|
|
|
|
|
|
Hahaha would have been easier to do that lol The rear springs are coilovers in themselves already yes look the same as the golf ones I've bought so I'm hoping those will be a straight swap |
| |
|
|
|
|
|
|
|
More done tonight! This is the next piece of the puzzle, for a mk1 golf: 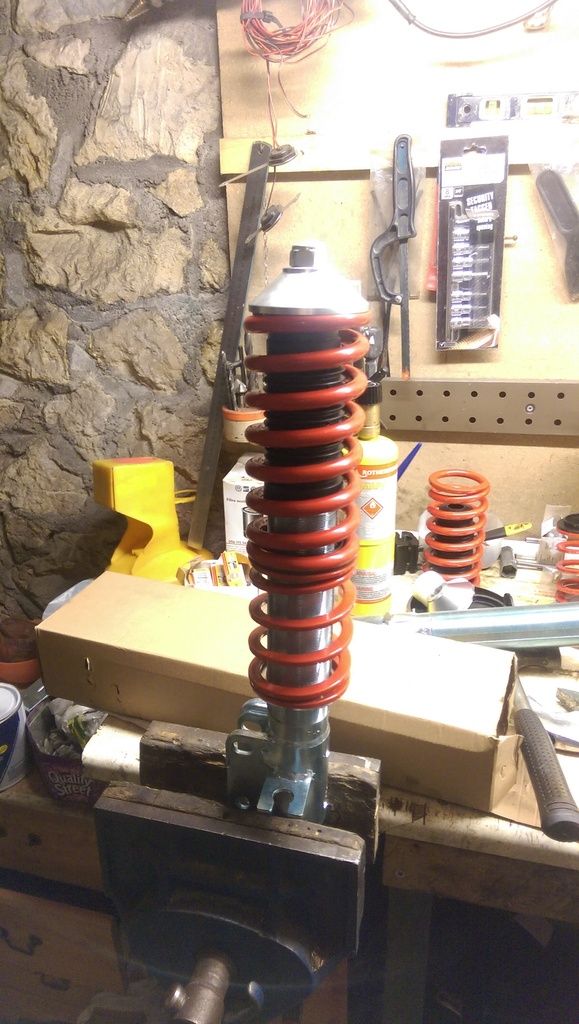 Disassemble and remove the shock insert so I don't destroy anything with welding:  Cut off the bracketeeeyy parts: 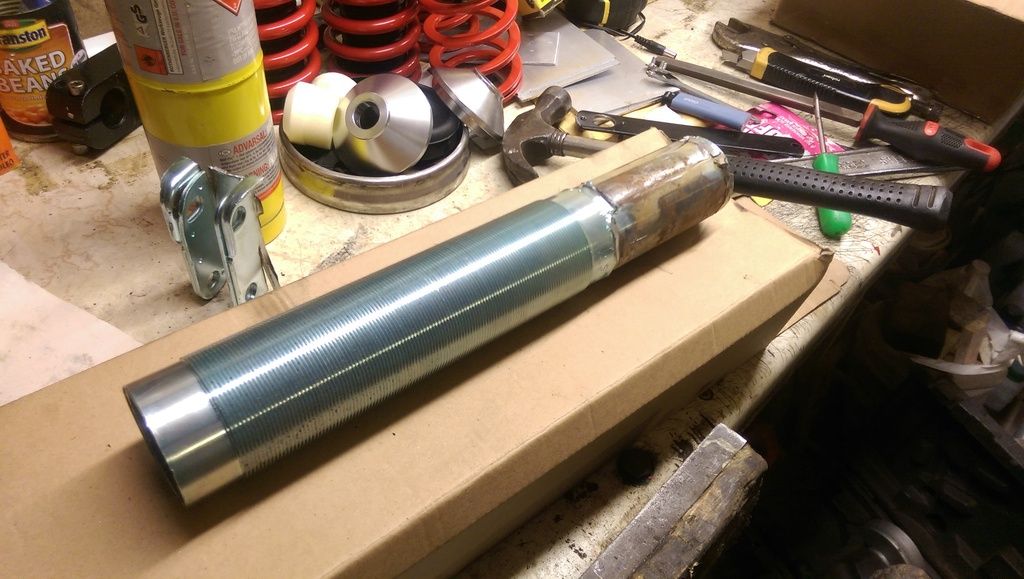 Slide into the Audi parts and weld in place: 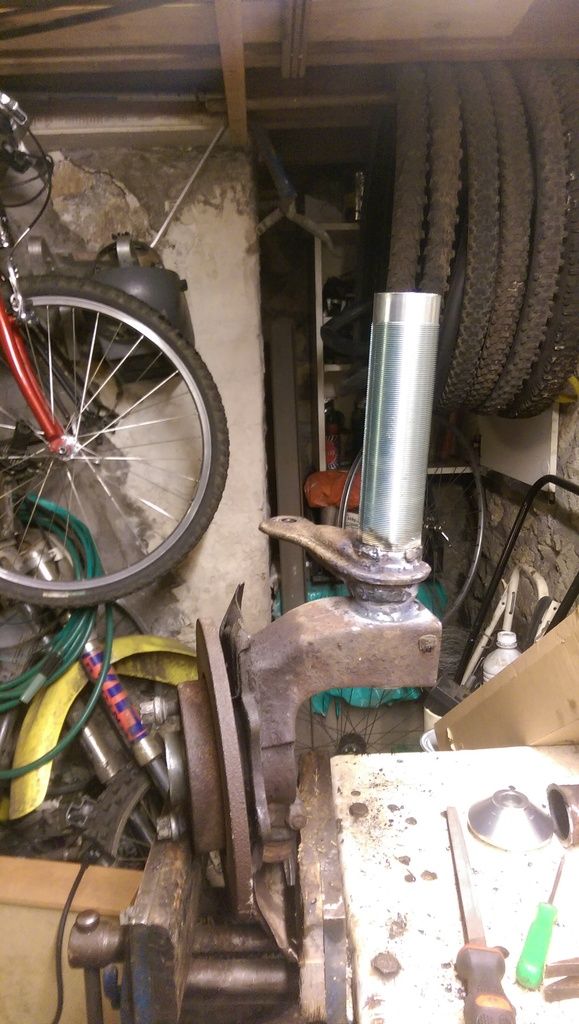 the steering arm is just tacked in place here waiting for a finishing pass hence the horrible looking weld! So far this is an original and the new one compared, the top of the shock is lowered so won't bottom out: 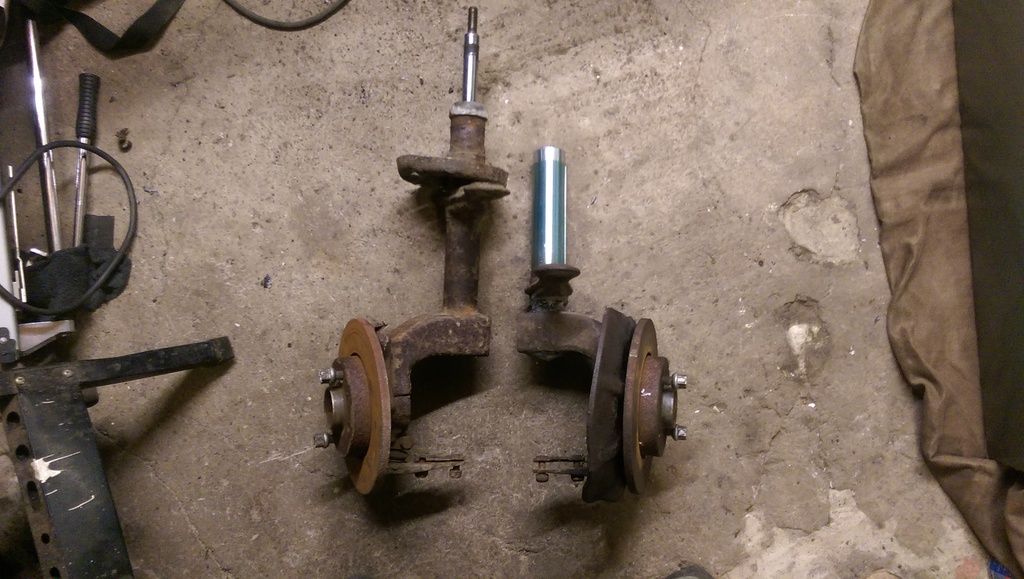 And the steering arm has been moved down to accommodate the lower ride height without messing up steering angles: 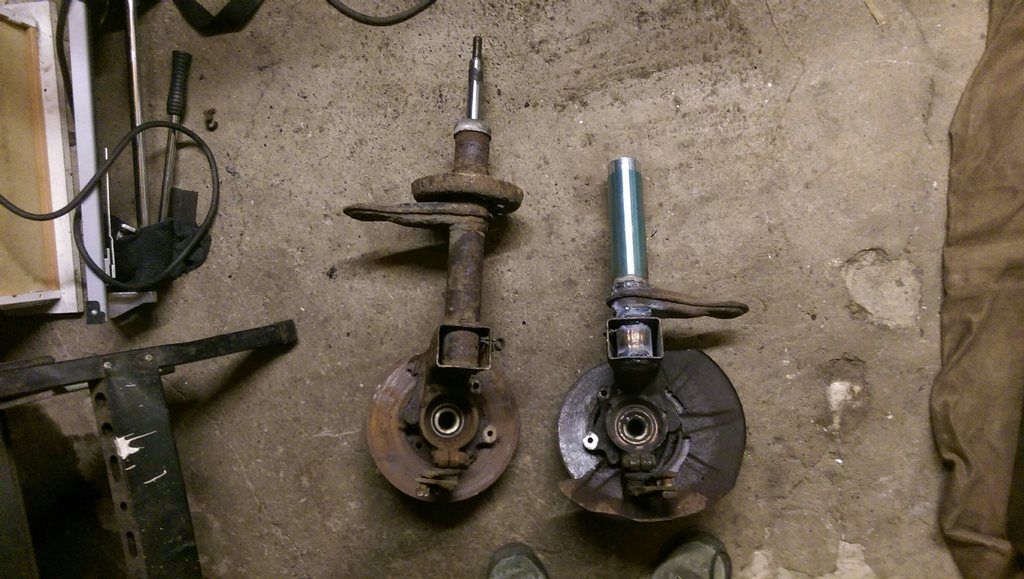 Next is just reassembling the new coilovers creation, and replicating for the other side! All the top mount stuff, and top of the shocks piston are exactly the same, even use the same threads by some miracle, so everything just fits and bolts together with no modifications!!! Will be easy to just swap over the struts in a matter of minutes All for now folks |
| |
|
|
foldy
Part of things
Posts: 710
|
|
|
|
Liking the DIY coilovers alot. Doing something similar myself, ideally need the shock insert out like you did. Did you buy/make a tool for the two pins on the top or just animal it off with stilsons or similar? Be nice to know if there's a tool available rather than the latter! Reckon they'll be rather tight with the red loctite on the threads. Bookmarked btw, I like the direction you're going  Edit: a quick google shows the tool is called a pin spanner 2nd edit: I can see the tool on your work bench, were you really that lucky that the spanner for your grinder just so happened to fit!?! |
| |
Last Edit: May 7, 2016 16:49:49 GMT by foldy
|
|
|
|
|
|
|
|
|
|
|
Foldy, I know the part you mean, I did get a big pin spanner for an angle grinder in work which was luckily the same size, although to make a plate of metal with a hole and two bolts wouldn't be too hard? But in all honesty you can do what you like, IT WILL NOT MOVE with the red thread lock stuff on, believe me! Lol I ended up getting a swirl flame blow torch full on around the top to melt it all, then unscrew it while it was still hot And thanks for the link oldschool shame you sold it though! |
| |
Last Edit: May 25, 2016 12:18:03 GMT by code109
|
|
|
|
|
|
|
All reassembled: 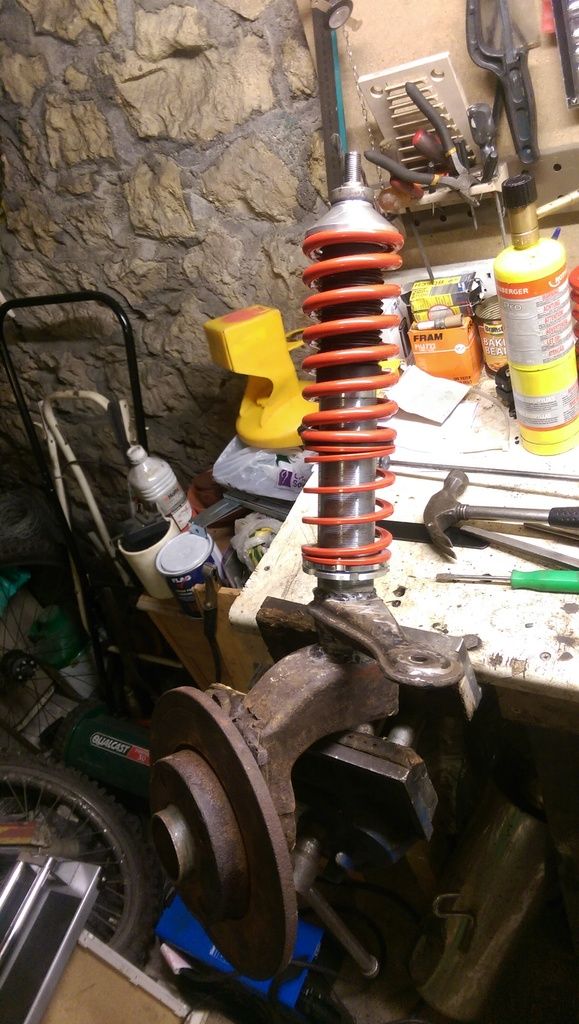 Then a blast of spray (just had it lying around hence the glorious shape of blue) to stop the welds going rusty: 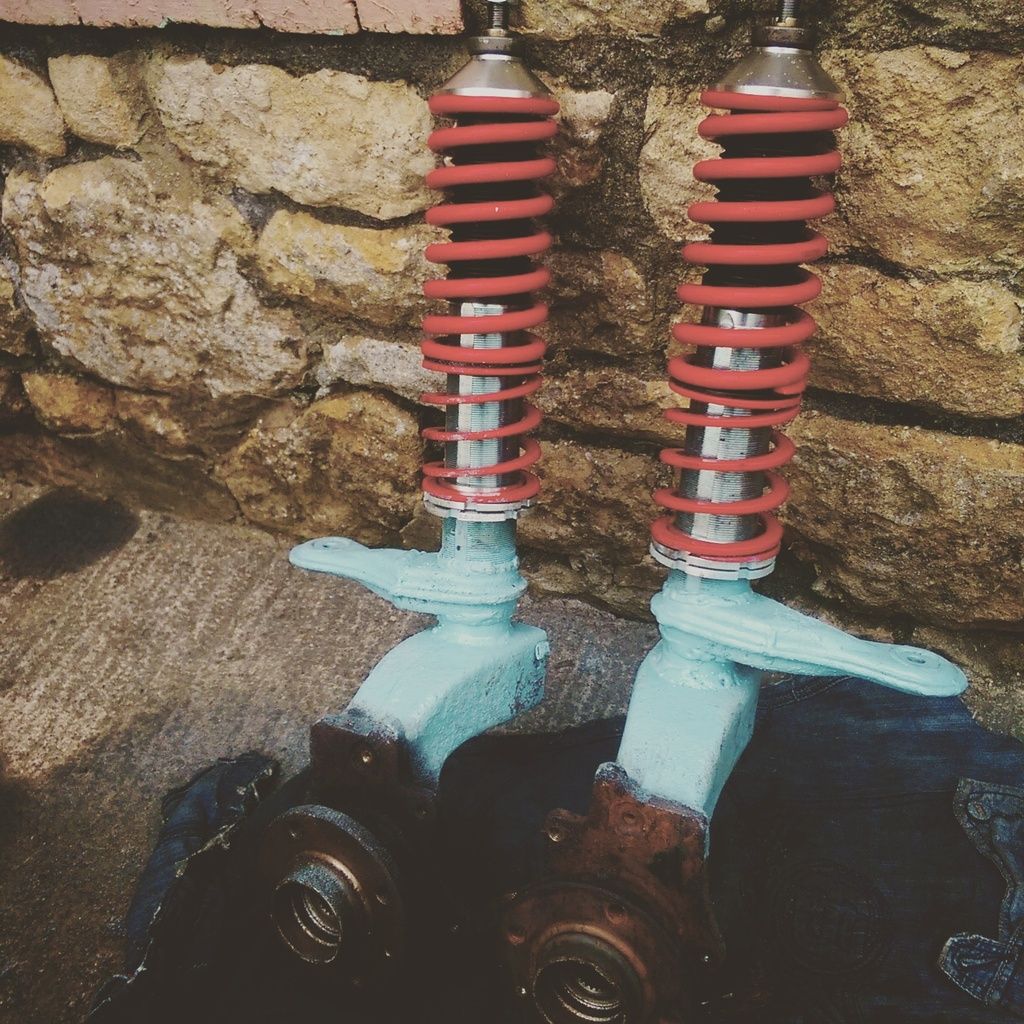 Also have to say, I trial fitted them yesterday and I'd somehow managed to weld the steering arm too faaarrr out maaaannnn.....! Silly Craig!!! So a quick snip n' weld sorted that out too. It's made the arms about 1/2" shorter, but that'll just increase steering angle (which I like) and has put the ackermann angle back to normal anyway, so happy days!!!!! 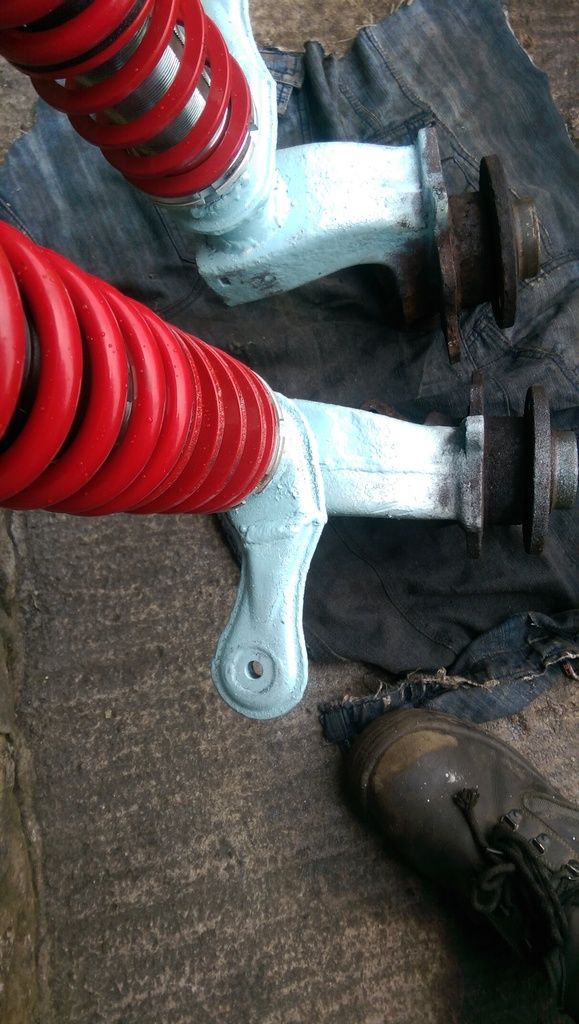 Whilst I was trial fitting them, it made me smile how far up in the arch the hub was! So I can't wait to see what I've done to this car haha Should be fitting them very shortly |
| |
|
|
hamps
Posted a lot
www.medwayrscentre.co.uk
Posts: 2,077
|
|
|
|
Sweet, can't wait to see it on the ground |
| |
|
|
|
|
|
May 14, 2016 19:32:40 GMT
|
Great base for a nice project! I have a 90 B2 great cars! |
| |
|
|
|
|
|
May 17, 2016 20:47:19 GMT
|
Spent the evening fixing the rear bumper as it was hanging off! Both brackets were completely rusted away: 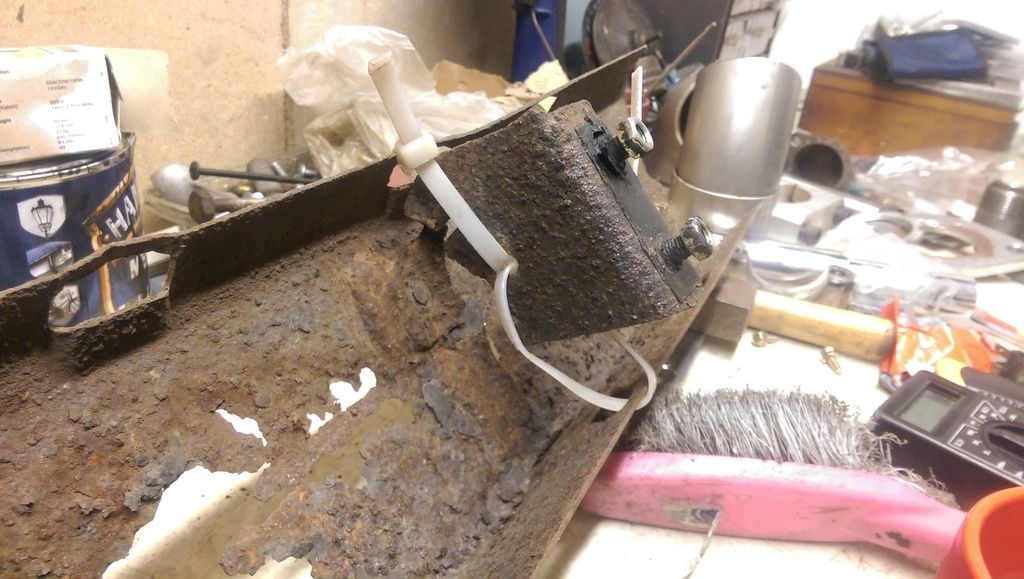 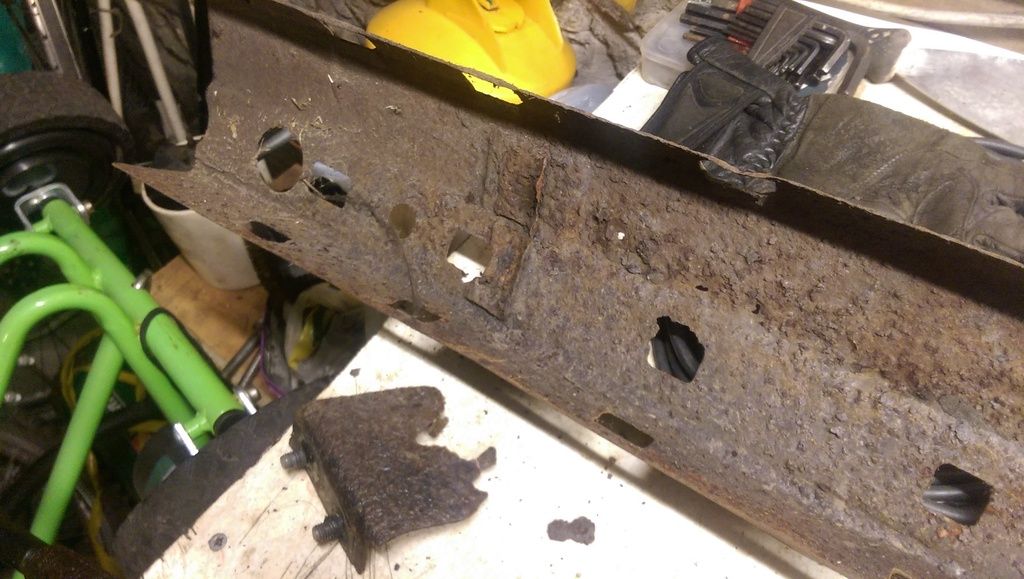 Mark out some new ones made of ali so they don't rust again: 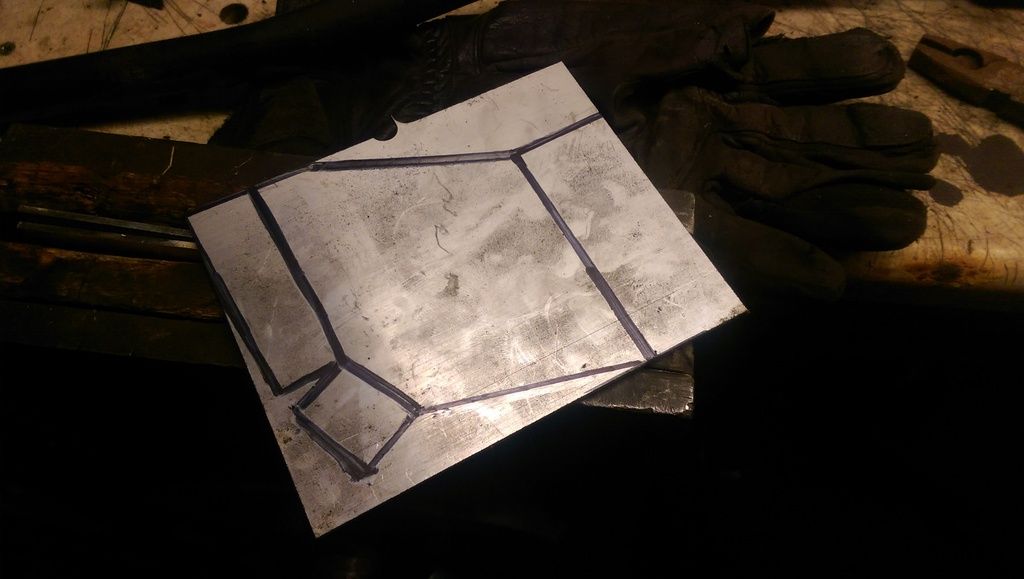 Bend them both up: 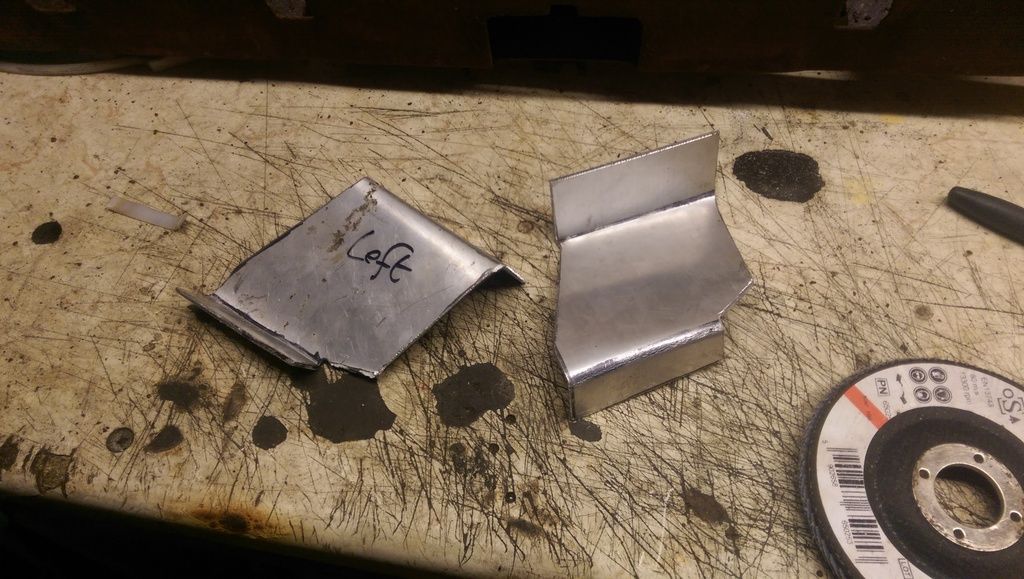 Also cleaned of the remaining of whatever was left of the bumper frame thingeeey: 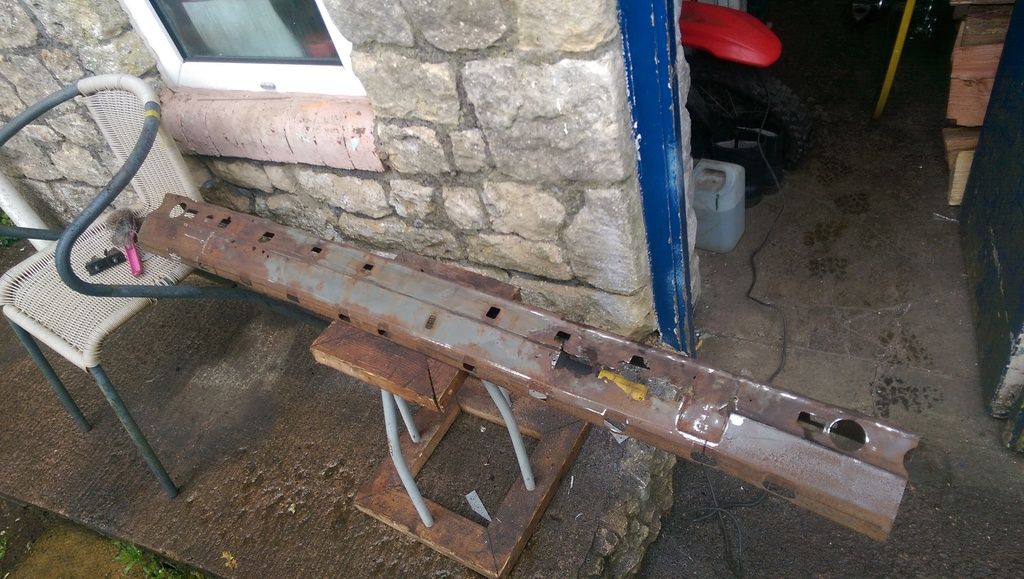 I have fixed it back to the car just so I could drive to the Mrs house for the night, but I will take it back off and paint it black then take a pic of it attached |
| |
Last Edit: May 17, 2016 20:47:45 GMT by code109
|
|
|
|
|
May 21, 2016 20:56:46 GMT
|
Sooooooooo yeah....... 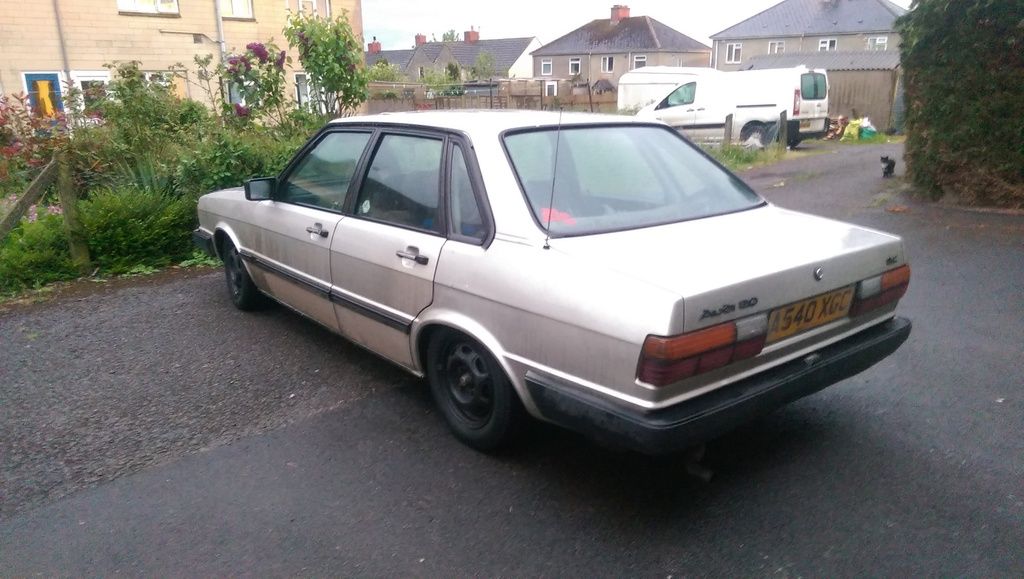 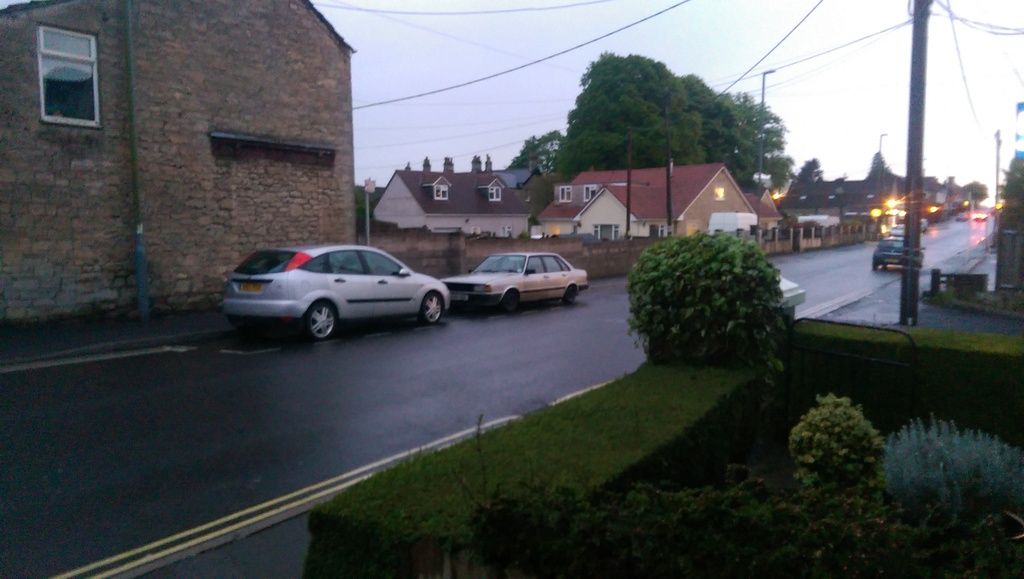 That's with the coileeeeys not even full Roger'd!!! Hopefully get the wheels on tomorrow and adjust springs for proper fitment Although I do quite like its slight ratty-ness atm..... We'll see |
| |
Last Edit: May 21, 2016 20:57:36 GMT by code109
|
|
|
|
|
May 22, 2016 15:23:15 GMT
|
Got the wheels on today, just carry on with body work now and make a new exhaust up 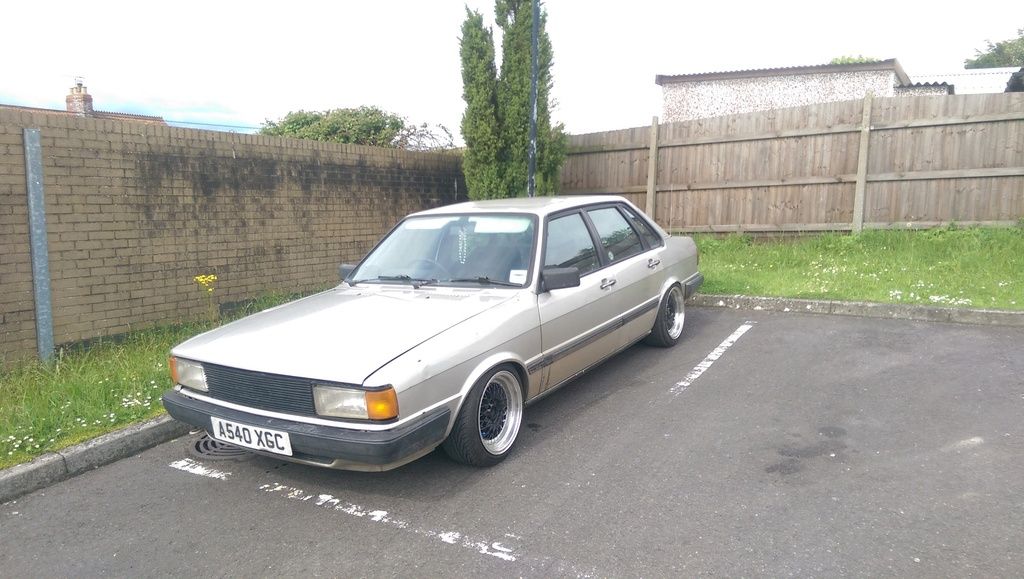 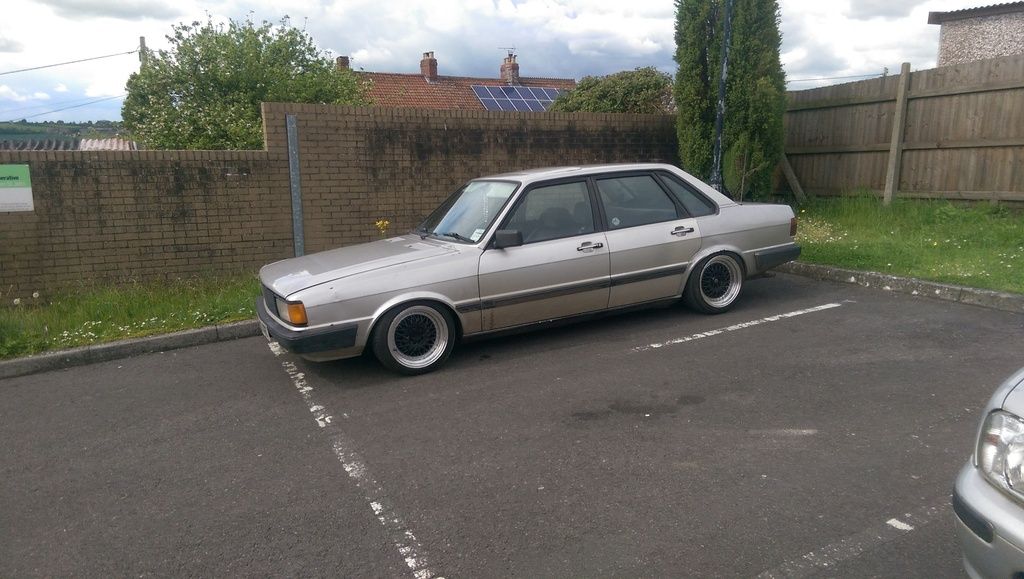 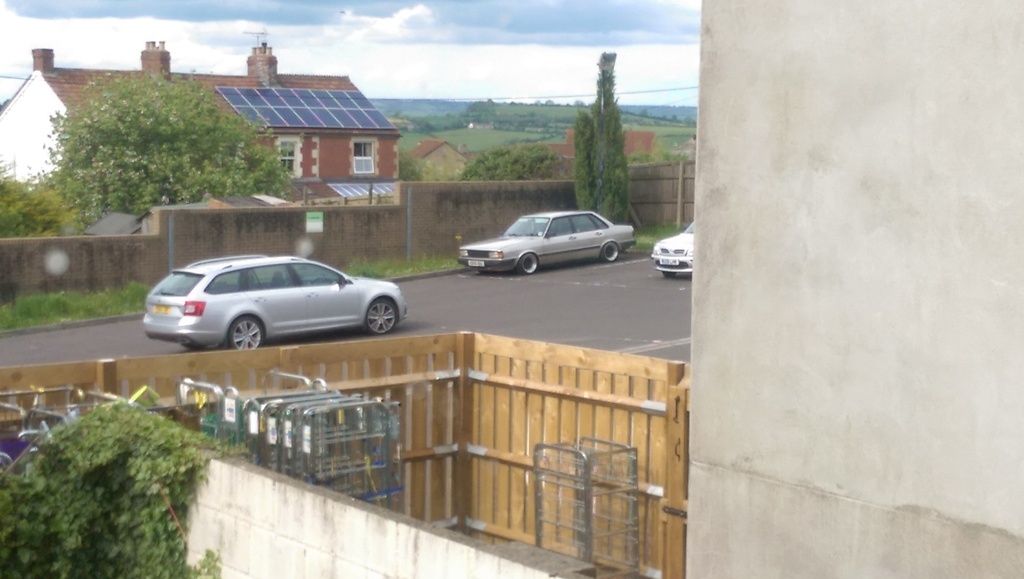 It doesn't look that low in the pics until you stand next to it! Ha or when it scrapes on the middle crest bit of the road surface |
| |
|
|
|
|
|
May 22, 2016 20:33:59 GMT
|
|
Liking that. I love an old 80's box.
|
| |
|
|
tomglt
Part of things
Posts: 137 
|
|
|
|
|
Looks great dude.
|
| |
|
|
tomglt
Part of things
Posts: 137
|
|
|
|
|
Looks great dude.
|
| |
|
|
|
|