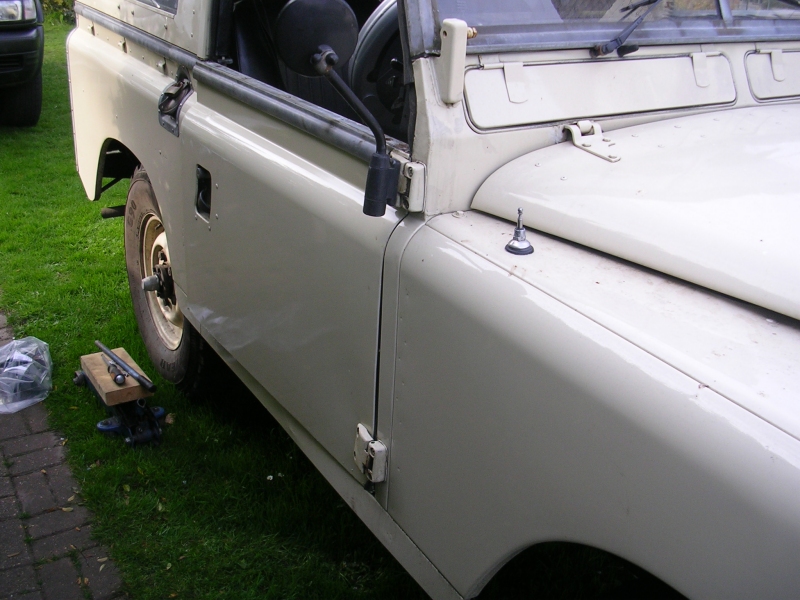
|
|
|
|
|
huzaah! the gearbox is done and i have the landy back on the road :cool: :cool: in the end it had new primary pinion and first gear (because its got drive teeth for 4th inside it), new 2nd gear, new 3rd gear, plus all new baulk rings. bearings, seals, gaskets. oh and a new borg+beck clutch heres the primary pinion, the clutch goes on the splines arrowed green. red is the drive teeth for 4th gear, well there's no actual "gear" for fourth it just a direct drive. 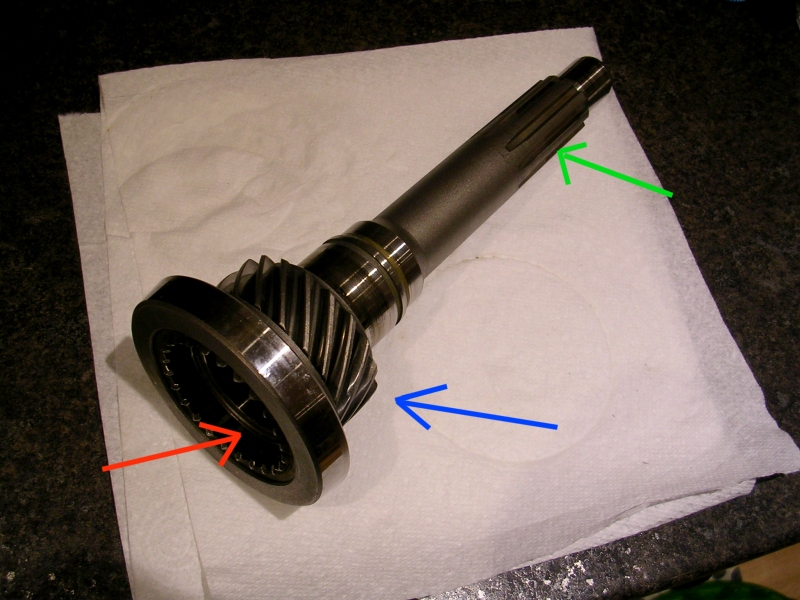 heres a close up of the teeth for the direct drive (4th gear) i.e the red arrow above. notice the edges have become bevelled with wear 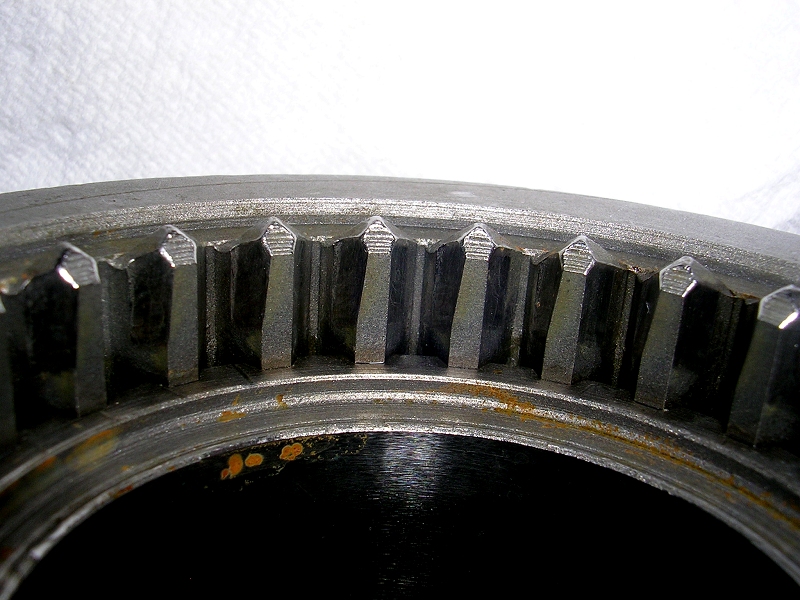 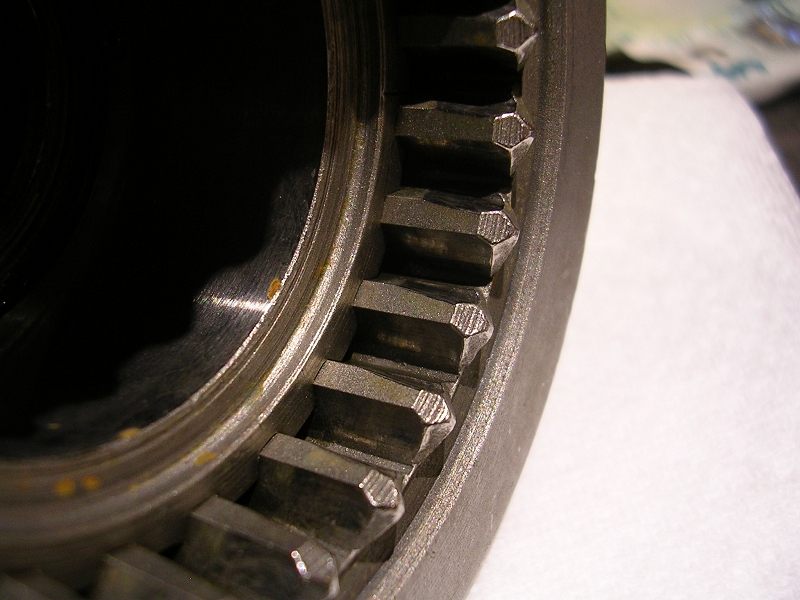 this is the chalice/syncro for 3rd and 4th gear. when pushed in one direction the inner teeth slide and mesh with the teeth inside the primary pinion from the previous pictures, this then provides the 1:1 direct drive to transfer box (4th gear) 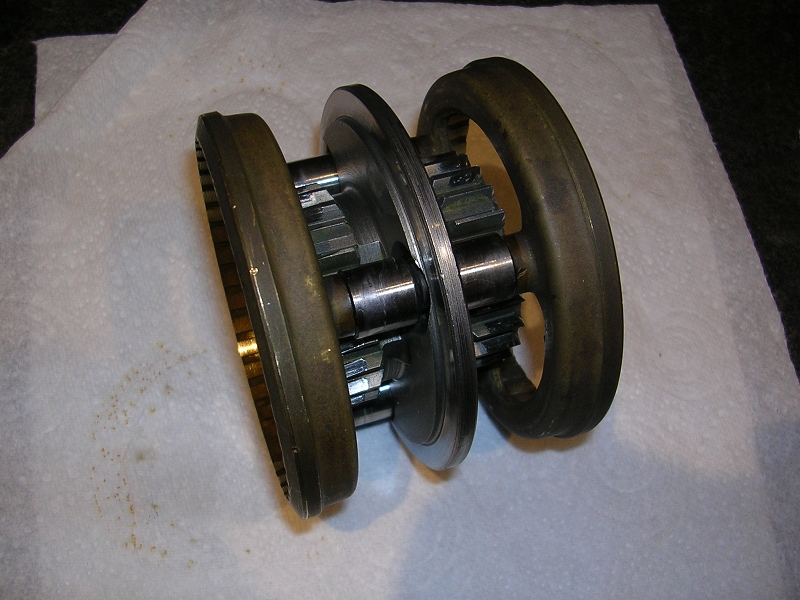 close up of the teeth for direct drive (4th gear) so this horrendous wear/chamfering, plus the bevelled wear inside the primary pinion is why it kept jumping out of 4th gear, it was literally pushing itself apart 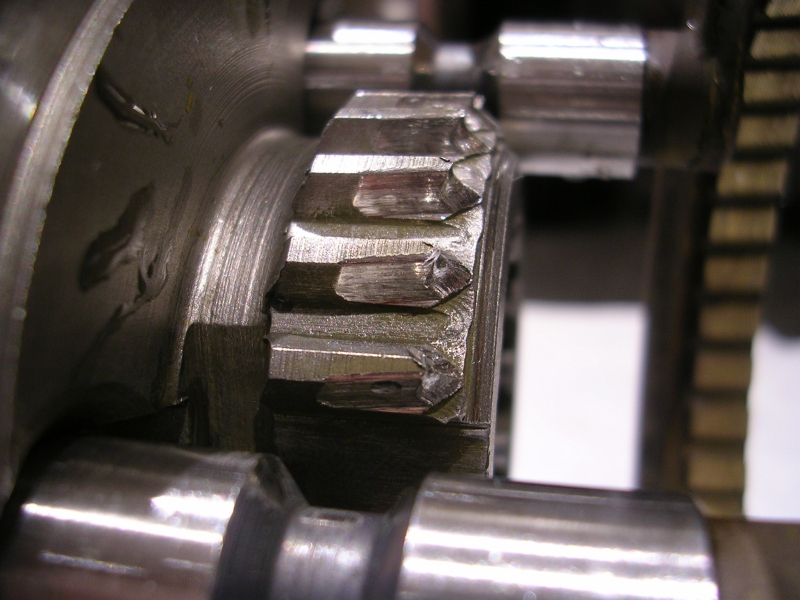 heres the other gears that were replaced due to the syncromesh teeth being terribly warn 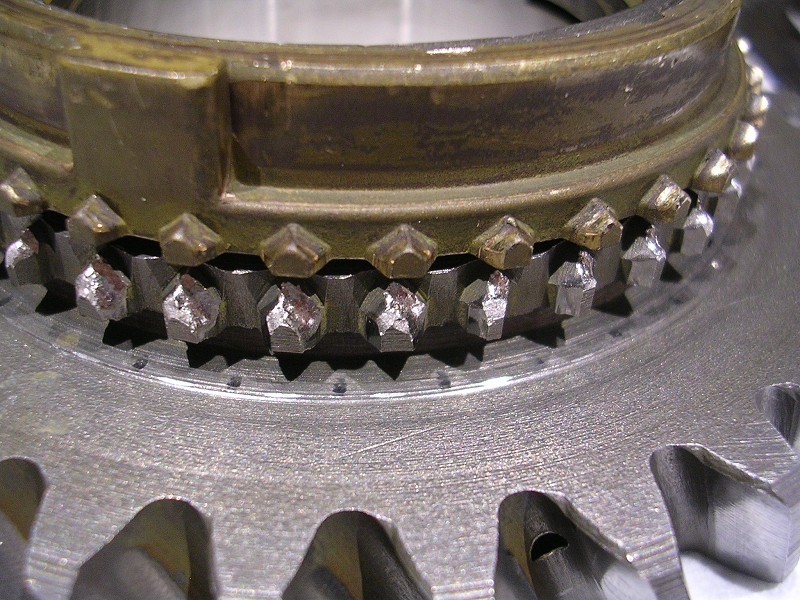 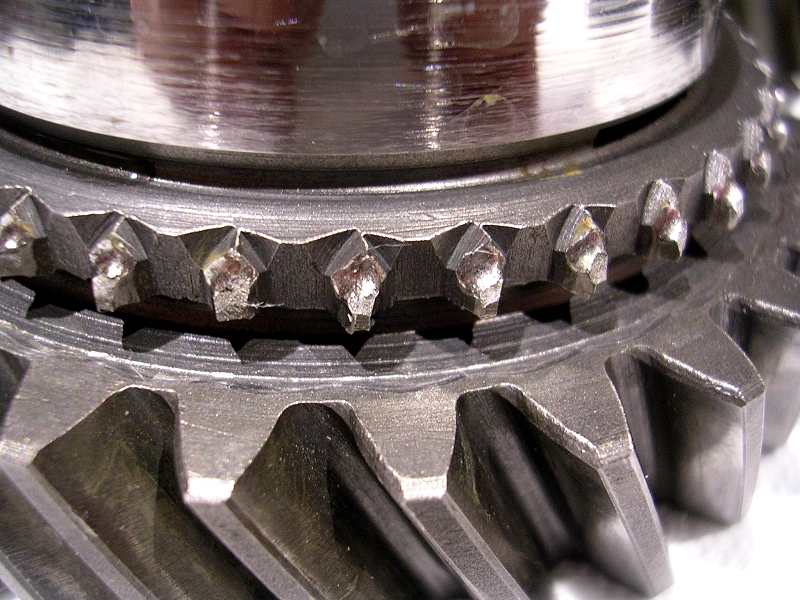 it drives really nicely now, the gearbox is tight and quiet, slides into gear like a lovely bolt action rifle. very happy   |
| |
Last Edit: Mar 11, 2015 12:20:56 GMT by darrenh
|
|
|
|
munky
Part of things
 
Posts: 462 
|
|
|
|
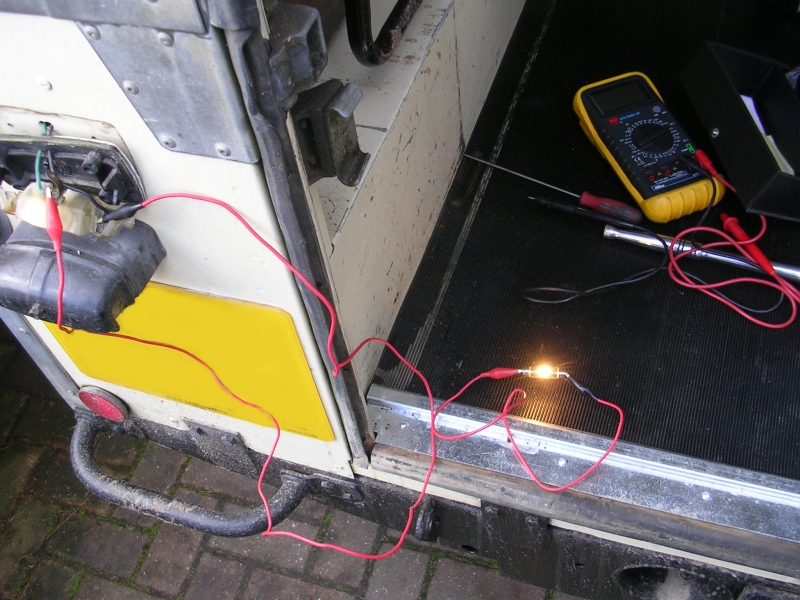 What a great idea! I have a brake light nightmare to deal with tomorrow (on my own). Will definitely be doing this so I can see what's going on. Tell me though, what sort of wizardry makes your rear plate look like that when photoed? |
| |
|
|
|
|
|
|
|
What a great idea! I have a brake light nightmare to deal with tomorrow (on my own). Will definitely be doing this so I can see what's going on. Tell me though, what sort of wizardry makes your rear plate look like that when photoed? i couldn't work out what the great idea was to start with  but yeah see what you mean, you can see it working from the driver seat. usually use a bit of white timber rested up against the rear of car and watch for reflection in rear view mirror ! reg plate was blanked out in paintshop with airbrush button  its really old, only really use it for resizing and basic functions |
| |
|
|
munky
Part of things
 
Posts: 462 
|
|
|
|
Worked for me!  Thanks again. Good luck with Amy. She looks to be a real stunner. |
| |
|
|
|
|
|
|
|
couple more bits of random. found starting handle! not brave enough to try it but will be very useful for rotating the engine for tappet adjustment 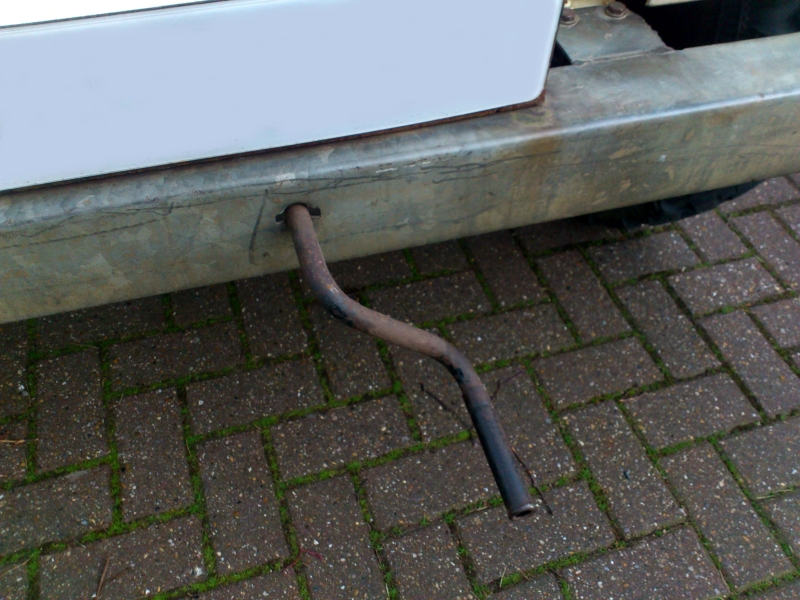 which slides through front bumper, cross member and connects to this... 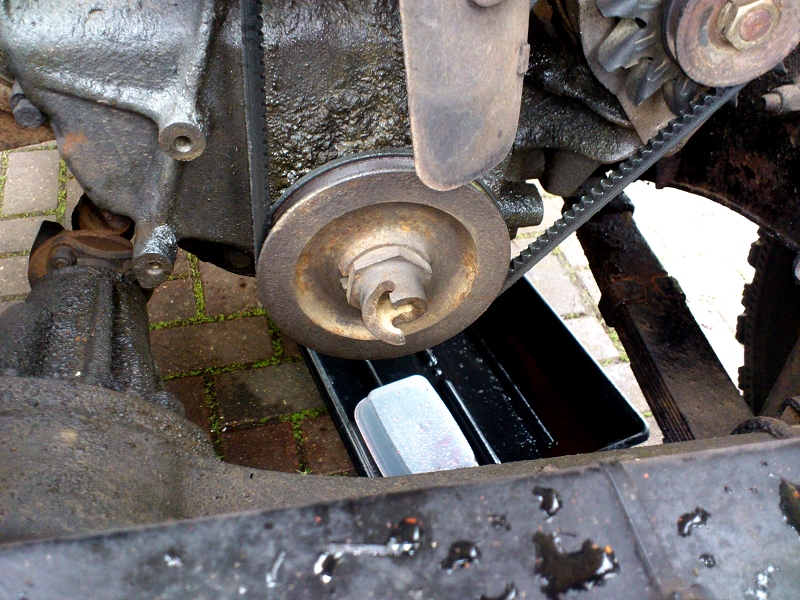 retro tax disk with '83 expiry (roughly calculated 12 months from date of first registration) 80 quid a year though, yes please !  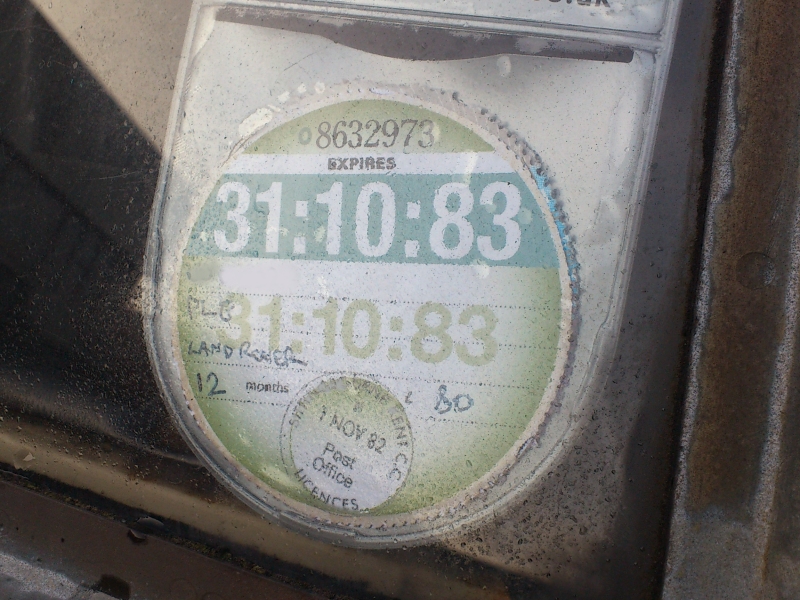 |
| |
Last Edit: Mar 9, 2015 20:33:46 GMT by darrenh
|
|
|
|
|
Mar 10, 2015 23:24:31 GMT
|
a nice looking little landy, try not to do this with it 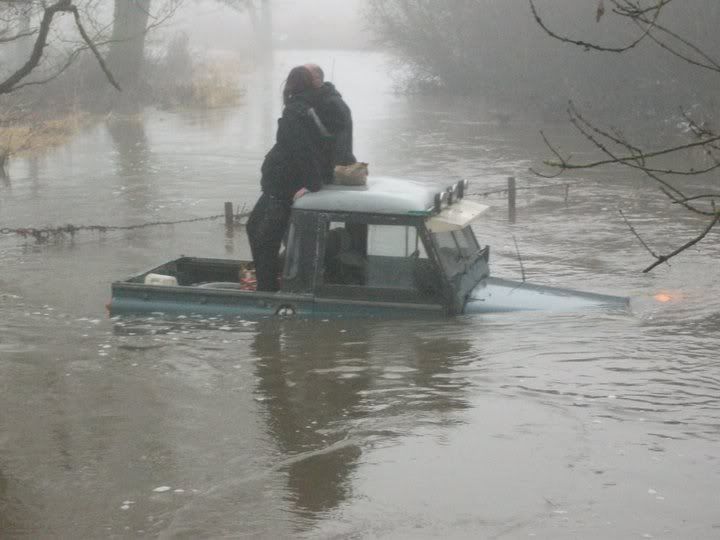 that was me and the ex in my old bitsa just "checking" to see if we could get through the river  |
| |
|
|
|
|
|
|
|
|
When I had mine we had a period of being flat broke, as you do, which unfortunately coincided with a flat battery. For around six months I started her with the handle and got to the stage of one nonchalant swing would do the job!
|
| |
|
|
|
|
|
Mar 11, 2015 10:38:19 GMT
|
a nice looking little landy, try not to do this with it that was me and the ex in my old bitsa just "checking" to see if we could get through the river  ouch ! reminds me of that old clip on youtube from billing, guy in a lightweight with bow wave washing over the cab roof, you can see the water slopping about inside at chin height like a goldfish bowl   made it though  For around six months I started her with the handle and got to the stage of one nonchalant swing would do the job! guessing those 6 months were august 2005, august 2006, august 2007 etc  the mind boggles at a january cold start, the choke doesnt seem to have a fast idle, literally just blocks the 'ole  |
| |
Last Edit: Mar 11, 2015 10:39:16 GMT by darrenh
|
|
|
|
|
Mar 14, 2015 18:32:34 GMT
|
i had a puncture at work on friday, luckily our place is right opposite my favourite tyre shop so i limped it over. i was gonna put the spare on, but while the wheel brace fits on the nuts, its about 10 inches long and completely hopeless. so i had to drive it flat but its only 50yards. when they disassembled the wheel there was a crack from the valve hole, and when they stuck a screw drive under it the crack became a huge hole. the tube had slashed itself on the sharp metal. 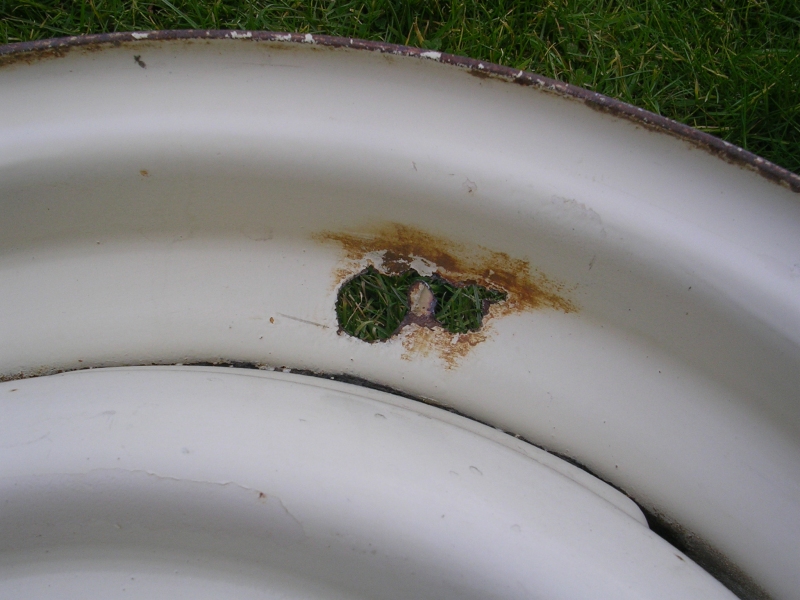 the tyre place wanted to, and i quote, "put some gaffer tape behind the hole to stop the new tube bulging out. i said naa don't be silly, can you put the spare on for me then i will repair the wheel and come back so i've been doing a bit of blacksmithery today, this is the inside of the rim, i guess as the tyre isnt air tight to the rim then its not water tight either, sits in there rotting away 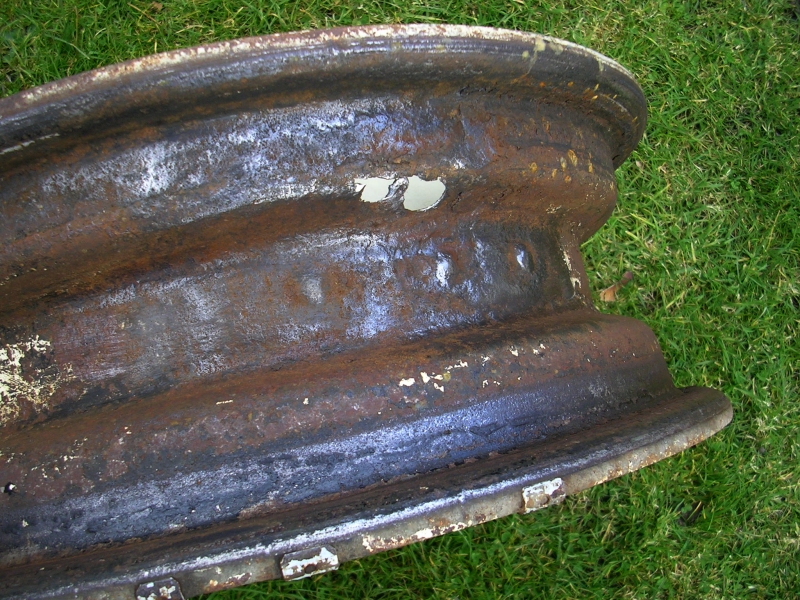 spent about 30 minutes with knotted wheel in the grinder 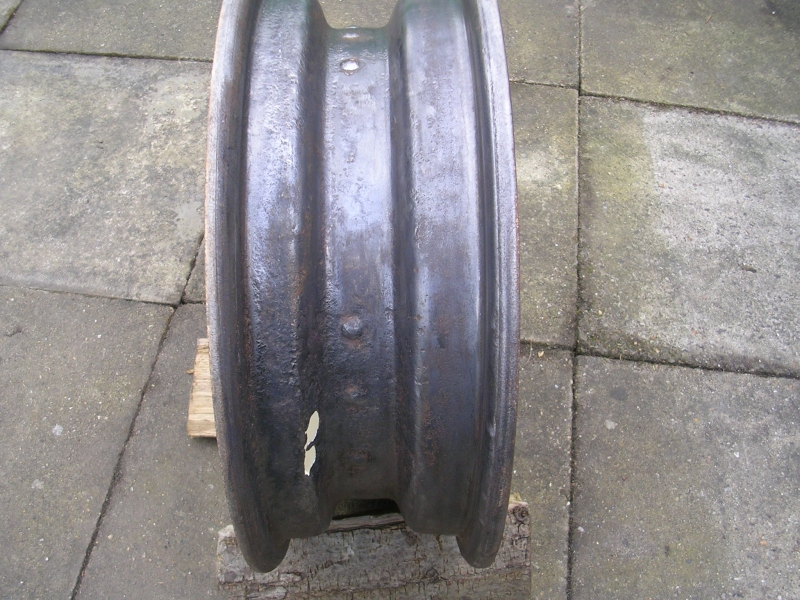 i thought, instead of titting around trying to make a repair near the valve hole i would just cut a new one at the next set of rivets, then make a solid patch. pillar drill plus perfectly sized hole-saw made light work of it 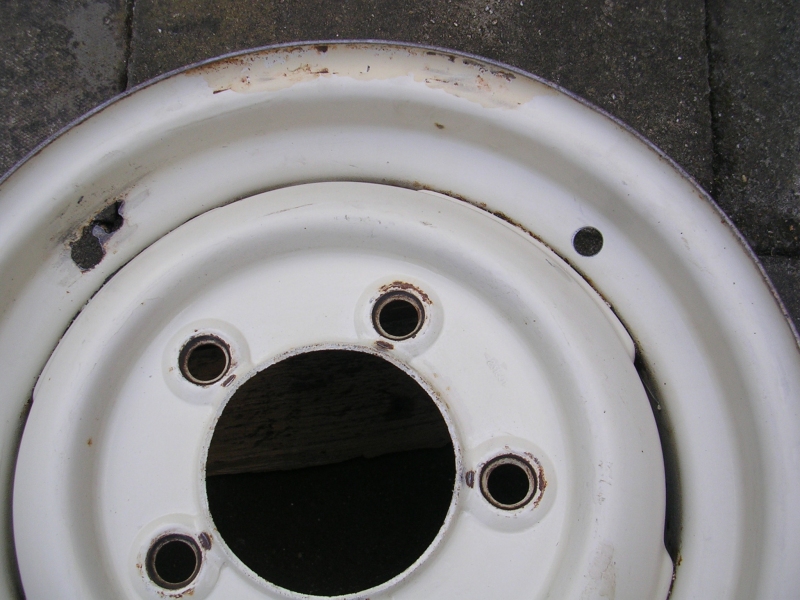 then i cut round the rot 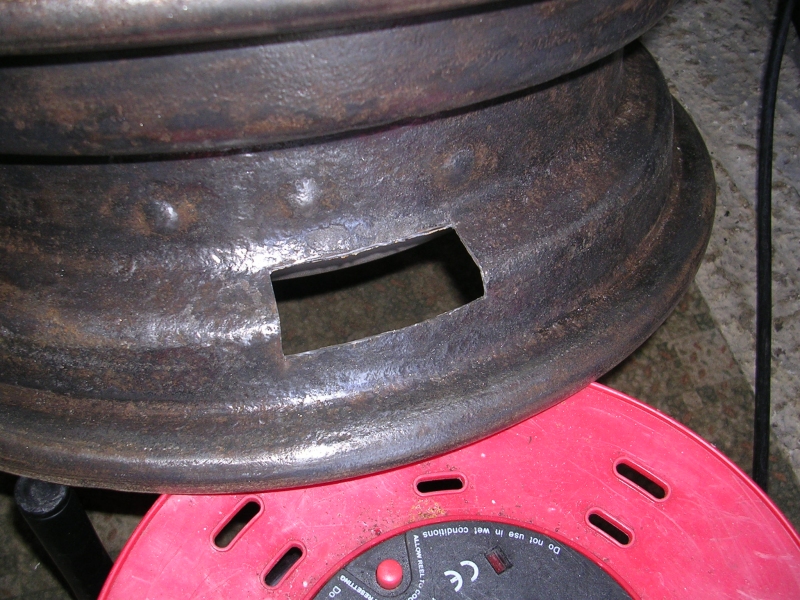 beat a patch out of some 2mm 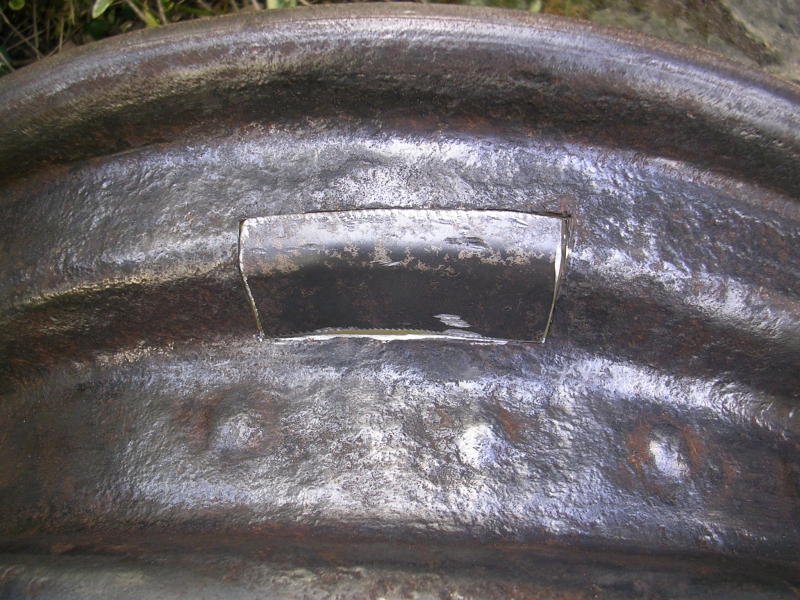 welded it in (note this is the BACK of the welds) 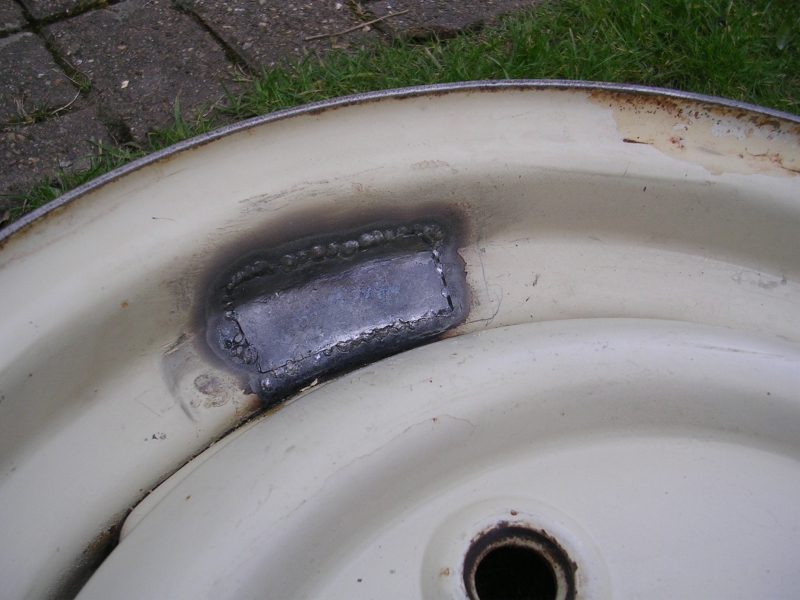 then cleaned up with the welds with 60 grit flap disk and a bit of high build primer. i don't have any limestone paint so will get a pot of that. after this i treated the inner rim with rust converter then will put some enamel on after that to make it smooth 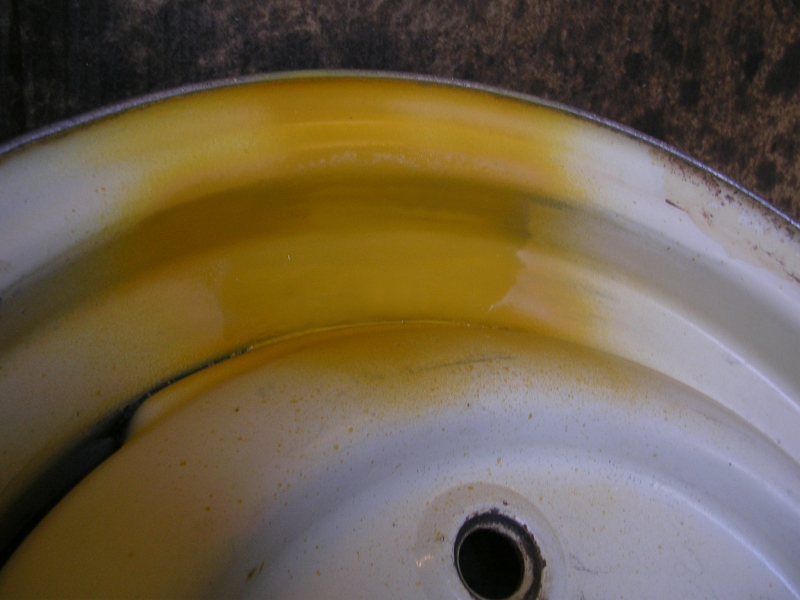 |
| |
Last Edit: Mar 14, 2015 18:34:35 GMT by darrenh
|
|
|
|
|
Mar 28, 2015 21:04:20 GMT
|
revisited the non functioning reverse light, if you remember it had gone a bit melty inside 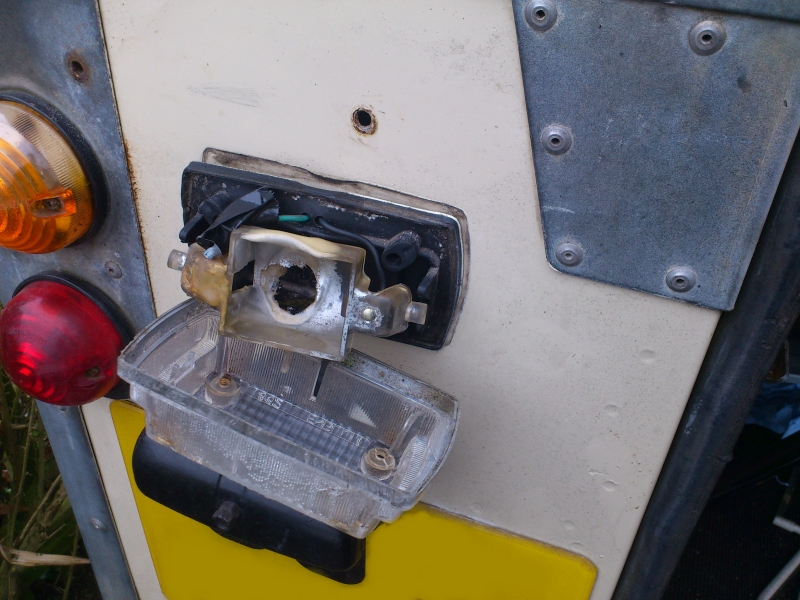 after quite a bit of effing and blinding at rusted whitworth nuts and bolts i got the metal cover of the rear of the lights. inside was yet more scotchlock heaven, the earth wire for none function reverse light was scotched into the cable for the tail lights. despite the +!2v being a dedicated feed from the dashboard, they had also used scotchlocks as means of joining it to the reverse light. :confused: 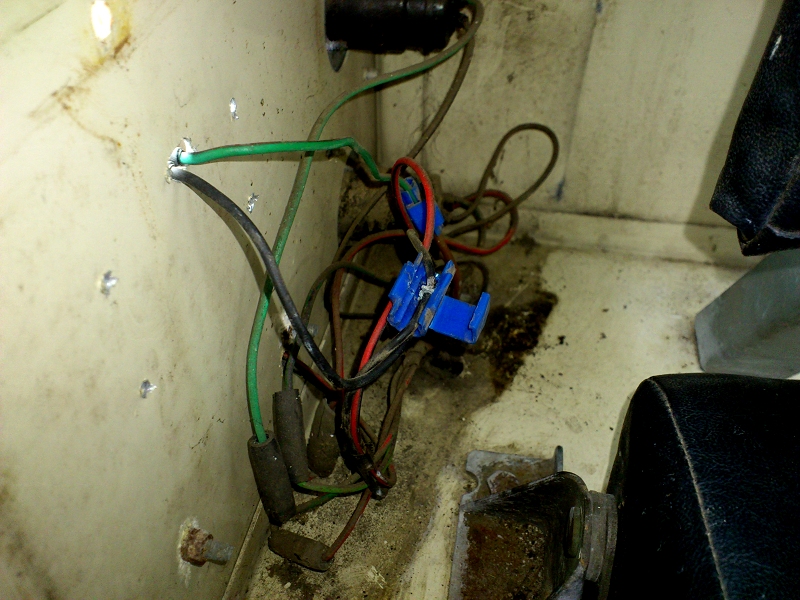 ripped all that off and filled the old holes with epoxy resin, then i had to drill 3 new holes for the new reverse light, which is just a generic bearmach defender one, matches my fog light on the other side. i used a grommet in the loom hole and put O rings round the bolts to seal them to the rear panel. +12v got soldered and shrink wrapped, i put a ringlet on the earth and slipped that under the bolt where all the tail lights earths are ganged together. 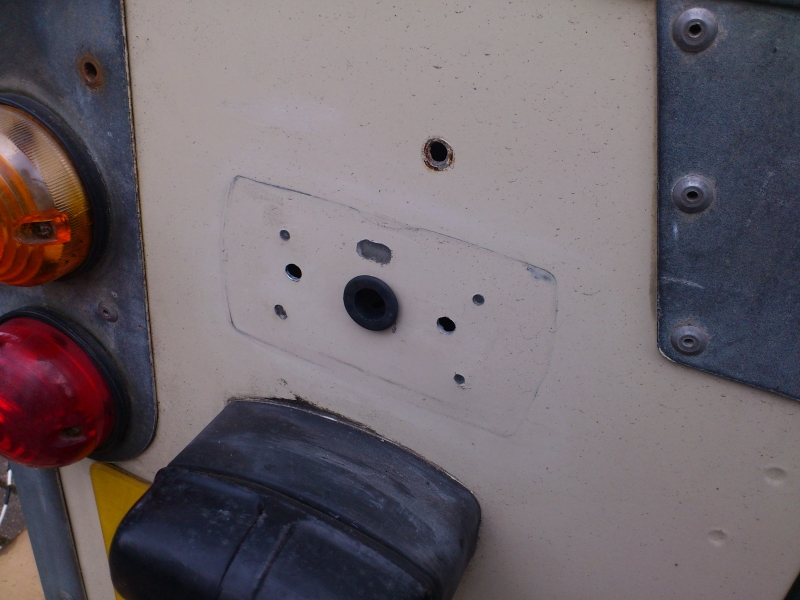 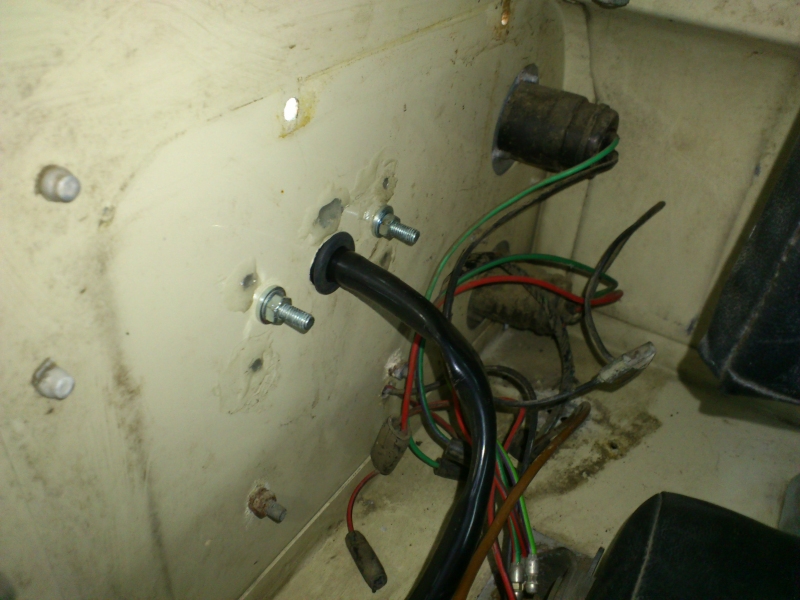 back up front remember it had a vintage lucas pull switch, 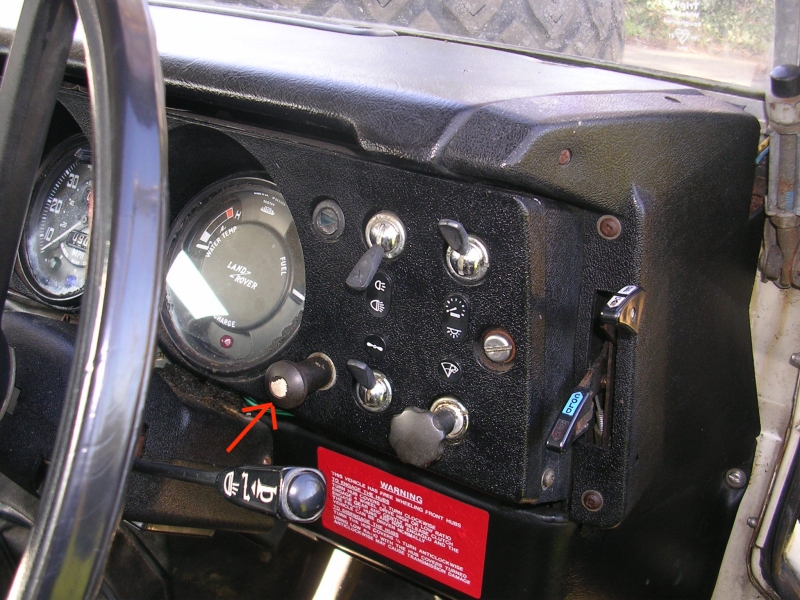 i unscrewed that and found it had a length of wire wrapped round it which went off to a dashboard earth post :confused: wtf are people like? 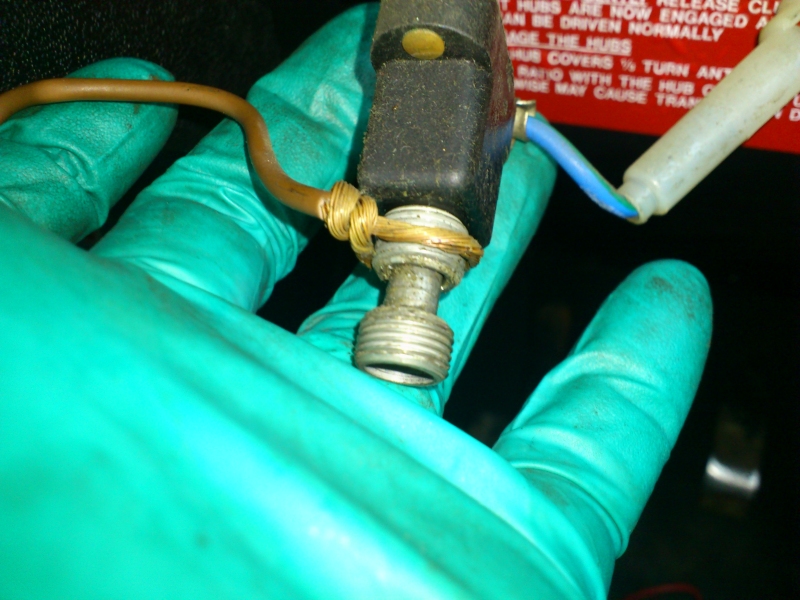 then i bolted in a brand new lucas SPB200 switch i bought to match the rest, laarvly ! this was given a new fused switch ignition supply from fuse box 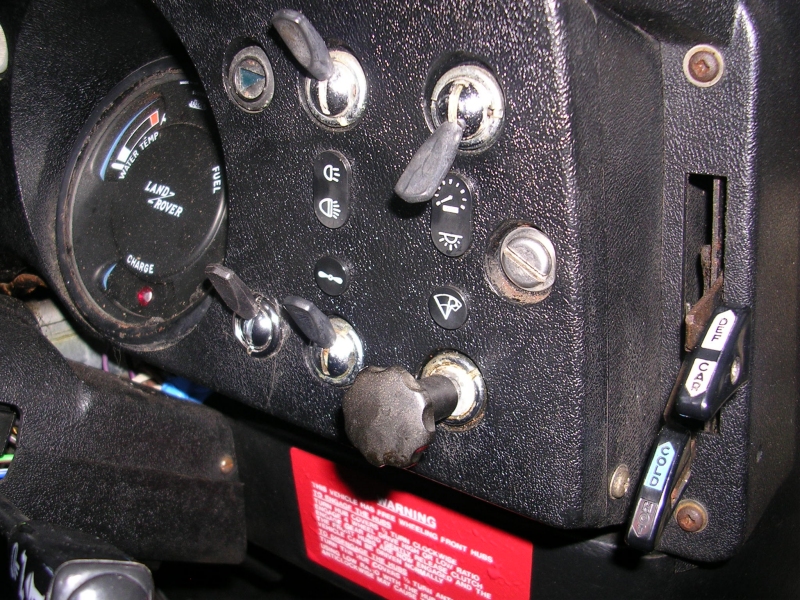 i could probably have fitted a plunger switch to the gearbox selector and have it automatic, but figured it will be useful for a work light too  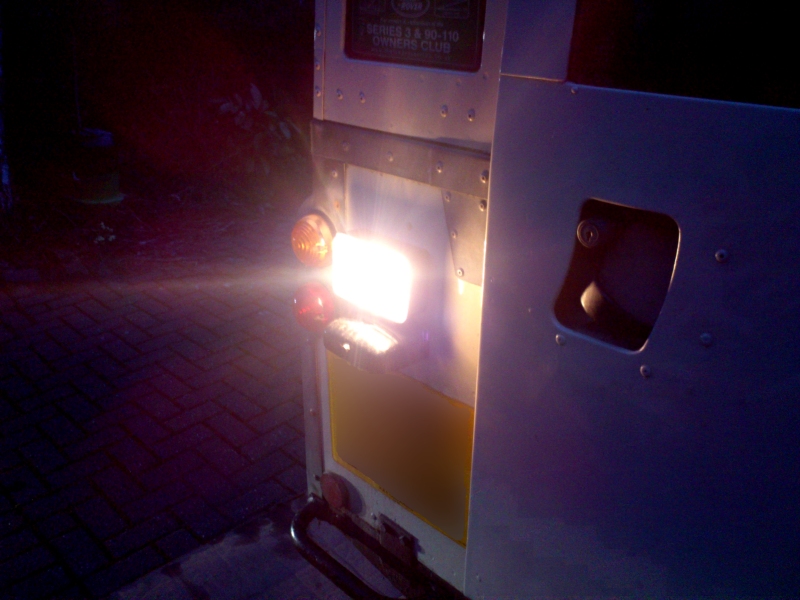 |
| |
|
|
|
|
|
|
|
Apr 15, 2015 21:24:22 GMT
|
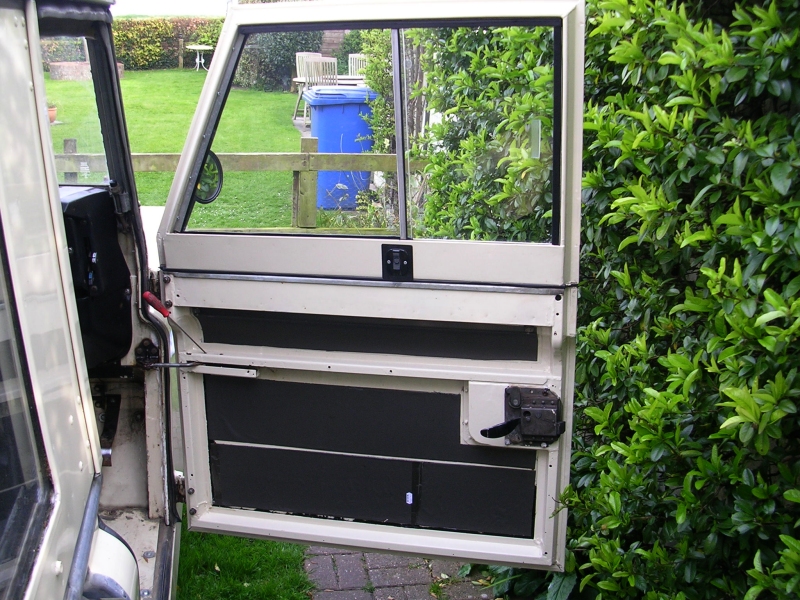
D-Day on the frontera sale looming, i thought i better use the time wisely and get the landy a bit more hospitable. this morning i unbolted the drivers door, i removed the bolts from the door side rather than bulkhead. i'm under no illusion why the doors are floppy mind you (rust), just knuckling down with the work 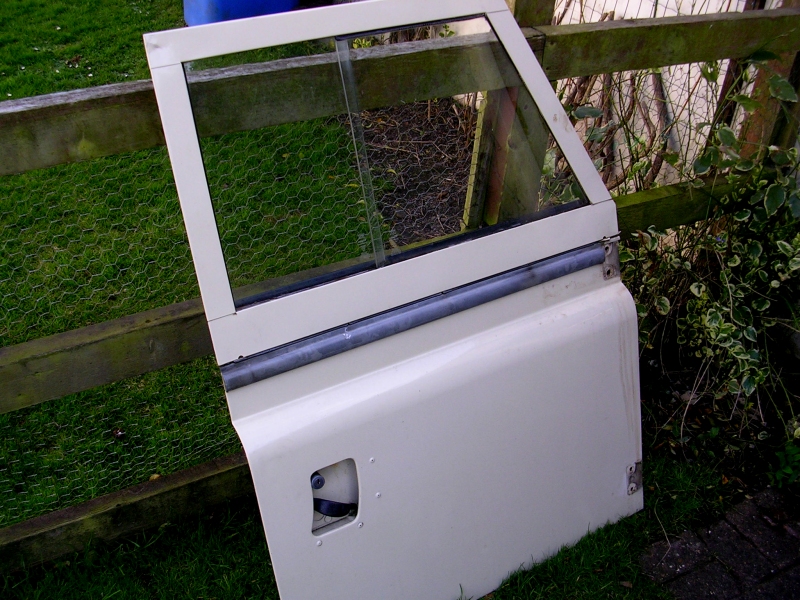 temporary door! 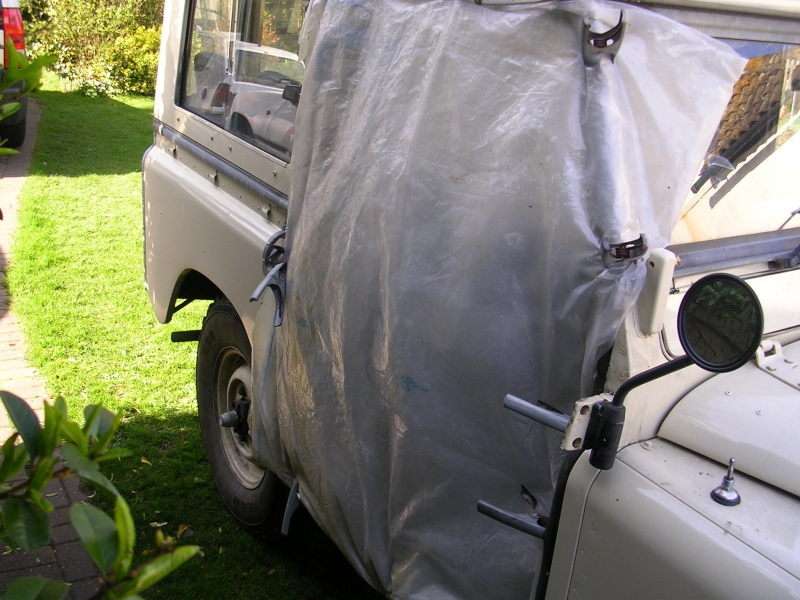 transferred to the work bench (2 gold stars for when i decided to make the bench 3 foot deep !!) you can already see some grott along the bottom rail 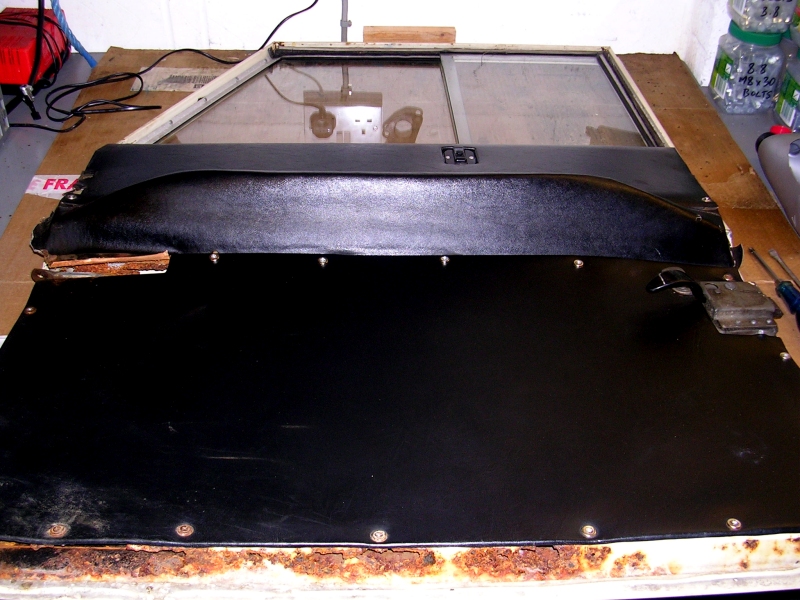 heres the 3 station wagon trim pieces removed, the strip pictured middle covers the join between the door bottom and top, appears to be stainless steel clad in vinyl. narrow section pictured left is the armrest and looks like its backed with some sort of zintec material, its rusted anyway and will need replacing. large section pictured right is the door bottom cover, its hardboard with vinyl stapled on. 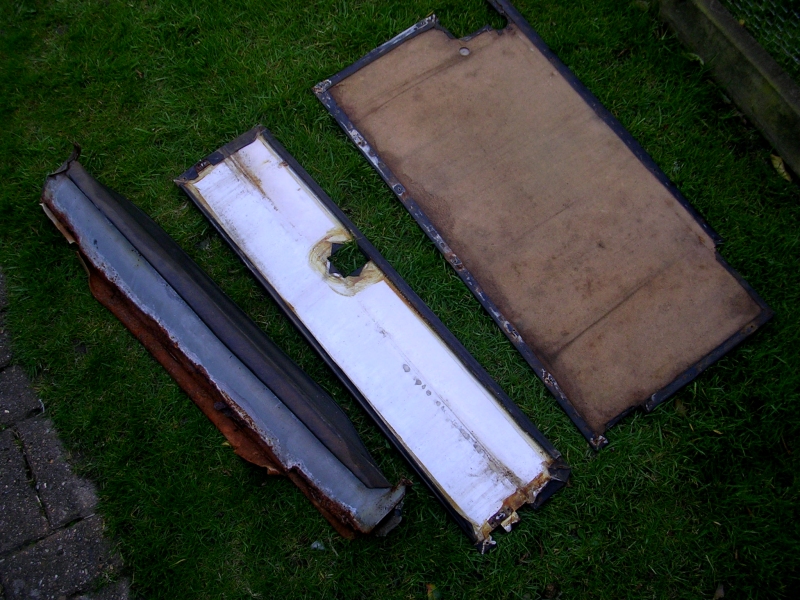 close up of the arm rest backing. ive got a load of 1.2mm galvanised sheet in stock so i think i will just remake this. 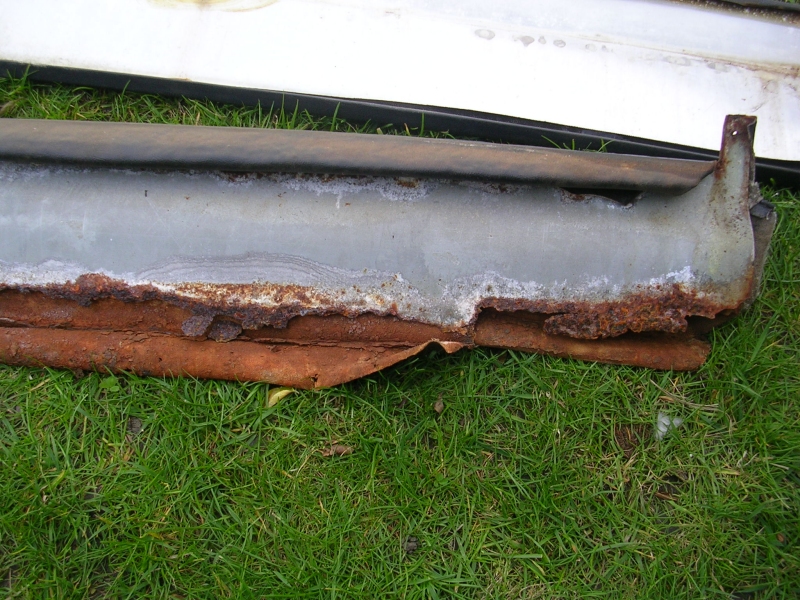 now onto the door carcass, rotten bottom rail, no biggie as i repaired this on my ninety to good standard. already have some YRM repair lengths which came last week :cool: 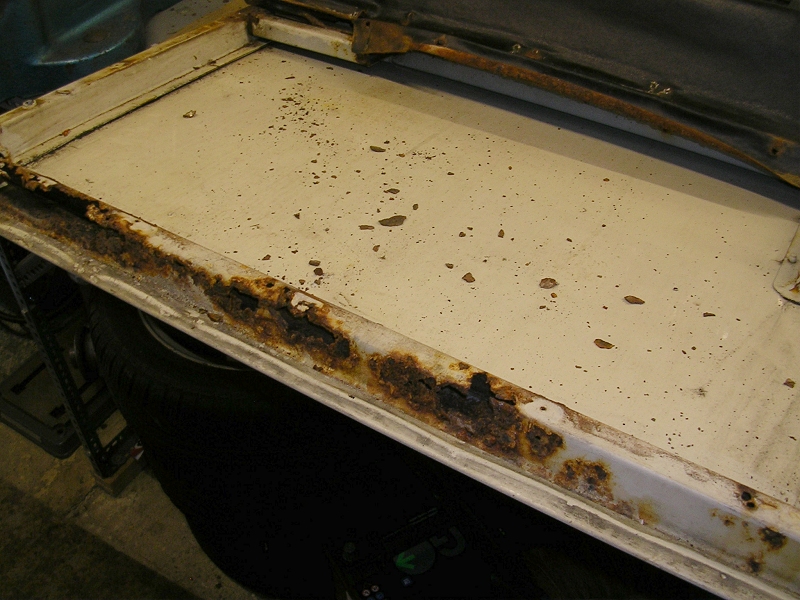 then i unbolted the door tops, i was gonna repair these for originality but they are completely teabagged in the internal structural areas. i think i will get a new pair from SPlandrovers to be honest. 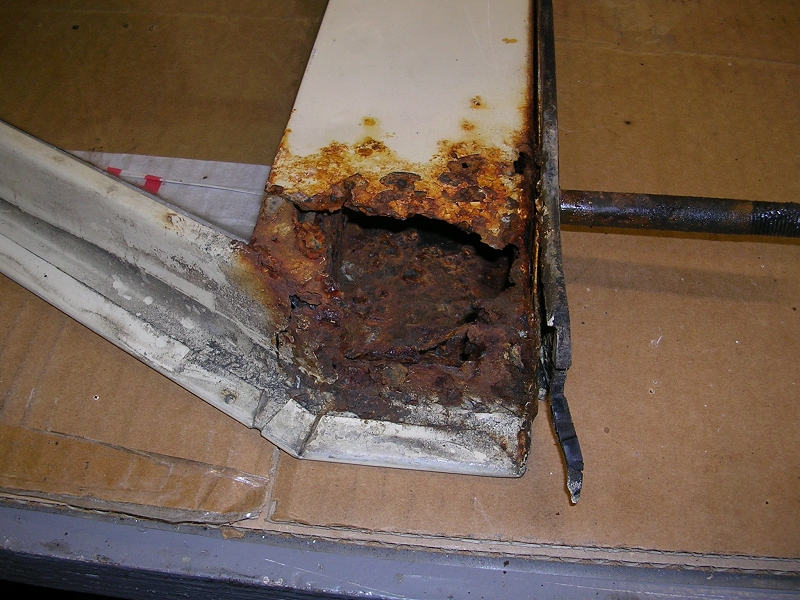 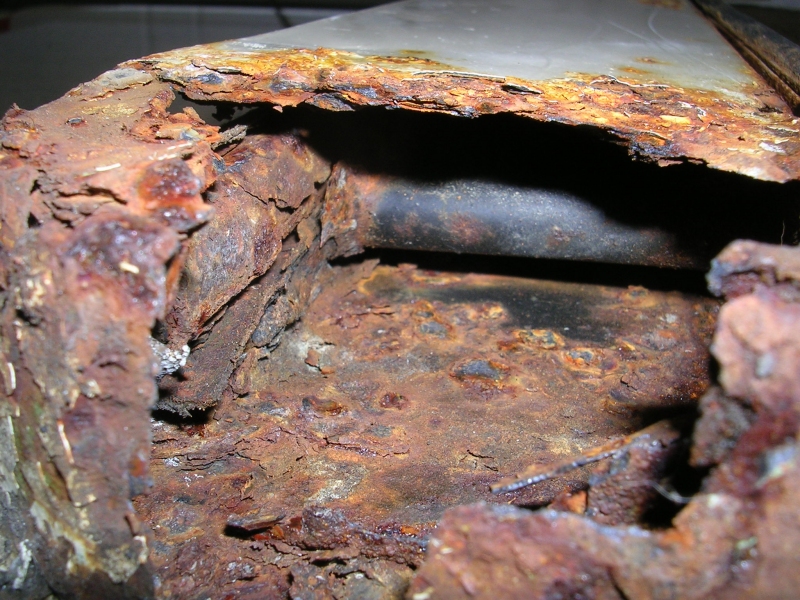 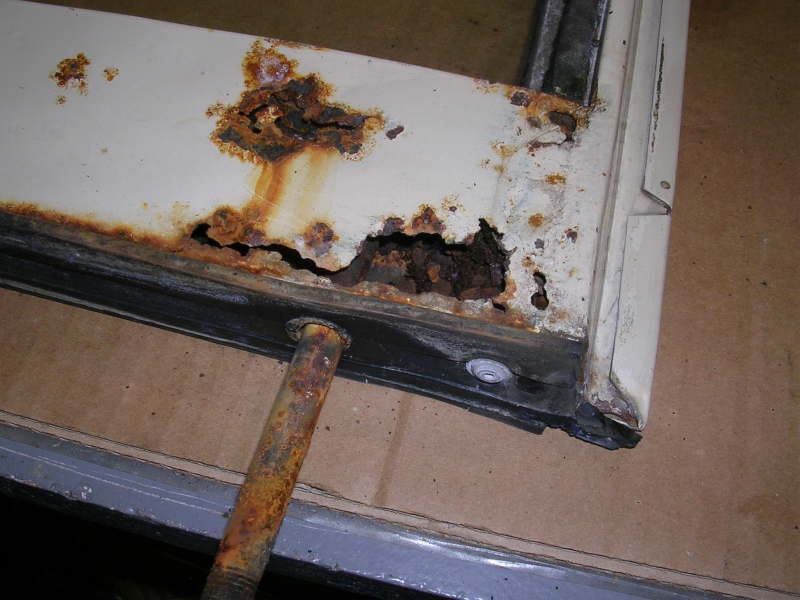 the following pictures are really just for reference so i know how the windows tops go back together. gonna keep the original glass and i also need to re-use the stainless steel packing pieces, but i've already received a clutch of brand new genuine felt runners a few weeks back 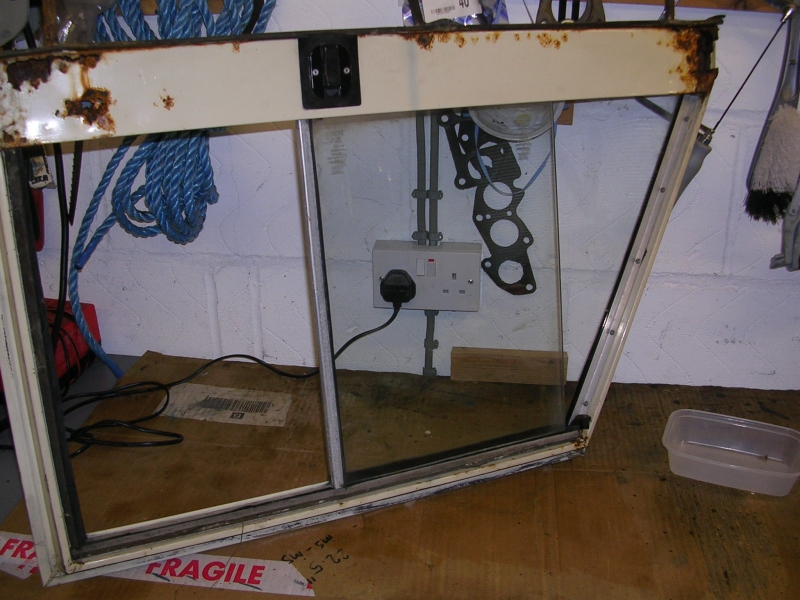 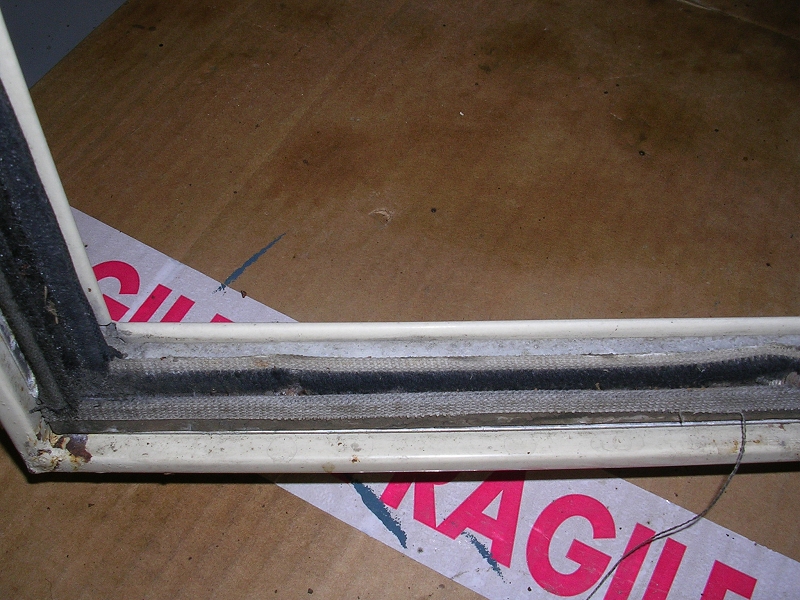 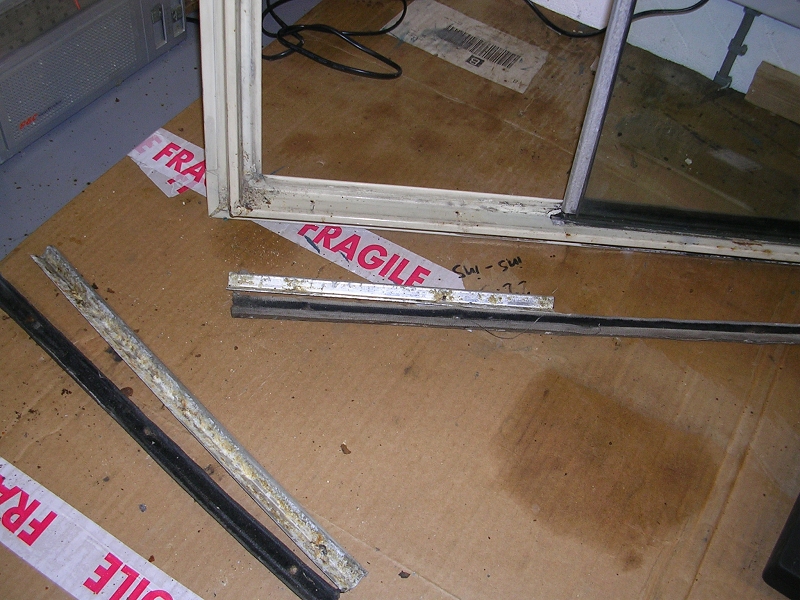 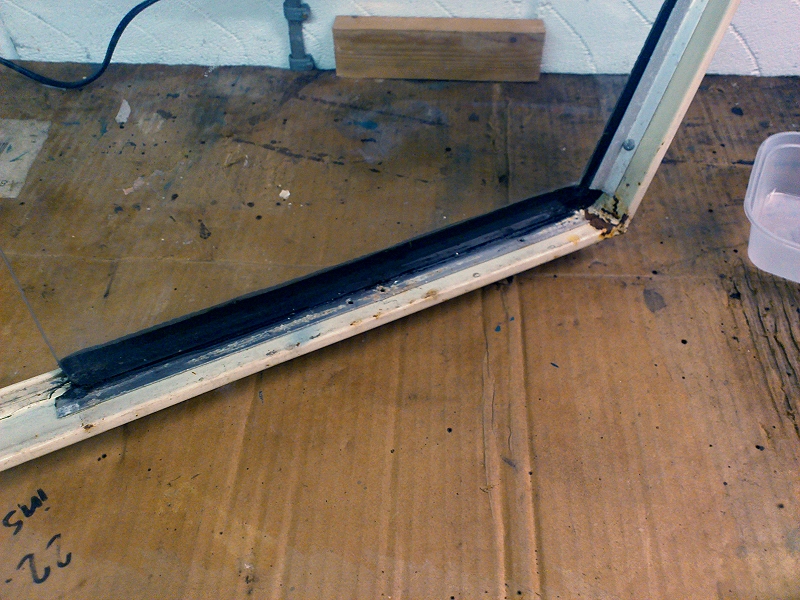 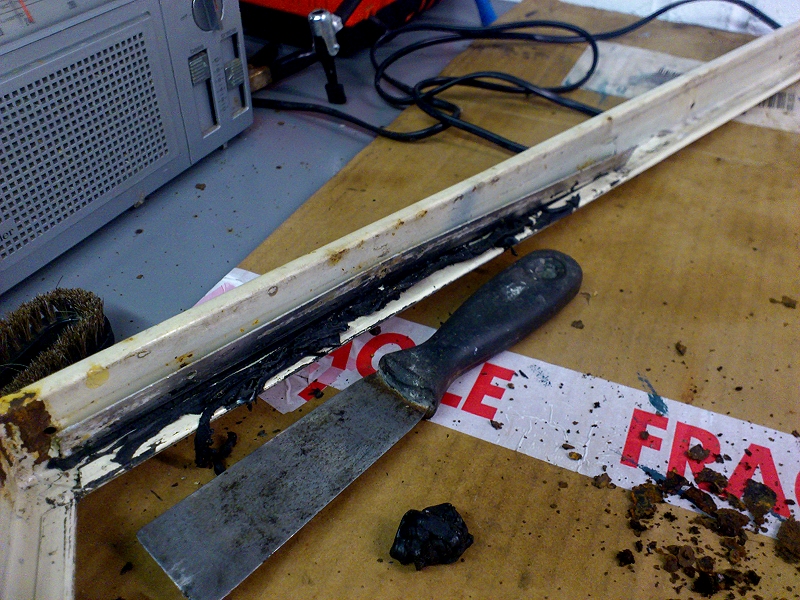 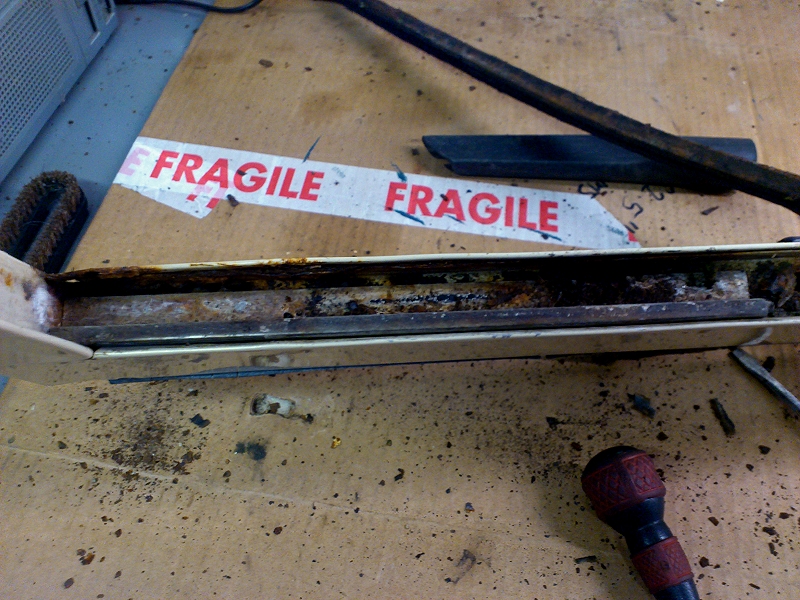 first job on the door bottoms is to peel the alloy skin back from frame. i learned my lesson on the ninety so heated up the paint to stop it cracking this time, then slowly lifted the lip up 90 degrees with combo of paint scraper and tack puller 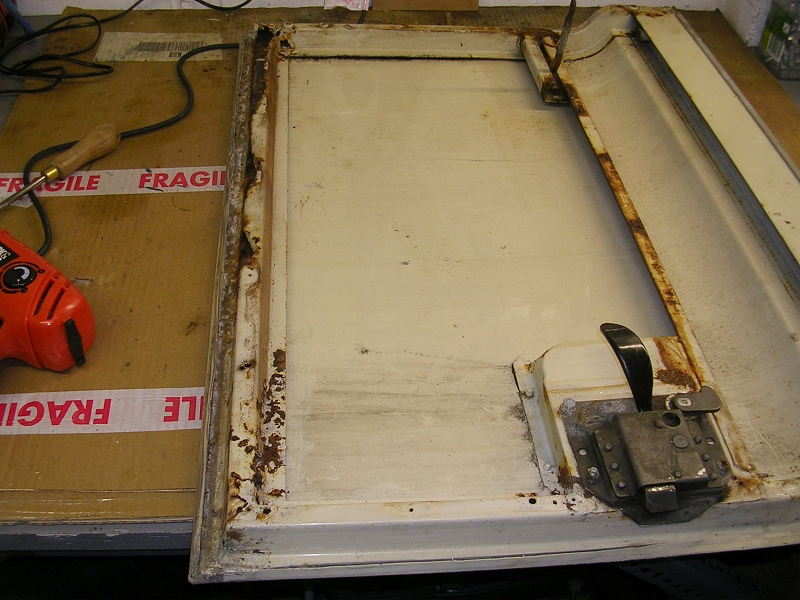 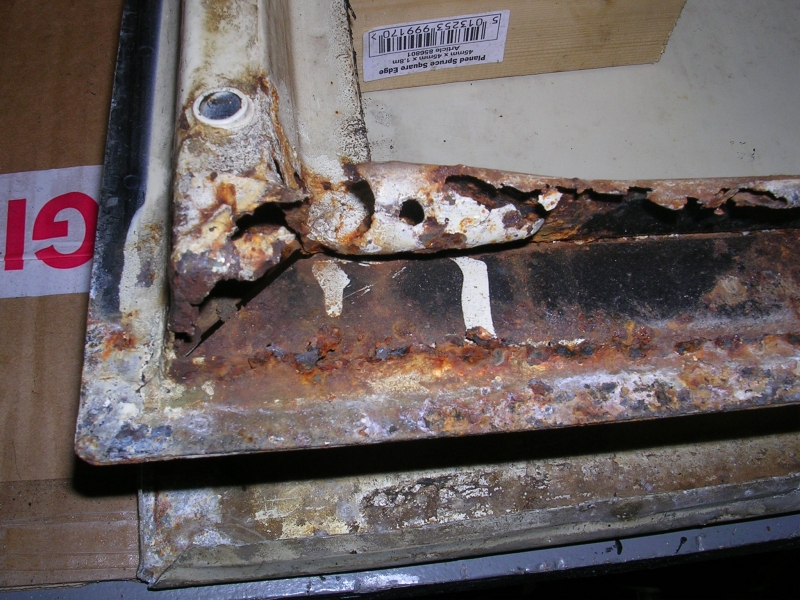 then i sliced the entire bottom frame away, at a nice mitre each end 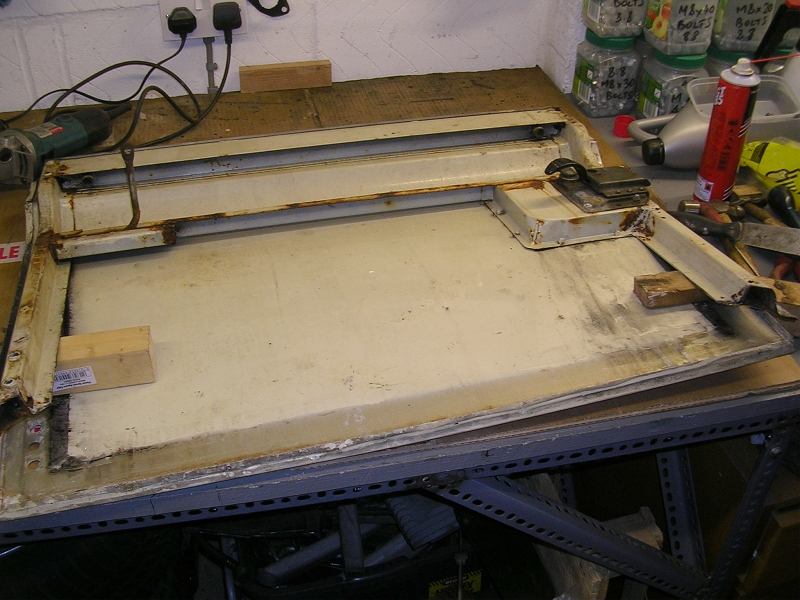 you can buy repair sections from quite a few places, this is from YRM metal solutions, cut to length and mitred to match the door 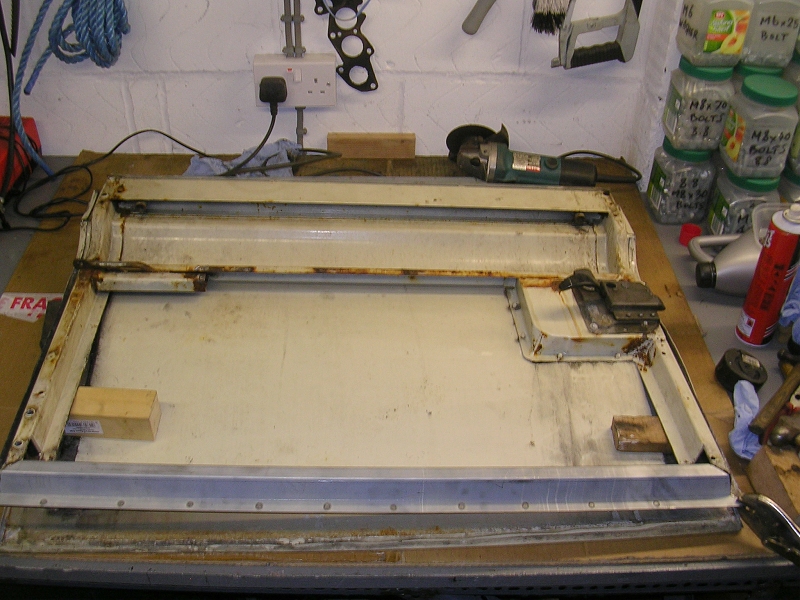 i also ordered a new pair of door tops for SPlandrovers, top quality british made items. rather than poor quality chinese made with a british name items  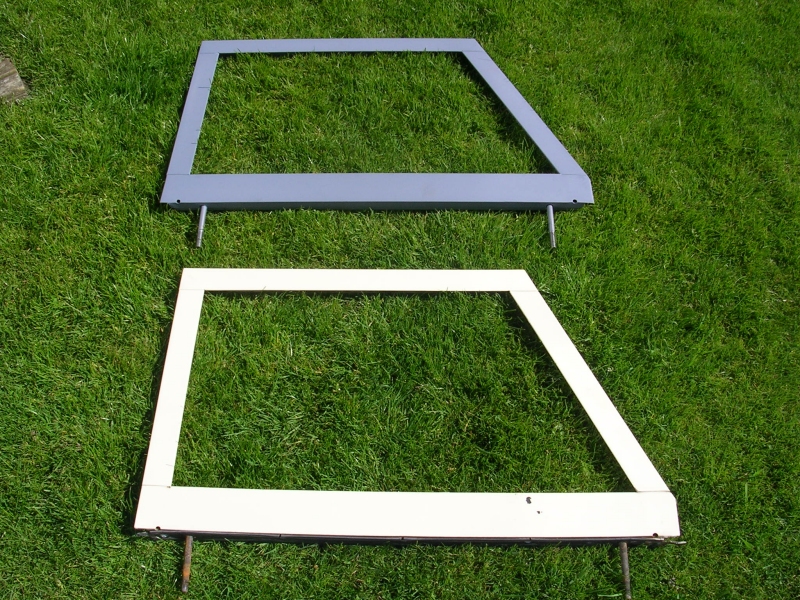 |
| |
|
|
bstardchild
Club Retro Rides Member
Posts: 14,971
Club RR Member Number: 71
|
|
Apr 15, 2015 23:55:04 GMT
|
|
Crikey - Opel could teach Land Rover a few things about rust proofing and I reckon Opels are bloody terrible for rust!!!
Love the fact that you can still get bits for them
|
| |
|
|
|
|
|
Apr 23, 2015 19:27:30 GMT
|
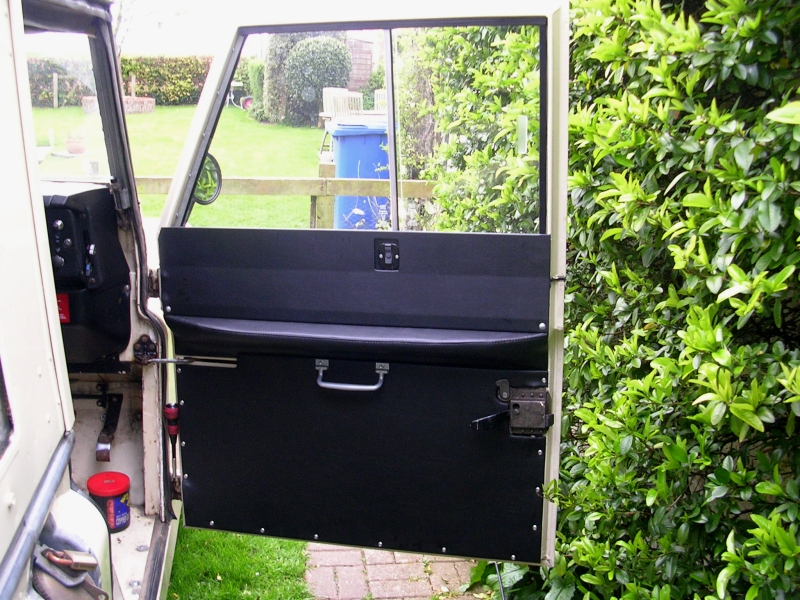
finished the welding, also had a decent wire wheel on all the other surface rust, plus a bit of hydate80 rust converter, lastly a word out to our sponsers Steve a.k.a gridman for donating a tin of landrover limestone coach enamel  supplied to him in error (label says matt, contents is gloss). first coat on, a few more to follow. 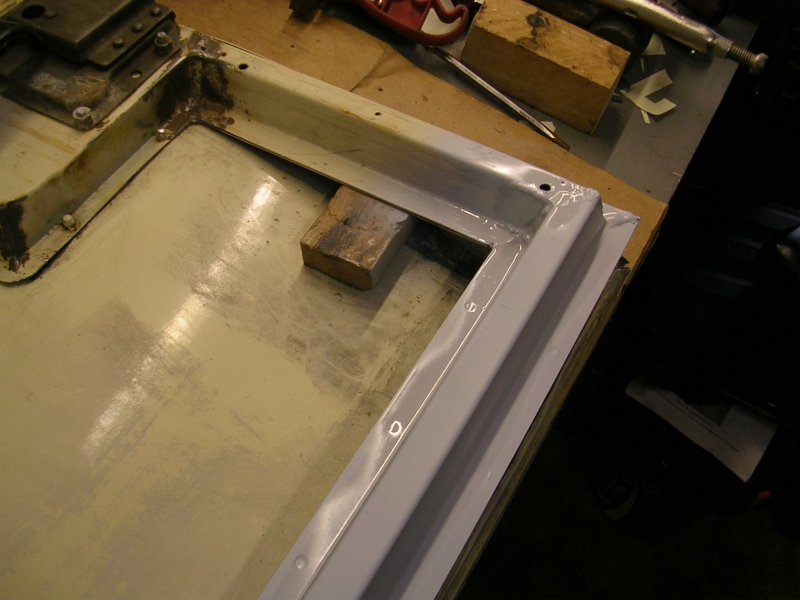 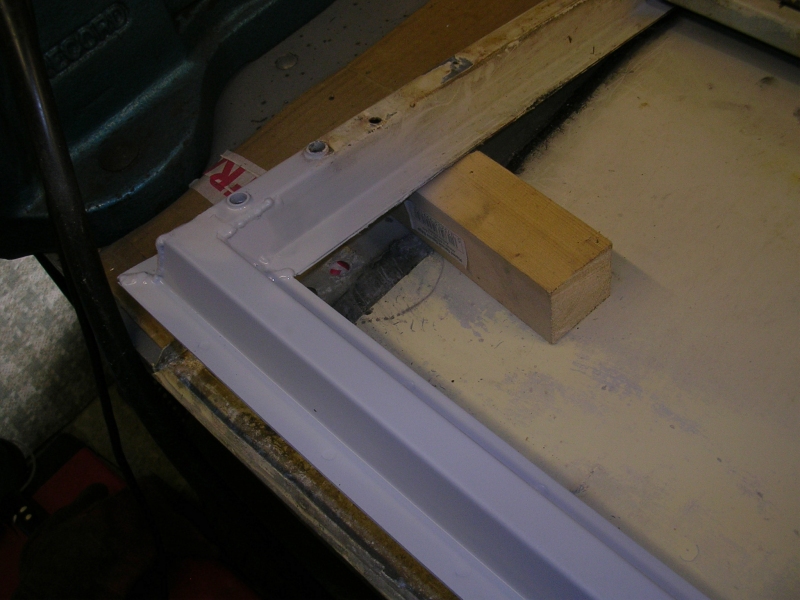 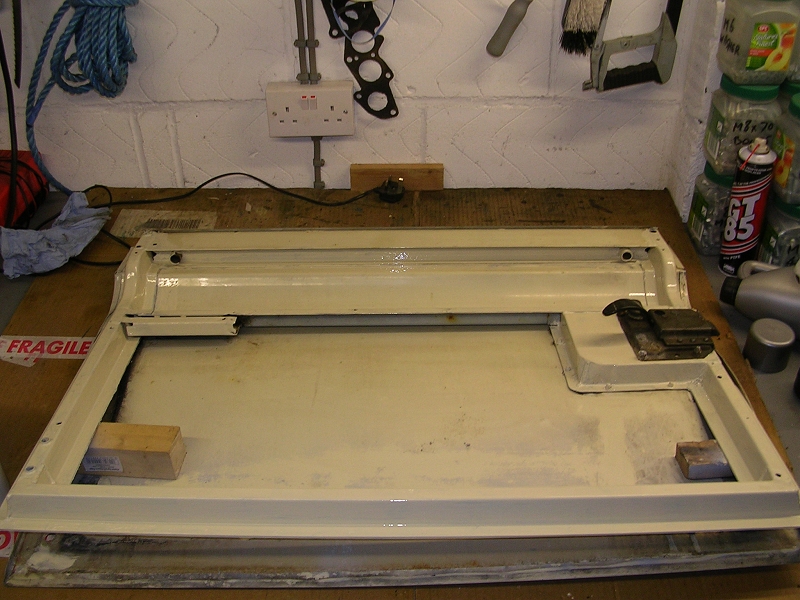 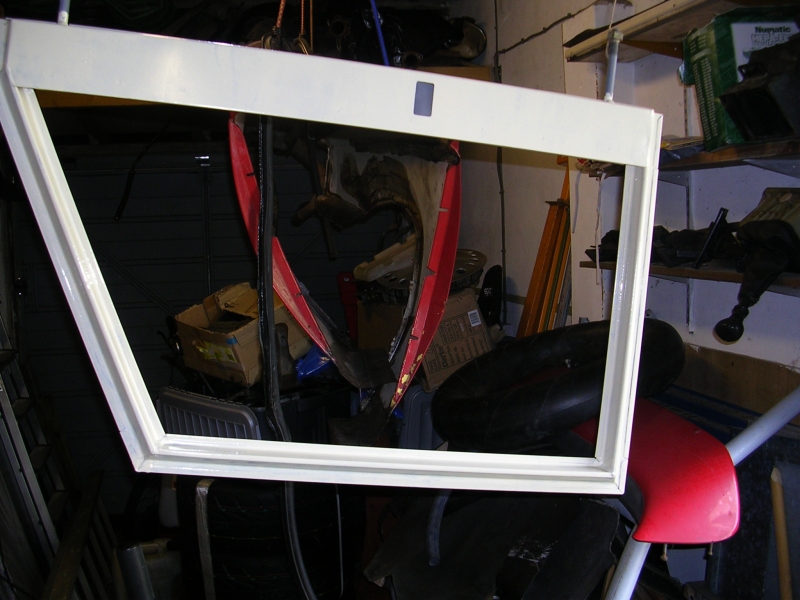 here i was dressing the door-top with the new felt runners, really fiddly time sapping job trying to match the screw you are putting in blind, to the hole you previously drilled blind, basically doing it by feel and trial and error. i also put loads of waxoil in the screw holes and behind the glass sliders so it was getting a bit mind bending. 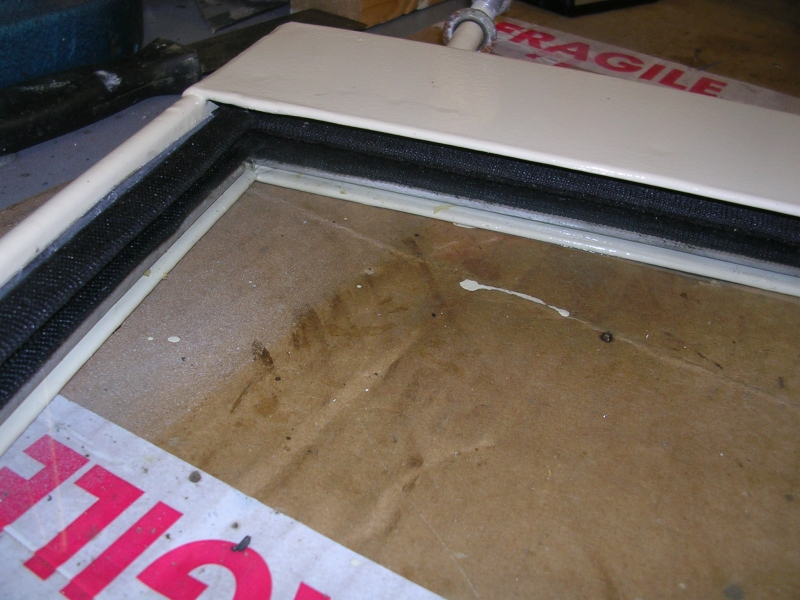 retaining strip on the fixed forward window 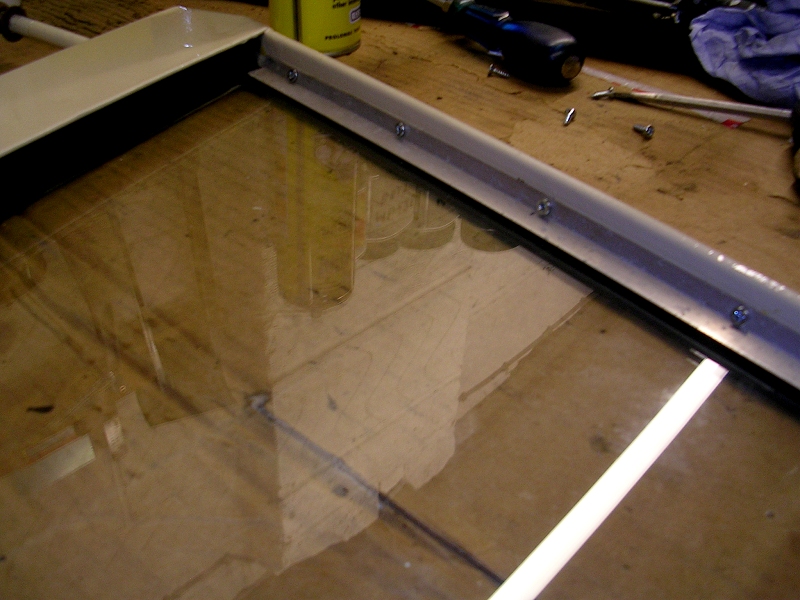 this is the fixed window from the outside, i used butyl rubber strip which comes in a preformed bead on a roll with non stick backing, like a huge comedy fruit winder, nicely squished out thatll do it 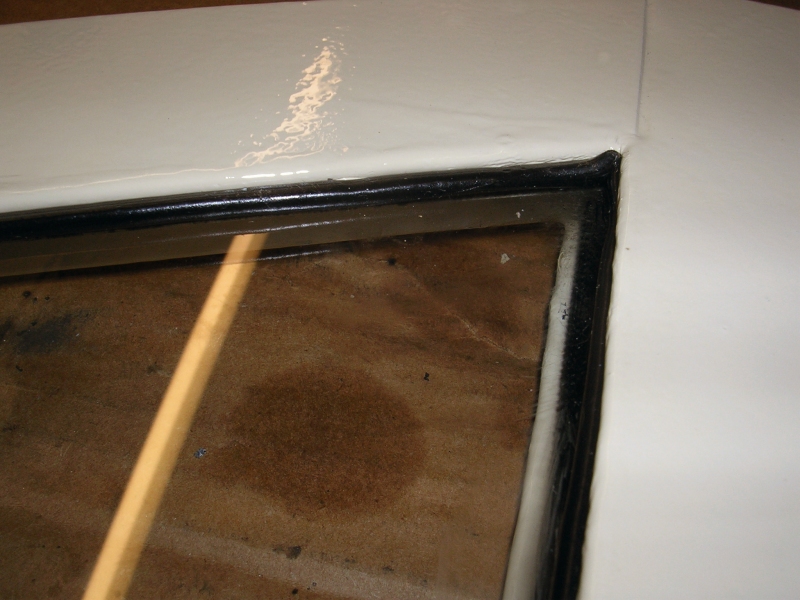 here i swapped over the window lock from the old door, fitted the rubber blade draft excluder thing that goes between the two panes, also riveted on the rubber seal that goes between the door bottom/top. (lip on the cabin side, lip upwards, incase you are wondering !) 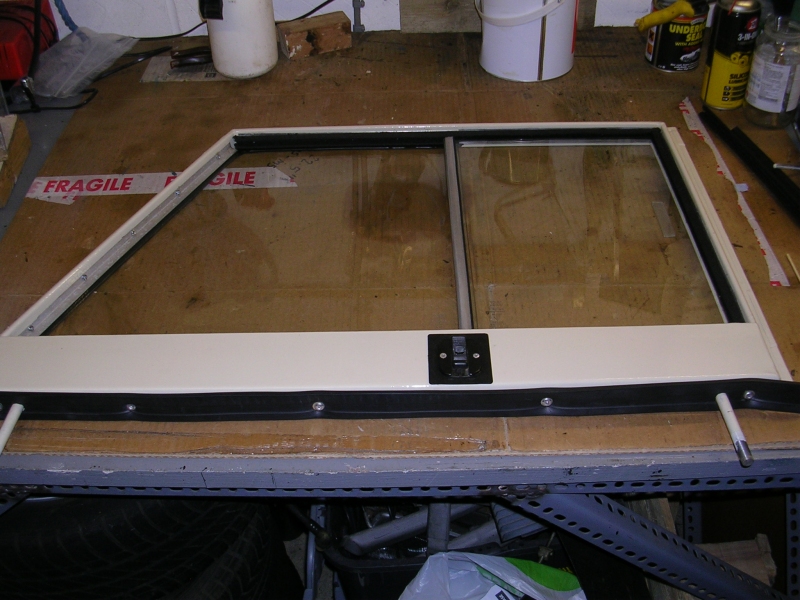 also did a couple bits on door bottoms, fitted a couple strips of bitumen anti-drum pads. these will give the door a bit of build quality and stop the road noise a bit. gonna do the same on the floor panels. 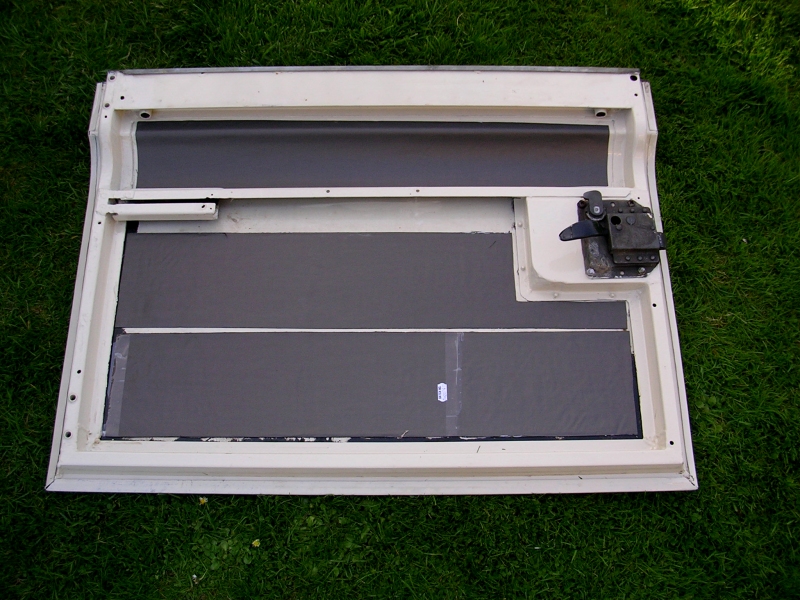 confession time, i originall said i was gonna refurb my station wagon trim set. then one evening while browsing exmoor trim (making my imaginary wish list for when the euro millios roll in) i noticed they sell exact copies of the deluxe/station wagon trim! you get 2x door cards, 2x arm rests, 2x upper door cards, for the same price as a weekend out on the lash. that was a complete no brainer, ordered them up because i'm getting lazy in my young age and saves me about 2 days. heres two of the bits test fitted to the door bottom 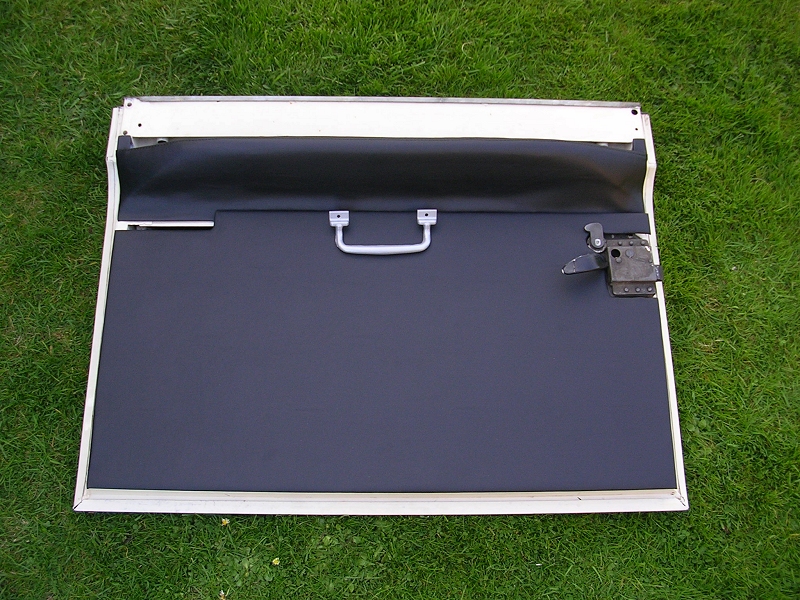 |
| |
|
|
|
|
|
Apr 26, 2015 12:00:44 GMT
|
|
|
| |
|
|
bstardchild
Club Retro Rides Member
Posts: 14,971
Club RR Member Number: 71
|
|
Apr 26, 2015 12:08:39 GMT
|
|
They look great - I'm also liking the quick release door hinge pins
|
| |
|
|
|
|
|
Apr 26, 2015 19:08:56 GMT
|
They look great - I'm also liking the quick release door hinge pins thanks BC |
| |
|
|
luckygti
Posted a lot
   I need to try harder!
Posts: 4,912
|
|
Apr 26, 2015 21:20:26 GMT
|
|
That's fantastic. A mates just bought a series one and I keep looking at a series 3 in a garden on the way to work! I'm getting serious Land Rover envy!
|
| |
|
|
|
|
|
May 10, 2015 16:44:41 GMT
|
last week i took the door card off the the passenger door for a quick peek. not *as bad, but still needs exactly the same amount of work, bottom rail replacement, new door top. 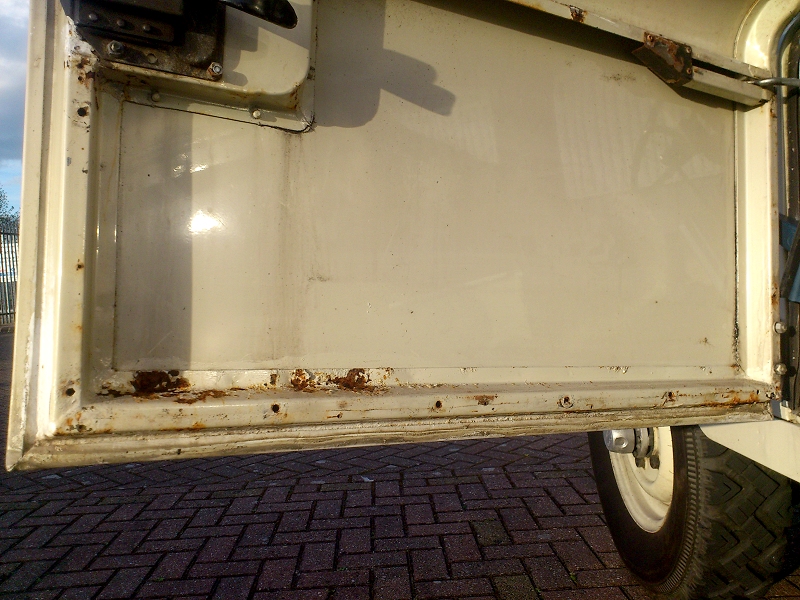  now onto the rear door, just to pre warn, you'll need a tetanus booster to even view this picture :eek: 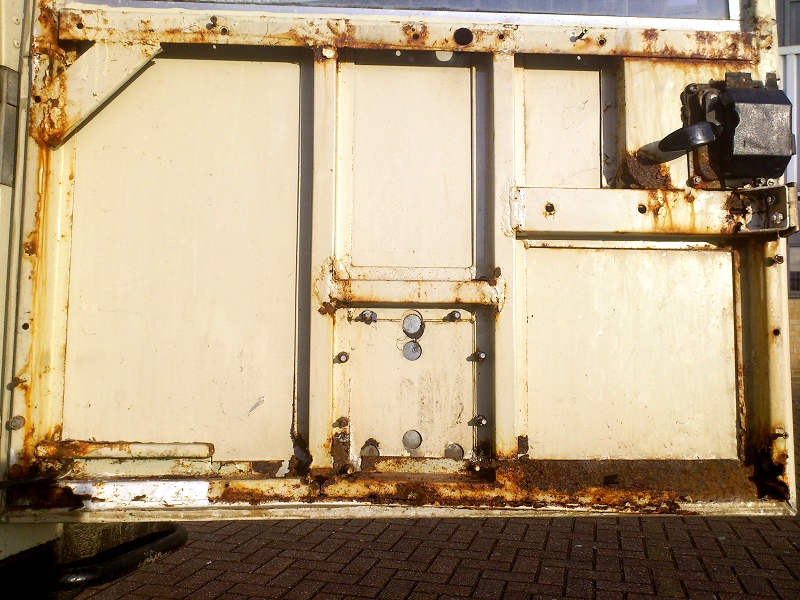 couple bits done yesterday, the first was a new alternator which i pre-emptively bought a couple months ago. the issue with mine has been there since day 1, the charge light has flickered on and off at idle but always goes out when revved, also everything electric used to flicker as if the voltage was rising and falling rapidly by a couple volts (most noticeable on the headlights). in last couple days the charge light wasn't going out at all until very high revs, so thought i better get it changed before the battery throws a wobbler. 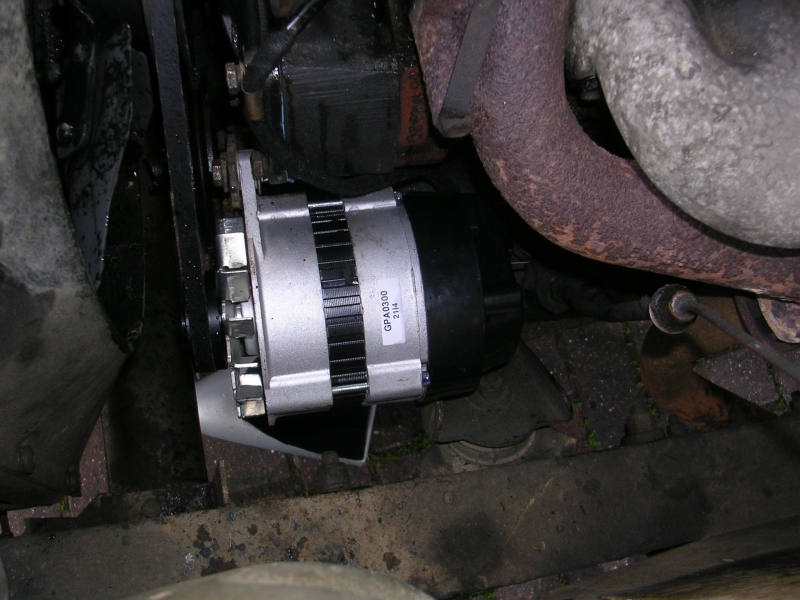 another issue was the engine temp being a bit erratic, sometimes appearing if it never heats up, other times charging up to the red in a couple of miles. sounds like electrical gremlin but the heater output tended to mirror the gauge, so changed the thermostat... 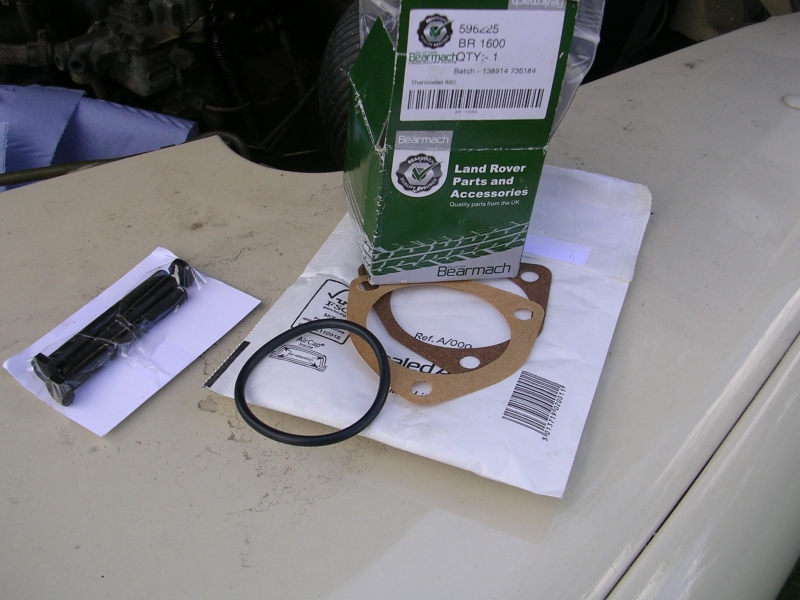 i thought i nearly lost the front bolt, it felt like it was twisting the shank rather than undoing, then all of a sudden it went DINK and came undone ok, phew. when they were all out i used the best one to make a thread cleaner... basically cut a slot along the threads then wound it in and out the block to clean the threads out. it pulled quite a bit of curse word out, oil, rust, even black sump sealer stuff. used a nice bit of copper grease on the new bolts !! 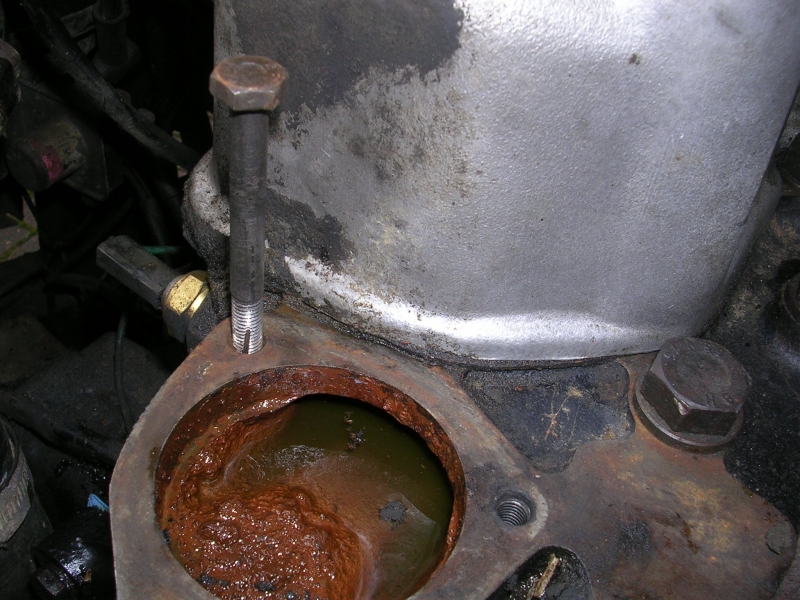 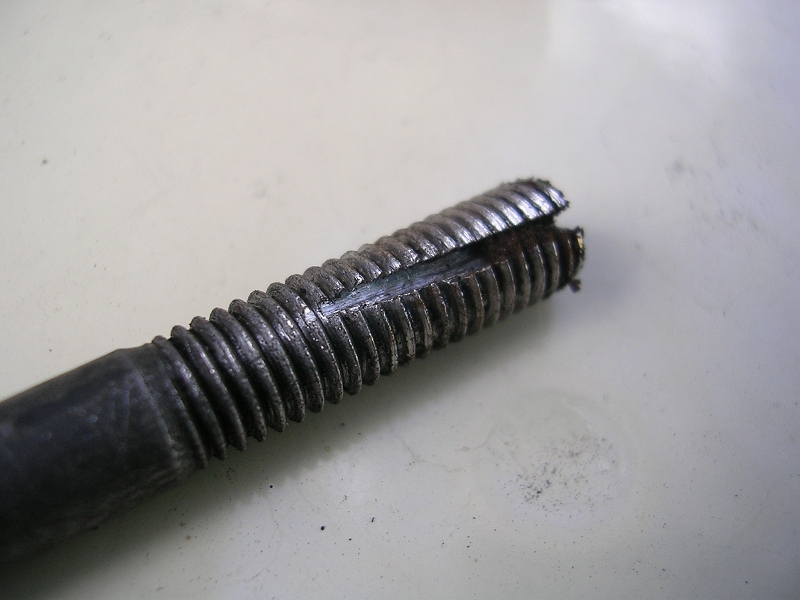 lastly the galvanised rear door arrived on friday  its galvanised frame, alloy skin and the skin is bonded to the frame with PU seam sealant. seam sealer gives it the barrier (although allu and zinc are closer on the galvanic table than allu and steel anwyay) also gives it way more build quality. 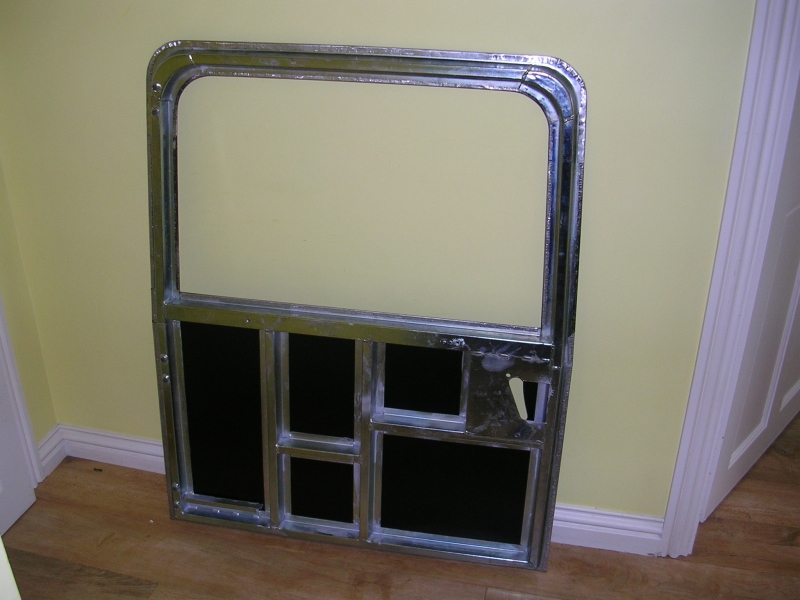 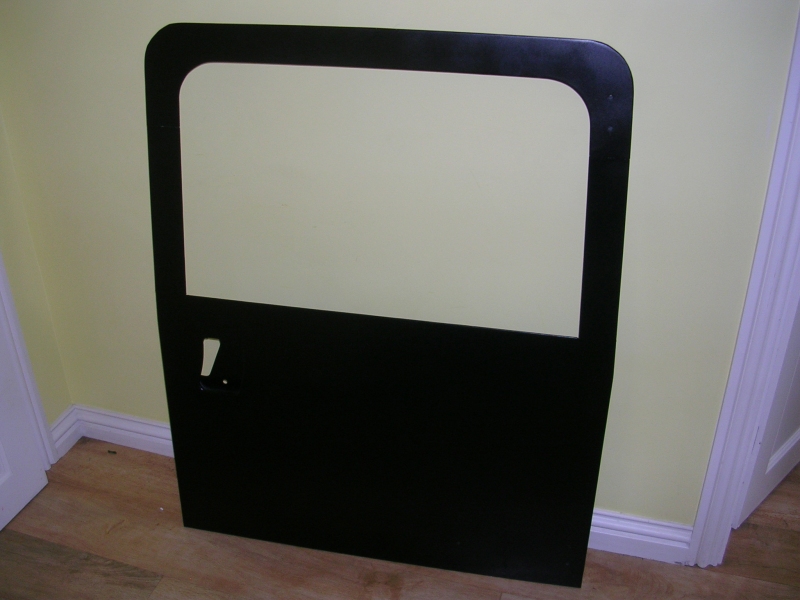 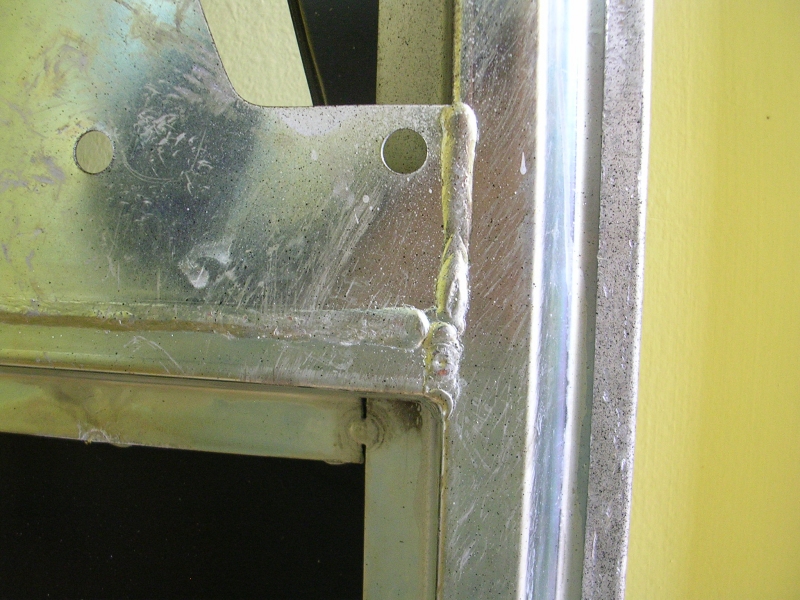 |
| |
Last Edit: May 10, 2015 16:47:45 GMT by darrenh
|
|
|
|
|
|
|
i can see a bit of a running theme in some of retrorides threads. in as much as if you can twiddle a spanner and weld metal together, you usually end up inheriting plumbing, tiling and all sorts of random DIY ? anyway thats my excuse for doing nothing since the last update. but did take this shot at a local disused petrol forecourt, with a bit of colour balance tweak for vintage look  |
| |
Last Edit: Jun 2, 2015 11:29:39 GMT by darrenh
|
|
|
|
|
|
|
i did all the oils yesterday so took the opportunity to fit the oil filter adapter from a later 200tdi defender engine. from the 2.5 petrol of mid 1980s to the 300tdi of the mid 2000's they used this adapter with a modern "spin off" oil filter. its essentially a straight swap onto the older series land rover engines which have the old fashioned BL canister setup, it has a replaceable element inside but makes a mess during oil changes and a pig to seal up. i used a new series 3 gasket and the old series 3 bolts. because its off a 200tdi it has a few outlets that i don't need which wouldve been the oil cooler feed and return plus oil temp sender. all of the blanking plugs are off the shelf items listed in land rover parts manual. the low pressure warning switch is the same on both but it points in a different direction, however the loom reaches. 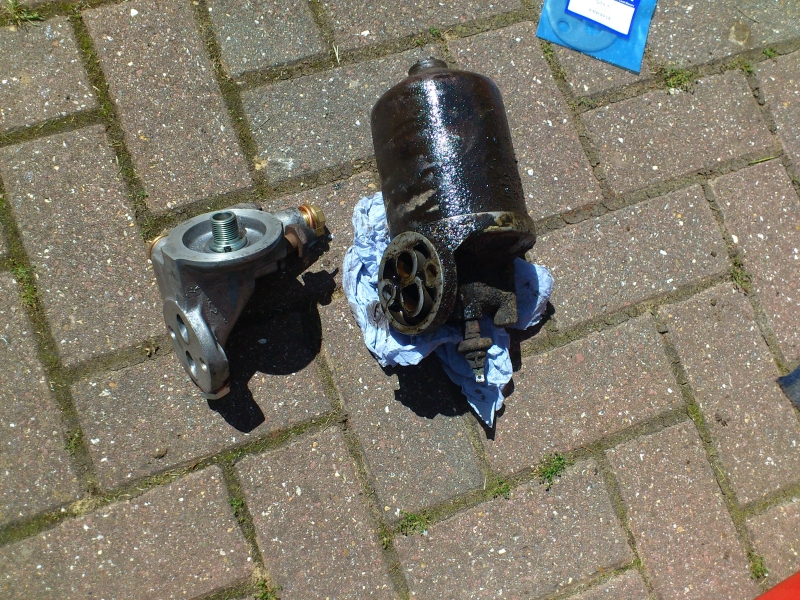 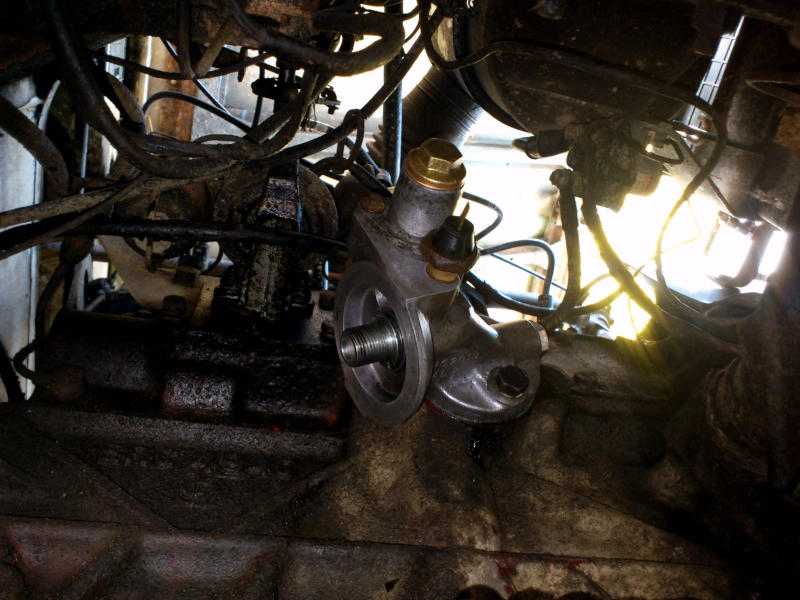 today i fitted the H+H ignition solutions electronic distributor kit. this is a well trodden path by myself as i had the exact same kit on my 2.3 ninety. it came with a new high power coil, lucas 45 style billet distributor plus all the wiring and mountings. inside is a hall sensor driven system to trigger the coil. i started by rotating the crank by hand to get TDC and marked it with a blob of tippex. my crank pulley had 5 marks on it with 6 deg written at either end. i figured the middle mark was TDC and confirmed this by using a screw driver down no.1 spark plug hole and rotating the crank further. 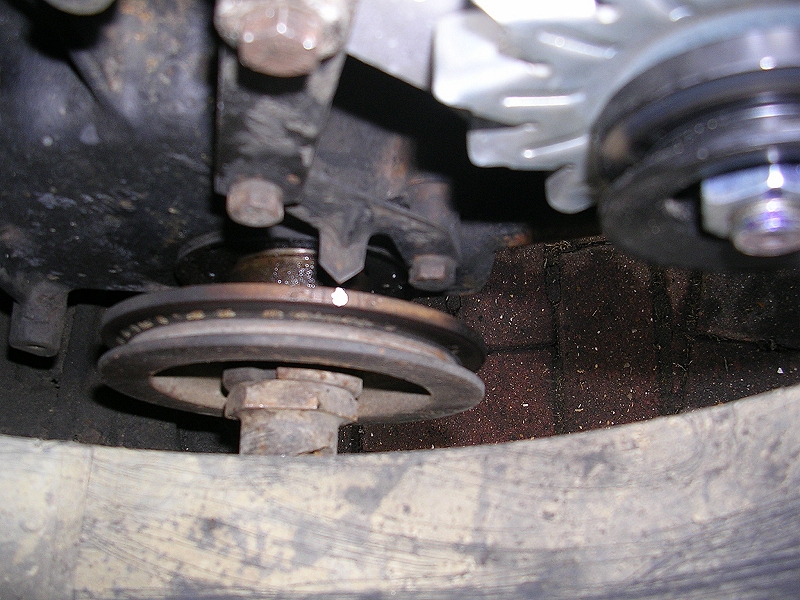 then i took the cap off just to check the rotor arm was pointing towards the electrode for no.1 cylinder 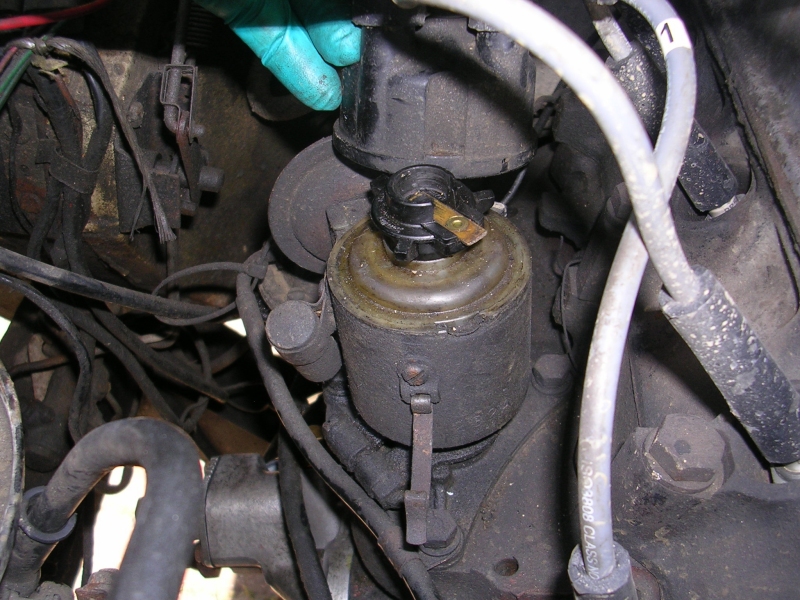 one 11mm bolt is all that secures the distributor into its mounting bracket 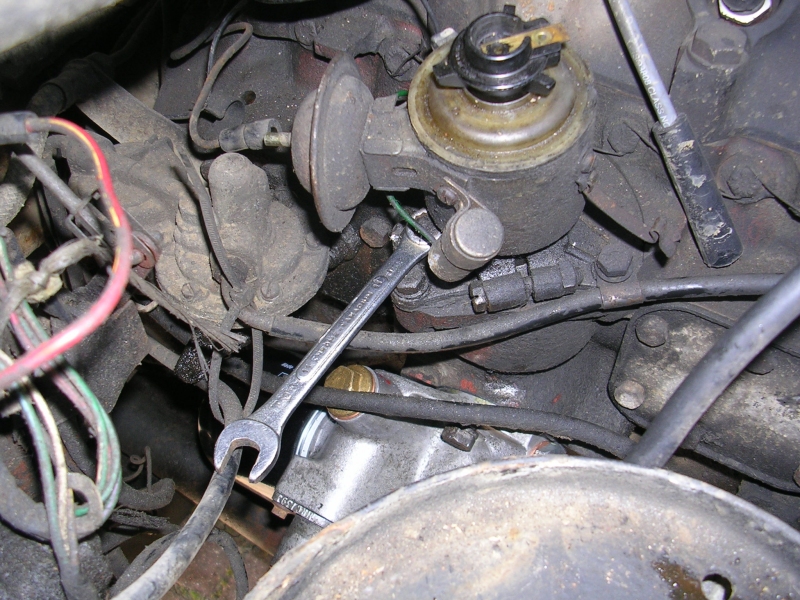 i lubed up the new distributor and slid it into the block, engaging the offset dog drive by wiggling the rotor arm 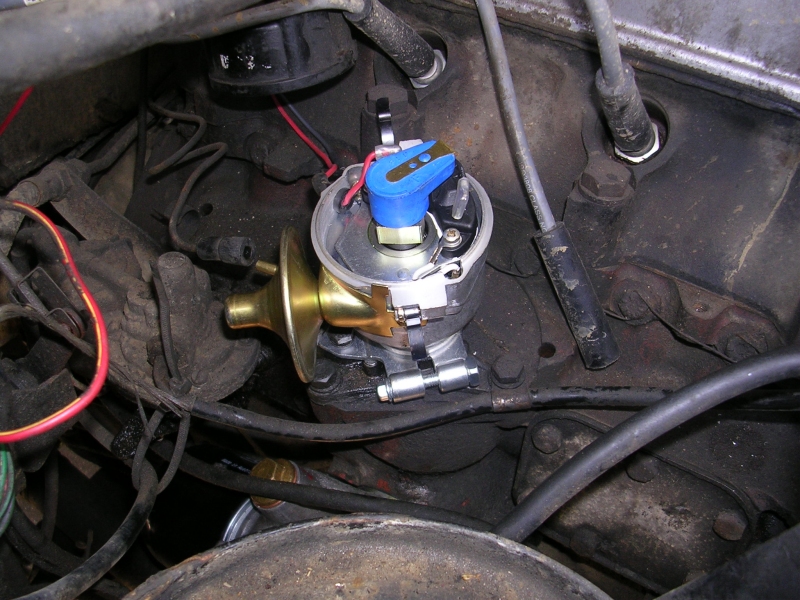 then i wired up the new distributor cap, since the arm was still pointing towards no.1 cylinder and the rotor travels anti-clockwise, its easy to plug the leads in using the firing order, 1-3-4-2. i also fitted the new coil with its spades and screwed that to the bulkhead. beforehand i had cleaned up all the mounting points with wire wheel so it makes a good earth through the mounting bolts, put loads of vaseline on the bare metal. there's two wires coming out of the new distributor, positive and negative which go to + and - on the coil fairly easy. the standard distributor only had a positive as it earthed through the block i think. 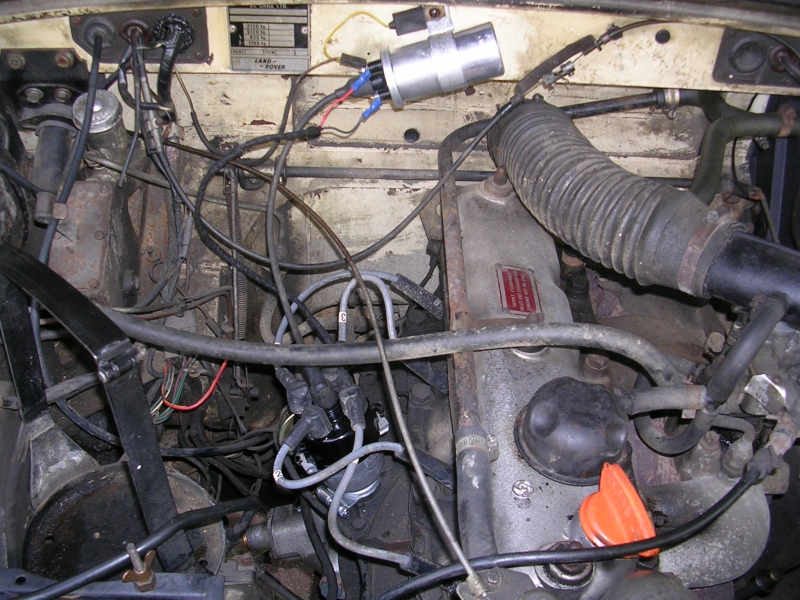 then i got the vintage gunson timing light out (inherited from dad !) hooked it up inline with cylinder 1 and the engine fired straight up at the first turn! it was bang on TDC so that was a good guess to start. then i disconnected the vac feed and turned the distributor body slightly to get about 6 deg advance. you can see in the video i bring the engine revs up just to make sure the centrifugal advance works, the tippex blob migrates over to the left  |
| |
|
|
|
|


 but yeah see what you mean, you can see it working from the driver seat. usually use a bit of white timber rested up against the rear of car and watch for reflection in rear view mirror !


