|
|
|
|
|
yesterday i did a bit more mincing, just all the time sapping little things like stuff not in their clips or brackets or not bolted down, rusty components that needed a wire brush and paint up. i also dropped the "oil" in the steering relay. one of the 4 bolts at the bottom of the relay is actually a drain, its the one facing the radiator. the other 3 bolts go into blind holes but the 4th one is threaded right the way through into the relay cavity. bit of water and some very stinky black oil came out. 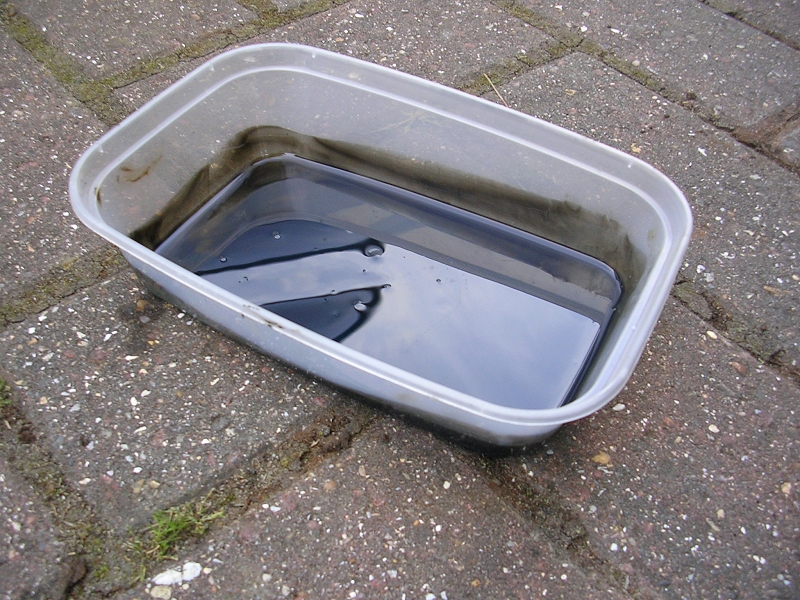 then i removed 2 of the bolts from the top plate, one to fill through and one to act as a breather. i used a 10ml syringe to fill it up 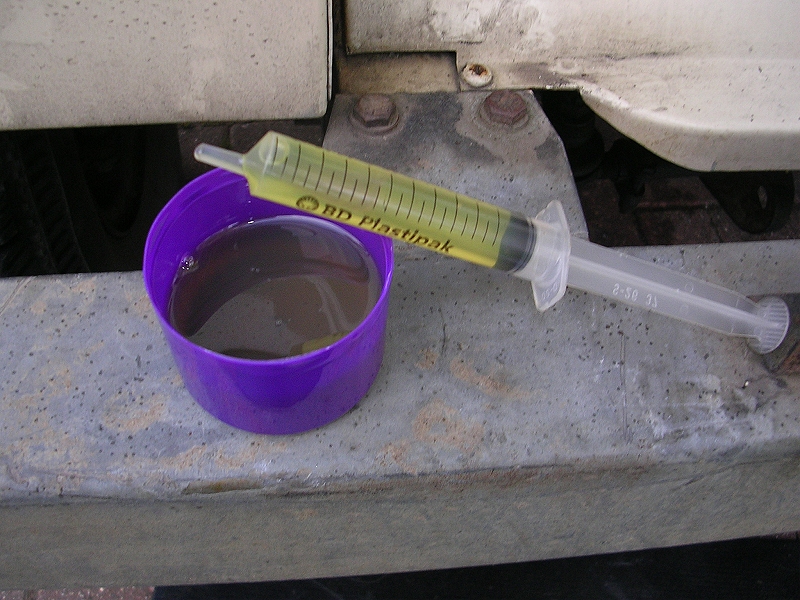 it was quite a long slow process as the innards of the relay are very simple and tightly packed. i thought it might be a gear system but actually the shaft passes right through top to bottom with some plastic cones and springs and either end, basically just allot of friction ! it took about 1 syringe full until it appeared "full", but then i went lock to lock a couple times and the level dropped. in the end i carried on like this and it took just under 90ml of oil 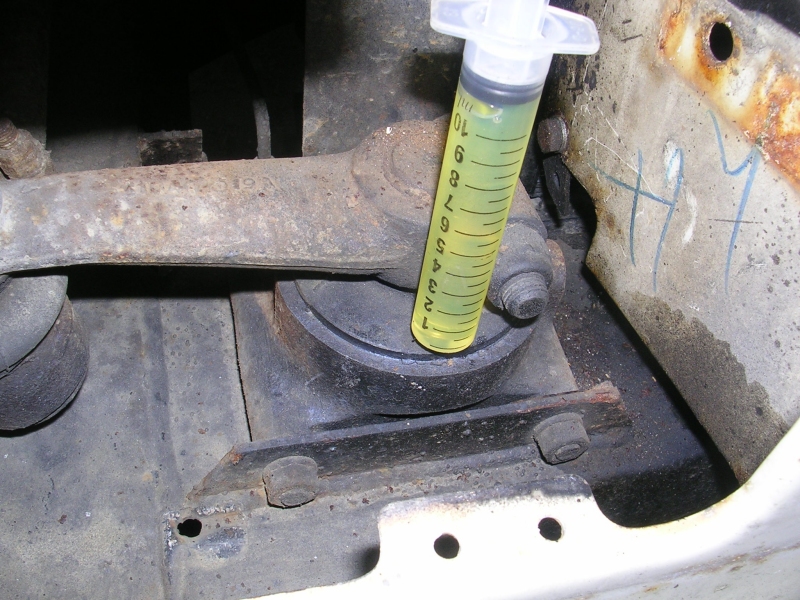 also found a new old stock horn on ebay for 6 quid, as mine was really quiet and muffled. 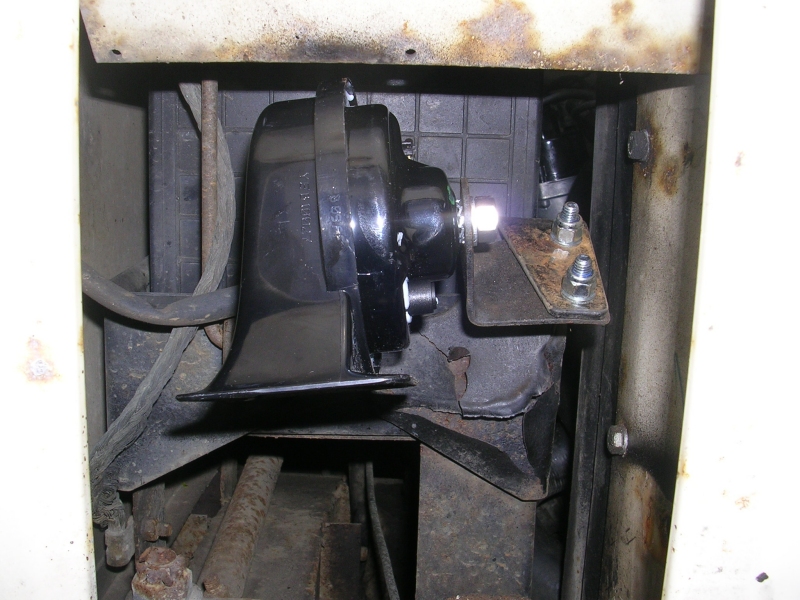 |
| |
Last Edit: Jun 7, 2015 9:42:47 GMT by darrenh
|
|
|
|
|
|
|
Jul 26, 2015 13:41:21 GMT
|
bit of a non update update. spent the last 2 weeks digging 8 inch hole in the ground to widen and extend the drive, provide permanent block paved hard standing for landy next to the garage. why has it taken 2 weeks, well we did it by hand, as in a mattock + shovel + wheel barrow  :eek: so its not technically a land rover update, but for the benefit of, and will get progress moving again. 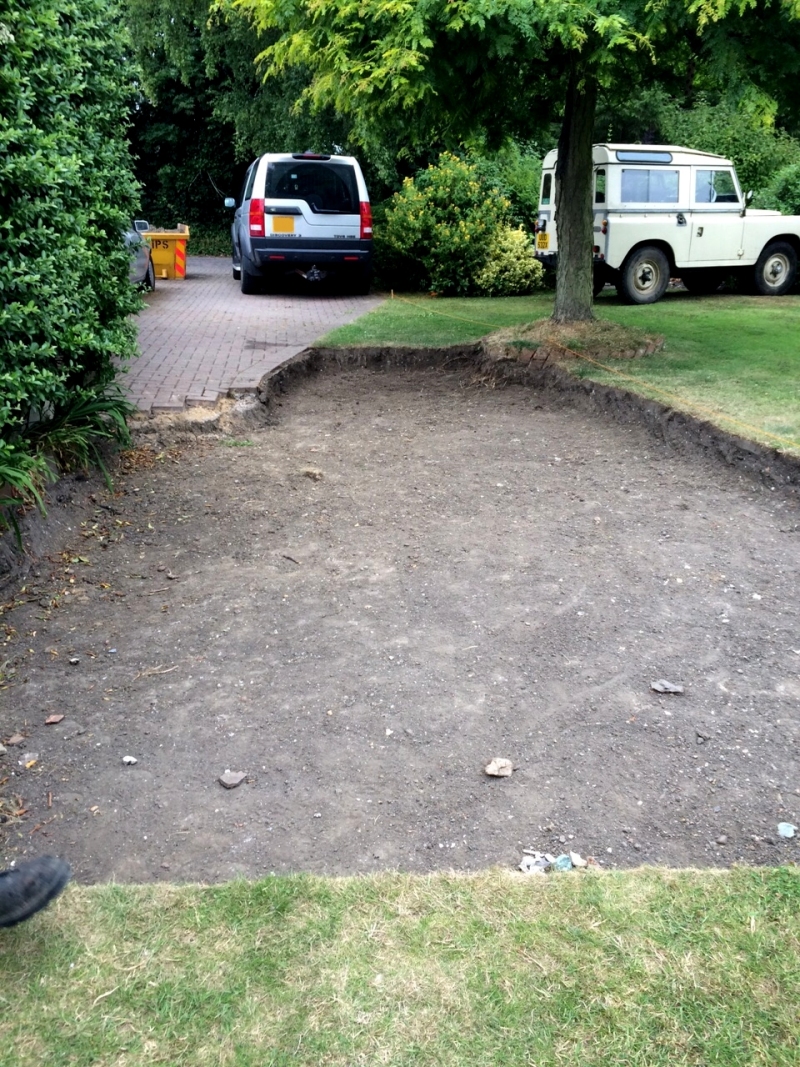 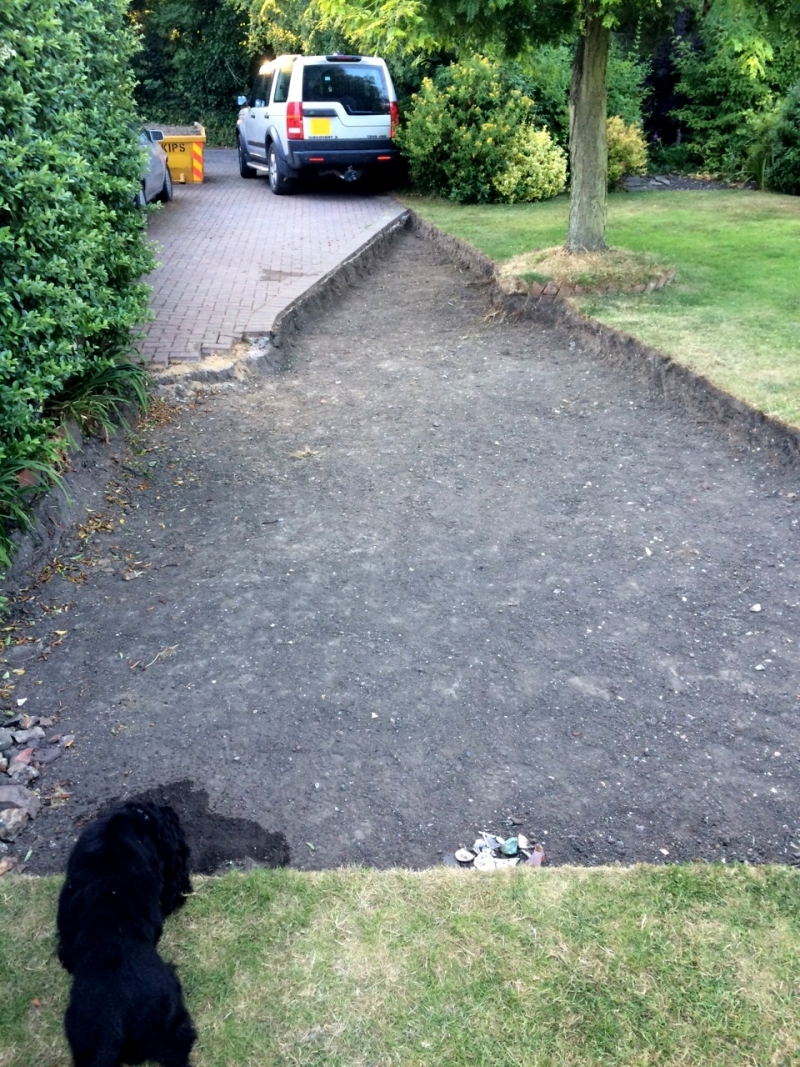 in other news i managed to get in contact with owner number 2 who had the landy between 1984 and 1992. it was a lady owner who is alive and well still living in the same place, now aged 70 and still a huge land rover buff. after selling the series 3 she had a brand new disco 1 in 1992 and now has a freelander  had long chat on the phone and exchanged emails. considering its now 30 years since she bought it, was quite a big surprise, a nice one. she sent me this photo from the mid 80s, almost disappointingly identical to the current day, it hasnt changed a bit ! 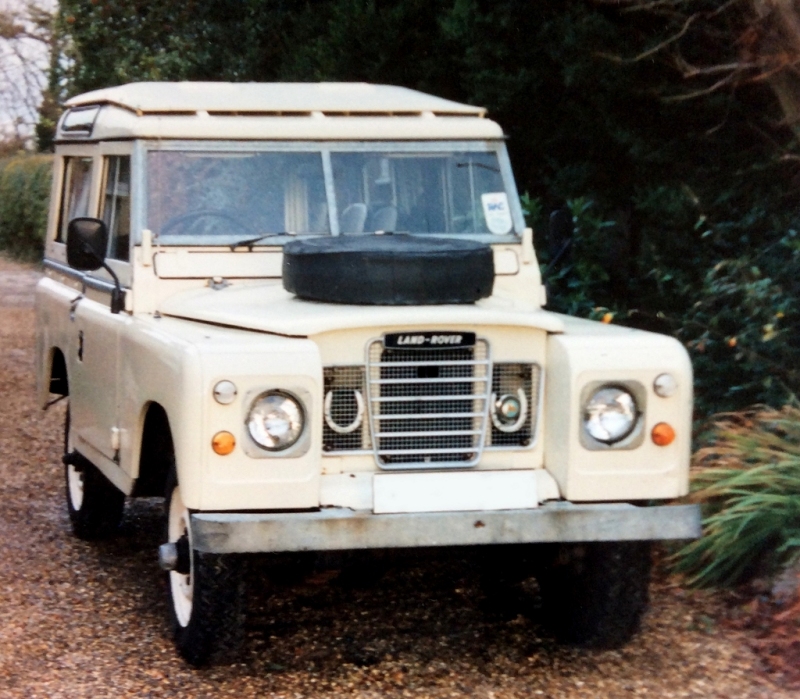 |
| |
|
|
|
|
|
Jul 26, 2015 20:10:48 GMT
|
|
Cool pic.
Cool wagon.
|
| |
|
|
|
|
|
|
|
|
MOT failed :/
left hand drag link ball joint excessive play. nearside brake flexi hose perishing.
bit disappointing (in myself) as i always moan at people using the MOT as diagnostic tool for basic maintenance, but when are you ever laying under your own land rover looking at everything in fine detail while someone rocks the steering ?
got an advisory on excessive inner wheel arch corrosion, which i thought was odd as they are alloy. when quizzed he was on about the splash guard that goes over the steering box. little bit too thorough for my liking
|
| |
|
|
|
|
|
Aug 13, 2015 11:32:18 GMT
|
new drive surface in action fixing the MOT items. 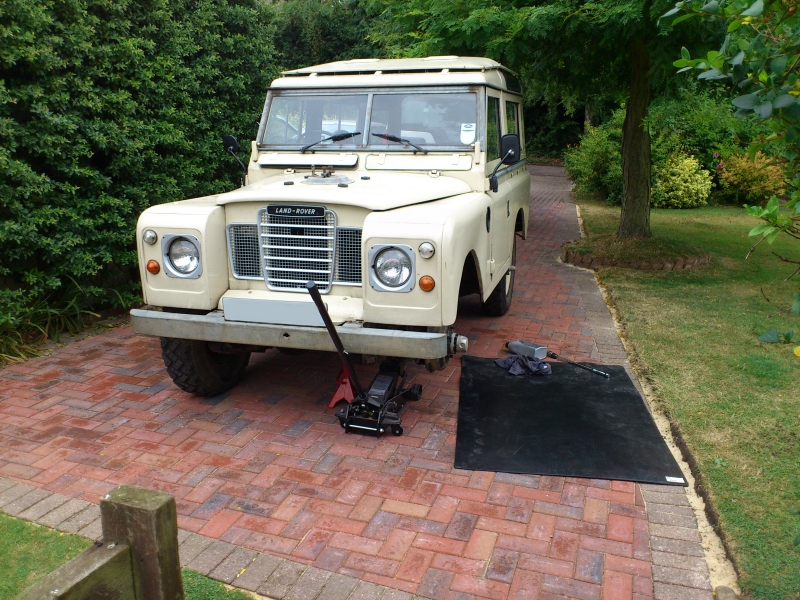 outer braids on the brake hose had split, it wasn't leaking but i imagine was ballooning a bit under pressure 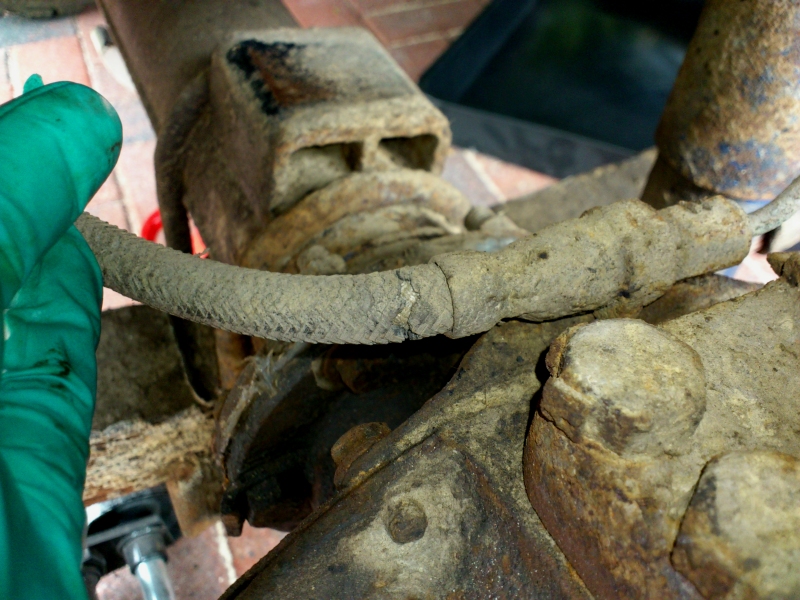 the LR gods were smiling on me as all the unions undid with a firm hand, fitted a new genuine LR hose as i couldn't be bothered to test or do my own R+D on an aftermarket item. 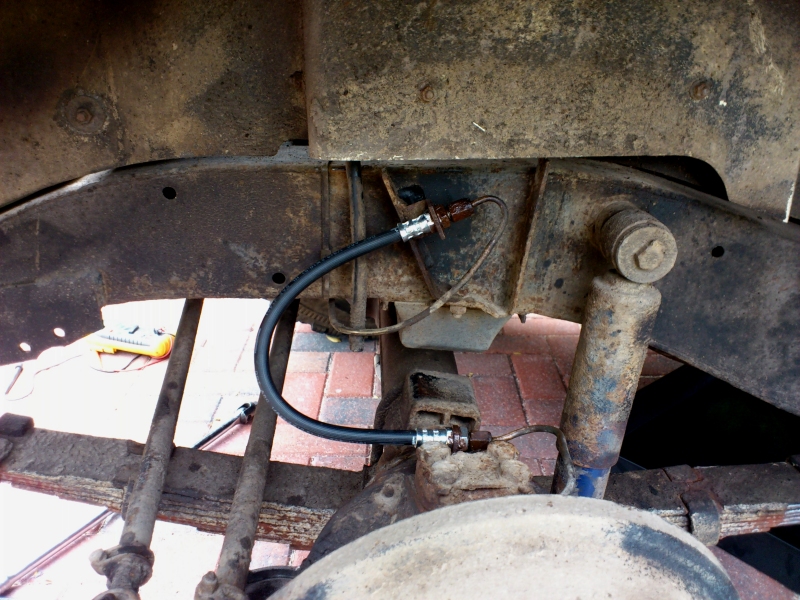 new drag link balljoint, delphi lockheed variety. 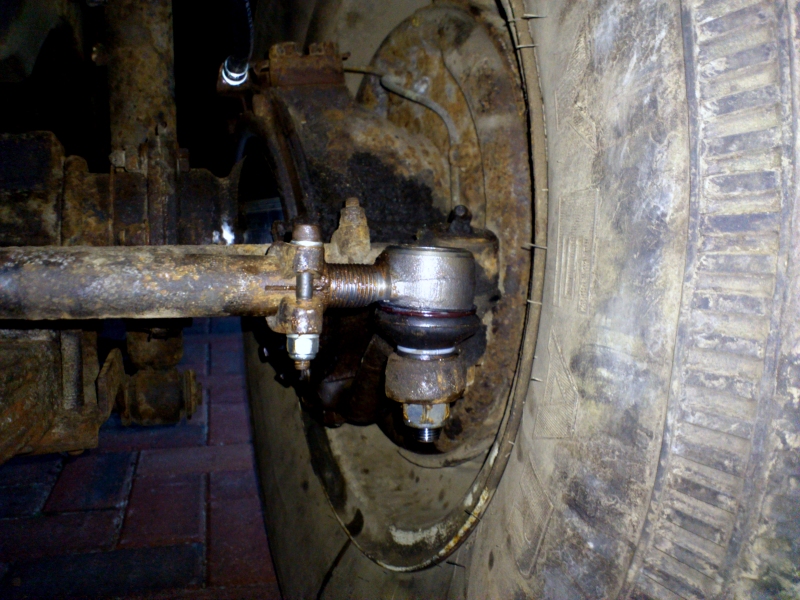 while the hydraulics were disturbed i also changed the master cylinder reservoir as the old one had gone a bit weird, a bit like UV damage? bled the whole system front to back, very pleasing peace of mind job seeing all the old scummy black fluid flowing out. 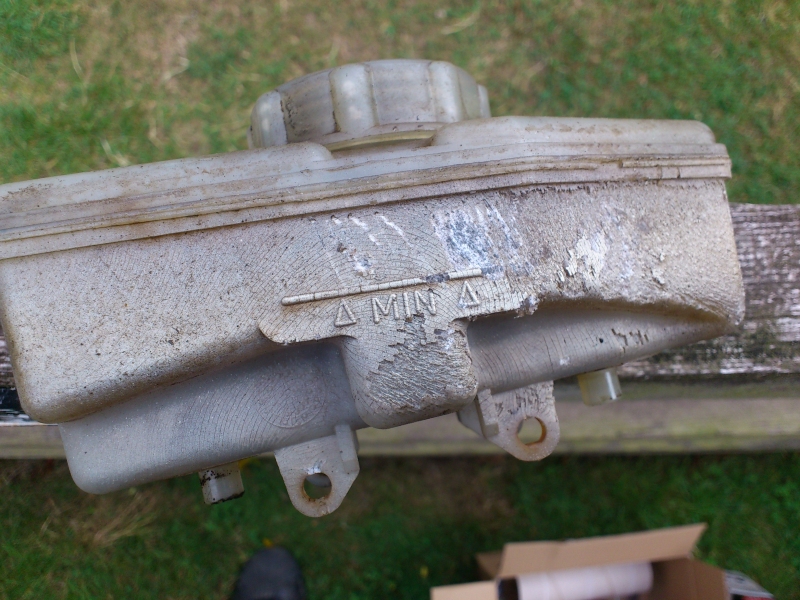 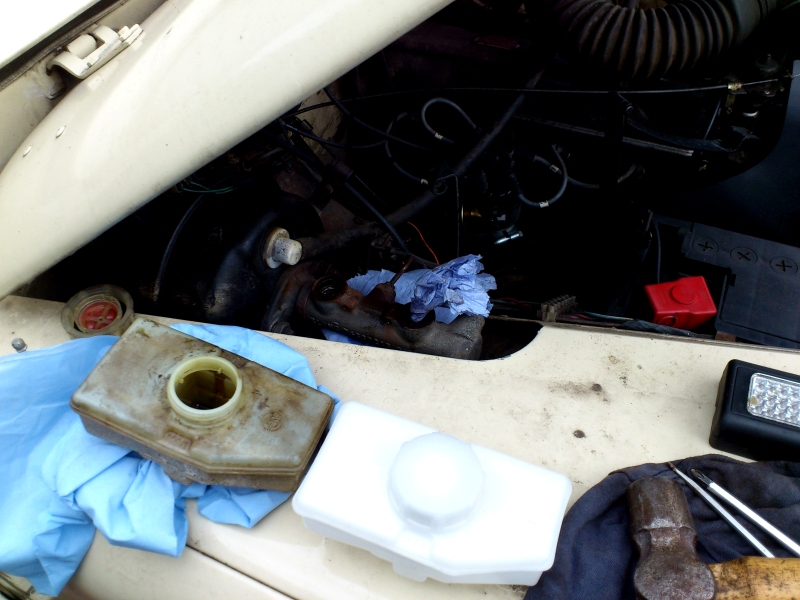 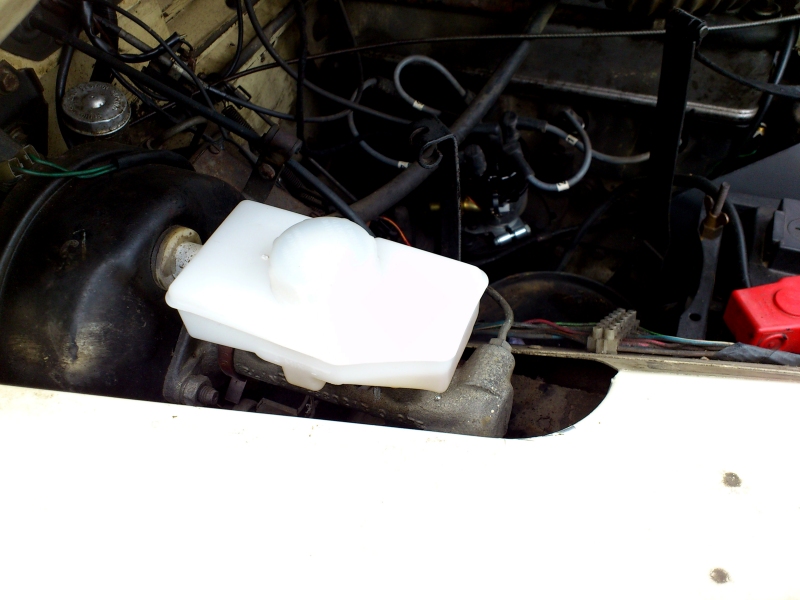 no pictures but i also bled the clutch which came out like muddy water :confused2 |
| |
|
|
|
|
|
|
|
i did a couple "quality of life" bits of work, the first was to remedy buzzing HI LO shifter which as been annoying me for months. a bit of googling and parts book browsing showed there should be a spring clip on the ballpivot, so i ordered one. I stared at it for a bit, then i guess i came to the same conclusion as LR design team that its just pure faith/hope holding it in 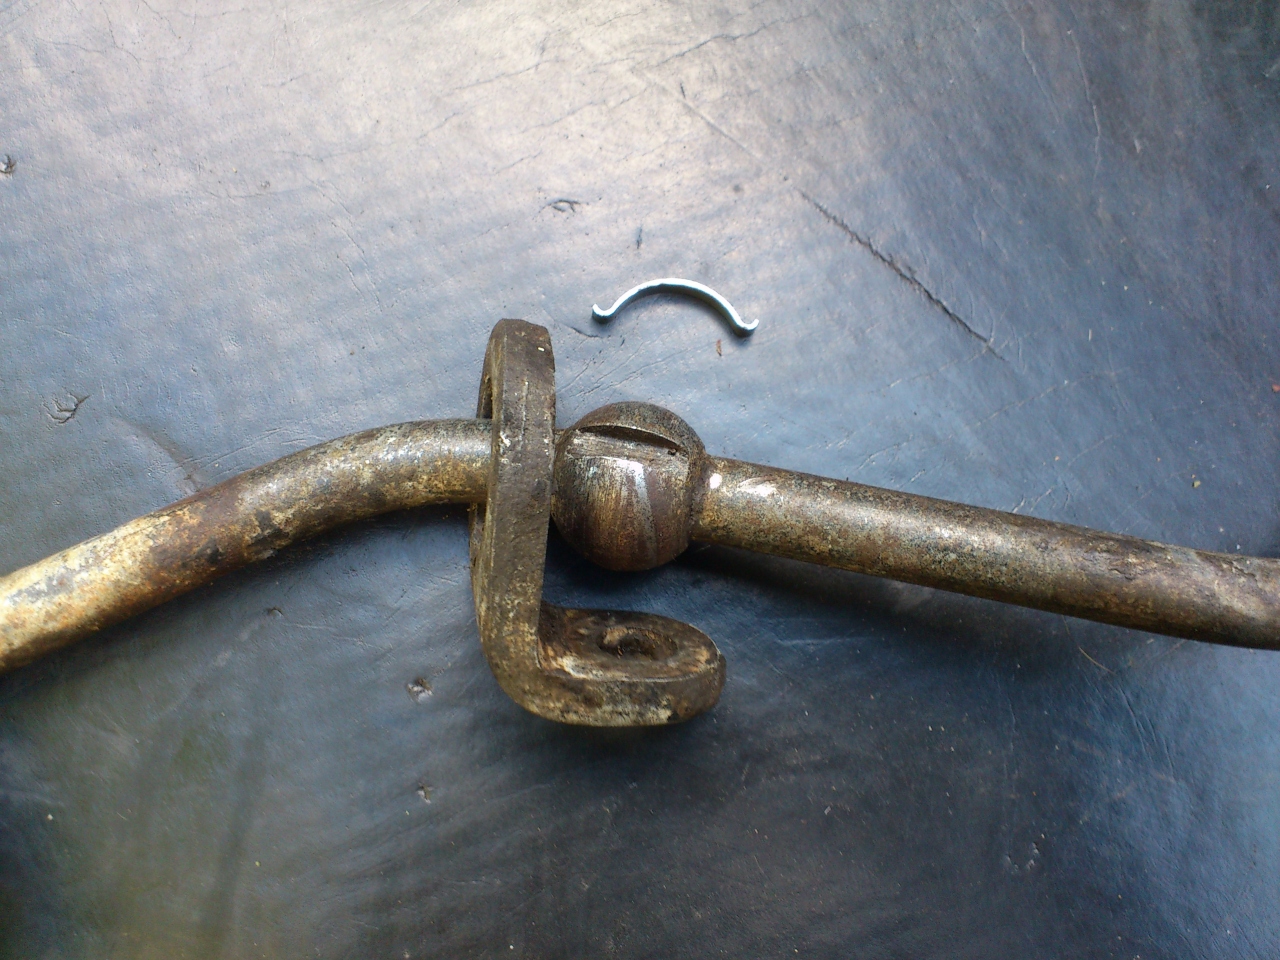 a while back i also bought a set of leather gaiters from ebay to replace my torn rubber ones. My history file says it had a britpart gaiter set a few years back. As with most britpart stuff it hasnt taken too lightly to just sitting there with the forces of gravity on it. i got the new HI LO gaiter out of the bag, stared at that for a bit, started effing and blinding doubting they had even laid eyes on a land rover before designing and stitching it up. after about 10 minutes i then decided to fit the HI LO gaiter to the HI LO stick, instead of the handbrake gaiter to the HI LO stick, and that worked much better.   Hand brake gaiter also in bad shape. i did wonder how it was supposed to "seal" against the handbrake lever, which is open sided U channel. thoughtfully land rover put some rubber filler where the turtle neck of the gaiter would seal   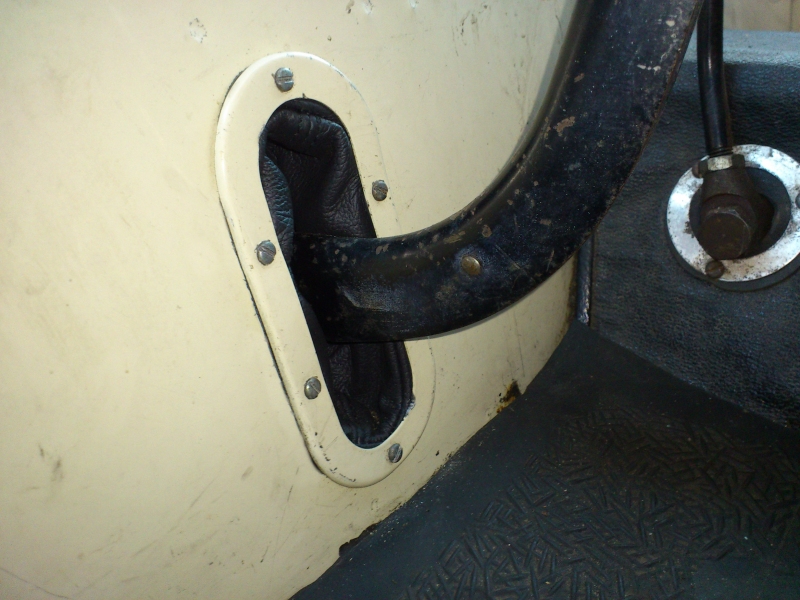 should have slightly less carbon monoxide poisoning now |
| |
Last Edit: Oct 2, 2015 21:18:47 GMT by darrenh
|
|
|
|
|
Oct 29, 2015 21:50:07 GMT
|
the day before london to brighton i went round and did fluid checks, the radiator took about 200ml but didnt think much of it. when we got home and parked up i noticed steam patch on the passenger side windscreen then put two and two together, the drop in radiator level, plus steam on the windscreen, heater matrix is directly below the passenger side vent! :-\ quick peak under the engine bay confirmed leakage. 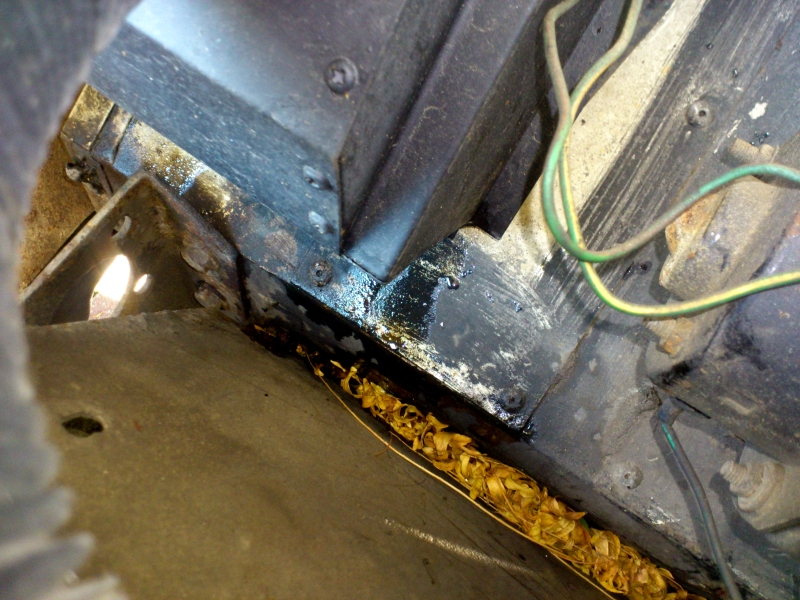 i have a spare heater box in the garage but thats the leaky one that was on the landy when i first had it, so i bought a new matrix off the internet. its from a british company who proudly exclaimed on ebay that its brass and copper and much better than other cheap ones for sale! 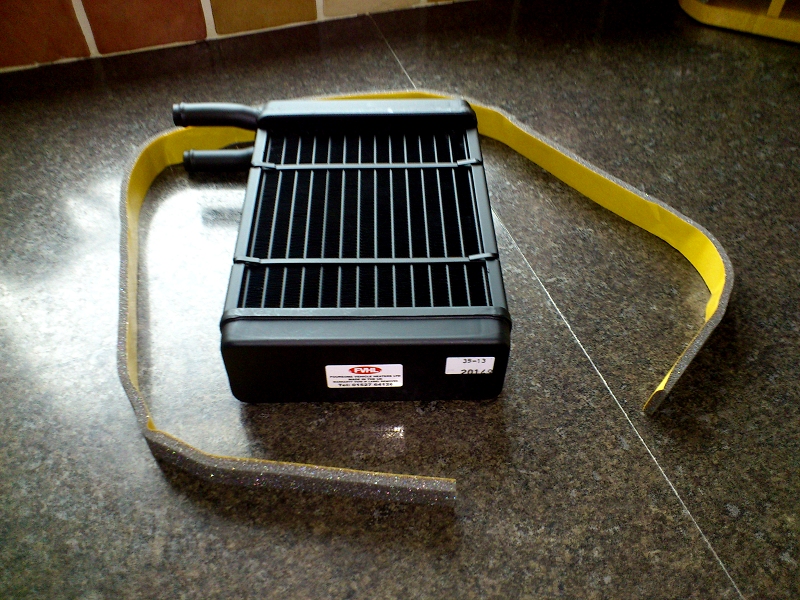 today i opened up the original heater box to strip it down and fit the new matrix, you basically just take out the self taping screws down one edge and the side cap comes off 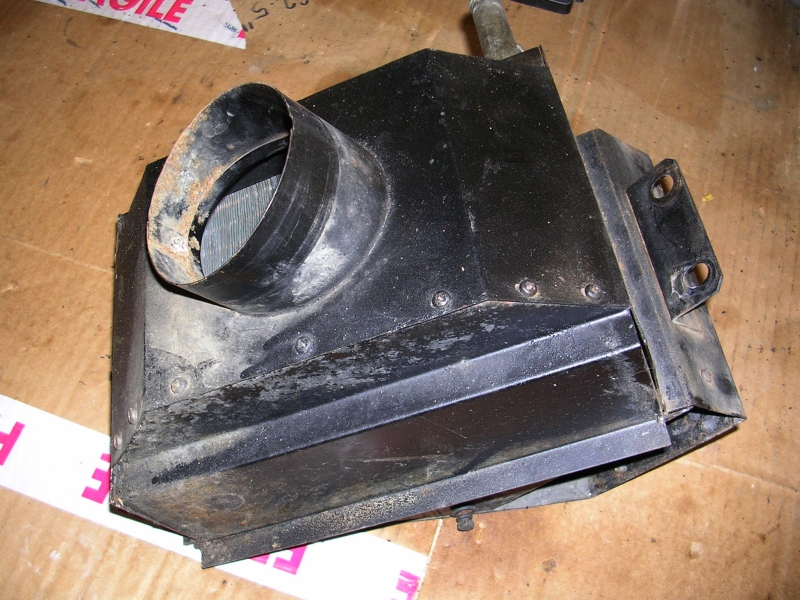 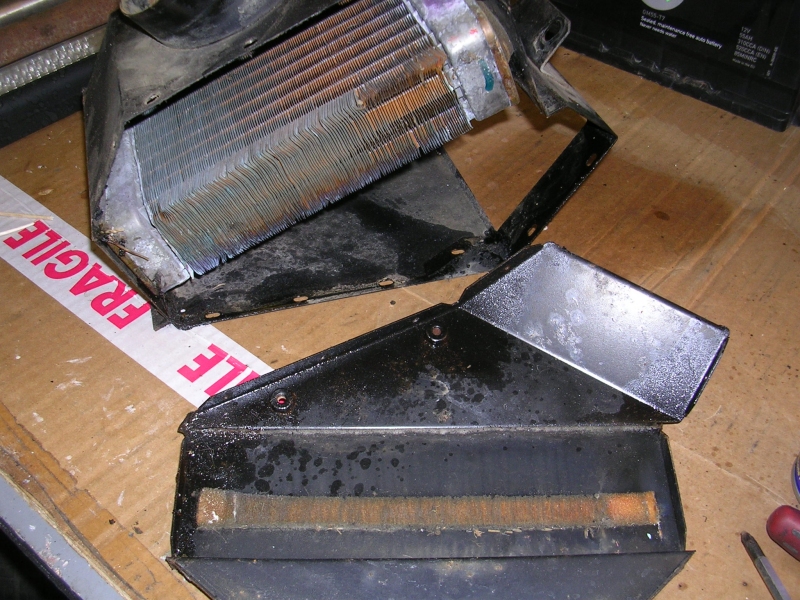 the matrix slid out pretty easy as the old foam seals were smeggy 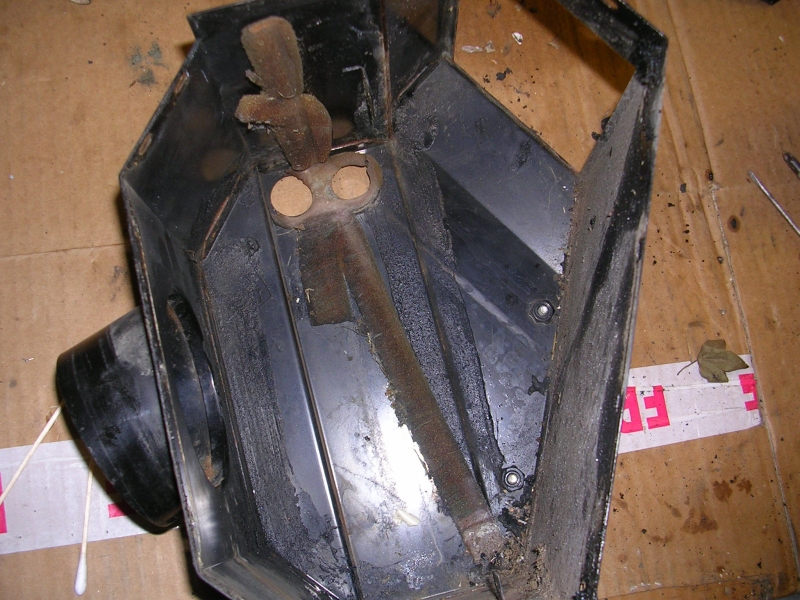 if you remember on the first page or two, when i tested the original matrix it was spraying water at high pressure from the inlet 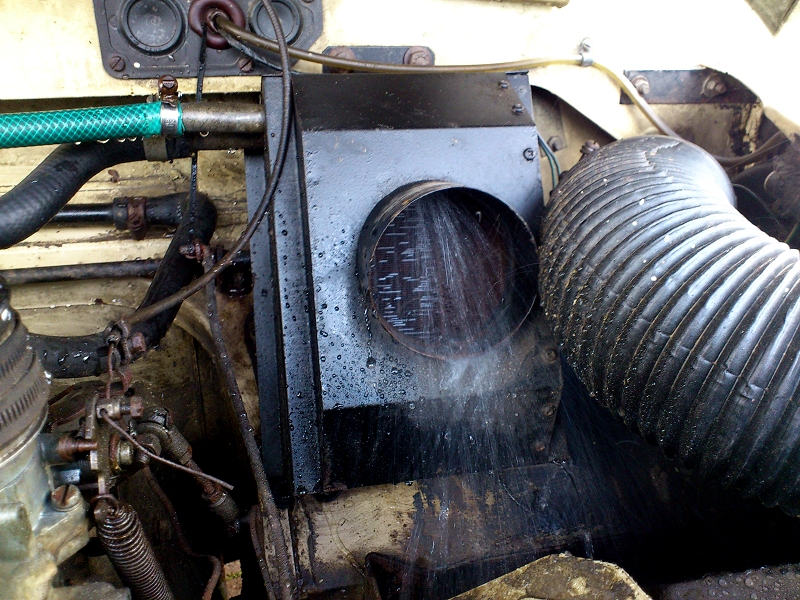 pretty clear when examining the matrix that the end cap had blown off... 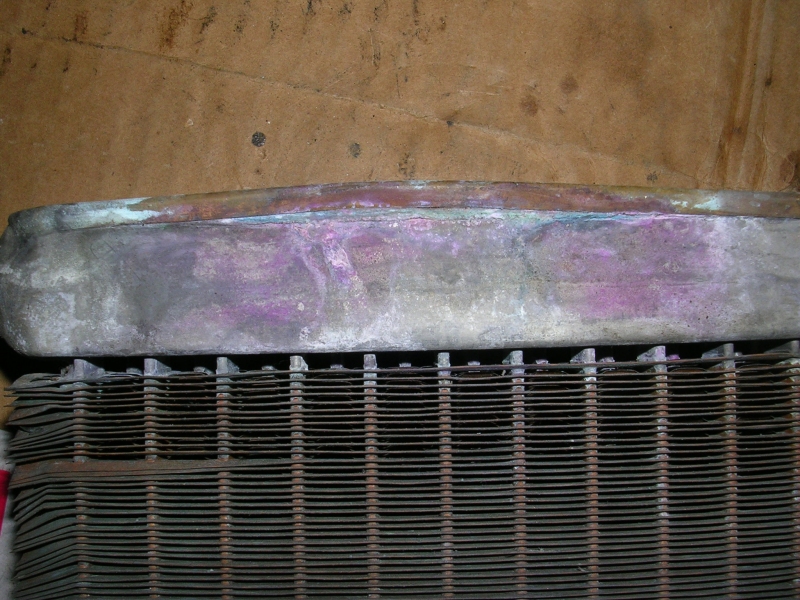 then i started thinking, hmm that looks really easily fixed as i have a blow lamp and solder. so i wired brushed all the curse word off then tapped the "lid" back down, then a bit of flux in the seam, followed by some heat and way too much solder   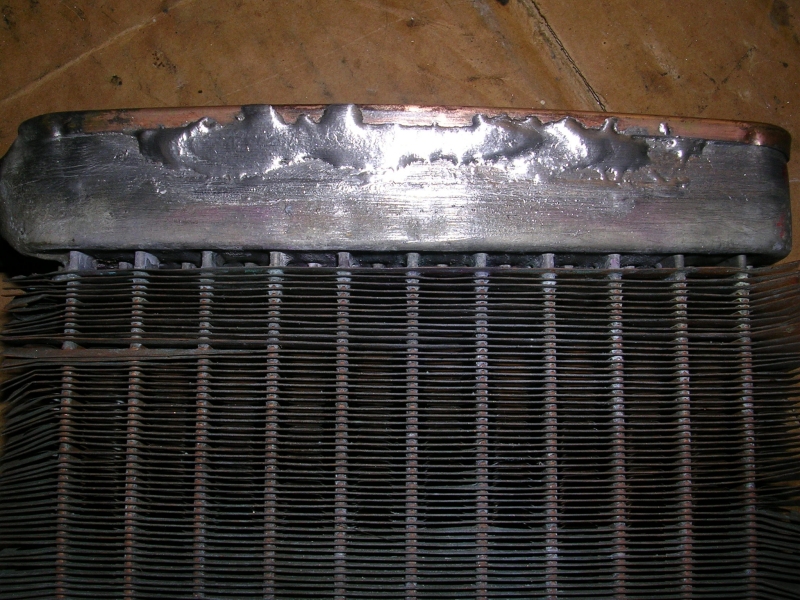 i did a garden hose leak test again and it was fine, apart from the copper end caps actually ballooned out in comedy fasion, but still, it didnt leak ;D i was 50/50 about re-using the old matrix as it looked way bigger than the new one, more fins and wider. however the new matrix has more cores and i paid for the curse word now so it deserves a shot. i will keep the old fixed one for spare. moving on i started dressing the insides of the heater box with some new dense foam, the weird spider web looking stuff is overspray from contact adhesive 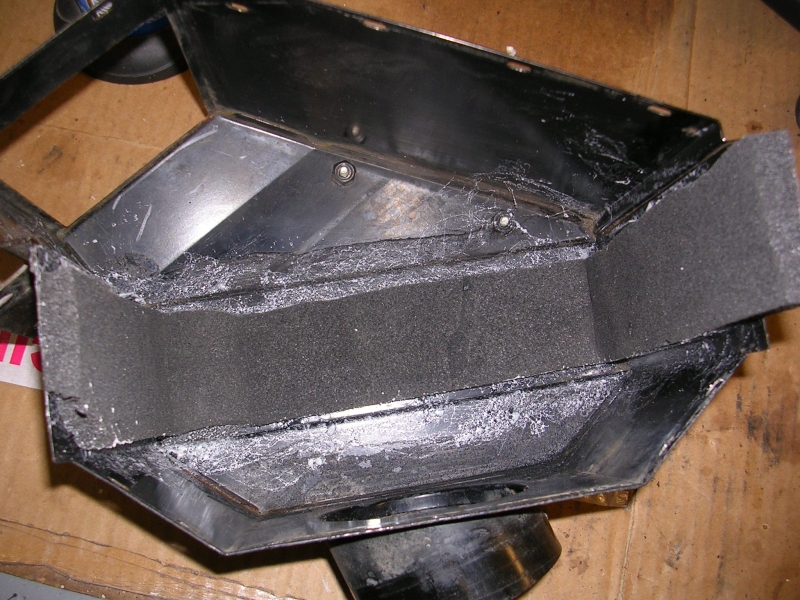 then slid the matrix in (very snug fit) 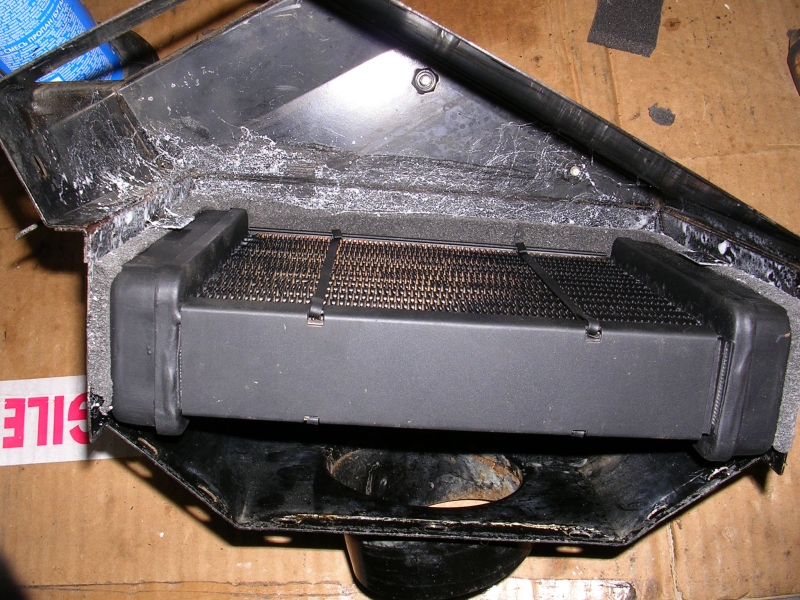 zipped the side panel back on and then refitted to the truck 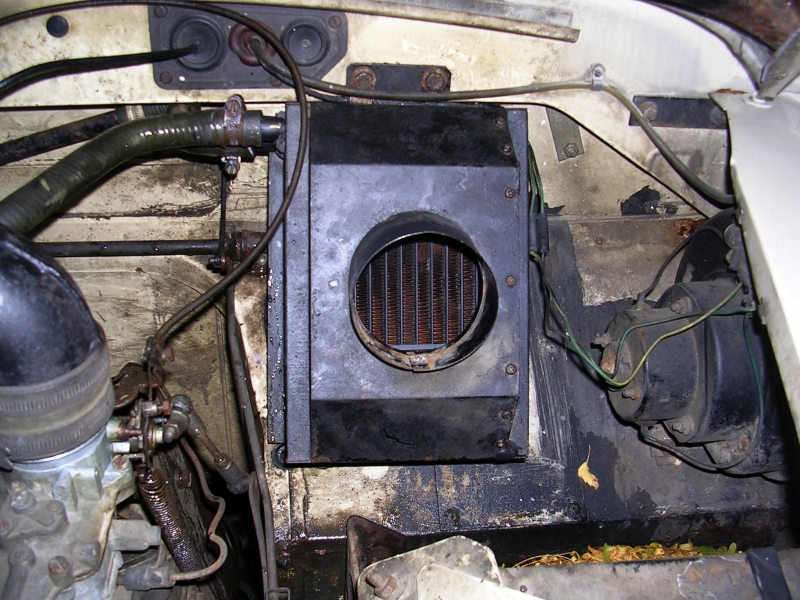 the first visit to the heating i actually bought a new ducting from LR, as mine is holed slightly. 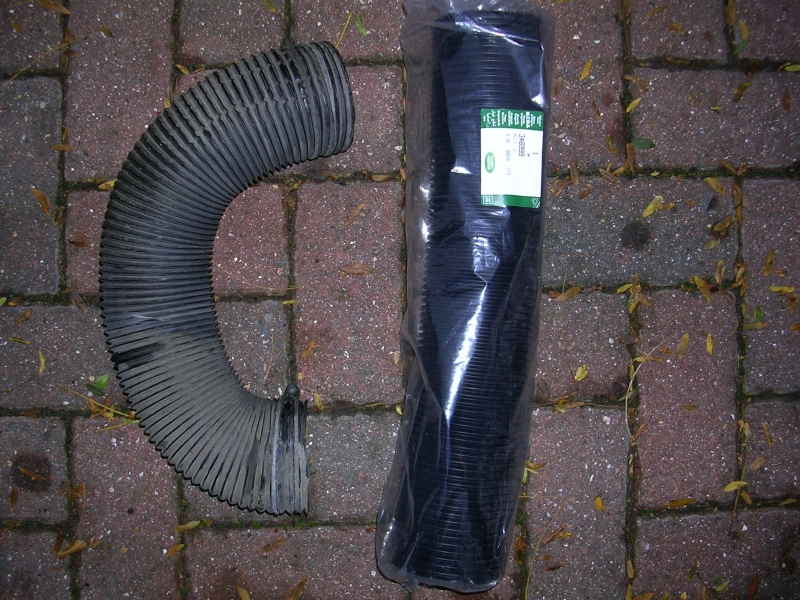  all back together and bled 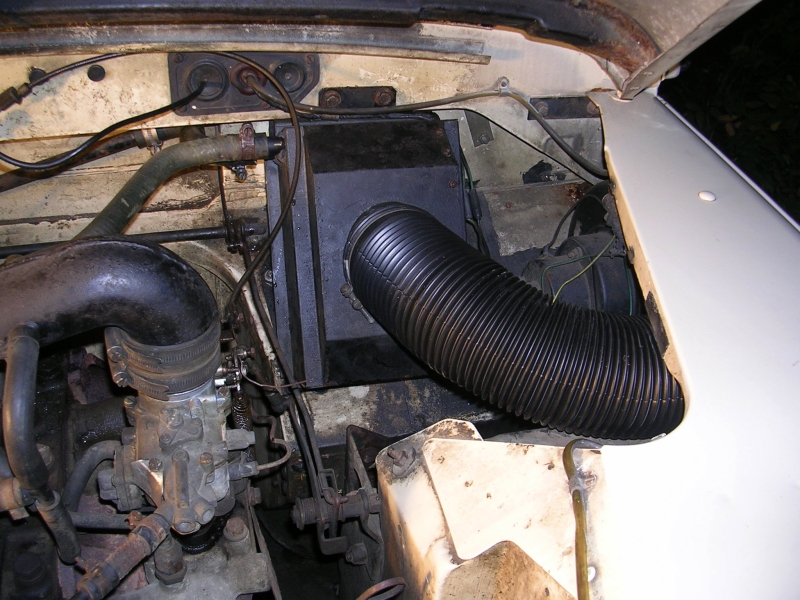 |
| |
|
|
|
|
|
Oct 29, 2015 21:54:45 GMT
|
saturday i set out to remove the drivers side front wheel arch splash guard. it was quite fun unbolting it on my own as the bolt heads are in the cabin, nuts are in the wheel arch. i have quite long arms but not mr tickle! i basically stuck a spanner to the bolt head and wedged up against whatever was nearest, to stop it turning, then undid the nut in the wheel arch. 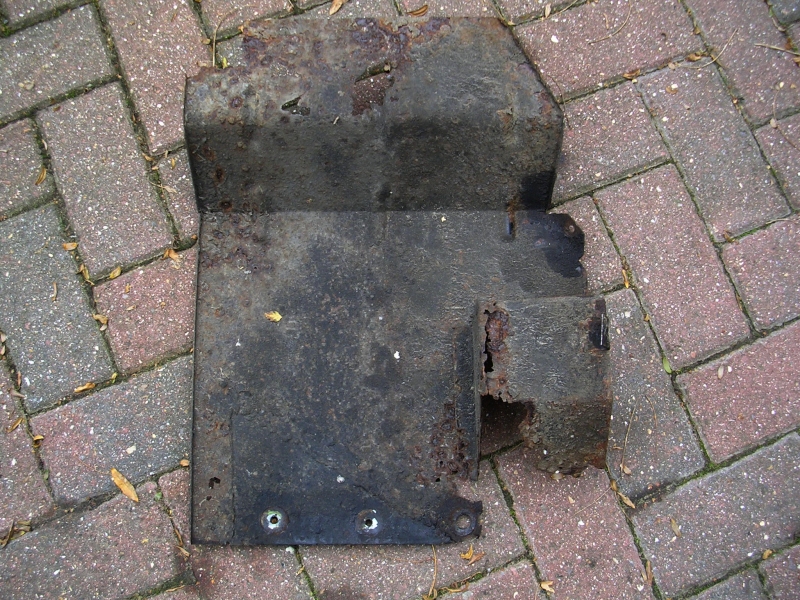 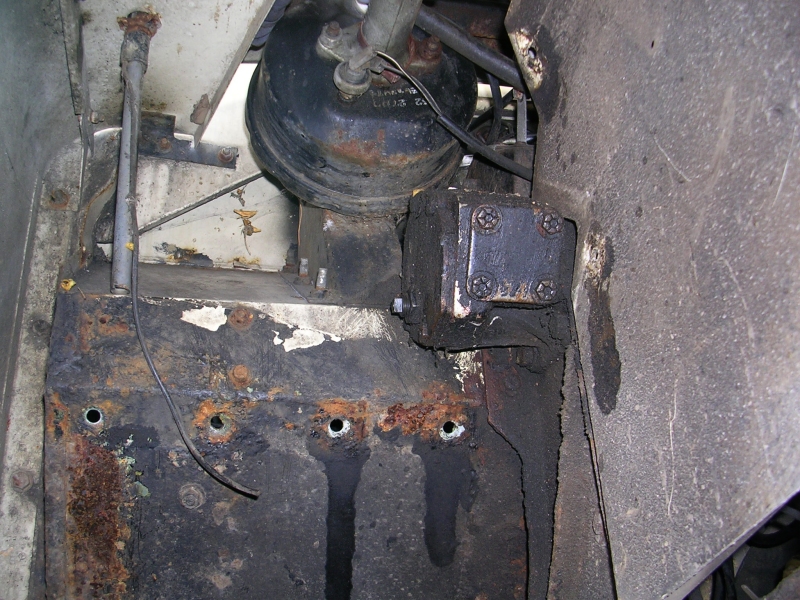 did a quick knotted wheel + angle grinder, rust kill fluid, then stone chip paint 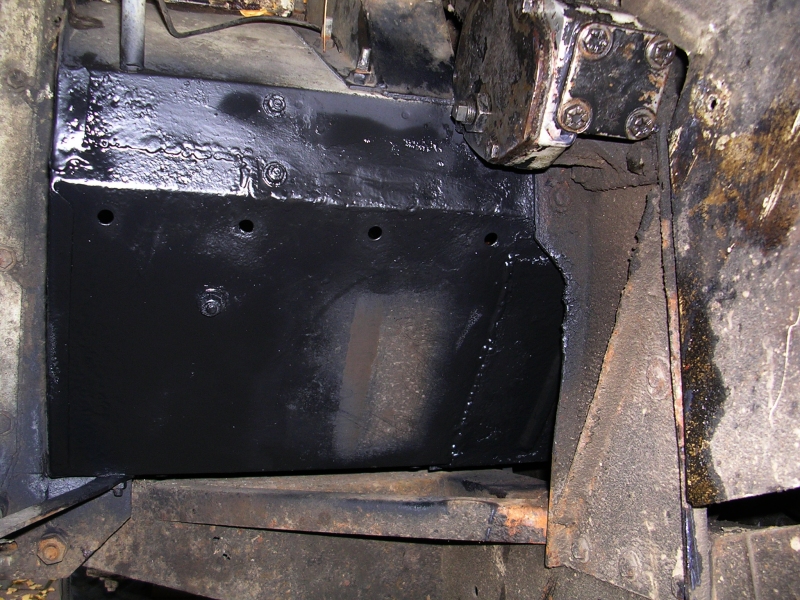 while i was in the wheel arch i wanted to change the steering box oil (or rather replace it for one-shot grease as the drop arm seal is leaking) 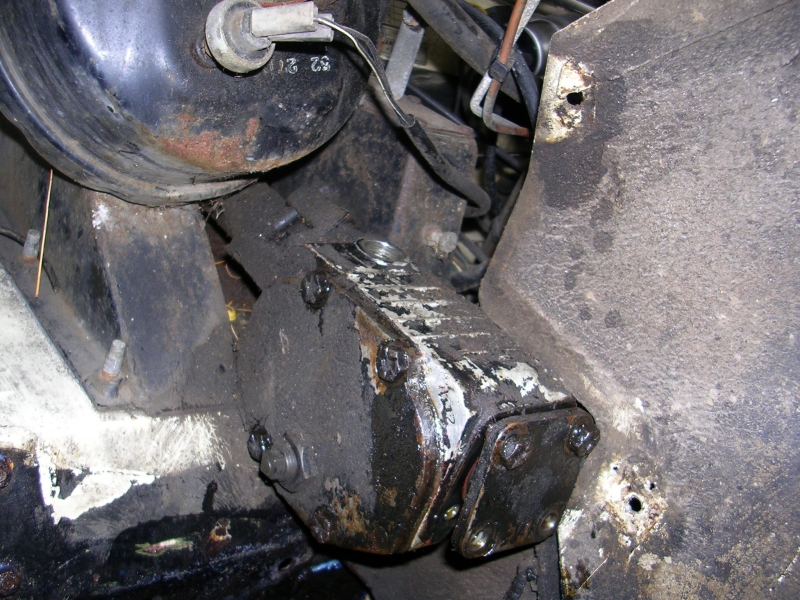 you can see from previous picture i loosened the bolts in the end plate to drain the oil which was suggested by someone on LR forum. DO NOT DO THIS!! Disaster rapidly followed as the bearing track dislodged, then the ball bearings basically fell out, then unloaded the bearings at the top of the box, which also fell out, then i had 20 ball bearings loose inside the cavity of the steering box, and no steering what so ever. that was about midday saturday and it took till about 2pm sunday for me to get the bearings back into the top track. (all the lit hours between those times) all manner of fiddling around, levers, thick grease, long screw drivers, bungee straps, clamps, swearing, possibly one of my most stressful weekends in all my life. it was either fiddle around with this or strip the column off the truck (major work plus 30 year old bolts to contend with) glory picture after i finally got them back in place 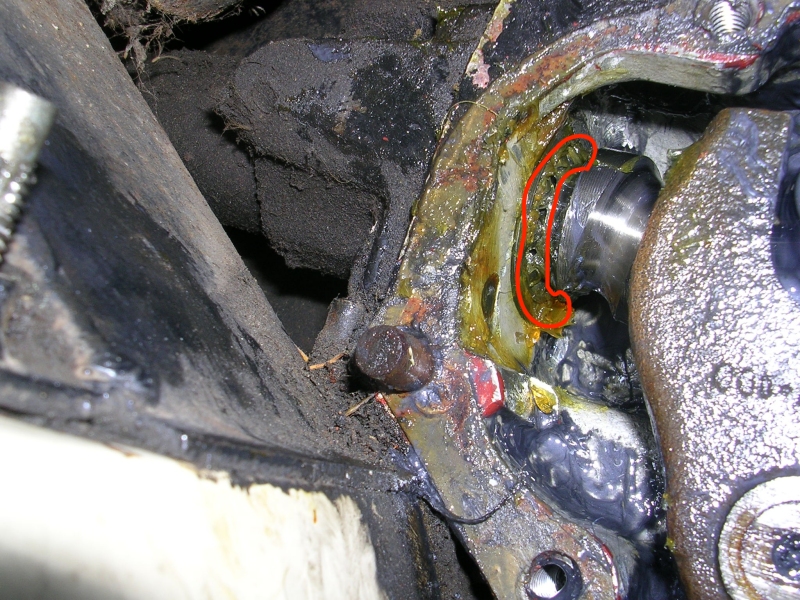 i refitted the side plate, adjusted the slack out with the pinch bolt, locked the pinch bolt off, refilled the steering box with one shot grease (note one-shot is very fluid, it isnt like normal grease) then i could move on to the original job, replacing the splash guards. the replacements are galvanised ones that i think were bought from paddocks (had them so long i forgot).... 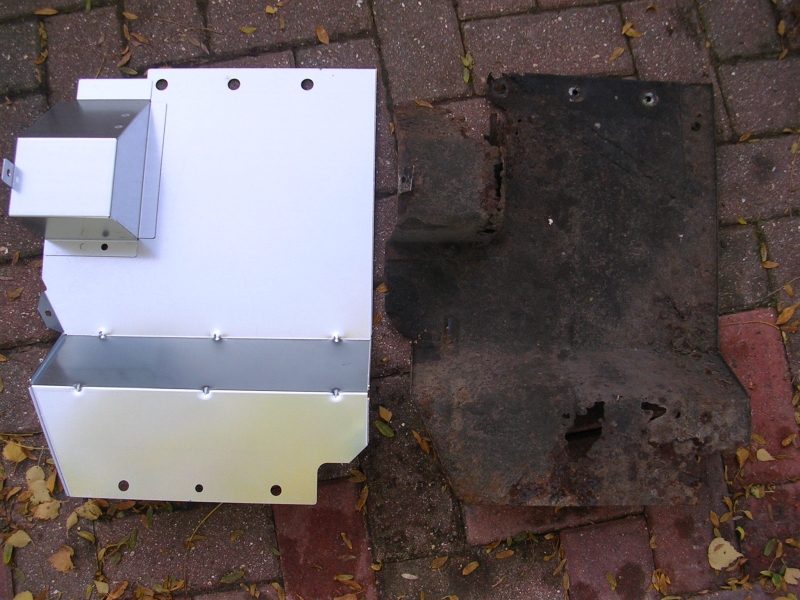 i decided to use grommets to space the guard out at the bottom, from the footwell. its a common rot point as the rain channel above the engine bay drains over the foot wells and behind this splash guard. water also capillaries through the bolts into the cabin which is a pain. so i decided to space the bottom out with grommets (not fitted through the bolt holes but literally used as a rubber washer) you can also see i bought the stainless steel splash guard bolt kit from YRM metal solutions. they are A2 stainless, not as strong as 8.8 high tensile bolts, mustn't use them for load bearing stuff. 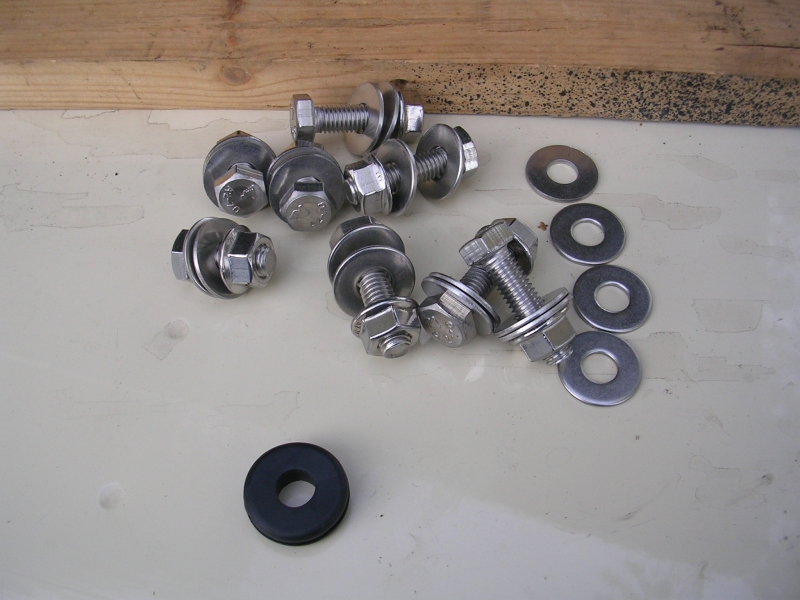 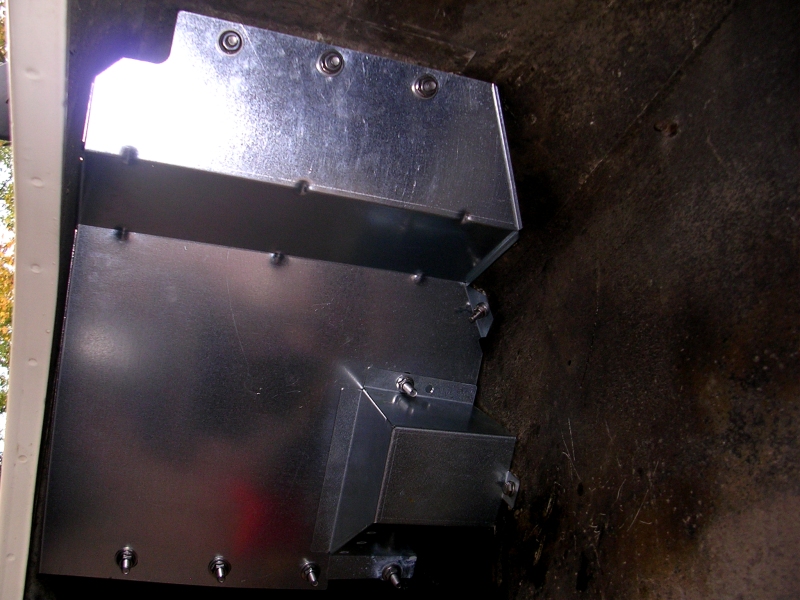 |
| |
|
|
bstardchild
Club Retro Rides Member
Posts: 14,975
Club RR Member Number: 71
|
|
Oct 29, 2015 22:37:25 GMT
|
Good to see it's still getting love Nice to see the makers have banded the heater matrix - I had an early one of a similar aftermarket design for a Senator years ago and it bowed inside the heater box and then started leaking from the joints - I had to strip the whole dash out and then the heater box down to get it out - it wouldn't come out any other way - certainly not they way it went it thro a slot in the side. To be honest - I don't think I'd use the old one again but as spare it'll take up some space for a few decades before you wonder why you Keep everything  |
| |
|
|
|
|
|
Oct 29, 2015 22:52:33 GMT
|
Got to love Series Land Rover heaters. They may only warm six molecules of air an hour, but I know several Range Rover owners who'd kill for that level of accessibility! Whoops on the steering box  |
| |
|
|
|
|
|
|
|
Oct 29, 2015 22:58:04 GMT
|
Nice to see the makers have banded the heater matrix - I had an early one of a similar aftermarket design for a Senator years ago ... i did wonder, so its literally belts and braces I don't think I'd use the old one again but as spare it'll take up some space for a few decades before you wonder why you Keep everything  it does fit perfectly in a gap on the shelf next to a broken starter motor for a car i don't own anymore  |
| |
|
|
|
|
|
Oct 29, 2015 23:01:19 GMT
|
Got to love Series Land Rover heaters. They may only warm six molecules of air an hour its the land rover way, you gotta put the hours in so that every aspect of the truck is the least terrible possible.  |
| |
|
|
bstardchild
Club Retro Rides Member
Posts: 14,975
Club RR Member Number: 71
|
|
Oct 29, 2015 23:03:21 GMT
|
Got to love Series Land Rover heaters. They may only warm six molecules of air an hour, but I know several Range Rover owners who'd kill for that level of accessibility! Those aftermarket type heater cores are actually bloody effective - the heat transfer is not as good as a densely packed Alloy finned core but they make up for it by flowing well Whoops on the steering box  I chuckled but felt it prudent to chuckle quietly..... I mean it's not like I dropped a torx bit down the front of an engine after rebuilding it and fitting it into the car....... Cue hours of fun "fishing" Rather than tear it all down again, nope wasn't me |
| |
|
|
|
|
|
Oct 29, 2015 23:20:43 GMT
|
I chuckled but felt it prudent to chuckle quietly..... It was an empathetic chuckle. I've done exactly the same myself, albeit not with an LR. Bloody ball bearings everywhere! |
| |
|
|
|
|
|
|
|
a while back i set up a new earth post on the slam panel with a 27amp jumper straight to the battery. there was an earth point there originally but its the usual BL thing, bullet connectors in a spring loop, plus it earths via the bodywork itself. From memory the ringlets are dipped beam, main beam and sidelights (or might be indicators) 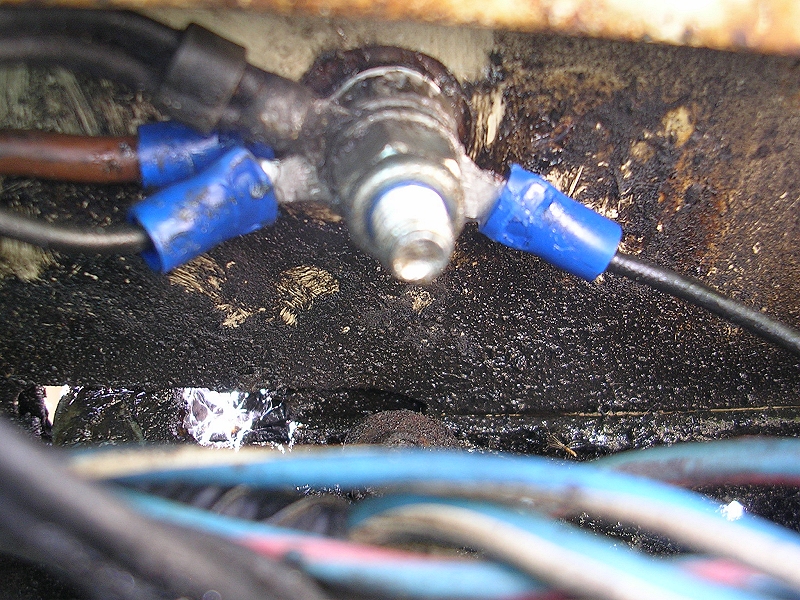 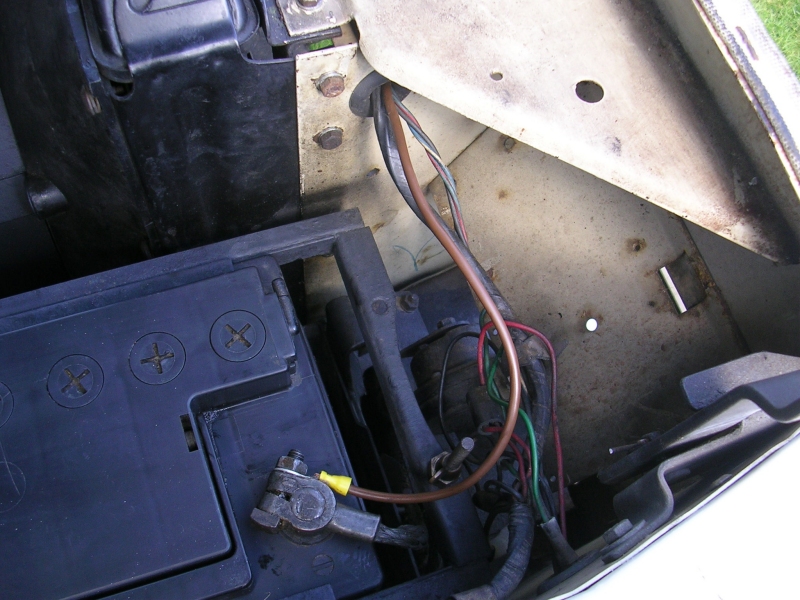 in the landy the headlights go battery > dasboard switch > headlights, fairly torturous route for 40 year old wiring, plus the inrush current turning on 110 watts of headlamp means the switch takes a beating. its a fairly common mod to introduce relay fed from the battery, it saves the switches burning out and get a bit more heat from the headlamps. i made my own setup basically 2 fused 30amp relays (one main one dipped), the 12v source for the load side comes directly from the battery (17amp wire for each relay), then the original dipped/main loom rerouted to the low current side of the relay to act as triggers. self amalgamating loom tape to tidy it all up  at the time of fitting the relays i still had the sealed beam headlights, one of which is totally dead. (sealed beam headlights are like normal headlights but there isnt a separate lamp inside, the filament is bare in the glass expanse of headlight, so its basically one big lamp) 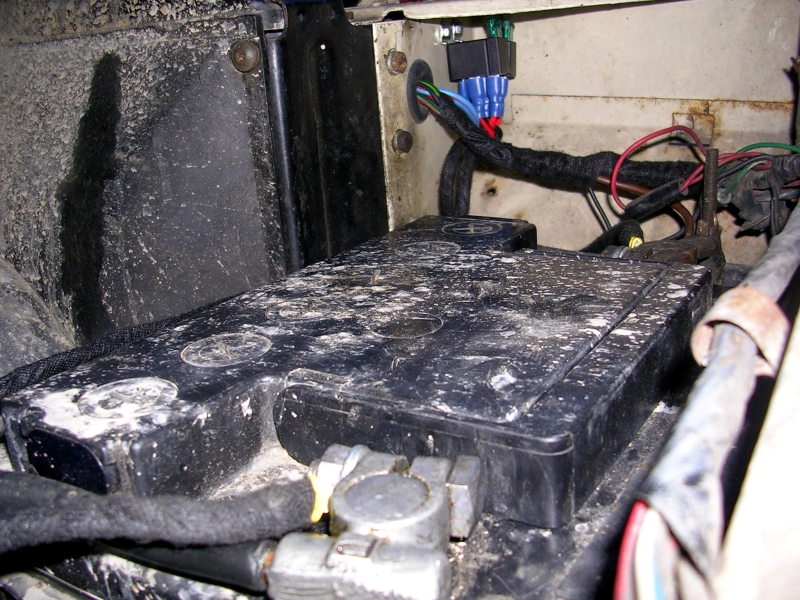 got the H4 wipac crystals fitted this afternoon. i started with the drivers side which has been non functional since december, before that it worked fine if you bashed it  When i popped out the sealed beam unit i found the bowl to the rear was the modern plastic wipac type, so that was cool. passenger side was the traditional metal bowl, metal backing shield + spring treatment. the bowl was absolutely rotten, i could see right through to the road wheel! luckily i had a pair of wipac bowls so i fitted one followed by the wipac H4 headlamp. many many brights (this is with engine off too)  when it got dark i found a guide on youtube to get a basic alignment, for uk cars the projected beam is wedge shaped and kicks up to the left like so...  the guide said to park right close up against a wall on a flat surface then put a masking tape cross in the middle of the beam. the vertical straight down the middle, and the horizontal lined up with the horizontal part of the beam. brick wall helps as the mortar gives a good datum 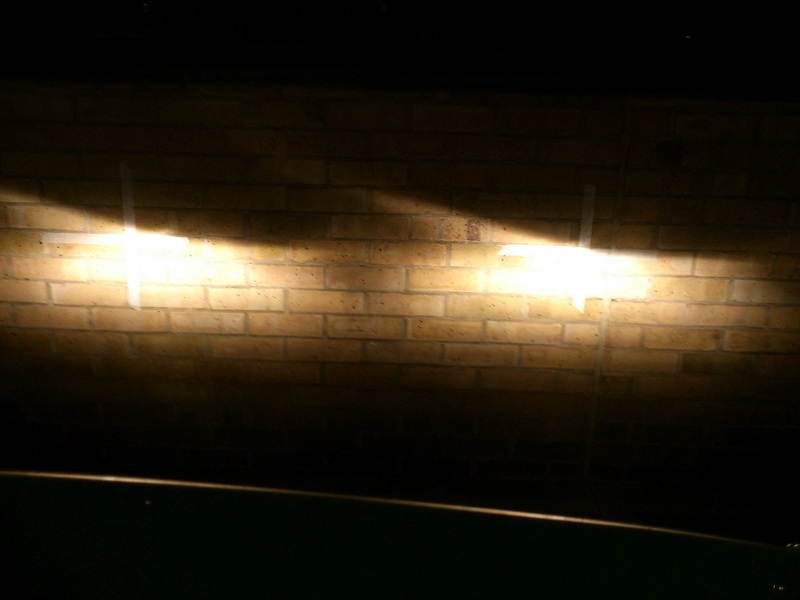 then you reverse up 10 meters in a dead straight line and you can see if/how the pattern deviates from the close focused starting point. your original horizontal tape should line up with the horiztonal beam still, and the vertical cross should be roughly in the spot where the horizontal beam kicks up to the left. you can see below my passenger side is pretty much spot on, but the drivers side needs pulling slightly to the left.  |
| |
Last Edit: Feb 2, 2016 19:41:18 GMT by darrenh
|
|
|
|
|
|
|
few other little bits done, the first is the windscreen washer which packed up last week. the water stopped squirting out the jets and i could hear the motor over speeding like when the water runs out, but the bottle was still half full :-\ i unscrewed the cover on the bottom of the pump and the gears were not moving but i could see the motor shaft in the middle spinning. so the gear has started slipping then the motor shaft has melted the hole bigger. i found the part number in the LR parts book, googled that and it came up with a bearmach pump identical to my busted one, hmm, cheap toot, i'll take a rain check on that ! There were also a few hits for a nice shiny metal OE version made by lucas which looked just like the picture in the parts book, so i got that instead, it works really well  last week i got a new set of rear springs as mine are rusted badly and seriously sagging. They are OEM 11 leaf springs made by santana, i also bought a set of new U bolts and a set of bolts/nuts for all the bushes. This a weird picture i know but it was just to illustrate that one of the springs has more camber (drivers side) 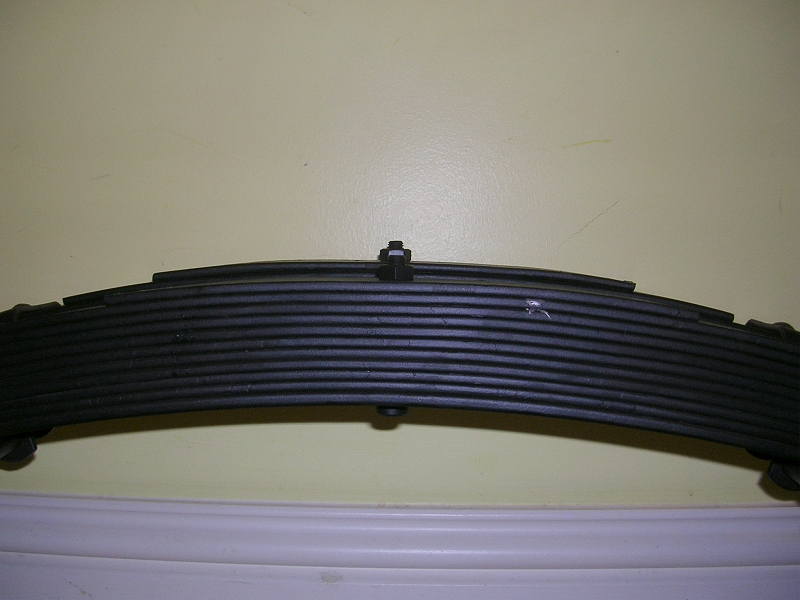 also my cheapo 2 tonne scissor jack arrived from ebay which was only 9 quid including delivery. I bought it specifically for the hardened/hi tensile screw through the middle which i'm gonna hack out of the jack and use it to make a bush puller for the chassis and spring eyes. just need some stout tube and various spacers, probably sockets. The screw has major diameter of 14mm (probably M14 1.5 pitch) if my maths is correct the bolts for the springs and shackles are 9/16 unf which has major diameter of 14.3mm, so in theory the screw should go through the bushes ok :confused: :smile1  lastly a bit of useful information for you, found on an ancient post on a random land rover forum. spring hights, thicknesses, rates for series 3 8)  |
| |
|
|
|
|
|
|
|
|
The jack will fit the bushes fine.
I made a similar to to which you describe using a scissor jack that used to hang out in the back of a Rover 75 before it was scrapped.
They're good for springs which aren't bad to change, although the older I get the more I lean towards some decent quality polybushes for the chassis.
New metalastic bushes don't last as long as the old school ones, and the idea of changing polys every 5 or 6 years is more appealing than changing the standard type.
Thinking about it I've just reminded myself of the time I spent 20 minutes with a 101 spring over an anvil braying it with a sledge hammer to get the bush out.
Tidy looking motor though. I've always enjoyed driving Series motors.
|
| |
|
|
|
|
|
|
|
|
I look forward to watching how you turn the jack into a bush removal tool, as it's a job I have to do on a couple of Series 3's soon!
|
| |
|
|
|
|
|
|
|
|
Good luck with the bushes. Did a Series 2A many years ago without the benefit of such ex-jack technology. First two springs were a doddle and I wondered what all the fuss was about. Then I discovered...
|
| |
|
|
|
|
|
|
|
thanks  possibly attempt tomorrow, these are my youtube inspirations. i can only pray it goes 1/10th as well as this building pulling |
| |
Last Edit: Feb 5, 2016 16:57:34 GMT by darrenh
|
|
|
|


 :eek:
:eek:

 had long chat on the phone and exchanged emails. considering its now 30 years since she bought it, was quite a big surprise, a nice one.


