|
|
|
Jul 26, 2015 22:46:59 GMT
|
Thanks for the replies and positive comment fellas, it really goes a long way to keeping my chin up at the moment as I've started to come to the realisation that its becoming impossible to have it back on the road this year now.
It could just about be done but with even more shortcuts and jobs undone and some other small projects I need to do would end up as failures too.
I cant see how to do a multiple quote thing, see how this works, its too much technology for me.
Thank you qwerty, its my favourite kind of thread too, RR is a good place to find them.
Posted by joe90
13 hours ago
.
Some nice work there mate, I always liked the Carlton but there getting a bit thin on the ground now.
Bryan
Cheers Bryan, very thin on the ground indeed in any engine size, I'm glad I bought some while they were more readily available.
Posted by bstardchild
12 hours ago
.
Good to see you sharing this here Chris - As I said elsewhere it should be appreciated
Also third time round the "before pics" no longer have me hiding under the duvet...
Yes thanks BC, you were right, its good to share.
I'm pleased that you aren't frightened any more. Be careful that you don't get de-sensitised to rot though, it could lead to rot blindness and carelessly blundering into projects like this. Do have nightmares!
Posted by jonsey
12 hours ago
.
Cracking job. Love seeing the work people put in to save something so rotten. More updates please.
Thanks, I'll post some more Thanks Darren, I have had quite a shock when I got to the back end too, stuck it out so far though, positive vibes from people enjoying reading about it have helped a great deal when my mojo has been heading for the door. I've been to view "rust free" cars that turned out not to be when you make an effort to look, never welded is another classic line, often true but failing to mention the need for welding.
Posted by frodo
11 hours ago
. You're either very brave or totally mad to take on so much welding
You decide, my shrink can't 
Thanks for your kind words. Its always a possibility for later to repaint, I'm a bit torn with the car, if it was ever going to be done to a high standard I wouldn't have started it, it was only taken on as a quick n dirty fix up to save it from the scrap yard, I don't have time to get carried away, too many other projects. My thinking is get it on the road so as to get some pleasure from it then if I enjoy it enough I can improve it.
Posted by pistonpopper
7 hours ago
.
BOOKMARKED!! I'm on the lookout for a Mk1 Carlton Estate meself, whereabouts are you based fella, i'm probably gonna need your welding skills as you seem to be almost able to fabricate an entire Carlton from scratch! Excellent save mate, well done! More though... WE NEED MORE!! 
I'm in Co Durham, but its the last Carlton I'll ever weld (I have said that before). Thanks for commenting.
Posted by MonzaPhil
6 hours ago
.
Crikey
Very concise, thanks. 
Posted by shielsy68
5 hours ago
.
looked like it was in the tide beautiful bit of work hats off to ye
I,ve been asked questions like whether it was found in the sea or worked in a salt mine, it probably did. Cheers.
|
| |
|
|
|
|
|
|
|
Jul 26, 2015 22:51:35 GMT
|
Well that last post is as patchy as the Carlton. Sorry about that.
Another unbelievable fight against the tin worm on here, it terrifies me just thinking about taking on something like this. Even more of a remarkable feet when you consider you're working in a garage with power via a generator. The repairs are proper repairs too with excellent welding and fabricating of all those sections and patches being let in. Damn, you is the man Chris! Keep up the brilliant work. Thanks for the positivity, I don't think the quality is all that great but its strong and safe and a long term fix in the areas I've worked I like to think. |
| |
|
|
|
|
|
Jul 26, 2015 22:55:19 GMT
|
Some more copy and paste to get the thread a bit closer to the present day before I go to bed. I cleaned bits and put everything I could back on the front end during winter. I would have liked it all back together except for the engine but not having done the work on the sills meant that the wings couldn't go on and therefore neither could the rest of the front end. It was quite a pleasure to clean and refit bits so I bought stainless replacements for the screws, P clips and washers etc. Not a lot of money to make a lot of difference as all of the old ones were badly corroded (as you would expect on this car). I didn't get carried away with painting everything but one big job was to sort the wiring, it was utterly appalling, the previous owner said that it had been off the road for a very long time with electrical trouble and the garage had left it like corroded tatty spaghetti. I quite enjoyed sorting it out. I deleted some bits I didn't want like the headlight wash wipe and cruise, and replaced a lot of damaged stuff, some of the harness was binned. I re-wrapped the lot using self amalgamating tape and the proper flexible covers that I recovered from the spares estate car, it looks a lot better. 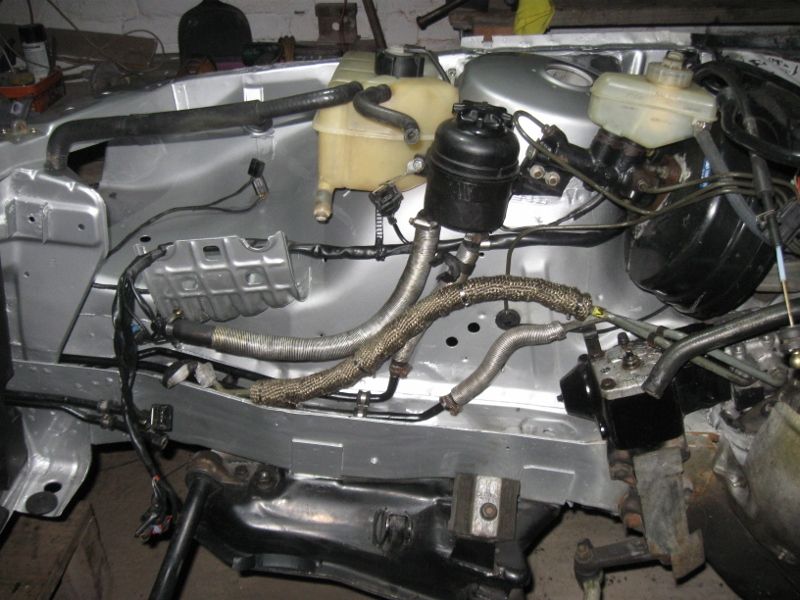 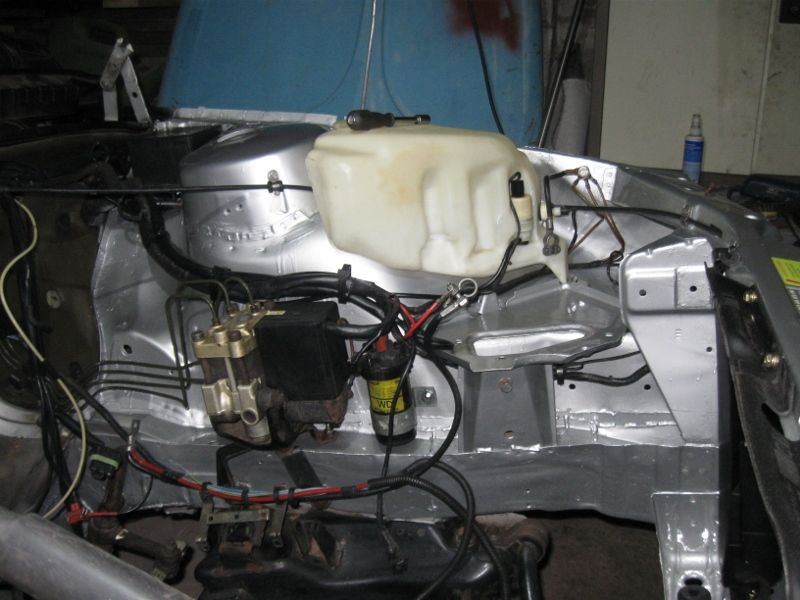 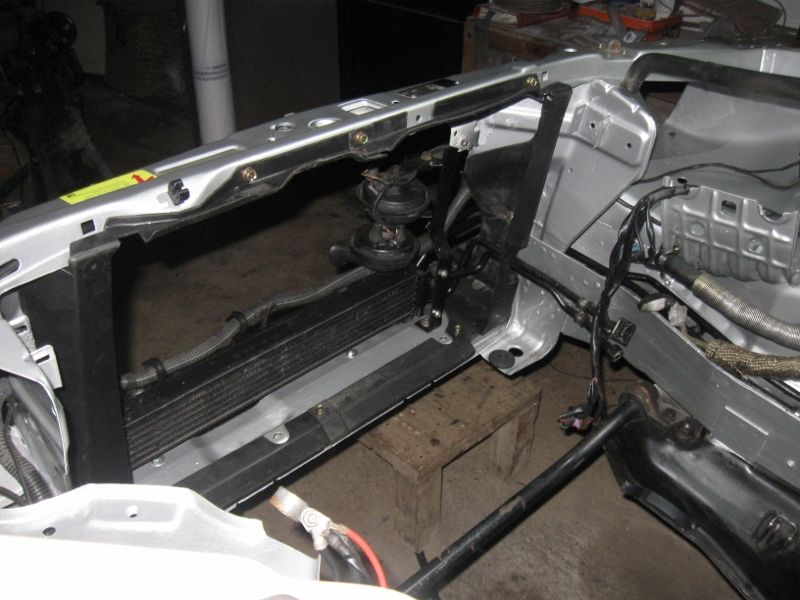 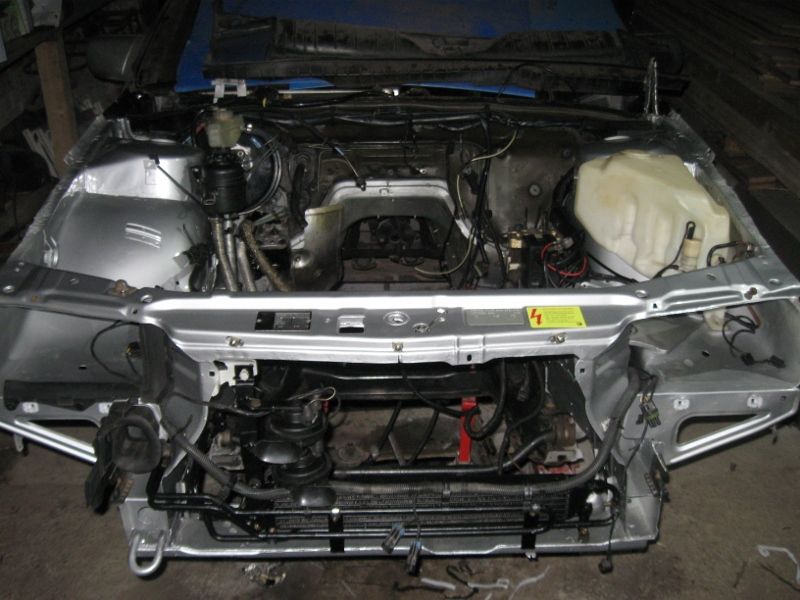 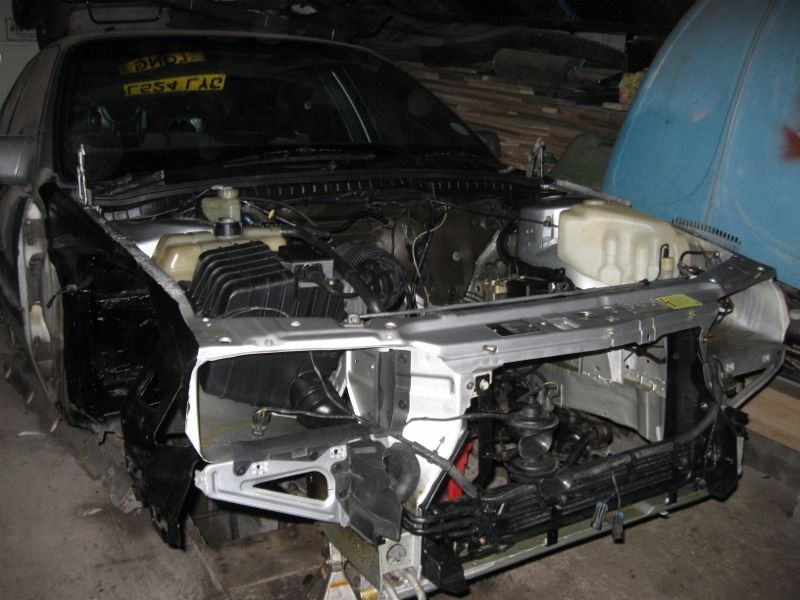 I enjoyed the tidying and finding the proper clips and fastenings so much I heated up the slam panel sticker from the estate and removed it to put on here for the original look. Pointless on this car but satisfying. |
| |
|
|
|
|
|
Jul 26, 2015 22:55:43 GMT
|
I had a go at rebuilding the brake calipers because they looked shocking, it turned out that there was nothing functionally wrong with them. Starting at the front, all of the castings looked a bit like this 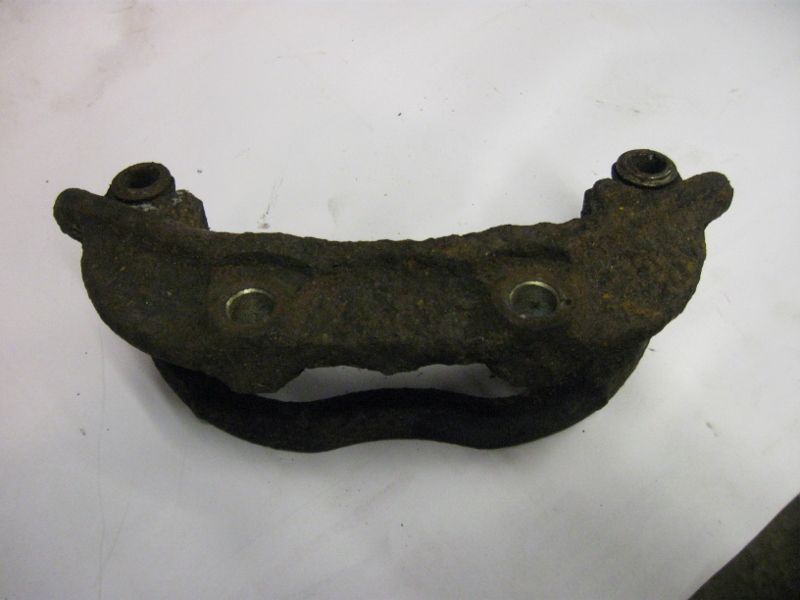 I decided to try electrolytic rust removal, submerging in electrolyte (washing soda and water) and passing a small current through to de-oxidise the rust. It worked well. 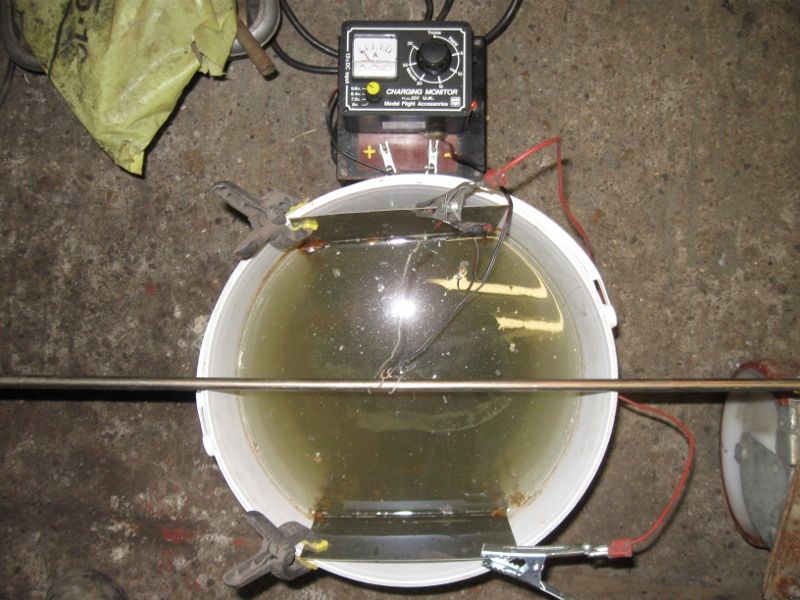 They came out of the bucket and the rust was a black substance that rinsed off. 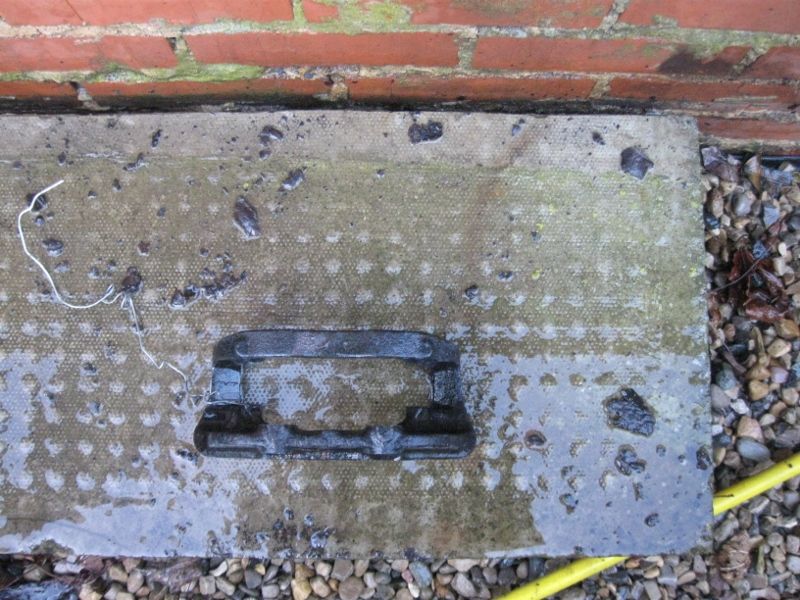 Leaving this 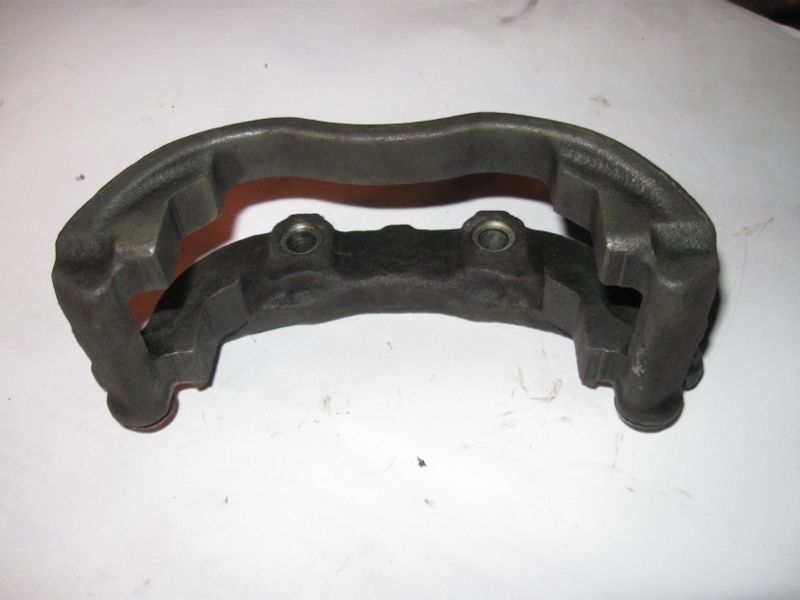 I set up my small parts paint booth, sheets hung in the garage and a big radiant heater on to get the temperature high. I first did this when I spent a while restoring / modifying 70s bicycles and its quite handy. 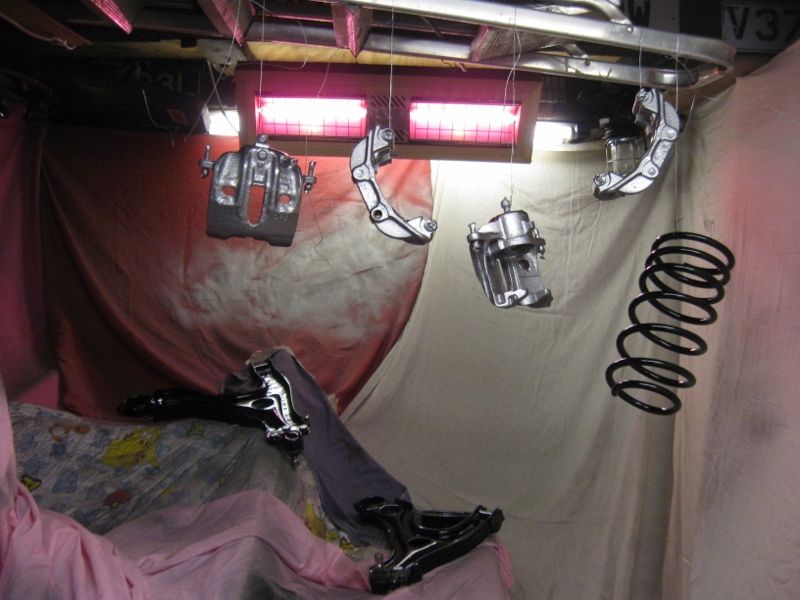 Then rebuilt them with new seals and bleed nipples etc and red stuff pads. 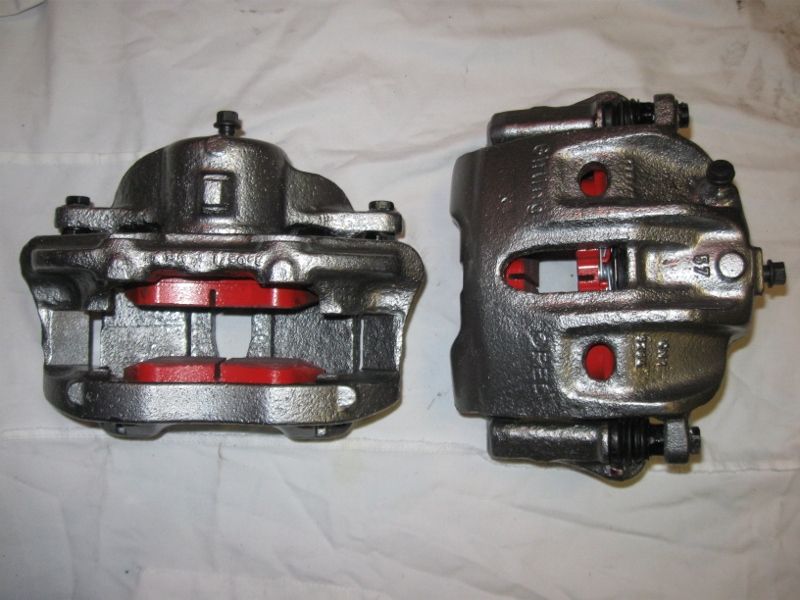 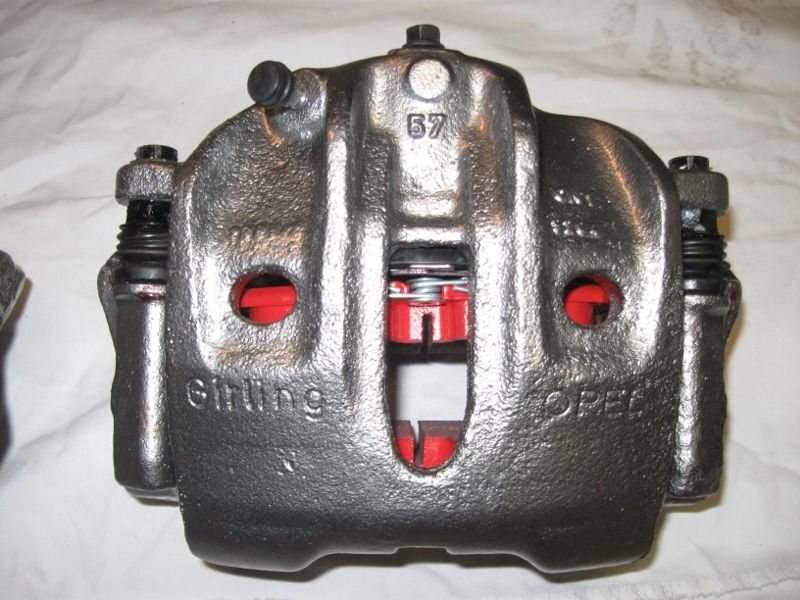 And refitted them with some discs that I skimmed years ago, they were drilled and grooved EBC discs that rusted badly over a winter and after skimming them I wiped them over with thinned primer to keep the rust off. Skimming on a lathe isn’t easy, to achieve parallelism and this was my first attempt, I think it went well so I’ll try them and if no good replace them. 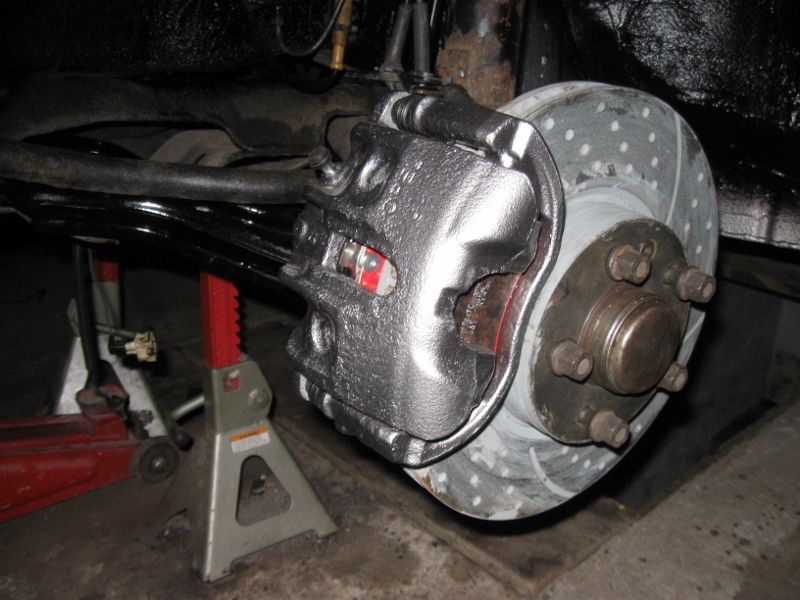 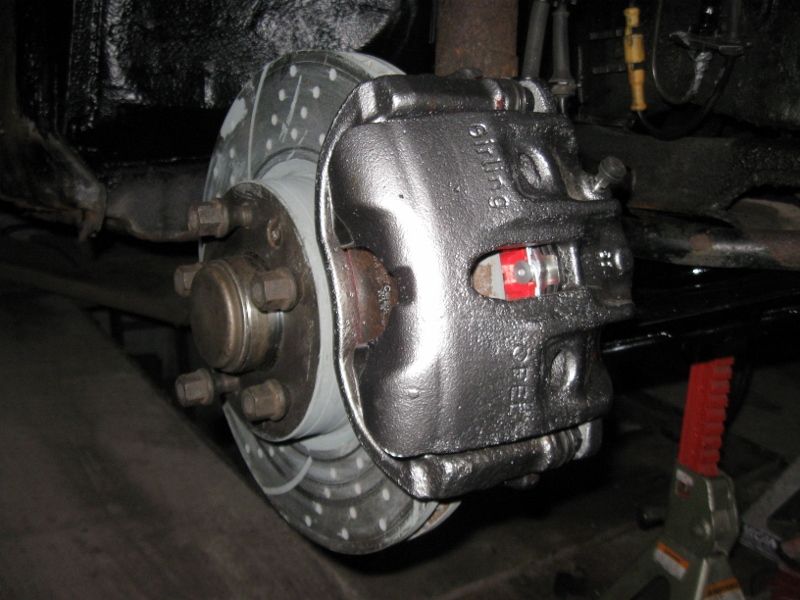 |
| |
|
|
|
|
|
Jul 26, 2015 22:57:26 GMT
|
Here goes with a rapid smattering of various jobs that got done during winter. A couple of pics to finish off the brakes. The handbrake internals were replaced, shoes and holddown kit. In future it may need back plates but I’ll deal with that later. I fitted a new handbrake cable, that was a particularly difficult job, I don’t know if I did it wrong but it seemed like a lot of hard work. Most of the brake pipes were very good, but the invisible bits above the rear axle area were terrible, the visible pipes seemed to be the only part of the car well protected from rust. I’m sure a few of us have struggled with this Tee piece that is so difficult to reach – 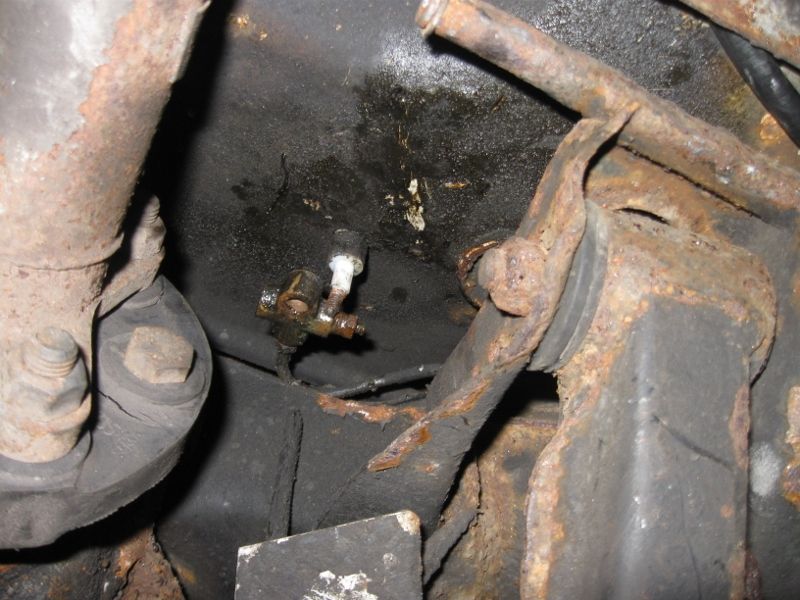 I moved it to here to make life easier 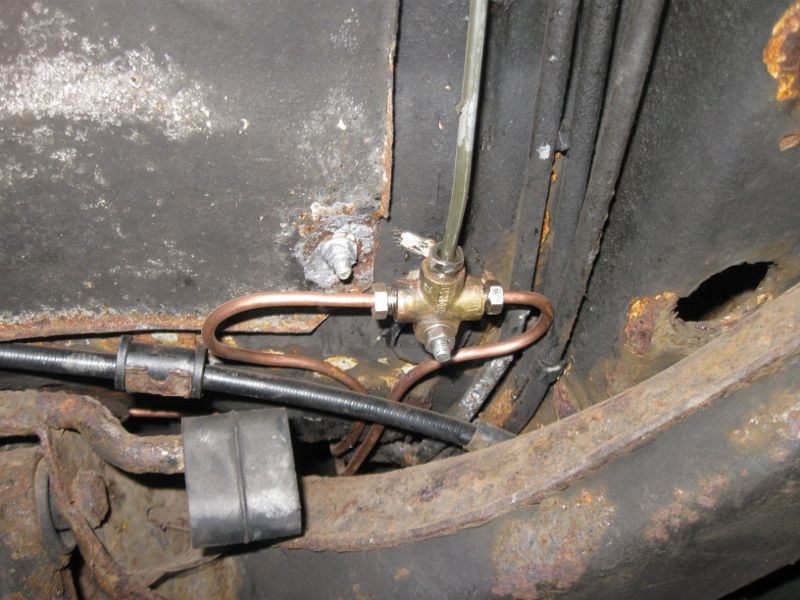 The rear discs were quite good so got derusted and the edges painted to slow the rust. The rear calipers turned into a nightmare. I decided that life was too short to go for the same standard as the fronts on this car but wanted to make them safe and sound. Out of four calipers I had (two from a car I broke years ago) I struggled to make two calipers. Two castings broke where the screwdriver is pointed here, it just fell off and the break showed it had been waiting to do that for a while 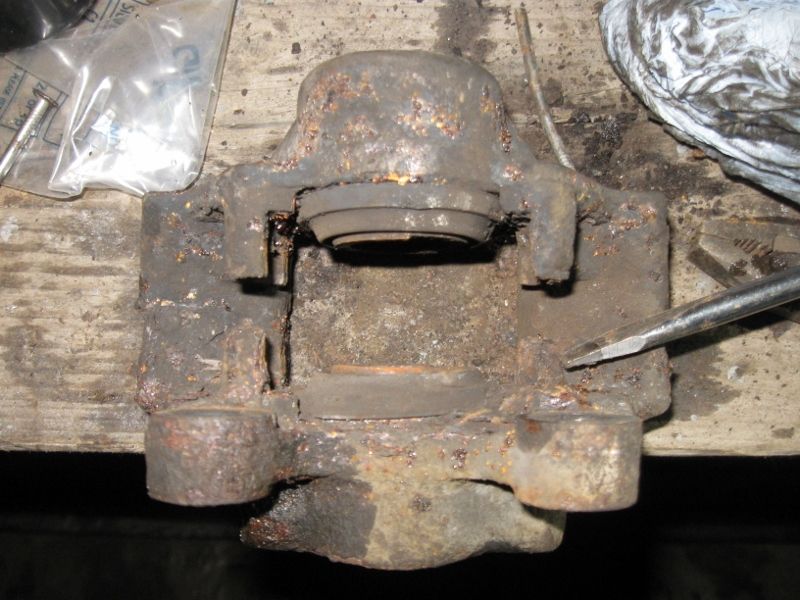 All of the bleed nipples were rotted so badly that they broke straight off, because I had no good one I foolishly made the assumption that they were the same thread as the fronts and also assumed that they were fitted perpendicular to the surface, anyway I snapped an extractor off in one before remembering that they are just rubbish and I know how to drill broken things right out, ruined two working out that I had got the thread size and angle wrong and successfully drilled only one out. Very embarrassing, I’m supposed to be good at stuff like that. Anyway, you can see that one caliper has the bleed nipple on the wrong side, it just means that to bleed it will need the wheel off. Its there because I drilled an opposite side casting with a brand new hole for the nipple. It worked well. Both calipers were made from the few saveable castings I had. Fortunately the pistons and seals were very good so were cleaned and re-assembled. 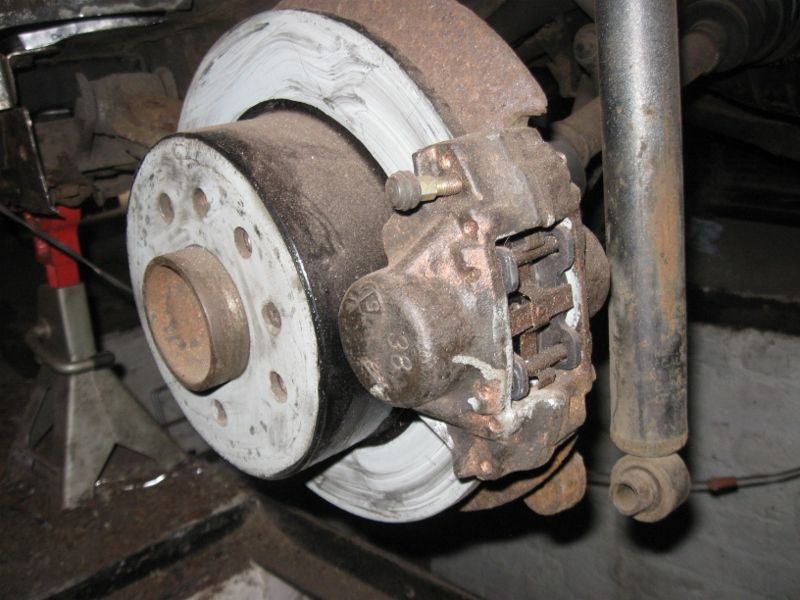 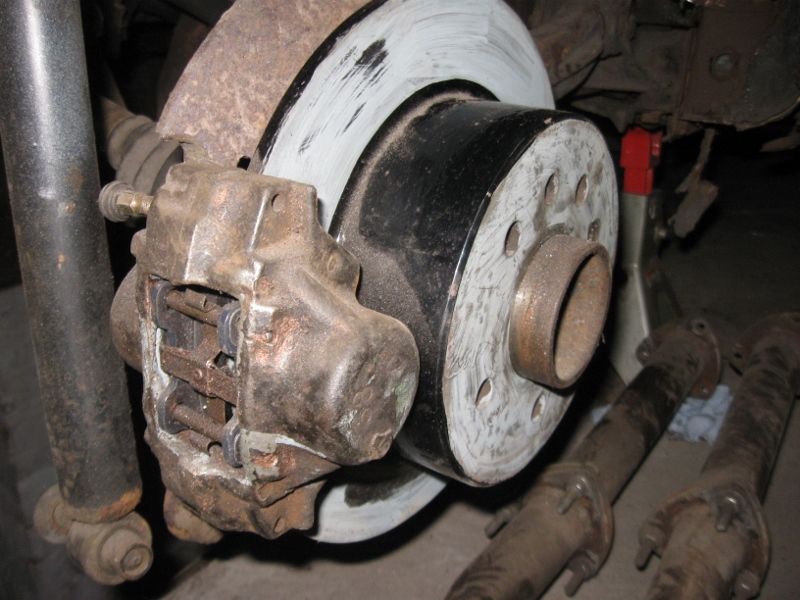 Not looking great but all safe and working. I swapped one drive shaft due to a split boot, and while it was out changed its seal in the diff. It’s a quiet diff so worth keeping the oil on the inside. 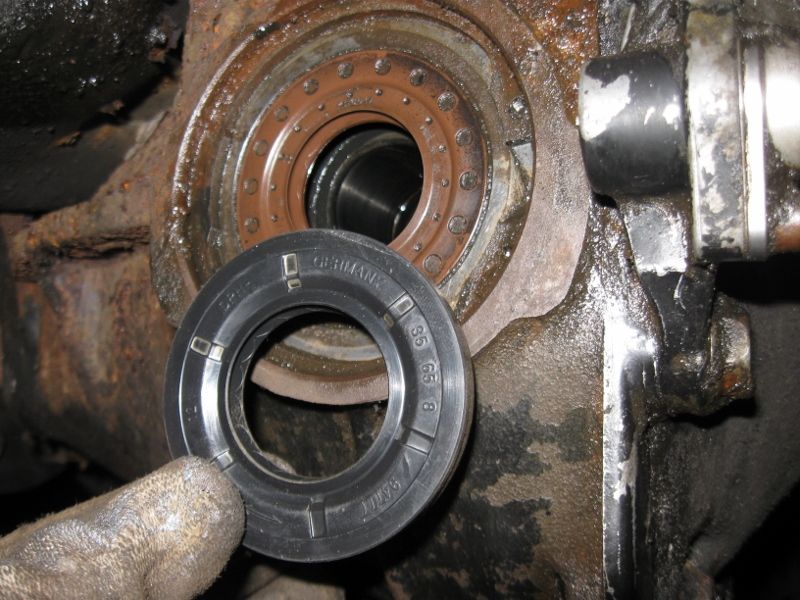 The front bottom suspension arms were replaced with little used ones, I painted them in 2k paint to help them last while the painting gear was out and pressed in genuine vertical bushes. 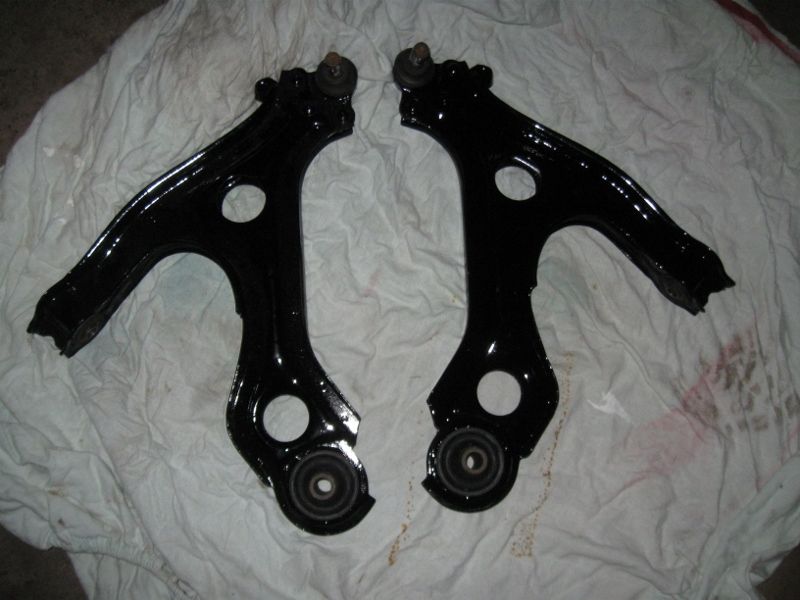 I fitted new drop links, some of you might remember a thread a while ago where I experimented with cheap droplinks and found that filling them with grease prevented the ball from rusting and chomping away at the insides. This time I bought Delphi items, not genuine but a reputable brand and still cheap. I popped the seals off to find just a light film of lube 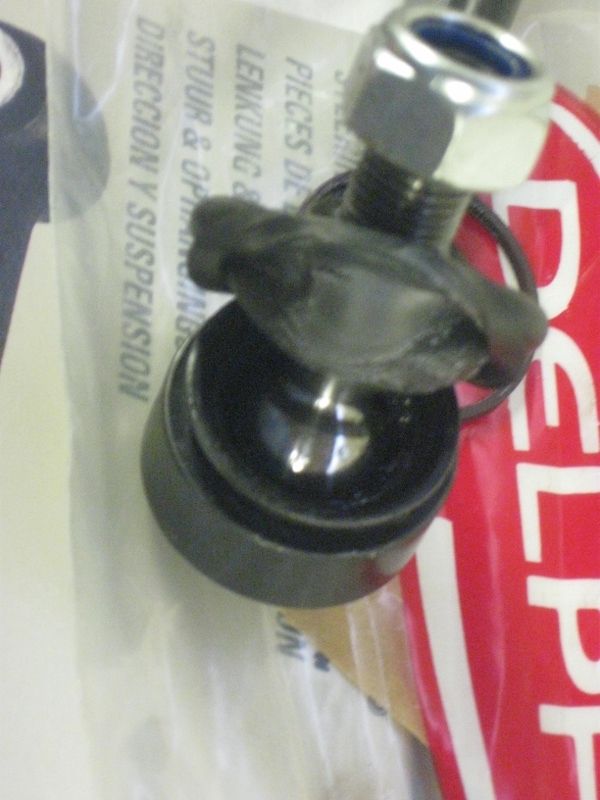 I filled them with grease, its supposedly rubber friendly grease so the boots should be fine. 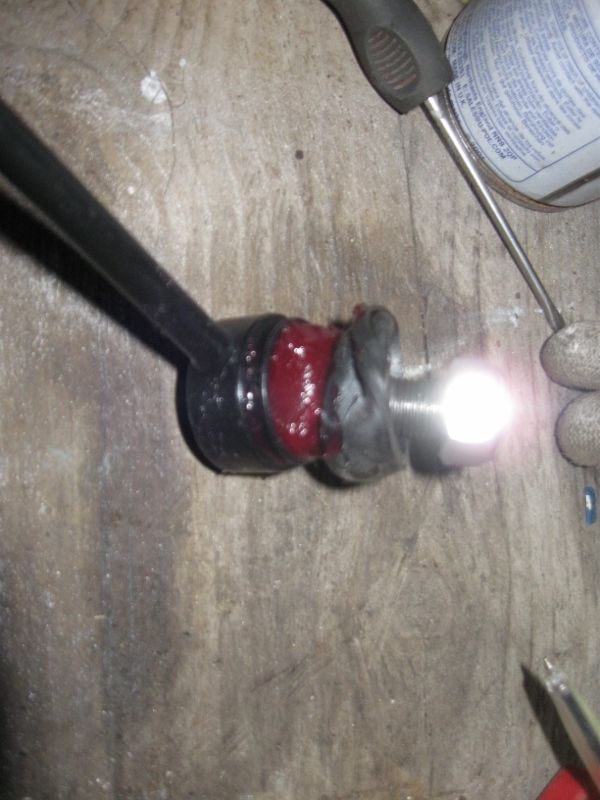 One thing that got done soon after painting was Waxoyl, with a bit of a difference. The observation of how the right hand chassis leg had been saved by an oil leak and other experiences over the years I decided that oil would be a good thing in cavities but on its own would run off too soon and need too frequent re coating. I decided to mix new engine oil (I had a 20l barrel of diesel oil from years ago) 50/50 with waxoyl and fill everything with a lot of it including all of the underbonnet areas so it could seep into the seams. I used an un-needed continental quilt under it to catch the run off and put a lot everywhere done so far with a powerful spray. It might not be wise to do it beside a cup of tea in future. Here is the mixing machine. 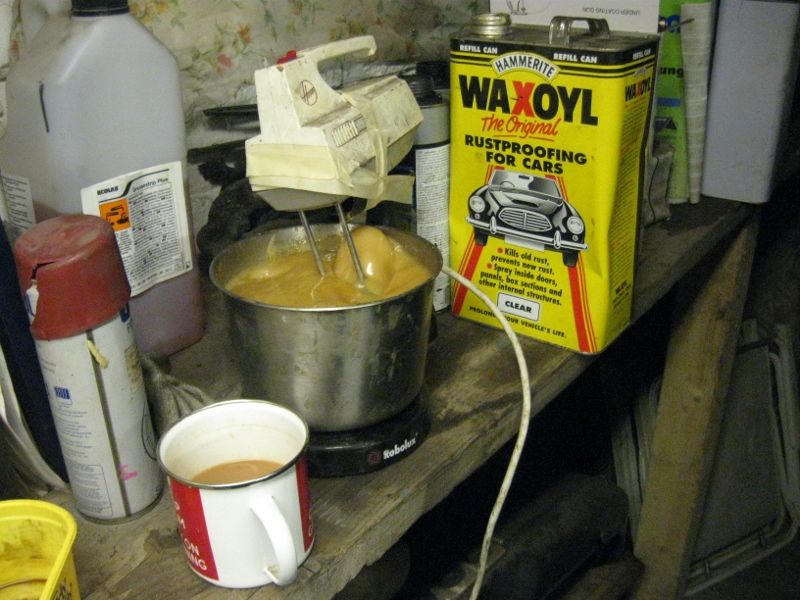 A few months on and the wax is helping to keep the film thick while the coating is very soft and oily so it should seep into joints, a couple of hours a year might keep the insides of everything soaked if the car lasts, and it wont cost too much. Its completely useless for the exposed underside areas of course, the inner wings etc got shutz applied. Another thing I did was to modify a trolley to be an engine stand that can take the engine or engine and gearbox while anything can be removed. I then got help and took it home on a trailer so that I could work on it over winter. I didn’t get far. 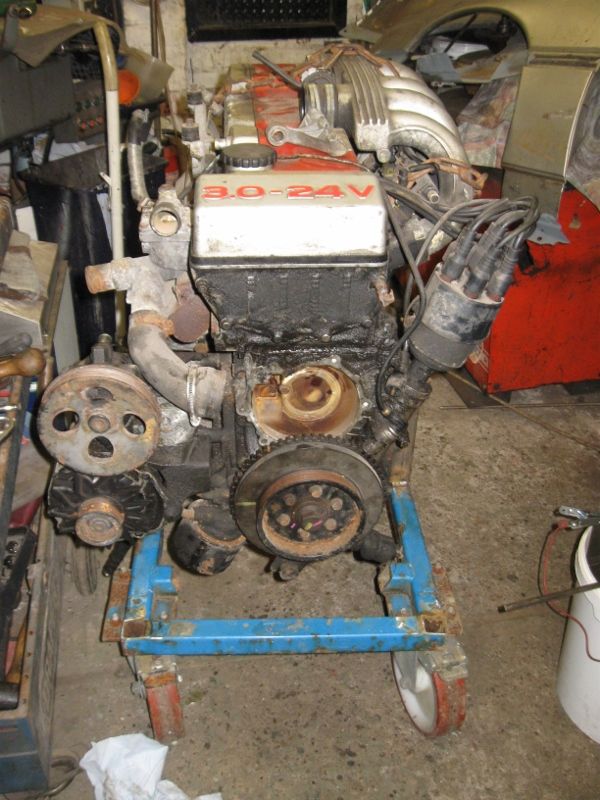 |
| |
|
|
|
|
|
Jul 26, 2015 22:58:38 GMT
|
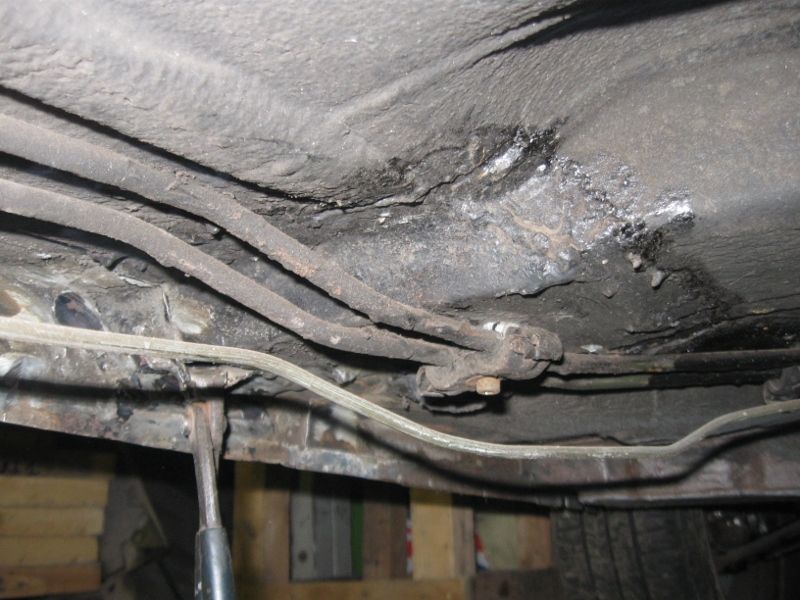
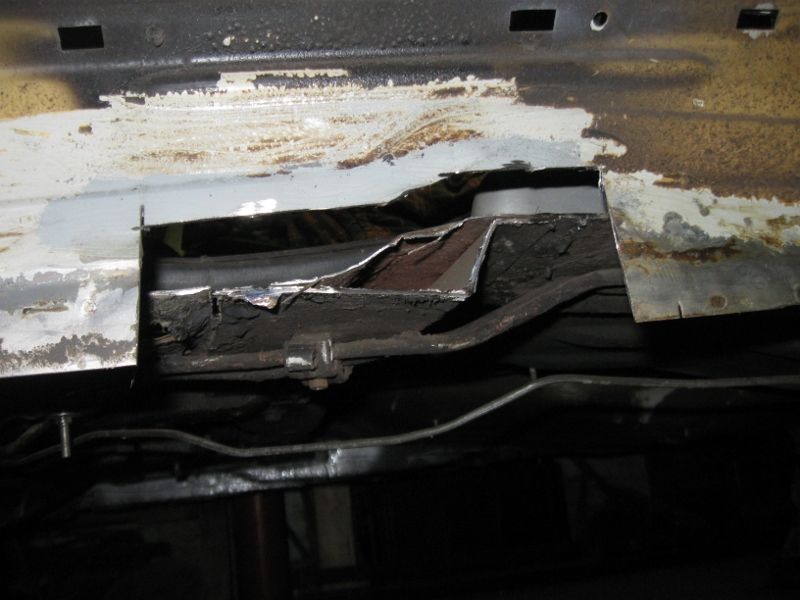
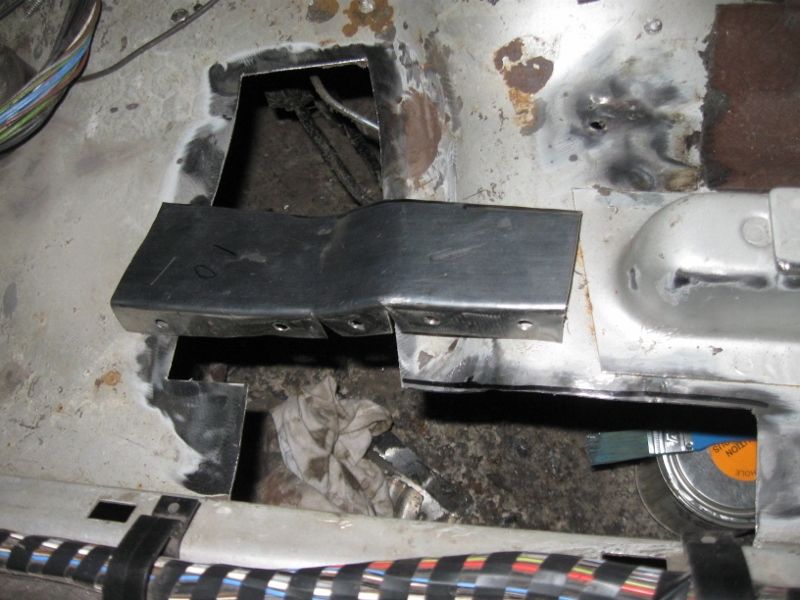
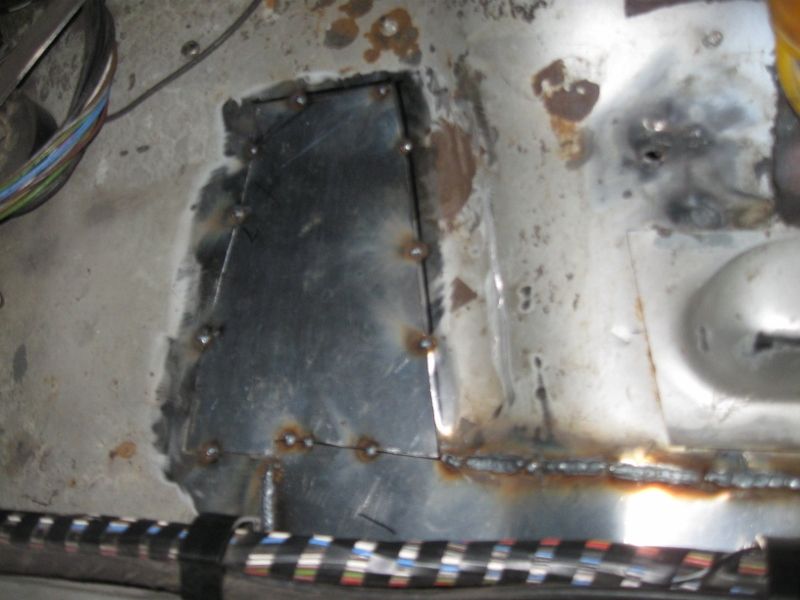
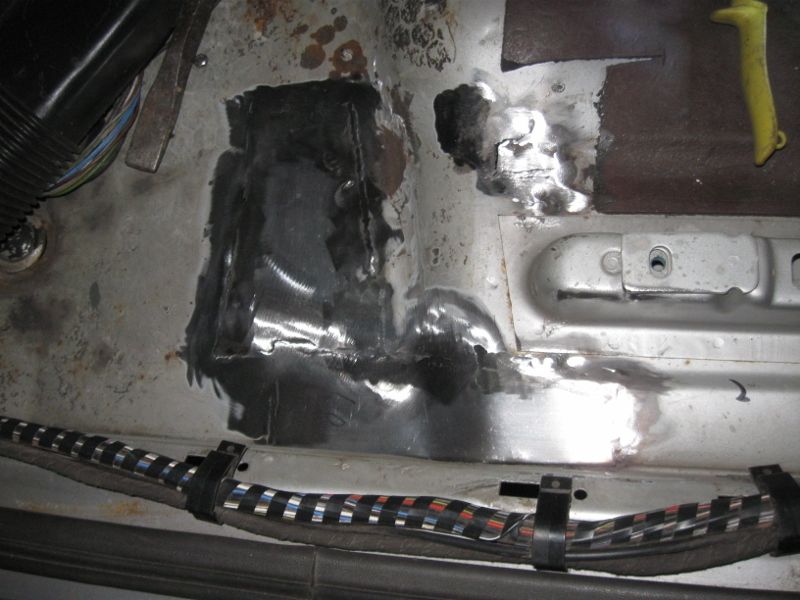
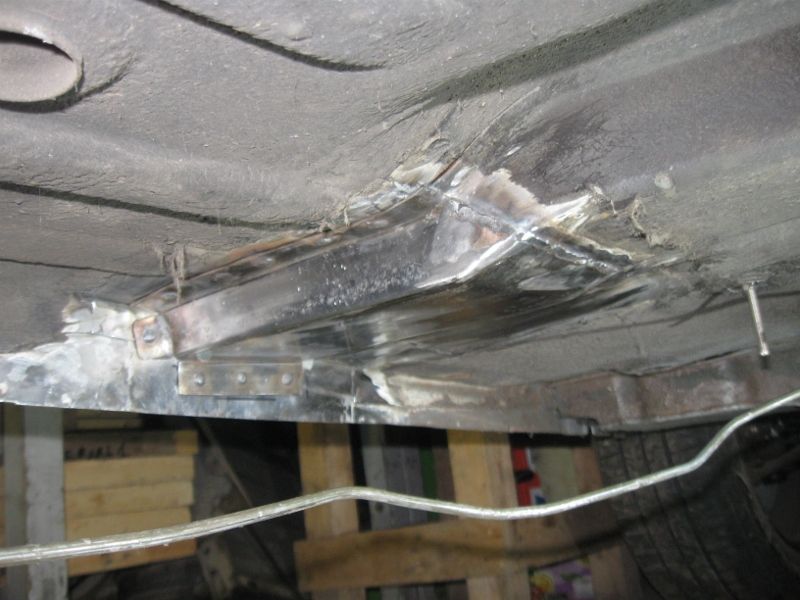
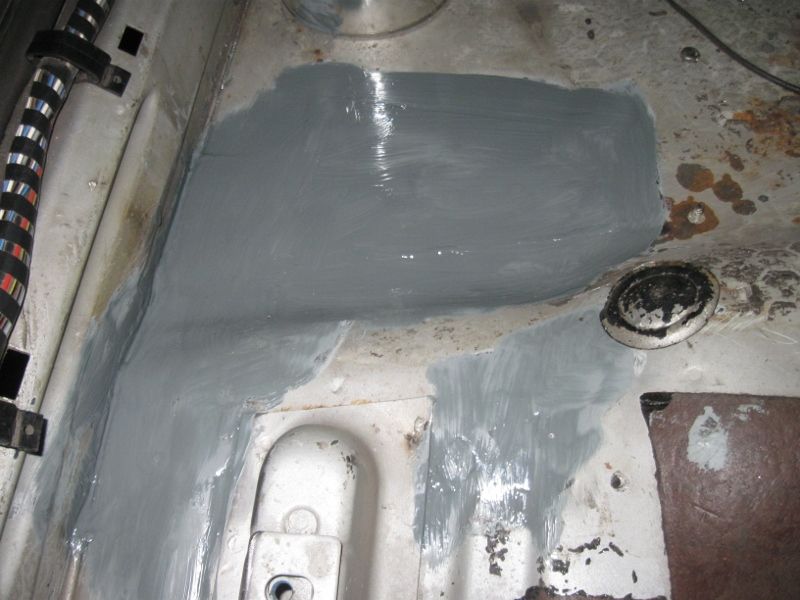
Back to some metalwork. Annoyingly I’ve lost some of the pics of this next bit. A little bit of rot started from what looks like damage from a jack on the bottom of the channel shape, close to the usual rot on the seam at the back corner of the floor. 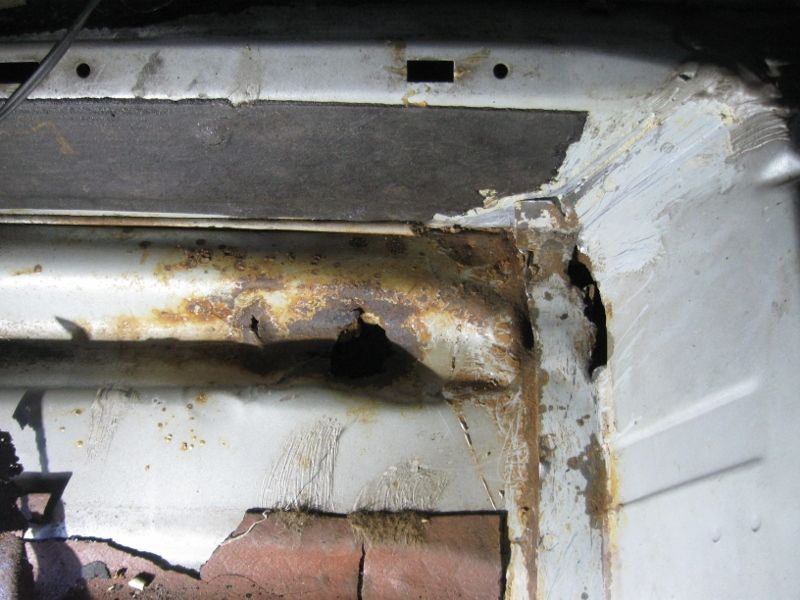 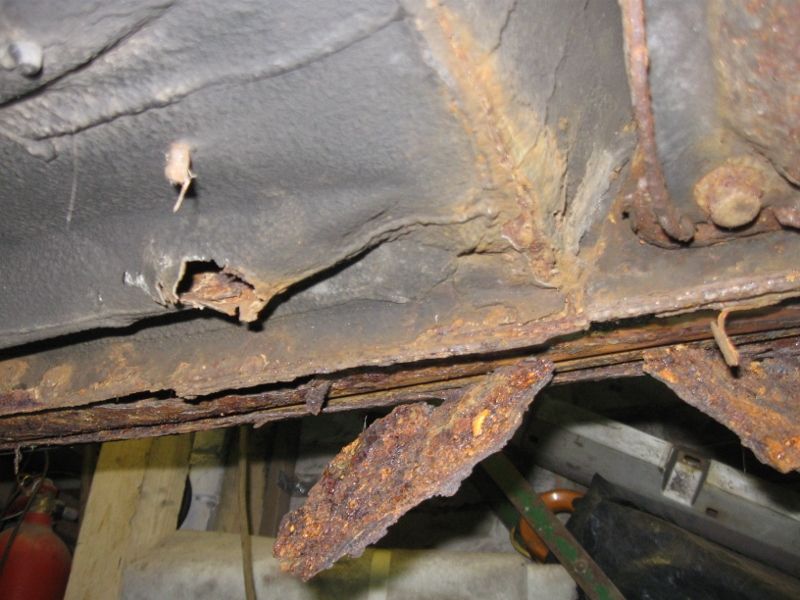 Try to ignore the sill for now. Pics of the repair are missing, and it was a bit of a pain to make that channel shape, a couple of pics in primer. 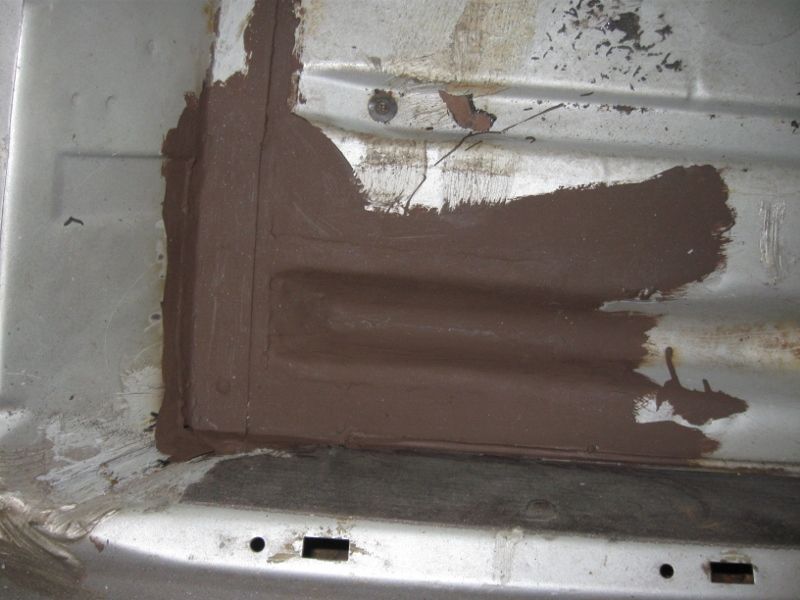 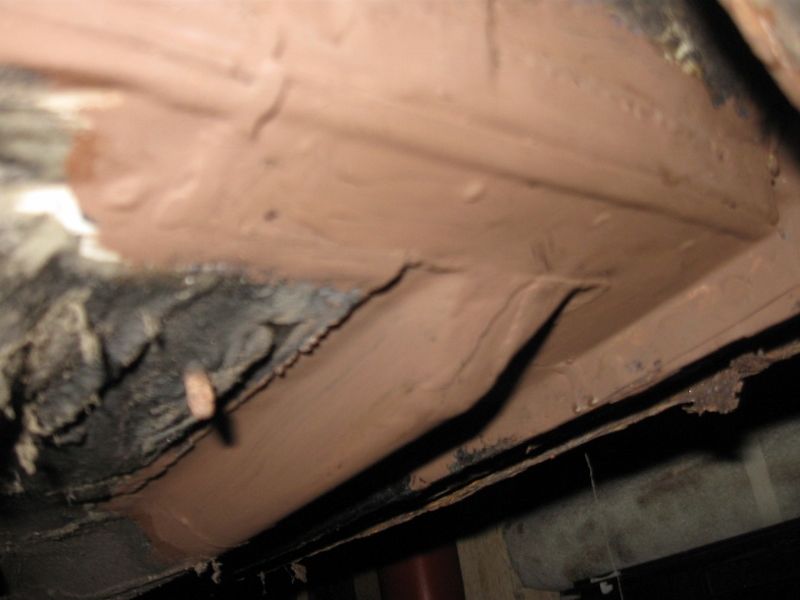 Next, under the seat. Tip – If the black tar board under your seat has swellings in it either leave it alone or prepare to find that the rear chassis leg is immediately under there and the rot in the leg has taken the floor with it. I should have taken a pic of the swelling but thought nothing of it. Anyhow, under it was this 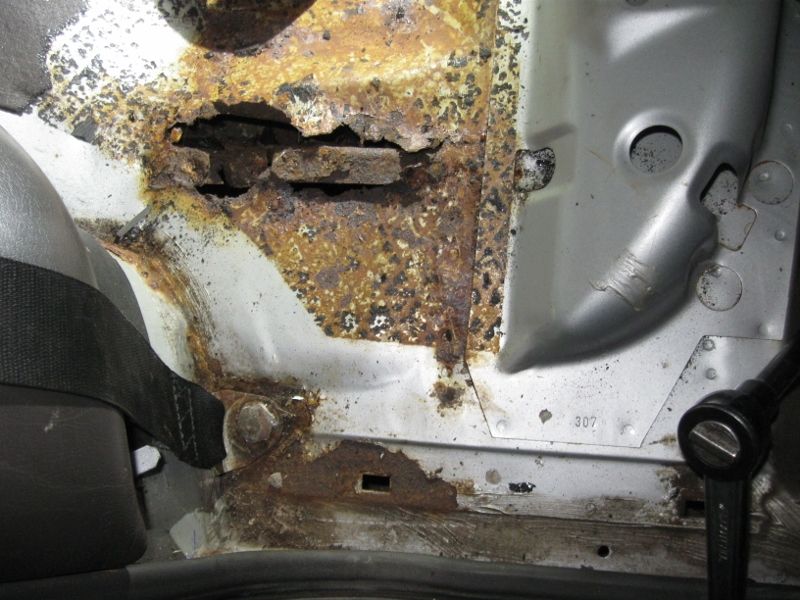 So I unbolted the seat belt and things got worse 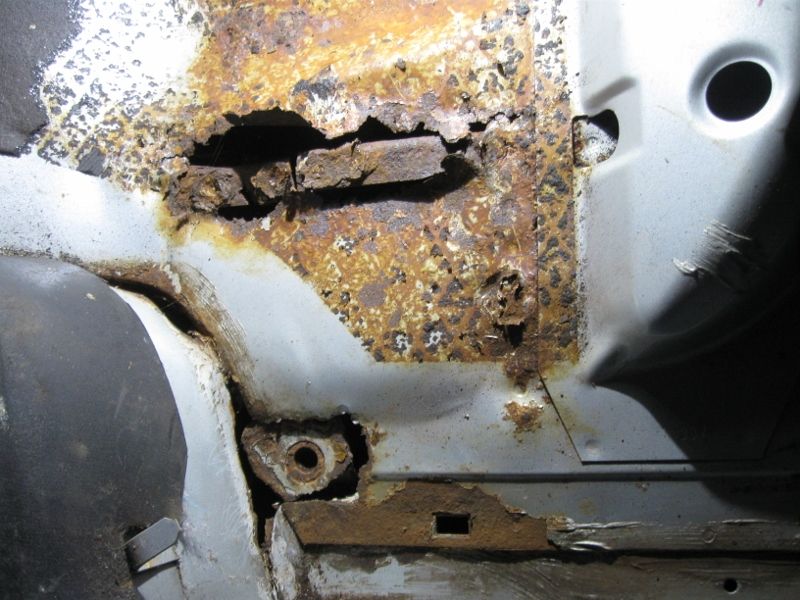 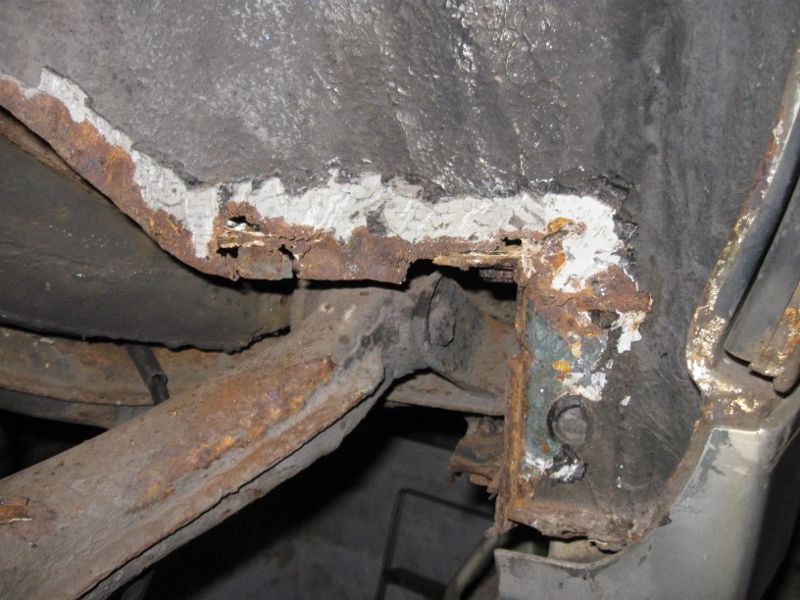 Chop chop 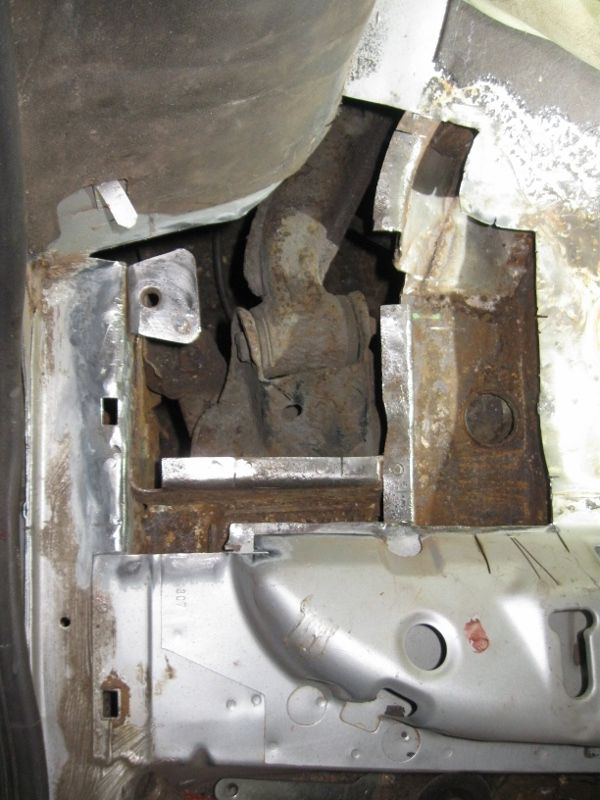 Surprisingly the chassis leg repairs I did years ago were holding up well, yes, they are rusty but not much needing immediate attention (one small repair) so my though it to leave them alone until such a time as there is work needing the rear subframe taking off. Big repair piece, awkward shape 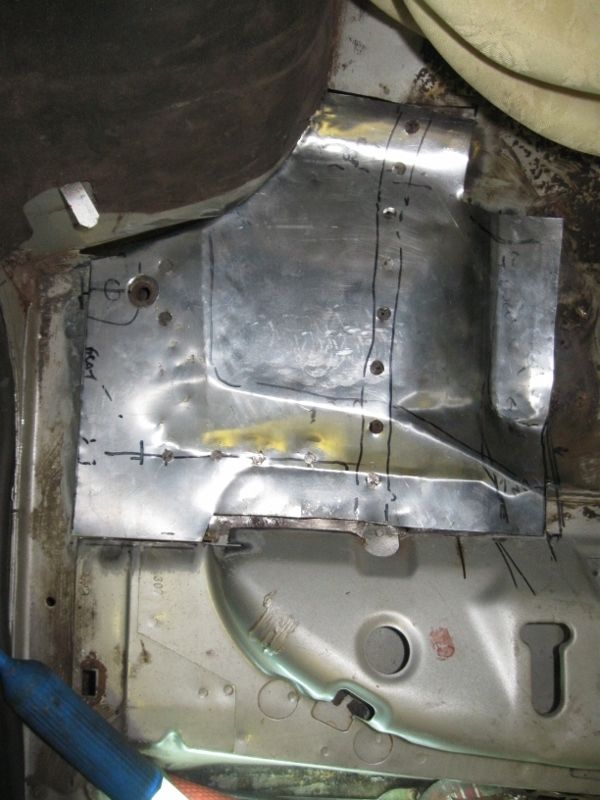 Welded in, difficult to get a pic due to lots of reflection. 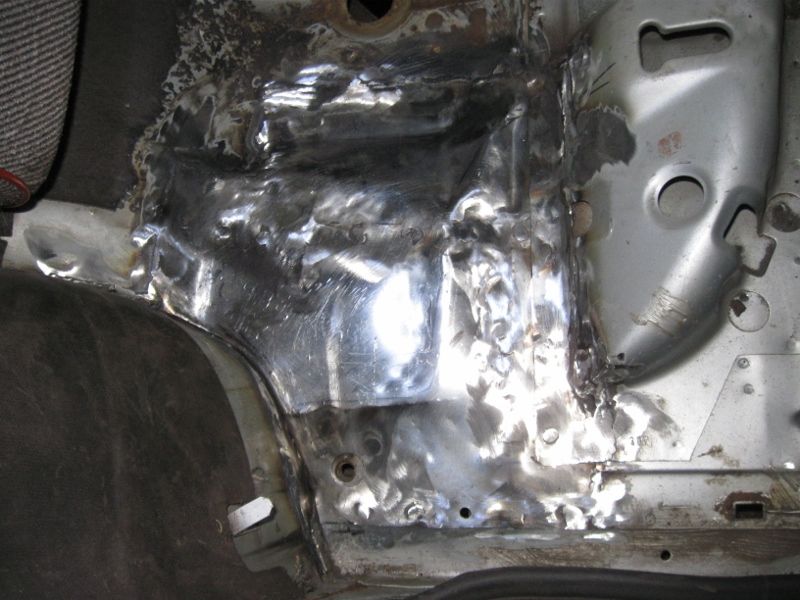 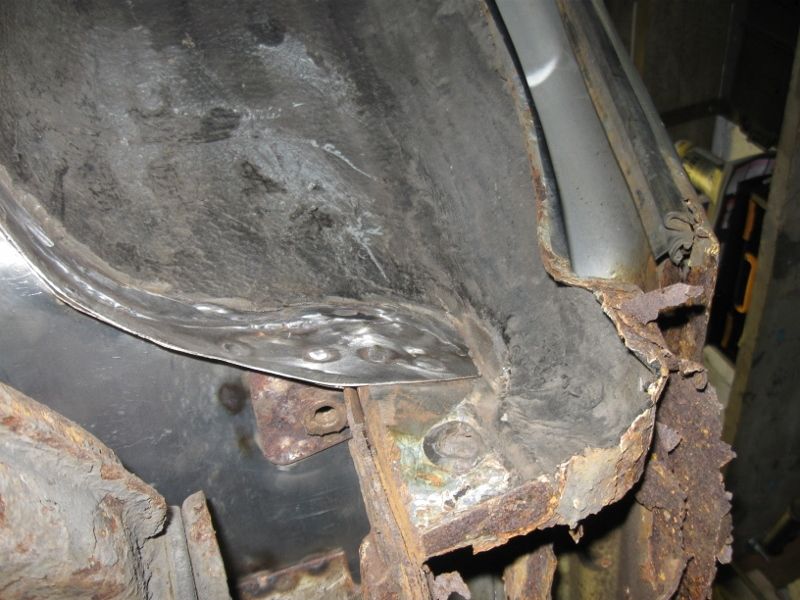 On to the boot next, where I feel silly for stating to my friends early on that there was nothing to do at the back end, must have had a mental block :oops: |
| |
|
|
|
|
|
Jul 26, 2015 23:00:25 GMT
|
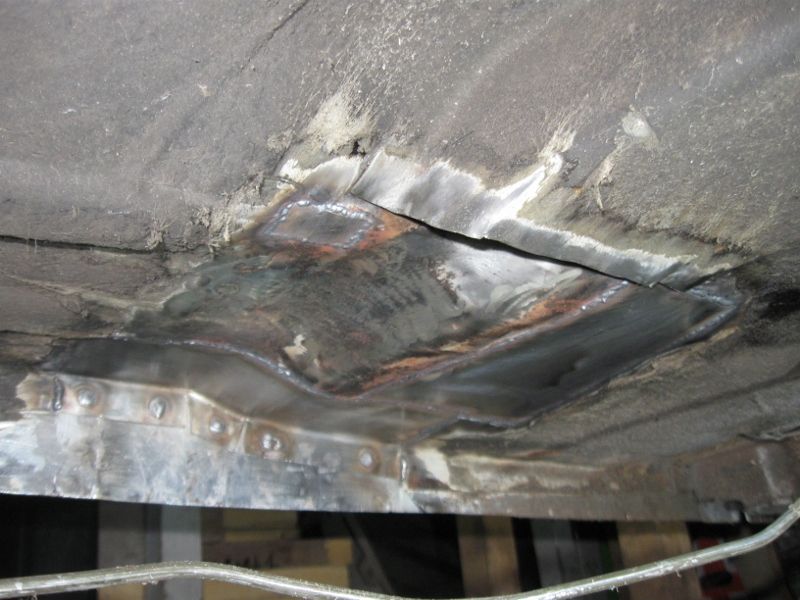
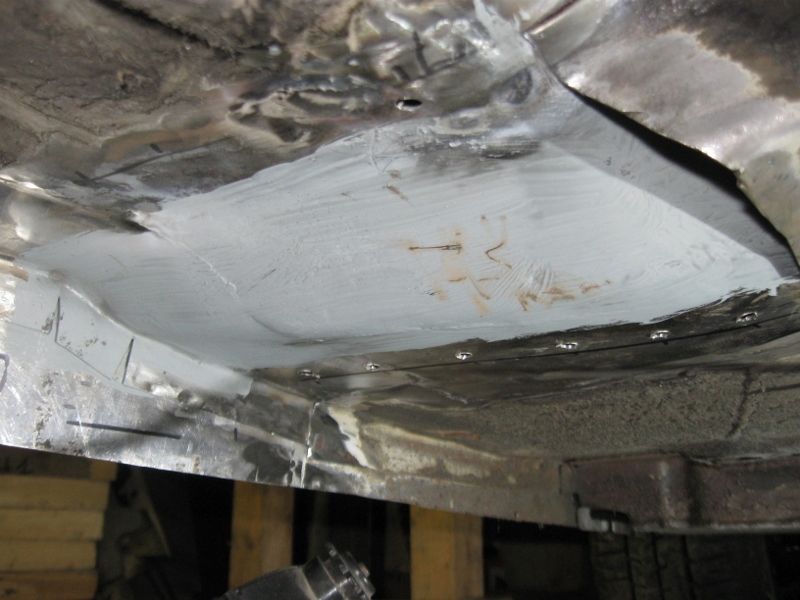
Some more rust – While working on the brakes I noticed a coin size piece of loose underseal on what I thought was a solid spare wheel well in a solid back end. HA HA HA HAAA, what kind of loss of sanity gave me the idea that the car would have a solid area! Anyway, a quick poke showed a bit of corrosion. 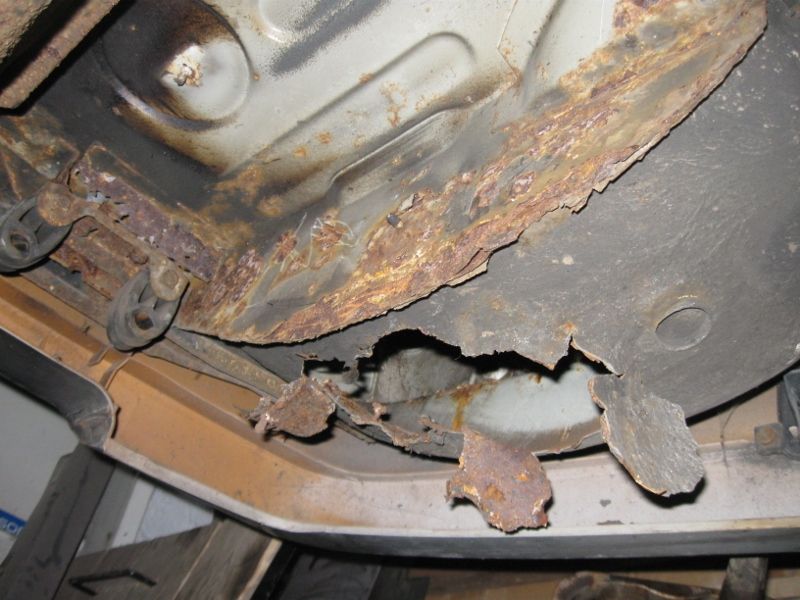 So I went up top and looked around at the ahem solid areas around the solid wheel well. 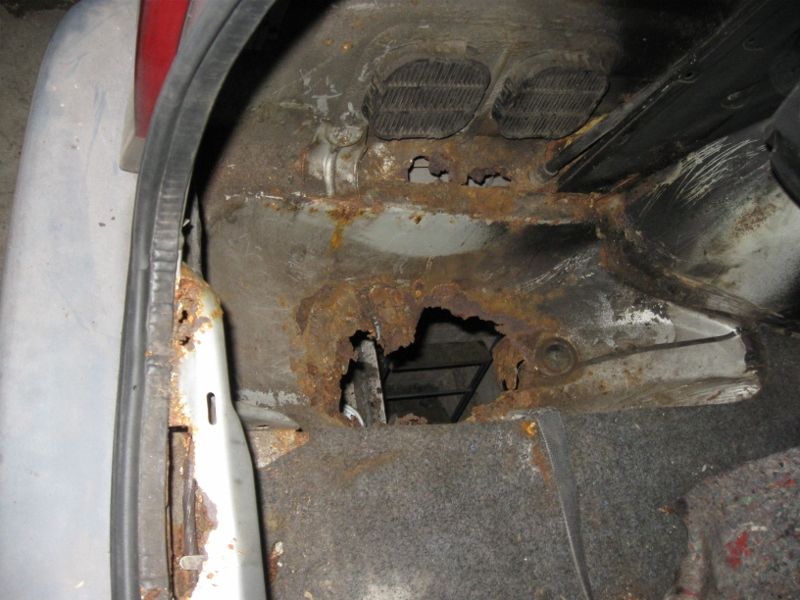 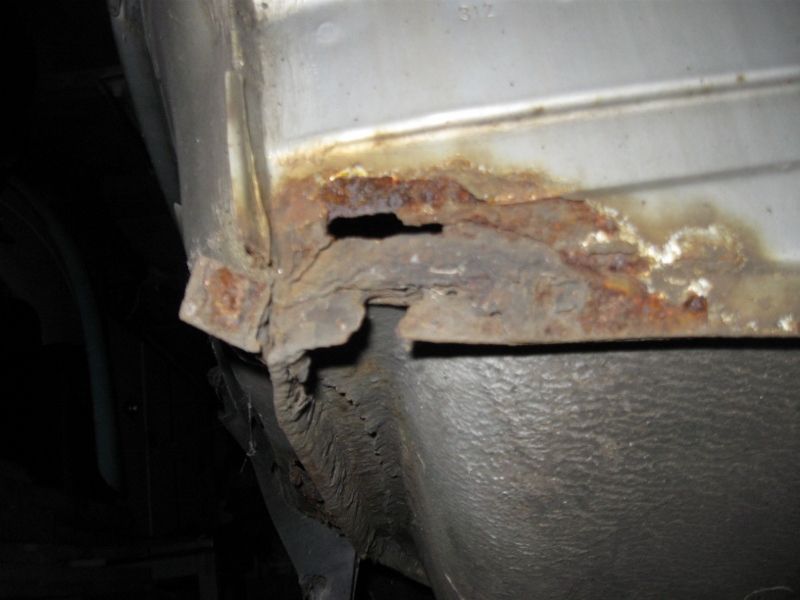 Not easy to see but there was rust all over including the rear quarter This bit was dust so I chopped it off and made a new bit, I didn’t bother with the swage lines. 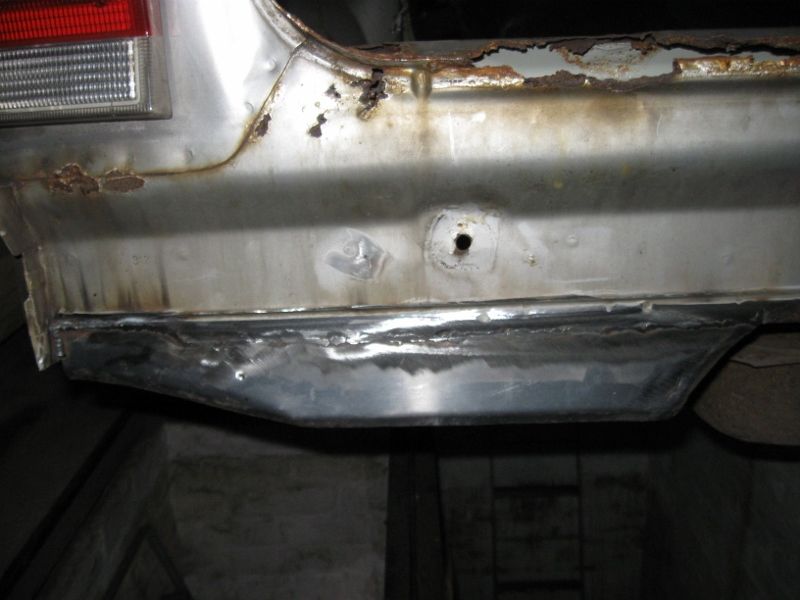 The only way forward was to chop it all out 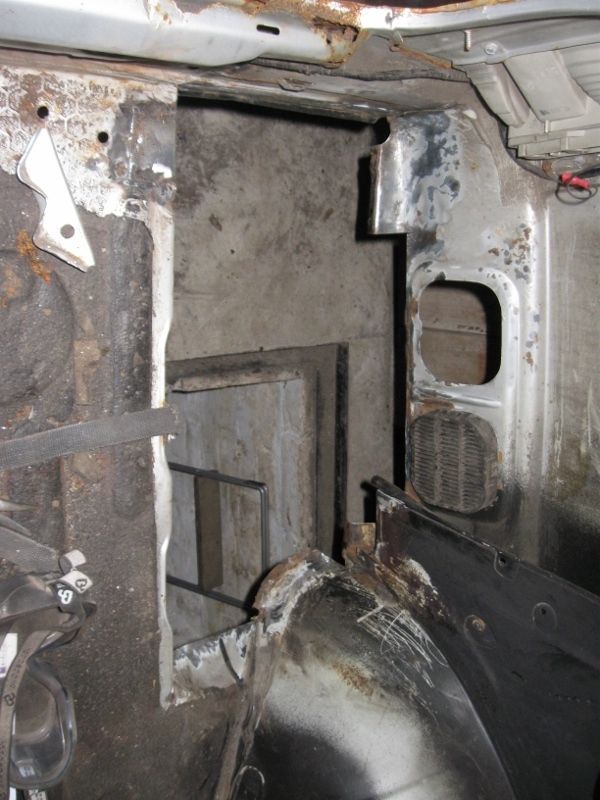 Quarter patch in 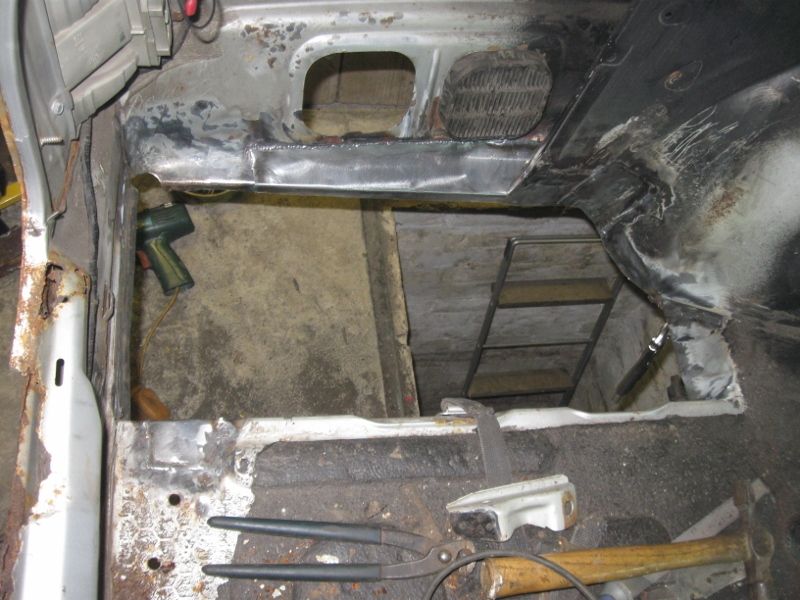 You probably cant tell but I massaged the front of this area (back of rear wheel well) quite a bit forward, I thought I’d take the opportunity to fit a much larger wheel well in case of future bigger wheel choices. I made a well that is as deep as the bottom of the back bumper and as wide as I could fit, you can throw the standard spare in from a distance and have room to spare now. 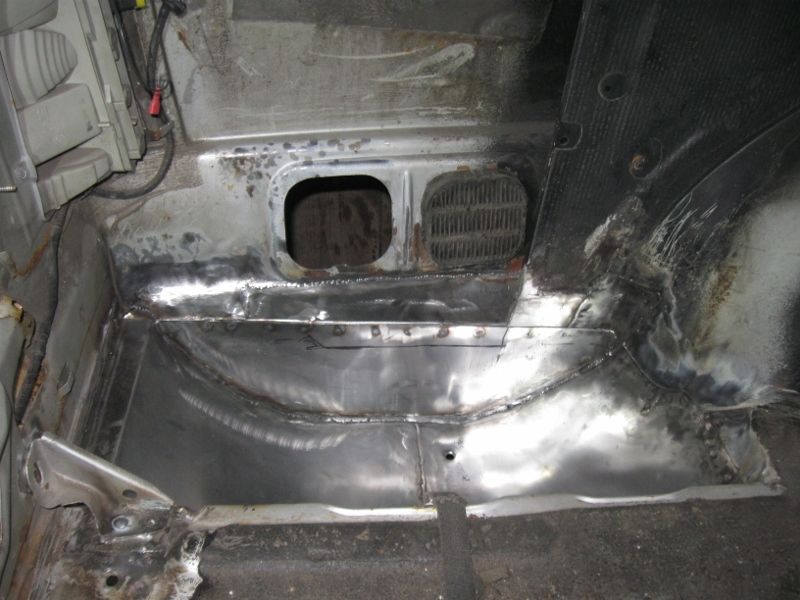 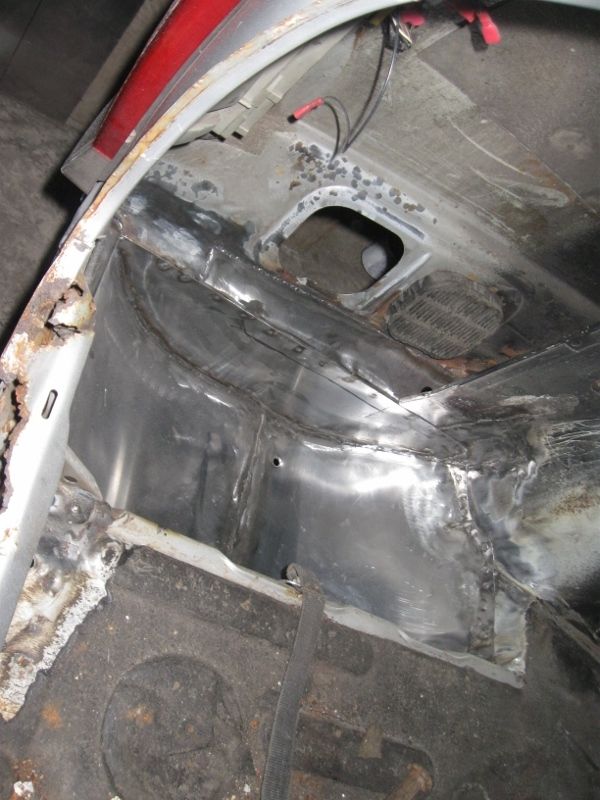 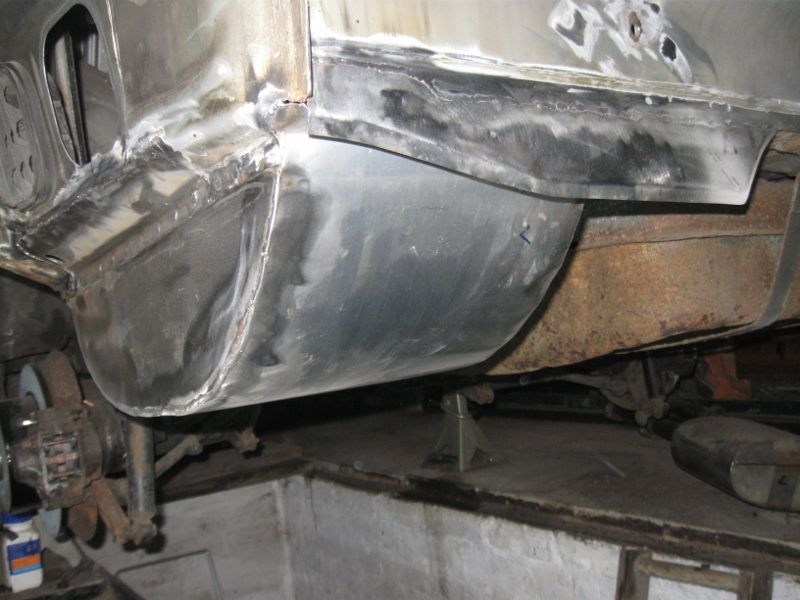 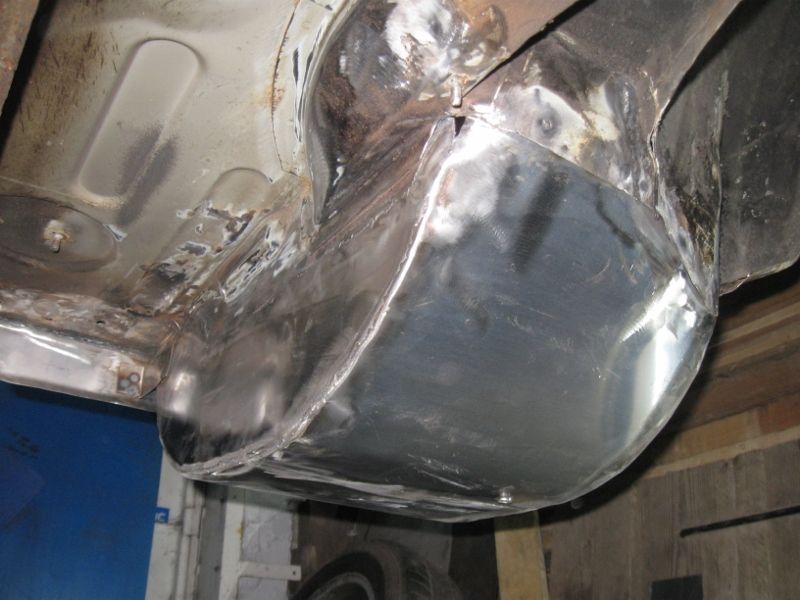 Notice the lack of exhaust hanger, the first pic was misleading, it had rotted off in about 2010 and was bodged back on by putting some long bolts and spacers straight through the boot floor, I’ve made a new one to bolt in place to be fitted later. That’s it for now. |
| |
|
|
|
|
|
Jul 26, 2015 23:02:39 GMT
|
I should mention that my finishing target mentioned way back of 130 patches / repair panels is out of the window, it stands at exactly 130 now, its sure to pass 150 (edit added, it has gone well past 150). A little more rust repair on the solid back end next. This three layer bit under the light was rotted through 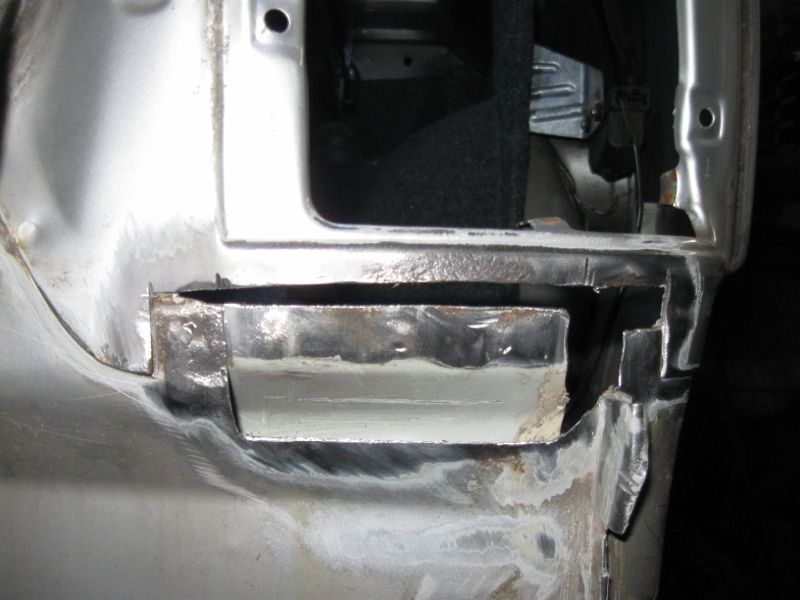 Outer patch on. Not what you would call smooth for an outer panel but at this time I’d set myself difficult weekly targets and a few times took more short cuts that normal, I’m constantly finding it hard to be happy with the balance of making an untidy car solid quickly for fun and doing a better job. I’ve got a tidy GSi, theres just no need to do restoration on this one, just sound repair. 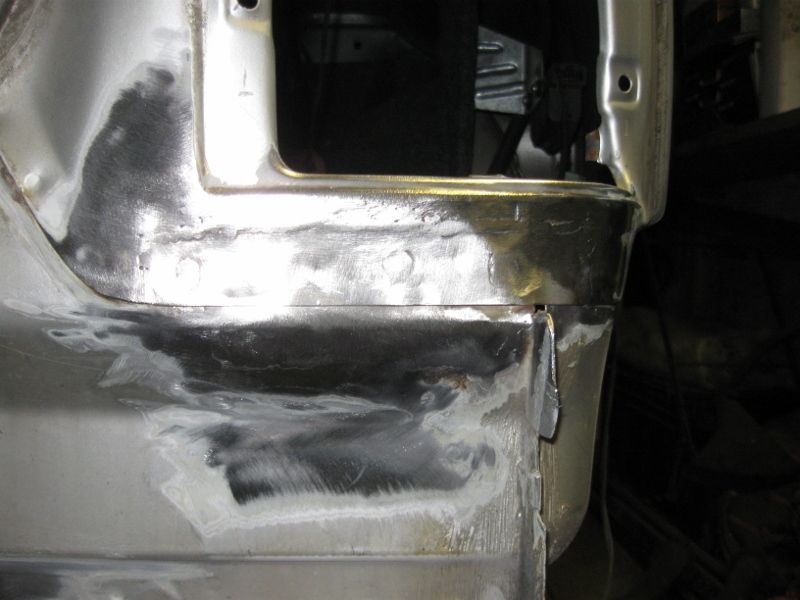 Boot corner 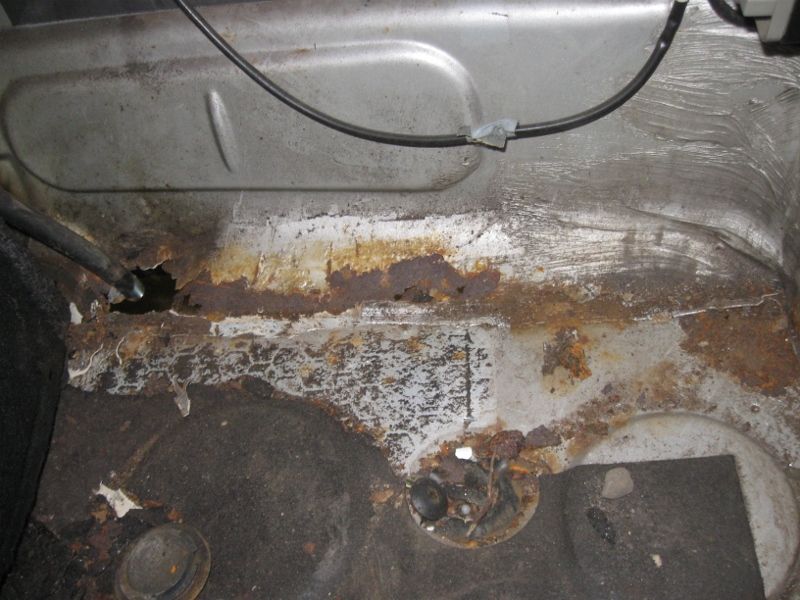 outside 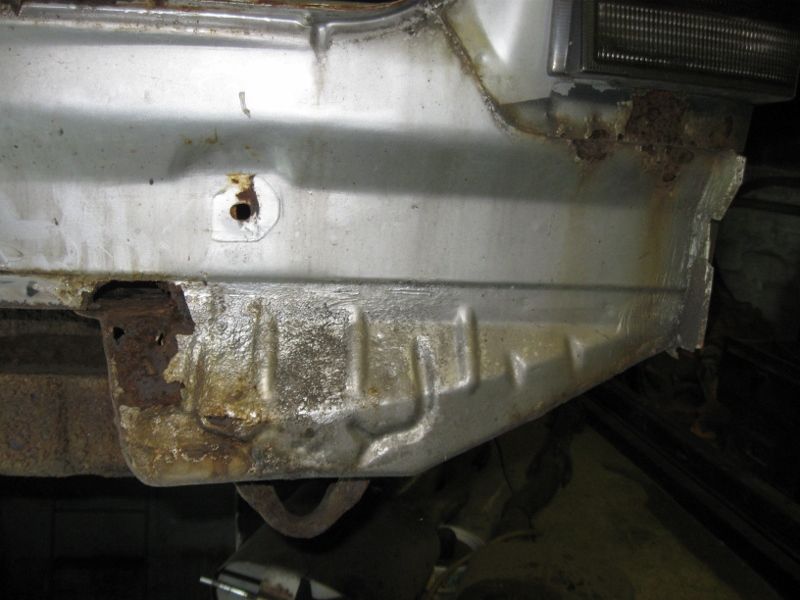 chop chop 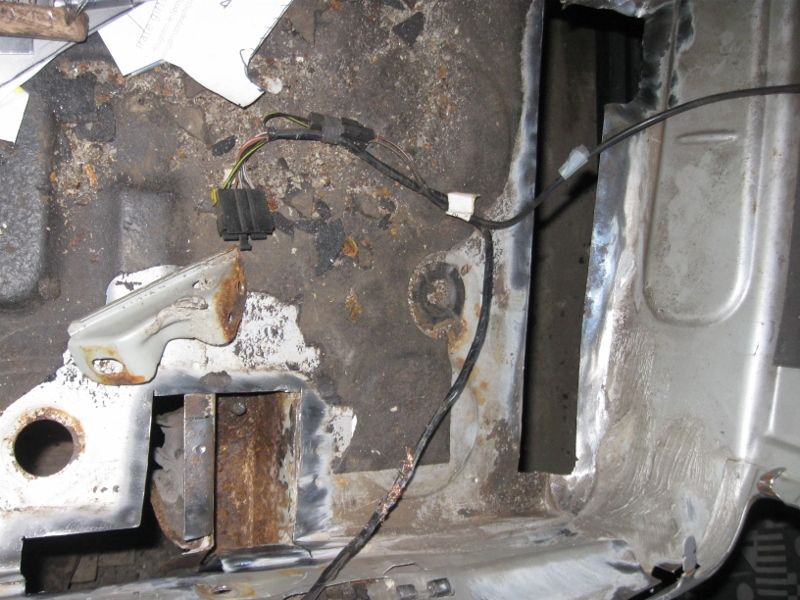 Notice the chewed up wires, a small grinder accident. Later soldered repairs and covered with heatshrink. I should have chopped that bottom bit right off but just crudely put half of it in and didn’t bother with swage lines. 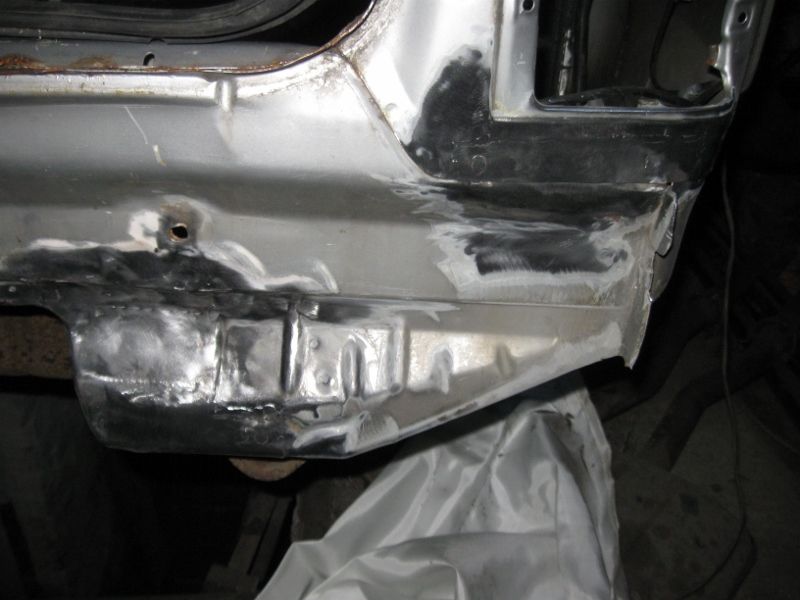 Patched 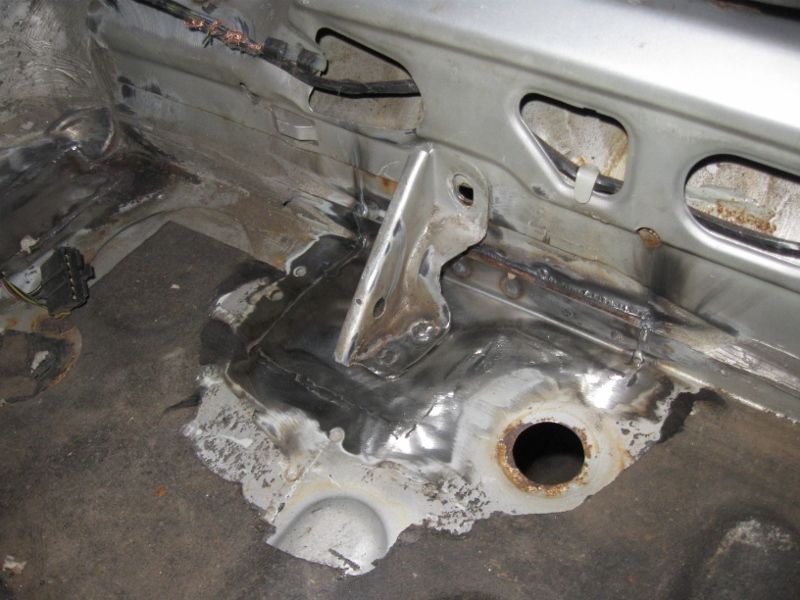 I reached 100 patches in this pic, its written on. 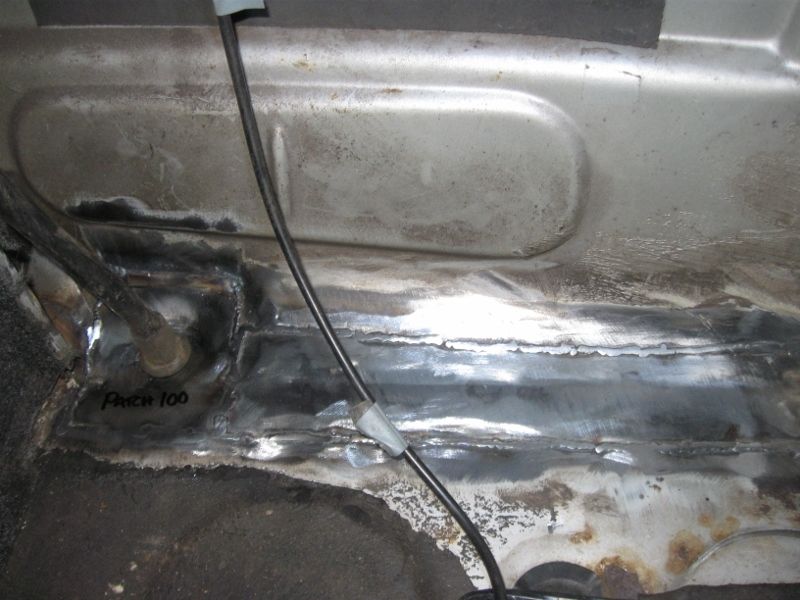 A regrettable shortcut, that long repair should have been two panels with a downward seam but I just went straight across for quickness. Completely safe and sound but not as original. 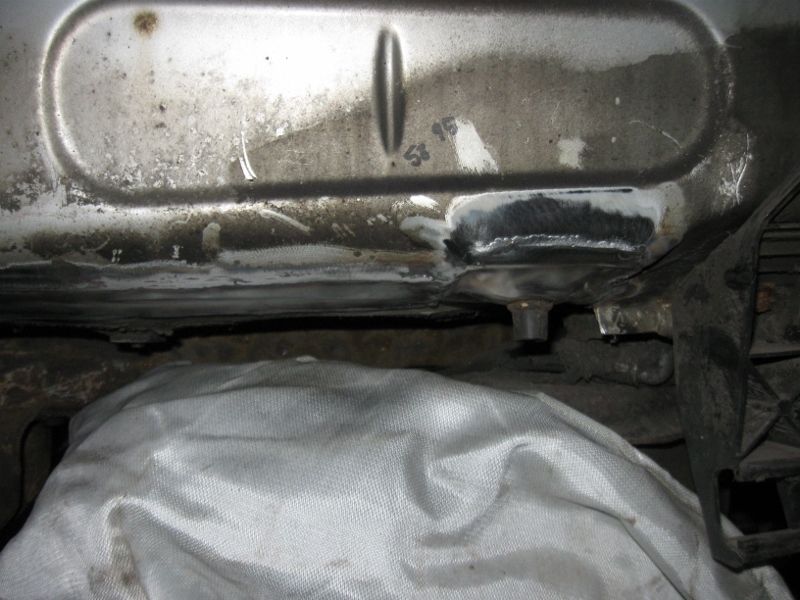 How can even the towbar be rotted right through? 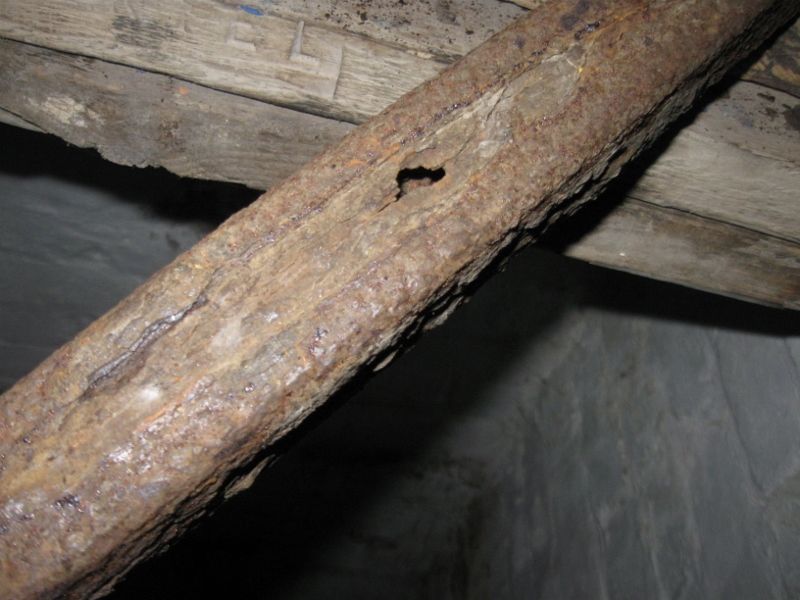 |
| |
|
|
|
|
|
|
|
|
Holy curse word thats some epic rust battling going on, almost makes me feel bad for stripping and junking a pretty rusty 2.6 Omega recently!
|
| |
|
|
|
|
|
Jul 27, 2015 22:31:40 GMT
|
Don't feel bad MadMaxx, I've scrapped less rusty cars, I just happen to really like this one. A few more copy and pastes and this thread will be caught up. Someone over on ABS asked about how I’m shaping the metal so I took a couple of pics of making one part, I don’t have a lot of sheet metal tools and even less at my allotment where I’m doing the work. The main tools 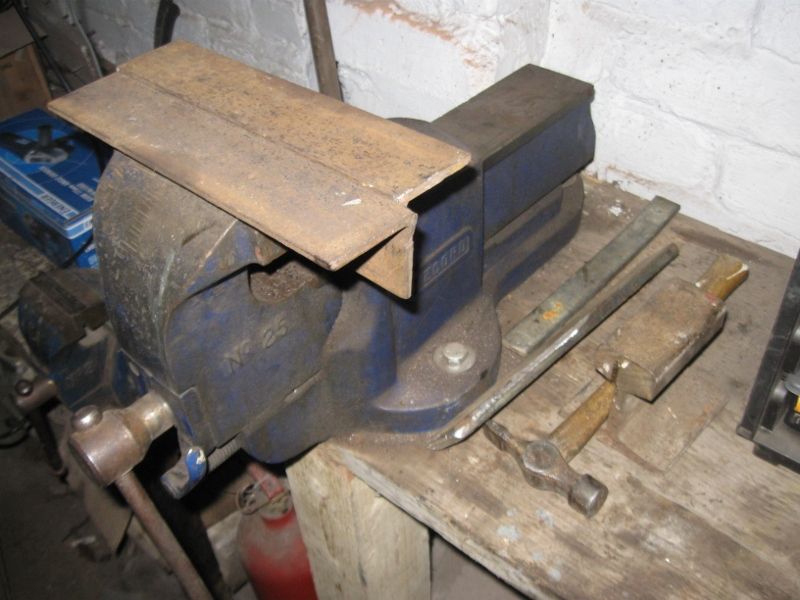 A big vice, various bits of sturdy angle iron and flat bar with various radii ground on as required, an offcut of colliery railway line and a little hammer. Sometimes I use a bigger hammer but for most work a little one does a much better job. Other than these, some bits of wood and anything that's around and has the shapes I need. For anything really difficult there is a guillotine and folder at work but its very rare I can wait to go to work and back, usually if I've cut out I need it made there and then. A couple of pics of a part I made today to give you the idea. 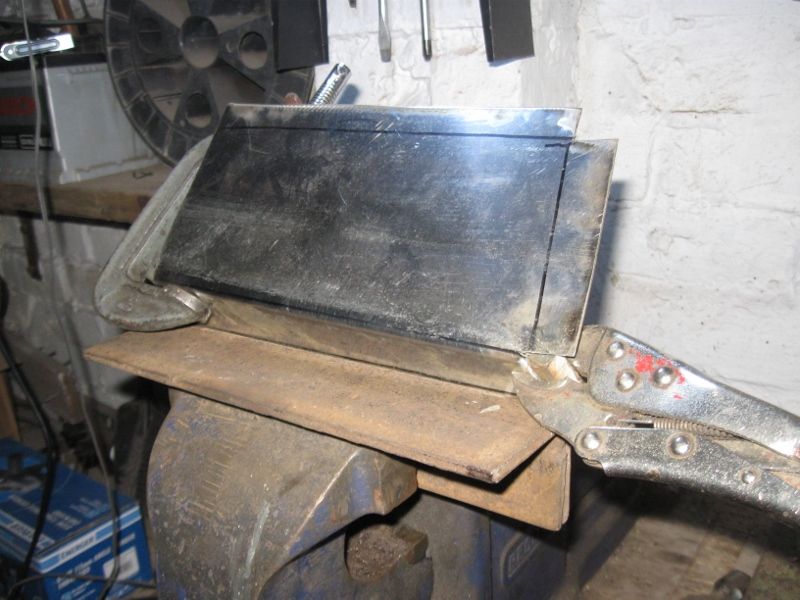 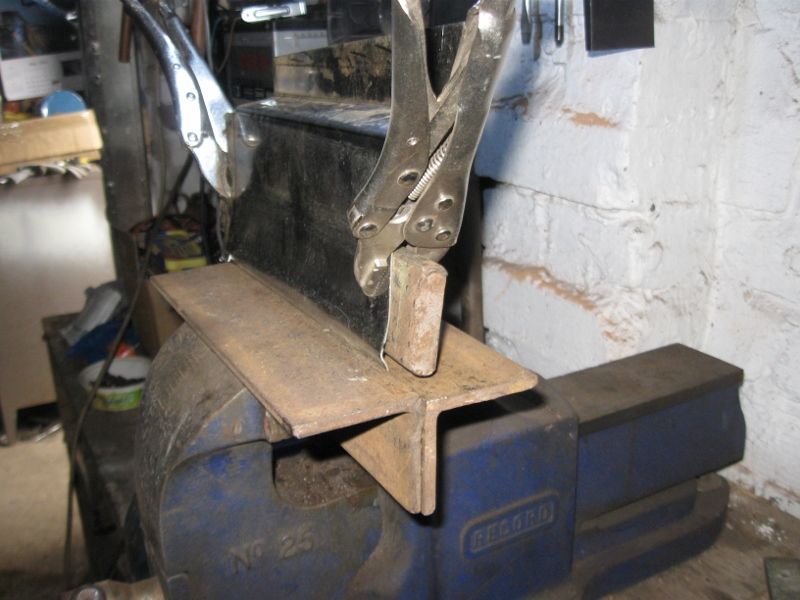 The rest was bashed to shape on the vice with the hammer, a couple of notches cut for the angle. 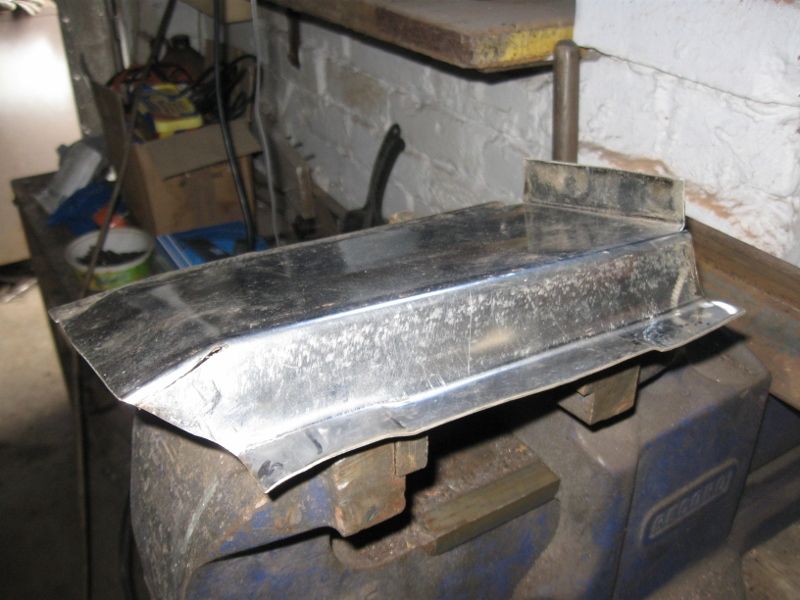 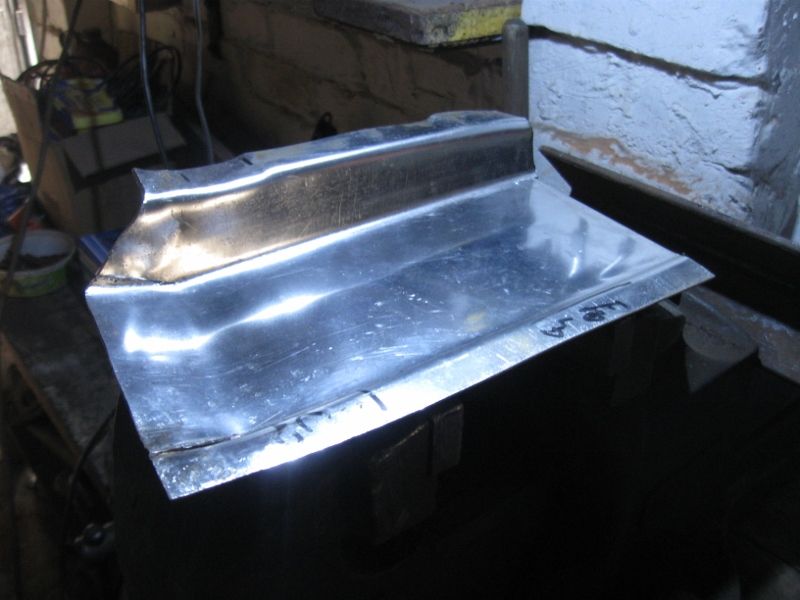 I carelessly left a tab off so welded one on and drilled some plug weld holes. 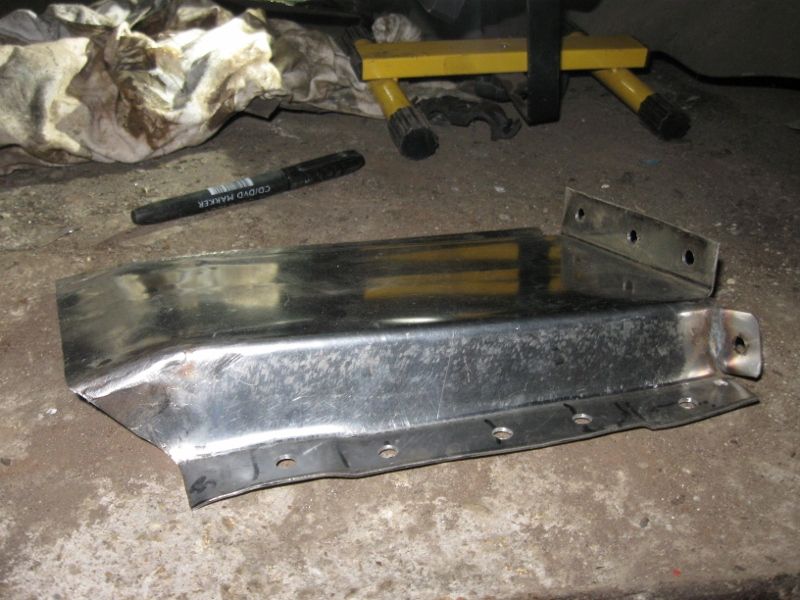 And welded it on 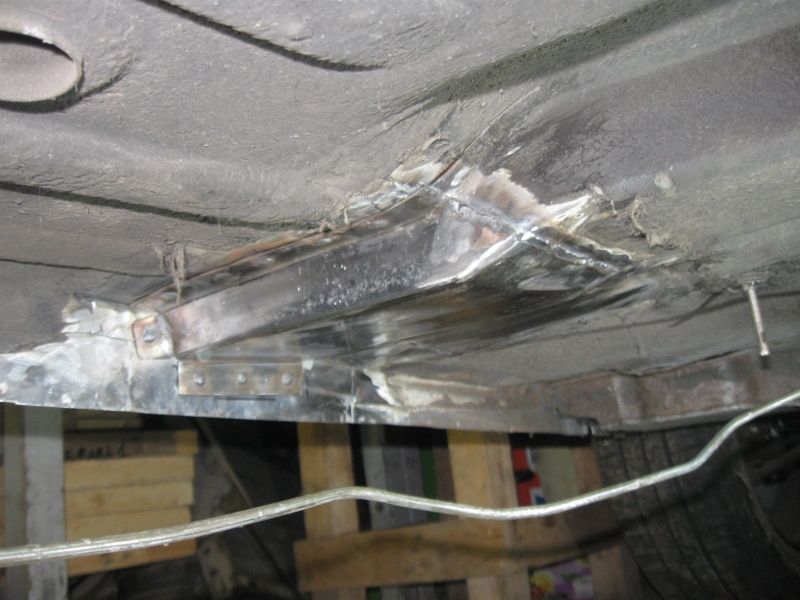 That’s out of sequence with the thread so the next pics will be back to the timeline as it happened. |
| |
|
|
|
|
|
|
|
Jul 27, 2015 22:34:05 GMT
|
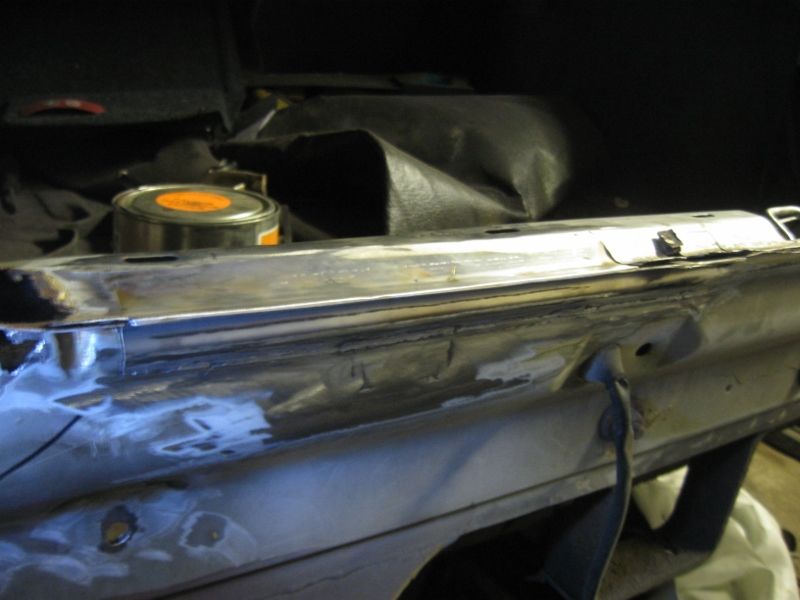
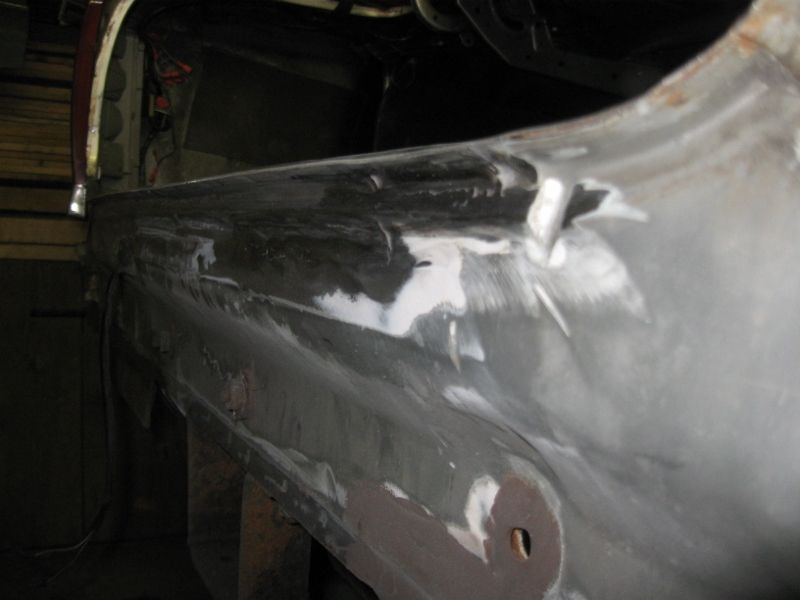
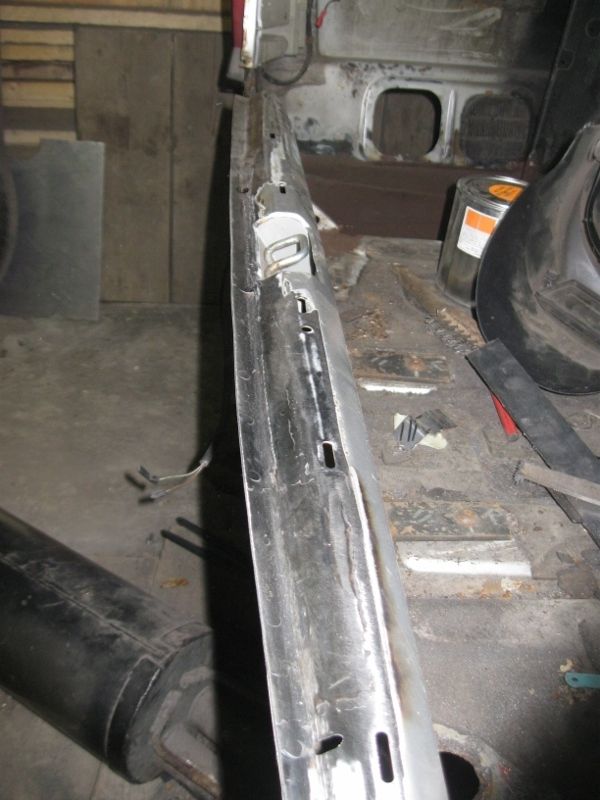
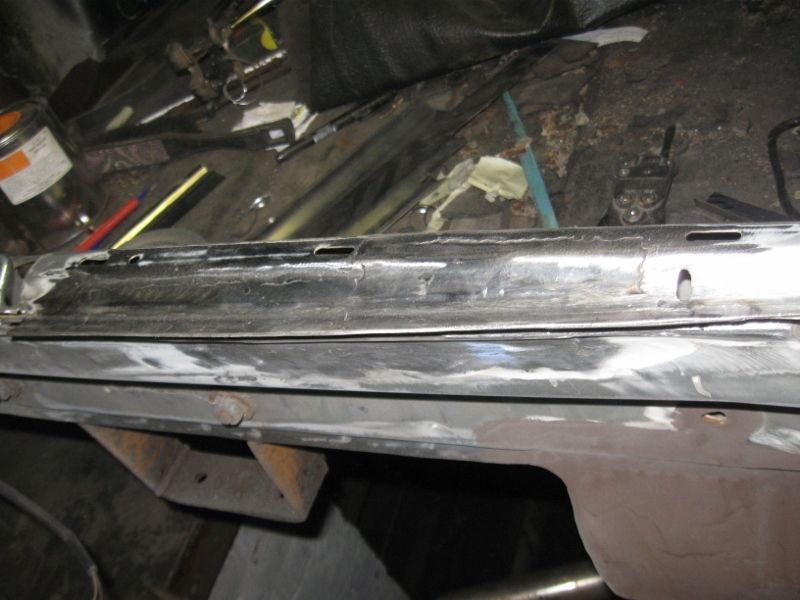
Next bit, when I went to the boot to have a look at the hole in the spare wheel well I was taken by surprise when leaned on the boot lip and it fell away, I’d completely forgotten that it was rotten years ago and I’d just avoided touching it to help keep it looking boot shaped until the end of its life and that final journey to the showroom in the sky.
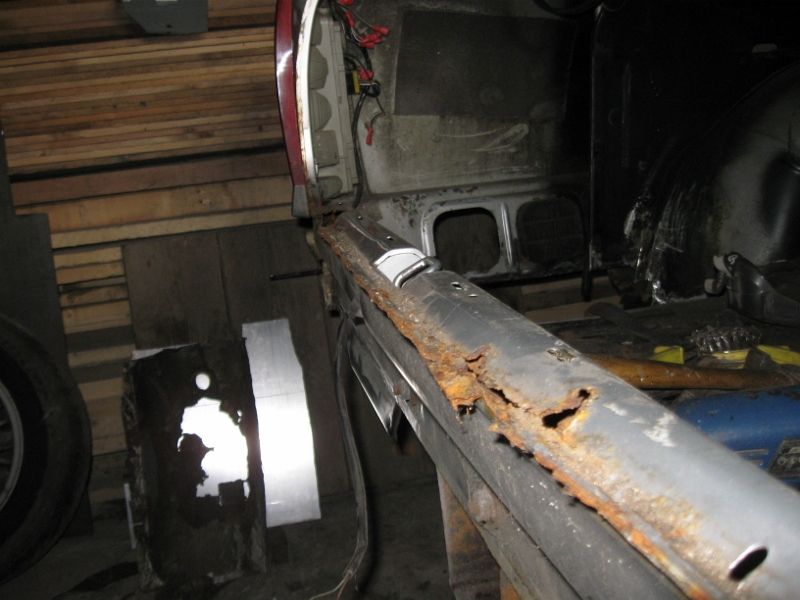
I have to admit I found this repair quite a challenge, I would have liked a cut from another car to weld in but I’m far too impatient to try to find that, so had a go.
There was only one spot on the whole of the lip that was intact and not either missing or burst open, about 10mm long held by a spotweld so at exactly that spot I made a couple of profile gauges to work to before it was cut off.
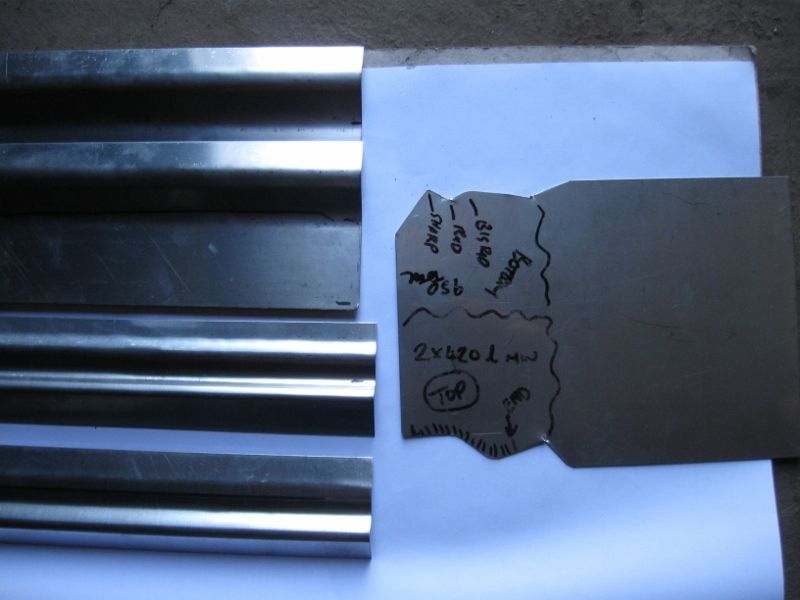
From the gauge I made up some lengths of the profiles for the top and underside of the lip.
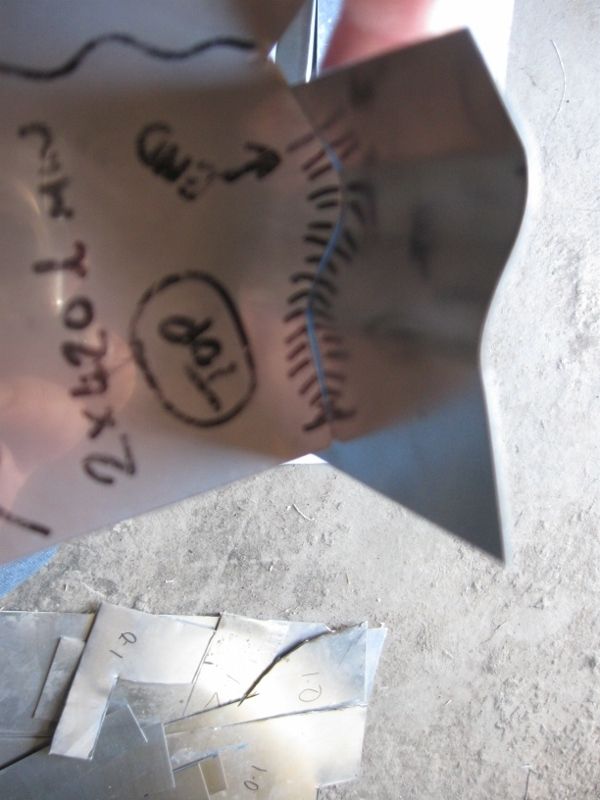
The plan was to cut some chunks out, then weld in sections, then cut out the bits previously left behind and weld in more sections until it was all new. It took quite a while.
The particular difficulty here was that the lip is curved around the back of the car.
Some pics to do the talking.
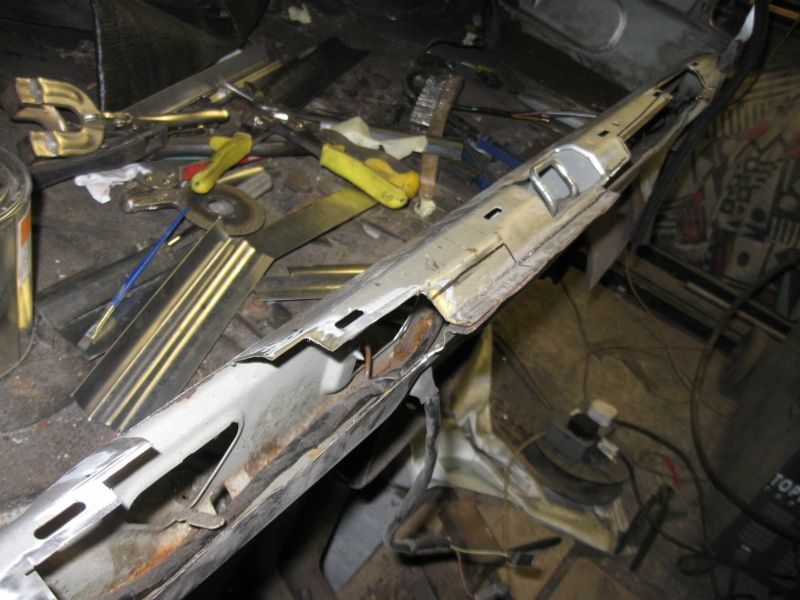
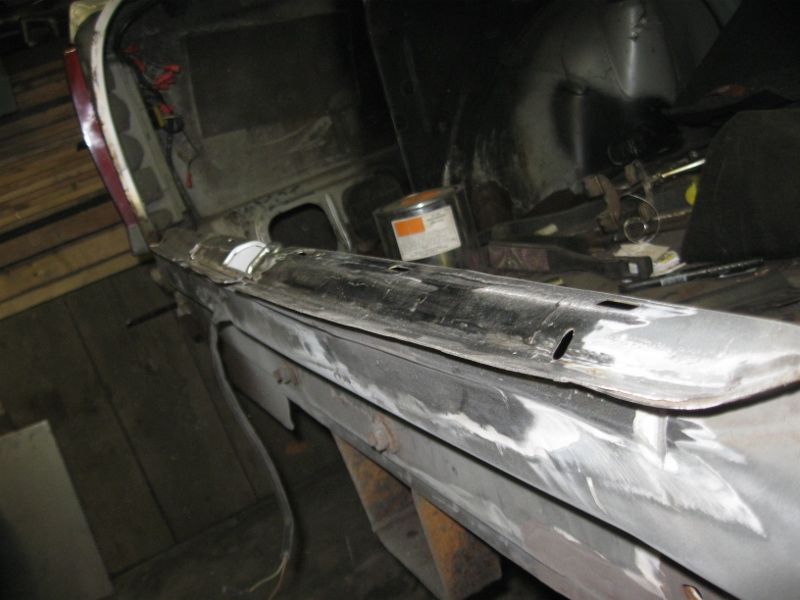
This end was needing more than just a lip and it should have had some unusual shapes, I made a bit of an effort with it for the challenge.
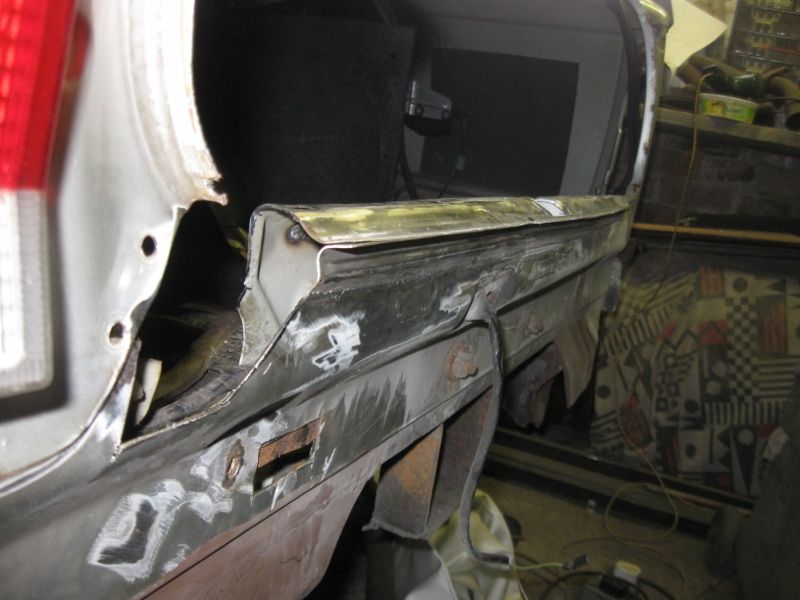
The outside was easy enough
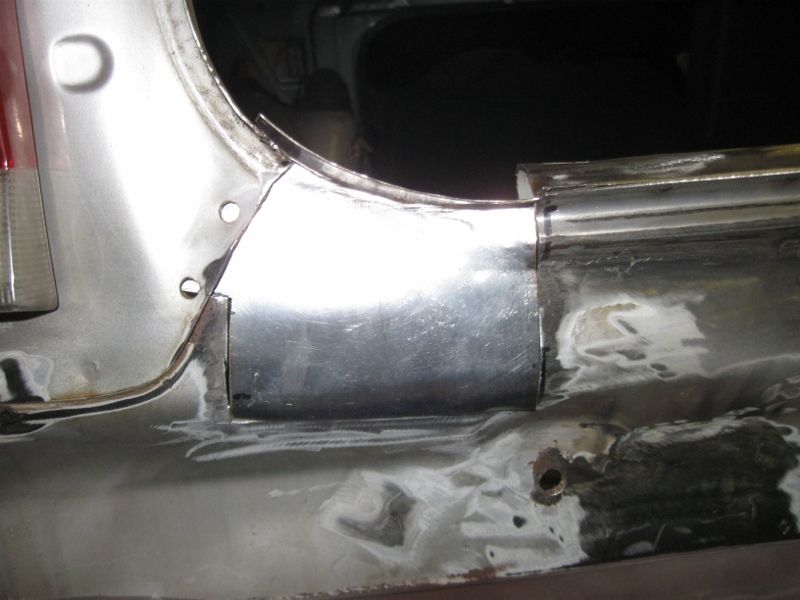
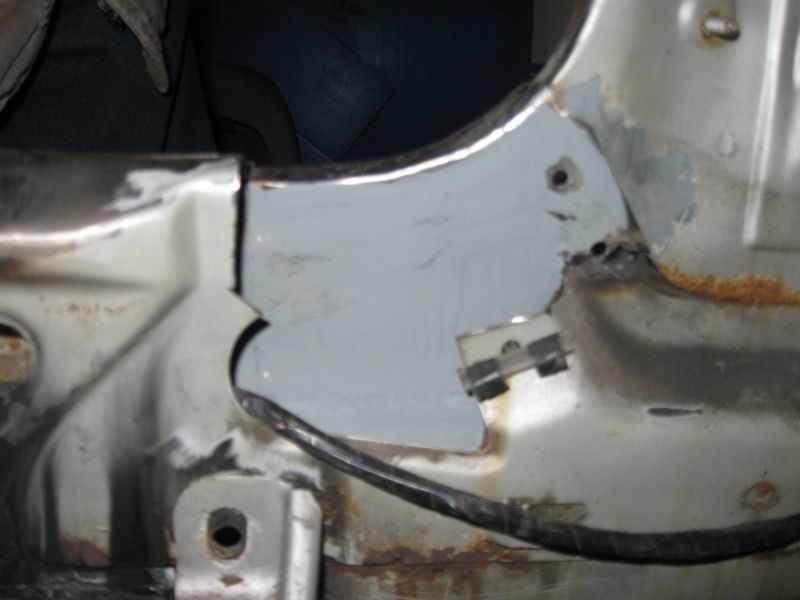
The inside needed a bit this shape, or alternatively a quick plate, who would know, but it seemed a good idea to make an effort
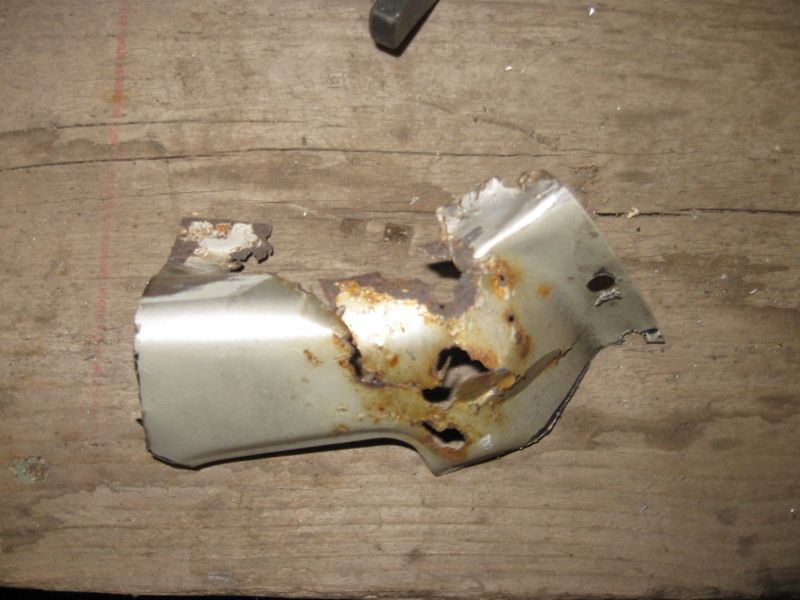
I guessed a blank shape to start with.
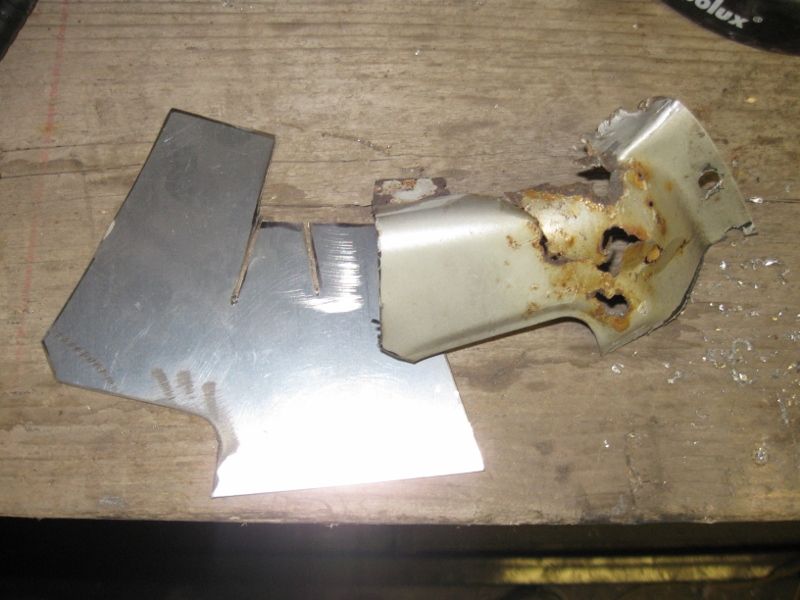
And bashed it round a bit with the little hammer
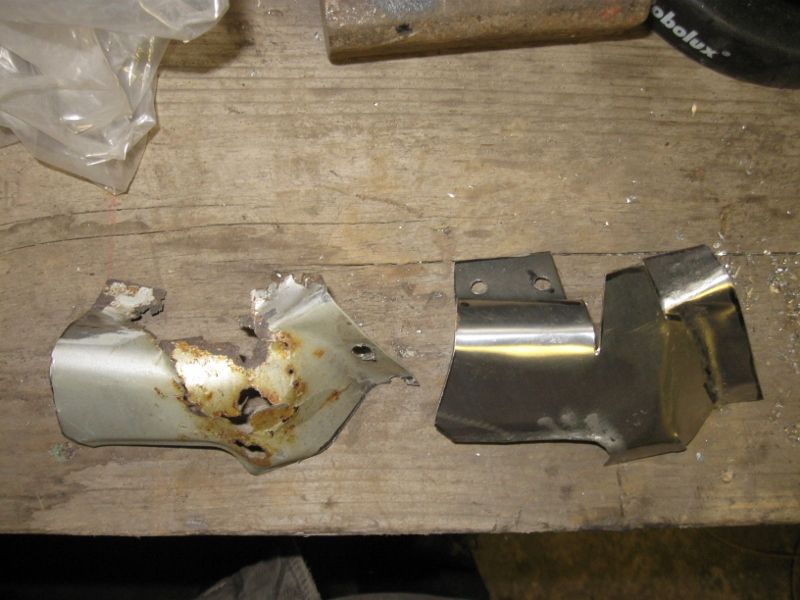
And welded it in
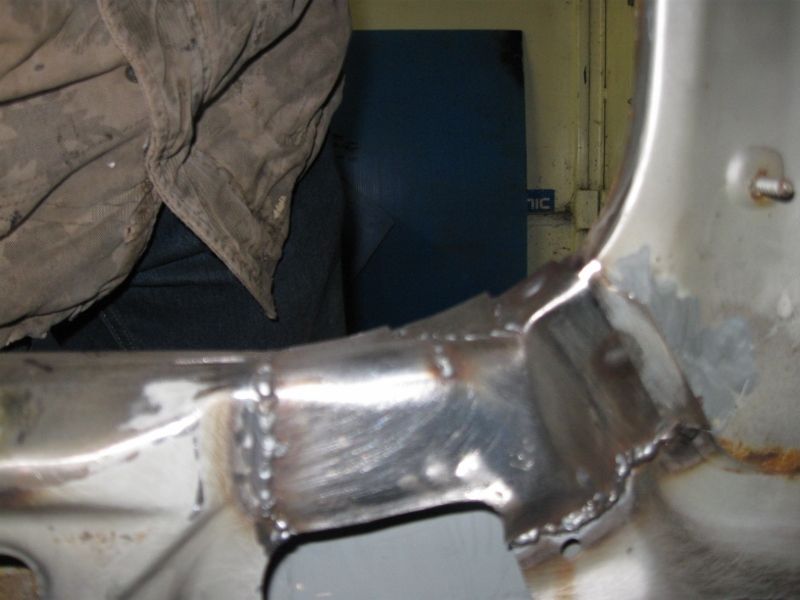
Some tapping and smoothing later
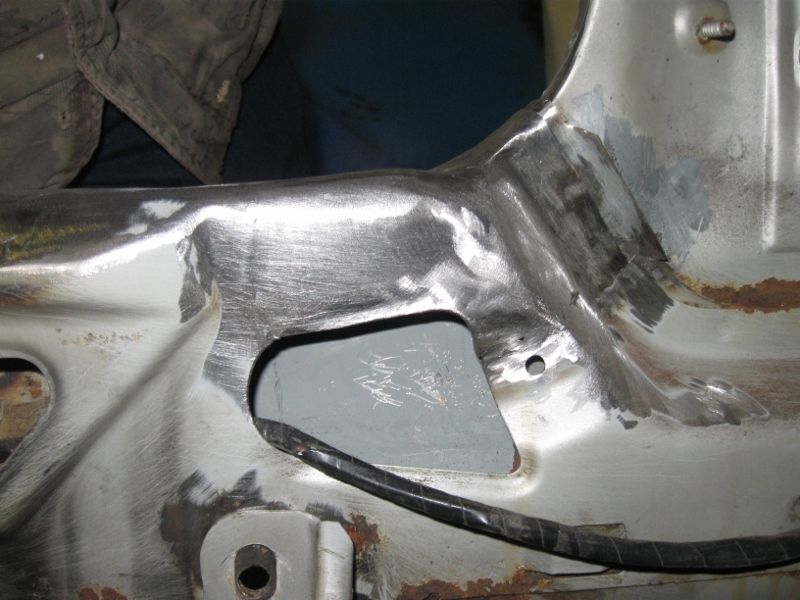
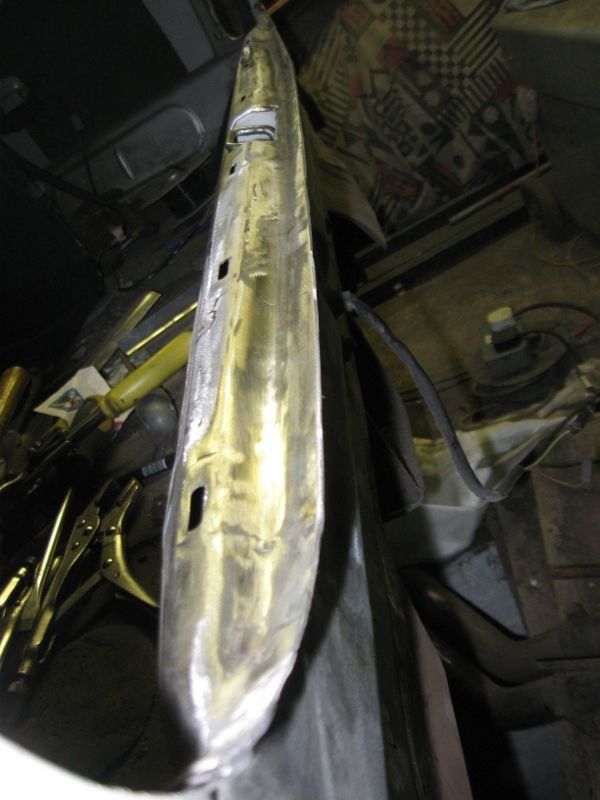
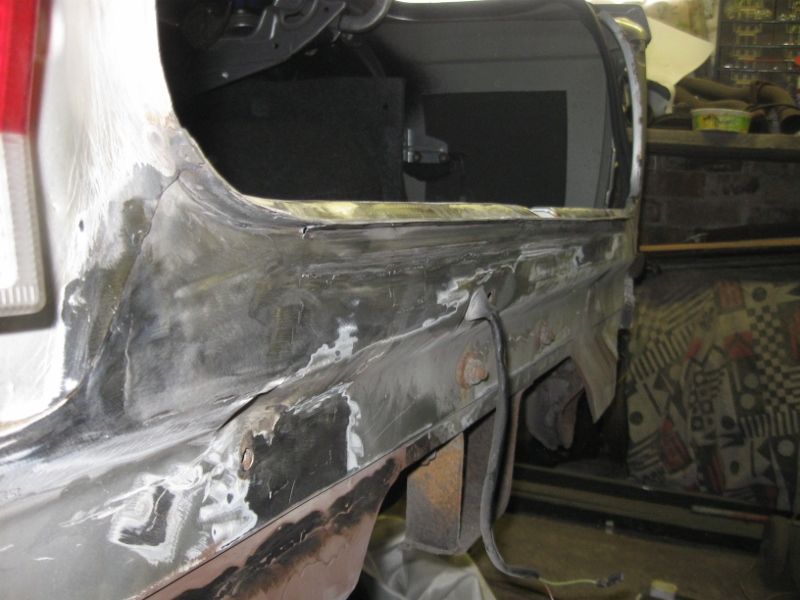
That was that, I found it quite difficult but was quite happy in the end. I hope I straightened it a bit more after this, if not I will do, in the pics it looks a bit wonky, easy fix though.
Things you would never imagine could rot have done on this car, even the steel core in the boot lip seal, even a rubber seal is scrap due to rust, I need a new one if anyone has one.
Thats the boot area about done so off to a sill next, which I thought would be easy :roll:
Off to bed.
|
| |
Last Edit: Jul 27, 2015 22:43:28 GMT by chris y
|
|
|
|
|
|
|
|
Goodness gracious that rust is terrible. I think you are trying to rival Jim of Police SD1 fame for saving the worst basket case you could find..
|
| |
|
|
düdo
Part of things
  wide as house
Posts: 770
|
|
Jul 28, 2015 17:51:09 GMT
|
|
Hats off for stamina and skills. Now we know why all Carltons have gone west.
I've been staring at French rust all day but this has put it into perspective. I feel better now, thankyou. Keep up the good work.
|
| |
|
|
|
|
|
Jul 31, 2015 23:16:48 GMT
|
Hello Sciclone, I haven't seen the SD1 yet, must check it out.
Thanks düdo, I guess all nationalities of rust are much the same, they can all be replaced with metal.
Some more copy and paste to get close to caught up.
Next the passenger side sill and associated bits.
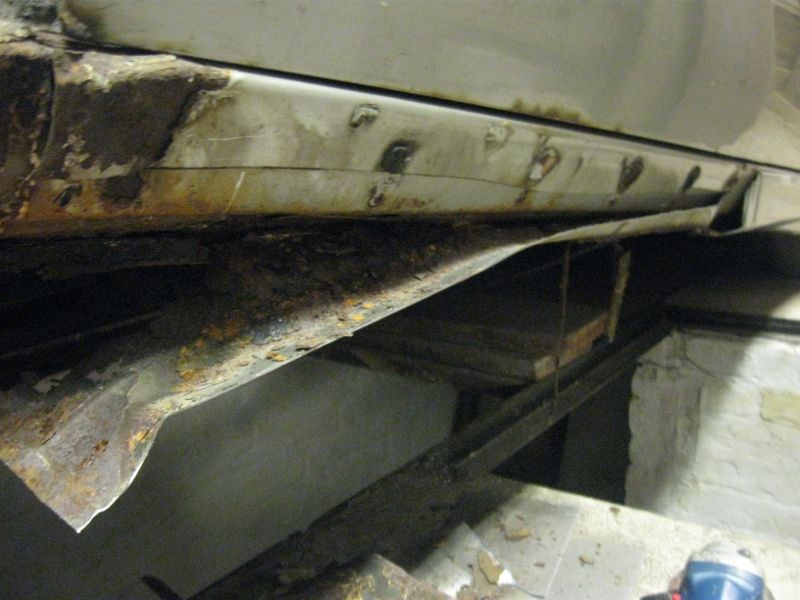
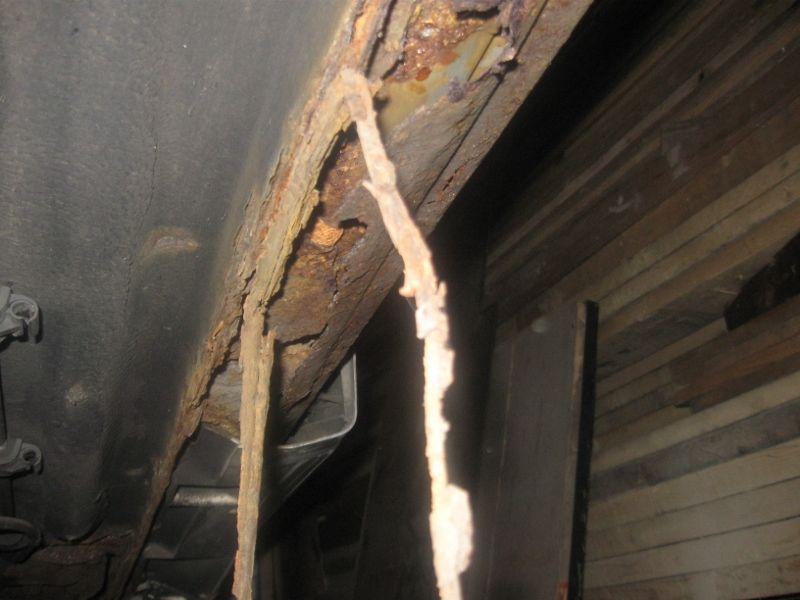
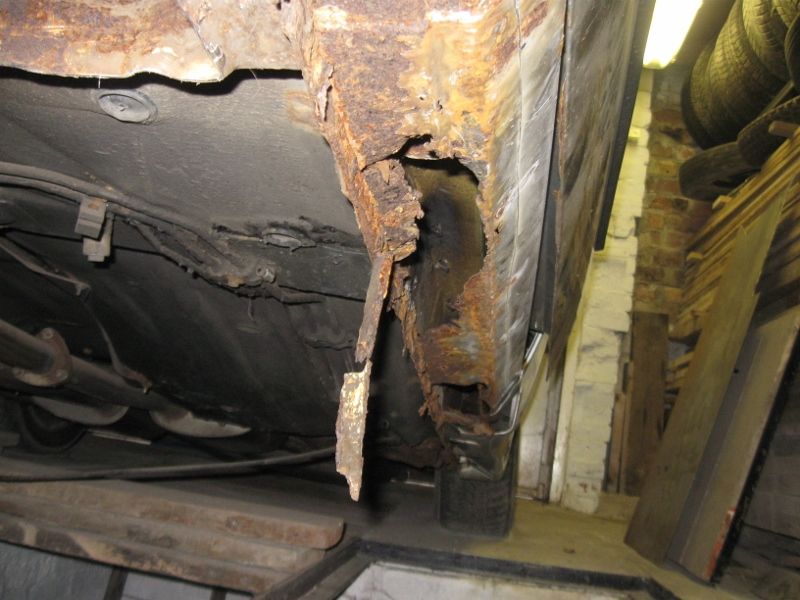
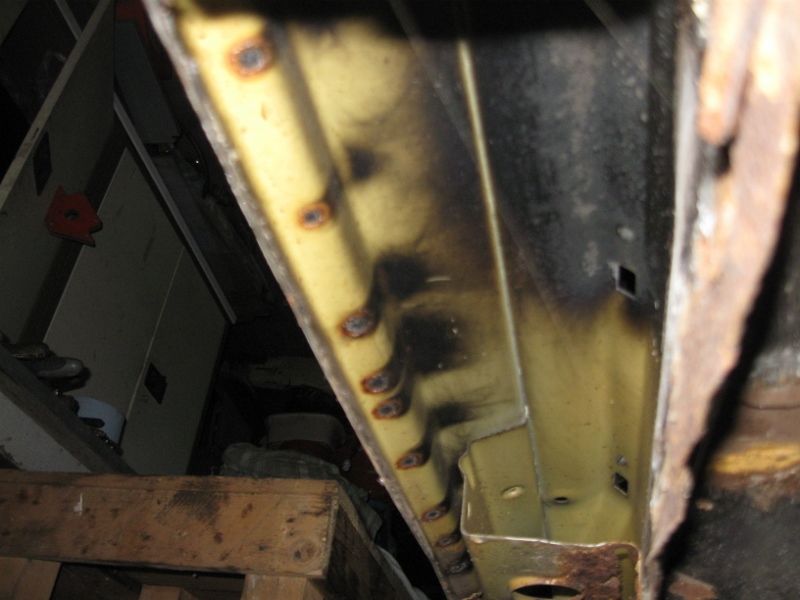
The original sill was still there, minus what had rotted out of the bottom, then a cover sill was barely attached over the top of that with a few spots of weld and quite a bit of filler. I didn’t do this I have to add.
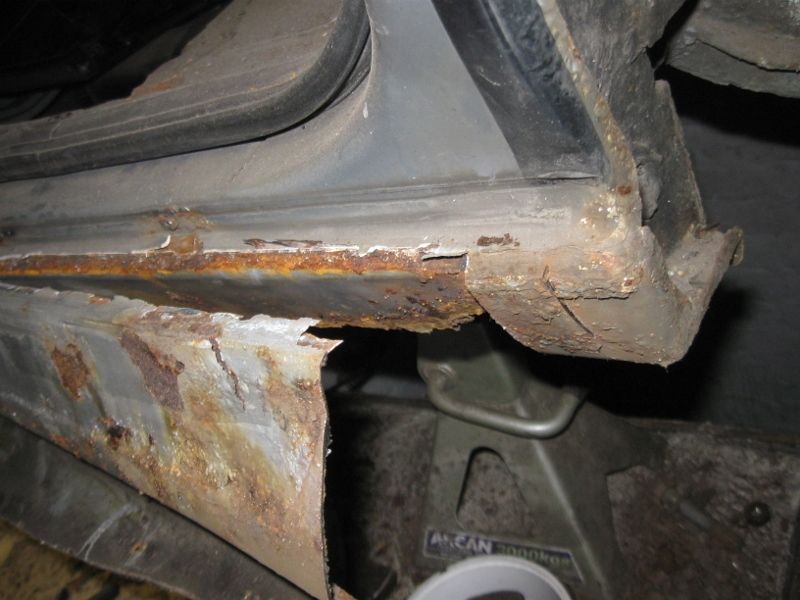
You can see the heat marks from the welding on of the old cover sills here.
The wheelarch I put in in around 2010 to keep it out of the scrapyard for one last year is still sound but rusting around the edge as I never did stonechip it or regularly polish it to seal it, the car was just neglected for a bit longer me expecting it to be spare parts before too long anyway.
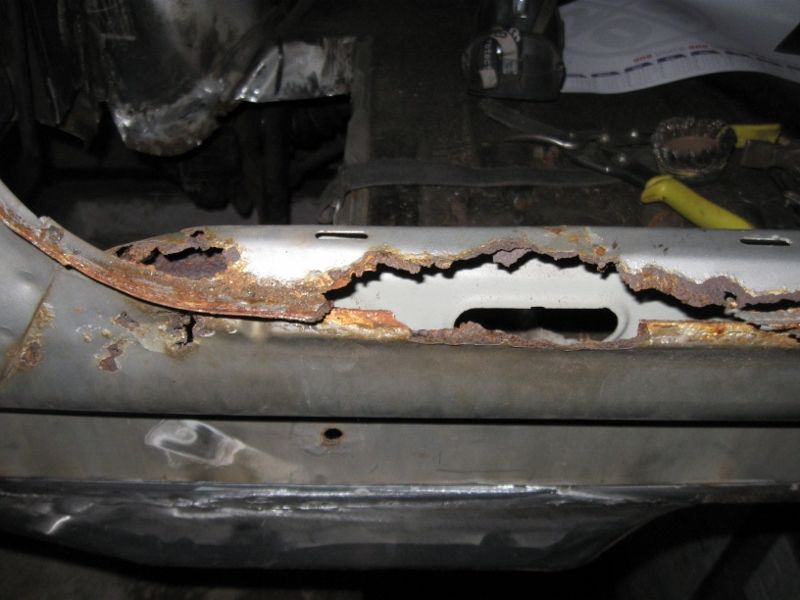
Of course the sill was rotten, so was the inner sill and the central reinforcement, oh and some of the floor edge. They were all replaced in reverse order.
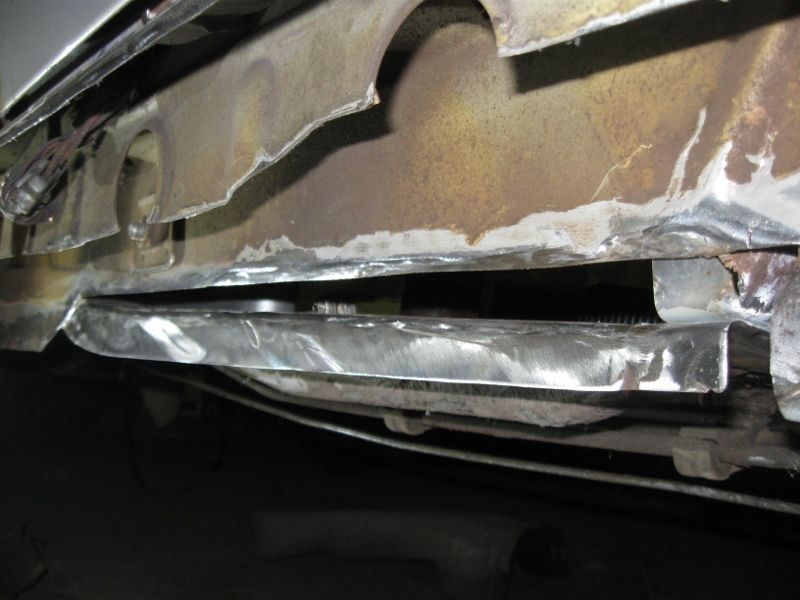
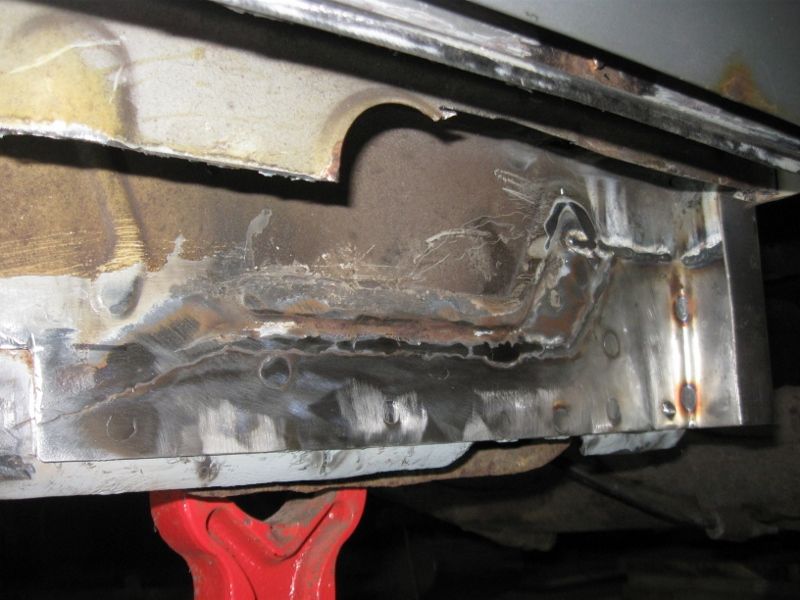
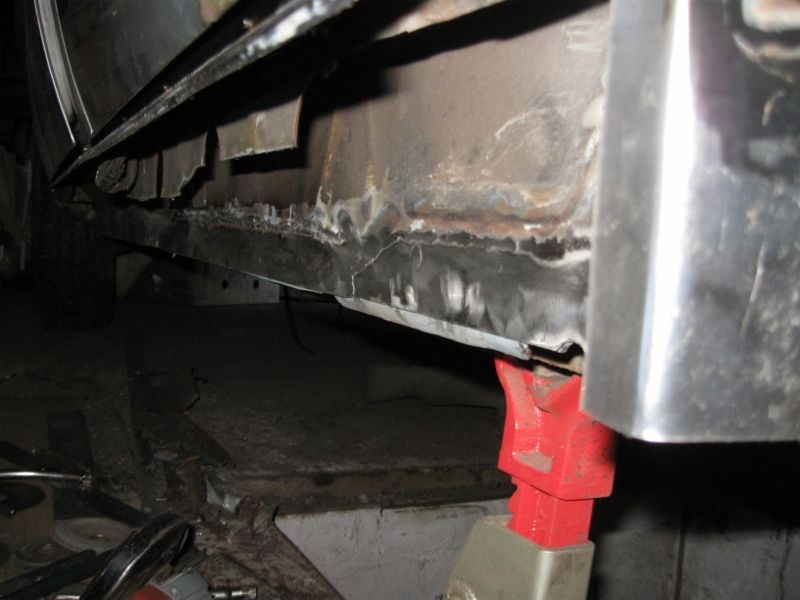
It was interesting to discover that the sunroof drains exit into the front of the sill, obviously likely to be one of the biggest causes of sill rot, all that salty spray that gets thrown over the car on winter roads would drain into the sill and sit there festering all year round, what a ridiculous design.
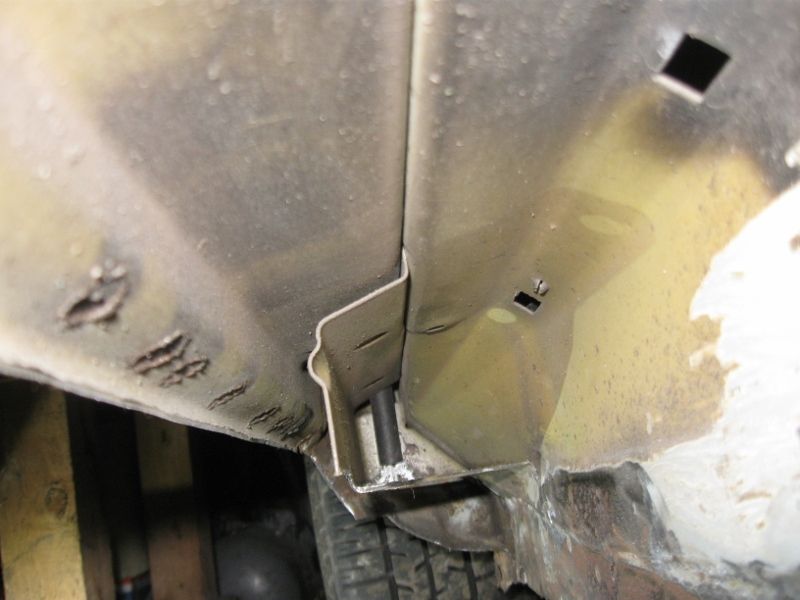
You might be able to see a hole I made here and flared inwards to prevent damage, the drain was put through there to exit into the front wheelarch area in future. I might put some of those one way cats  valves on the end that the rear pipes have in case theres positive pressure under the wheelarch. valves on the end that the rear pipes have in case theres positive pressure under the wheelarch.
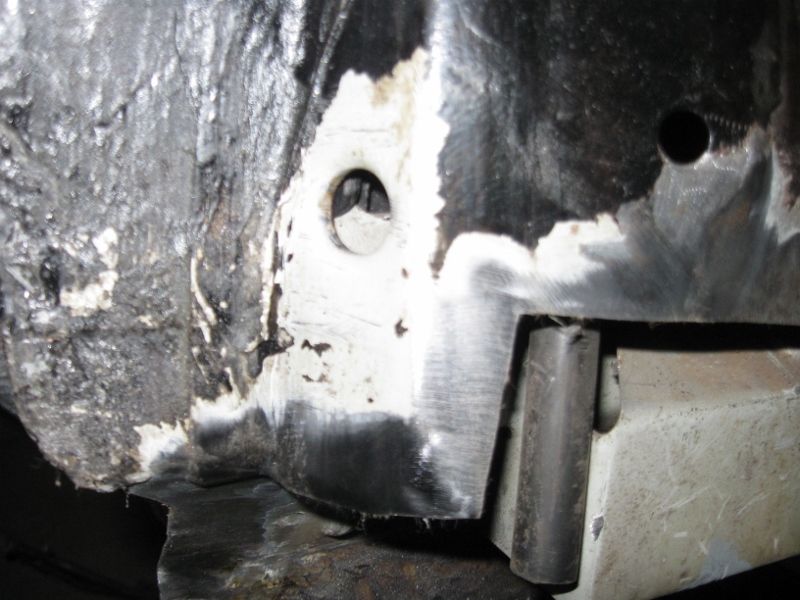
That bit the drain was hidden in had a small repair
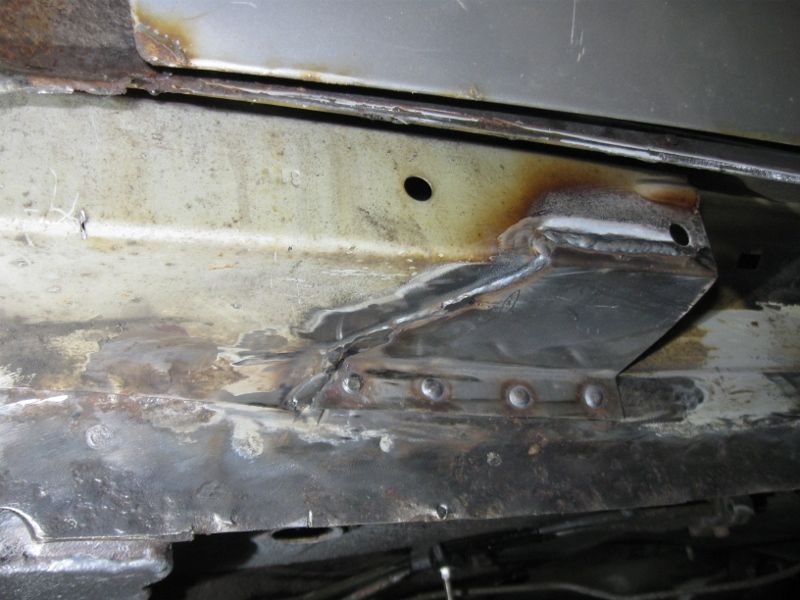
The way I chose to fit the sills might be a bit unorthodox and people might think its a bad idea, I bought full sills but for various reasons only fitted below the top edge.
Firstly cheapo pattern parts are rubbish, great as a starting point and on something like a Carlton where almost nothing is available, you have to be grateful for any panels at all, but still very poorly formed and poorly detailed, I just wouldn’t trust them and don’t want to end up with bad door gaps and too big rads etc. I also like to keep original metal where possible, it just seems right and cheapo panels are made of the lowest quality instant rusting steel it cant be a bad thing to keep the original stuff.If I just replace below this line all of the new metal would be below the sill trims too.
I think I create a lot of work doing it this way though, there were some holes to repair where the rubber seal rivets always start rot.
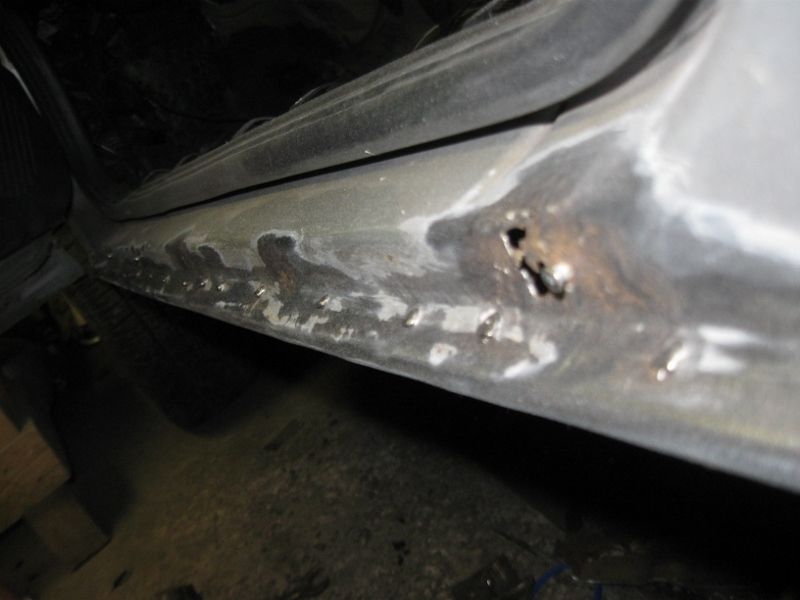
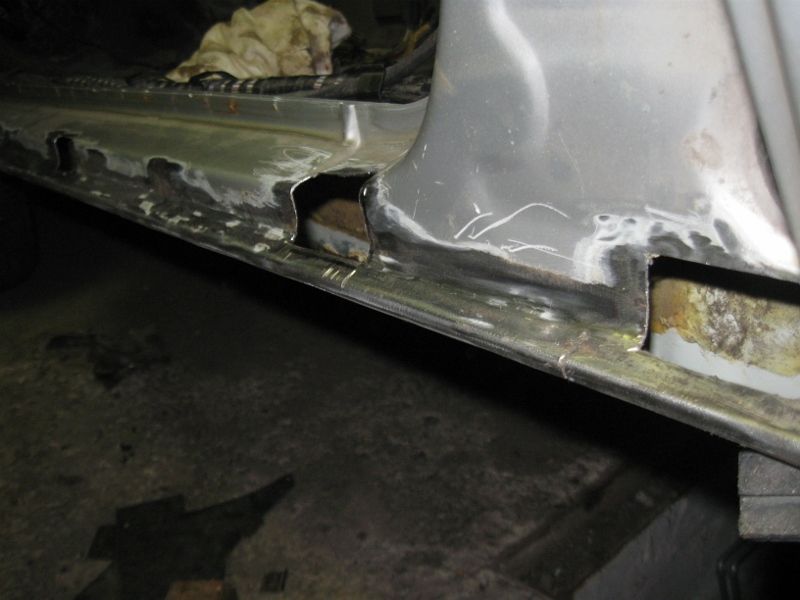
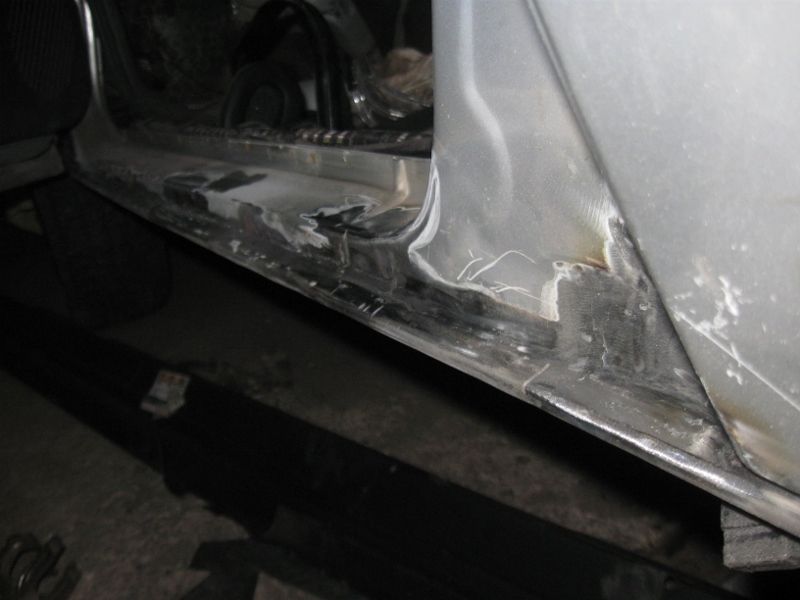
The central reinforcement was a right pain to do, first I put one of the closing plates in and clamped a piece of angle iron on to give a line to work to.
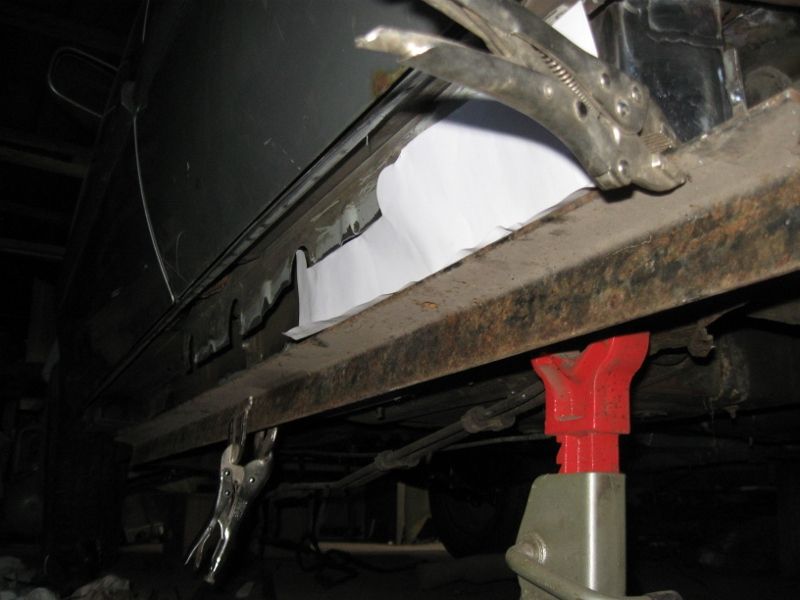
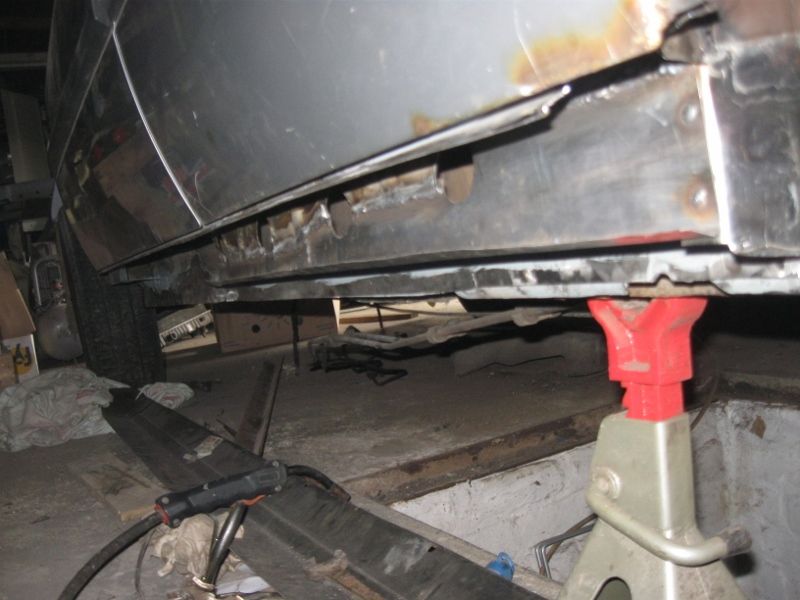
A piece of metal bent to replicate a piece of sill helped to set the height.
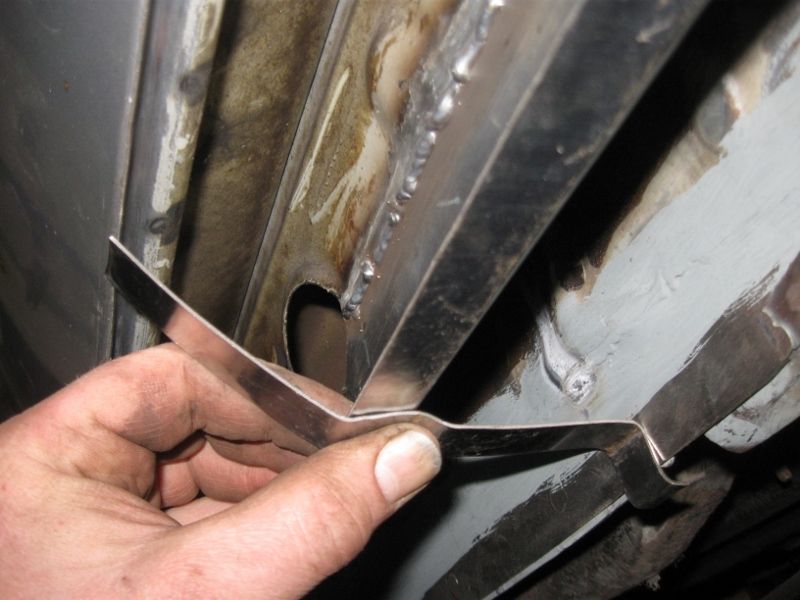
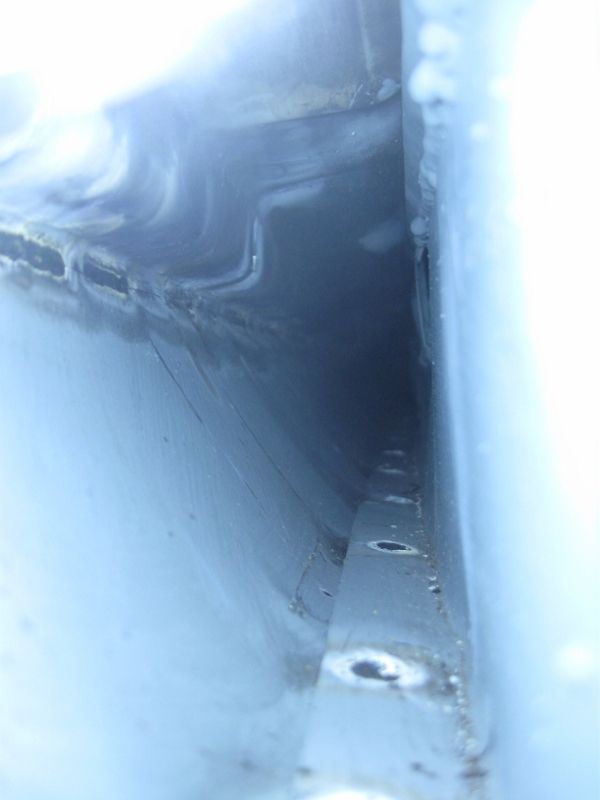
It’s a bit crude to be honest, not the best quality work but strong and rust free, I used a toothbrush to get a good zinc paint covering on the inside. You can see here that all of the seams have paint in them too, I marked through the plugweld holes I put in the new sill and painted around them, the new sill was rubbed down on the insode and painted the same way. 10 points to anyone who can spot the error I made though.
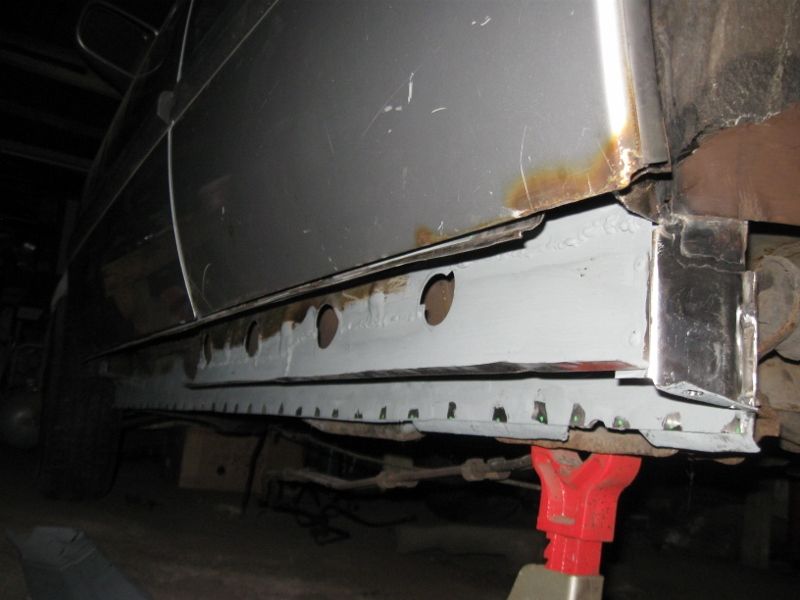
Front end
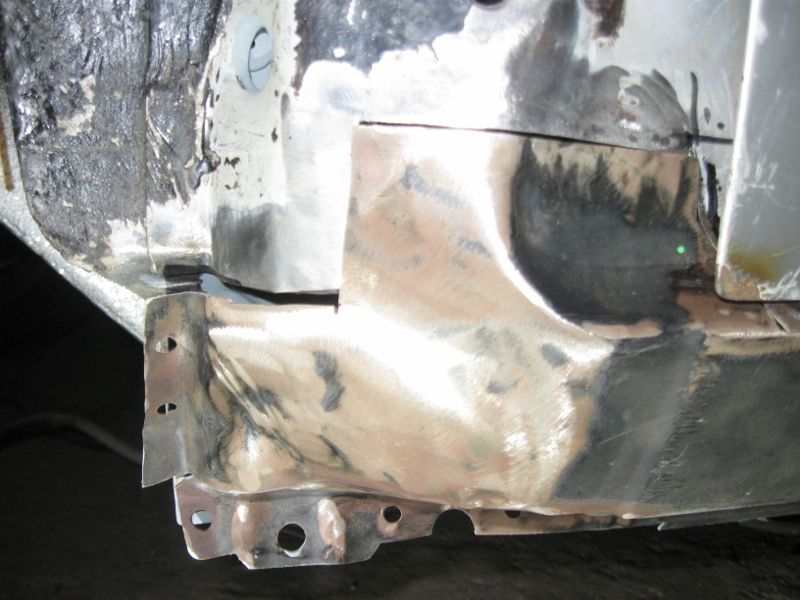
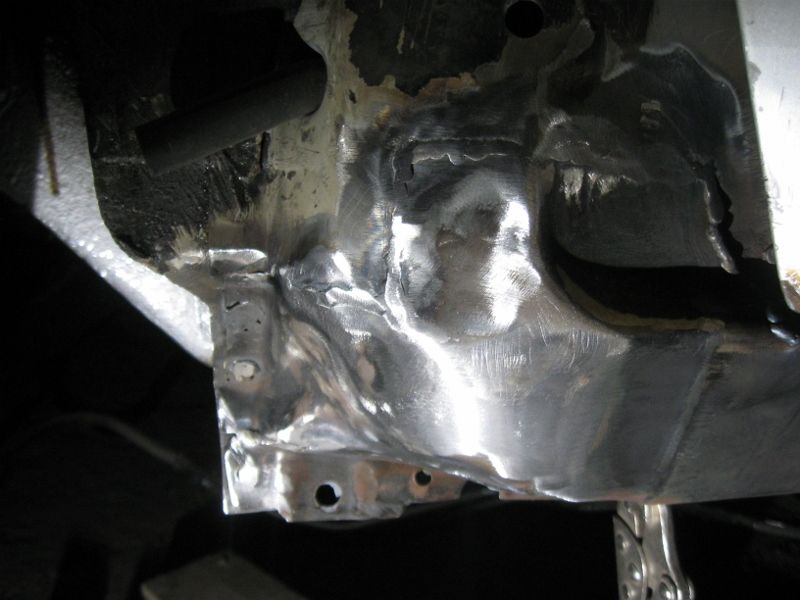
Sill welded on, quite a task with such a long join.
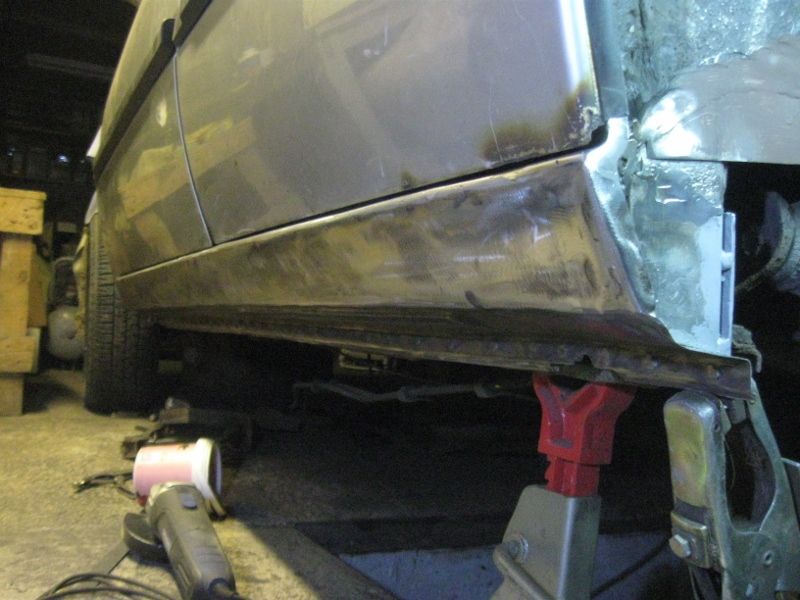
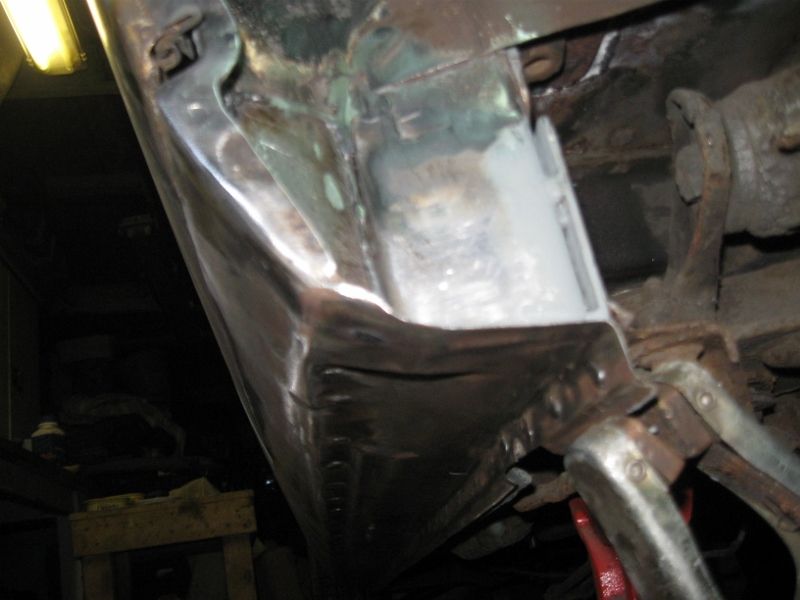
Central reinforcement plug welded from underneath of course. Closing plates drilled for grommets for waxing later.
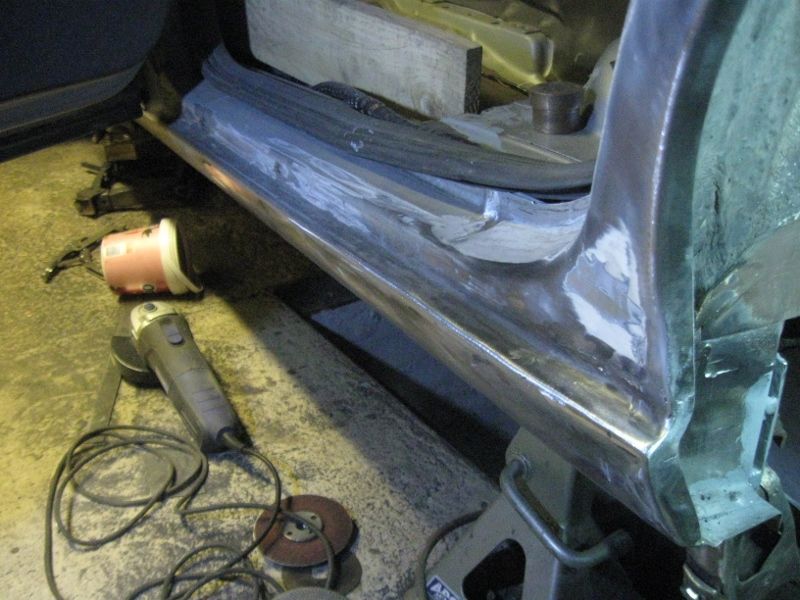
Inside
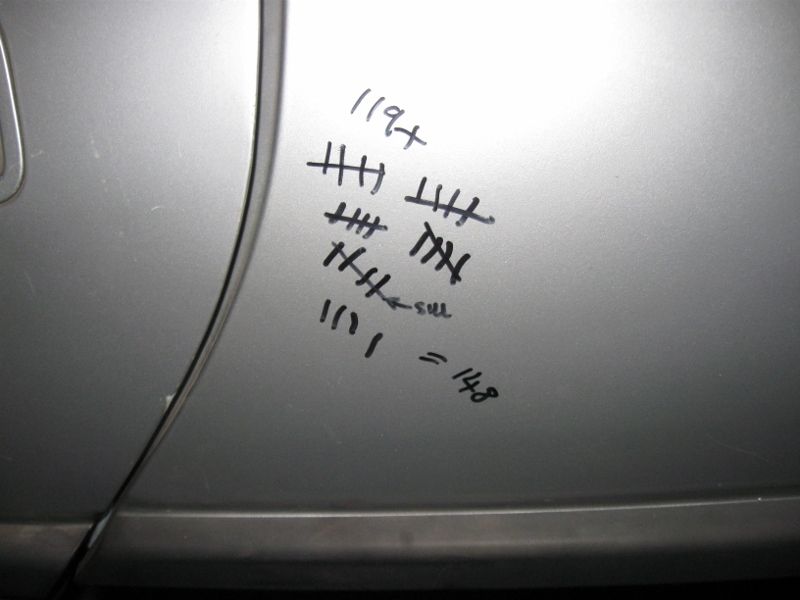
A pic of the patch count tally for the sill and associated bits for entertainment. It means there was 119 patches before starting that are and 148 afterwards, that includes the sill, inner, floor edge, closing plates, and the chassis crossmember that I think there was a pic of earlier.
|
| |
|
|
|
|
|
Jul 31, 2015 23:17:35 GMT
|
|
|
| |
|
|
|
|
|
Jul 31, 2015 23:18:27 GMT
|
|
|
| |
|
|
|
|
|
Jul 31, 2015 23:19:07 GMT
|
Of course once I disturbed the sill closing plates that lead to the bottom edge of the inner arch and then the seatbelt mount area.
The usual process, cut out, make bits, weld in.
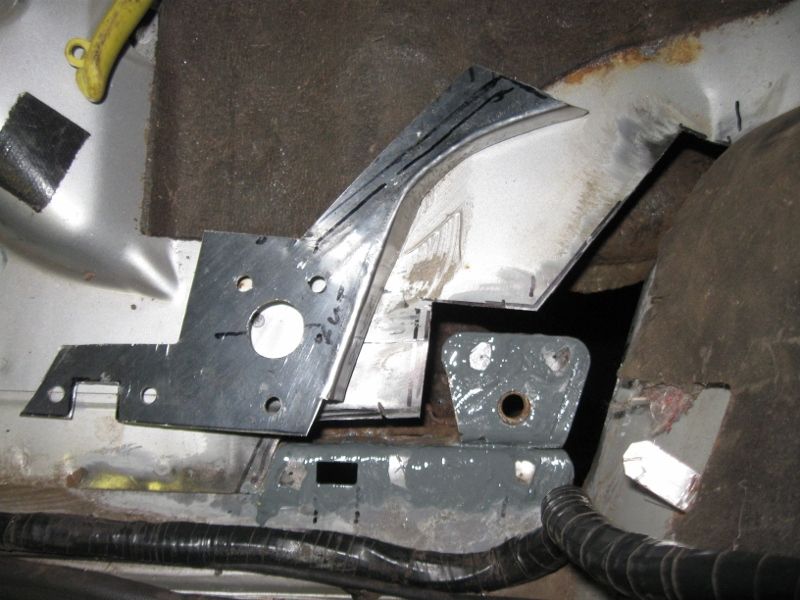
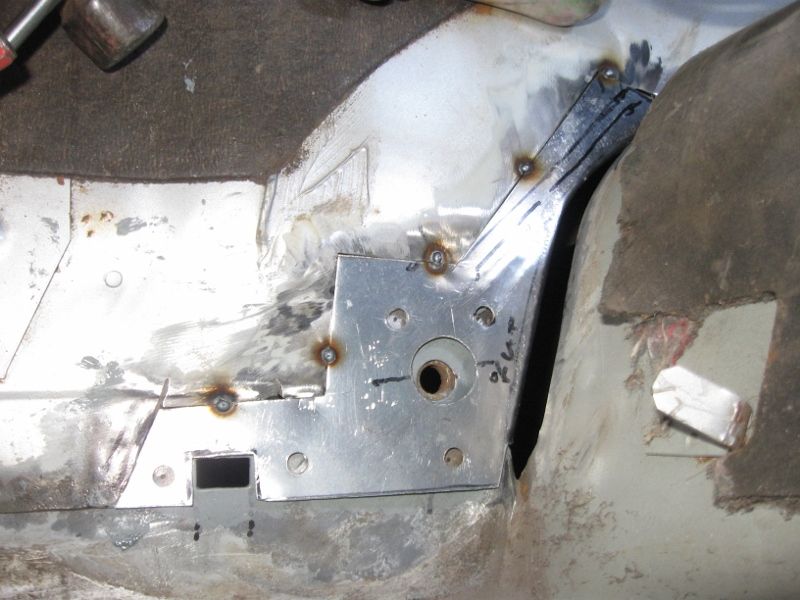
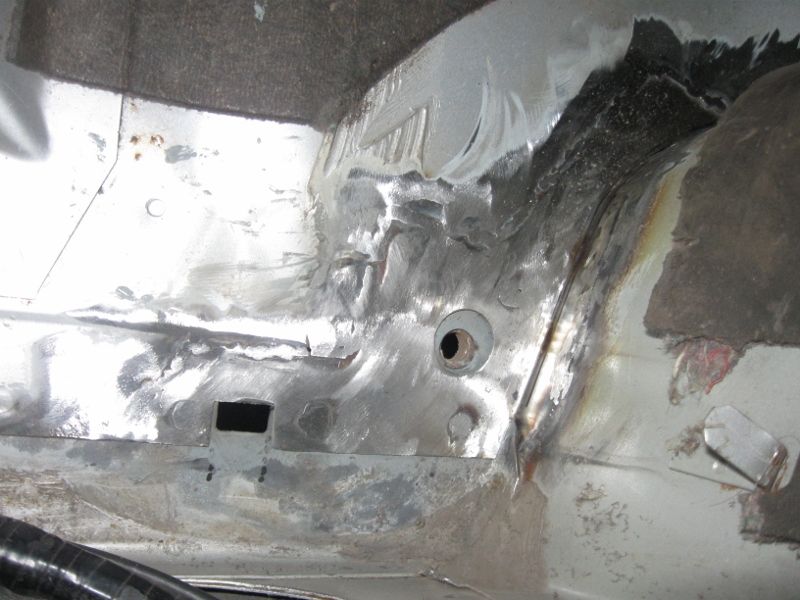
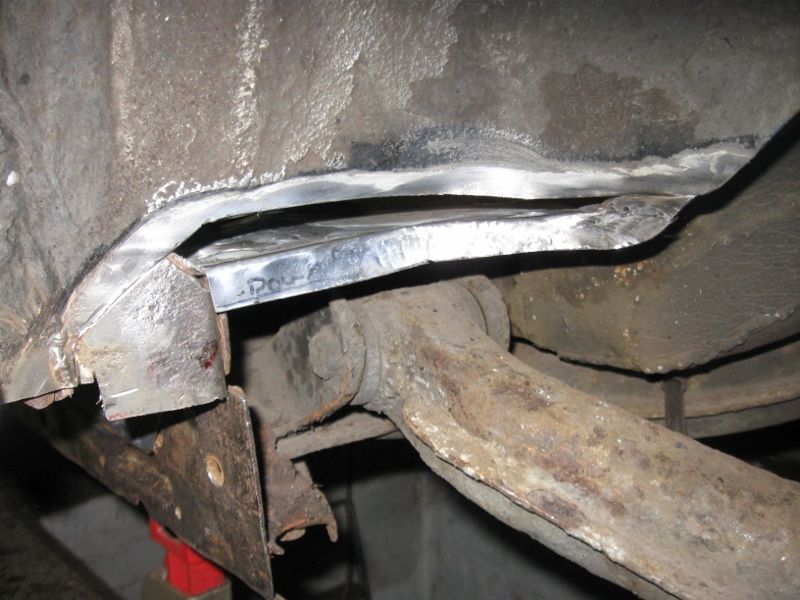
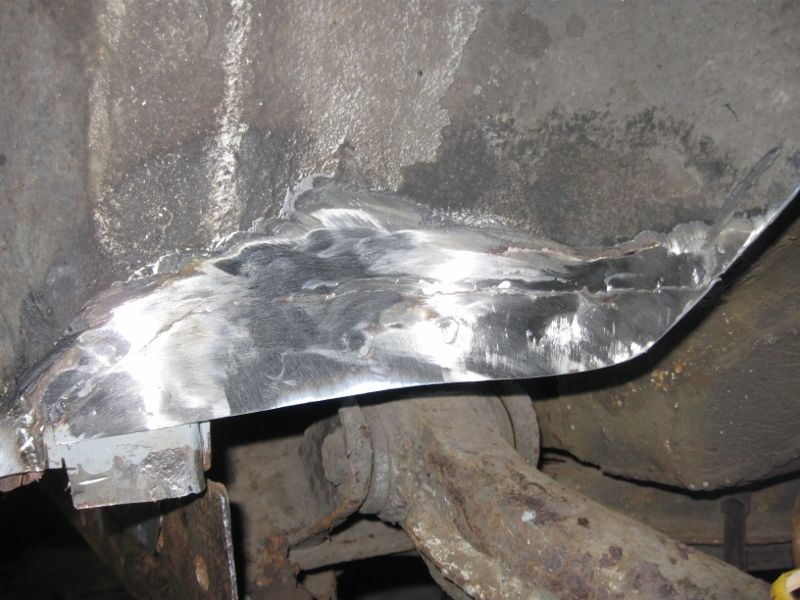
Thats this thread caught up with the other places its posted, now I need to catch up with the car which is a bit further on.
|
| |
Last Edit: Jul 31, 2015 23:22:55 GMT by chris y
|
|
|
|
|
Jul 31, 2015 23:32:06 GMT
|
|
I reckon you should've weighed the Carlton before you started welding to see how different the weight was when you finish. I feel that it will be probably twice the weight once it's finished... Nice welding though, keep up the good work fella!
|
| |
|
|
|
|
|
|
|
|
that inner rear sill work is spot on, exactly same construction as cavalier/astra of same vintage. i've yet to see one where that 3rd skin still exists. scary really as that is the transition between C pillar rear arch and chassis rail which gives the rear half the car allot of strength. on soft top versions that strengthener runs the whole length of the sill
|
| |
|
|
bstardchild
Club Retro Rides Member
Posts: 14,975
Club RR Member Number: 71
|
|
|
|
that inner rear sill work is spot on, exactly same construction as cavalier/astra of same vintage. i've yet to see one where that 3rd skin still exists. scary really as that is the transition between C pillar rear arch and chassis rail which gives the rear half the car allot of strength. on soft top versions that strengthener runs the whole length of the sill Commodores had the middle sill whole length then from Monza onwards they got a partial middle sill |
| |
|
|
|
|


 valves on the end that the rear pipes have in case theres positive pressure under the wheelarch.


