Darkspeed
Club Retro Rides Member
Posts: 4,874
Club RR Member Number: 39
|
|
|
|
No engine building today as recently when I get an hour or so, I have been nipping up the barn and spending a bit of time shifting bits and pieces around sorting and stacking. This evening I managed to get a set of Revo's on the Red Gem chassis in order to get it rolling in preparation for a bit of a shuffle so that I can get access around the Strato's. A couple of long weekends have been booked this month and the B/H weekend one extended so I can make a push on getting the Blue Gem as near complete as I can. Had a bit of a result whilst going through the steel bin looking for bits to use on the engine stand adapter - I found a nice piece of 1/8 plate that will do nicely for the foot plates on the Red Gem roll over bar.  That reminds me that I have to get a move on and do the back stay brackets and support for these cars. |
| |
|
|
|
|
Darkspeed
Club Retro Rides Member
Posts: 4,874
Club RR Member Number: 39
|
|
|
|
Operating on the principle that no pictures means it never happened, I made sure I took a shot of the rolling chassis after completing some more works up the barn today. 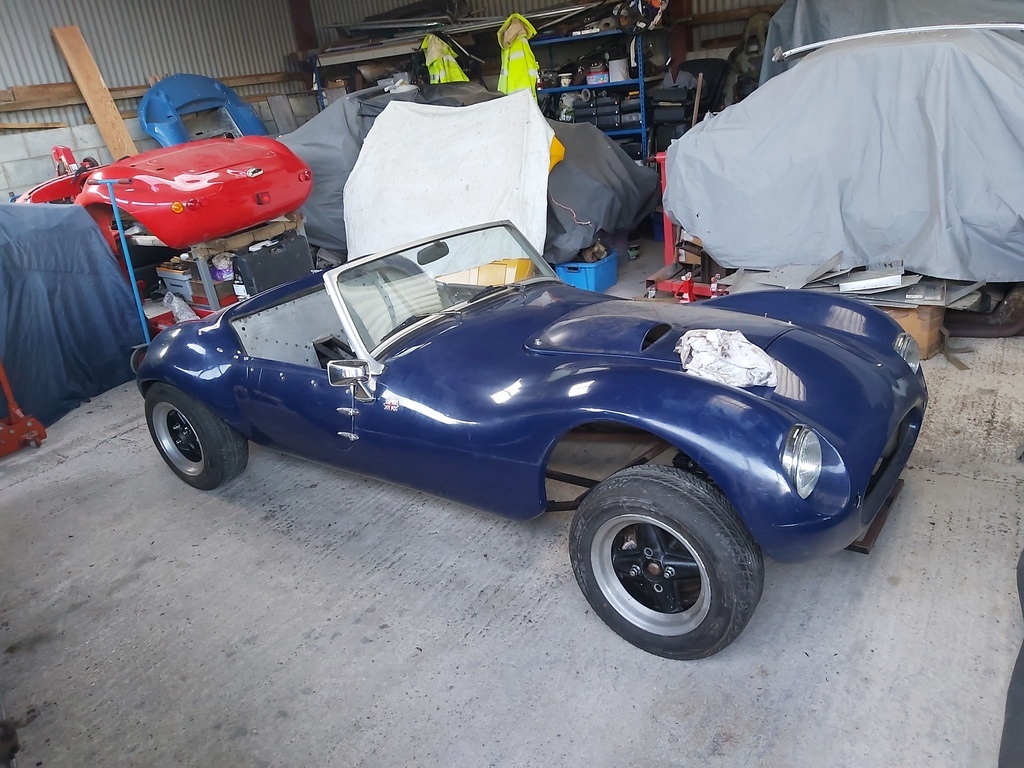 Blue Gem body does not fit the Red gem chassis due to the mods required for the V8 to fit. The wheels and tyres leak badly so tomorrow I will arrive to a car with 4 flats. So it will be up on stands shortly after a major reshuffle of the space. |
| |
|
|
Darkspeed
Club Retro Rides Member
Posts: 4,874
Club RR Member Number: 39
|
|
|
|
Engine is almost complete. 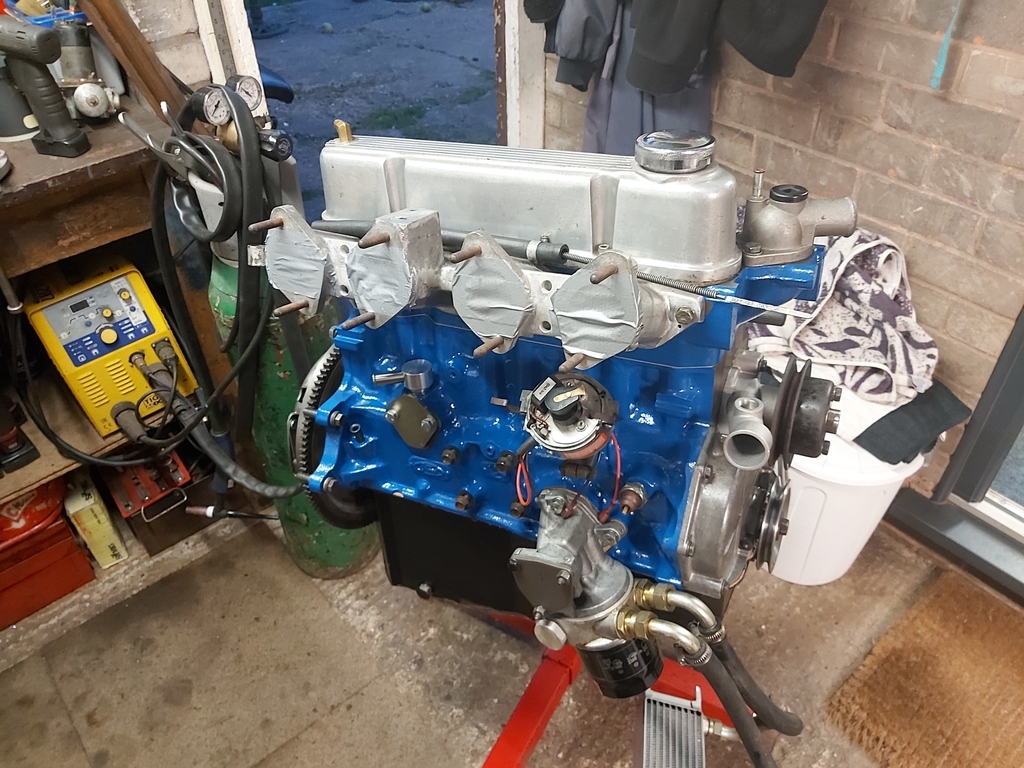 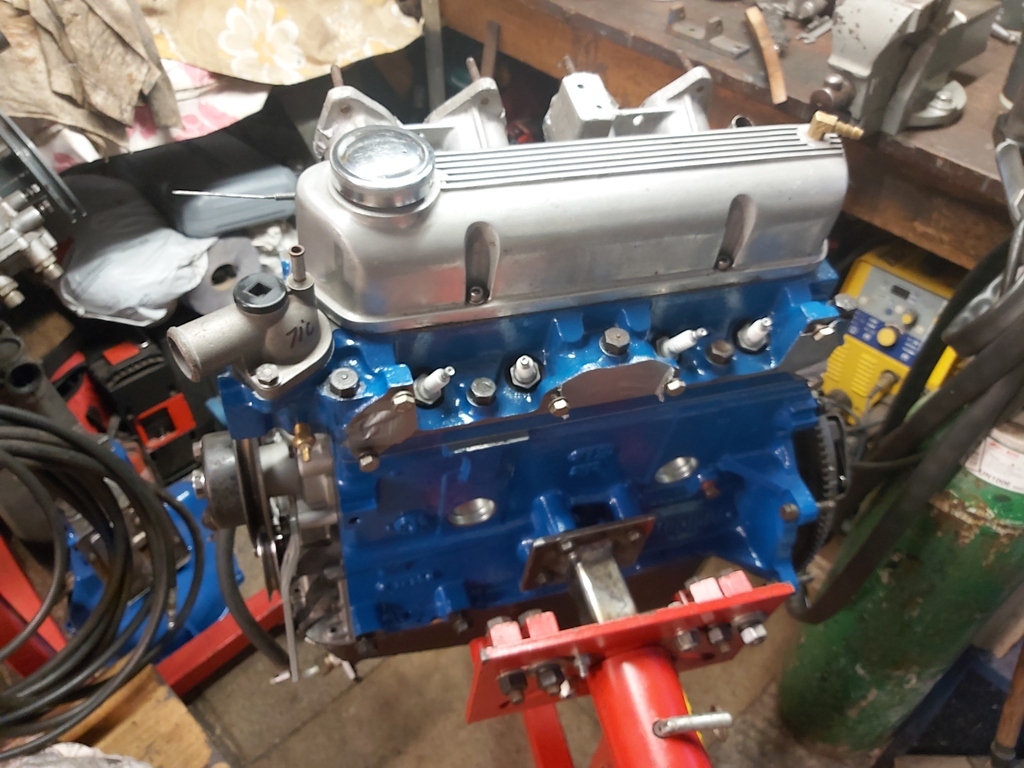 Jobs to do Weight needs to be taken out of the alternator bracket Dellorto's need a clean up Tappets need setting Larger breather connection on the rocker cover Sump needs some paint VDO senders for oil and water Crankcase breather - Loctite 3/8BSP plug for Servo take off in manifold When in the car Bracket for oil cooler |
| |
|
|
|
|
|
|
|
|
Be carefull about taking too much off the lower alternator bracket, the lighter earlier ones used to fail which is I'd imagine why they ended up with the heavy cast steel one.
|
| |
|
|
Darkspeed
Club Retro Rides Member
Posts: 4,874
Club RR Member Number: 39
|
|
Aug 10, 2024 13:10:56 GMT
|
Be carefull about taking too much off the lower alternator bracket, the lighter earlier ones used to fail which is I'd imagine why they ended up with the heavy cast steel one. I have made a good few Alt brackets in my time and never had one fail yet - I have left what I consider to be too much on this one as I should have drilled out material from the back as well as the holes. 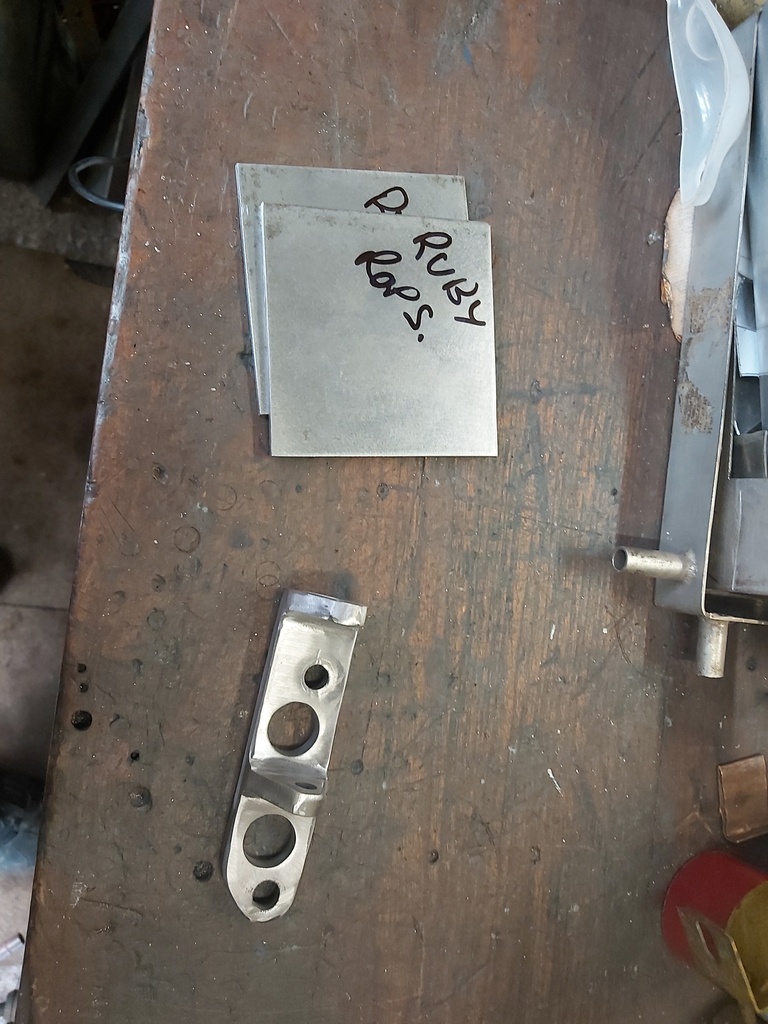 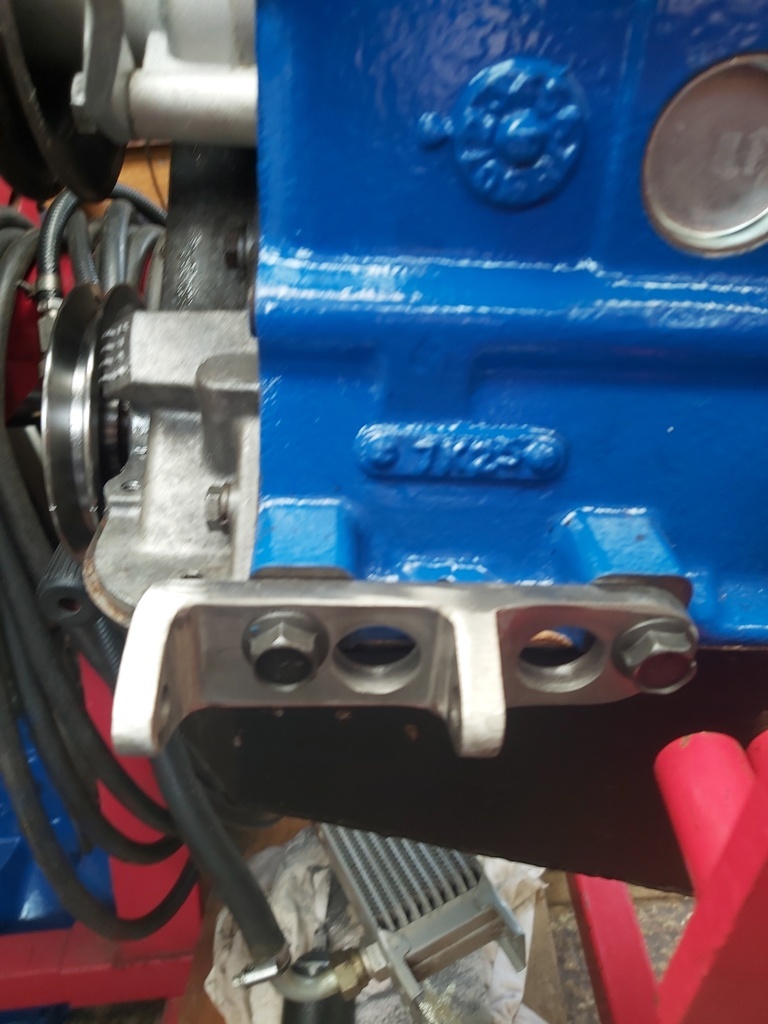 This will do - just need to decide on Blue, Grey or Aluminium the colour. It would look lighter in Aluminium  |
| |
Last Edit: Aug 10, 2024 20:14:49 GMT by Darkspeed
|
|
Darkspeed
Club Retro Rides Member
Posts: 4,874
Club RR Member Number: 39
|
|
Aug 10, 2024 20:13:45 GMT
|
Got stuck into the wiring again today 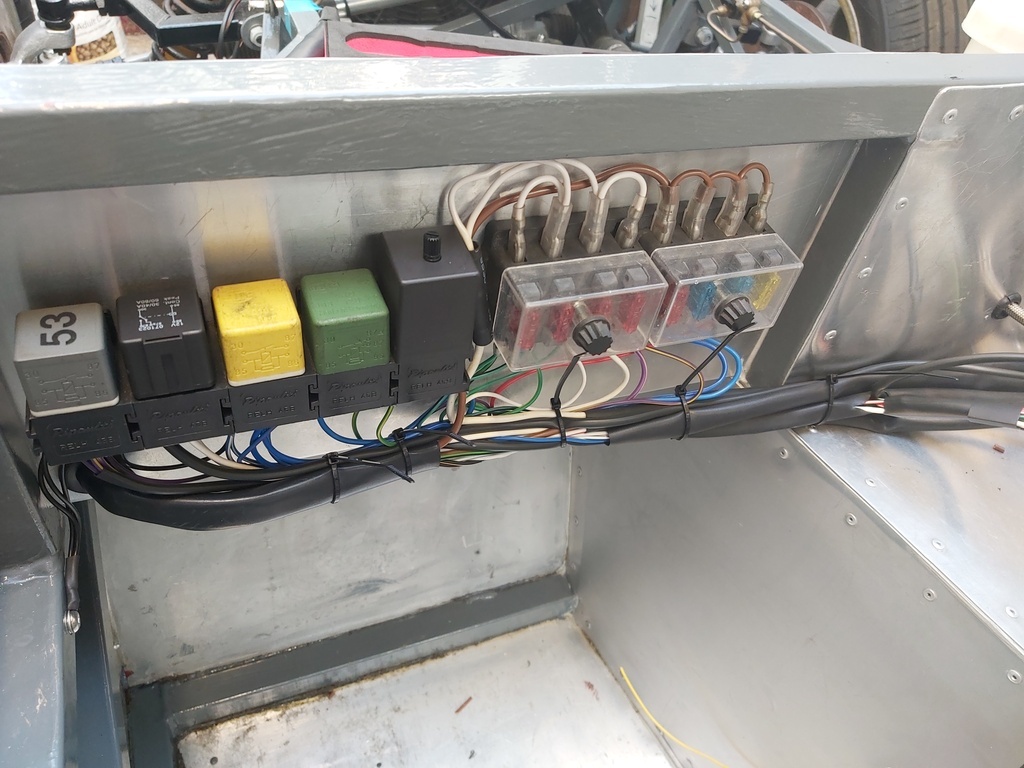 Horn - Check Coolant Fan - Check Sides - Check Heads - Check Mains - Check Flash - Check Brake - Check Indicators - Check Screen washer - Check Instruments - ( Volts Fuel Coolant Oil) Check Ignition - Check Fuel pump relay is wired but currently contemplating installing a switch rather than just having it live with the ignition. Wipers - TBC - Not yet wired apart from a supply to the switch Mostly done then - Check  |
| |
|
|
Darkspeed
Club Retro Rides Member
Posts: 4,874
Club RR Member Number: 39
|
|
Aug 17, 2024 19:35:41 GMT
|
Had a reasonably busy day The morning was spent dropping the engine and box in - prop in and connected to the axle. 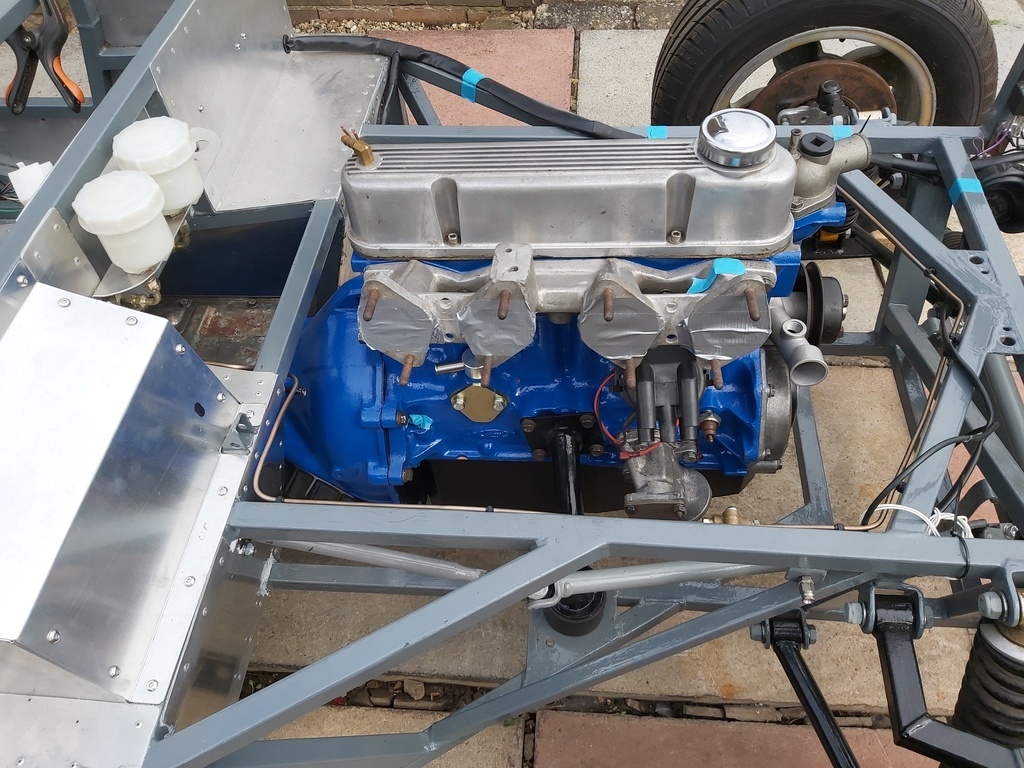 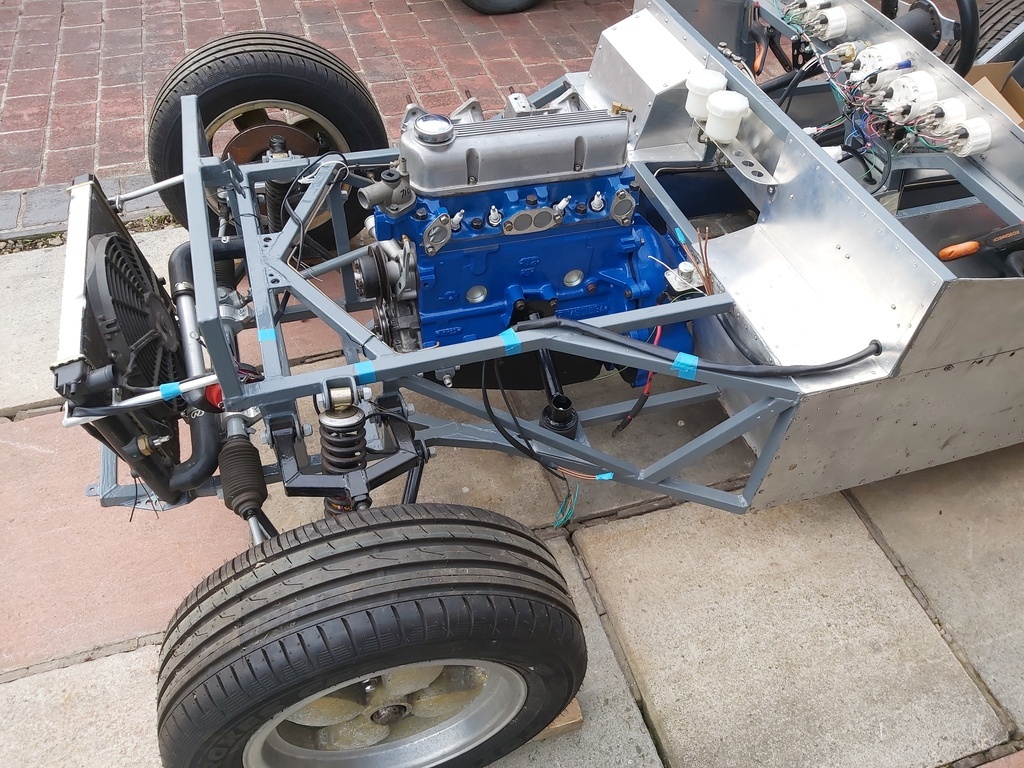 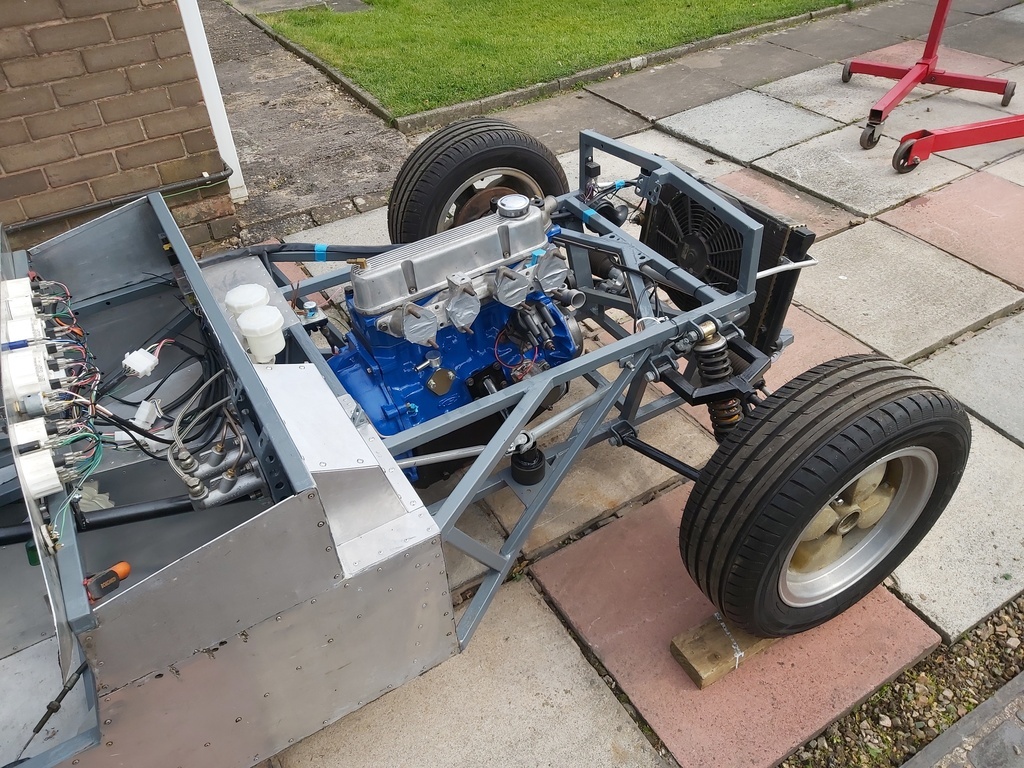 I dropped the oil cooler on, not shown in pics, and it fits very nicely. It will just require a couple of brackets which I may try and get done tomorrow along with a bracket for the fuel pump. Clutch cable connection will also get on the list together with making up the brake lines. The afternoon was spent up the barn moving things around again. |
| |
|
|
Darkspeed
Club Retro Rides Member
Posts: 4,874
Club RR Member Number: 39
|
|
Aug 18, 2024 20:37:53 GMT
|
The oil cooler works did not happen today as the time was allocated to works up the barn - The Blue Gem body and the Red Gem chassis are sitting on the trailer now ready to come home. 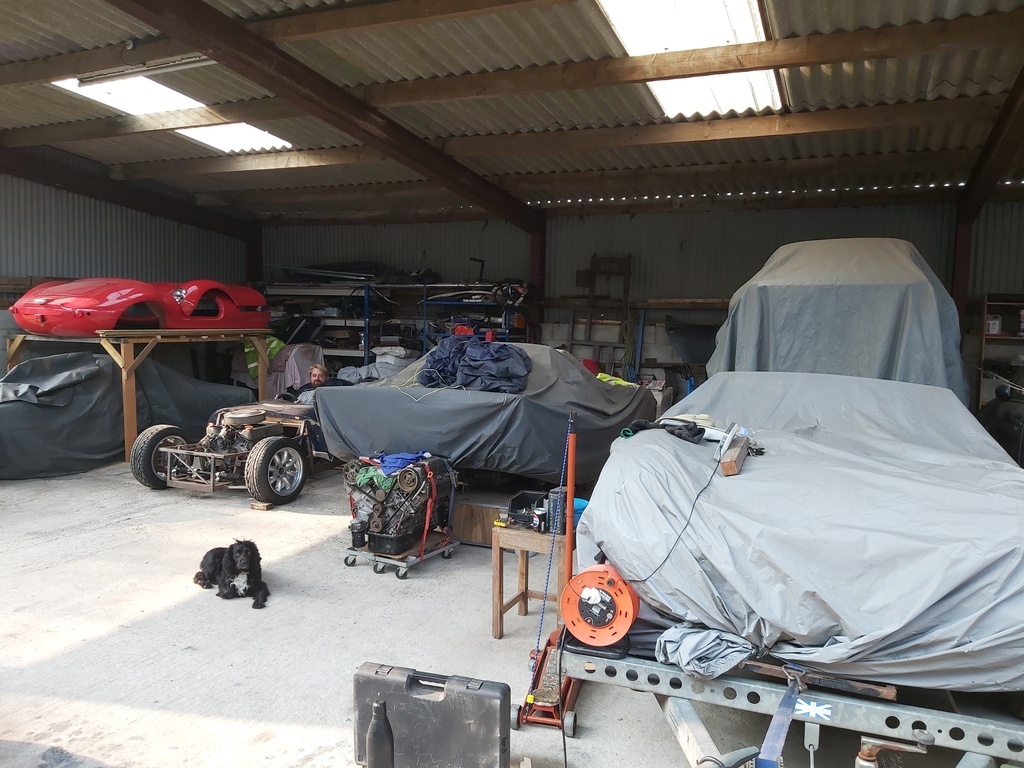 We knocked up a bit of higher level storage for the Red Gem body, so that's now up out of the way and not getting damaged. The engine and box for the Red Gem is the one currently sitting in the G27. Progress on quite a few fronts. |
| |
Last Edit: Aug 18, 2024 20:38:37 GMT by Darkspeed
|
|
Darkspeed
Club Retro Rides Member
Posts: 4,874
Club RR Member Number: 39
|
|
Aug 19, 2024 20:59:00 GMT
|
Got the Gem up in the air. About that cooler 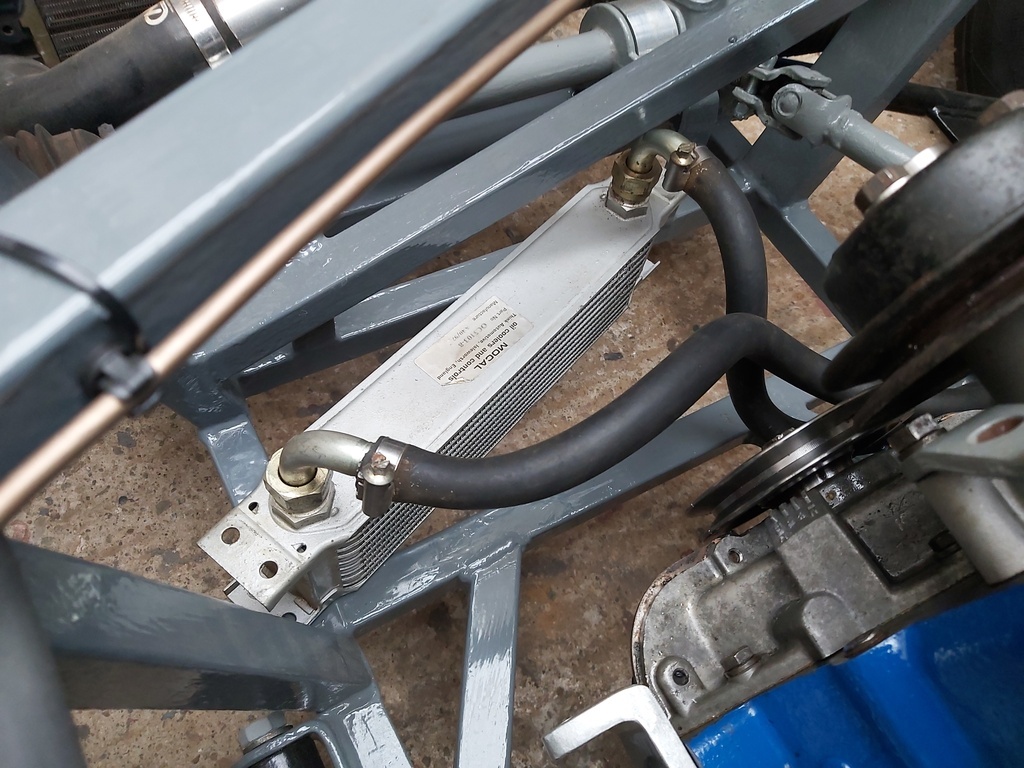 Took a bit of time fitting Starter Motor Alternator Exhaust Clutch cable - would be nicer if the cable was a couple of inches longer. Will have to see if there are other lengths available from the Ford parts bin. Removed the Front suspension and the Alternator - to look at the oil cooler fitment a bit closer. Decided on a position and then went and searched the tin bin for a bit 40 x 20 box. 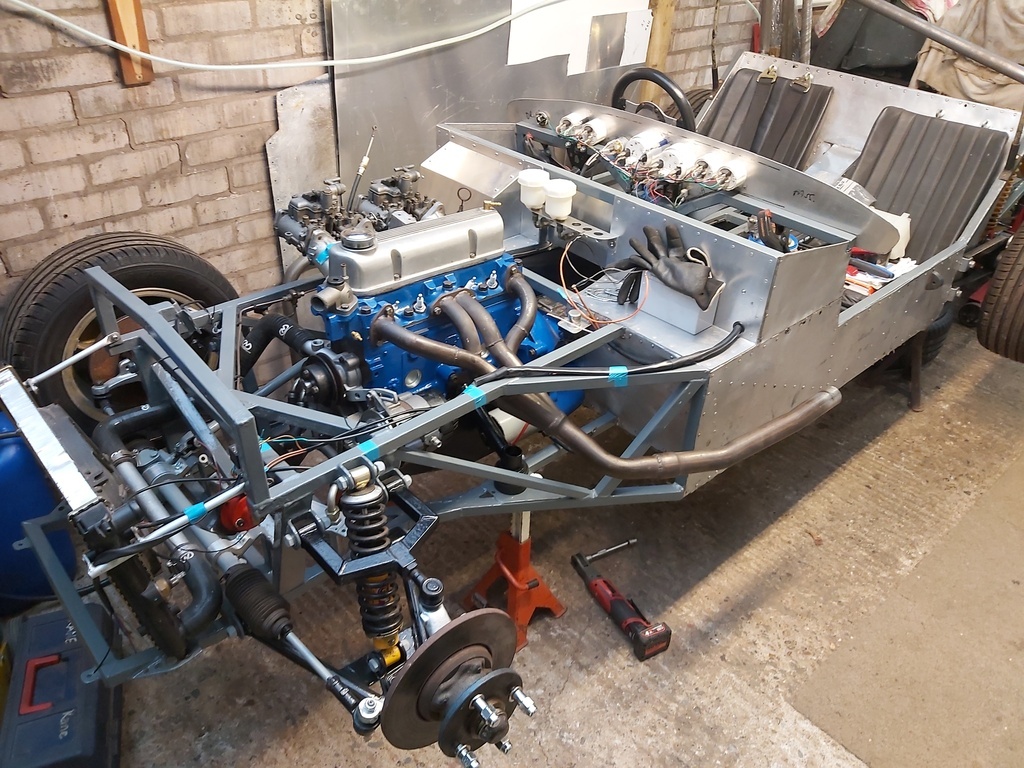 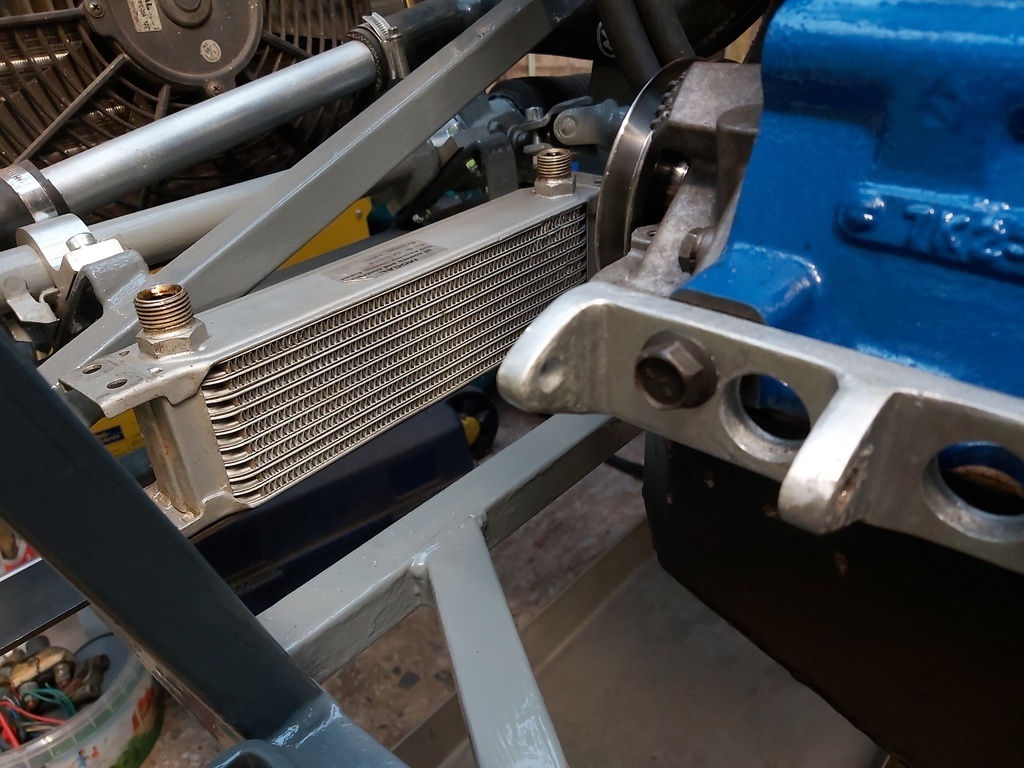 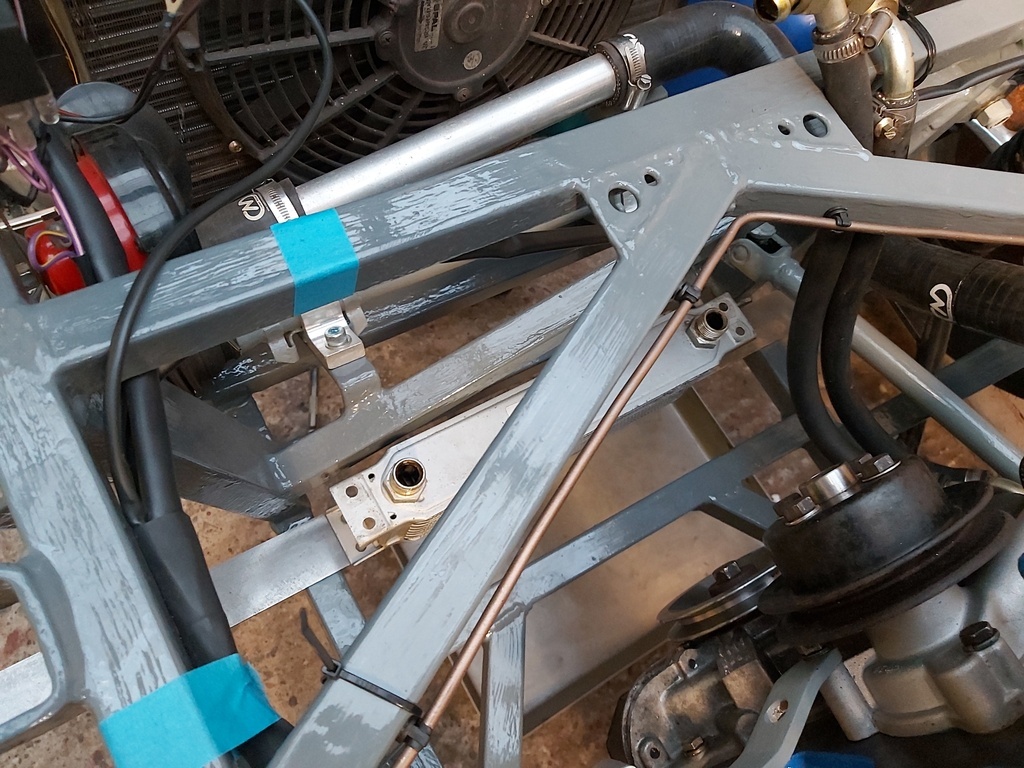 That may do the job 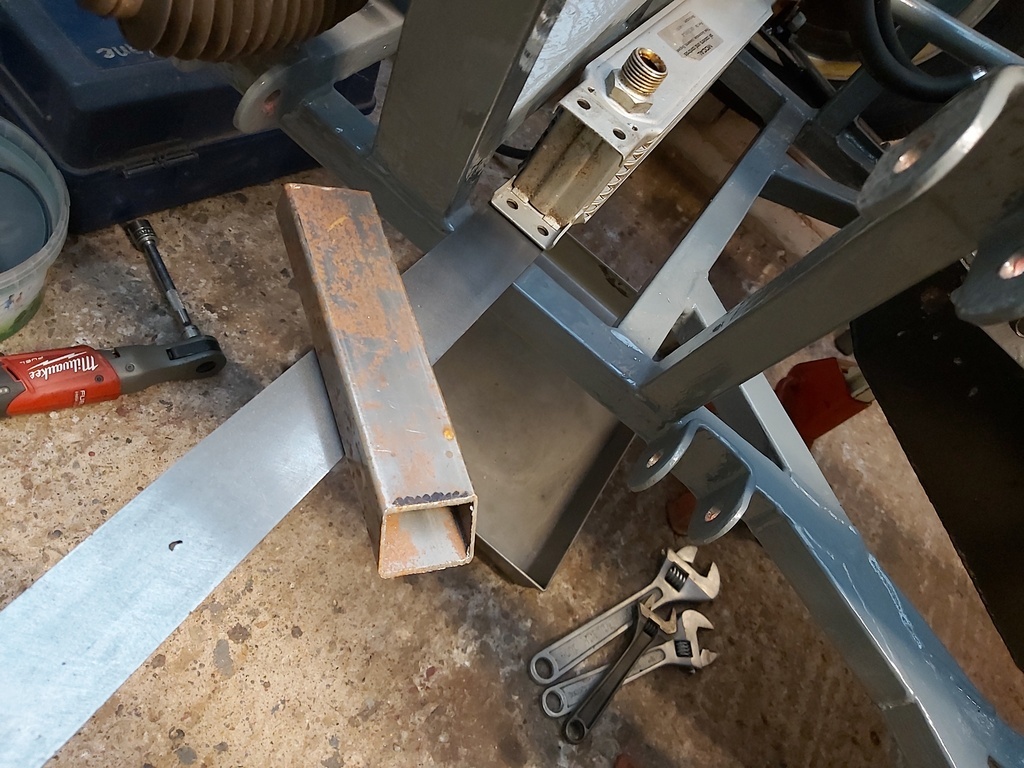 Although with the offset nature of the cooler I may go the route of some asymmetry with the brackets ! |
| |
Last Edit: Aug 20, 2024 6:18:55 GMT by Darkspeed
|
|
Darkspeed
Club Retro Rides Member
Posts: 4,874
Club RR Member Number: 39
|
|
Aug 23, 2024 20:34:01 GMT
|
Brackets made 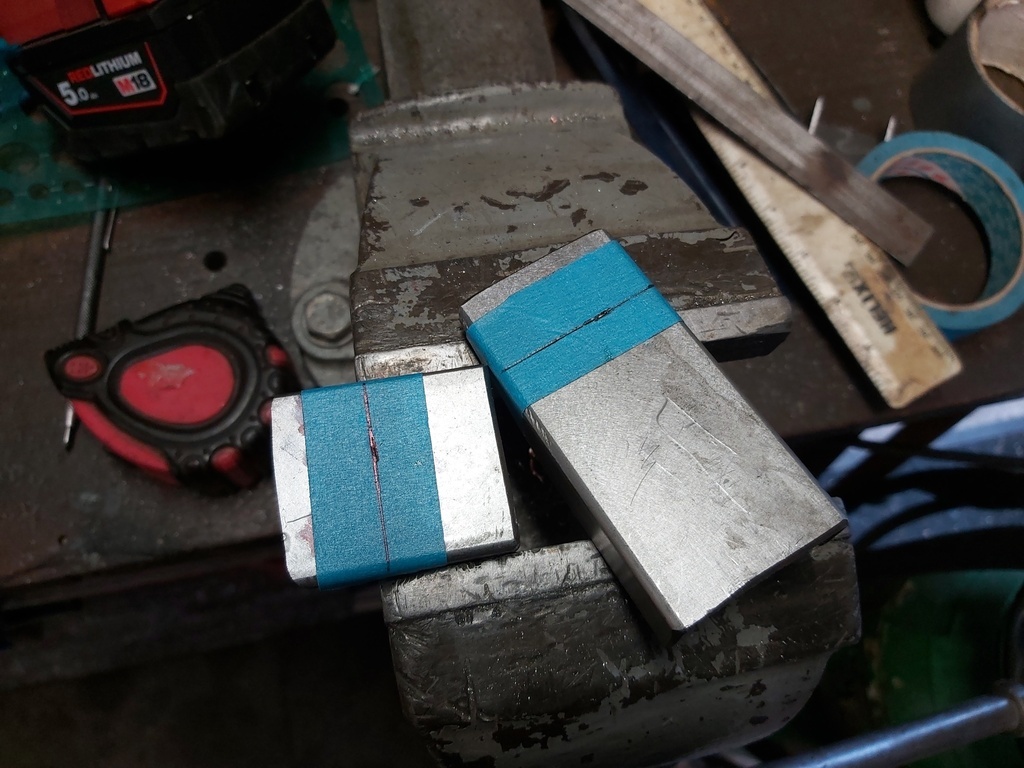 Welded on 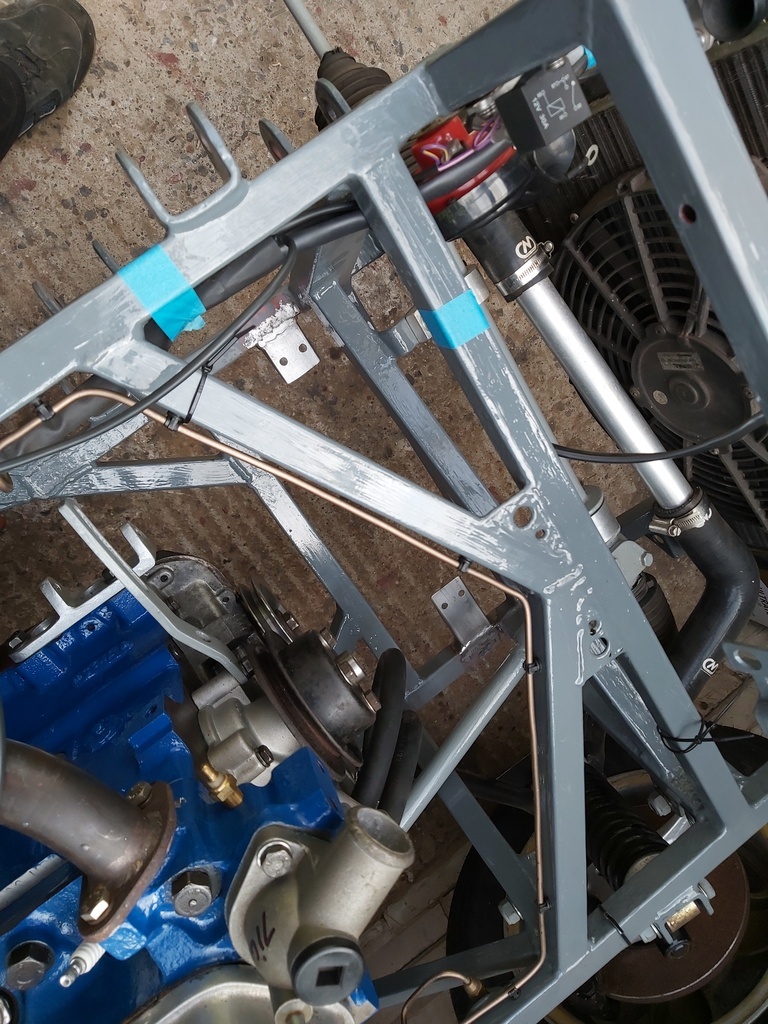 Cooler test fitted and hoses cut to suit 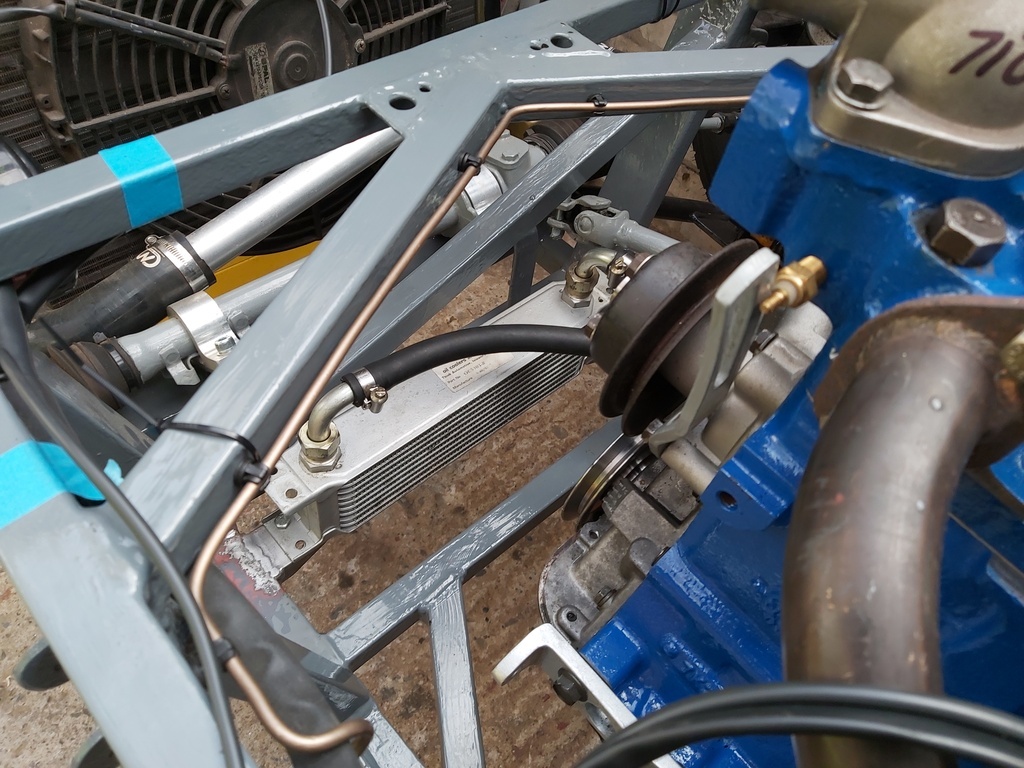 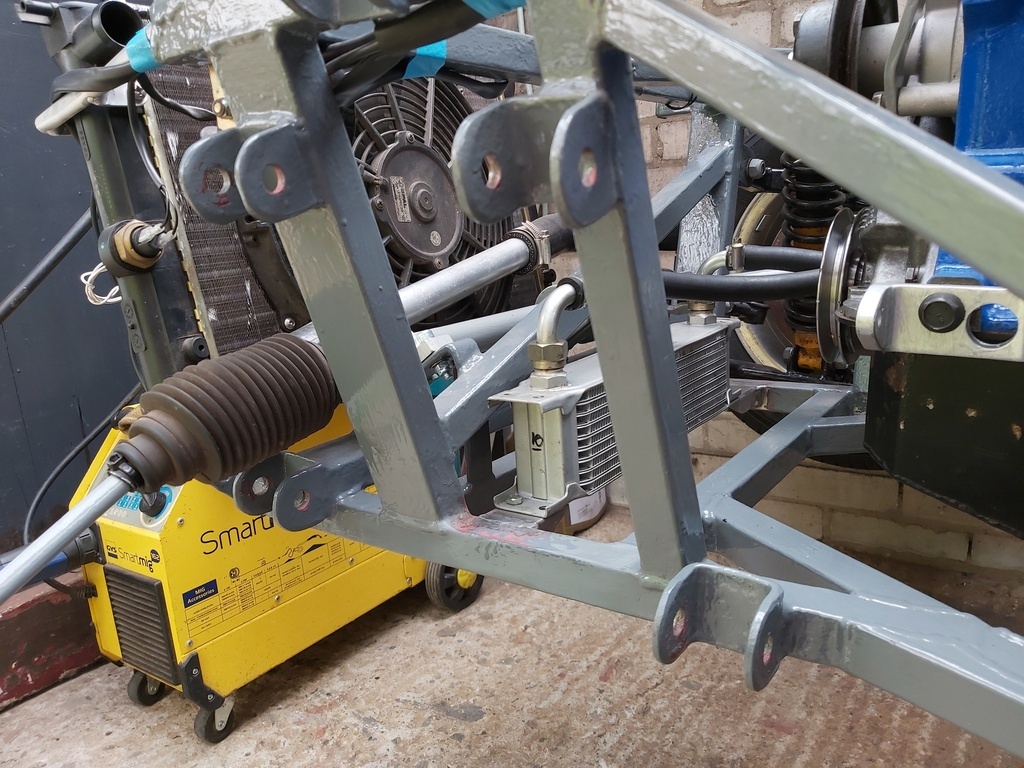 Jobs for the weekend Fuel pump fitting - Weld on bracket Fuel pressure regulator fitting - Rivnuts Coil fitting - Rivnuts Mix up some epoxy primer and then follow with a couple of coats of Grey on the cooler and pump brackets. Cut a hole for the gearstick in the central tunnel alloy cover |
| |
|
|
|
|
Darkspeed
Club Retro Rides Member
Posts: 4,874
Club RR Member Number: 39
|
|
|
|
From the list above I managed the cutting of the hole for the gearstick ! It's not that I was bone idle -> I went to Loton for a morning - Watched the F1 - looked after dogs and house whilst Mrs DS visits overseas relatives - cut the grass - moved parts up the barn for the other projects - remade burnt out wiring on a ride on mower. Time was spent on the Gem - I made a start on brackets for the roll over bar backstays, more involved than expected due to a lot of measurements for bodywork clearances and it may not work out! The exhaust will be getting a boss for Lambda senor for an AFR gauge for tuning purposes - a bit of a read up and the suggested position is 1M from the nearest exhaust valve. About there 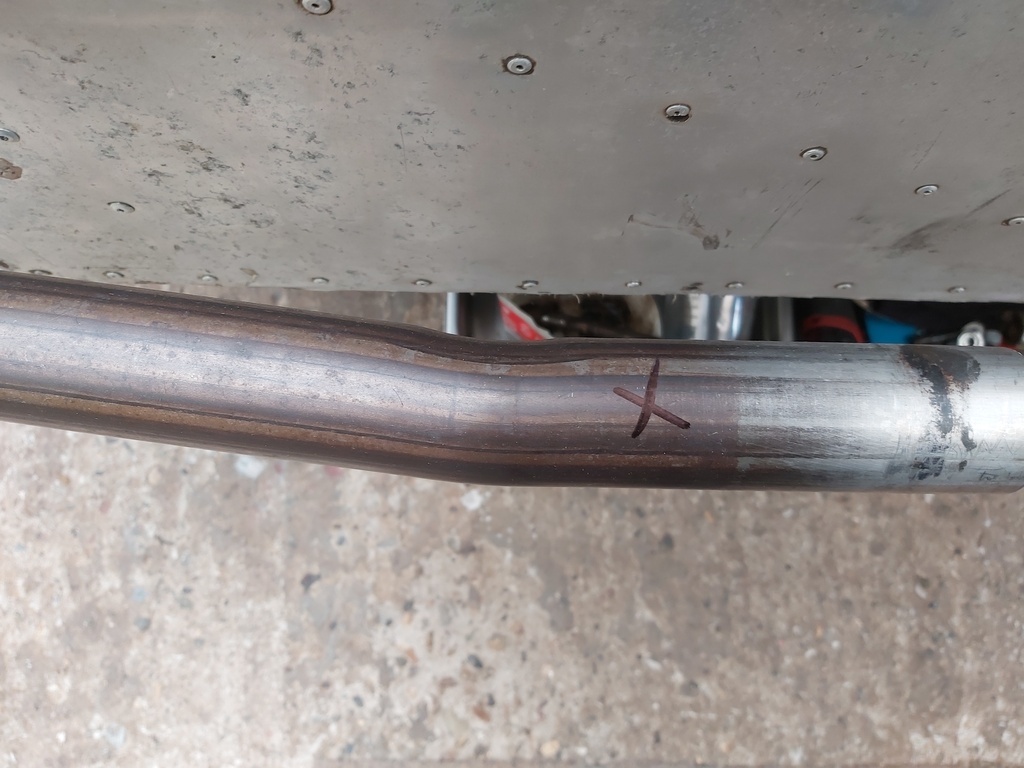 Which is lucky because that's just about how long the exhaust is... 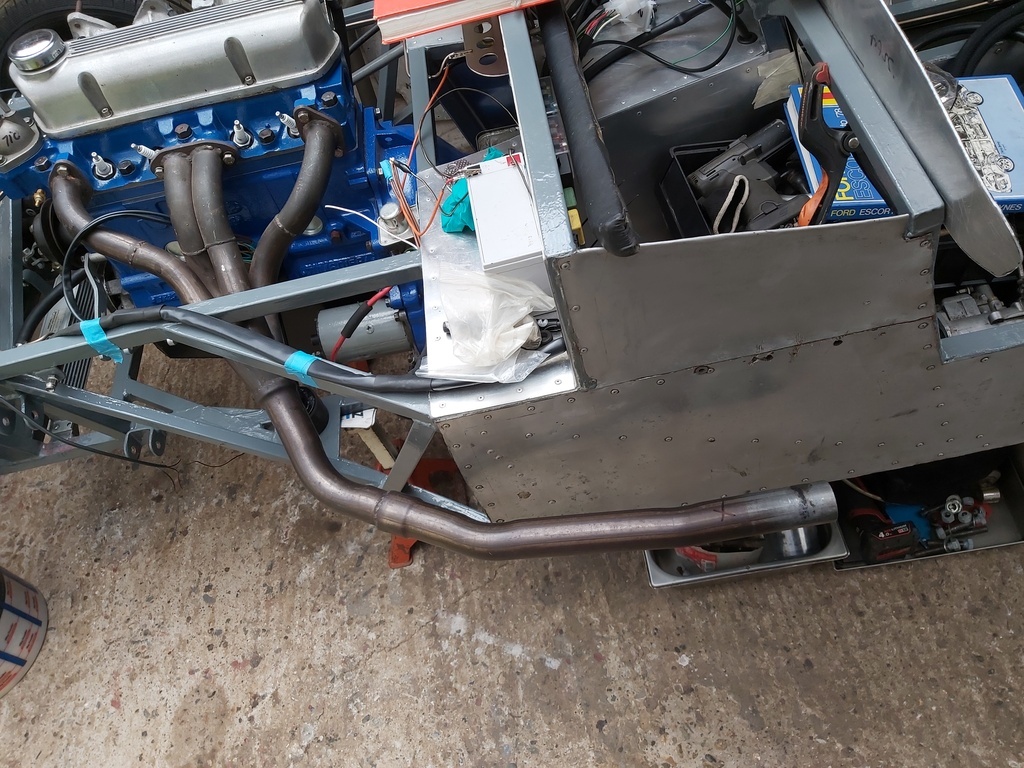 A week or so back I had given up on finding the sensor for the oil pressure gauge - so I ordered a new one and the required adapter - As per expectations, a few days later I opened a bag of old wiring to see if I could find a wiper motor plug.... 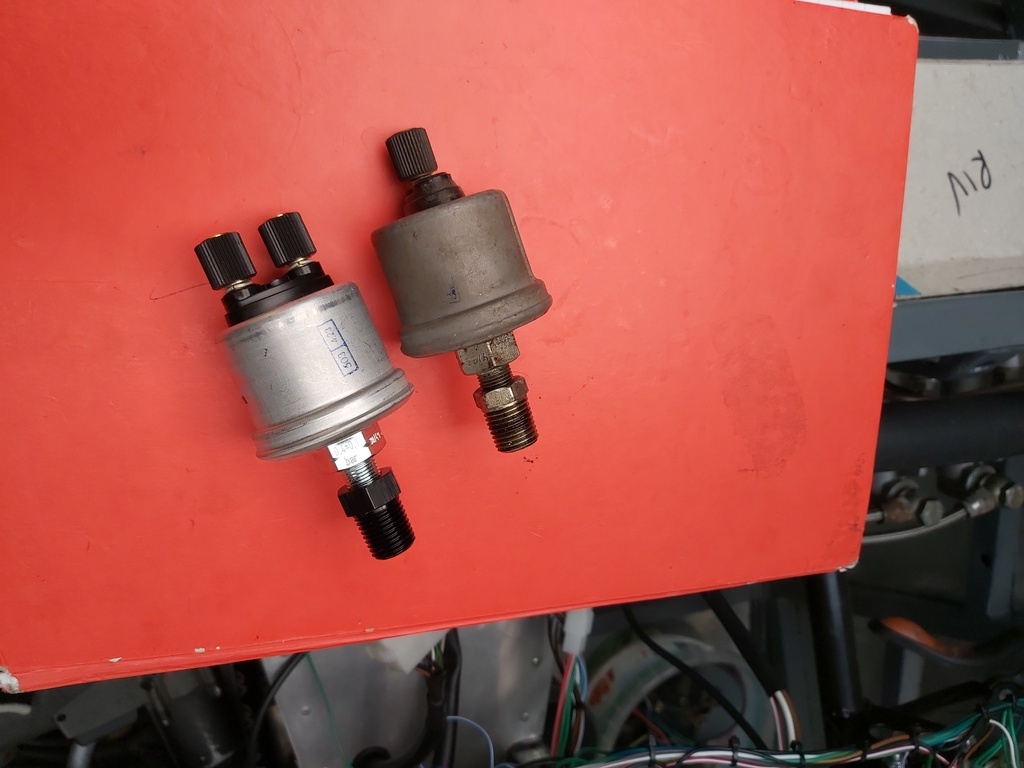 At least there was a difference. For the new one I went for the combined sensor and switch so I would not have to mess about with separate switch location. Slightly annoying all the same, they are not cheap items, and I did not find the wiper motor plug I was looking for. The fuel pump fitting is still under consideration as every time I return to it I find reasons to change either the location or the orientation. |
| |
Last Edit: Aug 26, 2024 10:54:05 GMT by Darkspeed
|
|
Darkspeed
Club Retro Rides Member
Posts: 4,874
Club RR Member Number: 39
|
|
Aug 26, 2024 11:51:43 GMT
|
This has now dropped to a sensible price - Started at 9 or 10K 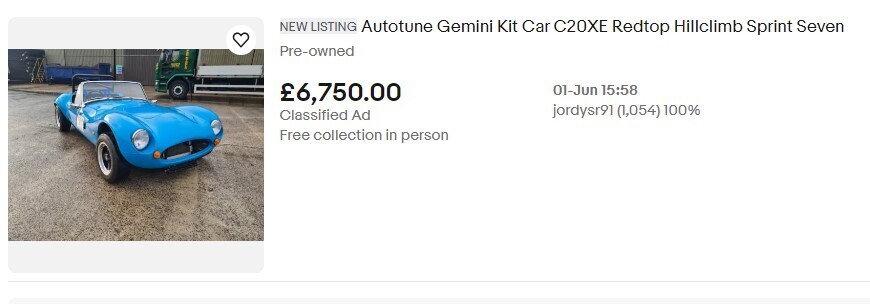 Quite a lot to like and quite a bit to dislike with it, but it has the foundations for a very good car. |
| |
|
|
Darkspeed
Club Retro Rides Member
Posts: 4,874
Club RR Member Number: 39
|
|
Aug 26, 2024 18:06:07 GMT
|
Fuel pump fitting - Weld on bracketFuel pressure regulator fitting - RivnutsCoil fitting - RivnutsMix up some epoxy primer and then follow with a couple of coats of Grey on the cooler and pump brackets. Cut a hole for the gearstick in the central tunnel alloy cover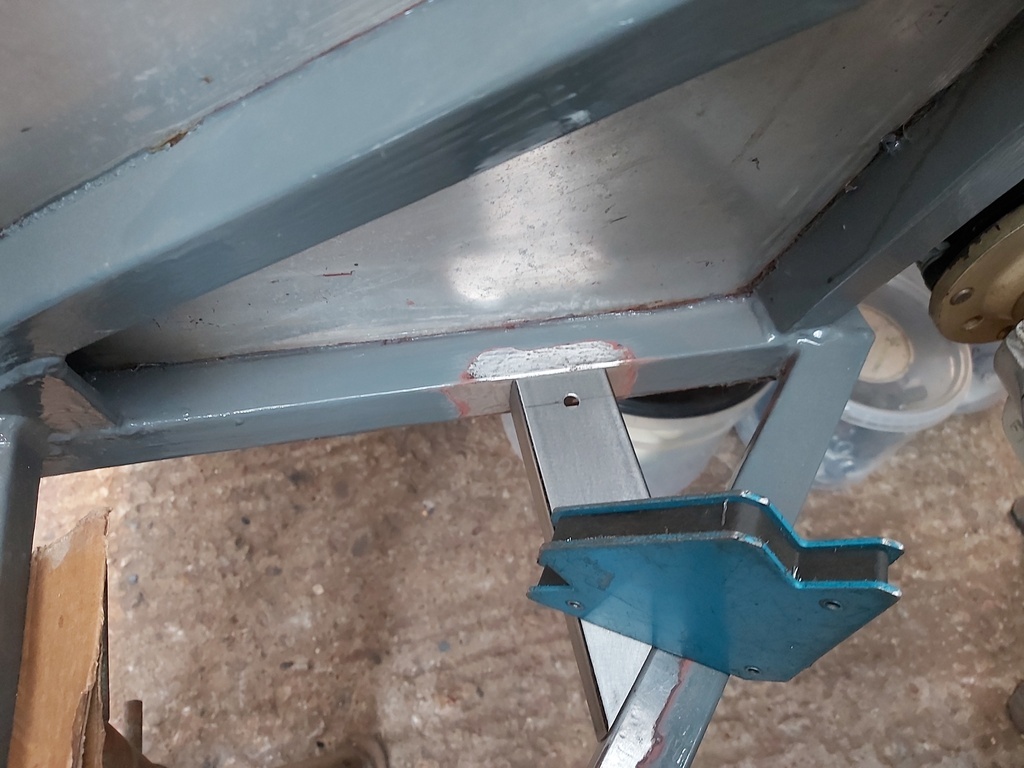 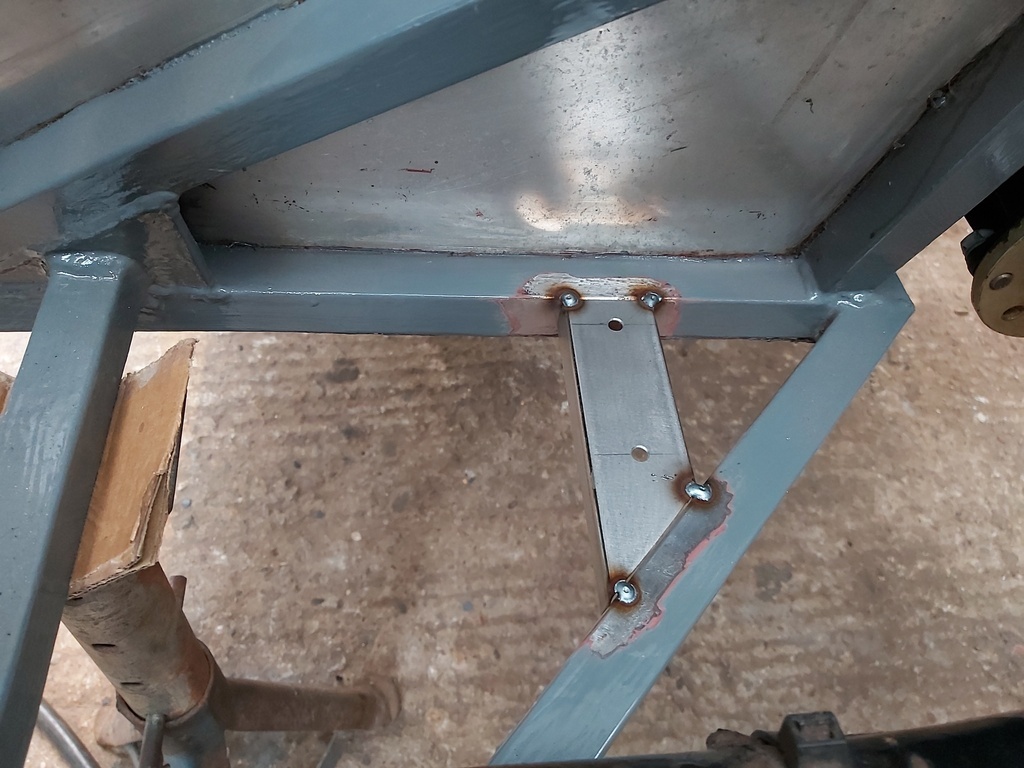 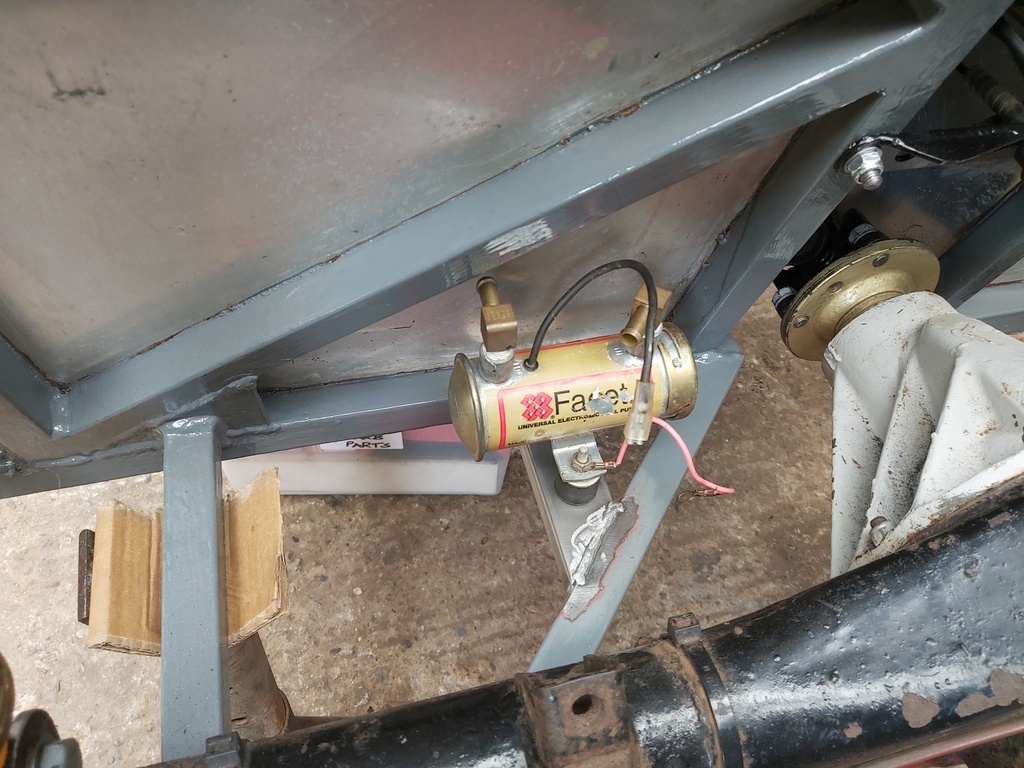 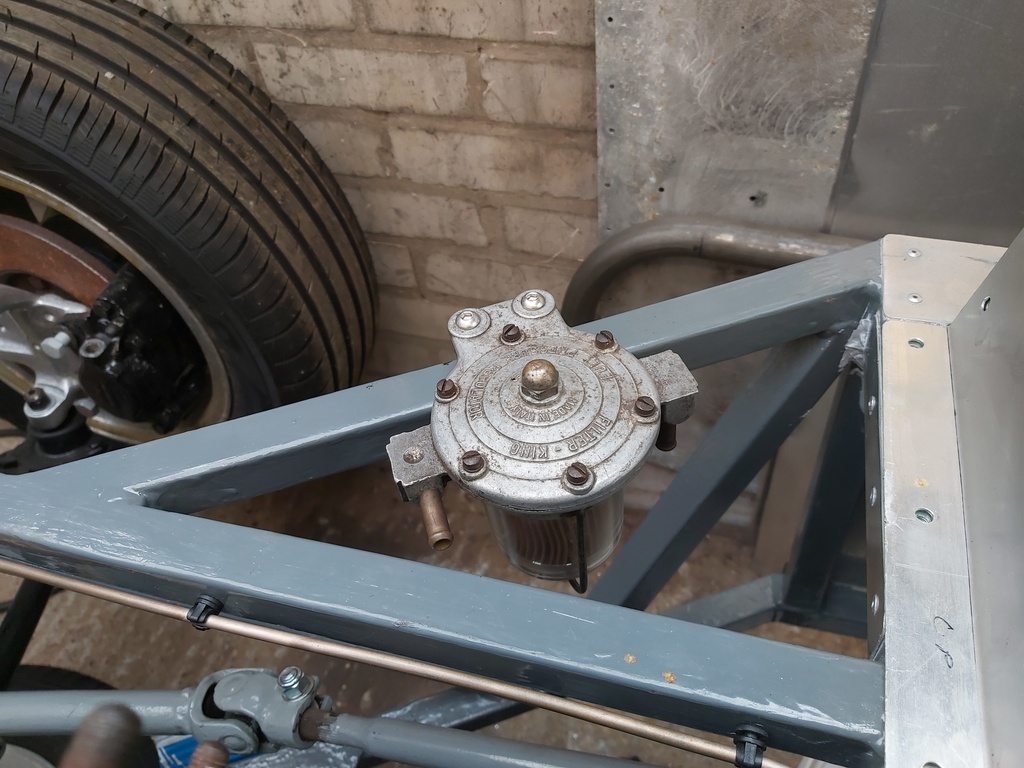 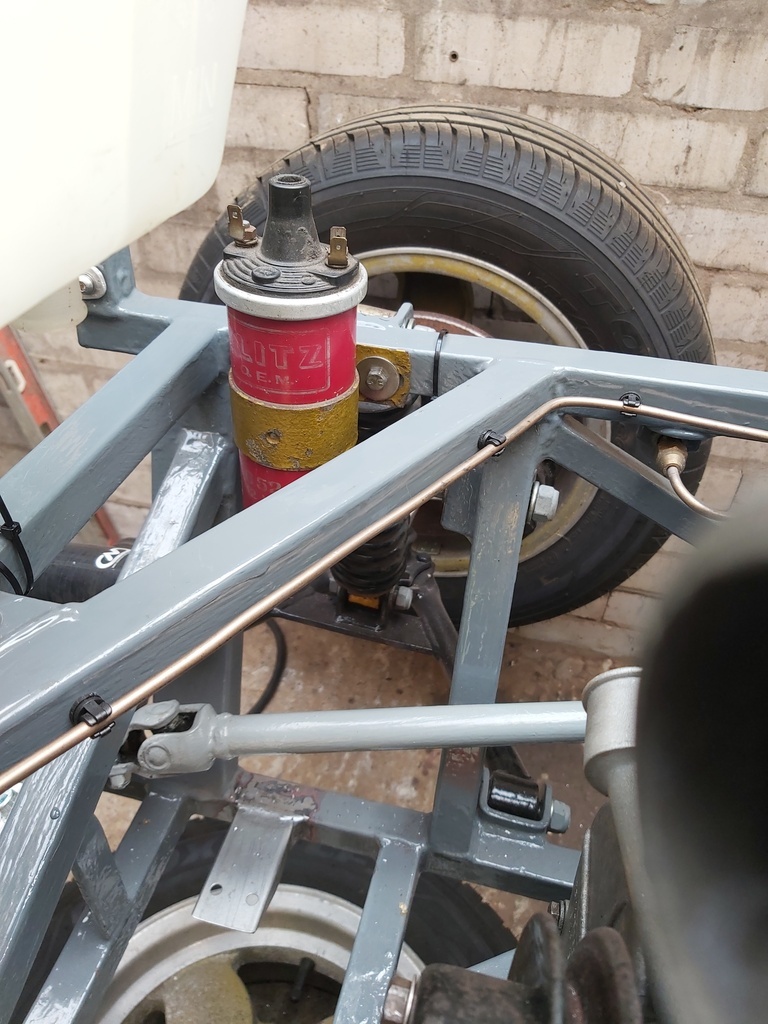 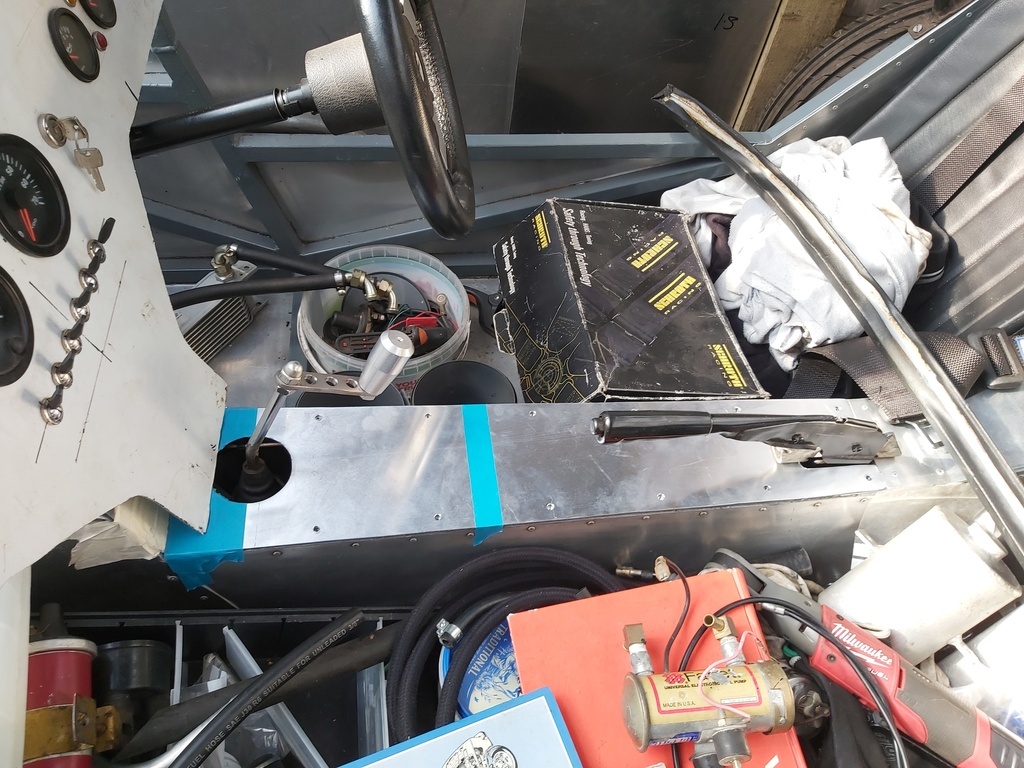 And a few more jobs Found a longer clutch cable 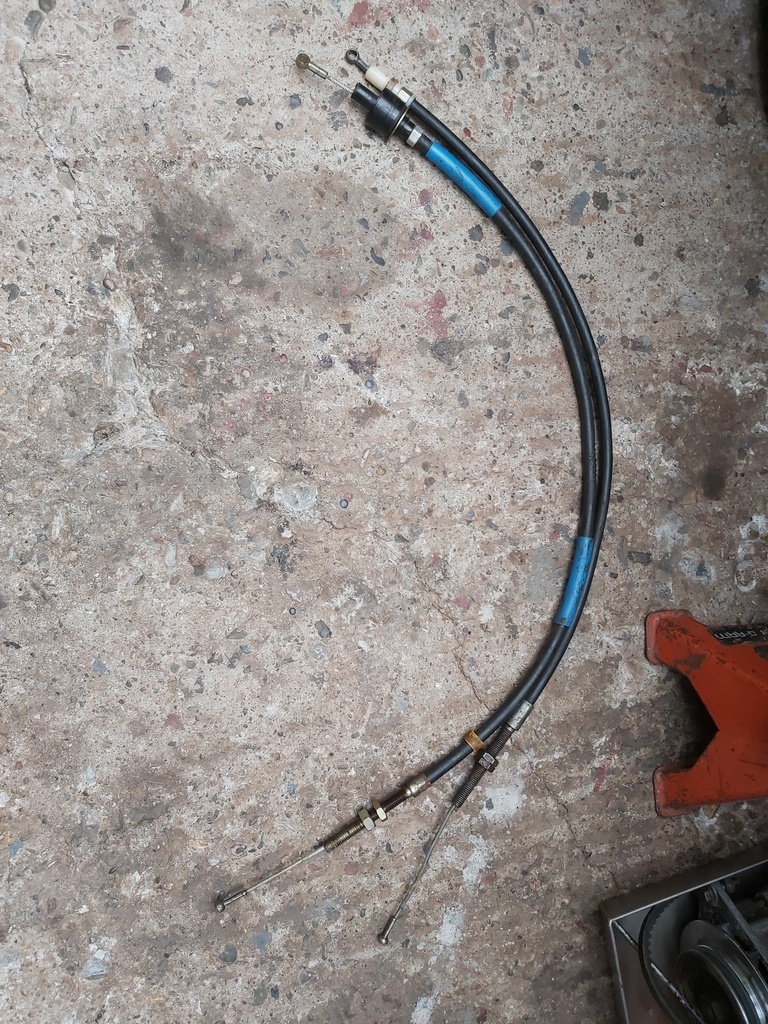 Fitted a throttle cable 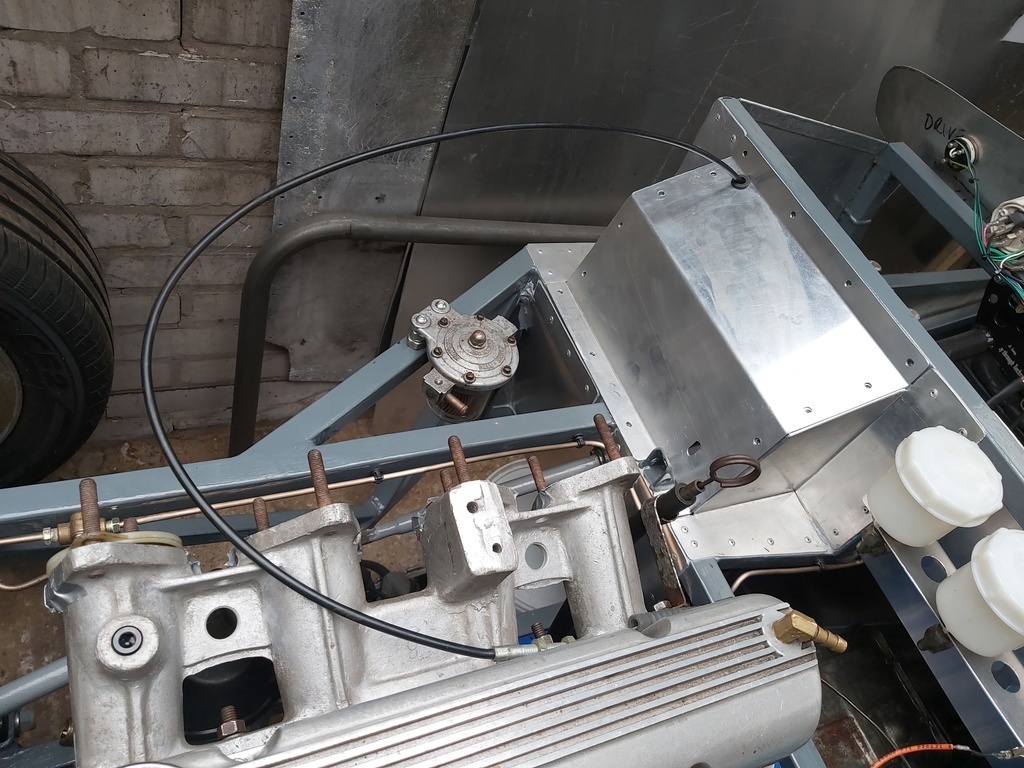 The fuel filter is one of the larger Malpassi types as I found two that are for the V8's and the newer of the two, an alloy bowl type, will go in the Red Gem along with the Facet Red Top that is the test subject above - The Silvertop will be the one used on the X-flow. Although this work is taking a little longer than expected it will come right with time saved when doing the same on the Red Gem. Removed the Panhard as that's another item that needs a coat of paint. |
| |
|
|
|
|
|
Aug 27, 2024 15:49:23 GMT
|
|
Good progress!
|
| |
|
|
|
|
|
Aug 27, 2024 21:37:39 GMT
|
|
If you havn't wired it up yet I like to wire the fuel pump via the oil pressure sender. No oil pressure - no fuel delivery. I run a momentary switch as a bypass for priming the system for starting the engine when it's not been run for a few weeks.
|
| |
|
|
Darkspeed
Club Retro Rides Member
Posts: 4,874
Club RR Member Number: 39
|
|
Aug 27, 2024 21:44:29 GMT
|
Cheers buddy - I would like to be wrapping this up now but as per usual the final details are absorbing more time than anticipated. Today it was removing the large glass FPR and replacing it with the smaller one as the realisation dawned that although the G27 V8 is now injected and not needing the larger FPR, The V6 converted to carbs will be needing it ! Redoubling of efforts are required, but any thoughts of getting it running for a quick end of summer blast are evaporating fast. |
| |
|
|
Darkspeed
Club Retro Rides Member
Posts: 4,874
Club RR Member Number: 39
|
|
Aug 27, 2024 21:55:29 GMT
|
If you havn't wired it up yet I like to wire the fuel pump via the oil pressure sender. No oil pressure - no fuel delivery. I run a momentary switch as a bypass for priming the system for starting the engine when it's not been run for a few weeks. Good idea and a nice thing to have. All the wiring is in and I am already struggling to stay on the keep it simple path. |
| |
|
|
Darkspeed
Club Retro Rides Member
Posts: 4,874
Club RR Member Number: 39
|
|
Sept 1, 2024 20:17:39 GMT
|
Mix up some epoxy primer and then follow with a couple of coats of Grey on the cooler and pump brackets. Getting there, but before any paint I figured the brackets could be made a little less bulky  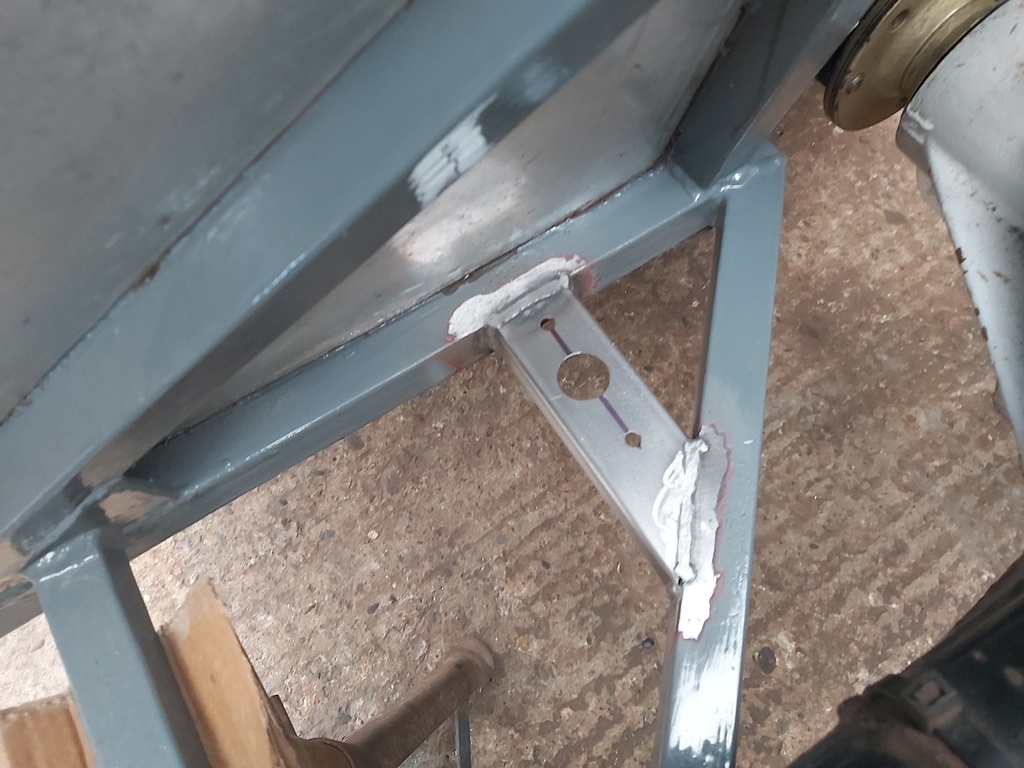 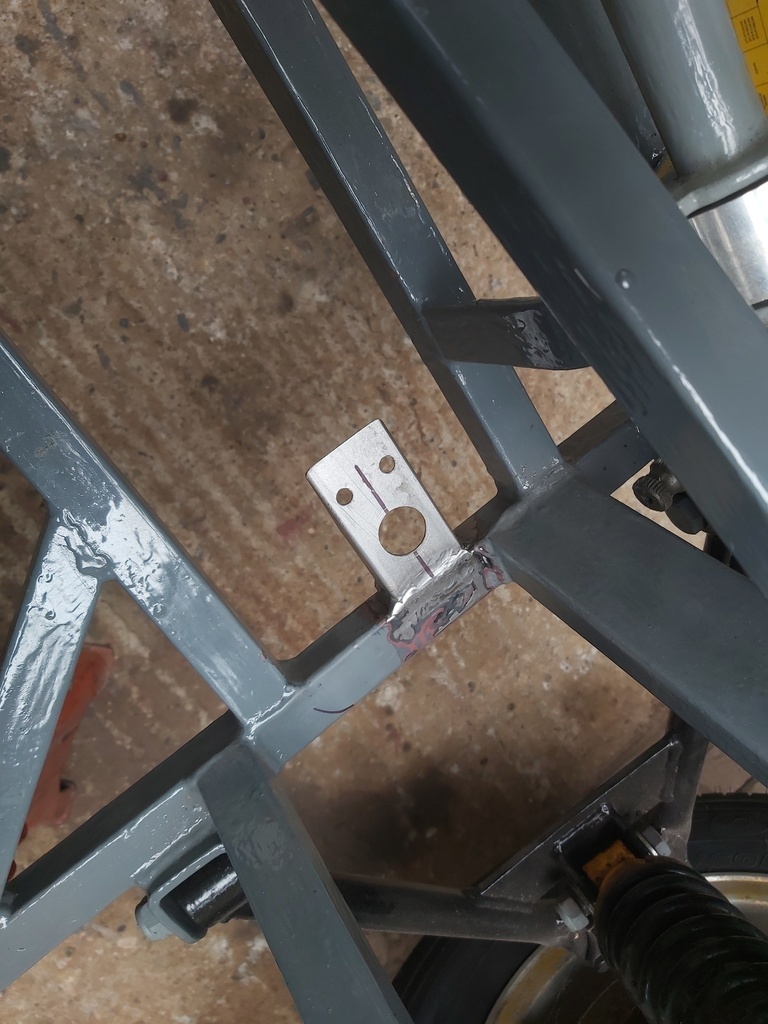 Epoxy applied. 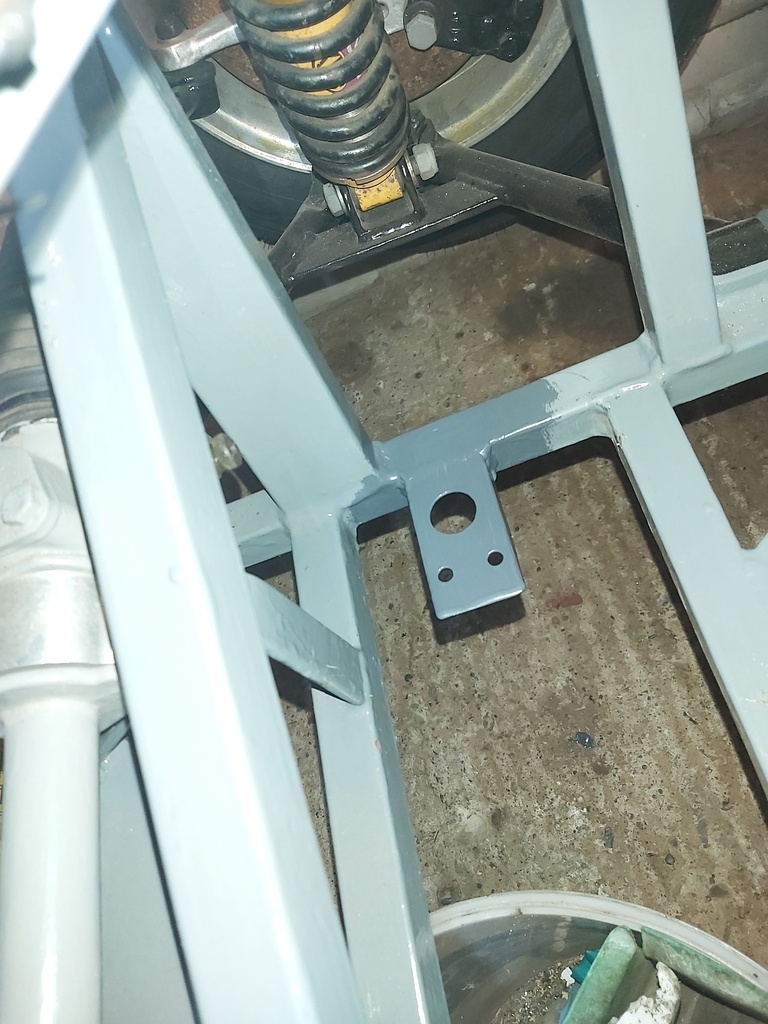 Whilst sorting things up the barn I found a NOS Sparkrite ignition coil with a nice chrome bracket - Figured it would save me work cleaning and painting the Bracket on the Klitz coil. The difference on size and weight between the two is considerable. 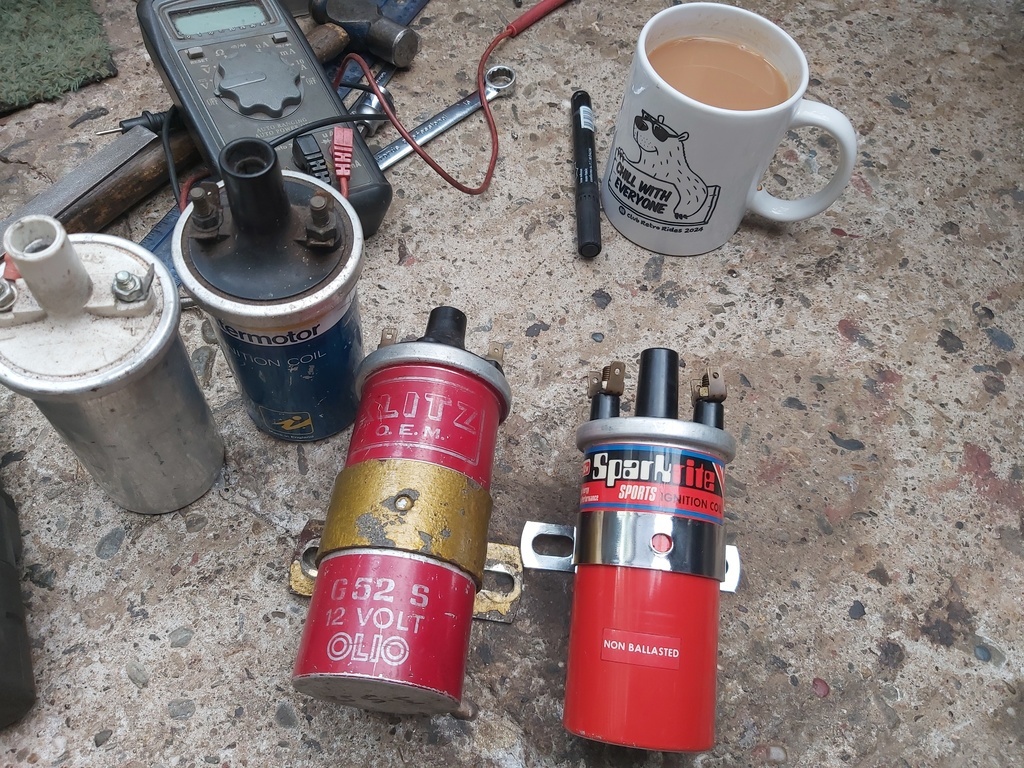 The other two coils are ballasted types - pretty sure there is a flamethrower brand coil kicking about somewhere. The Panhard got a coat of epoxy on it - just to decide what colour it gets tomorrow. Another Gemini has turned up - This has been kicking about for some time now - price wise it appears to be one that someone has added up the parts worth to get to its value - It has been chopped about a lot and will need a lot of work to get right. An interesting project all the same. 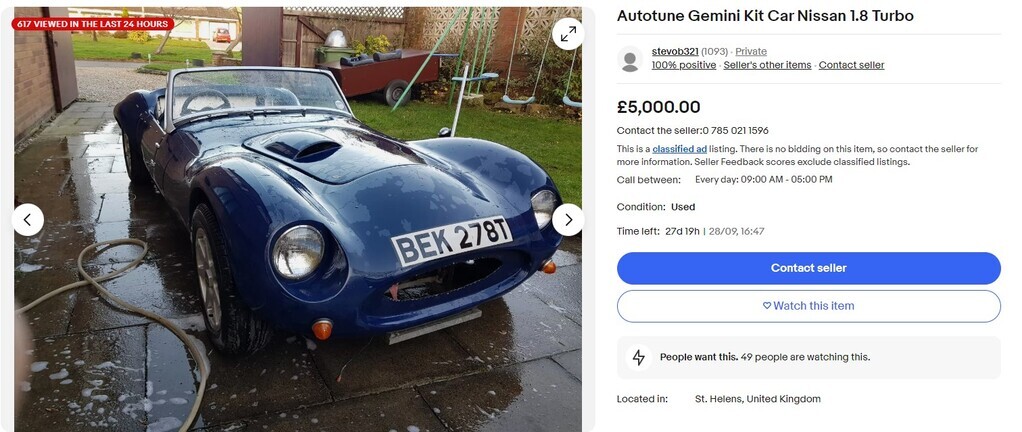 |
| |
|
|
Darkspeed
Club Retro Rides Member
Posts: 4,874
Club RR Member Number: 39
|
|
Sept 7, 2024 21:00:36 GMT
|
Everything that needed paint got painted. Once dry the Cooler, Fuel Pump and Panhard got fitted. 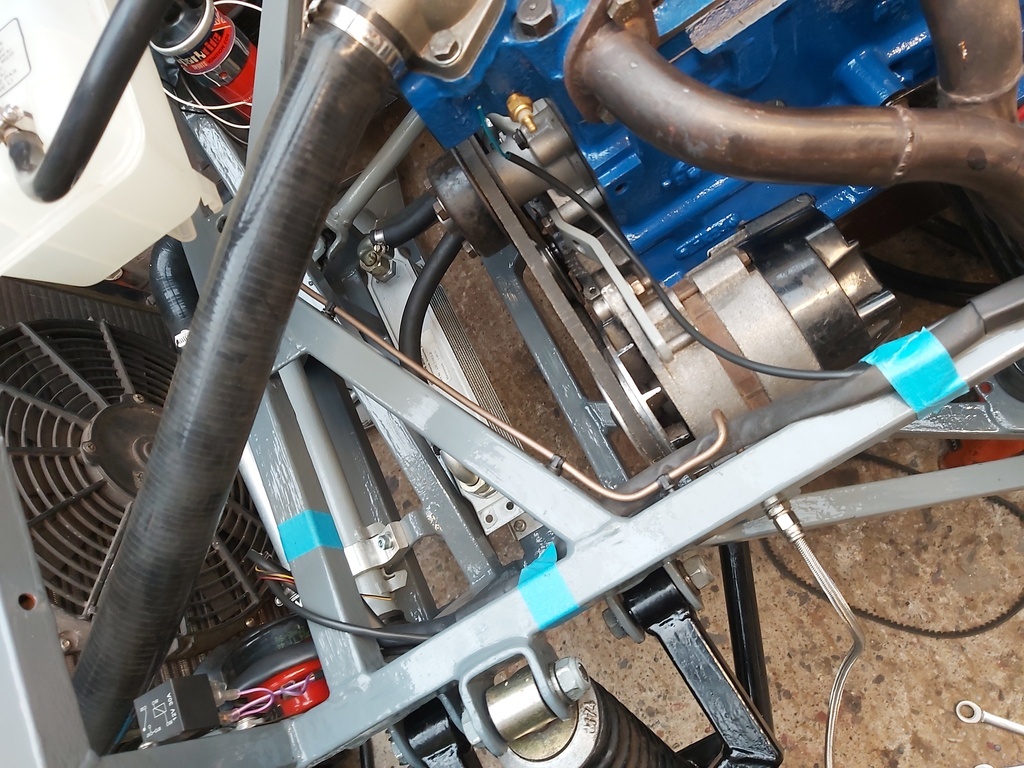 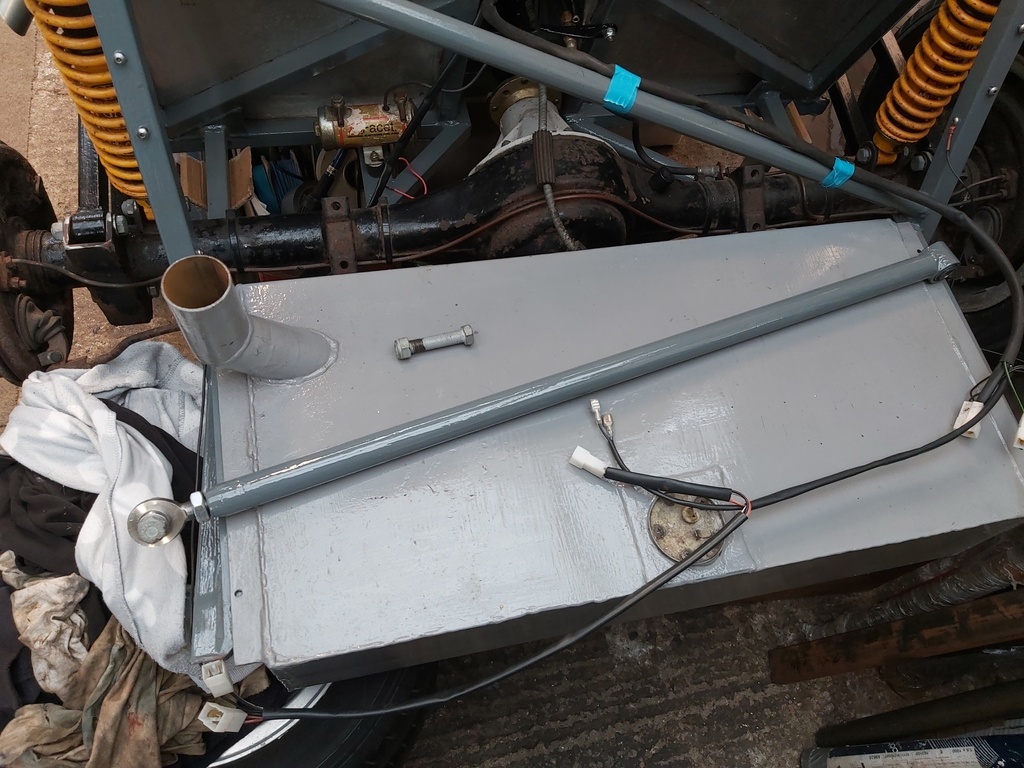 A pair of stainless brake hoses got made up and fitted - will swap out for a set from Hel once I am fully happy with the lengths. 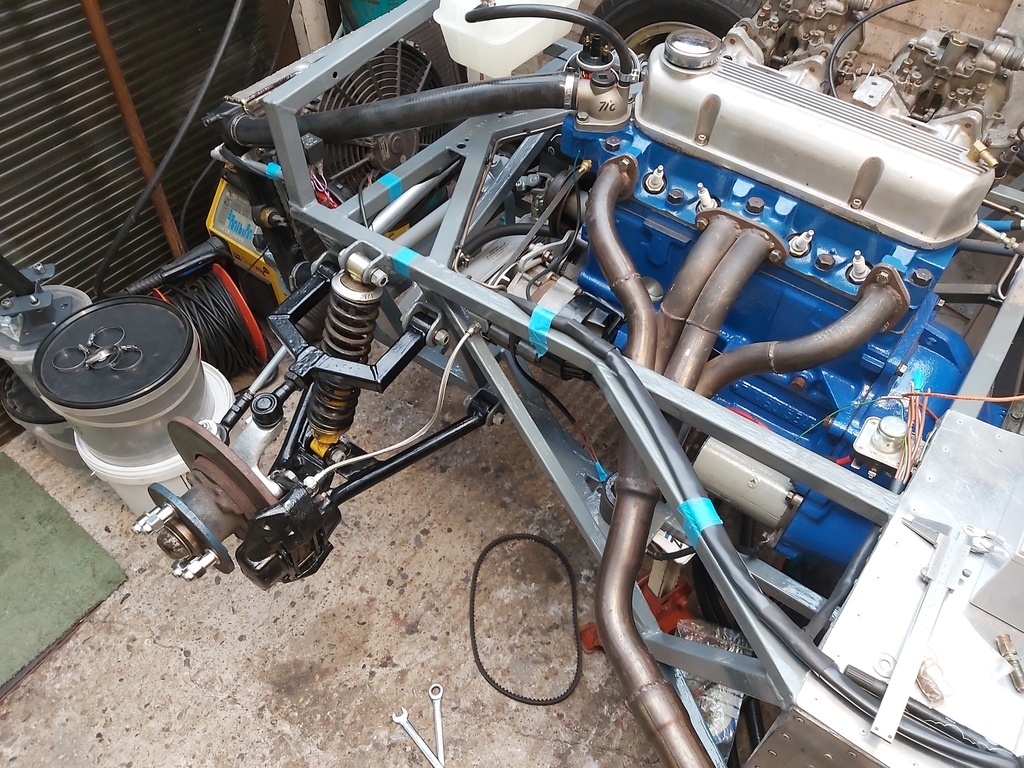 A wideband boss got welded in - need to order a tap now as they always distort a little and I really do not want a bung or a probe getting stuck in there. 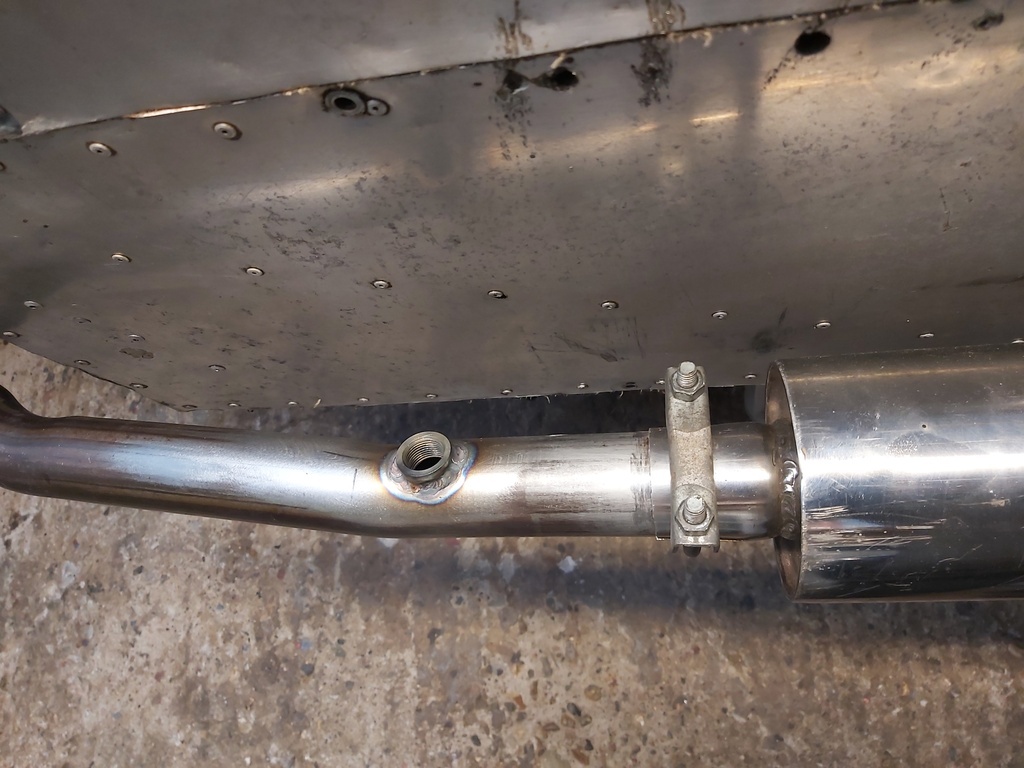 The masters got put through the ultrasonic and reassembled 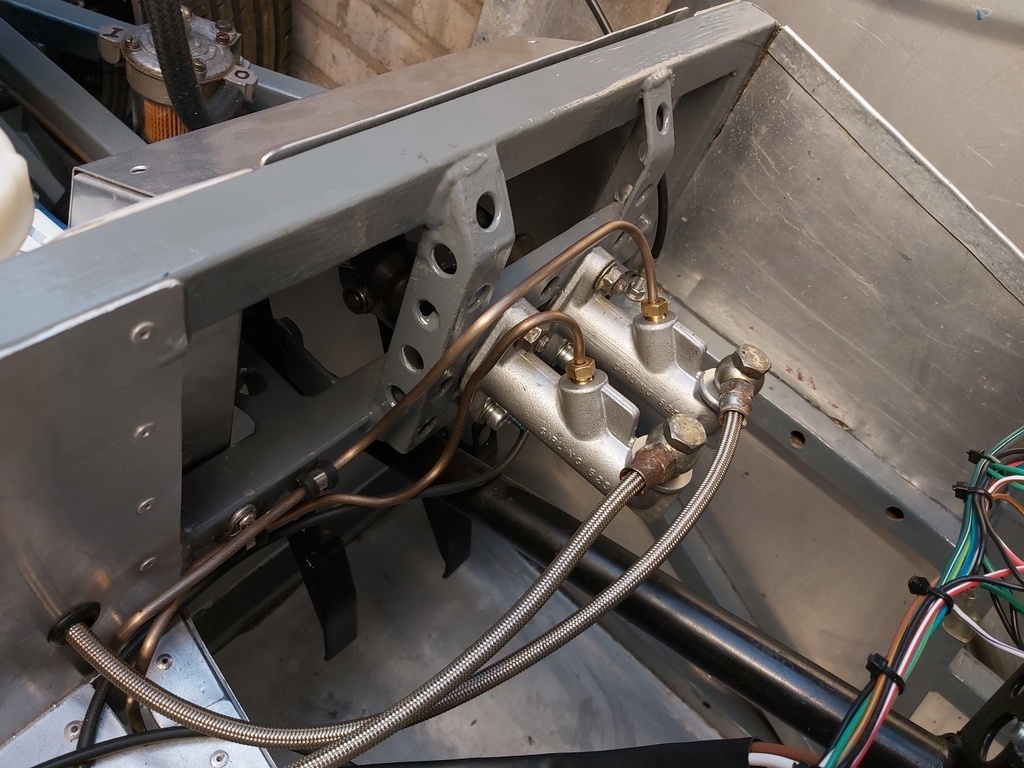 Found a gaiter for the gearlever 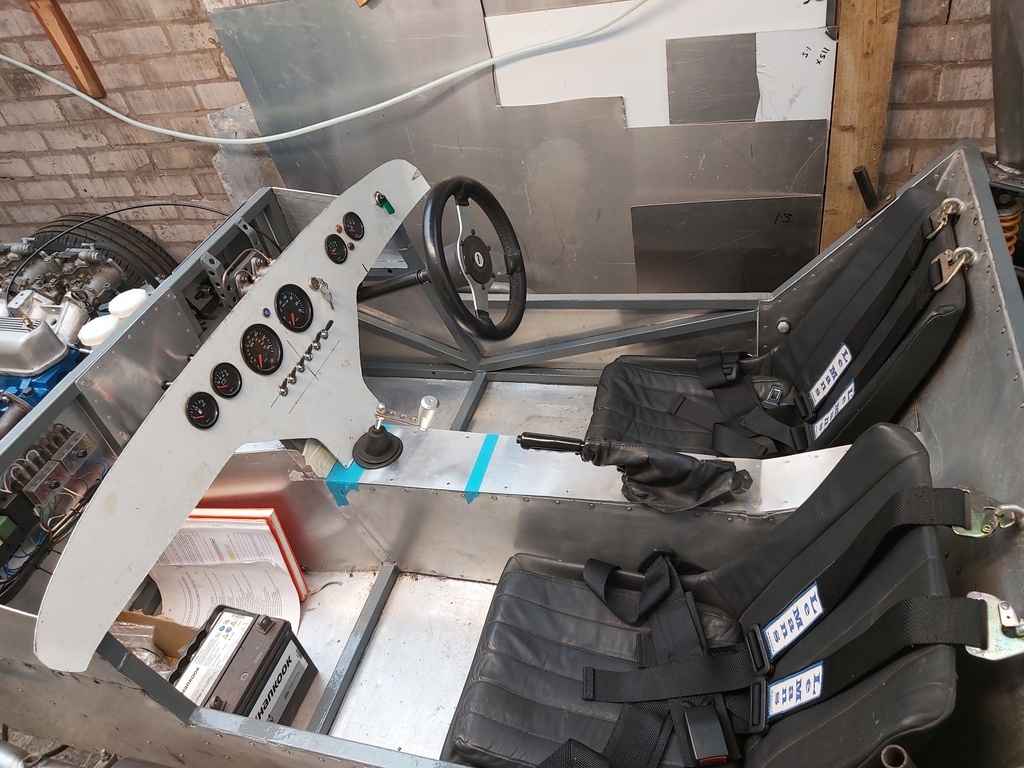 Reset the tappets Measured up for a battery to fit in the passenger footwell - will be going for a PC545 Started going through the coolant hoses - need to make up an adapter for pump to expansion tank. Bolted the fuel tank in Checked the wiring for the Oil and Alt tell tails - all good Need an earth point for the fuel pump. May need to move the drivers seat forward a little now that the pedal position has been improved. Oil pressure switch next, followed by filling the engine with oil and seeing if it will build pressure? Getting close now. |
| |
|
|
Darkspeed
Club Retro Rides Member
Posts: 4,874
Club RR Member Number: 39
|
|
Sept 8, 2024 16:55:39 GMT
|
Figured I would have a go at building oil pressure today. Fitted the pressure sender and put the ring terminals on the wiring - Did the coolant sensor wiring as well whilst I was at it. Lamp came on with the ignition switch Filled the oil filter, oil cooler and the sump Packed the oil pump with Superdrug Adult Vapour Rub ! (Closest thing to Vaseline I could easily find) The engine took the full 5 litres to get to the Max mark on the dipstick as its quite a large sump. 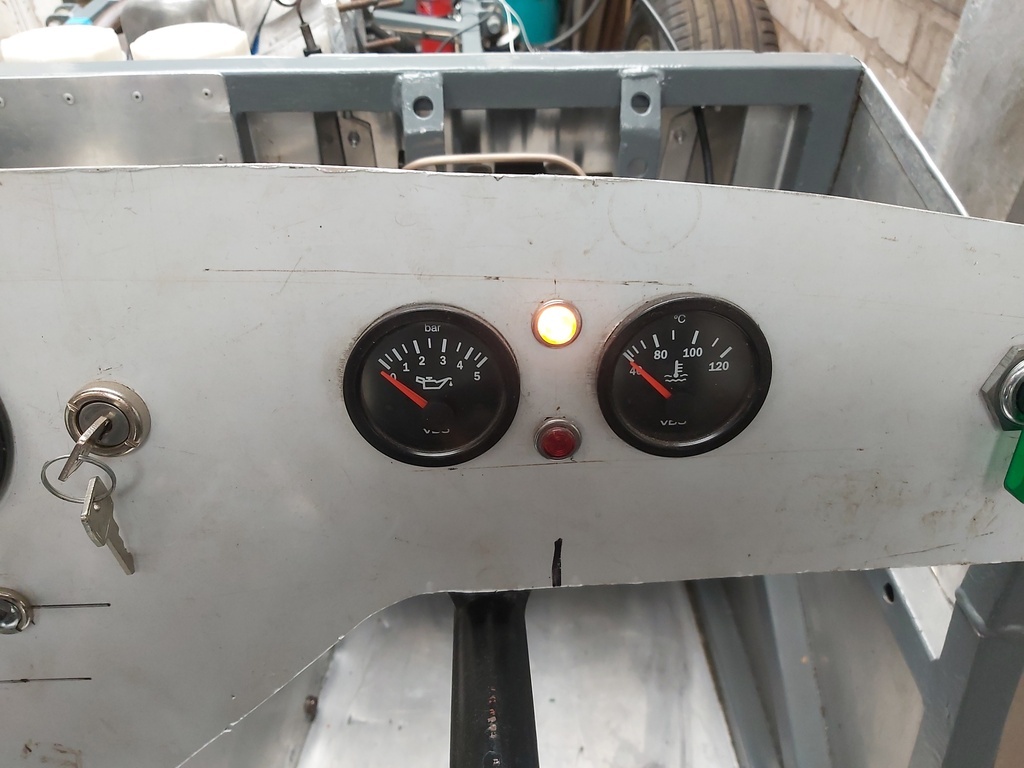 Ready to turn.... About 20 seconds later - with no unexpected or concerning noises 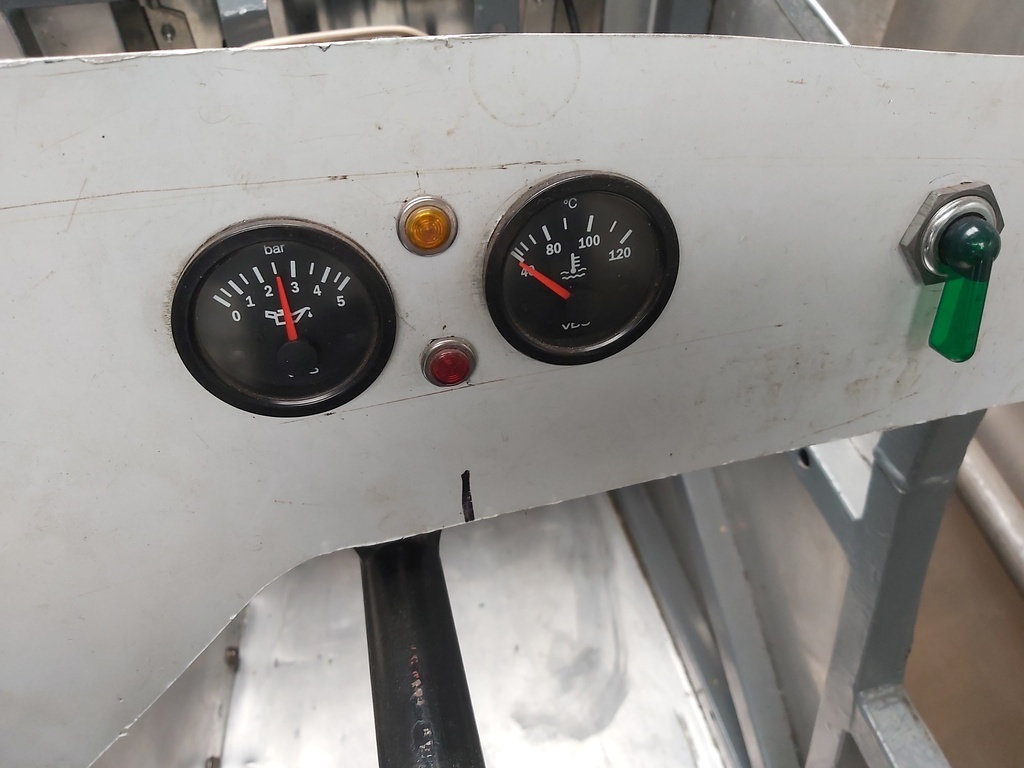 Being only a 5 bar (75 PSI) gauge I have a feeling that for the most part when running it will be reading at the very top of the scale. The starter motor did not seem the strongest. I am not expecting great things when the plugs go in. Coolant next. |
| |
|
|
|
|
 That reminds me that I have to get a move on and do the back stay brackets and support for these cars.
 That reminds me that I have to get a move on and do the back stay brackets and support for these cars.


