Tamber
Part of things
  Shattered. Held together by spite and tape.
Posts: 342
Member is Online
|
|
|
|
Still taking short bursts at it; I've started rebuilding the rear corner panel for the passenger side which is coming along quite nicely when my welder plays nice. There's something screwed up in the torch that even a new liner didn't fix, so I've got a new welding torch on the shopping list, and in the meantime I'm using the TIG. More metal-forming and welding to do yet before I get it to the stage I can hang it on the truck, but it's all progress. Did take a trundle down to the unit to drop off more workshop equipment (nothing too fancy, just a proper bench grinder because it's a real pain getting things done without one.) and will myself into poking at something, while I was still capable of standing; which turned into scraping and peeling paint 😀 The really big news for today is that thanks to that, I have finally got confirmation of something I've been pretty confident I was right about. So, I took the little body tag off the nearside to let me clean up that little bit behind it to make way for new paint... 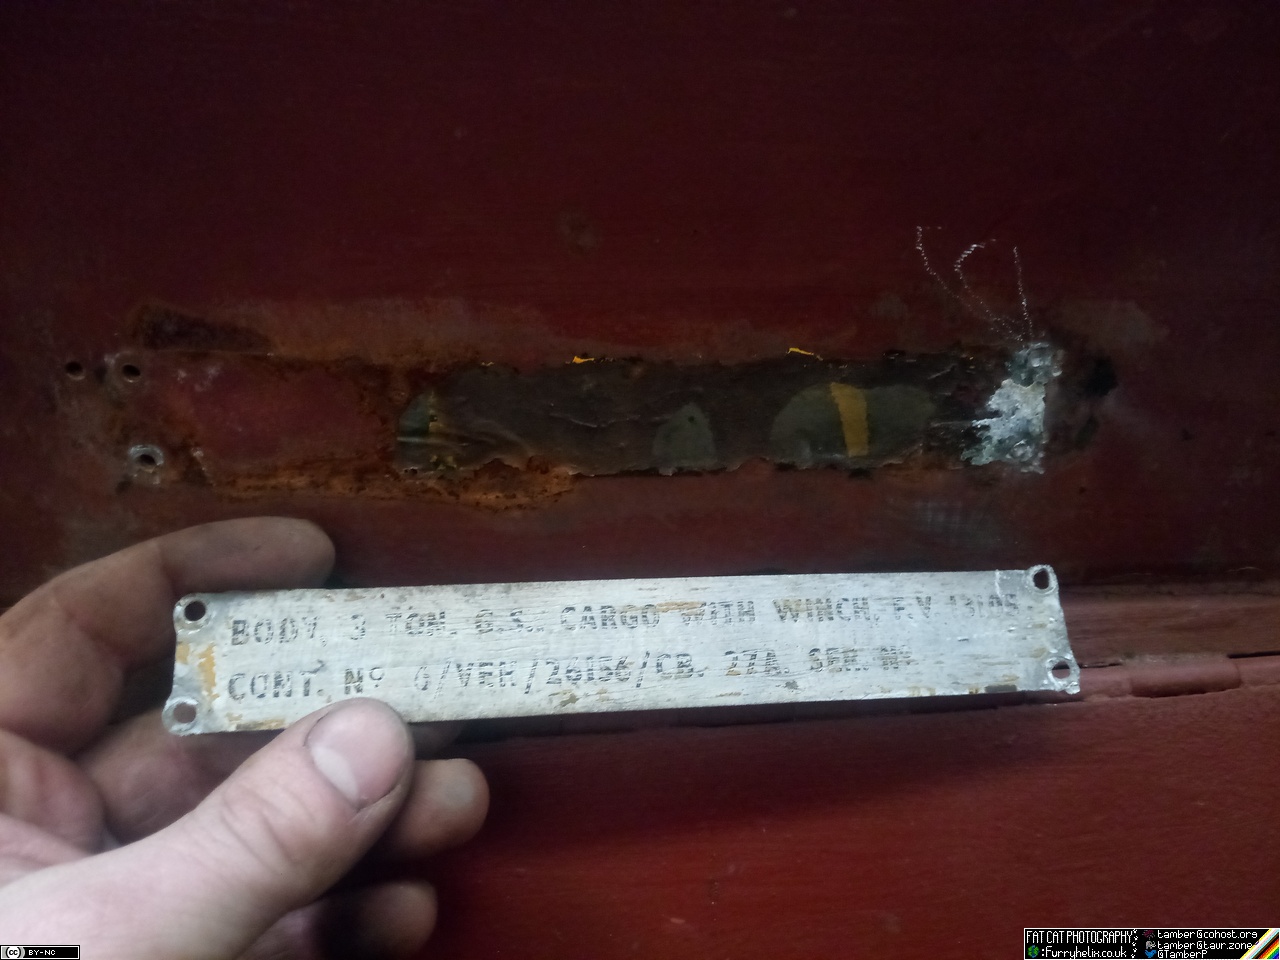 And on the back side of it, I found some magic words stamped in! 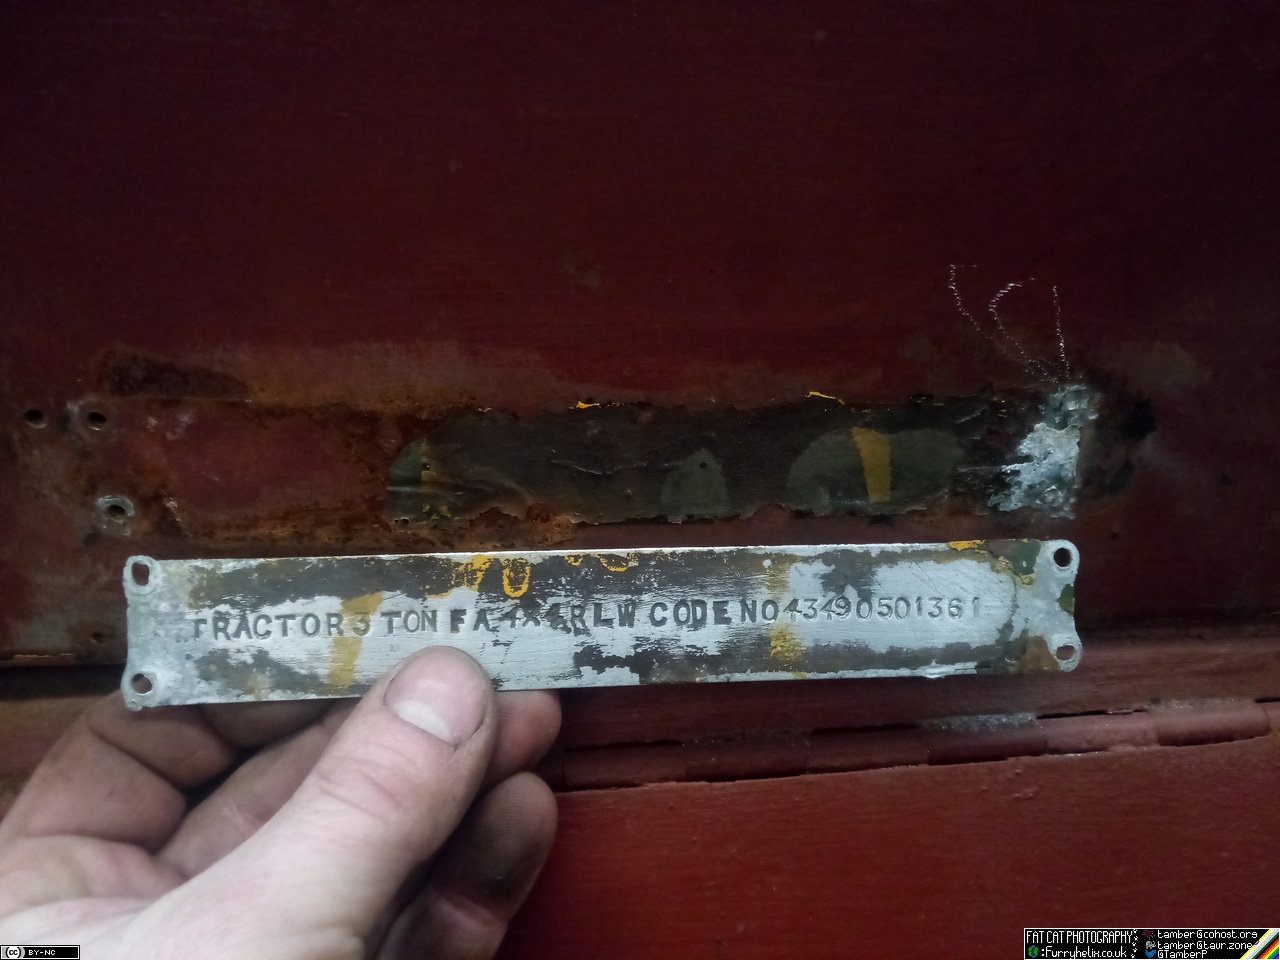 TRACTOR 3 TON FA 4x4 RLW CODE NO 43490501361 TRACTOR 3 TON FA 4x4 RLW CODE NO 43490501361This not only confirms my suspicions of Field Artillery conversion; but IMO also puts a line in the sand as far as date of conversion, in the form of the vehicle code number using the system that -- according to sources -- was phased out by VESPER from 1964. So, the mystery timeline gains another data-point! |
| |
Last Edit: Mar 9, 2024 19:17:47 GMT by Tamber: linky
-< Welder. Allegedly a mechanic. Bodger of Things >-
* 1958? Bedford RL - Progress: Glacial.
* 1994 Skoda Favorit - It's baaaaaaaack!
* 2018 Herald Classic - Gone!
|
|
|
|
Tamber
Part of things
  Shattered. Held together by spite and tape.
Posts: 342
Member is Online
|
|
|
|
Speaking of making way for new paint... 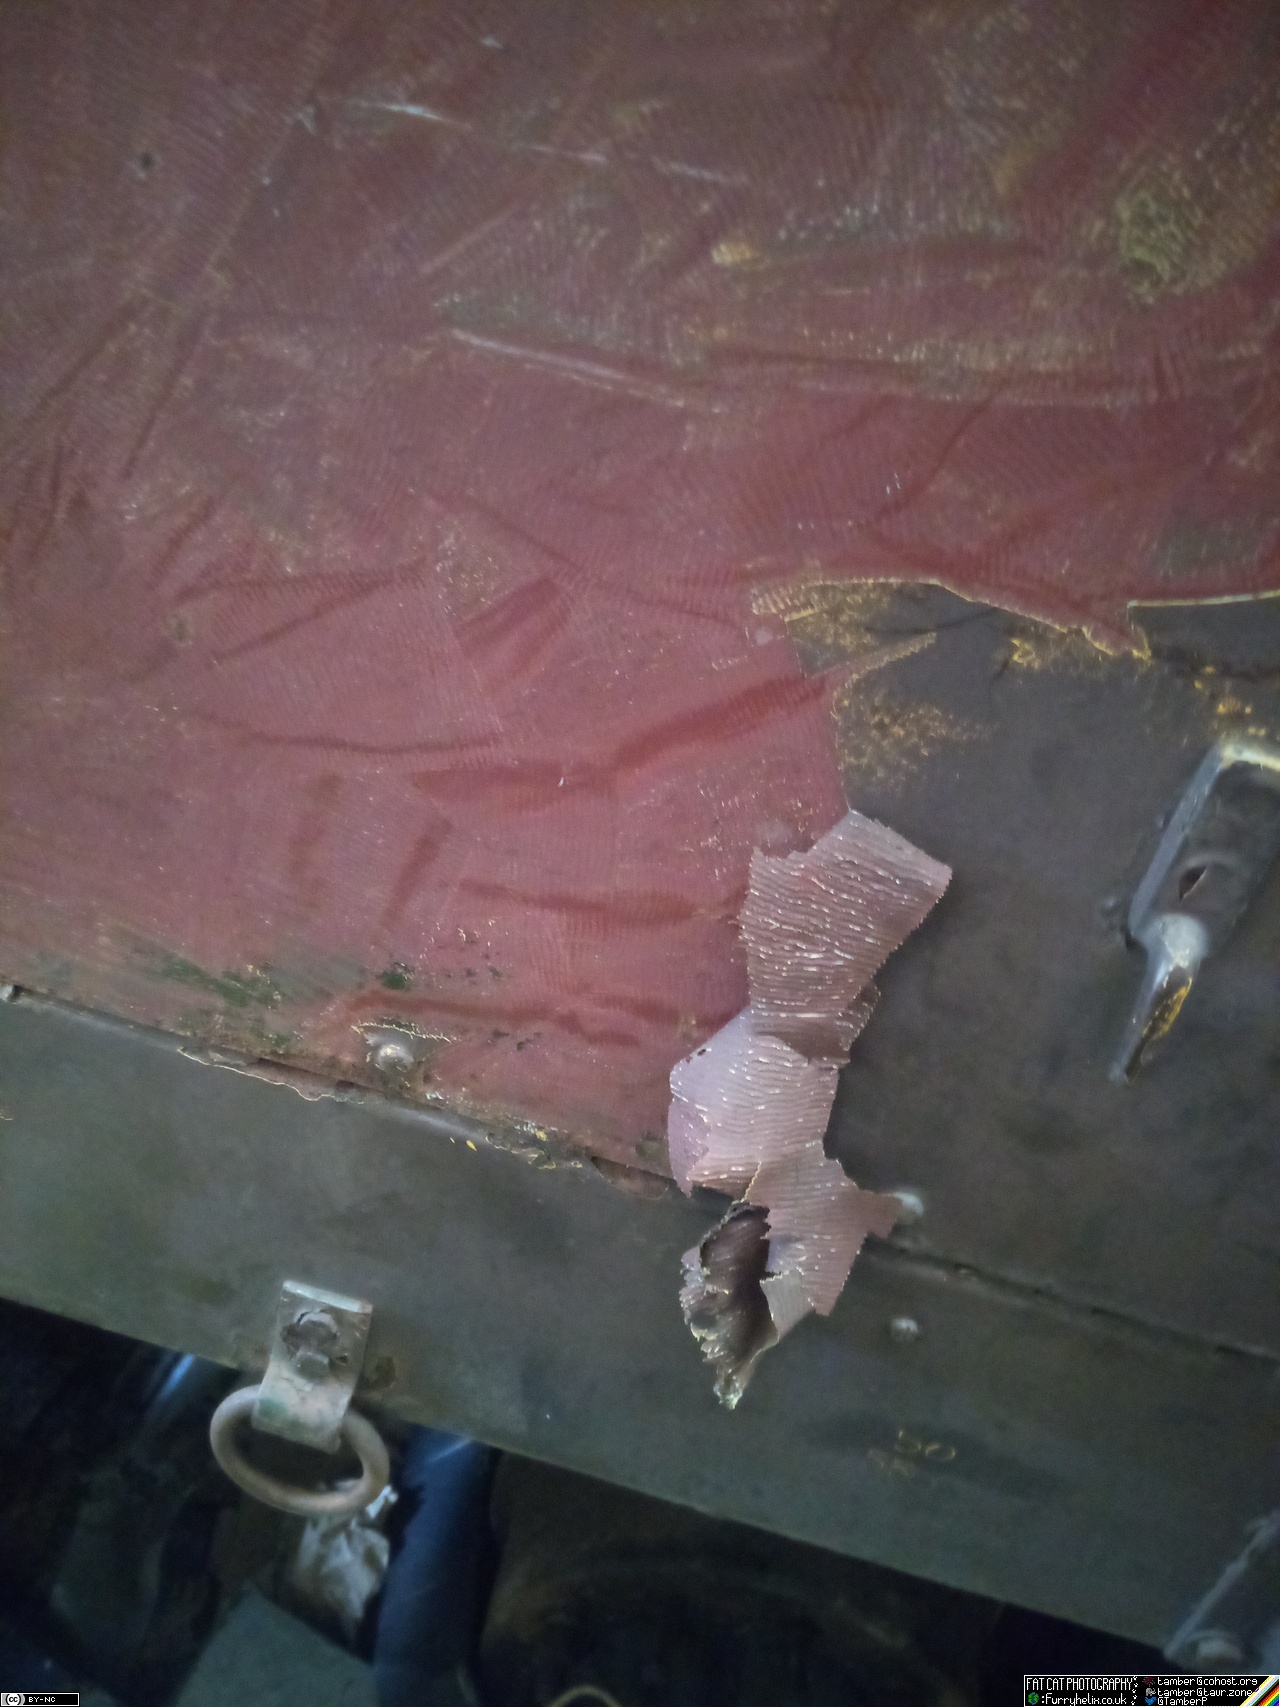 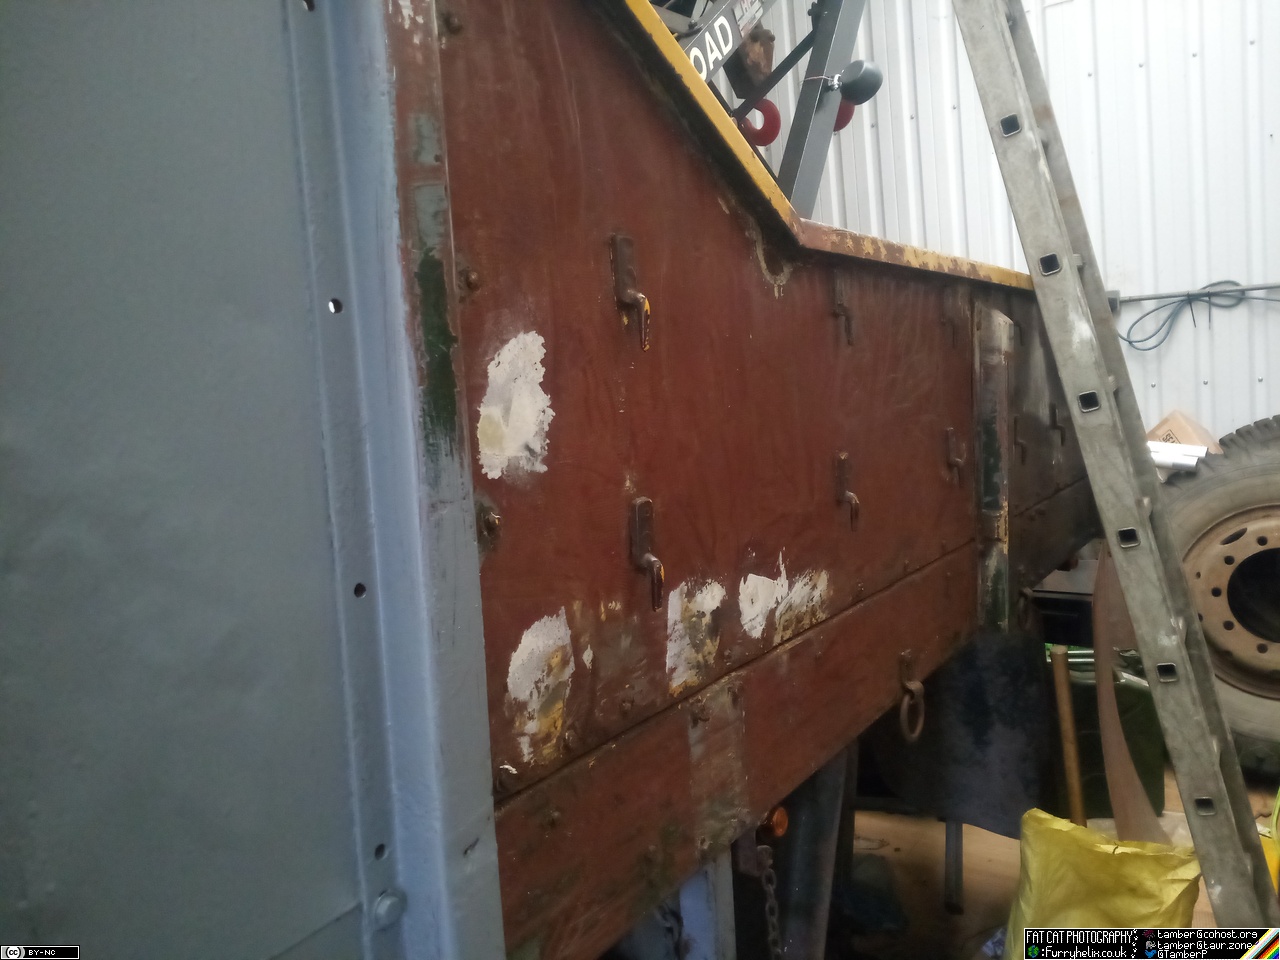 Technique that appears to be working the best at the moment is a hot-air gun and a wide scraper. The paint softens nicely and just peels off, rather than turning into dust and fragments. 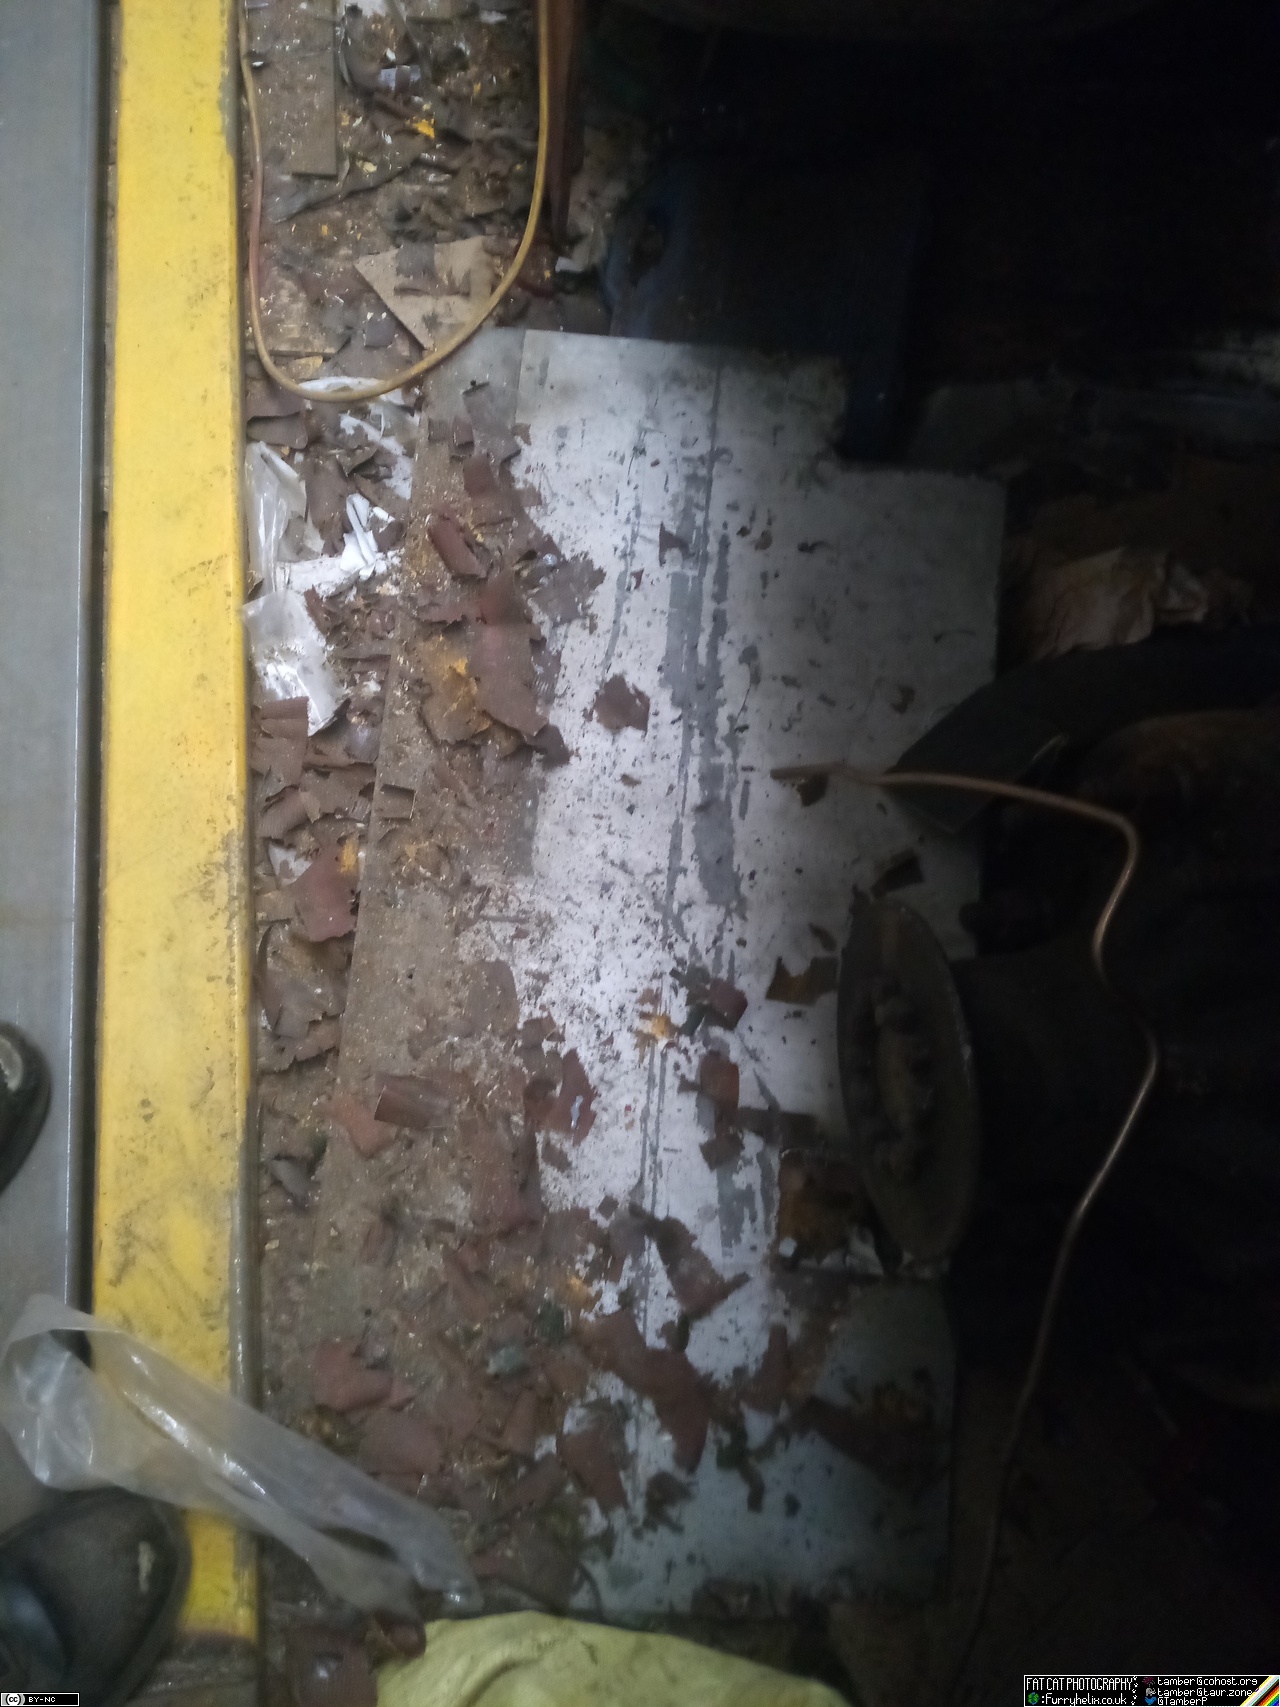 And a first coat of heavy zinc primer, after beating all the pitted spots and filler patches with the wire brush to see what happens 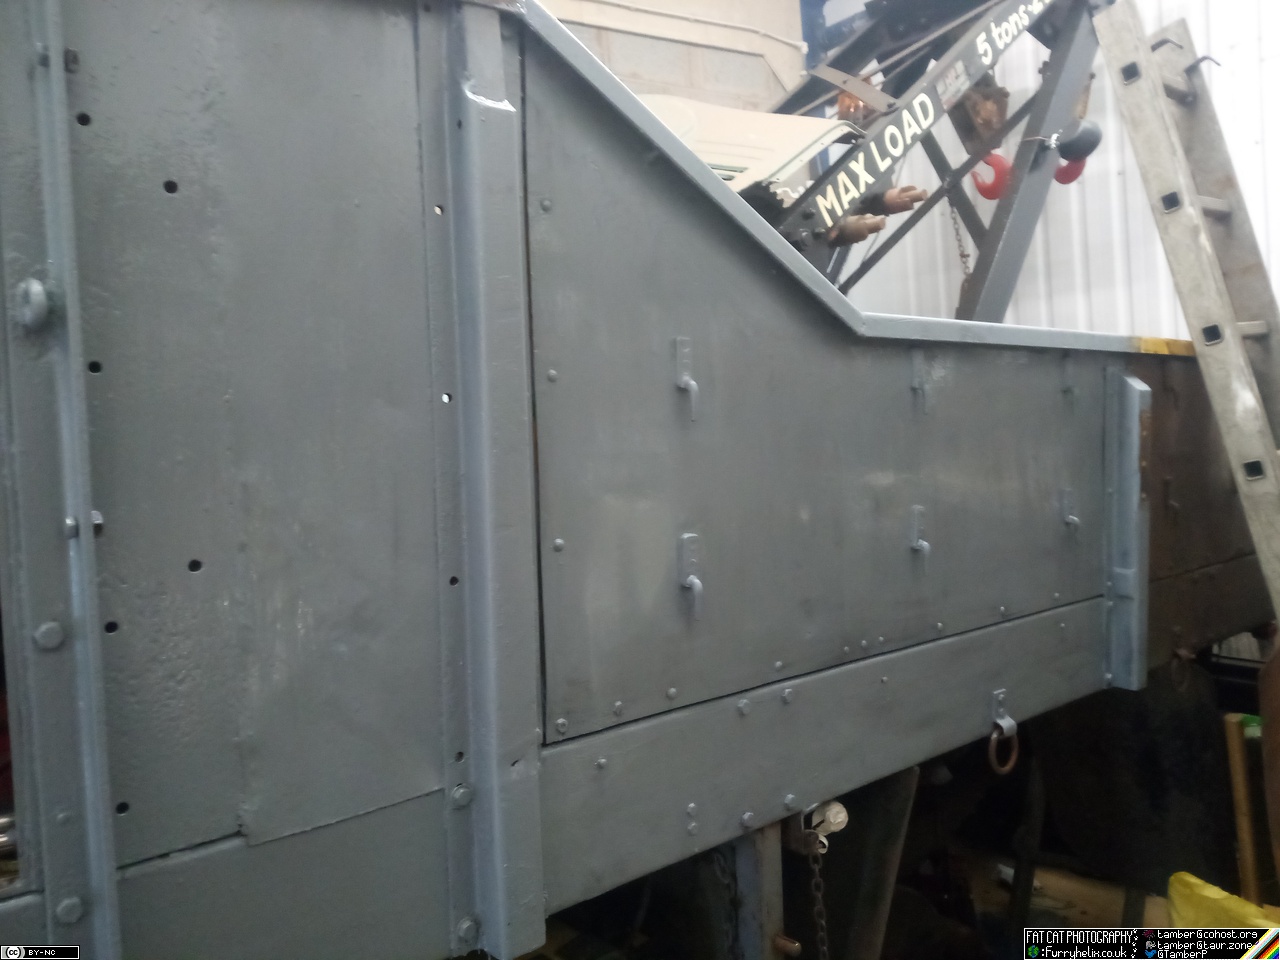 Thankfully, none of the pitting or filler turned out to be hiding any big trouble, so I'm hoping I can blitz through this side fairly easily. Only the rearmost section of the body, and the locker doors, to do before I can start thinking about laying on yellow paint. And I'm pretty hopeful that I can get away with not having to repeat the whole process on the other side, thanks to it not having been painted over with the mystery brown paint. 'course, I'm also still undecided on whether (and how) I want to do a tilt, which would then mean I need to add mounting points for that before painting... Would be nice to have a covered portion over the back, though. Maybe I'll just add the brackets, then it doesn't matter if I can't make my mind up.) While I'm waiting for next week's paycheck, so I can pick up the new welding torch and some other assorted bits (New nuts & bolts for the locker I removed, in particular. ...a locker which I need to give a coat of black paint, come to think of it.), I'm giving serious thought to attacking the insides of the lockers with the powered wire brush and hoover... Clean them up and get them at least in primer, because I'm sick of everything being a shower of rust flakes all the time, especially into wet paint!  Will have to get a bucket of white paint for the locker internals, too, when I can. (Lockers are a lot more useful when painted white. Especially if there's a light fitted! Now there's an idea...) |
| |
-< Welder. Allegedly a mechanic. Bodger of Things >-
* 1958? Bedford RL - Progress: Glacial.
* 1994 Skoda Favorit - It's baaaaaaaack!
* 2018 Herald Classic - Gone!
|
|
glenanderson
Club Retro Rides Member
Posts: 4,361
Club RR Member Number: 64
|
|
Mar 17, 2024 11:52:27 GMT
|
|
I can definitely vouch for white paint inside lockers and cupboards. 👍
|
| |
My worst worry about dying is my wife selling my stuff for what I told her it cost...
|
|
Tamber
Part of things
  Shattered. Held together by spite and tape.
Posts: 342
Member is Online
|
|
Mar 17, 2024 12:56:48 GMT
|
I have also, while poking around online this morning while refuelling (coffee, bacon & egg on toast) was ongoing, discovered an answer to one of my previous ponderings! Remember this? 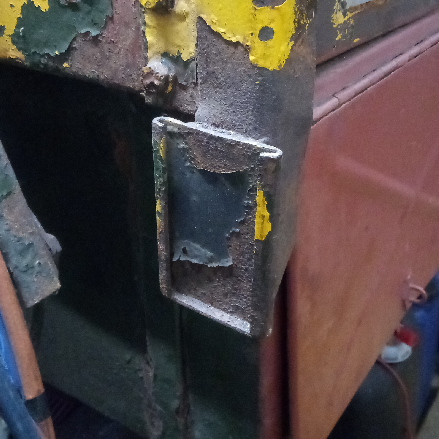 Turns out, it's for this: 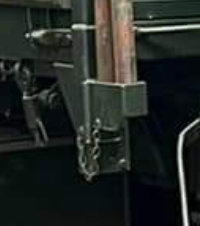 Which lets you do this: 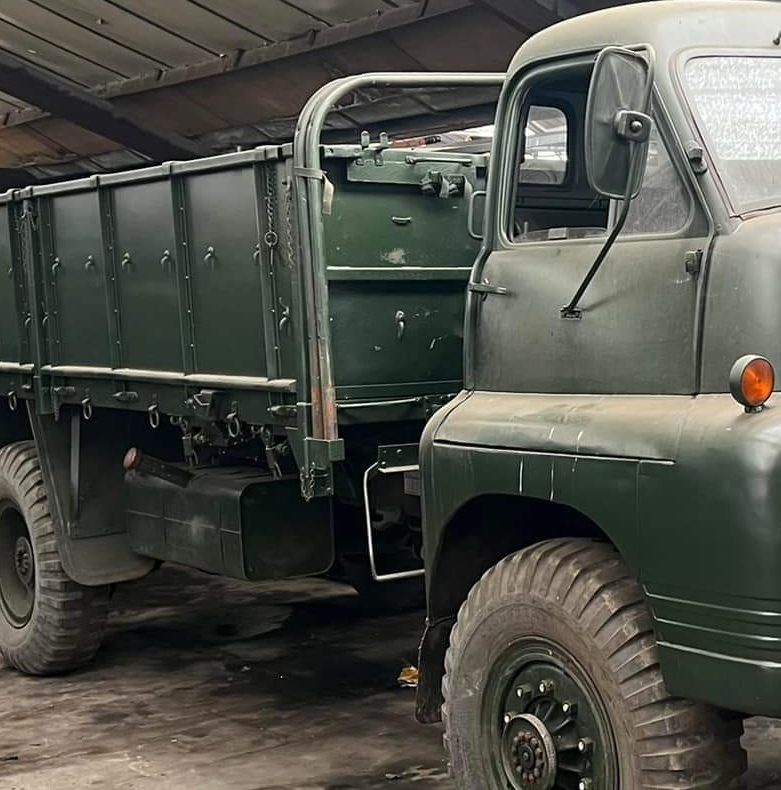 And now I know. 🌈🌟 |
| |
-< Welder. Allegedly a mechanic. Bodger of Things >-
* 1958? Bedford RL - Progress: Glacial.
* 1994 Skoda Favorit - It's baaaaaaaack!
* 2018 Herald Classic - Gone!
|
|
|
|
|
Mar 17, 2024 18:54:27 GMT
|
|
I hate to be the one to ask the stupid question but I guess it's my purpose in life.
What are they?
I'm guessing hoops for a canvas top. But I'd think you'd need a couple more of them. Might be cool and it would keep the rain off your crane.
Or maybe they are to make a roll cage for when you want to rag it sideways down a country lane?
James
|
| |
|
|
Tamber
Part of things
  Shattered. Held together by spite and tape.
Posts: 342
Member is Online
|
|
Mar 17, 2024 21:41:26 GMT
|
I hate to be the one to ask the stupid question but I guess it's my purpose in life. What are they? I'm guessing hoops for a canvas top. But I'd think you'd need a couple more of them. Might be cool and it would keep the rain off your crane. Or maybe they are to make a roll cage for when you want to rag it sideways down a country lane? James Got it in one! They're the hoops for the canvas tilt.  There's some other pieces that run between them, to support the fabric. I'm thinking having it only extend over the length of the lockers, which still leaves the area around the crane exposed for working in; but provide some covered space on the back of the truck, out of the rain. I was also thinking of having the cover made out of the same PVC tarpaulin that tautliner curtains are made of, in a similar sort of yellow to the body. I know, it's a lot of yellow in one place, but anything else might look out of place. In other items, I have now almost completely stripped and primed the nearside. Only the locker doors to do, now. Interestingly, the paint is a lot harder to strip where it's only the yellow (and brown); where it's painted over the top of the DBG comes off lovely. Well, I guess the DBG comes off lovely, and takes the rest with it.  Just after 2pm today: 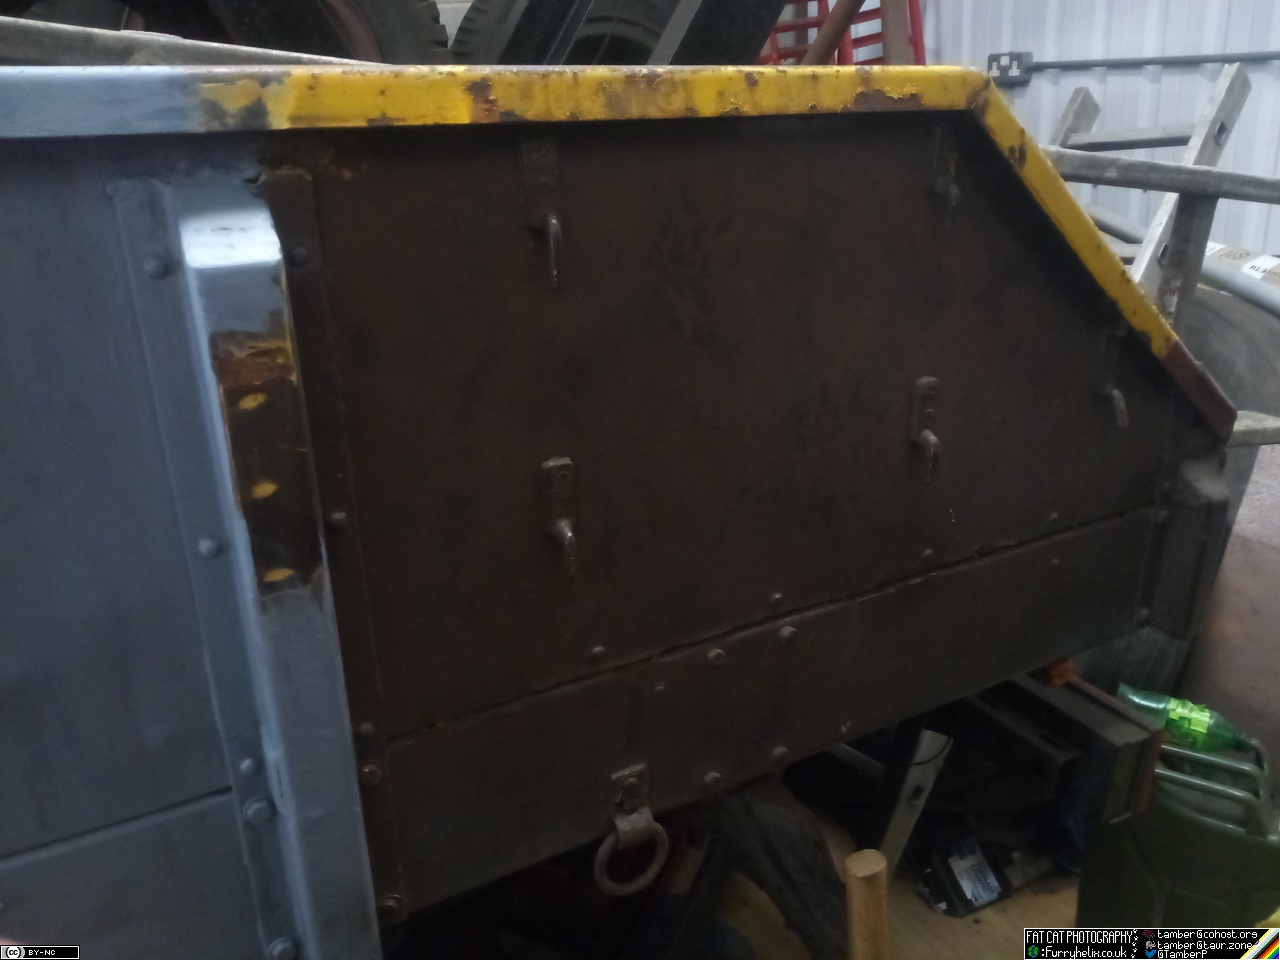 And by a few short hours later: 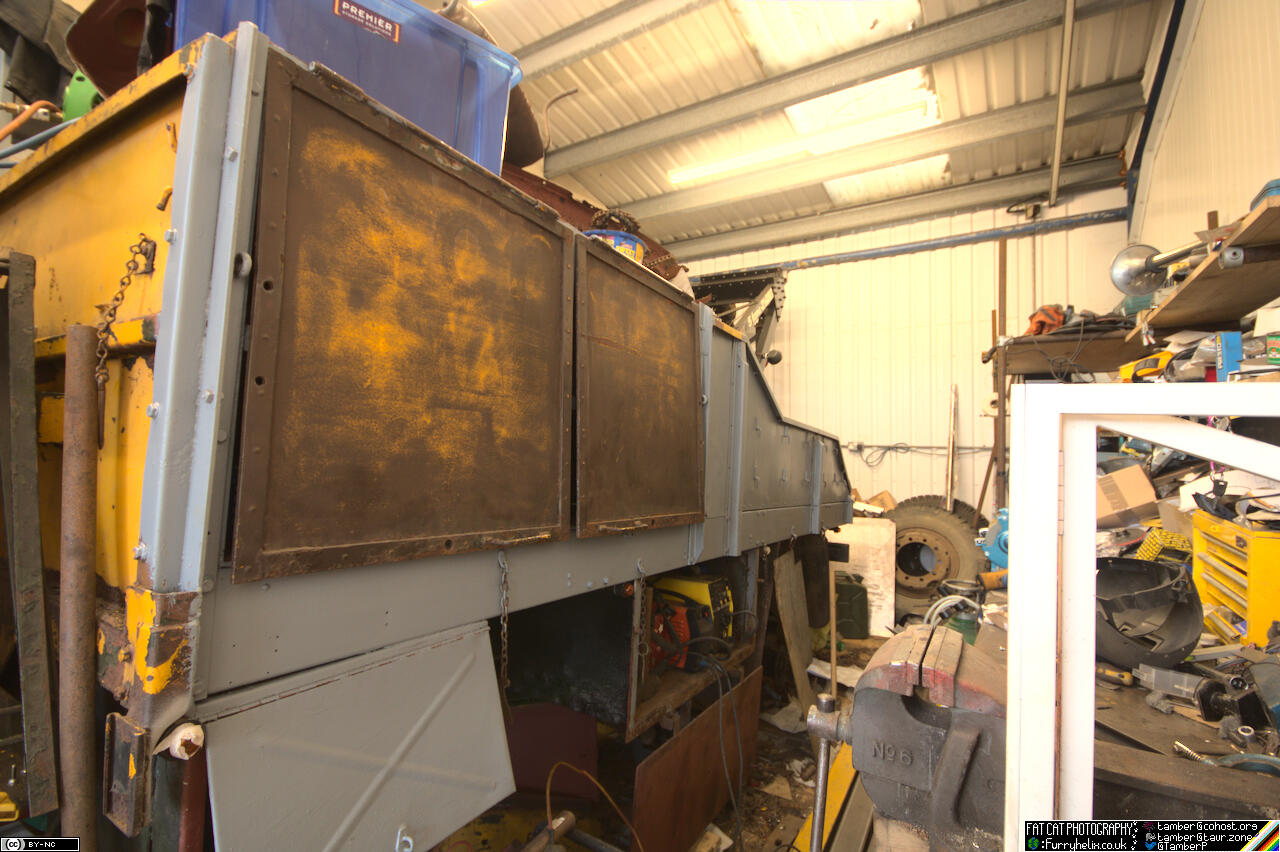 I did do some tinkering with mockup-bracketry for a tilt, because it's now seeming like a very good idea (if only to give me more space to dump stuff  ), so that took up the rest of the evening. I reckon, tho, that I'm only a couple of hours away from having the whole nearside in primer, which is a good thought. Less fun is the thought of having to do the front of the body, too, but I really should while it's easy enough to get at. |
| |
-< Welder. Allegedly a mechanic. Bodger of Things >-
* 1958? Bedford RL - Progress: Glacial.
* 1994 Skoda Favorit - It's baaaaaaaack!
* 2018 Herald Classic - Gone!
|
|
Frankenhealey
Club Retro Rides Member
And I looked, and behold, a pale horse! And its rider's name was Death
Posts: 3,888
Club RR Member Number: 15
|
|
Mar 18, 2024 11:53:23 GMT
|
I was also thinking of having the cover made out of the same PVC tarpaulin that tautliner curtains are made of, in a similar sort of yellow to the body. The red Goddess tilt is made of the PVC tarpaulin and it's good stuff but a beggar to clean. It seems to absorb dust and dirt and even scrubbing and jet washing won't get it pristine again. Yellow might be a bridge to far. |
| |
Tales of the Volcano Lair hereFrankenBug - Vulcan Power hereThe Frankenhealey here |
|
|
|
|
Mar 20, 2024 10:00:50 GMT
|
|
I wonder would a 'sand' coloured canvas tilt look a little less jarring than green? Assuming they are available for stuff other than Land Rovers...
|
| |
|
|
Tamber
Part of things
  Shattered. Held together by spite and tape.
Posts: 342
Member is Online
|
|
Mar 22, 2024 23:25:24 GMT
|
The red Goddess tilt is made of the PVC tarpaulin and it's good stuff but a beggar to clean. It seems to absorb dust and dirt and even scrubbing and jet washing won't get it pristine again. Yellow might be a bridge to far. That might just make it match the rest of the currently-existing yellow paint on the truck...  I've had fairly good luck cleaning darker shades of the stuff stuff with work's steamer and TFR; but you're right, it'll be really noticeable with the yellow. I'll keep rotating the idea in my head, since I'm a ways off that yet. |
| |
-< Welder. Allegedly a mechanic. Bodger of Things >-
* 1958? Bedford RL - Progress: Glacial.
* 1994 Skoda Favorit - It's baaaaaaaack!
* 2018 Herald Classic - Gone!
|
|
Tamber
Part of things
  Shattered. Held together by spite and tape.
Posts: 342
Member is Online
|
|
Mar 23, 2024 19:43:45 GMT
|
Have I mentioned that my phone's white balance drives me round the twist? 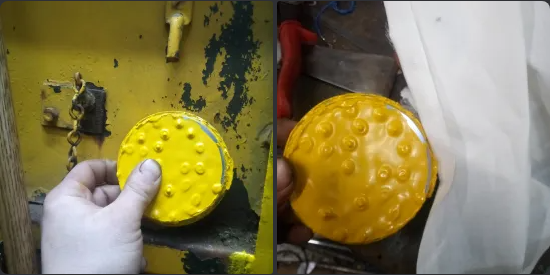 Anywho. Turns out, I need more yellow paint anyway. 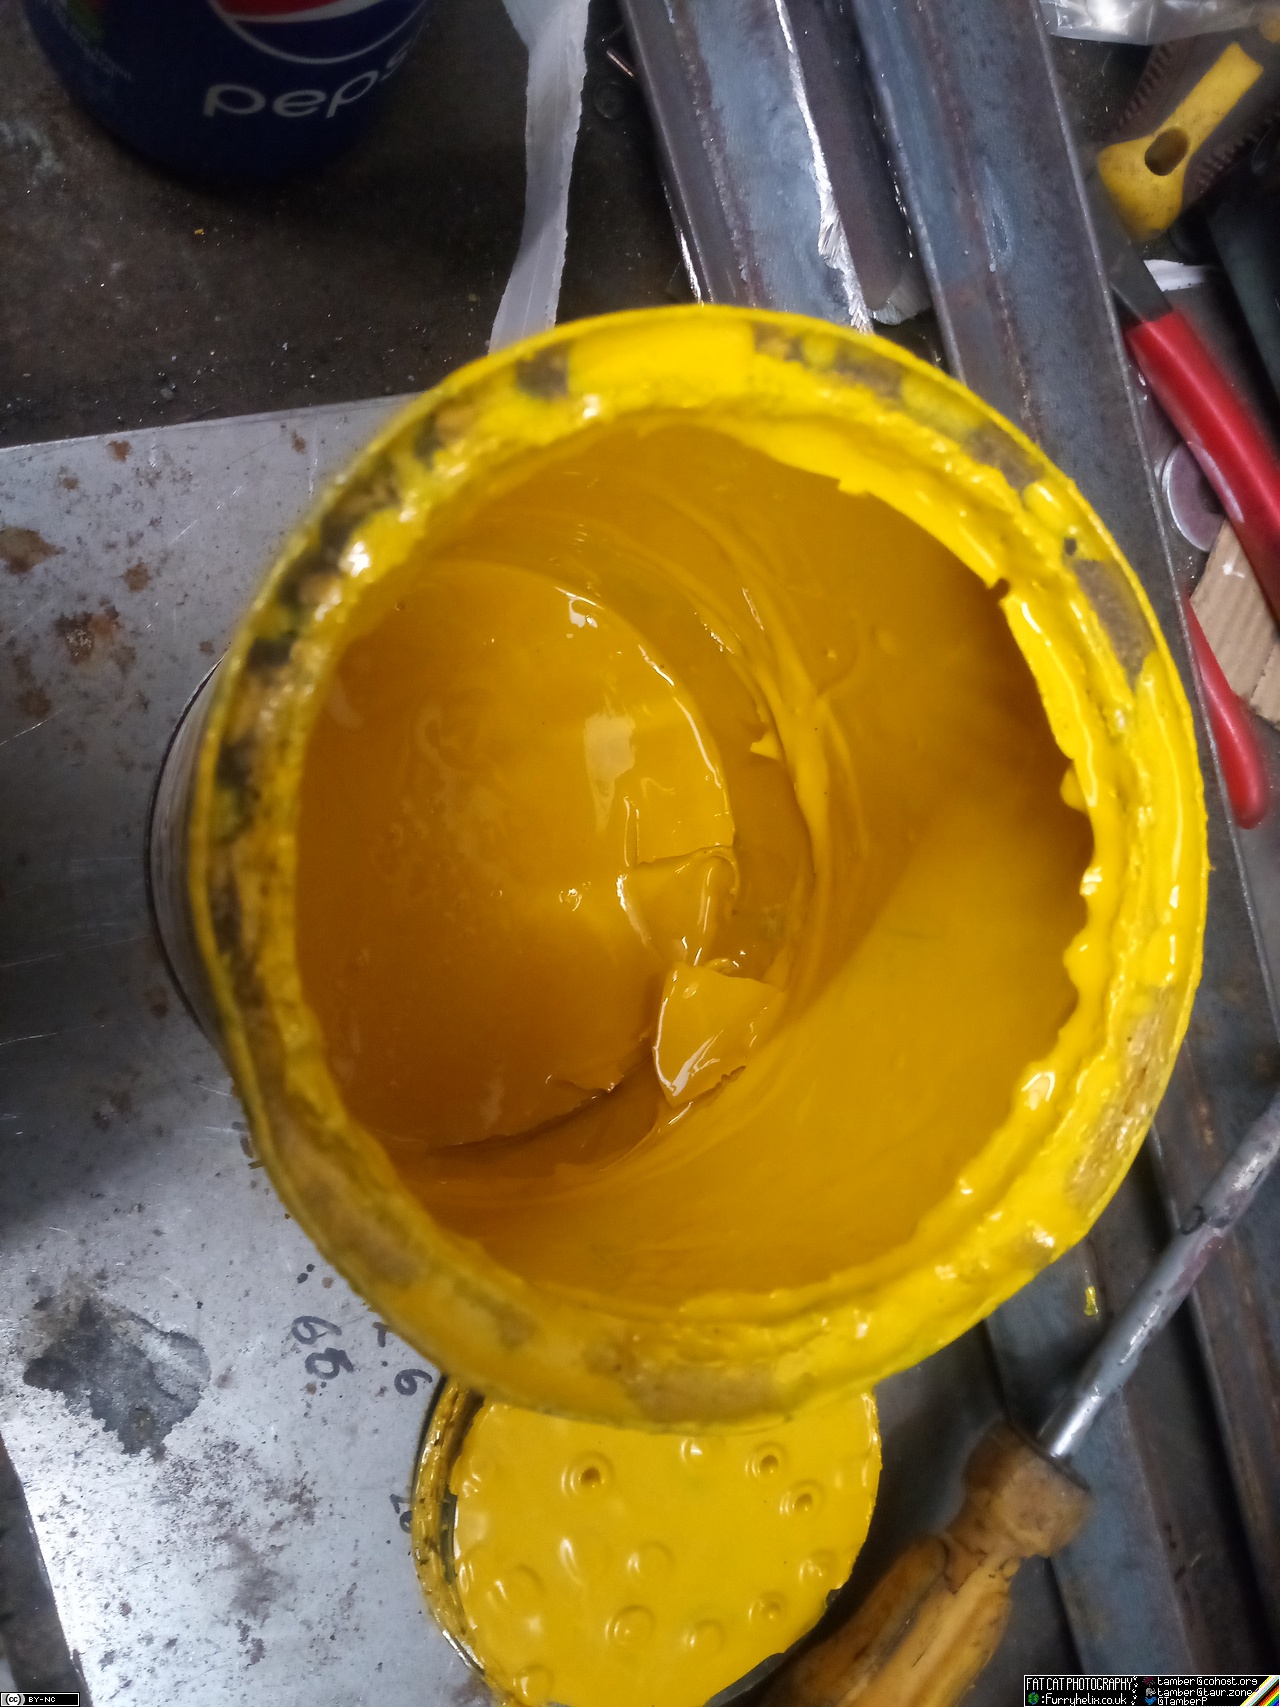 I know I said I wasn't planning on painting the side of the truck 'til I was sure about bracketry and whatnot, but I had an oopsie and my brush slipped. 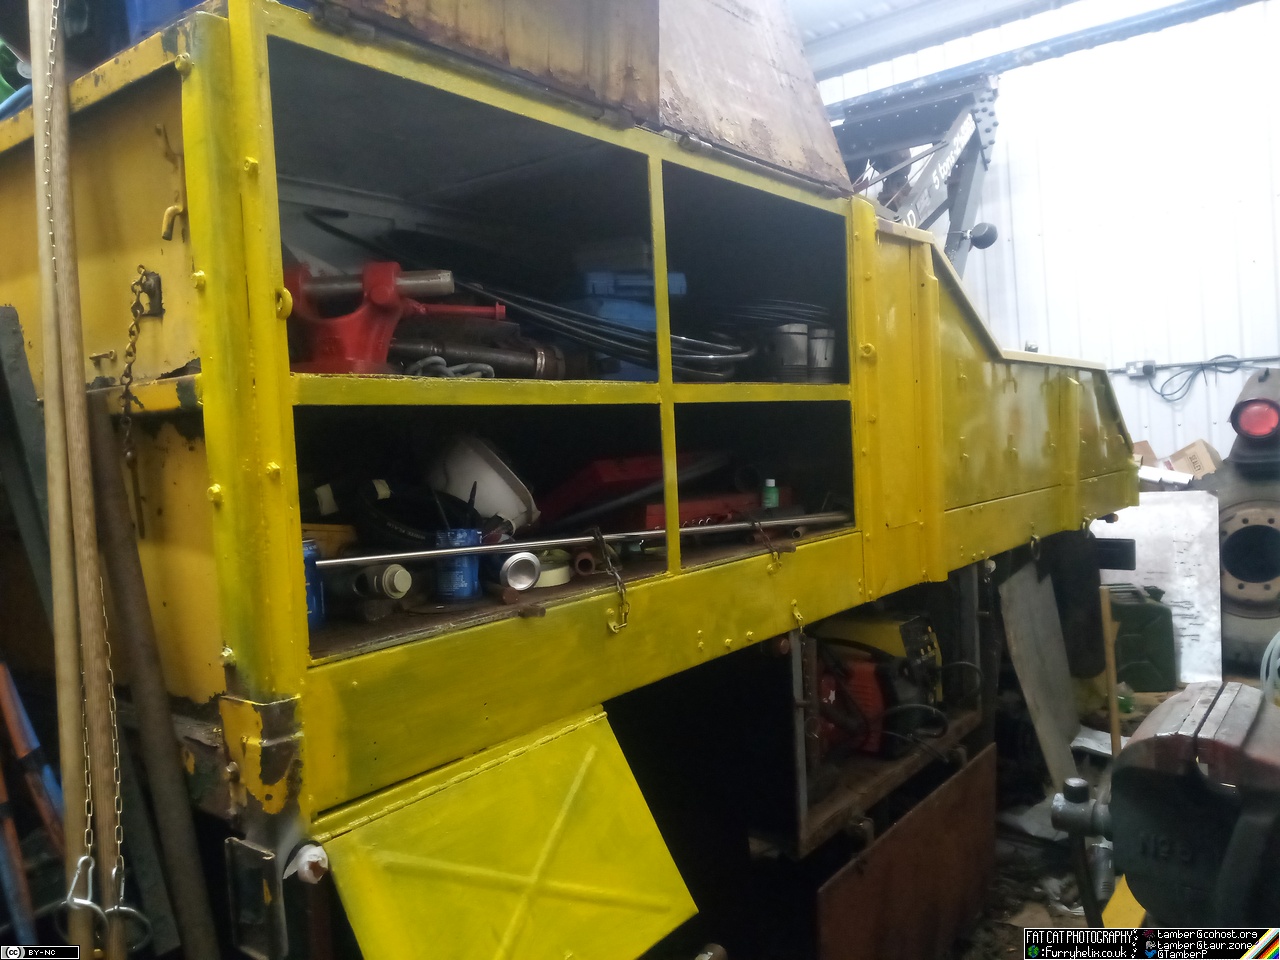 First coat always looks pretty grim; seems like the opacity isn't really there when brushing this stuff. I had enough in the tin to give a second coat to that centre panel, and that looks significantly better; but I suspect I'll probably be three or four coats in before I'm happy with it. And it seems to take about half a litre of paint per coat, give or take. And if I force my phone camera's white-balance to play nice, it's pretty good. 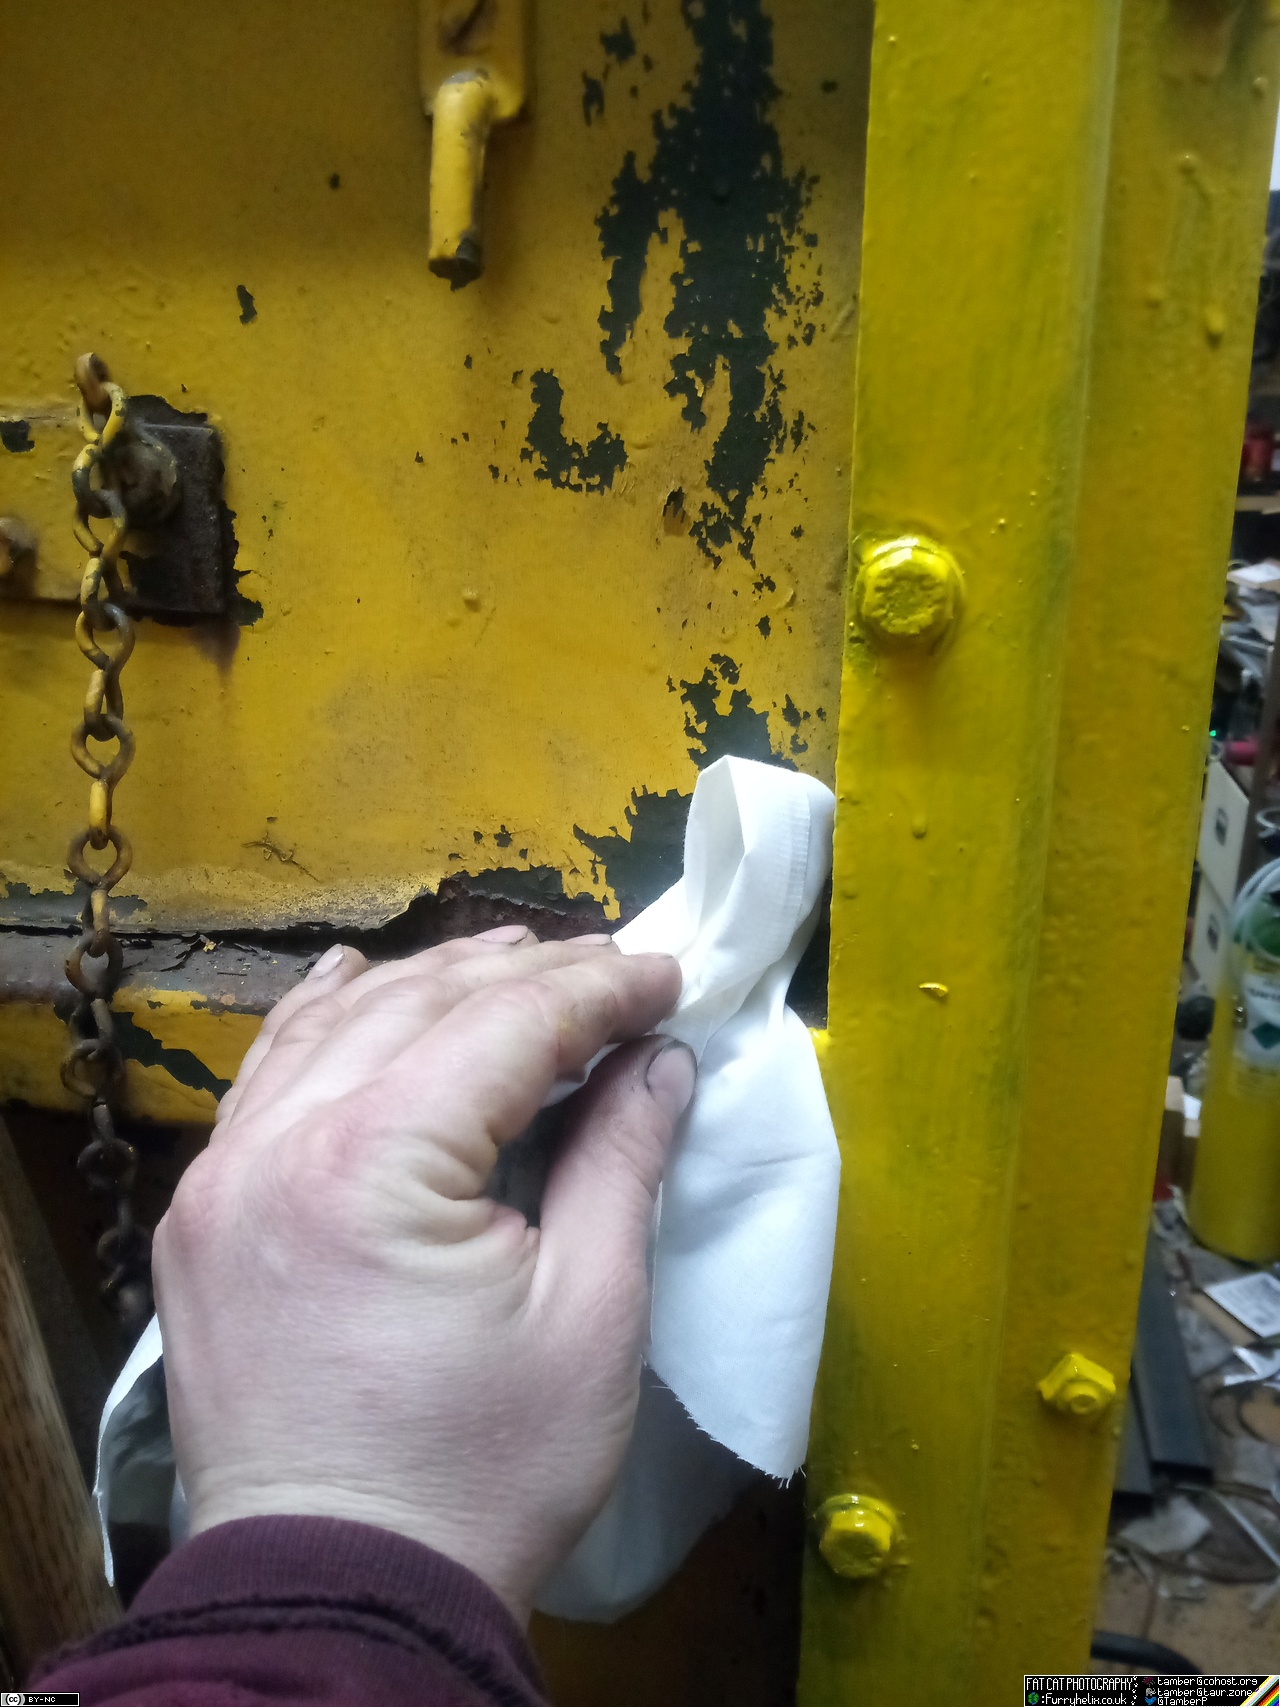 And when I got back from doing that, my bolts had come in for putting the locker back on the side; so I'll have to get that in a couple of coats of black and fitted up! Hooray! |
| |
-< Welder. Allegedly a mechanic. Bodger of Things >-
* 1958? Bedford RL - Progress: Glacial.
* 1994 Skoda Favorit - It's baaaaaaaack!
* 2018 Herald Classic - Gone!
|
|
|
|
Tamber
Part of things
  Shattered. Held together by spite and tape.
Posts: 342
Member is Online
|
|
Mar 24, 2024 22:26:25 GMT
|
Okay, partially for reference, because I keep losing this sort of info: The tach I'm using is a VeeThree 37092, 0-4000rpm. It's basically disappeared off the Internet, other than the odd ebay listing; however, it's basically just a clone of a VDO gauge and the settings switches work in the exact same way. With the power & signal pins at the bottom, the three switches are set as follows: | Cyls | A | B | C |
|---|
| 4 | down | up | up |
|---|
| 6 | down | up | down |
|---|
| 8 | down | down | up |
|---|
With it set to 6 cylinders, I can feed it a 50Hz square wave and it will hold at displaying 1000rpm. Lovely. And, fitted back to the truck, with the megasquirt set to tach output on IAC1 (rather than whatever wrong pin I had it set at before), we have... 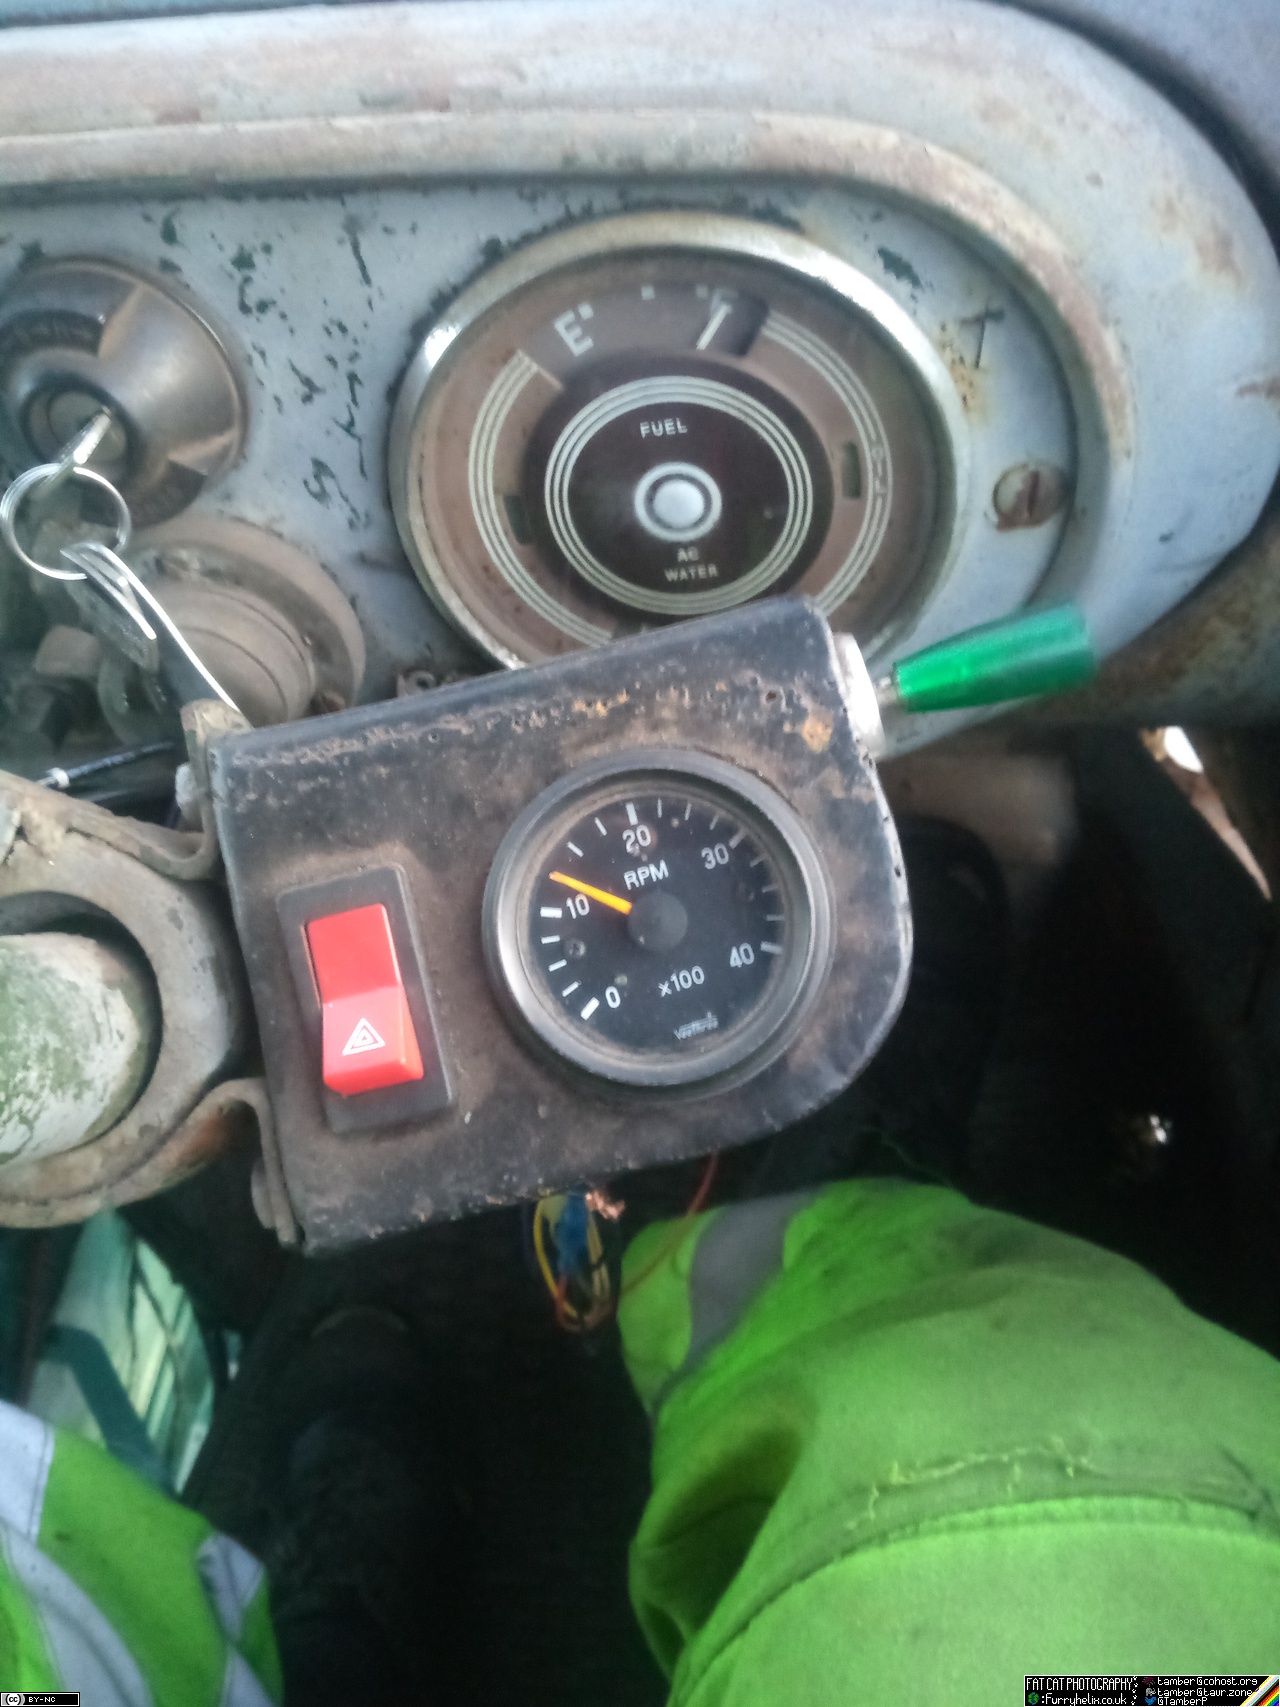 ... a working tach. Stunning, I know! And then I decided I'd drive the truck outside so I could tackle the growing pile of detritus building up beneath it. 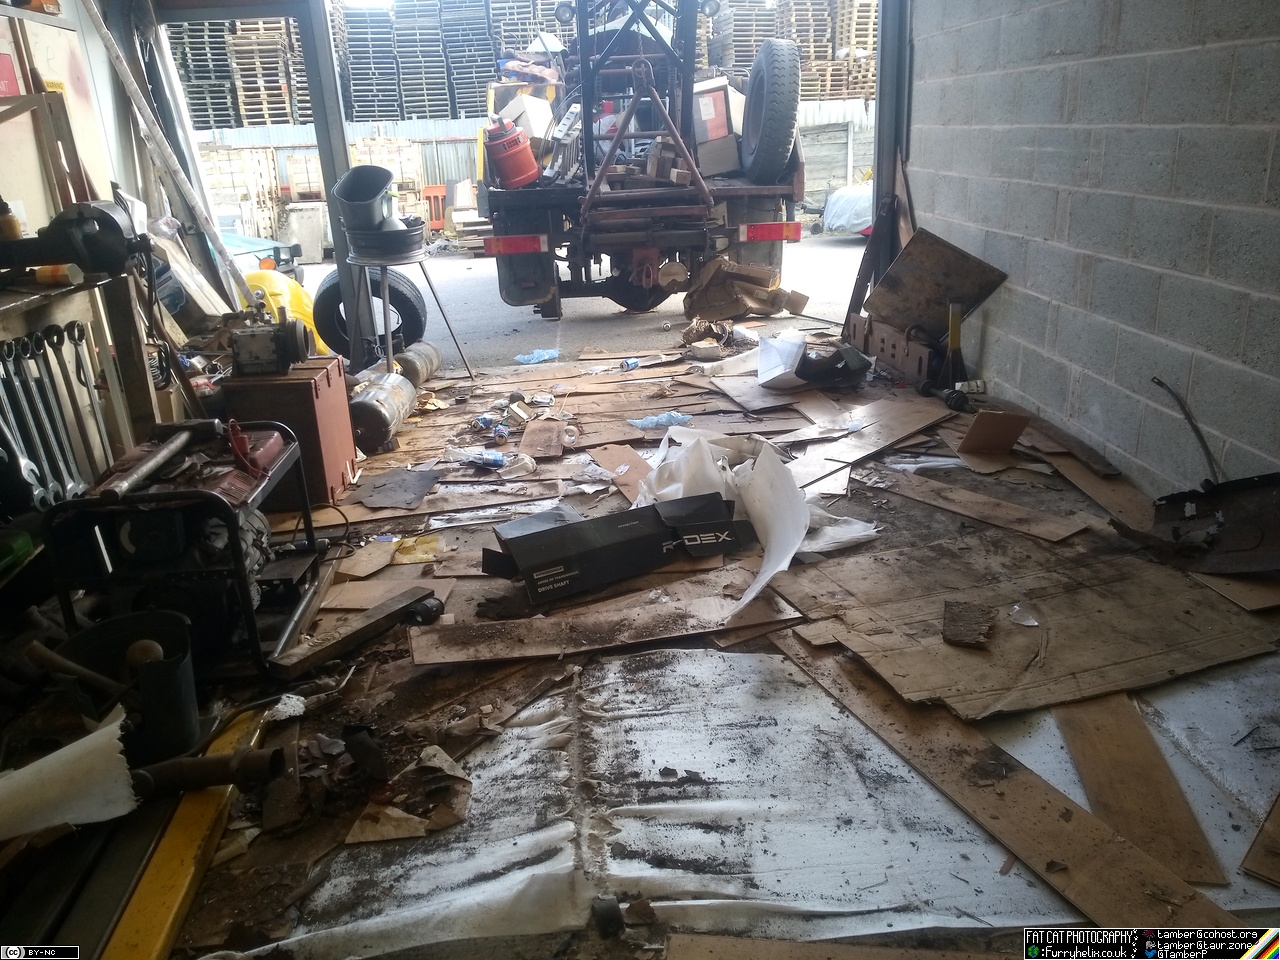 Several hours of sweeping and scooping later (Excuse the shaky photo, I'd not eaten anything during aforementioned several hours, but I had drunk two mugs of coffee): 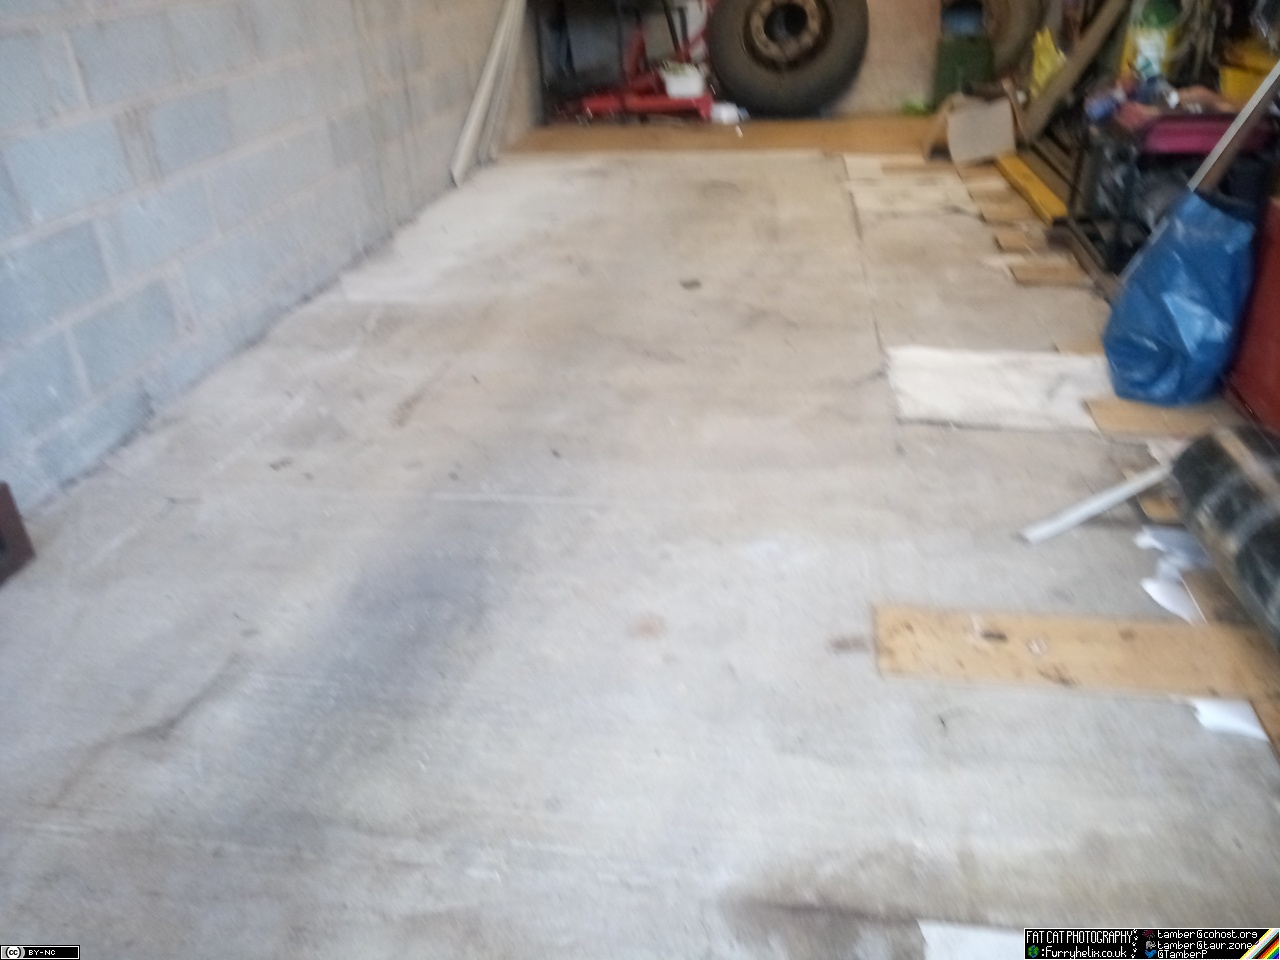 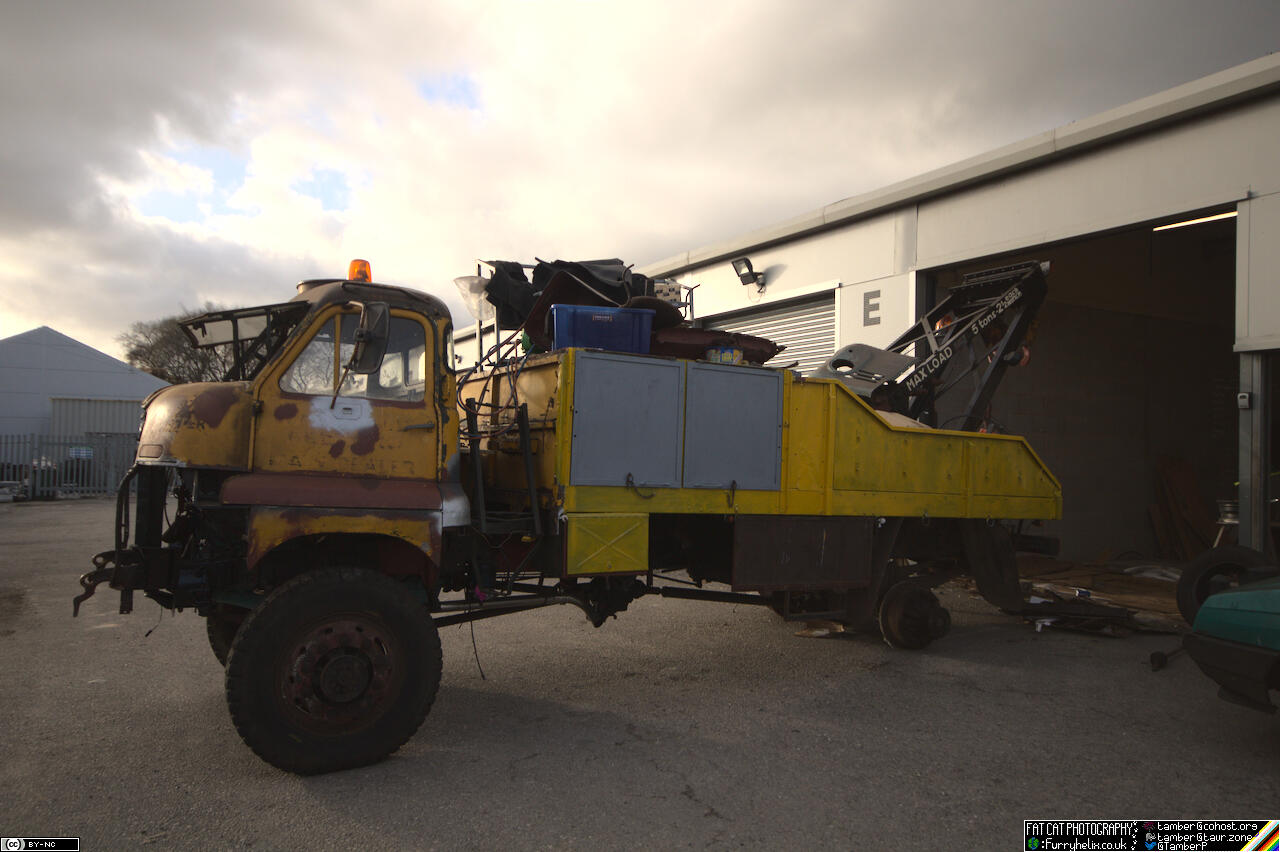 It'll be a couple of weeks before I can get more of that yellow paint; got to wait for next paycheck, at which point we'll then run into the bank holiday weekend. On the bright side, that'll give plenty of time for the current coat to dry, because it's still tacky! Didn't quite manage to reverse the truck back in squarely, so I've somewhat cramped myself up in there, but the upside is that once my torch arrives for the MIG, I'll have a little more room to weld on the remaining brackets for the two loose side-markers on the offside. I also didn't manage to remember to bring the bolts for the side-locker I removed, but I need to get that cleaned up and painted first anyway, so it's no big deal. |
| |
-< Welder. Allegedly a mechanic. Bodger of Things >-
* 1958? Bedford RL - Progress: Glacial.
* 1994 Skoda Favorit - It's baaaaaaaack!
* 2018 Herald Classic - Gone!
|
|
|
|
|
Mar 24, 2024 22:31:23 GMT
|
|
Looks very yellow. No excuse for people who say they didn't see you coming.
|
| |
|
|
|
|
|
Mar 24, 2024 22:46:12 GMT
|
Red lorry, yellow lorry, Led lolly, yellow rorry... Oh sod it. So you drove it out without the rear wheels fitted? Cool. Well done. I guess the crane doesn't fit through the door with the wheels on? James Edit - jimi was commenting that my bus had low ground clearance under the diff. It's a damn sight better than your truck is at the moment!  |
| |
Last Edit: Mar 24, 2024 22:53:51 GMT by Sweetpea
|
|
Tamber
Part of things
  Shattered. Held together by spite and tape.
Posts: 342
Member is Online
|
|
Mar 25, 2024 21:29:46 GMT
|
So you drove it out without the rear wheels fitted? Cool. Well done. I guess the crane doesn't fit through the door with the wheels on? Yeah. 😬 The door opens to 10'3", the top of the crane is 10'10" with the wheels on. jimi was commenting that my bus had low ground clearance under the diff. It's a damn sight better than your truck is at the moment!  Can't get much lower! Looks very yellow. No excuse for people who say they didn't see you coming. I've had someone drive into me while I was in a bright yellow and orange truck before; turns out, it doesn't matter how bright you make it, if they're not paying attention... |
| |
-< Welder. Allegedly a mechanic. Bodger of Things >-
* 1958? Bedford RL - Progress: Glacial.
* 1994 Skoda Favorit - It's baaaaaaaack!
* 2018 Herald Classic - Gone!
|
|
|
|
|
|
|
|
Did you have your beacon switched on?
|
| |
|
|
Tamber
Part of things
  Shattered. Held together by spite and tape.
Posts: 342
Member is Online
|
|
Mar 31, 2024 21:18:52 GMT
|
Did you have your beacon switched on? It didn't have one! Maybe that was the problem... Thankfully, the limit of the damage done (to the truck, anyway...) was a new scuff on the steel bumper. The car fared rather worse.
Anywho! Back I've had a fairly productive week/long weekend so far, away from work (Which has been the land of gearbox/clutch hackery...) The 26thI got my new MIG torch in, so I celebrated by welding on my remaining two side-marker light brackets on the offside. Which, if my doctor's reading this, involved exactly 0 crawling or kneeling on the floor the day after having some exploratory work done on my knee. (Did you know they made needles 80mm long? Neither did I 'til then!) 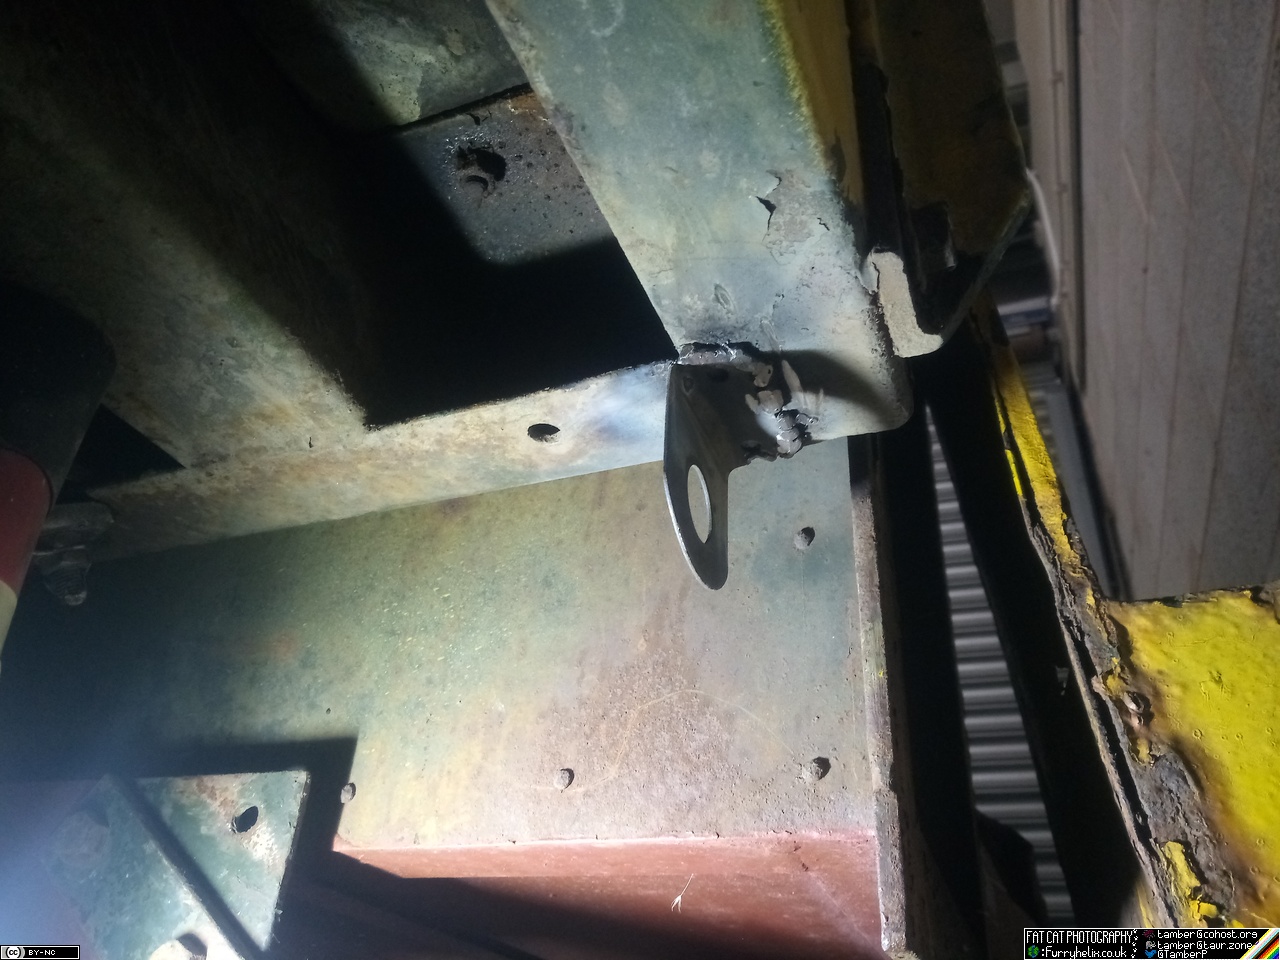 One at the front. 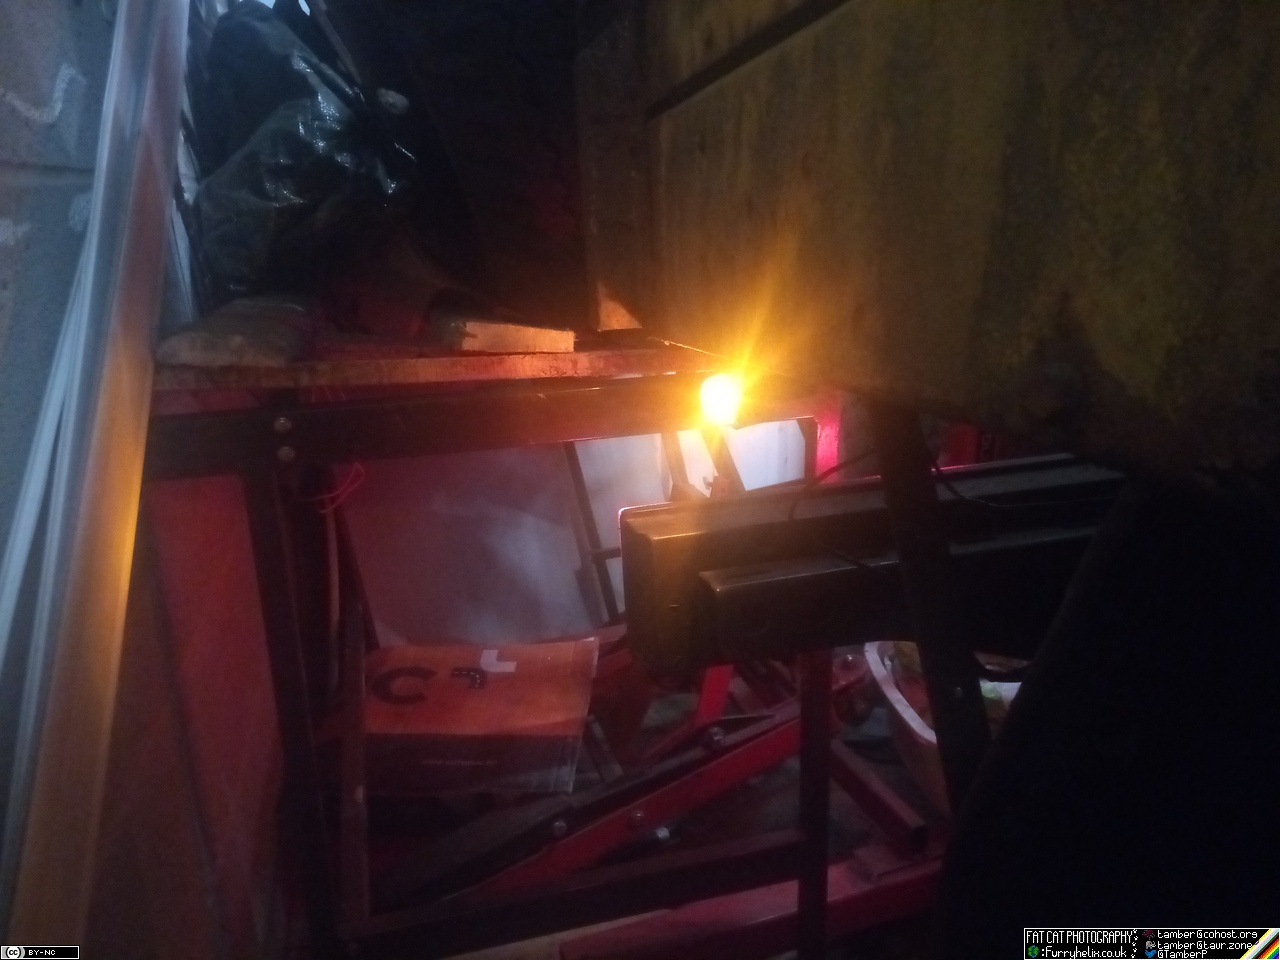 And one at the back. 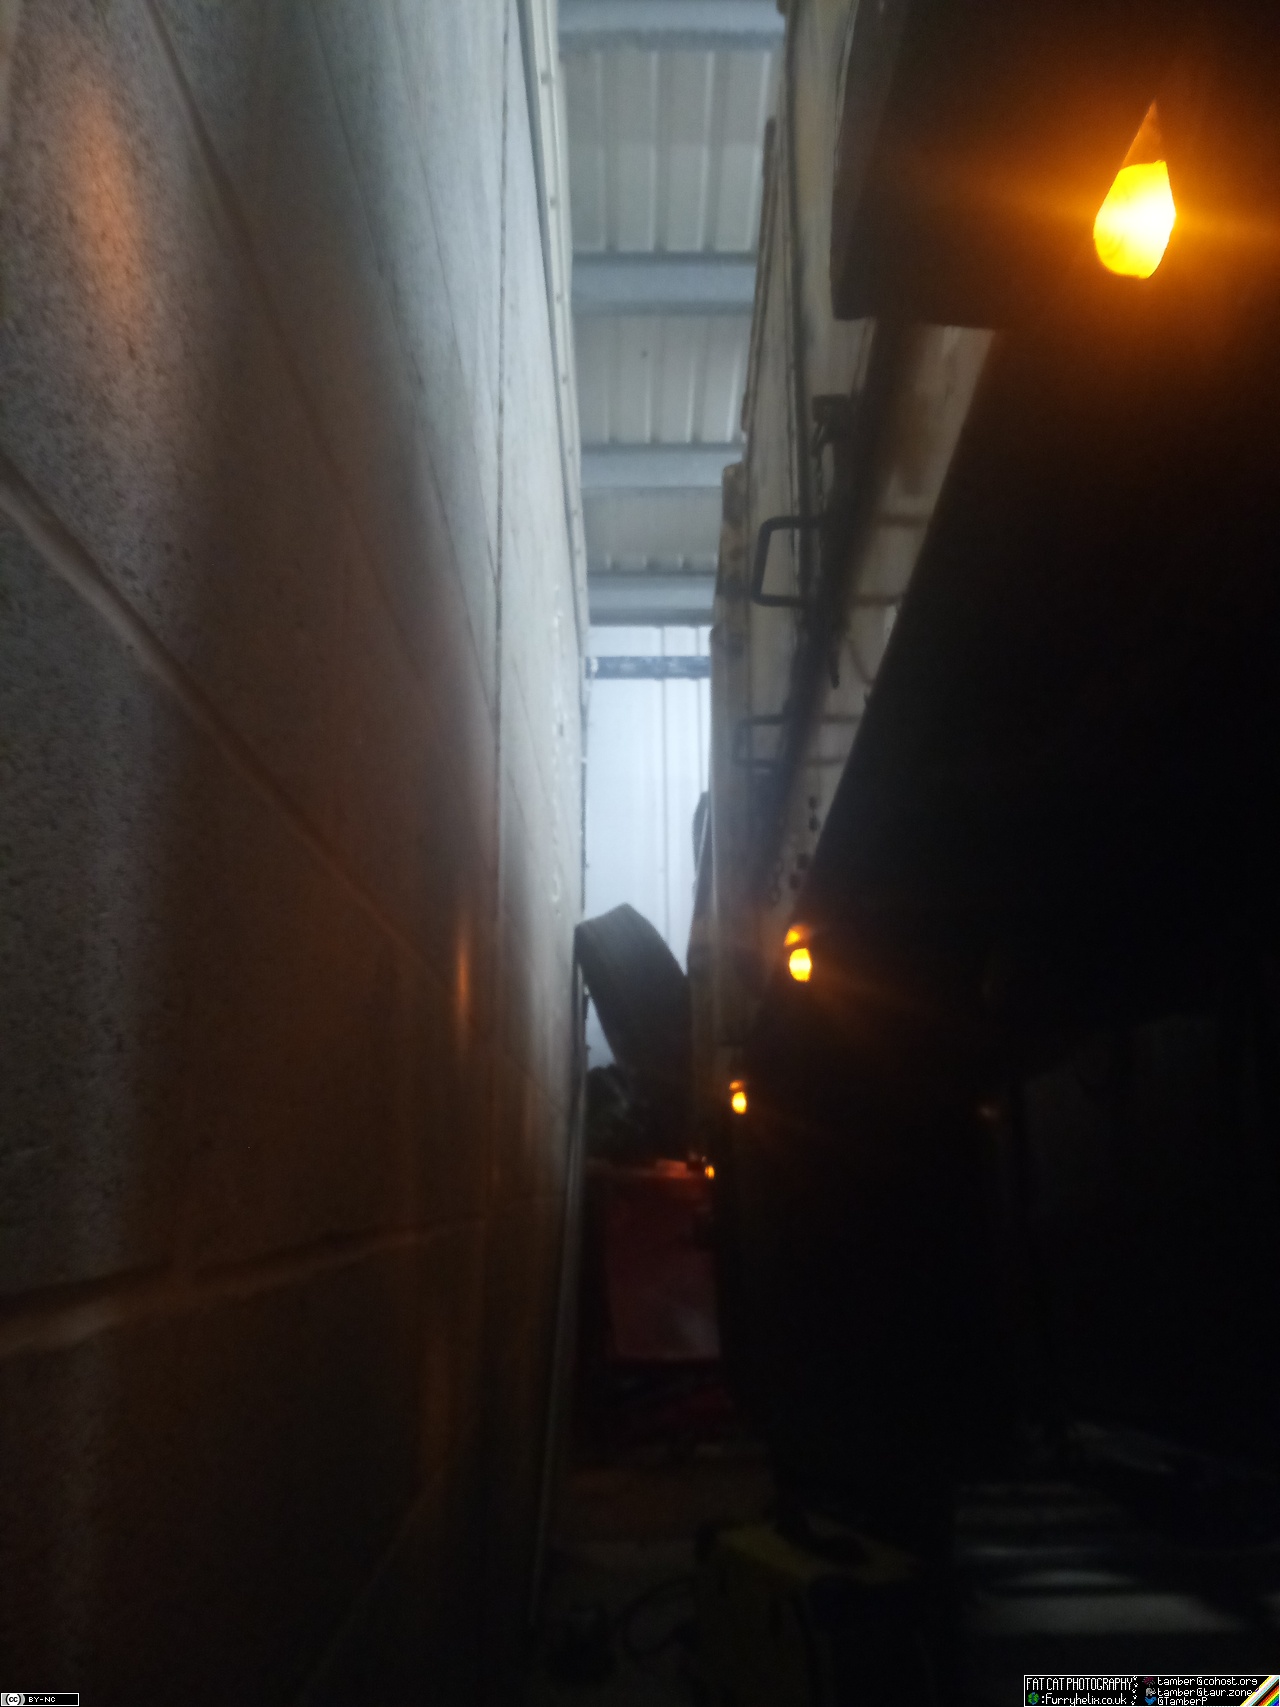 Happy days. The 28thGot some tracing paper in, so I could take advantage of having put the truck too far away from the wall, and trace out the signwriting on the offside. 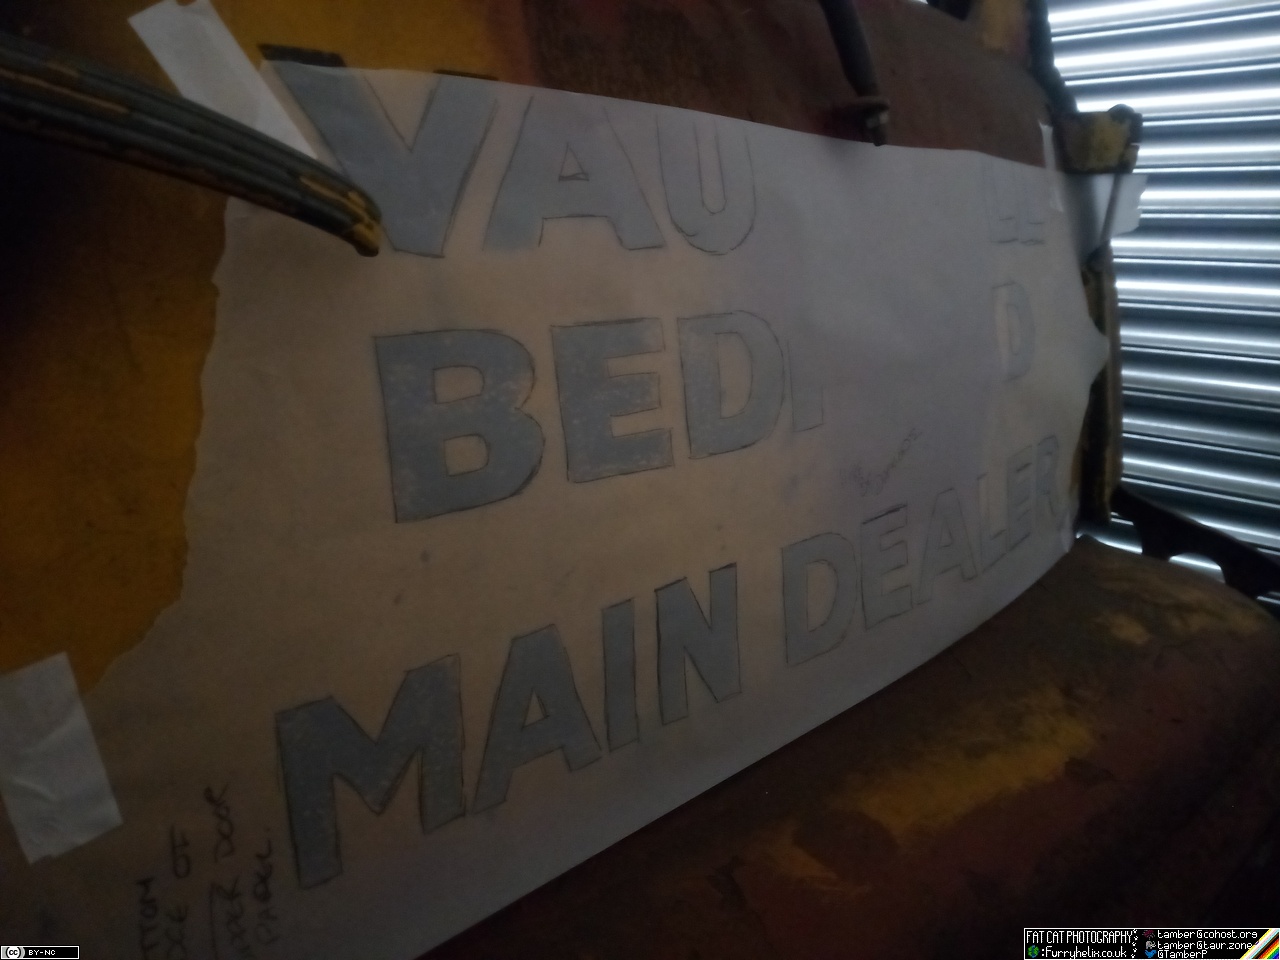 Well, what's left of it, in some cases. 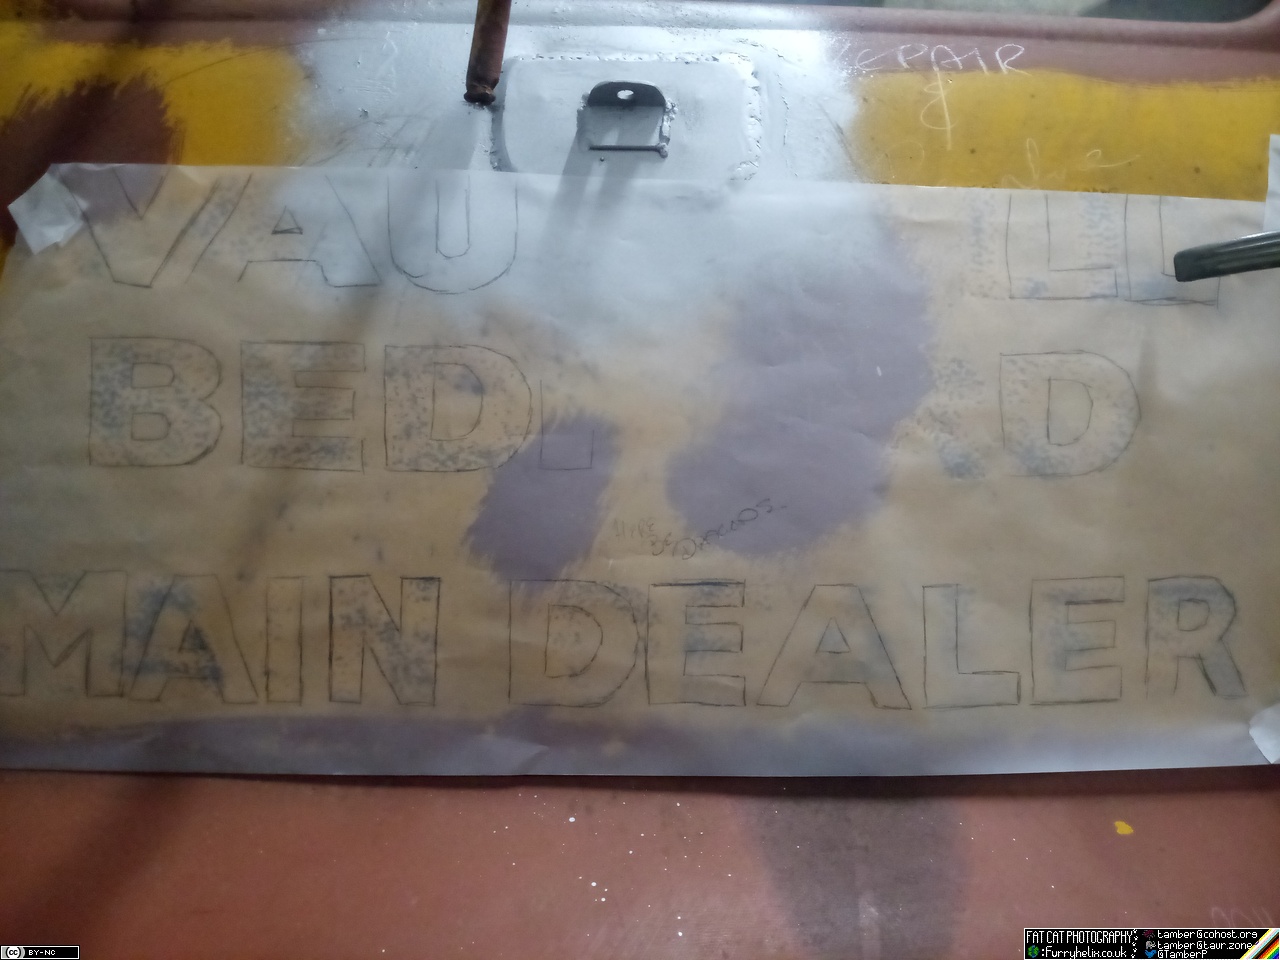 See, I managed to wipe out the same bit on both doors before I managed to get a tracing of it. Thankfully, I have enough pictures that I can reassemble the missing bits pretty close to how it used to be; they won't be exactly identical, because I'm probably going to move the "vauxhall" and "bedford" bits down to miss the mirror bracket, but... 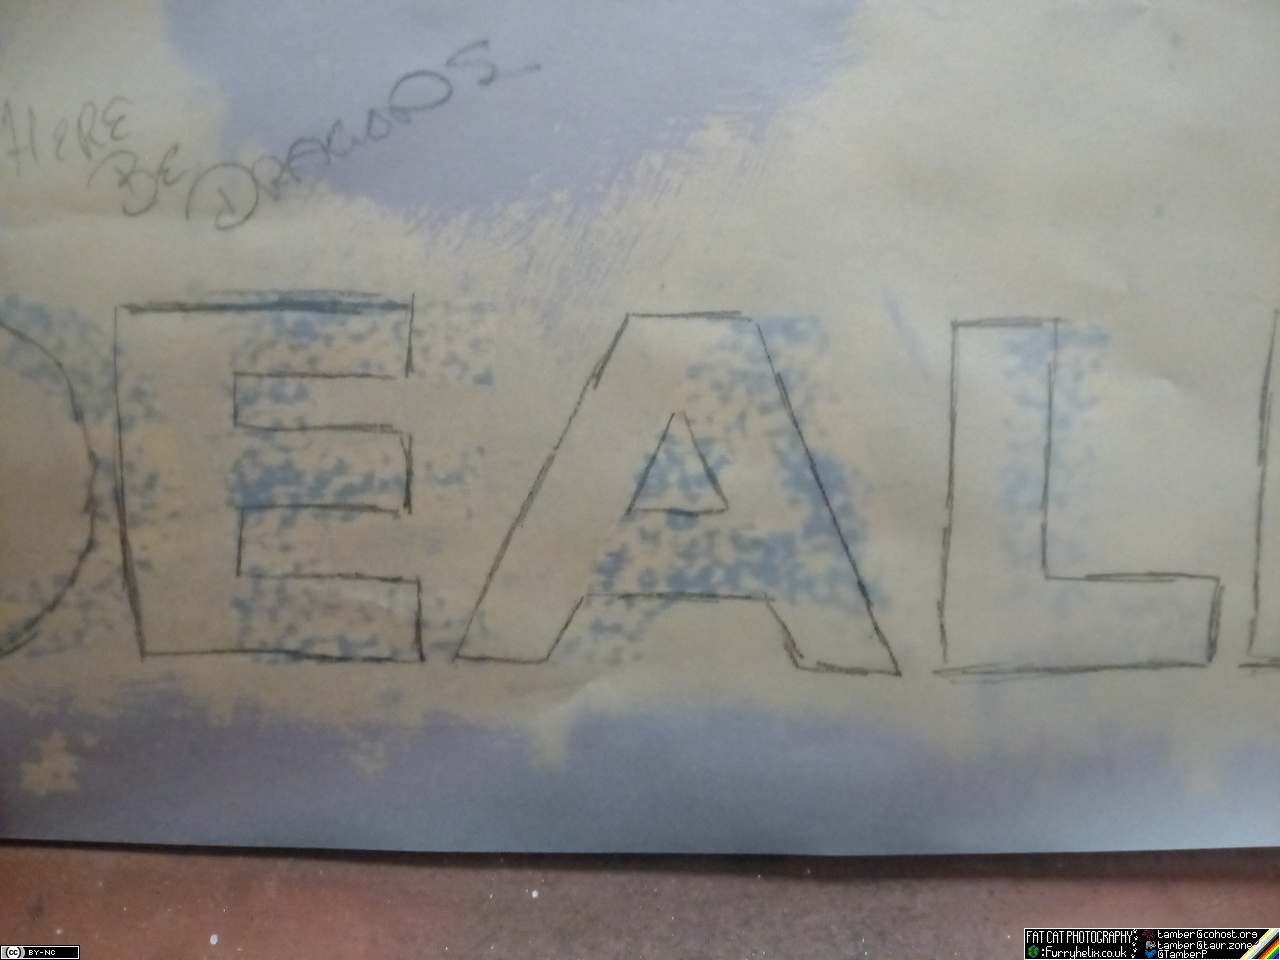 ...that's alright, because they weren't identical to begin with.  I did also make a set of tracings of the "Scott Bros. (Colchester) Ltd" on the locker doors, but no pictures of that because it was incredibly close-quarters in there! The 29th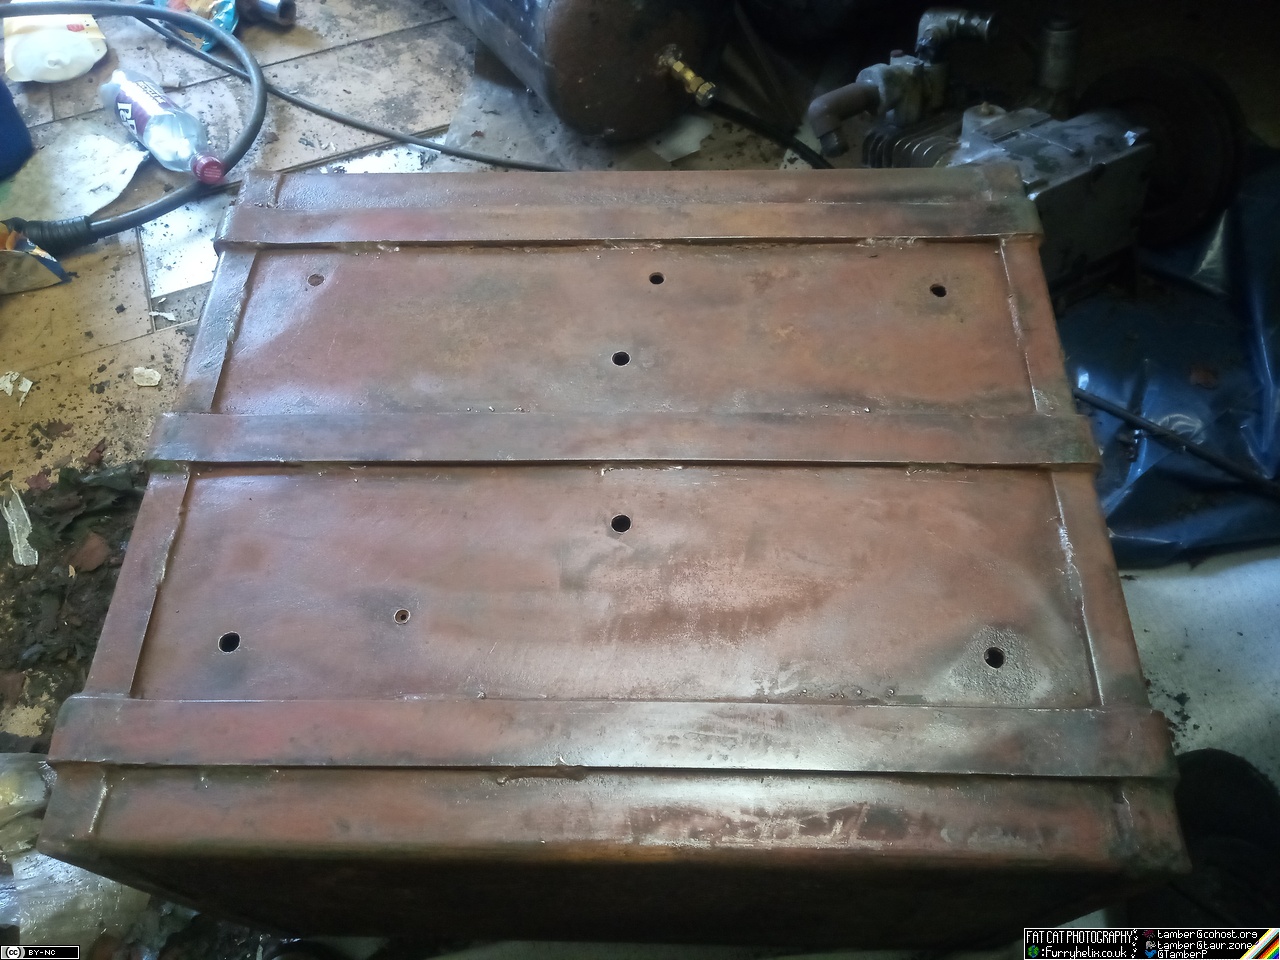 Dragged the locker out from the nearside, and stripped all the old mud, underseal, and paint. It's in pretty good condition underneath, all things considered. Much better than the locker in front of it. 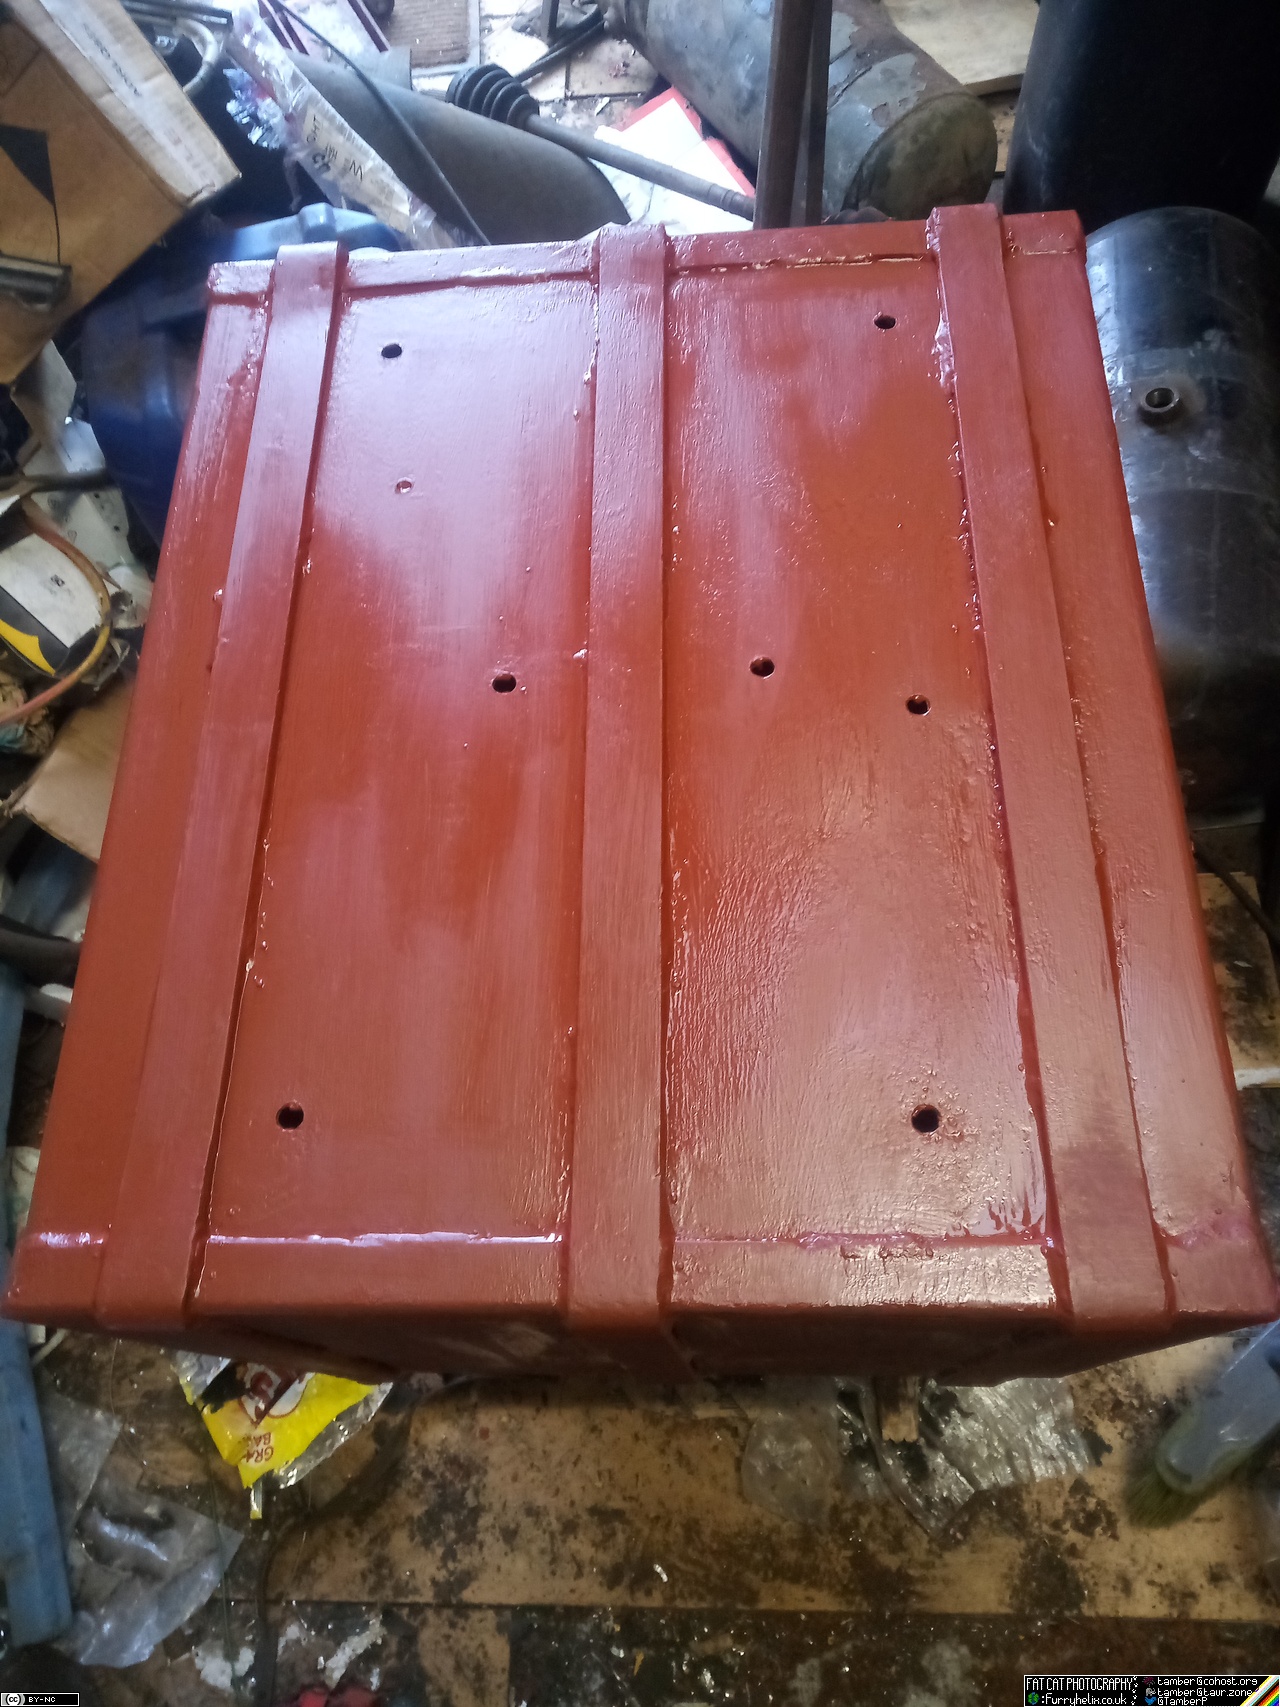 A nice heavy couple of coats of primer... The 31stNot a lot of pictures from today, because my phone was on music duties again. I did interrupt it in order to grab a snapshot of the whole ridiculous mess that was reftting the locker. I should note, this was 2-1/2 hours into proceedings; I had to give every enclosed side of that locker a coat or two of black paint, which thankfully dried pretty quickly in the warm sunlight. And while it was drying, I made up a mounting bracket for my air manifolds. (Unpictured. I'll have to grab a snap next time I'm down there.) I also went and tack-welded in the bolts at the forward end of the locker, because there's no way to get a spanner on them in order to prevent them spinning. I'm not entirely sure how they were originally put in, because there's a floor above them and they're inside a C section in such a way that you can't hold a spanner in from the side even if the forwardmost locker wasn't there! 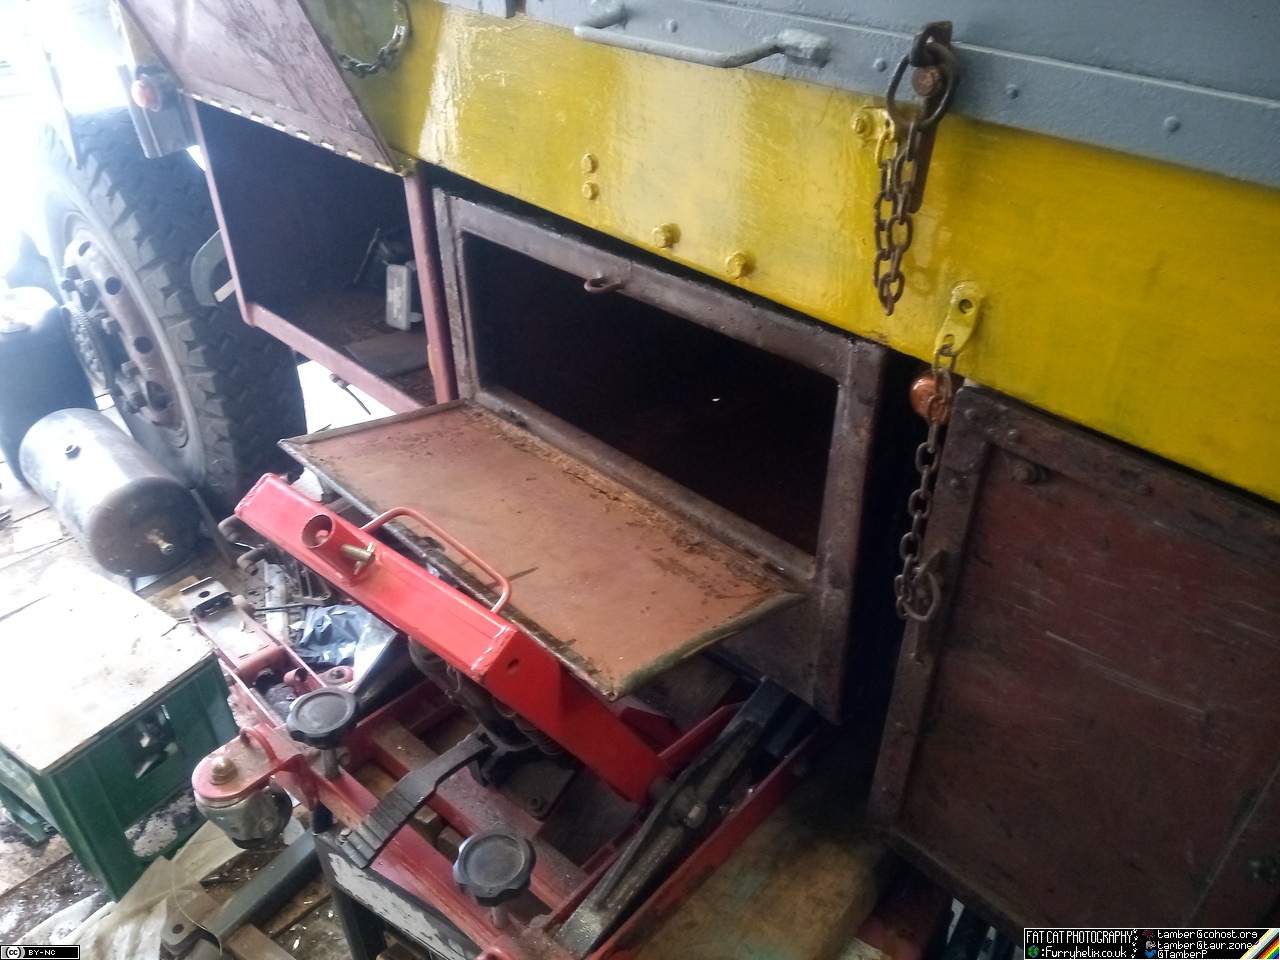 This was round two of trying to fit it; the previous round, the bike jack launched itself out as I tried to squeeze the locker into place atop it, and I ended up making an attempt to fit the locker by lifting it a bit at a time and blocking it up... only to find out I only drilled the mounting holes to 8mm, and the mounting bolts are 3/8.  Redrill holes, reassemble the whole silly stack. Discover that all the bumping and banging has tweaked two of the mounting bolts... Make up a special tool (bent stick) in order to reach in through the narrow gap and pull the bolts back into place, then pump the jack to shove the box over the bolts before anything else moves out of place! And, of course, this results in scraping off a non-zero amount of the paint I put on this morning.  ...but most of it's still painted so that's something. The worst of the paint damage is on the underside, which I can still get to in order to repaint it. 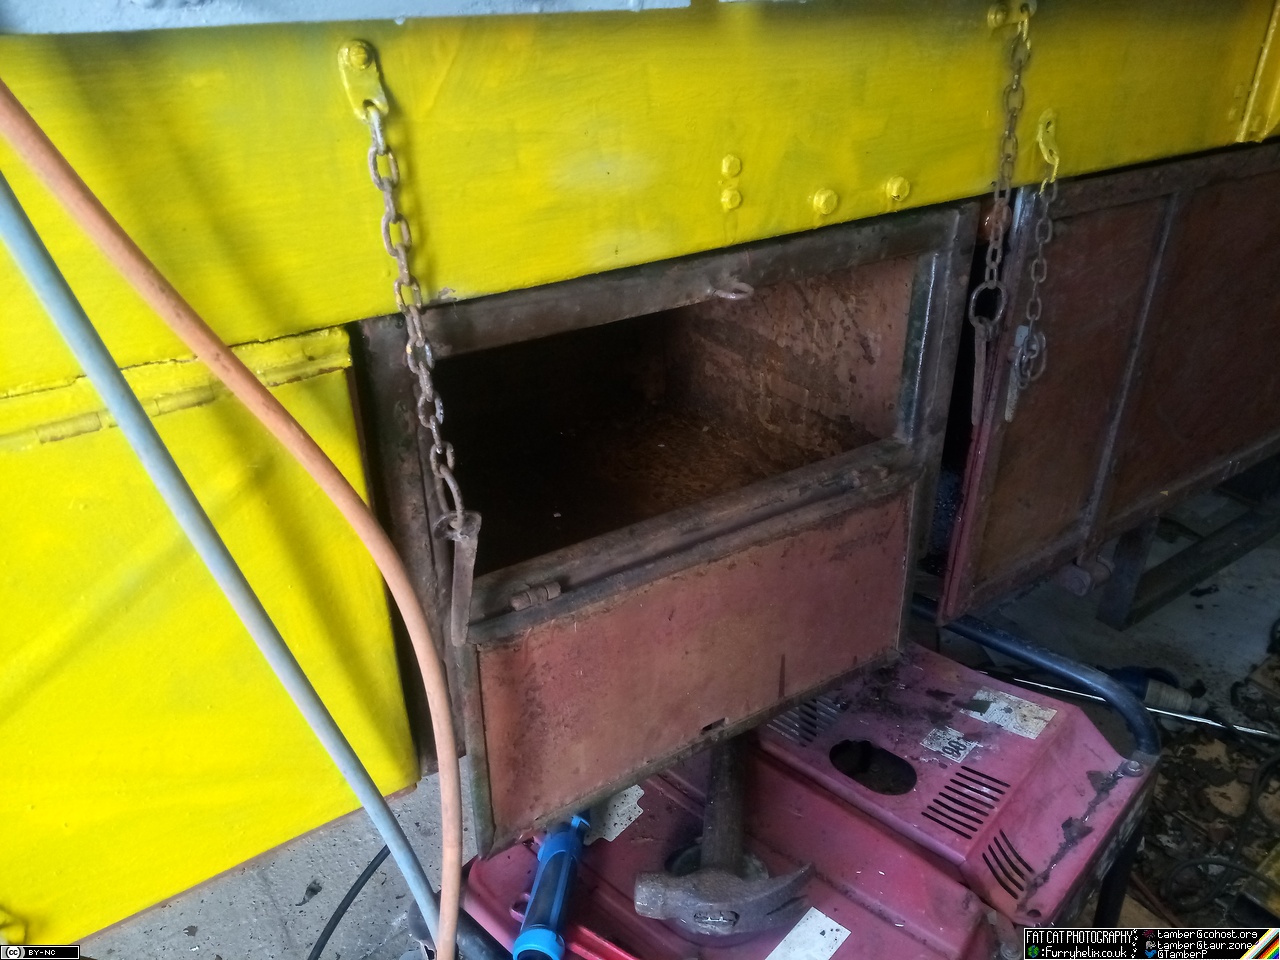 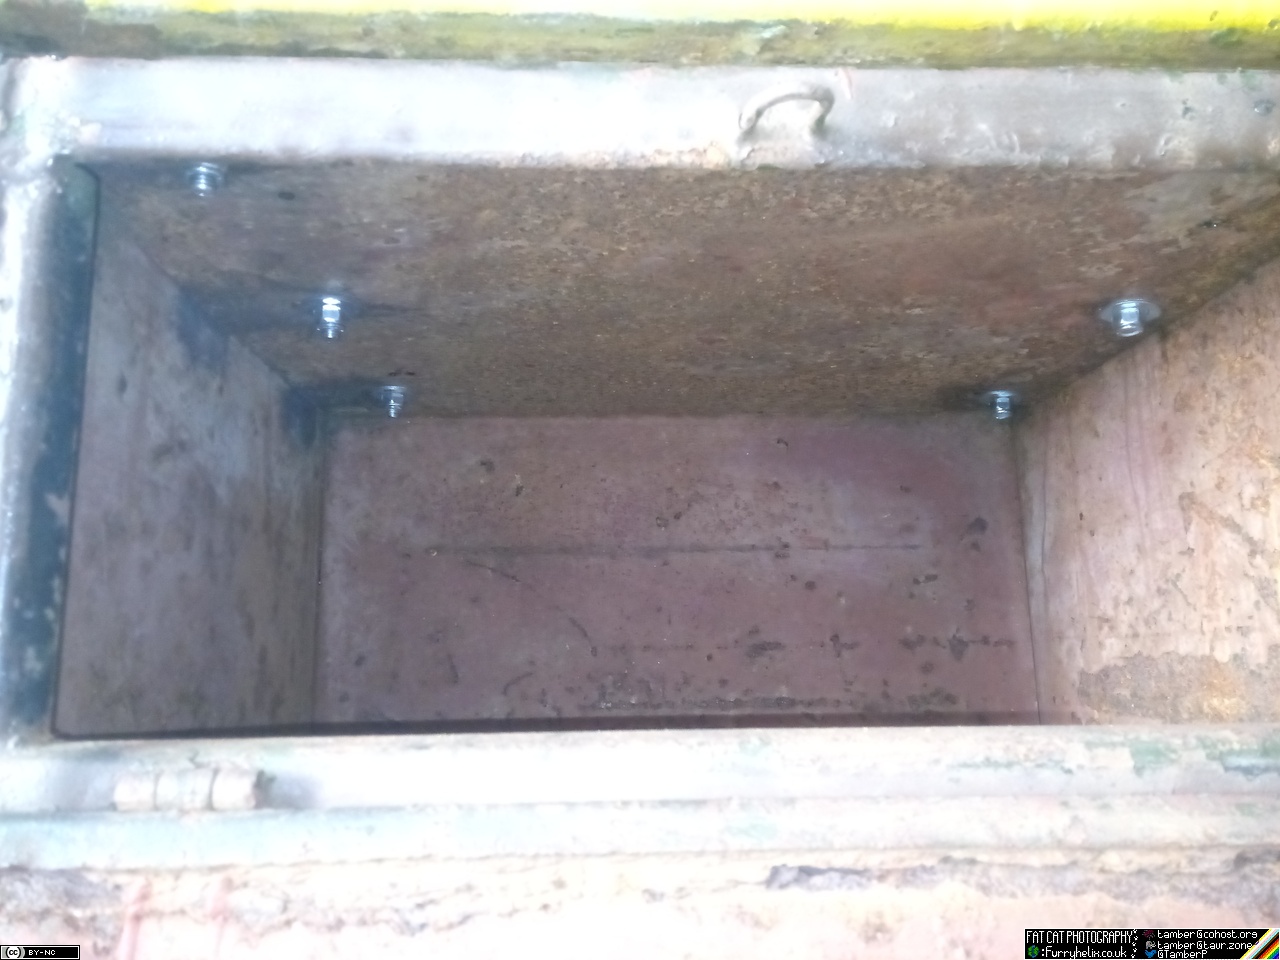 Tada! I will, of course, have to clean and paint the inside of that; which promises to be fun. Oh, and strip & paint the face of it that has the door on, of course. But I might leave that 'til I've pulled the door off and repaired/re-made it, because it's suffered quite badly from The Rot. Then, three hours of tin-bashing, heating & forming, welding, grinding, more bashing... and we finally have the nearside-front rear wing put back on! 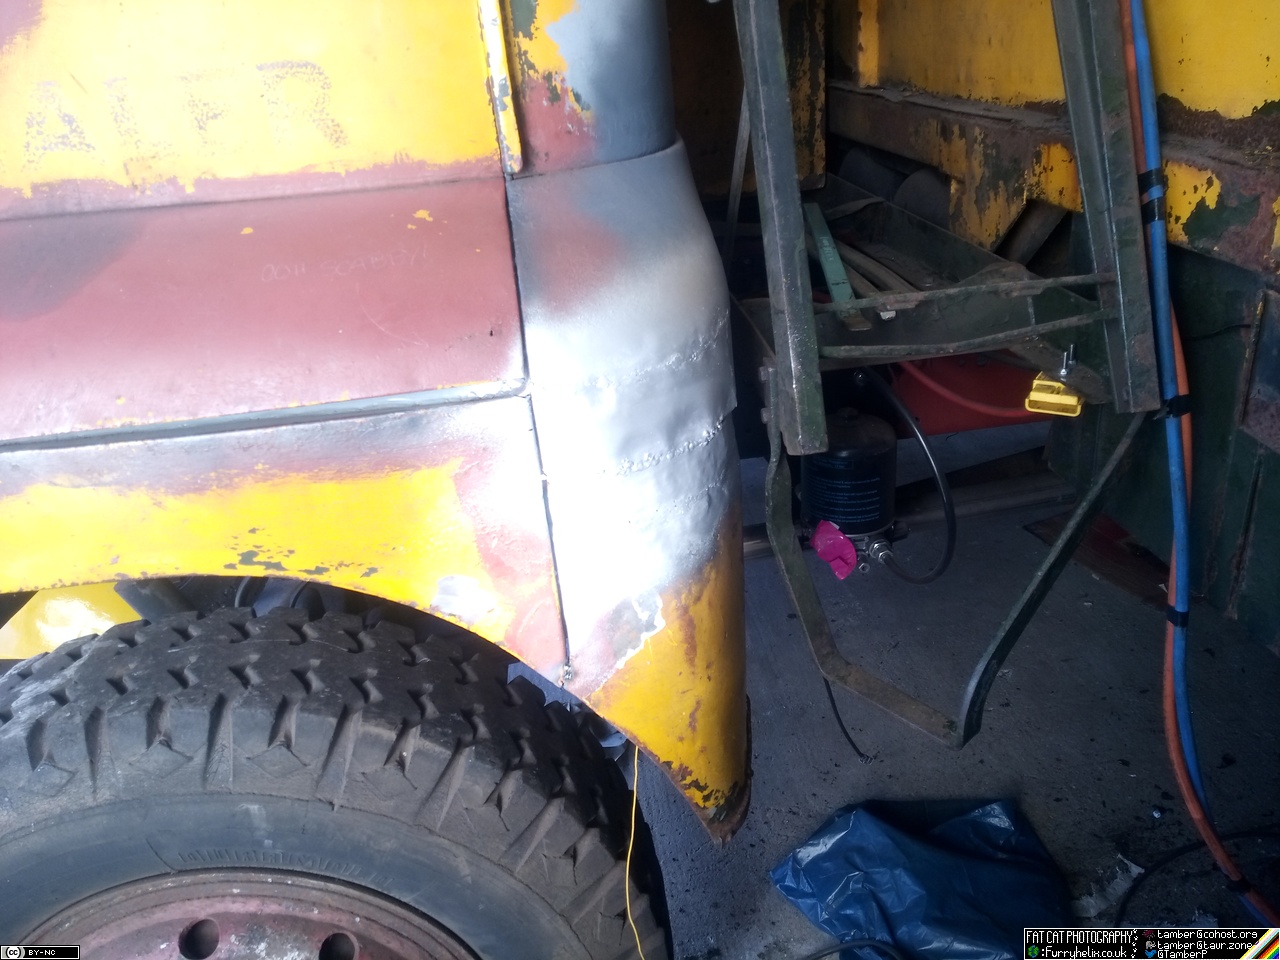 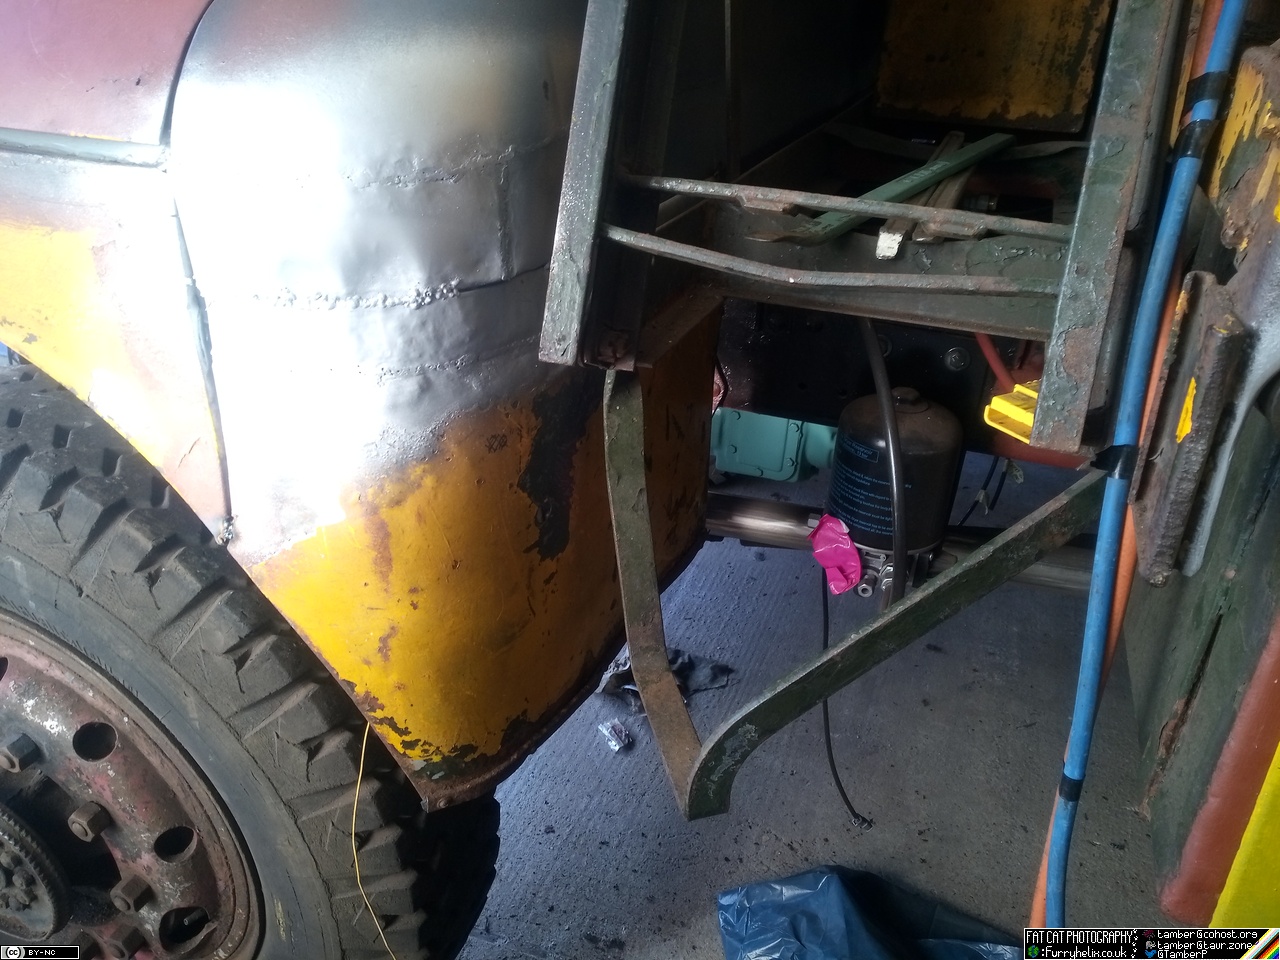 It's only partially welded in place, the rest of it's just tacked for now, and I've just hosed over the welds with the zinc primer for ... I don't know why I did it, really, I'm only going to end up taking a bunch of it off when I grind them down. Makes me feel better, I guess? No it's not pretty. More work to do on it, which will neaten it up a good bit; but even then it will probably still show the scars of the repair, and I'm fine with that.  Still some bashing and fitting to do in order to close up gaps before fully welding, but it's on now which is good news for multiple reasons: 1. It's not floating around for me to trip over and damage 2. Another piece goes back onto the truck! 3. It's been holding up figuring out where I can put the compressor's air supply and unloader return pipes. So now I can make the bracketry to fit those! (Just in time for me to run out of gas for the TIG welder, I'm sure.) |
| |
Last Edit: Mar 31, 2024 21:19:56 GMT by Tamber
-< Welder. Allegedly a mechanic. Bodger of Things >-
* 1958? Bedford RL - Progress: Glacial.
* 1994 Skoda Favorit - It's baaaaaaaack!
* 2018 Herald Classic - Gone!
|
|
Tamber
Part of things
  Shattered. Held together by spite and tape.
Posts: 342
Member is Online
|
|
|
|
I have a big tin of yellow paint! And I've not touched it since it turned up because after a good couple of months of relatively decent health, joints-wise, I have come off the 4-day Easter weekend and faceplanted into the meatgrinder. I have managed to get a little tinkering done, however. 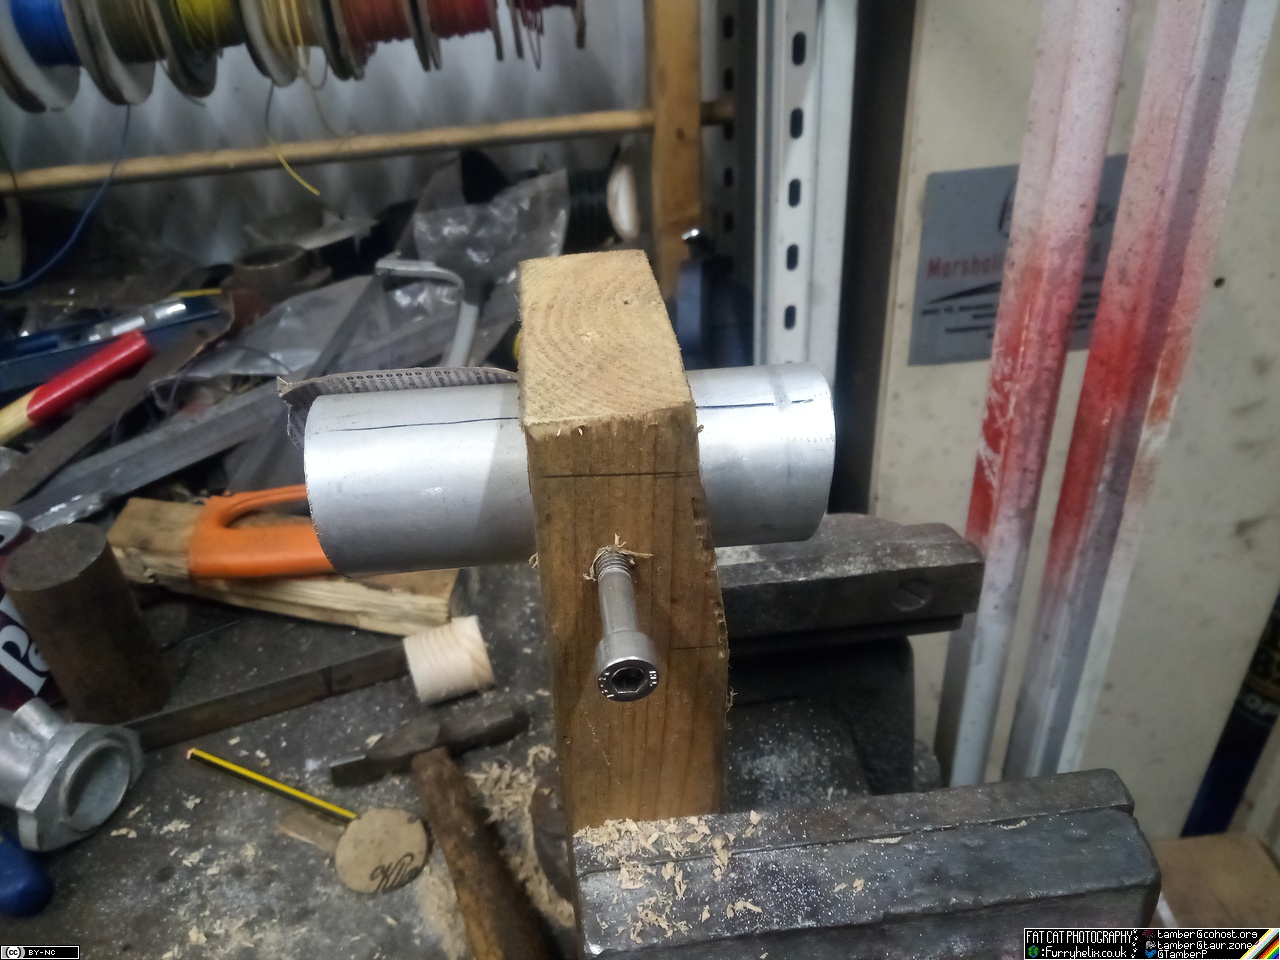 A 10° angle jig. (The retaining/clamp bolt, as pictured, is a pain in the behind because it kicks the tube over in the hole and makes it not line up properly any more.) 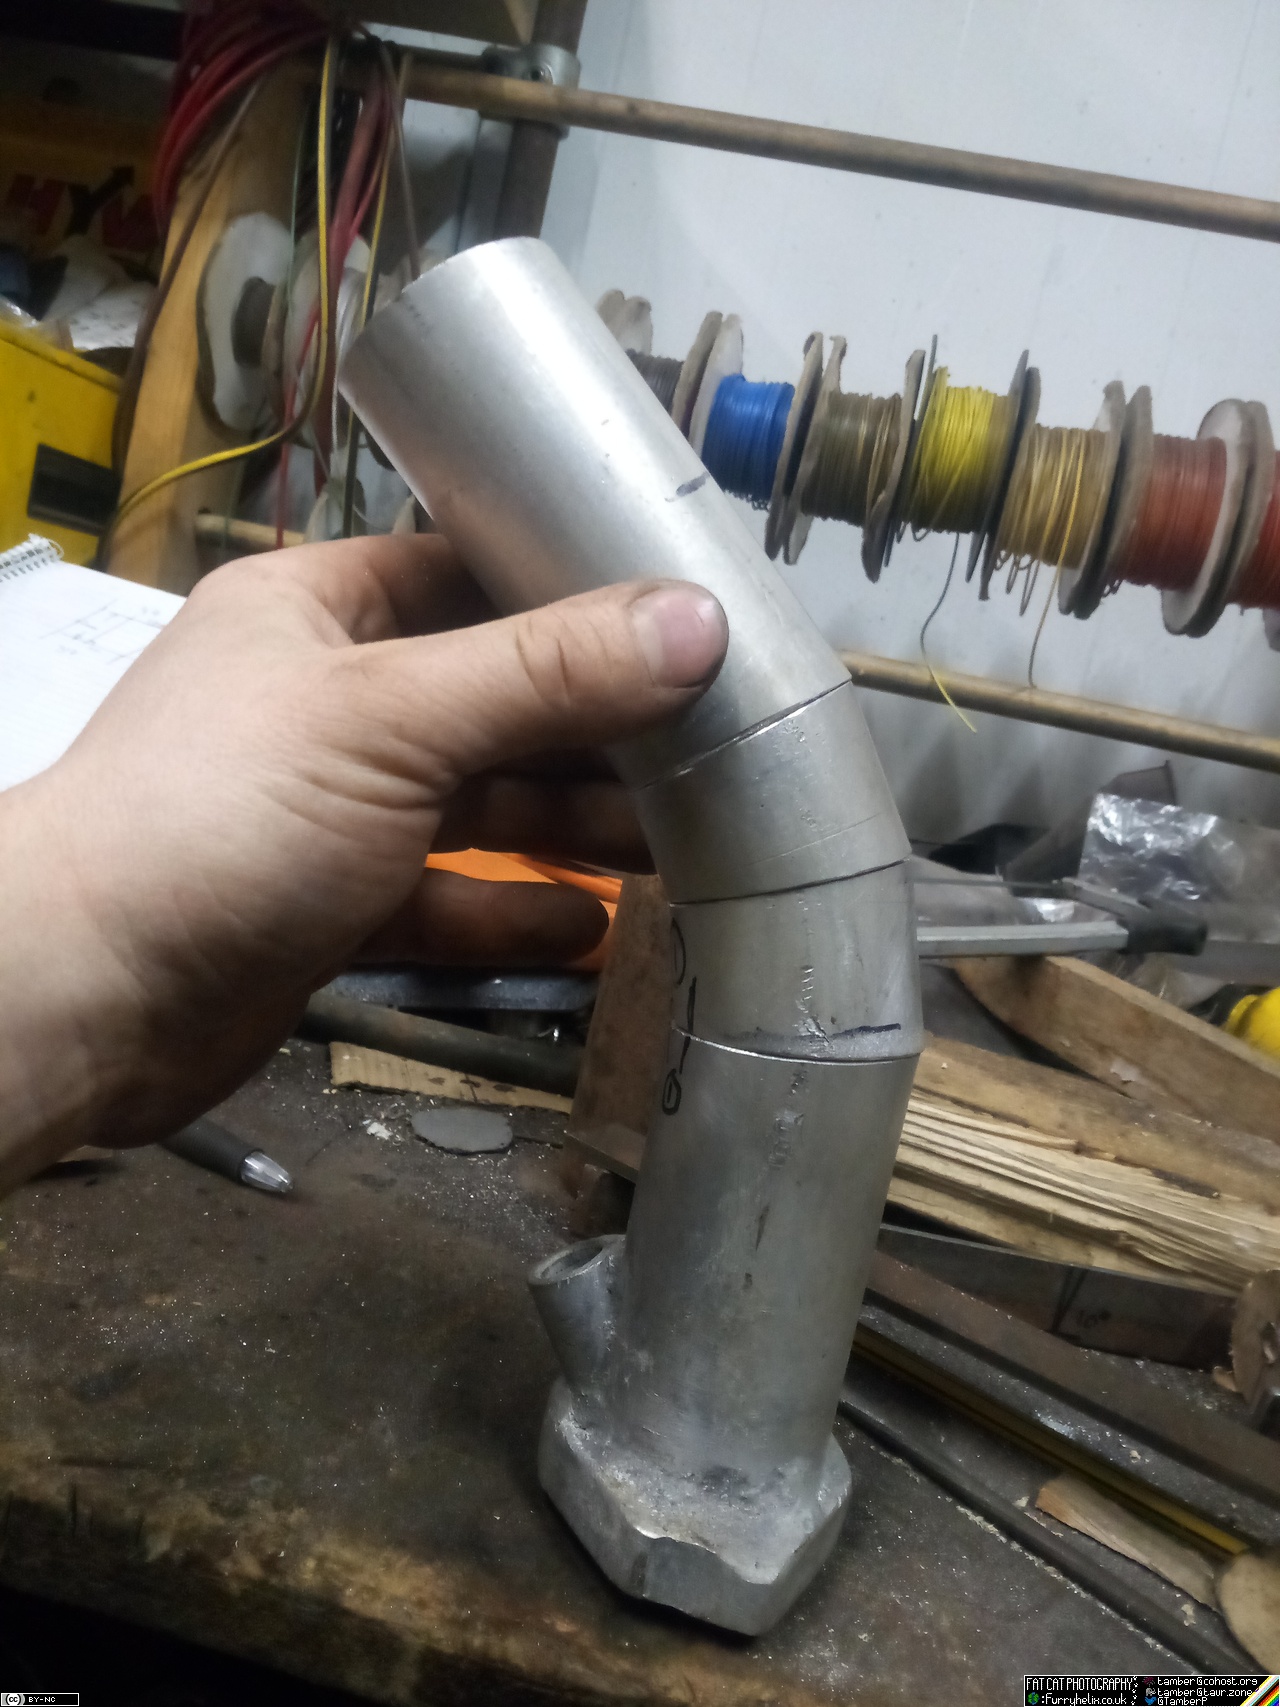 And that jig lets me cut my intake runners in such a way that I can force them to curve over. 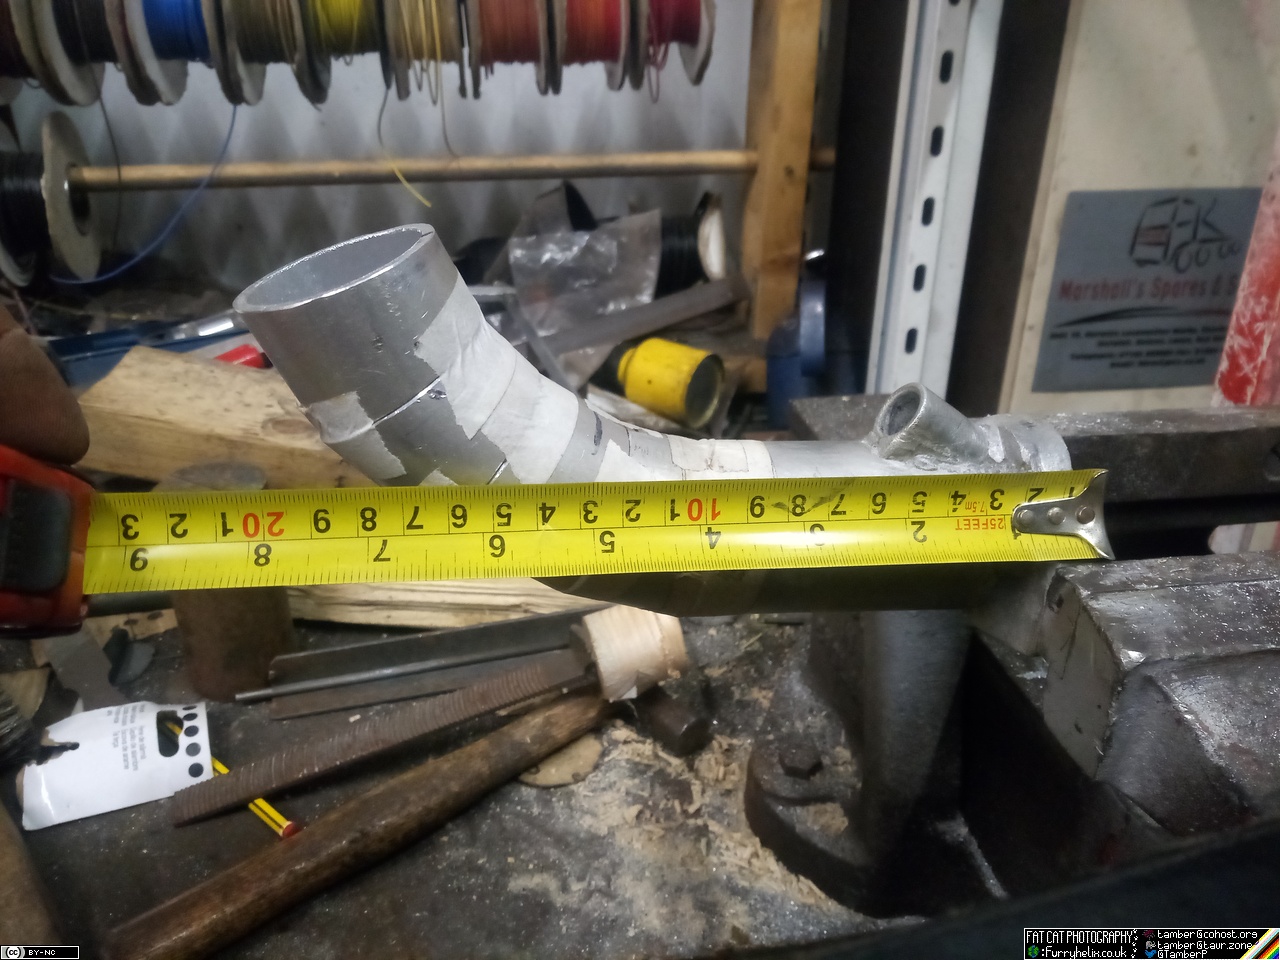 Not quite enough of a curve yet, though! I have a little over 8 inches of horizontal clearance from the port face on the head, to the closest point of the cab structure. So my next step is to modify the angle jig to be a 15° cut, making each step of the bend a 30° change. Once I'm happy with it, I'll start brazing it all together and seeing how much of a plenum I can get away with under that engine cover. I just have to be careful to leave enough room for the injector, fuel-rail, associated hardware and connectors... 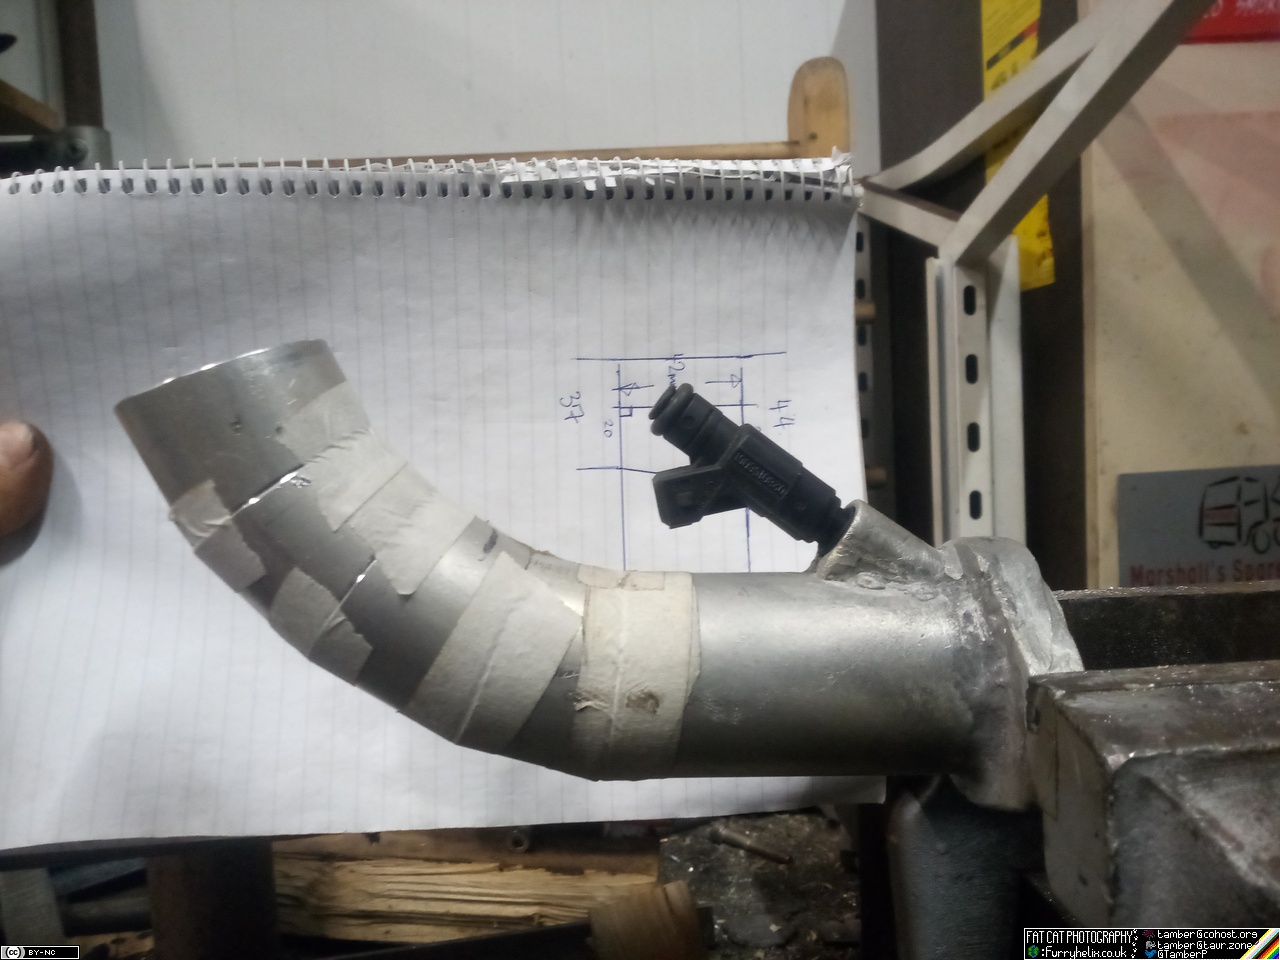 |
| |
-< Welder. Allegedly a mechanic. Bodger of Things >-
* 1958? Bedford RL - Progress: Glacial.
* 1994 Skoda Favorit - It's baaaaaaaack!
* 2018 Herald Classic - Gone!
|
|
Tamber
Part of things
  Shattered. Held together by spite and tape.
Posts: 342
Member is Online
|
|
|
|
Since my last update post here, I've not done a whole lot. (Beset by The Agonies again, alas. Thankfully, it's been a short work-week. The painkillers help, but I turn into a pumpkin when they start wearing off.) I have got another big bucket of golden yellow paint, and that's now in my paint cabinet awaiting a paintbrush day! I have also gotten some more air fittings; two elbows to come out of the compressor -- unloader return, and compressed air supply -- and a T so that I can attach my unloader to the supply hard-line. 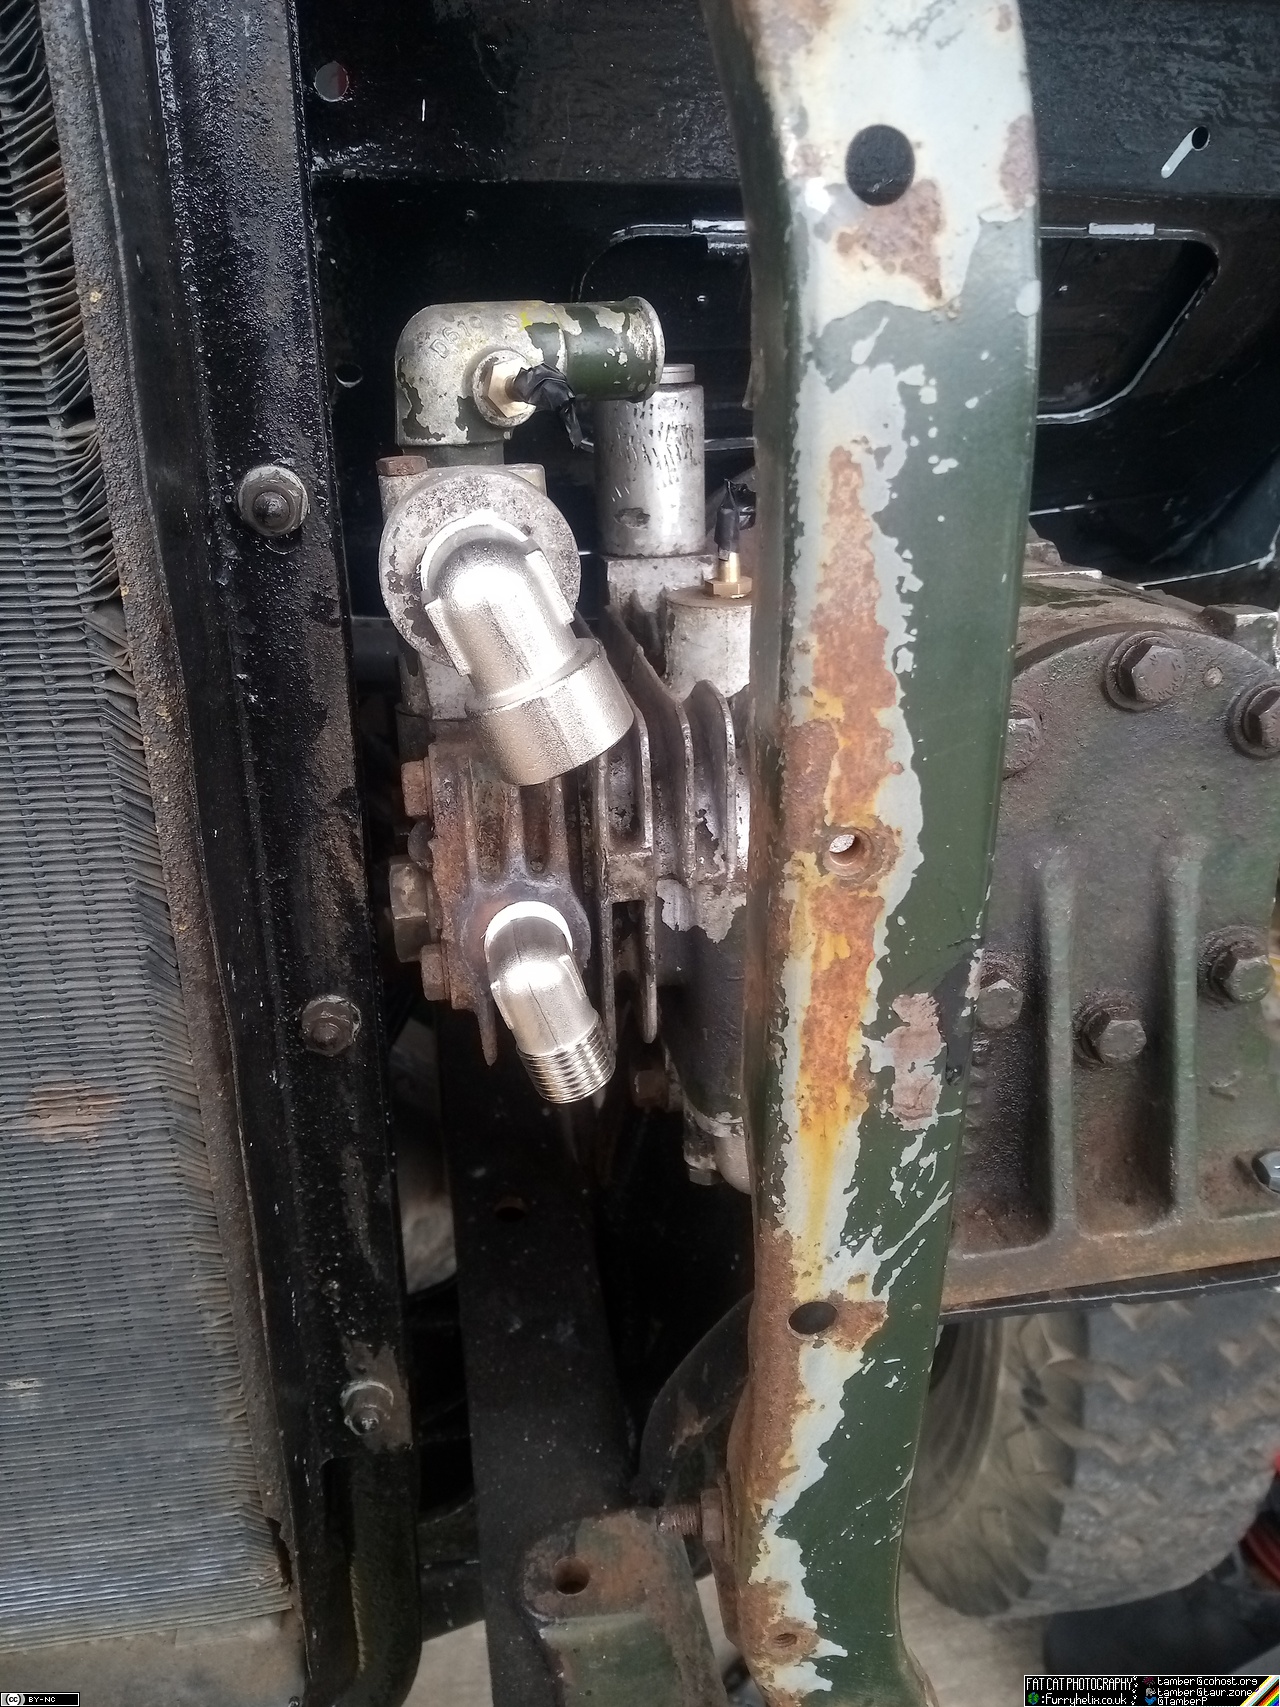 I've attached a little bracket to the nearside front cab mount bracket, with a bolt welded to it, so that I have somewhere to bolt my new hard-line pipe to; since the original, while also being a hard line, was formed with multiple bends that I do not have the capacity to replicate. At the other end, there'll be a tab that I should only have to drill a hole in the spare wheel carrier bracket to support. 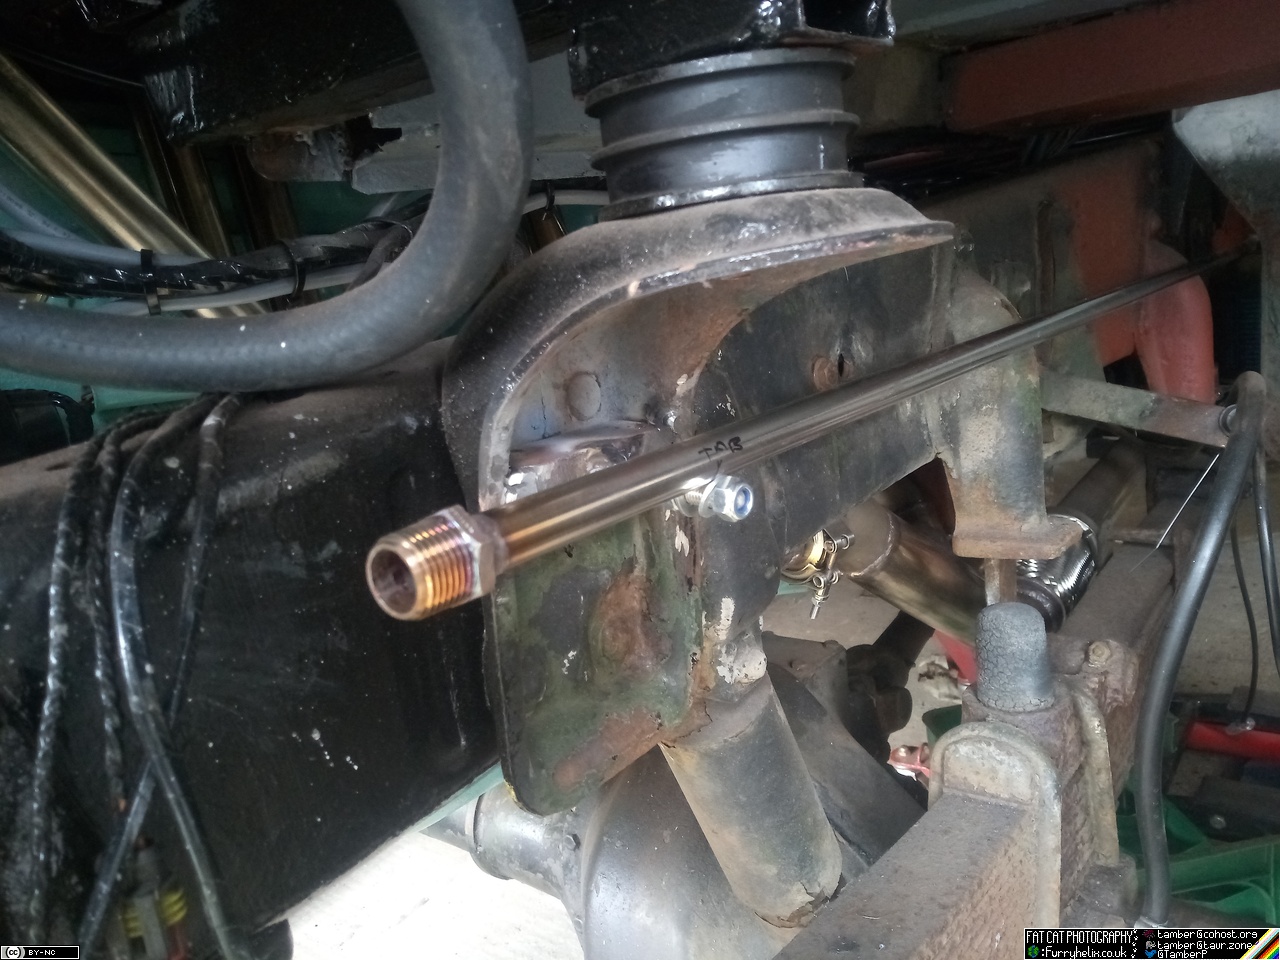 The replacement is a straight-shot from just in front of the cab mount, to underneath the spare wheel carrier; which will have a flexible line at each end -- stainless-braided teflon, as is common on modern trucks-- to connect to the compressor and the dryer unit's inlet. The return from the unloader to the compressor's inlet, I think I can get away with regular air-brake hose, which I will support with a rod welded to the tab for the supply (But it's easy enough to change out to a similar setup as the air feed, if I have to.) I also did some more playing about with bits of aluminium tube, and modifying my little jig to cut a 15° angle. It definitely tightens the turn up -- I can now come from the manifold flange to pointing straight up, in 3 join lines -- but I'm going to have to add in some straight sections to ensure enough clearance for the injectors and whatnot. And all the while I have to make sure it fits underneath the engine cover! It's certainly a packaging challenge, but I'm sure I can make something happen. And once I've got one of them figured out, the rest should be a fairly easy job of replicating it. |
| |
-< Welder. Allegedly a mechanic. Bodger of Things >-
* 1958? Bedford RL - Progress: Glacial.
* 1994 Skoda Favorit - It's baaaaaaaack!
* 2018 Herald Classic - Gone!
|
|
Tamber
Part of things
  Shattered. Held together by spite and tape.
Posts: 342
Member is Online
|
|
Apr 14, 2024 23:07:44 GMT
|
Another coat of paint has definitely made a big difference to the side of the truck. It really does take a few coats to build up the opacity. 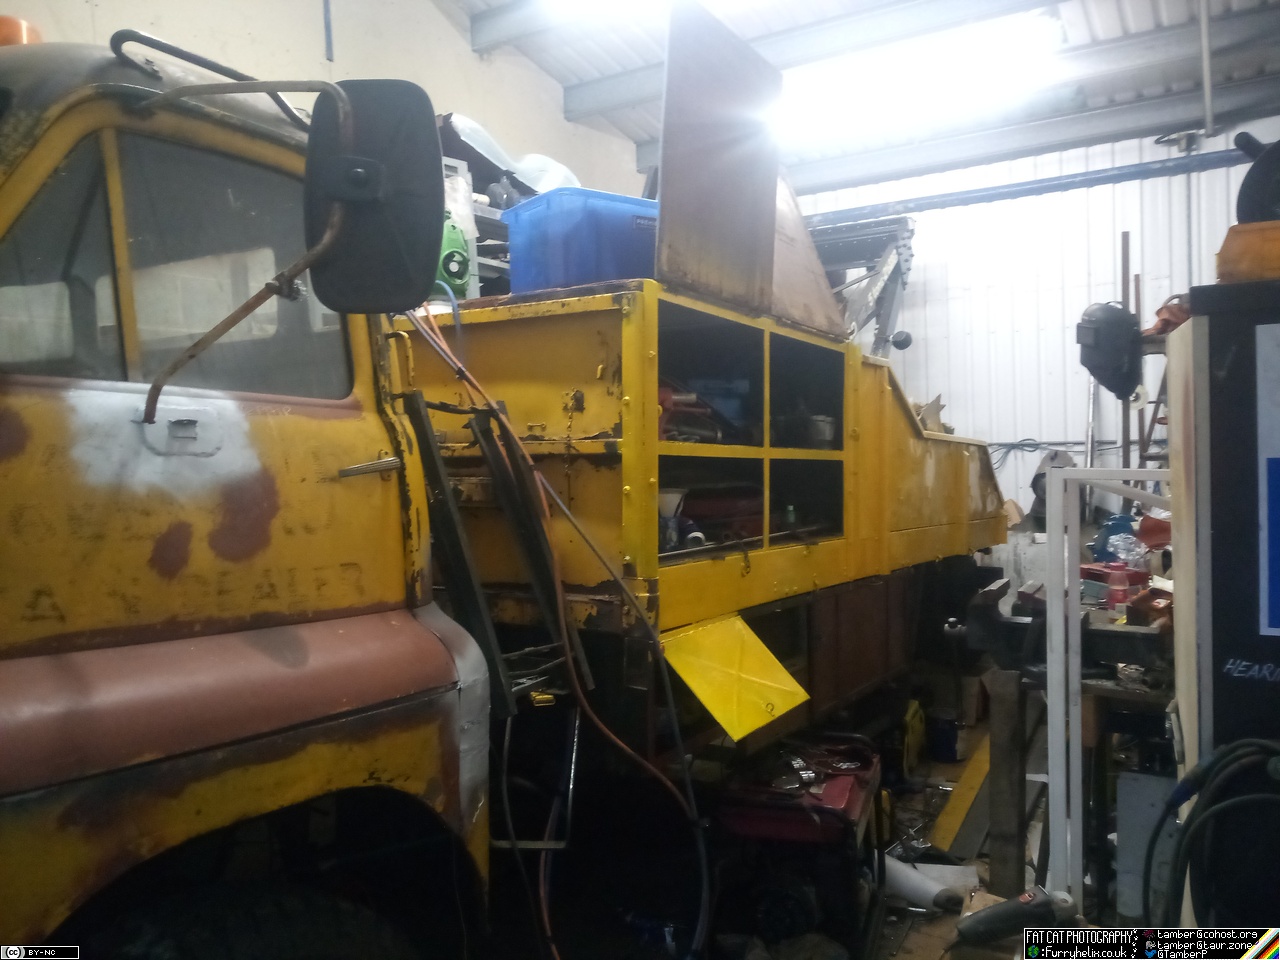 And I got one tab welded onto the air pipe, and as expected that was the last dregs of the argon. 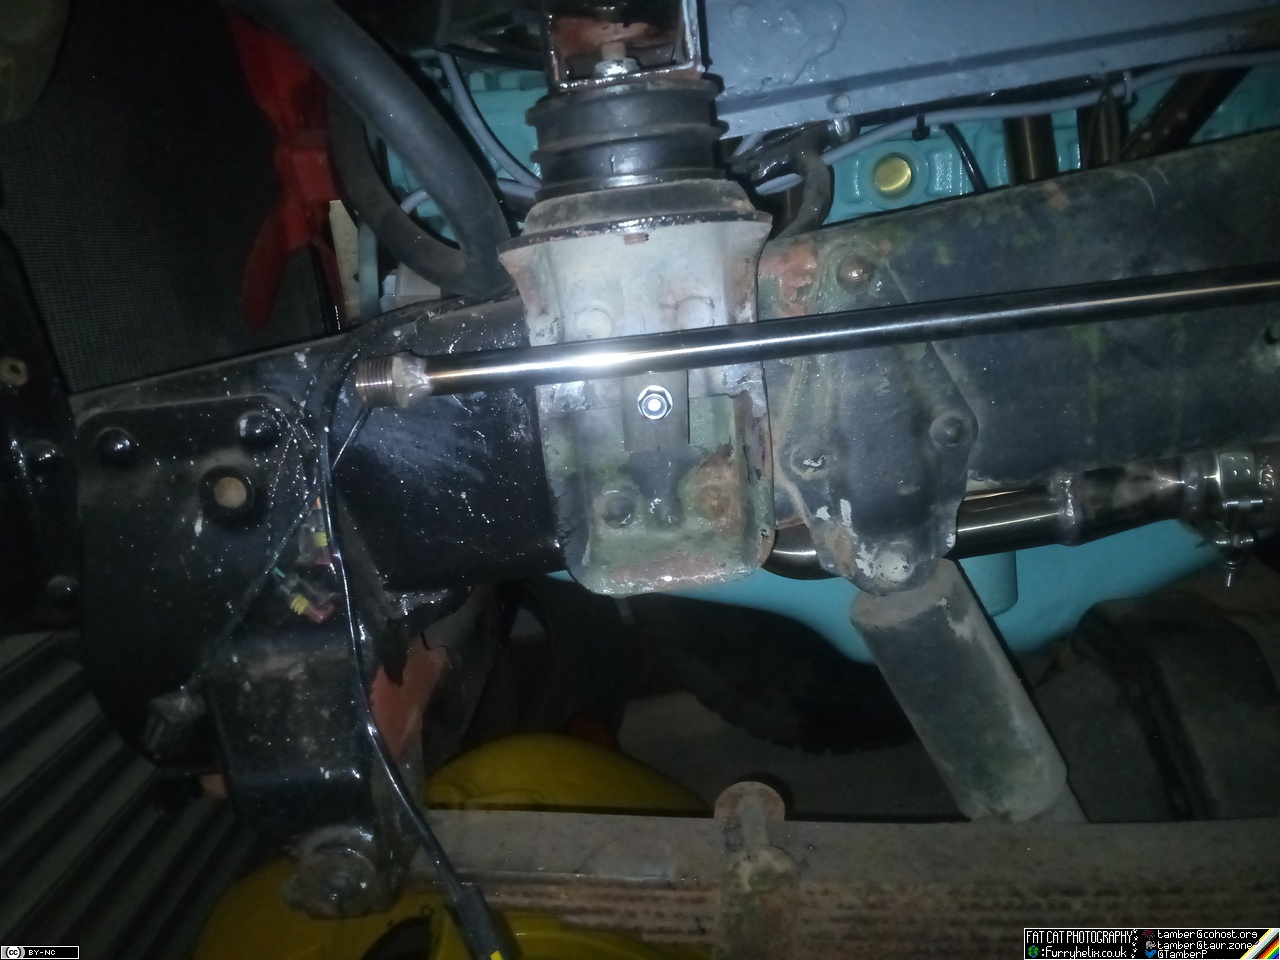 Thankfully, I got my brother to grab a replacement bottle, so that's sorted. I've done nothing directly to the truck since those pics (from the 8th), but having gotten more argon I did give TIG brazing a try on the aluminium and it does work a lot nicer than doing it with gas; probably because of the more concentrated heat. But it makes it incredibly obvious just how important the flux is to it even being possible to work with. As long as there's flux there, it makes a lovely join just like tig welding; but as soon as you get to a point where there's not enough flux, it just suddenly stops flowing and just becomes a big ugly blob. So I've bit the bullet and bought a new welder, that does AC as well. It's another magic mystery brand-of-the-week china made one, but I've had pretty decent luck with that so far. (Frustrations with the torch on my mig welder aside, anyway!) We'll see how that goes; I'm quite excited. Having the capacity to do aluminium is something I've missed since I left the bodybuilding shop... |
| |
-< Welder. Allegedly a mechanic. Bodger of Things >-
* 1958? Bedford RL - Progress: Glacial.
* 1994 Skoda Favorit - It's baaaaaaaack!
* 2018 Herald Classic - Gone!
|
|
Tamber
Part of things
  Shattered. Held together by spite and tape.
Posts: 342
Member is Online
|
|
|
|
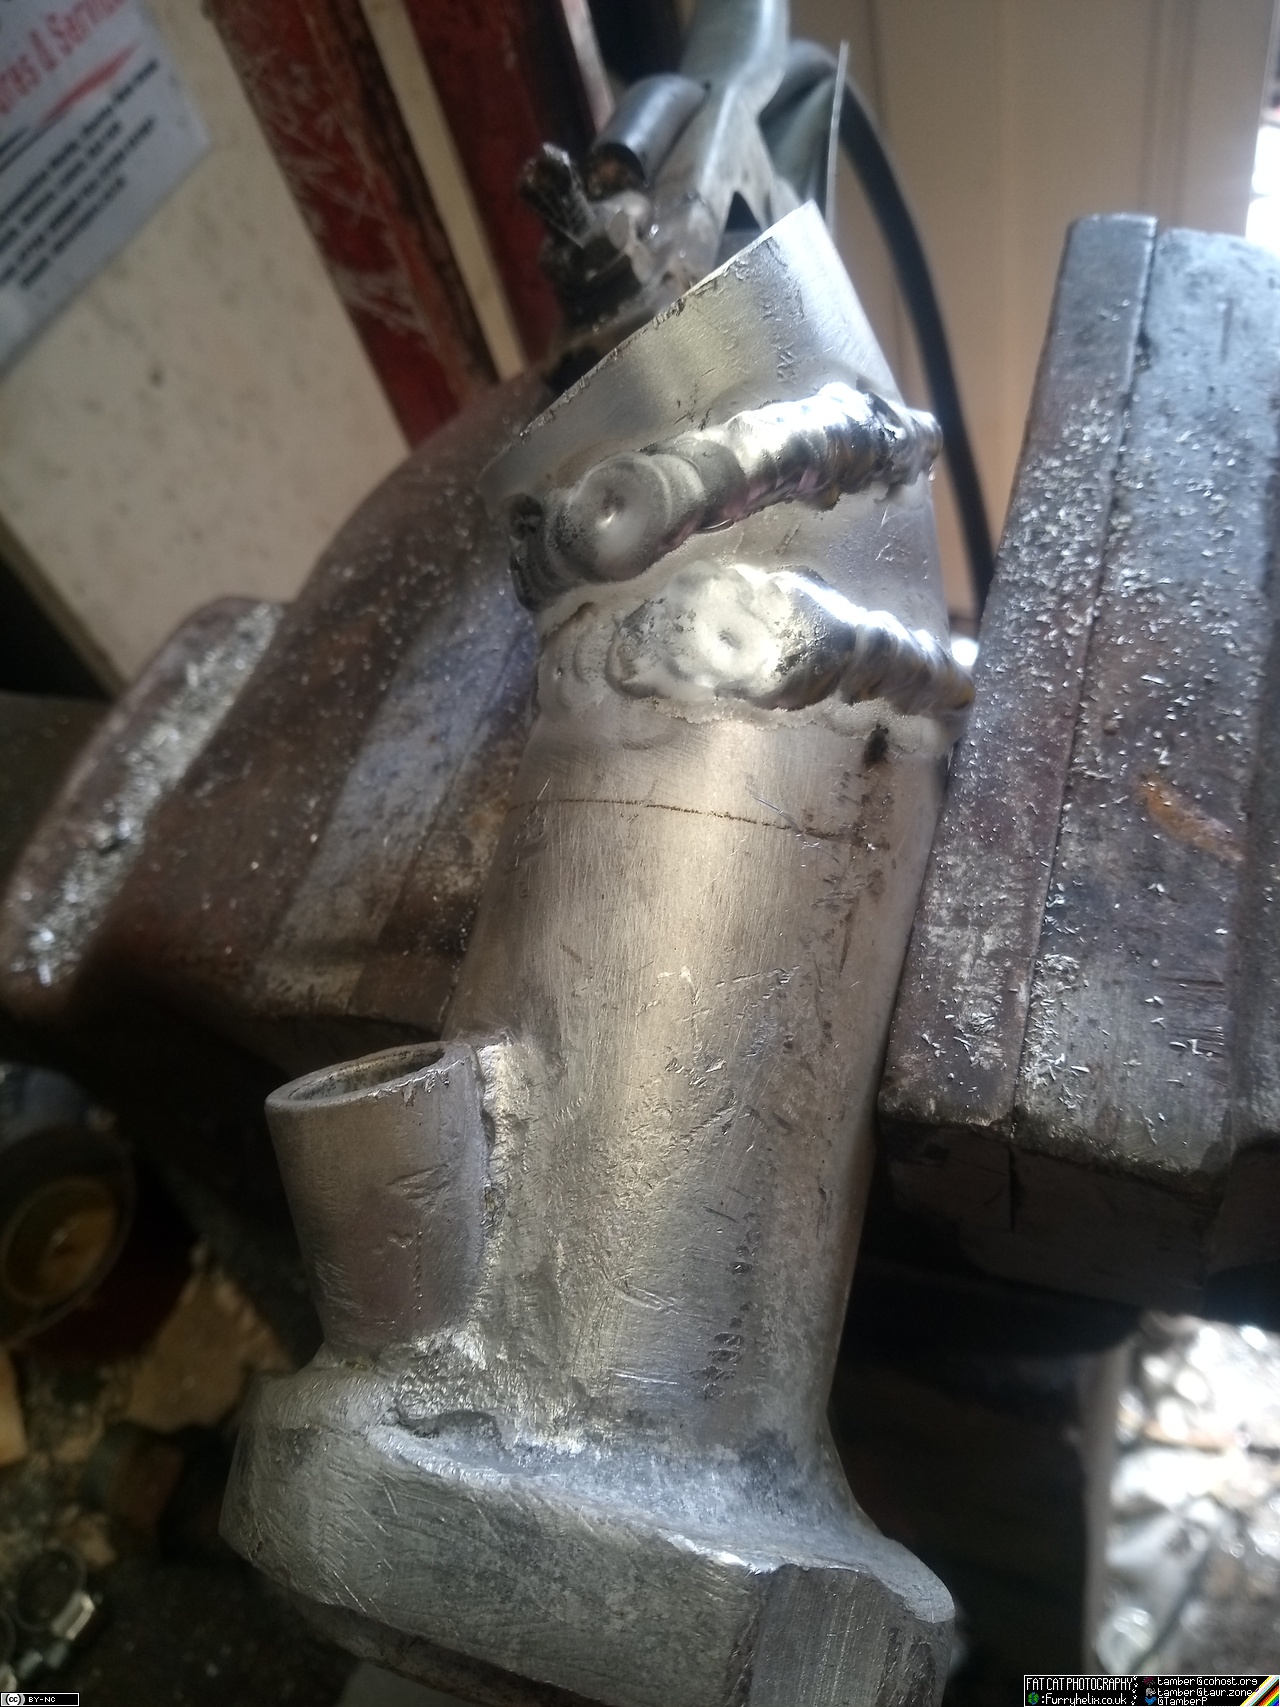 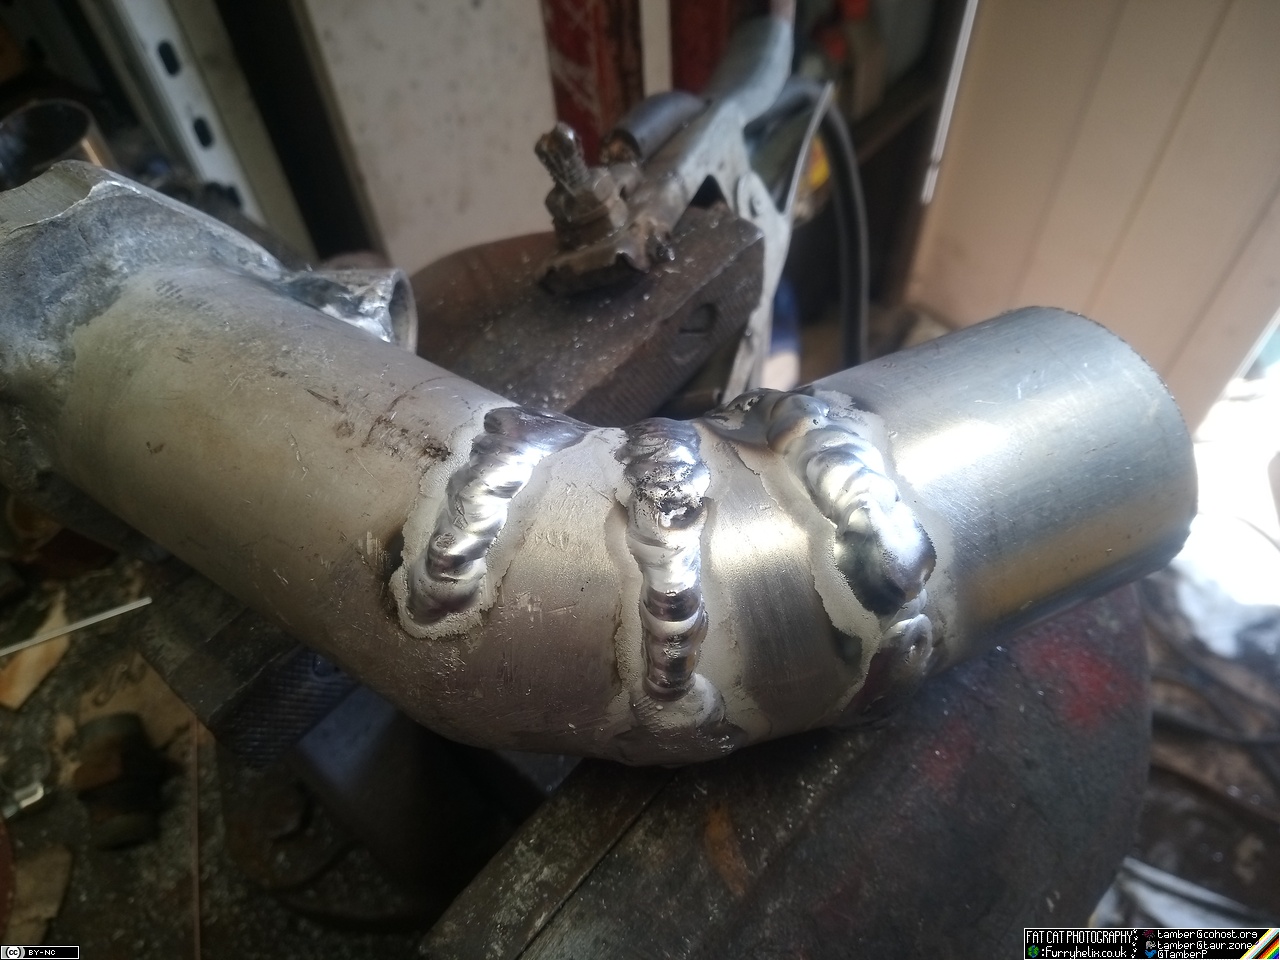 It's been a while since I've welded aluminium, but it's going quite nicely as I get the hang of it again. 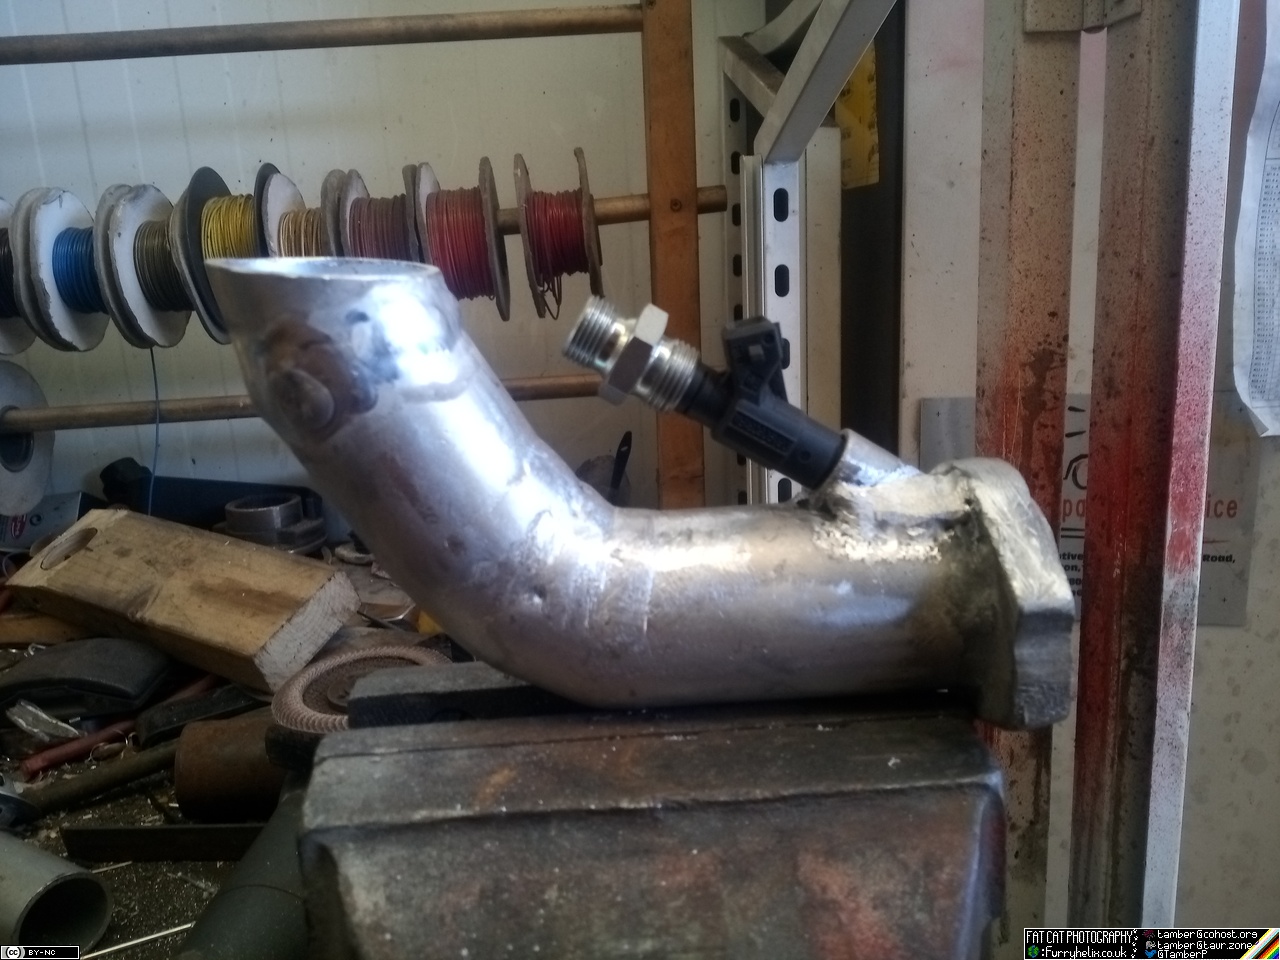 I think it's going to work out. Maybe. I have to be careful about the amount of space I have left, but I think I can make it work. (And if I can't, I guess I get more welding practise? The nice thing is, the component parts -- flanges and whatnot -- are pretty simple items to make, without needing to have somewhere laser-cut them for me; so if it turns out that it just won't work, I can make new ones and take a different tack. Though I would have to order more injector bungs.) 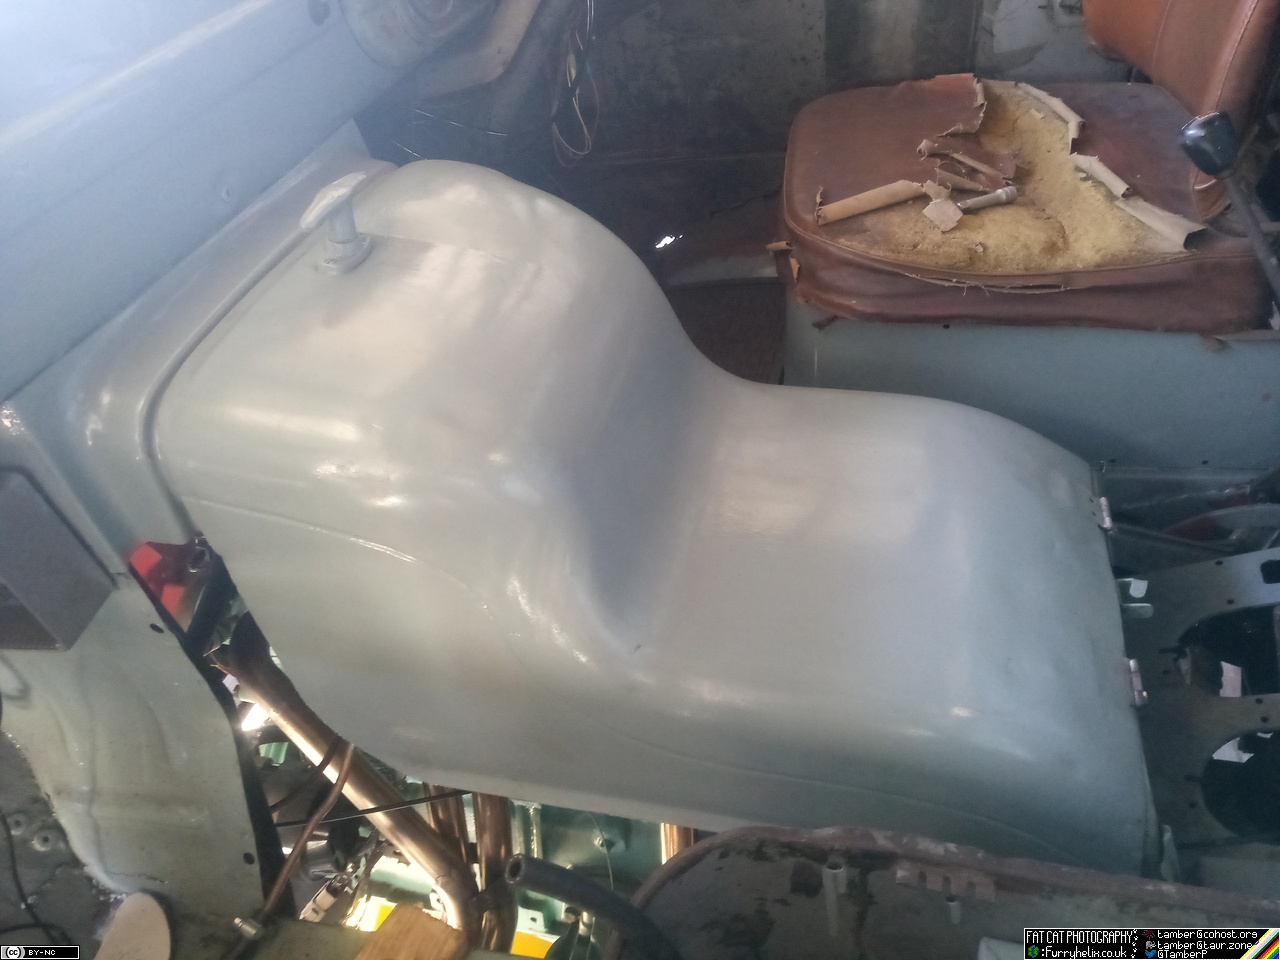 After all, it's got to fit underneath that engine cover.  The engine cover is now also bolted down where it should be, through the proper holes; though it does appear I need to extend the hinges slightly to capture both bolts on each side rather than just the uppermost. It'll do for now. In the process of doing that, however, I've discovered a broken spot-weld that's supposed to be holding down the rear panel of the engine-hump, and which has allowed everything to slump backwards to the extend that the cover no longer latches properly; so I'll have to do something about that before too long. No big deal, but it will mean a *little* more damage to the paint I thought I was done with. Still nice to fill up some of the gaping hole in the cab, mind. Makes it feel a bit more finished, just for a moment. At some point next week, I've probably got to find myself a piece of heavy plate I can use to make a jig for manifold welding, try prevent it turning into a pretzel that won't seal. (And if I use my brain, I can make it match all the ports and bolt-holes on the head... Not that I foresee there being a great demand for manifolds for a Bedford 300, mind!  But it would help with perhaps sorting out that slightly wonky front manifold that pulls up a bit funny and tends to blow the gasket out...) Anyway, that's a lot of words all to say that the new welder is working out nicely, and I've spent several hours making horrible loud buzzing noises and melting aluminium.  |
| |
-< Welder. Allegedly a mechanic. Bodger of Things >-
* 1958? Bedford RL - Progress: Glacial.
* 1994 Skoda Favorit - It's baaaaaaaack!
* 2018 Herald Classic - Gone!
|
|
|
|


 There's some other pieces that run between them, to support the fabric.


