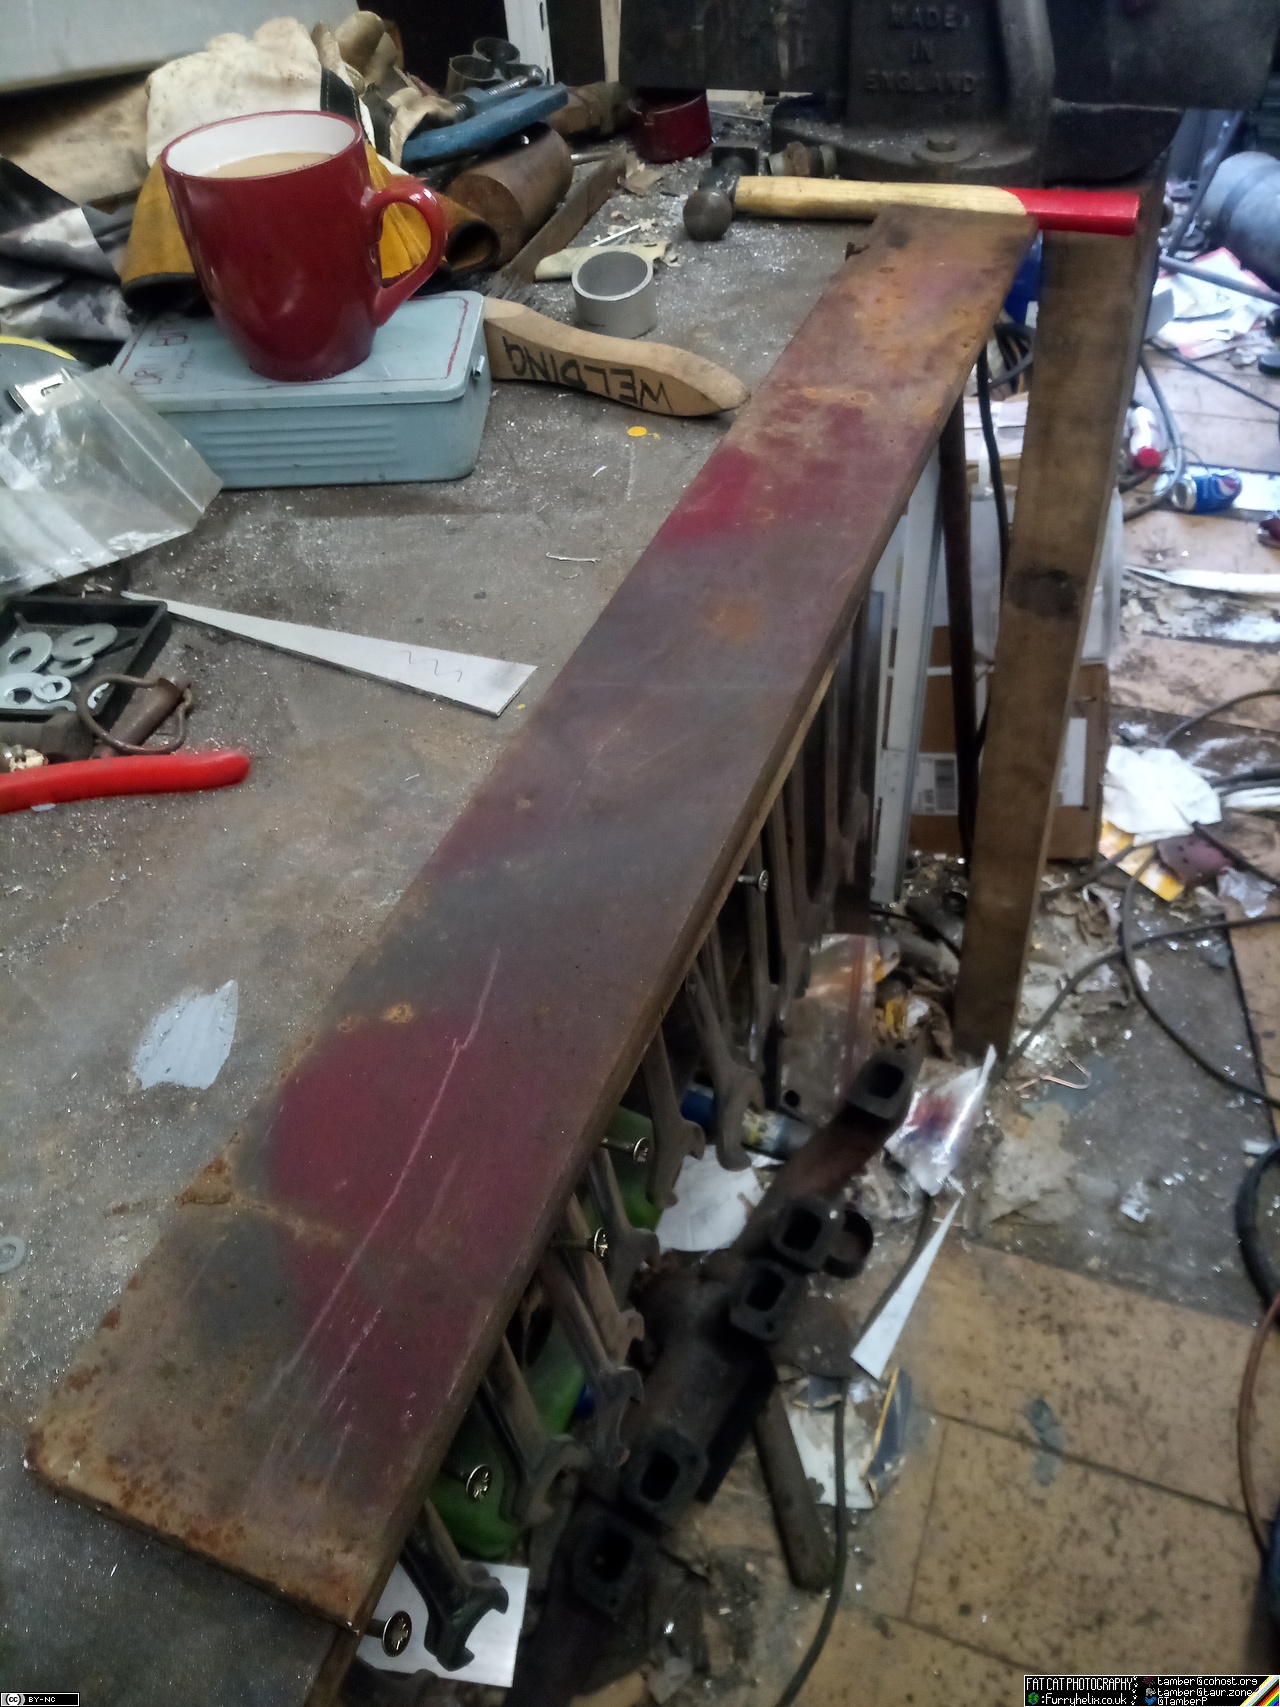
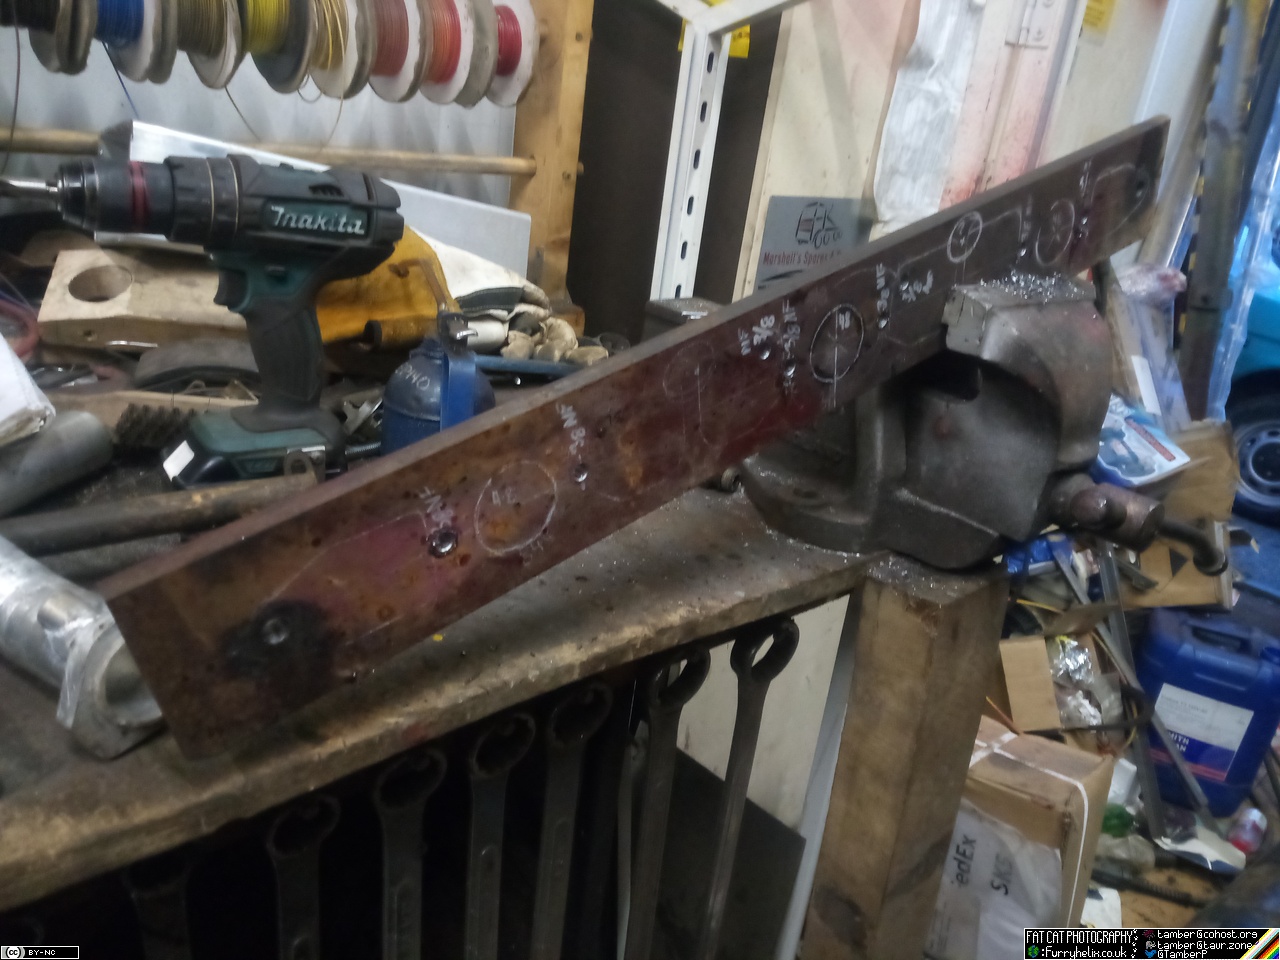
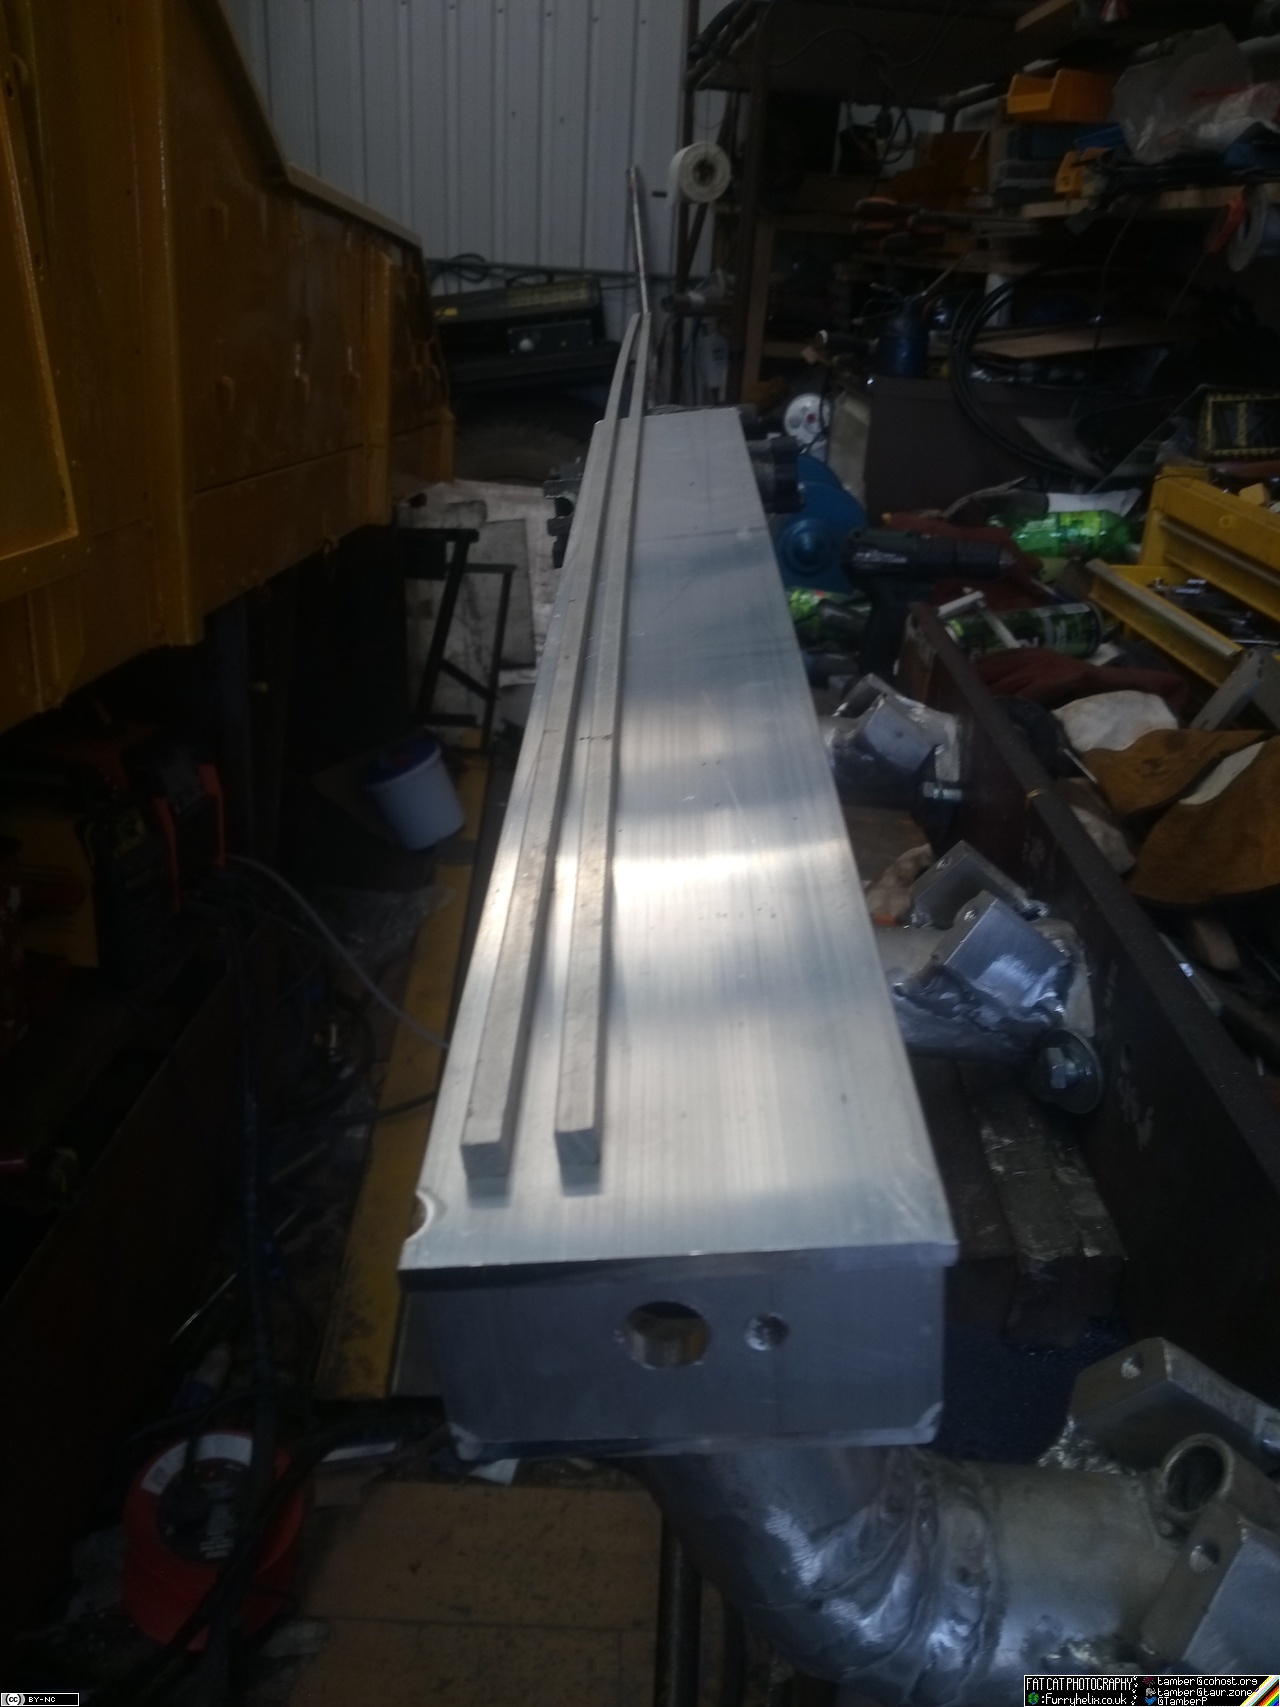
First off for this evening, let's start with that fixture plate.
A 33" long piece of 100x16mm should do nicely.
Spend an hour and a half measuring, marking, re-measuring, re-marking, re-re-measuring, head-scratching, drinking coffee and thinking real hard, then measuring again just to make sure. It's recommended you do some swearing when you find out that the 3 pairs of studs that clamp down the inlet manifold all have different spacings. (There's about 3 to 4mm between the tightest to the widest.)
Thankfully, their exact spacing isn't critical, as long as they don't interfere with the flanges on the manifolds. But this does explain why I had a bigger gap than expected between two manifold flanges; I thought I'd just screwed something up with the welding somewhere, but the bolt-holes lined up!
Then spend about half an hour drilling holes, and waiting for the drill to cool down. Optional step: Discover your 3/8NF tap has disappeared into the aether, and decide maybe that's enough on the fixture for one evening. I'm extremely not looking forward to drilling three 48mm holes through it.
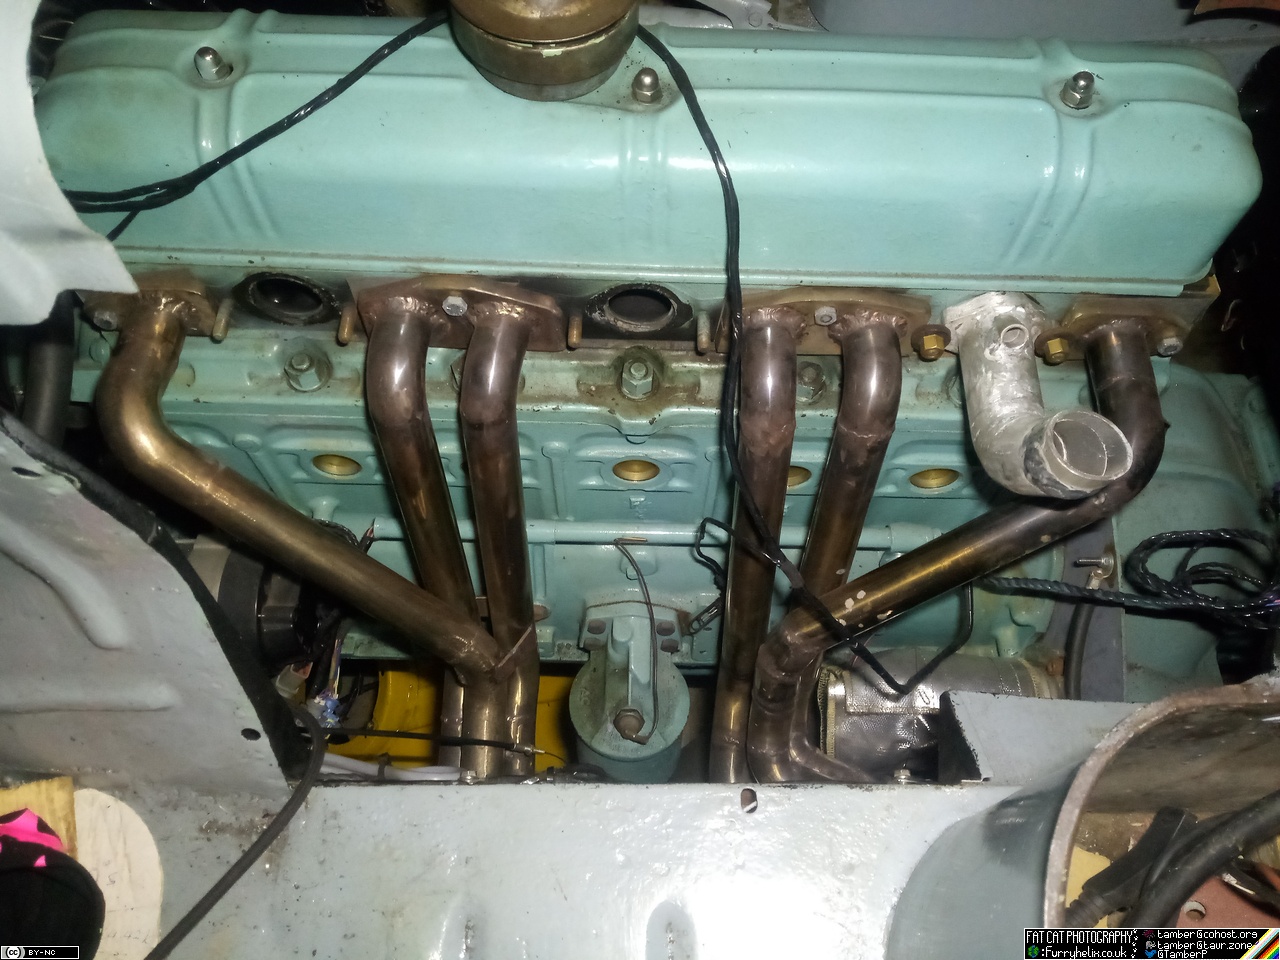
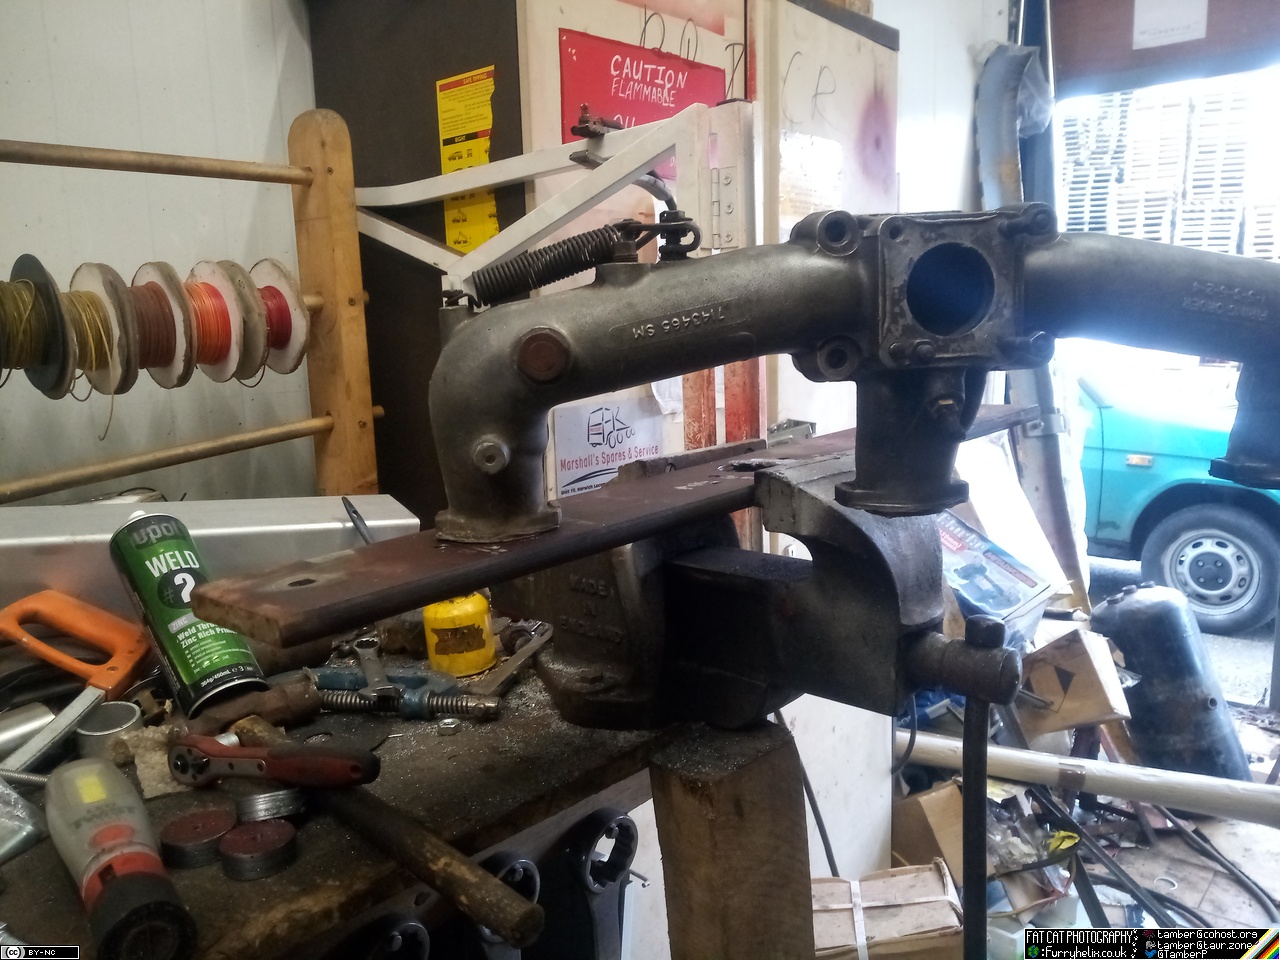
With that on hold, next I want to test-fit that intake runner I've been making, and see how much clearance I have to the engine cover. From measuring, I was pretty sure I'd have a little over 2 inches, but there's nothing quite like fitting it and measuring.
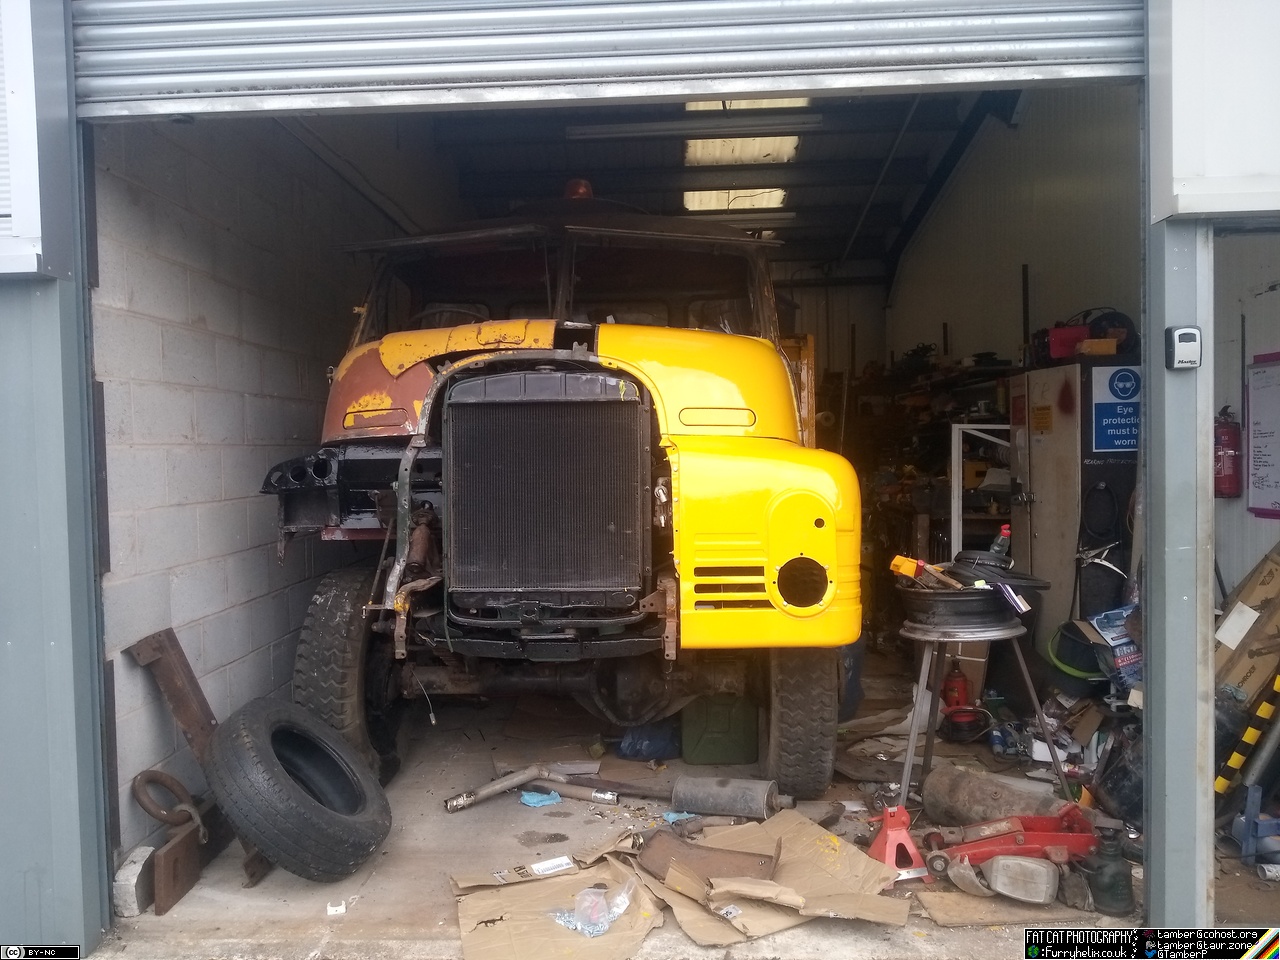
(This picture also shows that the engine is settling into its home quite nicely. Plenty of grot helping tone down that fresh paint. You can also see that the exhaust for #3 is blowing, and has destroyed its gasket; something warped during welding, and if I don't tighten them down in the correct sequence it won't seal. I'm hoping to fix that, hence why adding the exhaust mounting holes to the fixture )
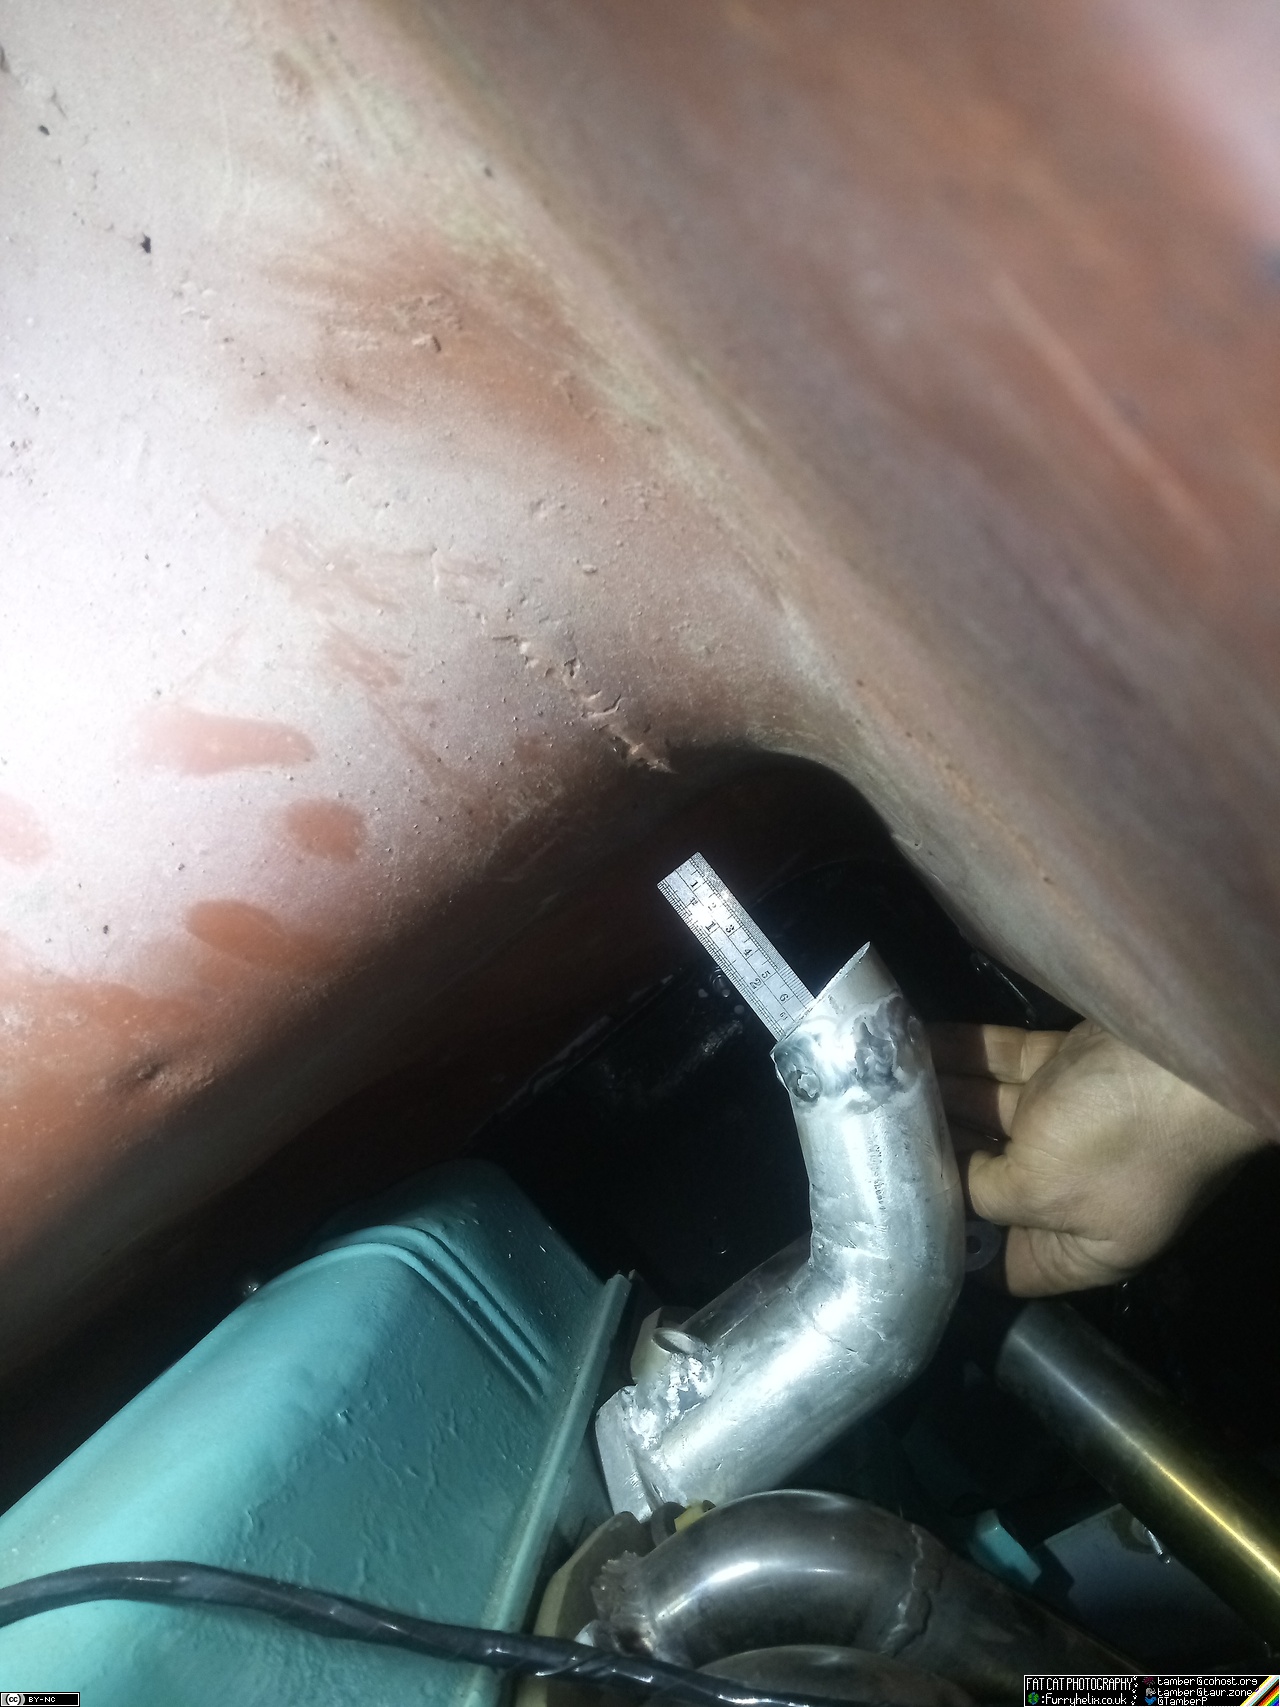
Next step is to close the engine cover, and hold up a calibrated stick behind the intake runner, to show how much clearance there is to the lid.
It's about 2-3/4" or so, at the tightest point. I want to leave at least 1/2" to the underside of the cover and any insulation I end up adding, so it is going to be tight regardless. Going to do some more pondering and doodling...
(Do I make a wedge shaped plenum right on top of that vertical section of the runner? Do I roll the runner hard over another 90 degrees and build the plenum over the top of the injectors? I was pondering over intake trumpets, but I don't think there'd be enough room for that, and I don't think they'd add any real benefit anyway; so long as the transition is smooth... This sure is a neat corner I've painted myself into!)
-< Welder. Allegedly a mechanic. Bodger of Things >- * 1958? Bedford RL - Progress: Glacial. * 1994 Skoda Favorit - It's baaaaaaaack! * 2018 Herald Classic - Gone!
Man, I seem to have been crazy busy for having not gotten a lot done!
The car forced my hand on the exhaust front, when I hit a speedbump at a funny angle dodging some clown who came to a complete stop on the far side of a blind bend on a B-road, and the exhaust just ... disintegrated. As amusing as it is for a small central-european economy car from the 90s to sound like it's just driven out of a tractor factory in Stalingrad and straight into action, the novelty wears off very quickly.
So I spent five hours welding up just barely enough of an exhaust that I can use the car. It's basically just a 2" straight-pipe with a 45 degree turn-down pointing at the floor on the passenger side; but I sacrificed a complete roll of steel wool from my little selection bag and stuffed that into said turn-down, with a little piece of bar tacked across the end to hold it in place, and it's surprisingly civilised unless I really lean on the throttle.
I managed to put a burn-mark on my tongue, because I was getting so sleep deprived that I went to hold the filler rod in my mouth while I adjusted the pipe in the vice... and bit down on the wrong end of said filler rod. I do not do well when I start running low on sleep.
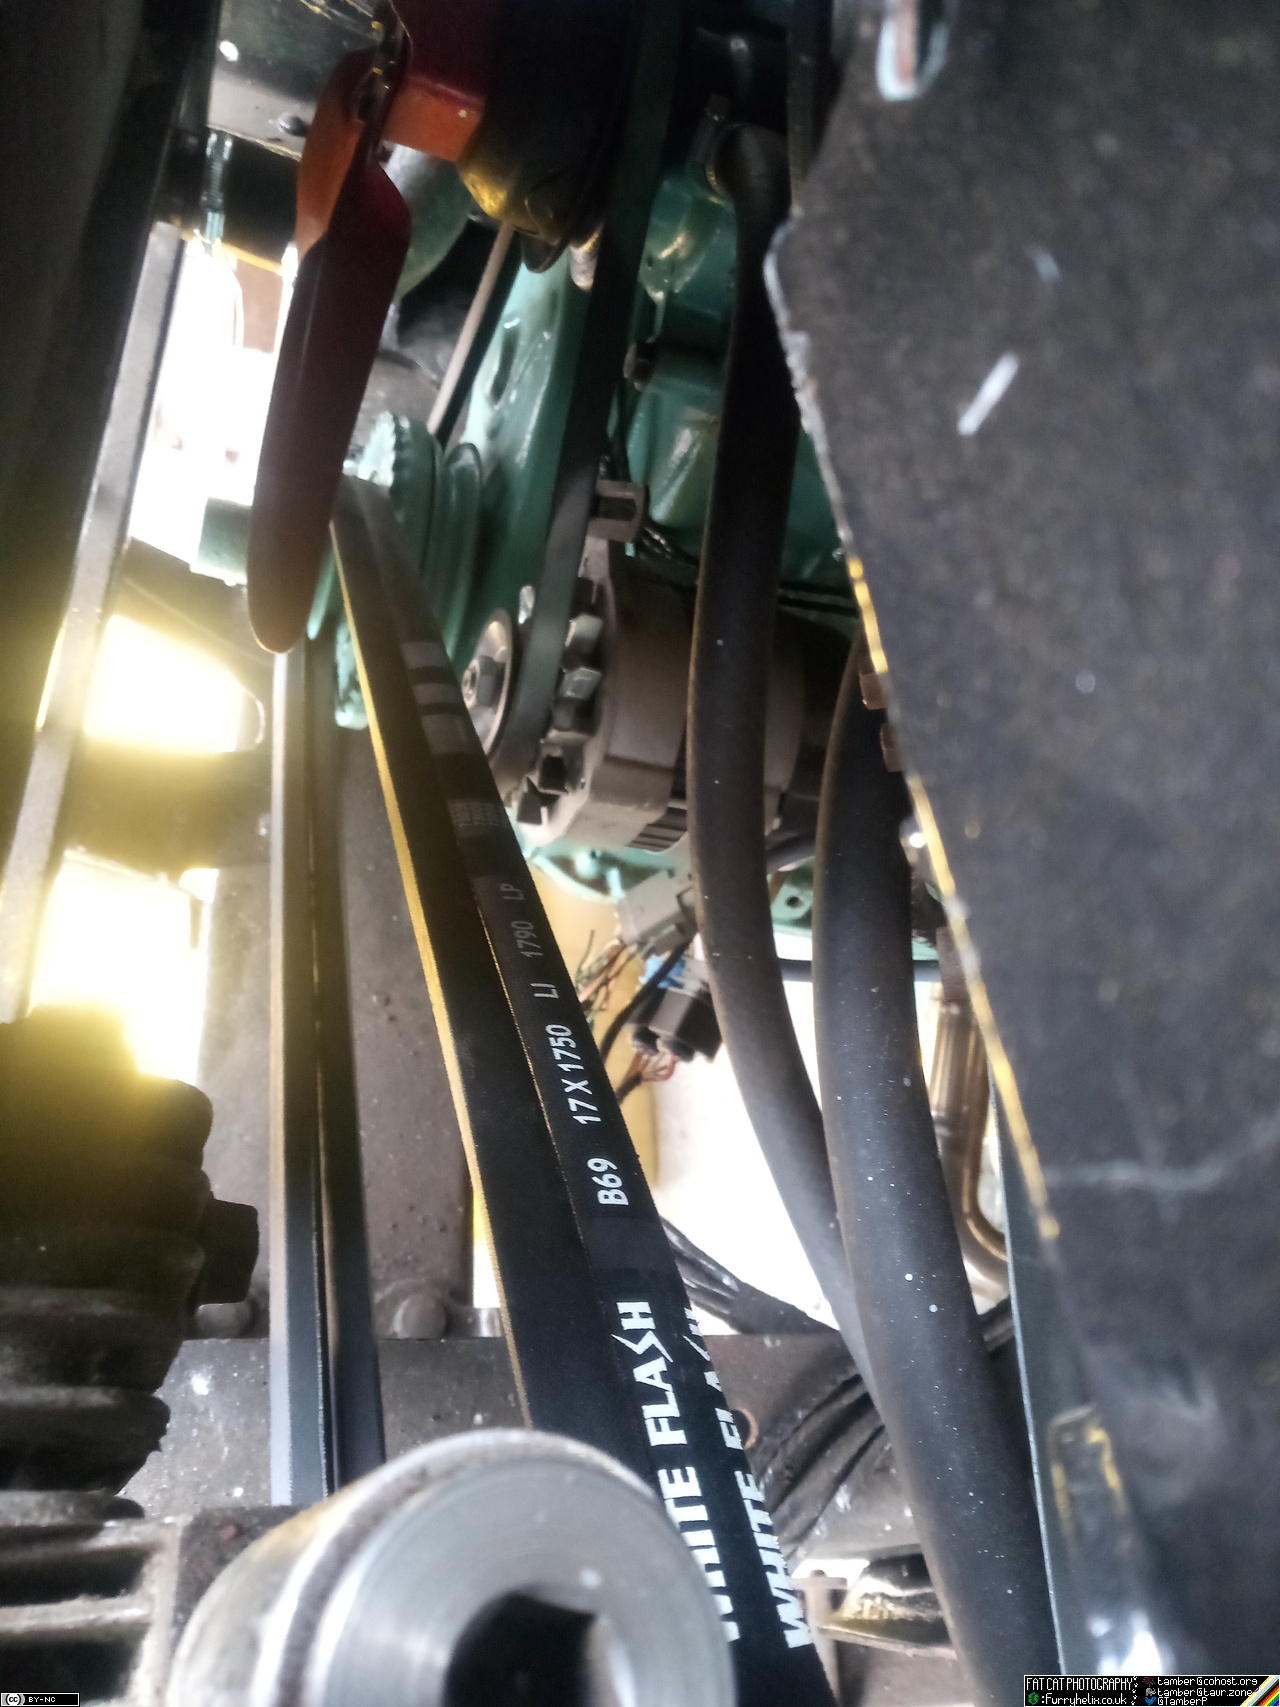
On the truck front, I've ordered belts for the compressor (I hope it's the right size this time, I really do.), and new taps so I can finish that weld fixture!
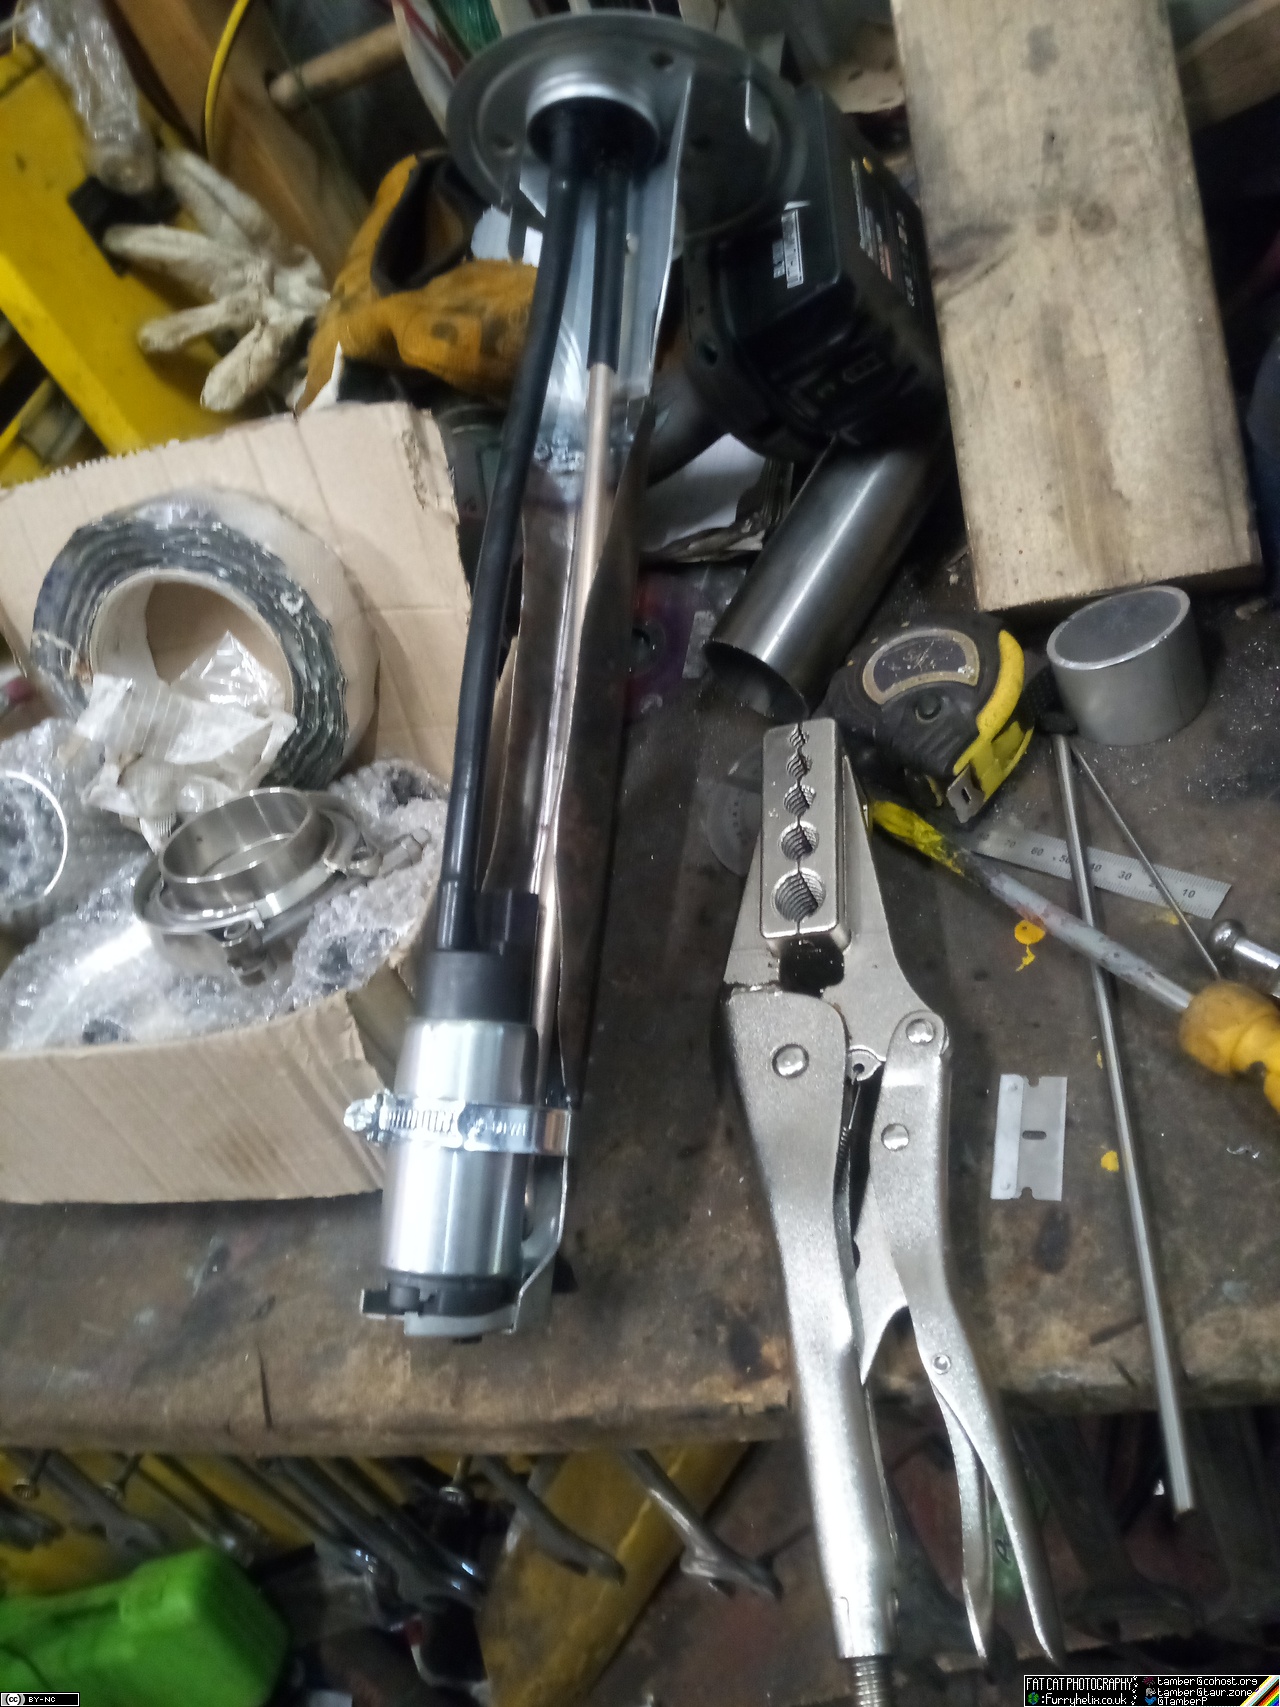
I've also fitted pipe to the extended fuel pump pickup thing. It's a slightly thinner wall, more flexible version of the nylon pipe I'm using for air on the truck; since I had the remains of a big roll of it from redoing the fuel lines on my car several years back. Need to put some little clamps on it, but I can't remember where I left them.
(Those air-pipe pliers are a godsend for pushing nylon tubing onto hose-barbs and the like, without kinking it!)
Now I just need to come up with a mounting flange to stick it to the tank (and space it up a little bit, I think) and I'll be golden!
Oh, and noodling over intake manifold design continues, too...
-< Welder. Allegedly a mechanic. Bodger of Things >- * 1958? Bedford RL - Progress: Glacial. * 1994 Skoda Favorit - It's baaaaaaaack! * 2018 Herald Classic - Gone!
Laser Tools 7030, if it helps. I do quite a bit of nylon air and fuel pipe in the day-job, so they're a real timesaver.
Well, that's that sorted. Still need to get some longer bolts, as well as find (or re-make) the tensioner bolt thing. I'm also pretty sure I have the bolts for the compressor's intake manifold, so I should find those and actually fit that bit properly too.
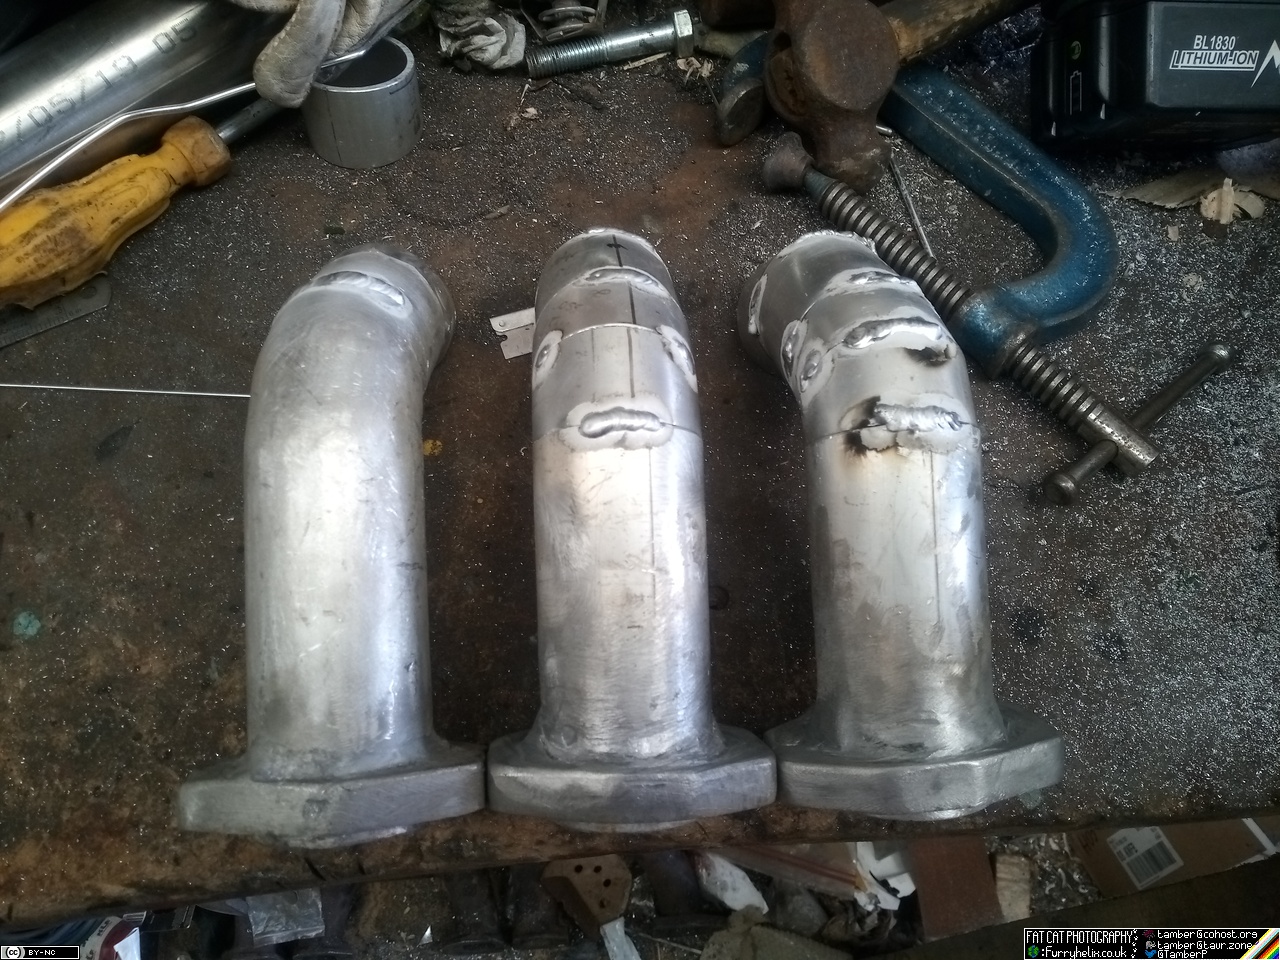
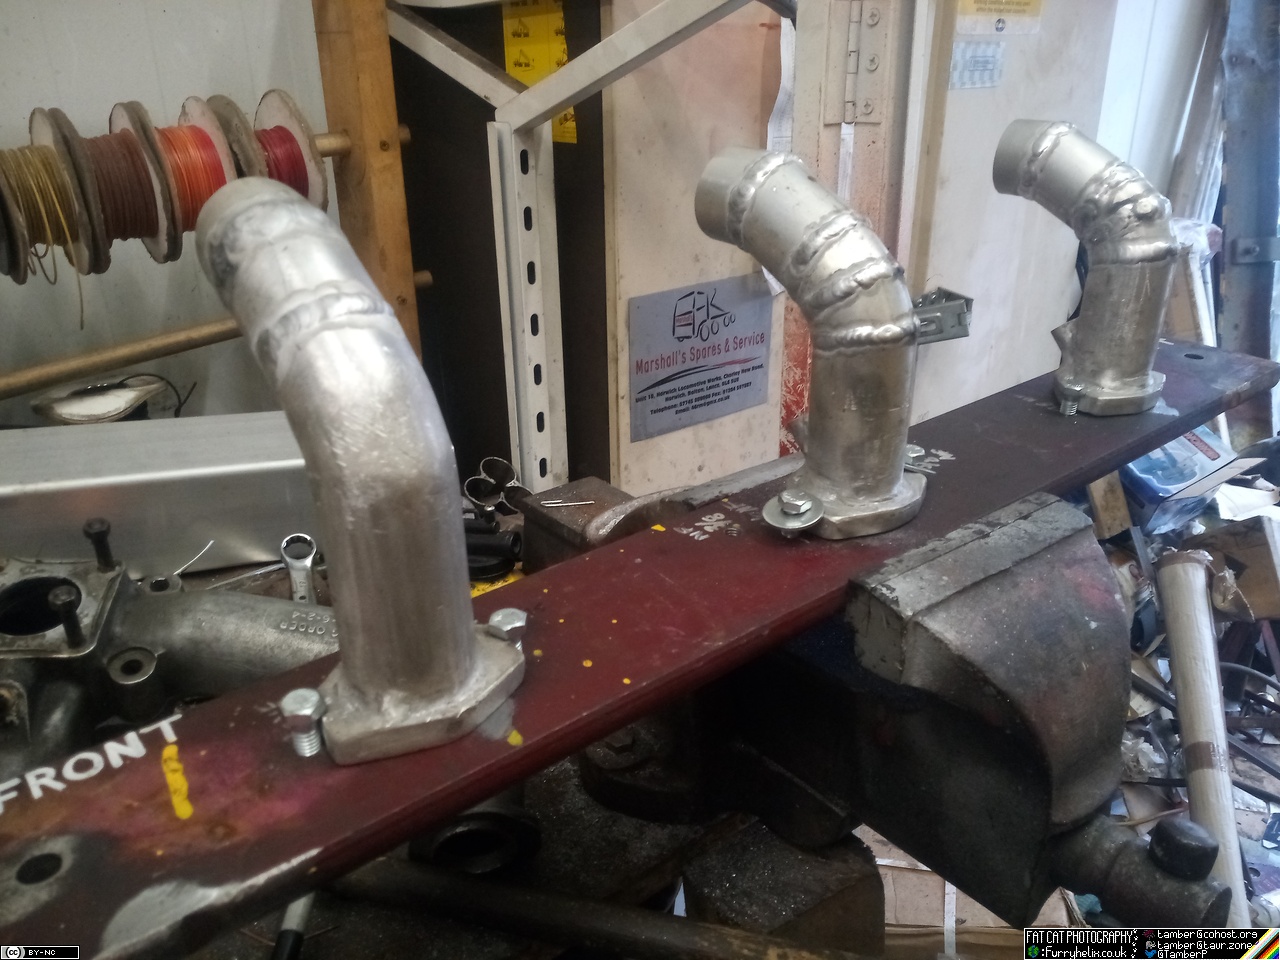
While I'm still noodling over how I want the manifold to lay out, I can still make up the other two runners to the same finishing point as the first. So, step one, cut some material in just the right way...
Enweldinate
And admire
Optional step: Quietly wonder where the hell that missing manifold nut went, because it doesn't appear to have hit the floor. (Or if it has, it's zoomed off into oblivion.)
I would like to also get the mountings for the injector hold-downs done, but I have managed to kill my drill (To be fair, it was already poorly, but now I've really finished it off. Smoke, flames, and flying chunks from the vents... It went out in spectacular fashion!) So those bits are a bit stuck until I can grab my other drill from work (and buy a new one at some point.)
Also got started on the other mounting bracket for the back end of the main compressor feed pipe, but that needs a hole drilling in it, so that's on pause for now as well.
Still plenty of other bits n pieces to fabricate, things to paint, etc. Frankly, the list seems neverending!
-< Welder. Allegedly a mechanic. Bodger of Things >- * 1958? Bedford RL - Progress: Glacial. * 1994 Skoda Favorit - It's baaaaaaaack! * 2018 Herald Classic - Gone!
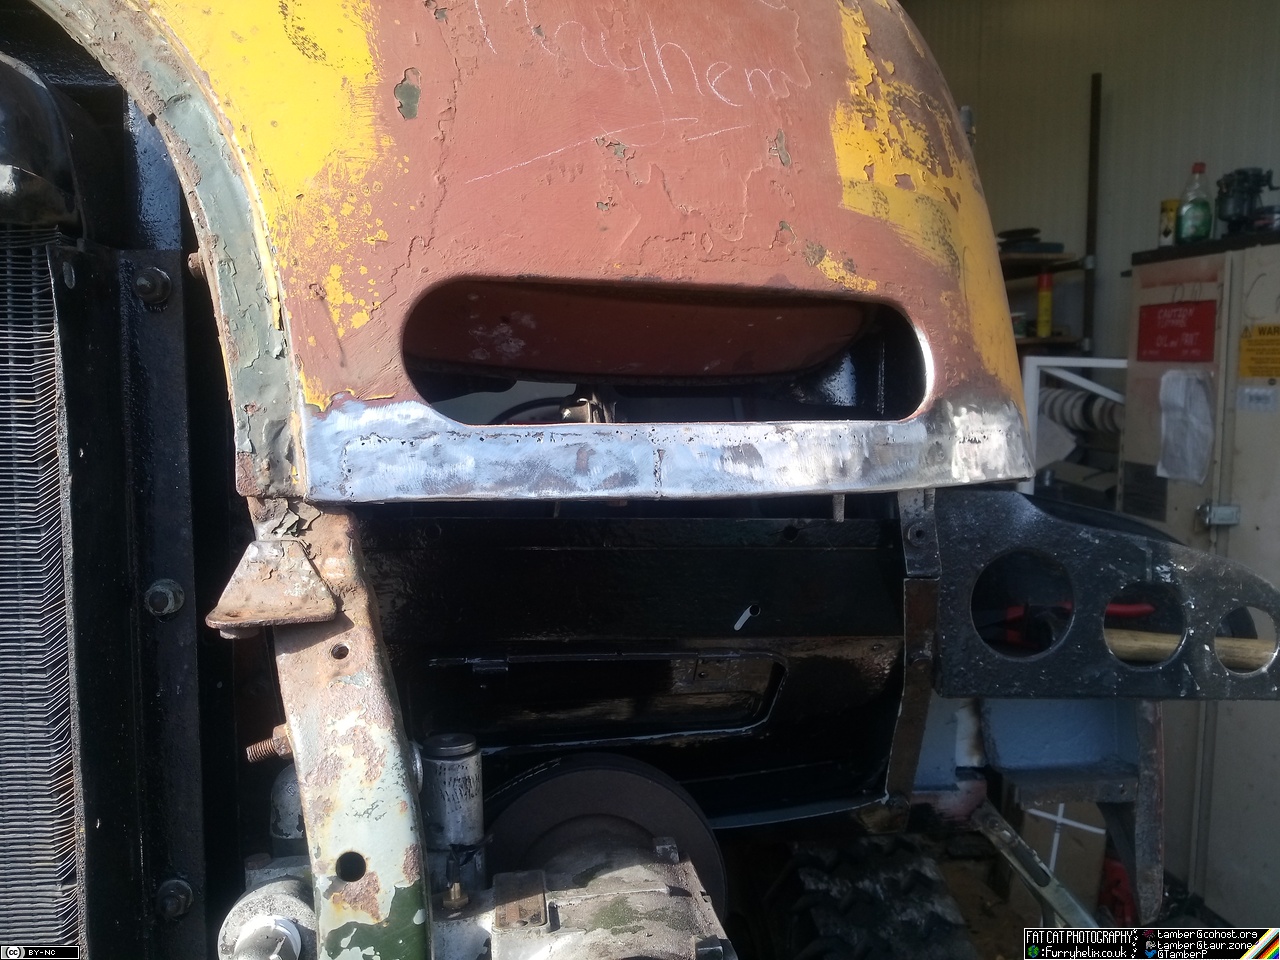
That's coming along quite nicely. I also gave the nearside front wing a cleaning and another coat, too, since I had the paint out. Really should finish repairing that cheek panel, so that I can refit this one, at some point.
Next on the list, since I was stalled without a drill, was making a bracket to mount my air manifolds. Step one is finding a suitable location on the chassis to mount it; right here behind the brake booster, with these two convenient holes in the chassis, seems a fantastic place.
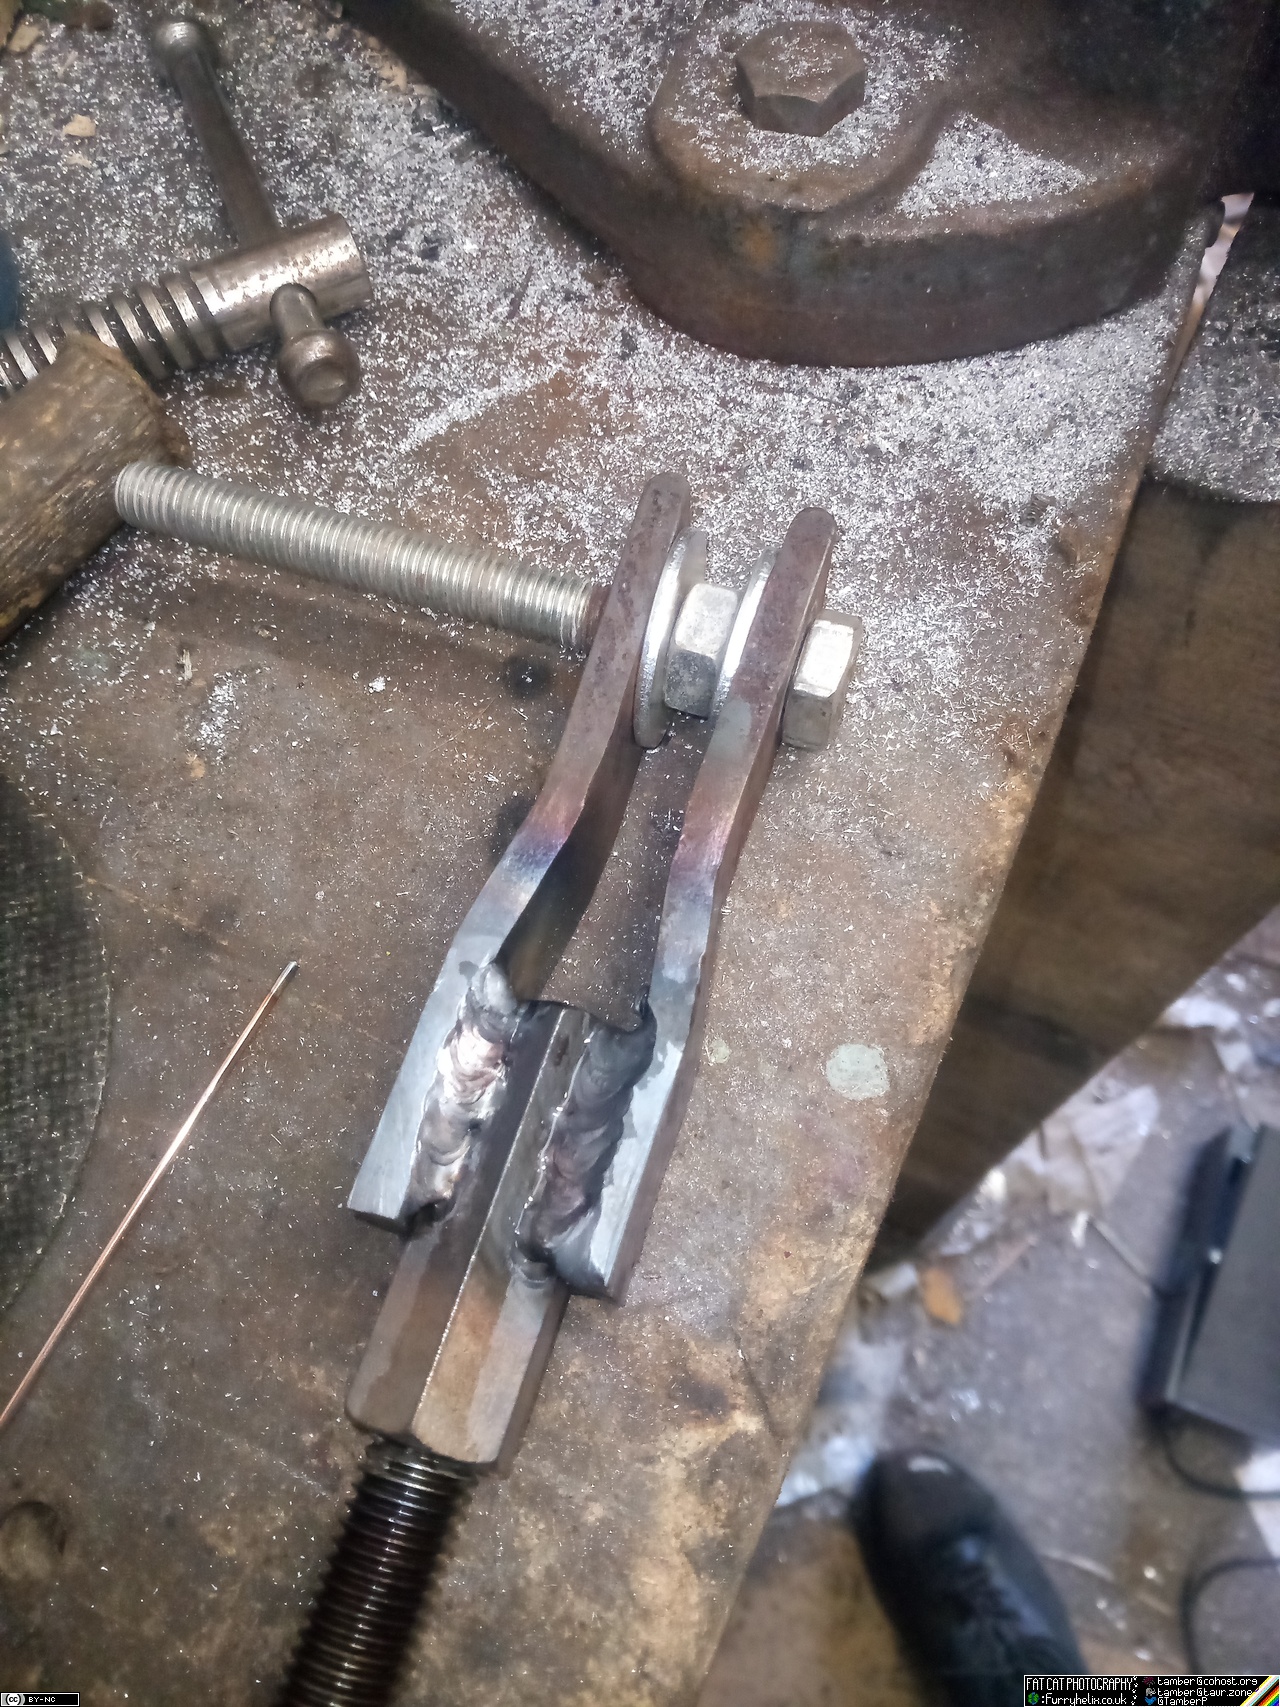
Forgot to get a picture of the bracket all welded up, so instead have a moment of me not thinking ahead far enough. I needed to hold both halves of this clevis in place while I welded it up, and they needed to be spaced a certain distance apart, so I wound a nut onto the bolt to act as a spacer.
(Thankfully, it did come out easily enough, but there was a moment of intense concern when I realised what I'd done.)
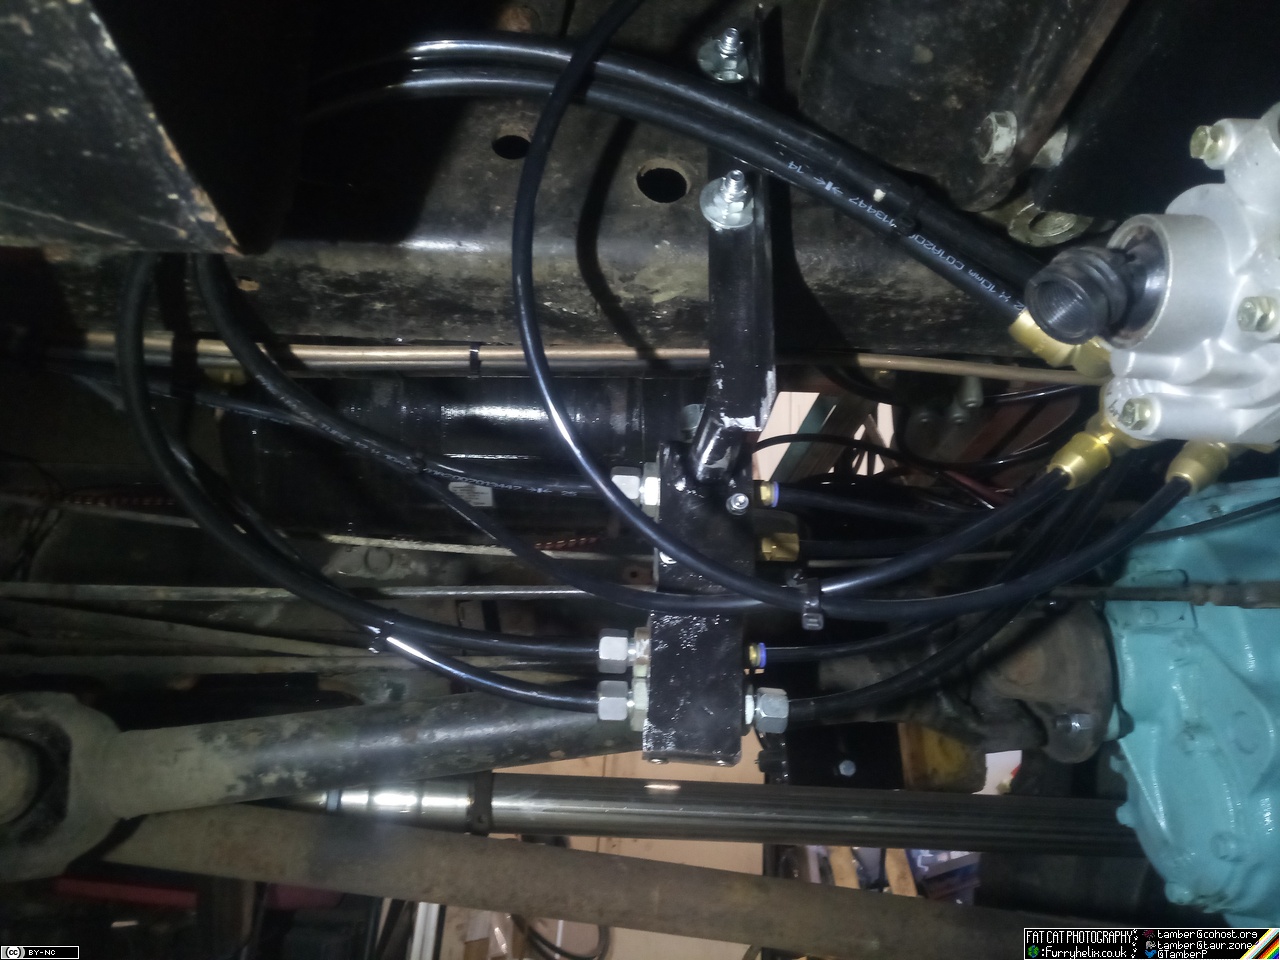
Rolling on forward to today, I brought my drill home from work, and put the two required holes in the air manifold bracket. At which point, I figured it'd be rude not to start connecting pipes.
The open threaded hole in the upper block is an additional circuit 1 air port for auxiliary uses (like the winch drive clutch, and so forth), and whatnot. Being extremely pedantic about it, technically that's not optimal, because a leak would draw down the air pressure available for the brake servo; but that's no worse than how the truck was originally built, and I can always move it to circuit 3 at a later point if I decide it's worth worrying about. (Circuit 3 is currently earmarked for an air-tool/tyre-inflator supply.)
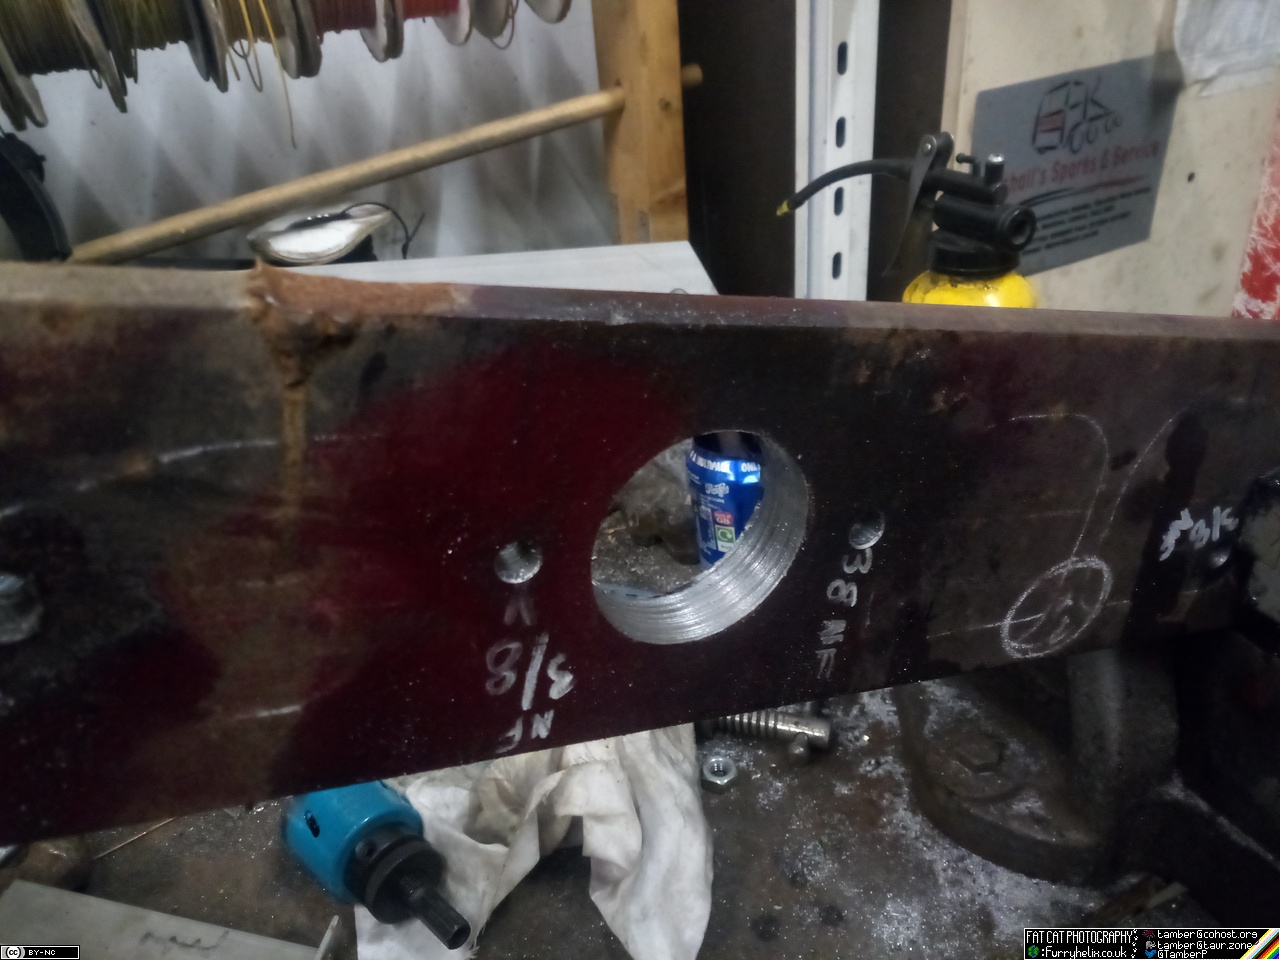
Anywho, I also went and drilled one of the three big holes in the weld fixture, which took some time. It does also occur to me that I don't need those mounting holes to be UNF, and I don't have any free 3/8NF bolts anyway; so I could just tap them UNC and be done with it. I may need to move at least one of them over, though, depending on how the flange sits on the inlet manifold; but I'll have to drill the other two inlet holes first before I decide that.
Oh, and I did find that missing manifold nut. It was hiding under the back of the offside front wheel.
-< Welder. Allegedly a mechanic. Bodger of Things >- * 1958? Bedford RL - Progress: Glacial. * 1994 Skoda Favorit - It's baaaaaaaack! * 2018 Herald Classic - Gone!
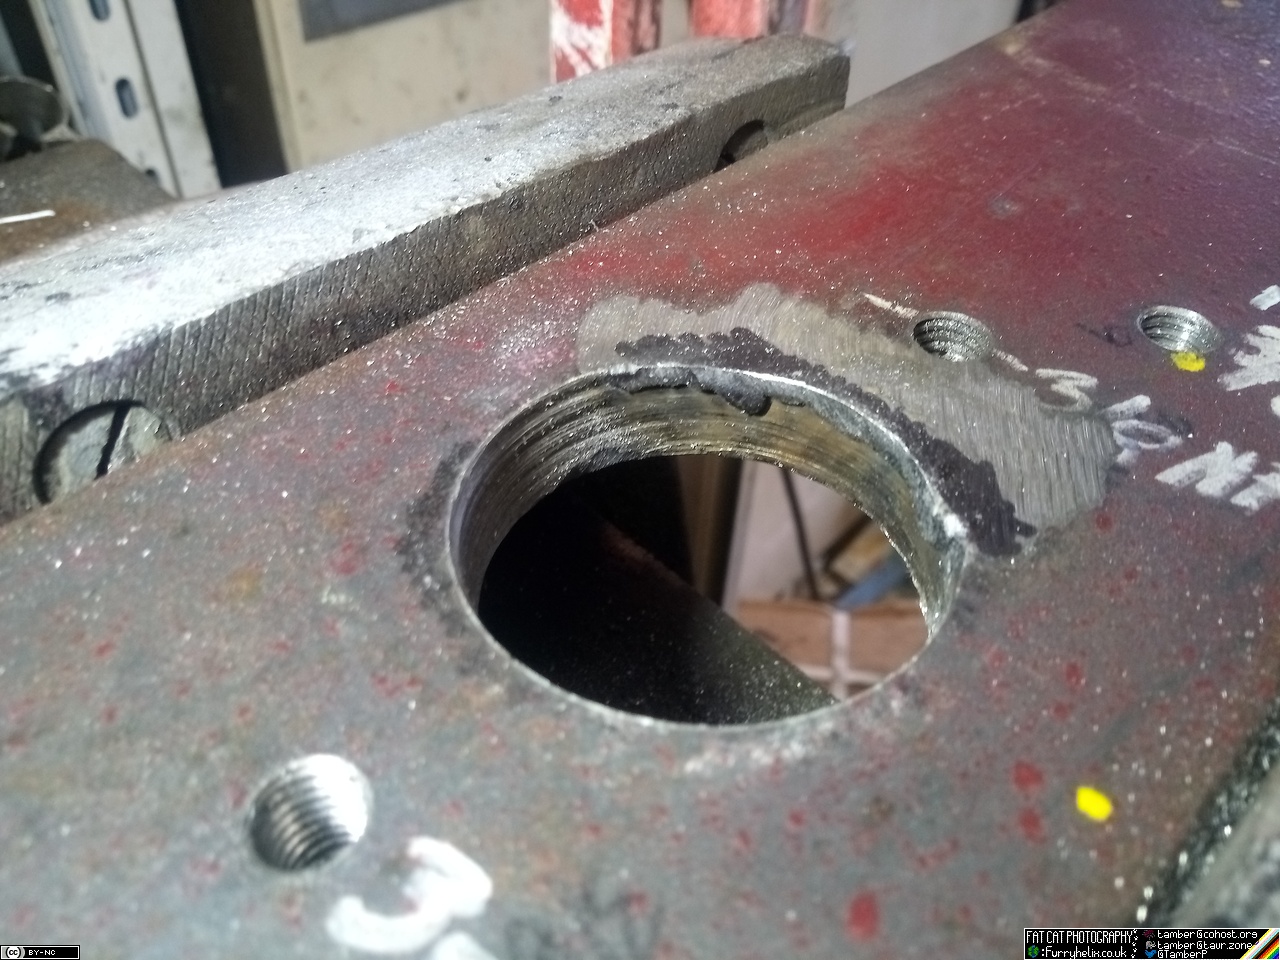
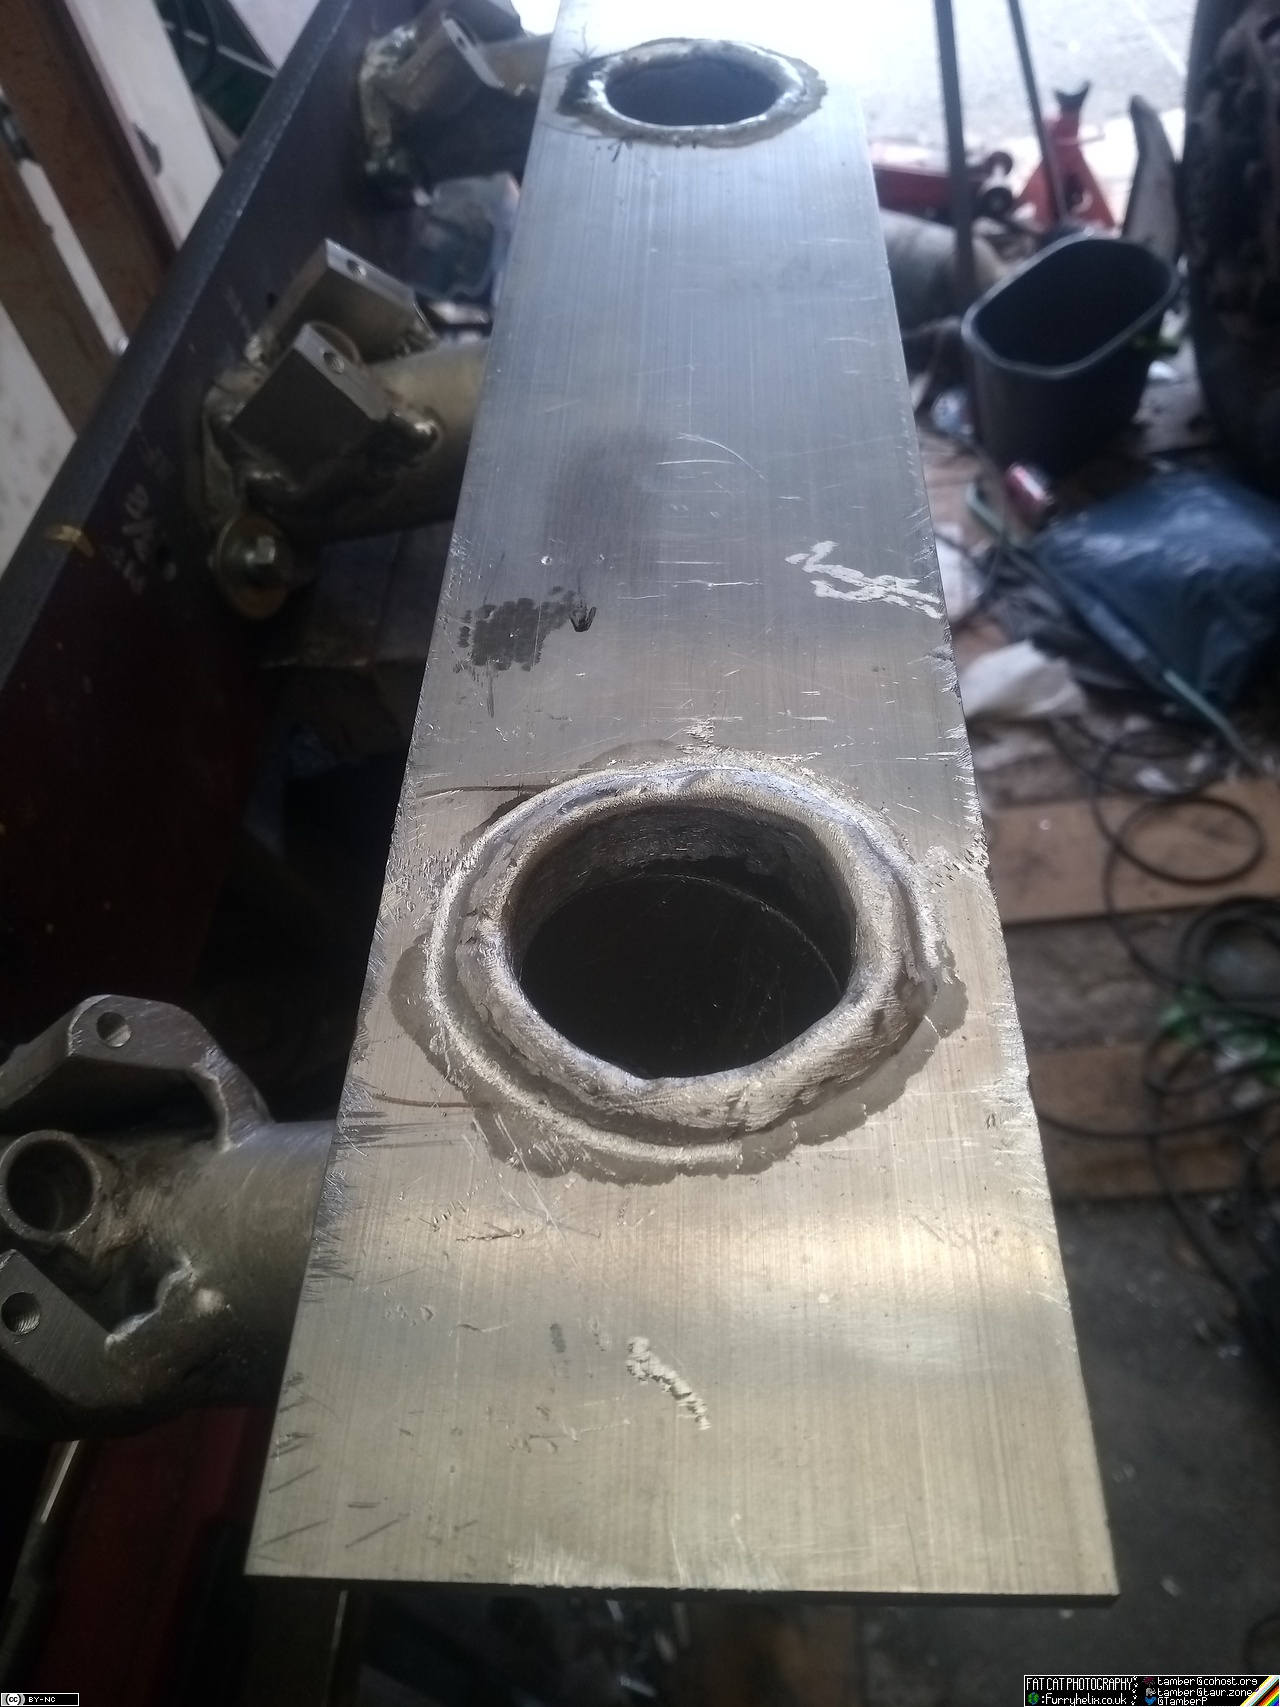
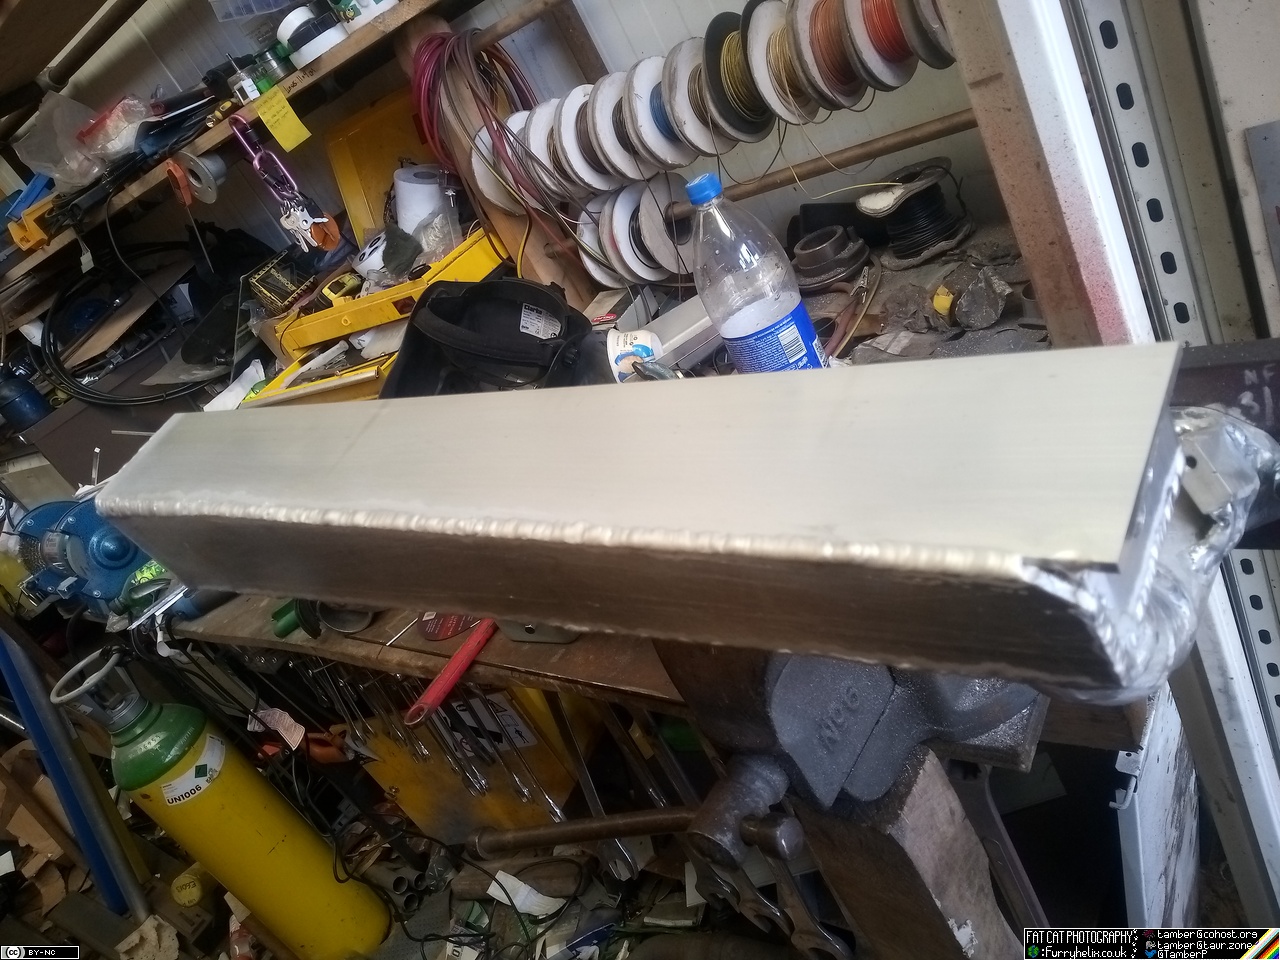
Then, follow this up with some additional fettling (carefully applied weld, then dress back with a file) to ensure as snug a fit as possible.
That will do nicely.
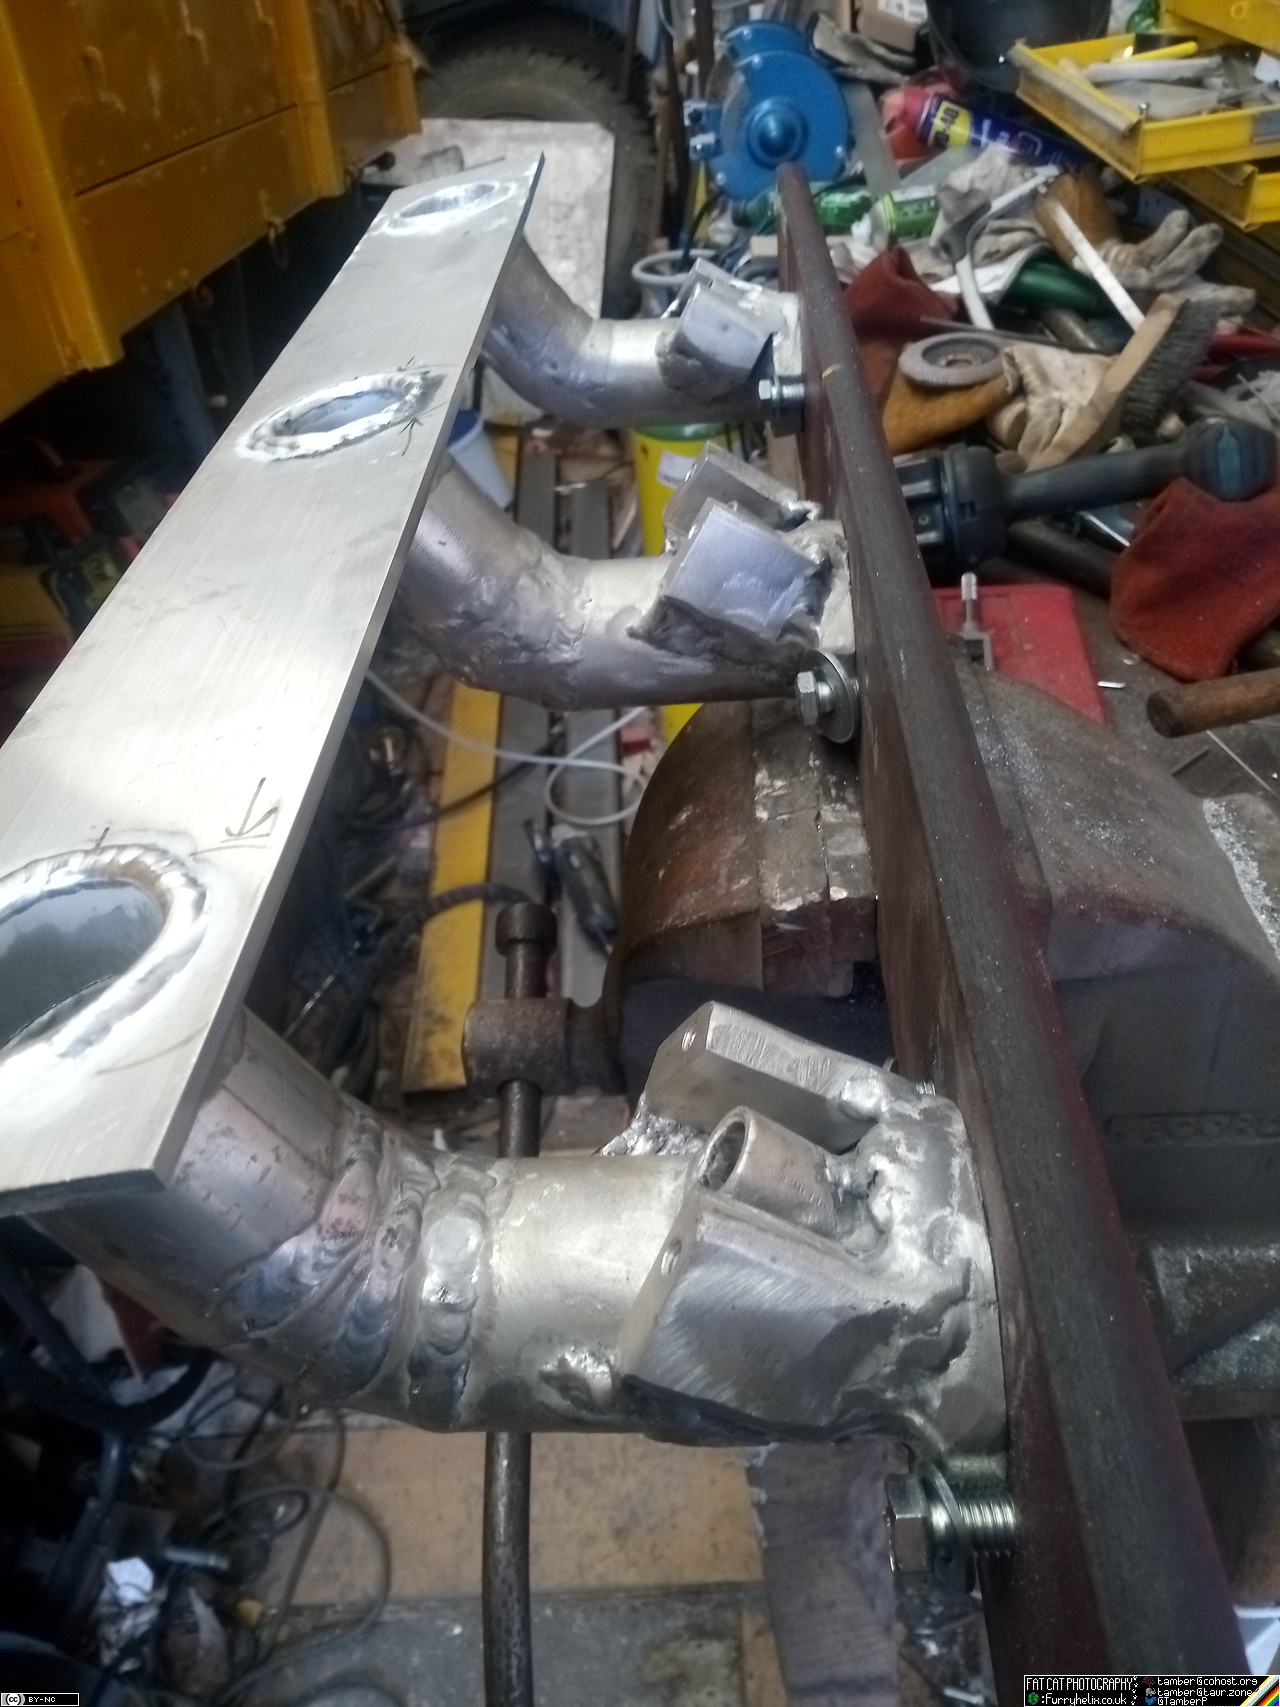
Next step, pull all the new inlet runners back off the engine and try them in the fixture.
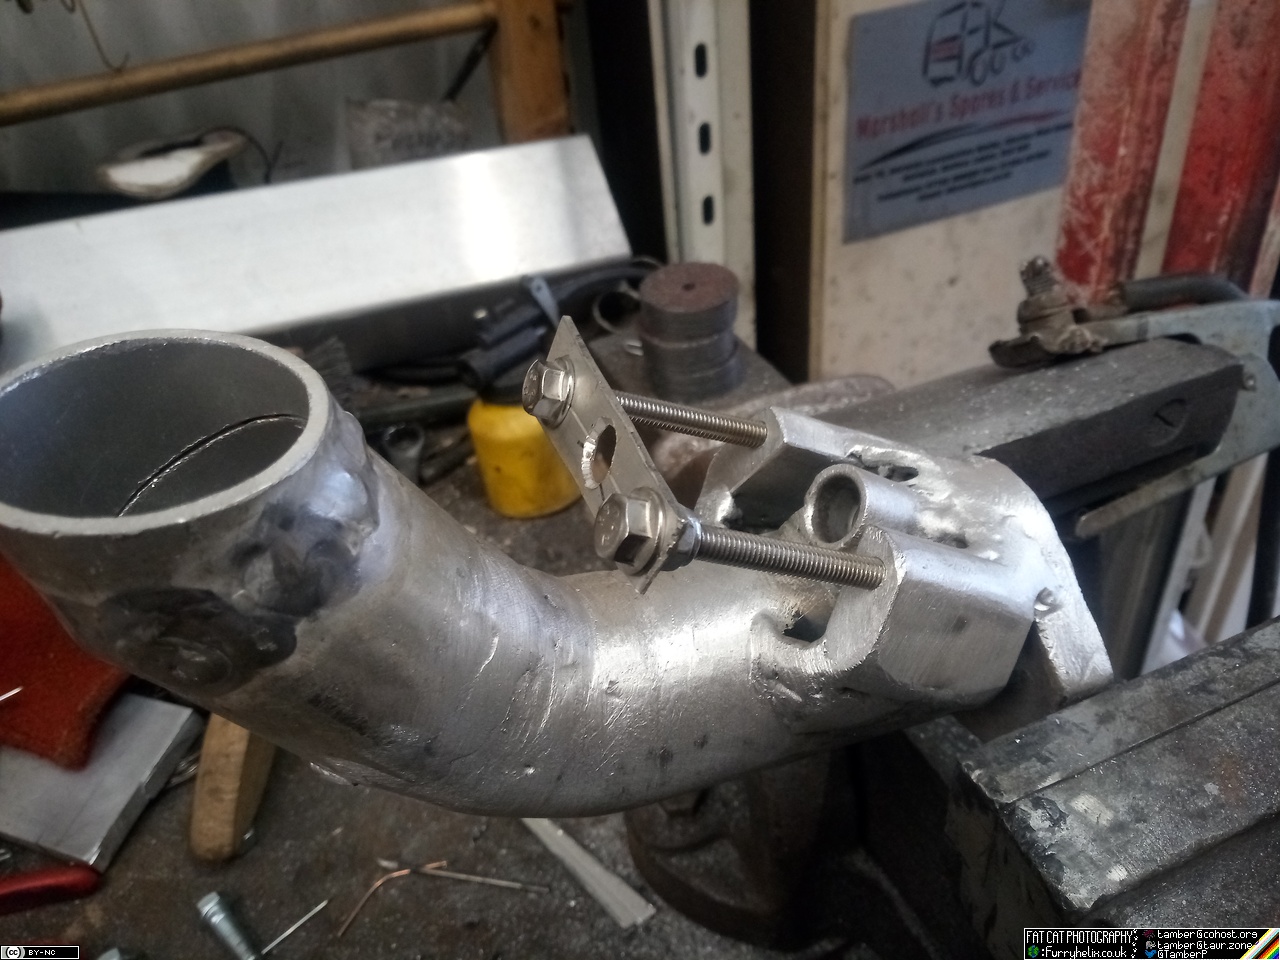
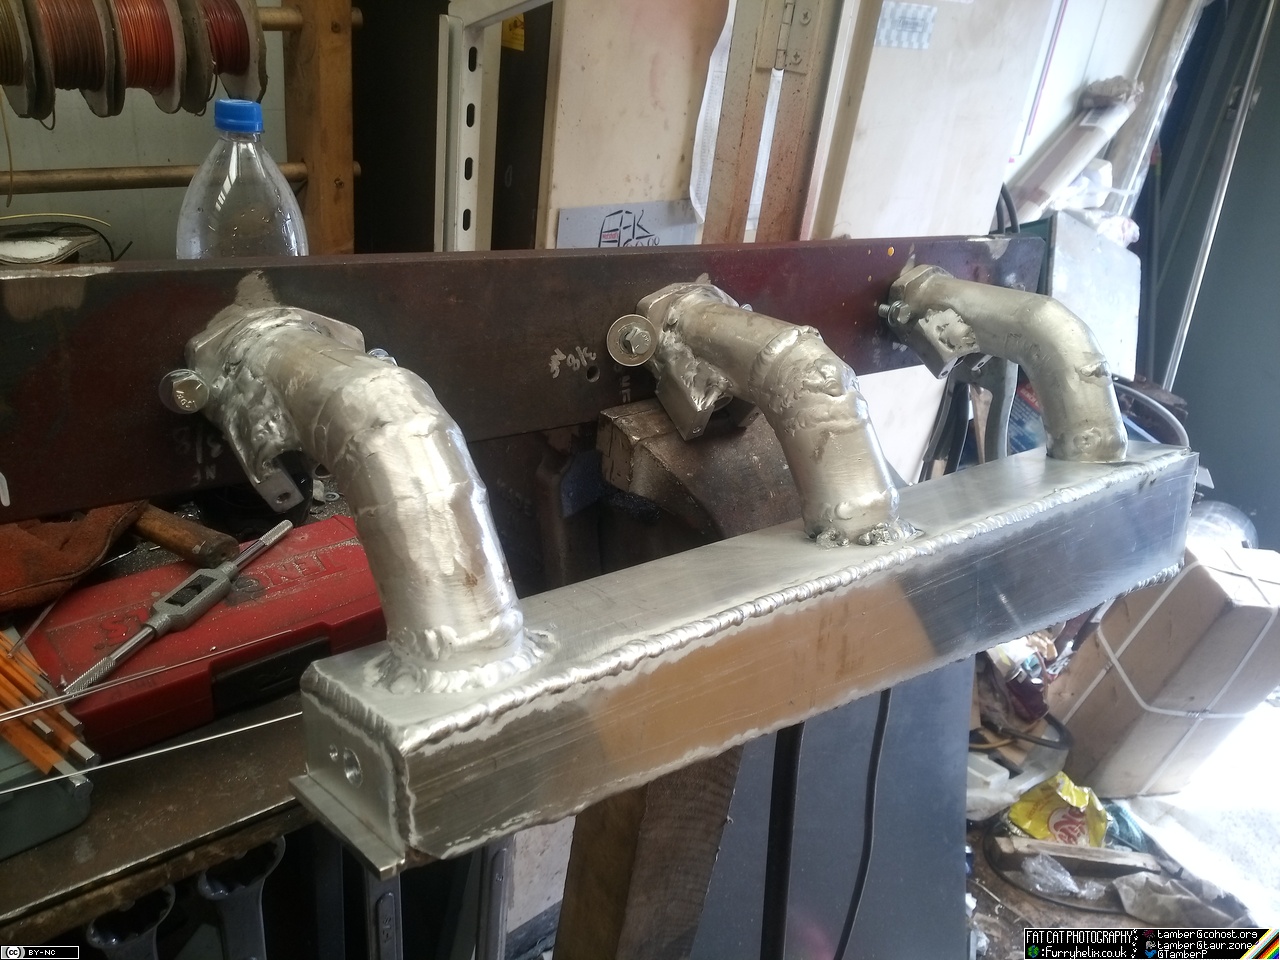
Then remember that it'll be easier to weld in the injector hold-downs now, rather than before it's all boxed in with plenum. This isn't quite as aesthetically pleasing as I'd like, but I feel like I can clean it up to be something I can tolerate. A more ideal way to do it would be to have the injector boss and the hold-down bolt bosses all machined as one piece, but I'm working with what I have.
The thin strip between the two bolts is the stand-in for the injector hold-down; just to hold the bolts in the correct alignment for me to be able to weld the blocks on. The finished version will be much thicker, of course; and the central hole will be tapped to take the fittings that the injector will seat in. Also, in the completed version, I'll fit studs into the manifold so I'm not having to screw bolts in and out of those aluminium threads very often.
That will all sit something like this:
And with the base-plate for the plenum tapped into place, that comes out much like so:
I have a vision in my head for how I'm doing the injectors' connection to the fuel-rail, but we'll have to see how the exact details play out. I can't go the classic route of standard extruded fuel rail clamped directly down onto the injectors, because none of this is quite consistent or square enough for that to fit, unless I want to drill precisely-wonky holes in a piece of fuel-rail. If I had to do this again, I'd build more jigs, to give myself half a chance of things turning out with some consistency. Even building all the runners to the same measurements, I managed to get that centre one so far off that I just broke out the grinder to slice & adjust it to fit!
Still don't think I'm doing too bad for a cripple with a hacksaw, grinder, and a welder! Imagine the damage I could do if I had machine-tools, and more space to work! (And enough money to get stuff as I need it! Injectors are going to be a good chunk of change; I've got my eye on a reconditioned set, for the time bean.)
-< Welder. Allegedly a mechanic. Bodger of Things >- * 1958? Bedford RL - Progress: Glacial. * 1994 Skoda Favorit - It's baaaaaaaack! * 2018 Herald Classic - Gone!
Is it a 6 cyl? I did have a set of bosch green injectors which were taken out of a brand new Ford v6 30 years ago, if they are likely to be of any use I will see if I can find them.
Is it a 6 cyl? I did have a set of bosch green injectors which were taken out of a brand new Ford v6 30 years ago, if they are likely to be of any use I will see if I can find them.
It is a 6-cyl, yeah! (Though, only 3 inlet ports.) I'd be curious to know the part number on those injectors, if they're not too badly buried! (But don't put yourself into hours of searching, just for my sake!)
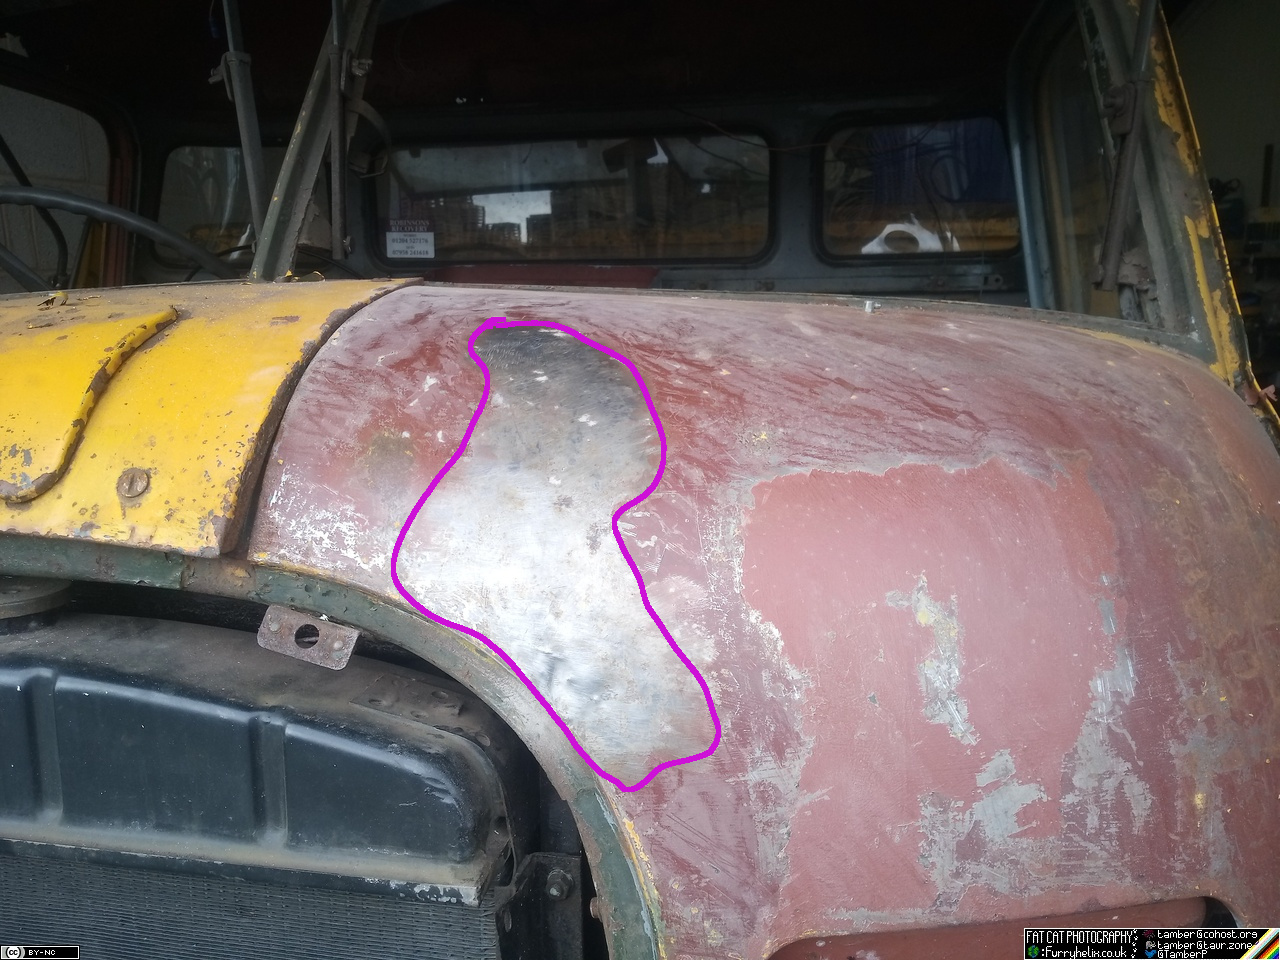
On a different note, I finally got around to tackling another patch I've been putting off for too long. (I know, I know, that's not like me... )
Following that up with a round of paint-stripping. Everything highlighted in magenta here, was one giant patch of filler!
...which was incredibly funny, because the only part I could find anything wrong was right at the bottom of it, right in front of the radiator mount. Shame I didn't find this dent before I went and refitted everything, because I reckon I could've taken it out with a hammer and dolly while I had the rad brackets out of the way.
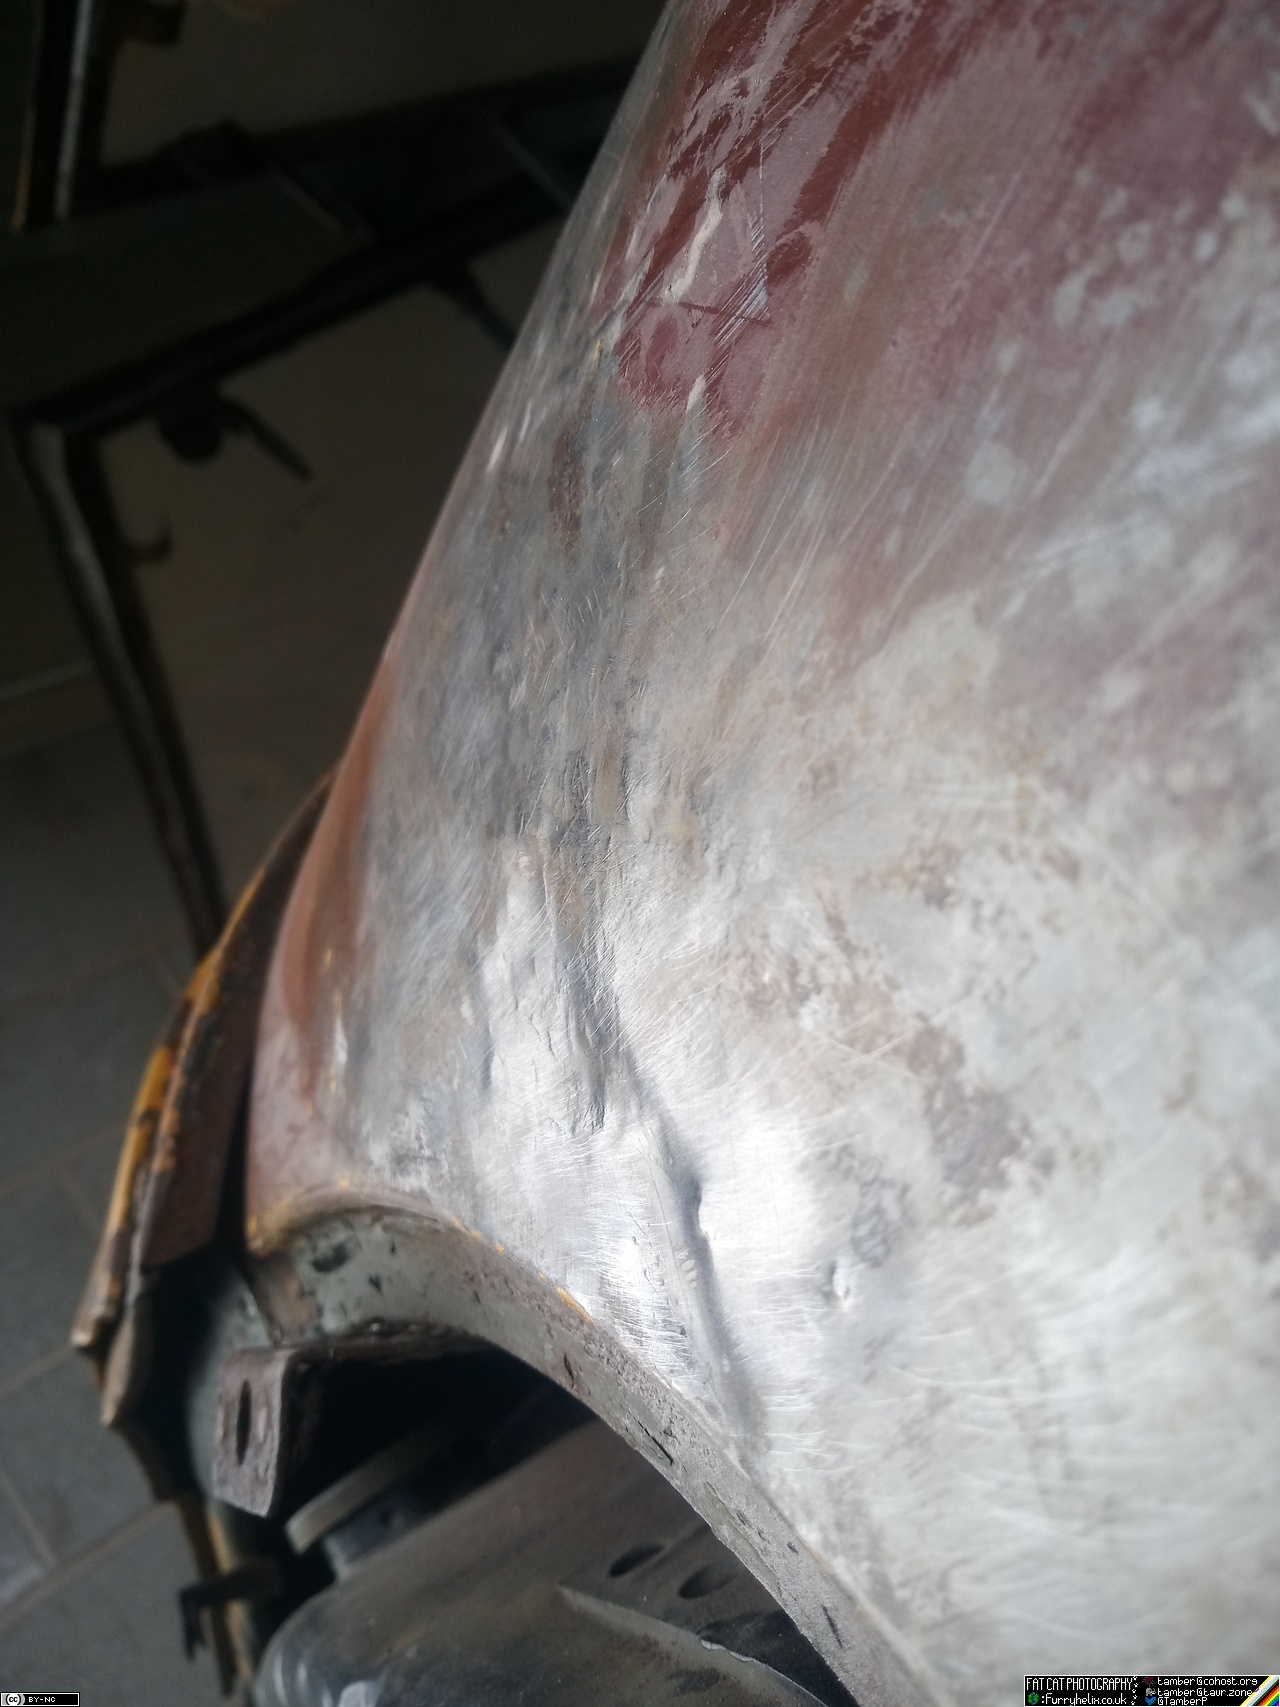
Too late now, though! I gave it a tiny skim of filler, hardly any in comparison to what was there before, and went in with the zinc primer. I'll probably give it another coat of primer, then start with the yellow.
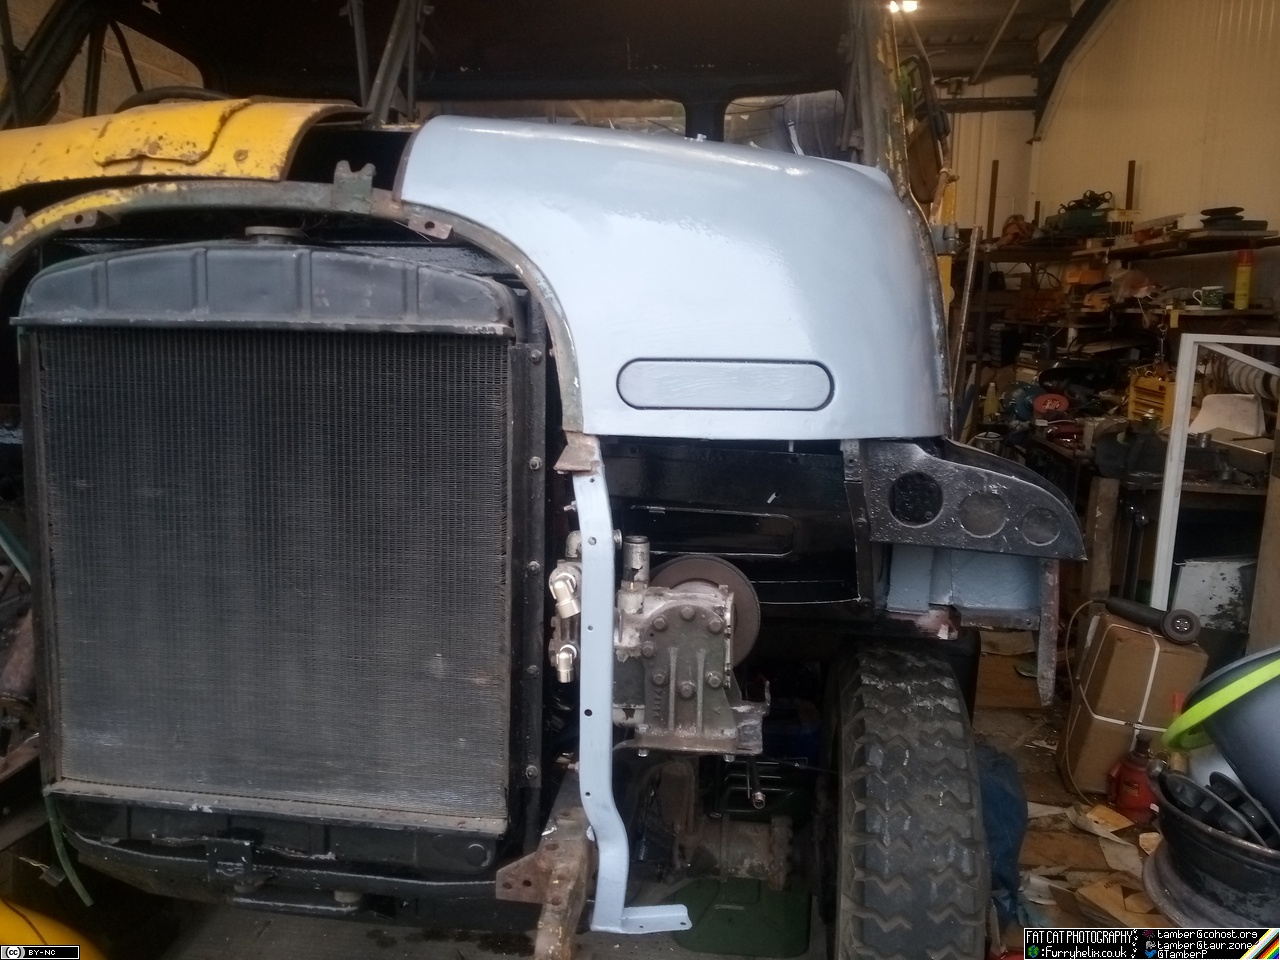
That's the biggest blocker to putting the front wing back on, other than a few other little bits n pieces. (I still have to salvage a brace rod from the old section of passenger footwell that I cut out, and there's a little closing in I need to do for the underside of the step. And probably give the wing another coat of paint before the lights go in for good.)
I've probably got a solid month's worth of work to do in cab repairs, all told; I just have to herd enough braincells together to knuckle down on that and get things put together, without getting too distracted. My trusty, crusty org chart claims the cab is about 35% done, including glass, wipers, all the welding, and additional items such as demister vents in the dashboard. Hmm...
-< Welder. Allegedly a mechanic. Bodger of Things >- * 1958? Bedford RL - Progress: Glacial. * 1994 Skoda Favorit - It's baaaaaaaack! * 2018 Herald Classic - Gone!
You're better-organised than I am, then! Thanks for that; I've just looked them up by that part number, and they look to be physically fatter than the injectors I was planning on using, so might not fit with my mounting brackets. Thanks again for digging them out to have a look, though!
-< Welder. Allegedly a mechanic. Bodger of Things >- * 1958? Bedford RL - Progress: Glacial. * 1994 Skoda Favorit - It's baaaaaaaack! * 2018 Herald Classic - Gone!
Didn't manage to grab my drill from work, because my saturday morning shift turned into a most-of-saturday driver cpc instead. And without my drill, I can't make up the other injector hold-downs.
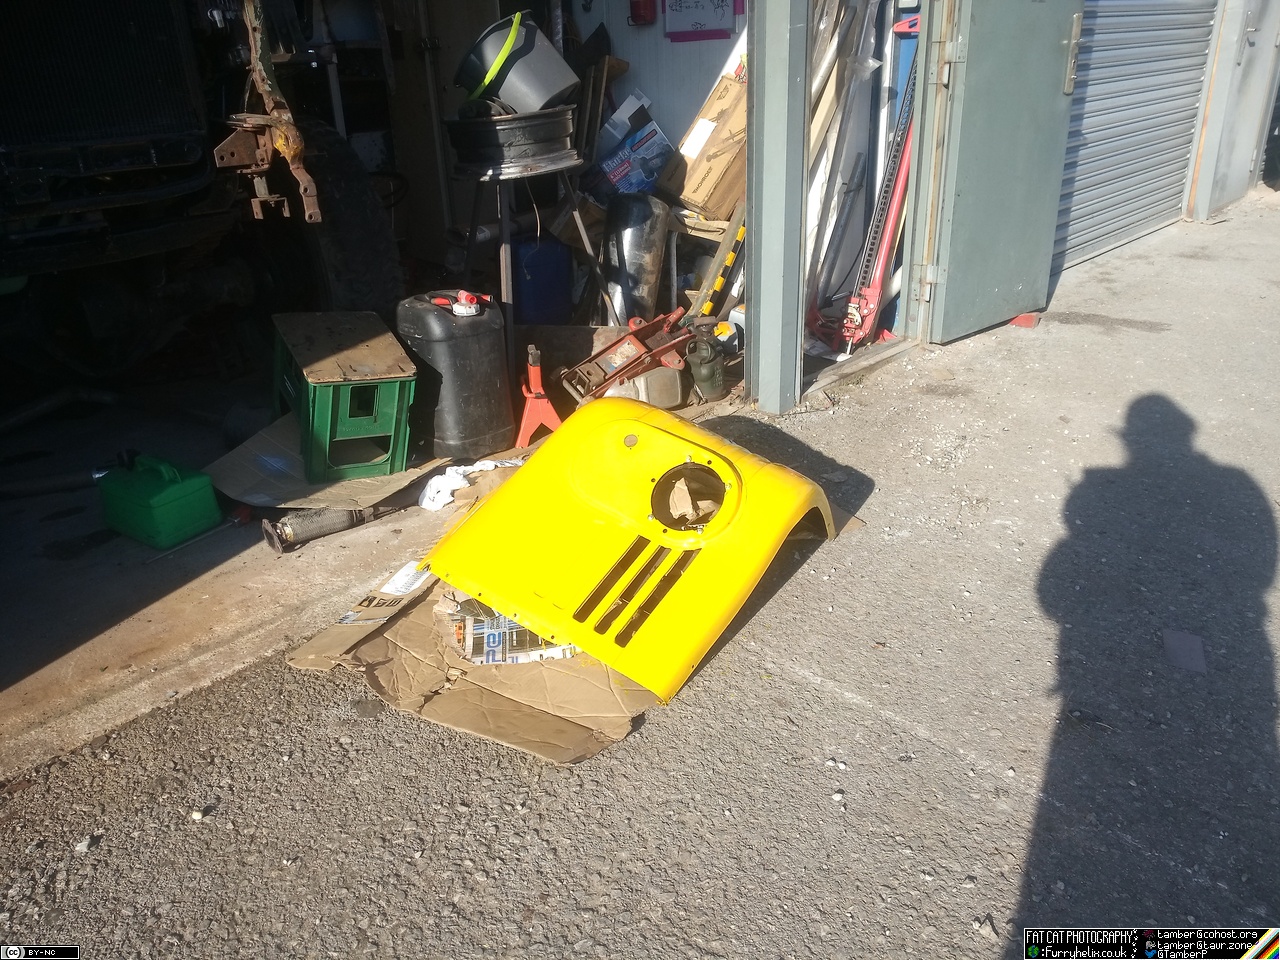
Painted a bit, instead. And, just as the rain rolled in, loosely bolted the front wing on for the time bean, to keep it out of the way and also so I can double-check there's no missing bolt-holes I need to fix before I paint the underside of the footwell vent panel. (Spoiler alert, there's some bolt-holes I need to fix. But that would also require a drill, so...)
Also loosely bolted on some other bits n pieces, like the braces that go from the footwells to the front wings; which reveals another bolt-hole I'm missing in the passenger footwell panel. The intake manifold was also refitted again, so I can run the truck if needs be; which might be helpful for testing things like the compressor, or scooting the truck out to start work on the driver's side floor... which I spent several minutes staring up at. I'm glad it's not as bad as the passenger side, but there's still a good few hours work in it yet.
Pulled the passenger mirror arm off so I could straighten it, and prep the bottom of it to receive a new threaded section. May also take advantage of it being off, and reinforce the upper mount on the door, too, so it doesn't risk tearing out.
And, having made that clevis up for the footbrake valve, I went and fitted it; which reveals that the mounting bracket for said footbrake valve is not in line with where it should be, and it's also too flexible. (Which I suspected it would be, but I didn't want to brace it all up before I tried it to see if everything was in line; and now I'm very glad I went that route.)
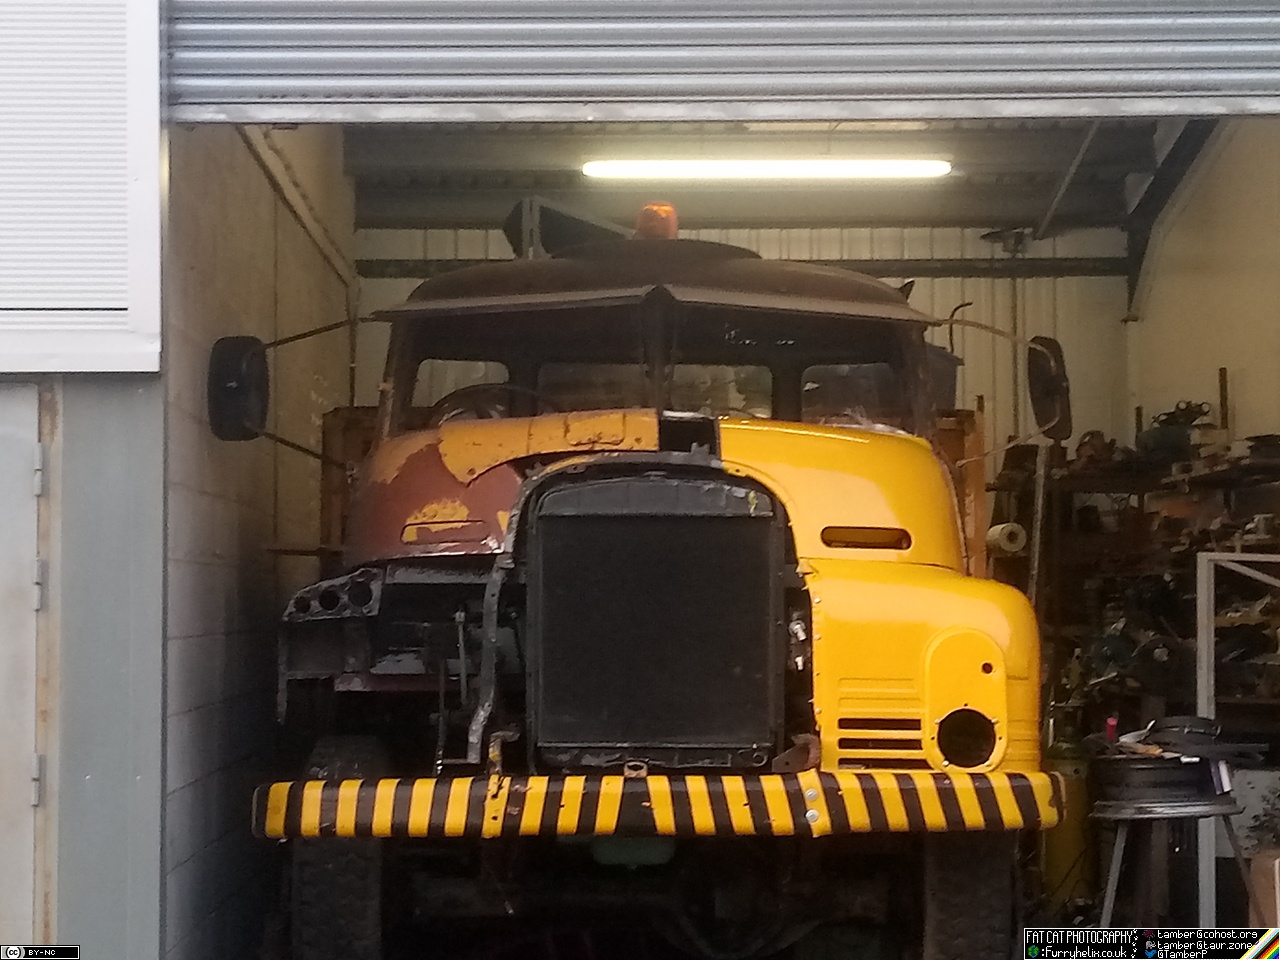
It's nice to see more of the truck going yellow again, because it's an extremely visible marker of progress; even if it does feel like it's going to take ten coats of paint on everything...
So, mirror arms! The nearside was already in pretty decent shape, I just had to replace the bolt at the top and weld a new bolt to the bottom of it to be the new lower mount, and that's that sorted.
The offside took rather more work. Unfortunately, I hadn't gotten a picture of what it started like, but it was incredibly well-bent to the point that it almost looked to be installed upside down.
With the addition of some heat, though, and careful bending... and tweaking... and hitting it with a hammer... and also welding on a new bolt to the base of it because the one I'd done previously was crooked...
It's not perfect, but it's 85.53% closer!
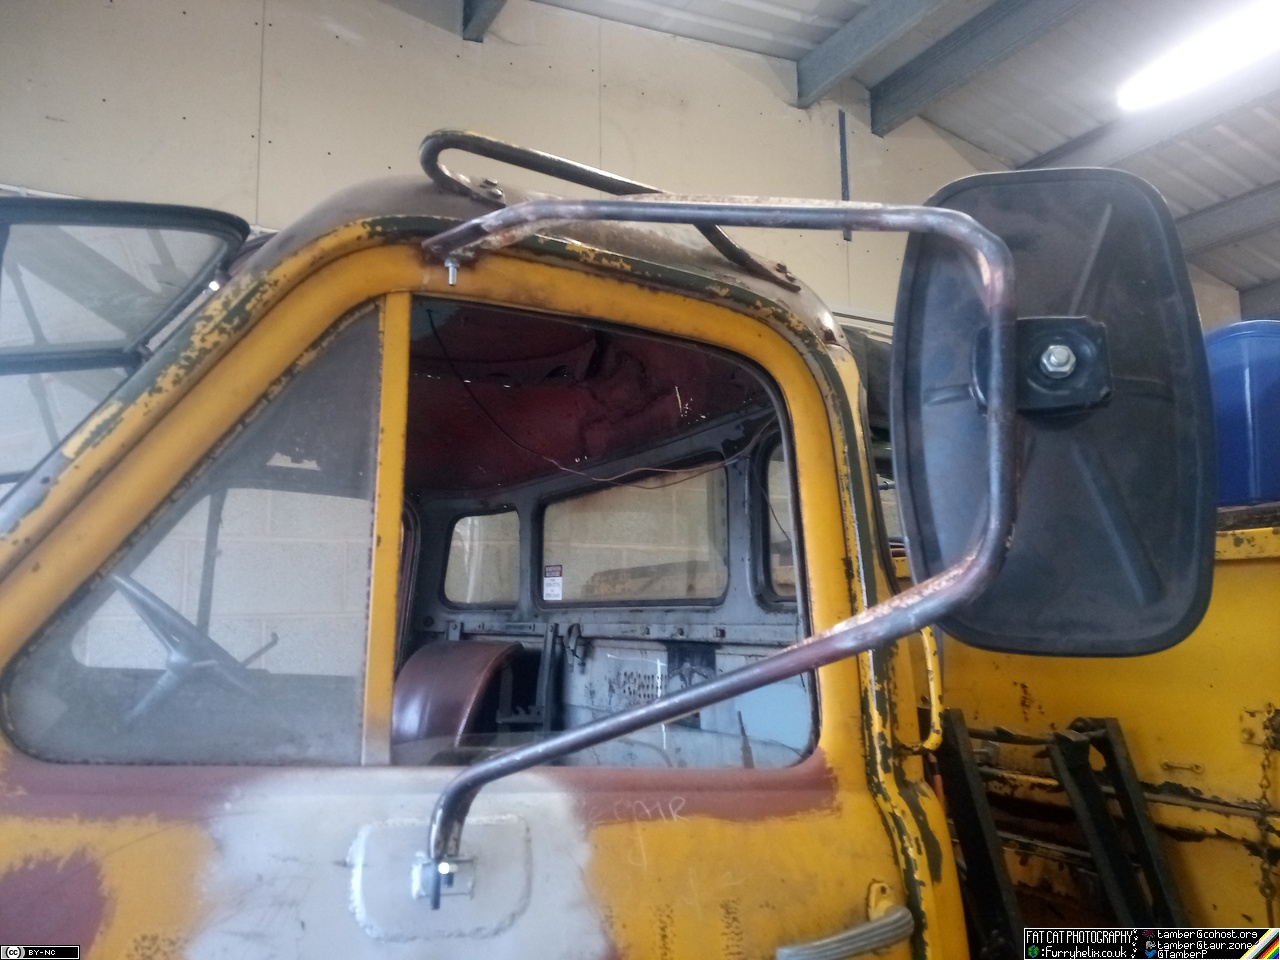
The mirrors are in line with eachother again. Bumper is definitely offset to one side, though I did the obligatory sit-in and daydream about reaching the finishing point with this project. Definitely plenty to do before I get there, though. Messing about with the mirror arm reminded me of how much I've got to rework that driver's door; but I'm confident I can do a better job this time, so it's not too much trouble.
Other minor things included spiral-wrapping and running the plastic fuel line up to the engine bay, which was an easy enough job. I've also dug up a filter housing and spin-on filter that I'm planning on using; just got to find a good place to mount it, and get some more fittings! Yay!
I was hoping to tinker a bit more after work today, but I've spent my morning at work in excruciating pain -- thanks to my joints -- and loaded with painkillers; so I nixed those plans, just went home and turned into a pumpkin.
Might draw up a template for making the fuel pump mounting flange for the tank, come to think of it. Then I might be able to assemble enough of the fuel system that I can run the truck from the actual tank rather than a little can.
-< Welder. Allegedly a mechanic. Bodger of Things >- * 1958? Bedford RL - Progress: Glacial. * 1994 Skoda Favorit - It's baaaaaaaack! * 2018 Herald Classic - Gone!
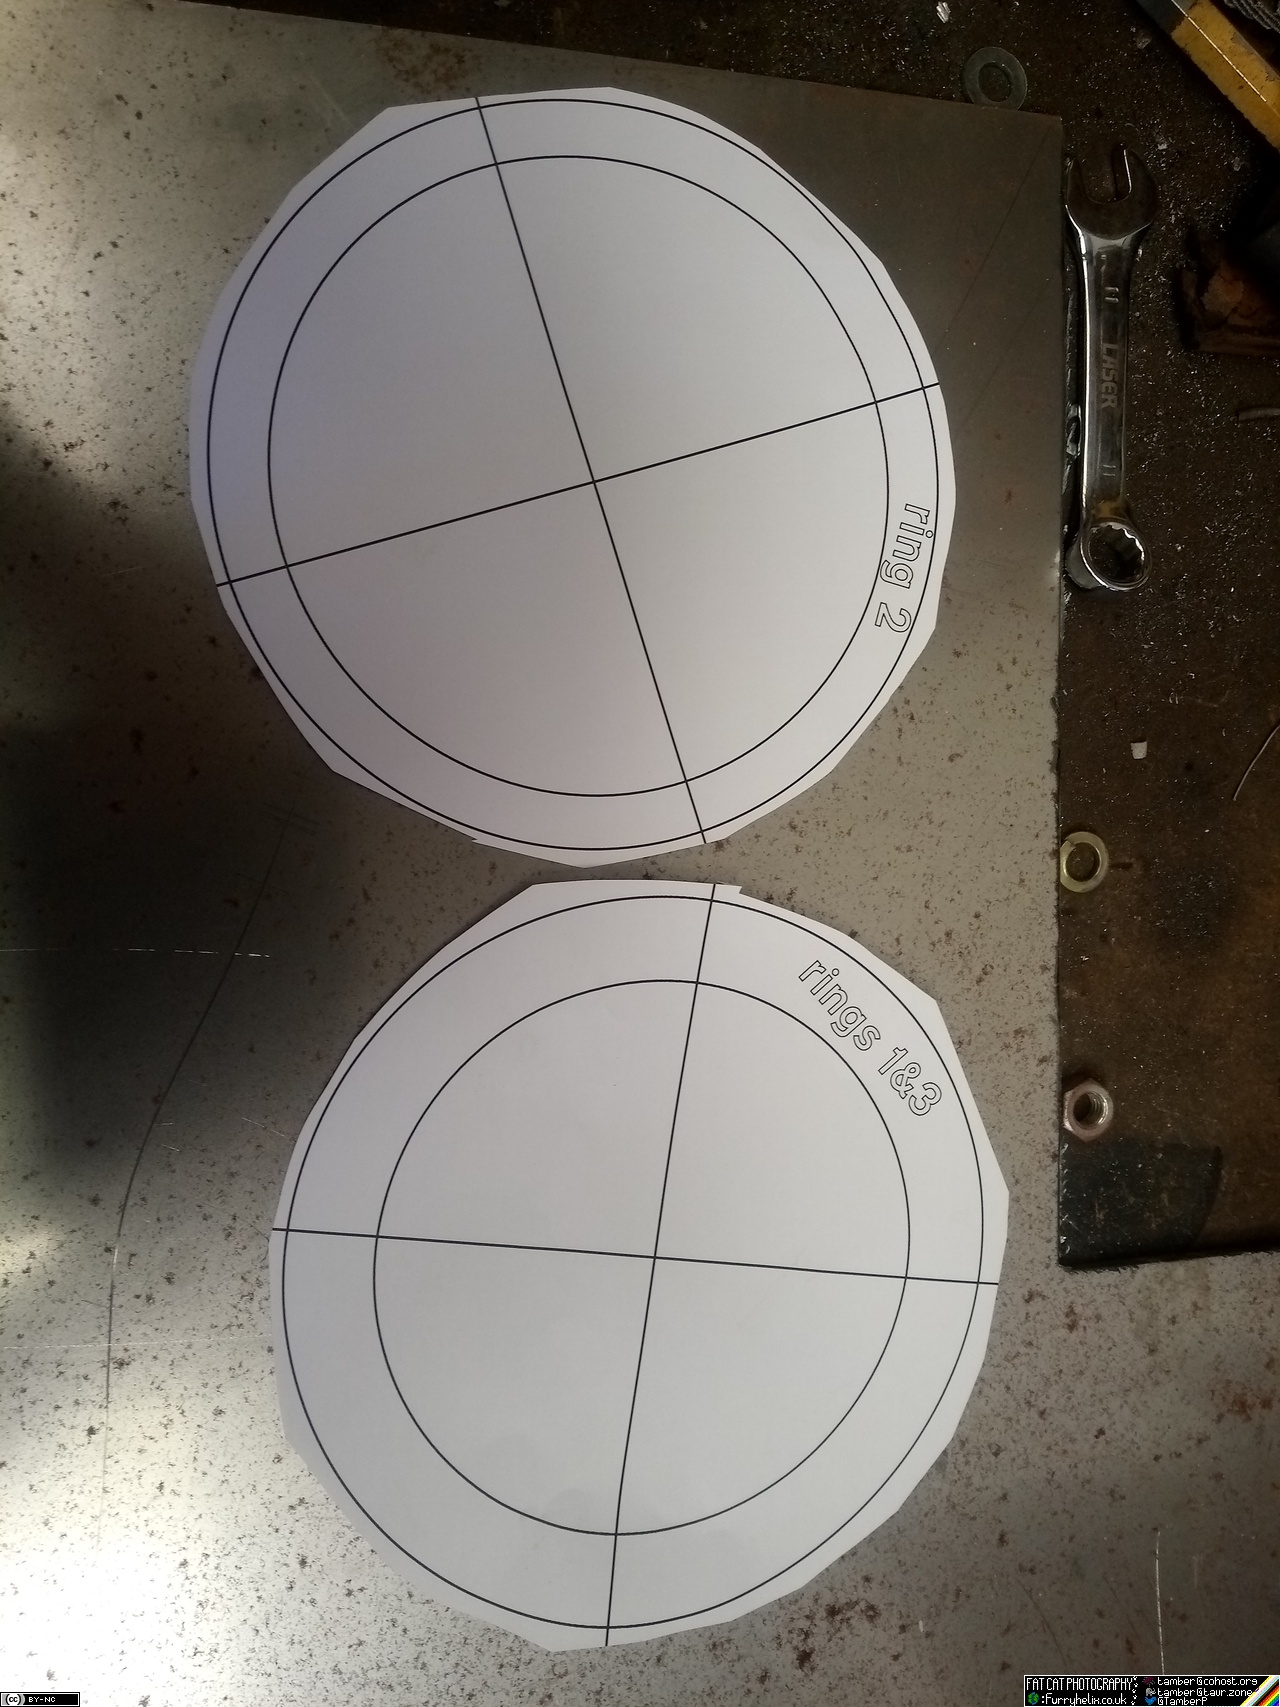
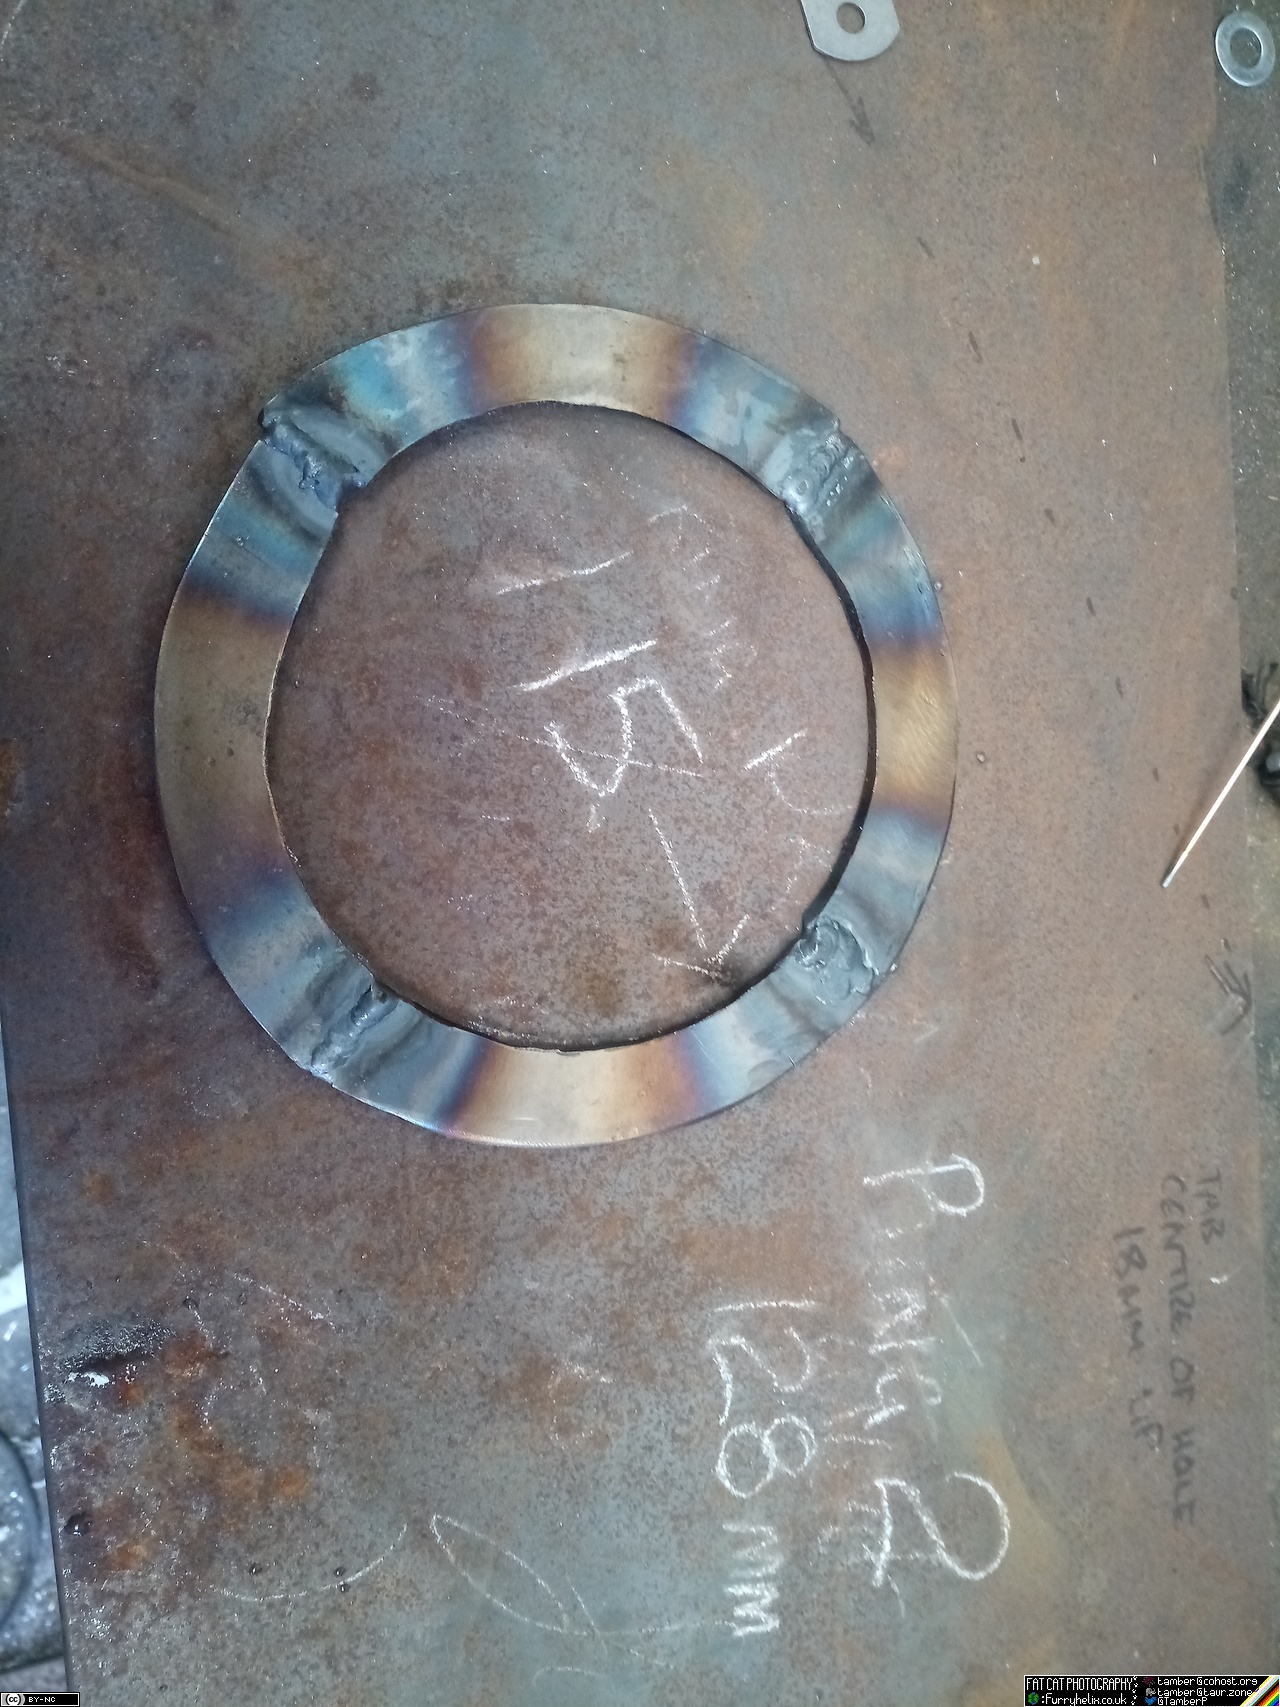
Templates drawn. I would have preferred to have these cut by cnc plasma, or something, but I haven't yet gotten myself to the point I can make up and send out a drawing for someone else to cut it. So how do we make those?
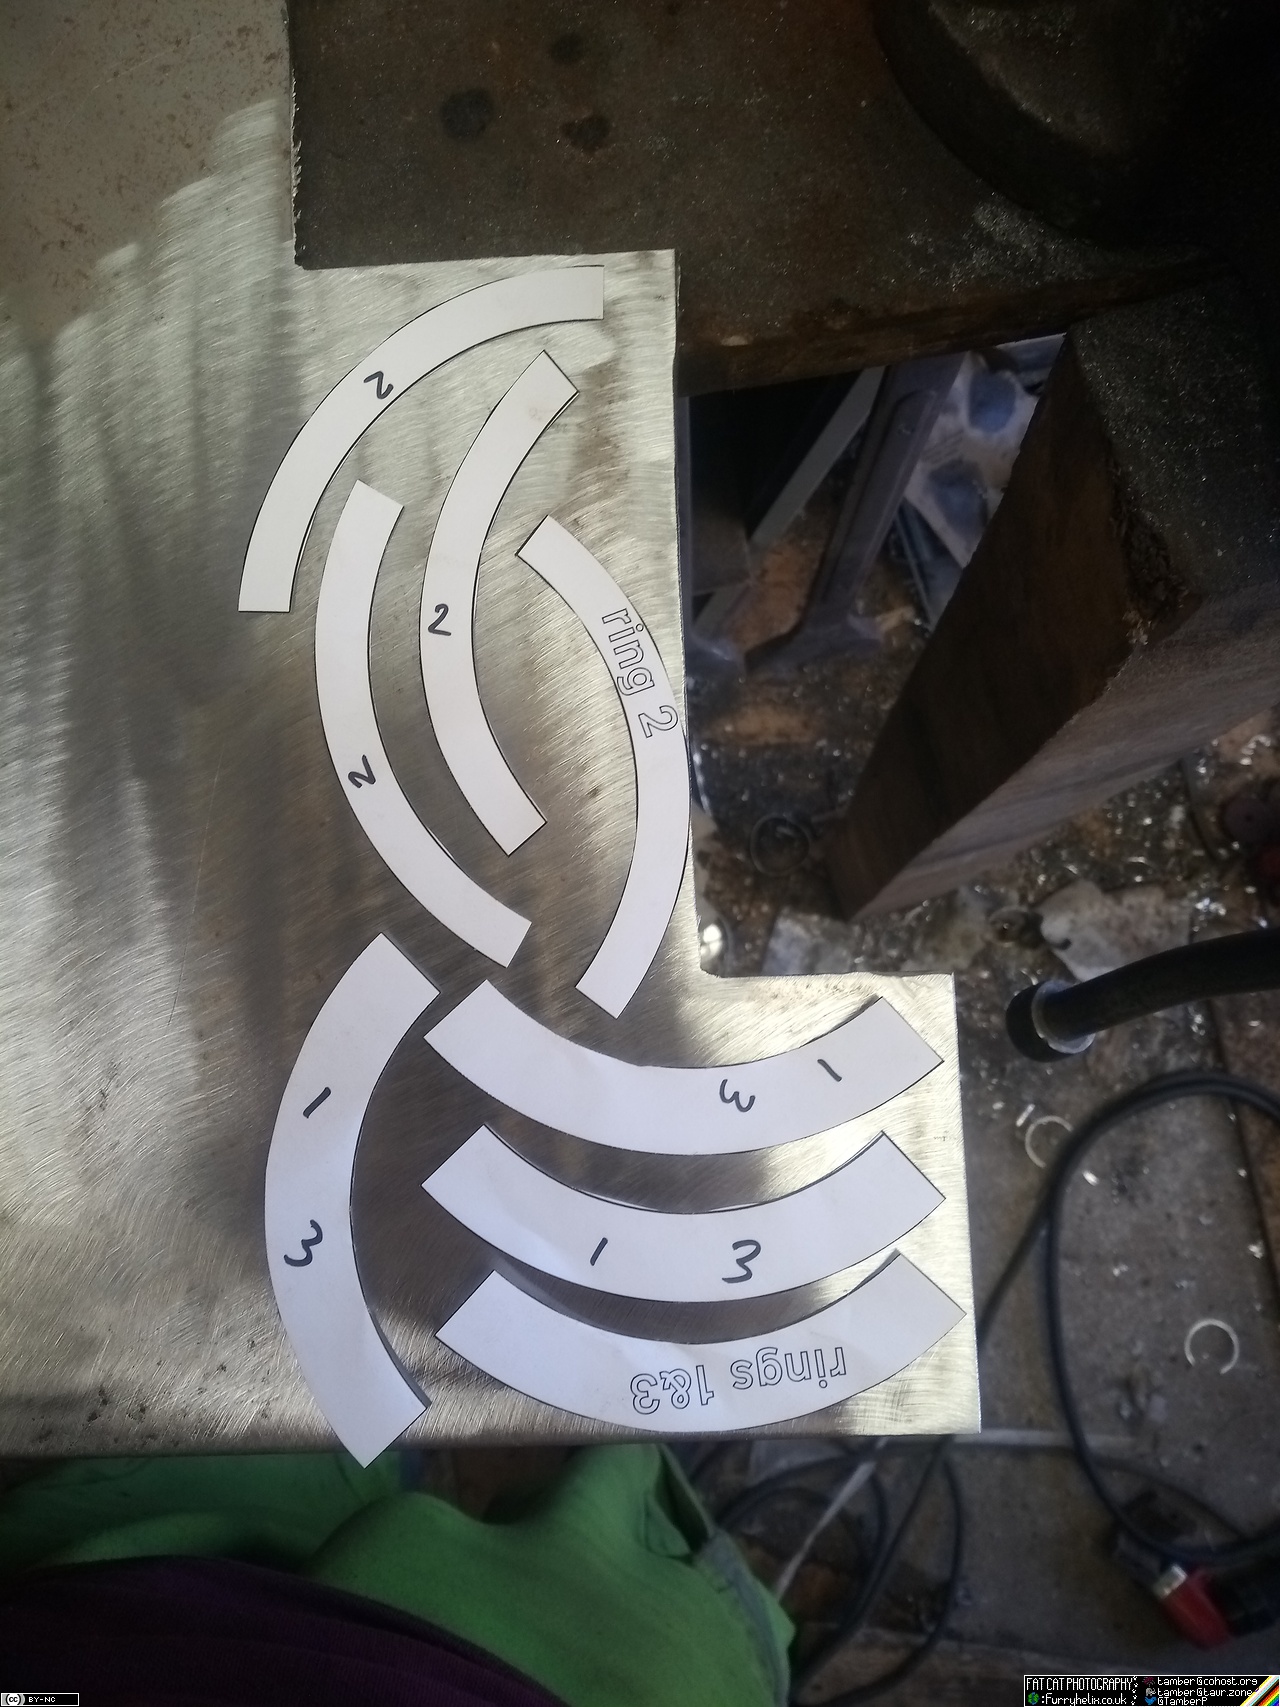
And cue about an hour and a half with the angry grinder, cut-off wheels, grinding discs and flap-disks; until we get something that looks a little like so:
And the whole thing will build up in layers thusly:
Also noted are dimensions. (Do not use those dimensions. I screwed up the most important one, but hadn't realised it at this point.)
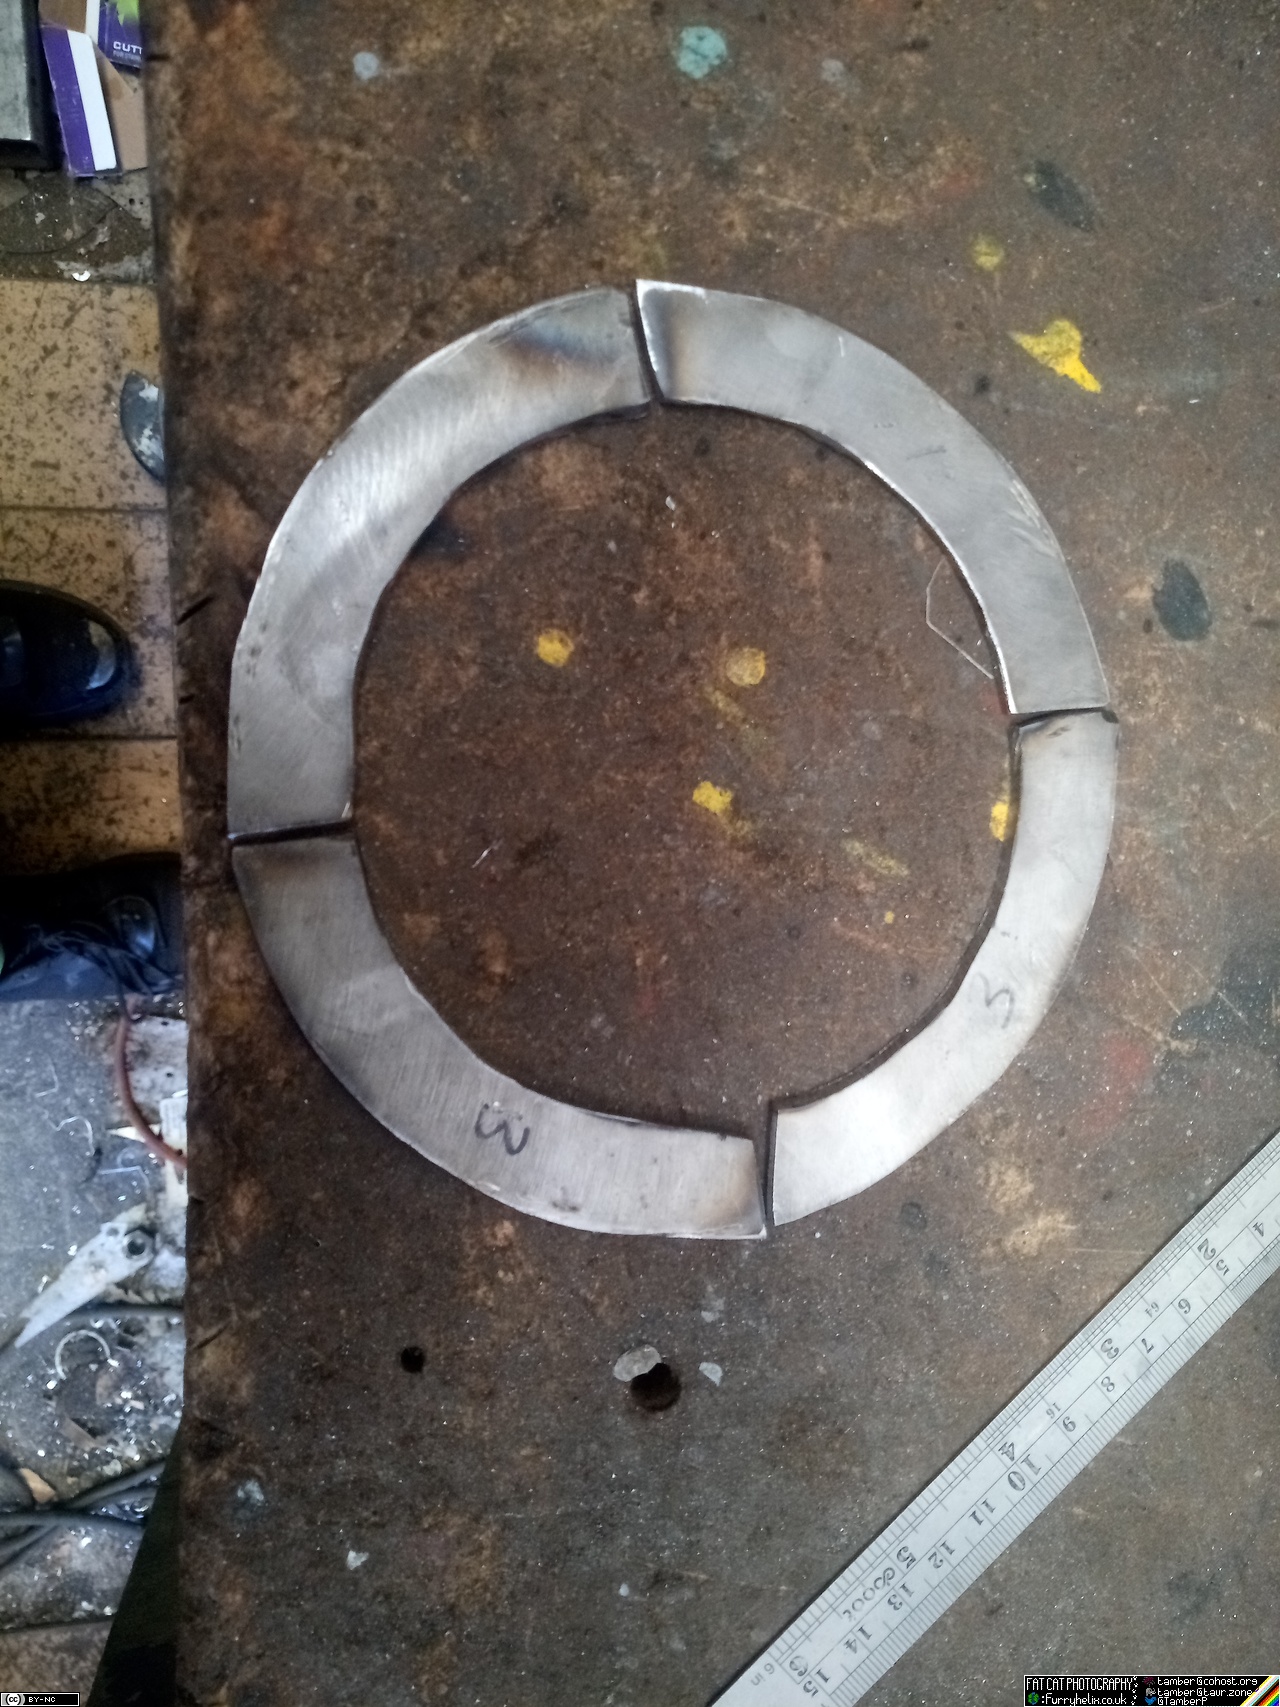
Then, weld the pieces together like so: (I still haven't discovered the screw-up.)
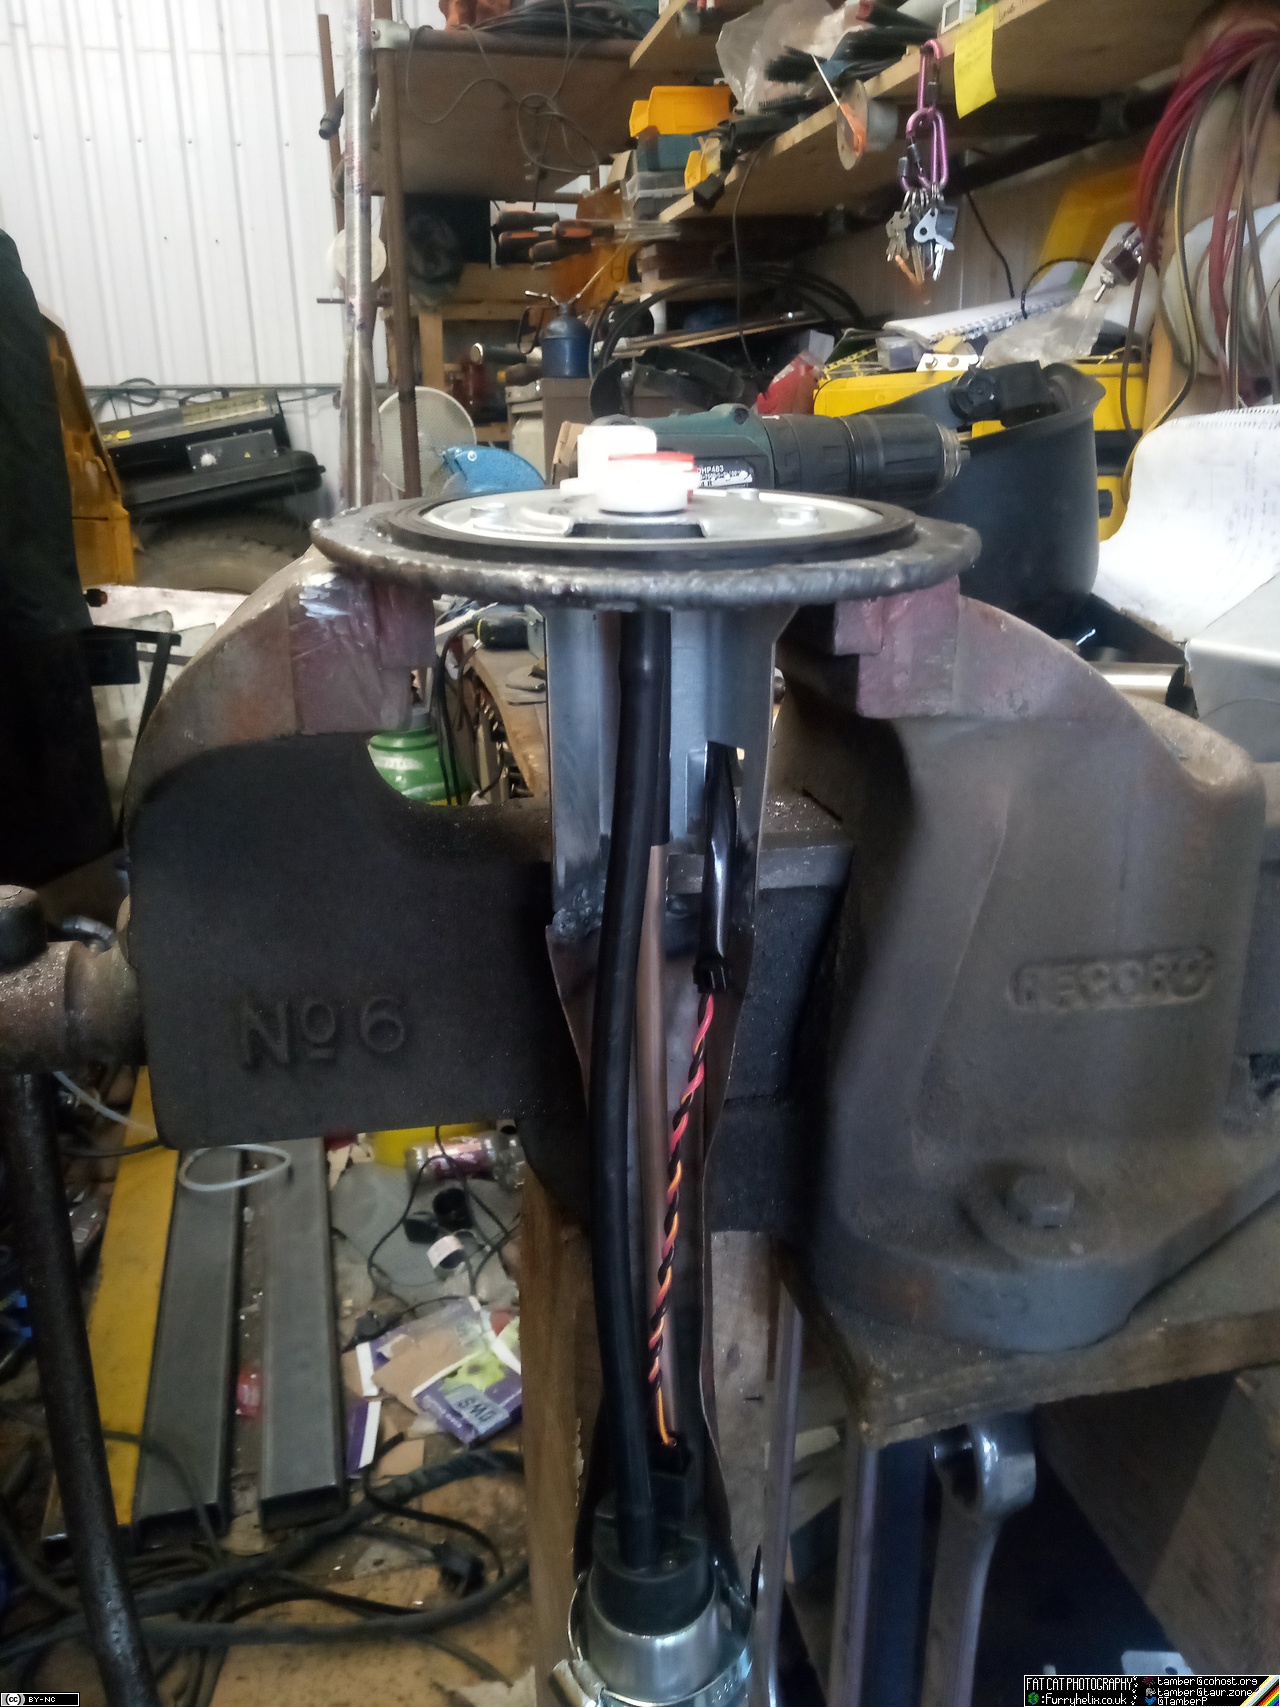
Once that's cooled, carefully tidy-up all the rough edges and whatnot inside until it's a nice smooth circle at 115mm. Then drop the fuel pickup/pump unit through it.
Spend about an hour building the inside edge up with weld, until you've taken up the 10 mm measuring error.
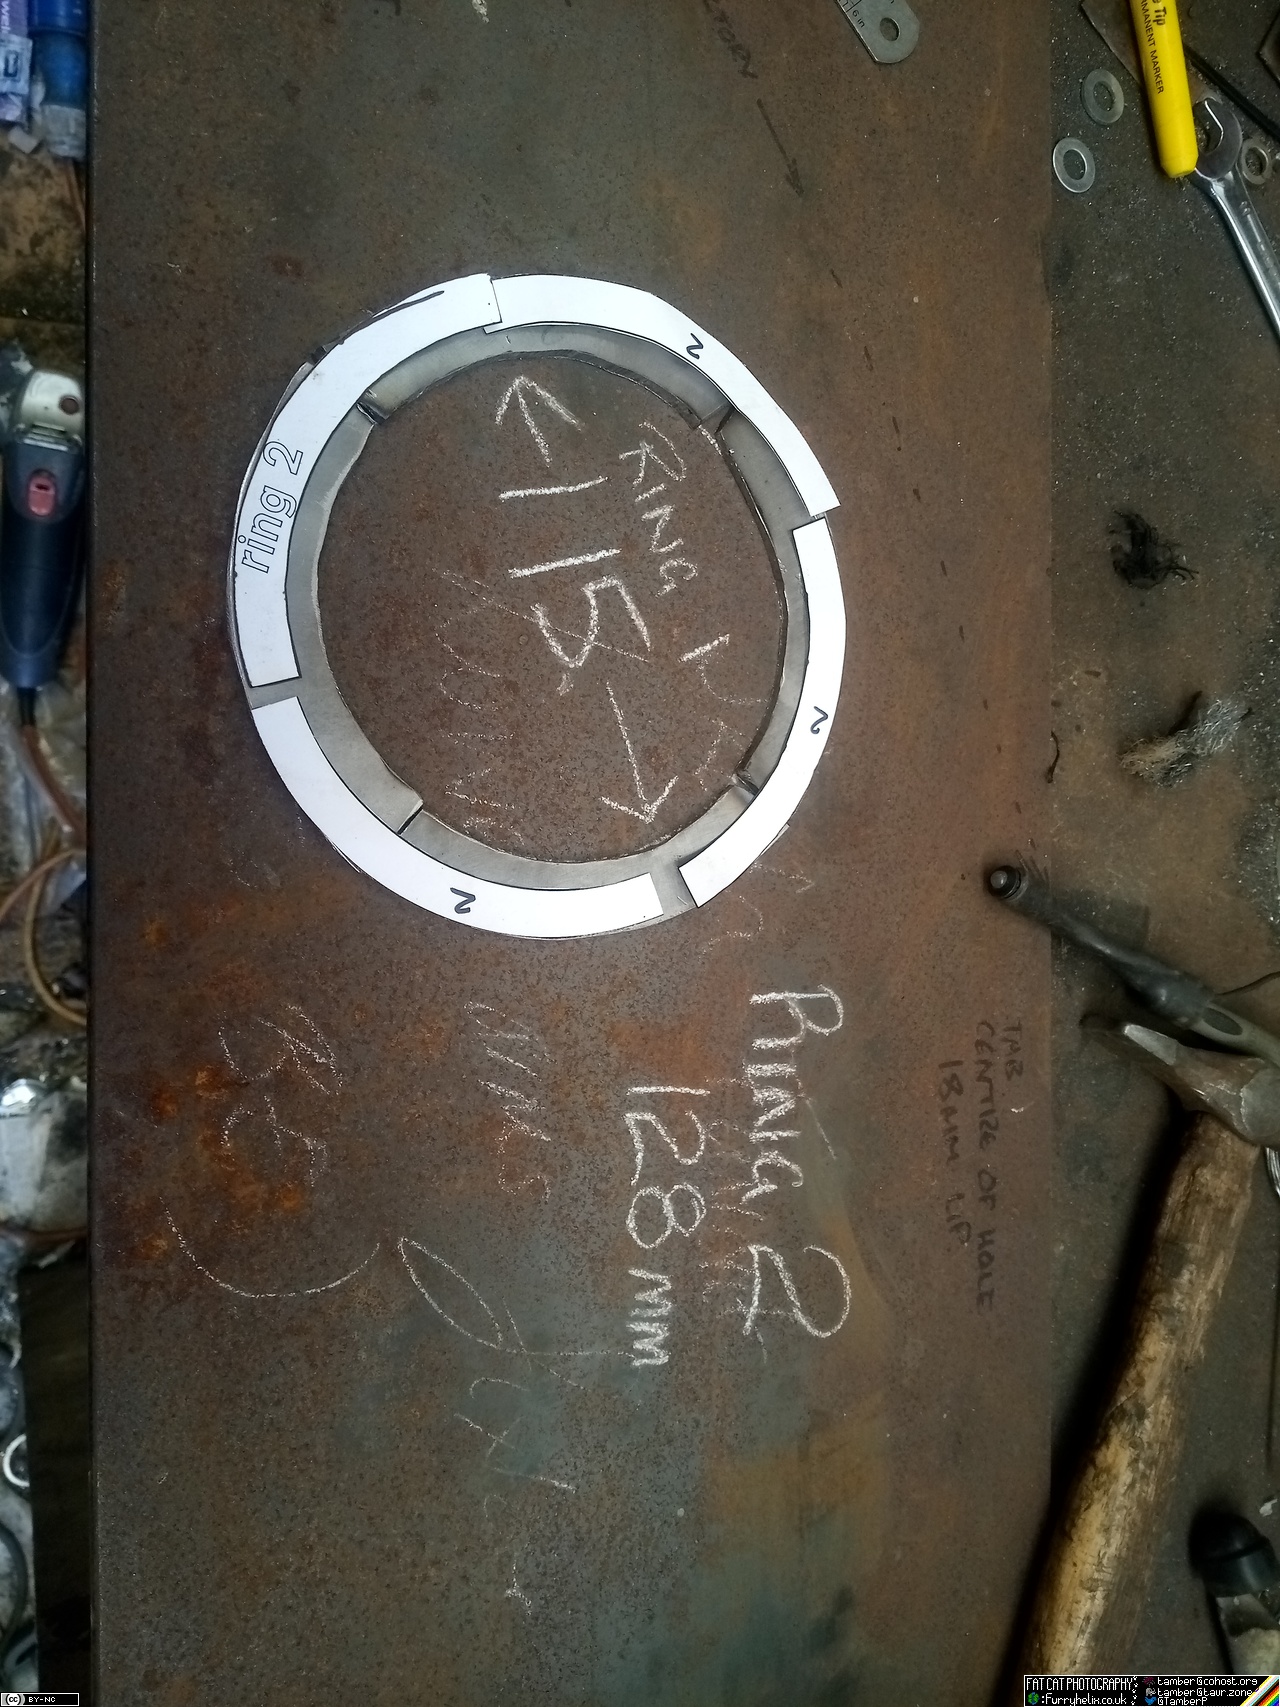
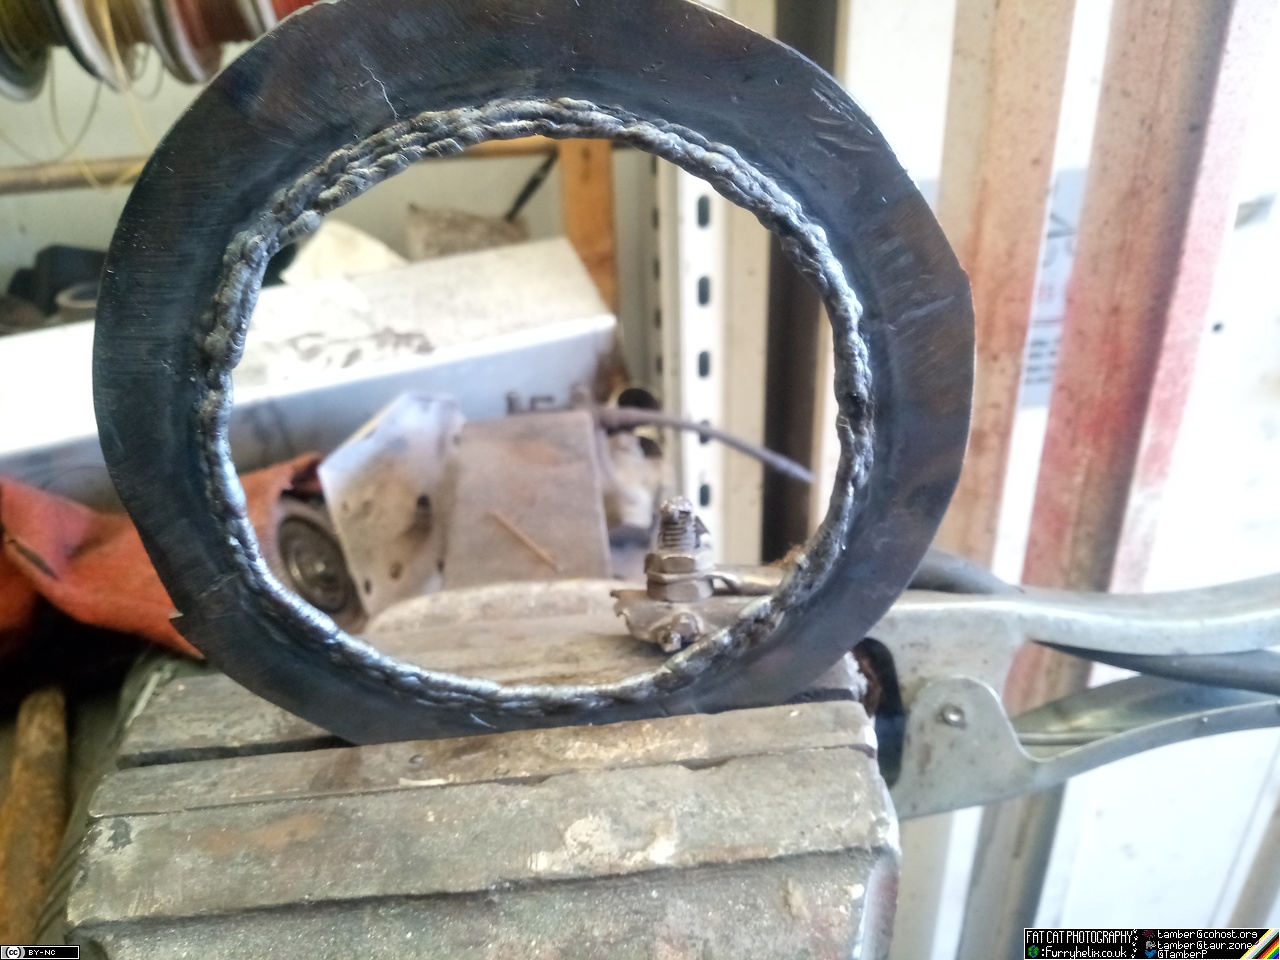
Grind all of that flush, and test-fit again!
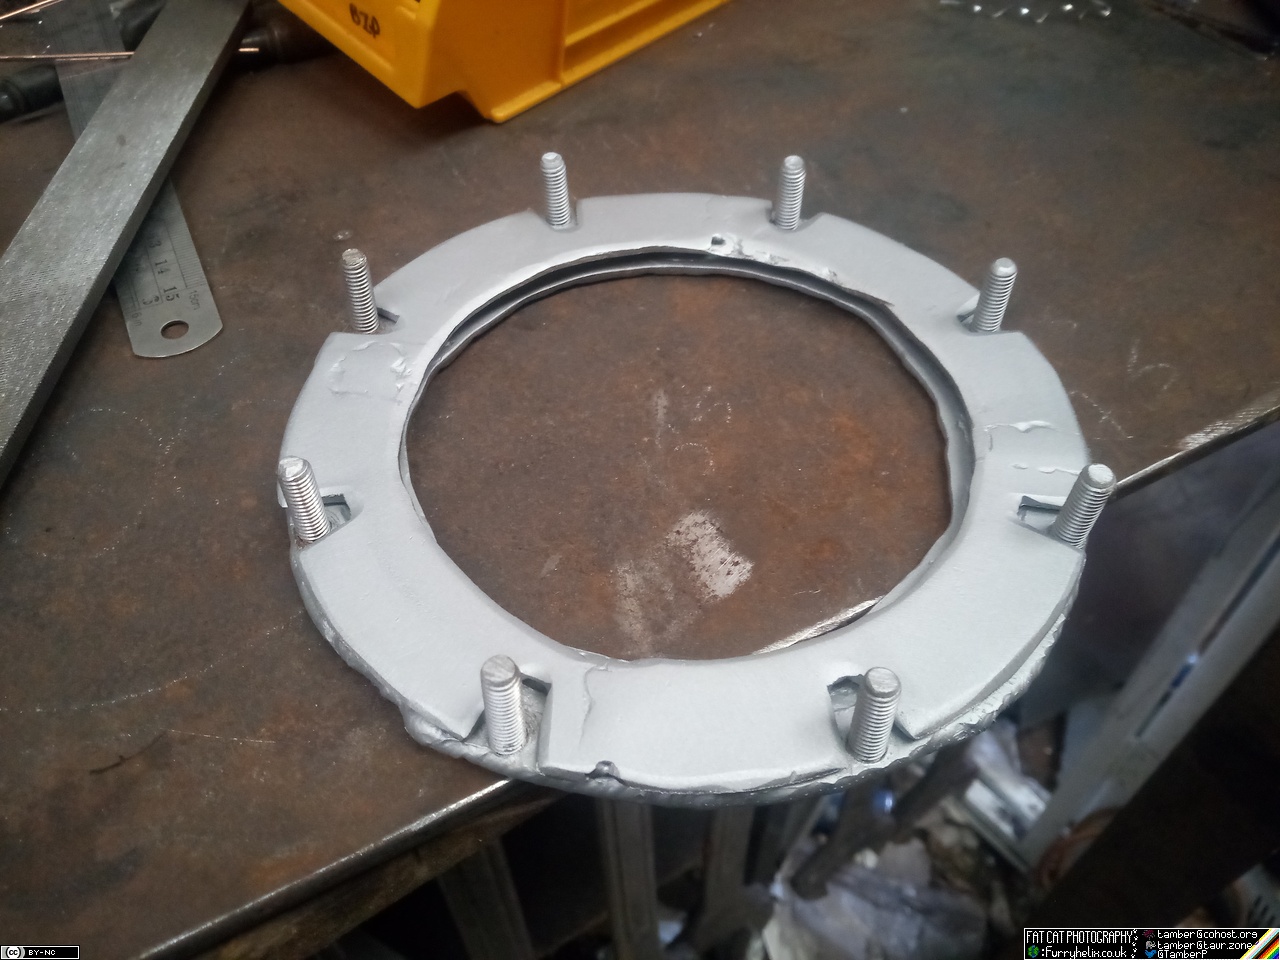
Next step, repeat the process with layer 2; which it appears I did manage to measure correctly, at least.
Weld layer 2 on top of layer 1, and that results in... (drumroll please):
Some tidying up with a die-grinder needed to dress the welds back on the inside so that the sender sits in properly, and that's the lower portion done. Layer 3 is identical to layer 1, but is bolted down onto the previous two in order to clamp the pump unit in place. Hopefully I've left myself enough material on the segments for layer 3, that I don't need to build the whole thing up with weld, now that I know about the measurement screw-up.
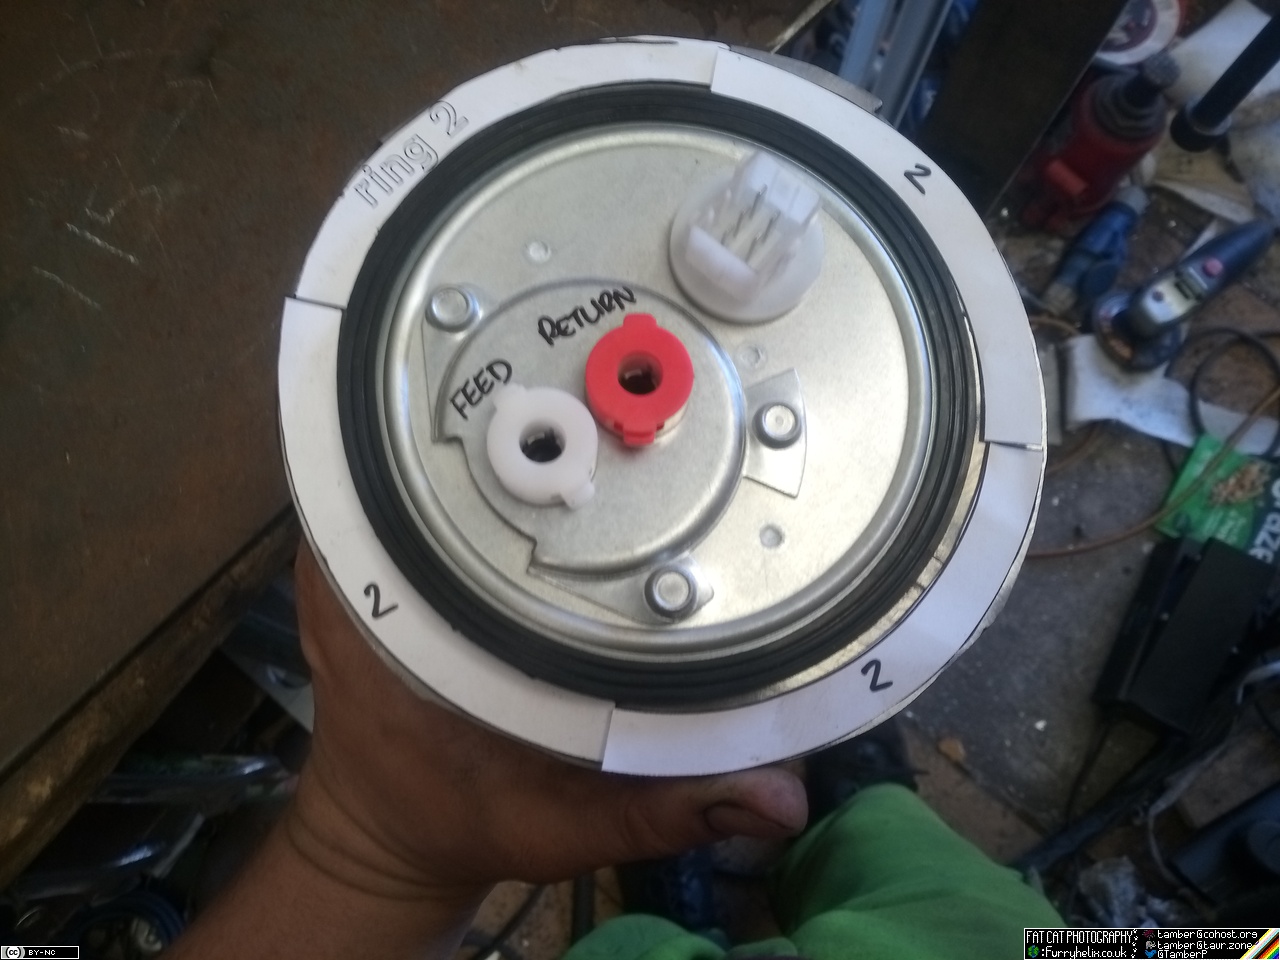
As for the correct dimensions: All three layers have a 150mm OD, and are to be made from 4mm thick steel. (I made mine from 3mm, because that's what I had. It should seal fine, but I might not be able to fully seat the plates together by the time it's clamped tight.)
Layers 1 and 3 have a 106mm ID. Layer 2 has a 125mm ID. Bolt-holes added to taste.
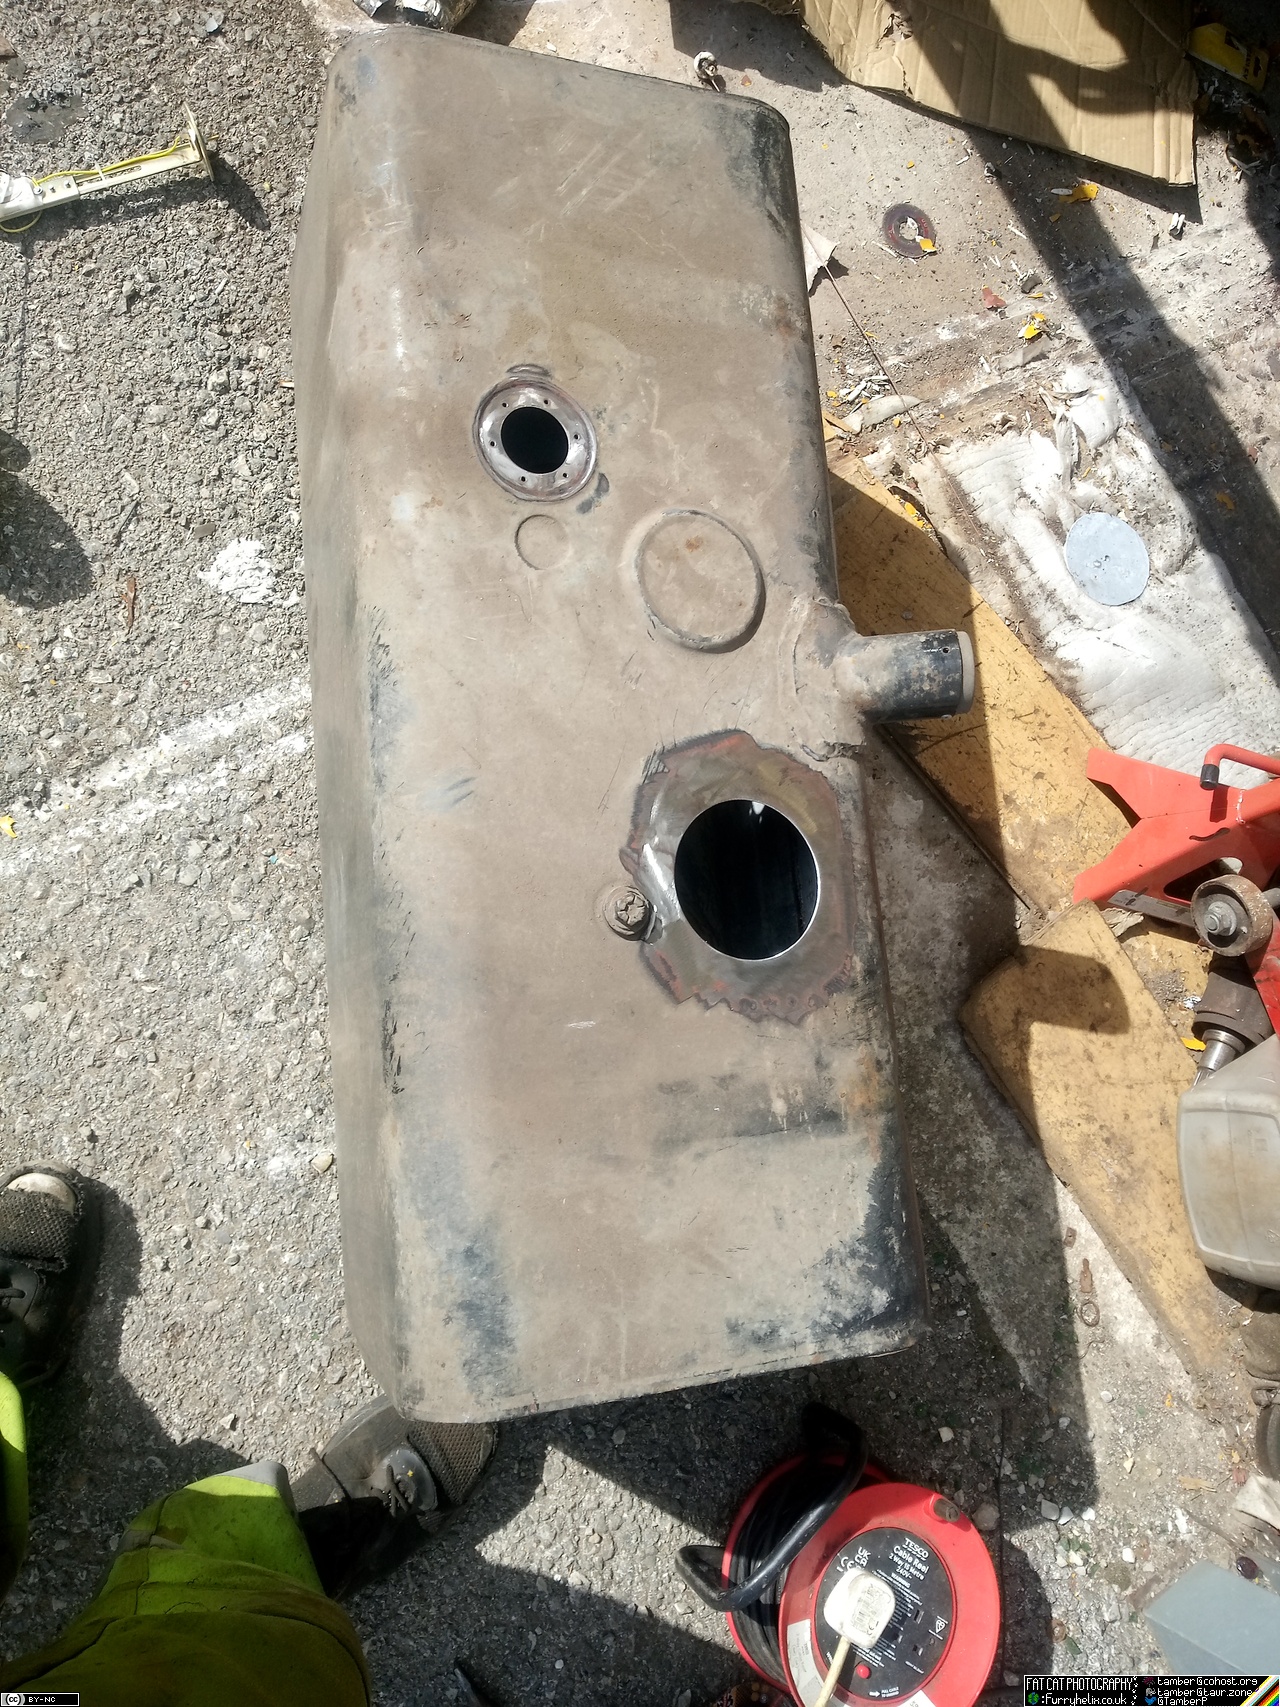
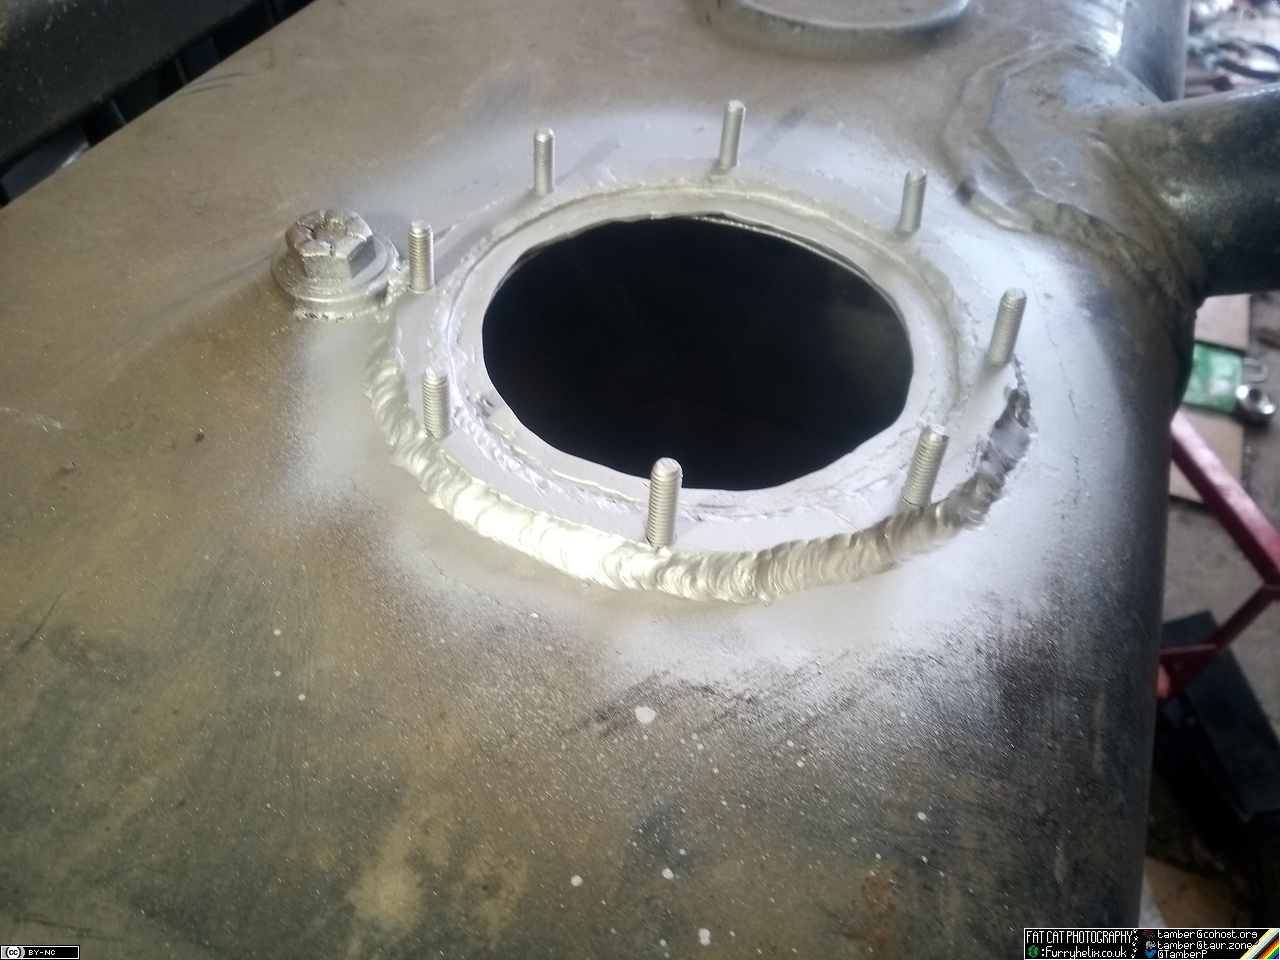
Once I'm done messing about with this, I've got to cut a hole in the top of the fuel tank to mount it, which should prove... exciting.
-< Welder. Allegedly a mechanic. Bodger of Things >- * 1958? Bedford RL - Progress: Glacial. * 1994 Skoda Favorit - It's baaaaaaaack! * 2018 Herald Classic - Gone!
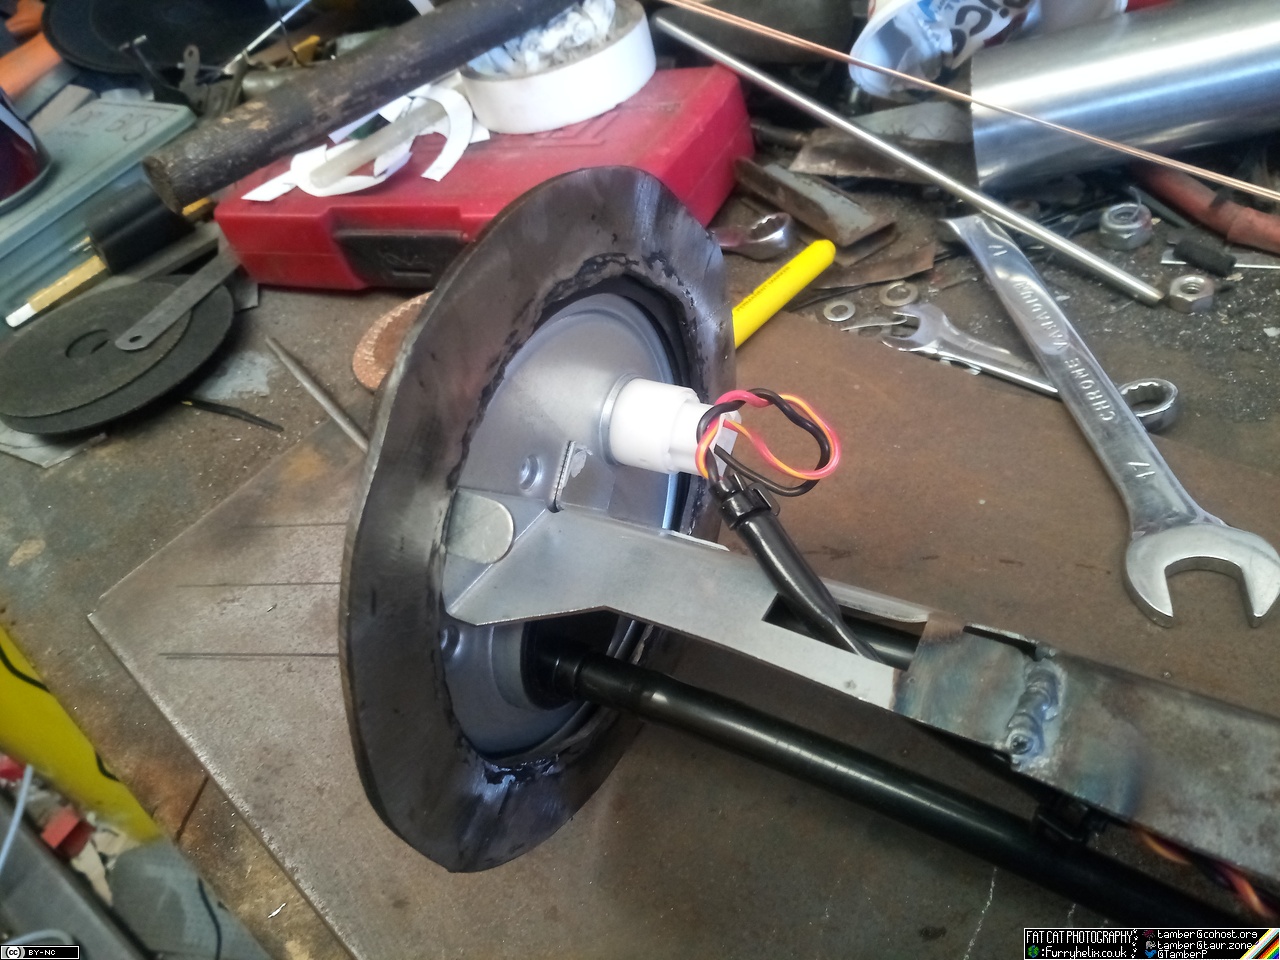
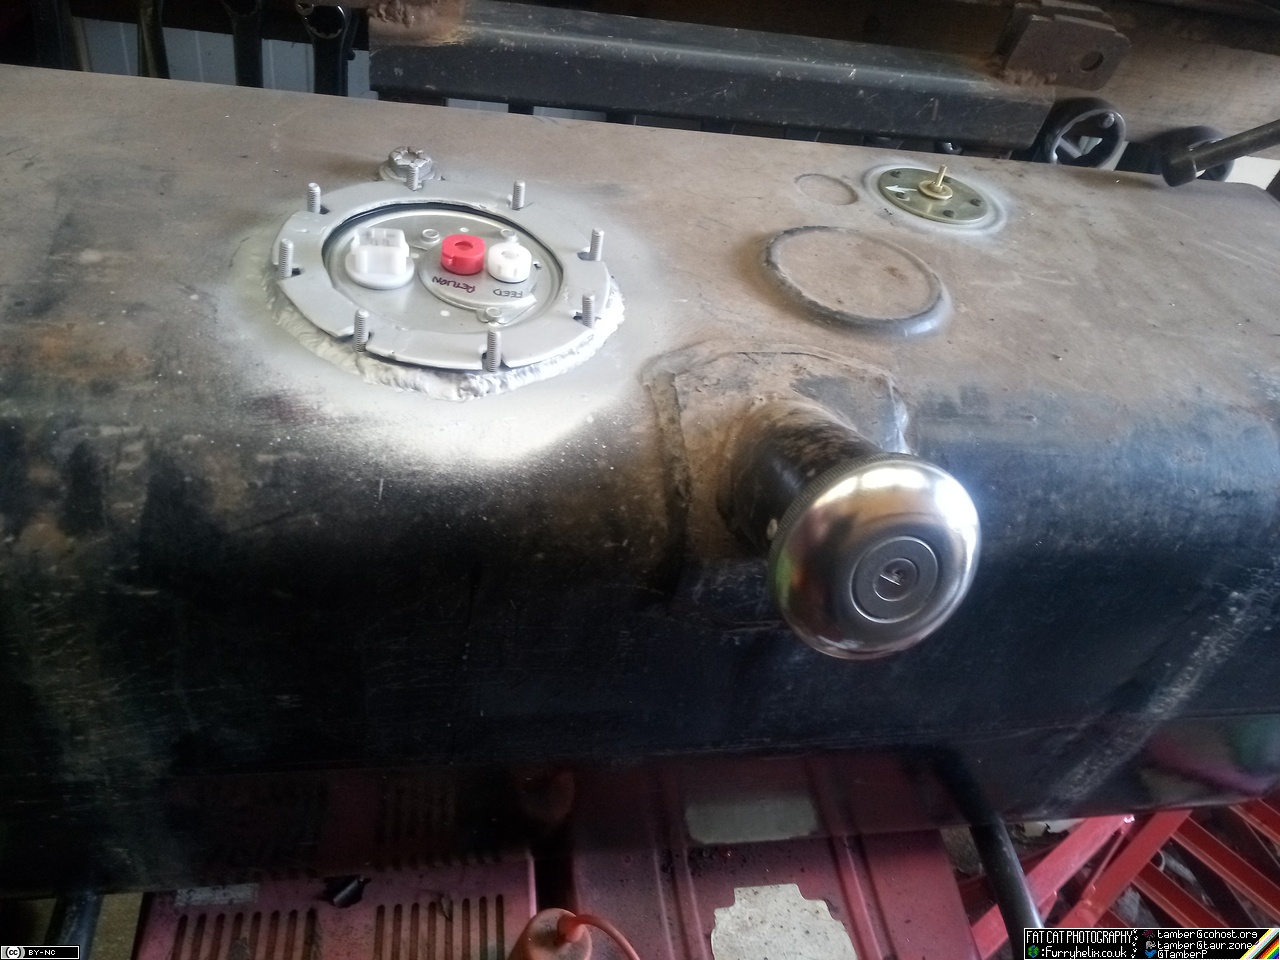
The completed fuel pump mounting ... thing. I didn't get the alignment of my hold-down studs absolutely perfect, so I did end up having to open out the slots slightly in order to get the top ring to fit in any position. Might've tickled them out a touch further than intended, but it's nothing that some washers won't fix.
I've ordered the big hole-saw for the top of the tank, too. Soon™
Today's progress was mostly making the injector hold-down bosses for the other two runners, and getting them welded in place. Took a little time to get back in the swing of welding aluminimu, but eventually we get to this point: (I have just noticed I forgot to round the corners off the hold-downs on the centre runner, whoops.)
A little die-grinder and file action to round the welds off on the inside of the manifold -- doing my best to make a nice-ish radius -- and we start to look a little more like:
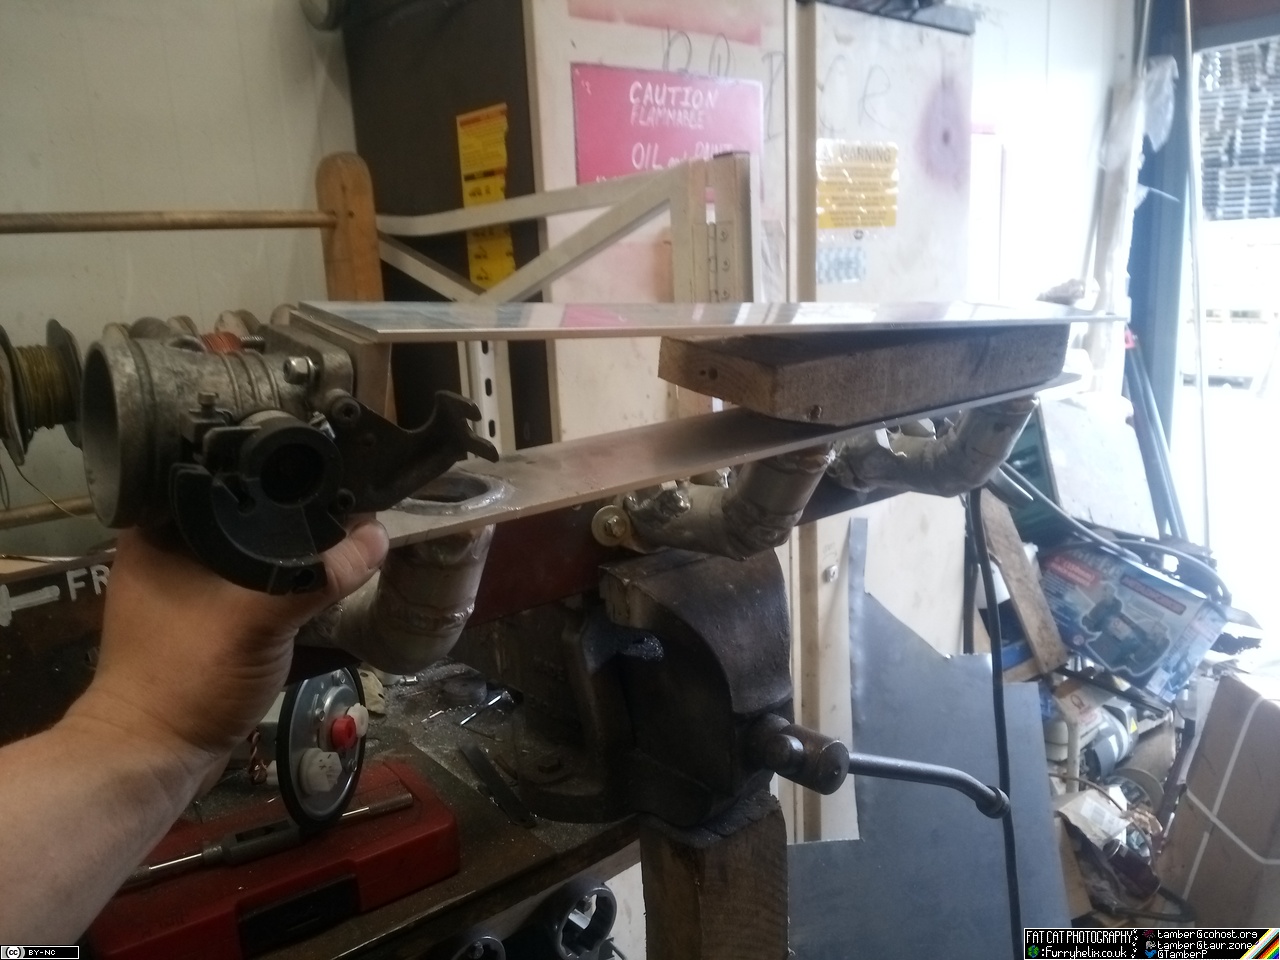
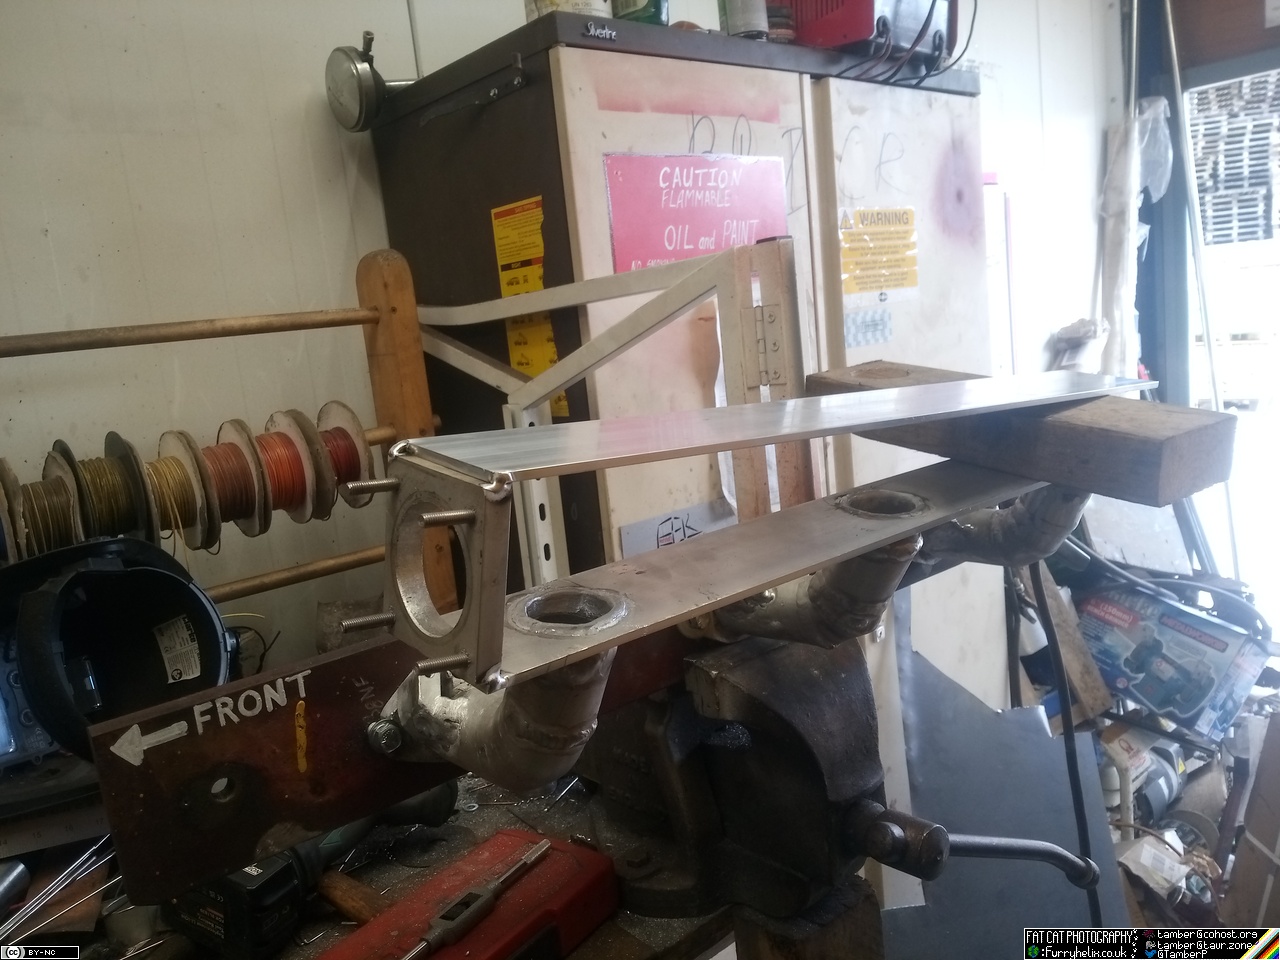
Well, that's looking snazzy, but what sort of overall shape is it going to take? That should be easy enough to set up, if I space the back of the plenum up with a block of wood to get it about the right height, and find the flange with the throttle-body on it. And I think that's looking perfectly acceptable.
All tacked together.
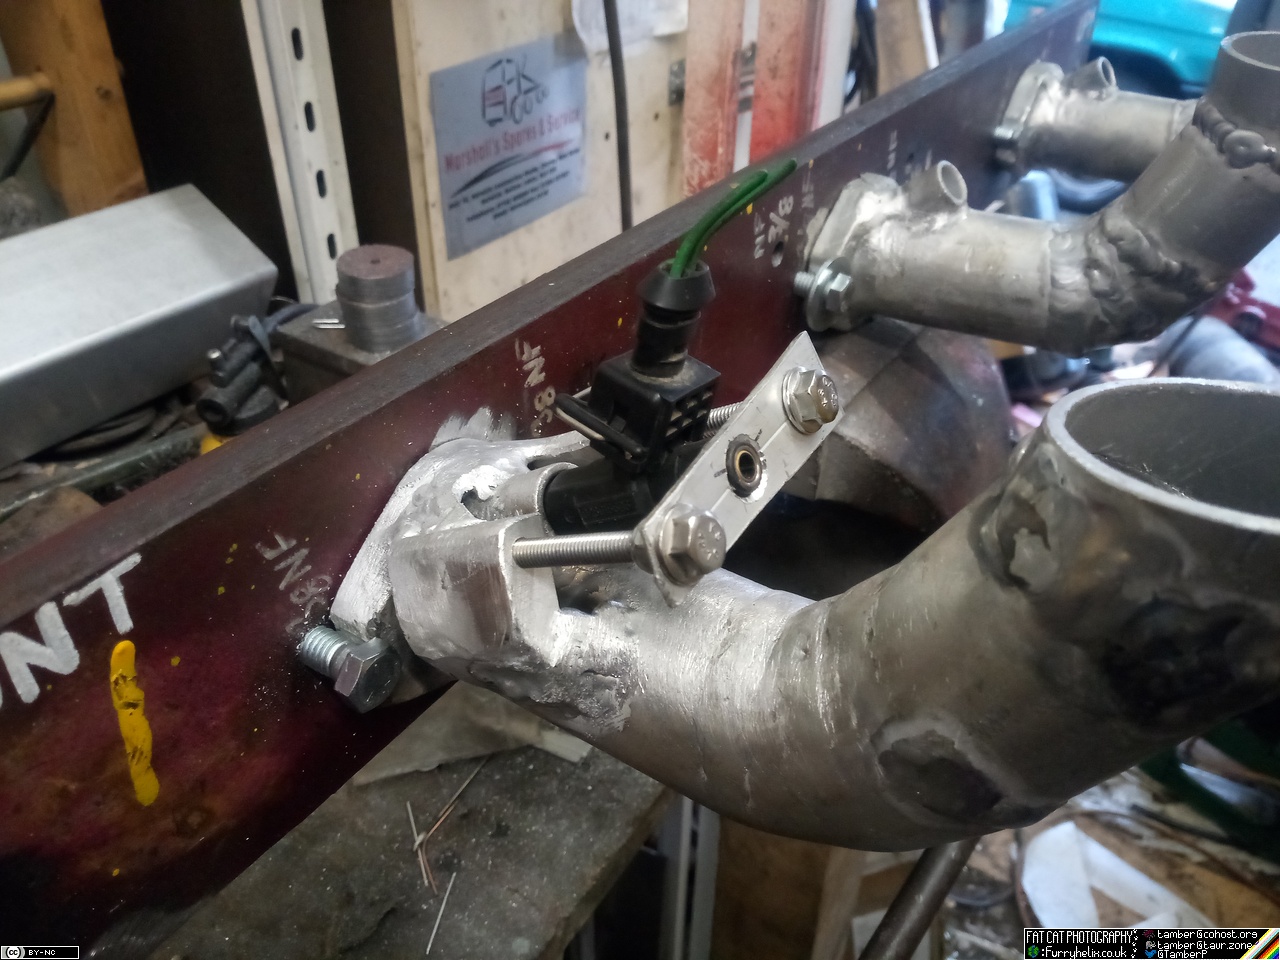
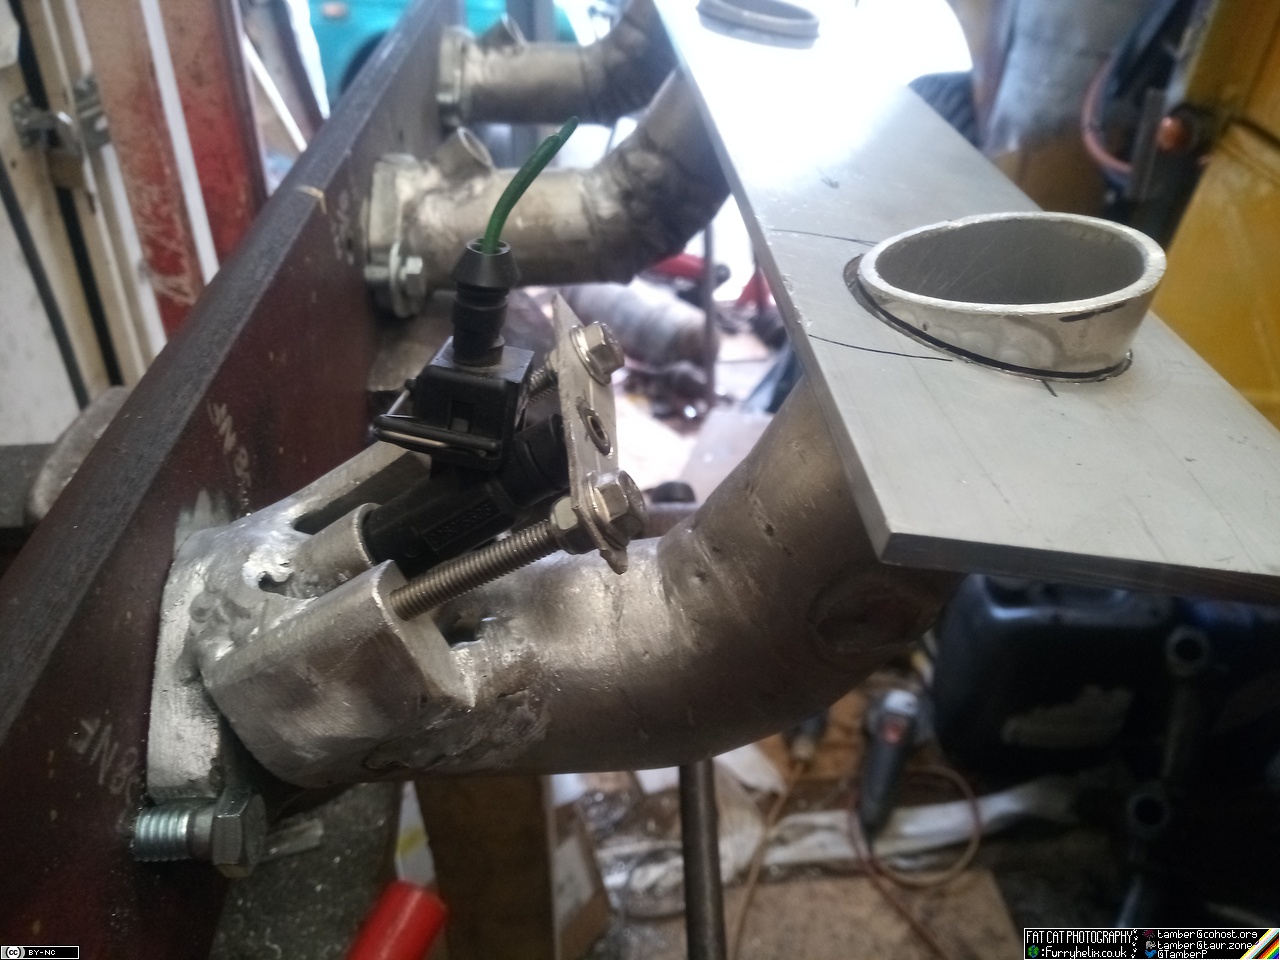
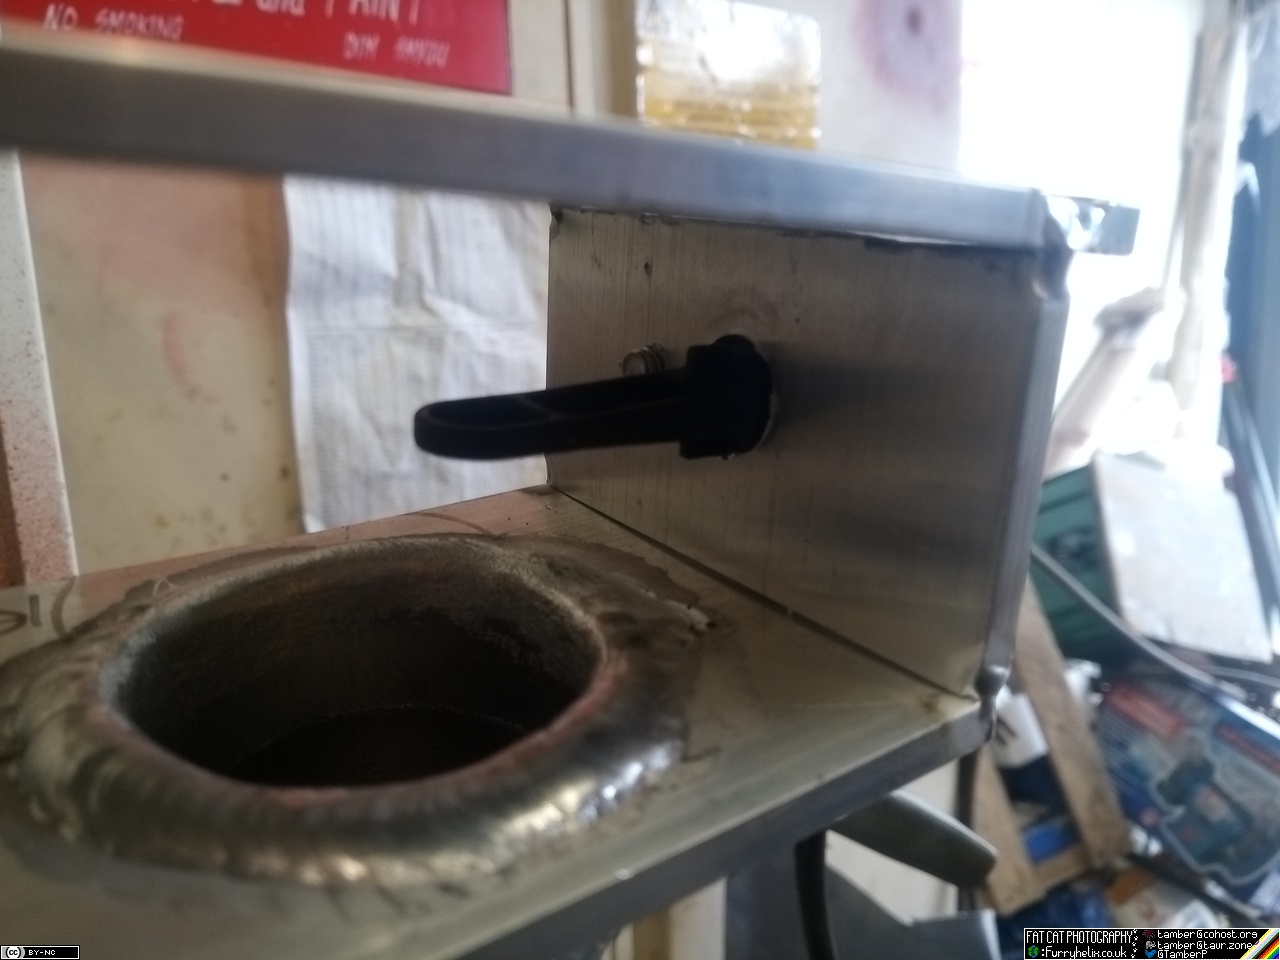
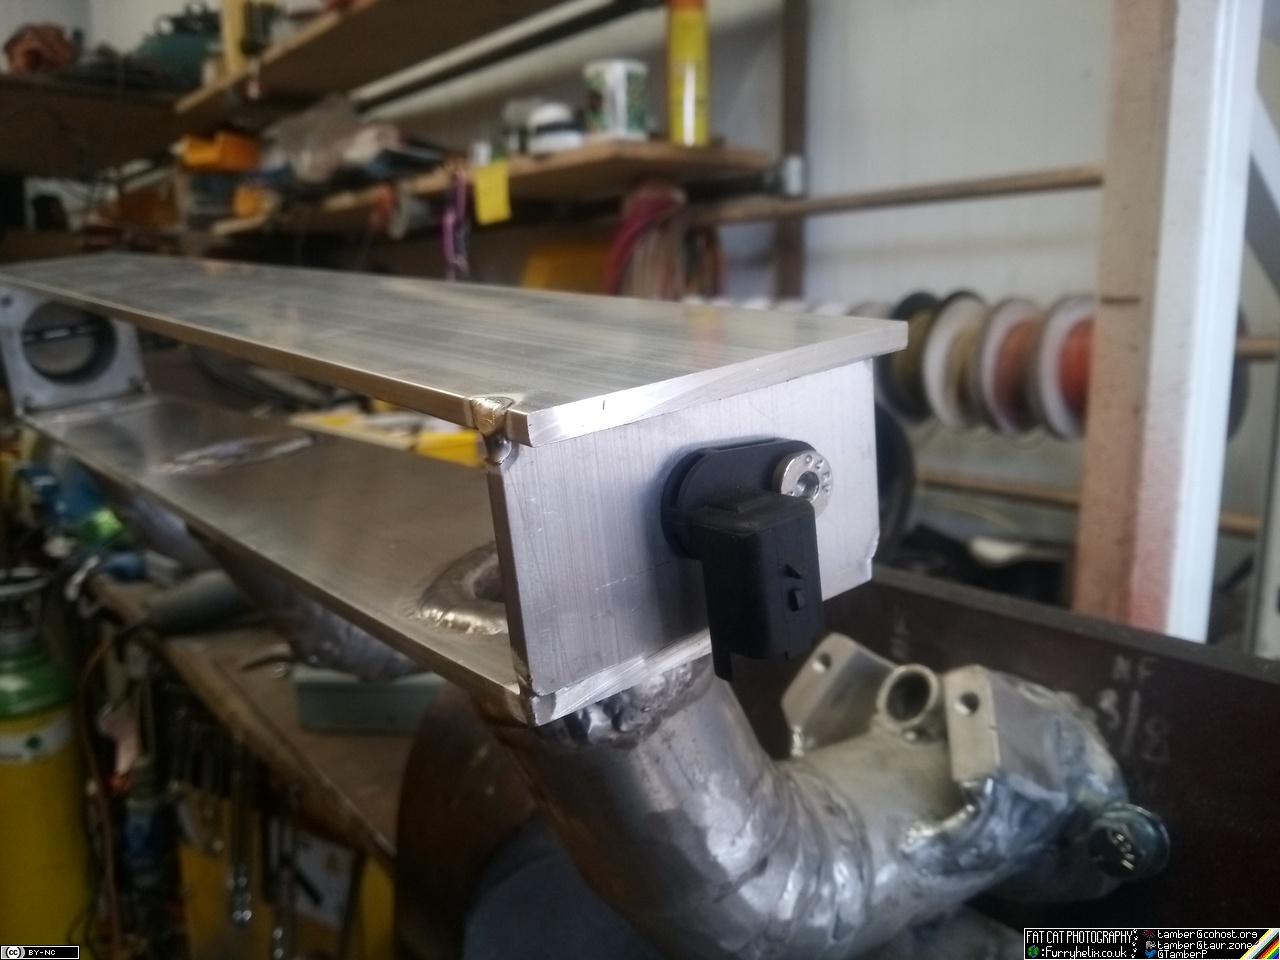
And with the manifold air temp sensor fitted over the cylinder 5 & 6 runner...
Now I'm a little bit annoyed that I stuck the original manifold back on the other week, because I really want to test-fit this before I commit to fully welding it! Didn't realise I was going to be struck by sudden movement on this front, or I might've left it off. Maybe I'll just leave it half-done until I've collected more of the fuel-injection bits; or maybe I'll just measure measure measure until I feel happy about it, and just weld it up~
Also, I dug out the little bits of square stock and laid them on top to see how that looks; I like it, so I'll order up some more of it along with a few other bits I need, like the plate for the injector clamps, and whatnot.
-< Welder. Allegedly a mechanic. Bodger of Things >- * 1958? Bedford RL - Progress: Glacial. * 1994 Skoda Favorit - It's baaaaaaaack! * 2018 Herald Classic - Gone!
So, on the bank holiday monday, I did a little more measuring and confirmed that I should be able to get the manifold as-built to fit under the engine cover with a bit over an inch of clearance. Satisfied with this, I committed to more welding!
And a bit more...
And then I ran out of welding gas again. This is really getting on my tits... Thankfully, I have an early finish at work this Friday so that I can go to a medical appointment (More testing, hooray!), so hopefully I can nip into the supplier and swap the bottle afterwards.
Going back in time, though, I figured I might as well pick up where I left off in the nearside of the cab. So, chop the rot out of the seat-base, being careful not to hit the data-plate and whatnot, and start snotting in fresh metal. (It'll clean up with some grinder action, no worries)
Zap zap zap...
Upright panel trimmed (slightly too short in one spot, of course.) and folded over to be welded in. Discovery of the day, that Zinc-182 primer smells like rotten milk when it's burnt by the heat of welding next to it. Yuk!
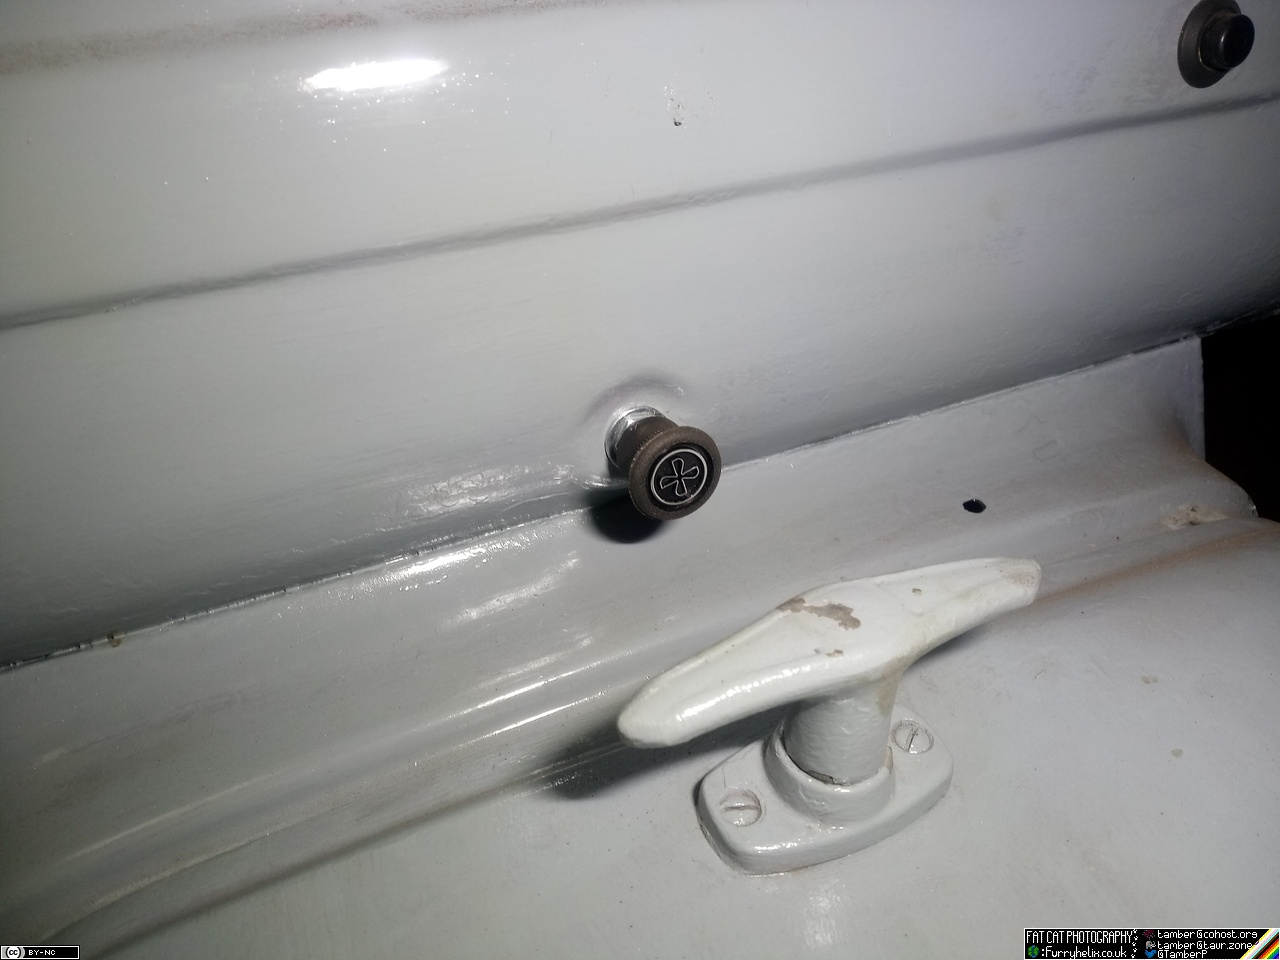
Decided I'd had enough of that, and went to go refit the wiper mechanism. Still need to re-tap the switch standoff to replace the screw that holds the cover on the wiper motor, but I'm waiting on the tap for that and there's no real rush. It'd just be nice to have it not disassemble itself while I'm trying to work the switch.
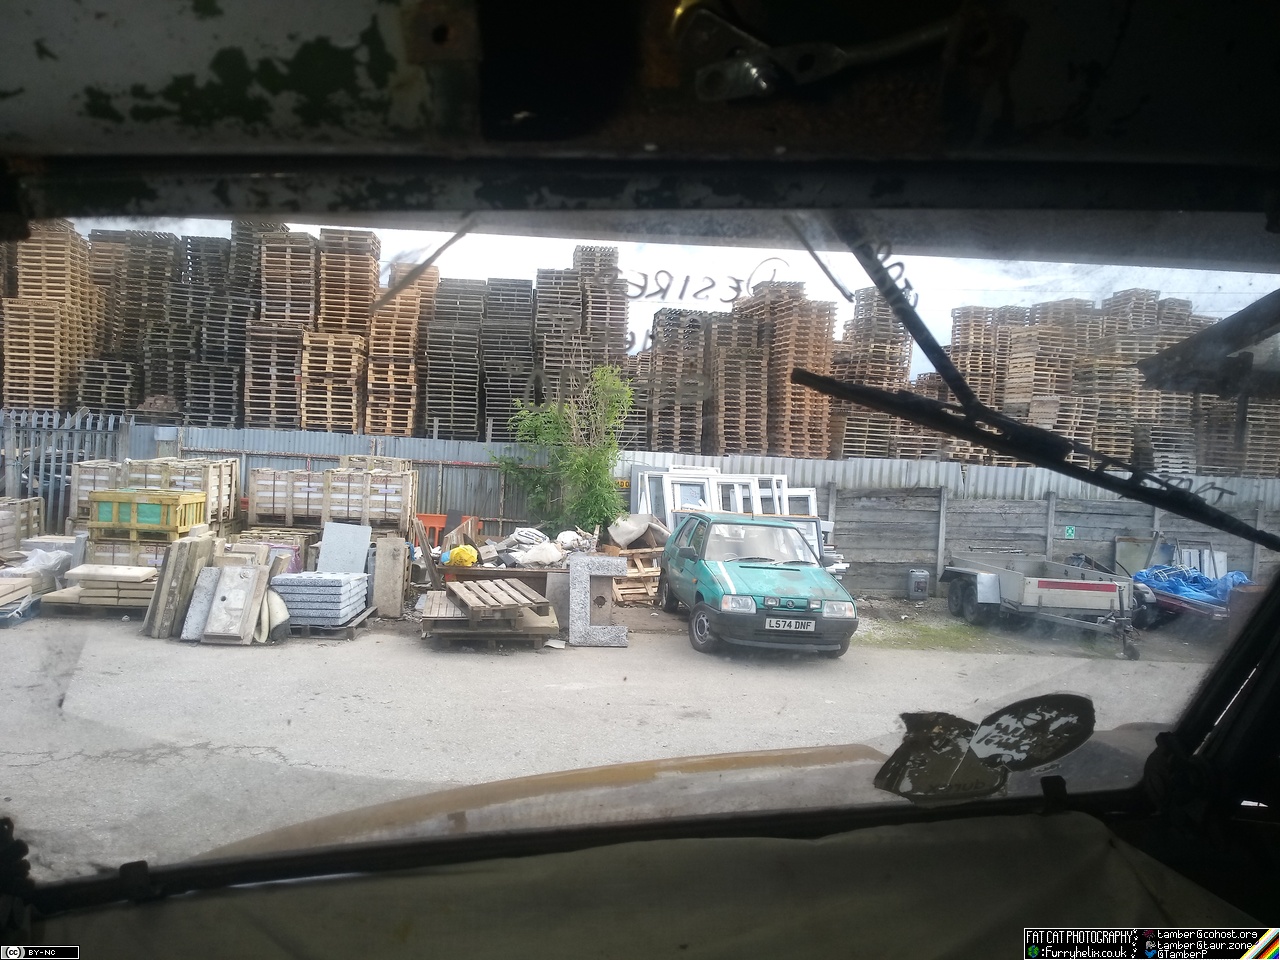
The good news is, with the spindle arm shortened as much as I have it, I do have the sweep I was after! The wiper shown here at its start position, and you can -- hopefully -- just about see the end of the sweep in the dust on the screen (About in-line with that funny yellow and green crate)
Unfortunately, it sweeps out to its end position, and then it all starts going wrong. There's enough drag -- and the lack of leverage afforded by the shorter linkage arm -- that the wiper blade can't fully return to its start position, because the long linkage rod just buckles and effectively becomes shorter. It might not be a problem with water on the screen, because that might reduce the friction enough to work out fine. If not, then I guess I've got to make a slightly more rigid linkage rod.
While I was pondering on that, I went and repurposed a hole in the dash for a fan switch. Nothing for it to connect to, yet, but I'm tumbling ideas around for a compact heater box in the dash for windscreen demisting purposes. (Shouldn't need a heater for the occupants of the cab, from what I've been told of how much heat comes up from the engine hump anyway. )
On the fuel tank side of things, I've got my big holesaw, so I'm almost ready to go with that; but it will mean driving the truck outside to take the tank off. (Which means moving a bunch of stuff from under the truck again, and rigging up a temporary fuel system again.)
OH! That reminds me: The fuel filter housing I've had sitting around, that I'm planning on using, turns out not to have NPT ports but 1/2-20. I can adapt it to what I need, but that's just funny to me, especially since the inlet on the carburettor is also 1/2-20.
-< Welder. Allegedly a mechanic. Bodger of Things >- * 1958? Bedford RL - Progress: Glacial. * 1994 Skoda Favorit - It's baaaaaaaack! * 2018 Herald Classic - Gone!
Go round in circles for a bit, and voilà! I didn't quite get to place the fuel pump hole where I'd originally planned, due to conflicting with the fuel tank straps. It's sat further out than I would've liked, but I didn't want to end up running into the level sender and causing myself even more headache.
(Please note, in the background, the patent-pending explosive atmosphere detection kit: a burning wad of paper on the end of a welding rod.)
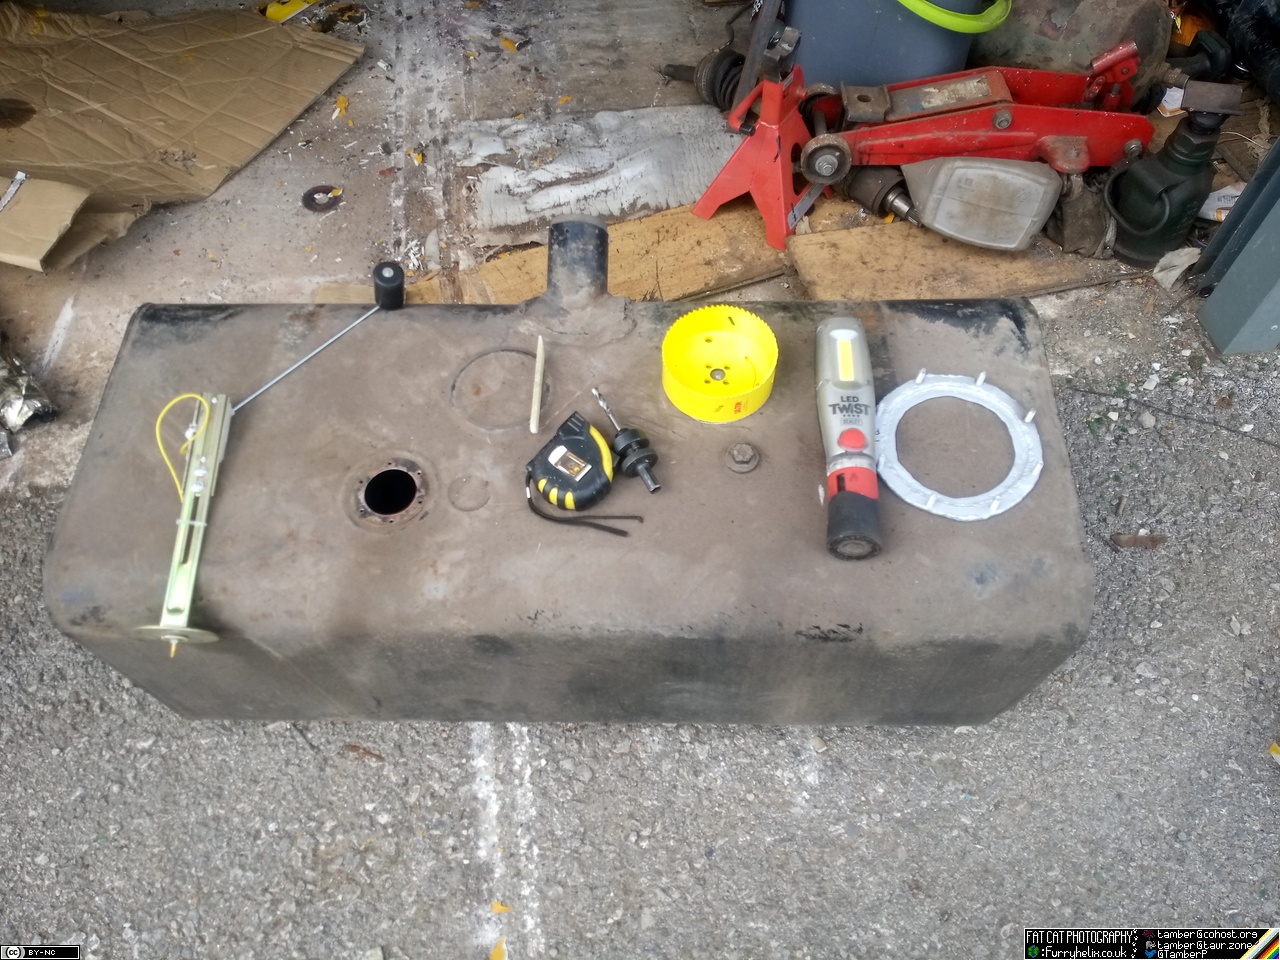
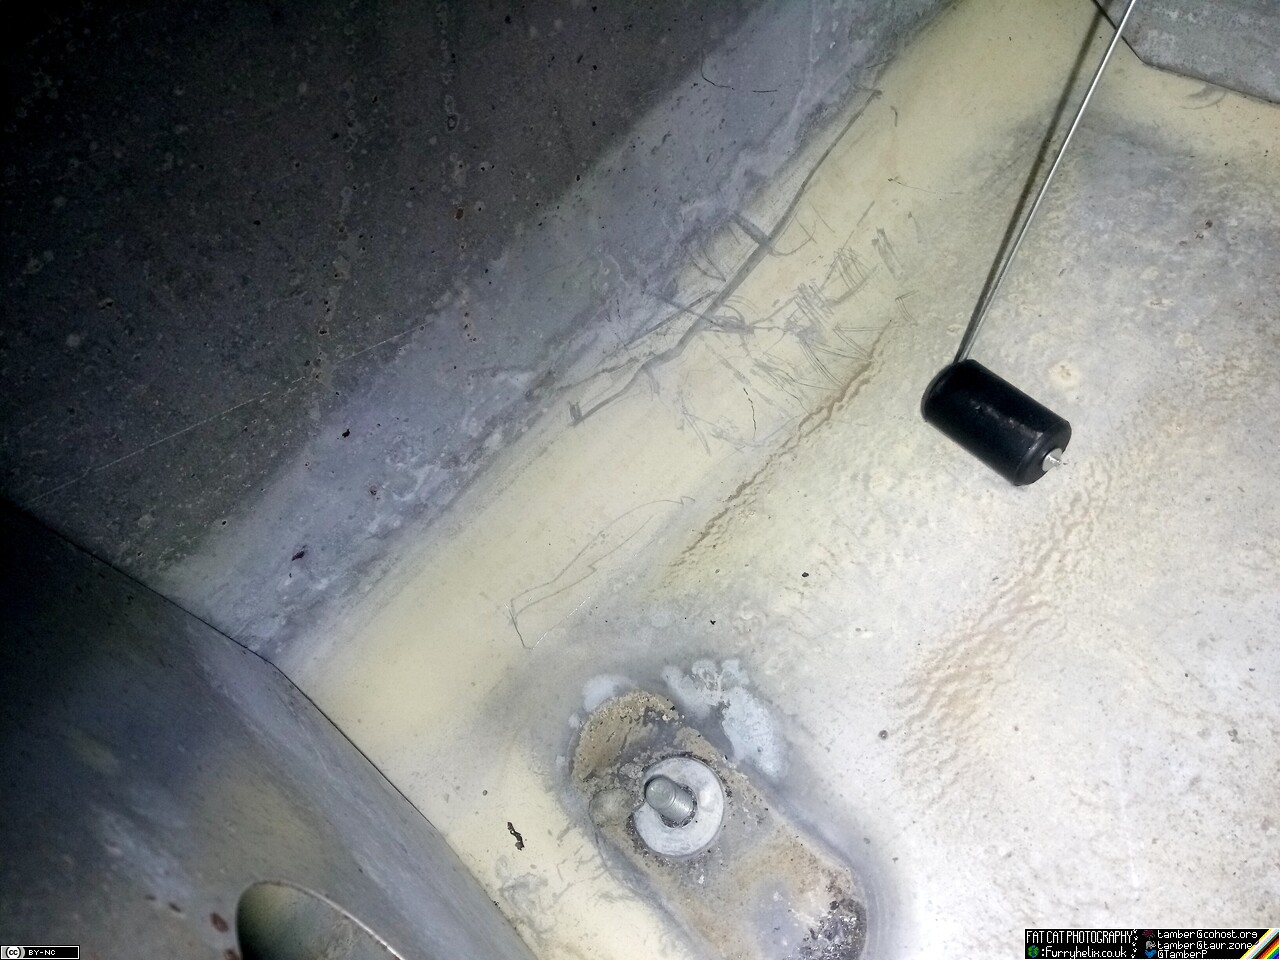
On the level sender note, I went and dug out the universal ("One size fits F**k-all") GM tank sender that I bought quite a few years back now, and set that up with the same angle of dangle as the original.
May end up tweaking that float arm a little more, in the future, but for now it's good. Inside of the tank is also in lovely condition due to being galvanised; there's some sediment on the bottom -- plus all the swarf from drilling, now -- so I'll wash & hoover that out as best I can.
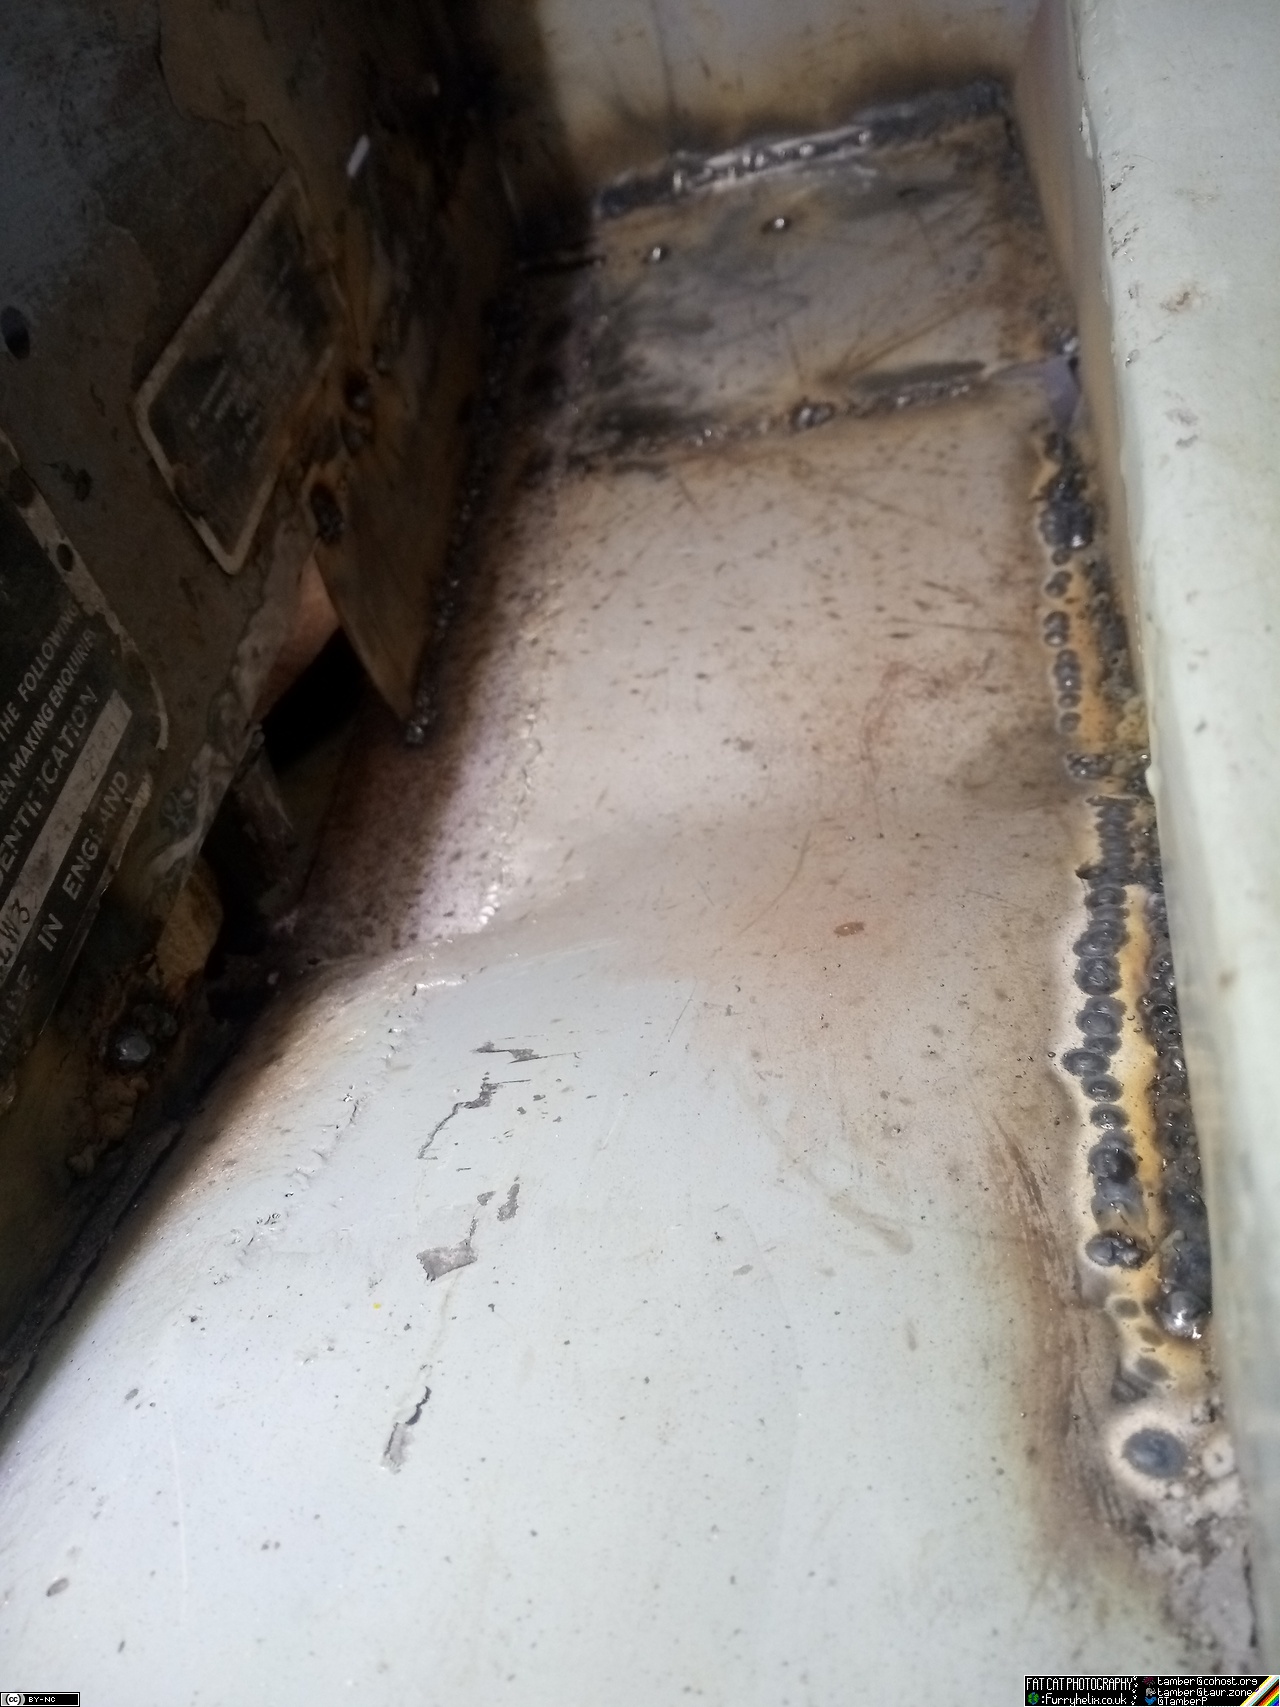
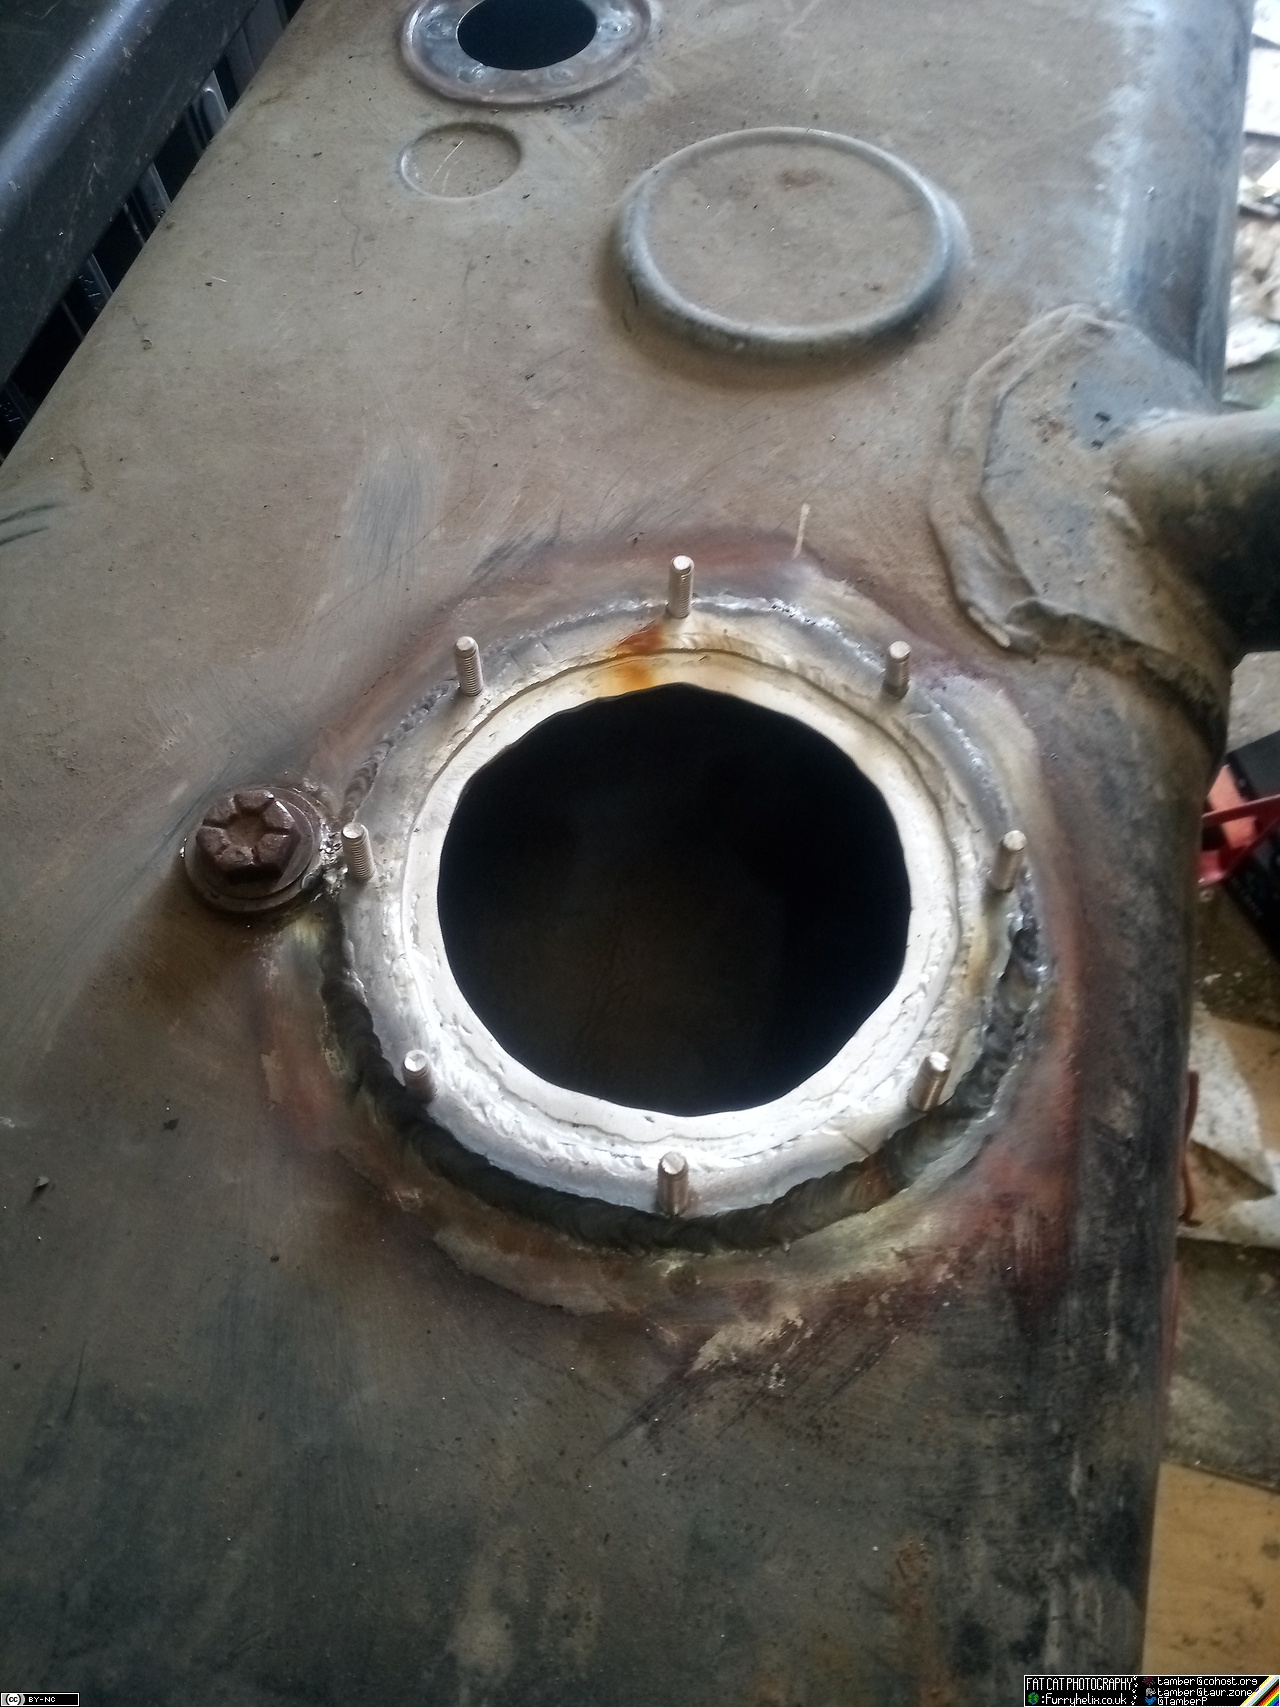
Then comes the weldinating!
I should've cut that bung out, I really should; it turned out to be soldered in, and that made a real mess while I was welding so close to it. Still, it's all welded in and solid. Once it's cleaned and painted, it'll be golden. Well, black, but you get what I mean.
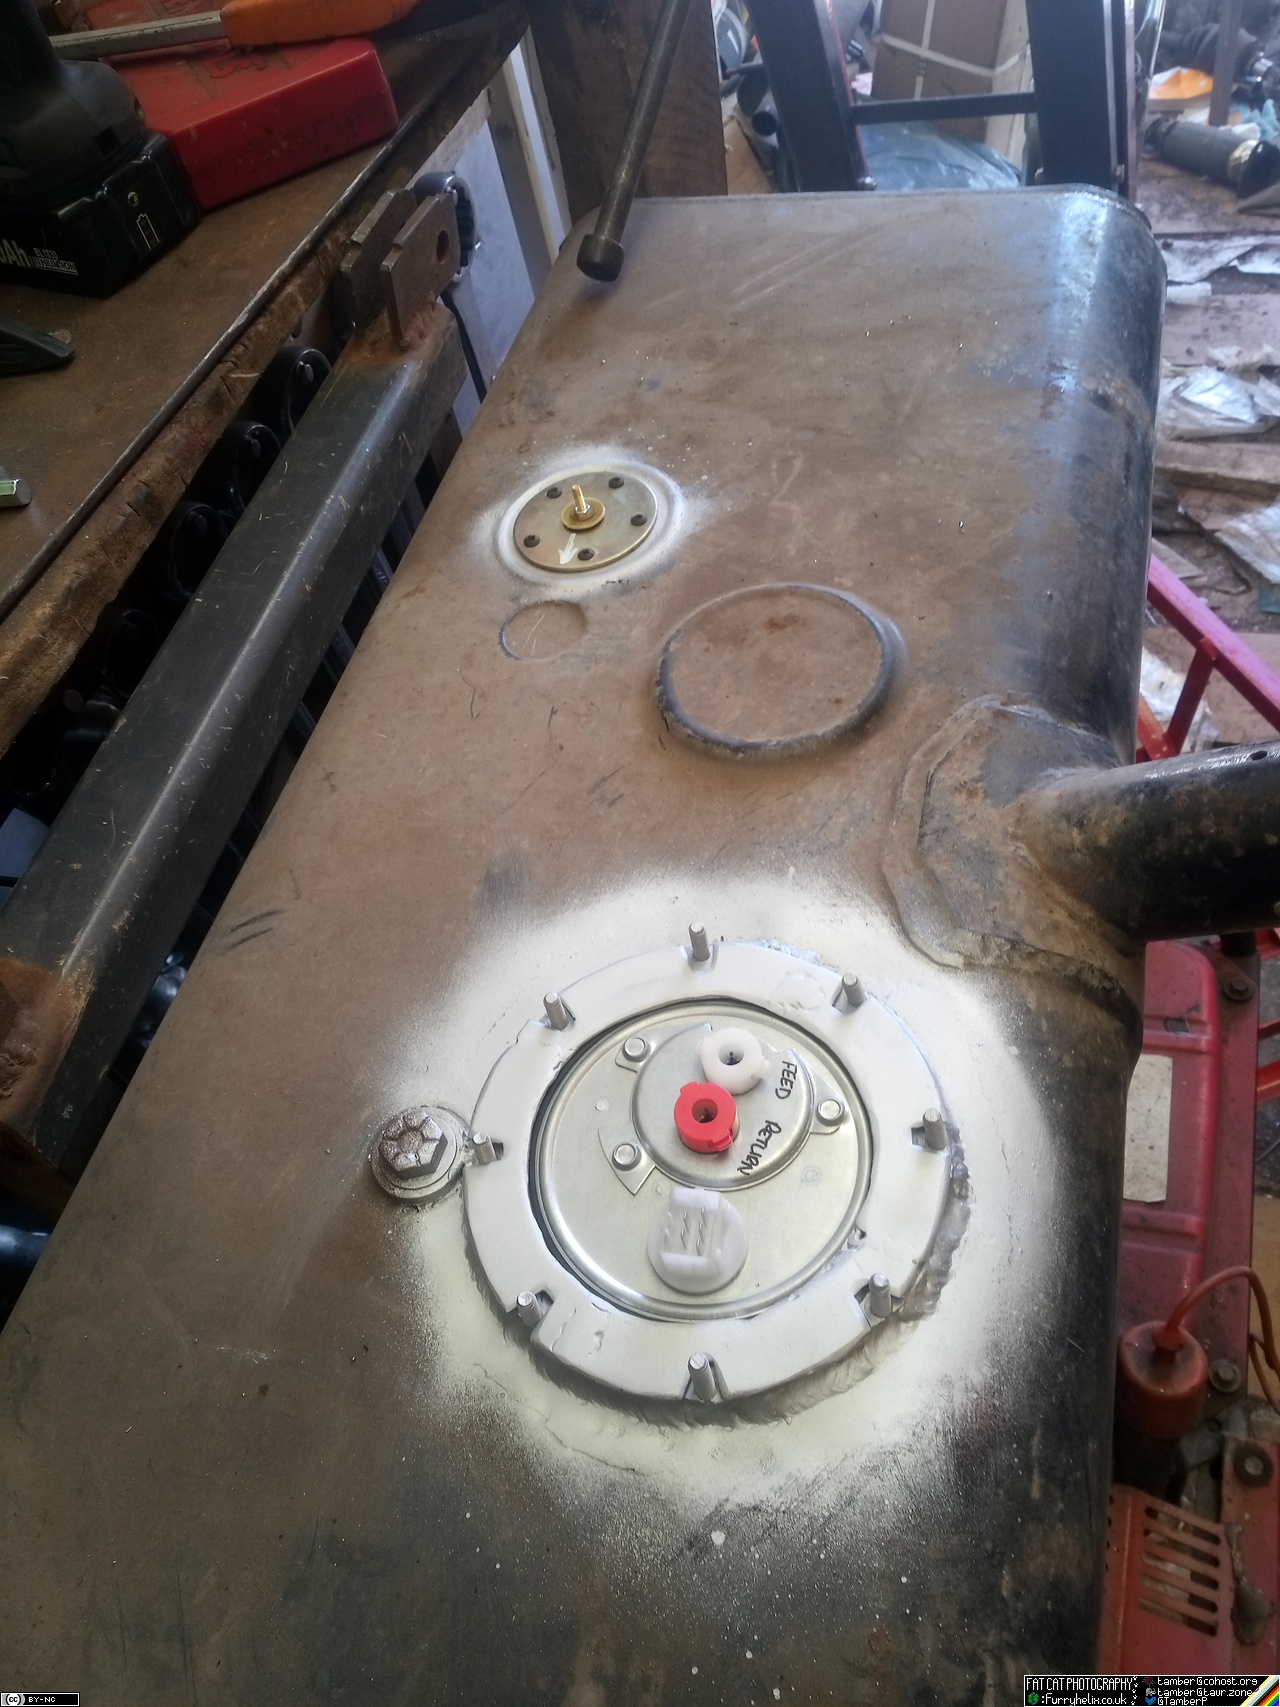
Weld up the bolt-holes for the original sender, so I can drill the flange for the new pattern.
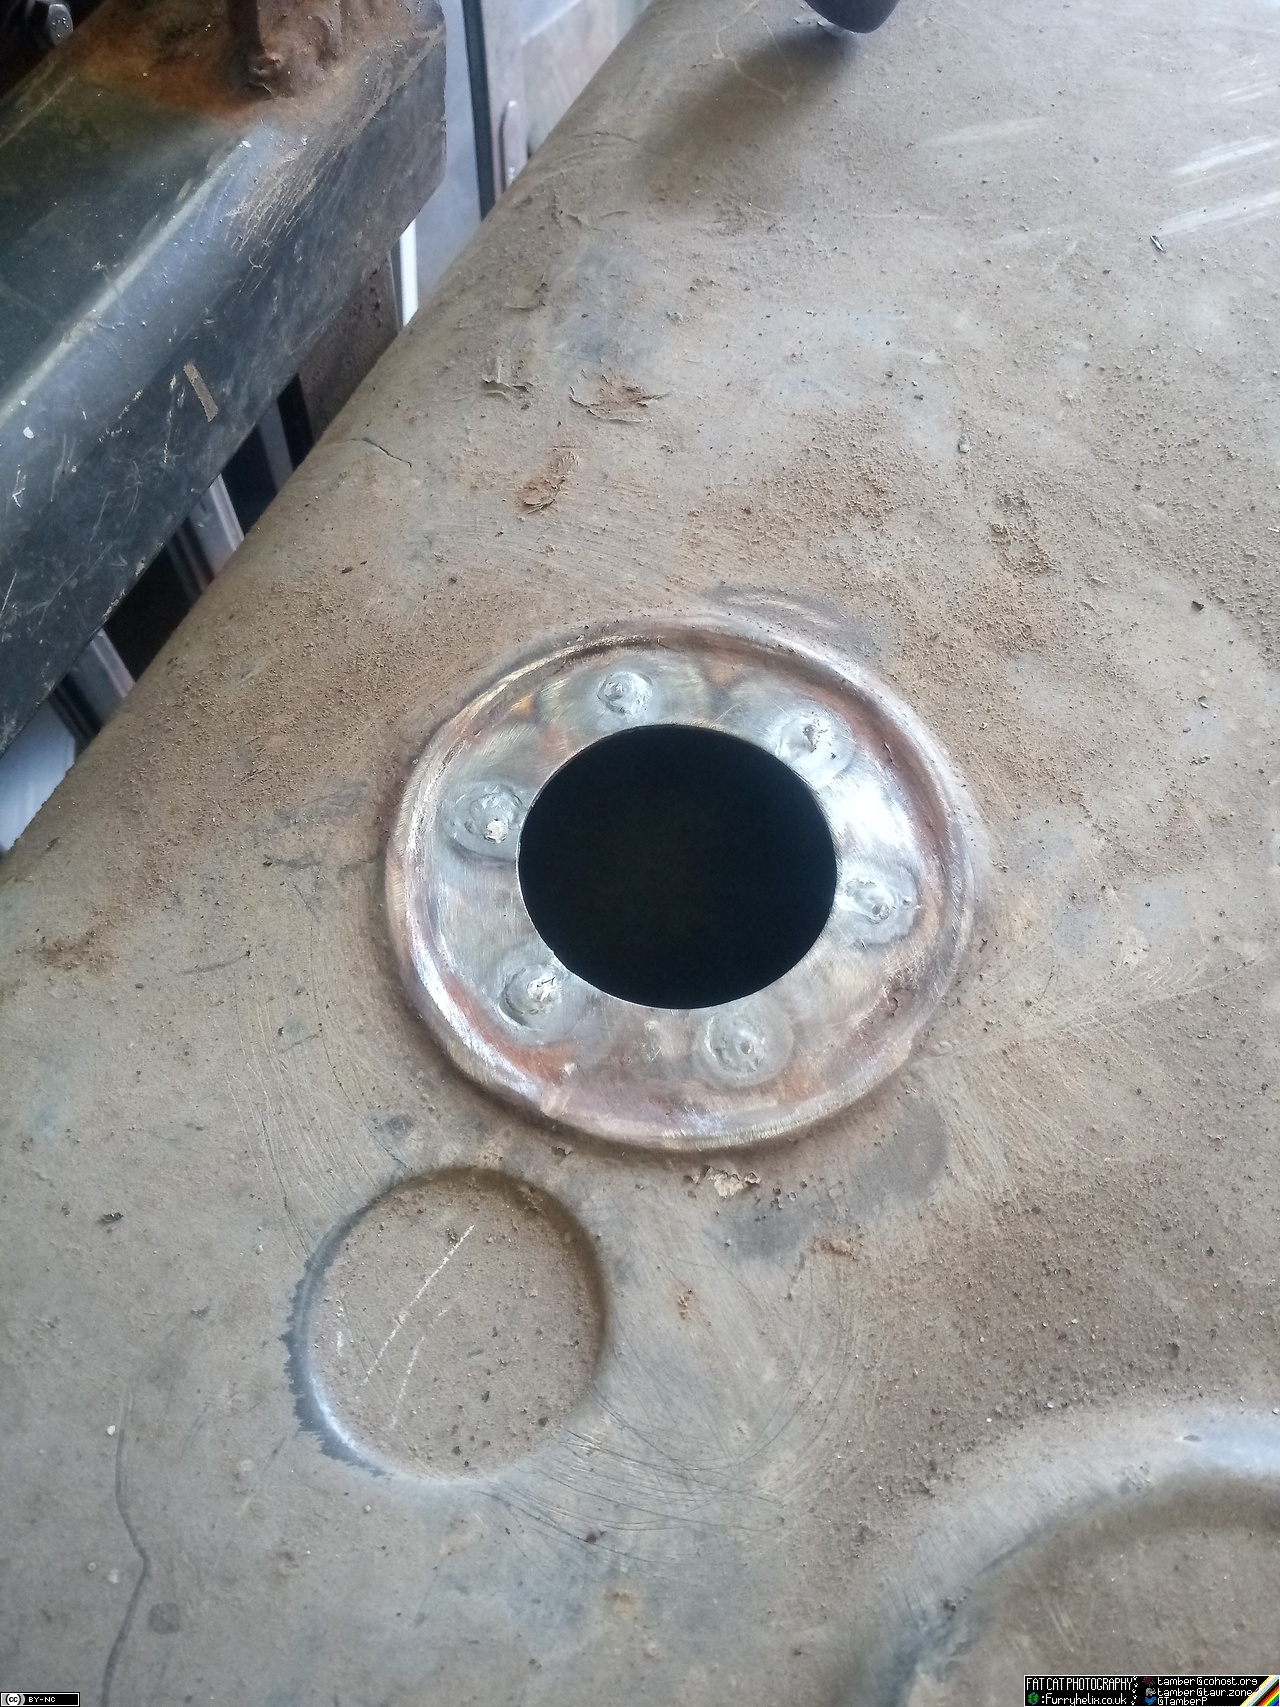
Quick spritz of zinc primer, just to stop the lot of it going crusty before I get around to cleaning and painting. Mostly just a wash off, and a quick buff over with some sandpaper to key it.
Test fit.
And, of course, a little jewelry... Gave the cap a bit of a polish.
I'll need to make up a gasket for the sender, and a new seal for the filler cap, but I'm not expecting either of those to be a particularly difficult task. (Must also get some rubber to put behind the tank-straps, too.)
-< Welder. Allegedly a mechanic. Bodger of Things >- * 1958? Bedford RL - Progress: Glacial. * 1994 Skoda Favorit - It's baaaaaaaack! * 2018 Herald Classic - Gone!
The car is starved for attention, and decided to get some in a potentially dramatic way, with a fairly sudden hot low oil pressure problem. So I went and changed the oil & filter -- no glitter at all (hmm) -- in case it was just degraded. That didn't fix it. So I order bearings, and go to park the car up until I can tear the sump off and investigate. When I park it up, I notice my alignment has gone all to hell and one of my front tyres is shouldered off down to cords. So I go to check and adjust that, and in the process discover that the front spring on that side has snapped. Also in the process of adjusting the tracking, I managed to ding the threads on the track rod end and get the nut stuck.
Track rod end and spring get. Change the track rod end, drive the car up closer to the unit to do the spring, notice that the oil pressure switch is wet on the connector end. Like, almost dripping levels of wet. Joining some dots (the oil on the end of the switch; the neat effect that turning the engine off for 30 seconds while the oil pressure warning's screaming, lets it run for another minute or so after restarting before the warning starts to chirp again; and that there's not a single sign of metallic flake in the oil, even on the pre filter side of the oil gallery, behind the oil cooler feed port plug (oh yeah, I also found out that an oil cooler was an optional extra on that engine)) I think the switch has just started to go bad. New oil pressure switch is on its way...
Anywho!
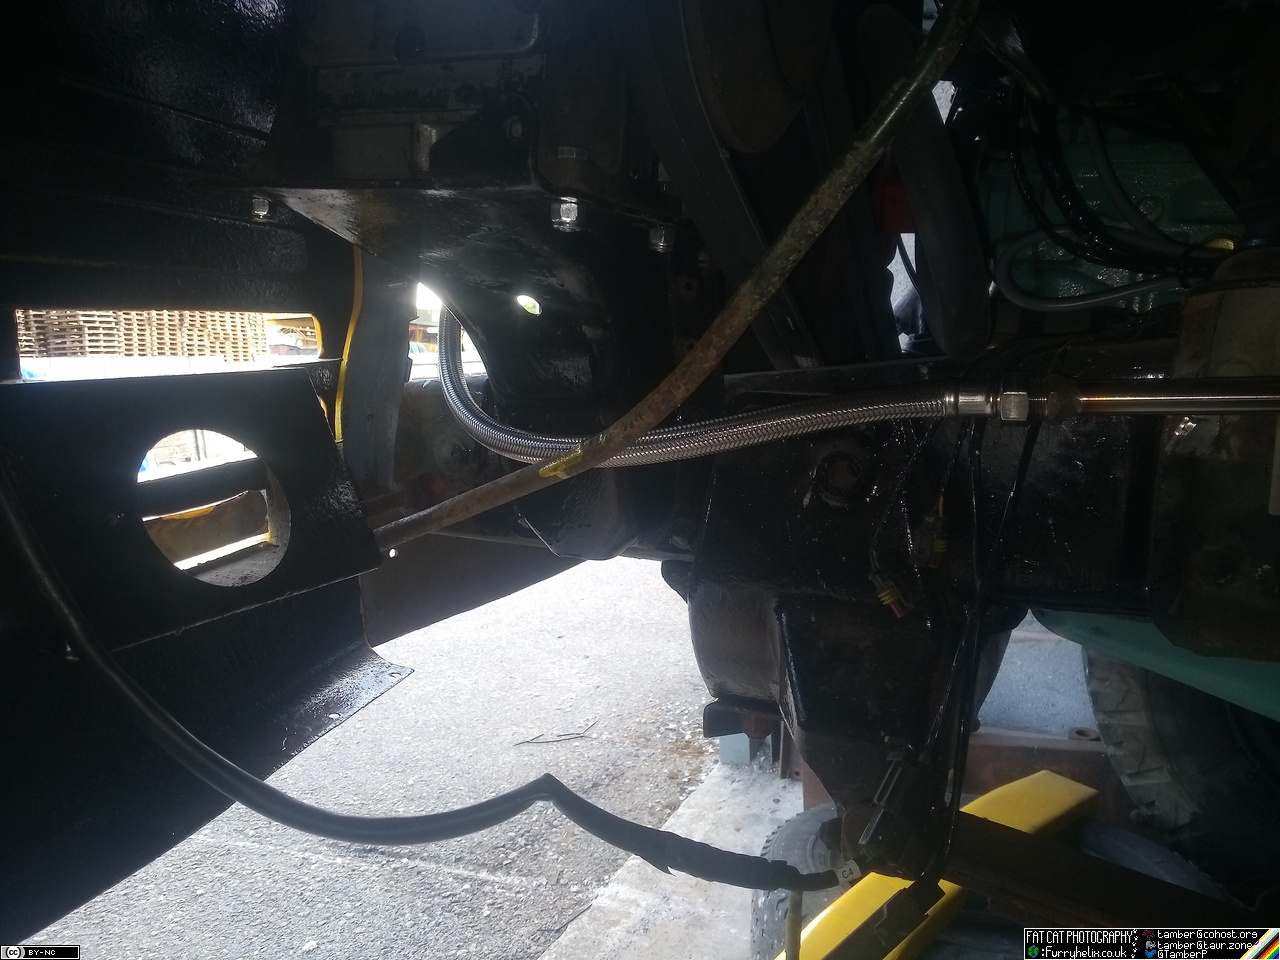
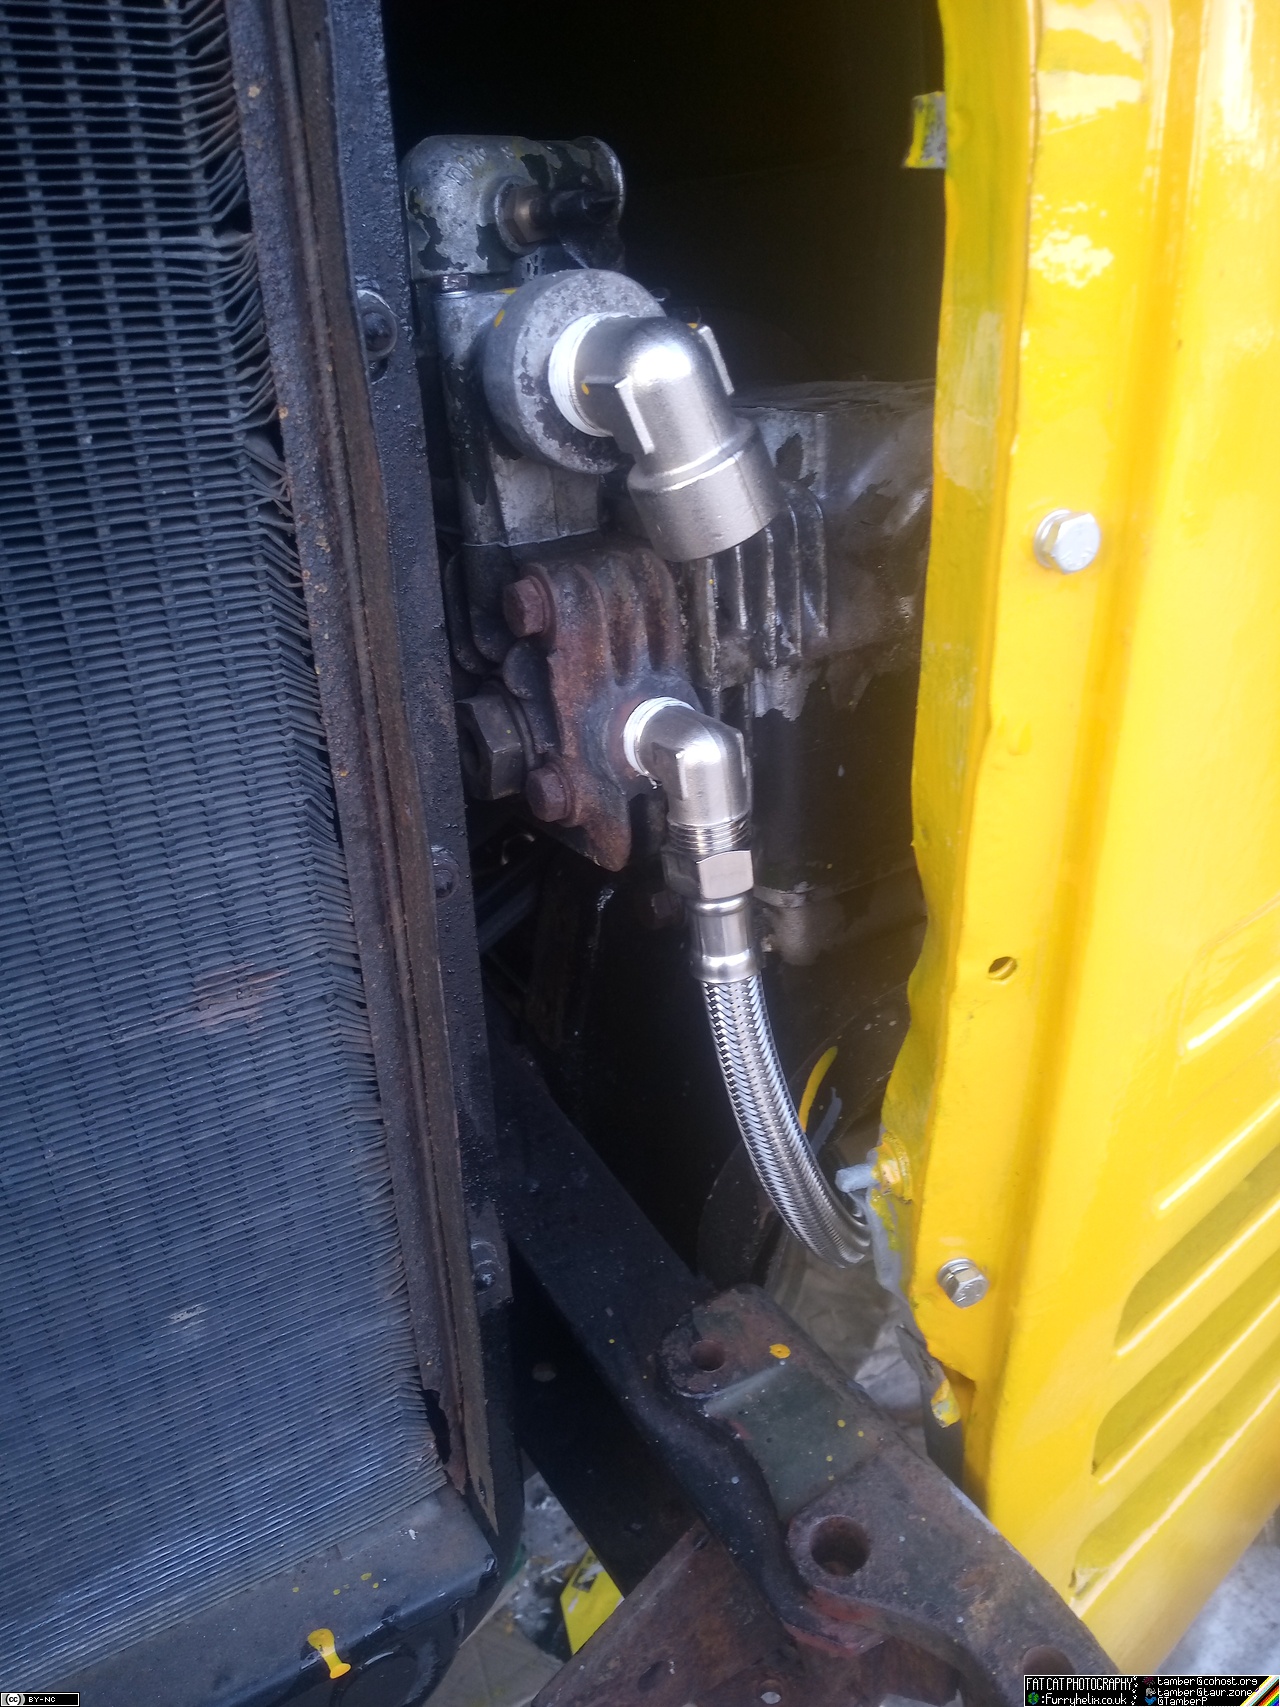
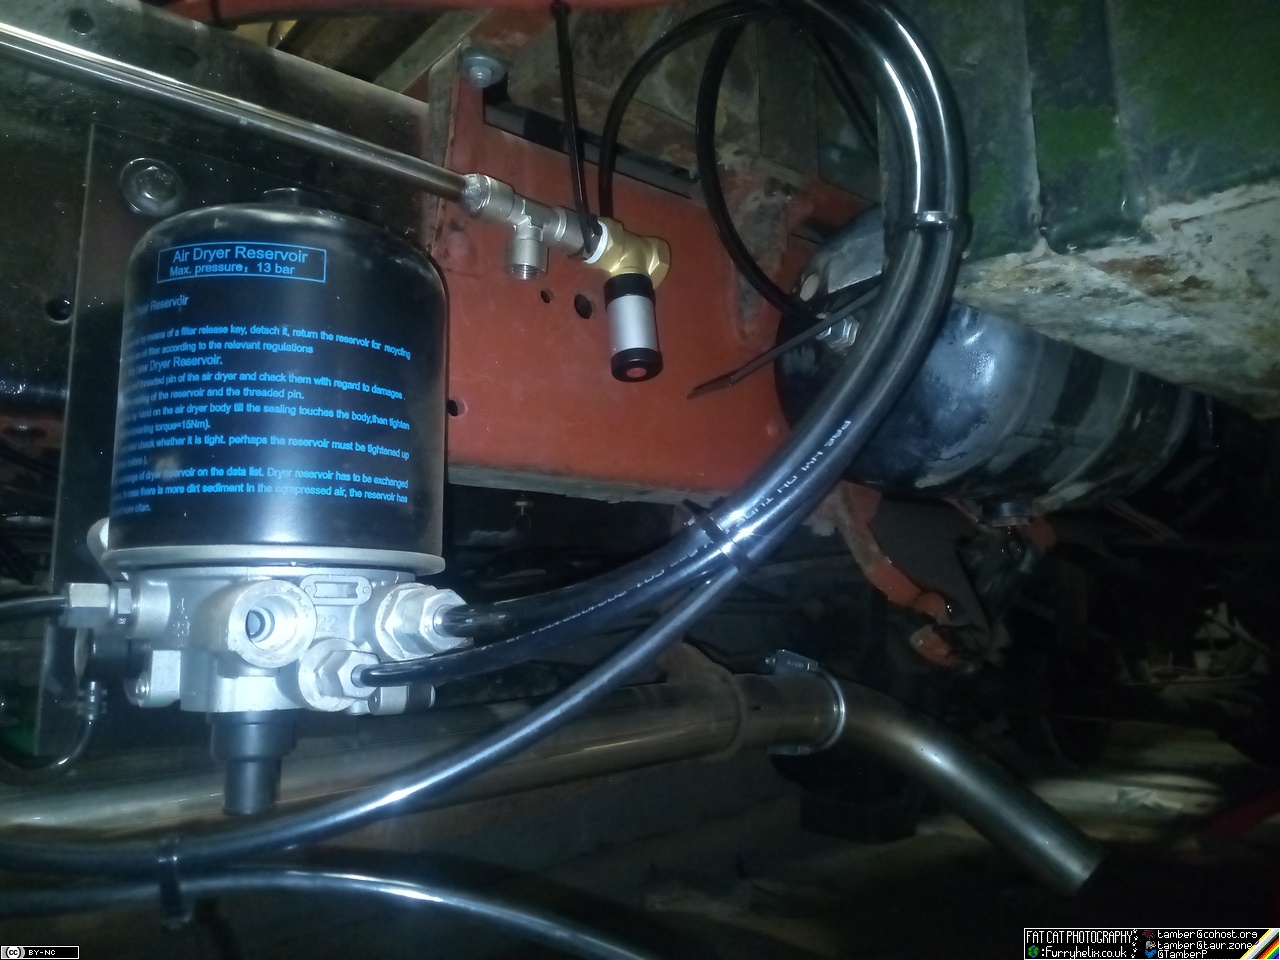
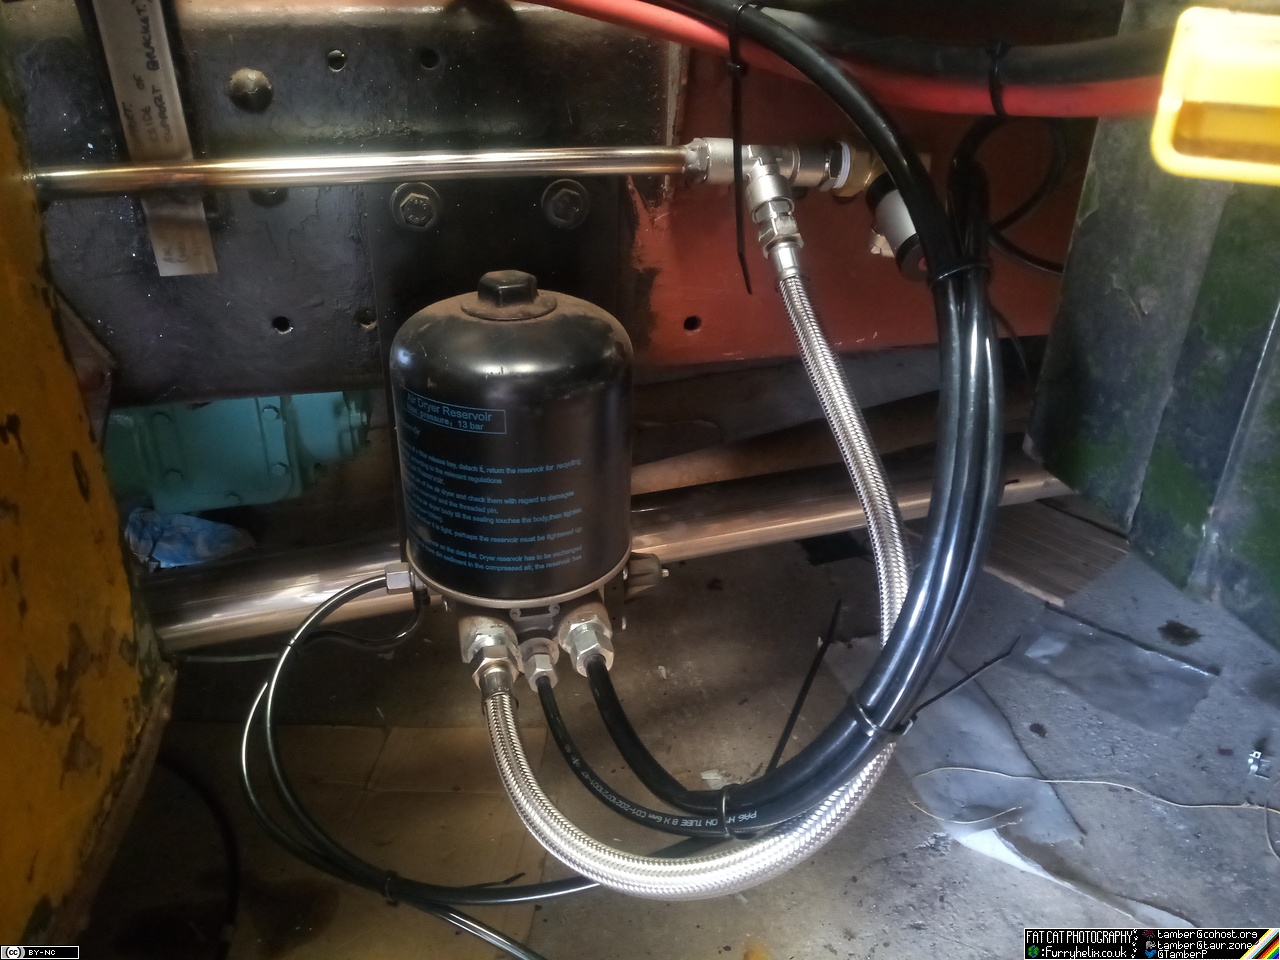
Compressor outlet line running to the hard feed, and there's a matching one for the other end of the hard-line to the air drier that I'm waiting on fittings for. Stainless braided hose rated up to 20bar; that'll be more than sufficient!
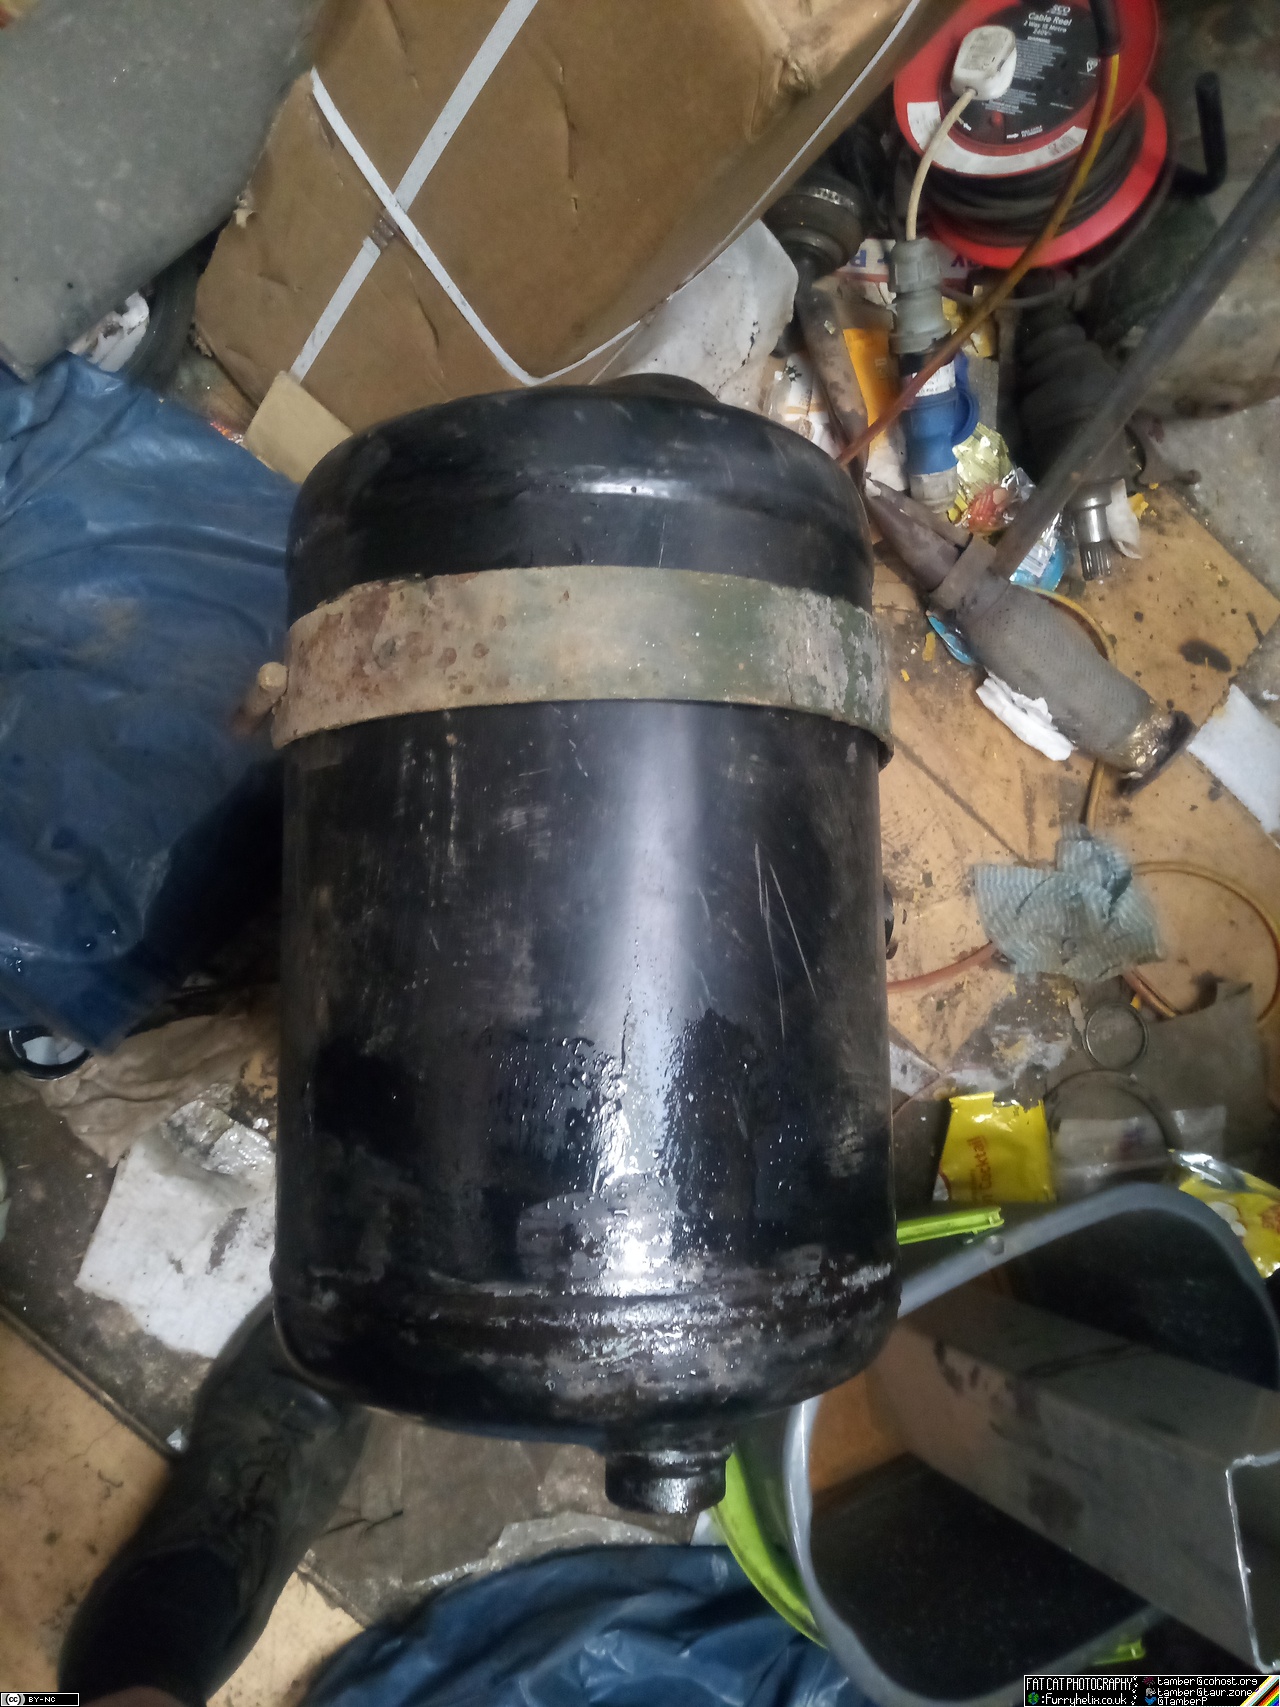
Next little jigsaw piece was the purge tank for the air dryer; used for what's termed "regeneration", it holds air that's then dumped back through the filter to the dryer unit's exhaust once the relief valve satisfies and the unloader is tripped, blowing accumulated moisture out of the exhaust. Gives a longer useful life for the dessicant cartridge.
It's a little on the big side, a 10 litre tank from a Mercedes bus that was headed for scrap after a fire. But, waste not, want not!
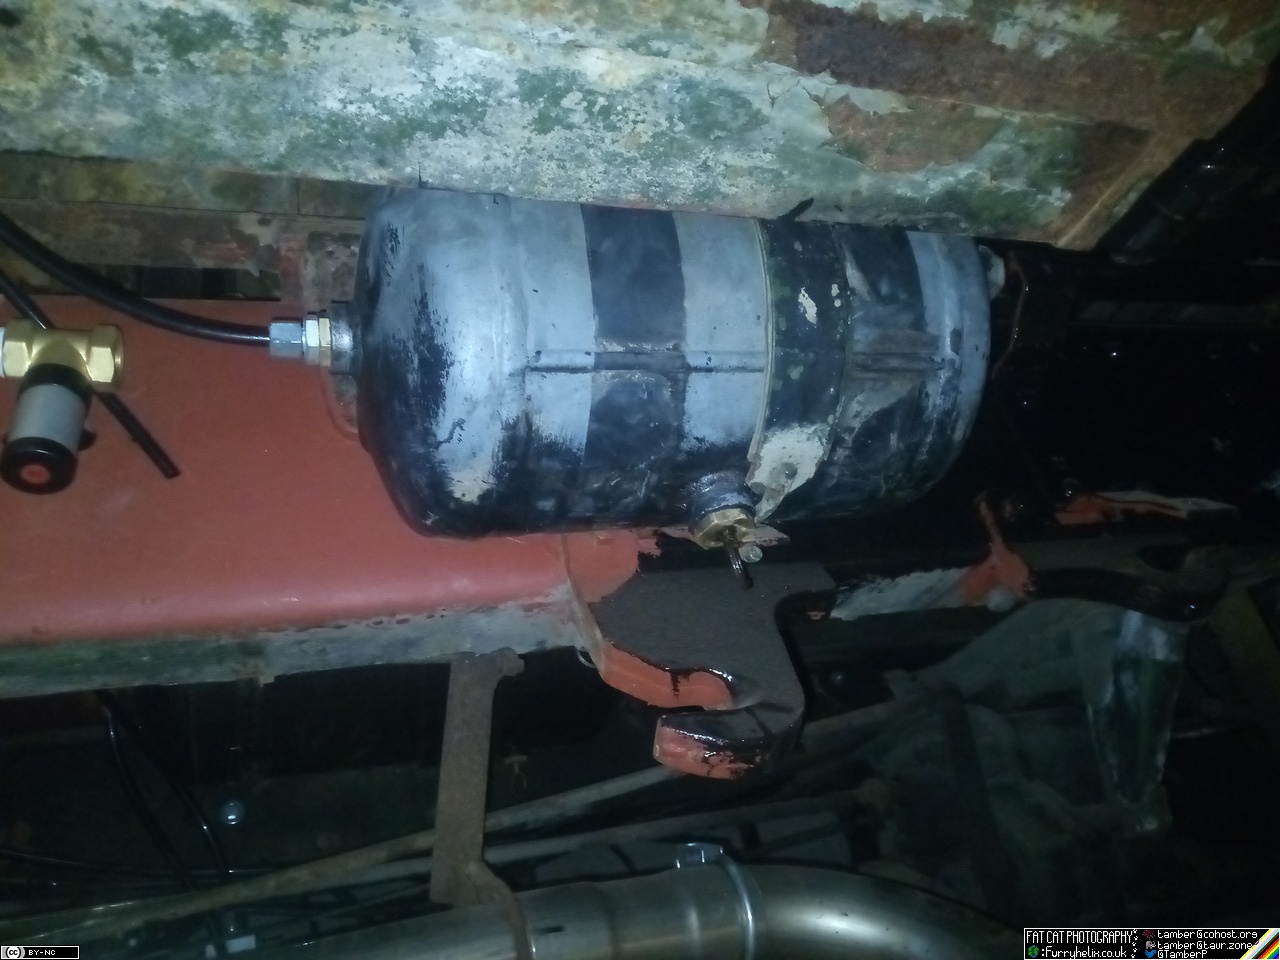
The really nice thing is, it fits into the bracket for the truck's original air-tank, which saves me a great deal of hassle mounting it!
A little more plumbing, and that portion is ticked off. I have fittings in the post for putting the other braided line between the branch of the T-piece in the background, and the open port in the dryer unit in the foreground. (And the little elbow fitting to connect the air-line to the unloader valve, and ...)
Still more parts needed, but I am drawing closer to the point where I can build air pressure in the system. I did notice, though, that the edge of the compressor belt is just grazing the crank trigger wheel, so I might need a bit of a spacer washer to move the pulley slightly further out for clearance.
-< Welder. Allegedly a mechanic. Bodger of Things >- * 1958? Bedford RL - Progress: Glacial. * 1994 Skoda Favorit - It's baaaaaaaack! * 2018 Herald Classic - Gone!
That's that bit complete! (Will need to put a little protective sleeving on the plastic pipes where they pass right by the braided hose, just to remove any risk of rubbing/melting.)
So, we all know what needs to happen now, don't we?
Of course, my little temporary fuel can ran out of fuel before I got to the point that the regulator hit the cut-out, so I didn't get to completely check how that works, but it all seems pretty promising so far! There's still a couple of little leaks here and there that I need to sort out, but this is a major moment for me.
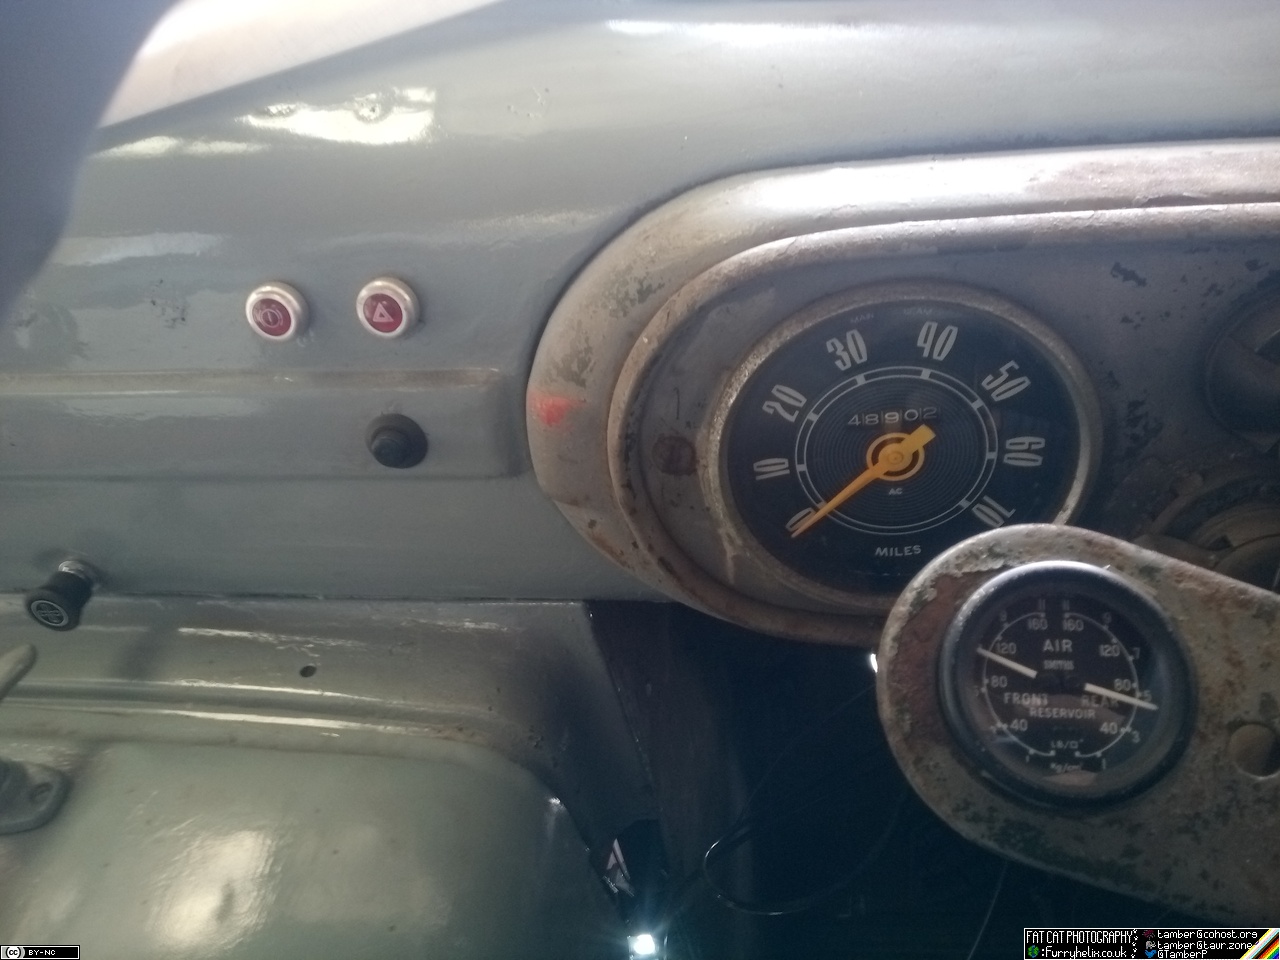
Both gauges reading pressure, warning light extinguished (and if the buzzer was hooked up, it would've stopped sounding too!) I still need to time how long it takes to build air up to an effective minimum level as per the inspection manual's assumed 3 bar/45 psi, which should "normally be within 3 minutes".
Interestingly, I did notice that the "Rear" tank (for the trailer) didn't seem to start building pressure until the "Front" (truck) tank reached 7kg/cm² (6.8 bar), which really drags things out as far as reaching that minimum level on both tanks and turning the warning off, especially with the larger air tanks. Might have to adjust the 4-way valve elements to even it out a little.
Still have a few things that need finishing up, like mounting the trailer park valve, quick-release valve, and properly mounting both of the trailer gladhands. I did fit the yellow line glad-hand in place of the old one, just so the trailer brake line isn't just a giant air-leak, but the newer ones are shaped differently and I'll need to change the brackets to give a little more room to actually hook them up.
And it'd be nice to get the fuel tank put back on its brackets, because it's extremely in the way at the moment, and I want to get back to welding the inlet manifold up. It'd be a real bonus if I did the rest of the fuel system stuff to be able to use the in-tank pump, too. (Regulator, filter, etc.)
On a more annoying note, the gearbox has started leaking from the PTO flange cover again. Not sure why, because it's been fine for months, but there it is. Going to have to drain the gearbox down again, and apply a nice thick gasket with a good coating of sealant.
-< Welder. Allegedly a mechanic. Bodger of Things >- * 1958? Bedford RL - Progress: Glacial. * 1994 Skoda Favorit - It's baaaaaaaack! * 2018 Herald Classic - Gone!
Brought some more fuel, gave it another go. Got all the way to reaching the main system pressure (about 9 bar) and it blew-off as expected! Still haven't adjusted the protection valves yet, though. A little under 3 minutes to reach ~3 bar on the 'front' tank, but then waiting for it to reach ~7 bar before it starts filling the 'rear' tank leads to it being a good bit over 4 minutes before it reaches the same 3-ish bar threshold there too.
I also managed to get around to modifying the bracket for the footbrake valve so now it's inline with the relay arm, and added some bracing; still needs an additional mounting tab to reach up to a bolt on the master cylinder for some support, because now it's flexing at where it's bolted to the back of the servo.
In the process, I did manage to drill holes for -- and rivet on -- the brake light switch, only to find out that where I'd fitted it, it runs straight into the underside of the master cylinder when I reinstall the bracket. Hm. Some additional thinking needed there, then. Also appears I need to lengthen the pushrod from the relay arm to the footbrake valve, because it's just a bit too short to actuate it beyond just barely cracking the valve open. Not a big deal, though.
It's all just adjustments and tweaks.
-< Welder. Allegedly a mechanic. Bodger of Things >- * 1958? Bedford RL - Progress: Glacial. * 1994 Skoda Favorit - It's baaaaaaaack! * 2018 Herald Classic - Gone!


 )
)
 )
)


 And without my drill, I can't make up the other injector hold-downs.
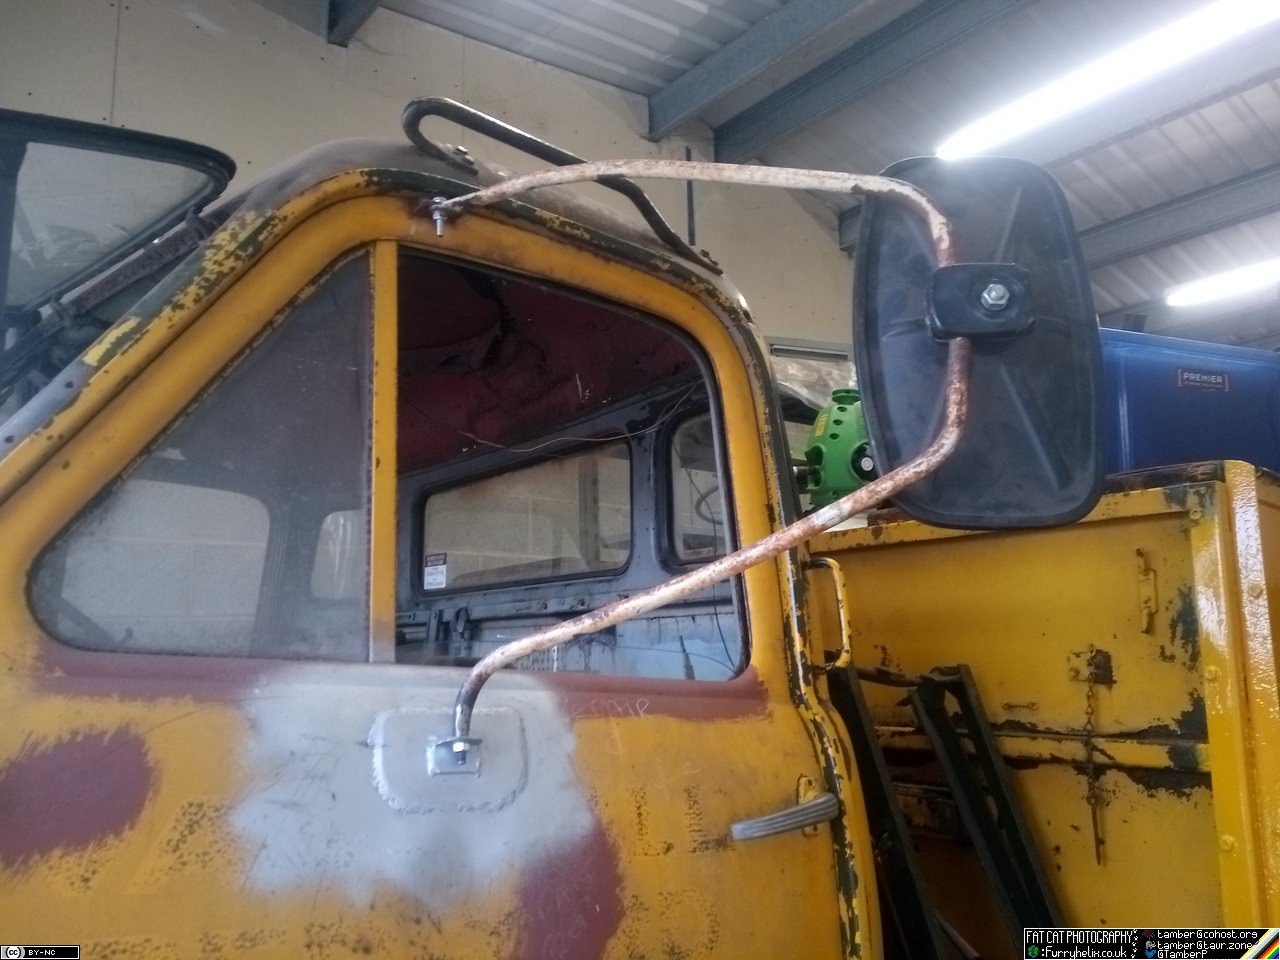


 Thankfully, I have an early finish at work this Friday so that I can go to a medical appointment (More testing, hooray!), so hopefully I can nip into the supplier and swap the bottle afterwards.
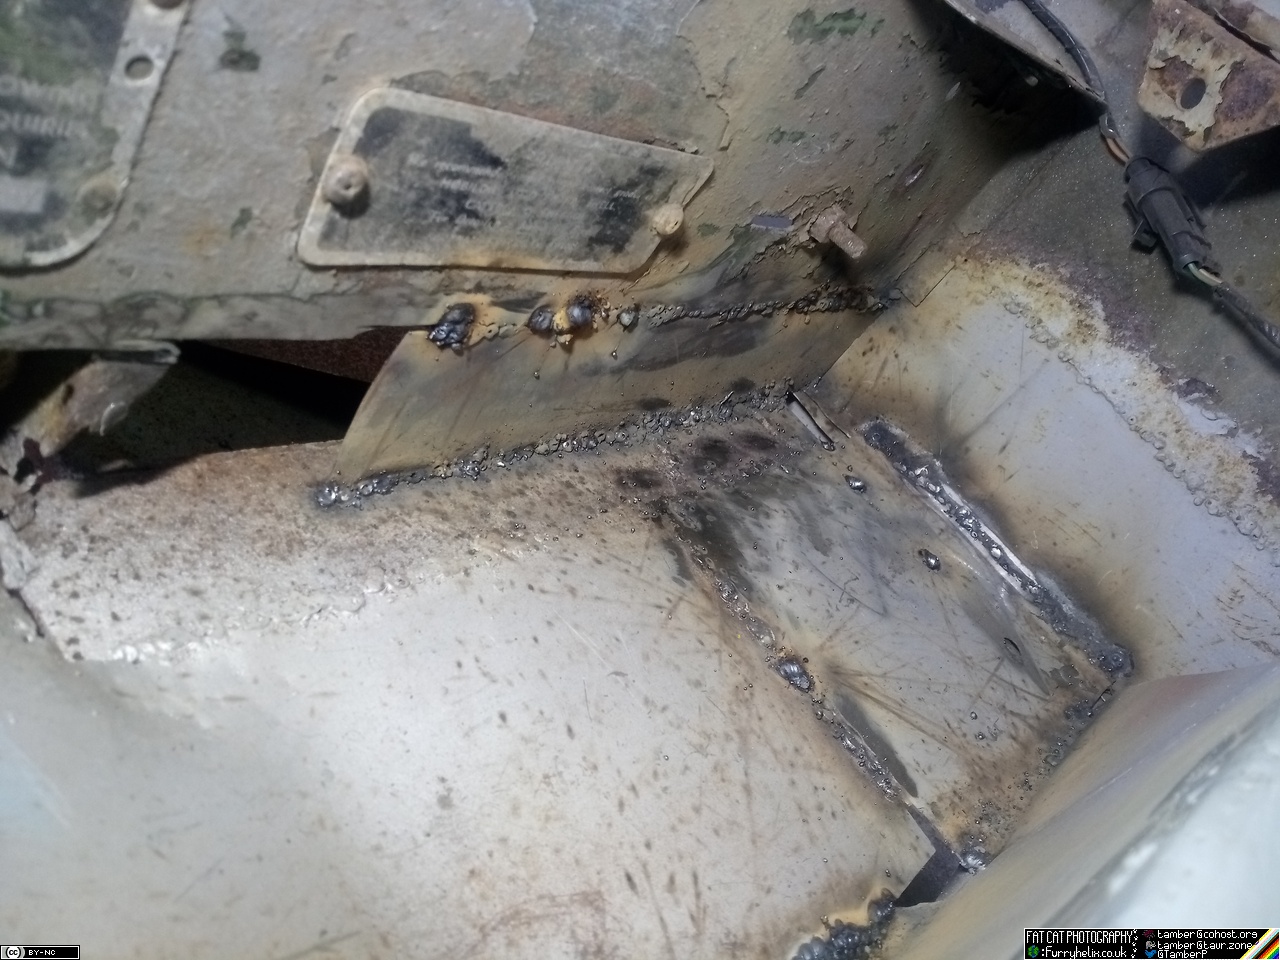


 New oil pressure switch is on its way...