|
|
|
Jan 12, 2021 14:53:09 GMT
|
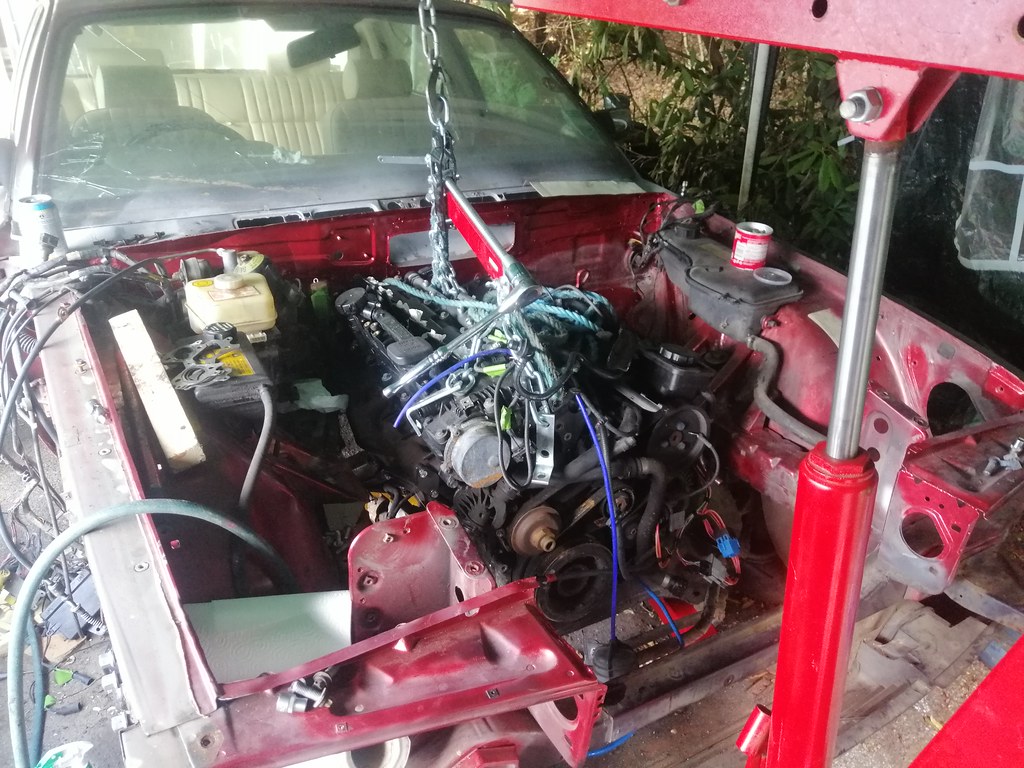
Yeah the OE BMW install has a funk PCV system which attaches into the intake ahead of the filter, but that's all gone now that I've changed the cam cover (will be coming in a later update!). Was planning on a catch tank so hopefully that'll be enough, and will help avoid any nasty runaway situations! Don't let the next update derail the conversation though  20th June 2020 20th June 2020Next couple of steps on the Jag. Got the engine bay rust wire wheeled, treated and primed.  By and large this isn't a particularly rusty car, but it's amazing how many little bubbles there are where paint's been chipped away or not covered for whatever reason. That was yesterday, and managed to get the basecoat on today.  I've been using my airbrush which is brilliant for little touchup jobs, but I'm not sure it's quite cut out for this scale of job. The poor motor was getting quite hot by the end of each coat. I'm also not convinced it will give a nice even fade, even with some blending out, thanks to the mica paint the Jag has. Not that it's overly bothering me as this'll be a daily driver and the engine bay's bound to get mucky. Still, good for making sure unseen bits don't rust. 21st June 2020Aand the paint's done. Lots of learning on this one, but luckily it'll be hidden by diesel engine bay dirt :S needs more colour coats than I did with 1k base to cover the colour of the primer. Really with an airbrush it needs blending into the paint underneath, which again would be easier with straight 2k rather than clear over base. Still, it's hopefully stopped most of the rust from progressing and that's the main thing.  I still have the bulkhead panel to fix so the engine can't go in yet, but I thought I'd have a look at brakes. In stock form, the brakes on an XJ40 are very good. Thanks to the hydraulic gubbins in the previous posts you get a lot of braking force to stop the car without having a squishy pedal. Their only real issue is that they tend to fade under hard use, so a bigger disc for better heat capacity would be useful. As standard, the later 40s like mine have a 291mm disc at the front. People have fitted the 298mm front discs and twin-pot calipers from early XJ81 V12s (the V12 version of the XJ40), but parts are getting a bit thin on the ground these days. There are also megabuck 4-pot caliper/massive disc solutions which the racers tend to go for. I then got looking into later versions of the '40 chassis. X300s have bigger rears (and vented) but the same fronts. X308s have the same, but the XJR8 has beefy 325mm fronts and 326mm rears. The fronts even use the same standard calipers as an XJ40. Bingo! Rears will come later, but I bought discs and caliper carriers for the front. They're noticeably bigger, and thicker too (1mm thicker, but also less venting space).   Couple of issues though. Turns out Jag changed the hubs and vertical links for the X308. There's a little step on the XJ40 hub that locates the disc which isn't present on the X308, so the centre-bore of the discs will need boring out.   Also, the new discs have a smaller hat so the disc sits physically further forward on the V8 car. Turns out they did this by changing the mounting lugs on the vertical link, not the caliper carrier. Did some measuring and found that I'd need a 16.5mm spacer to get the disc central. Luckily, I've been hoarding little bits of metal that look useful for years so I had a piece of box section that was 16.4mm in diameter.  Some further testing showed you need to take a sliver off the hub-side of the carrier to clear the metal dust/heat shield. Couple of mm at an angle should do.   With that I could get everything mounted in place to check it clears on my wheels (Japan Racing JR9s, 17x7.5 ET20). It's less the OD that's the issue, but the space between the caliper and the face of the wheel. Luckily, it does!   I can say they definitely don't clear the stock 15" wheels (caliper hits the outside), but I don't have any 16" ones around to test. If they do it'll be a close run thing. Oh, and if anyone wants dimensions for the spacer here they are (as yet untested, but will see how they work):  I was originally looking at getting one machined, but it turns out you can quite readily get 30x16 bright steel bar stock so I've ordered some of that and will have a go at making my own (there's 2.5mm of clearance either side of the disc so there's a bit of leeway). There's a chance it might turn out to be 5/8" (15.875mm), which should still work and can always shim it out slightly if it doesn't  Also, as a recent update, I haven't yet found anyone who's willing to take the bore out on my brake discs. It should be a simple job, but needs someone who's got a sodding great lathe as the OD of the discs is 325mm! If anyone knows anyone who has a large lathe who would be up for a quick job for a bit of cash please let me know! |
| |
|
|
|
|
jmsheahan
Club Retro Rides Member
Posts: 689
Club RR Member Number: 121
|
|
Jan 12, 2021 16:46:32 GMT
|
|
What an insanely cool build! Bookmarked!
|
| |
|
|
|
|
|
Jan 12, 2021 20:53:17 GMT
|
|
Keep it simple, vent the crankcase to a catch can with a breather on top, it wont need vacuum.
I'm pushing 2.5bar through a OM606, I only need to empty the catch can every 6 months when I change the engine oil.
|
| |
1988 Mercedes w124 superturbo diesel 508hp
1996 Mercedes s124 e300 diesel wagon
1990 BMW E30 V8 M60 powered!
1999 BMW E46 323ci project car
|
|
|
|
|
Jan 13, 2021 19:42:34 GMT
|
|
Putting the hubs in the lathe not An option? Would also make life easier if you have to replace the rotors.
|
| |
|
|
|
|
|
Jan 13, 2021 20:03:23 GMT
|
Keep it simple, vent the crankcase to a catch can with a breather on top, it wont need vacuum. I'm pushing 2.5bar through a OM606, I only need to empty the catch can every 6 months when I change the engine oil. Or weld a small pipe to the exhaust under the car and run a hose to the catchcan. That way you don't get oil fumes or oil spill. The exhaust gasses will create a small vacuum to pull the air out of the catchcan. |
| |
|
|
|
|
|
Jan 14, 2021 15:25:32 GMT
|
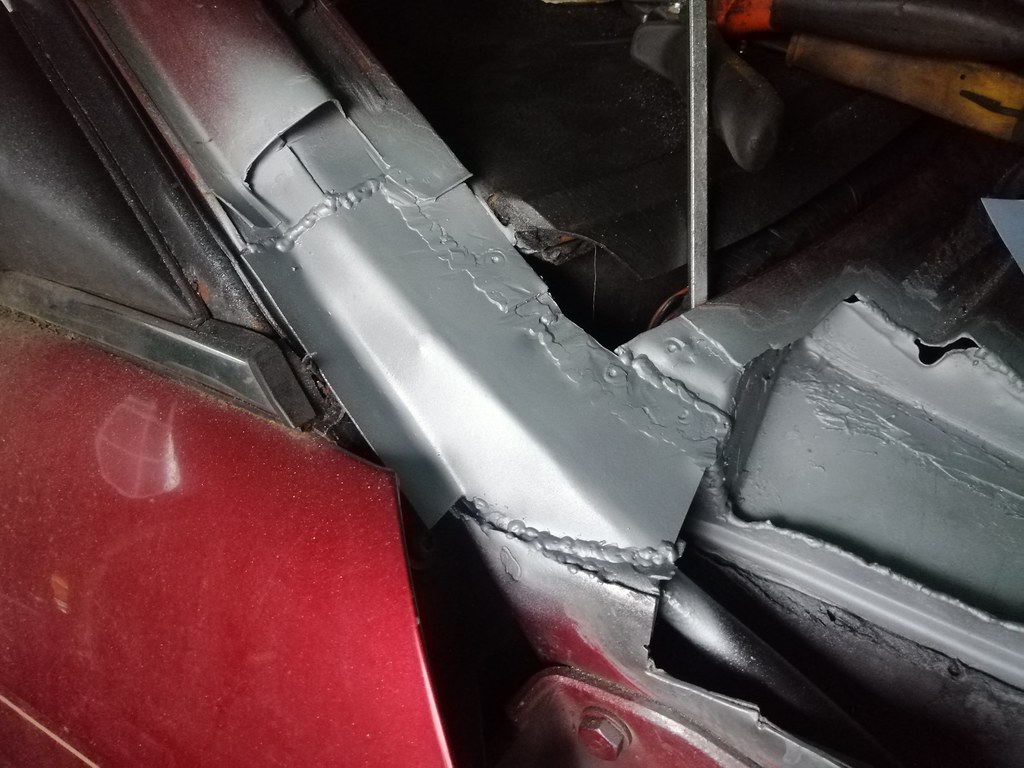
What an insanely cool build! Bookmarked! Haha thanks man! Glad you're along for the ride  Keep it simple, vent the crankcase to a catch can with a breather on top, it wont need vacuum. I'm pushing 2.5bar through a OM606, I only need to empty the catch can every 6 months when I change the engine oil. Or weld a small pipe to the exhaust under the car and run a hose to the catchcan. That way you don't get oil fumes or oil spill. The exhaust gasses will create a small vacuum to pull the air out of the catchcan. A vacuum pipe to the exhaust is a neat idea. Might give that a go at some point  think I'll get it going with a catch can and then that can be a future modification. Putting the hubs in the lathe not An option? Would also make life easier if you have to replace the rotors. Tha;ts definitely the sensible option isn't it? I'd hoped I wouldn't have to touch the front wheelbearings as they seem in decent nick, but it would make it much less of a faff to change rotors in the future. I'll do that  Onto the next update  29th June 2020 29th June 2020Next steps on the Jag are arond sorting the bulkhead area rust. There's some crustyness peeking out from the seam running along the top panel you can see here:  Turns out the spot-weld guy was definitely keen to make an impression as there's a billion of them. Makes a nice change from earlier British cars where the relationship with the construction workforce was...fraught, but it does make removing the panel a bit of a task. 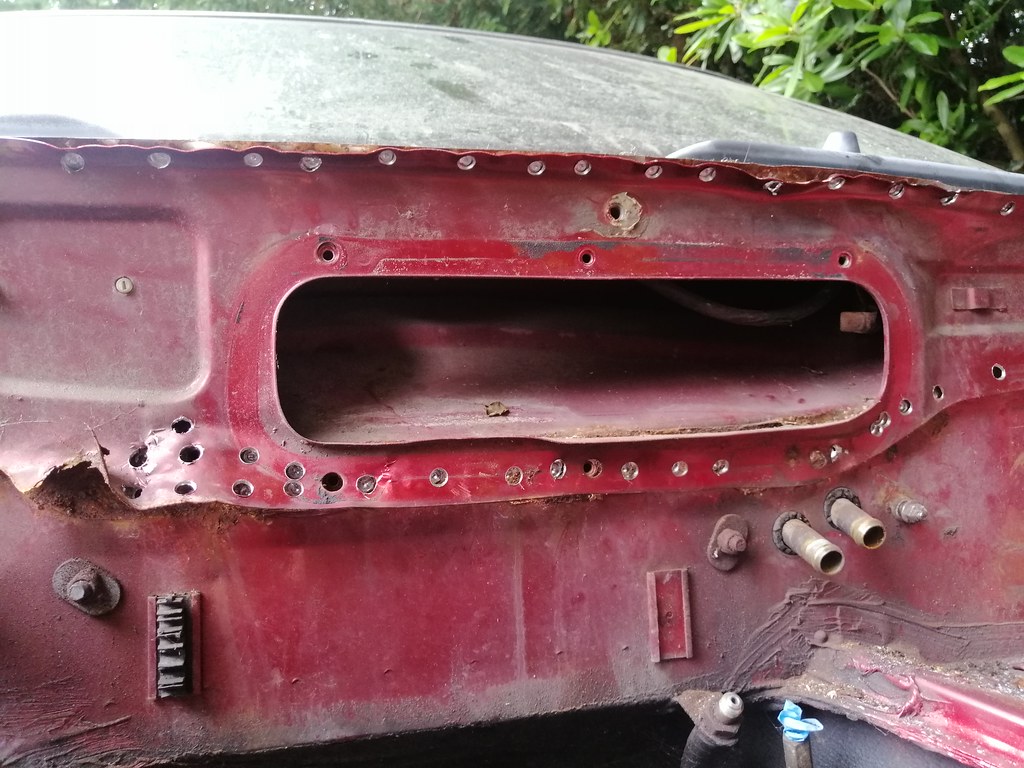 In doing so I've made a rather interesting discovery. These cars like to rust at the bottom corner of the windscreen, seemingly from the inside out. Turns out, there's a little closed box section sitting just beneath that corner which is filled with this weird silicone gel foam.   There's then a dividing panel between the two which is sealed to the upper and lower panels, isolating the little box section bit off (except for a grommet into the engine bay). When I took the grommet out of both sides, water poured out despite the rest of the car being dry for quite a few days.  Initially I thought this was rust protection, but kevins mentioned that it's an NVH reduction thing. I think I can cope with a little extra NVH in exchange for a windscreen that doesn't rot from the inside out! I'll be checking for this on other cars I've got as well...  That also lets water capillary-action all the way along the seam on the bulkhead panel, rusting behind it.  I can see what they were trying to do, but it would definitely have been better to leave the box open to let water drain out as the car corners. Luckily, I reckon anyone who's got one of these can fix the problem by drilling a drain hole right here:  You'll have to drill a hole through the main bulkhead panel just to the right of the two vertical spot welds that hold the little blocking panel in place. Then, using that hole as a guide, drill at a diagonal through the bottom corner of the blocking panel. You can then excavate the foam through the grommet, and any water that gets in there now has a route to get out through the new drain hole. It's not a cure if the process has already started, but if you have a good car then it would prevent it from happening in the future. |
| |
Last Edit: Jan 14, 2021 15:29:00 GMT by biturbo228
|
|
|
|
|
Jan 15, 2021 13:45:58 GMT
|
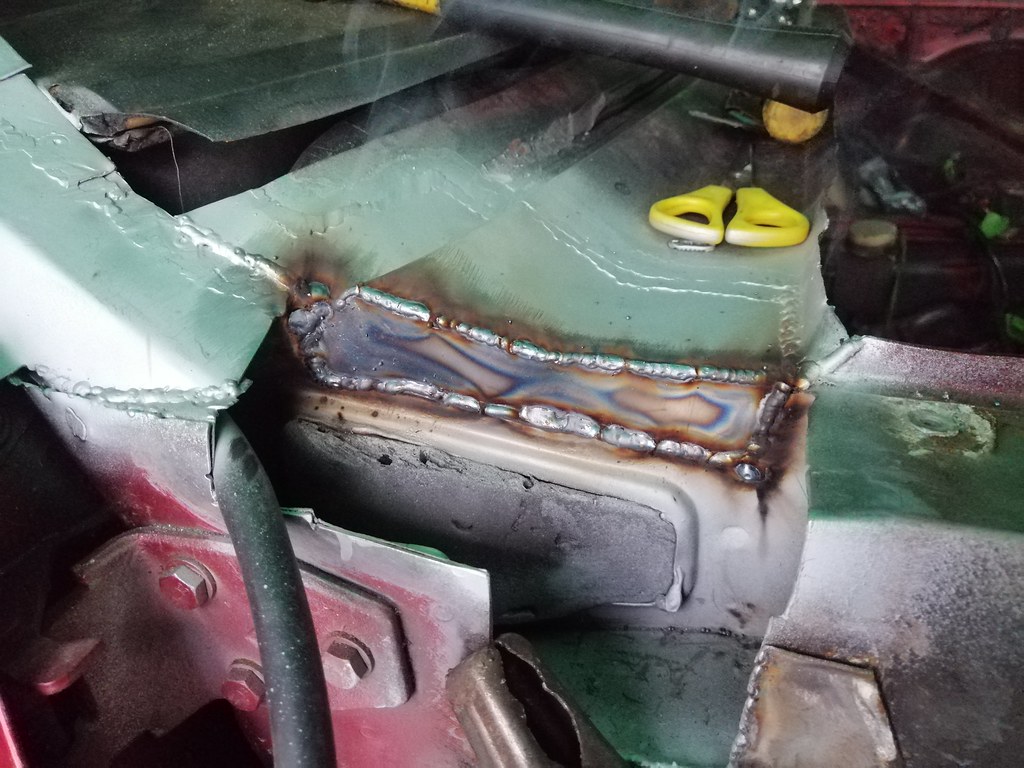
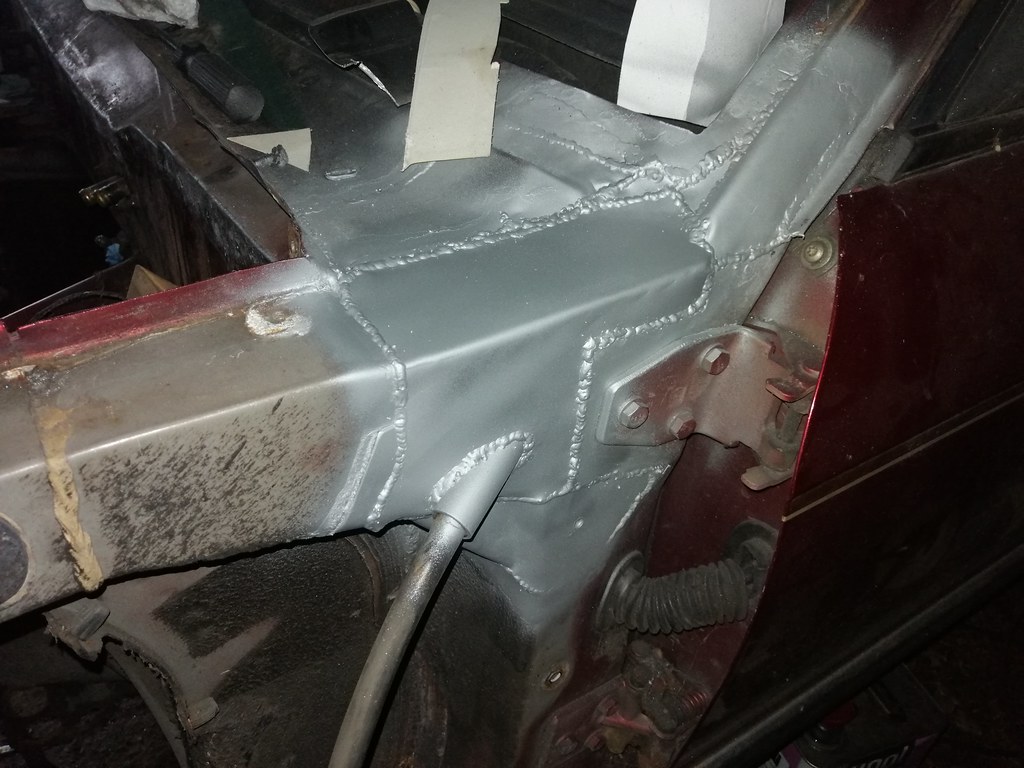
Onward with updates! Nearly there now  1st July 2020 1st July 2020Well the screen's out! Needed more muscle-power than I'd have guessed, and I can see why people often leave it to the professionals (it's very easy to nick the paint around the screen, and I managed to crack the screen even further than it was previously). Might get someone in to do the rear screen as that isn't cracked yet!  Also, put up a marquee to keep the rain out of the interior. Chose one that said 'HEAVY DUTY' on the description but it was just as flimsy as every other marquee I've ever seen. Will have to work fast so it doesn't blow down before I'm done! 6th July 2020So this is what greeted me underneath the right-hand wing. Not a brilliant start, but about as expected.  Some further investigation showed that it had tracked quite a way up the a-piller, but not very far towards the centre of the car.  It's going to be a tricky little bit to repair as there's so many different pressings involved (5 in the a-pillar alone!). Still, tackle it piecemeal and it all comes together. You can see how water got into the little foam-filled box section as the mastic isolating it wasn't complete. I wonder if the other side (which has fared a bit better) is a bit more thorough.  Decided to do away with the sealant and just weld the little vertical panel to the scuttle. Sometimes it's easier (and less prone to trapping water) to change the designs of panels a little when rebuilding complex sandwiched areas.  So here's all the rot excised...  ...rust treated, and sprayed with zinc-rich primer.  It was at this point that my 'HEAVY DUTY' marquee collapsed under the moderate breeze that was blowing. Honestly, just about hair-ruffling stuff. 5 days it lasted... When the wind blew the bent section would get pressed against the roof and move around a bit against the paint. Luckily it's plastic so no major damage (and it's getting a respray anyway), but still. Not ideal.  So the rest of the day was spent starting construction on a bit of a beefier shelter using the original flimsy marquee as a jig. Had some old tubing from an actual heavy duty marquee that got blown down years ago (in an actual storm) so I thought I'd repurpose that to make some triangulated frames which can go together with slip-joints along the length of the marquee letting the whole thing collapse down into flat-ish sections.  Would rather be fixing the Jag, but needs must! 9th July 2020So managed to get the marquee sound enough to be usable. Not a moment too soon as it chucked it down that very night!   Still up in the morning! With a bit of finishing off I reckon this thing will be quite useful. Can stick it up out the front of my garage over winter and start tinkering with the 75 (inbetween Spitfire progress of course). I've also managed to get the BMW engine mostly inside it which is useful as now's the time to get the injectors out in part-exchange for some 535d pre-LCI ones. These engines really are ugly things under the covers (although I expect I've just been spoilt with Bussos and the pretty AJ6 cam covers).  In all honesty, really easy job. Aside from some odd nut sizes (who uses 11mm nuts?), they came out without much effort at all.  I've also removed some of the gubbins from the engine I won't be needing. Some of it will get replaced (electric fans for viscous etc), but this whole lot comes to 5kg  there's more to come off as well as I get rid of the cast-in air filter lower housing   I think I've decided I'd like this car to weight around the 1700kg mark (down from the standard 1800kg, including options). Hopefully doable without impacting any of the nice cruising nature of the '40  |
| |
|
|
|
|
|
Jan 15, 2021 16:52:33 GMT
|
decded to do away with the sealant and just weld the little vertical panel to the scuttle. Sometimes it's easier (and less prone to trapping water) to change the designs of panels a little when rebuilding complex sandwiched areas.  I often do the same, I also cut out double skinned areas and replace them with a single skin the thickness of the 2 original panels. |
| |
|
|
|
|
|
Jan 18, 2021 11:26:17 GMT
|
|
|
| |
|
|
|
|
|
Jan 18, 2021 11:26:58 GMT
|
I often do the same, I also cut out double skinned areas and replace them with a single skin the thickness of the 2 original panels. Yeah that's always a good idea. Nothing but a rust trap! |
| |
|
|
|
|
|
|
|
Jan 18, 2021 11:58:17 GMT
|
|
gosh what a mission... well done nice fab and welding .
|
| |
|
|
|
|
|
Jan 18, 2021 13:24:43 GMT
|
gosh what a mission... well done nice fab and welding . Thanks man  Yeah it's evolved from a 'get it swapped and driving, it's not a particularly rusty car' to 'near enough a full resto' in not a great deal of time  |
| |
|
|
|
|
|
Jan 19, 2021 16:55:00 GMT
|
|
|
| |
|
|
|
|
|
Jan 21, 2021 12:08:18 GMT
|
31st August 2020It's stuck!  Next steps were to clean everything, do a leak check and patch up any holes, and then get some paint on it.  ...and start filling the engine bay again.  Took a little while to get all of this sorted as I was helping my mate with a last-minute clutch and radiator change on his V8 E36 (which we managed to get finished at 3am!). 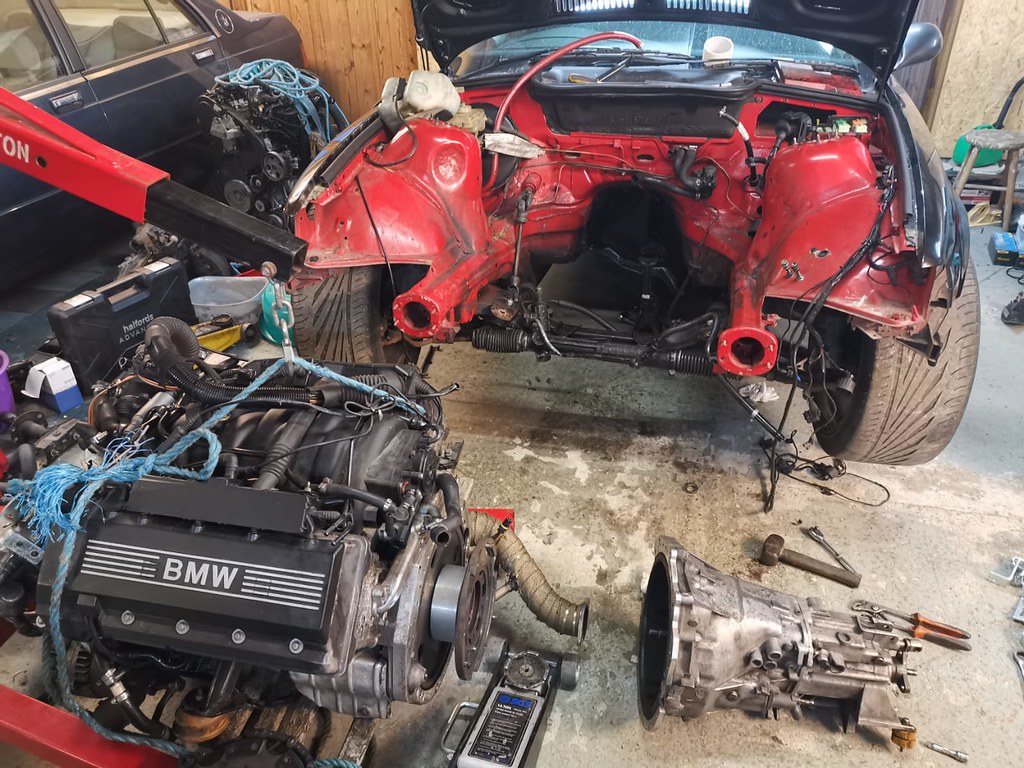 2nd September 2020 2nd September 2020Managed to pick up a 335d rocker cover, whose primary accolade is that it's managed to make an already spectacularly ugly rocker cover even worse.  It does, however, do away with the integral filter housing which I won't be using due to the bigger turbo. As far as I've measured it should fit with the filter housing, but not having it just means I actually have proper access to the turbo and manifold. The bolts also arrived for my shiny new flywheel so that could go on. This is a solid mass jobby from TTV racing in case anyone was wondering, chosen because it can handle much more torque than the stock dual-mass which tends to overheat and bleed all the rubber out of it. I understand the 530d versions are tougher, but I'm not sure how much by and the ring gear is different so a new starter would be needed. I think the clutch already on the car is the stronger 530d version which is bolt-on and is supposed to be able to take quite a bit of torque.  The input shaft on these is massive so the little universal tool I have was way too small. Had to make up a special tool using a 15/16ths socket, the crush tube of a random pulybush I had lying around and some tape.  Worked on the second attempt so the gearbox is on!  Oh, and I forgot to mention that I'd done a long round trip to pick up a Rover 2600 engine for a future plan for the Spitfire (I'm convinced it's possible to make decent power out of these engines, and they're getting a bit thin on the ground at the moment so I want a bit of a stock for experimental work). On the way I grabbed a good second hand front screen and boot carpet from the fantastically useful Naki K of Black Cherry Jaguars. He's always my first port of call for bits on these cars, and is a real guru of the many and varied model year changes that these cars went through. Would thoroughly recommend! Only just managed to fit in the pickup though. Drove all the way back with the rear windows down! Because they're so low which makes them seem a lot smaller than modern cars I tend to forget just how wide XJ40s are. Close call!  
|
| |
Last Edit: Jan 21, 2021 16:17:30 GMT by biturbo228
|
|
|
|
|
Jan 22, 2021 14:21:41 GMT
|
|
|
| |
|
|
|
|
|
Jan 22, 2021 15:29:01 GMT
|
|
Great project. That conversion will make for a great allrounder. I had similar engine ideas for my Series 3, but I lack the (any) skills.
|
| |
|
|
xfu990
Part of things
 
Posts: 78
|
|
Jan 22, 2021 21:04:41 GMT
|
Love the build, thanks for sharing it. What a great combination  |
| |
|
|
|
|
|
Jan 25, 2021 14:56:56 GMT
|
Thanks guys! Yeah I'm hoping the combo will be pretty good. The whole idea came from a skiing trip we had in 2018 where we drove down to the alps in convoy. I got to thinking how nice (yet financially ruinour) it would be to cruise down in the Jag, and how a turbodiesel could let that become a reality  monkfish monkfish I've seen swap kits around for older M57s into Defenders (adapter plates to LT77 and R380 gearboxes). If there's common stuff done to put Defender gear into series landies then it might be more achievable than you think! Onto the next update  0th September 2020 0th September 2020After a fair bit of jiggery pokery I think I've got the engine in the right place now. Raised the front a little to make sure the sump was above the bottom of the subframe to make sure I don't rip the sump plug out if I hit a log. I've also found that the diff pinion flange is angled 6.4deg nose up, so I've got the gearbox flange to point 6.2-6.4deg nose down. Should keep them both in the same plane for UJ speed variation. With that done I could start fashioning mounts   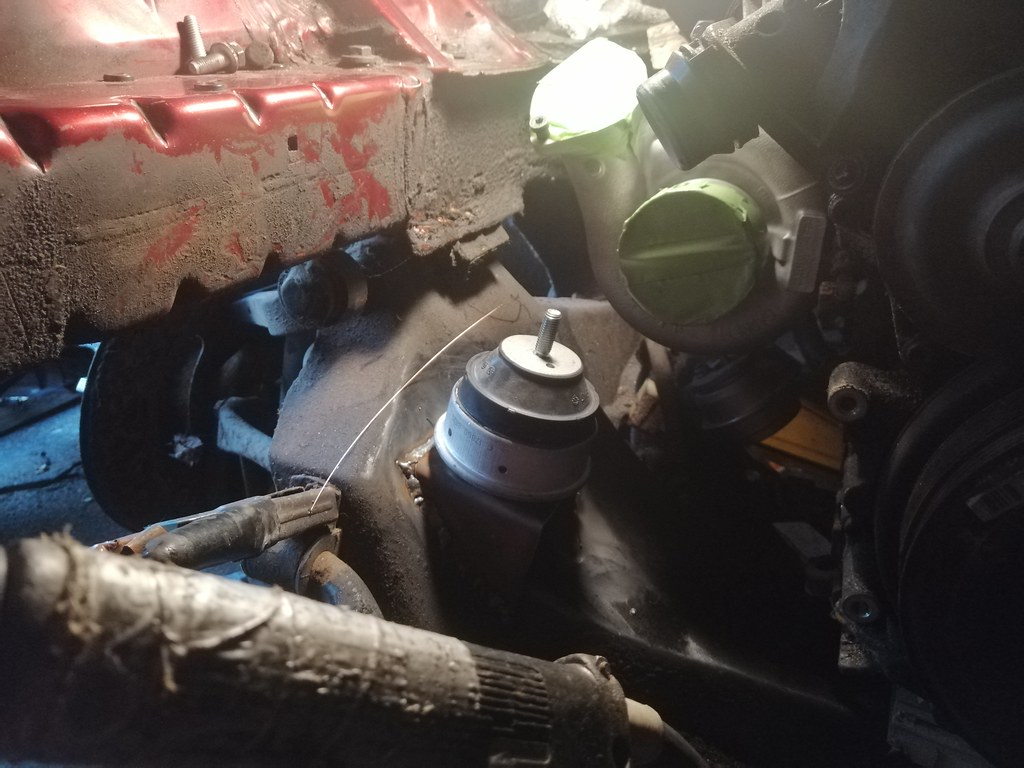 The nearside mount wouldn't really fit in the stock location behind the turbo so I tried to do some research on ideal engine mount locations, but there really isn't a great deal of information out there for the layman so it's down to looking at standard practice. Seems like having the mounts a little above the crank centreline, and pointing in towards the engine is the most common way to do it. The sort of hydraulic mounts the BMW has tend to be a bit more vertical than most. So with that, I just put them where they fit best in roughly that orientation  The other side was much closer to the original mount location (for both cars).    Now it's just lifting the engine up by another 5mm or so to take up any squish in the mounts, then making some brackets to attach to the engine  |
| |
|
|
|
|
|
Jan 25, 2021 15:07:37 GMT
|
monkfish I've seen swap kits around for older M57s into Defenders (adapter plates to LT77 and R380 gearboxes). If there's common stuff done to put Defender gear into series landies then it might be more achievable than you think! I confused myself there. I meant Series 3 XJ, but it's a fair point and I have an old Land Rover too so why not do ALL the M57 swaps?! Looking forward to the updates. |
| |
|
|
bstardchild
Club Retro Rides Member
Posts: 14,973
Club RR Member Number: 71
|
|
Jan 25, 2021 15:15:12 GMT
|
The bolts also arrived for my shiny new flywheel so that could go on. This is a solid mass jobby from TTV racing in case anyone was wondering, chosen because it can handle much more torque than the stock dual-mass which tends to overheat and bleed all the rubber out of it. I understand the 530d versions are tougher, but I'm not sure how much by and the ring gear is different so a new starter would be needed. I think the clutch already on the car is the stronger 530d version which is bolt-on and is supposed to be able to take quite a bit of torque.  TTV are a great company to deal with Really enjoying this thread - not sure if I've commented before but if I haven't keep on going it's great |
| |
|
|
|
|


