|
|
|
|
|
Another update: I went shopping! 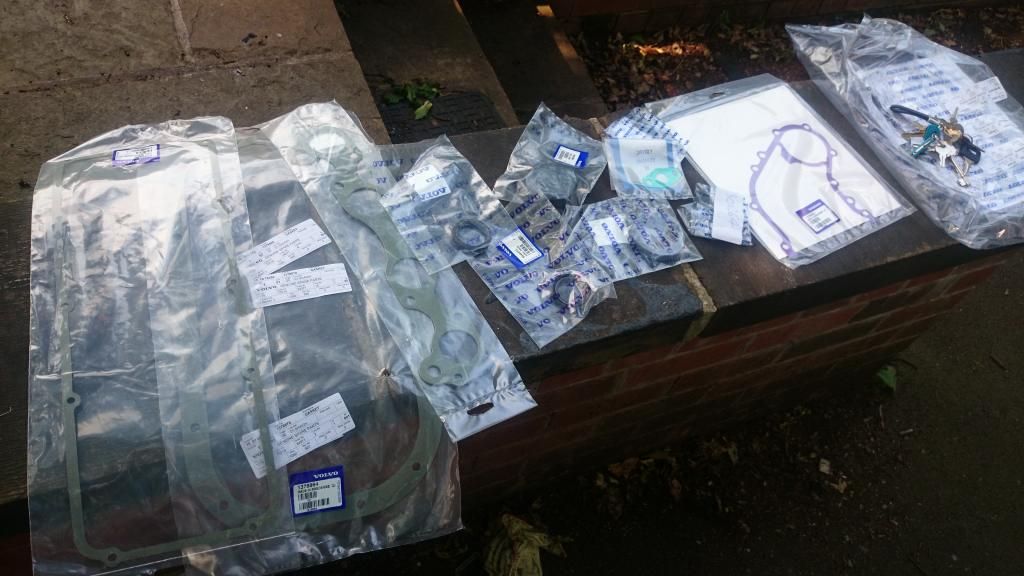 The girlfriend painted the sump! 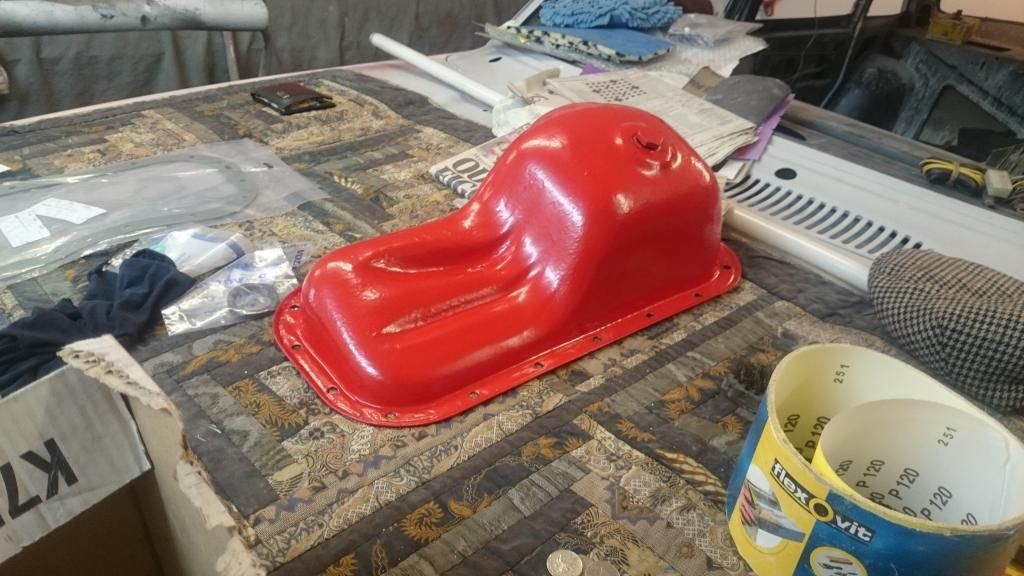 Painted the waterpump pulley: 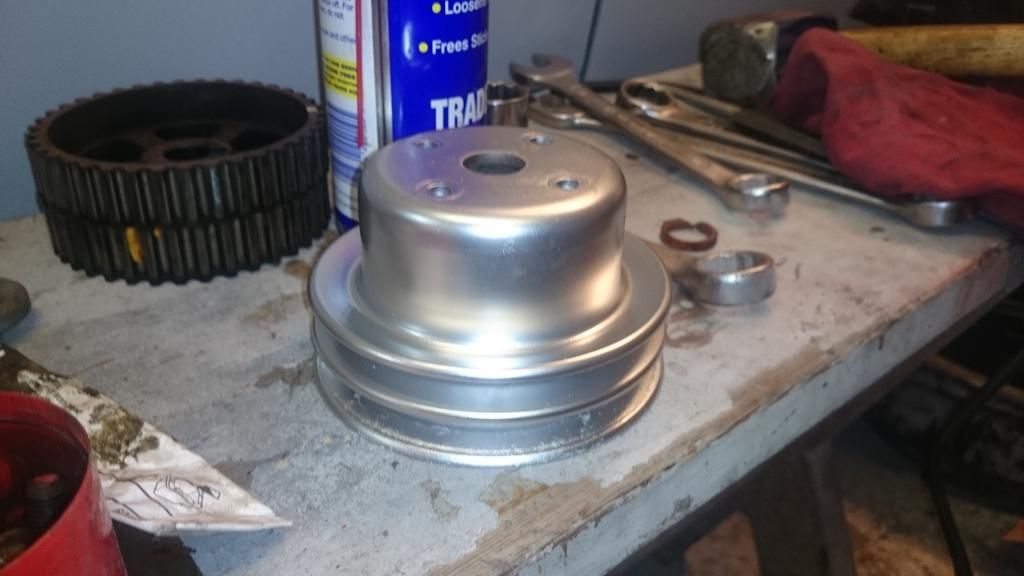 Got My 240 spec auxilliary shaft fitted, the H cam fitted that I had had in the NA engine (which might work well with the turbo, or might not. We shall see), the core plug for the back of the head to plug up the 940 distributor hole fitted, 3 new front oil seals fitted, new front oil seal housing gasket, and a new sump gasket. 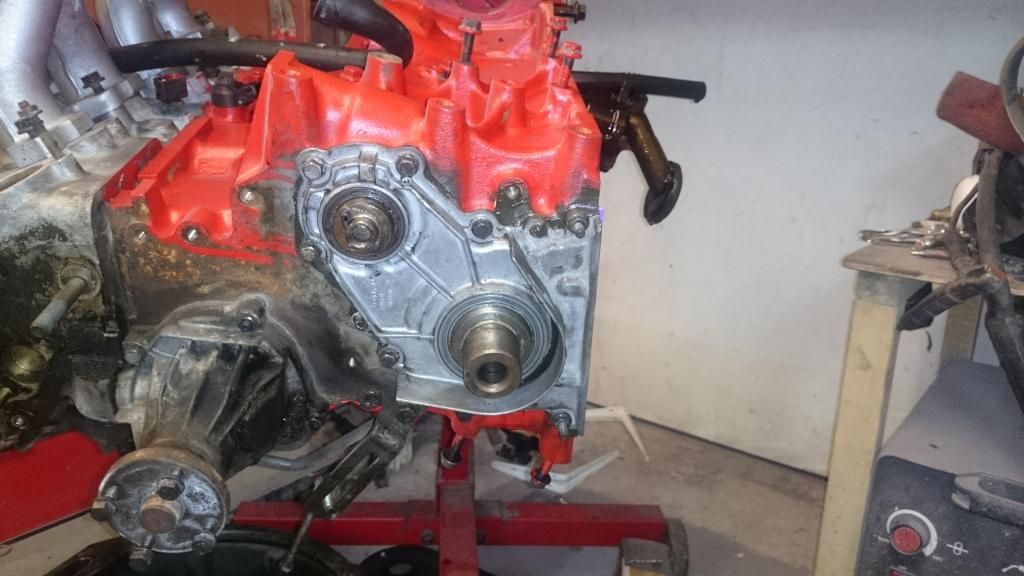 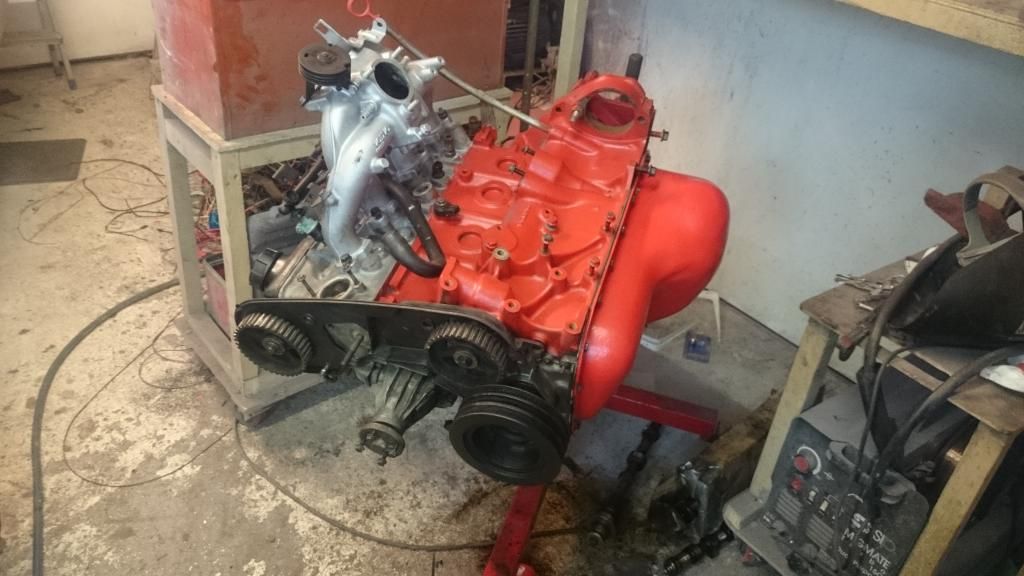 Plugged the EGR: 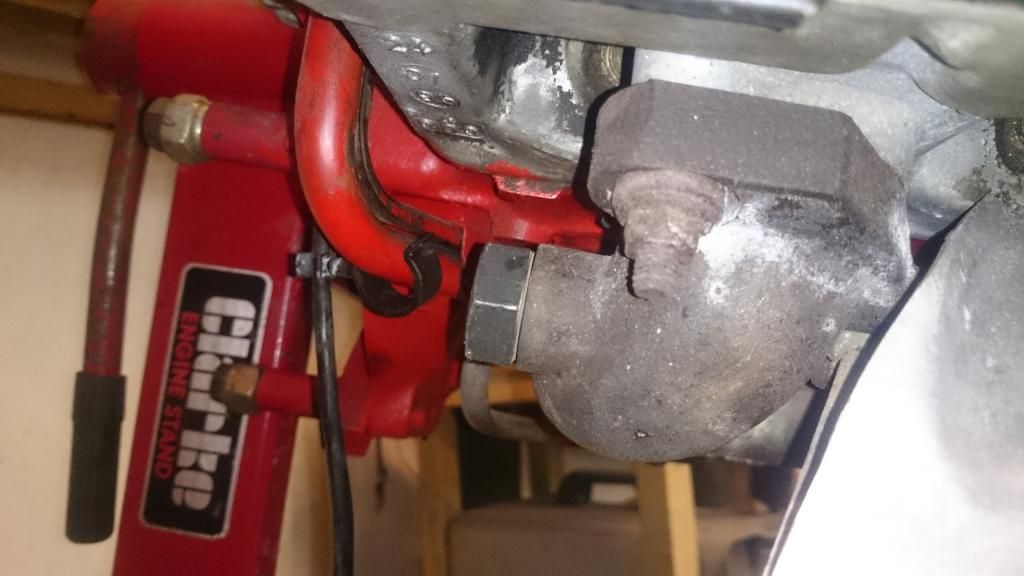 Did a batch of satin black bits: 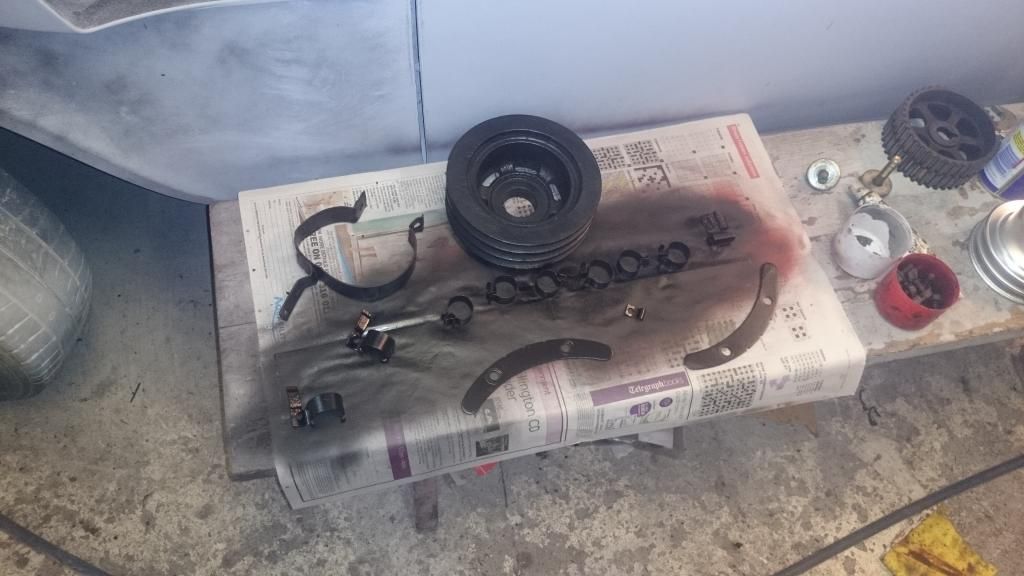 Cleaned up and satin blacked the crossmember 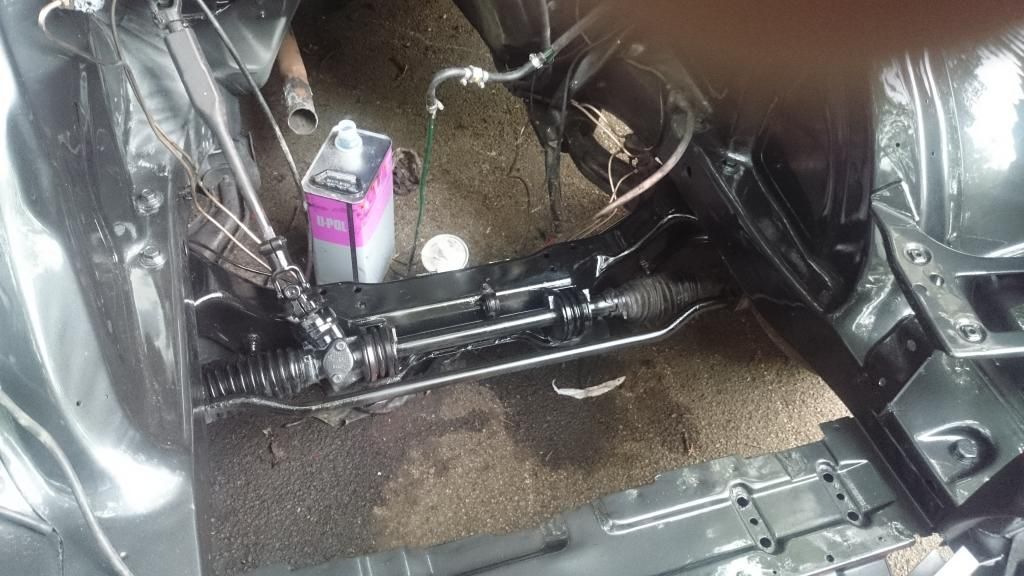 Polished my brake lines just to be an uber-tart 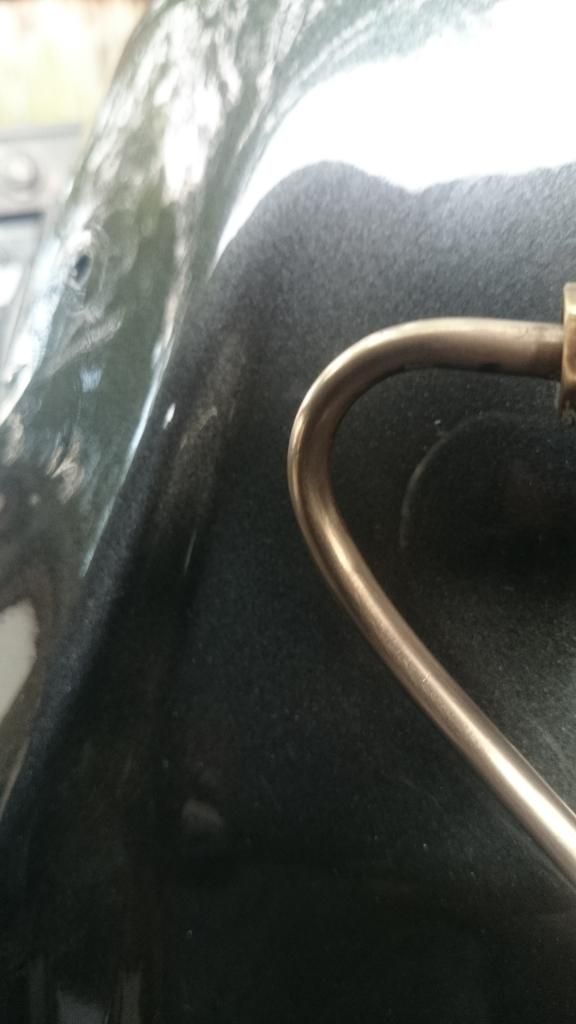 Turned the steering column shaft around to make more downpipe clearance 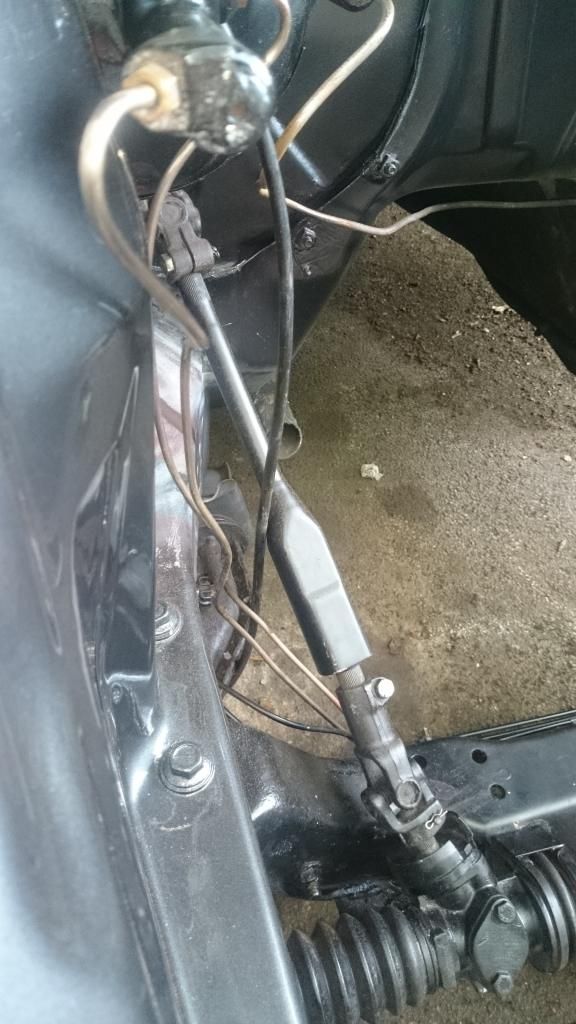 Painted the brake servo satin black and started refitting some parts in the engine bay. 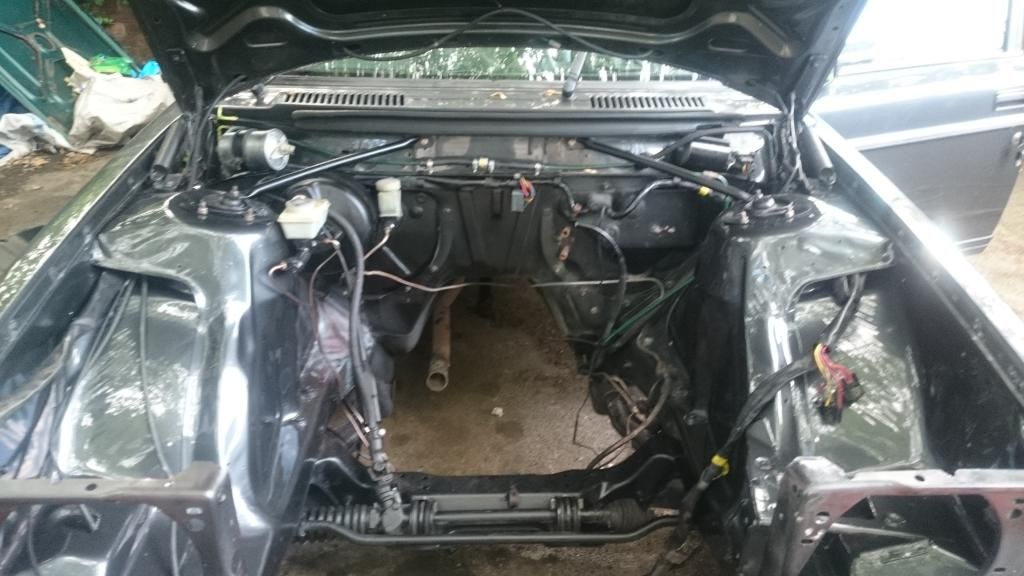 Not much left to go now until i fit the engine. Relined clutch to be fitted along with new rear crank oil seal 240 distributor to fit engine mounts to fit some heat shielding to make transmission tunnel to modify with a BFH turbo to refit alternator to fit geabox crossmember to modify for M90 More soon! Ste |
| |
Thor: 1980 - 244DL - B21A - M45.  CLICK ON THE PICTURE BANNER FOR MY PROJECT THREAD! CLICK ON THE PICTURE BANNER FOR MY PROJECT THREAD! |
|
|
|
|
|
|
Sept 14, 2014 8:09:35 GMT
|
Right then, bit of an update - sorry for the lack of photos, i need to get back into the habit of taking more! I made some heat sheilds for the brake servo/lines/master cylinder The flexible one is made of fibreglass tissue (Its the resin in fibreglass that does the burning...) covered neatly in foil plumbers tape both sides, then another layer of tissue, and another layer of foil. I then folded it where neccessary to fit, and attatched it to the car with a couple of self tappers. The other heat sheild is one i made from sheet aluminium to protect the master cylinder. At the point of the following photo, I had fitted the engine but only temporarily. The plan had been to get the engine and box in and on its mounts that night. I converted it to a dog dish flywheel and diesel clutch, as recommended by so many, and then when I went to fit the gearbox on, the plastic cup that goes over the pivot ball for the clutch arm on an M90 snapped. curse word. 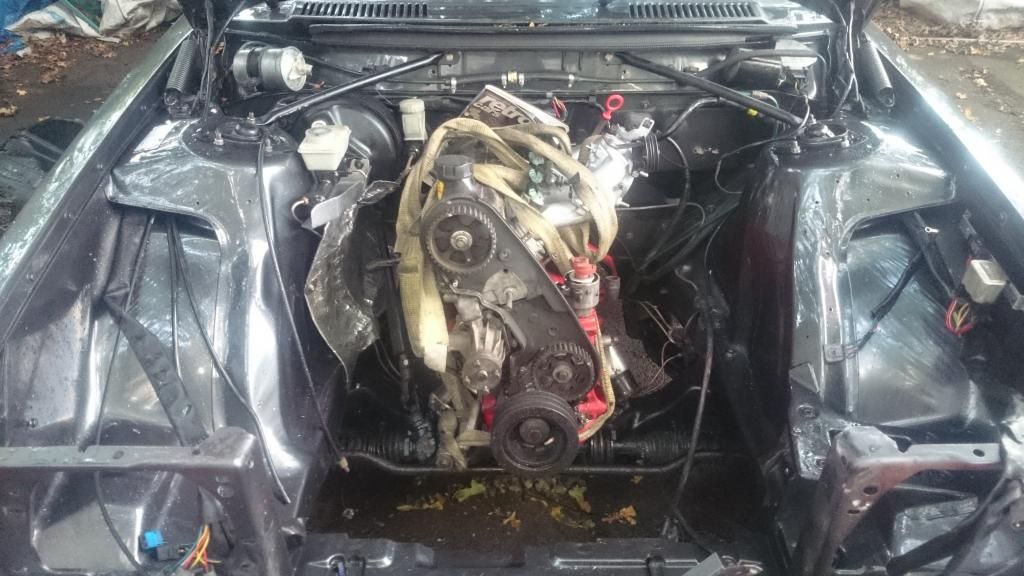 Gave it a wash to keep my spirits up (it gets covered in tree sap and bird curse word here very quickly) 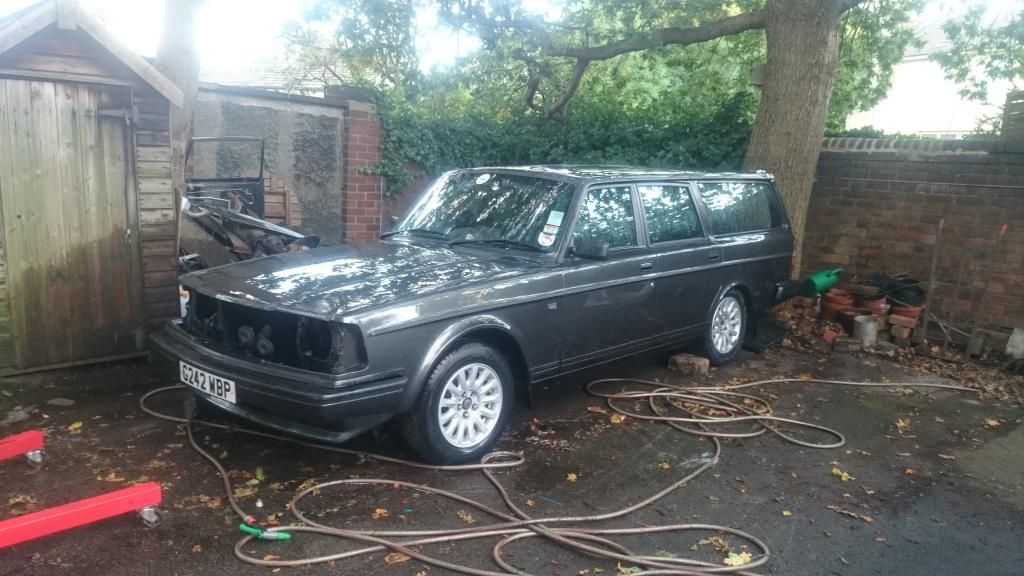 The day after I ordered the plastic cup and it was at the dealers for collection by 11am! So that evening I was dead keen on getting the gearbox on and the engine and box back in! Managed it just as it was getting dark (thanks for the help John...), so here it is, B230FT + M90 installed and also the shiney repainted slam panel refitted  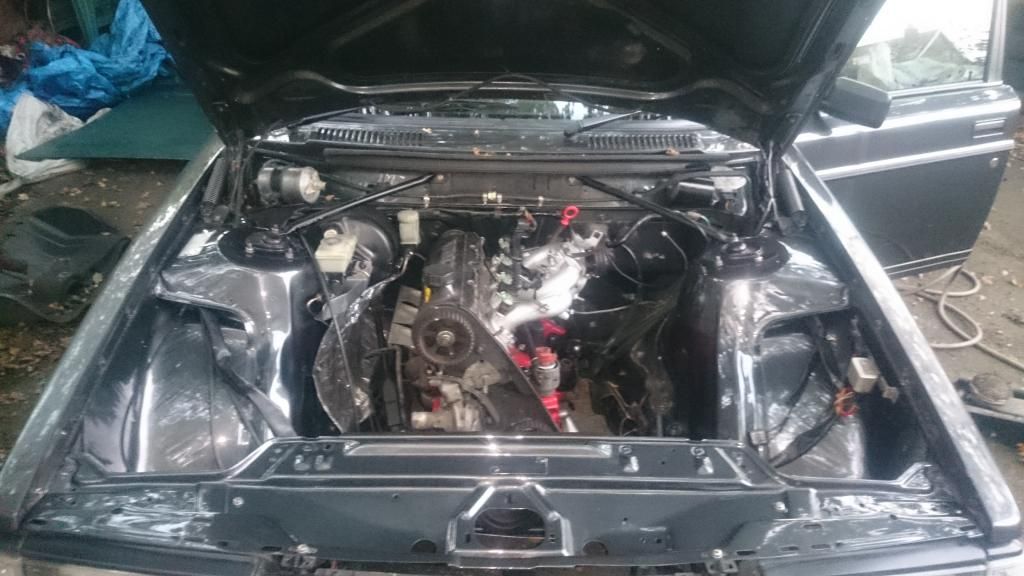 The following day I refitted its face to make me happy  More soon! Its well on its way to being finished! Steve |
| |
Thor: 1980 - 244DL - B21A - M45. CLICK ON THE PICTURE BANNER FOR MY PROJECT THREAD! |
|
eurogranada
Europe
To tinker or not to tinker, that is the question...
Posts: 2,487
|
|
Sept 16, 2014 17:34:34 GMT
|
|
Good for you!
|
| |
|
|
|
|
|
Sept 17, 2014 11:42:28 GMT
|
|
Looks great.
You have so much patience for painting. Wish I did!
|
| |
|
|
|
|
|
Sept 21, 2014 21:00:58 GMT
|
Update time again I made some intercooler brackets. These are made out of two sets of upper 240 radiator mounts chopped and welded to make them twice as long to clamp the intercooler and radiator as one. 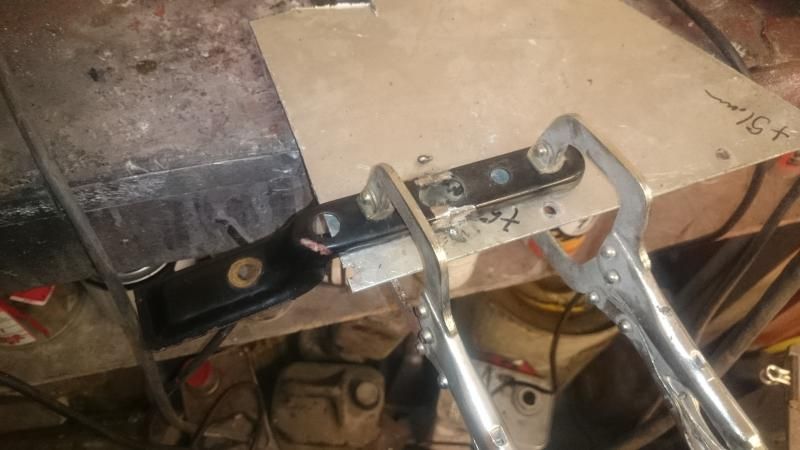 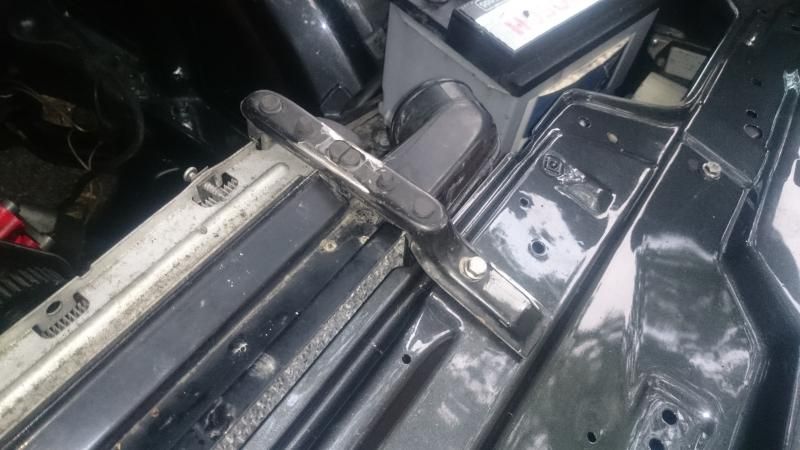 Filler primer... 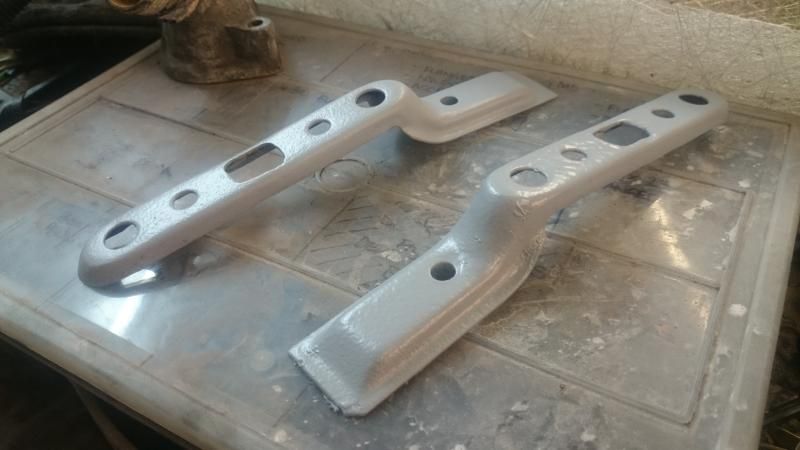 And i painted them satin black too but no photo as yet. Refurbished my transmission crossmember and modified it for the M90 mount. 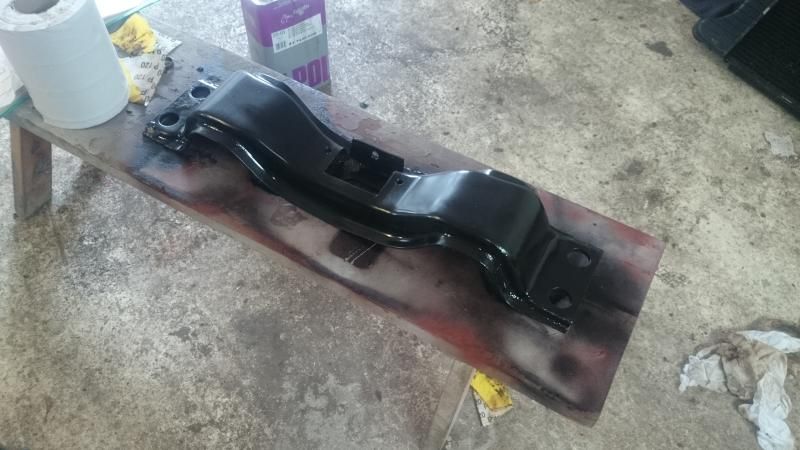 I went and bought all my wiring supplies and set about making a wiring loom for the engine management. I'm an auto-sparky by trade and I want to make it all neat and very factory looking (in fact better than factory - some 240 factory wiring is curse word!) because this makes it less likely to get any faults and also makes it much easier to fault find or modify for additional features in future. All the connections are being made using the factory (940) colours, and soldered and heat-shrunk connections, and proper lucar terminals (not the pre insulated type) where needed to connect into the fusebox etc. One other thing I am doing is wiring in a seperate small blade fuse box in a better location than the standard 240 fusebox (which uses the old curse word ceramic fuses, and is liable to water ingress) Here I have started with the ECU and EZK connectors with 6" of spare loom on them. I have comprehensive wiring diagrams adapted for using on 240 turbo conversions that me and John put together when we +T'd his 245. The loom taped up with rayon tape here contains the wires that link the ECU and EZK. 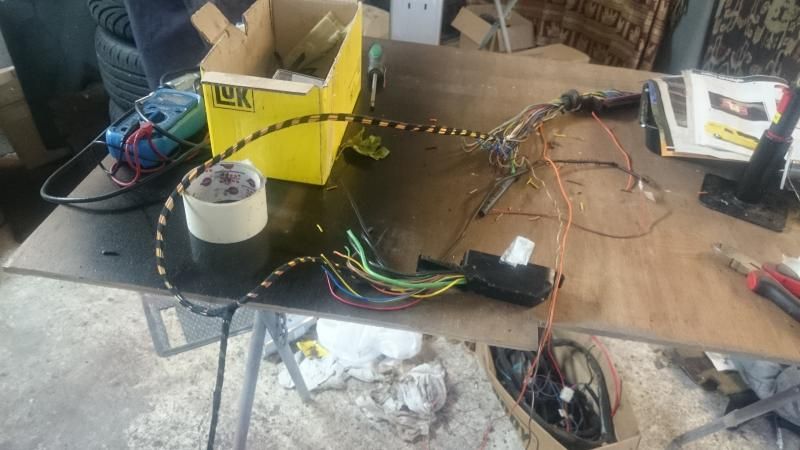 Here we have where i have got up to this weekend - the coiled up loom (upper left of photo) is the loom that I will finish once mounted in the car. This goes to various relay connections, the diagnostic plug and the fusebox. Then there are wires (not extended yet) which will go through the bulkhead and into the engine bay. 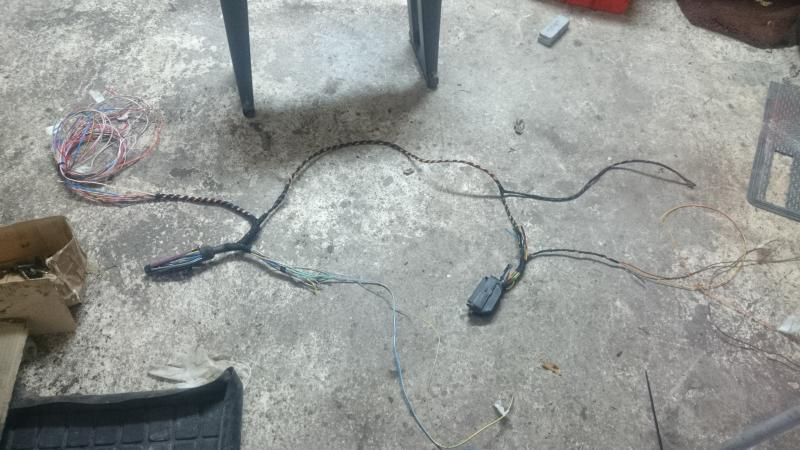 Now onto the next part of this weekends update - the clutch slave cylinder. What a b!tch of a thing. I know they are liable to corroding into their housings on the gearboxes, but ive never had one this bad before. In hindsight I should have got it out before i fitted the engine and gearbox, but hey ho. Basically, lots of WD40, hammering and heating up etc wouldnt shift it, and eventually half of the slave cylinder itself snapped off. I ended up cutting the other end off with the grinder to just effectively leave the tube inside the housing. 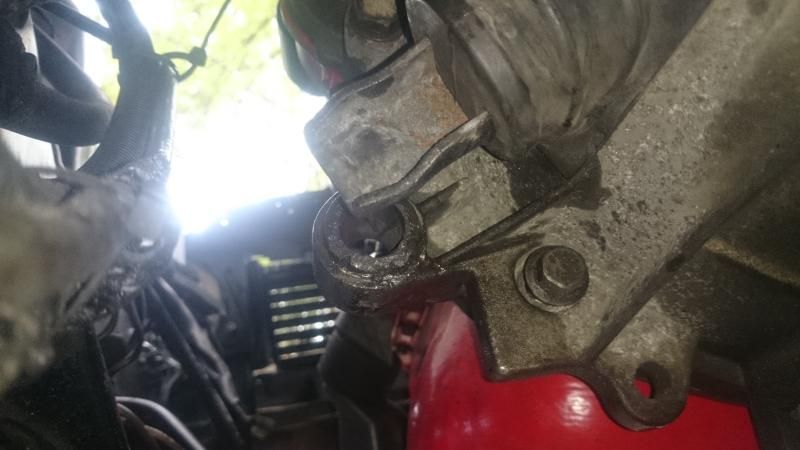 I then tried cutting into it sideways with a hacksaw blade to try and separate it into segments and be able to knock it out - it didnt want to play. Anyway, cutting a long story short, after four hours of messing around trying to shift it I did end up damaging the housing on the gearbox. This isnt too major as it is repairable and would be useable as is at a push anyway. What it did mean though, was that it was seriously weakened and that the hammering had to stop because it was sooner or later going to break the whole housing off the gearbox. 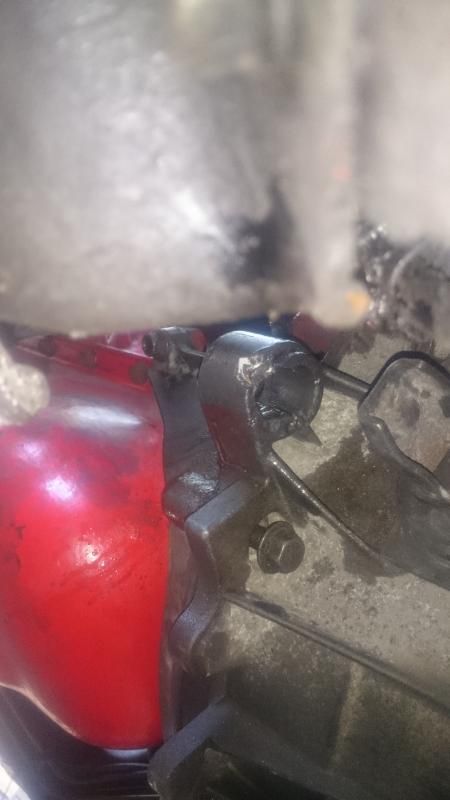 I decided that the best option was to swap the gearbox with my one I have for Thor (which already has the slave removed) and get this repaired at a later date. Gearbox out and this is the damage... 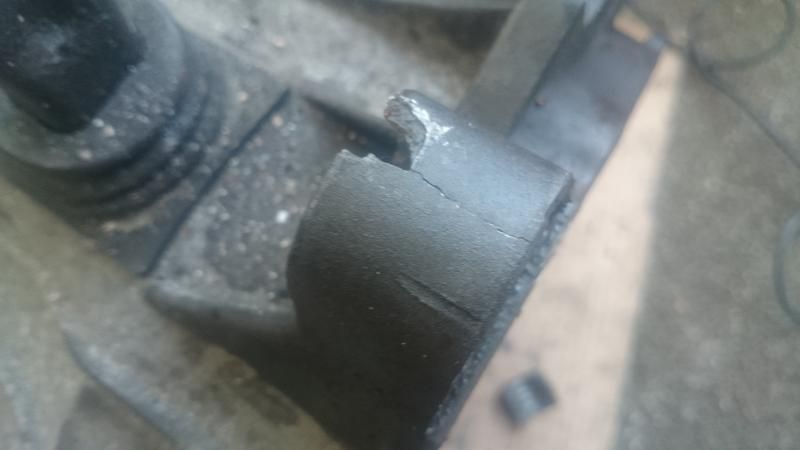 ....and this is whats left of the slave, having managed to get it out once the gearbox was out! For sale, suit enthusiast with a welder and a lathe and too much time....  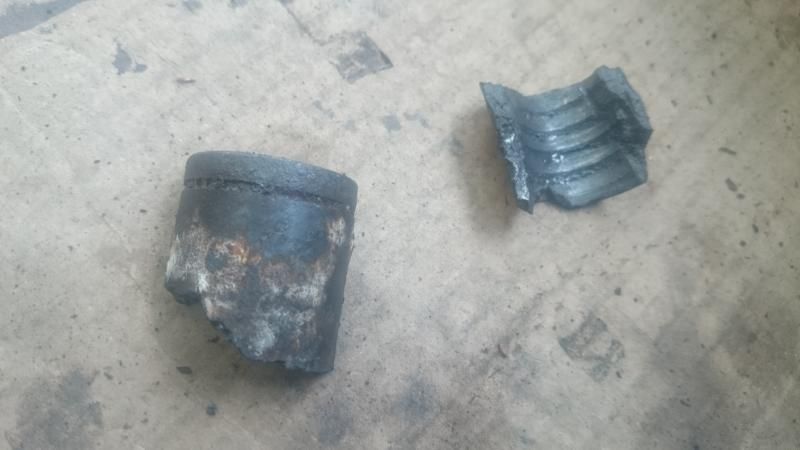 So tomorrow night the intention is to get the new gearbox in and the new slave in, and hopefully have a working clutch so that I can then get mack on with my wiring loom! Steve |
| |
Thor: 1980 - 244DL - B21A - M45. CLICK ON THE PICTURE BANNER FOR MY PROJECT THREAD! |
|
|
|
|
Sept 29, 2014 16:56:46 GMT
|
|
Really enjoying this thread!
|
| |
|
|
|
|
|
|
|
Right. Another long awaited update. Ive had to slow things down progress wise on the GLT due to various reasons meaning I have a lack of funds, but I'm keen to still make slow and steady progress. I struggled and struggled with trying to get my spare M90 back in, but due to the transmission tunnel being smaller on a 240 than a 940 and the M90 being a big gearbox, I gave up. I'm sure it would be easily done on a ramp with a transmission jack and your arms at the correct angles with a good grip, but laid on my back I just decided enough was enough and that it would be easier to just whip the engine back out and fit the gearbox out of the car and then throw the lot back in.  So, with that problem out of the way, it was time to get back on with actual progress! I made some top rad/intercooler brackets out of 4 old radiator brackets. 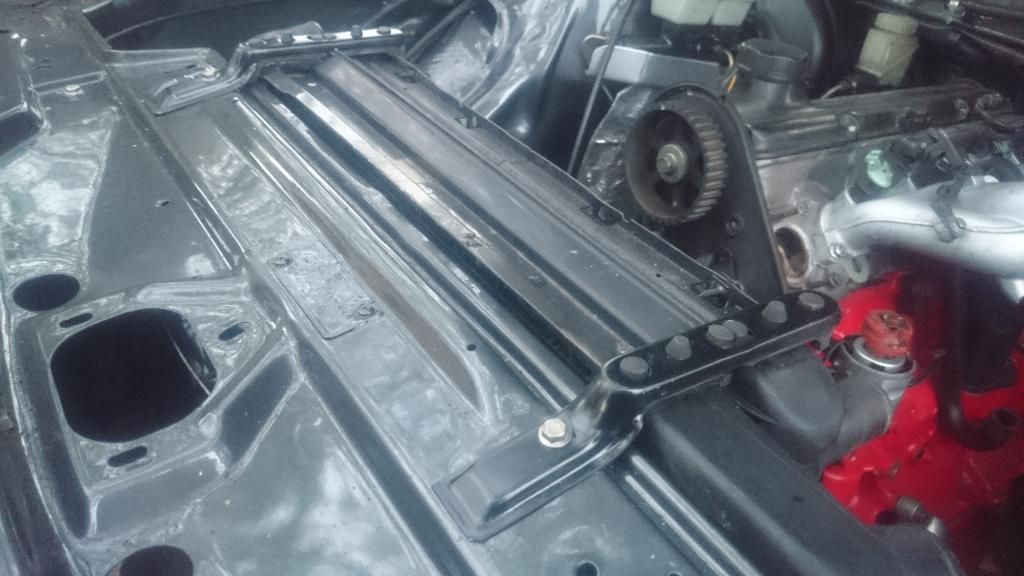 And bottom brackets. They are just a Z shaped peice of steel with some old rubber car mat glued on them and neatened up by covering them in a few layers of some wide heatshrink tubing. 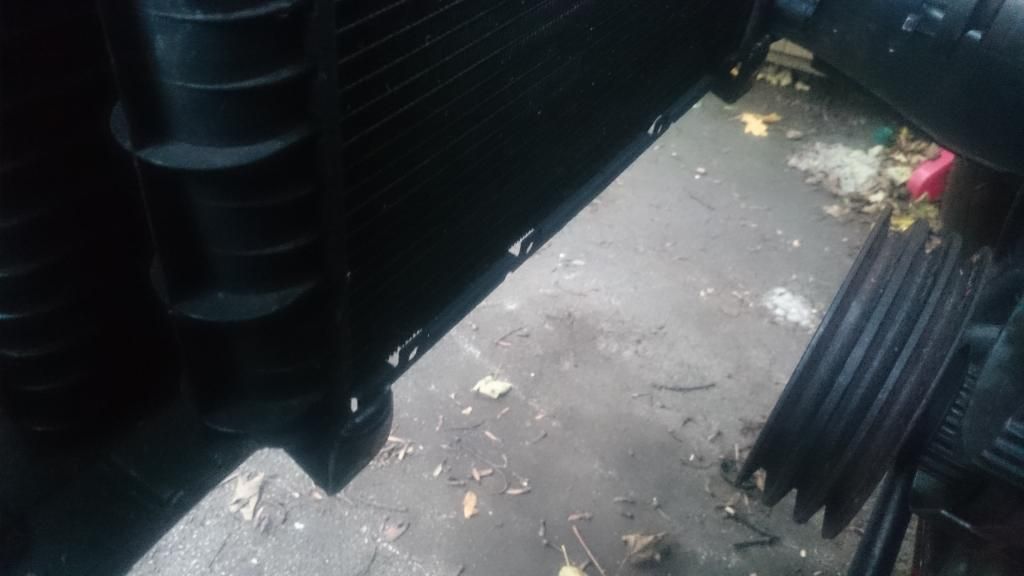  Fitted the cambelt, and cover, front pulleys, and the distributor 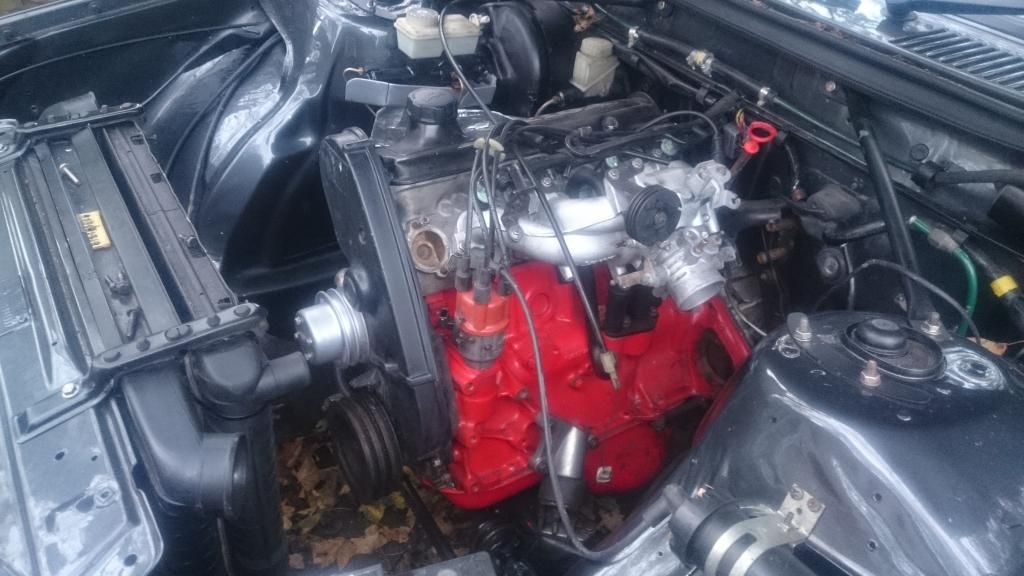 Painted my washer bottle bracket. I'm hoping to squeeze it back in aswell as the air filter on the same side as I like the 240 washer bottle for its big capacity. 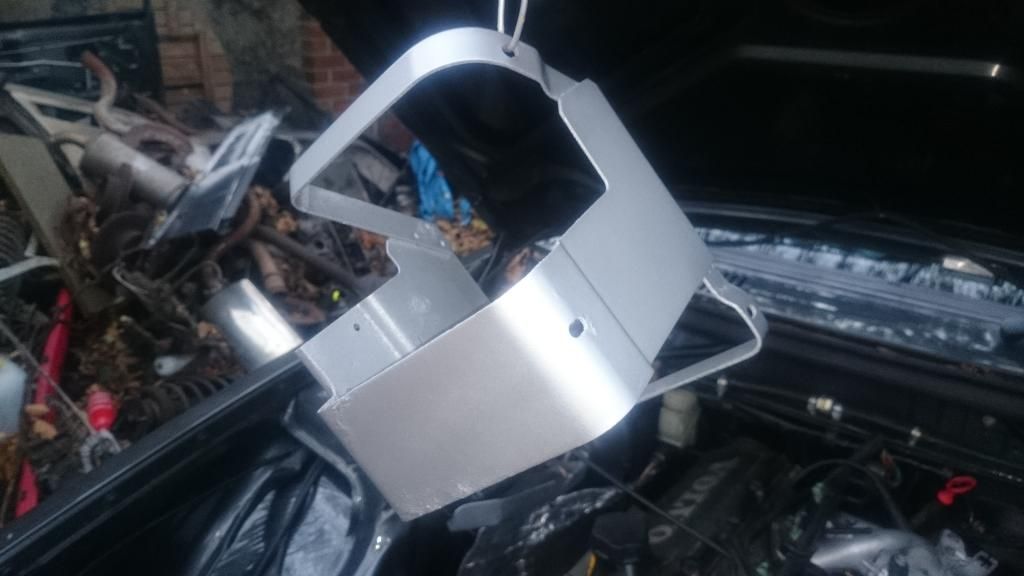 ...and the bonnet latch 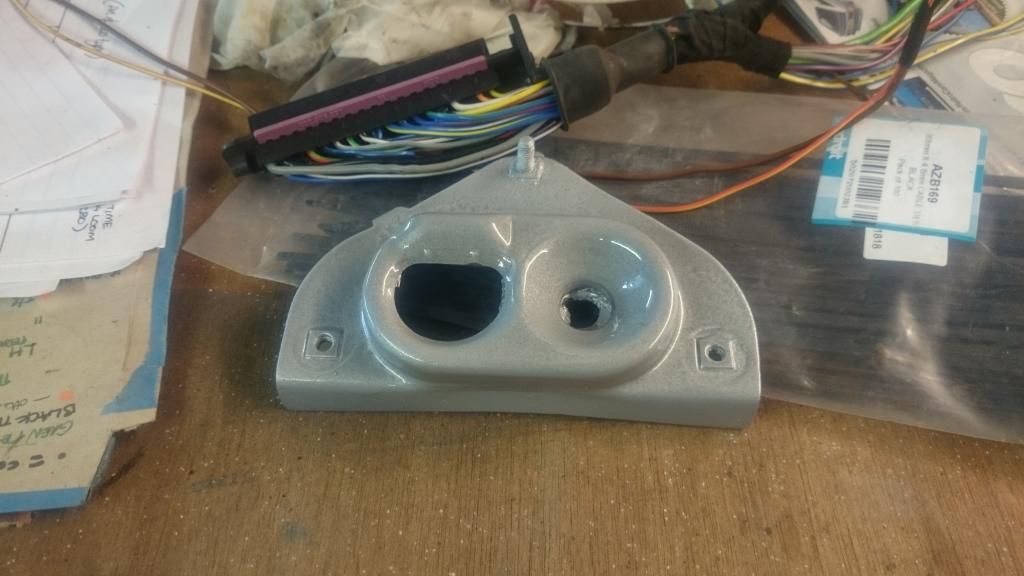 I decided as part of my installation I was going to run all engine management fuses to a seperate blade fuse box because of the poor design of the 240 fuse box which has affected running on Johns 245 in the past (Ceramic type fuses in a position prone to being dripped on...) (Excuse it not being straight) 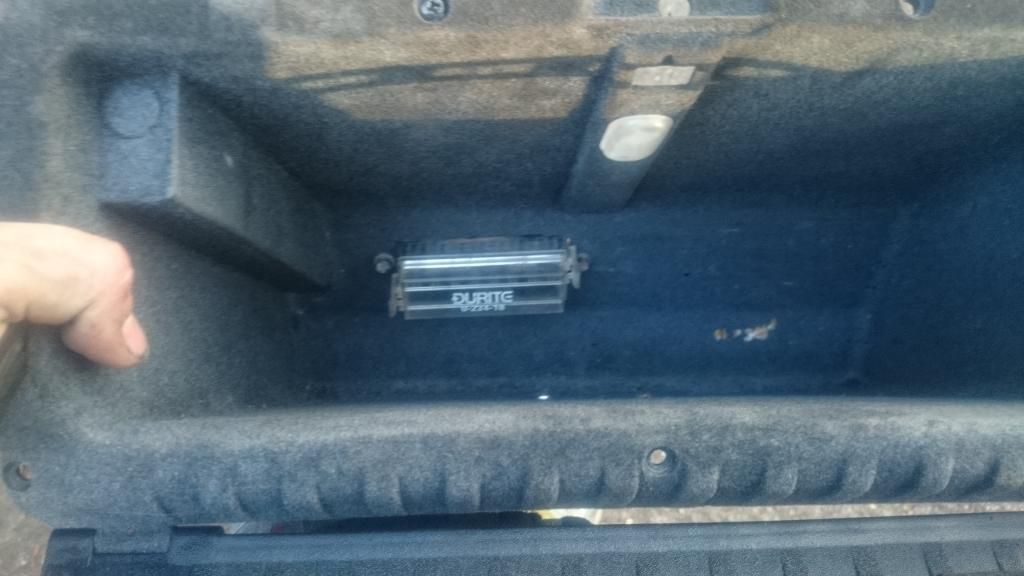 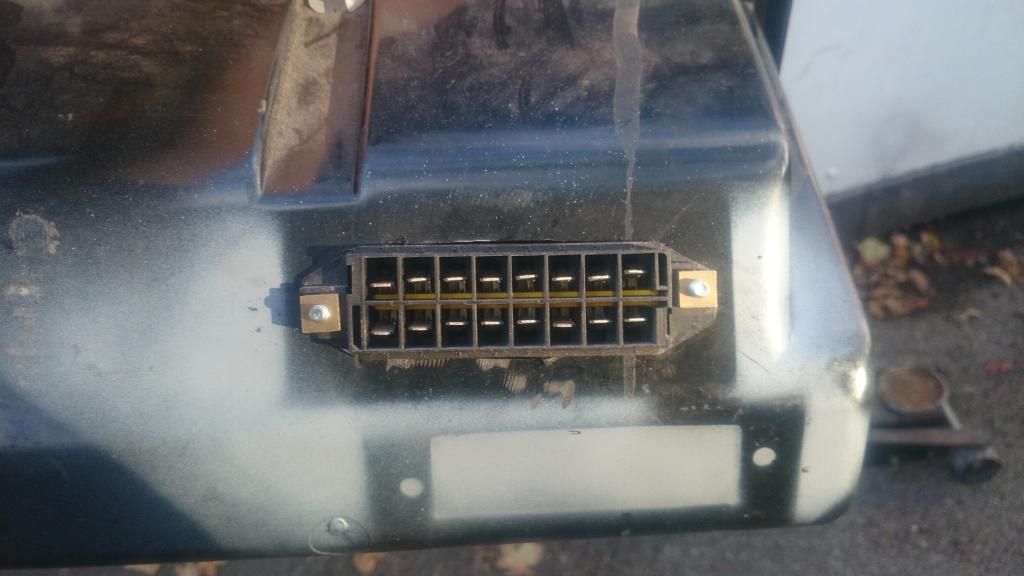 Installed the 80% made up loom in the carand wired up the fusebox outputs. I put a rubber lined P clip on there too to take the strain off the terminals.  And the outputs. Two permanant, two ignition, and one engine running.  More soon, Steve |
| |
Thor: 1980 - 244DL - B21A - M45. CLICK ON THE PICTURE BANNER FOR MY PROJECT THREAD! |
|
|
|
|
|
|
More stuff happened this weekend Not much in the way of pictures but progress was good this weekend. Much of it was wiring related though - making things tidy and secure, making things look factory, making improvements on the original design and making sure connections are good, clean and well insulated. 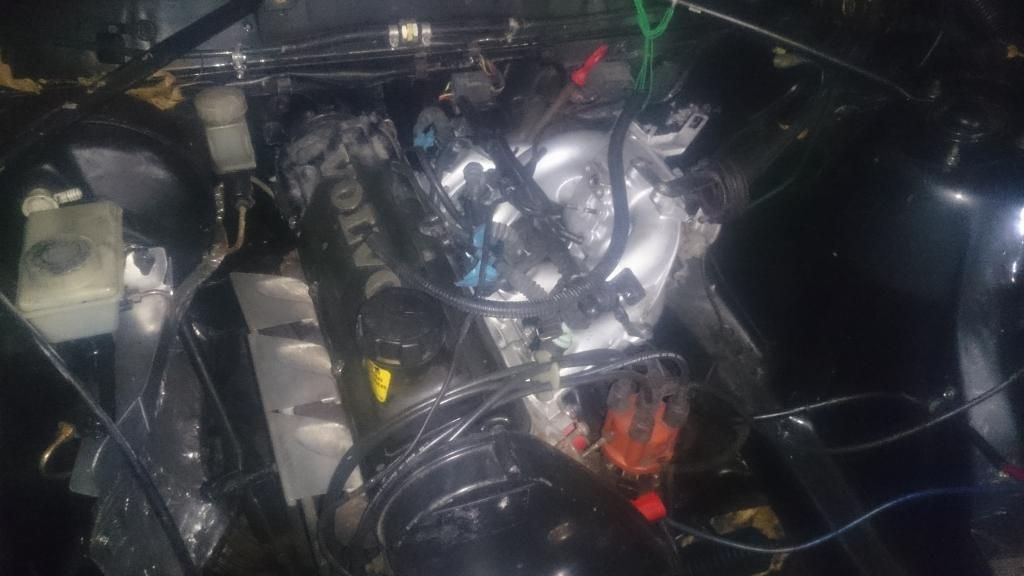 I have also wired up my fusebox feeds. I now just need to make somesort of ECU/EZK mounting, make an earth point, and connect the wires that go to the engine. 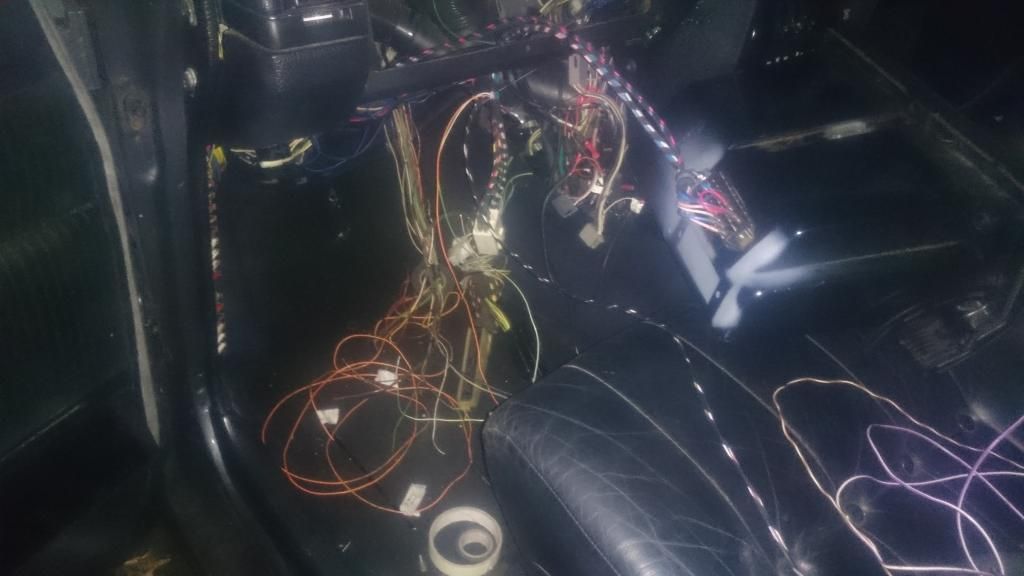 There is some other engine bay wiring to complete, such as the wiring for the injector relay and the resistor pack, and then the Air Mass Meter and Lambda sensor.  Cleaned (and polished ) the battery terminals and refitted the main battery leads making sure they were P clipped up where necessary 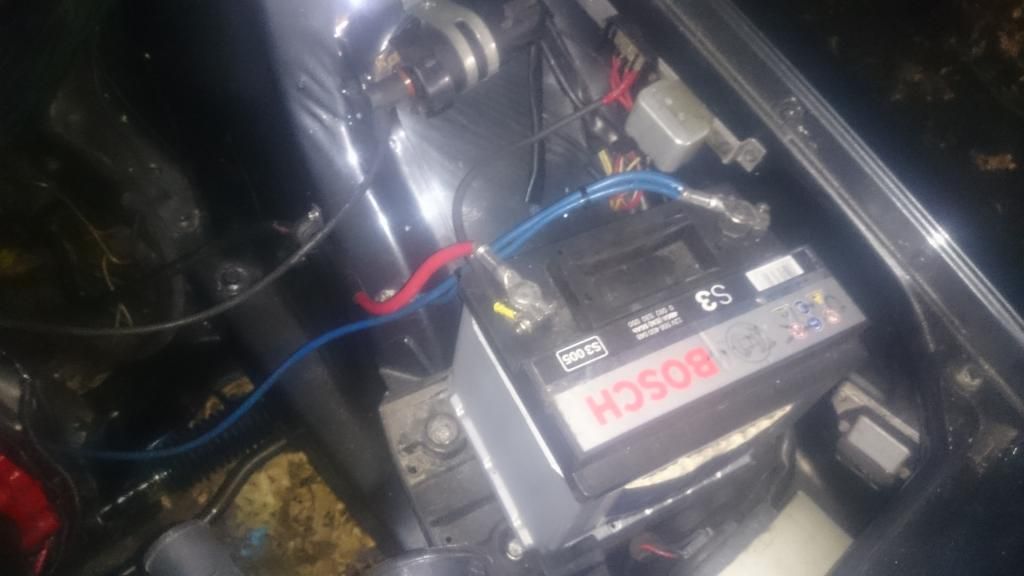 Another thing that annoys me on 240s (though ive never actually had any problems) is the poor earth connections in the engine bay through various self tapping screws. Just seems like a fault waiting to happen to me. I decided to put in an earth stud on either side. On the nearside wing there is already an M6 captive thread behind the washer bottle (though it doesnt interfere with the fitting of the factory washer bottle, which is ideal) so I cleaned the thread and put in a bolt from the back, followed by a flange-nut tightened up so it cut through the paint therefore creating a stud to put earth connections on followed by another nut. I put some vaseline on the connections to protect them from corrosion. There is a similar hole on the other side though it doesnt have a captive thread so i just put an M5 bolt in there and tightened the flange-nut up as per the other side. 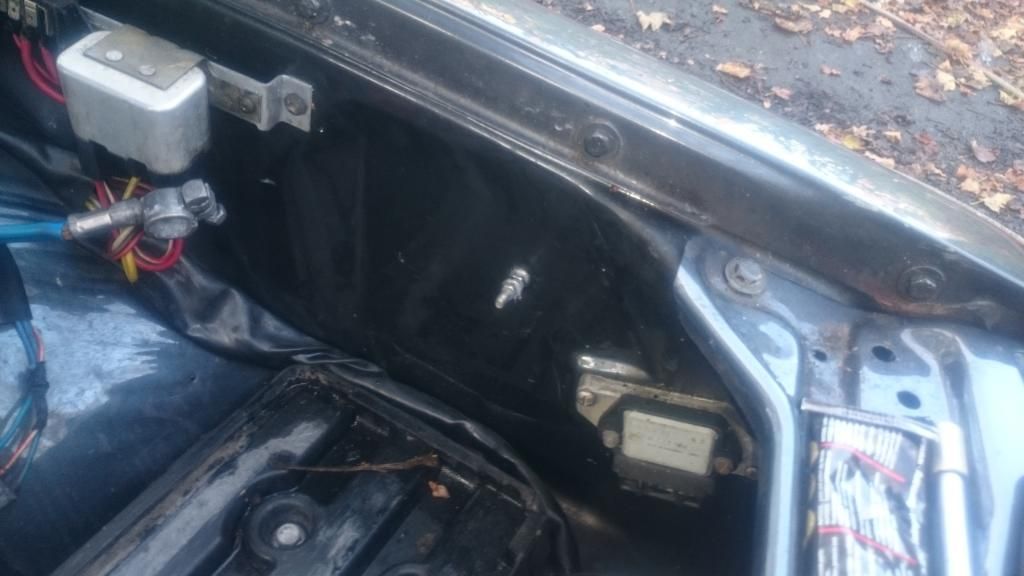 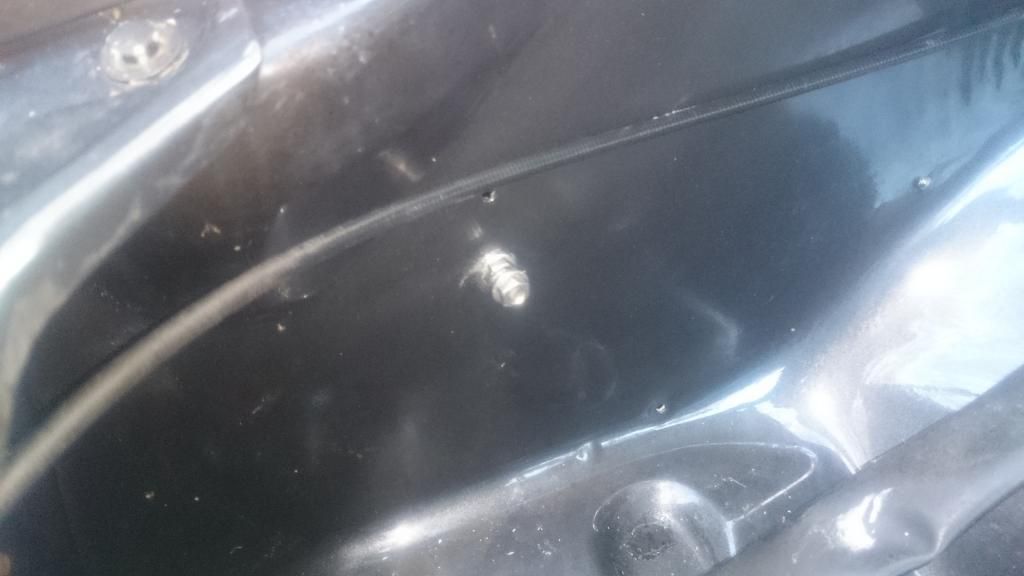 Also, to anyone thinking of doing a similar turbo swap on a 240 and is scared of the wiring (if converting a carb or k jet car) - theres not that much to it. This is 85% of the engine wiring loom. 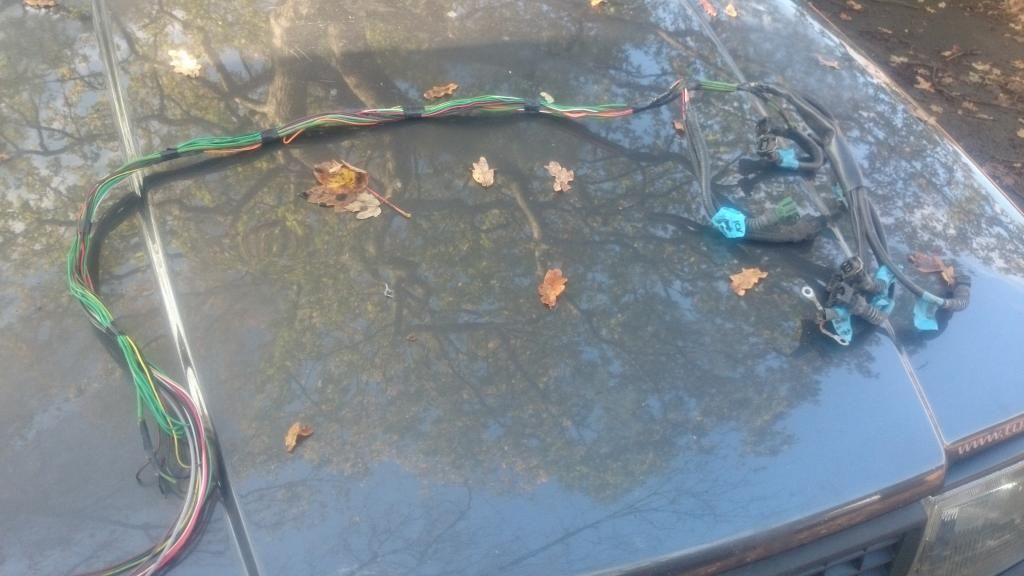 Next up is to finish connecting things up inside, and then the major thing left to do is fit the turbo itself, which first needs to have its V band flange welded onto the exhaust side. Steve |
| |
Thor: 1980 - 244DL - B21A - M45. CLICK ON THE PICTURE BANNER FOR MY PROJECT THREAD! |
|
|
|
|
|
|
More progress, not so much on wiring but more to do with the main feature - my turbo I took it to the welders to have a V-Band flange welded on the exhaust side, and also onto a 3" universal reducer to make it adaptable for if I have a 3" downpipe made. Heres some pictures for those not sure of what a v-band is or how it works (as I didnt before Chesh educated me...)  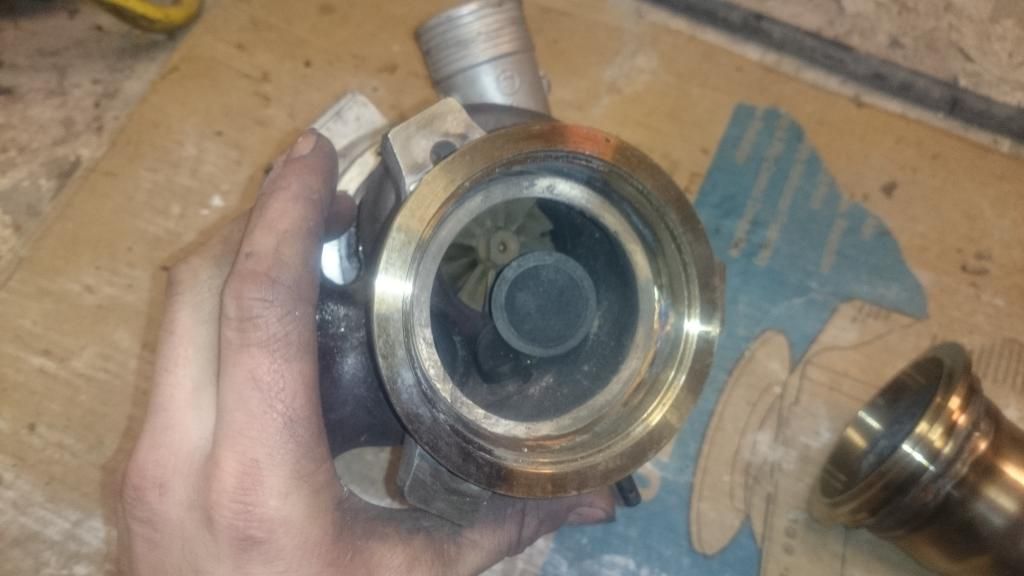 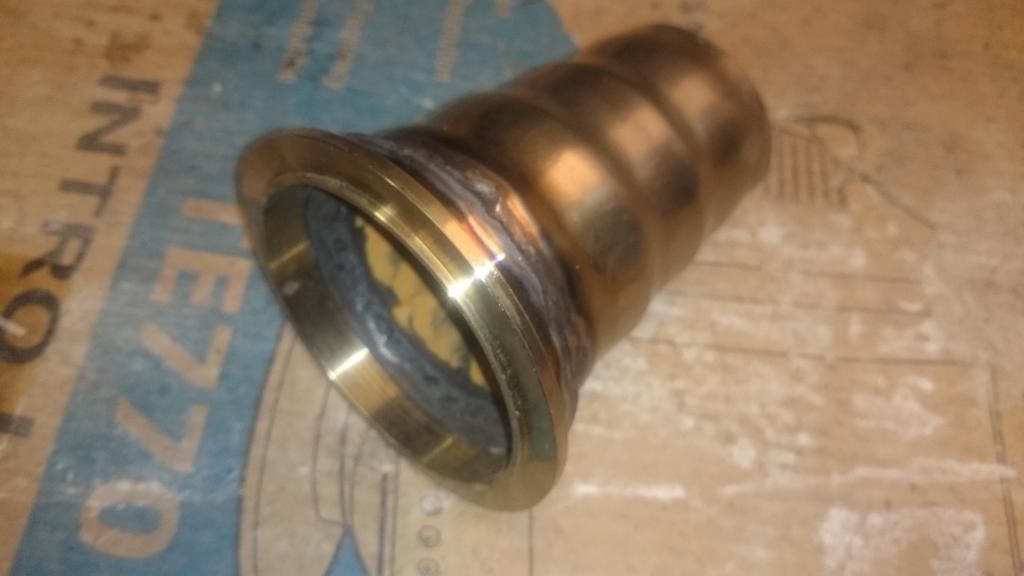 Obviously Ill be adapting that reducer onto my current modified 940 downpipe which will (for now) be hooked up to the standard 240GLT exhaust system, but with the back box and two 90 degree bends removed so that it comes straight out of the drivers side. 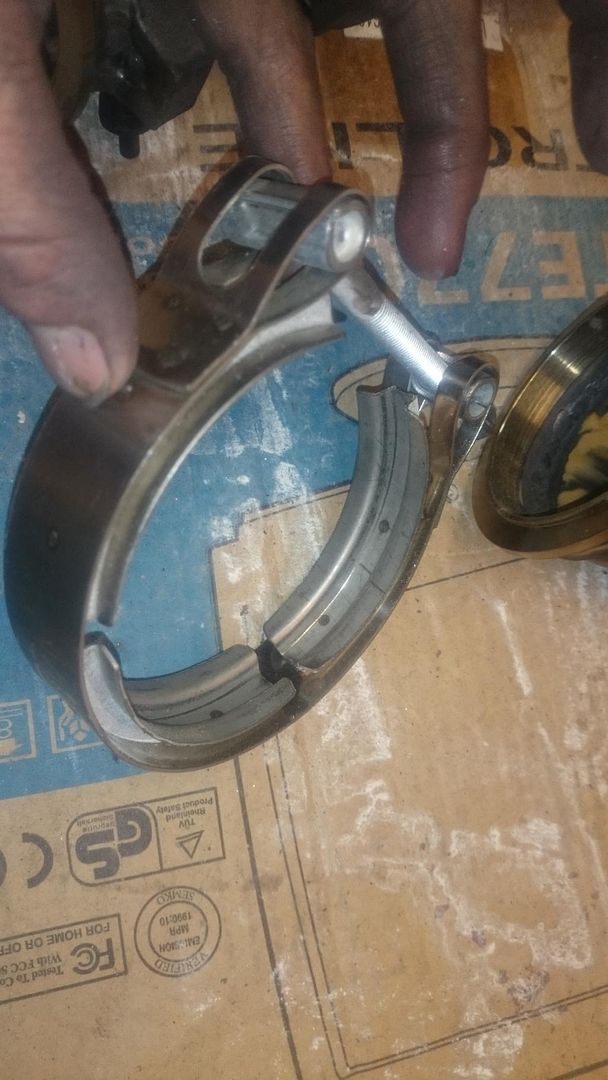 and all built back up and test fitted. Its a 16T straight flange turbo but I have clocked it for redblock fitment (i.e. rotated the exhaust side relative to the compressor side). I still need to make a bracket for the actuator but that should be easy enough. 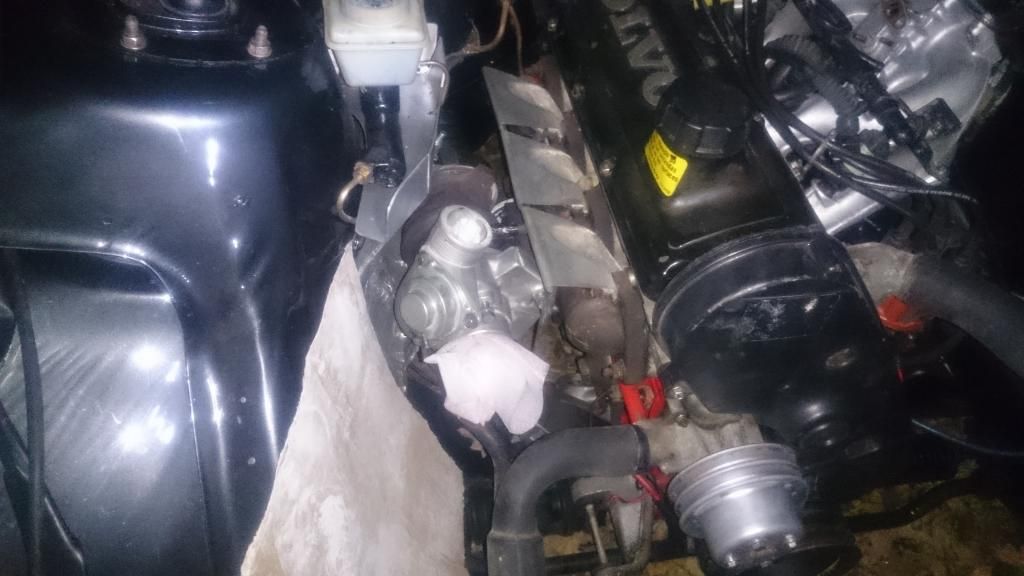 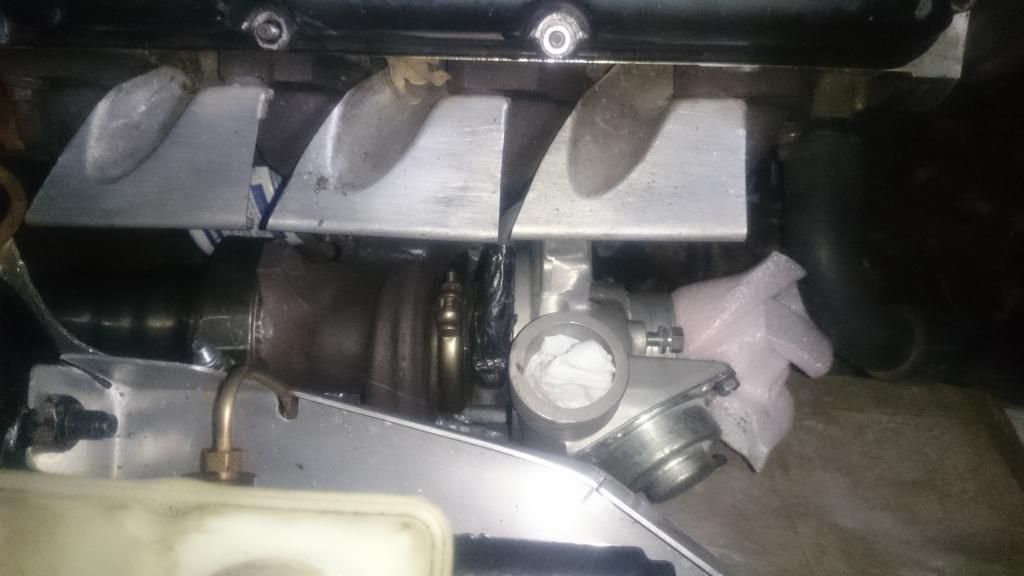 Heres the advantage of the V-band. just that one nut to separate the downpipe and turbo. More soon, Steve |
| |
Thor: 1980 - 244DL - B21A - M45. CLICK ON THE PICTURE BANNER FOR MY PROJECT THREAD! |
|
MJK 24
Part of things

Posts: 175
|
|
|
|
|
Great thread!!
|
| |
|
|
|
|
|
|
|
|
|
|
My dad had a Silver 84 240 GL, this brings back great memories
:-)
|
| |
|
|
|
|
|
|
|
|
Cheers guys!
|
| |
Thor: 1980 - 244DL - B21A - M45. CLICK ON THE PICTURE BANNER FOR MY PROJECT THREAD! |
|
|
|
|
|
|
Right, so a lot has happened since the last update! I made my downpipe - its not the prettiest thing in the world but itll do for now until I get a 3" one made up (hence the reason for the 3" V band) 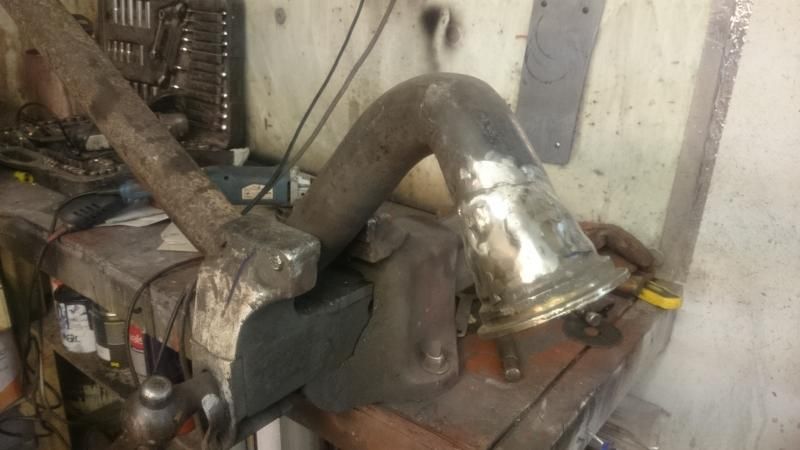 Then I needed to make a reducer piece to go from the downpipe to the standard 240 exhaust. Its just so happened that the disposable welding gas bottle had run out, so I bought a new one and immediately recycled the old one! I suppose this might seem a little bit "bodgy" but at the end of the day its good quality thick steel that welds well and worked for what i needed. 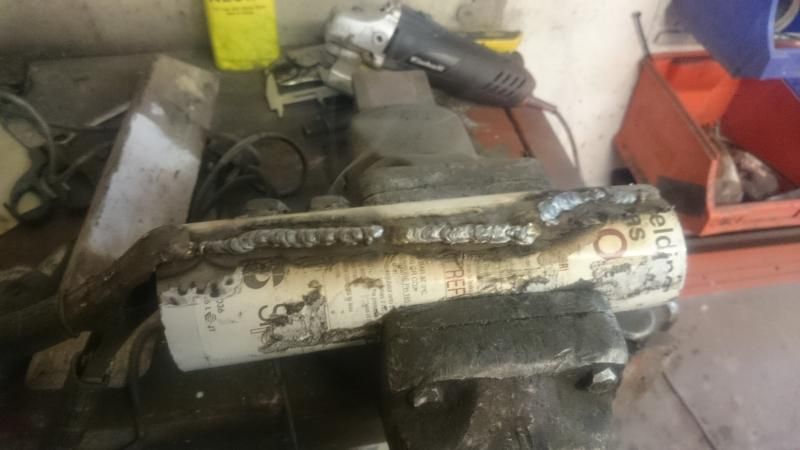 Lambda bungs (one for the 02 sensor and one for the wideband gauge when I get one) welded in and tidied up and painted the thing with some manifold paint 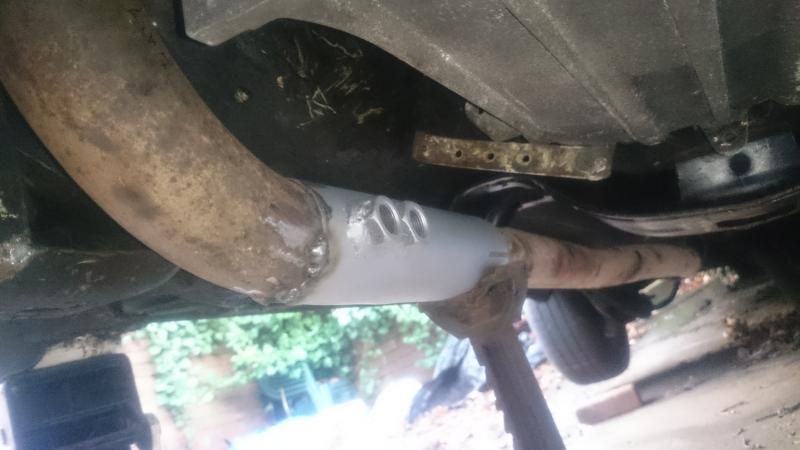 Now because I had clocked my 16T, I needed to make a bracket for the wastegate actuator to be in a different place. This needed to be strong so that it did not flex under any conditions. Starting to make it 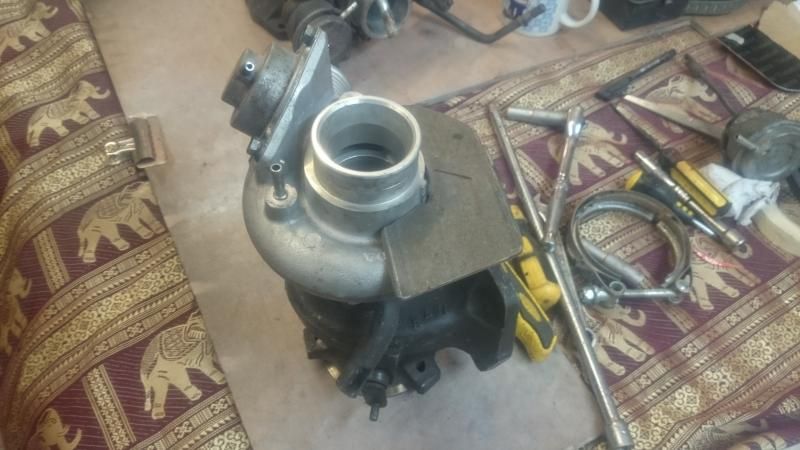 Getting there 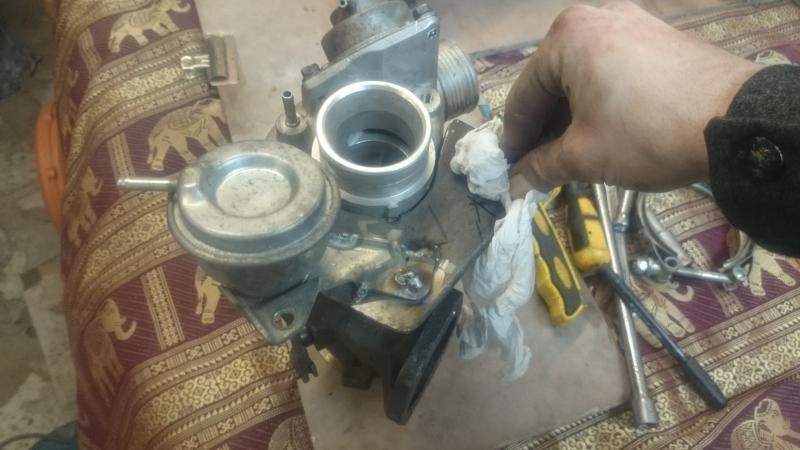 That'll do. Was quite difficult to get it so it was the correct length, didnt flex, and missed all the hard water pipes and oil drail pipe. 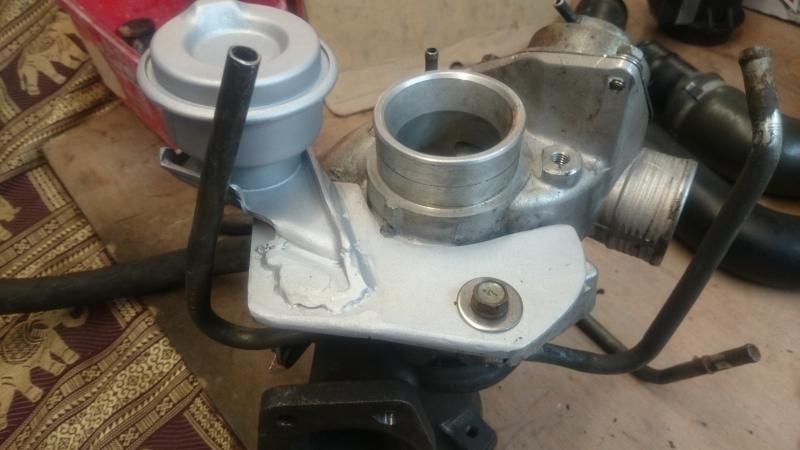 Wiring in a winter wonderland! 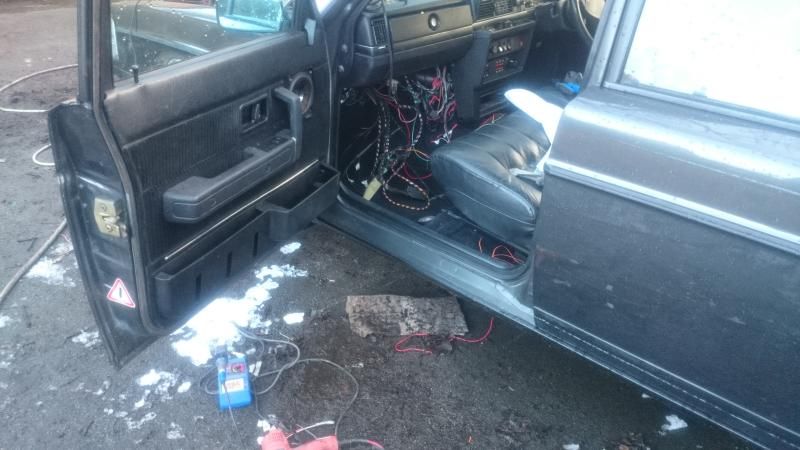 Did some research on how to make a top engine steady. I had seen a few aftermarket adjustable top engine mounts for minis and figured I could probably adapt one of these to fit, given some dimentions. Luckily there is a company local to us in Huddersfield called minispares that actually are the original sellers of these adjustable top mounts. I went down to their shop and offered one up and bought one. I think with some careful making of brackets this will work very well - and it was only £24! There are three M8 threads on the head (I think they are for US emmissions stuff?) that i will use, and then make a bracket on the engine bay. 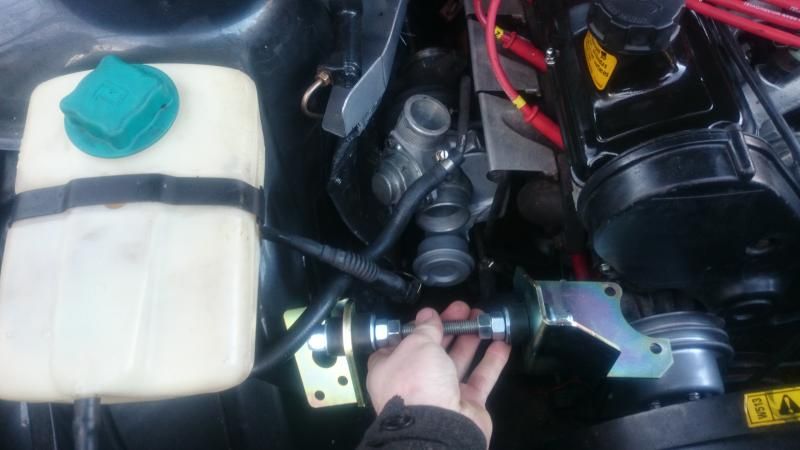 I made my oil drain bracket (not painted yet obviously...) and connected my flexi-drain up 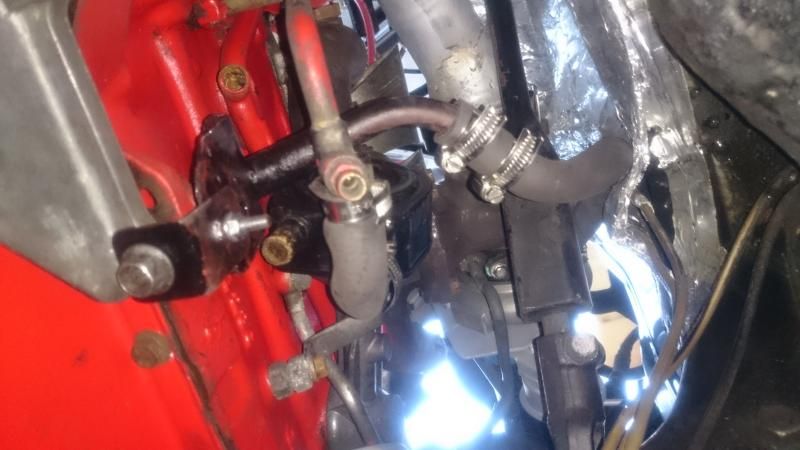 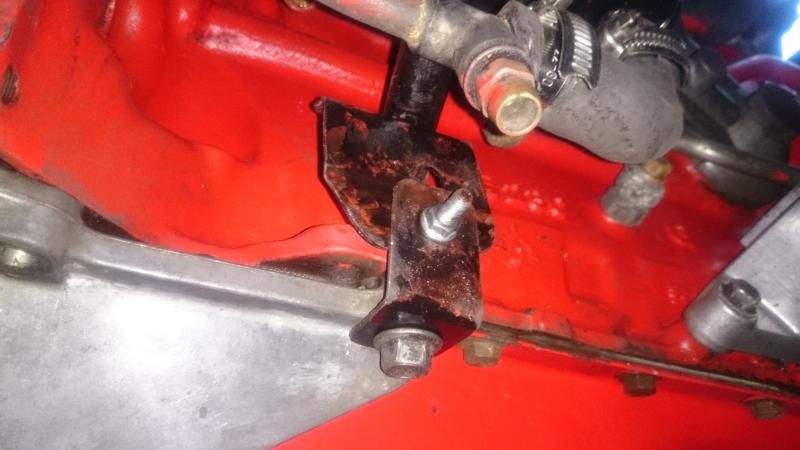 At this point it was time to make it run! At first it didnt want to play. At first there was no spark. After some research and hard thinking, we realised that the ignition powerstage module mounted on the N/S inner wing (the original one from the K-Jet car) was a different part number to the one John had. Luckily we found a spare, so fitted it and hey presto - a spark! Now we were then pretty hopeful that the car would run so put the plug back in and cranked it over - Still no joy. It now seemed to want to start very intermittently. It would start maybe once in every 30 attempts, with very similar sympoms to that of a car running out of fuel. We put some more fuel in it - still no joy. I tested the fuel pumps. The in tank pump had lost its feed so i rigged up a temporary one. Still no start  I did lots of research and tried a few other tricks the following morning but still nothing. THEN! The genius that is Mr John H had a brainwave... "Check your ignition feeds to the ECU are ones that are still live when cranking" Hey presto! It started, and it even stopped too! At this point I was literally jumping up and down like a 4 year old kid in excitement! [clicky video...]  My Christmas present from my mum was a big fat Jetex air filter, which I got to fit the 012 Air mass meter i scored for £20 from a breakers earlier in the week! 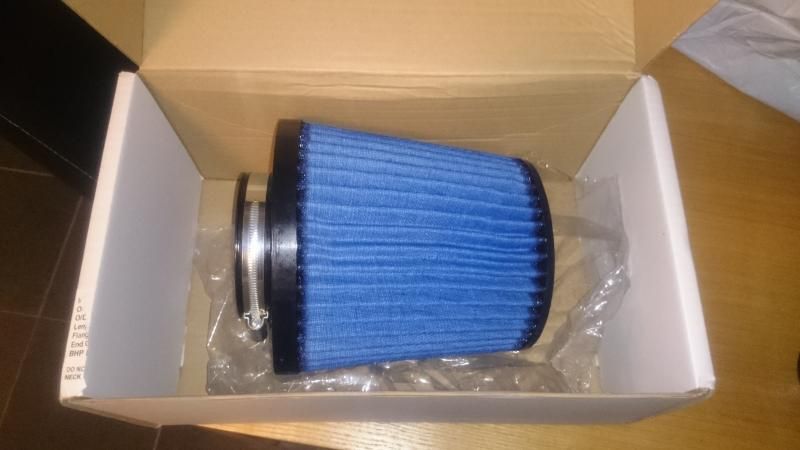 I also ordered an angled silicone reducer, and with a bit of careful grinder TLC, I made it fit in with the original washer bottle. Something I am pleased about because I didnt want a non factory looking small washer bottle placed elsewhere. I had to relocate the motors to the front of the bottle but that was no big deal.  It official! It has a boost gauge! 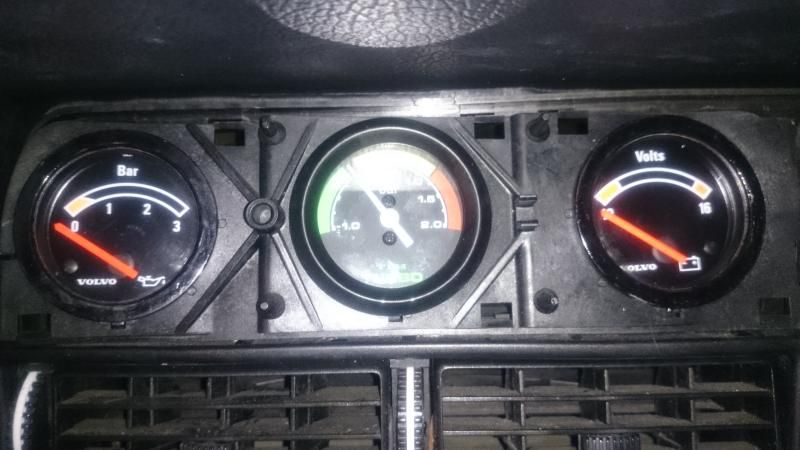 So the engine goes, but I still need drive! I fitted a retro-turbo propshaft adapter - the one originally bought for johns 245 but he ended up having the prop lengthened instead. I also spent time making the remote gear selector linkage for the M90 work well in the 240 - I made all the original 940 sound insulation and rear bracket fit.  So now, it runs and drives! (click for video of me grinning like a cheshire cat! ) scontent-b-lhr.xx.fbcdn.net/hvideo-xap1/v/t42.1790-2/10905587_10155006296160075_180038196_n.mp4?rl=356&vabr=198&oh=124022200a9074e177dbf448c031b8c0&oe=54A529D6Spent new years eve working on the car til 11pm. Unfortunately I had to break off for food though (had been out there since 8am!) 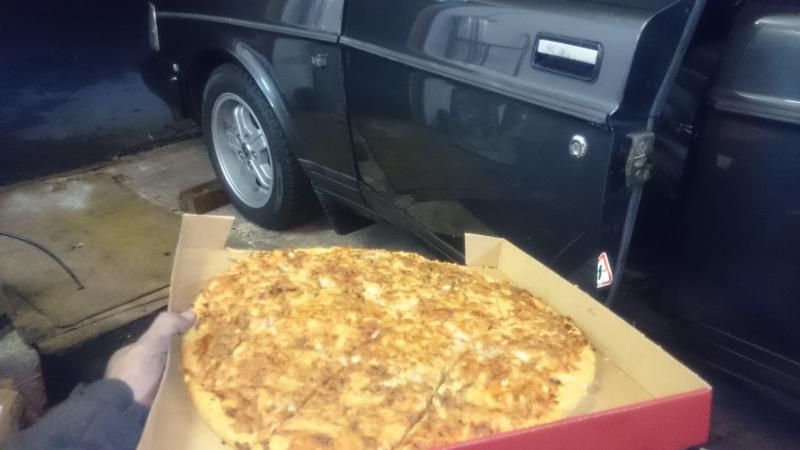 I have also phoned the insurers, and after some battling with them, got them to insure me (as per what they promised when i took out the policy in March '14!) but they do want to see an MOT carried out after the engine swap, which is no problem because the MOT is due at the end of the month anyway. So - MOT 8:00am tomorrow, and assuming it passes - email that to the inurers and insure it, then tax it, then drive the damn thing!!!!! |
| |
Thor: 1980 - 244DL - B21A - M45. CLICK ON THE PICTURE BANNER FOR MY PROJECT THREAD! |
|
eurogranada
Europe
To tinker or not to tinker, that is the question...
Posts: 2,487
|
|
|
|
|
Nice, well done!!
|
| |
|
|
|
|
|
|
|
Right then, so it passed its MOT. A few minor advisories, and a fail at first on the handbrake efficiency but I had that sorted within a couple of hours and got back down there for a retest which it passed. 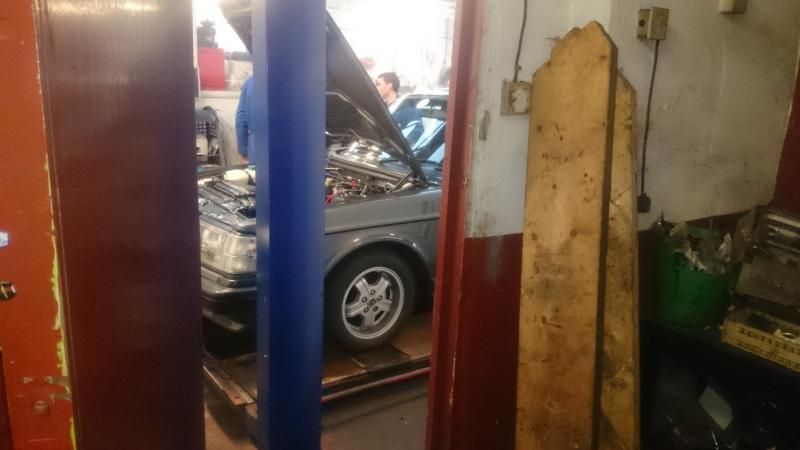 I did a couple of other bits too - wrapped the downpipe 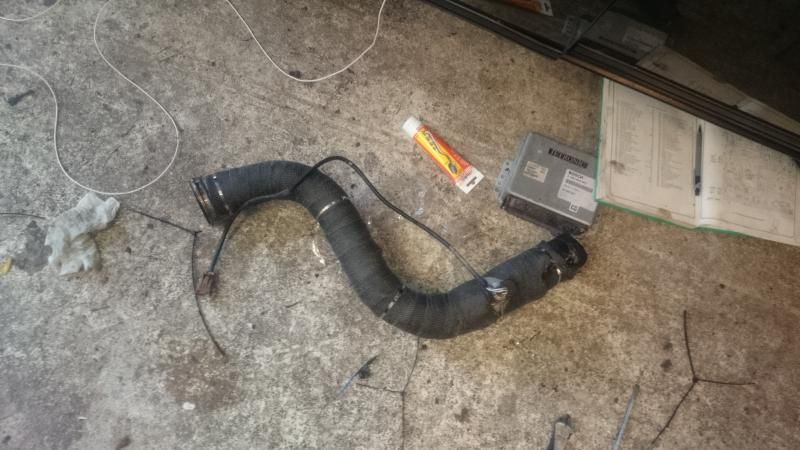 Photo from ages ago when I bought the engine. MOOEY lives on! 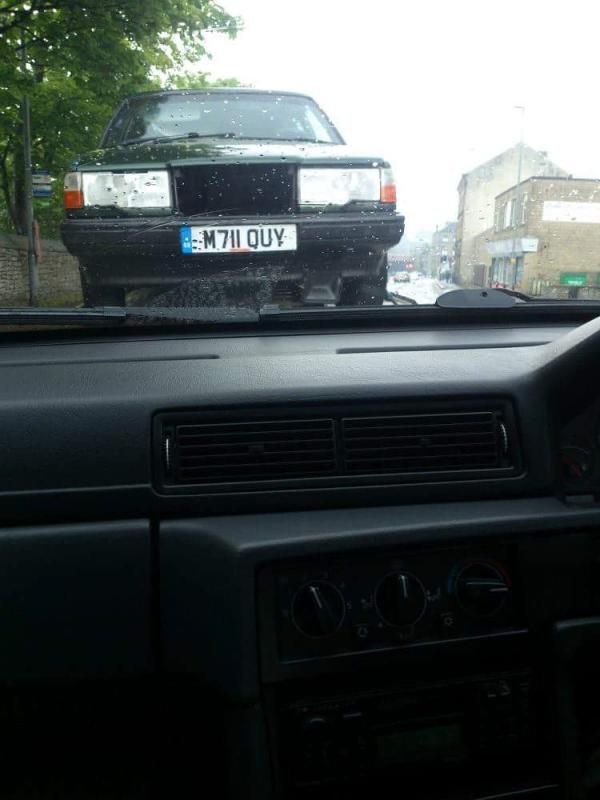 Cleaned up the engine bay after all the work 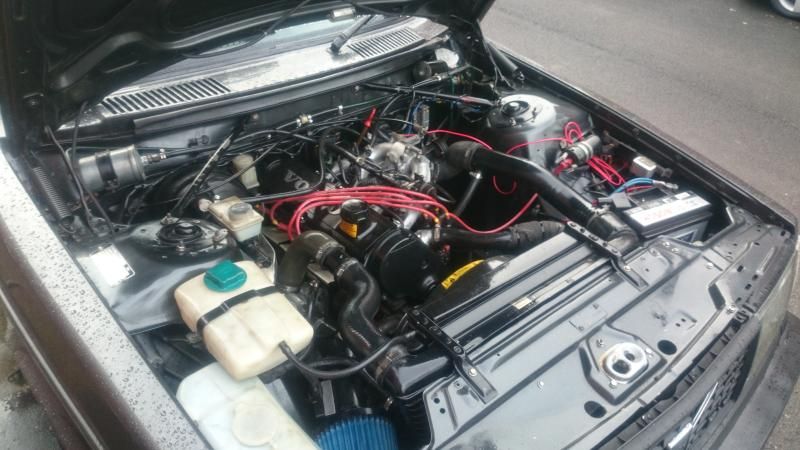 The turbo got its first wash....  I had a very stupid blonde moment when I was trying to gradually increase the boost. It does help when you screw the boost controller in instead of out! Aaaaaaaand now ive got to take it to bits again... It has got bad clutch slip that is getting worse. I have eliminated all the control side of the clutch system by test driving it without a slave cylinder rod (and the arm had free play i.e. no pressure on the pressure plate) and it still slips. Assuming there is nothing obvious when I take it to bits (which I doubt), I'm just going to chuck a new clutch in with the dual mass flywheel for now as its the safest option considering I'm now skint again! Steve |
| |
Thor: 1980 - 244DL - B21A - M45. CLICK ON THE PICTURE BANNER FOR MY PROJECT THREAD! |
|
|
|
|
|
|
|
That looks fantastic mate, hope I can see it round Huddersfield now! John's 240 was out in the bad weather round Xmas - so nice to see them being used....
Looks great in that colour too.
|
| |
The Millenium Volcon"Get yourself a Volvo if that's what you really want, you might be dead next year. In the meantime, you could be going sideways in a gigantic land barge."
|
|
|
|
|
|
|
|
Cheers! Maybe see you at another IK meet
|
| |
Thor: 1980 - 244DL - B21A - M45. CLICK ON THE PICTURE BANNER FOR MY PROJECT THREAD! |
|
eurogranada
Europe
To tinker or not to tinker, that is the question...
Posts: 2,487
|
|
|
|
|
I love your attention to detail. It shows in everything you do and how the car is presented!
|
| |
|
|
|
|
|
|
|
Thanks  I do try, though sometimes lack of funds does mean that corners have to be cut but i try to keep it minimal |
| |
Thor: 1980 - 244DL - B21A - M45. CLICK ON THE PICTURE BANNER FOR MY PROJECT THREAD! |
|
|
|
|
|
|
Right then, time for another update. You guessed it, ive been too busy annoying audi tdis and the local youths to be doing an update First things first - the clutch issue. This involved one day of work where all went swimmingly until the last 1 minute, followed by one day of shouting, swearing and generally wanting to set the car alight Having height issues..... 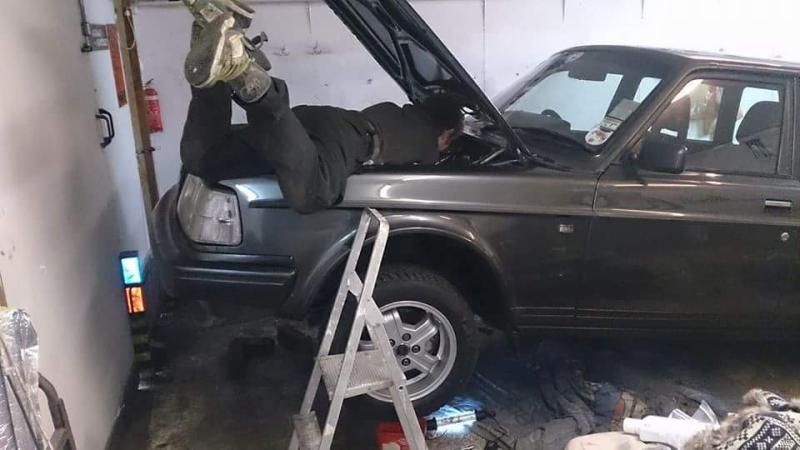 So, got the gearbox off, clutch off, flywheel off. There was no oil from the rear seal so definitely not that. Driven plate has evidence of slipping obviously, but no other obvious faults 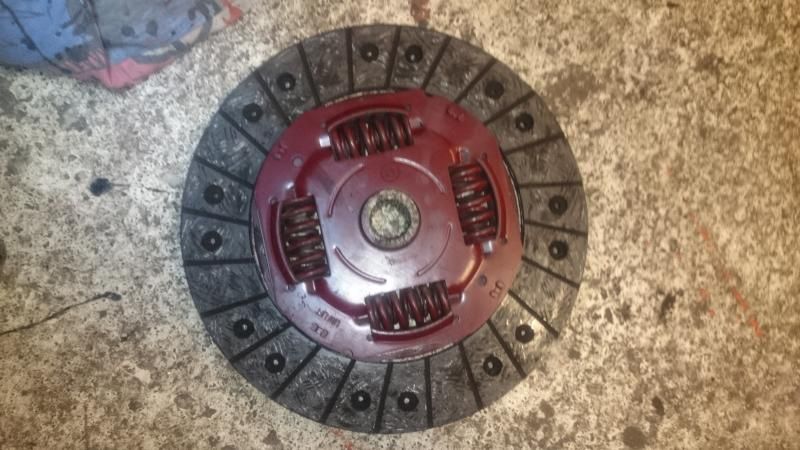 Pressure plate (note the machining marks....) 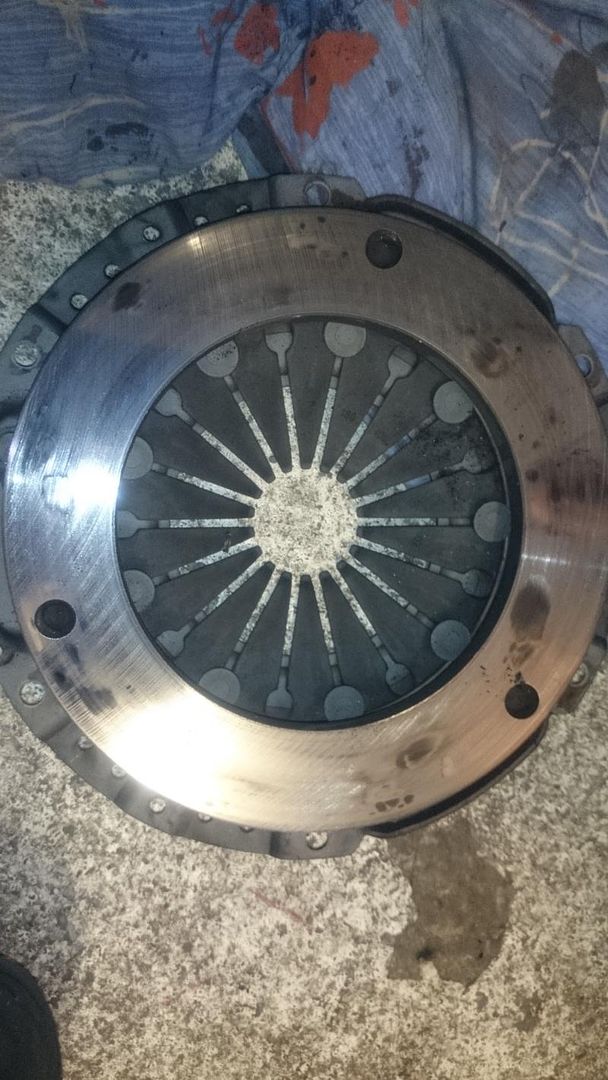 And the flywheel 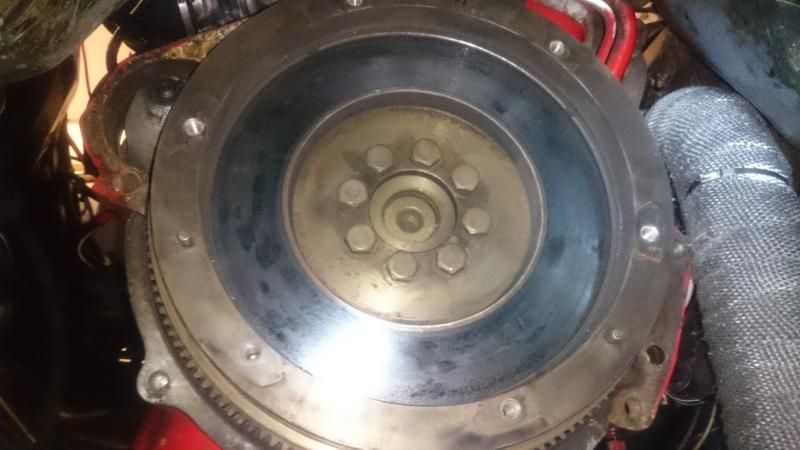 So not a great deal of evidence as to a reason why it was slipping. As Steve940estate said above, I reckon its that the remanufactured pressure plate had accidentally had too much machined off it. One thing I did notice in having the flywheel off, was that there is a fracture init, so I am quite glad I had the gearbox off again because that could have ended in tears. 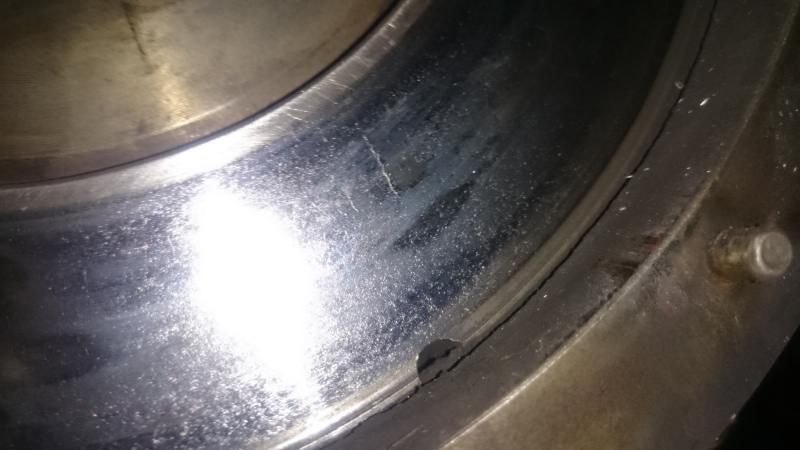 So, old dual mass flywheel back on, followed by a new clutch kit standard for that engine/gearbox combination, all aligned up - great! At this point obviously it was time to put the gearbox back on, so sat underneath the car i looked up and thought "that crank position sensor looks vulnerable to being smashed by a big lump of M90 and knowing my luck thats what'll happen" - so I took it off. Oh dear oh dear. Got the whole car back together, a good 3 hours work - lowered it off the stands thinking the last thing to do was refit that crank position sensor and go for a test drive. *You cant get to the two bolts that hold the CPS bracket onto the block unless the gearbox is off* Got pi55sed with john that night to drown my sorrows haha So the following morning it was off with the gearbox again to put back on the CPS. It was then that i discovered that in refitting an M90 in a 240 transmission tunnel, you have to slot the gearbox onto its splines with the starter motor "bulge" at 7 o'clock, then rotate the gearbox into its correct position so the bulge is at 9 o'clock. Doing this is impossible with the downpipe in place. So the downpipe had to come off, that resulted in my exhaust wrap falling to bits, then the joint was blowing, and my V-Band clamp thread stripped. What an utter ball ache. Anyway, its all back together now and the clutch works as it should and I'm happy to be boosting again! I do not wish to remove that M90 again for a very long time! Lesson to any of you M90 equipped 240 turbo drivers out there - if you're going to remove your gearbox - remove the downpipe first! I parked next to this and then got compliments from the owner 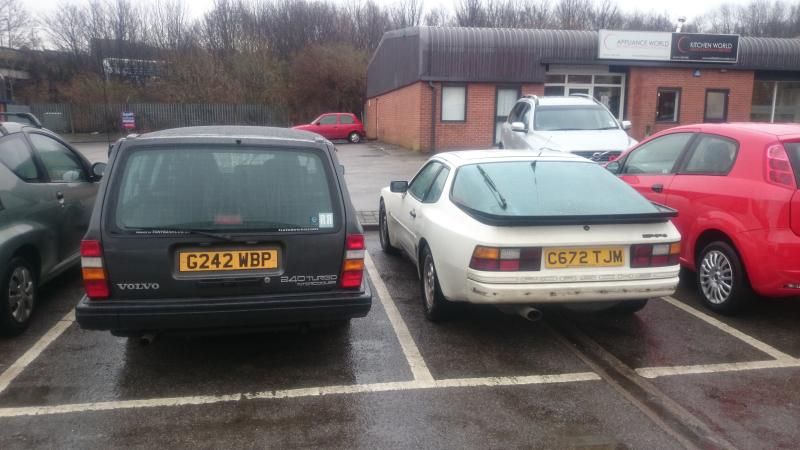 My Grandad came over in his 164, so obviously I had to have a little photo shoot 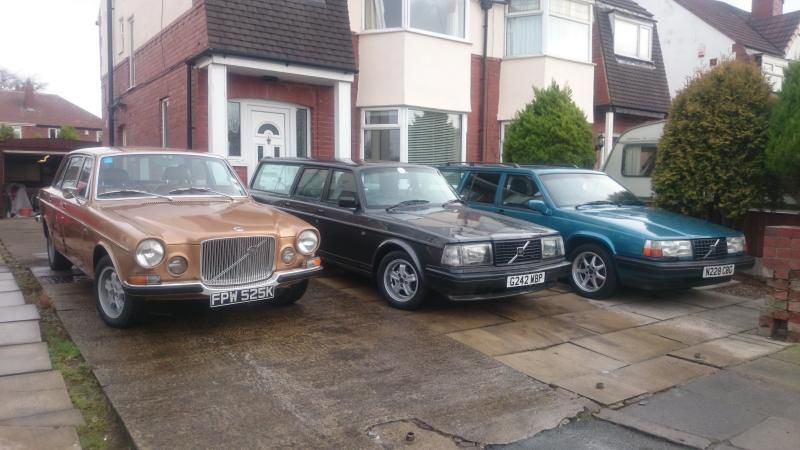 I carefully removed my lovato LPG kit from the 940 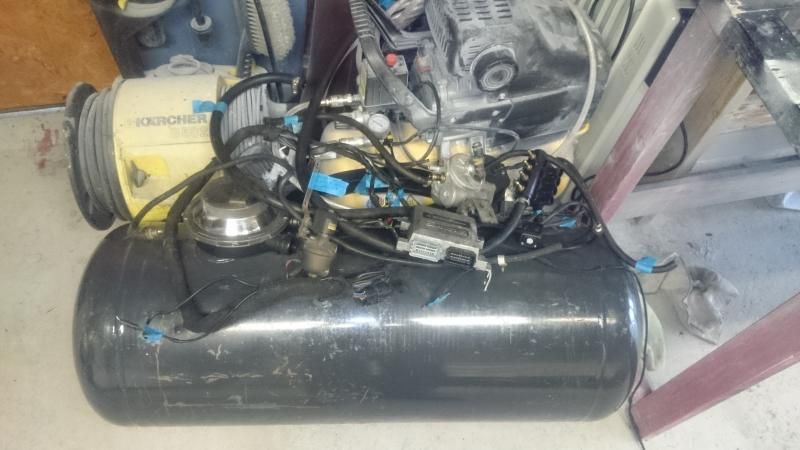 And started making the various bits of bracketry required to fit it in the 240 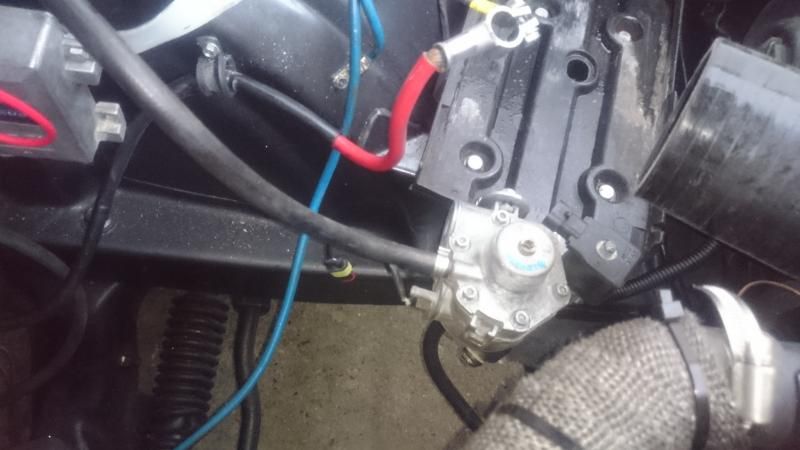 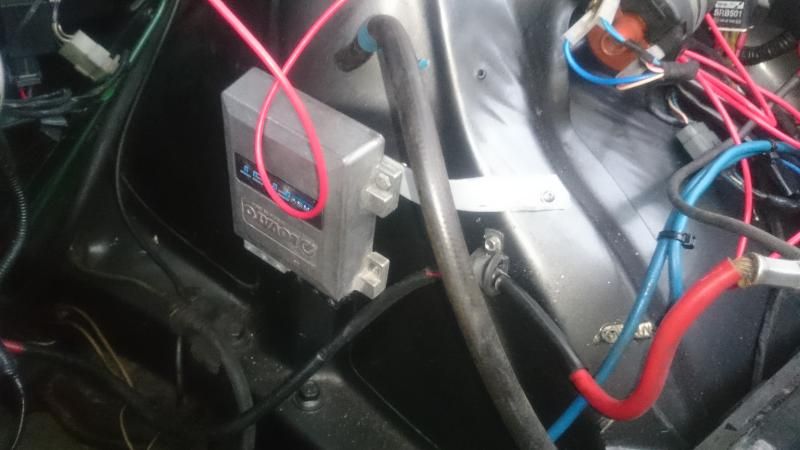 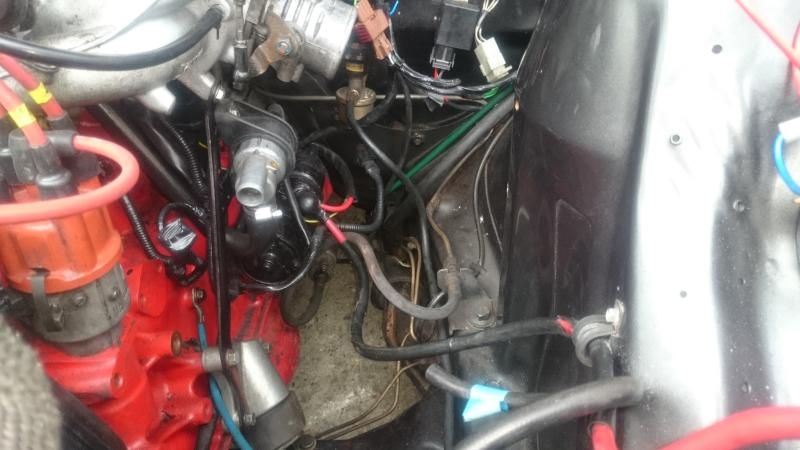 I have also reused the main front to back pipe from the 940, which is all fitted and properly clipped up. 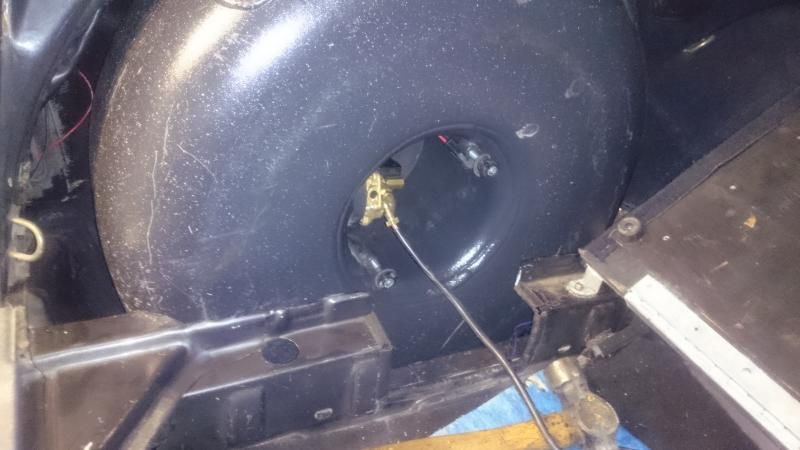 I cut down the spare wheel cover to accommodate my 60l tank. Its a tight fit! I'm going to give the tank a lick of some satin black paint for now, but I might also buy a universal black vinyl spare wheel cover for it. 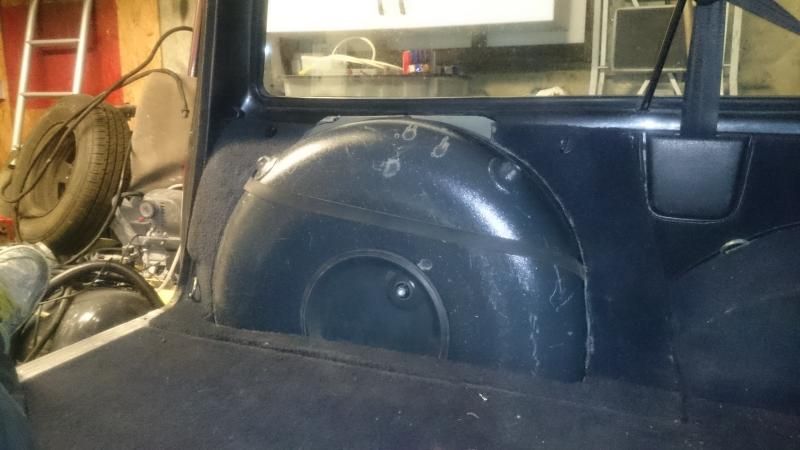 And finally - making use of my new man cave!  More soon, as always! Officially boosted Steve |
| |
Thor: 1980 - 244DL - B21A - M45. CLICK ON THE PICTURE BANNER FOR MY PROJECT THREAD! |
|
|
|


 I did lots of research and tried a few other tricks the following morning but still nothing.


 I do try, though sometimes lack of funds does mean that corners have to be cut but i try to keep it minimal


