|
|
|
Mar 18, 2024 21:56:33 GMT
|
I’ve done stuff all with the car. We’d best top up on excuses eh? I wonder how the paint in Ratty Towers is doing? Let’s go and look. I painted this a week ago so it should be looking great. 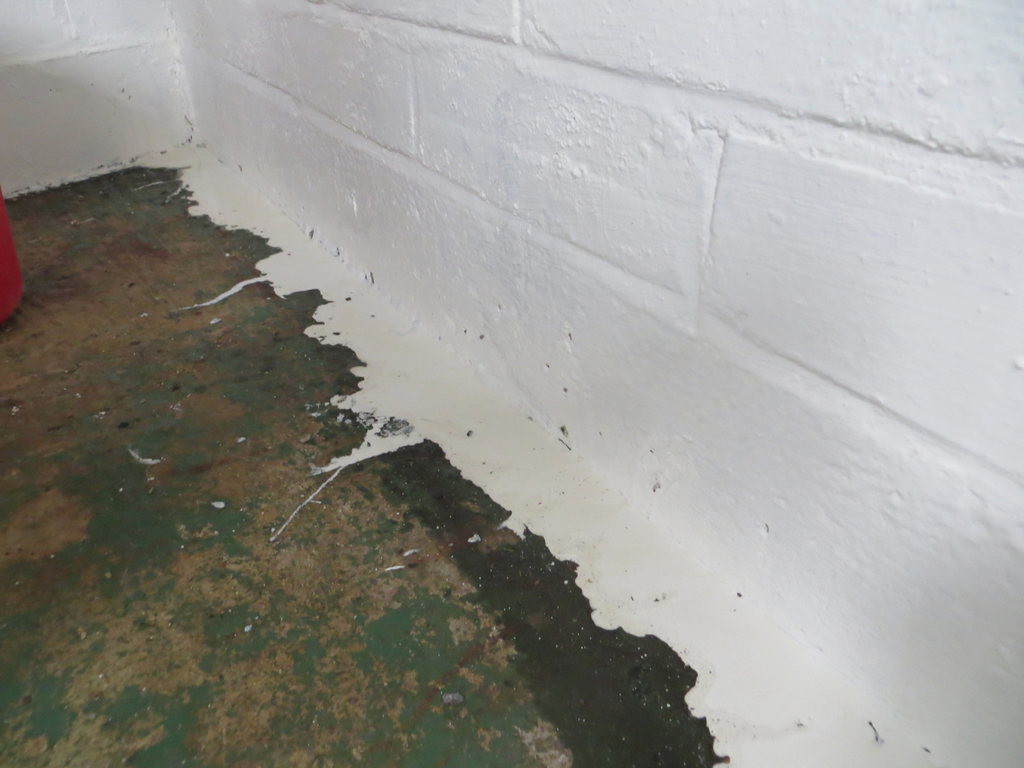 It’s literally run off the walls. I could have dipped my paint brush in the puddle and put it back on the wall. Unbelievable. Ah well, we only got most of it on the floor. I put a heater in there for a day to try and get it to actually dry. Might need to do that a few more times this week. I hope this damn bed repair is going better. 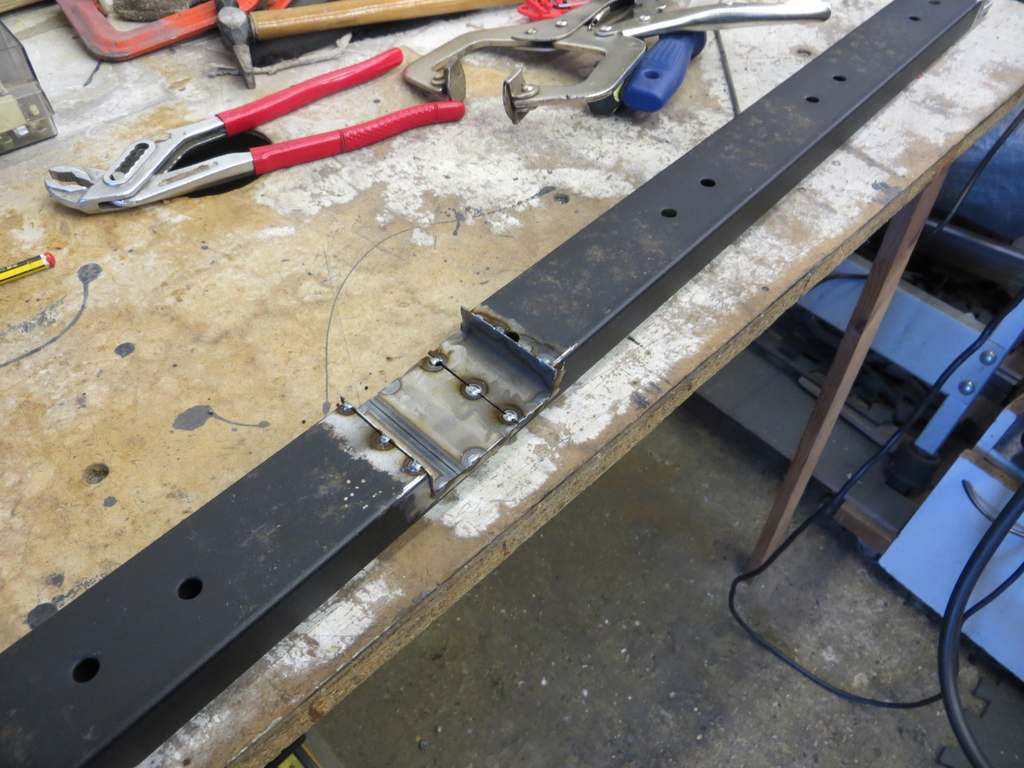 That’s a new cross rail being made. It needed slimming down a wee bit where it met the new centre rail. After some buzzing with Mr MIG the angry metal glue machine I seem to have a completed bed frame. 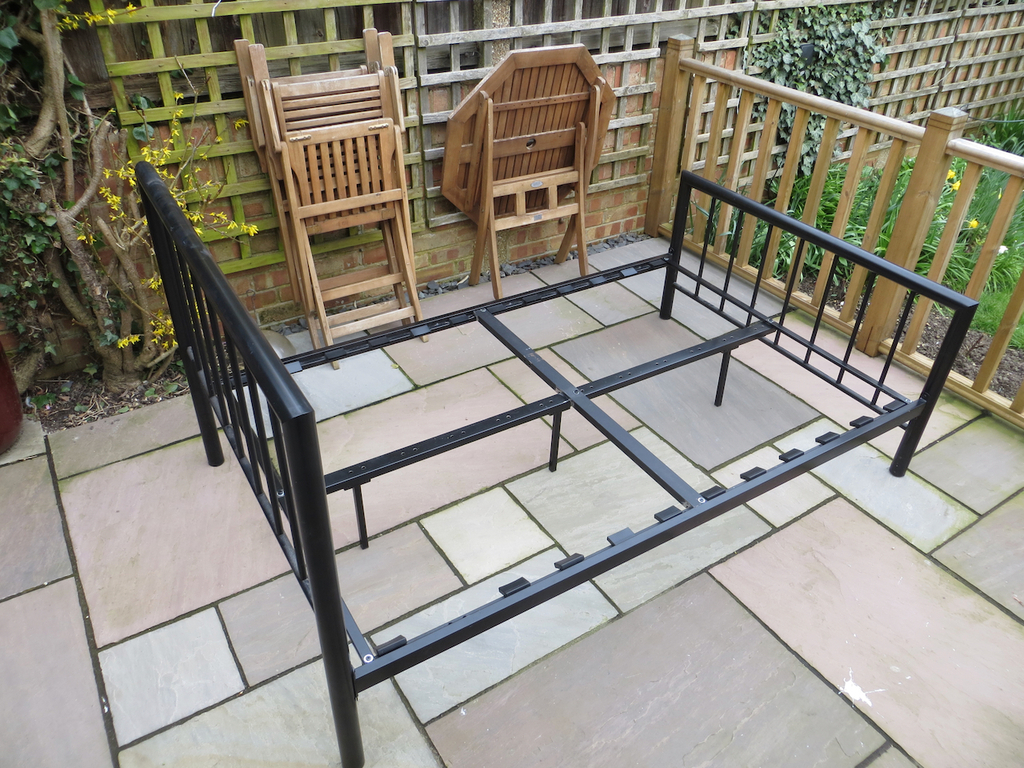 As we management types like to say, I think we’ve had a great accomplishment there, a tremendously successful endeavour. Genuinely came out on top. Being on top when you are talking about beds… Hmmm… Moving quickly along, let’s fix the wheel bearings on my trolley. The old bearings are spanked. 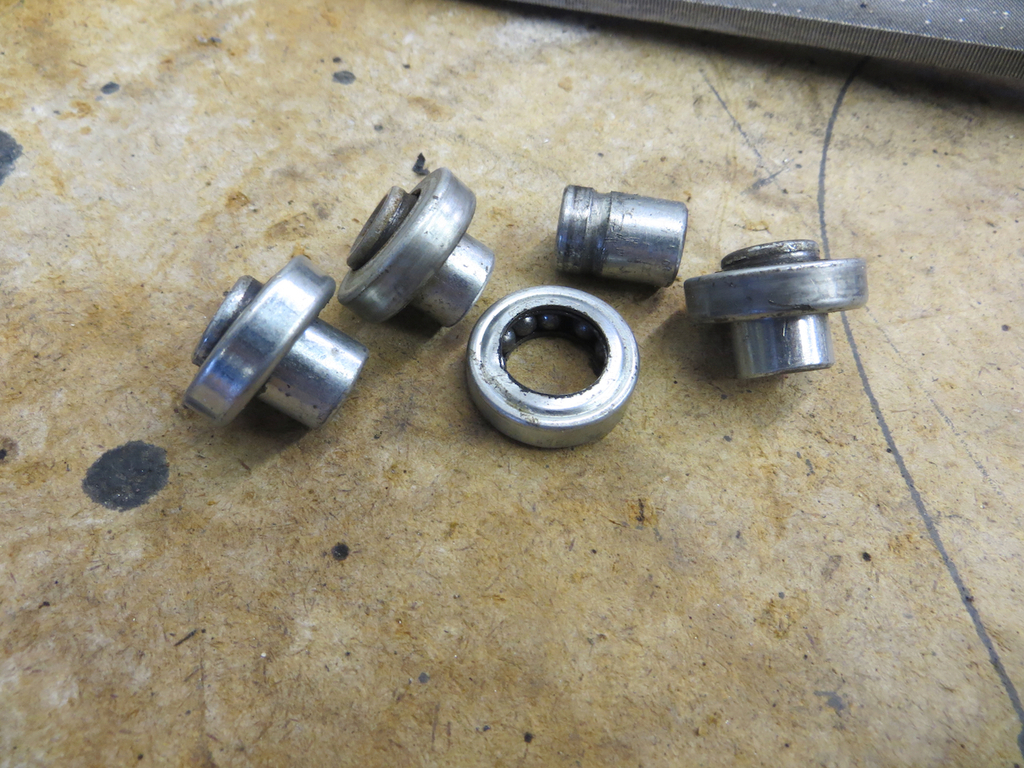 They are all sloppy and one came apart. That’s why the wheel fell off. I needed to reduce the thickness of the new axle to get the new bearings on. Thinking about some of the ideas on here I finally did this…  Basically I spun the axle in the drill and ran it on the big sander that I’d clamped to the bench. This didn’t work quite as well as I’d hoped. I got the end thin enough to slide the bearing on but needed to take a little more off further back. That over thinned the end marginally. But not by enough that I’m going to worry about it. It’s a £15 trolley at the end of the day. New bearings in the wheel, wheel on the axle.  And a couple of washers to space the wheels off the frame. On the outside of the wheel I needed some way to hold it all together. The original axle had a screw in the end to hold the bearing on. That was going to be a pain in the bum to replicate so I just cross drilled it for a split pin. 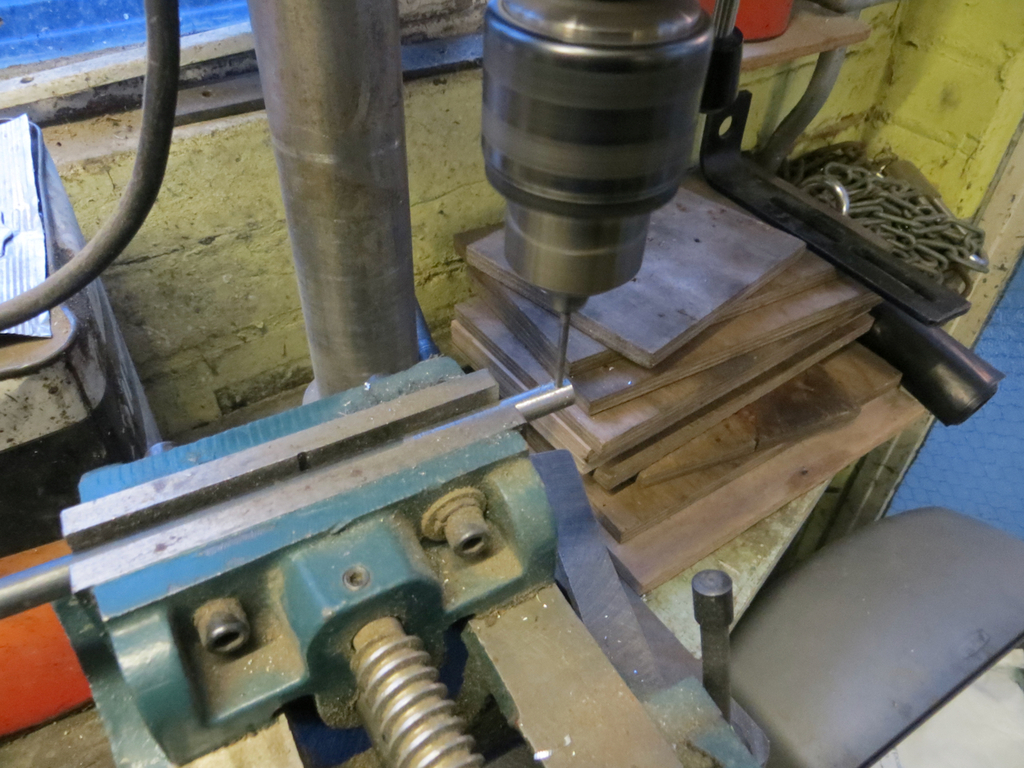 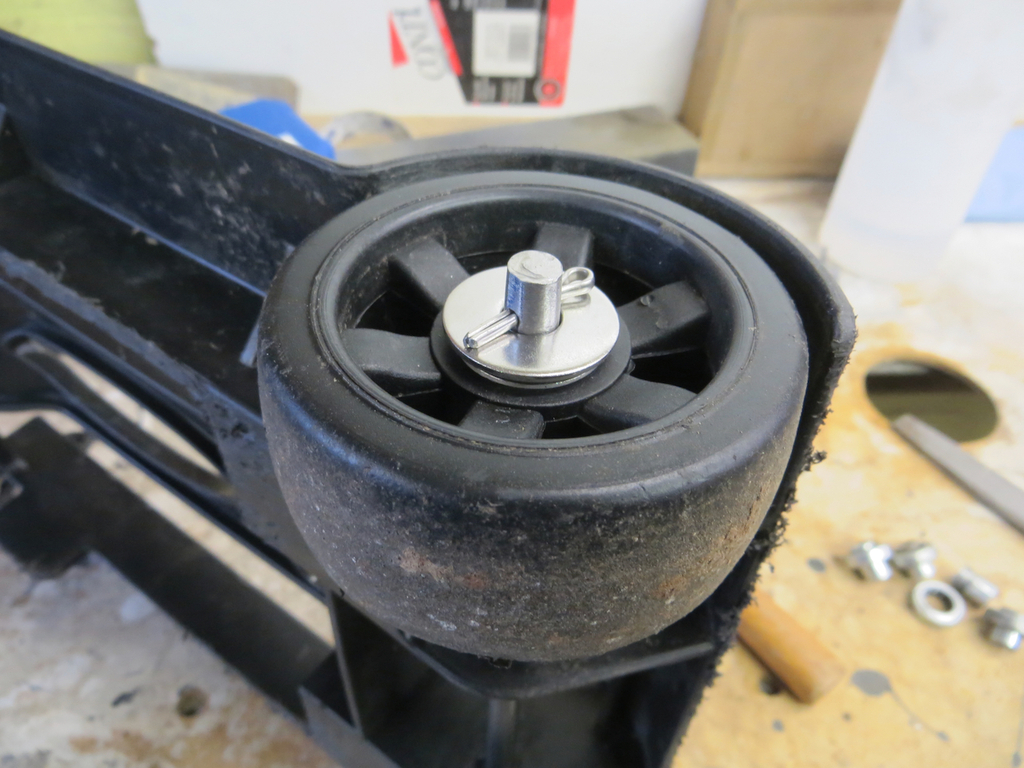 Originally the screw in the end of the axle only held the inner race on. So when the outer bearing failed the wheel just came off the axle. I’ve used a big washer (with a little one behind it) so even if my new bearings fail the washer will catch the wheel. See, Retro Rides, the best forum for modified Halfords Trolleys. 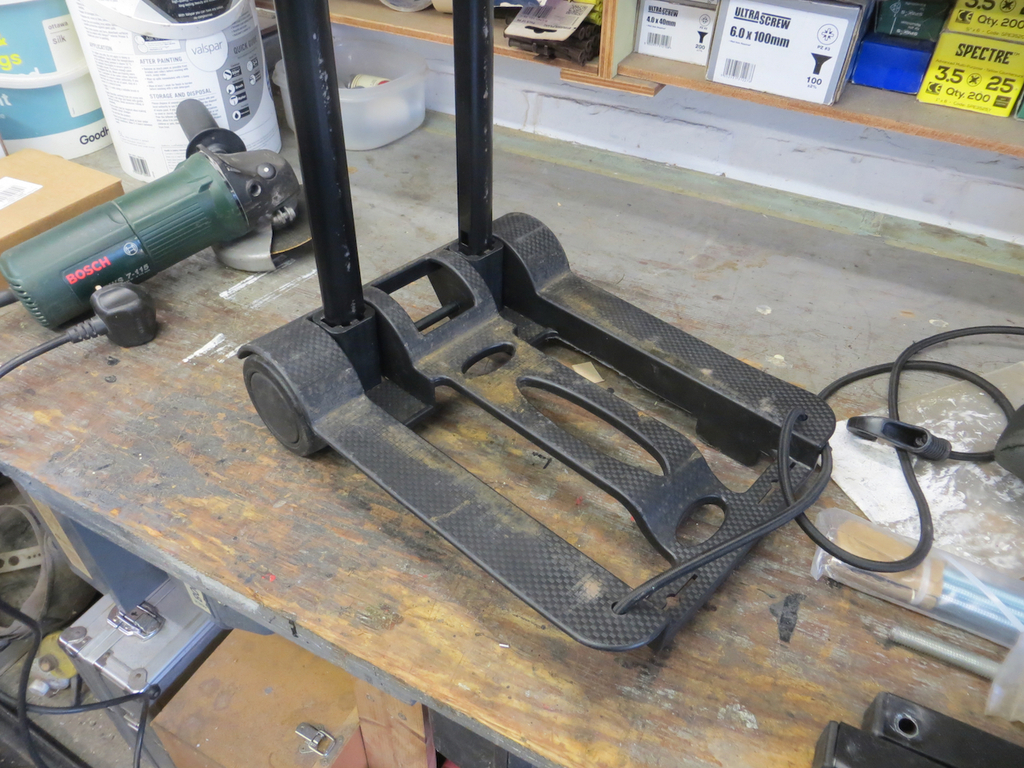 All ready for its next trip to the bus where I’ll treat it with respect and not overload it with tools. Not! James |
| |
|
|
|
|
|
|
|
Mar 18, 2024 20:18:22 GMT
|
|
Oh of course. I'd temporarily forgotten that the air intake runs right round the boot. It must take a fair bit of space out of what's already not that big of a space.
It's interesting that Mr T felt it was better to get cold air from the opposite side of the car than to take warm air from the engine compartment. I guess you might get a bit of air ram effect from the side scoop on the later cars to help things along.
I know there is low pressure on top of the engine cover and air is drawn up through the vents. I wonder if there is lower pressure under the cover too. Can't imagine why unless the design of the under tray sucks air out of the engine bay.
Hmmmm. Need a manometer (and a working car).
I'm also wondering what would happen if you took a tube from the just behind the fan on the drivers side vent across to the air filter on a MK1a. I think the only way to route that would be across the top of the exhaust manifold so it may defeat the object of the exercise.
James
|
| |
|
|
|
|
|
Mar 17, 2024 18:54:27 GMT
|
|
I hate to be the one to ask the stupid question but I guess it's my purpose in life.
What are they?
I'm guessing hoops for a canvas top. But I'd think you'd need a couple more of them. Might be cool and it would keep the rain off your crane.
Or maybe they are to make a roll cage for when you want to rag it sideways down a country lane?
James
|
| |
|
|
|
|
|
|
|
|
Ay up Dan, I just read your latest post.
Oh man, that's good. Really impressively good. If I'd done that I'd be wondering about painting it with some colour flipping pearl stuff with a million coats of highly polished lacquer. And that would look silly unless you slammed it, put moon eye hub cap things on, hot tub on the back, and so on.
As other have said, you are showing infinitely more love and care than VW would have taken when they built it.
Really nice.
James
|
| |
|
|
|
|
|
|
|
Interesting, the side trims are different on the 1b  are you going to paint them (mdf tends to swell if it gets damp) You mean the bits stuck to the inside of the wings? They seem to have done a lot of detail changes between the early and late cars. Yes, one day I plan to paint the mdf. Or possibly get a piece of fibre board and recreate the originals. But mostly I'm hoping that I've actually fixed all the leaks and the damn boot will stay dry now (apart form atmospheric moisture of course). James |
| |
|
|
|
|
|
Mar 15, 2024 22:24:27 GMT
|
I’ve got wood. All over the house. Behind the sofa, on the bedroom floor. All over. “Got wood” means what? You’re joking right? Nah, I don’t believe you. It’s white oak. What’s that a euphemism for then? So anyway, there are bits of oak around house stabilising the moisture content. I need to turn it into architrave and a reveal for the front door. This means I need to empty the garage so I can get the big woodworking tools out some time soon. What’s cluttering up the garage then? 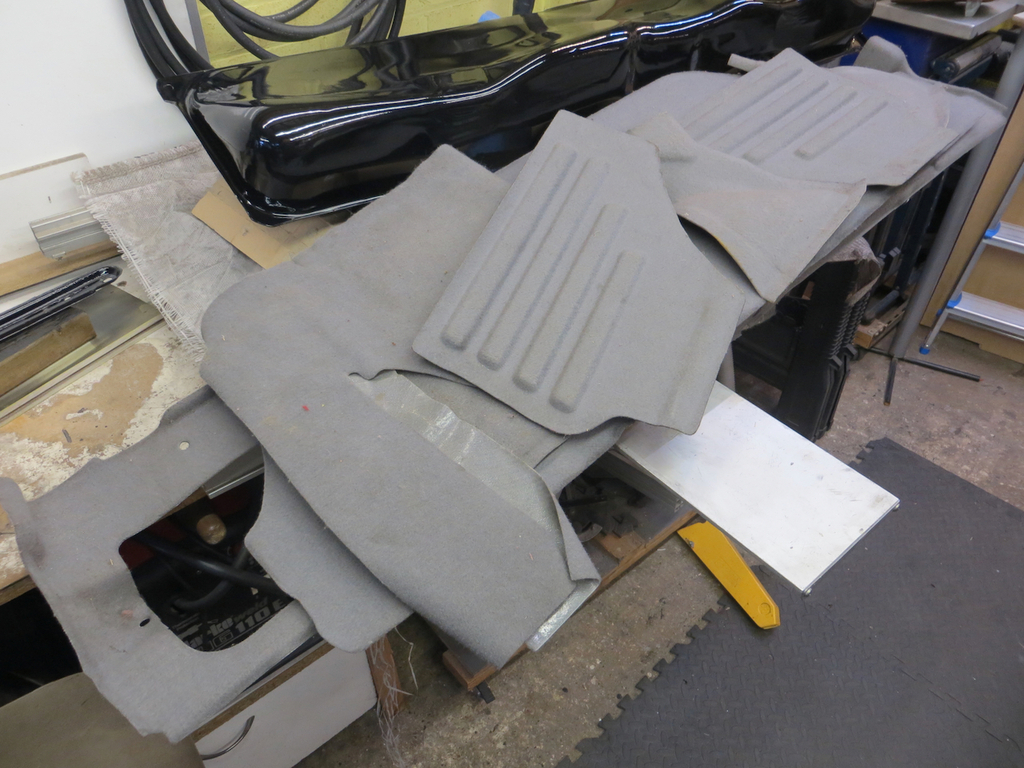 Ah yes, that’s the trim from the boot. That could go back in but it needs a clean first. We aren’t putting dirty trim back in the boot are we? Strangely it was cleaner than the car headlining. Still it’s getting shampooed.  Mr Toyota used a fair variety of substrates for this stuff. Some of it is on a thin foam type stuff, some on fibre board, plastic backed carpet, harder moulded plastic… It all looks the same. 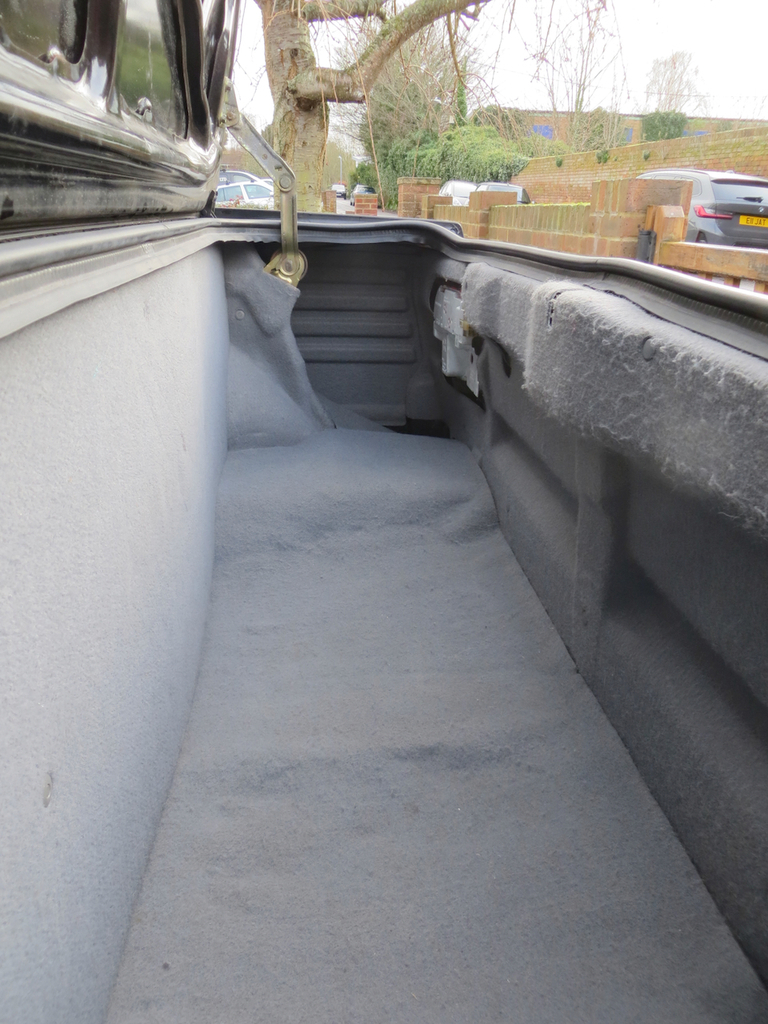 I need to get some trim clips if I can find them. I have some from Amazon but I think they’ll be too big and / or the wrong colour when I get round to trying them. At each side of the boot is a well, you know, the bit that collects water when the boot leaks and then drains it on the floor when the bit behind the rear wheels rots away? The boot carpet just falls down the hole. It really needs a bit of fibre board to hold the carpet up. And to stop stuff getting lost down into the well. As luck would have it old Mr Toyota also thought this and had the same idea. 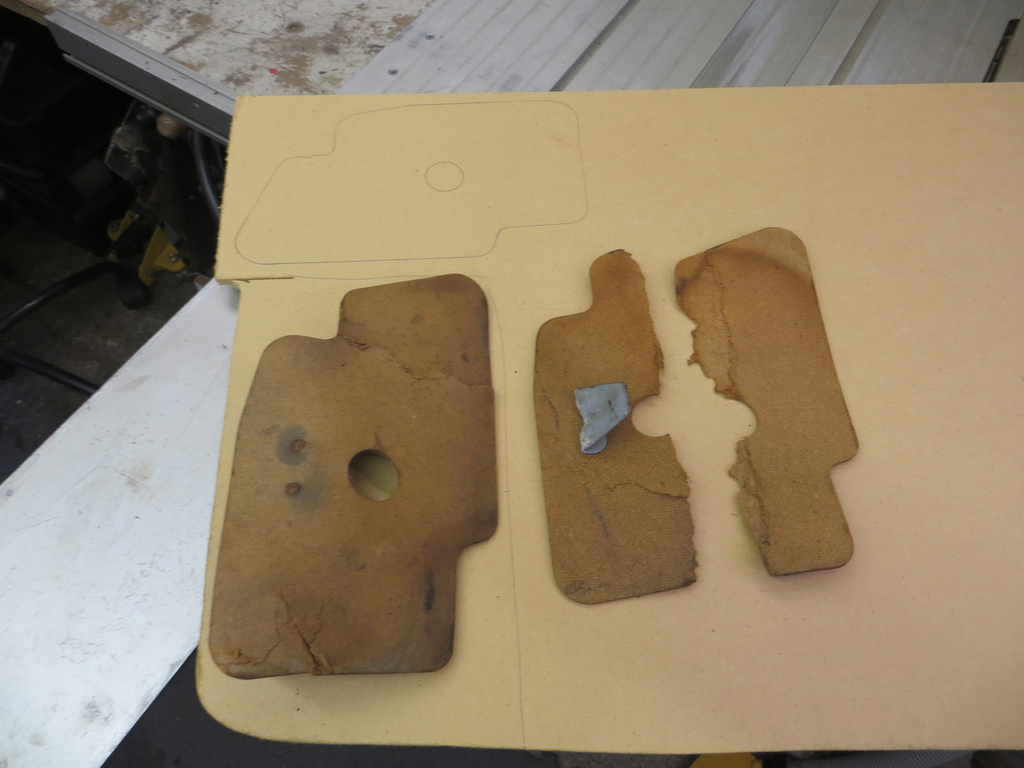 The newness has worn off mine. The one from the drivers side is a bit crinkled and the one from the passenger side got broken in two when the car’s previous owner smashed the rear quarter into a post. I suppose that the well it used to cover ceased to exist and the bit of fibre board automatically re-dimensioned itself. I don’t have any fibre board but I do have some MDF that’s a few millimetres thicker. Let’s make some new ones. I cut two rough shapes and stuck them together back to back. Then I could sand both to the final size at the same time. 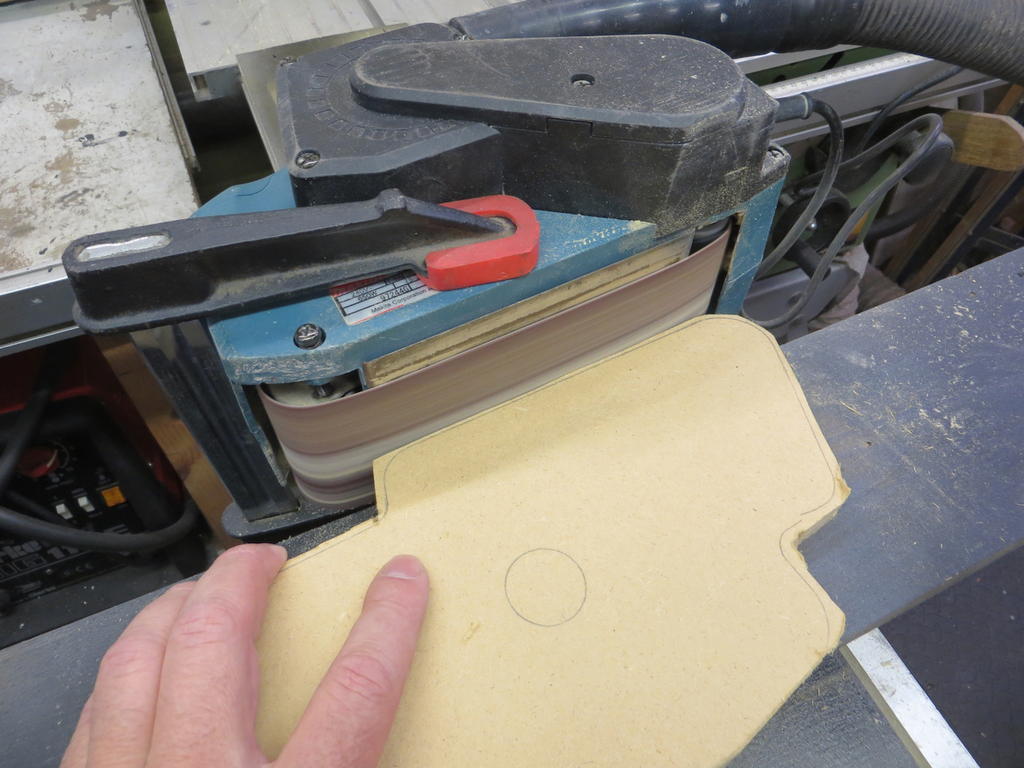 Once done I drilled the finger holes and the mount holes for the metal brackets. Then I could split the pieces apart and screw the brackets on. 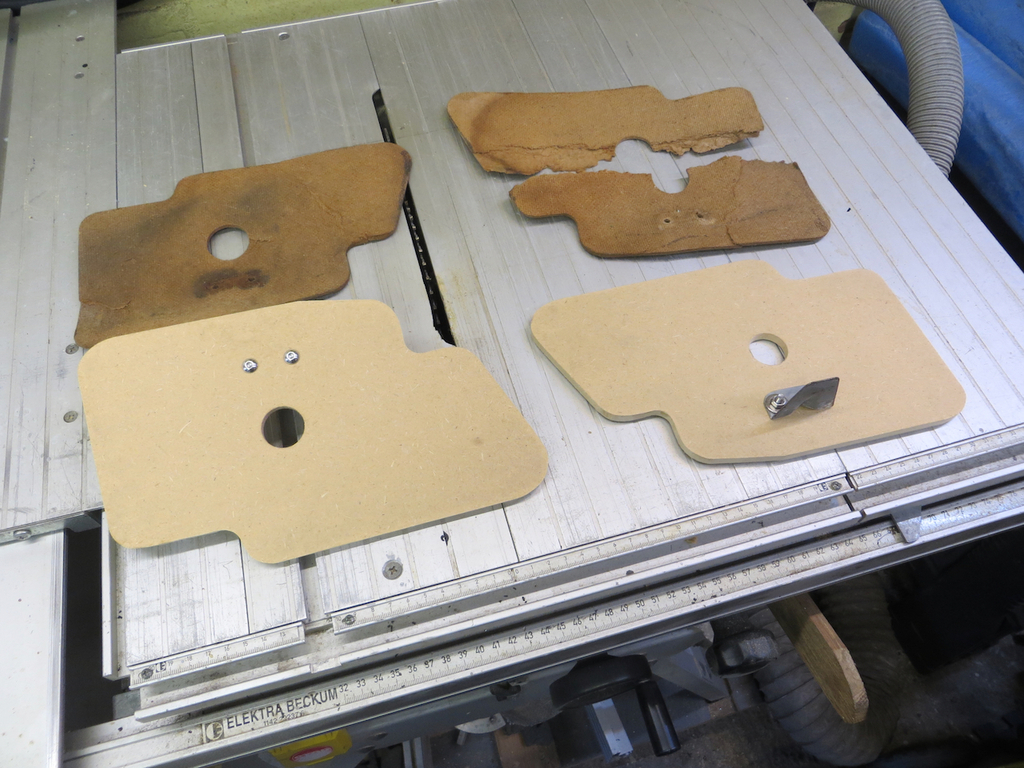 I’m not done with these. I want to zinc plate the brackets and I think I’ll paint them black and use a bit of cloth tape round the edges. For the moment they’ll do and they get some more bits out of the garage. 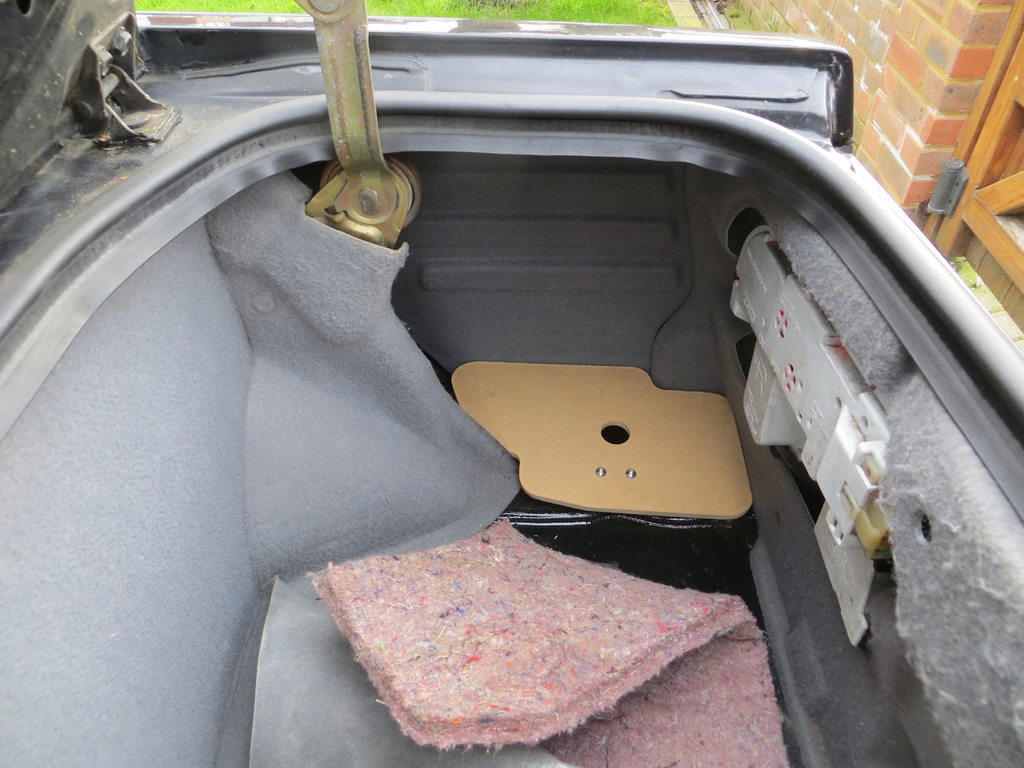 That looks ok to me. What da ya think? Smashed it out of the park I reckon. Well, tapped it across the garden and landed it in the pond maybe. James |
| |
|
|
|
|
|
Mar 15, 2024 20:22:03 GMT
|
You’re welcome to come over and use my lathe if you want. That's very kind of you to offer. It's only a £15 trolley though so that might be a bit over the top. Let me try on the grinder and if I can't do it reasonably well I'll let you know. Good luck 🤞 How much do you need to take off it? Jolly good question. I didn't know so I measured it today. It's 0.3mm oversized so not a lot. James |
| |
|
|
|
|
|
Mar 15, 2024 20:14:56 GMT
|
See, I can prevaricate just like sweetpea  I was trying to not draw attention to my slow progress and you go and point it out to the universe. Cruel or what?  Not to worry, I'll get right on with it just as soon as I've finished the bed, done some bus home work, fixed my trolley, and done a load of woodwork. Oh you might have a point... |
| |
|
|
|
|
|
Mar 13, 2024 20:56:07 GMT
|
|
I have a bench grinder with a fine wheel in it. I was planning to put the axle in the battery drill and rotate it against the bench grinder. I've only got enough rod for one shot at this so wish me luck!
|
| |
|
|
|
|
|
Mar 12, 2024 21:36:57 GMT
|
|
I miss old George and his sense of humour. Some people are taken from us far too early.
Often wonder how the family are doing without him.
James
|
| |
|
|
|
|
|
Mar 12, 2024 21:24:19 GMT
|
Skateboard wheels ? Or perhaps scooter. Same little tough & cheap bearings. James TY Ooh, mate, you couldn't be much closer without being totally right. I'm dead impressed. I'm keeping the wheels but they will take skateboard bearings. Those are tough (I hope) and cheap as chips. I've got a pack of ten so I have loads of spares. The only problem is that when you take the old bearing races off the axle the axle is too thin for a skateboard bearing by about 1.5mm. However I have a piece of 8mm ish rod. It'll need kissing on the grinder to get the bearings on but it'll work. If only I had a lathe. And the holes in the trolley will need drilling through to take the thicker axle. I need a way to hold the wheels on but I think I'll just cross drill the axle and put a split pin through with a washer behind it. That's the plan. That said... I was in town today and there was a wee lass on one of those little scooters. It had wheels with LEDs in and I thought... Hmmm. Wouldn't I look cool with my illuminated wheels on my trolley. Yeah? Yeah? James |
| |
|
|
|
|
|
Mar 11, 2024 21:09:16 GMT
|
Well, I hear you cry, what’s going on at Sweetpea towers? I did hear you cry that didn’t I? No? Well tough ‘cos I’m going to tell you anyway. Let’s start with Mr Ratty and the shed. Last we heard I’d emptied it and jet washed it all down. Now it’s painted shiny white. 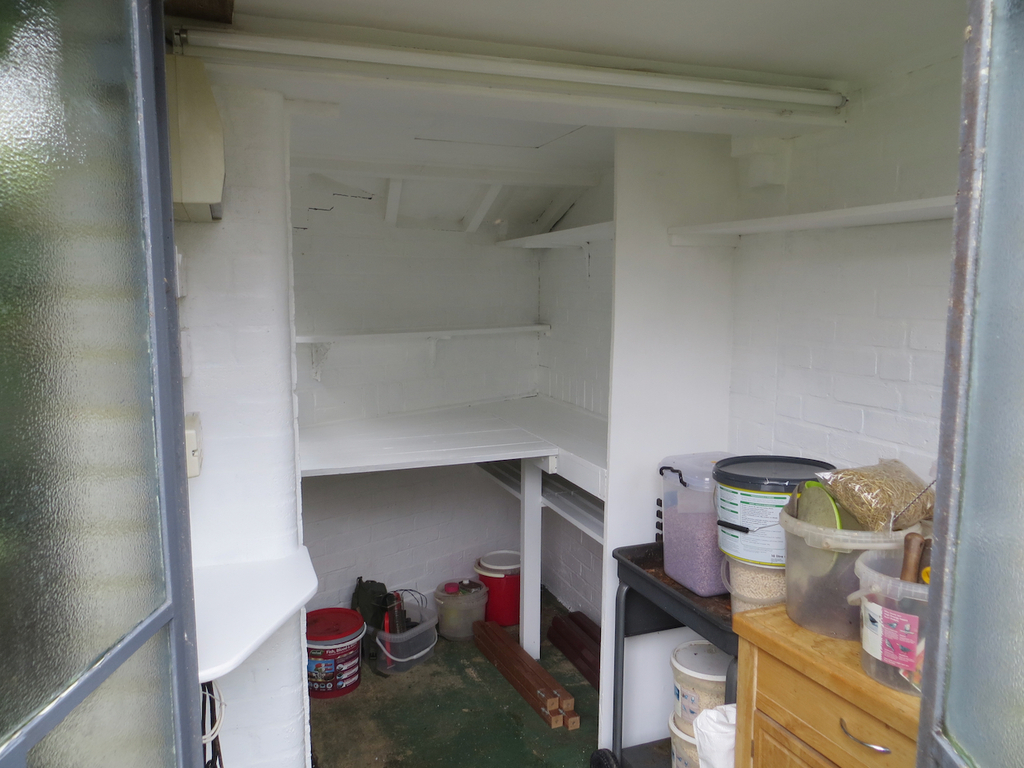 This, I have to tell you, was a right pain in the bum. It’s not been the best painting weather and the shed is always in the shade. It’s also damp so in general it’s cold and wet in there. I put the first coat on and 2 days later it was still wet. I don’t mean tacky, you could have wiped it off the walls and put it back in the tin. The second coat that I put on this weekend is still far from dry. Maybe it'll be ok by the summer? Poor Mr Ratty has lost his home. And his landscape gardening project playing with my bags of sand. And I’ve lost a couple of weekends cleaning and painting it. In fact the only person who has done well from this is Mrs Sweetpea who had her shed tarted up. Meanwhile, back in the garage… 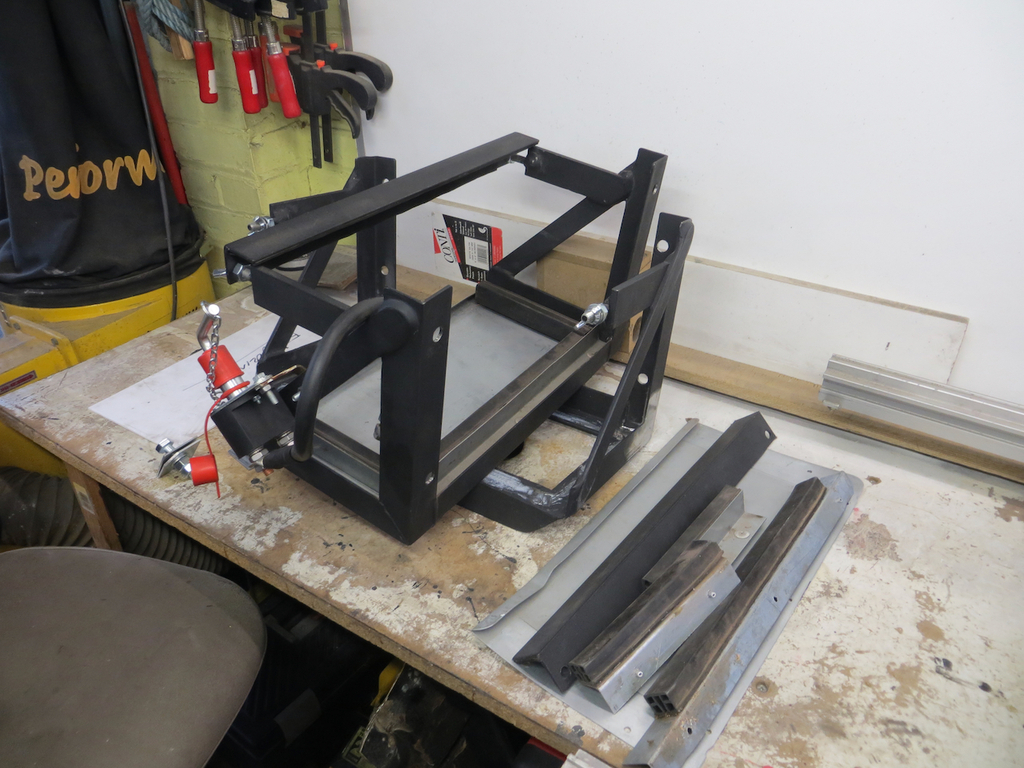 I now have both battery trays off the bus. I’d brought one home after the last trip and now I have two. Does that mean I’ve had another visit to the bus? Yes, yes it does. In fact I’ve had three weekends on bus duties.Two weekends under it and one at The Friends Of Chatham Traction AGM in between. I think I deserve a gold star for my dedication. Anyway, there’ll be another bus post coming along just as soon as I get round to writing it. Also in the garage I have a bed. 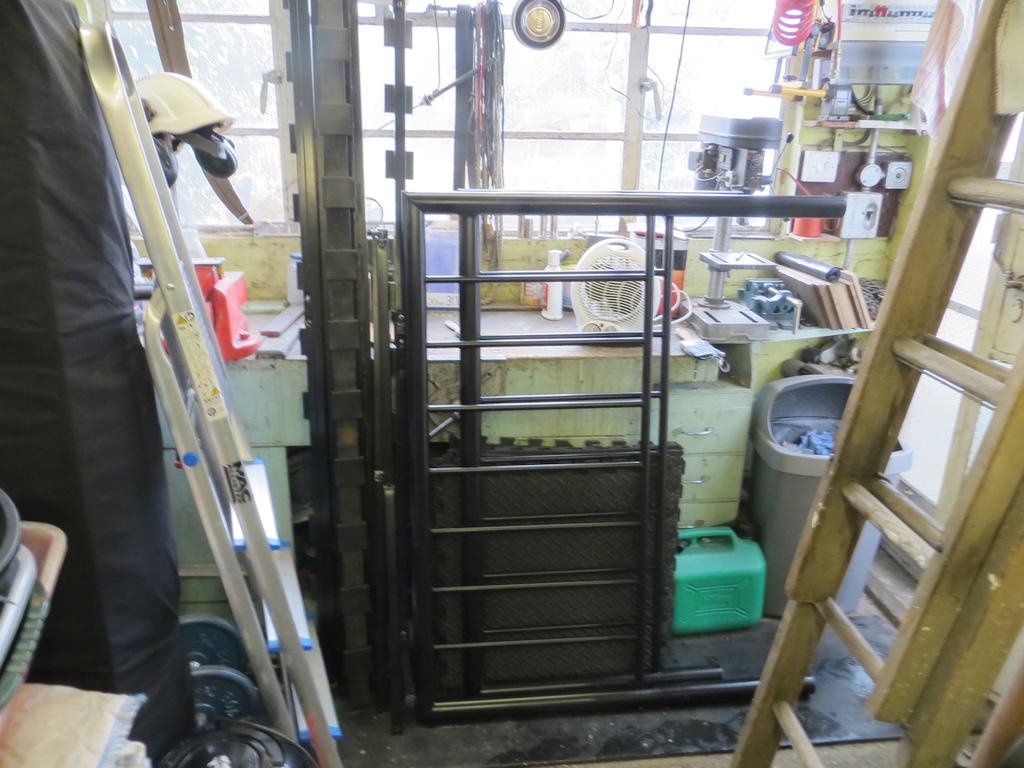 Sadly I don’t have room to set it up in there and snooze in it as much as I’d like to. This is the old "make one bed out of the wreckage of two" job. There is a rail that runs along the centre. All the wooden slats land on it. Well that rail always gets bent. I imagine it’s due to, er… due to, well, er, over enthusiastic sexual activities? I wish I hadn’t started that train of thought. It belongs to my 85 year old neighbour too. No it’s alright, it doesn’t really. I made that bit up. She’s 76. 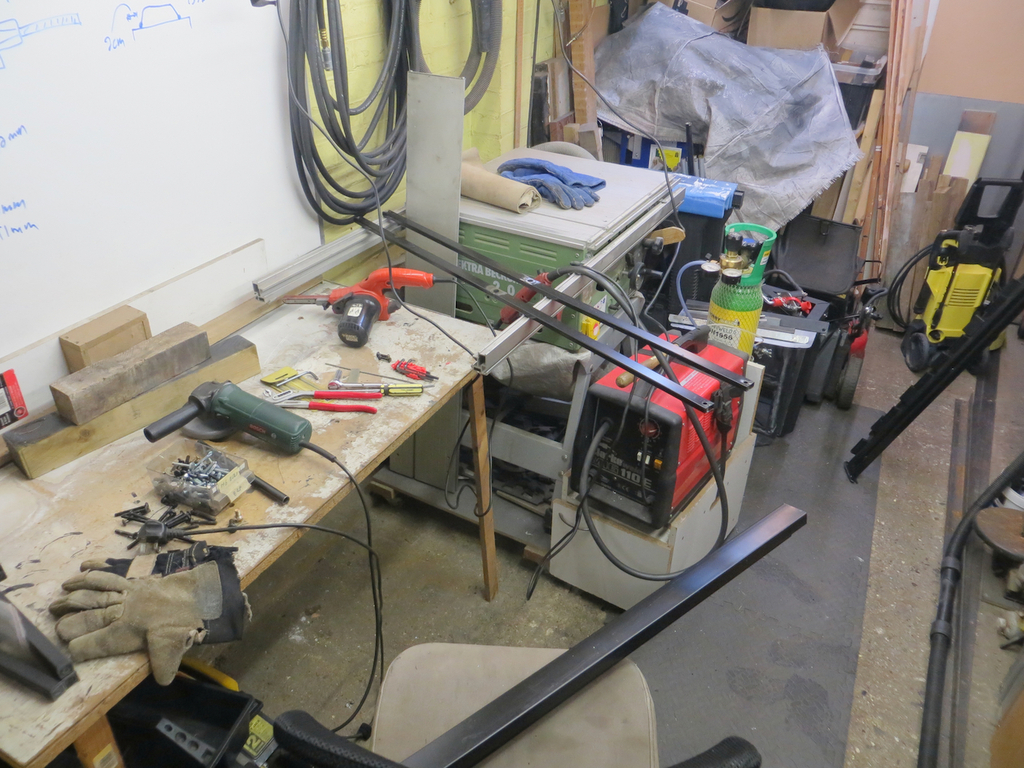 Not to worry, it’ll soon be stronger than when it was new. I have a trolley. A sort of fold up sack barrow thing. When I visit the bus garage there is very limited parking on site so I leave the car just up the road and cart my massive tool boxes around on the trolley. Looks like there was one too many spanners this time. 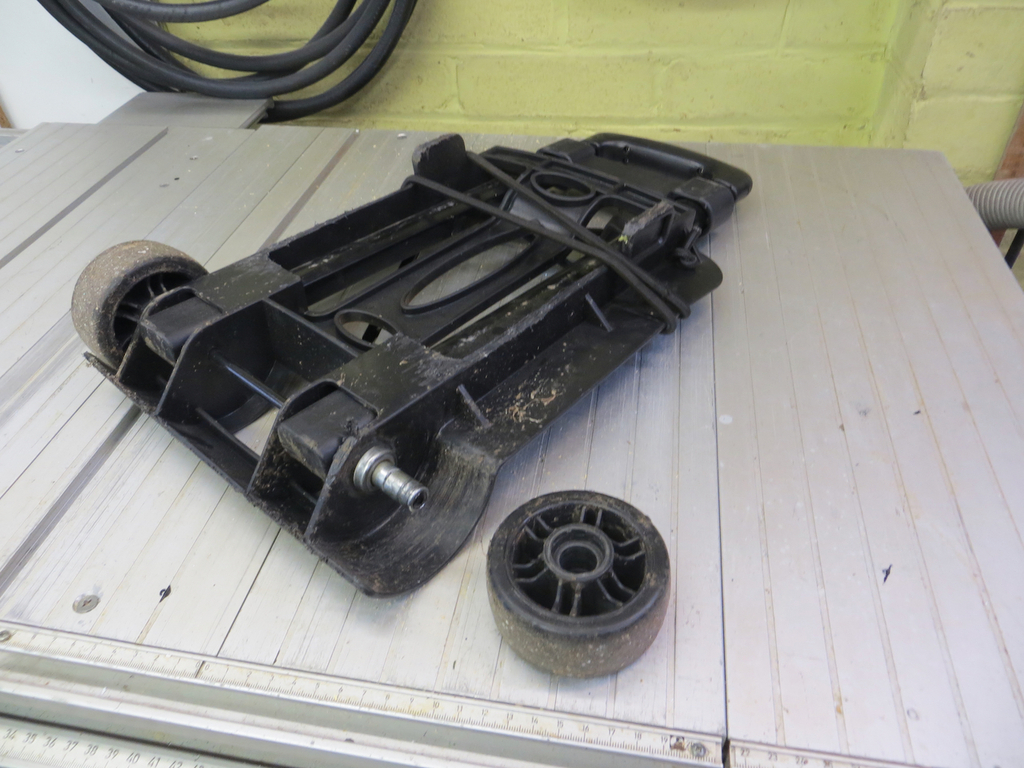 Well that wilts your blossoms doesn’t it? I’m quite fond of this little thing. The trolley came from Halfords and cost about £15. The first one I had took a huge amount of abuse before the bearings collapsed and the wheel fell off. This one hasn’t done quite so well but I’m still quite impressed with what it deals with. So we’ll be off to Halfords to buy a new one? Like hell we will. Hold onto your knickers chaps, but we’ll be fixing this one and, hopefully, upgrading it so it can better cope with my unreasonable demands. James |
| |
|
|
|
|
|
Mar 11, 2024 18:36:26 GMT
|
My ..... What a big schwitzer you have......... 🤔😮 Or a really smalll head. |
| |
|
|
|
|
|
|
|
Maybe you could also stencil your name & date on it as well, should put off putting it back in the car for several weeks Oh, that's a shame... I put it in the car at the weekend. (See note below.) (Note below)  |
| |
|
|
|
|
|
|
|
My Austin has no dampers whatsoever, and similar multi-leaf, semi-elliptic, spring packs. On my one, short, drive of the thing, I certainly didn’t think “oh my, this thing is really under-damped”. 🤣 My MR2's dampers are a bit beyond their prime. It feels a bit 'floaty' at motorway speeds. Maybe you needed to get you boot down a little to uncover the Austin's driving dynamics? |
| |
|
|
|
|
|
|
|
You are a complete nutcase, Sweetie. Thank you teaboy, from you that is a wonderful compliment! |
| |
|
|
|
|
|
|
|
I'm not sure any rust treatment will kill rust reliably. I've not found one that does. But I reckon, for the tank, I've got as much rust off as humanly possible and then I just need to keep water and oxygen away from it. The paint pretty much does that but I doubt if a coat of Hydrate 80 is going to hamper that. With a bit of luck it'll slow things down so that I'll not have to worry about it again. It's an interesting topic though. I've been using rust killers for years and none of them kill rust dead. But I think the bigger problem was that, in the olden days, I had no way to remove the rust properly or to get a paint coating that would protect it in the long term. Those were the days of bunging the hole up with body filler and slapping some paint over the top. My techniques have moved on a bit since then. I hope. Anyway... I suppose I just need a nice day and I can get it back on the car. Except… Except? Except what? Apart from the weather what’s stopping you putting the tank back in the car? Well, er… Here’s a photo of the tank taken the first time I removed it. What’s that I’ve circled in red?  Some numbers printed on the top? Let’s take a closer look. 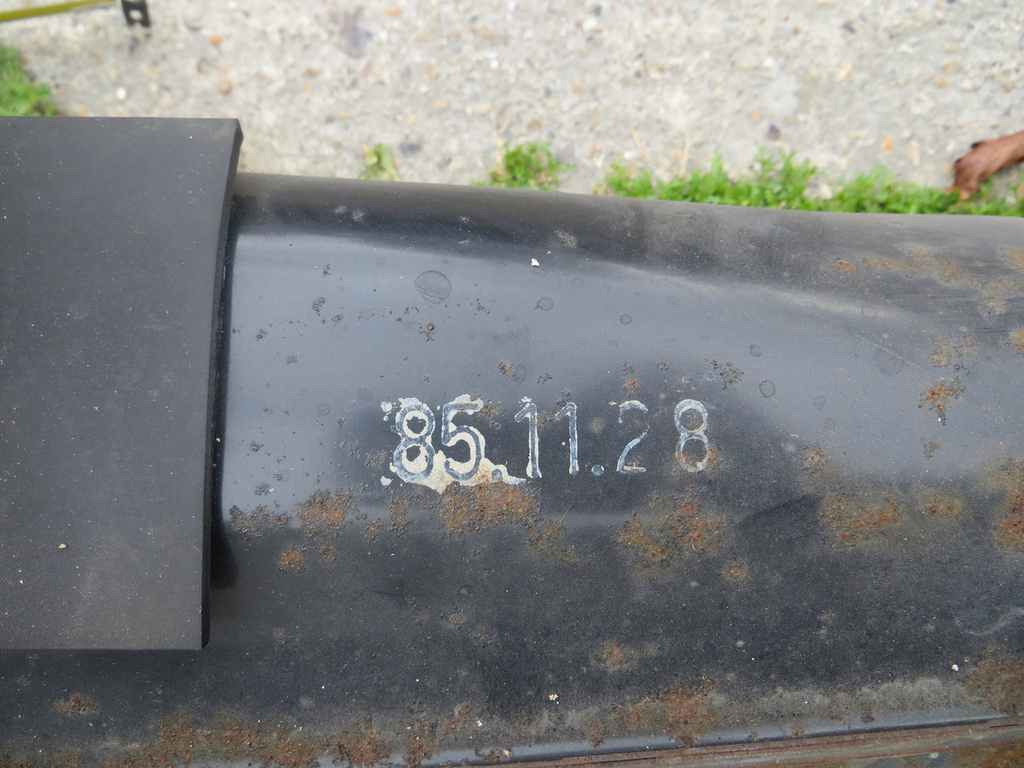 Oh, ok. It’s the date the tank was made. The 28th of November, 1985. Well it’s gone now. I scrubbed it off and painted it a shiny black colour. No… Don’t tell me… You’re not going to fit the tank because you want to stamp the bloody date back on the top!? I mean, it’s on top of the tank! Nobody can see it. Even if it was on the bottom it’s behind splash shields and nobody could ever see it… You are, aren’t you? You are going to stamp the date on the top again. Oh man, this bloke’s got issues. Well, a man doesn’t always need a good reason to do something and I’m going to prove that now. The original date was stamped on. Not brilliantly accurately either. I don’t have a stamp, I’m not going to buy one, and I can’t work out how to make one with reasonable accuracy. So we are going to do something slightly different that pays homage to the original. Something that they might have done if they hadn’t used the stamp. A few years ago I’d played with stencil fonts so I wondered if I could print the date on stiff paper, cut out the black bits with a craft knife and spray through it. I messed about with this idea for a while but the problem was going to be accurately cutting the black bits away. Then I realised that Helix, the people who make plastic rulers, also make plastic stencils. You can buy a set of 3 in different sizes. I know this because I bought a set of 3 in different sizes. All I had to do was to stick the stencil on the tank and mask off the appropriate digit. 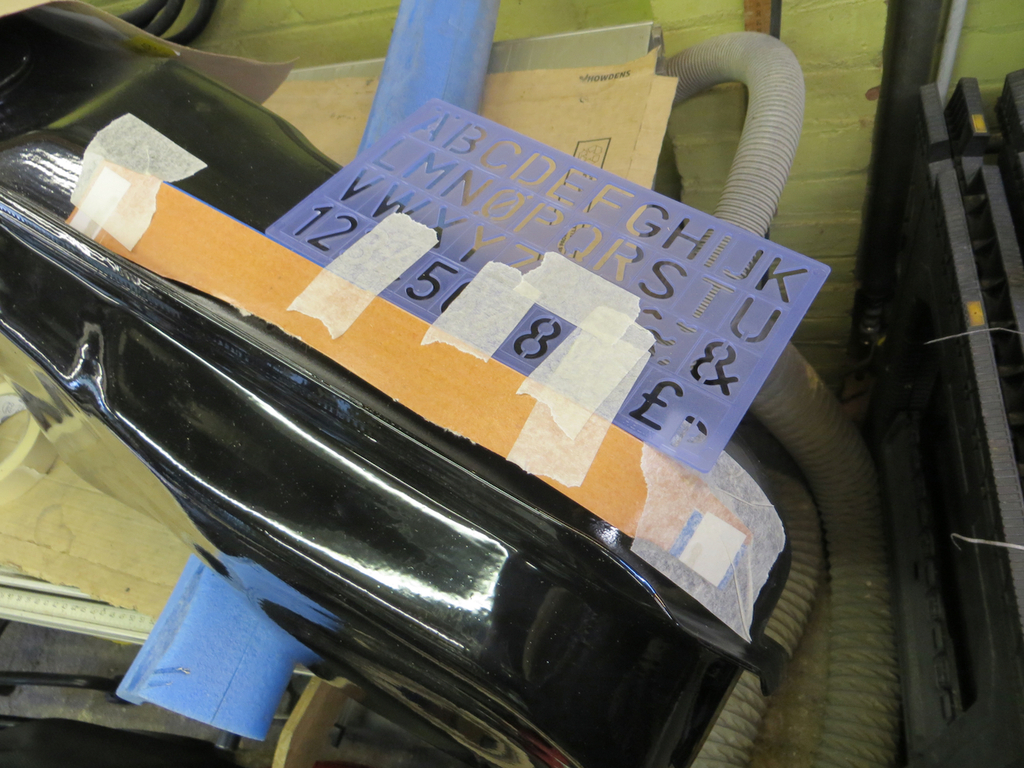 I had a piece of card with a digit sized hole cut in it to finish the masking. 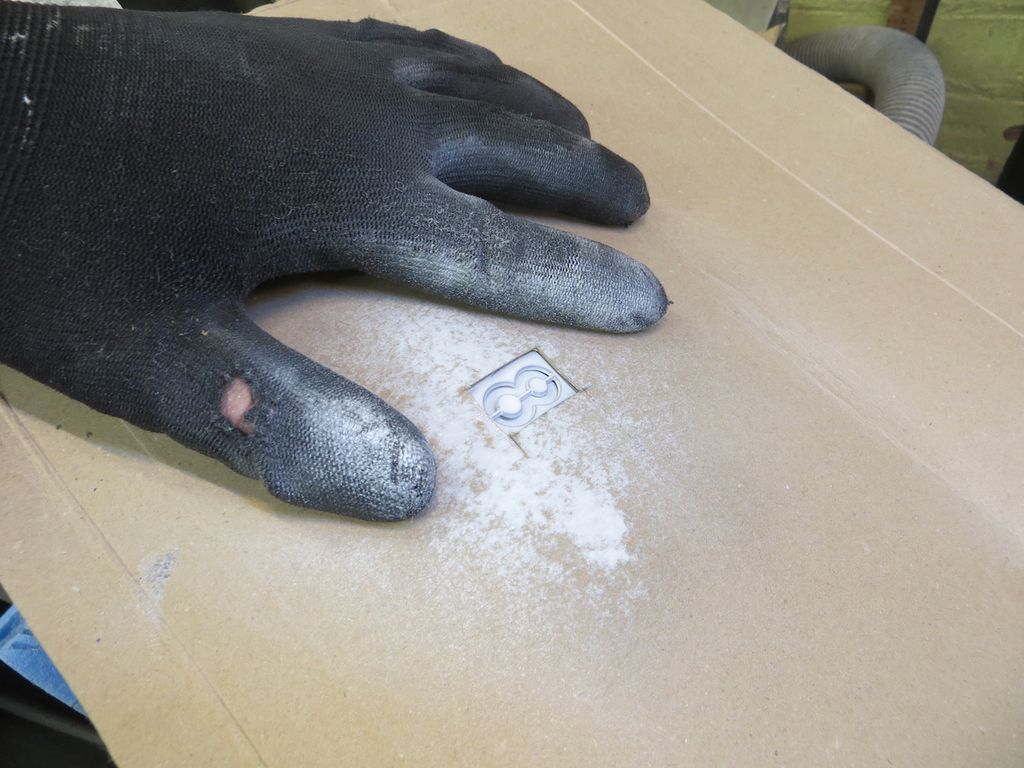 And a glove to avoid painting my hand white. The only problem with this method was that I had to spray a digit and wait for it to dry before spraying the next one. The whole process took about a week. So how did this pointless exercise turn out? It turned out like this. 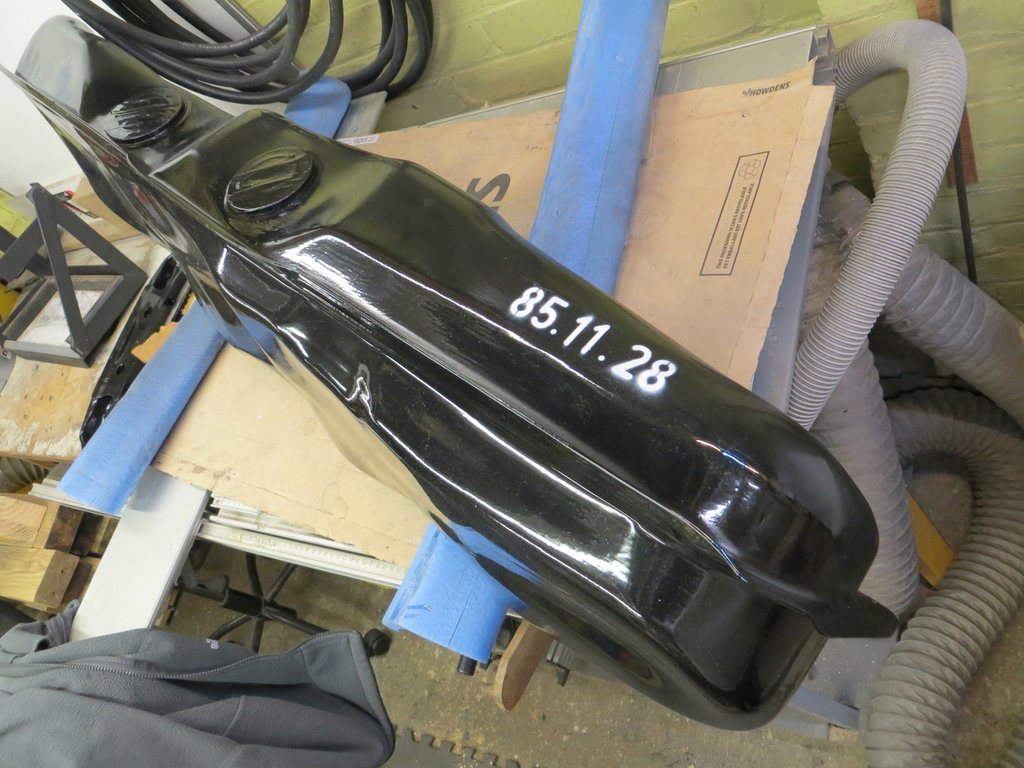 There is a bit of blow under the stencil but that sort of reflects the feel of the original stamp so I’m happy with it. I could have wiped the paint off and done it again if I’d really wanted to. And let’s face it, nobody will ever see this again. But I’ll know it’s there and so will you so that makes it worth it. Please tell me we can put the tank in now? James |
| |
|
|
|
|
|
|
|
mk2cossie , Being the sort of person I am... (Specifically I'm the sort of person who looks in the scrap pile to see what I can repurpose) ... I hadn't thought that I could just buy a hold down for peanuts off the interweb. Thanks for putting that idea in my head. I still might search the scrap bin because that's the sort of person I am. dampers 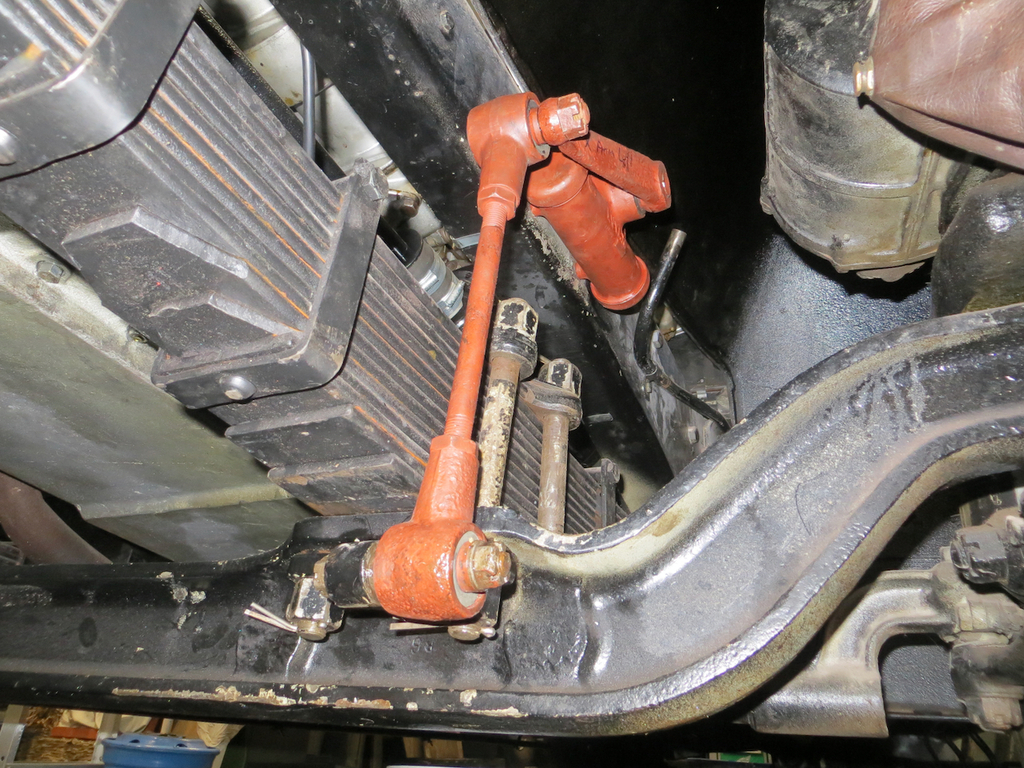 I'm fairly sure those dampers are just for decoration, them's some proper old spring packs! I'm fairly sure you are right. I remember discussing this years ago with Ian and he reckoned that a fair amount of the 'suspension' is actually done by the sidewalls of the tyres. 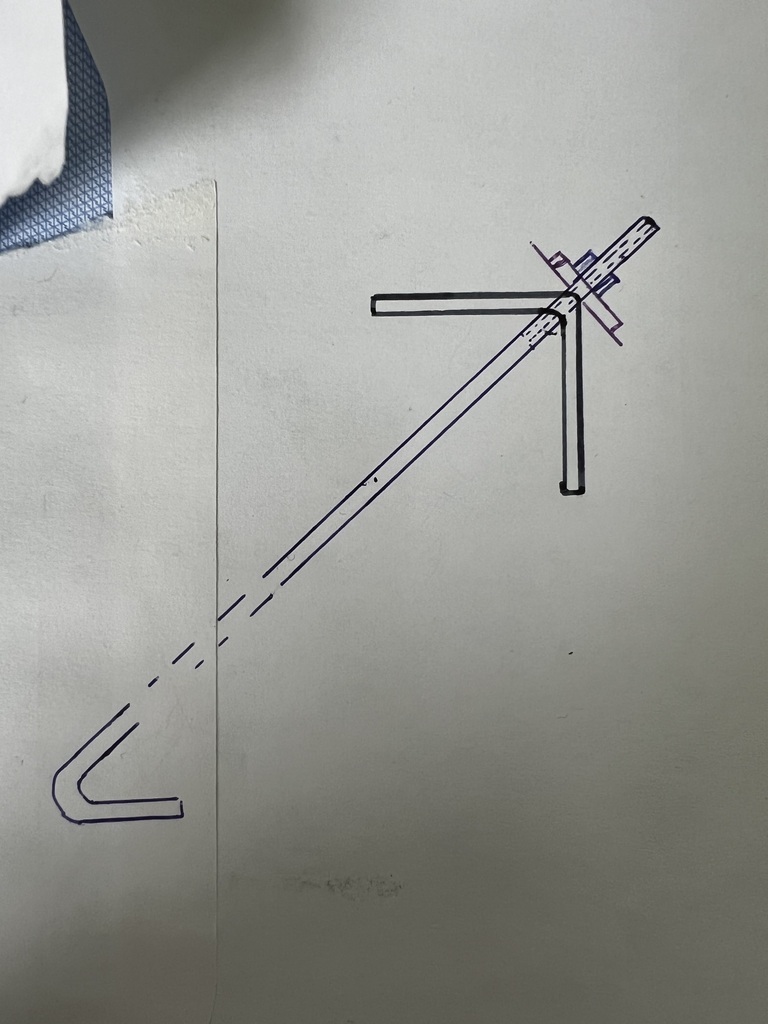 Back of an envelope sketch for things as bored and avoiding work. Your 'back of an envelope sketch' is better than my dreams. It's possible I need better dreams. Some people don’t want work! Too old to work, too young to retire.
|
| |
|
|
|
|
|
Feb 27, 2024 19:02:02 GMT
|
|
Ay up James the-differently-aged,
Yes that's roughly the plan and I had clocked that seating the wing nut (or whatever hardware we end up with) on the corner of the angle would be the tricky bit. Especially if I want to accommodate different battery heights.
There is other stuff to do too. The bottom corner that the battery will pull against is just thin aluminium at the moment so that'll need replacing. And it needs more metal under it to sit on if I dump the aluminium tray completely.
James the-terribly-dashing-really-if-you-squint-a-bit.
|
| |
|
|
|
|
|
Feb 26, 2024 19:40:18 GMT
|
Why not just make a wooden? spacer strip to fit behind the battery at the top so the clamp pulls the battery against it ? EDIT Using wood packers in a battery box would be "in period" it was commonly done even up into the 80's I've worked with many battery banks that used that method to adjust for different battery dimensions Actually Jimi that’s a damn good question. It was Ian’s first thought too. My first thought was to weld a piece of angle across which would have the same effect. Here’s the thought process… Ian says there are 2 or 3 different heights of battery. As it stands it’ll only work with one of those heights where as a swivelling, across the corners arrangement will work with all the heights. The battery sits on a thin piece of aluminium sheet with a steel rail under the front edge and a cross strap under the middle. But there is nothing under the back edge or under the sides. Ian wondered how secure the battery would be when the aluminium has been coated in battery acid and road salt and has corroded away. So if we are likely to rework the trays at some point anyway then we might as well do it now and go to the effort of doing the ‘across the corners’ thing. I wondered how batteries were strapped down in more modern stuff so we went and pestered one of Norman’s mechanics to show us the vehicles in the workshop. Some have a strap across the middle like many cars do. The others have a frame that goes over the top of all the batteries and bolts them down at the corners. Neither of those work for us because we have limited access over the top. On the modern stuff they are on a tray that slides out so access is better. He did say that some of the older stuff such as Routemasters often used the ‘across the corners’ method. James |
| |
|
|
|
|


 are you going to paint them (mdf tends to swell if it gets damp)


