|
|
|
|
|
|
|
Mar 19, 2021 23:20:14 GMT
|
|
Nice job. i notice the pitch of the roof is quite steep compared to most steel sheds around here (the midlands). is that to prevent snow build up or is it done like that to match other buildings you have?
|
| |
|
|
|
|
|
Mar 14, 2021 21:00:15 GMT
|
|
I think there are a few more about than you might expect. i suspect there are about 4 or 5 roadworthy ones and 20 odd on sorn, plus a few that emerge from the woodwork and appear on ebay every so often as projects. there's a mint gold one that has appeared in practical classics which has the same CON suffix as mine and came from the same dealer and was supplied around the same time. I believe that was also a factory left hand drive car that got put beck to right hand drive before the dealer sold it, as mine was.
I'm quite close to finishing the back end of mine, i'm hoping to have another good session on it in the spring once i've got a bit more time.
|
| |
|
|
|
|
|
Nov 21, 2020 17:38:25 GMT
|
|
|
| |
|
|
|
|
|
Jun 29, 2020 15:26:53 GMT
|
|
Hi Mark.
I never really knew Jim but from the conversation i had with him is was clear how much he loved the IS and how much enjoyment he gained through owning it. but i'm sure you know that anyway.
|
| |
|
|
|
|
|
May 19, 2020 18:05:22 GMT
|
|
|
| |
|
|
|
|
|
|
|
Good work. Hate screws into that panel. Nice that the flange thing for the tailgate seal is there. Quite often they disintegrate! cheers Jim, there was a bit of corrosion on the lip behind the tow bar but that's cleaned up ok and was treated with rust converter as was the corrosion behind the driver's side light cluster, you'll see in the photos there's a tiny rust hole by one of the light mounting holes but as this is hidden by the light and not structural and also very localised i decided to treat it and live with there being a hole, welding a piece in would have been a big job, not made the car any stronger and quite possible ended up as a bit of a balls up so i opted for the lazy option on that one. considering how scabby it is it's remarkably sound really, there's even rust on the roof but the main structure is solid, it needs 4 doors and both front wings, but apart from that the main shell is mainly corrosion free as far as i can see |
| |
|
|
|
|
|
Apr 30, 2020 20:42:24 GMT
|
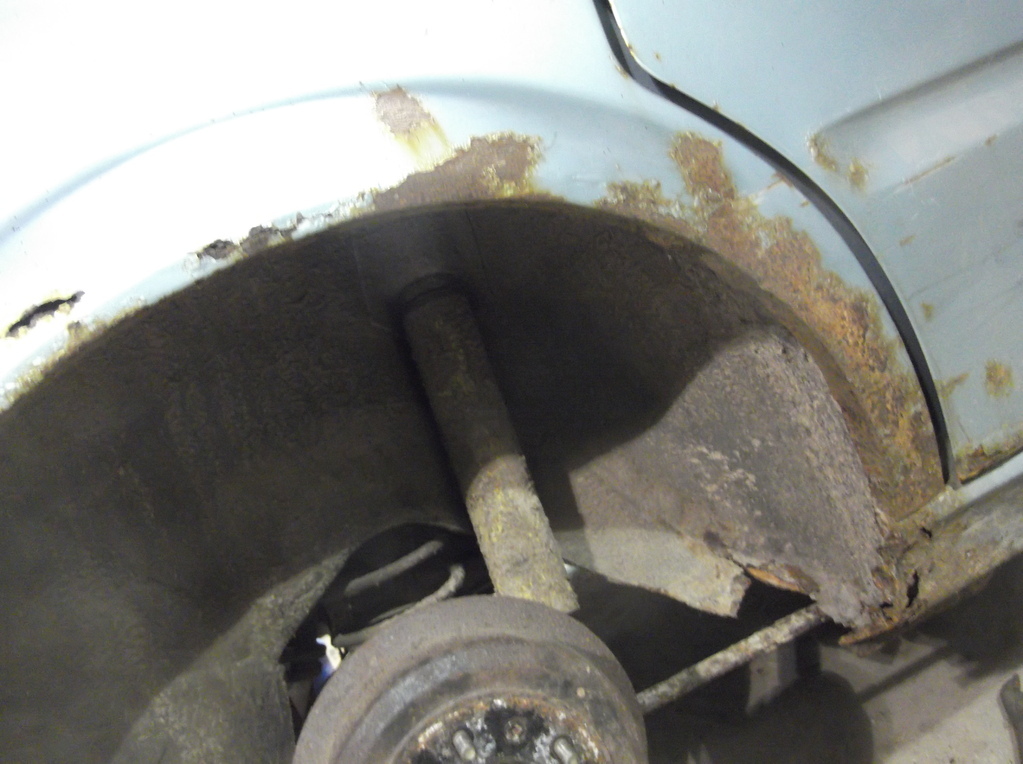
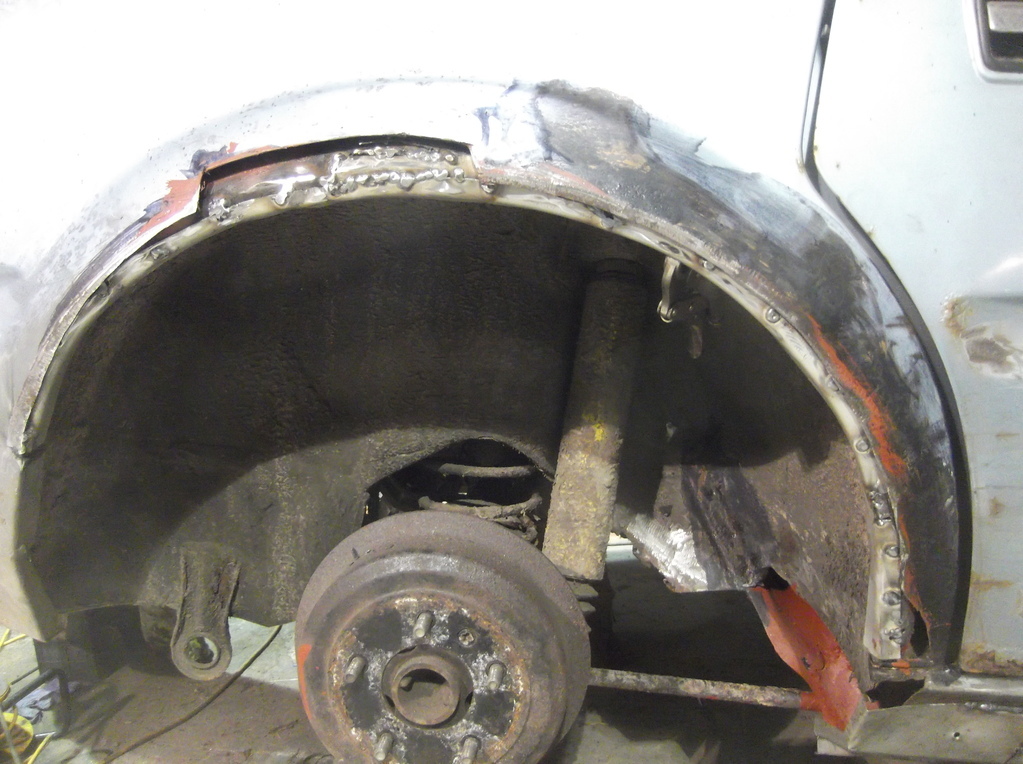
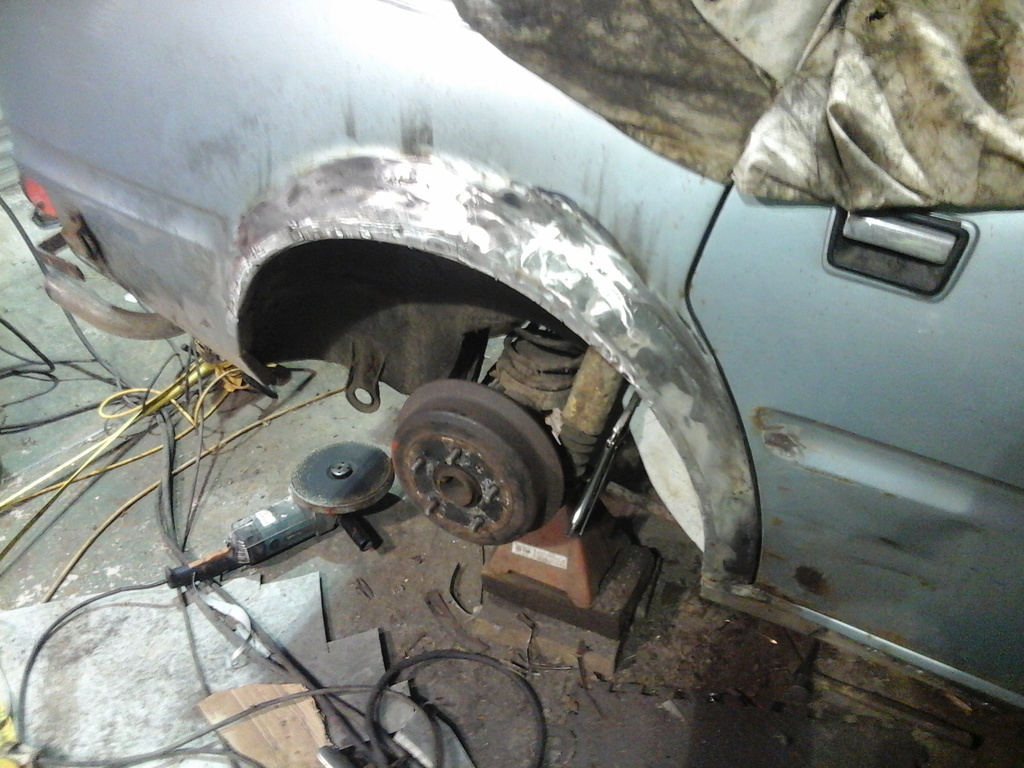
bit more done, not much as i've been too busy to get much spare time in the workshop but i've finished the sill and welding in the wheelarch and boot floor, the arch is flatted down ok as far as i can see so i'm going to epoxy prime that and see what it looks like when painted, but first i decide to tackle the rear panel as well so it could be primed at the same time. 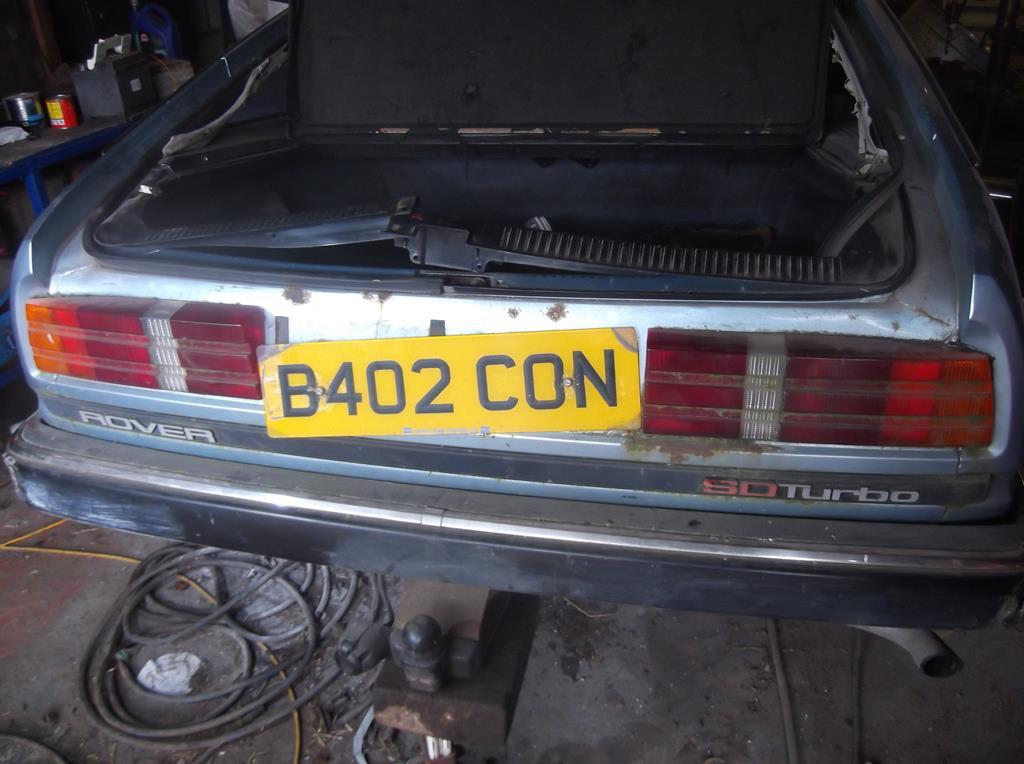 as you can see it's a bit scabby. i'm going to mneedanother rear light unit as the driver's side on was rusted up on the fixing bolts and they pulled out of the plastic housing and ended up getting cut off 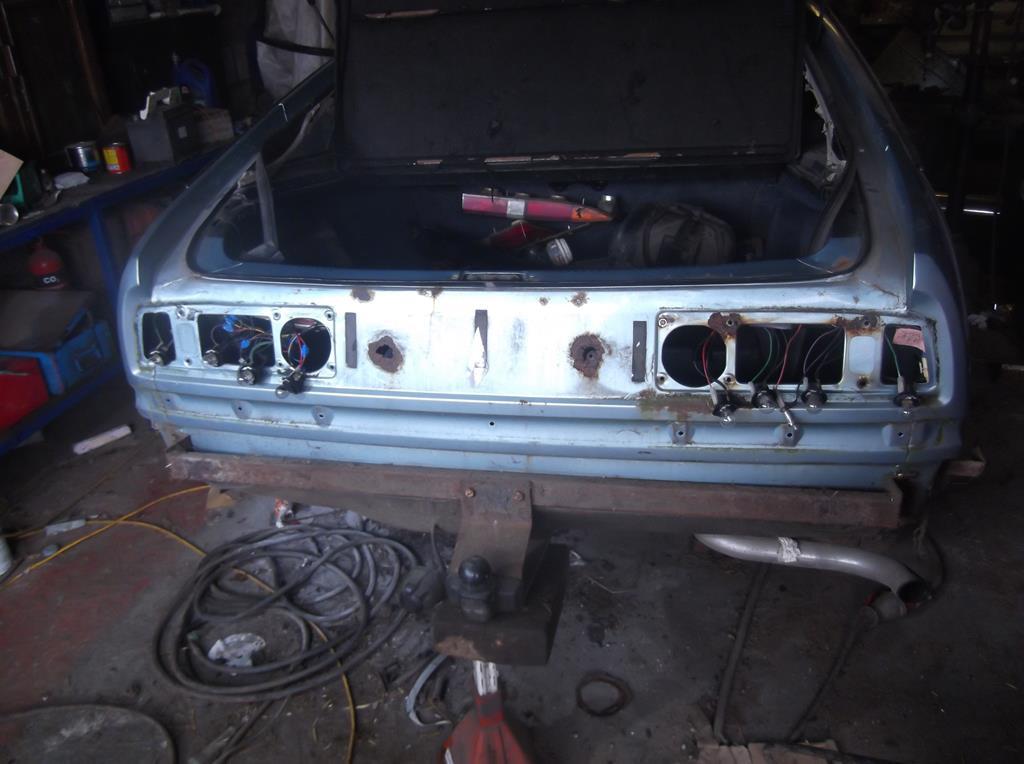 no wonder the number plate was crooked. i guess the holes foir the number plate must have been drilled by the dealer when they PDIed it, as the panel has rotted out round each number plate fixing. the bare metal of the drilled hole must have let corrosion in. i've chopped out a square hole and then swaged a plate to match the cut out 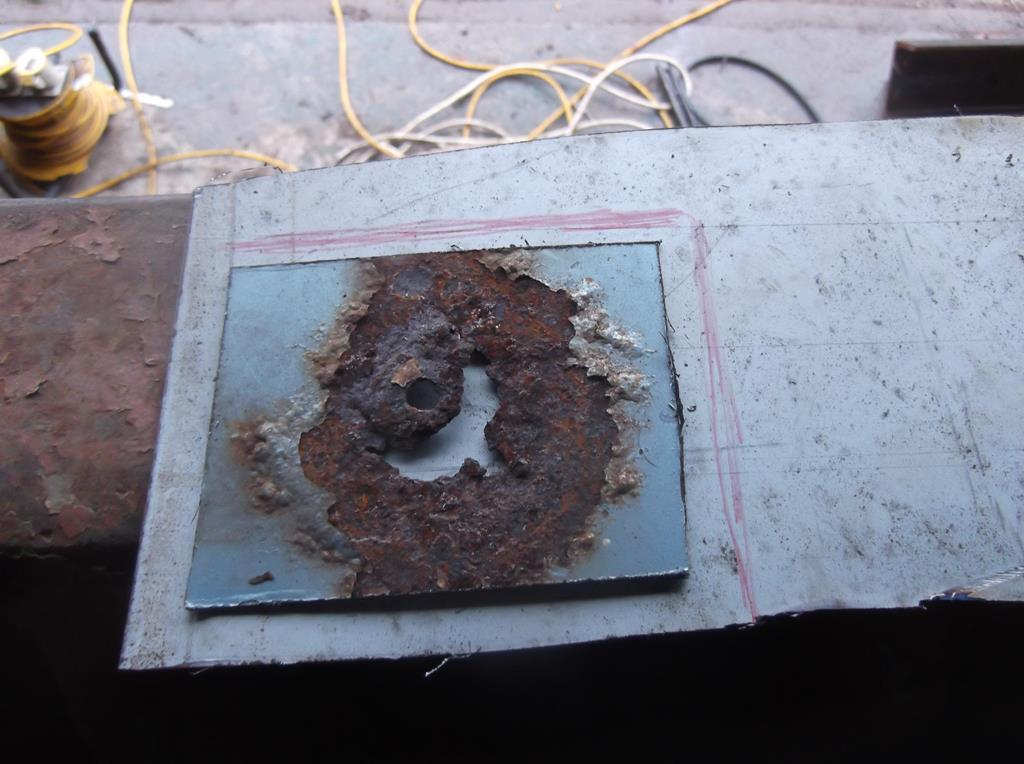 then punched some holes and plug welded it in place 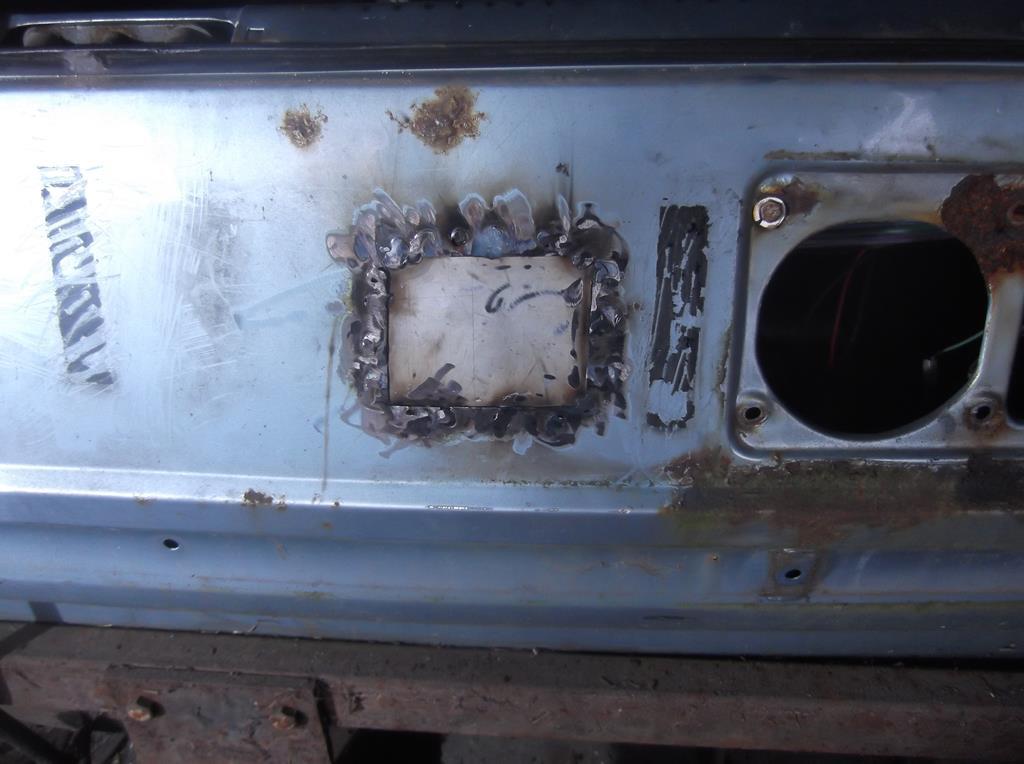 i've skimmed some filler over to hide the repair, it will be behind the plate so it won't be seen, then painted the panel with bonda primer as a rust preventative,i'd treated the rusty spots with hydrate 89 rust converter. not used the bonda primer before but i bought some on my last pre lockdown shopping expedition as i'd seen jim using it on his restorations and thought i'd try it. it seems like a good proiduct, i wanted sometyhing to add some depth of paint oin the rusted surfaces as they were opitted and needed a filler type primer to smooth out the rust damage. once it's gone hard i'll flat it back and spray some epoxy primer over the lot. 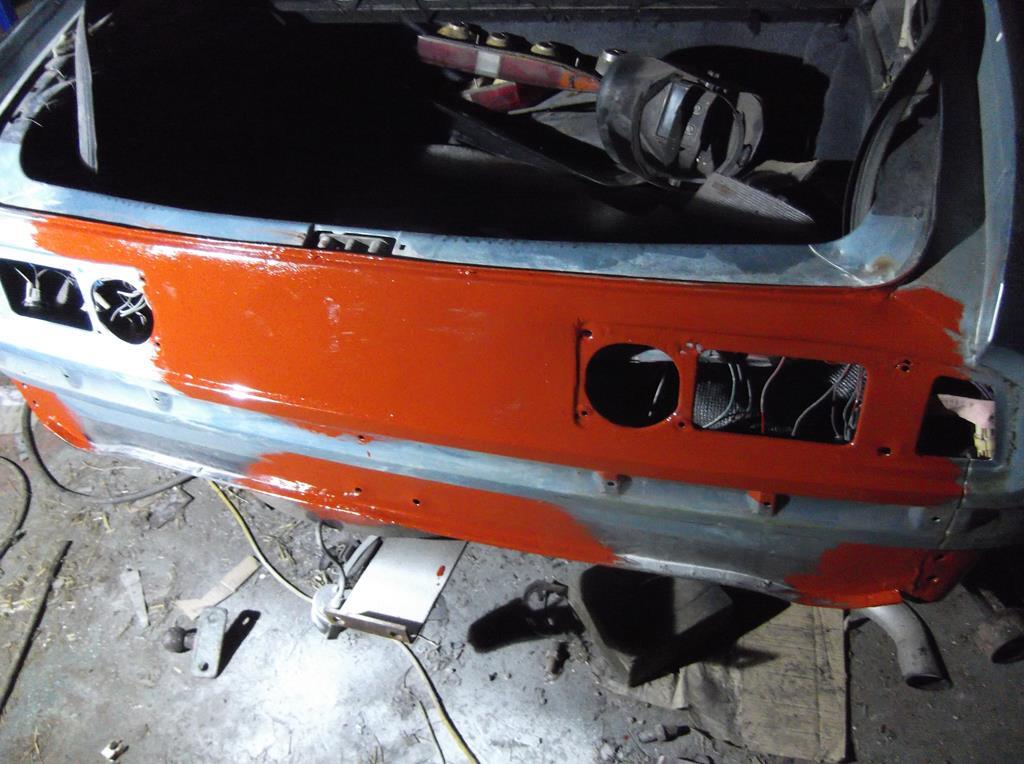 Ideally it wants the driver's side arch doing as well then prime the whole back end in one go. i could really do with a wheel arch repair for that side though, it's hard work trying to do it without as i found out on the other side. |
| |
|
|
|
|
|
Apr 13, 2020 23:48:55 GMT
|
IMO your first idea of using insulated composite sheets with compatible roof lights will be by far the simplest and quickest way of doing the job. These are a couple of companies i've used in the past to supply sheeting, they're both local to me in staffordshire so may not be convenient but may give you some idea of price and availability, the first one is currently closed for manufacture but they are still answering enquiries. www.mcsroofing.co.uk/rooflight-systems-/www.actionclad.co.uk/eco-roofing-panels.php |
| |
|
|
|
|
|
|
|
|
My dad bought a red 1.6 base model new in 1980, and we kept it until it rather spectacularly caught fire in front of the house and burnt to a literal crisp. i rather liked it, i've got a bit of a soft spot for talbot stuff as a result. I live just up the road from alton towers, which was the ancestral home of the talbots.
|
| |
|
|
|
|
|
|
|
|
|
I used to work at JCB! in the office though  it was wibblepoo and i left. They had some impressive tooling though. That shrinker/stretcher is something ive been thinking about buying for ages. I need to get my workshop properly sorted and then ill get a prepare work bench and some roper fabrication tools. for the the impressive tooling they still come round and borrow stuff from me, they've got my 5/8th UNF tap and die at the moment, doubt i'll be seeing that for a while if ever in the current circumstances. The shrinker stretcher is a metz, but this one appears to be identical with a different name on it www.ebay.co.uk/itm/SwitZer-Heavy-Duty-Shrinker-Stretcher-8-Throat-Sheet-Metal-Bending-Fabrication/123972897344?_trkparms=aid%3D1110001%26algo%3DSPLICE.SIM%26ao%3D1%26asc%3D225667%26meid%3D92bf88247a6245f9956f36d4c9c0fcee%26pid%3D100010%26rk%3D2%26rkt%3D12%26mehot%3Dpp%26sd%3D253672941584%26itm%3D123972897344%26pmt%3D1%26noa%3D1%26pg%3D2047675&_trksid=p2047675.c100010.m2109the only problem is it's a bit of a faff to swap the jaws round to go from one function to the other, ideally you want two, one for each function, but that would be a bit extravagant, you can get them in pairs for a similar amount www.ebay.co.uk/itm/Metz-Tools-Pair-Shrinker-Stretcher-metal-working-tool-classic-car/254226678609?hash=item3b31174351:g:9JQAAOSwyQVc1XQC but they don't have such a deep throat so are less versatile. looking at the one i've got though, i don't think it would be a massive job to fabricate something to a similar pattern. obviously i've got both sets of jaws so i could use a set in each machine if i built a second unit, but i believe you can buy just the jaws separately if you build your own from scratch. ISTR practical classics did a feature on making one a few issues back. the easiest way would be to have the frame profiled out on a laser cutter by an engineering firm, not really an option at the moment though. I think it could be done by welding together simple profiles that could be cut with a grinder or a workshop plasma cutter though, if i get time i might look into it as a bit of a lockdown project, but i've no shortage of them at the moment. |
| |
|
|
|
|
|
|
|
Hi, I think the problem is there's no real crime committed until the registration mark is applied to a vehicle to which it doesn't belong which is sometime in the future and done by someone other than the vendor of the listing. By which time the eventual owner of the vehicle ends up losing it and everyone else in between walks away. Colin I would say this is correct, however it doesn't have to be a crime for ebay to ban it. it's not a crime to give someone your phone number, but it is on ebay. |
| |
|
|
|
|
|
|
|
in fairness to them they've got a lot better at taking down the fraudulent listings, there's been a load of hijacked accounts selling hundreds of desirable classic cars and bikes that they obviously don't have, i've reported a few of them and they've been pulled within an hour, but a cynic might say that was because they're breaking the rule of soliciting off site sales by having the fraudster's email in the listing somewhere. Those listings are everywhere on eBay at the moment - always only two pictures, first one is of some classic car, second one their email address. Surprising that eBay can't get a handle on it, the contact details are the same every time. they must catch people with it or else why keep doing it, but you'd wonder how anyone would fall for it really. they've started putting the contact email in the photos so they can avoid detection by automatic software that scans listings for such things. i imagine they only use one photo of the car because it simplifies the listing process, they're listing 100's at a time, it must take a while to schedule them all them dump them in one go. it's not just ebay who are dropping the ball on this though, i'm convinced that it wouldn't be that hard for the police to catch the scumbags doing it if they put their minds to it. pose as a 'buyer' get the bank transfer details and then track the accounts. I think the police don't really have a handle on internet crime, and it seems difficult fir different regional forces to liaise with each other within the uk, let alone deal with forces in other countries where the scammers are based most likely. |
| |
Last Edit: Apr 1, 2020 22:13:39 GMT by matbrojoe
|
|
|
|
|
|
|
It won't get removed, i reported the defender log books above to ebay and they didn't get taken down, and those couldn't have been more blatant. they just don't give a monkey's about this, try cancelling your listing after someone has message you to ask for your contact number though, and they'll be right on it. Unfortunately you're right, that Viva one I reported is still on there 3 weeks later, not even an email from eBay to say they've looked at the report. in fairness to them they've got a lot better at taking down the fraudulent listings, there's been a load of hijacked accounts selling hundreds of desirable classic cars and bikes that they obviously don't have, i've reported a few of them and they've been pulled within an hour, but a cynic might say that was because they're breaking the rule of soliciting off site sales by having the fraudster's email in the listing somewhere. |
| |
|
|
|
|
|
Mar 31, 2020 19:49:33 GMT
|
|
It won't get removed, i reported the defender log books above to ebay and they didn't get taken down, and those couldn't have been more blatant. they just don't give a monkey's about this, try cancelling your listing after someone has message you to ask for your contact number though, and they'll be right on it.
|
| |
|
|
|
|
|
Mar 31, 2020 19:41:26 GMT
|
It must be that time of year! Great seeing progress, and how you folded that bit to make the internal structure at the lower edge. Was wondering how i should do that. I've got this beast for folding which is perhaps a little over the top for the job   this originally came from JCB but they got rid of it after, i kid you not, somebody managed to knock themselves out with the counter weight that you can just see on the far left. what i've also found very handy for making the curved flanges and the arch repair is this shrinker stretcher which rather handily fits straight onto the t slots in the fabrication table  I've not had much time to spend on the SD1 but i've been putting a bit of filler to finish of the outer skin of the repaired arch, got finished with work in good time tonight so spent a bit of time guid coating the filler and flatting it off  the DA is in shot there but apart from the first rough coat it'snot much use for ajob like this, most of it needs to be blocked off by hand to get it anything like flat.  getting there but away to go yet, you can see the low spots highlighted by the guide coat as i'm sure you all know. |
| |
|
|
|
|
|
Mar 15, 2020 23:58:11 GMT
|
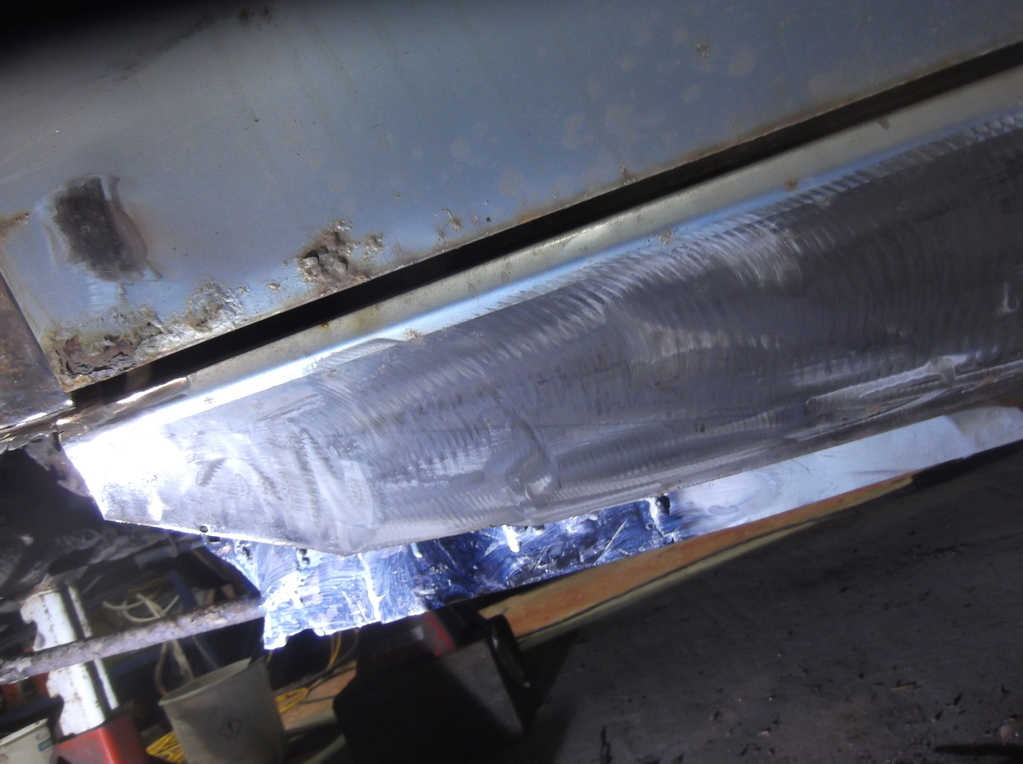
bit more work done today but the camer had a flat battery when i got to the workshop so i only got two photos  chopped out and cleaned up the rotten bit of the bit behind the arch then used the pan folder and a bit of hammering to make a repair section, i used the shrinker on the wheelarch flange part of the panel to get it to curve to match the original profile. here it is weldedin and ground back  i had quick look at youtube at lunch time and by coincidence i saw that jimspolicev8sd1 has a new video of him doing the same bit of the car as i am. next job is to get the arch skimmed off with filler and see what it looks like |
| |
|
|
|
|
|
Mar 15, 2020 12:45:27 GMT
|
|
hammer price of £510 plus £60 buyers premium, plus whatever it cost him to get it back to his yard.(looks like the cheapest transport option would have been to sweep it up with a dustpan and brush) I guess he's looking to double his money. good luck with that one i'd say.
|
| |
|
|
|
|
|
|
|
|
I'd like to see more and would be interested to hear what the basket case cars actually went for, surely they couldn't have been worth much more than the scrap value for stuff like that 1100 which realistically are never going to see the road again.
|
| |
|
|
|
|
|
|
|
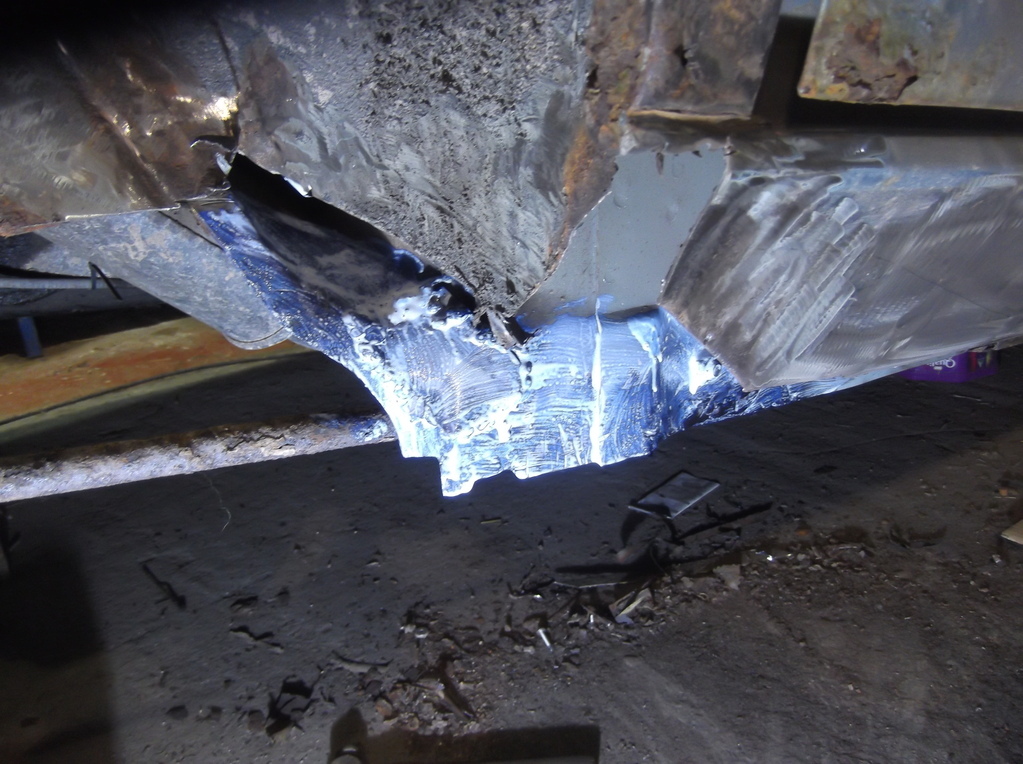
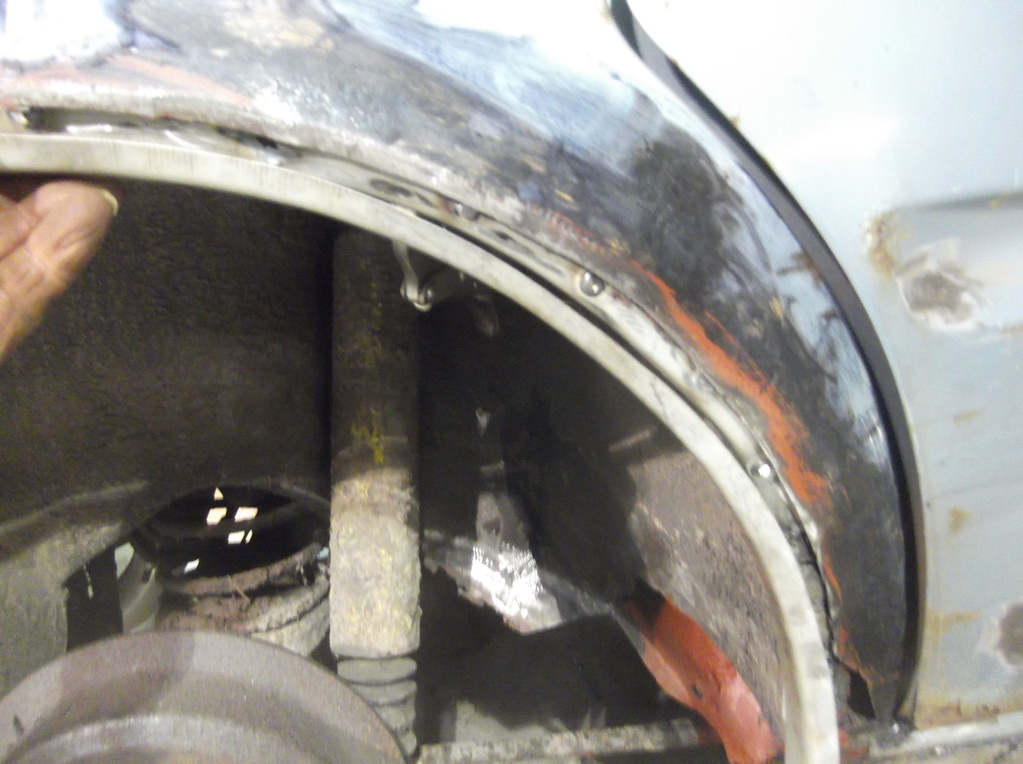
It's in some jeep Cherokees as well i think it was used in quite a lot of different applications, in the 80's a guy near me who ran an engineering firm put the 6 cylinder version in a range rover, that was a fair thing as i recall but the engine was to heavy for the car as it kept knackering the suspension, though that may also have had something to do with the guy's son who had a habit of driving straight across the middle of roundabouts at 40mph. Anyway, i thought i was nearly finished on the arch, just the bit at the rear bottom corner to tidy up and it seemed that this was rotten, a bit, as well so required some more bits making. 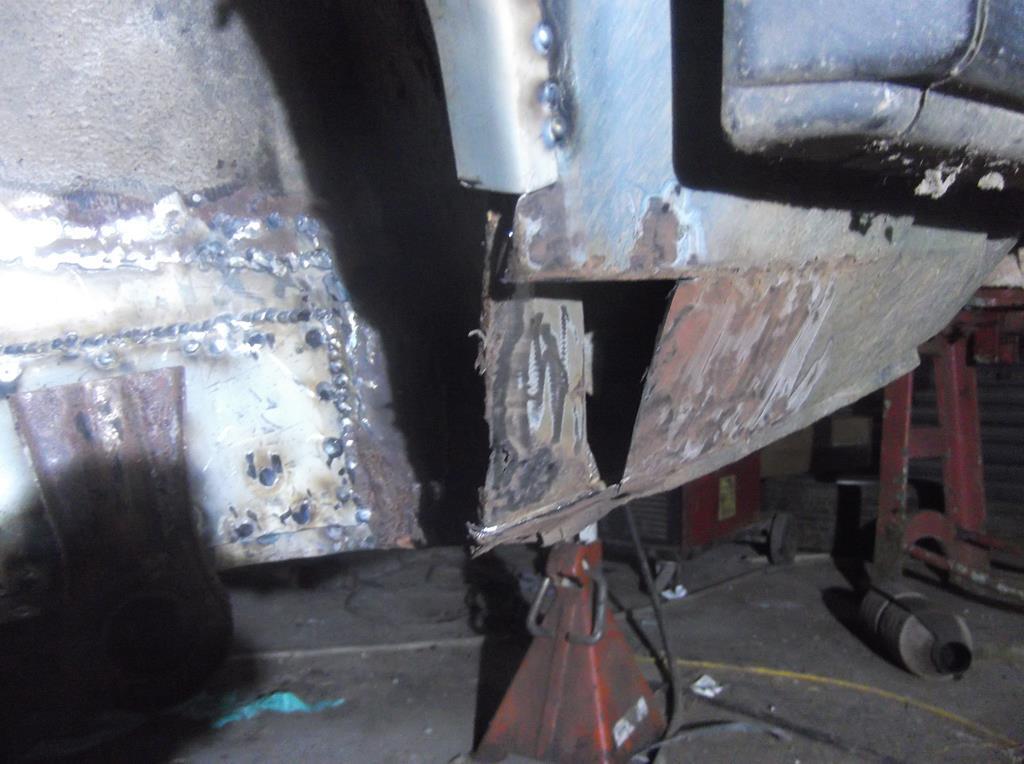 that looked ok superficially but there were some rusty pin holes in it so i've chopped it back to good metal, annoyingly it also took out the drain hole for that part of the boot, when i make the outer panel i'll have to find a hole saw the correct size for the rubber blanking grommet. the structure behind was a bit frilly as well so i've made a repair section to replace that, the front edge is also the final bit of the inner wheel arch flange. 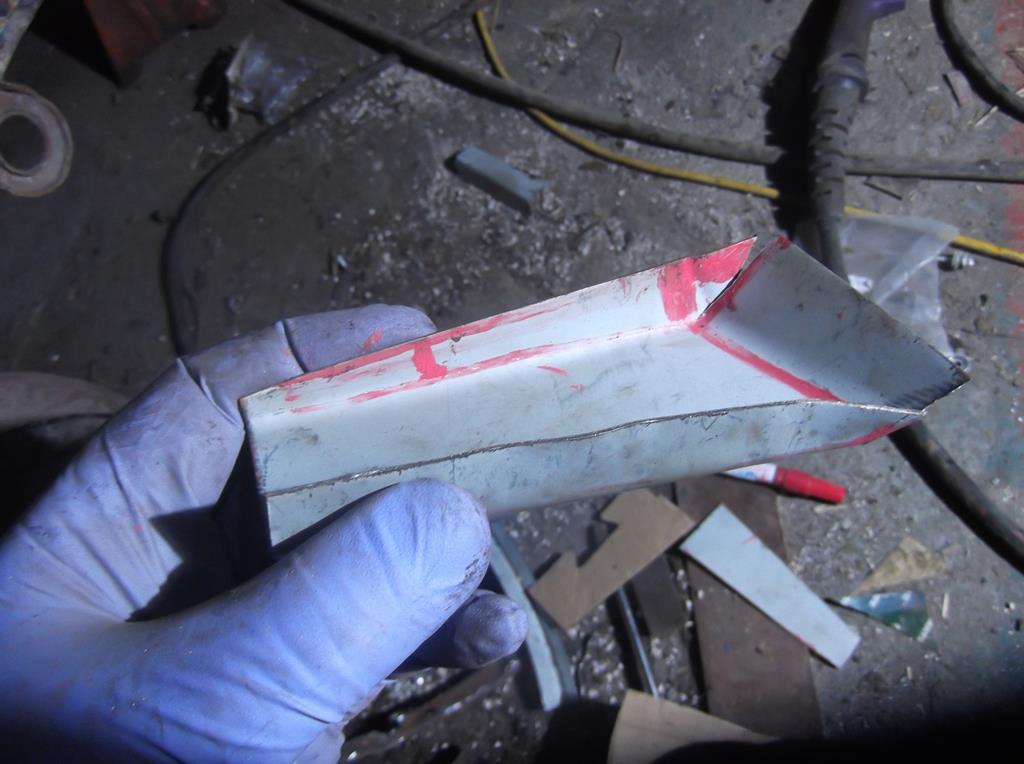 this is that bit welded in place, i've welded in from behind, and also punched some holes in the side that's not visible in that shot to plug weld it onto the good bit of the original structure.  and that's as far as ive got, the curved outer panel to make next, which should be fun. |
| |
Last Edit: Mar 2, 2020 21:21:28 GMT by matbrojoe
|
|
|
|


 it was wibblepoo and i left. They had some impressive tooling though.