teaboy
Posted a lot
   Make tea, not war.
Posts: 2,126
|
|
Sept 18, 2024 16:49:43 GMT
|
I’m not a happy camper with the TIG. Probably if I practice for twenty years, the very thought of it might not get my guts in a tangle… This is the problem with TIG welding, you see a picture of a beautiful weld and you think, 'Why can't I do it like that?'. I sometimes think that I should buy a new top quality machine but then I realise that if I did, I wouldn't be able to blame the poor quality of the job on the equipment...  |
| |
|
|
|
|
|
|
|
Sept 18, 2024 21:08:40 GMT
|
|
Actually, seems to me that the problem with Tig welding is the aesthetically perfect "row of coins" welds.
Which, to me, is more like show business than craftsmanship.
Like oxy acetylene welding, you start with a small gap and when you see the edges melt and move back from the gap, you cool the puddle with your wire ( timing is everything).
That leaves material with the right penetration, and every dip with your wire forms a bit more weld.
Main difference is (to me) that you finetune the heat (after you set the heat with the valves on a O/A set and the current on a Tig) by tilting the torch (aiming the flame into or slightly away from the puddle) with O/A and with the pedal on a Tig.
Other than that, its very similar to me, and they both give a continuous weld with less chance of inclusions or cold spots.
So don't even look at the "Facebook" welds.
They are not realistic as a goal, and they are not superior strength wise.
A couple things that may help to "crack the code" with a Tig,
How you grind the tungsten tip makes a big difference.
And absolutely get a foot pedal ( don't waste your time with a rotary knob on the torch).
Just some things that have worked for me, hope that helps...
|
| |
|
|
v8ian
Posted a lot
  
Posts: 3,832
|
|
Sept 18, 2024 22:09:01 GMT
|
|
For my penneth worth, mig weld is normally harder to grind back because you would normally use either Co2 or Argomix as a shield gas, both have amounts od carbon which include within the weld and make it hard, try mig with pure argon and the welds are nice and soft, the same as TIG
|
| |
Atmo V8 Power . No slicks , No gas + No bits missing . Doing it in style.
Austin A35van, very different------- but still doing it in style, going to be a funmoble
|
|
gazzam
Part of things
 
Posts: 746 
|
|
Sept 19, 2024 21:40:19 GMT
|
Cut a piece if 20# the approximate shape for the door skin repair. 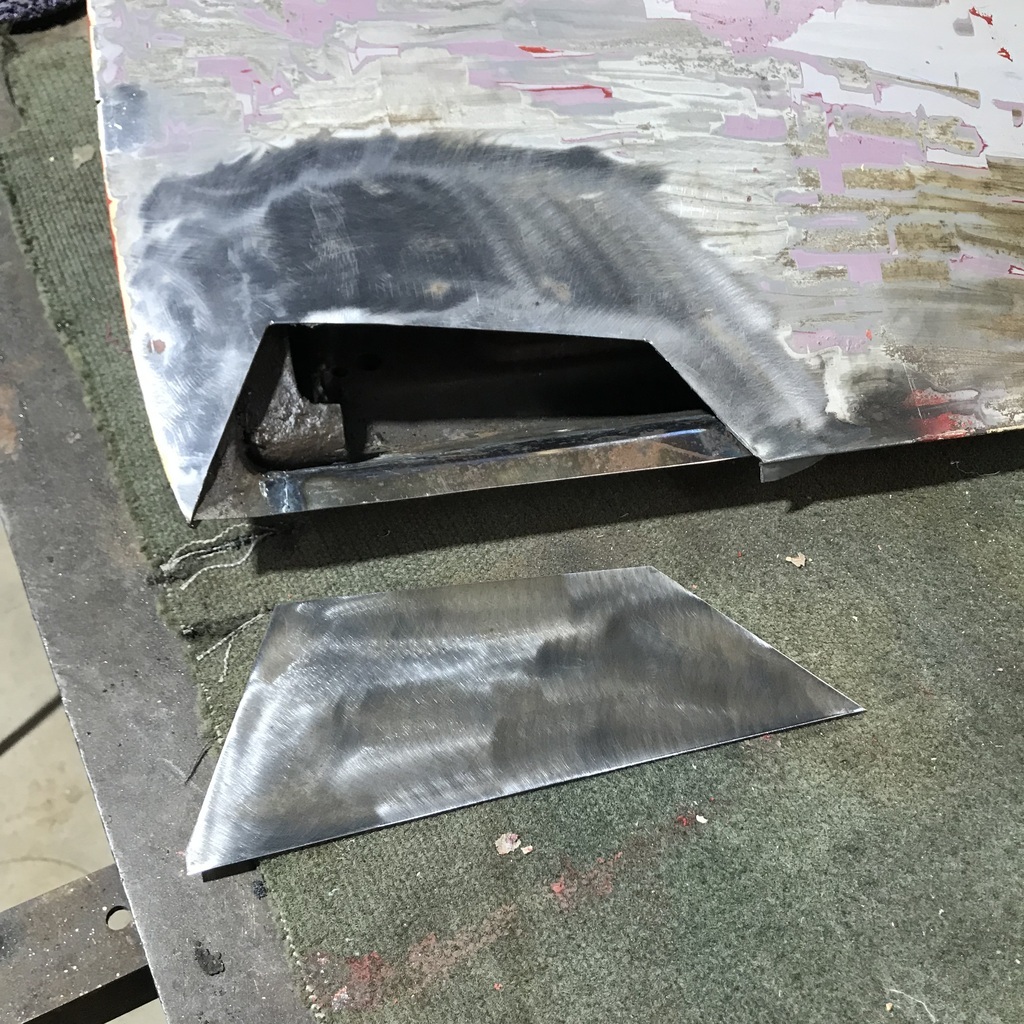 And used the bead roller to get a crease started for the fold. 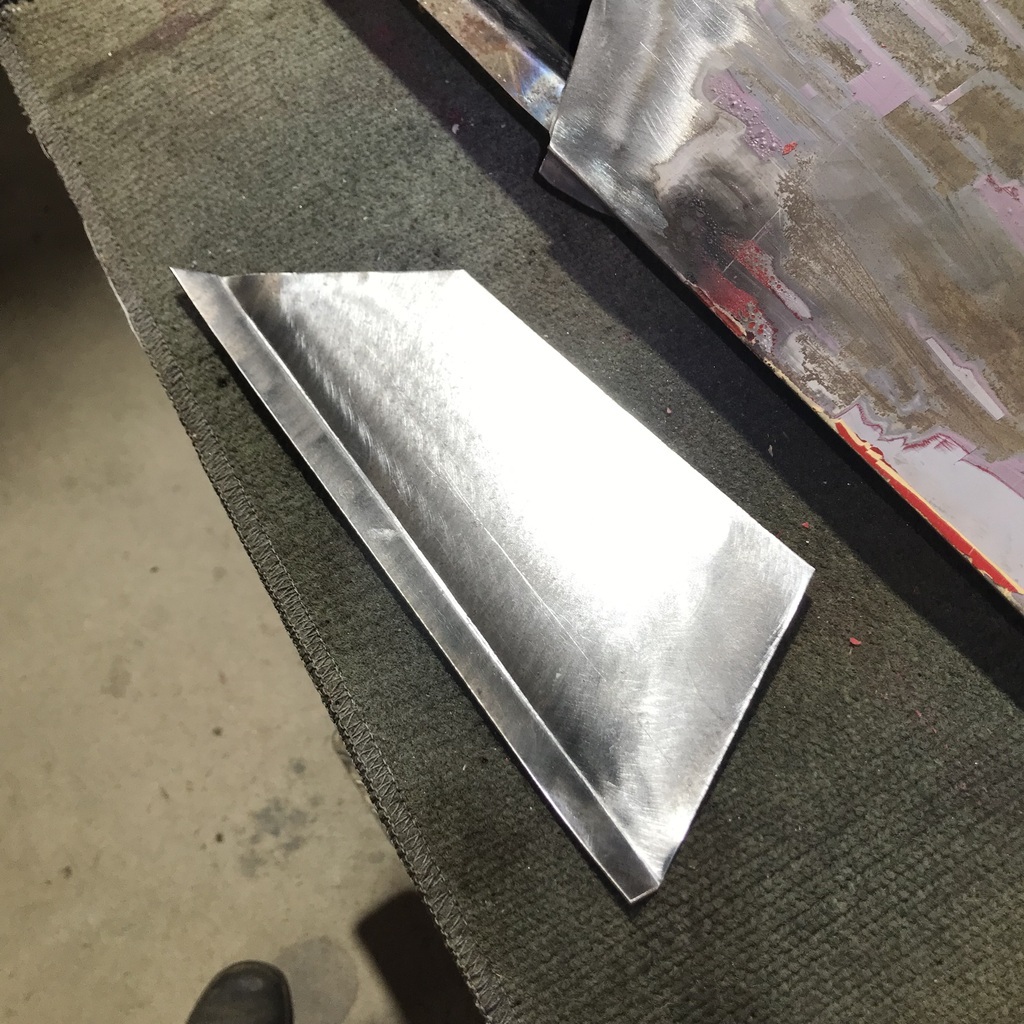 Crept up on the fit, but eventually got it. 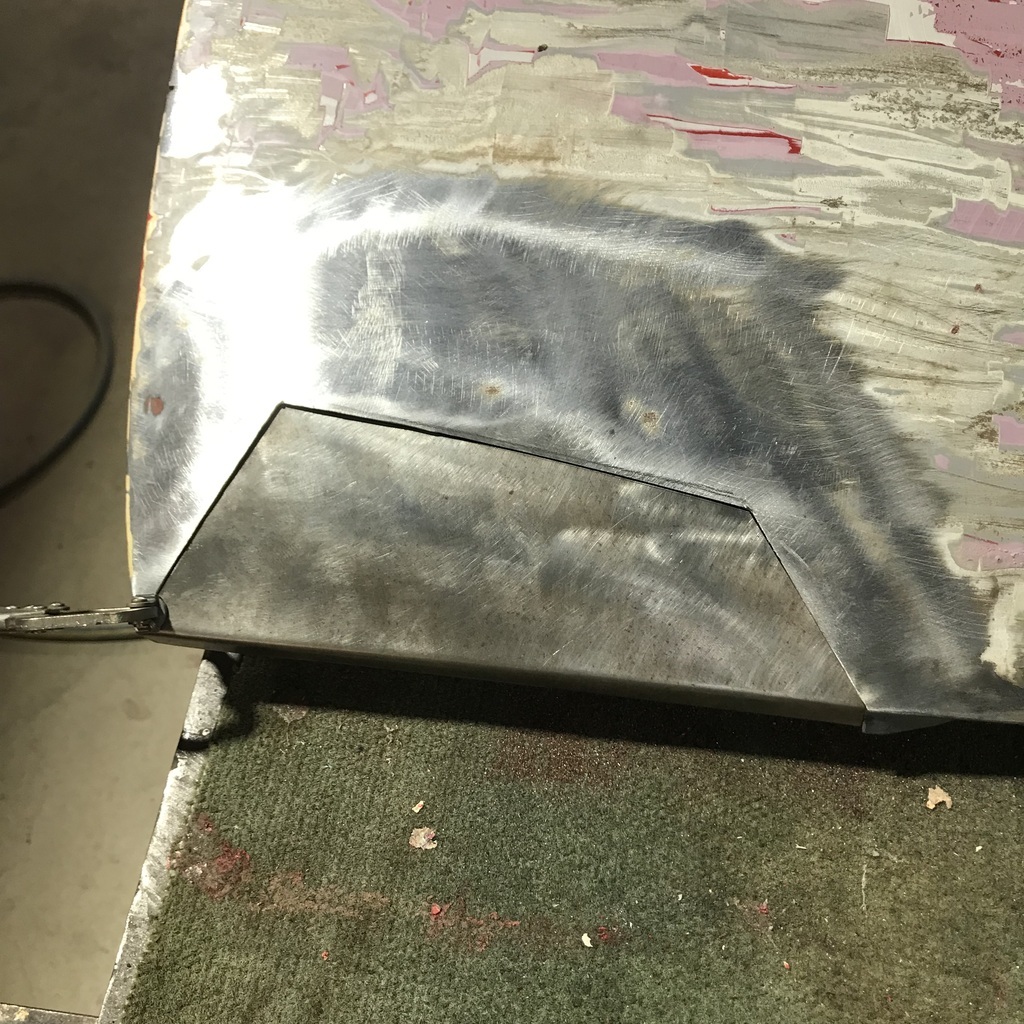 Masked the skin and put some primer on the new inner bit. 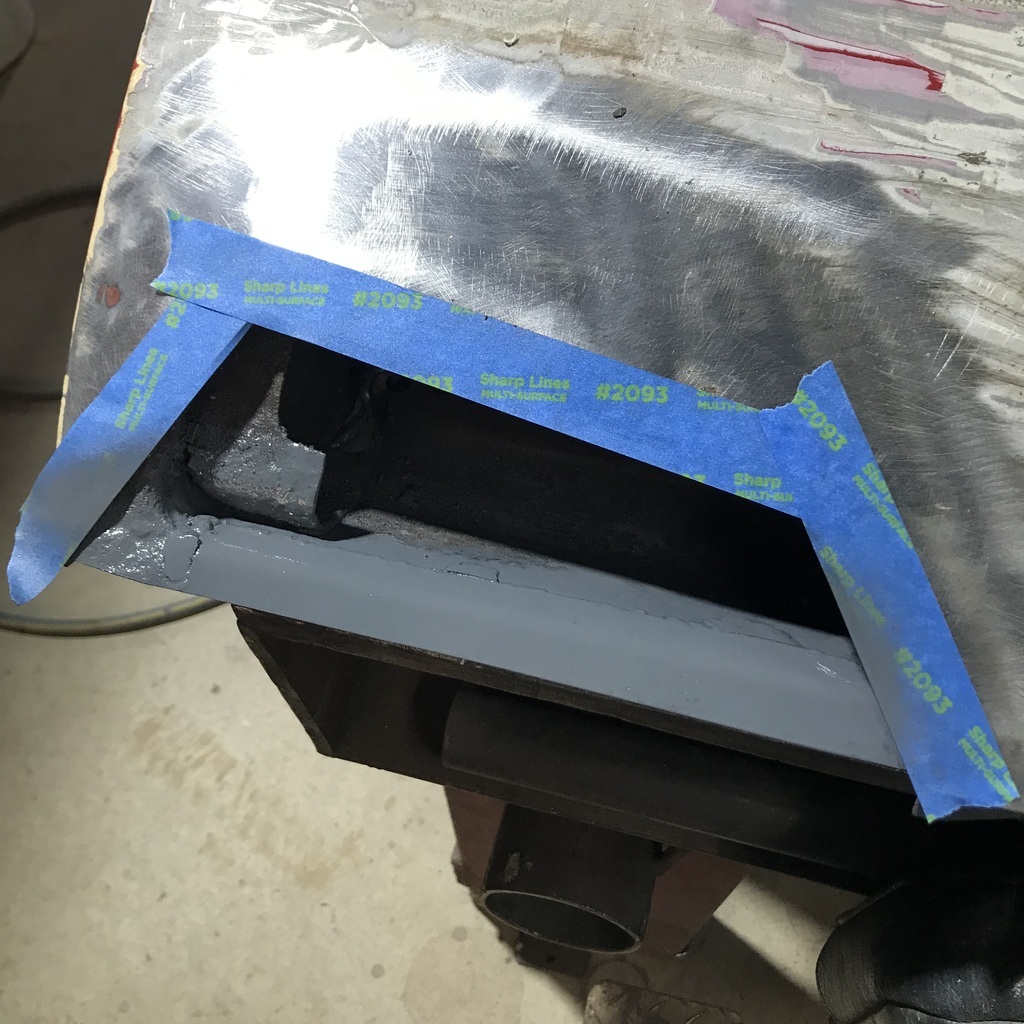 Held in place with a couple of magnets while I tacked it in with the MIG. Very pleased with the fit. 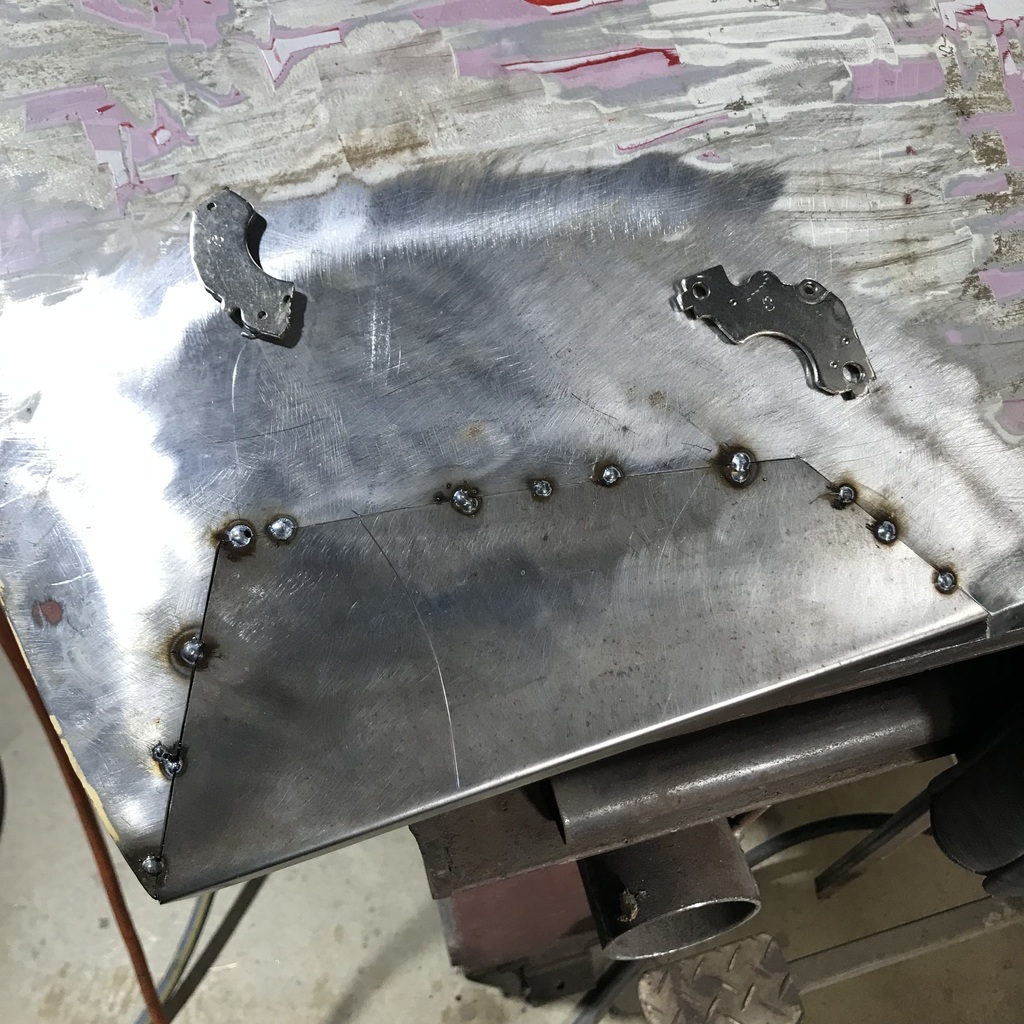 Ground the tacks down in prep for the TIG. I also cleaned the back side as well as possible. Did a bit of practice on a piece of scrap. I hooked up the foot pedal, on the advice of metalshapes, so I thought it best to get used to it again. I had taken it off ages ago, for a particular job, and just never plugged it back in. Ground a point on a new 2% thoriated electrode and got comfortable. Anyway the first bit went fine. 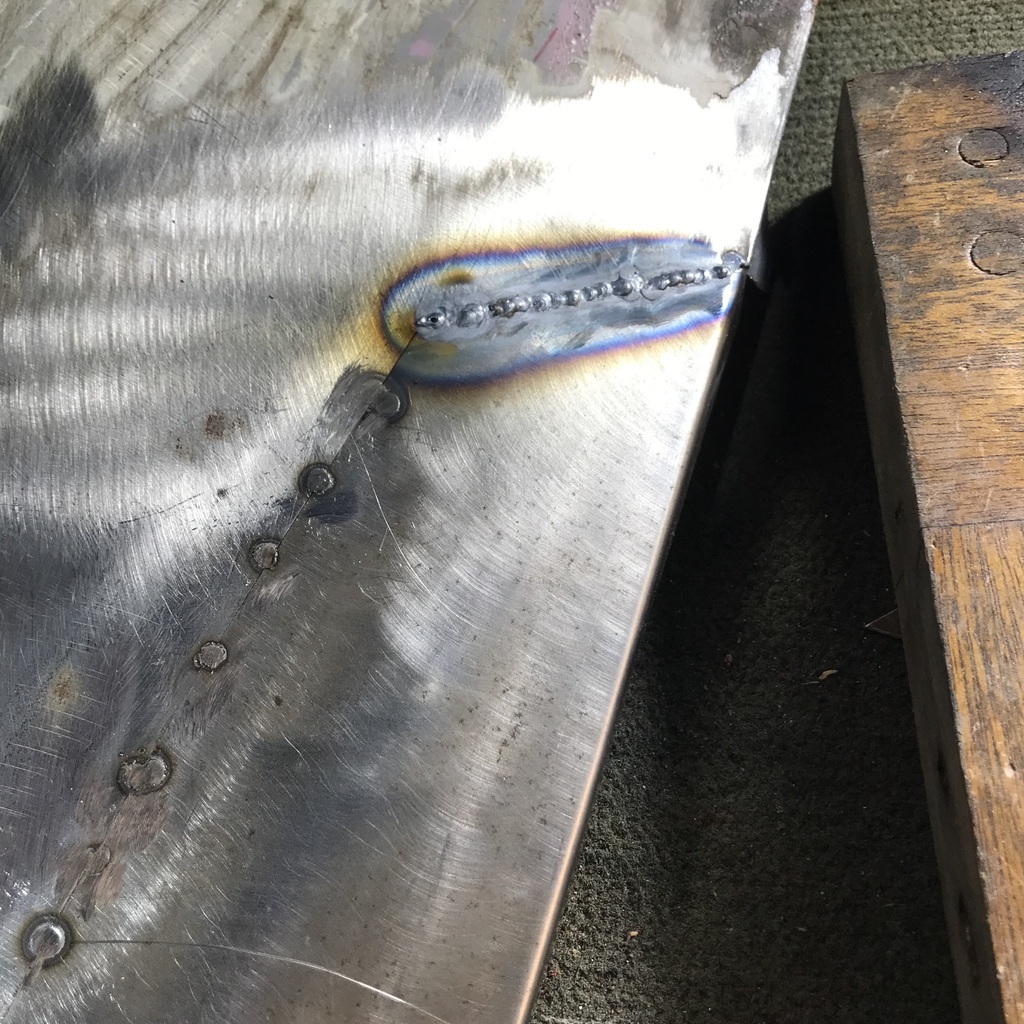 Certainly not pretty, but effective and will look fine once ground. Finished up with no real problems. I had already blown a little hole while tacking, but filled it quite easily. 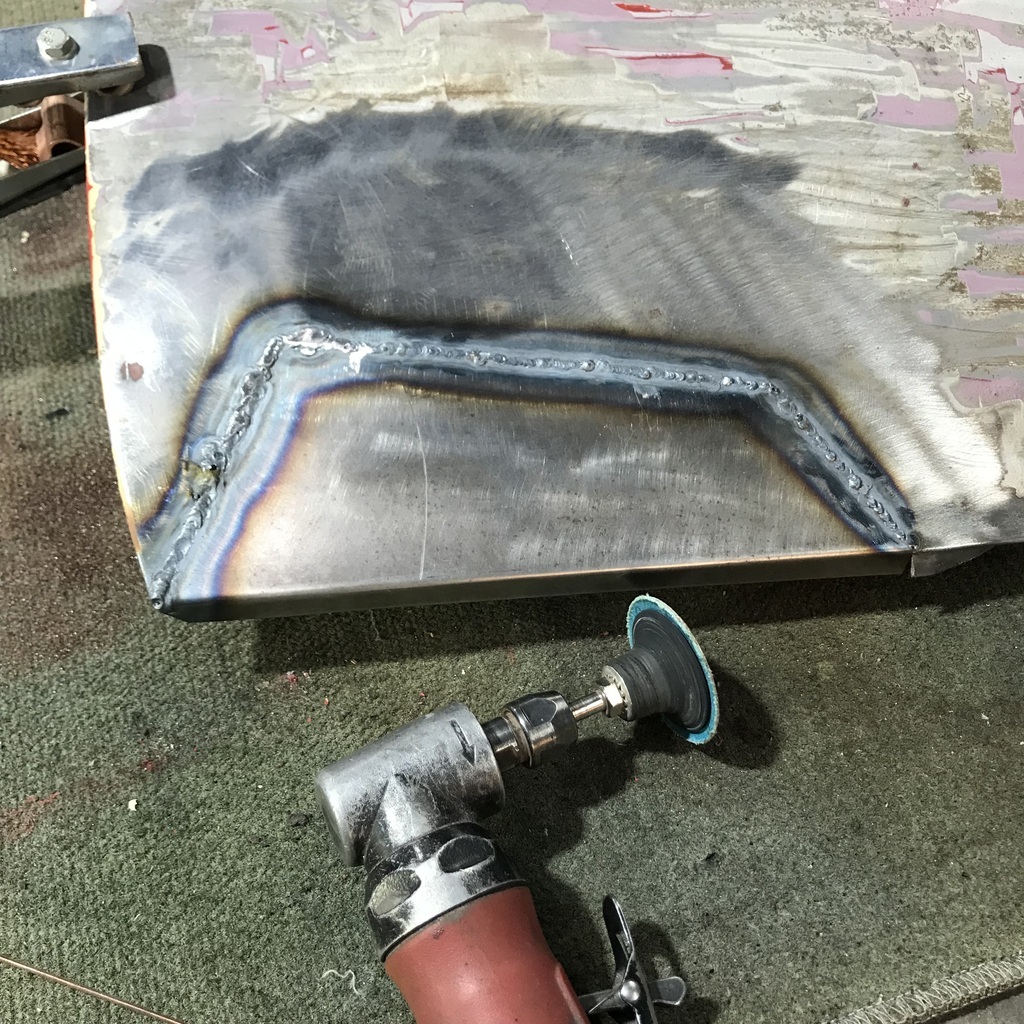 I made a real effort to concentrate on the weld pool ( thanks metalshapes, for making me think ) and that makes a real difference. It just needs to become second nature, and that takes a lot of practice. V8ian, these are the gases I’m using. MIG 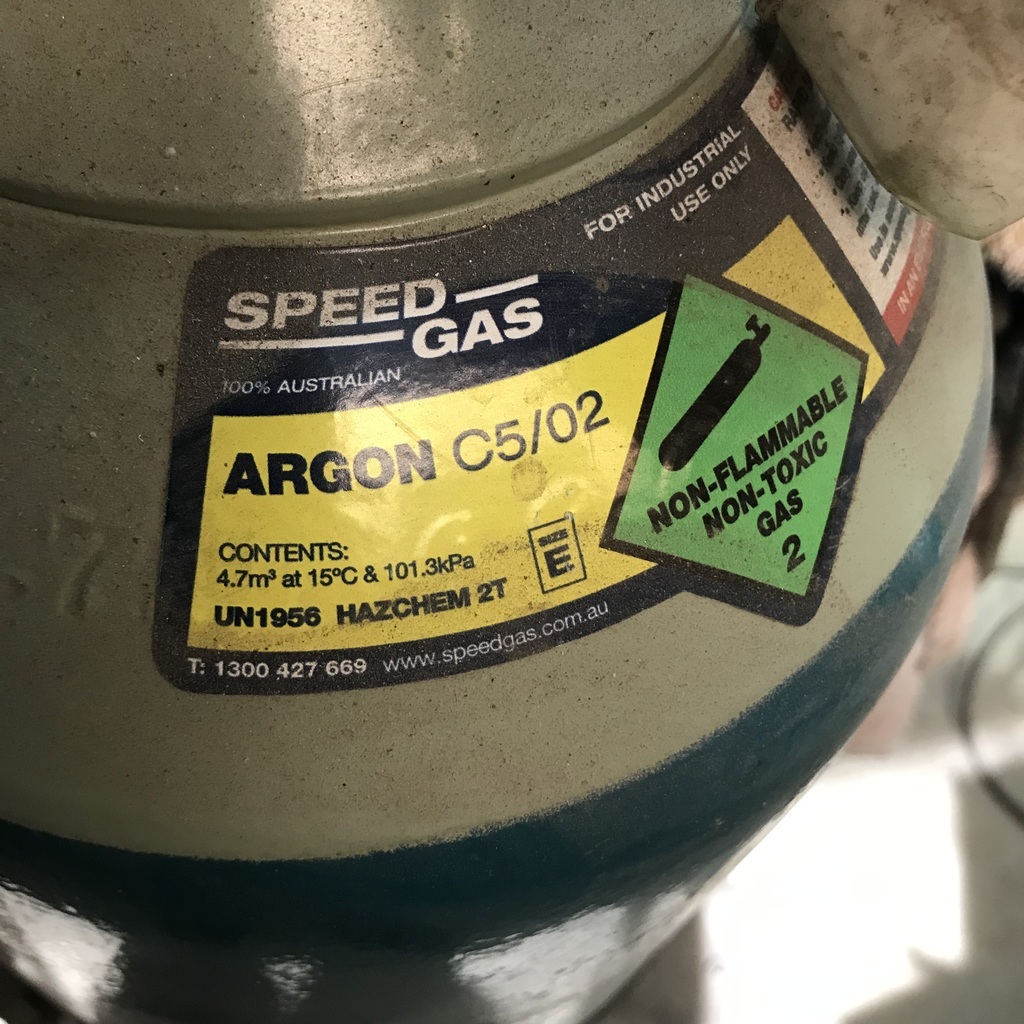 TIG 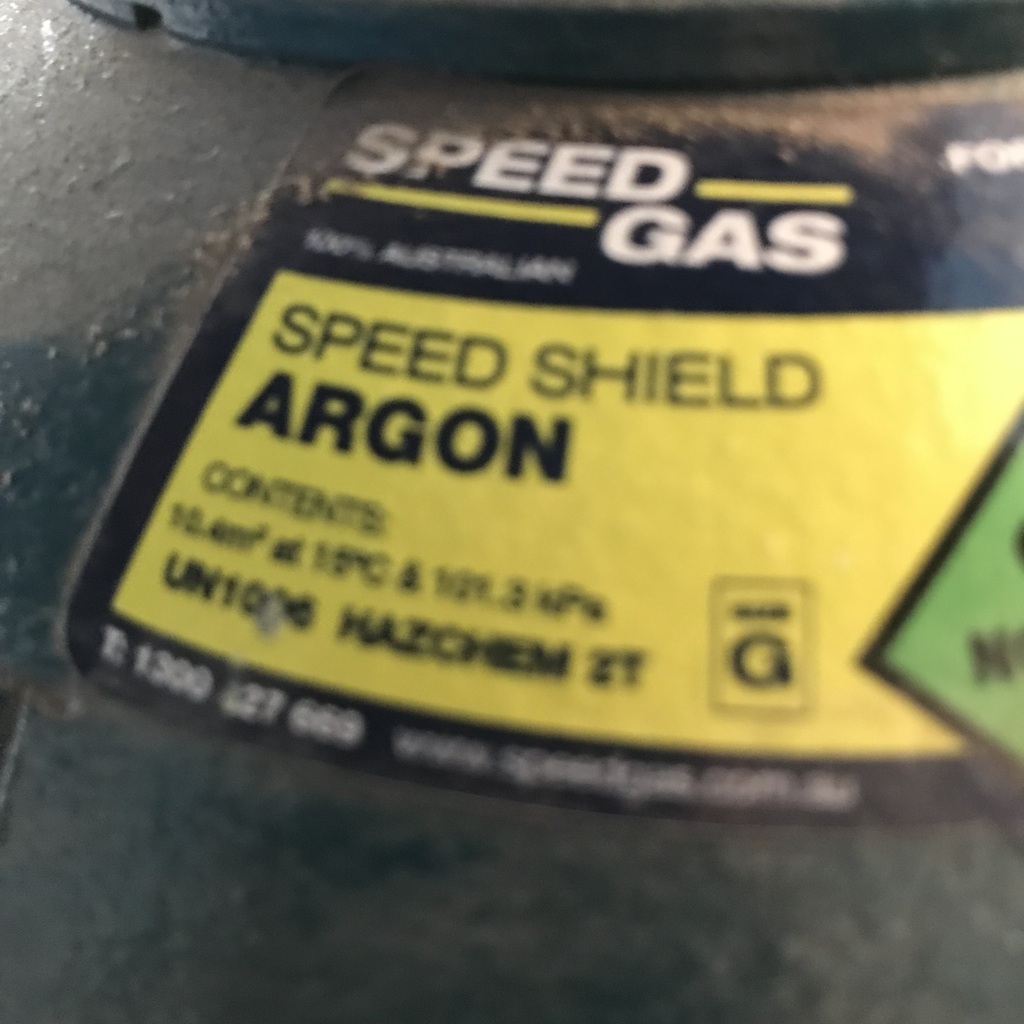 Do you reckon I should try the TIG gas on the MIG, and see if the welds are softer? We have friends staying for a couple of days, so play will recommence on Sunday. Thanks. |
| |
|
|
teaboy
Posted a lot
   Make tea, not war.
Posts: 2,126
|
|
Sept 19, 2024 22:22:19 GMT
|
Do you reckon I should try the TIG gas on the MIG, and see if the welds are softer? I'm pretty sure that there is a good reason why we have different gasses for different types of welding. If you do a test, it would be interesting to see the results. |
| |
|
|
|
|
|
Sept 20, 2024 11:57:57 GMT
|
|
Yep, I'd like to know too.
I suspect it's more to do with cost - mig is not so fussy so can use cheaper gas, tig has to have expensive argon.
|
| |
|
|
teaboy
Posted a lot
   Make tea, not war.
Posts: 2,126
|
|
Sept 20, 2024 13:07:17 GMT
|
Yep, I'd like to know too. I suspect it's more to do with cost - mig is not so fussy so can use cheaper gas, tig has to have expensive argon. I’m sure I heard it was something to do with arc stability. I could google it if I could be bothered…  |
| |
|
|
Darkspeed
Club Retro Rides Member
Posts: 4,884
Club RR Member Number: 39
|
1965 Sunbeam TigerDarkspeed
@darkspeed
Club Retro Rides Member 39
|
Sept 20, 2024 14:20:49 GMT
|
|
I ran out of Argosheild once and connected up the bottle of Argon from the TIG - It was dreadful - not to be done. It was a cheap old MIG but even these guys with real pro gear say - avoid.
As for TIG on old thin mild - practice practice practice - really close butted joins - thin electrodes and thin filler wires, low amps, or alternatively buy plastic cars with nothing less than 16 SWG on the chassis - Happy days.
Love the Tiger - always fancied an Alpine - Shame they did not do a glassfibre version - Hmmm potential kit venture to rival the Cobra clones......
|
| |
Last Edit: Sept 20, 2024 14:21:58 GMT by Darkspeed
|
|
gazzam
Part of things
 
Posts: 746 
|
|
Sept 26, 2024 8:37:18 GMT
|
Couldn’t sleep last night, so I made a small start on the car, hoping it’s not in a similar state to the door hinge face. 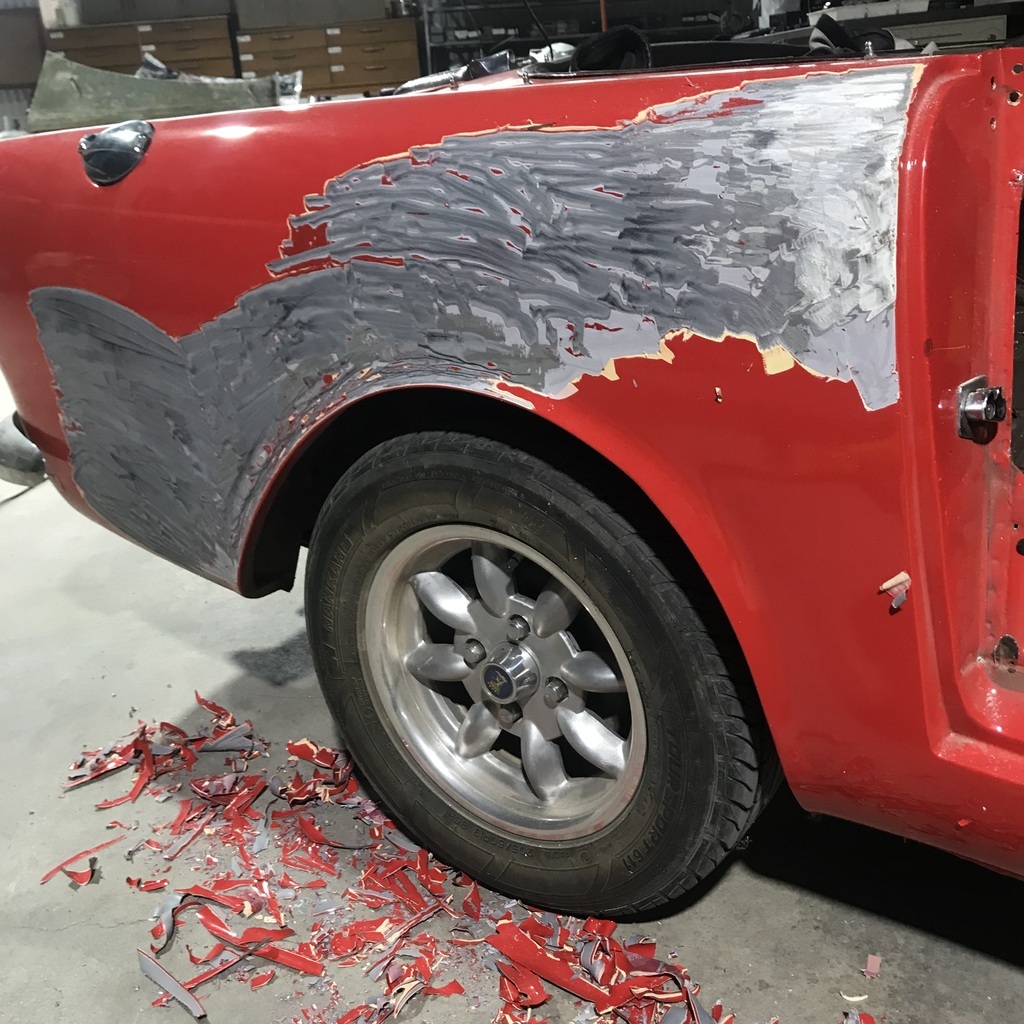 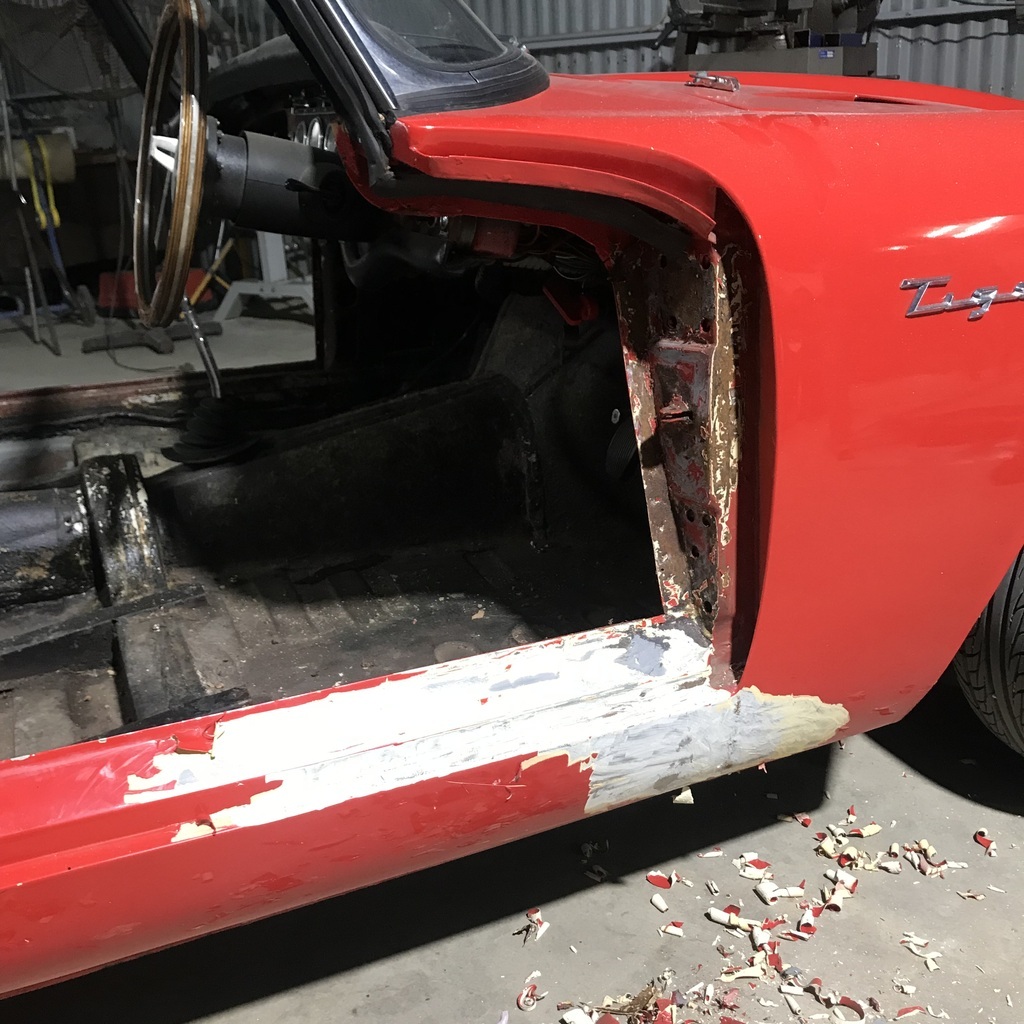 Nothing scary so far, but it’s very early days… Made a start on the driver’s door. I reckon it may be in a worse state than the passenger side. This is the area that was a fairly big job on the first door. 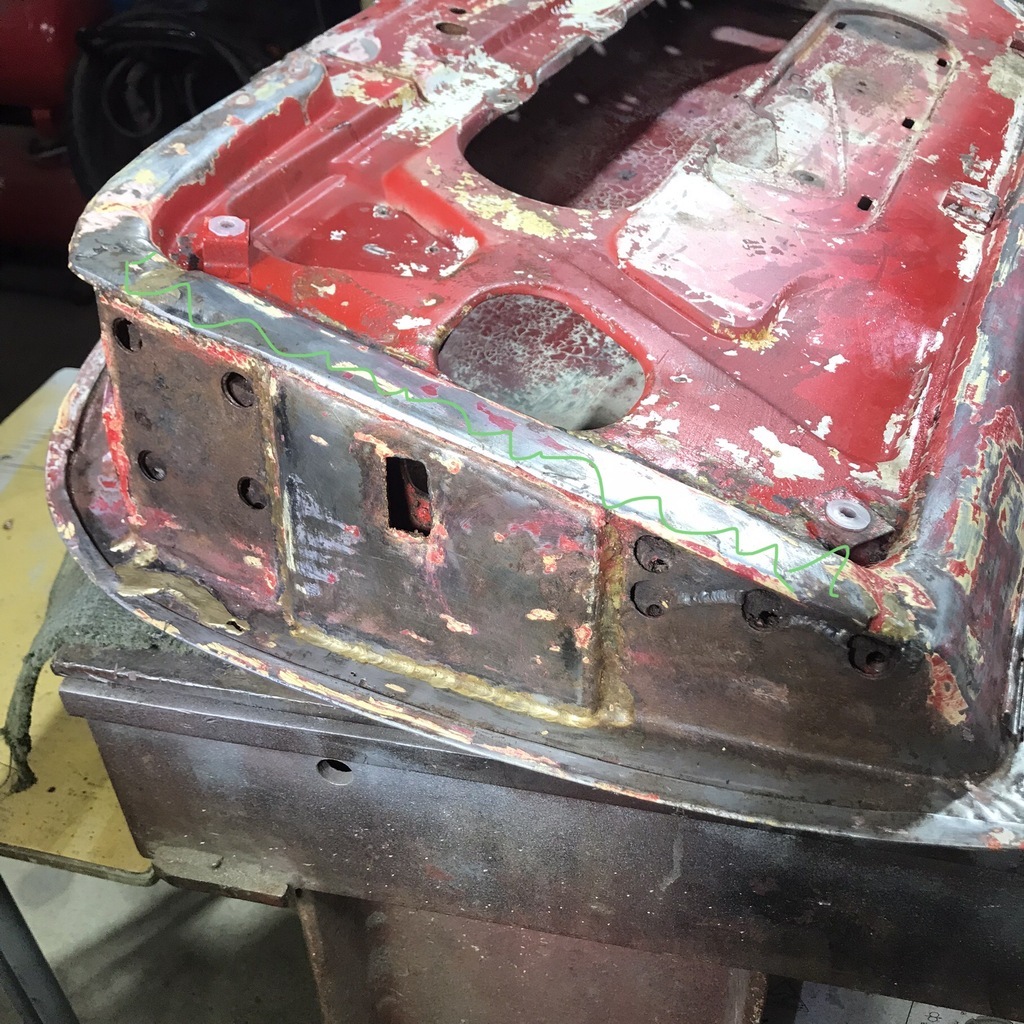 As you can see, braze everywhere, so I’m thinking someone’s been fairly well into this. The area marked in green is a sort of cover plate / dust and moisture trap. It needs to come off and with the amount of braze, it won’t surrender easily. So I made a replacement. 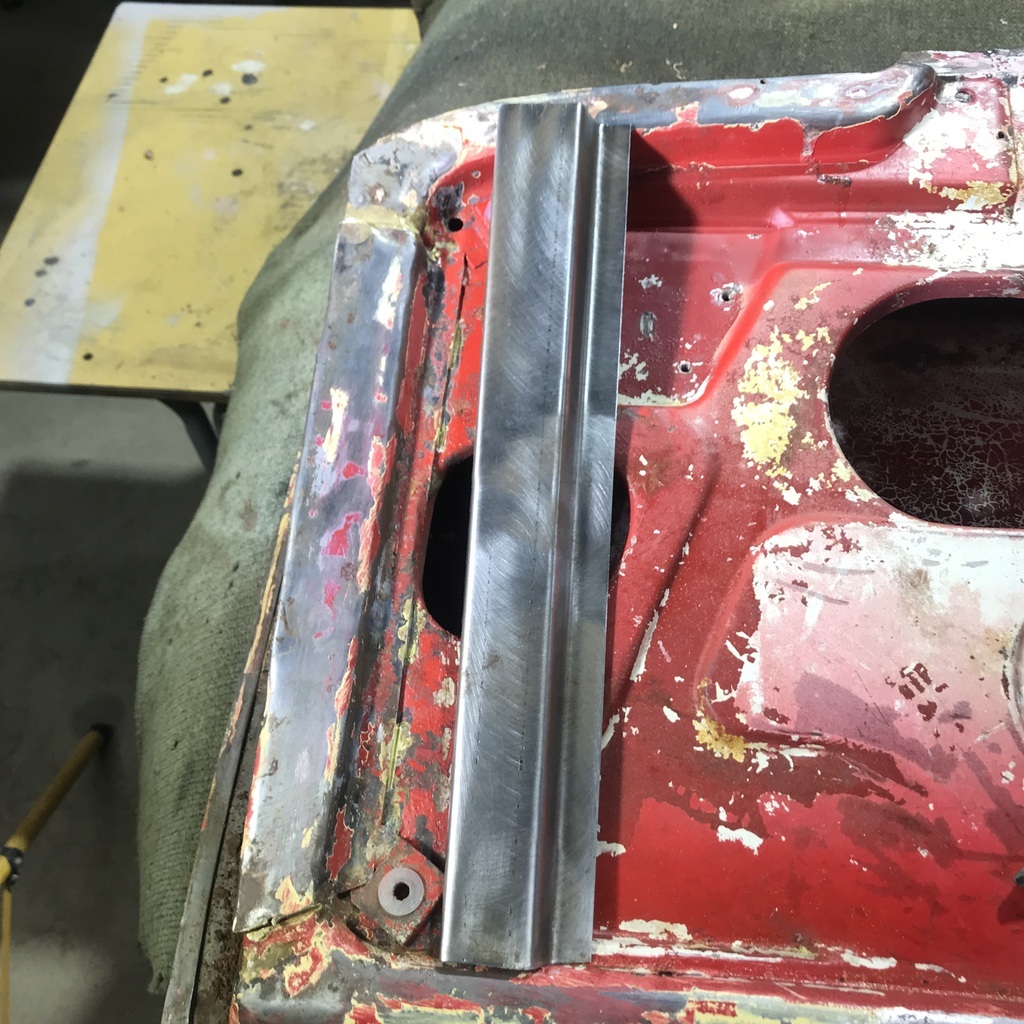 Then started unpicking the pieces. 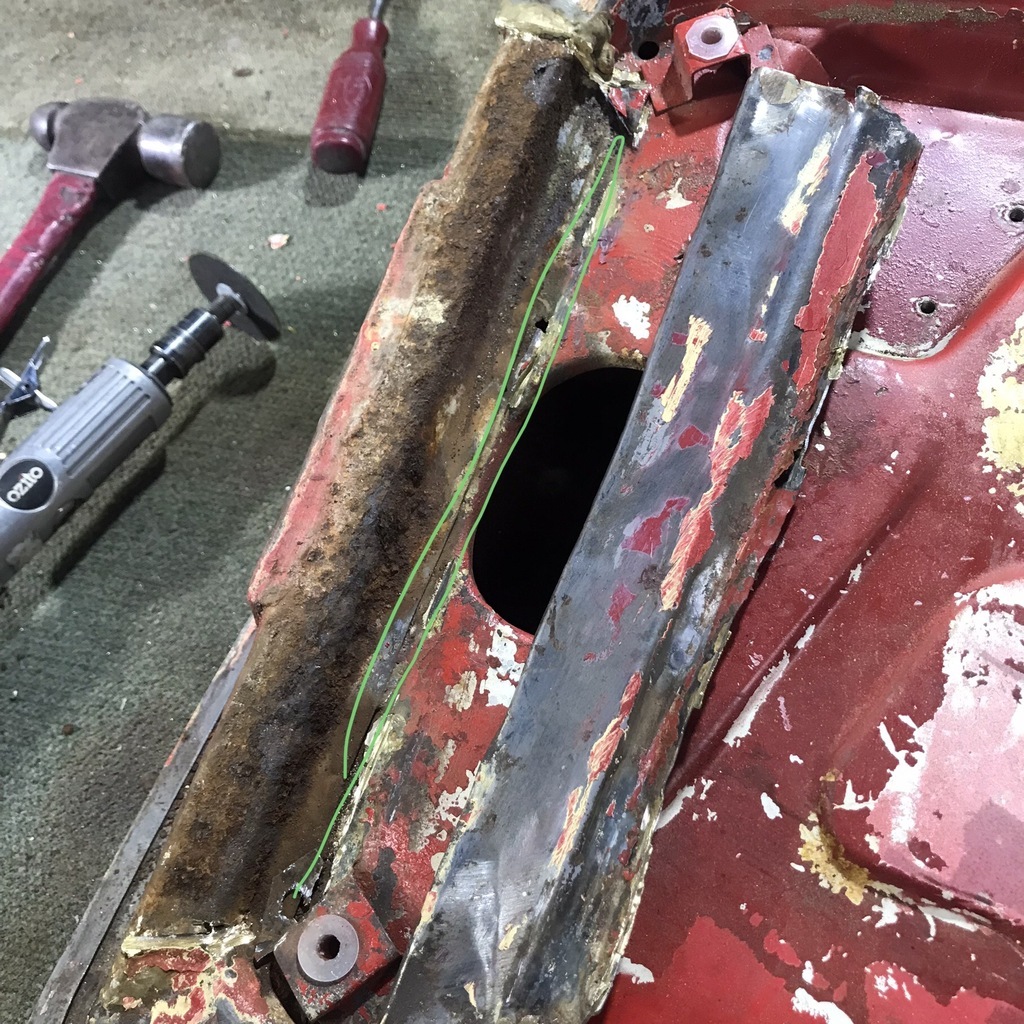 That’s an overlap circled in green. Some previous repair, not original. And once it was wire brushed, the brazed join is visible. 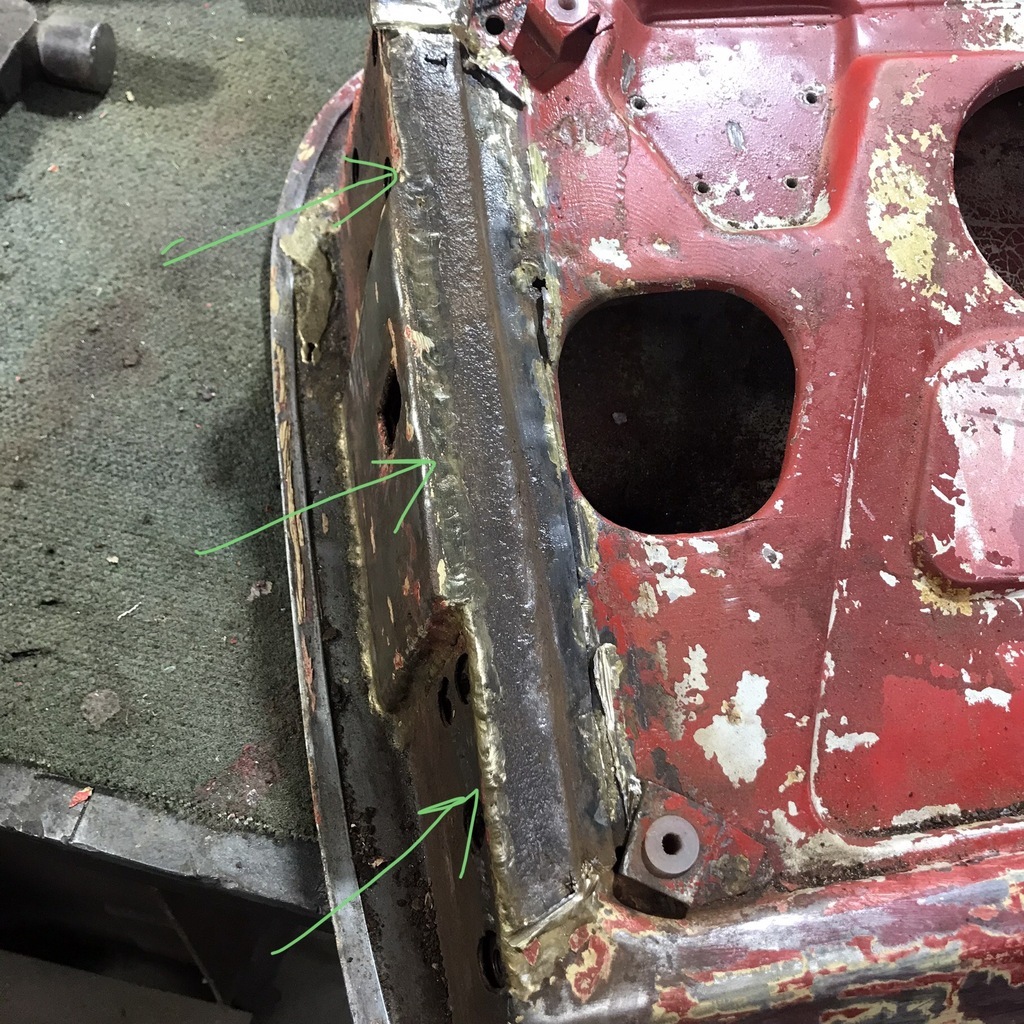 Virtually all the metal in that pic is originally one piece, the door frame. The folded over edge of the outer skin is also visible. So I cut that replacement piece off to reveal the inner brace for the hinge face. 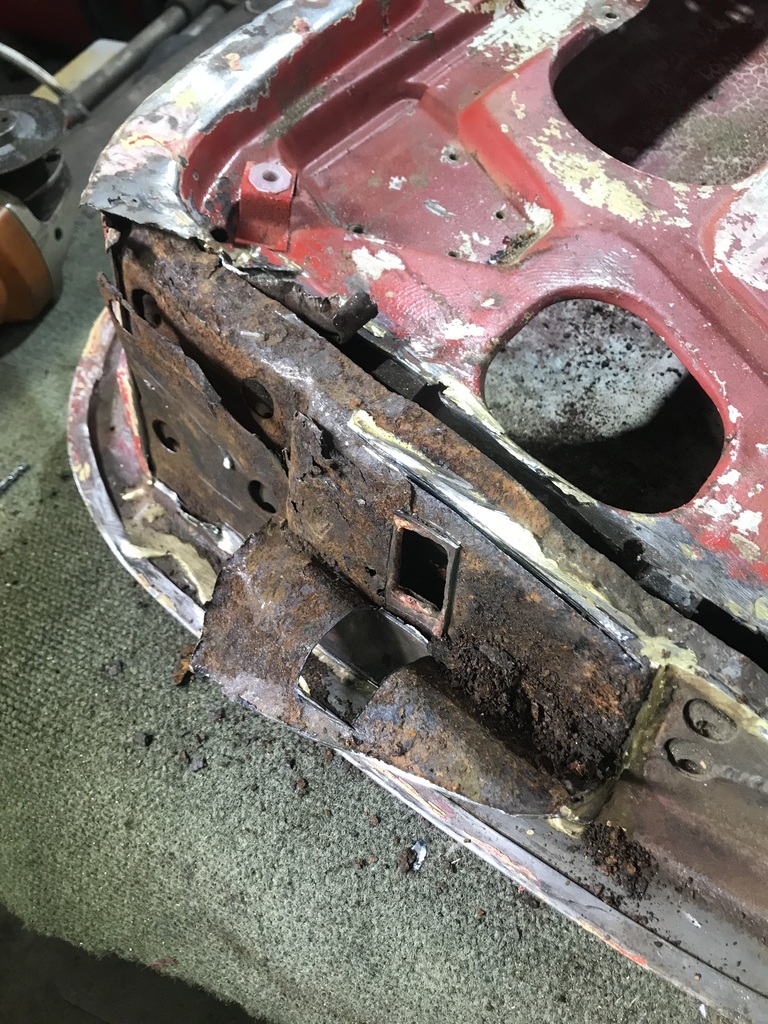 Not pretty. That would explain what appeared to be flex in the hinge area… I’ll make a replacement piece from 17#, for additional strength. Then I’ll make the frame repair out of 20#, which will be a bit easier to shape. First I got the inner brace exposed, so I could get my head around what it needs, and how it can be done without losing all the reference points. There are a couple of braces and hinge nut keepers welded to the inside of it. 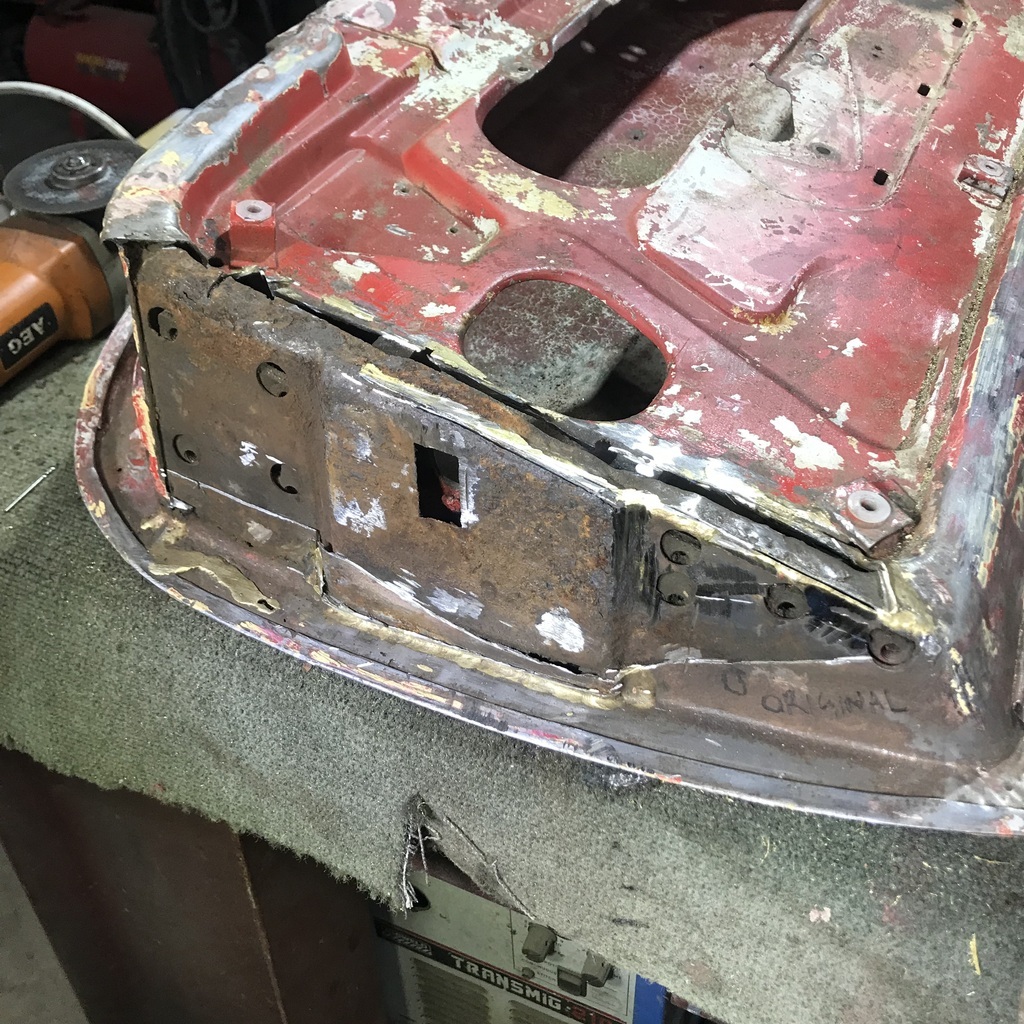 Rejigged the hammerform from the other day. And started whacking a piece of 17#. 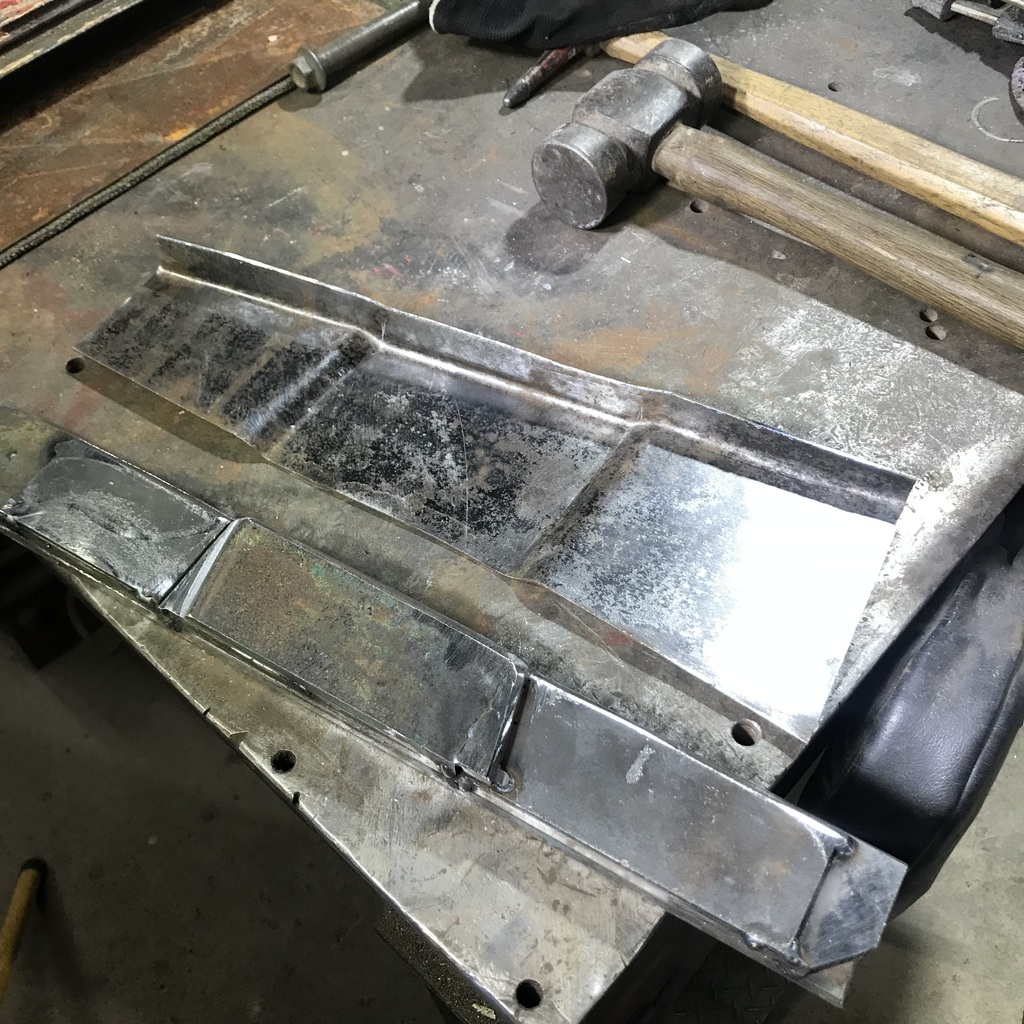 The shape is coming along. 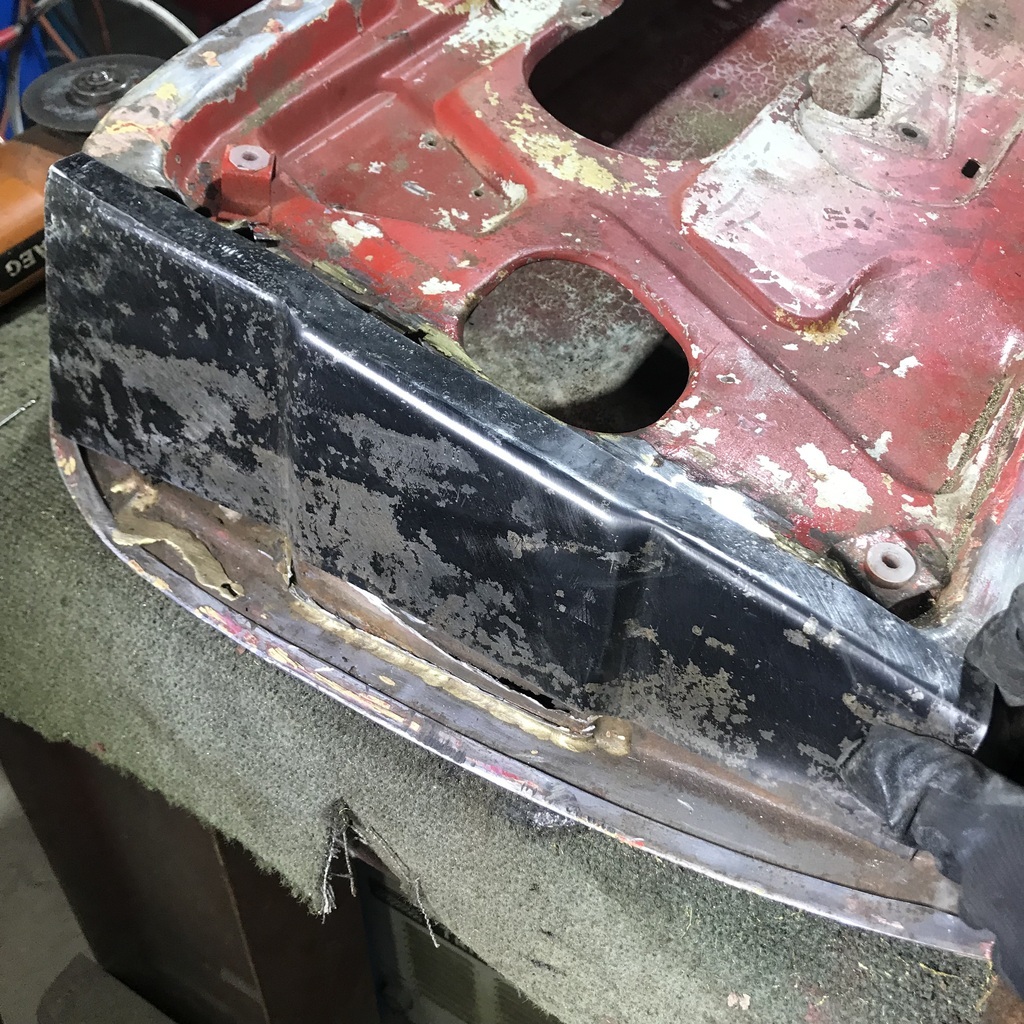 Thanks. |
| |
|
|
jamesd1972
Club Retro Rides Member
Posts: 2,921  Club RR Member Number: 40
|
1965 Sunbeam Tigerjamesd1972
@jamesd1972
Club Retro Rides Member 40
|
Sept 26, 2024 14:34:17 GMT
|
|
Nice work as always, brazed repair must be 30 years old !
As an aside to those that have been on here a bit I think georgeb would have loved this thread, he always liked an alpine and a V8.
James
“No one is finally dead until the ripples they cause in the world die away, until the clock wound up winds down, until the wine she made has finished its ferment, until the crop they planted is harvested. The span of someone’s life is only the core of their actual existence.”
― Terry Pratchett, Reaper Man
|
| |
|
|
|
|
jimi
Club Retro Rides Member
Posts: 2,239 
|
|
Sept 26, 2024 15:49:23 GMT
|
As an aside to those that have been on here a bit I think georgeb would have loved this thread, he always liked an alpine and a V8. James “No one is finally dead until the ripples they cause in the world die away, until the clock wound up winds down, until the wine she made has finished its ferment, until the crop they planted is harvested. The span of someone’s life is only the core of their actual existence.” ― Terry Pratchett, Reaper Man Indeed, another appropriate quote from Sir Terry is this from Going Postal |
| |
Black is not a colour ! .... Its the absence of colour
|
|
gazzam
Part of things
 
Posts: 746 
|
|
Sept 27, 2024 6:41:47 GMT
|
Stripped some more this morning. Worst I’ve found is this, quite a poor join in the repair panel to the sill. 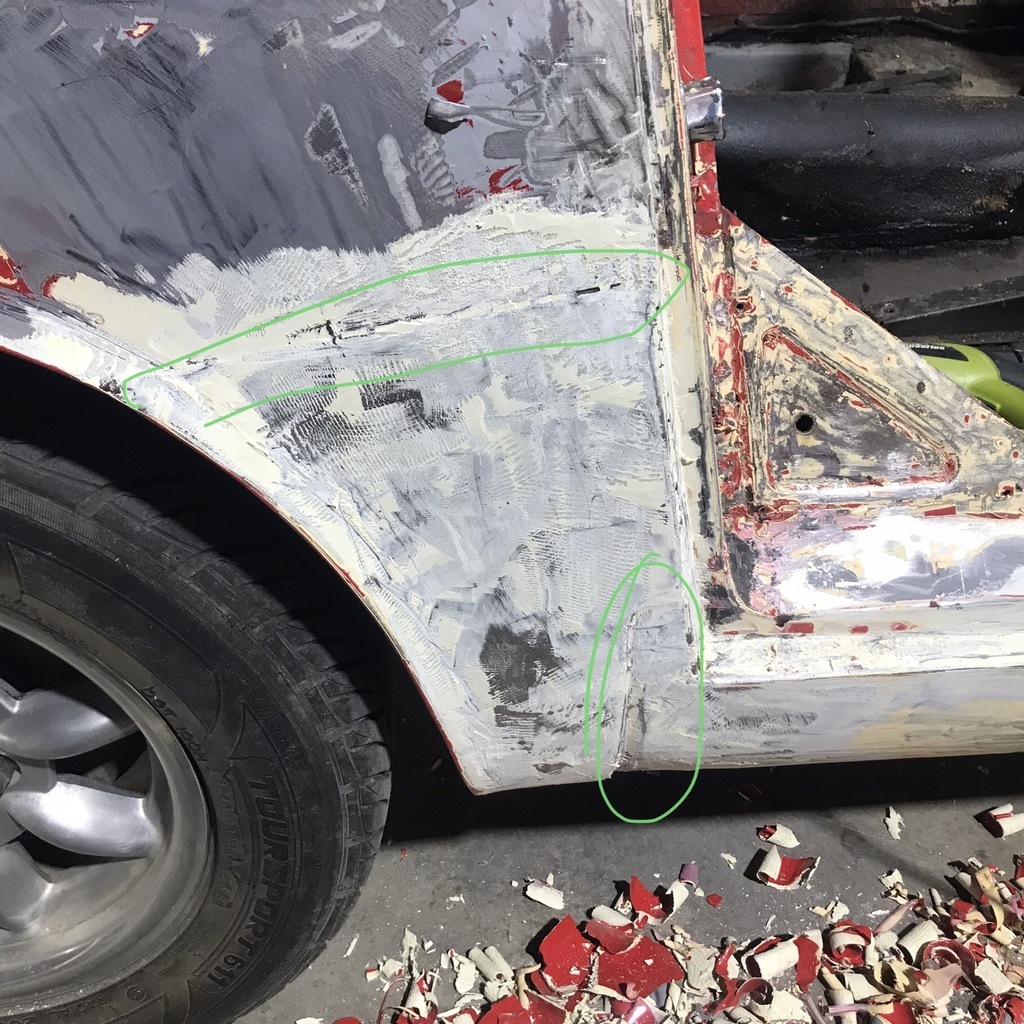 The top join seems quite well done but the lower one doesn’t meet the sill well at all. Probably about 4mm deep. Back onto the door. More fettling of the repair piece. 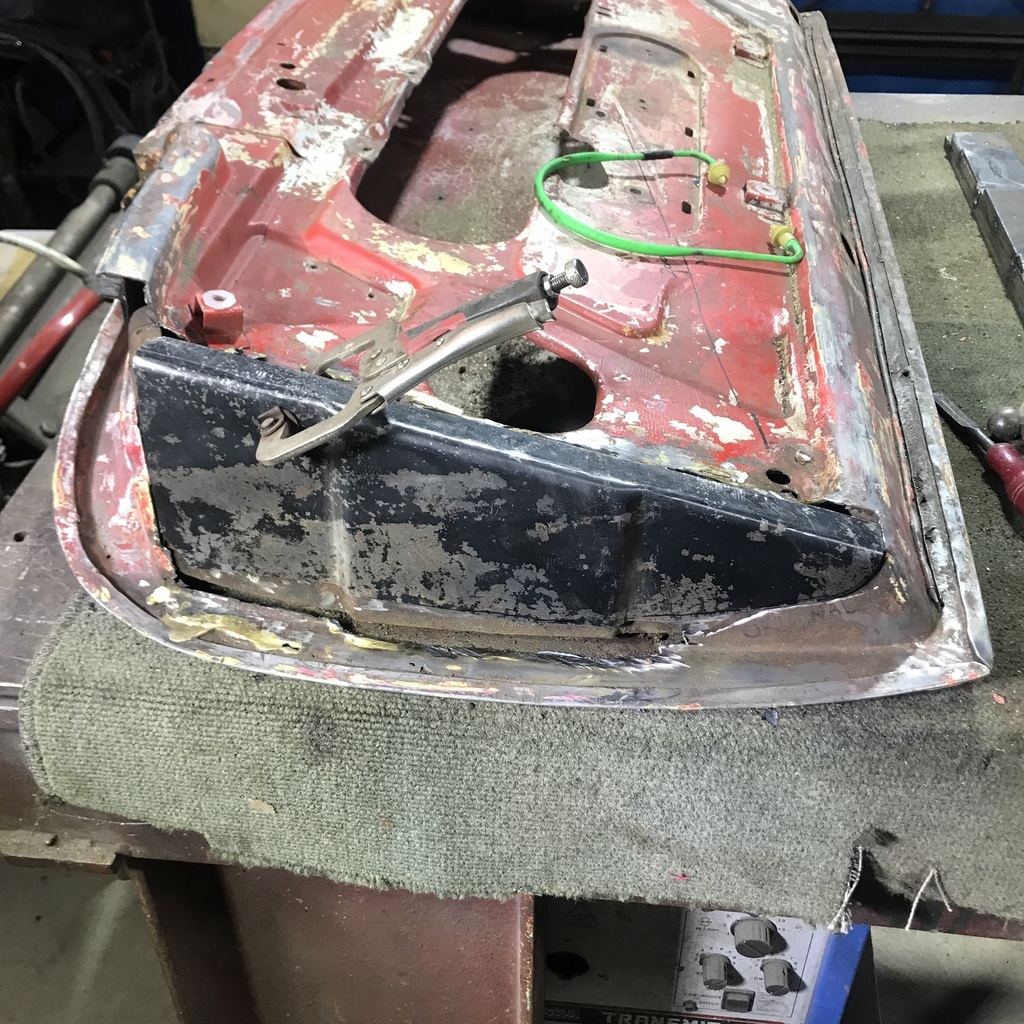 Got it to my happy place and trimmed out the old edge so that it would sit in the correct place. That let me pull the two hinge nut plates out. Then I could scribe the holes from inside the door. 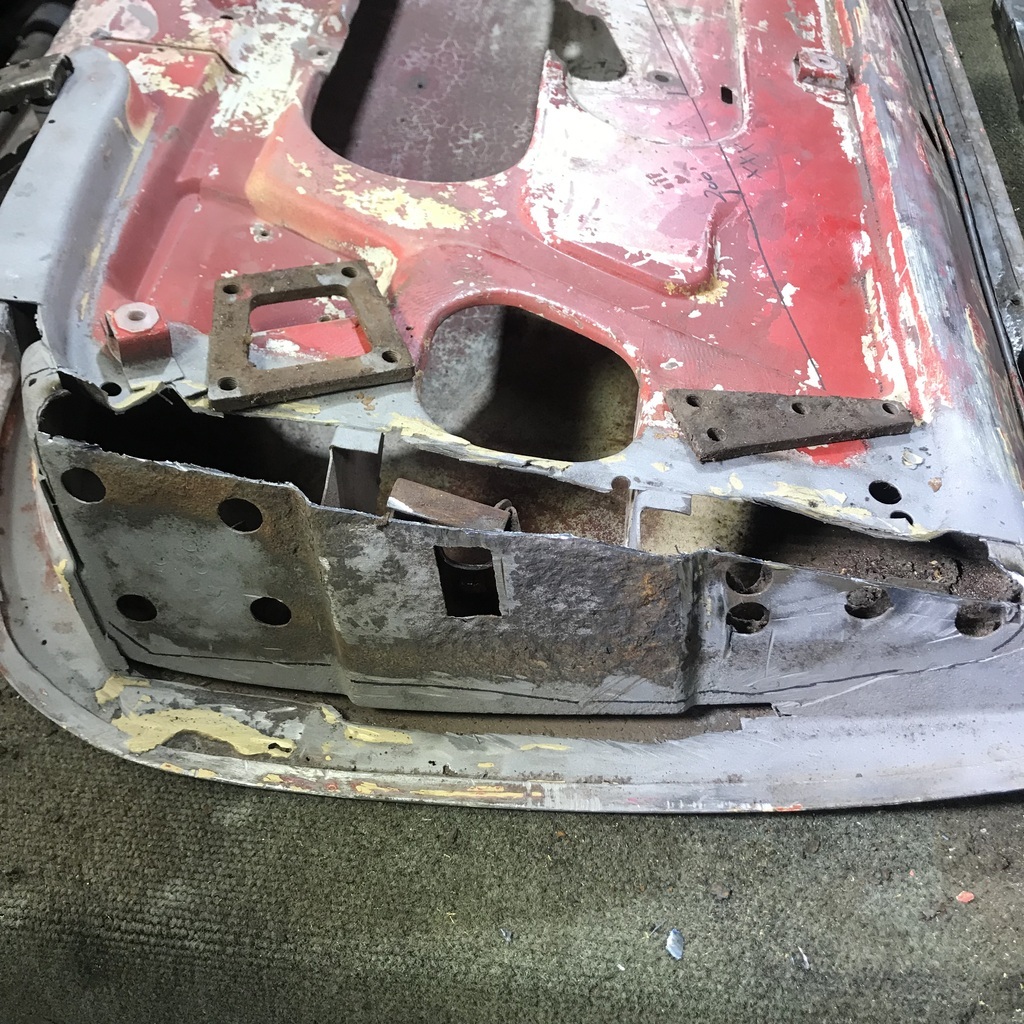 Tacked it back in place, and scribed the holes. Took it off and started the holes with a step drill. 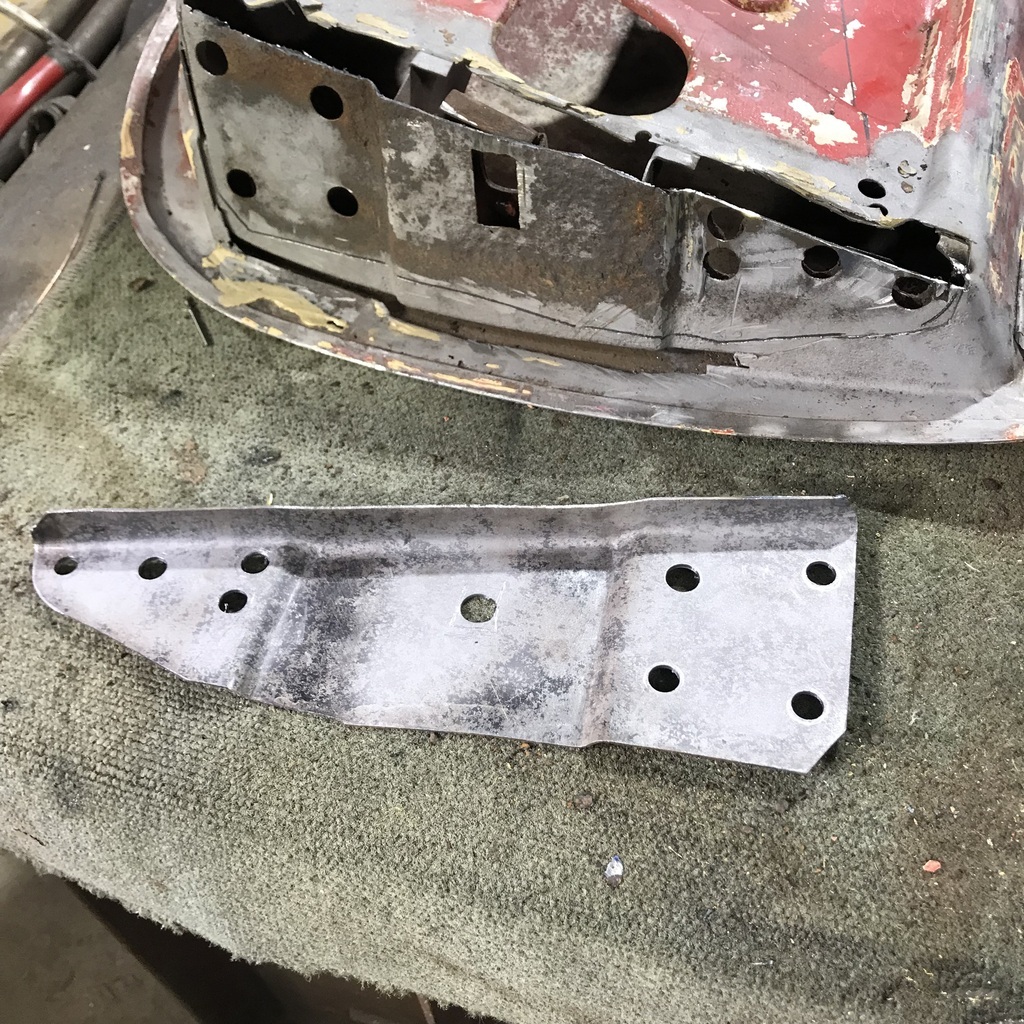 Then tacked it in again and finished the holes off with a die grinder, using the original holes as a guide. 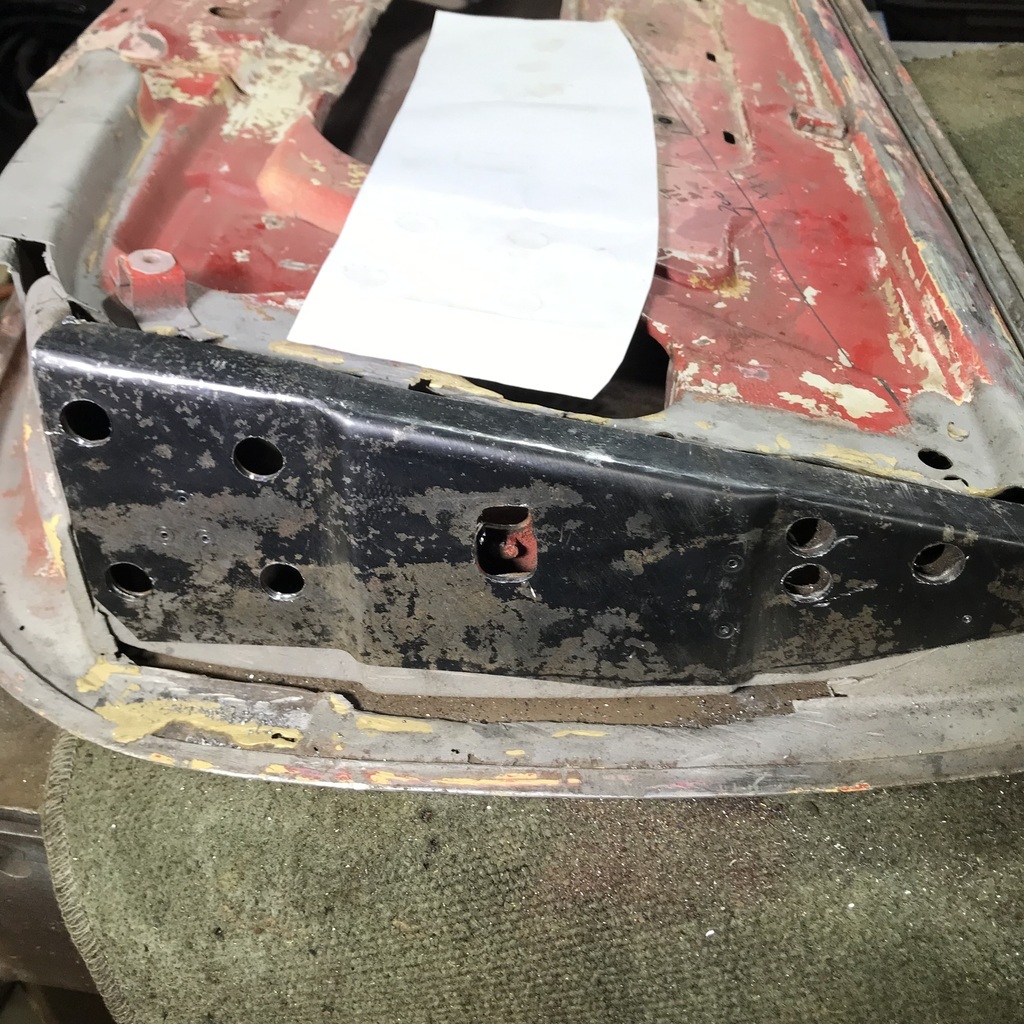 Except for the check strap hole. I'd made a dirty finger template of the holes previously. Lined it up with the holes then held it on with a couple of magnets and scribed the rectangular hole. 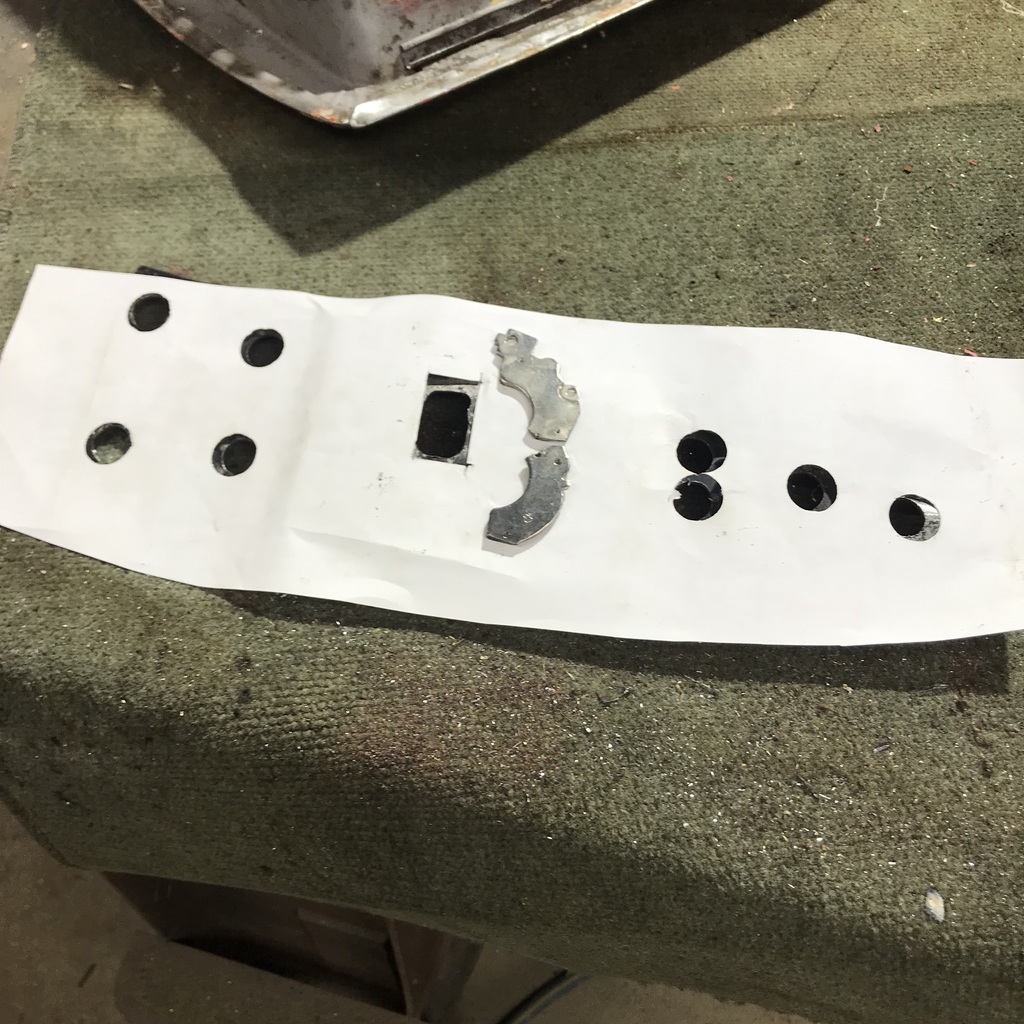 That’s all for today. Just waiting for an old school friend to turn up. We’re going to a school reunion tonight. Fifty years since we finished school. Fifty! Bl00dy Nora! Where did that go? Thanks. |
| |
|
|
gazzam
Part of things
 
Posts: 746 
|
|
Sept 29, 2024 7:47:48 GMT
|
Feeling a bit weary after two fairly big nights. Excellent reunion, but a bit sobering to think that it’ll probably be the last time I see a lot of those people. Back to the driver’s door. Removed the last of the internal brace. 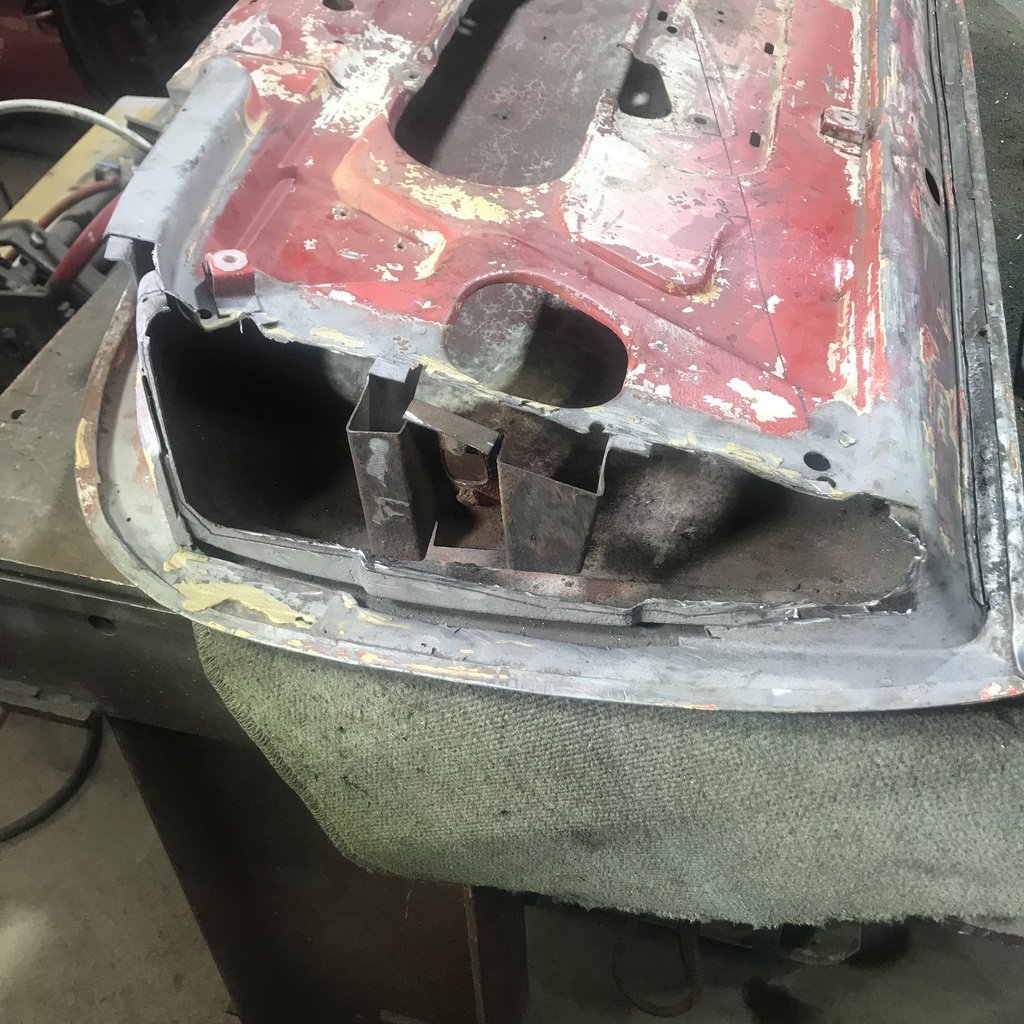 And got the repair piece fitting into place. 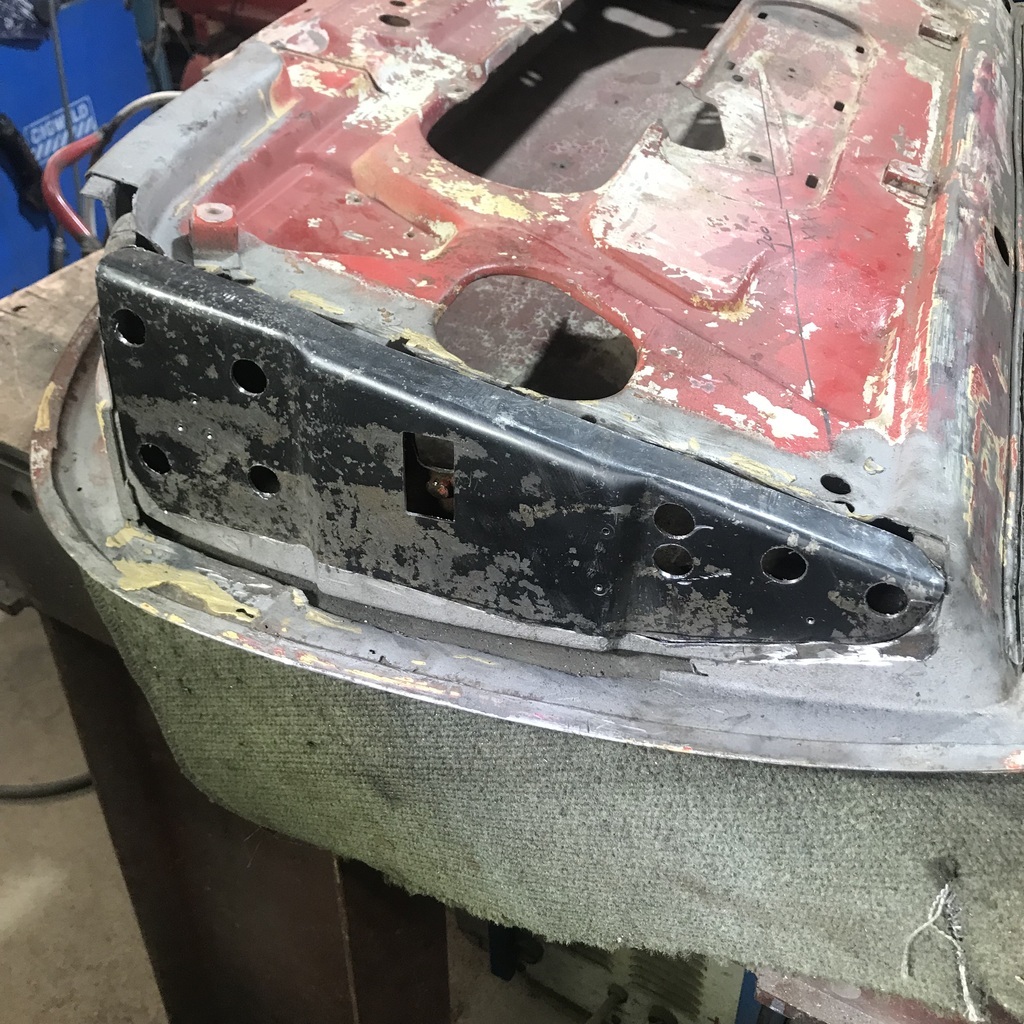 Blasted the repair piece and the hinge captive nut pieces. 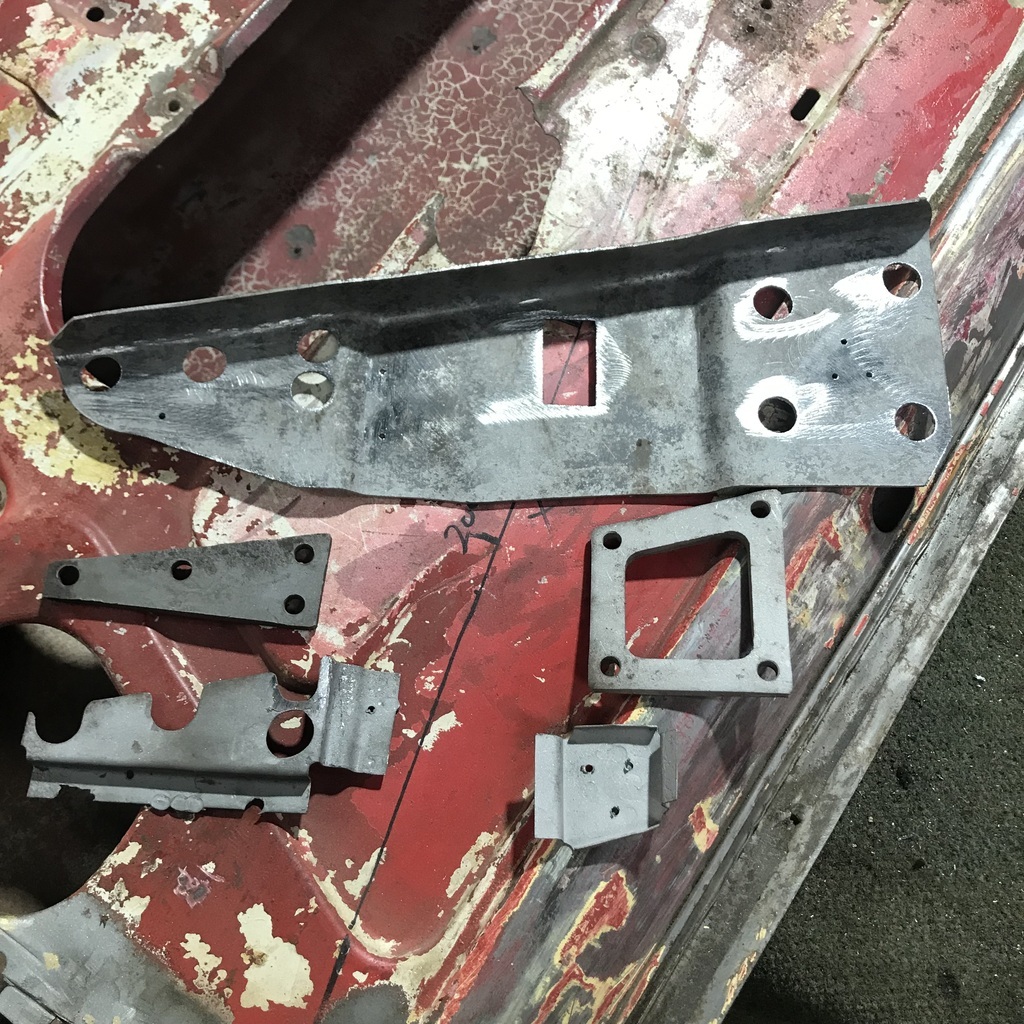 Sprayed some red oxide on them. 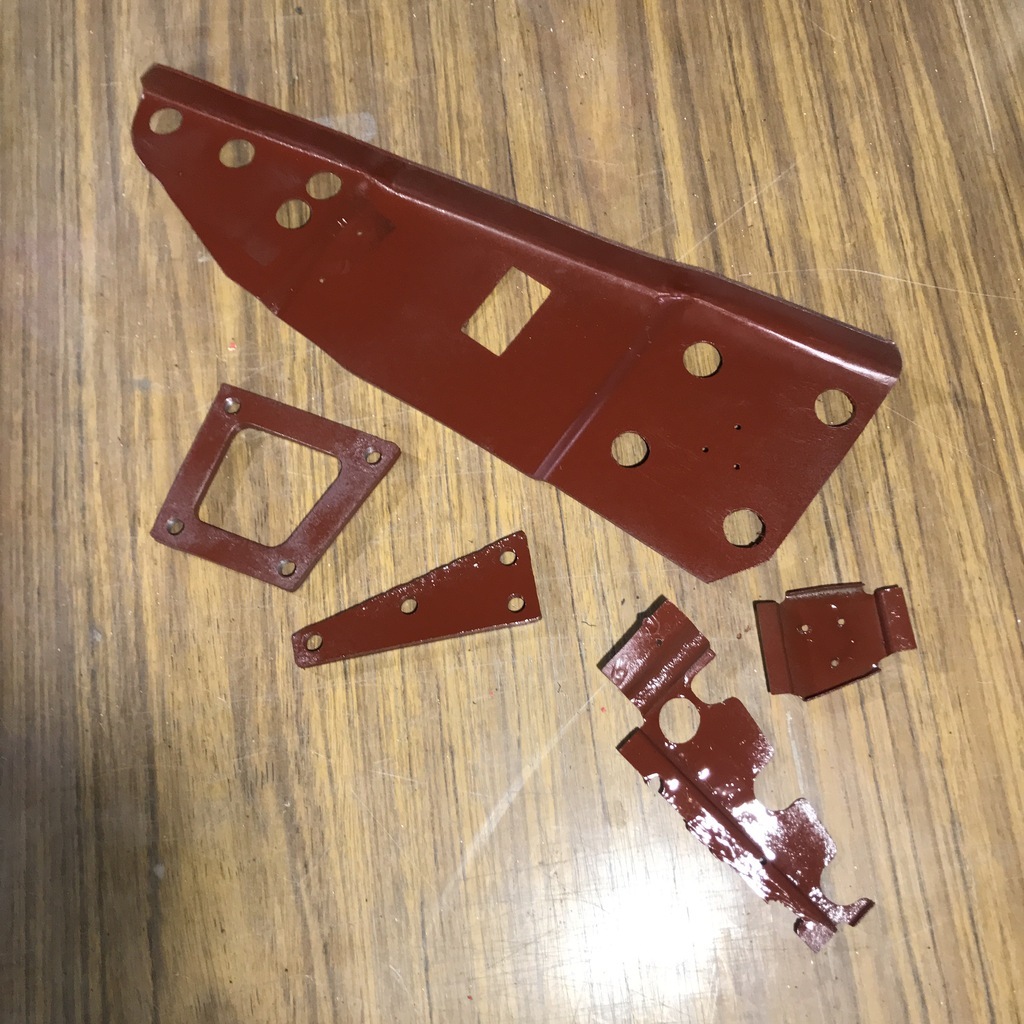 The door check strap mechanism is bent and the wire is missing. So I cut the spot welds and removed the whole thing. 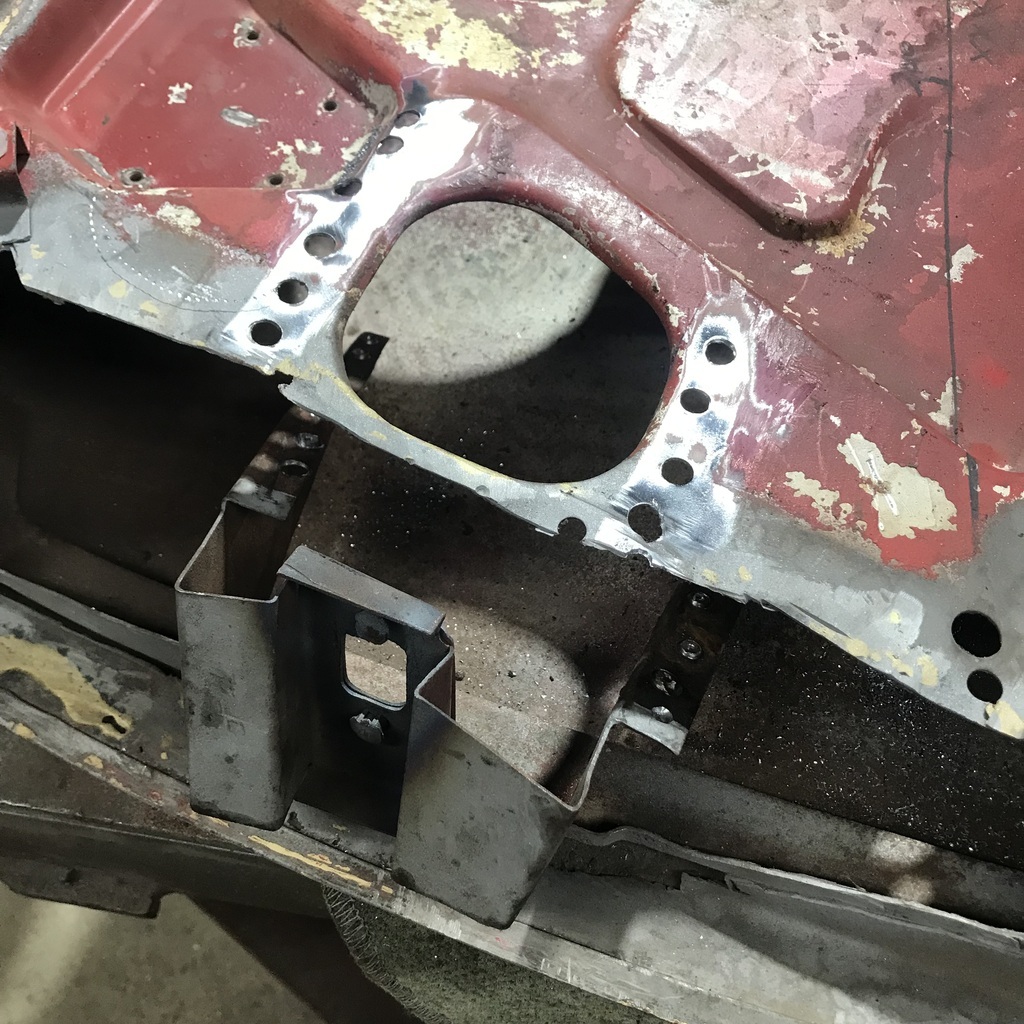 Straightened up the check strap hole which pushed the bracket legs out of whack. I’ll straighten it up so that the spot weld holes line up and it should be ok. Not sure what to do about the missing wire though. 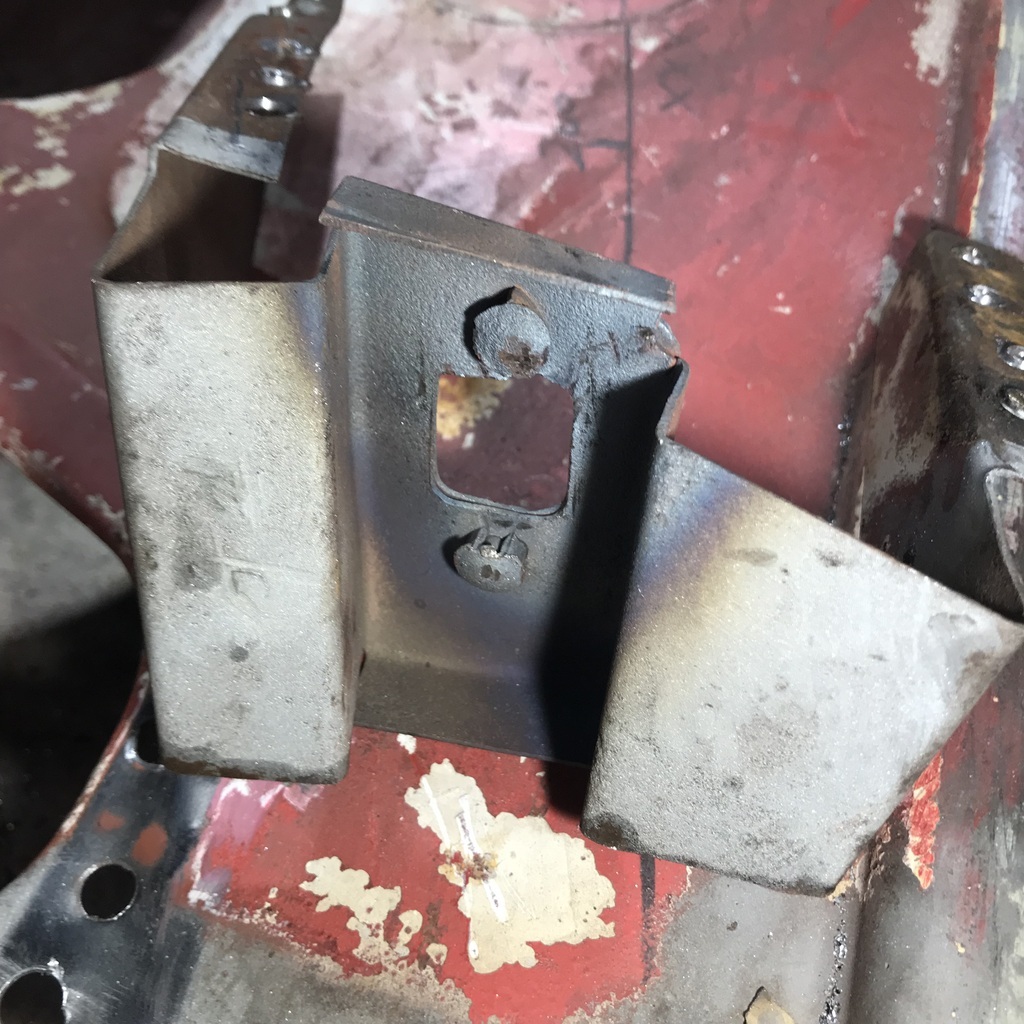 And that’s it for the day. Thanks. |
| |
|
|
gazzam
Part of things
 
Posts: 746 
|
|
Sept 30, 2024 8:23:00 GMT
|
The missing piece from the check strap is simply a strip of fairly hard steel. It's about 4mm wide and 2mm thick. I’ll call it a wire. The check strap clips to it, presumably to keep the door open if the car is on a slope. It’s wrapped around a rivet at each end. These are the rivets and the remaining bits of the wire. Poor pic, too close I think. 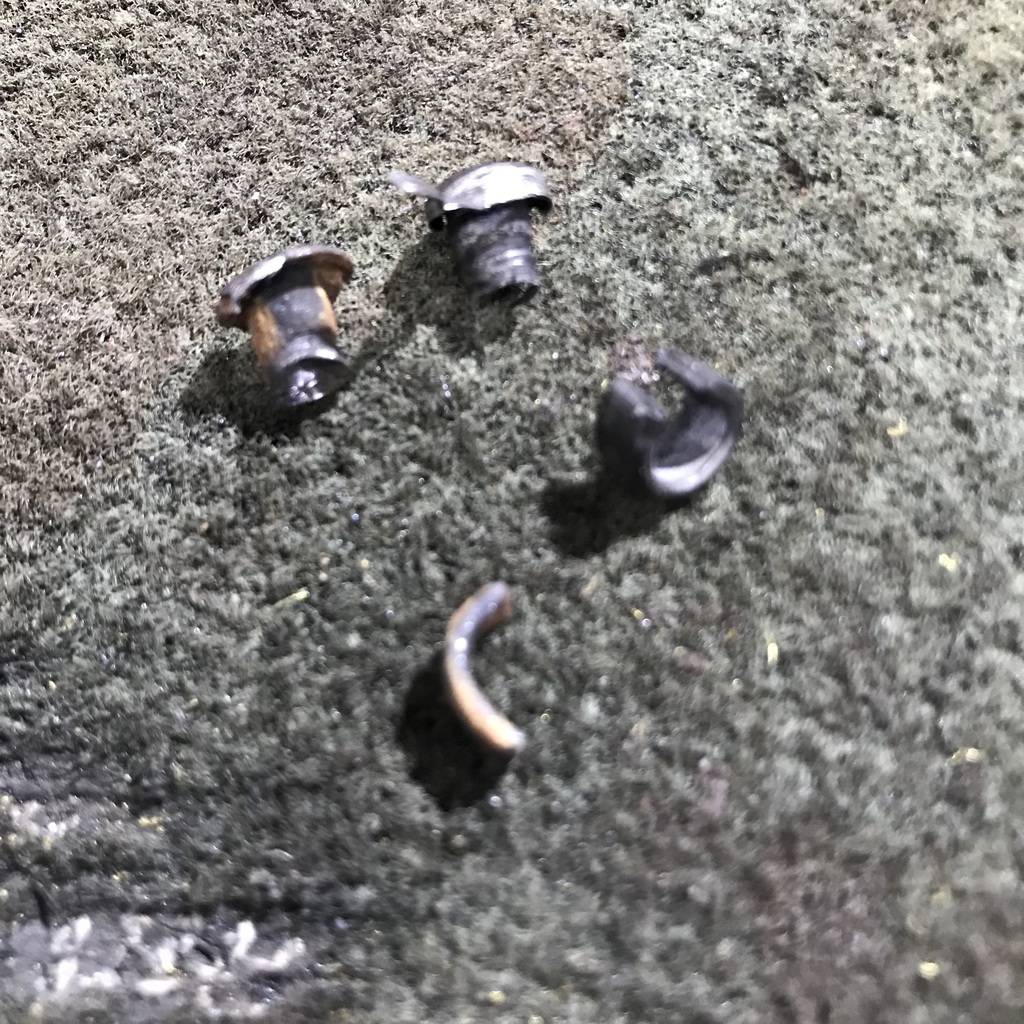 I found some spokes about the right diameter and ground a flat on either side. 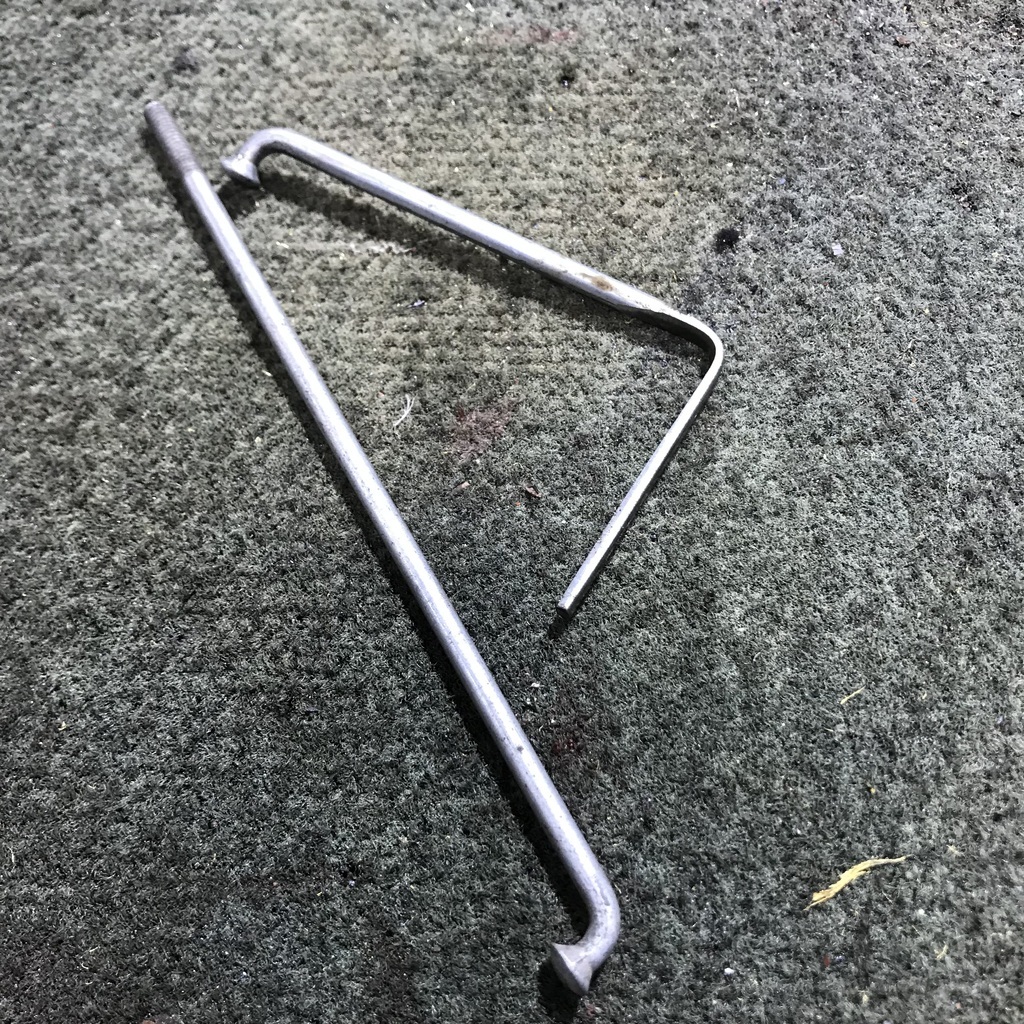 Then turned up a couple of rivets out of some 10mm mild steel rod. Very difficult to cold bend the wire around the rivets. Hard to get a hold of. 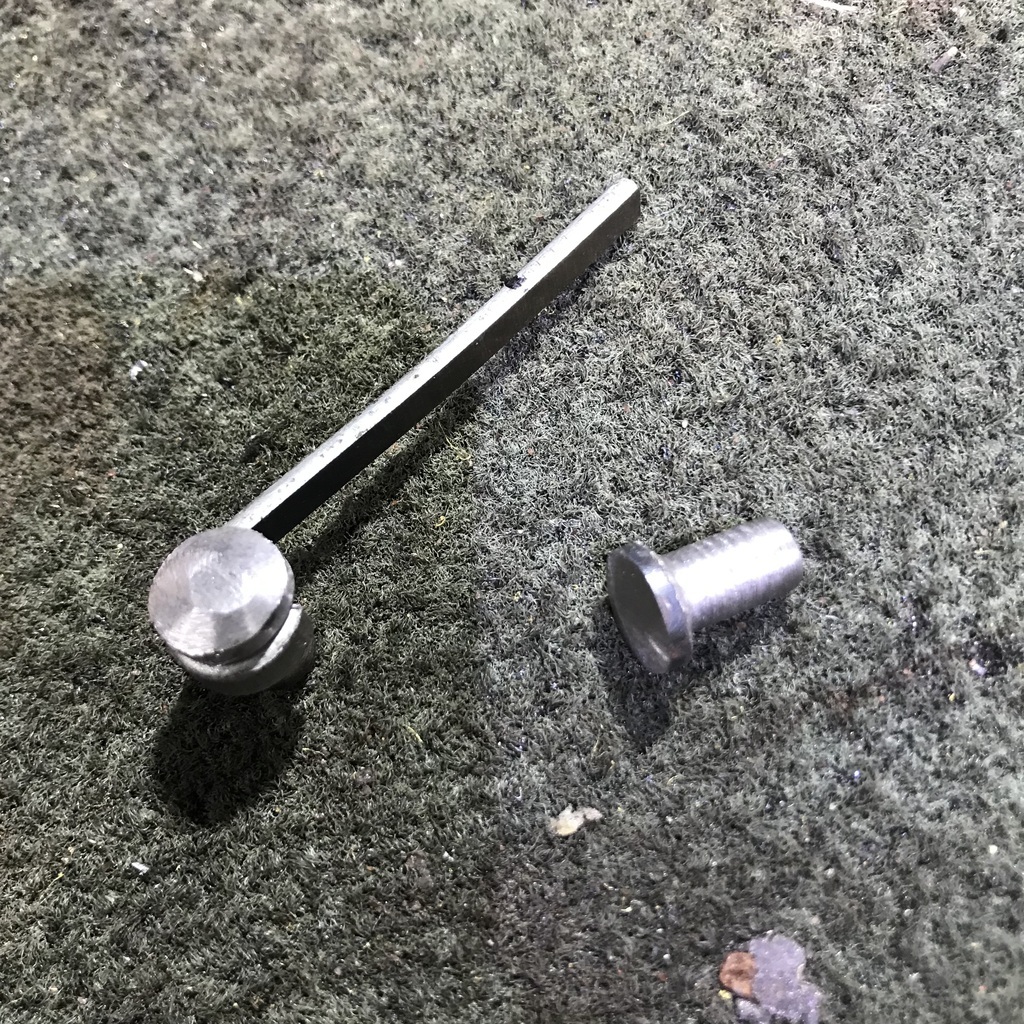 Finished and riveted back in place 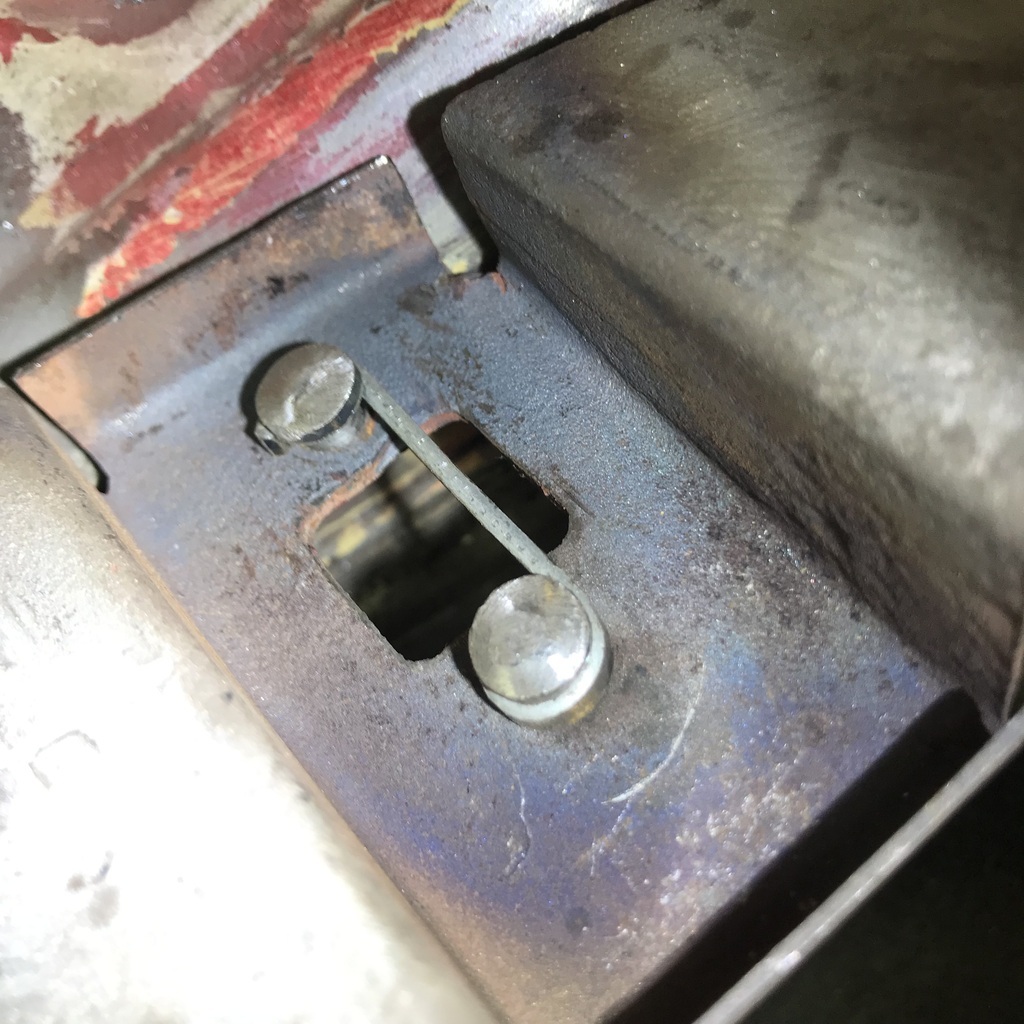 After that little project, I could reassemble the bits that form the inner brace. First I tacked the check strap bizzo in place. 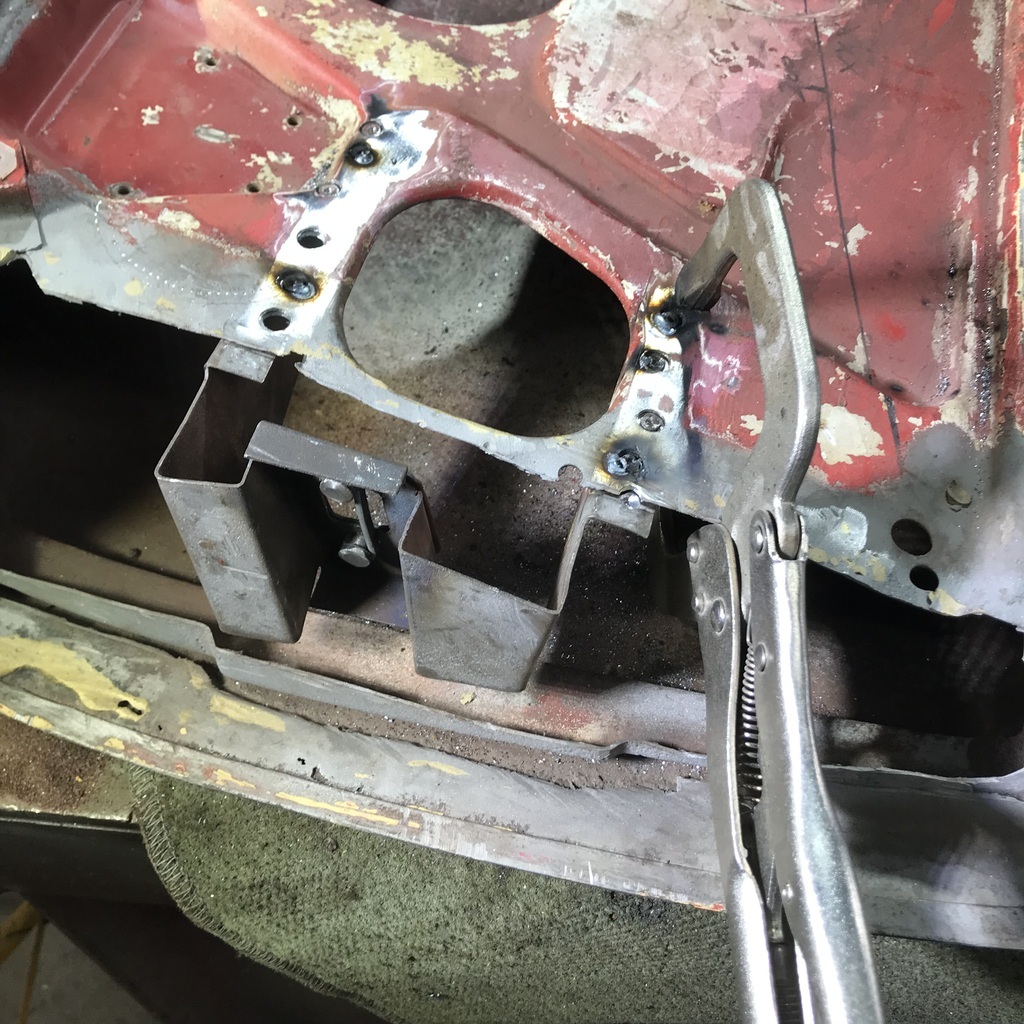 Once I was happy that it was in the right place it got the full MIG treatment and ground off. 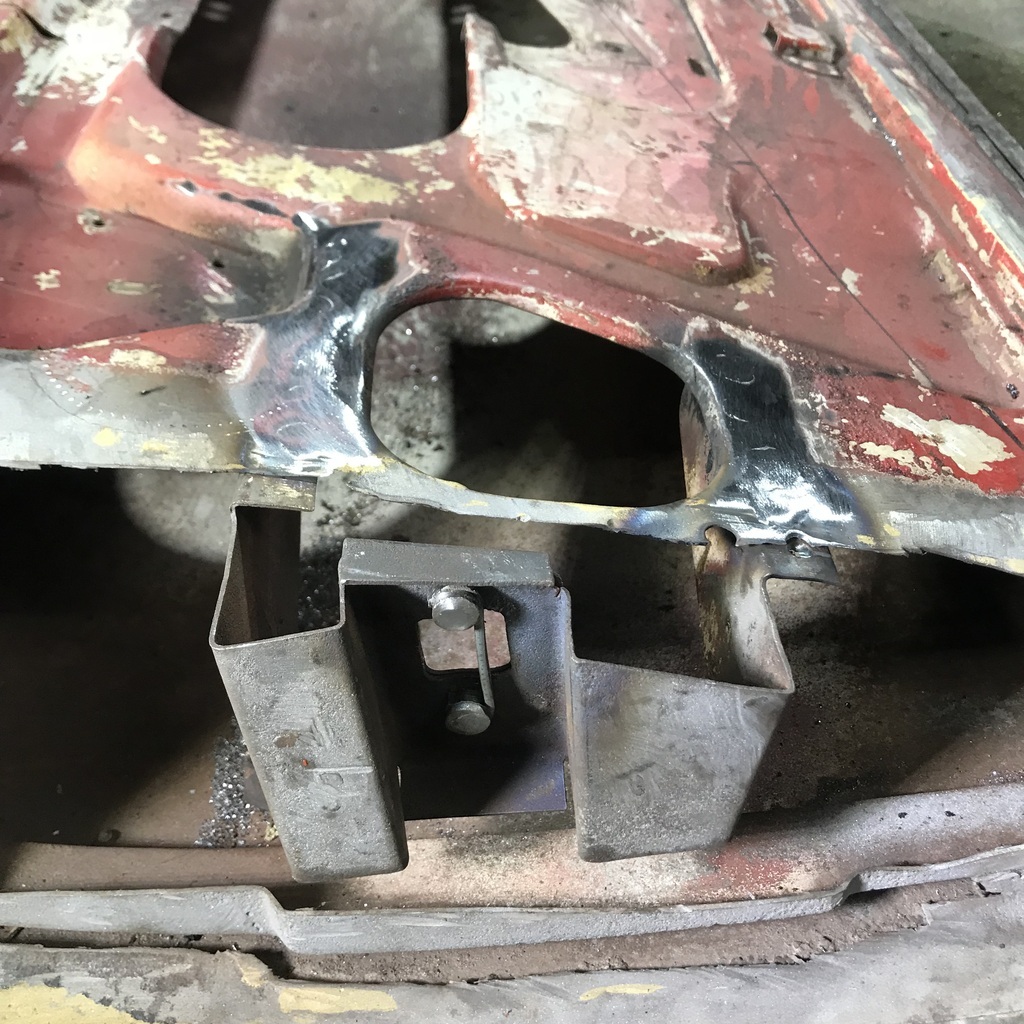 Then I welded the hinge nut plate retainers to the back of the repair piece. 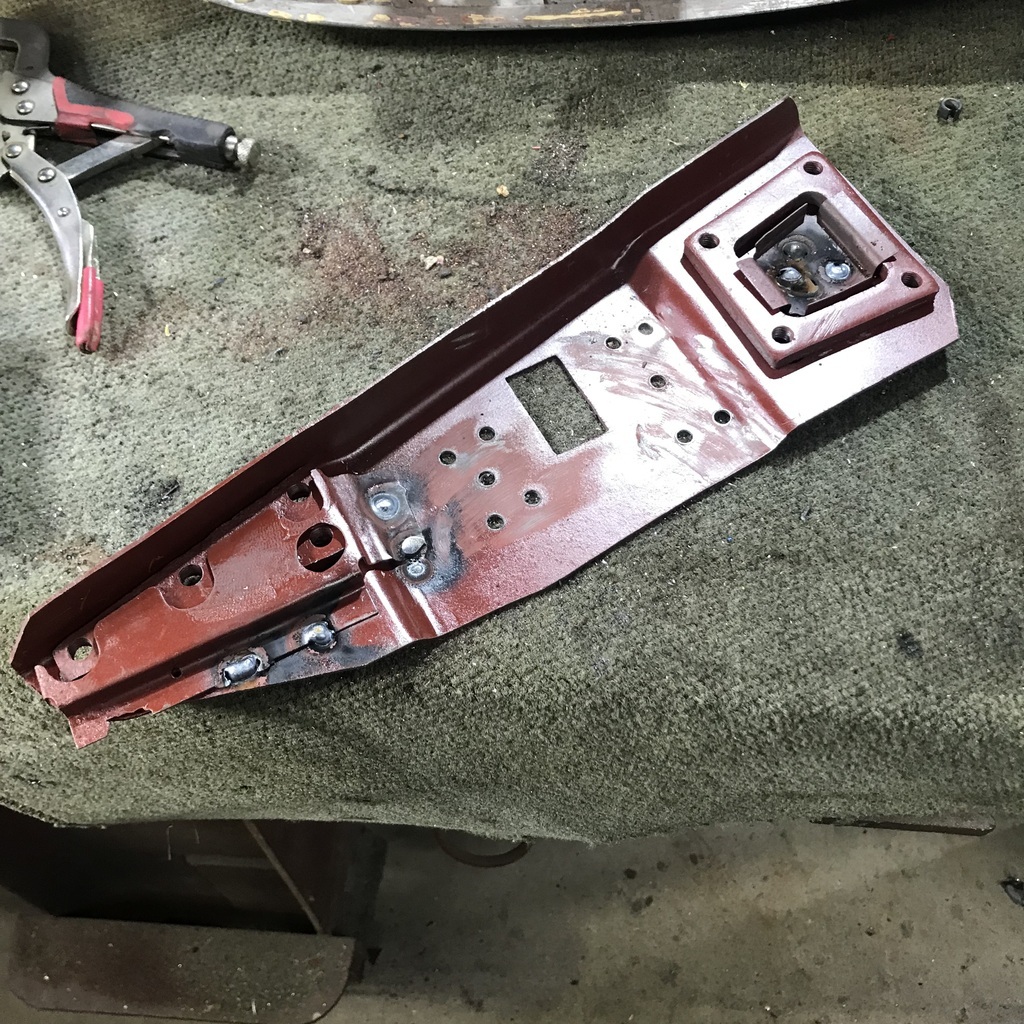 Then welded the finished bit back in. 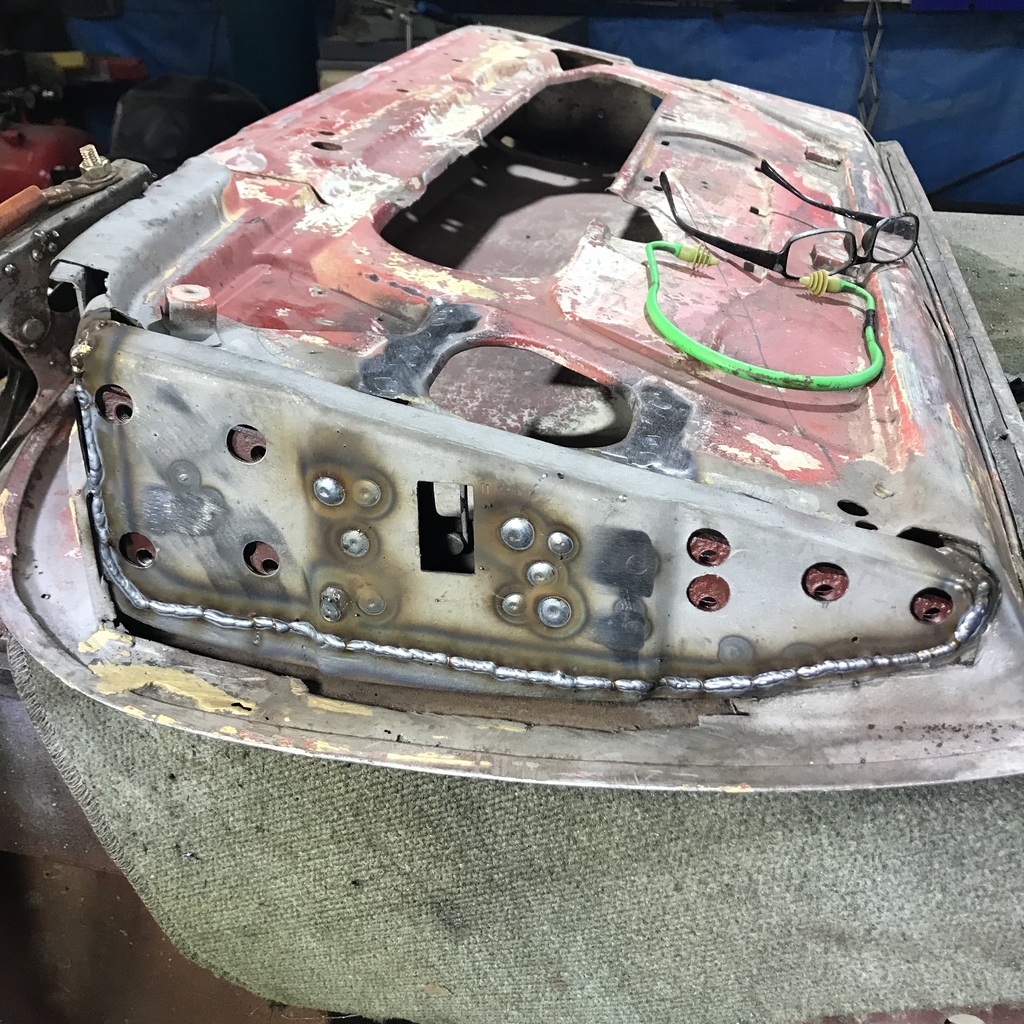 And ground it off. 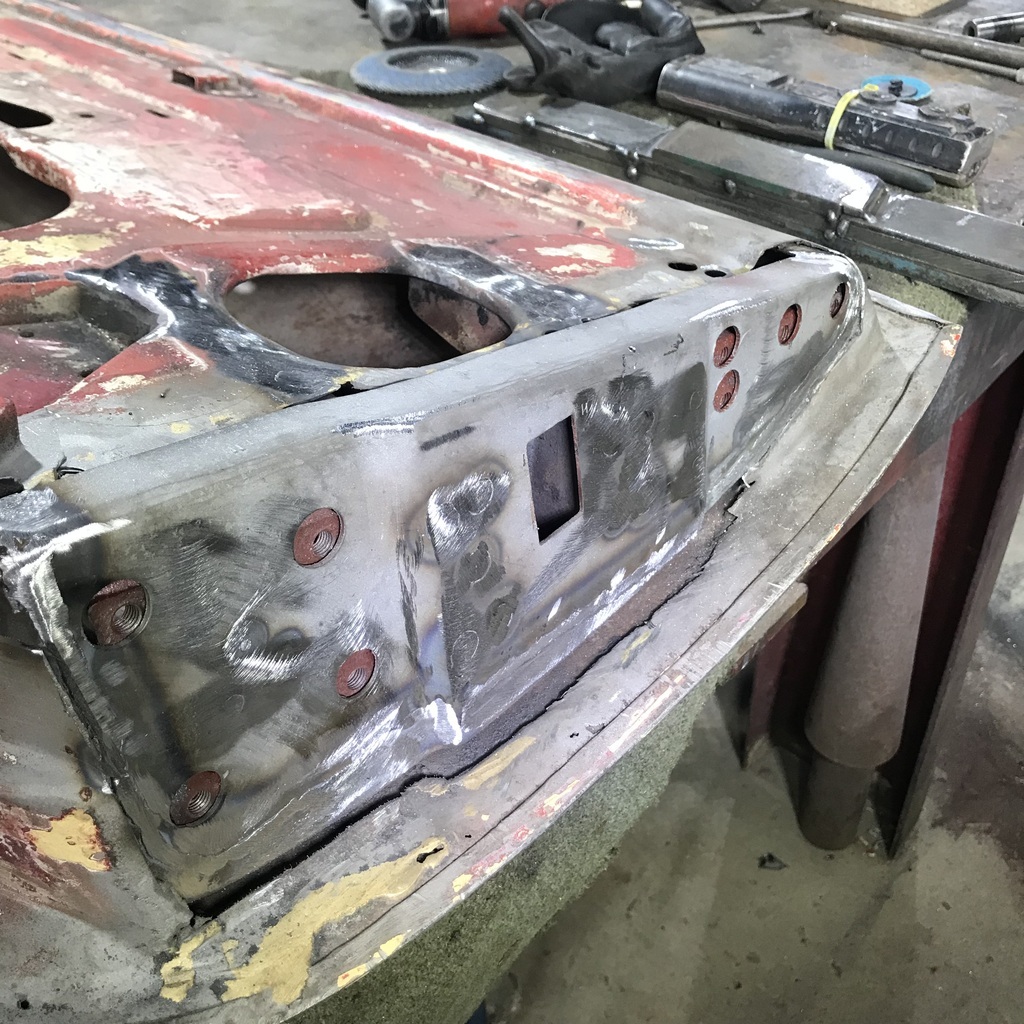 Quite pleased with that. Hope it’s all close enough to the right shape… So now I have to make the repair piece for the actual door frame, to cover up all you’ve just seen. Being a firm believer in the hammerform, I looked for some suitable steel. This is the handle for a huge “wallaby” jack, it’s going to be repurposed, just for a short time. 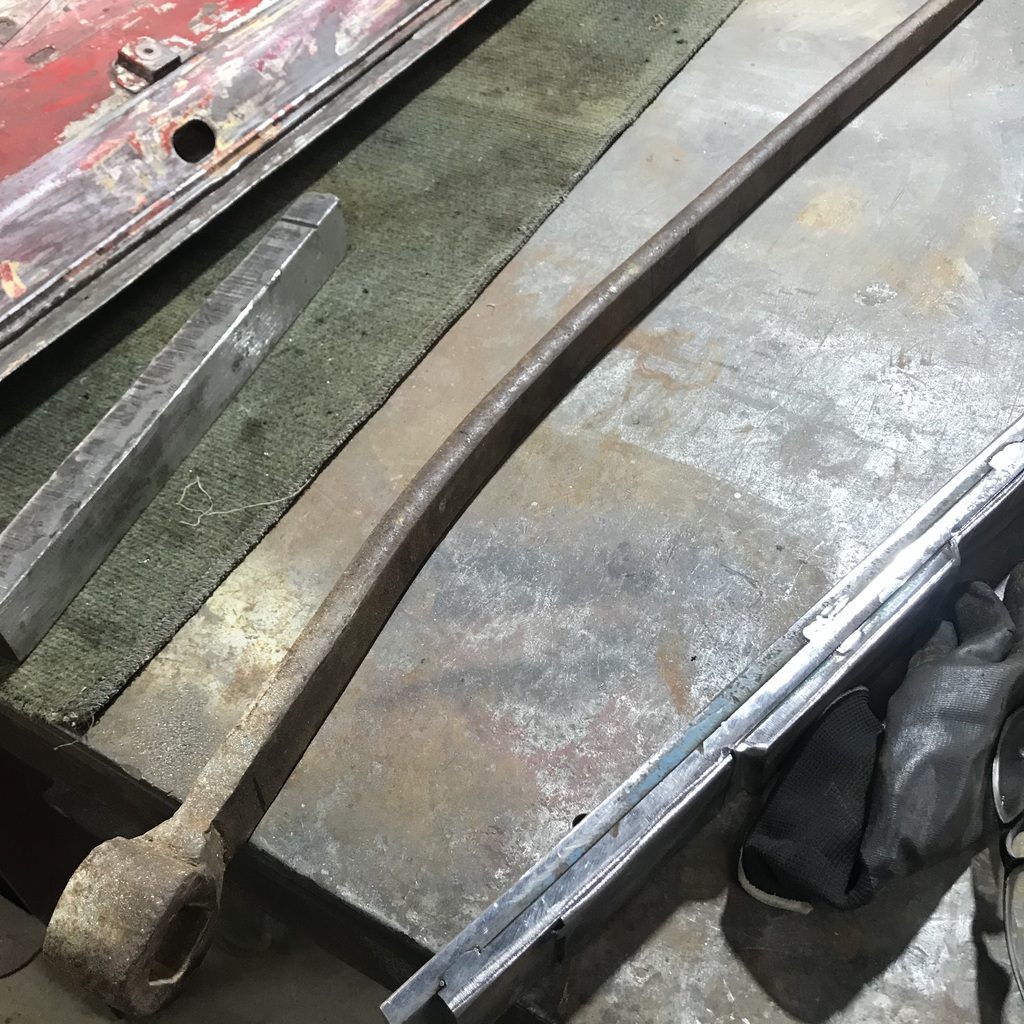 I have two of the jacks, (and two handles) and they’re older than me. They were my father’s, and he and I used them a lot, lifting truck bodies and other things. I was warned early on that they’d take a finger in a second, so I’ve always been very wary of them. Very handy when you have a job for them though. 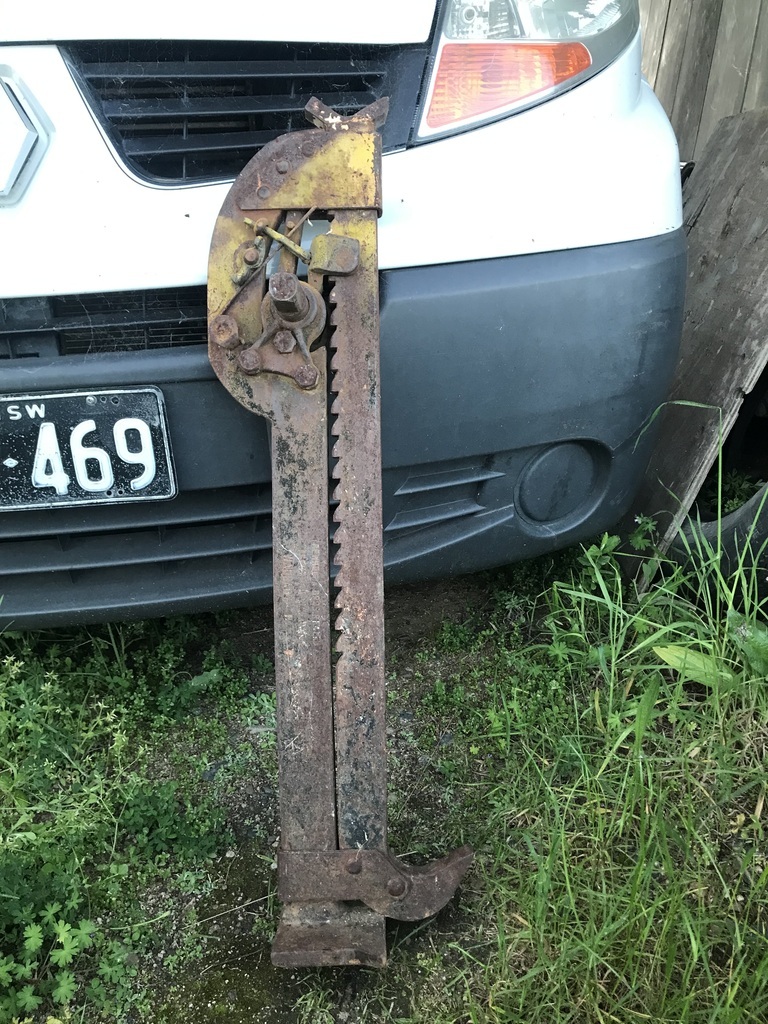 So I cut a section of handle after putting a bend it to follow the profile of the front edge of the door. Then welded a couple of bits of 1/4 inch plate to it. 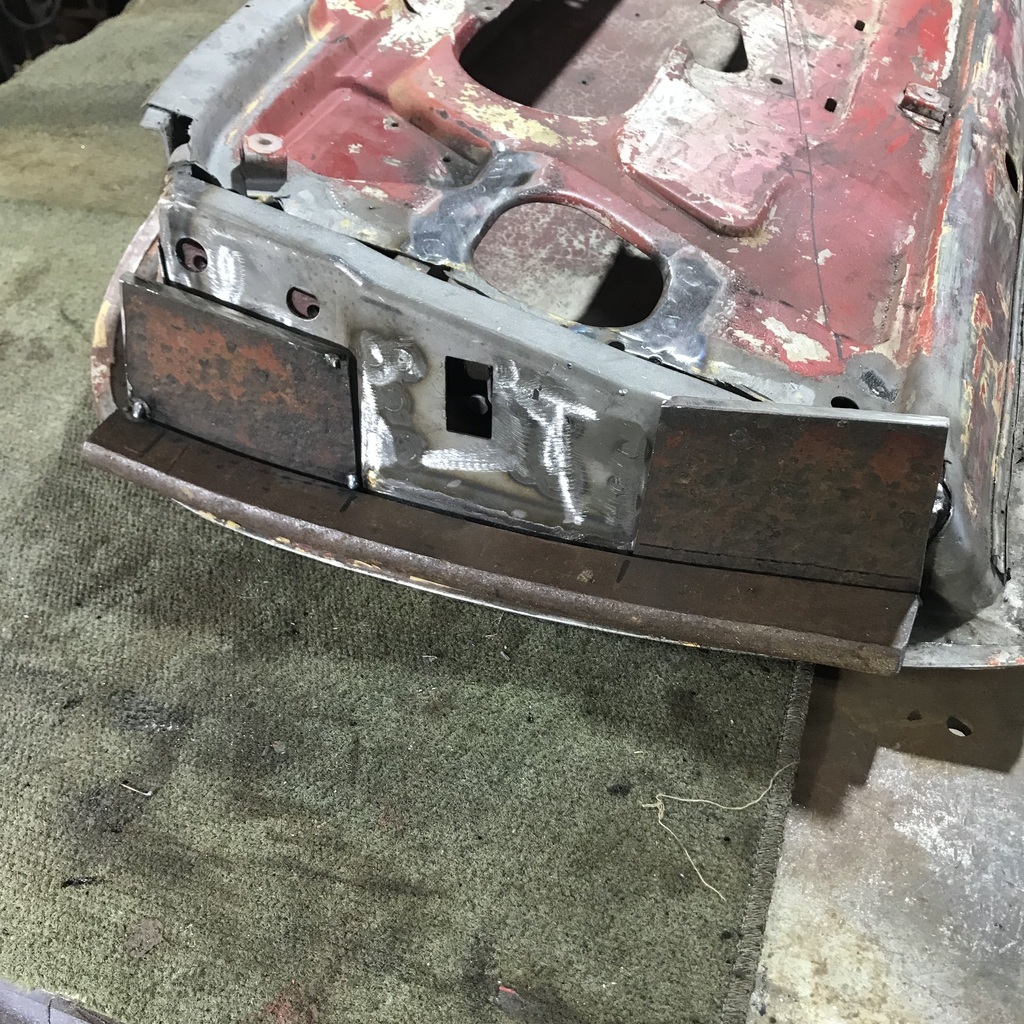 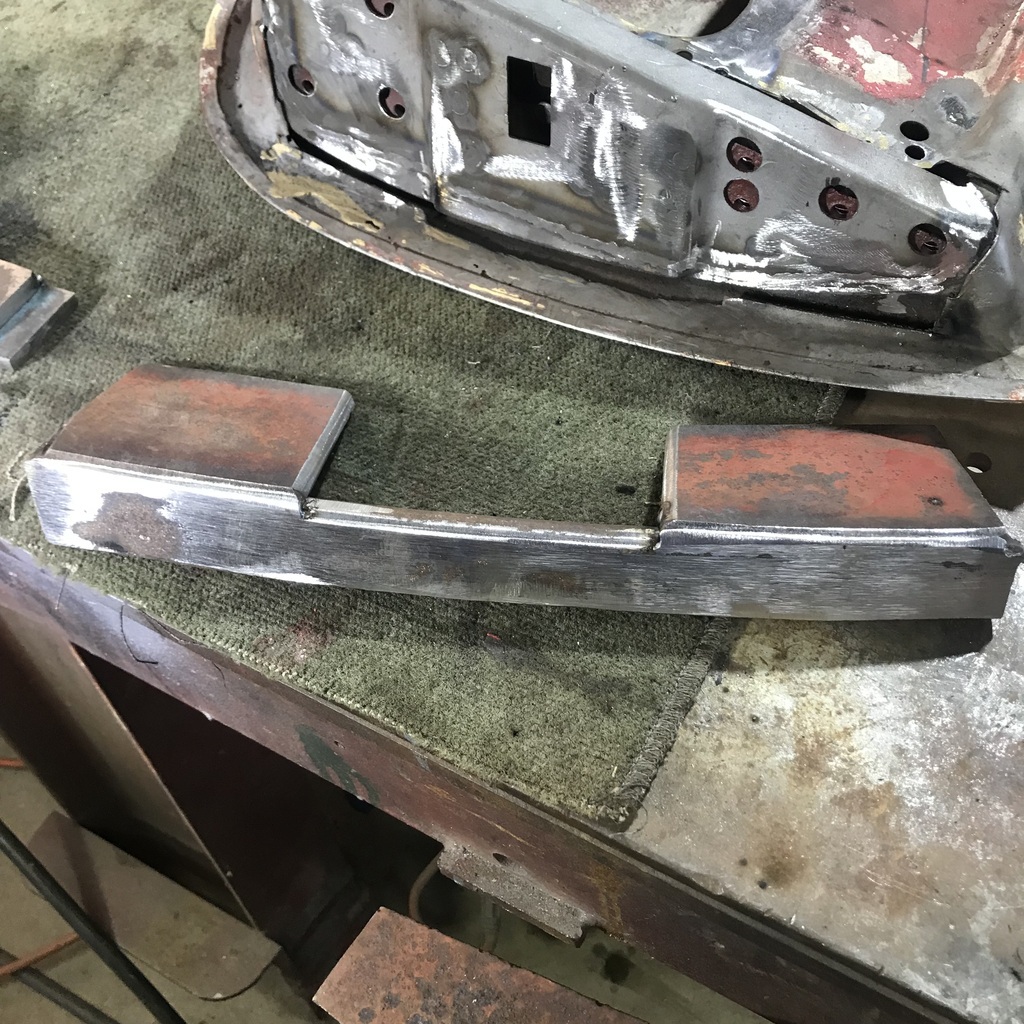 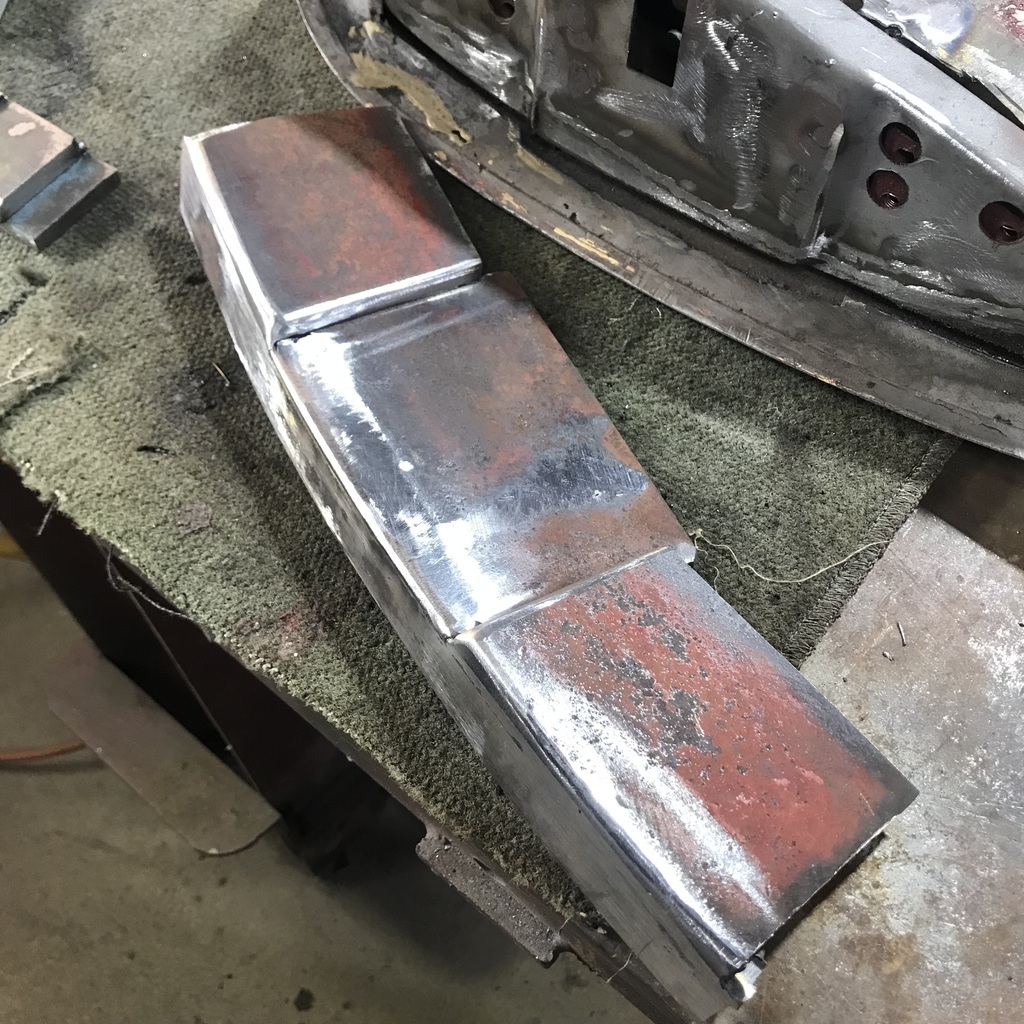 Next I’ll try whacking some 20# sheet around it and see how that goes. Thanks. |
| |
|
|
teaboy
Posted a lot
   Make tea, not war.
Posts: 2,126
|
|
Sept 30, 2024 11:35:51 GMT
|
|
Brilliant, Gazza.
I love a hammer form too.
|
| |
|
|
gazzam
Part of things
 
Posts: 746 
|
|
|
|
Tea, you’re my guru here, you’re the hammerforman! Time to start whacking sheet metal. Cut a piece of 20# using the plasma table. More fun than the alternatives. Then cleaned the surface rust off with a new toy. A cheap version of the Eastwood SCT. The Eastwood one is just too expensive in this country, and I’m not convinced it’s as good at removing paint as I’d like. But the one I bought for about a seventh of the price works well on light surface rust, and hopefully on paint stripped panels. So I clamped the nice shiny piece of sheet in the vice with the hammerform and started hammering. After about enough hammering to get an old tennis elbow thing happening, I had this. 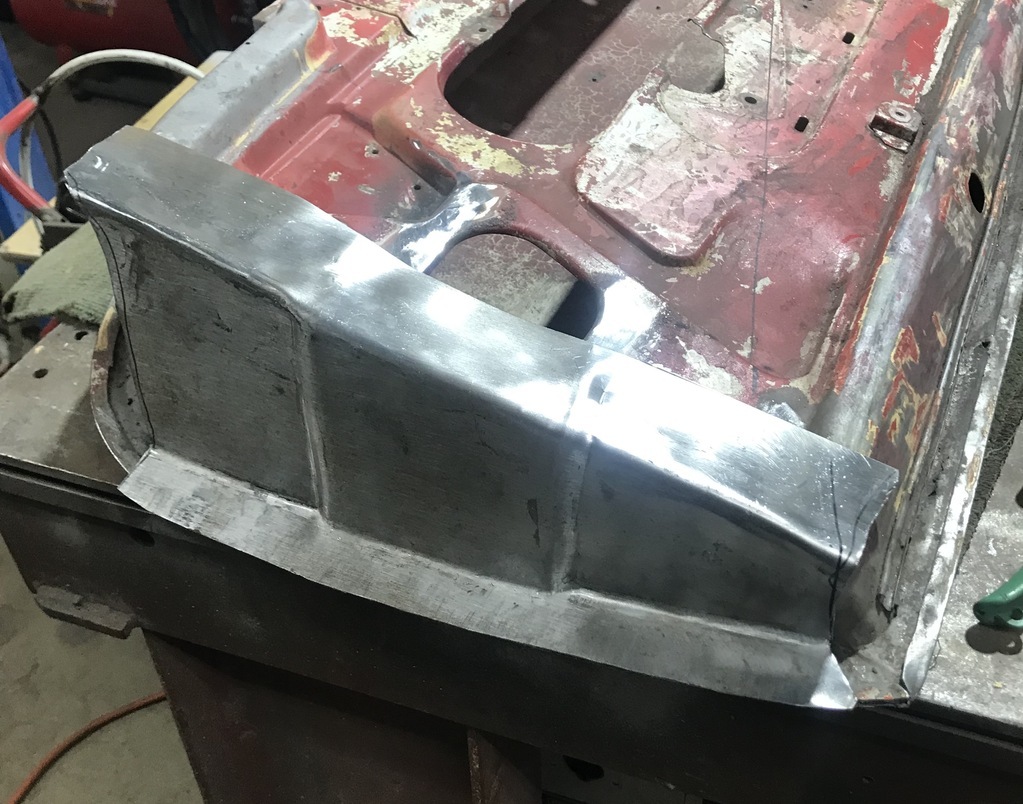 That was done with both the hammerforms, yesterday’s and the one from about a week ago that I used to make the inner brace. It just needed an extra bit if sheet to widen it and adapt it to make this piece. Of course, that was always the plan. Eventually I got to the point where I needed to remove the last bit of the door frame, so my repair piece could sit in it’s final place. So I ground the edge of the door skin off to get the rusty, brazed piece out of the way. 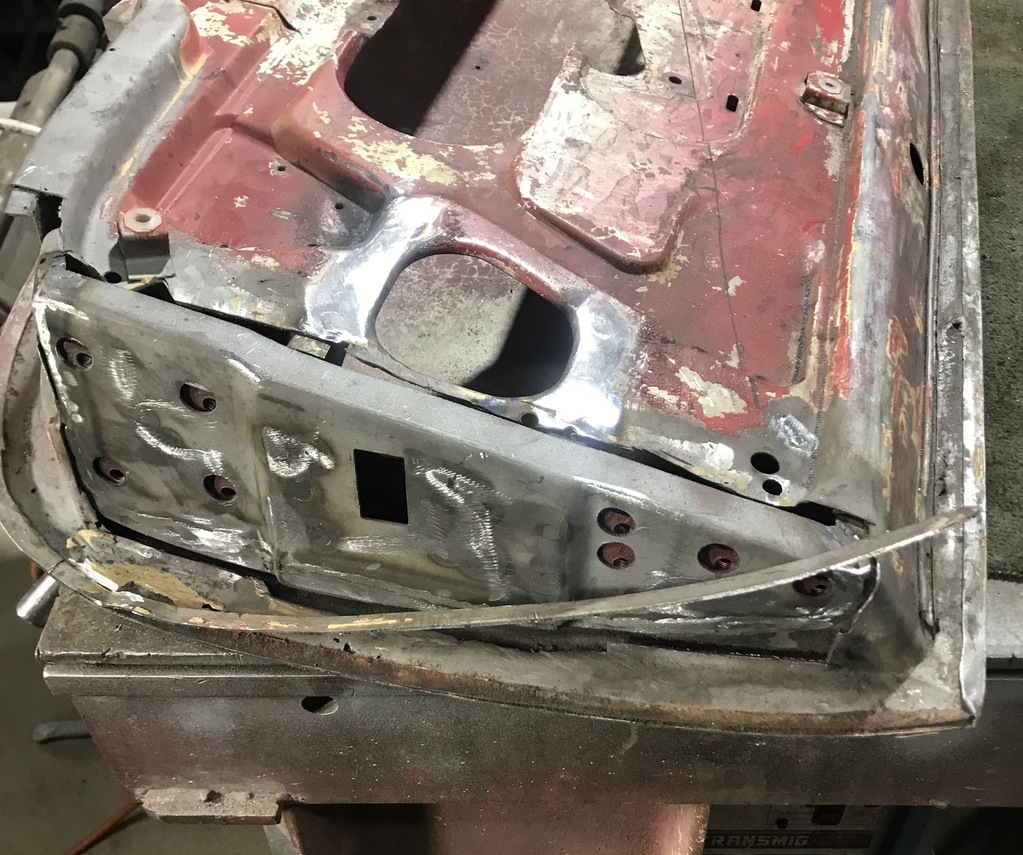 My plan is to replace a strip of the door skin on all three lower sides, leaving it attached at the top. This strip will be replaced before I weld the frame repair pieces in, allowing me to get at both sides of the weld. I was surprised to find the skin almost free of rust when I removed the last bit of frame here. 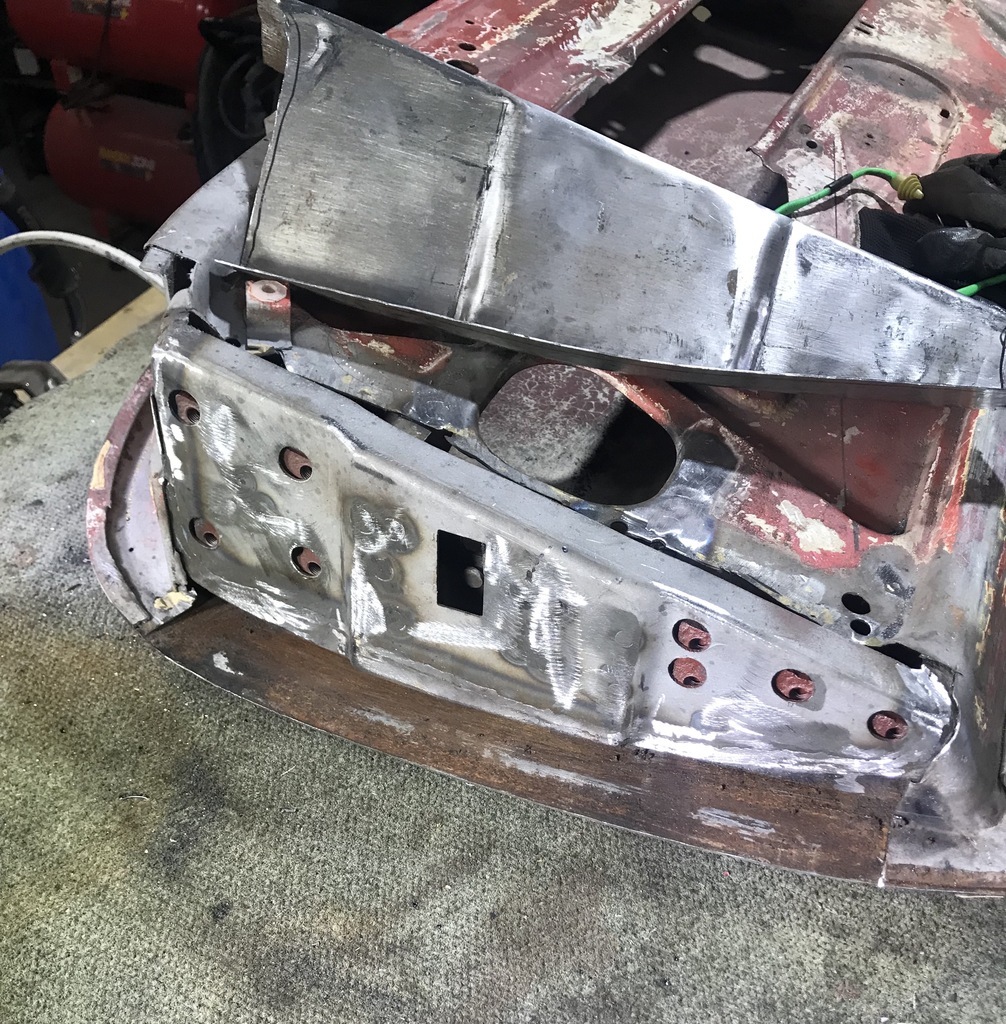 The last bit of frame had holes (and the braze) so it had to come out. The skin has only mild pitting. But I’m sure it would have been impossible to unfold the edge and then refold it. This is new to me, first time I’ve purposely ground the edge off a door skin. In for a penny… 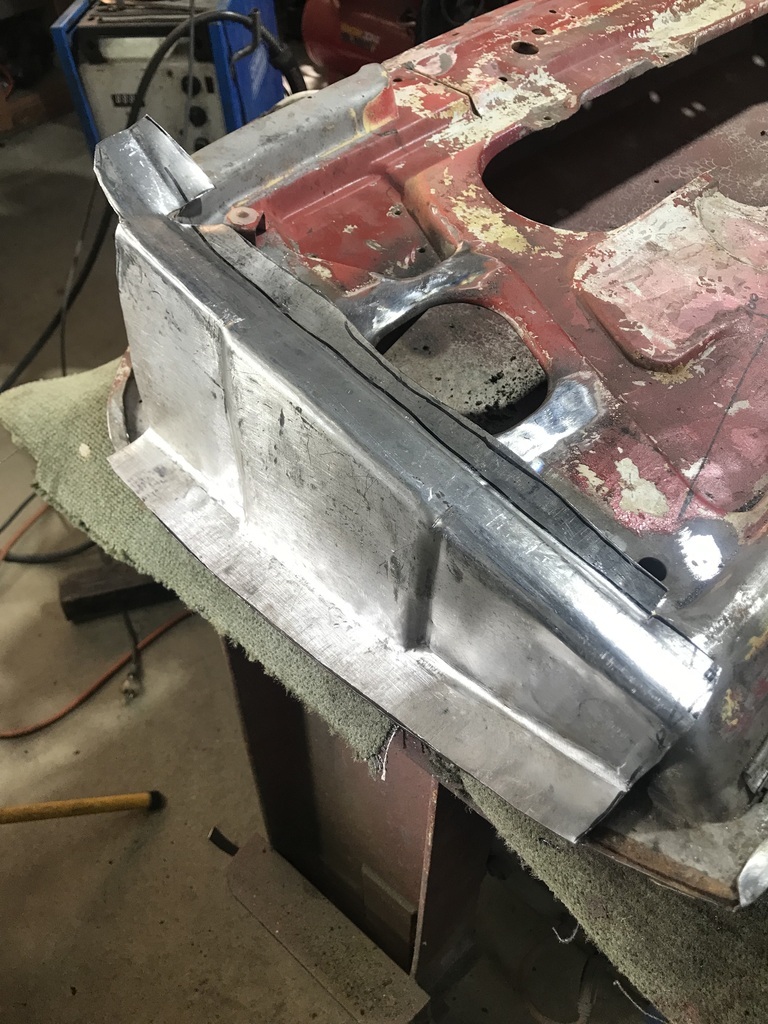 I had planned on making this in one piece. You can see the excess in the above photo. But once I put another two folds in it, it was obvious that it wasn’t going to work. Not with my abilities anyway, I’m sure it'd be physically possible. Just not for me. So I cut the ambitious part off, and will make it in two pieces. The join will be under the cover strip/dust and moisture collector. 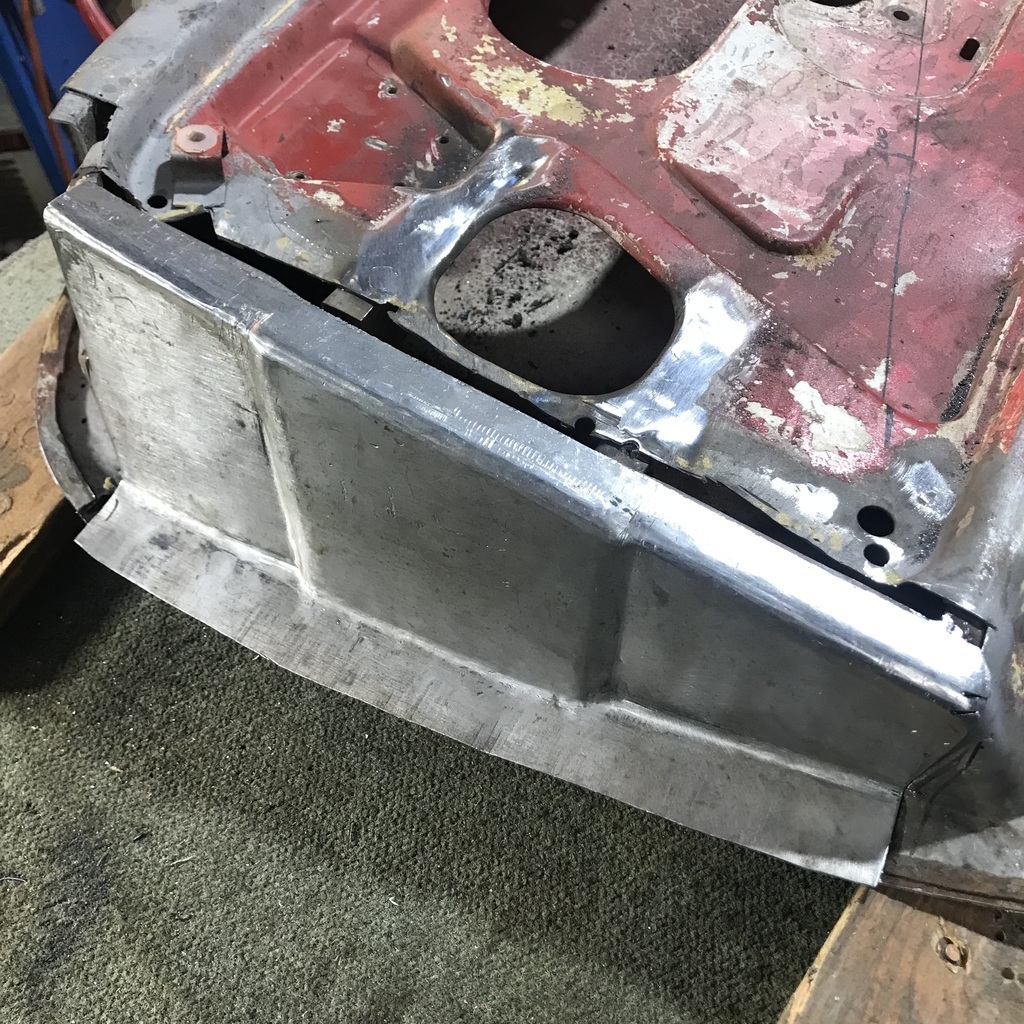 The small piece was pretty easy to make. Only a couple of hours. 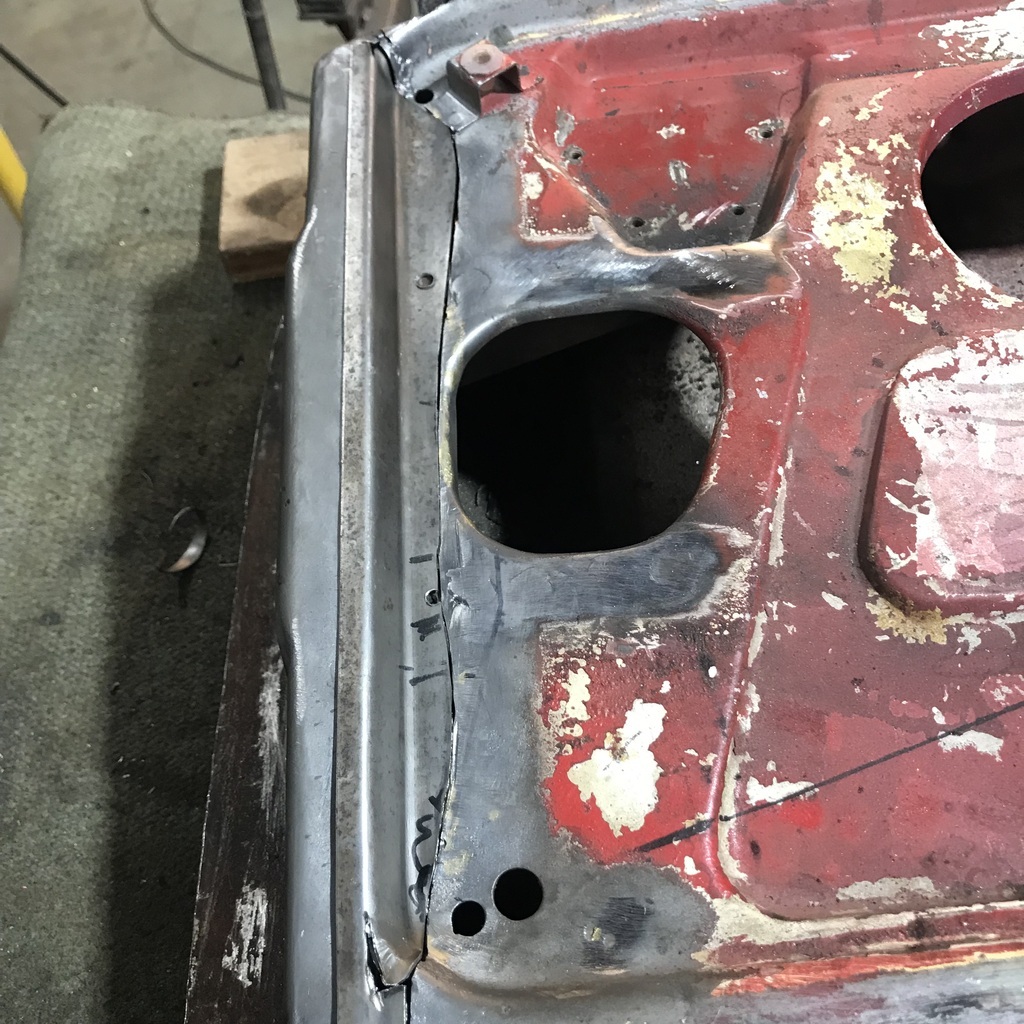 Masked up and put some red oxide on the inside bits. 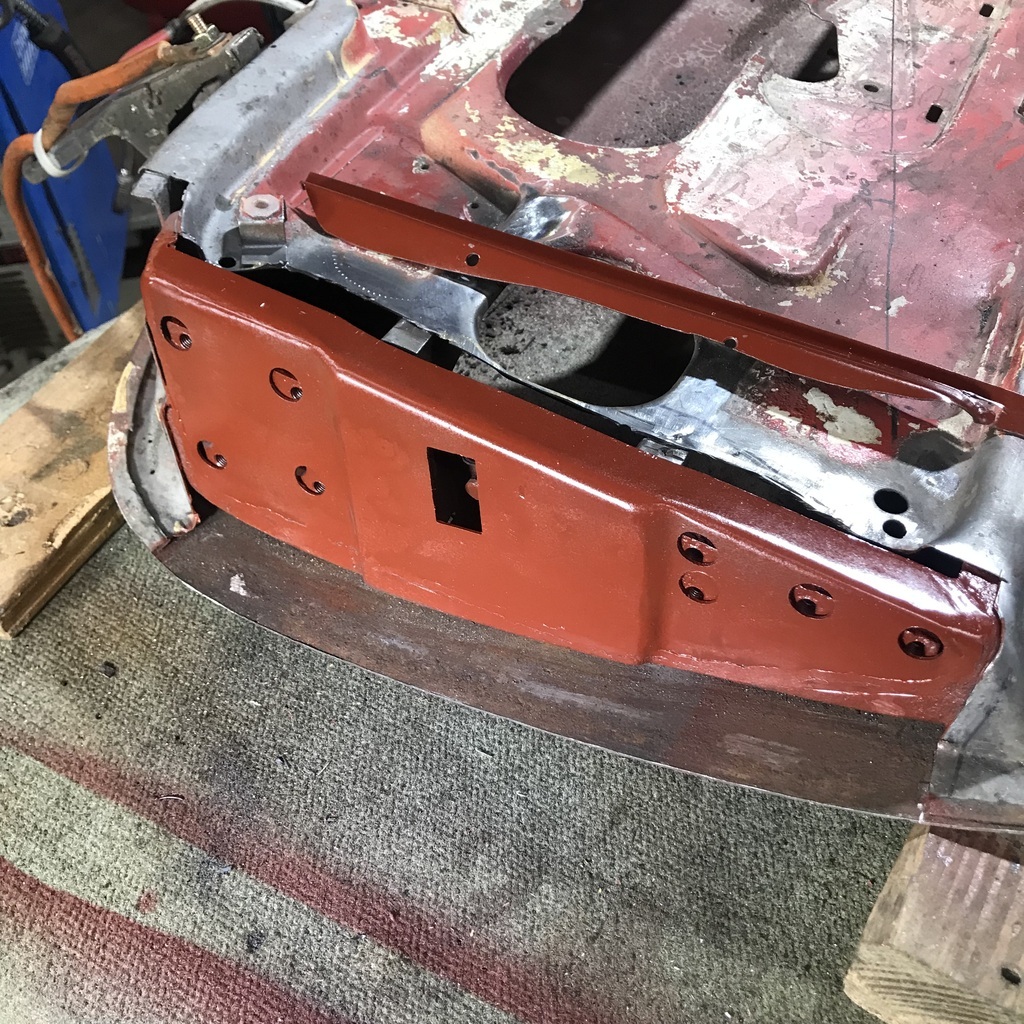 More tomorrow, thanks. |
| |
|
|
|
|
|
|
|
|
Great progress and impressive skill!
|
| |
|
|
gazzam
Part of things
 
Posts: 746 
|
|
|
|
Thanks Phil, but you may have to revise that! Tacked in the strip I made yesterday. 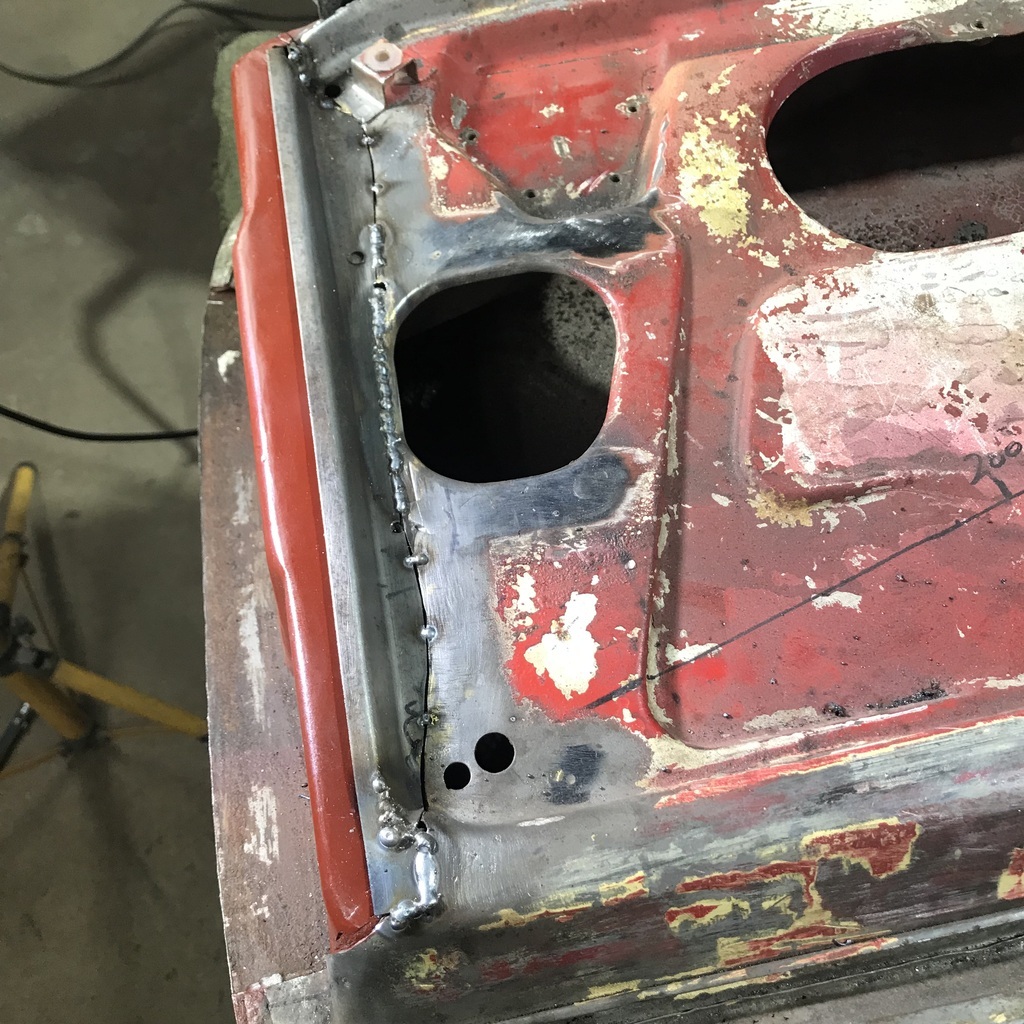 Then welded it and tidied it up. Shown here with it’s mating panel in place. Notice how well it fits… 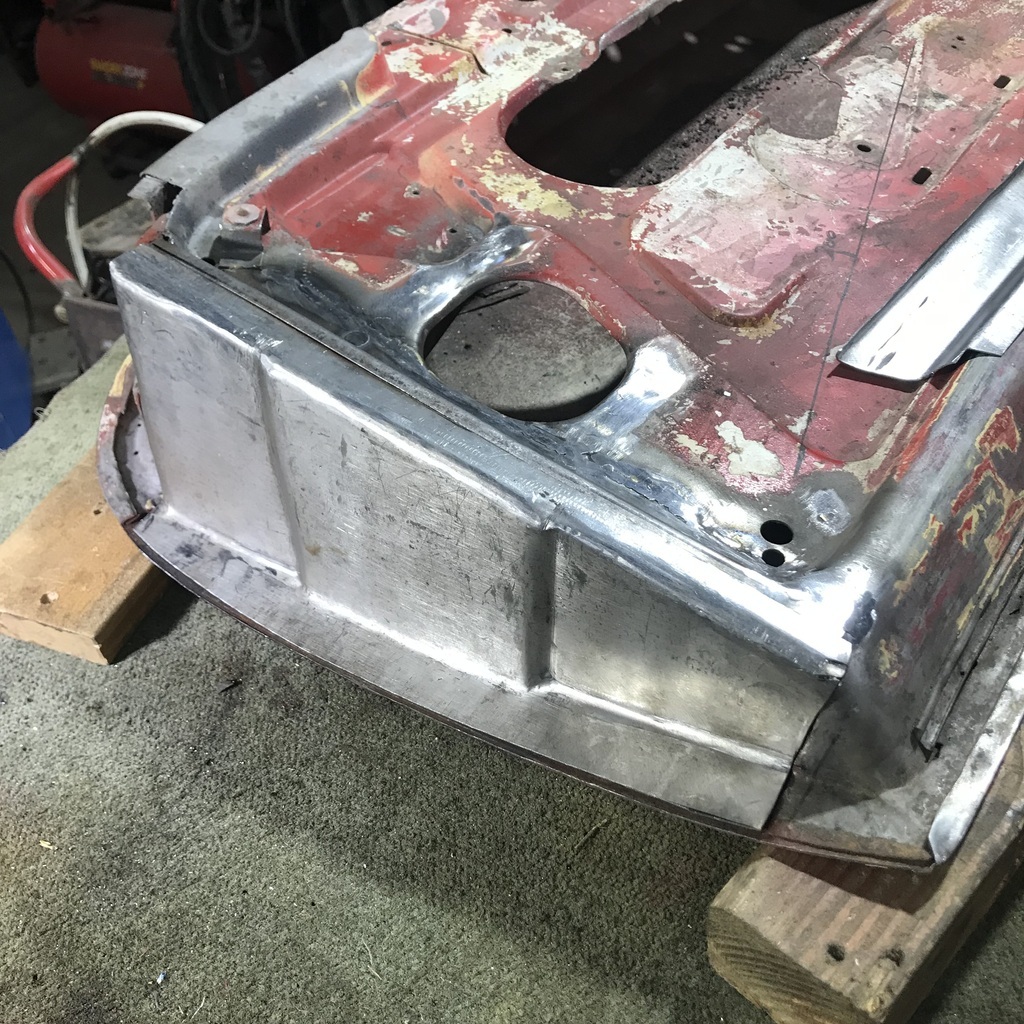 So I thought I had the hinge face piece ready to go. It was fitting beautifully. Sort of clicked into place. I guesstimated two of the hinge bolt holes and drilled them. Made them progressively larger till I could see the edge of the hole in the brace piece behind. As soon as I could see the hole behind, I realised there was a problem. The face panel had a gap of about 3mm to the brace piece. No good. They are meant to be touching, or as near as dammit. Otherwise the hinge can’t tighten correctly. It would be trying to distort the thinner outer layer to squeeze it to the stronger brace. Not possible to change the shape, it just wouldn’t work. Nothing for it but to make another piece. So I cut another piece of 20# and cleaned it. And I must have been paying attention when I made the last one. Even though I got it wrong, I must have learned something. Because this one didn’t take long at all. And turned out much better. Not only does it fit properly, it looks a lot less like it’s just been bashed into submission. I did get the position of a couple of the holes wrong, and had to add some TIG weld up one side. But it fits and is nicely up against the brace piece. 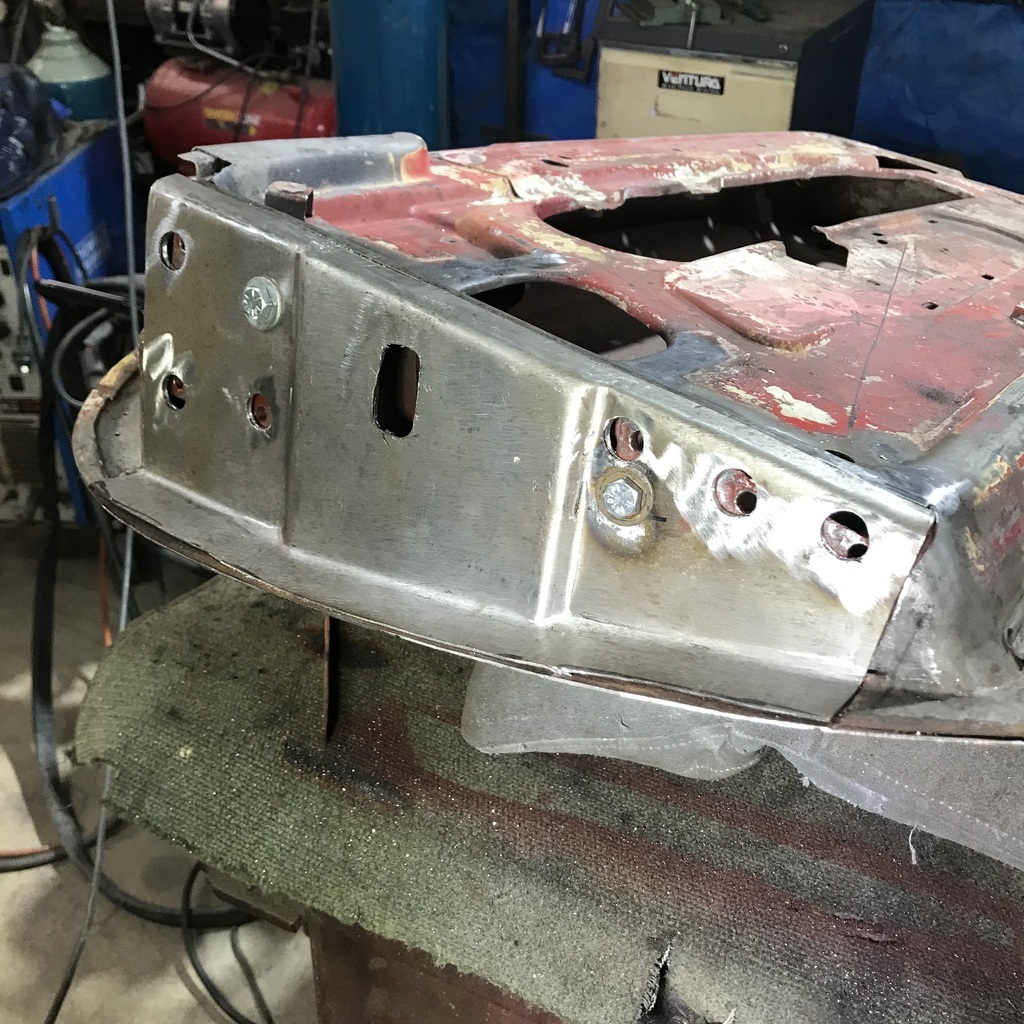 First and second, you can see how the new one is less battered looking. 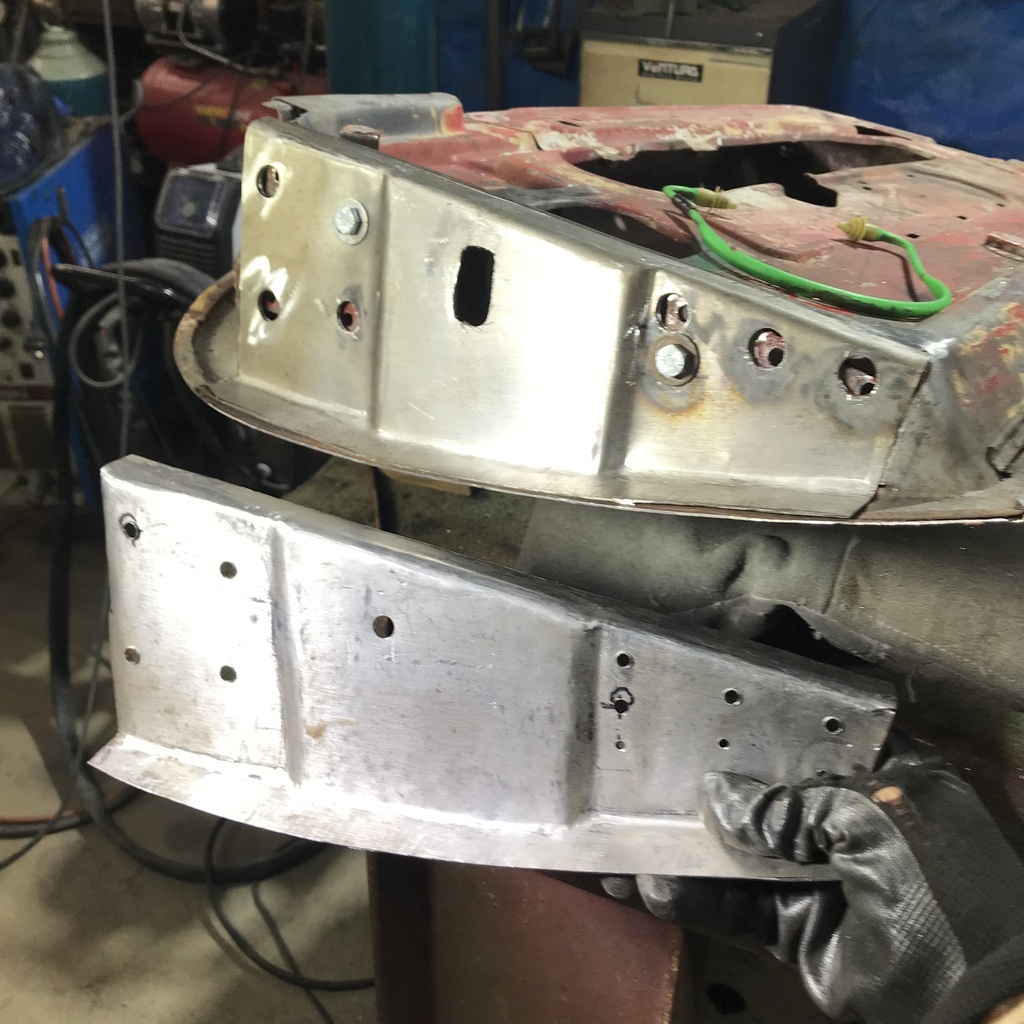 I’ll finish the hole for the check strap once it’s welded into position. Thanks. |
| |
|
|
teaboy
Posted a lot
   Make tea, not war.
Posts: 2,126
|
|
|
|
|
Excellent recovery, Gazza.
|
| |
|
|
|
|
|
|


