gazzam
Part of things
 
Posts: 741 
|
|
Sept 11, 2024 9:19:00 GMT
|
It’s probably not a good idea to start a new project before finishing the previous one, but what the heck, let’s live dangerously! So, while waiting on the clutch for the Triumph,and a replacement controller for the plasma table, I need a reason to get out of bed in the morning. Might as well start on this.  Now I reckon you will think I’m an idiot, but that pic is not realistic. It’s a nice driver, but pretty scruffy. Bits like this are more typical. 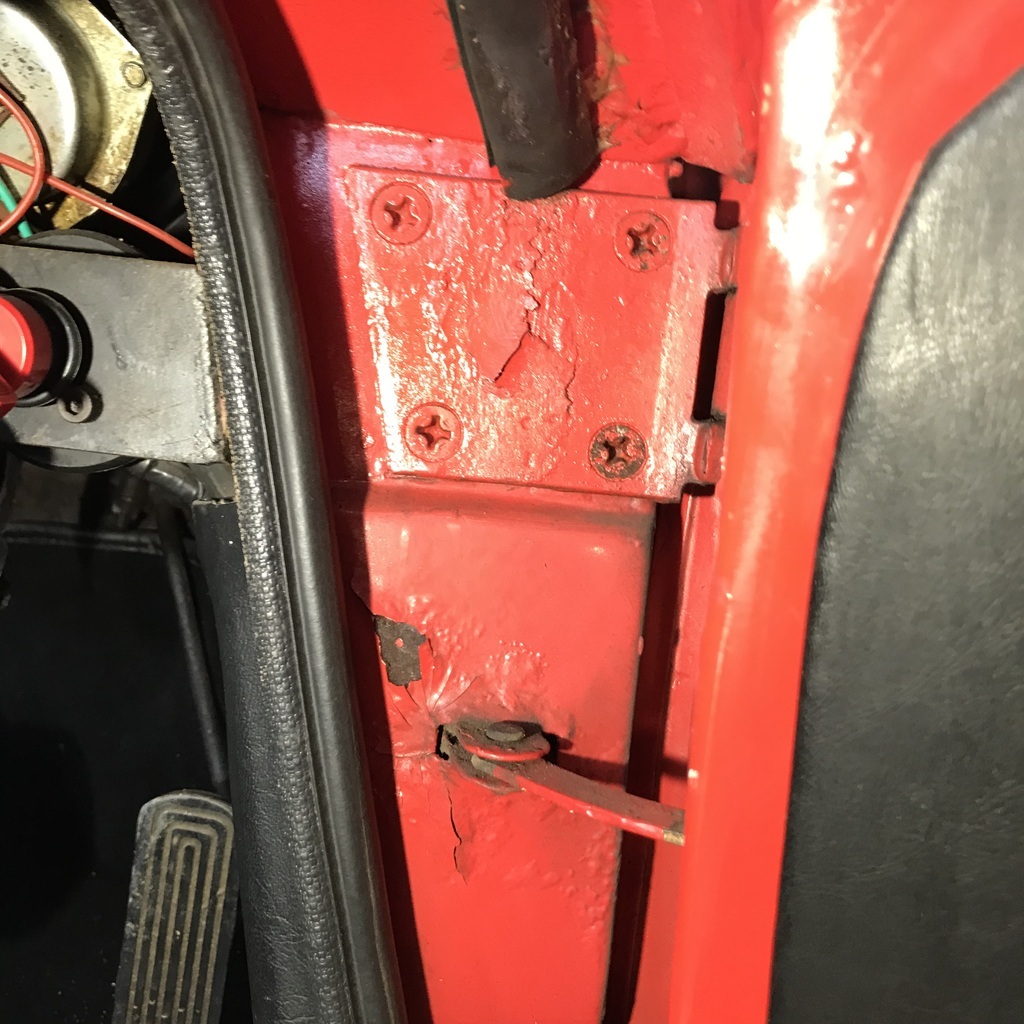 I bought this car five years ago to the month, because I thought I’d need something to do after the XK. Hadn’t actually started the XK at that point, but I must have been planning ahead for a change. It was for sale at auction and I bought it over the phone, unseen, on a Monday night. It was in Melbourne, about 1100 km from here. By an alignment of the stars it was delivered on the following Saturday morning. I got it straight onto the lift and started poking with a screwdriver. To my relief it wasn’t a disappointment. No really bad news. But it’s underside is covered with a good coat of tar based sealer so who knows what will be revealed when that’s removed… In five years I’ve done very little to it. The wheels were black and I stripped them. It had awful tailpipes and I changed them. That’s about it. Anyway, this is the state of play. 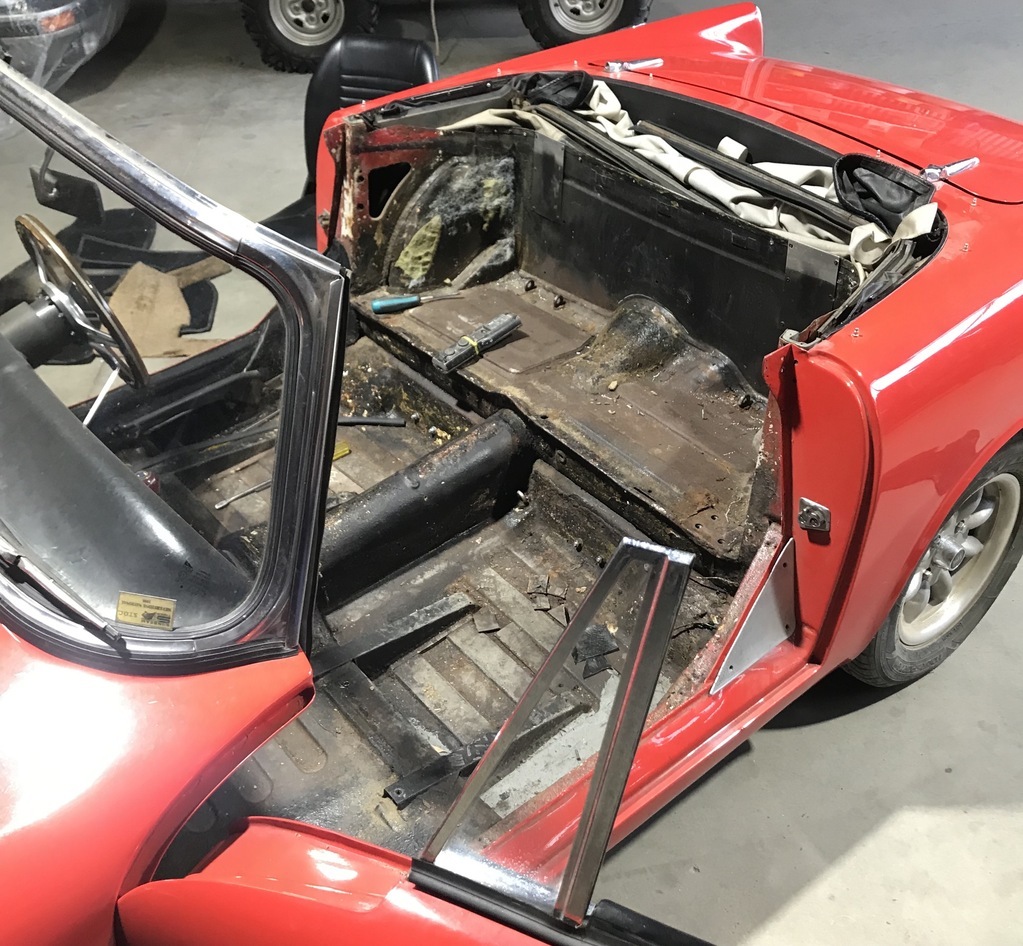 More to come, though I will be interrupting this to finish the Triumph and the plasma. Thanks. |
| |
Last Edit: Sept 12, 2024 7:18:09 GMT by gazzam
|
|
|
|
jimi
Club Retro Rides Member
Posts: 2,233 
|
|
Sept 11, 2024 11:43:53 GMT
|
Nice a Tiger  not many of them going about, must be pretty rare in your neck of the woods. Is it a 4.3 or 4.7 ? is the bonnet scoop standard ? the only one I have seen in the metal (a friend had an early one many moons ago) had just a plain bonnet, same as the Alpine  |
| |
Last Edit: Sept 11, 2024 15:44:14 GMT by jimi
Black is not a colour ! .... Its the absence of colour
|
|
|
|
|
Sept 11, 2024 12:25:56 GMT
|
Ooh goody - a new thread to read  |
| |
|
|
teaboy
Posted a lot
   Make tea, not war.
Posts: 2,125
|
|
Sept 11, 2024 15:38:40 GMT
|
Ooh goody - a new thread to read  These aren’t just threads, these are gazzam threads! 😀 |
| |
|
|
|
|
|
Sept 11, 2024 17:00:17 GMT
|
|
Tigers are great. Always liked these.
|
| |
|
|
Darkspeed
Club Retro Rides Member
Posts: 4,882
Club RR Member Number: 39
|
1965 Sunbeam TigerDarkspeed
@darkspeed
Club Retro Rides Member 39
|
Sept 11, 2024 17:51:14 GMT
|
|
Now I have the "Get Smart" theme as an earworm......
|
| |
|
|
gazzam
Part of things
 
Posts: 741 
|
|
Sept 12, 2024 7:27:35 GMT
|
Yep, not many Sunbeams around these parts. Tea, you are too kind. The Get Smart tune AND Agent 99! Both very memorable. Teardown continues. Stripped out the doors. Man, do I like cars such as the XK! No window mechanisms, not even an external door latch! One side done. 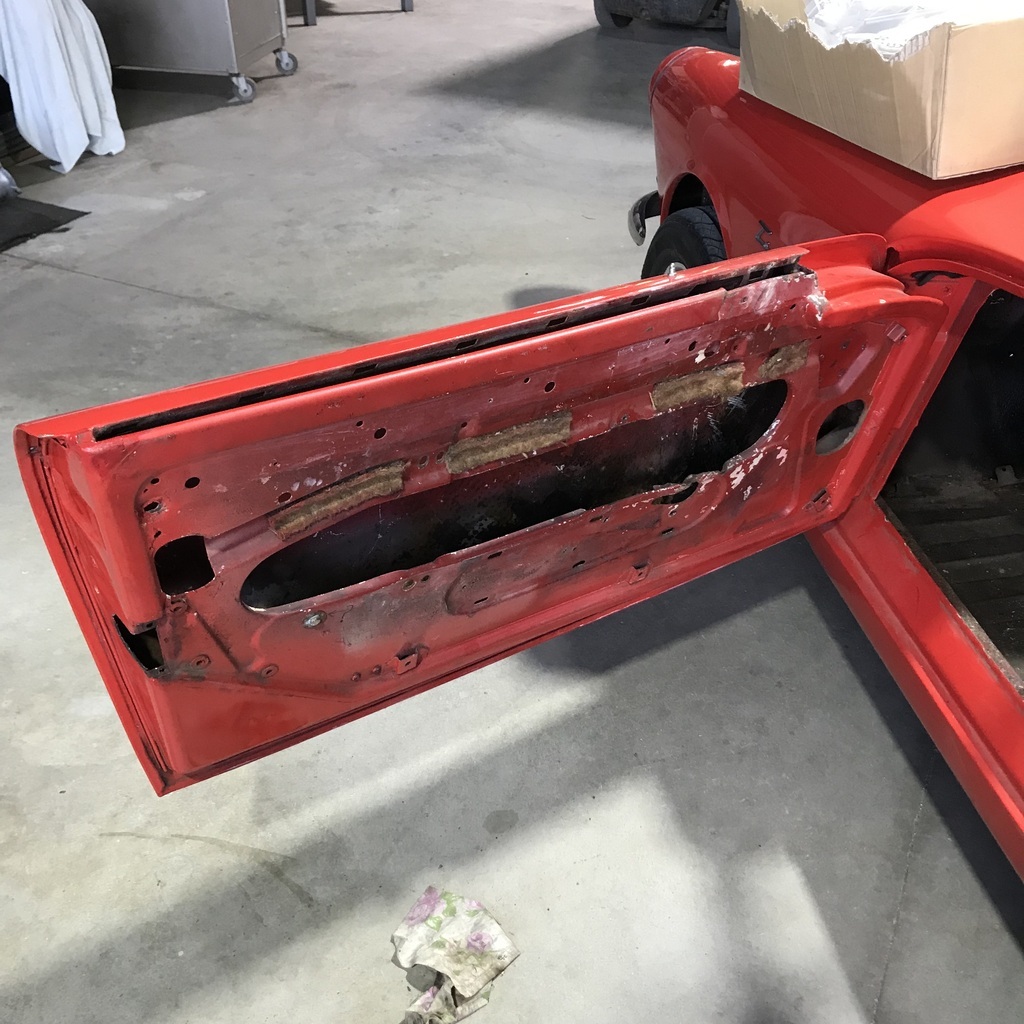 The other side was a bit quicker, but still took most of the day to strip and remove both doors. 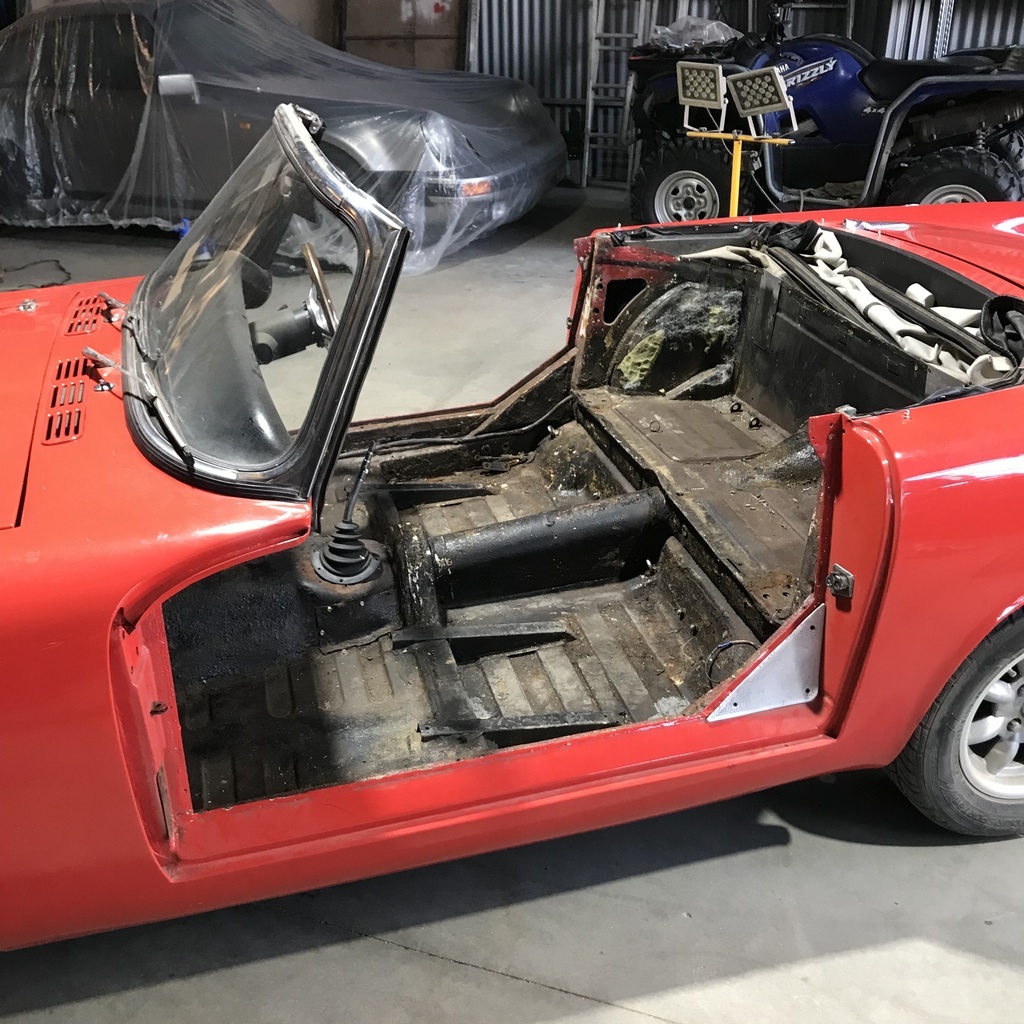 There’s a bit of up and down play in the driver's door. I haven’t worked out whether it’s in the hinge or flexing of the hinge face. Slathered some paint stripper on before I finished for the day. 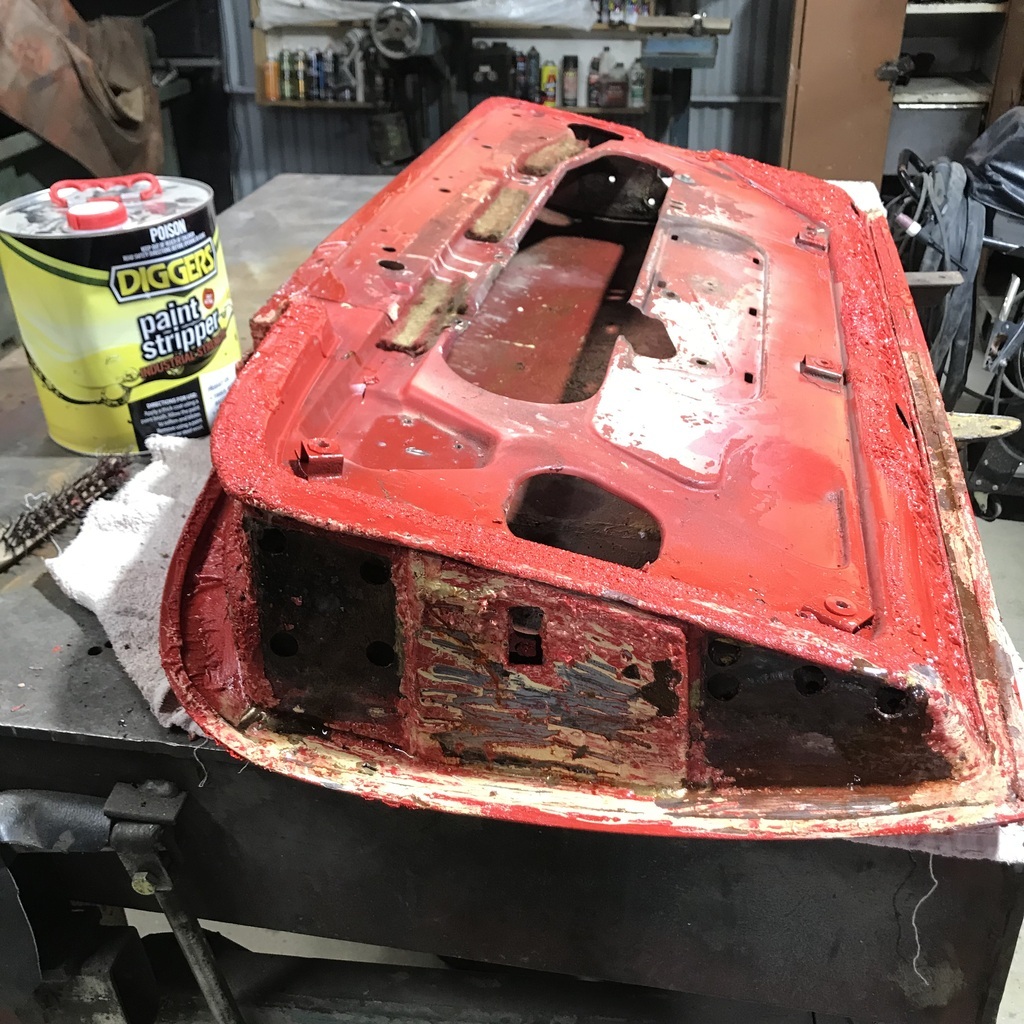 Once its cleaned up I should be able to see what’s happening. Someone has been in there before. Lots of little bits that need rechroming, and one broken diecast piece. Dammit. Thanks. |
| |
|
|
|
|
|
Sept 12, 2024 7:38:31 GMT
|
|
Ooh! Nice.
My brother has a Tiger 289. Nice cars but pigs to work on under the bonnet. Prices have gone up considerably over the last few years.
Cooling upgrades are very much recommended.
|
| |
Proton Jumbuck-deceased :-(
2005 Kia Sorento the parts hauling heap
V8 Humber Hawk
1948 Standard12 pickup SOLD
1953 Pop build (wifey's BIVA build).
|
|
v8
Part of things
 
Posts: 312
|
|
Sept 12, 2024 18:19:53 GMT
|
|
I've always wanted one of these, keep the updates coming!
Is it a restoration or resto mod?
|
| |
|
|
stealthstylz
Club Retro Rides Member
Posts: 14,960
Club RR Member Number: 174
|
1965 Sunbeam Tigerstealthstylz
@stealthstylz
Club Retro Rides Member 174
|
Sept 12, 2024 20:03:43 GMT
|
|
Noice. Built a 340ish bhp 289 for one of these a couple of years ago and had a lot of fun running it in. I've always slightly more Cobra-ised one would look cool (289 not 427)
|
| |
|
|
|
|
gazzam
Part of things
 
Posts: 741 
|
|
Sept 13, 2024 7:31:25 GMT
|
V8, my intention is just to make it as close to new looking as I can. I’m not overly concerned with originality, because I don’t go to the type of car shows where that matters. I just want it to look nice, so I can open the bonnet or the boot and it pleases me. First thing this morning I stripped the paint from the driver's door. Heatgun and a fairly sharp chisel were the tools. 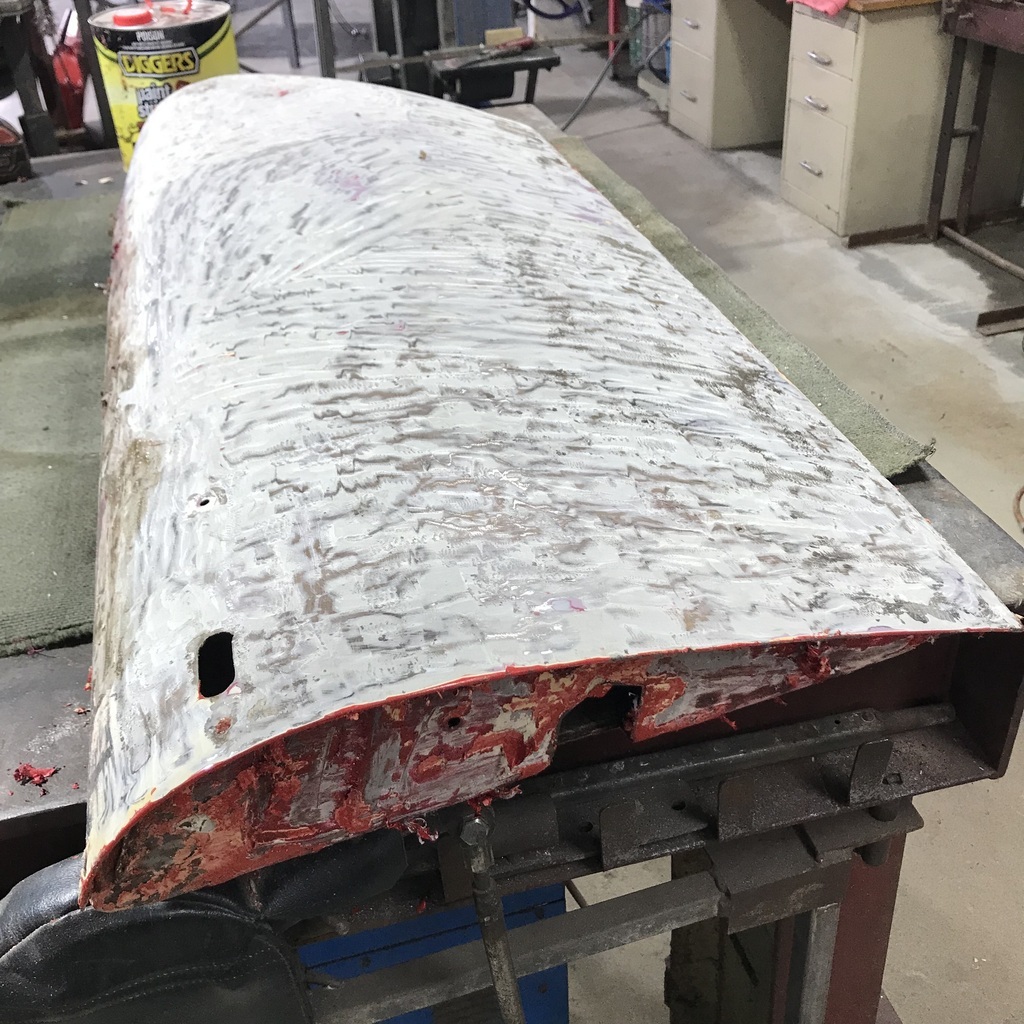 Now I’ll put some paint stripper on and that should get most of the rest off. The hinge screws on the passenger door were a challenge even for the impact gun. Some heat gave it the help it needed. 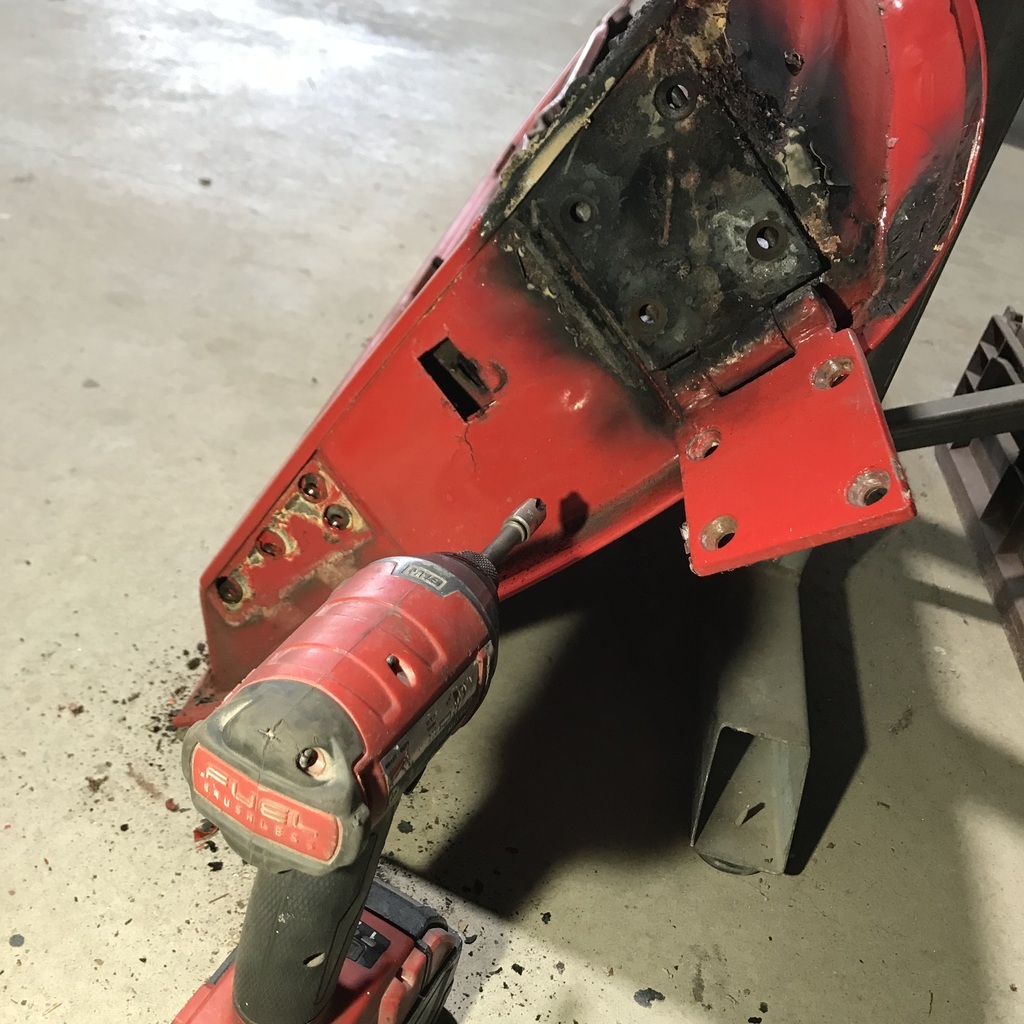 The hinge never came away though. Because it was welded in place! The green line is where the hinge finishes, the rest is weld. 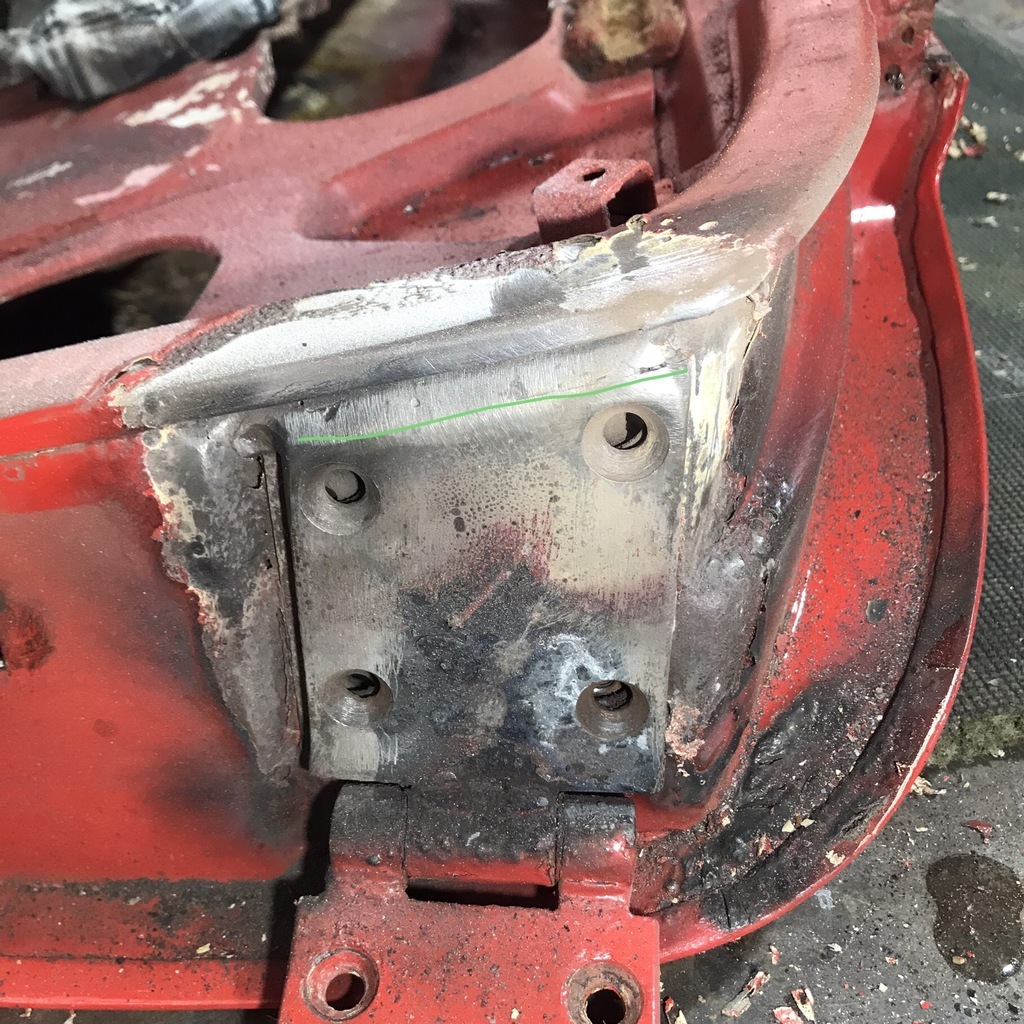 Cut off, I’ll clean it up and see if I can work out why. I think this may turn out to be a bit of a job… 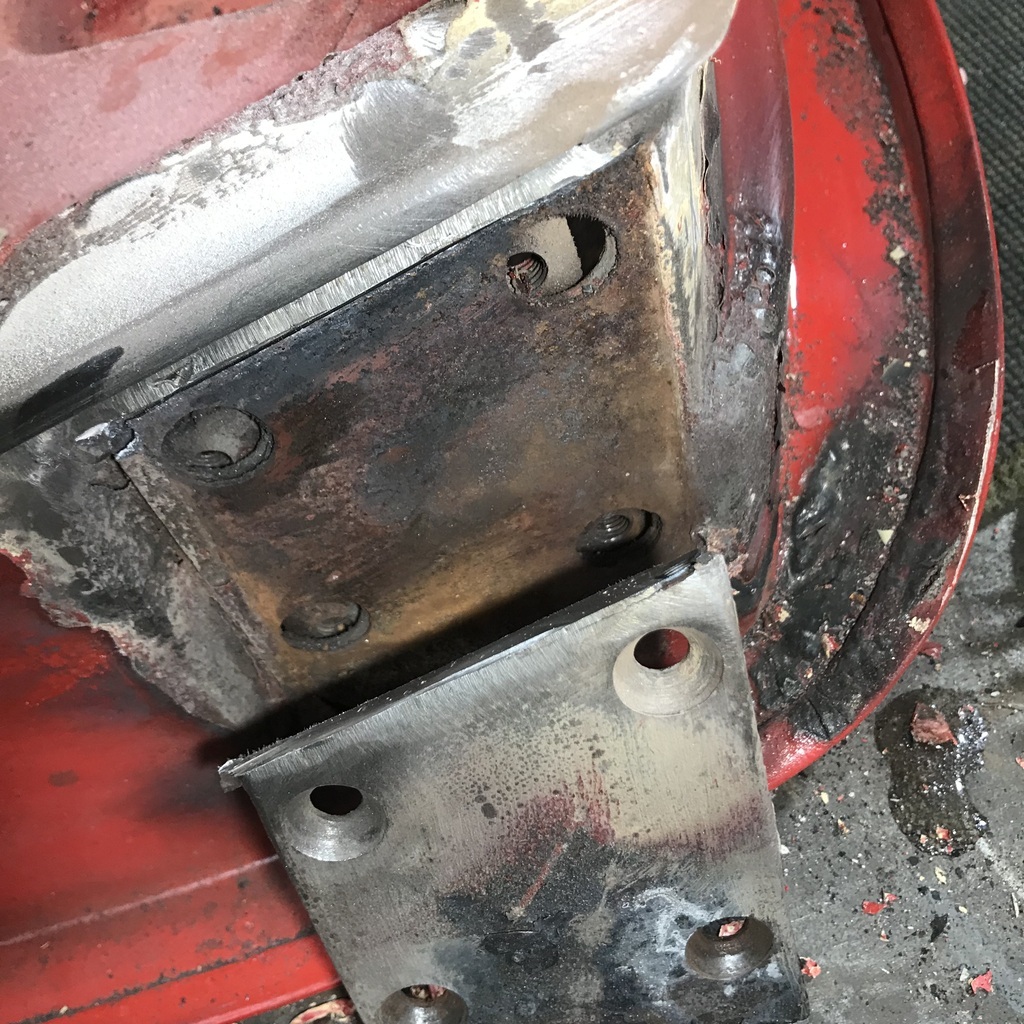 This is the broken diecast piece that I mentioned yesterday. 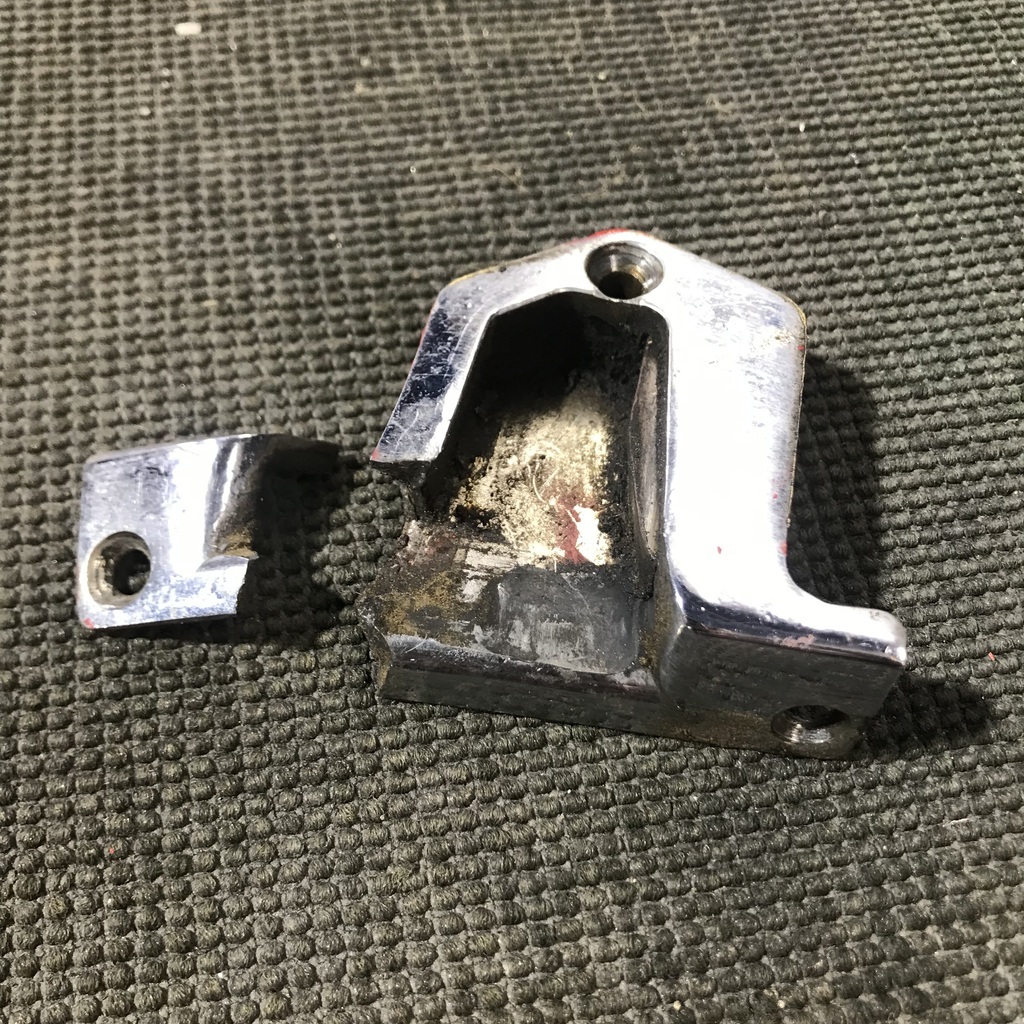 I may attempt to duplicate it in brass. Anyone know if brass would be a suitable replacement for diecast in a door latch? I cleaned out the inside of the doors, not because I’m obsessed, but so I can stick some sound deadening stuff in there. Not really to deaden any sound. Just because it’s probably the easiest way of making it look good. A real big job to clean it well enough to get paint to stick. I might be obsessed. Anyway, while cleaning the greasy rust prevention stuff, I noticed these. I’ve put washers on them to make it easier to see. 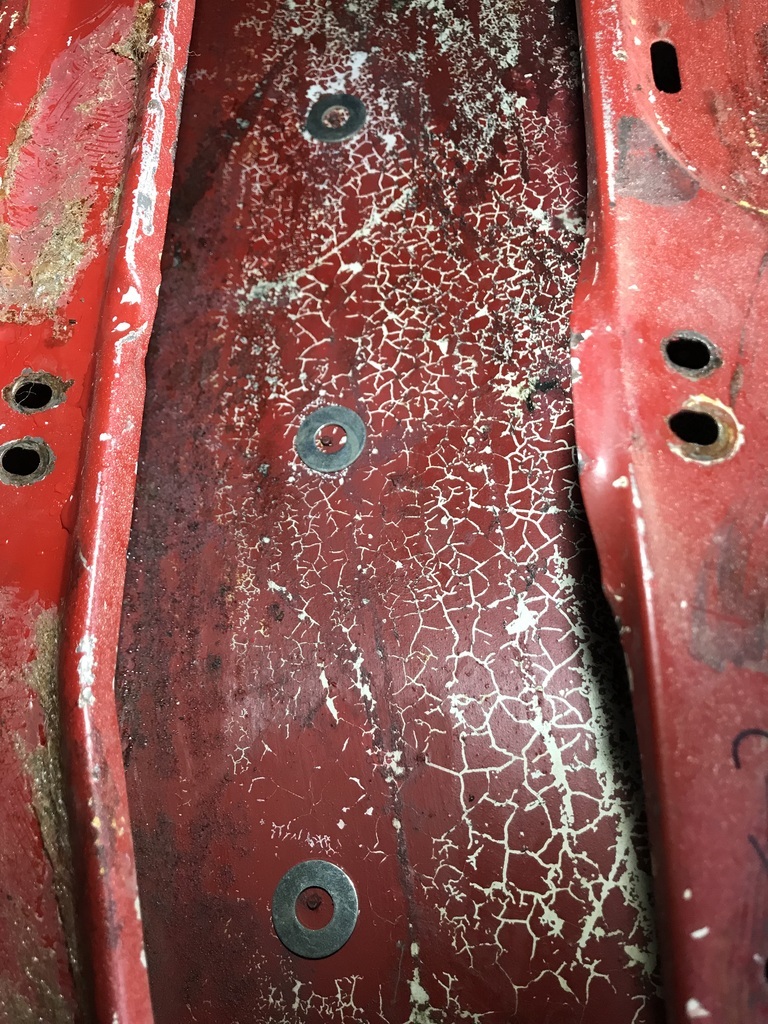 They are the rivets that held the chrome strip on the door. I think this is proof that these are Tiger doors? Alpines didn’t have the strips, or have I got that wrong? Anyway it’s got a V8, so in this country, that’s good enough! Thanks. |
| |
|
|
jimi
Club Retro Rides Member
Posts: 2,233 
|
|
Sept 13, 2024 12:28:30 GMT
|
They are the rivets that held the chrome strip on the door. I think this is proof that these are Tiger doors? Alpines didn’t have the strips, or have I got that wrong? Anyway it’s got a V8, so in this country, that’s good enough! I'm pretty sure your correct, my friends Tiger definitely had chrome strips and I don't remember Alpines having them. Is your battery in the boot ? |
| |
Black is not a colour ! .... Its the absence of colour
|
|
|
|
|
Sept 13, 2024 20:05:01 GMT
|
|
Yum !
|
| |
|
|
gazzam
Part of things
 
Posts: 741 
|
|
Sept 14, 2024 8:07:41 GMT
|
Sorry Jimi, I missed your previous post. I don’t know what size engine it is. Maybe the block will have something cast on it? I’ll let you know if I find out. The bonnet’s a horrific fibreglass thing. But I got a new genuine steel one, in a box, with the car. I also like the scoop, so I might mod the steel one. But either way the plastic one is going! And yes, battery is in the boot. Took the XK to a car show in Tamworth this morning, and sorry but I didn’t think to take any pics. I’m just not a photo minded person. But I did remember to have my phone fully charged, so I have no excuse. So it was afternoon before I got to the Tiger. Used the heatgun and stripped the passenger door skin. A couple of applications of stripper got most of the paint off the frame part of the door. There's a small patch of rust that needs attention. Started by removing the retaining strip that is supposed to hold some sort of a seal. 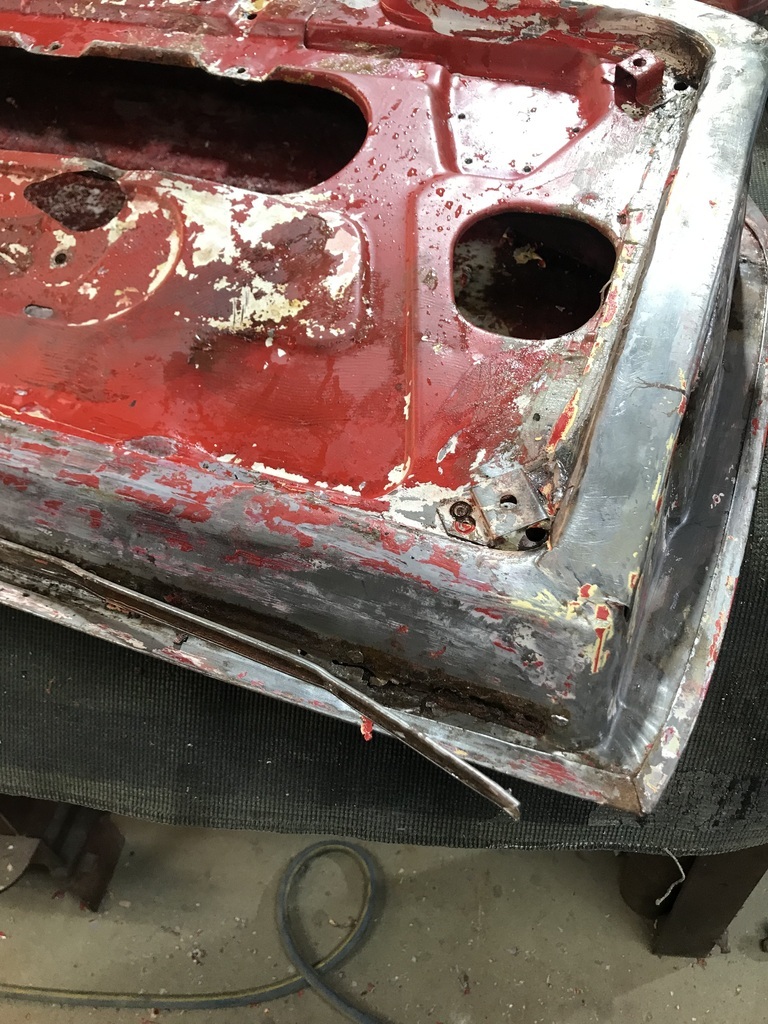 No seal was there, so I’ll see if I can find out what it’s supposed to be. If I don’t have any joy, I’ll just leave the retainer off. The strip itself is rusted through, so I just chiseled the spot welds. I’ll remake the strip if needed. Then opened up the folded edge of the door skin. 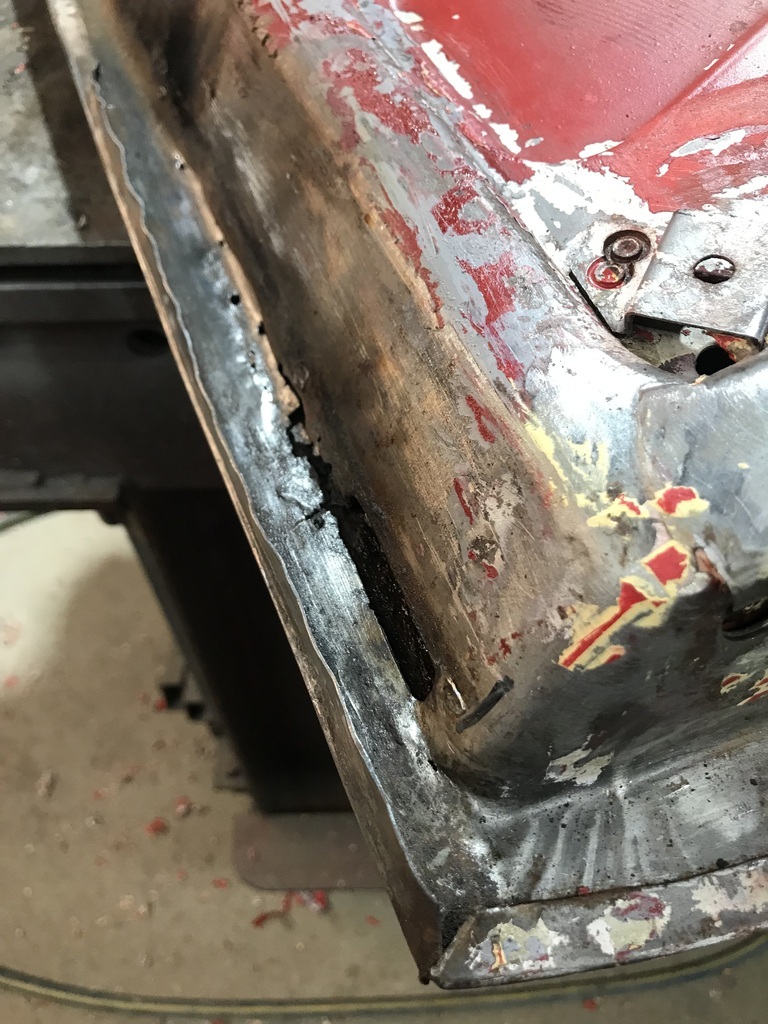 It’s a surprisingly small patch of rust. That’s a large drain hole right beside the rust area. The hinge face also needs sorting. 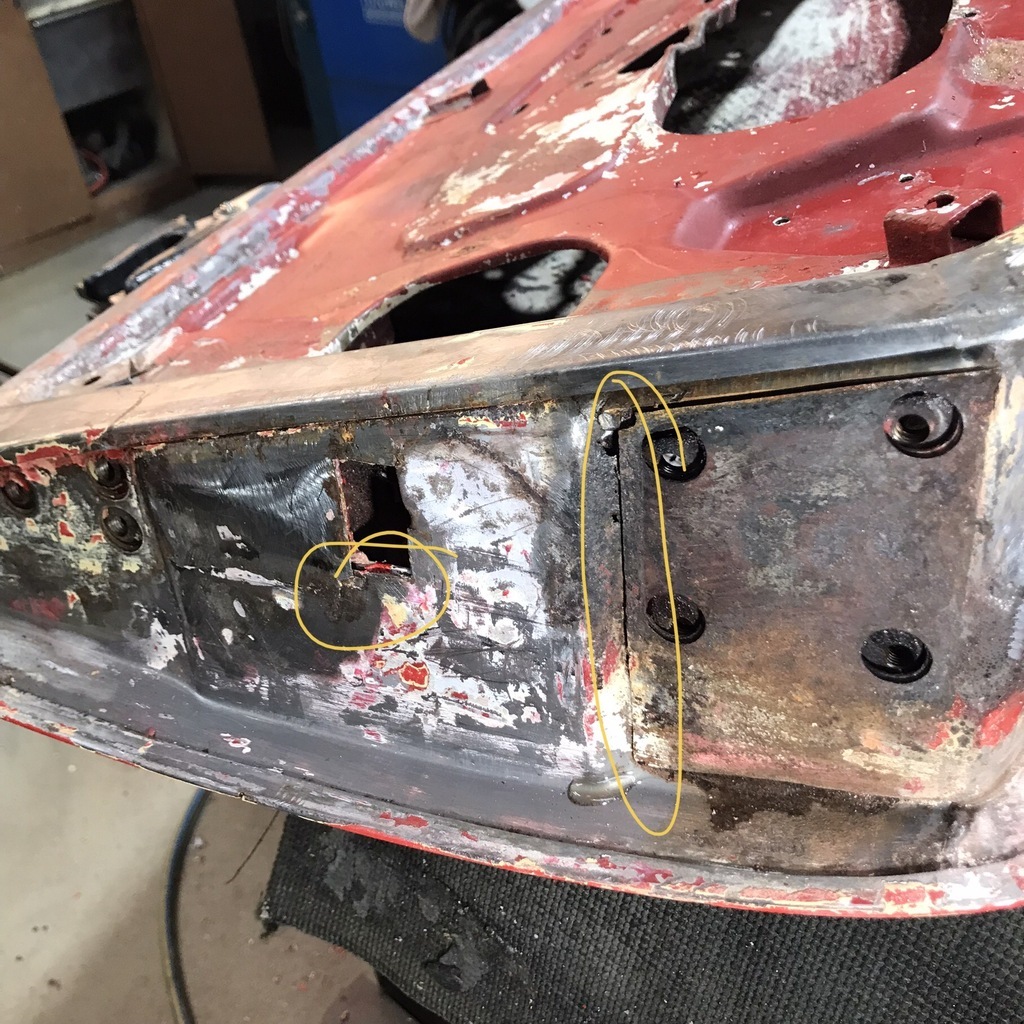 There are cracks/splits in the circled areas. I’m thinking of replacing the whole hinge area, maybe with a slightly heavier gauge, just to make sure the door is good and strong. To that end I took a couple of profiles, so I can be sure it ends up the same. First time I’ve used this profile gauge. 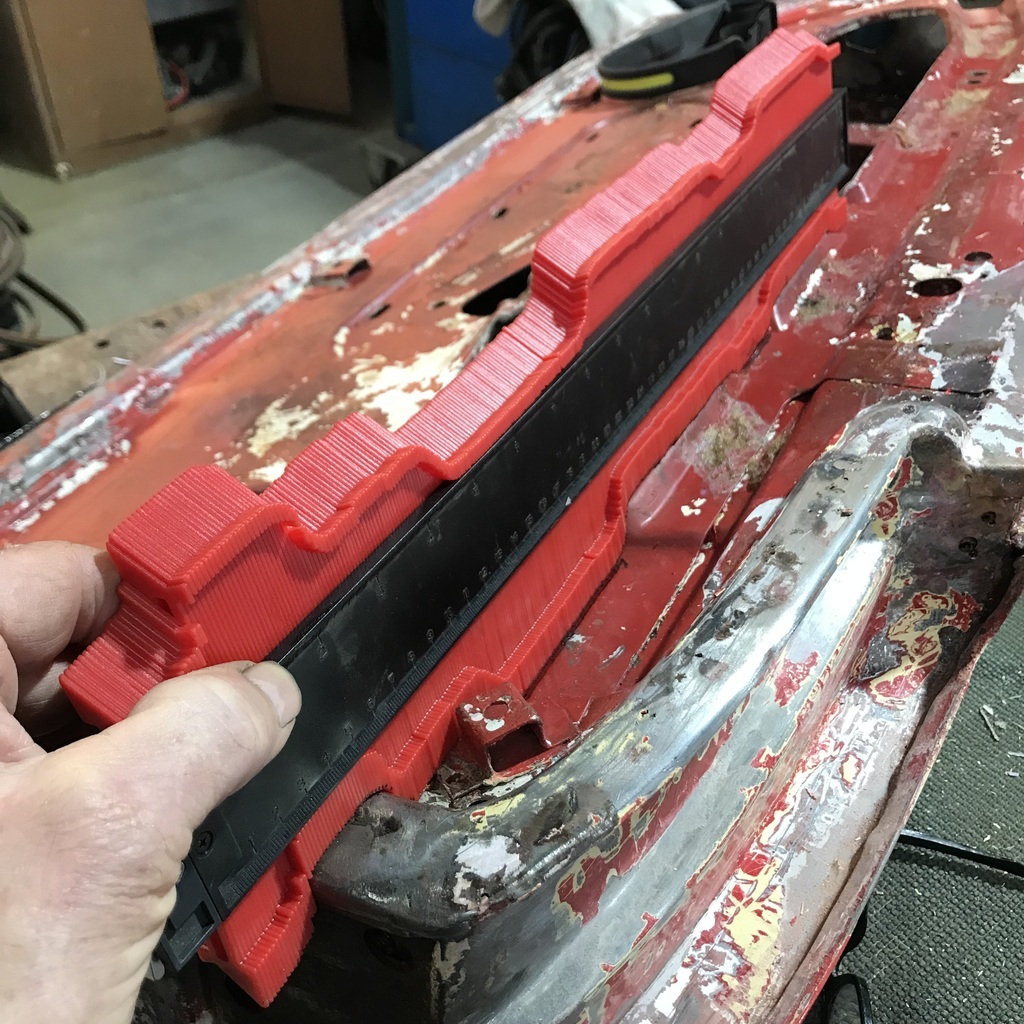 Then transferred it to some heavy card. 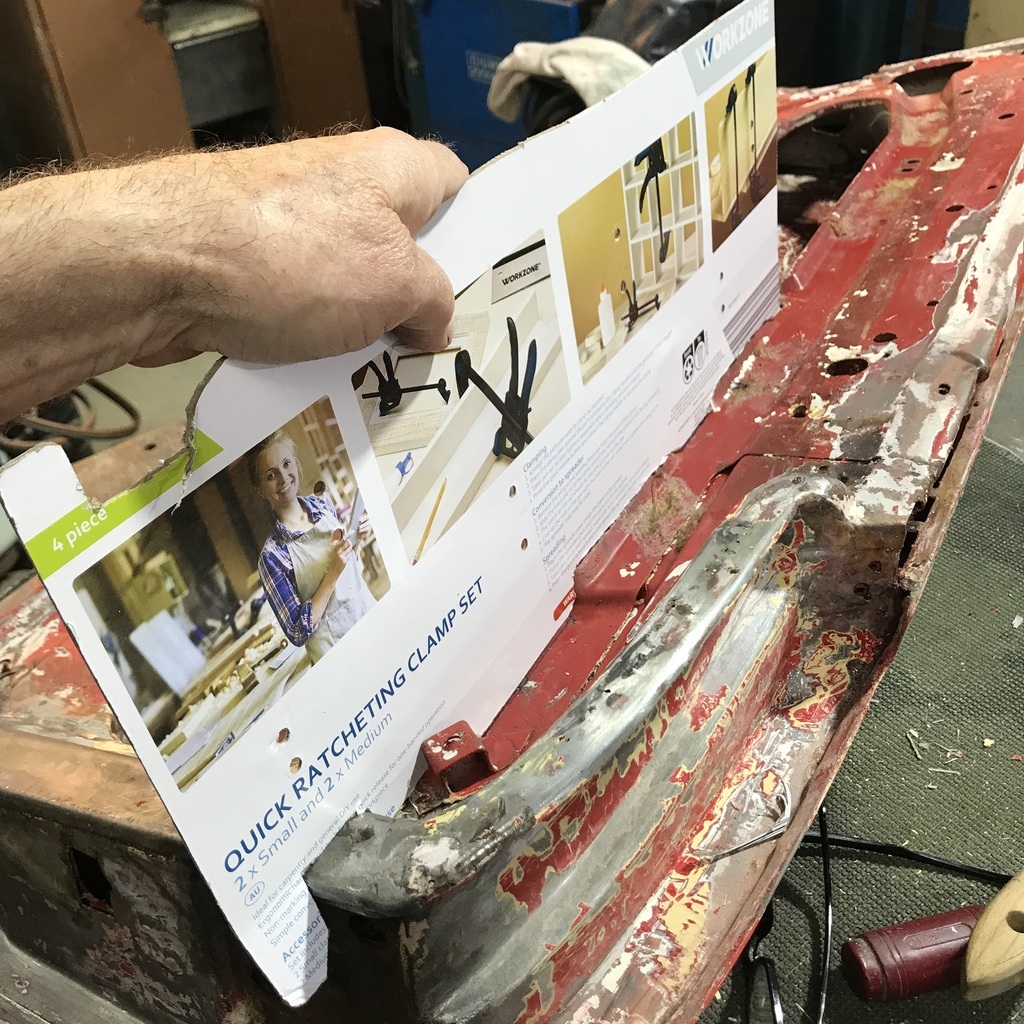 And by then it was time for a beer! Thanks. |
| |
Last Edit: Sept 14, 2024 20:28:08 GMT by gazzam
|
|
gazzam
Part of things
 
Posts: 741 
|
|
Sept 15, 2024 6:54:13 GMT
|
This cover piece has to come off so I can sort the hinge face. 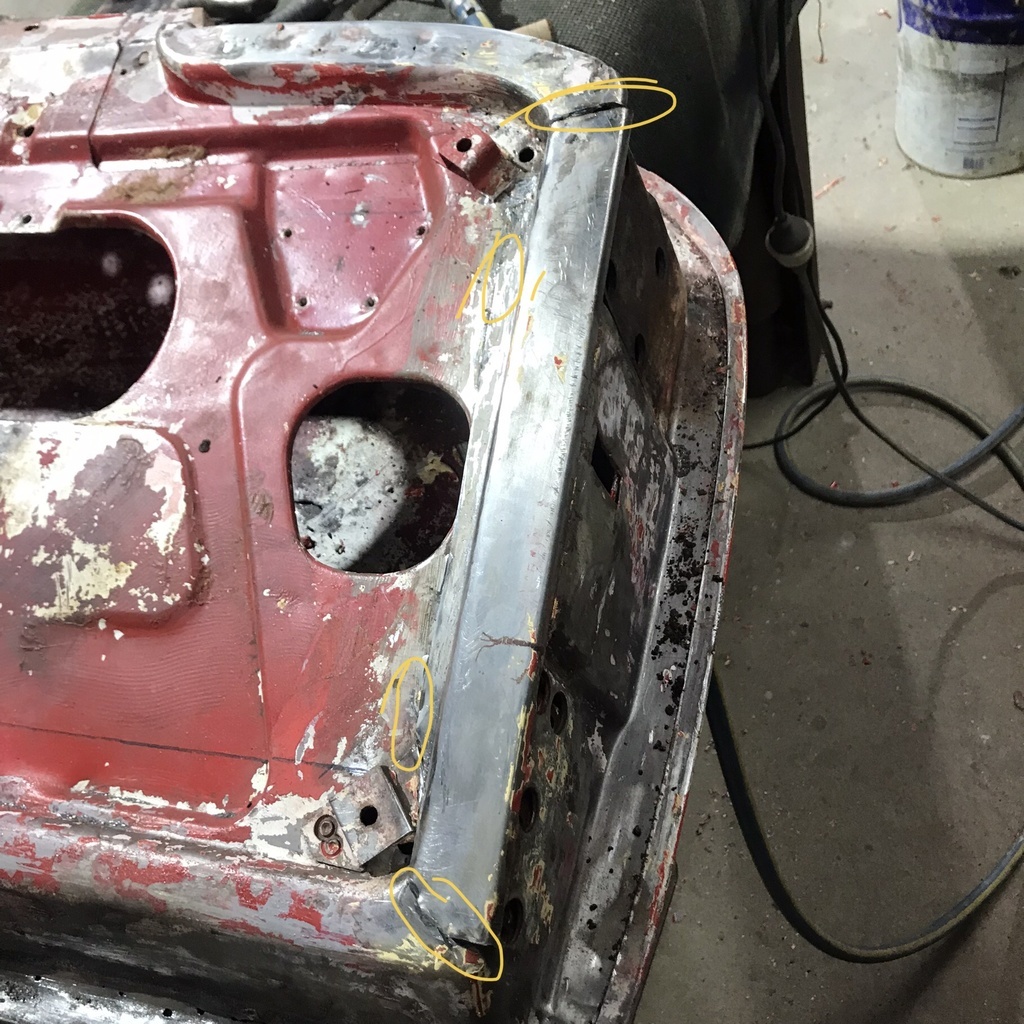 I cut through it and ground off some welds in the yellow circles. And the rust behind it is exposed. The result of a great little dust and moisture trap. 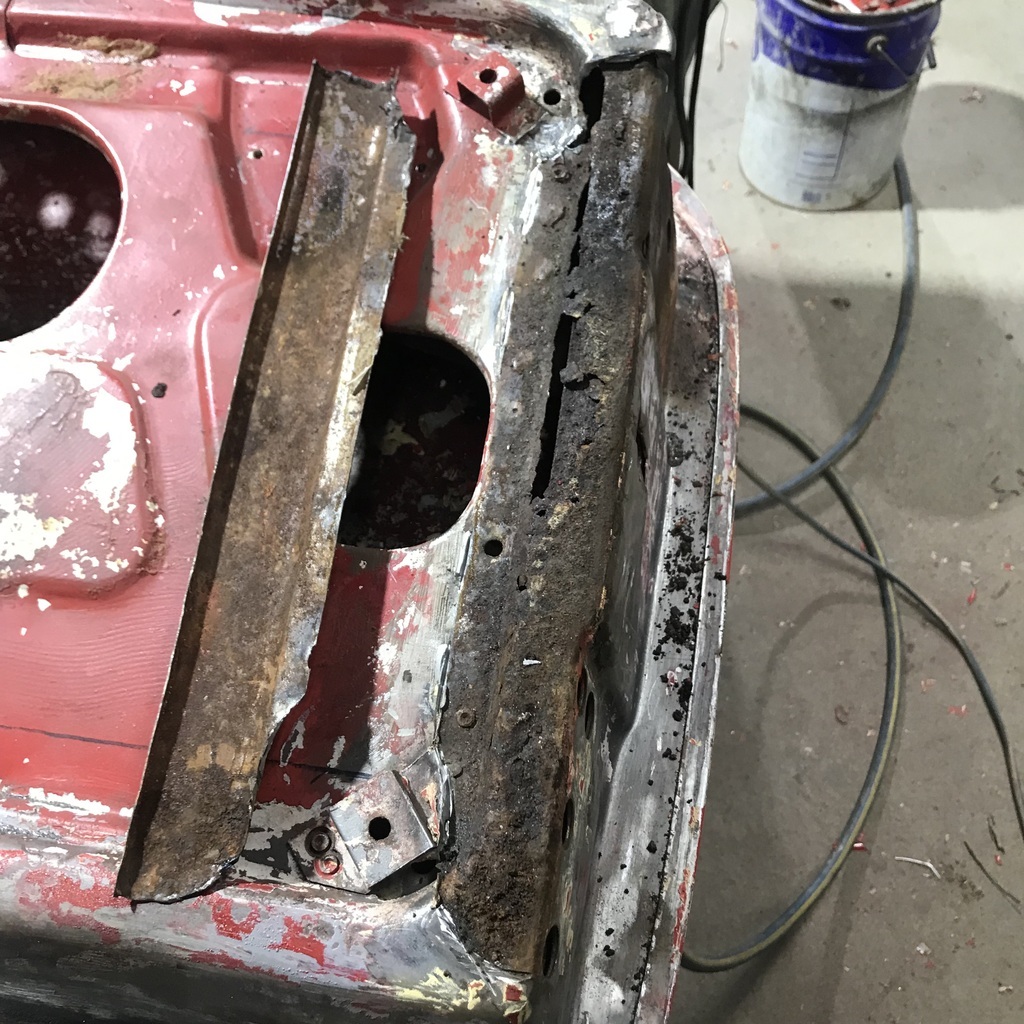 Turns out what I thought was a split is actually another layer of sheet metal. 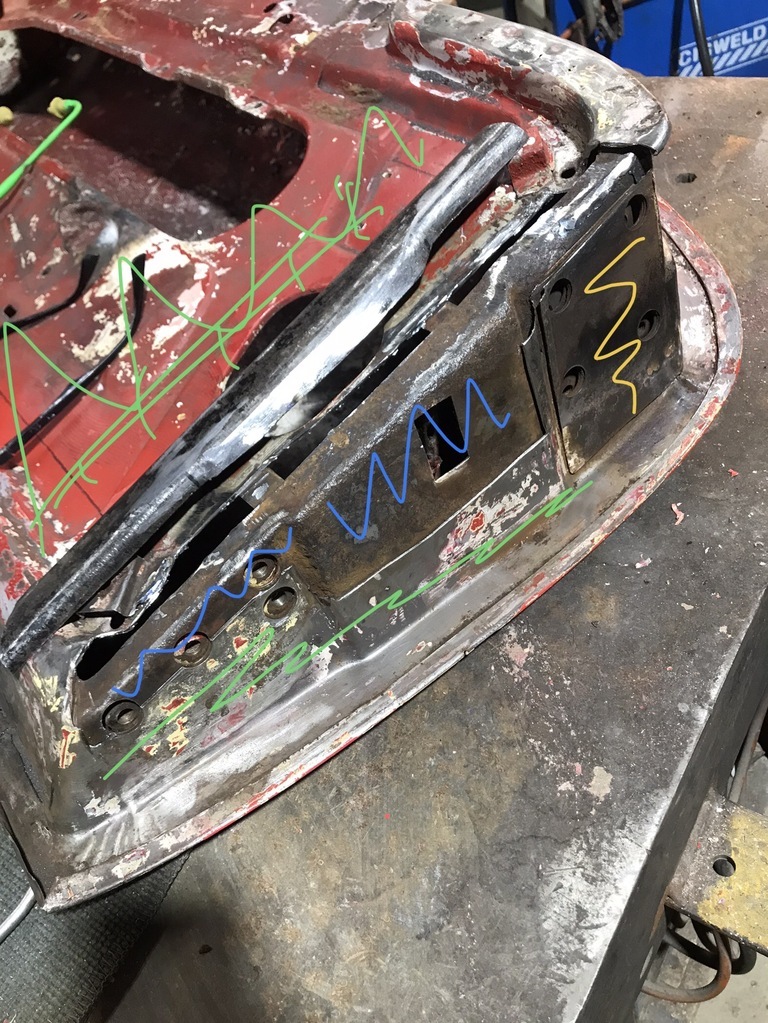 It’s a complicated arrangement. The green is what’s rusted, the main door frame. The yellow is a flap of sheet coming down and over the front of the hinge face. So three layers there. The blue is a heavier piece in behind the hinge face, It’s ok. So I thought I’d replace the rusted frame with a bit heavier gauge. A bit stronger and easier to weld. I plan to make it in two pieces. Pressed a double fold into a piece of 17#. Starting to trim it to size in this pic. 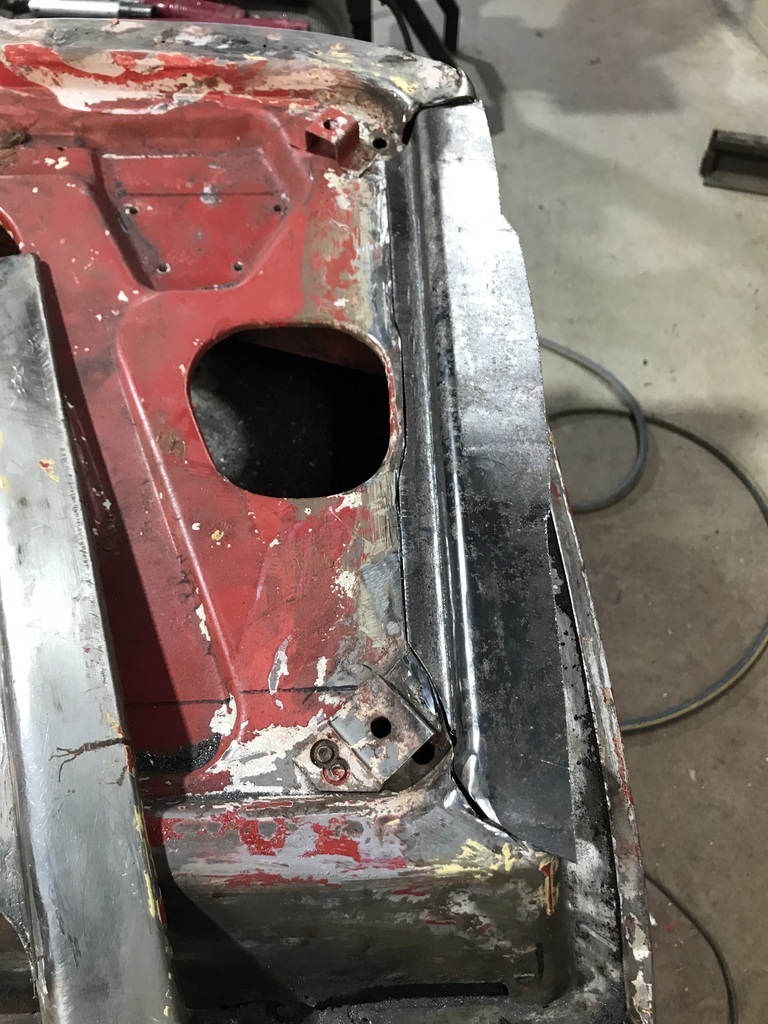 At the close of play, it’s pretty right. 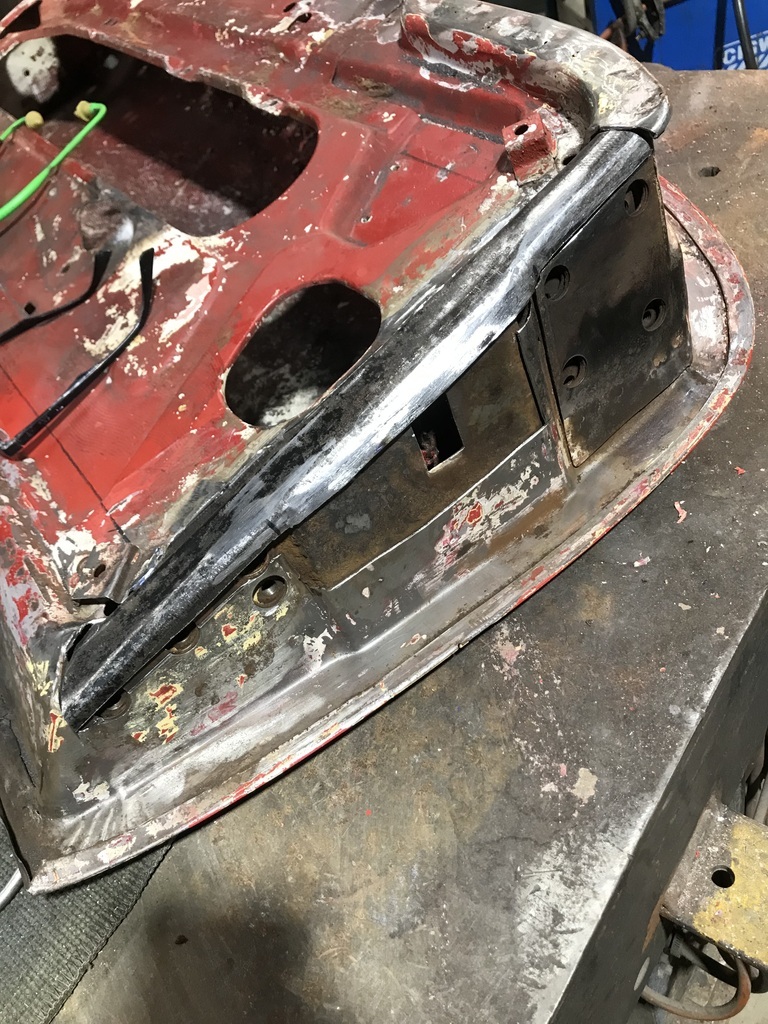 That took ages to bash into shape. I should have made a hammer form right at the start. I was seduced by the idea of pressing the two folds in one go… Tomorrow I’ll weld some bits to it to make it fill the gaps. At least that’s the plan for now. I’m not 100% happy with that three layer bit, so I’ll sleep on it. Thanks. |
| |
|
|
gazzam
Part of things
 
Posts: 741 
|
|
Sept 16, 2024 8:09:49 GMT
|
So, first thing this morning I did what I should have done yesterday morning. Made a hammerform. Just a couple of bits of flat bar lightly welded together and the corners ground off to replicate the door frame. 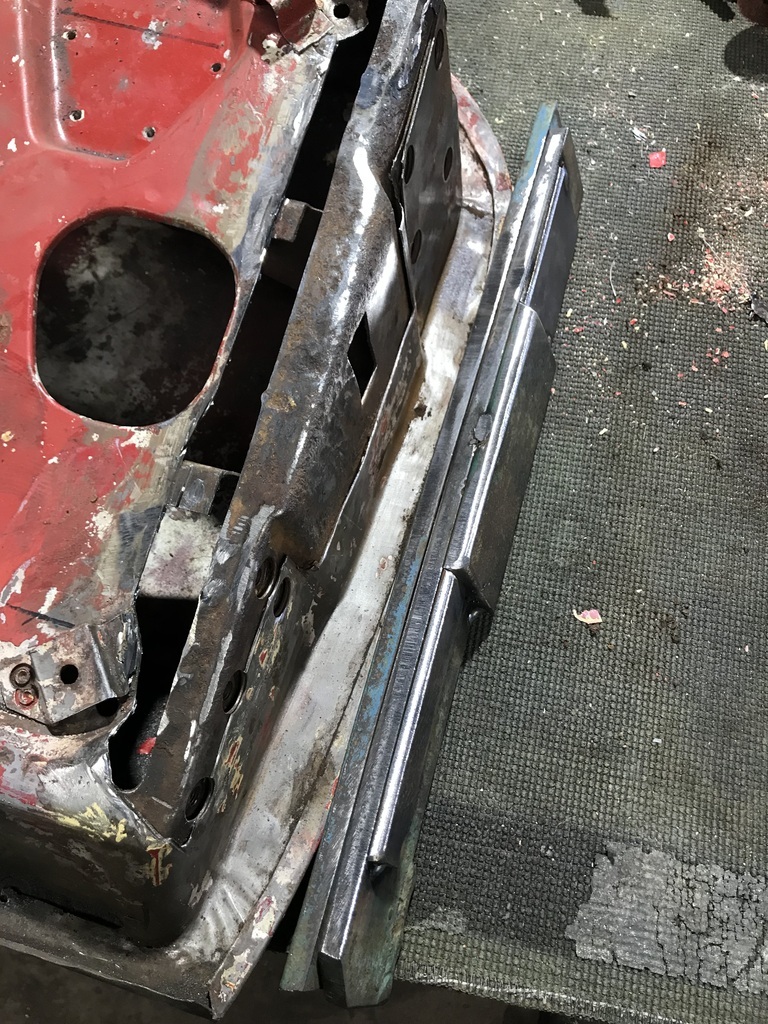 Took at least half an hour. Sat the piece that I'd been chasing my tail on for about half a day yesterday ( and still hadn’t got right ) and hammered it into shape in about two minutes. At least if the other door needs the same, and it will, I can remake the hammerform in mirror image very quickly… And I was just making excuses when I said the double fold lured me away. I will still do that next time. Gave the exposed frame a touch up with the sand blaster and discovered the inner frame wasn’t as ok as I said. This door just keeps on giving. 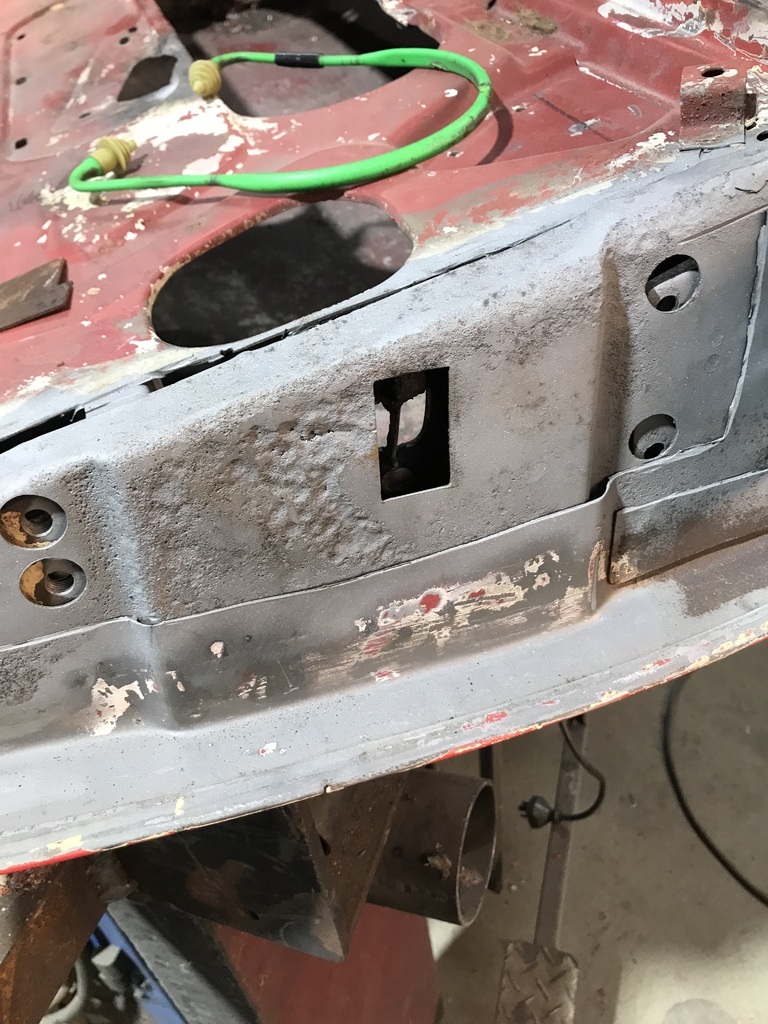 Cut a piece of sheet and scribed around it, then cut out the dodgy bit. Then sandblasted the inner bit. 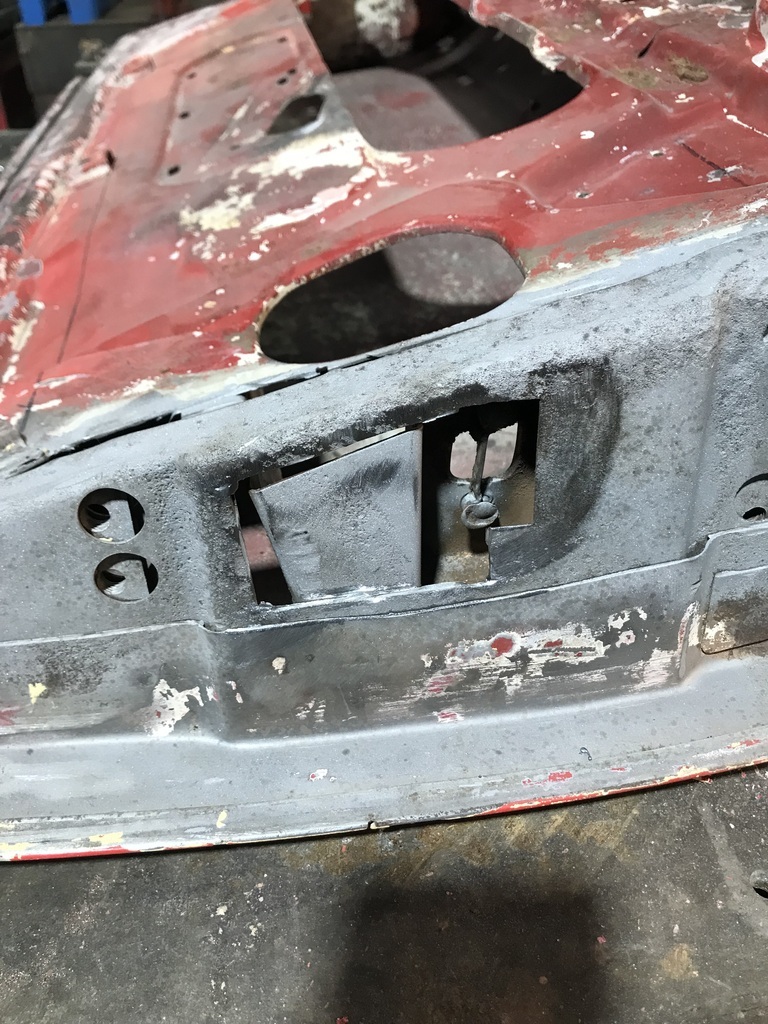 Tacked in the patch. 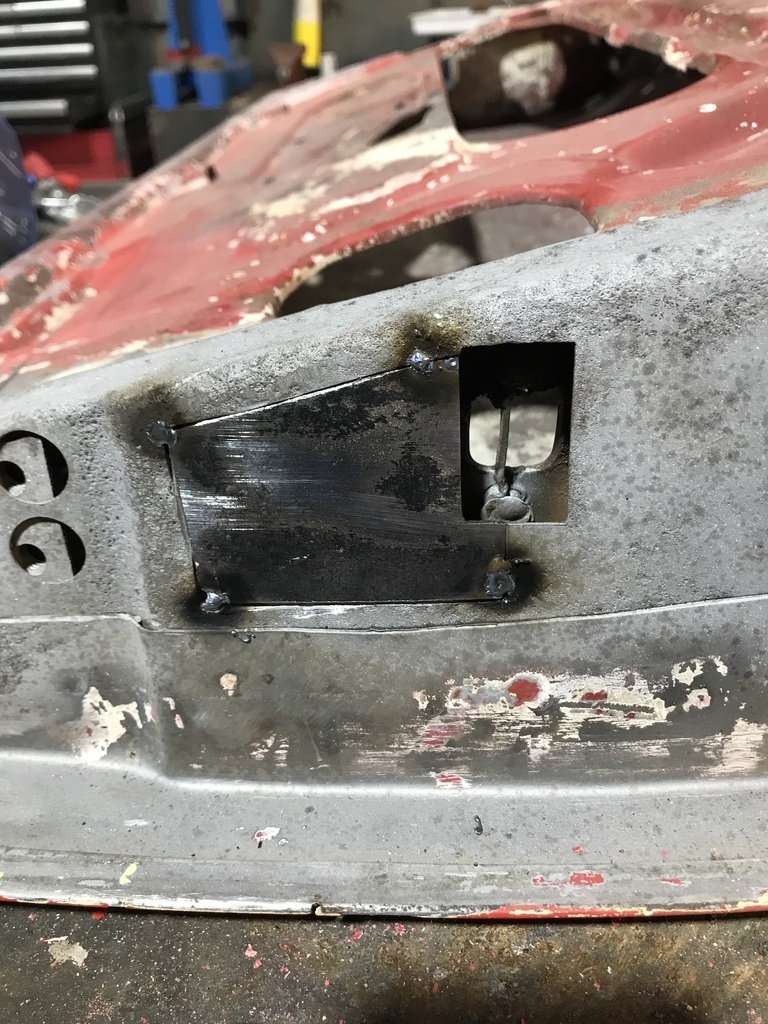 Then took it back out to drill a few holes to weld through on to the inner frame. Then welded it in and ground the welds back. 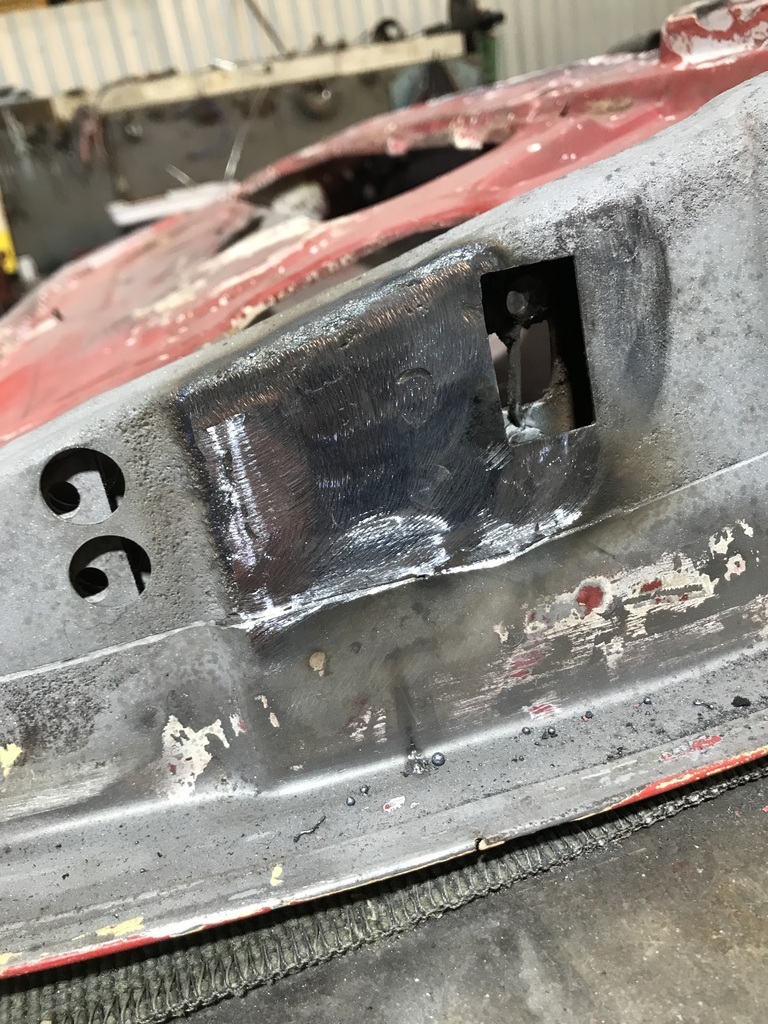 Masked up the whole repair and sprayed some primer on it. 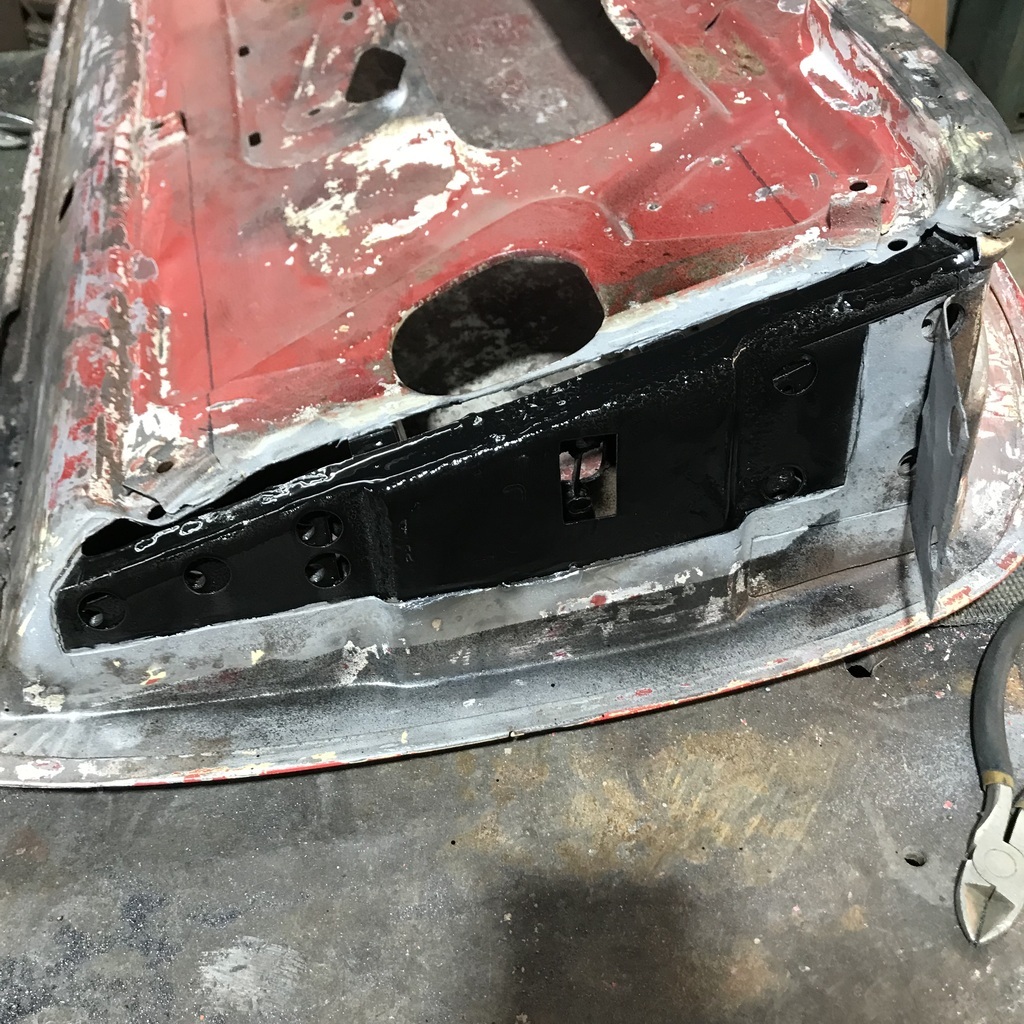 Then tacked the first piece of the repair panel, shown by the arrows. 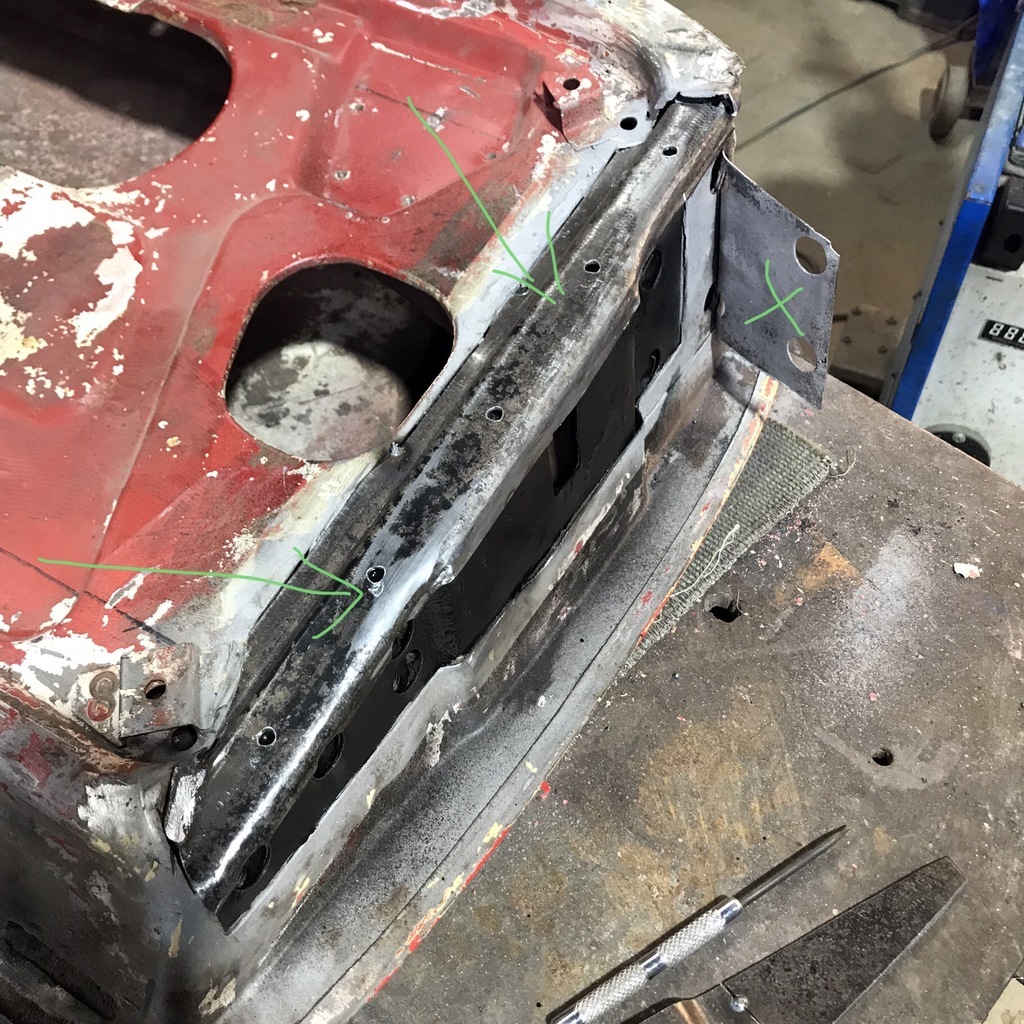 The x is the third layer that I mentioned. I cut it and folded it up out of the way. Then spent an inordinate amount of time cutting the holes for the hinges in the other part of the patch. And tacked it all in. 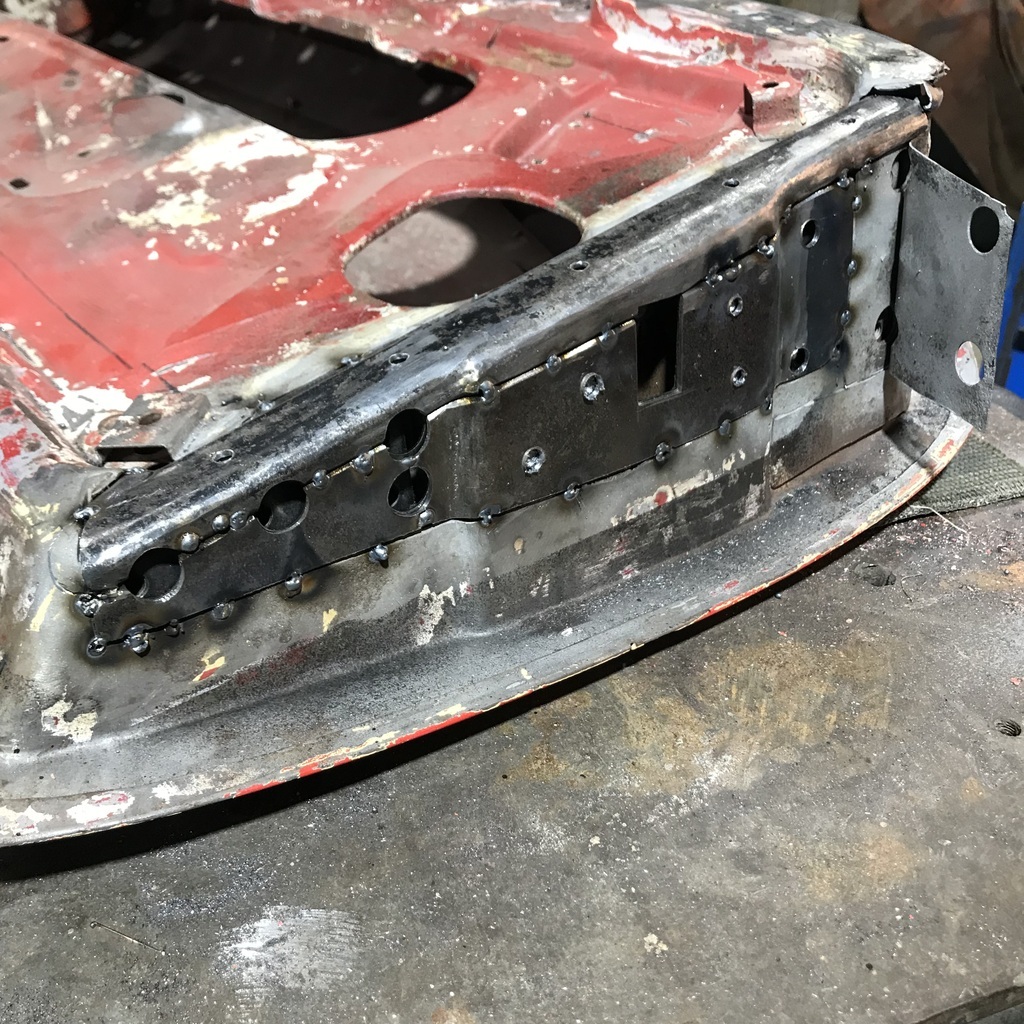 That’s all today. Thanks. |
| |
|
|
|
|
|
Sept 16, 2024 8:39:59 GMT
|
gazzam That seal channel is used on the Rover P6 so look up Rover suppliers, it is available in 700mm lengths, so no need to make it.
|
| |
|
|
gazzam
Part of things
 
Posts: 741 
|
|
Sept 17, 2024 8:56:45 GMT
|
Thanks colnerov, that’s good to know. I was thinking they would be tricky to make, being so narrow. More door fun. Welded in the hinge face piece that I tacked up last thing yesterday. 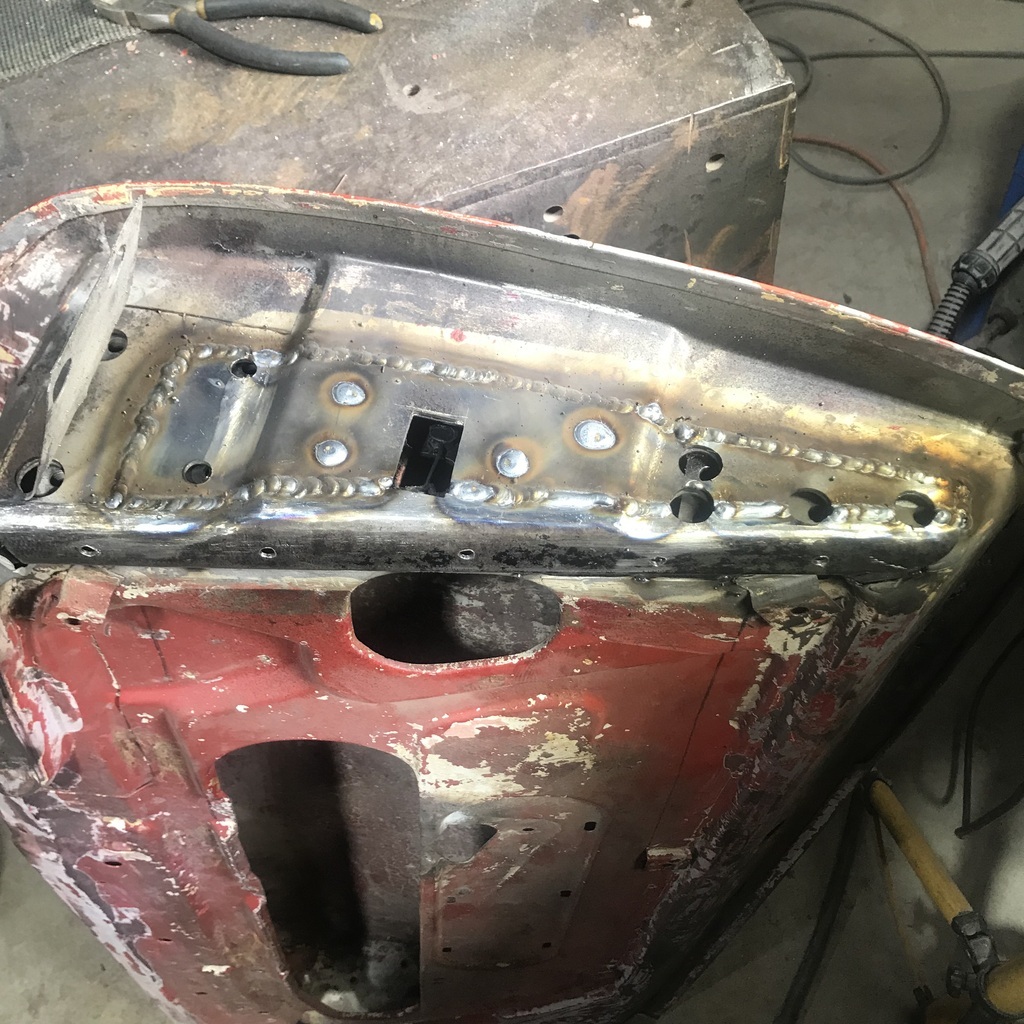 Then ground back the welds. 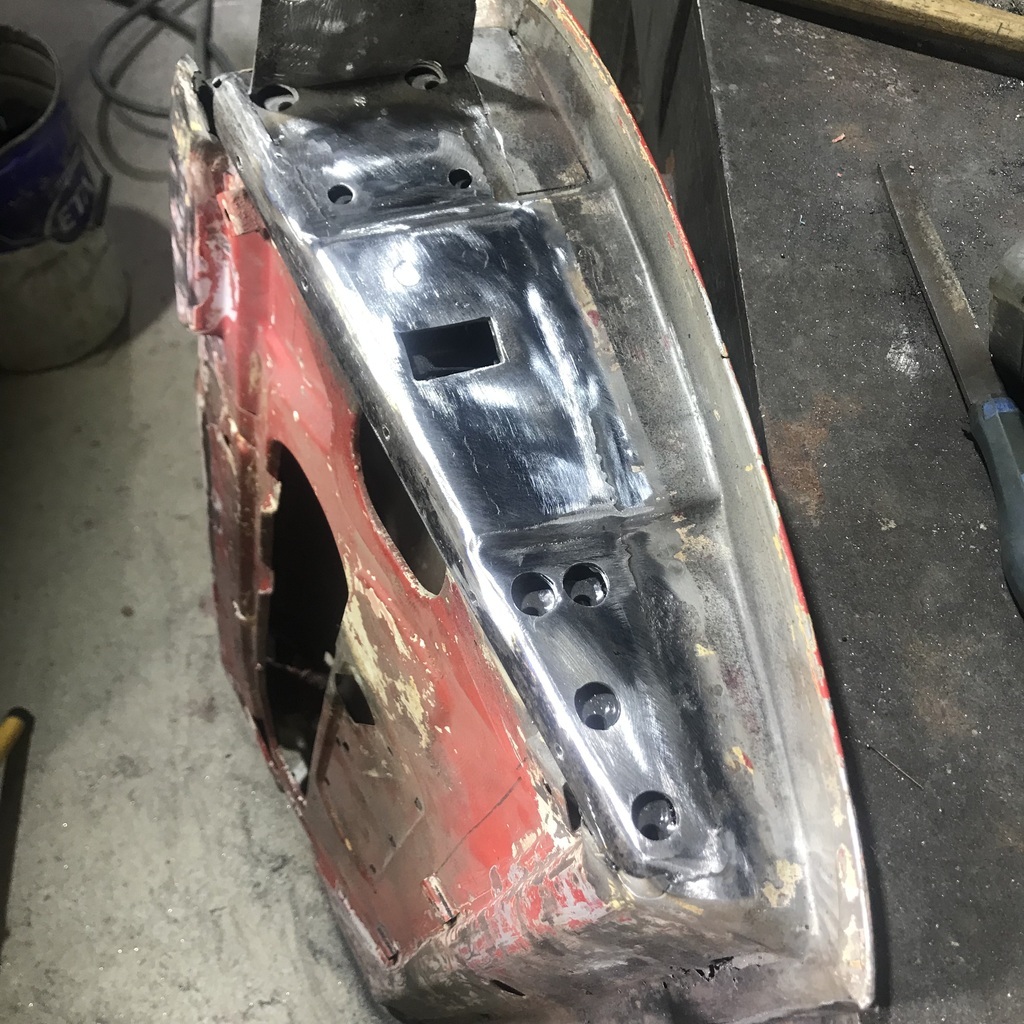 Welding 17# to 20# meant it was always going to have a mismatch in height. The extra thickness was stronger and easier to weld, and I thought a smear of filler would sort it. But once I sat the hinge in place, is it worth the trouble? 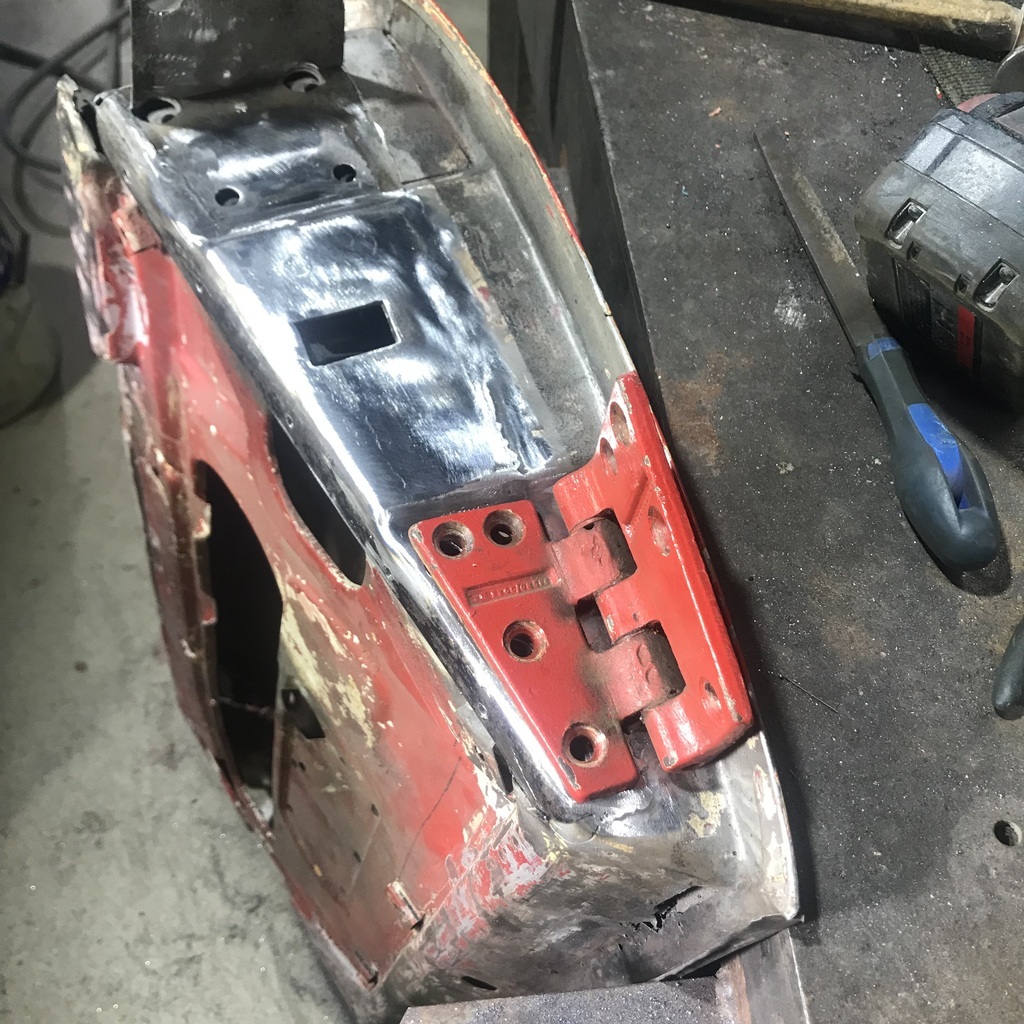 Next was this area. Cut a piece of 20# roughly to size. 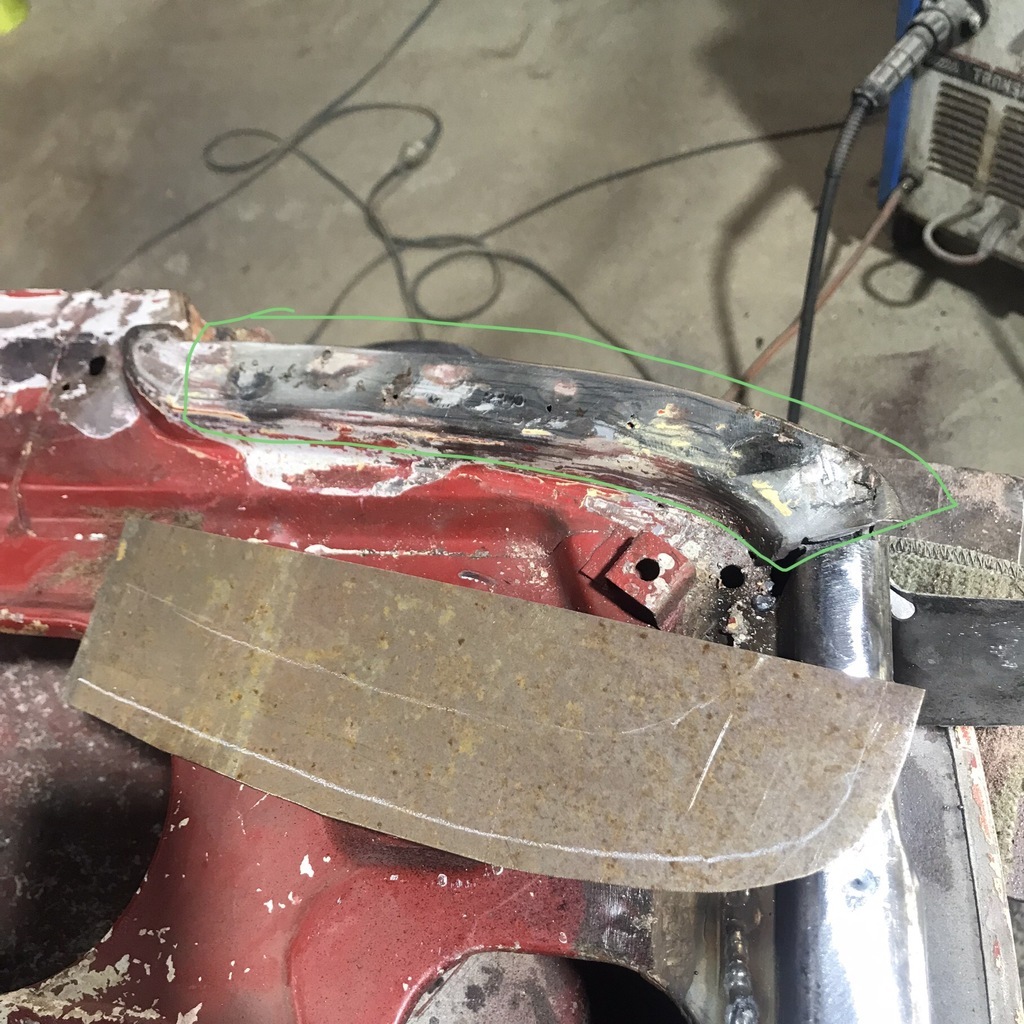 Tapped the edge over and trimmed it back, just to get this pic of the pig tail… 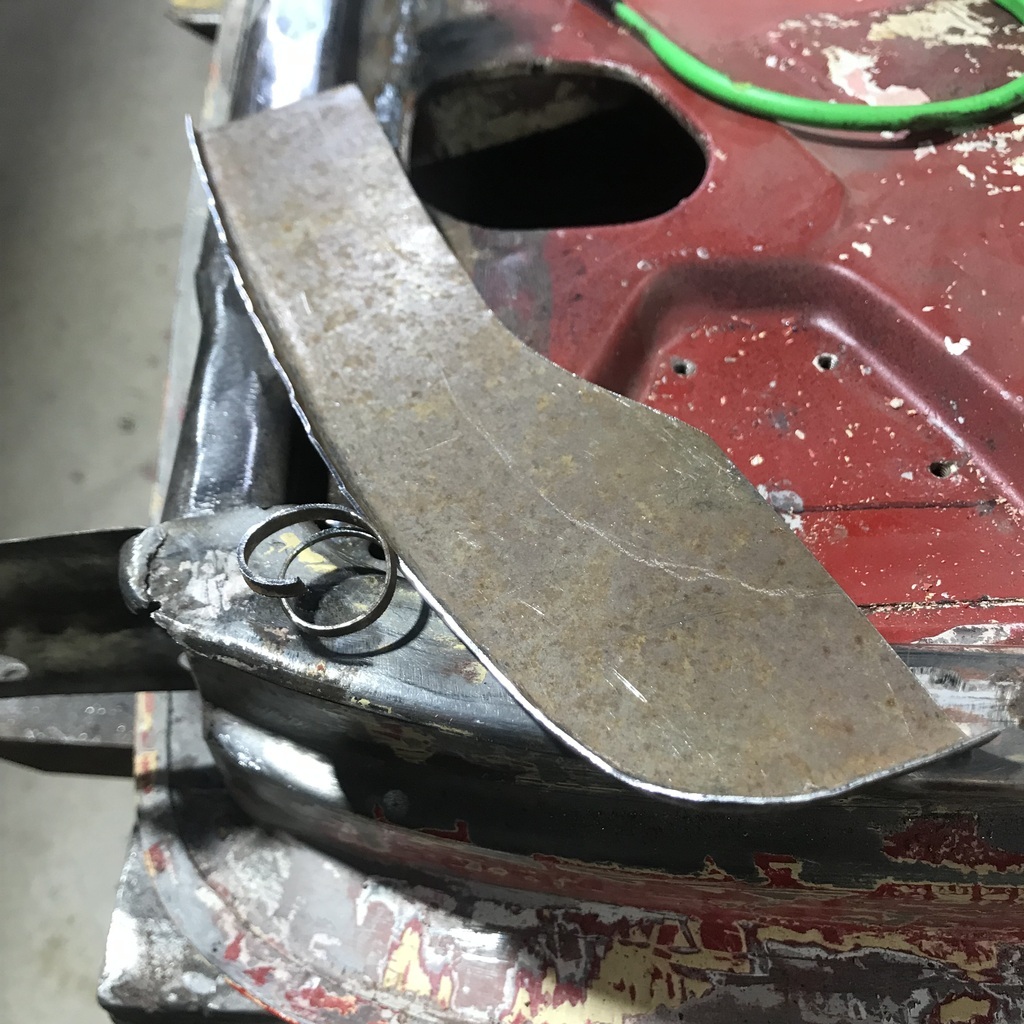 It was fitting ok, but that’s the easy side. 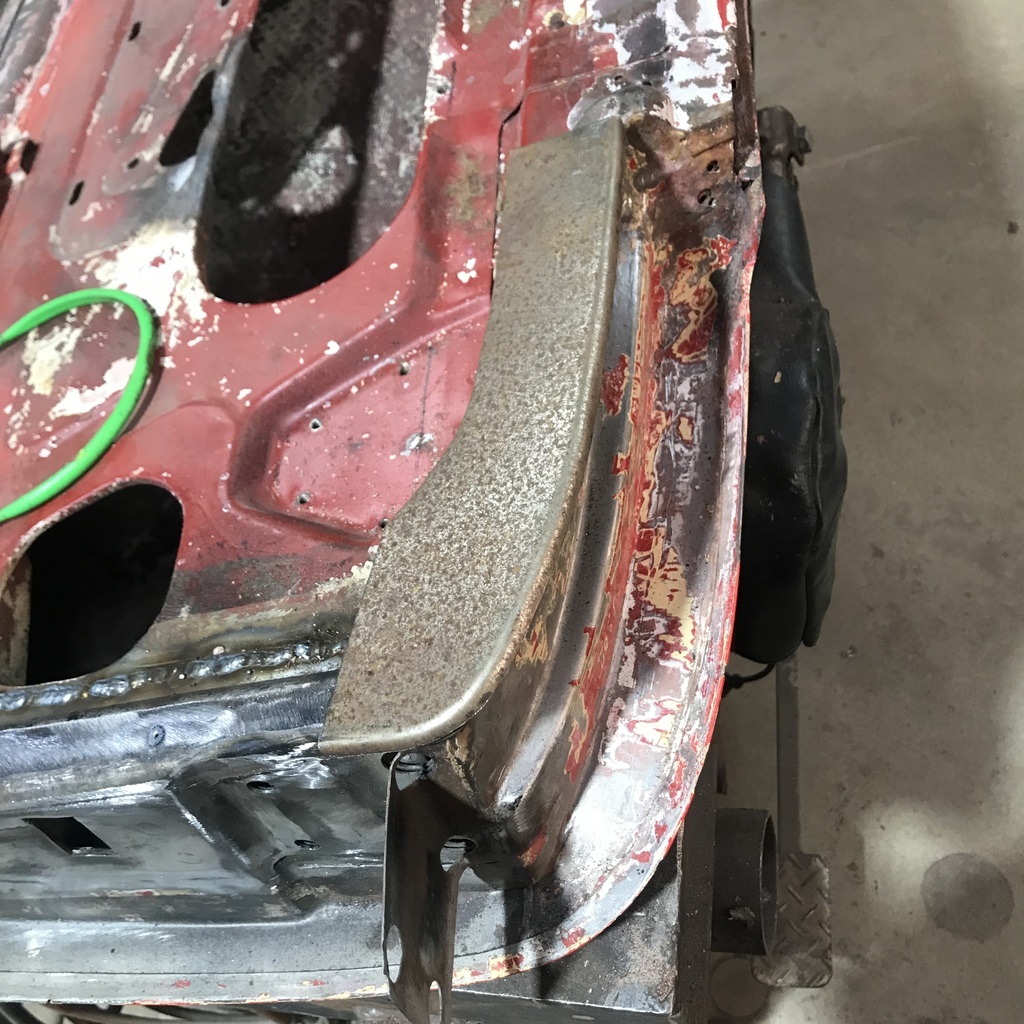 So I decided to learn from my mistakes and make a hammerform earlier rather than later. Bent a bit of 10mm rod and shaped a piece of 5mm flat bar. Tacked them together. 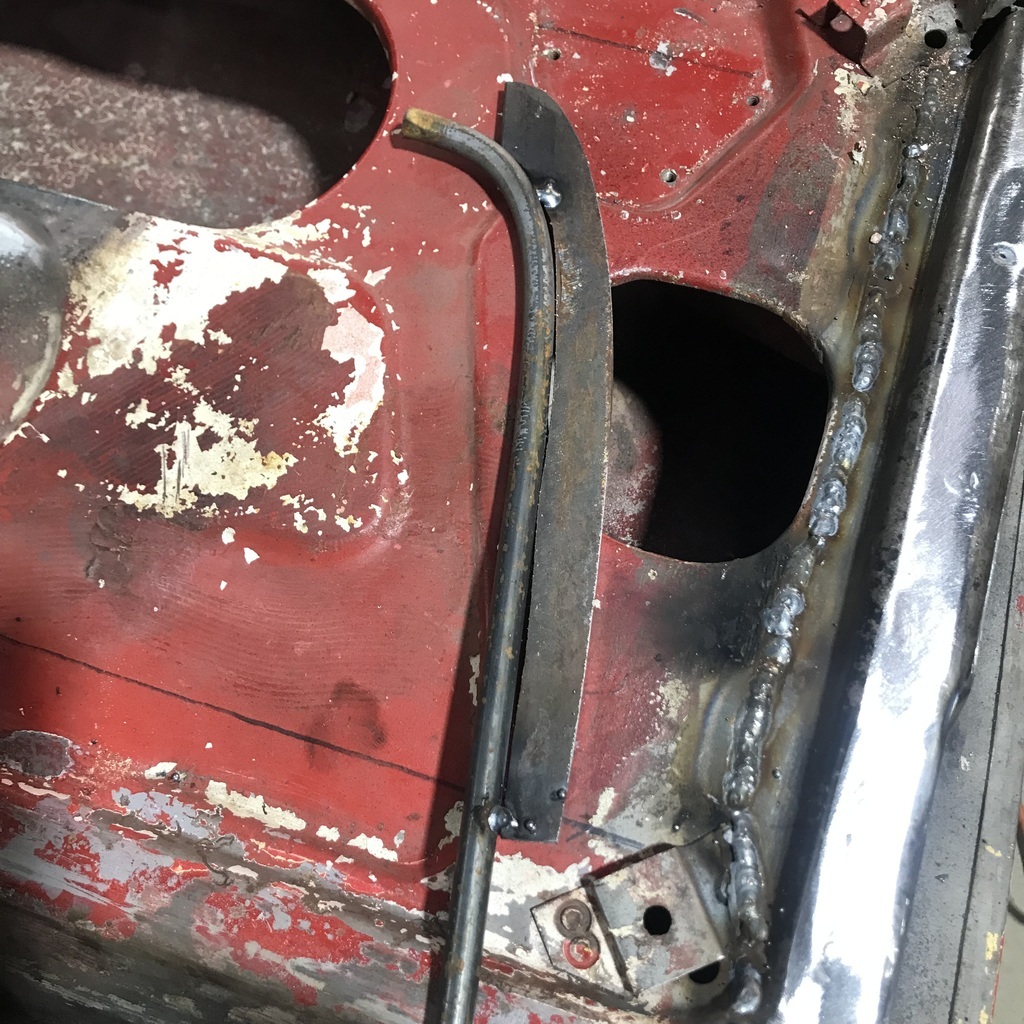 The shape is pretty close. The 10mm rod is a good match for the radius on that side. 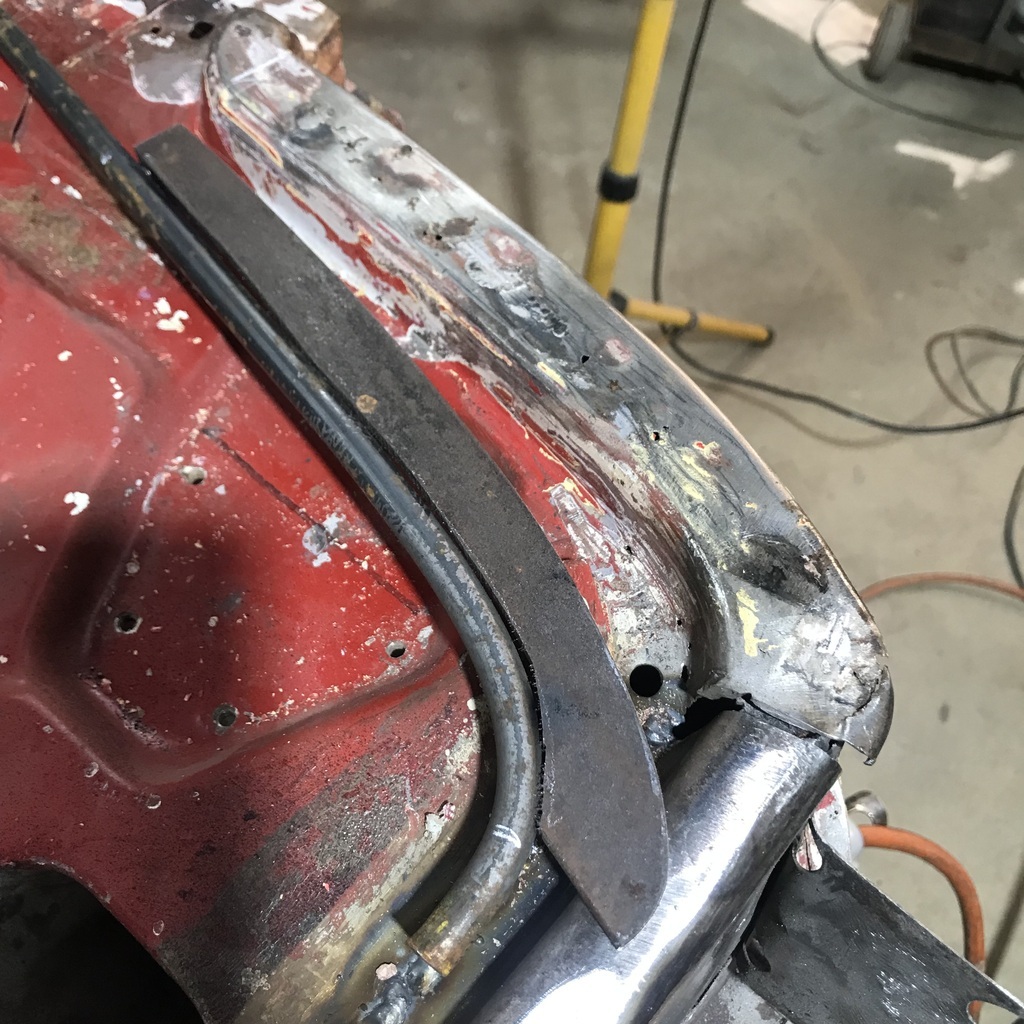 Time to remove that piece. Ground through the spot welds and expose the rot below. 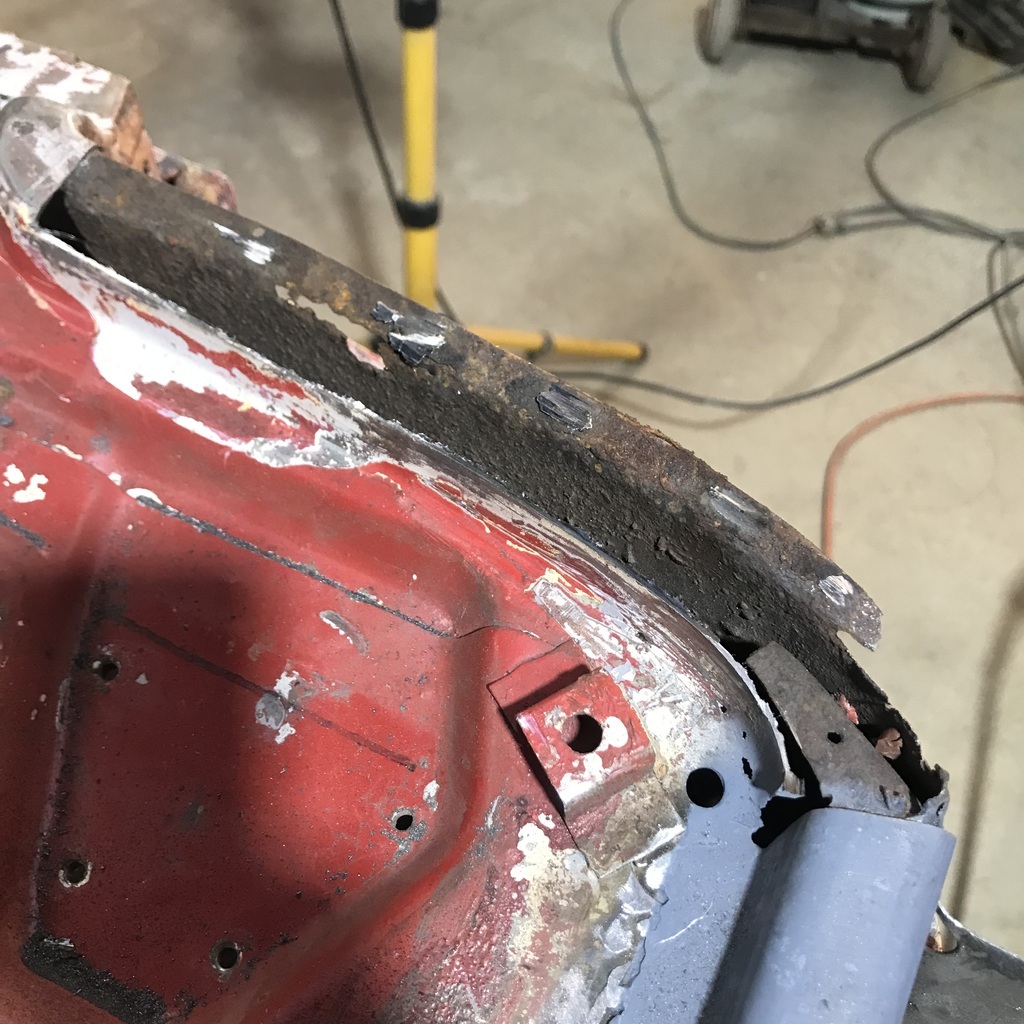 Cut and fold a piece of 20#. Then a bit of stretch on the short side, to put a curve in it. 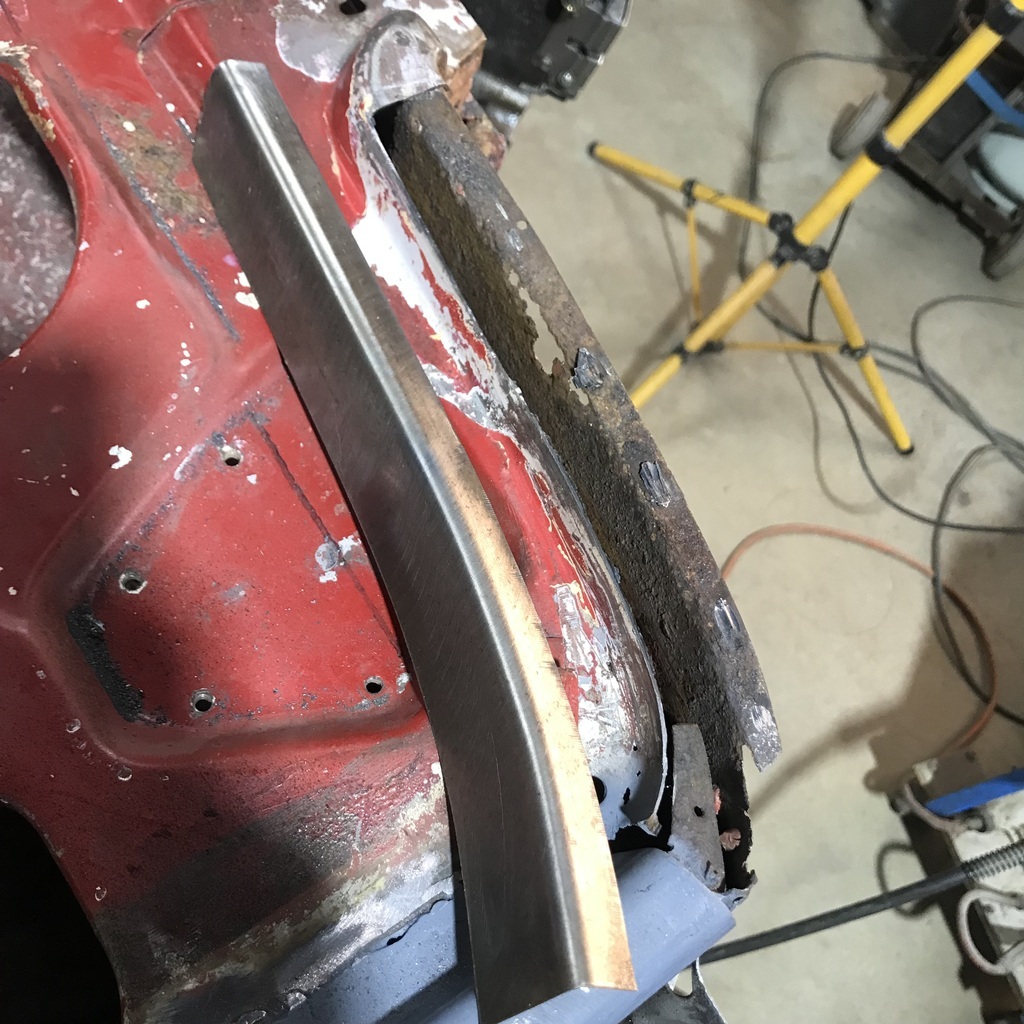 After a bit of fettling, tack it in. 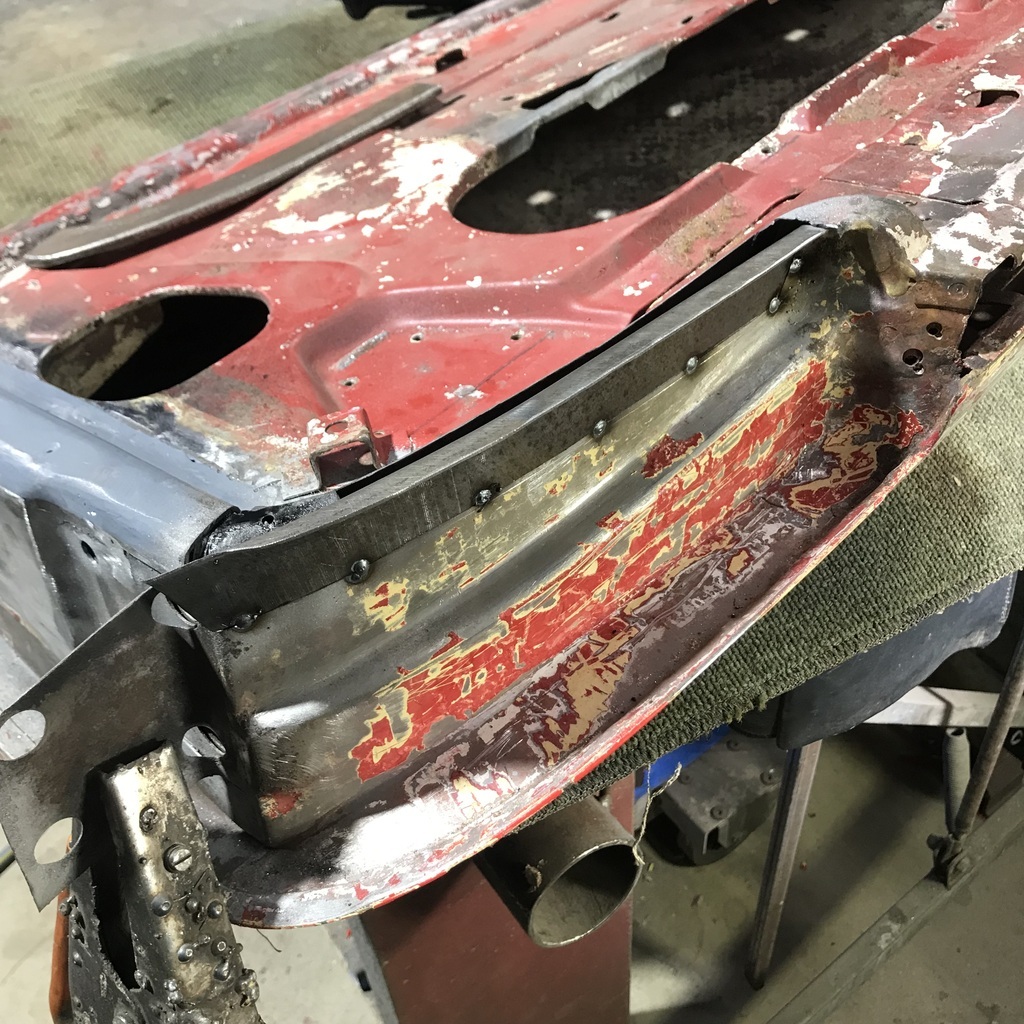 The piece that I shaped with the hammerform needs a bit more fettleation, but it’s close. 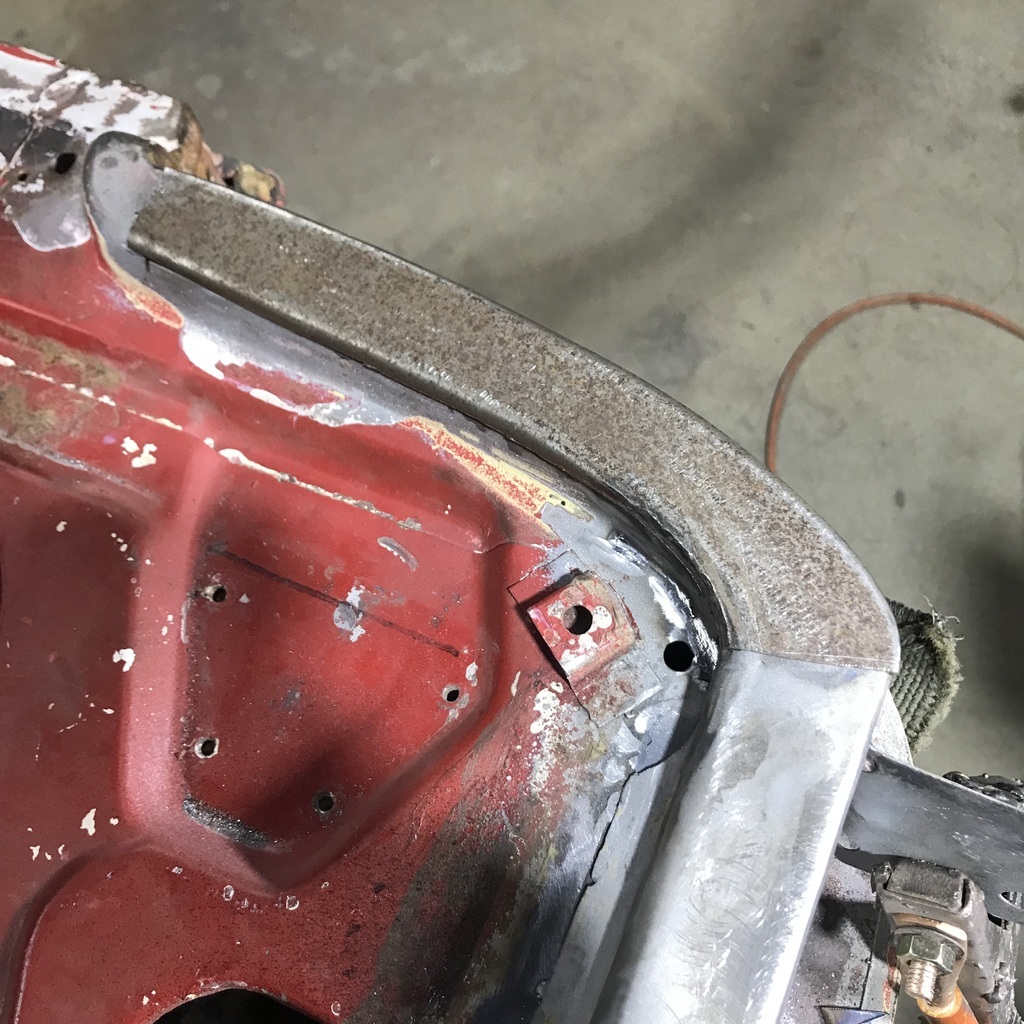 That’s for tomorrow.. Thanks. |
| |
|
|
teaboy
Posted a lot
   Make tea, not war.
Posts: 2,125
|
|
Sept 17, 2024 9:27:28 GMT
|
|
Excellent, as always.
I wouldn’t bother with filling the door frame..
|
| |
|
|
gazzam
Part of things
 
Posts: 741 
|
|
Sept 18, 2024 8:29:36 GMT
|
Thanks Tea. I like your thinking. So I got the TIG out to fully weld the piece I had tacked in yesterday. It was a beautiful fit and I managed to blow only a couple of holes in it. 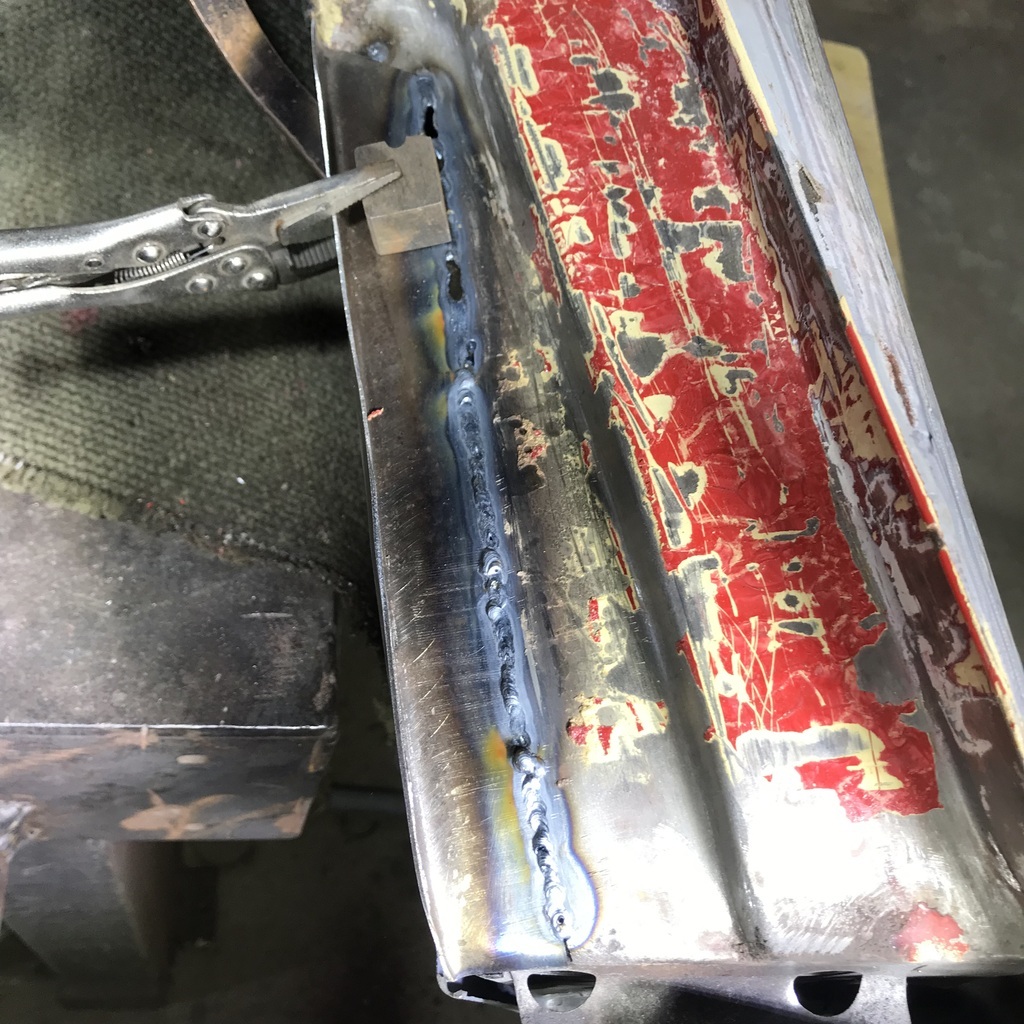 I’m not a happy camper with the TIG. Probably if I practice for twenty years, the very thought of it might not get my guts in a tangle… Clamped a piece of copper behind it and filled the holes. Then ground it off, turned out ok. 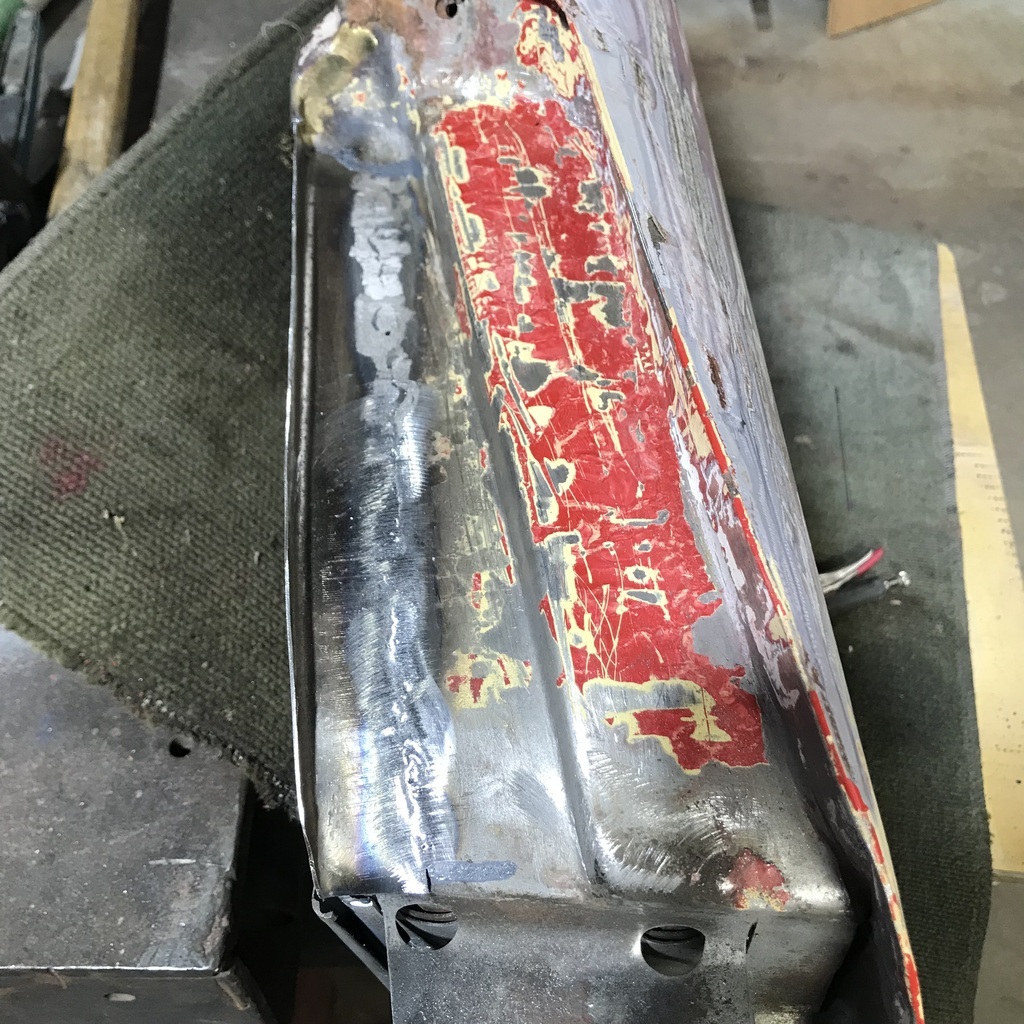 After tuning the fit of the last piece, tacked the join and rosette welded to the previous bit. 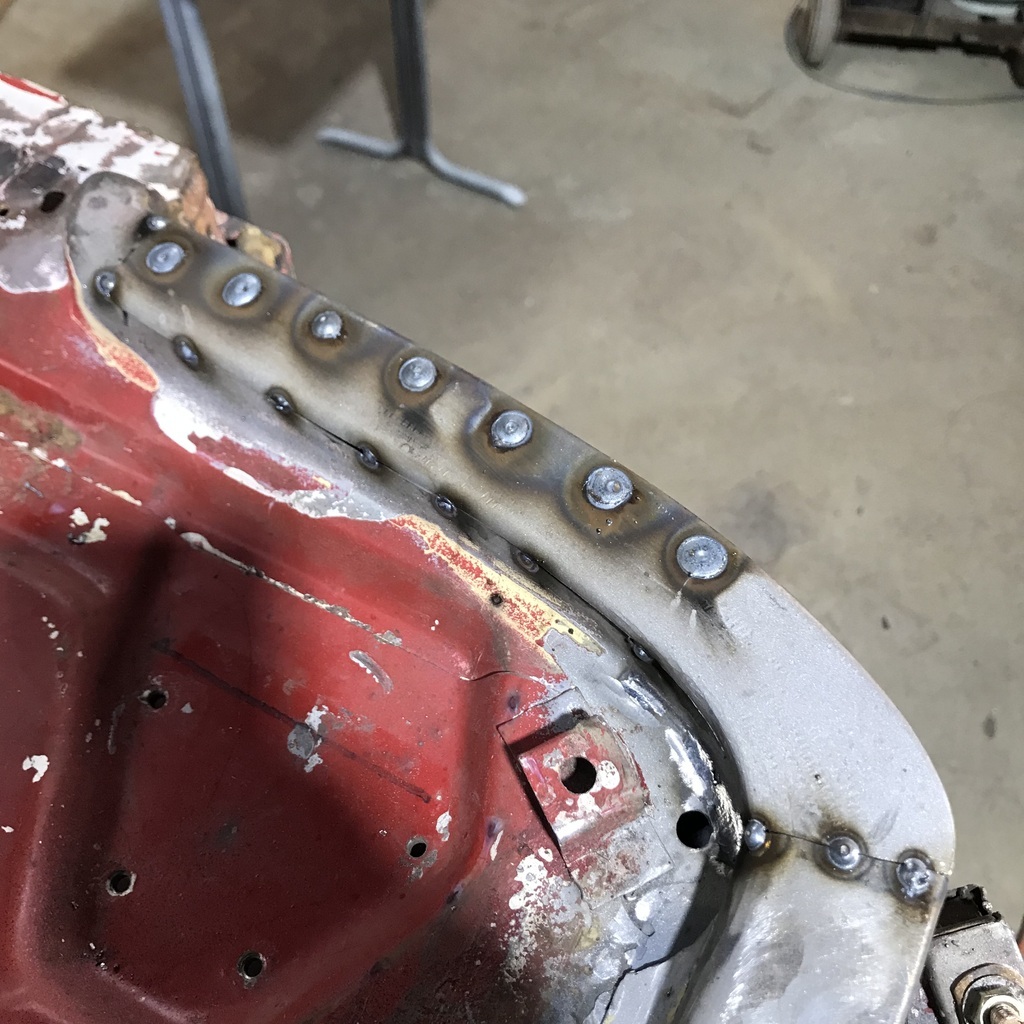 Welded and ground off. 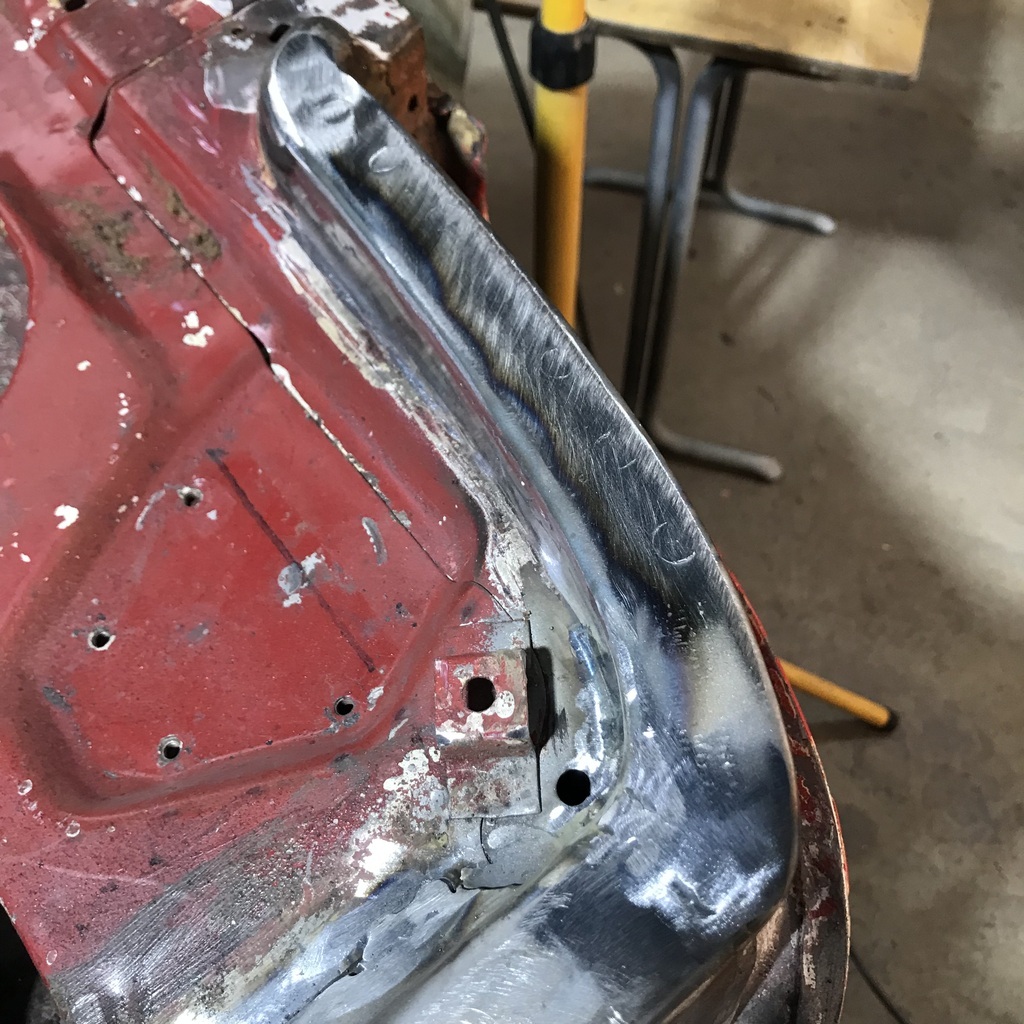 Folded down and welded the third layer at the top hinge. And ground it off. 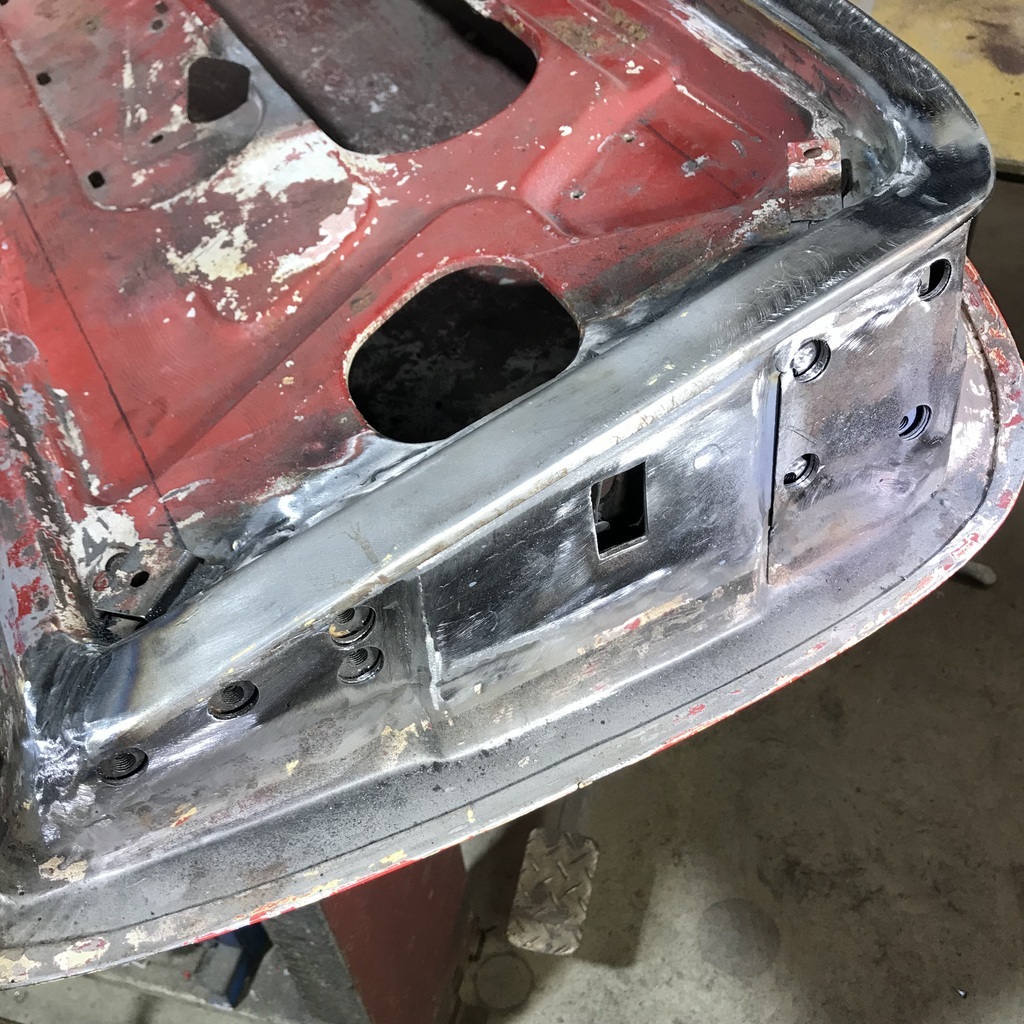 Pretty pleased with that repair. Started on the underneath damage. Heated the fold in the skin and peeled it back a bit more, so I could cut the bit out. 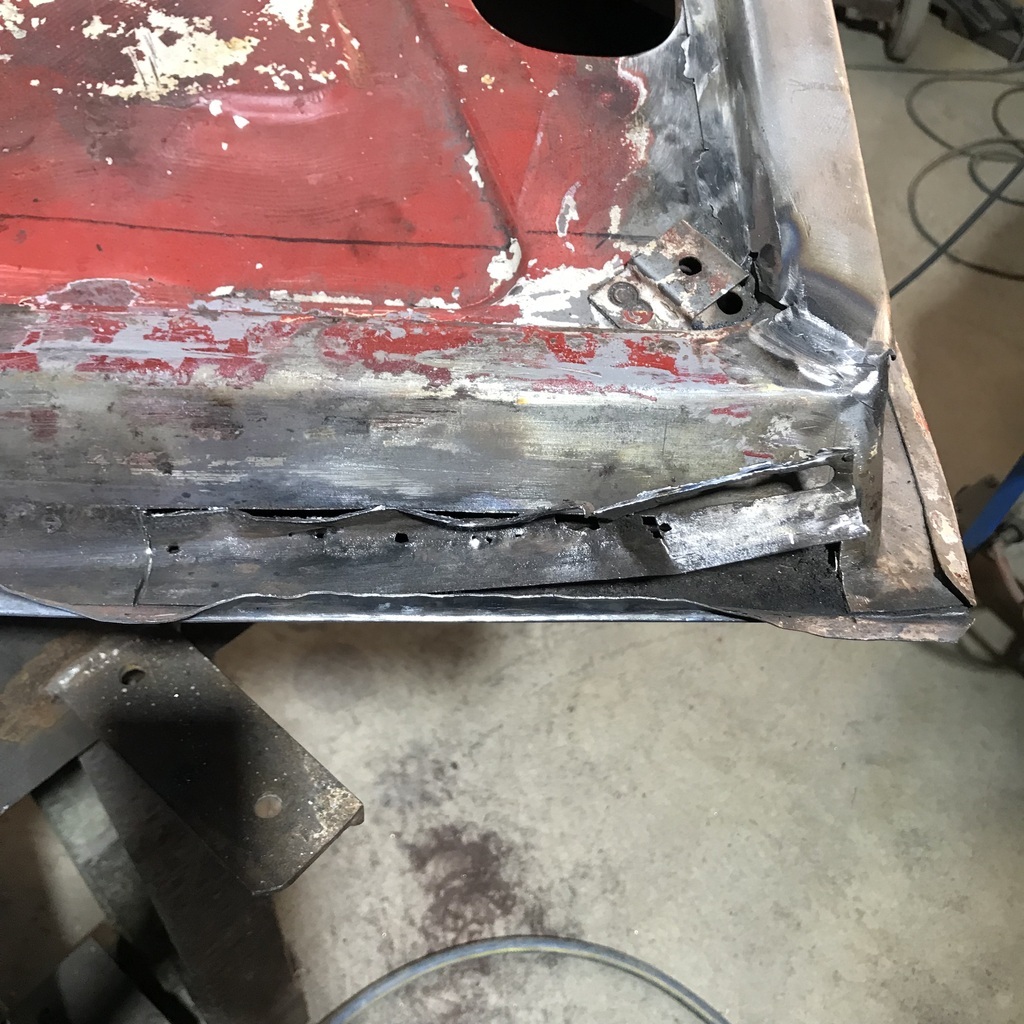 This nice little patch was on the skin side of that. 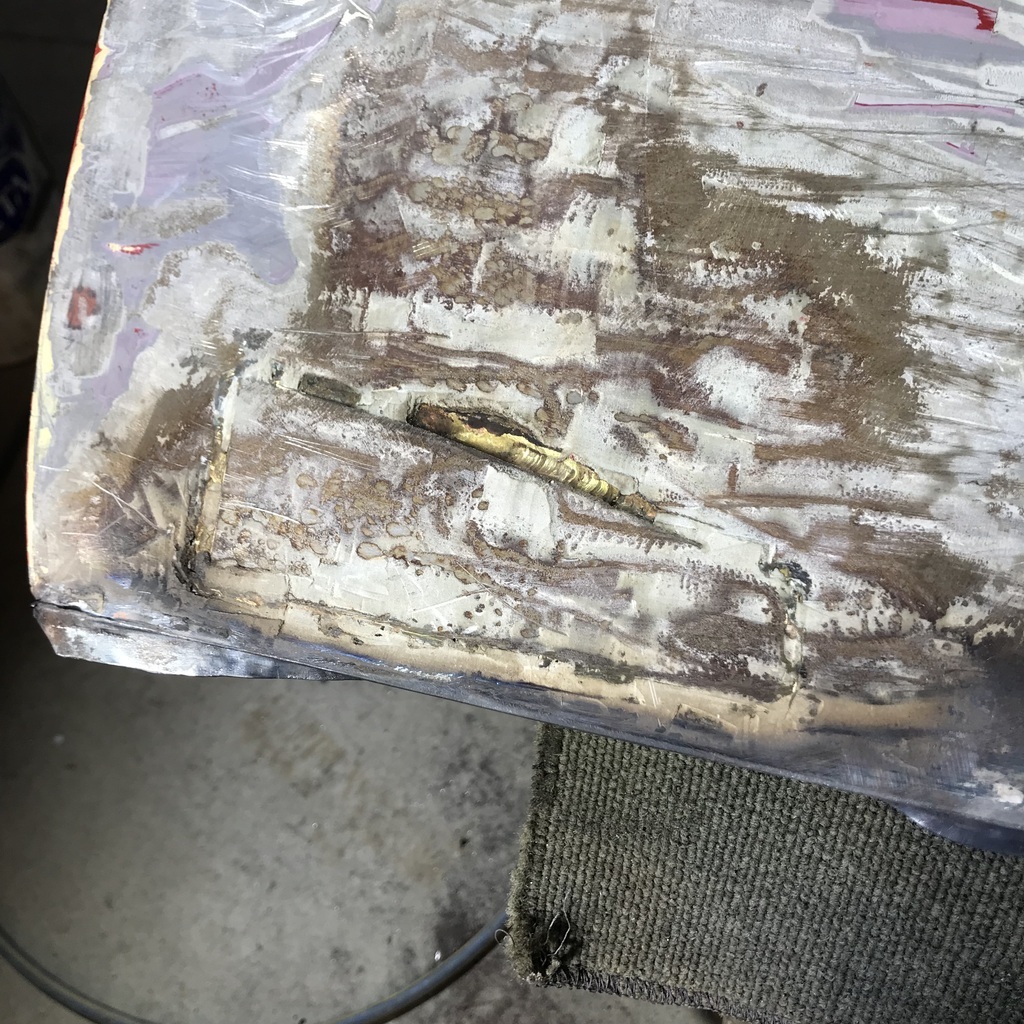 So I cut it out also 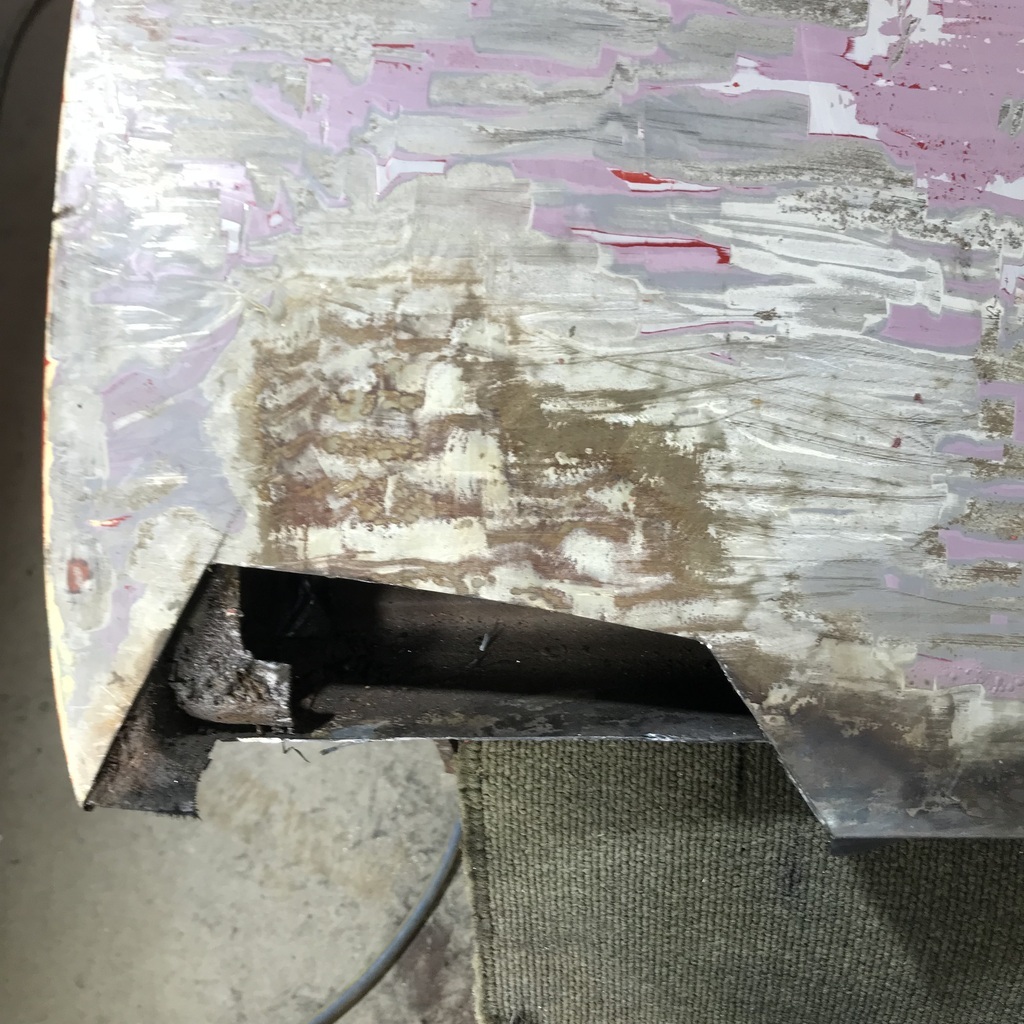 Cut and folded a piece for the frame repair, then tacked it in. 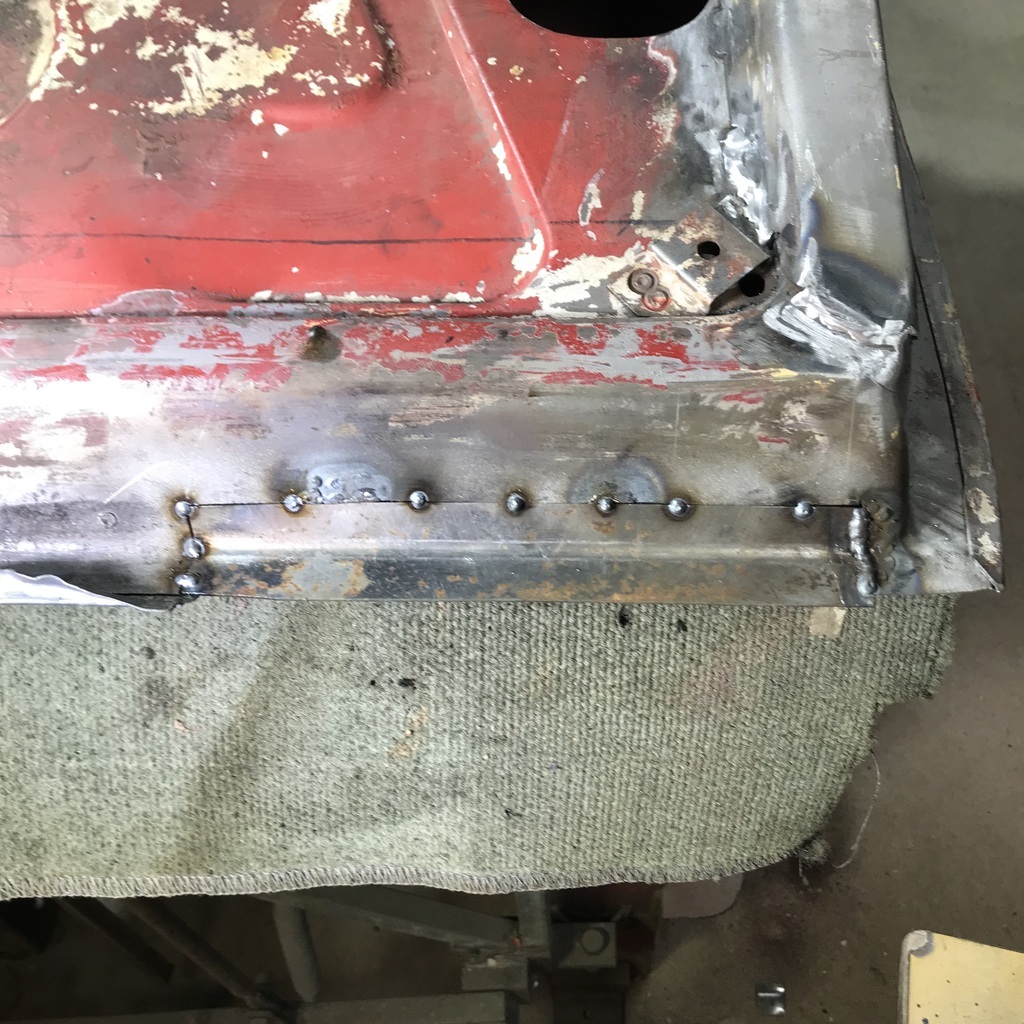 Fully welded with the MIG. 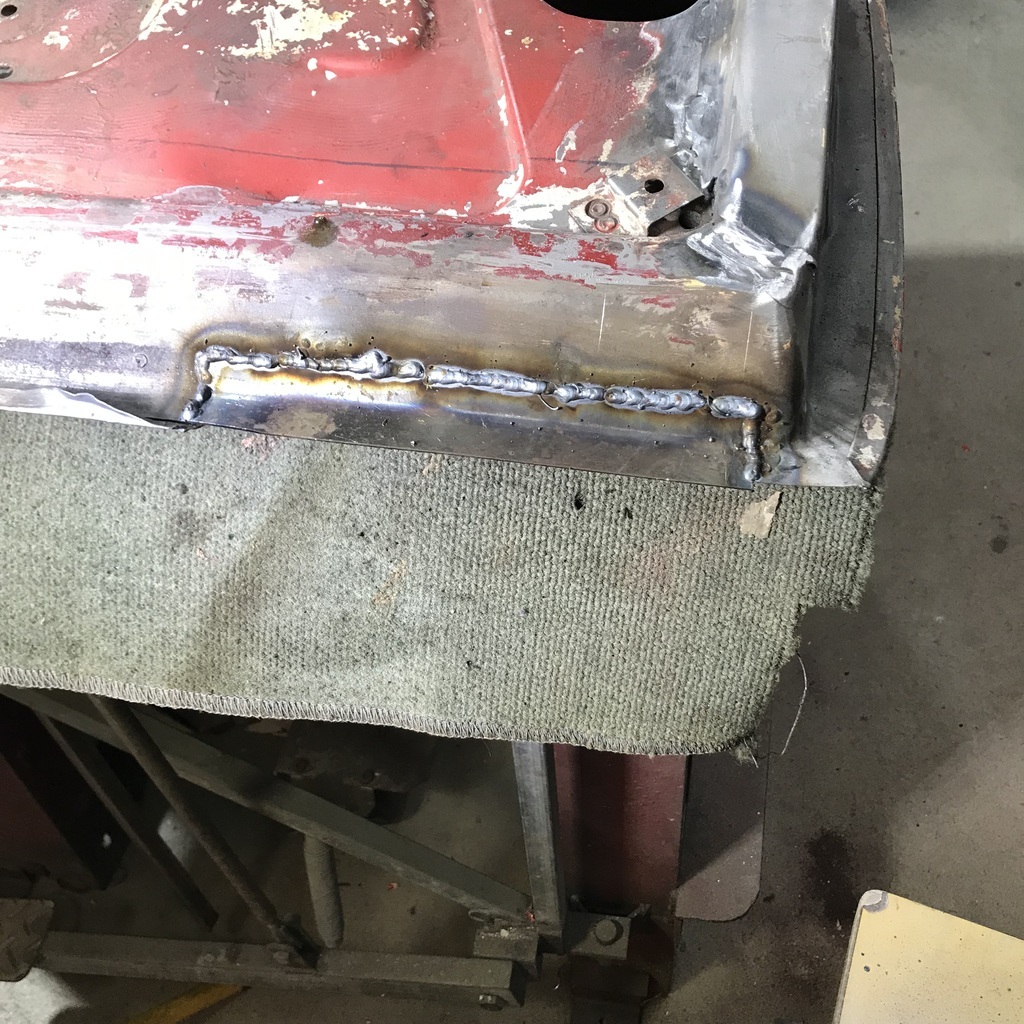 Really, I should have used the TIG, it’s certainly easier to grind back. And because I’d cut the skin away, there was good access to sandblast the back of it, so nice and clean. That’s all for today. Thanks. |
| |
|
|
|
|


 not many of them going about, must be pretty rare in your neck of the woods. Is it a 4.3 or 4.7 ? is the bonnet scoop standard ? the only one I have seen in the metal (a friend had an early one many moons ago) had just a plain bonnet, same as the Alpine


