gazzam
Part of things
 
Posts: 746 
|
|
|
|
Thanks Tea, cheers Jonsey. The inside of the door had had a piece cut out of it. Just a small bit, hard to see, circled here. 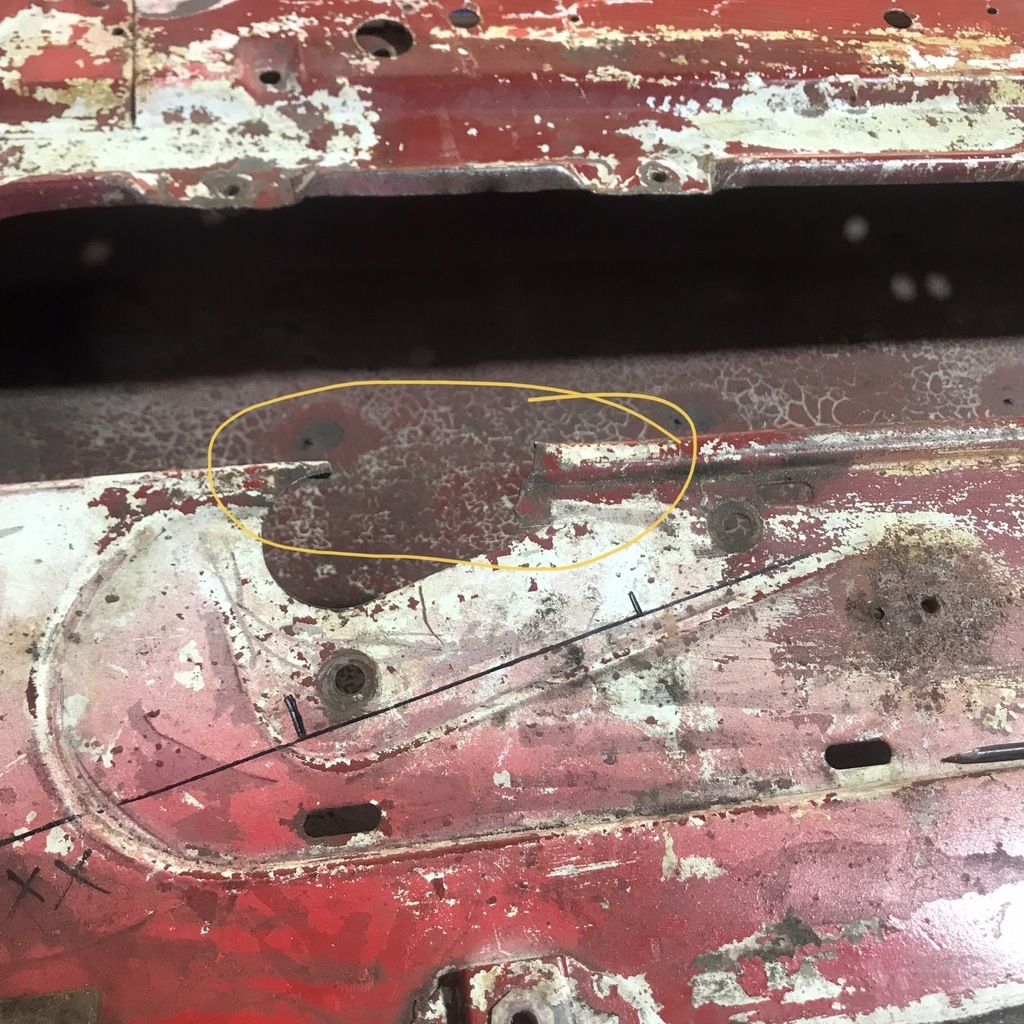 Cut and folded some sheet. 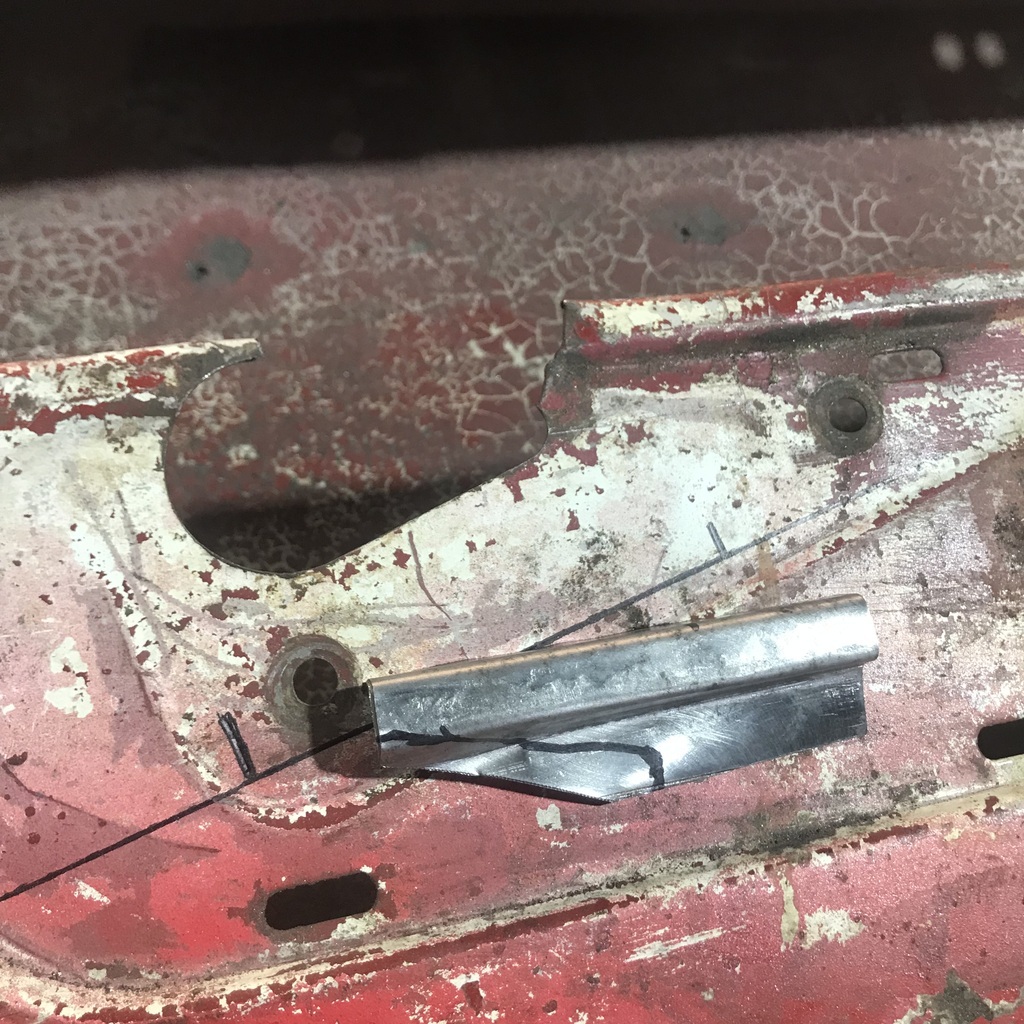 Welded in and tidied. 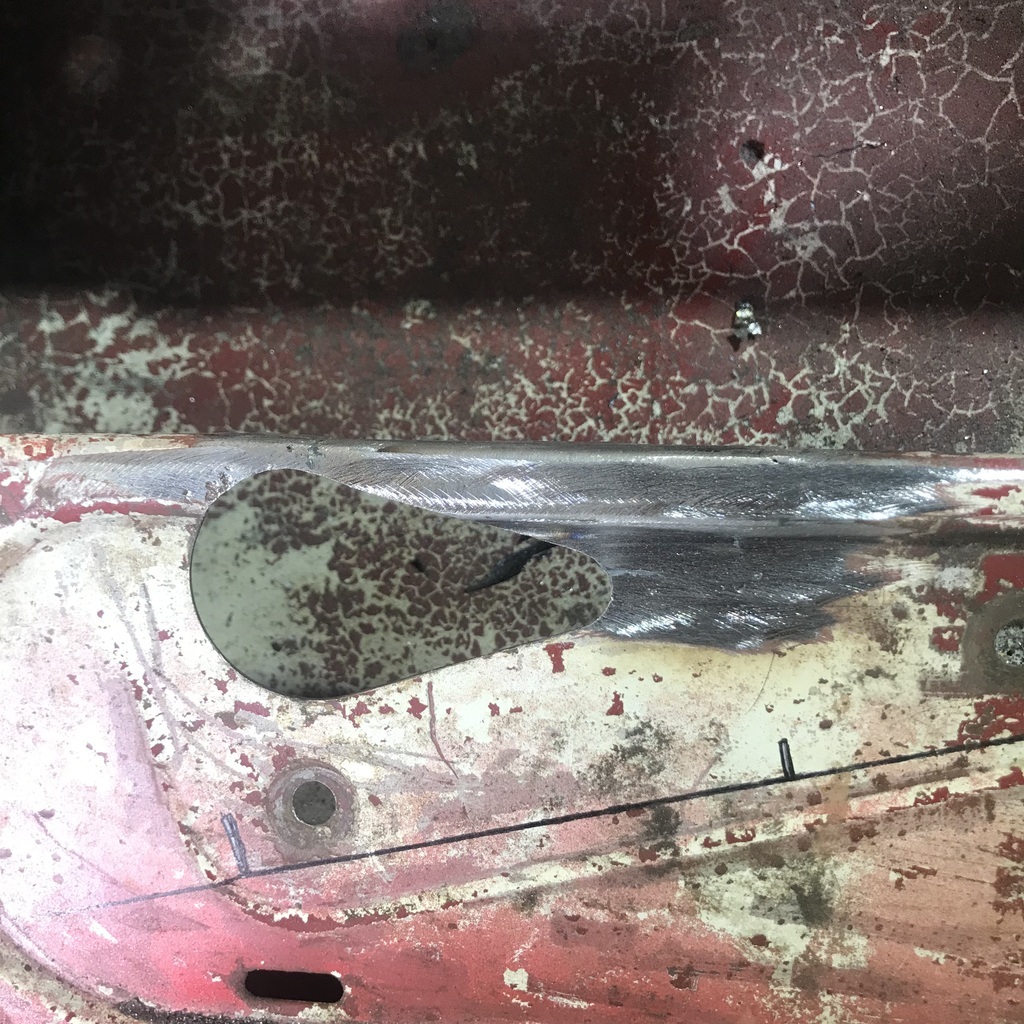 I’m predicting that will come back to bite me. The same spot on the other door was damaged, so I’m thinking somebody cut it out to make it easier to fit the window mechanism. This is the bottom of the door frame. You can see the rust below my hand. 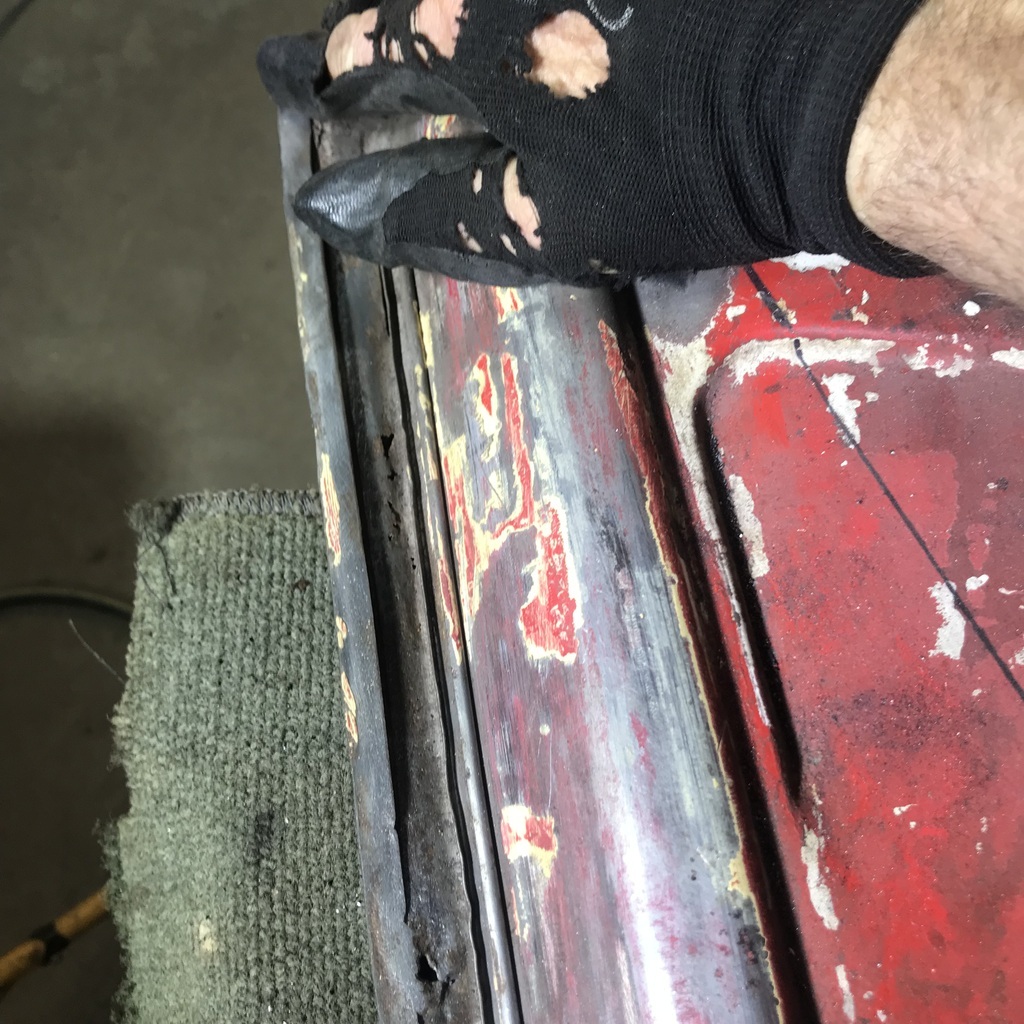 So I ground the edge of the door skin till… 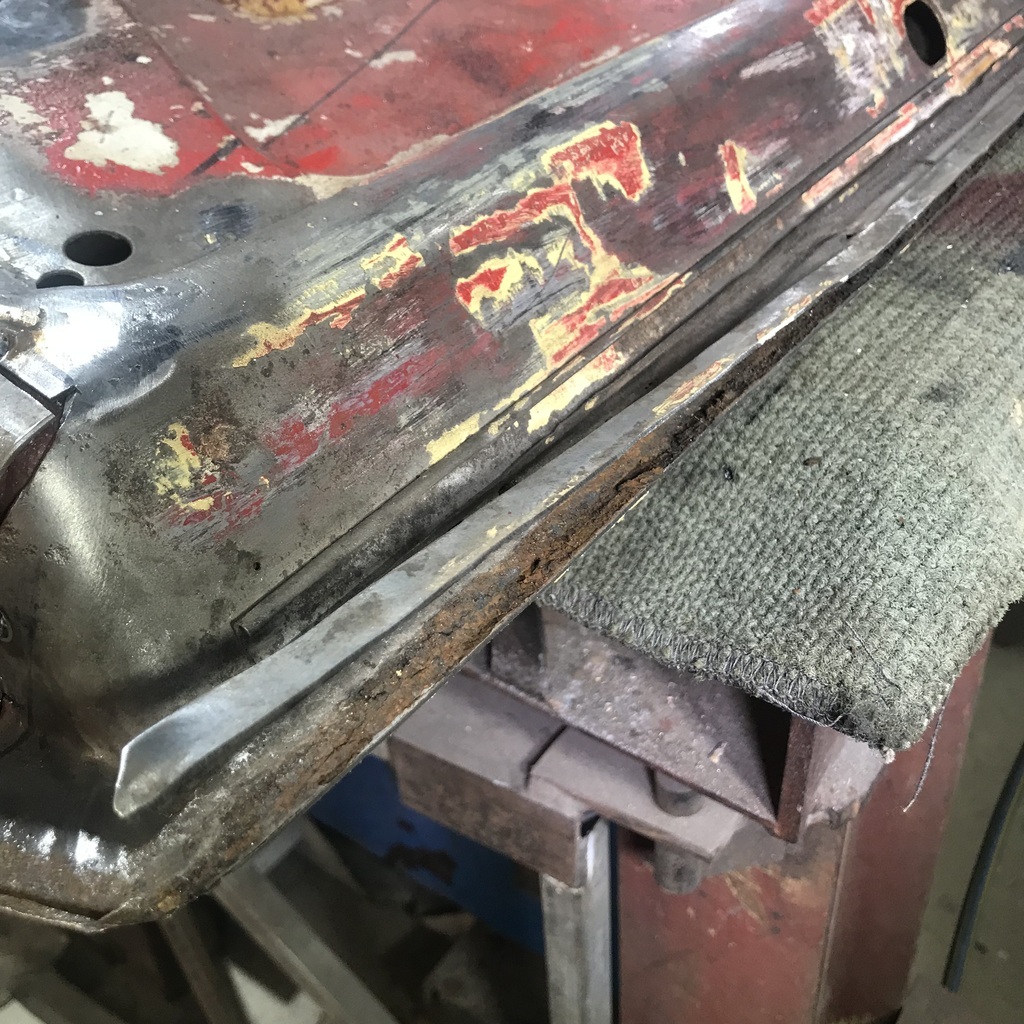 There were several welds, so these were cut. They shouldn’t have been there anyway. And I took the seal strips off. 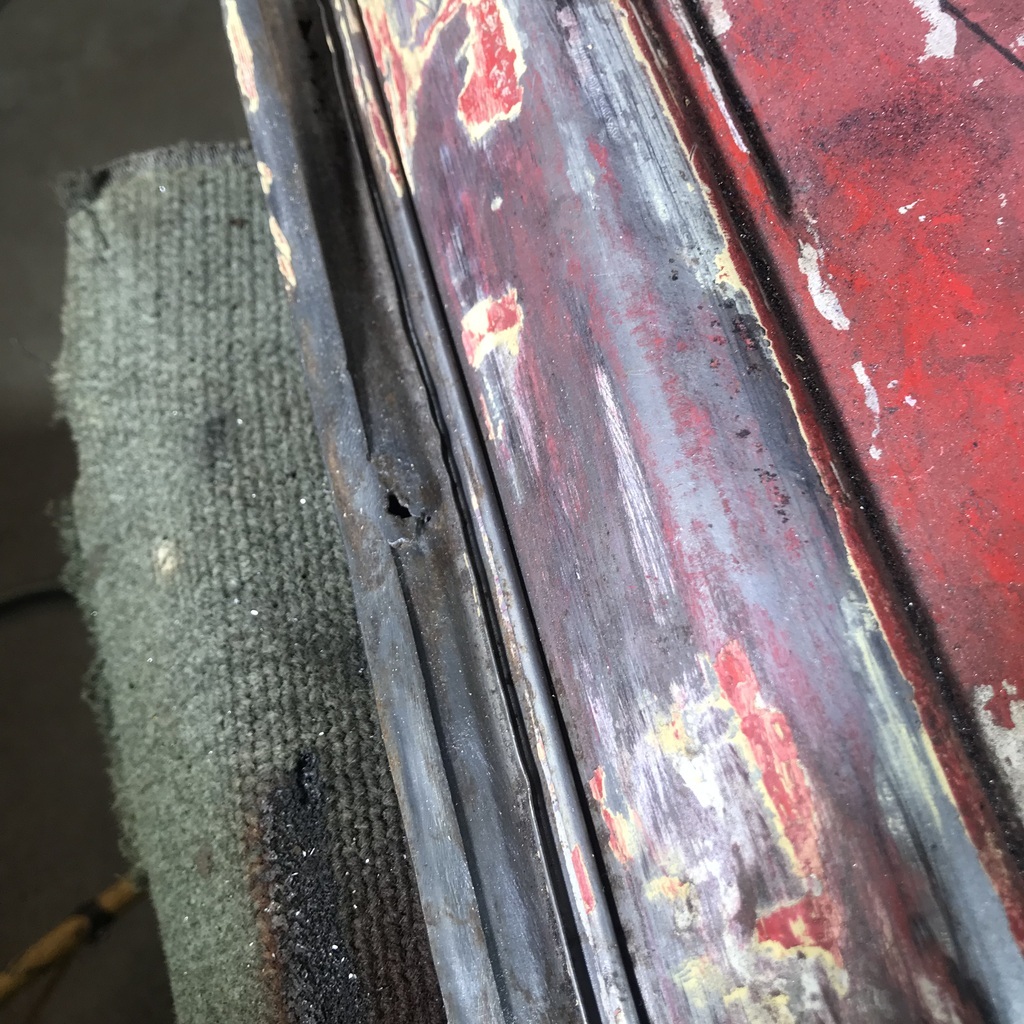 Then after a bit more grinding and general faffing about: 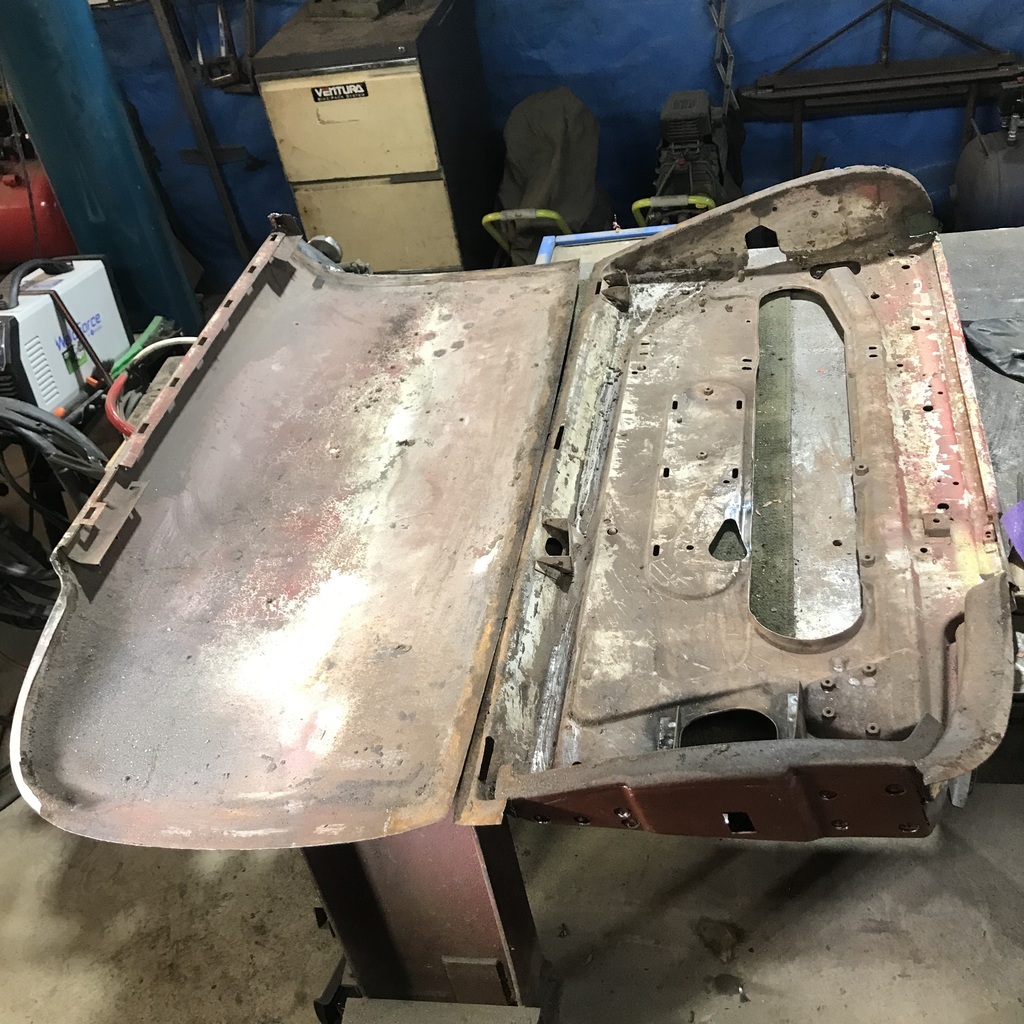 First time I’ve removed a steel door skin. Hope it goes back on ok! Found the back of my repair, one way of checking the weld penetration! 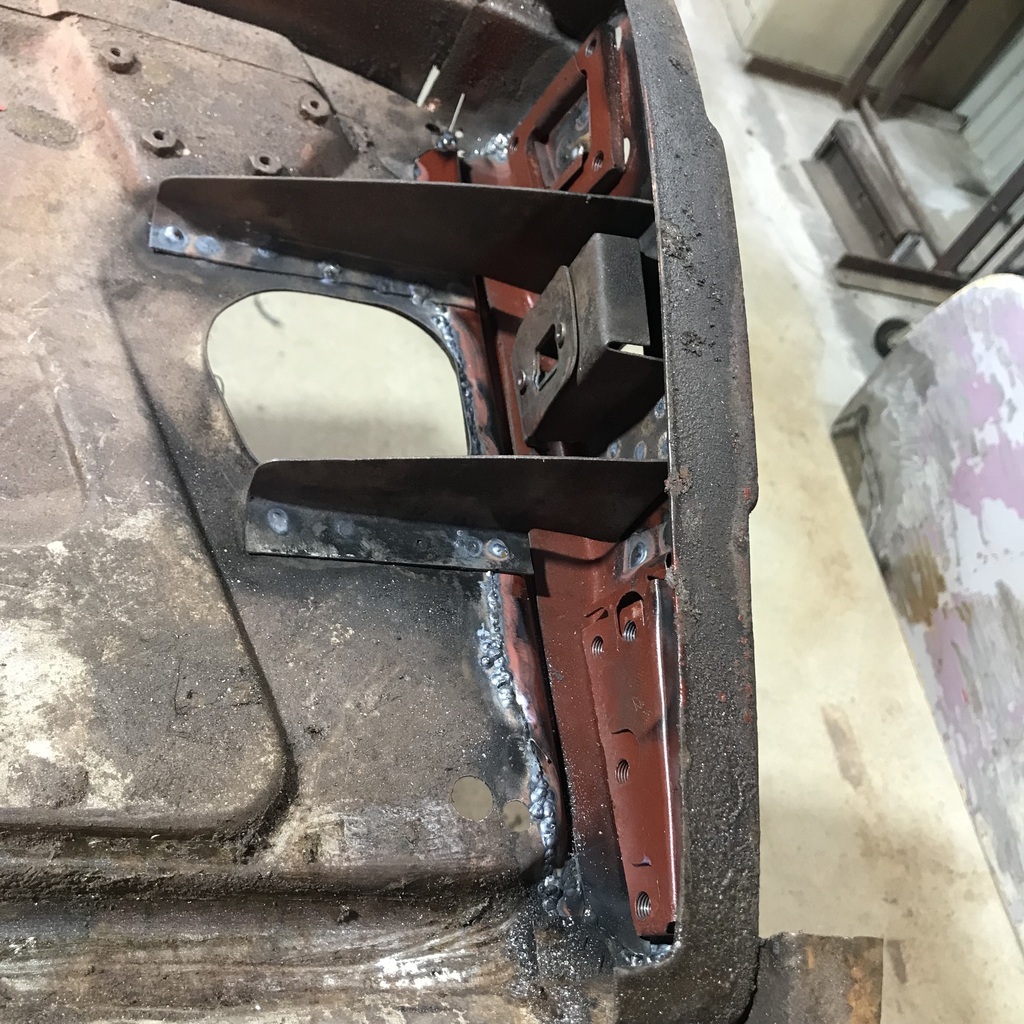 Had to hack up this area to release some spot welds. It was cracked and covered in rough welds, so I wasn’t worried about it . 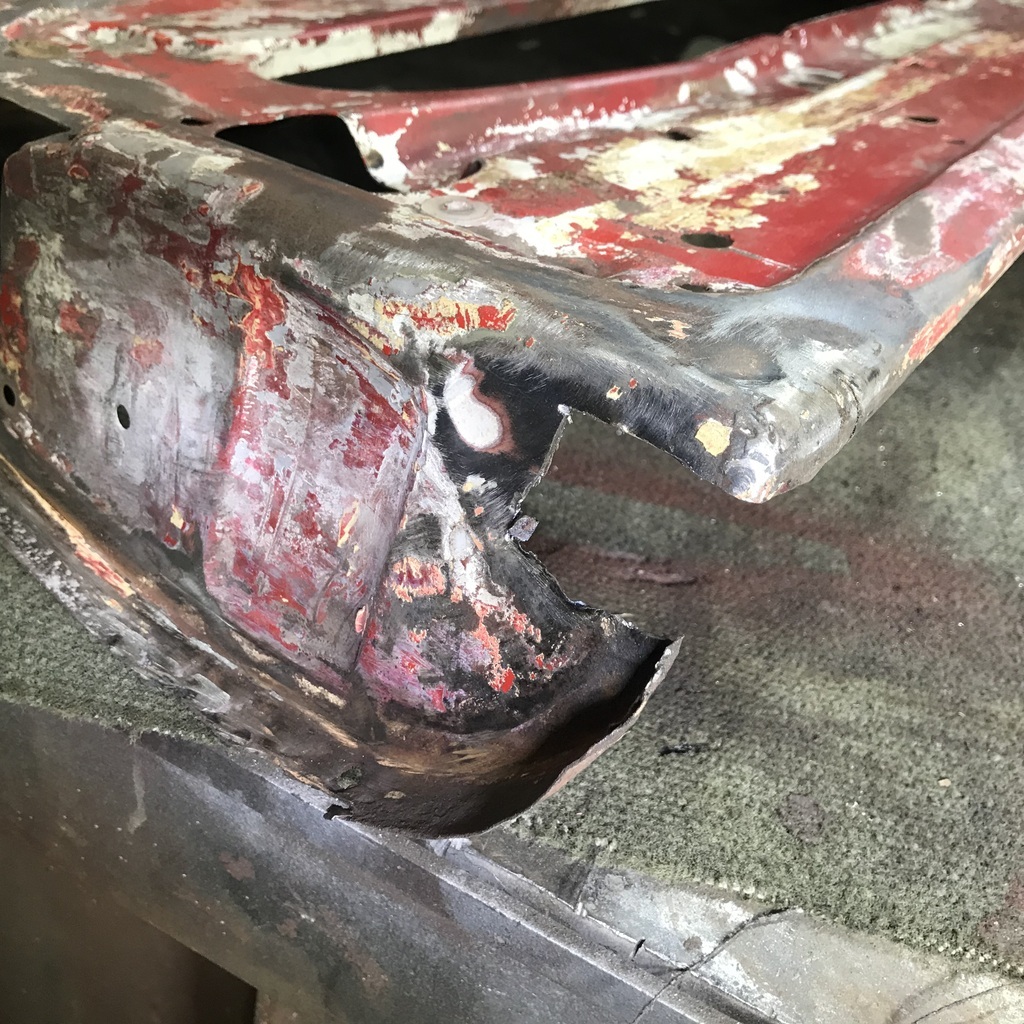 Started to make a card template. 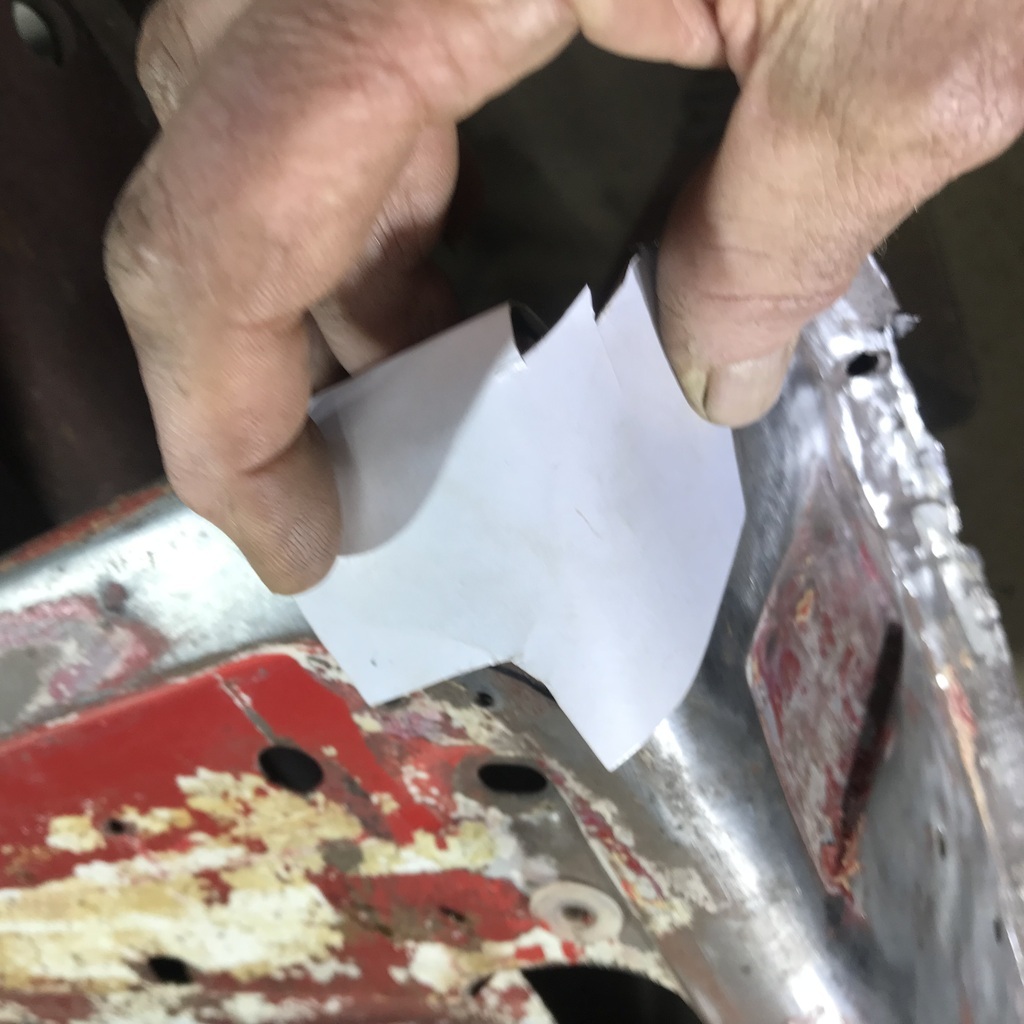 When it became obvious that I’d cut it too small, I decided to call it a day. Thanks. |
| |
|
|
|
|
|
|
|
|
|
|
Maybe worth just bonding the skin back on rather than making a new fold over strip?
|
| |
|
|
gazzam
Part of things
 
Posts: 746 
|
|
|
|
Mark, that is a very attractive option, and thanks for the suggestion. The only drawback that I can see is that it would mean the edges couldn’t be built up with weld, if the door gaps needed closing up. And to paraphrase JFK, we do these things not because they are easy, we do them because they involve TIG welding. So thanks again, but I won’t be shopping for glue. Back to the little repair from yesterday. Scrapped that card and started again. After some cutting and bending I had this. 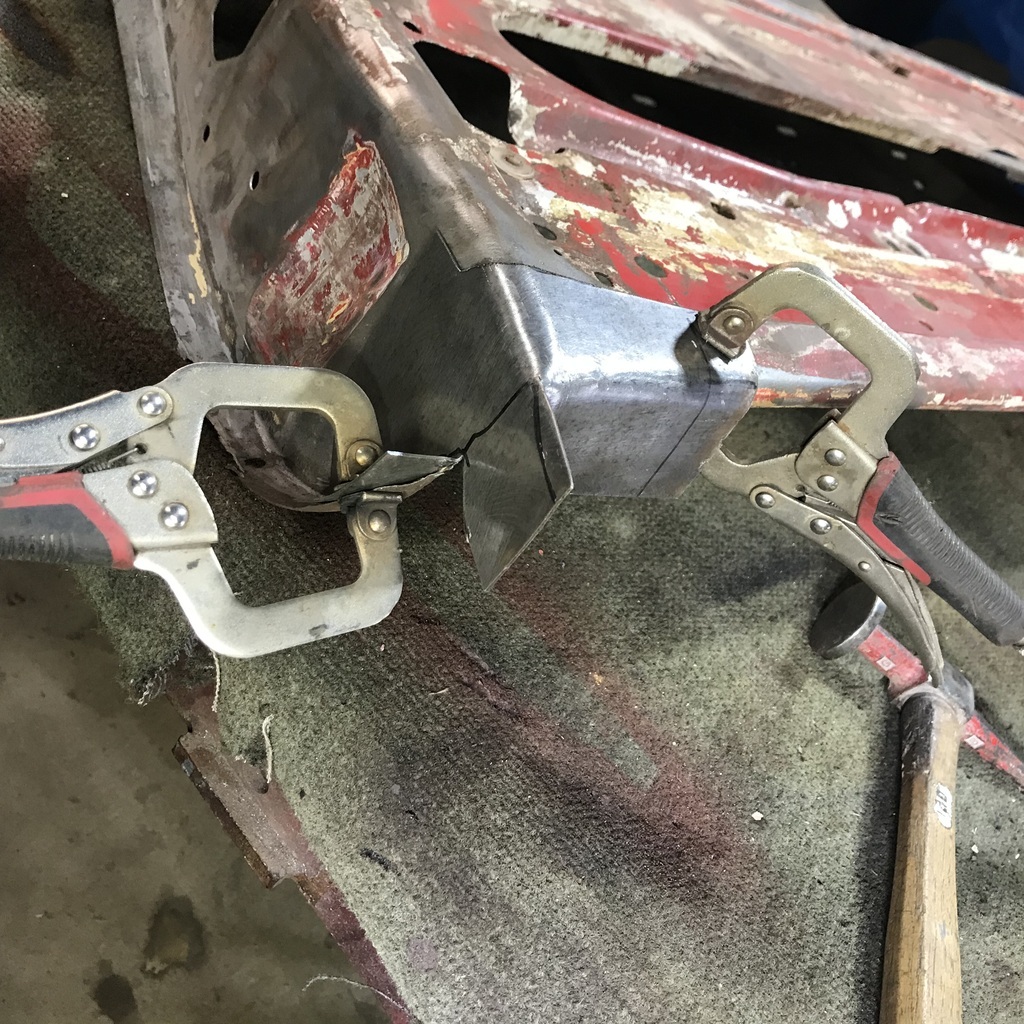 After quite a lot of fettling it was time to commit. 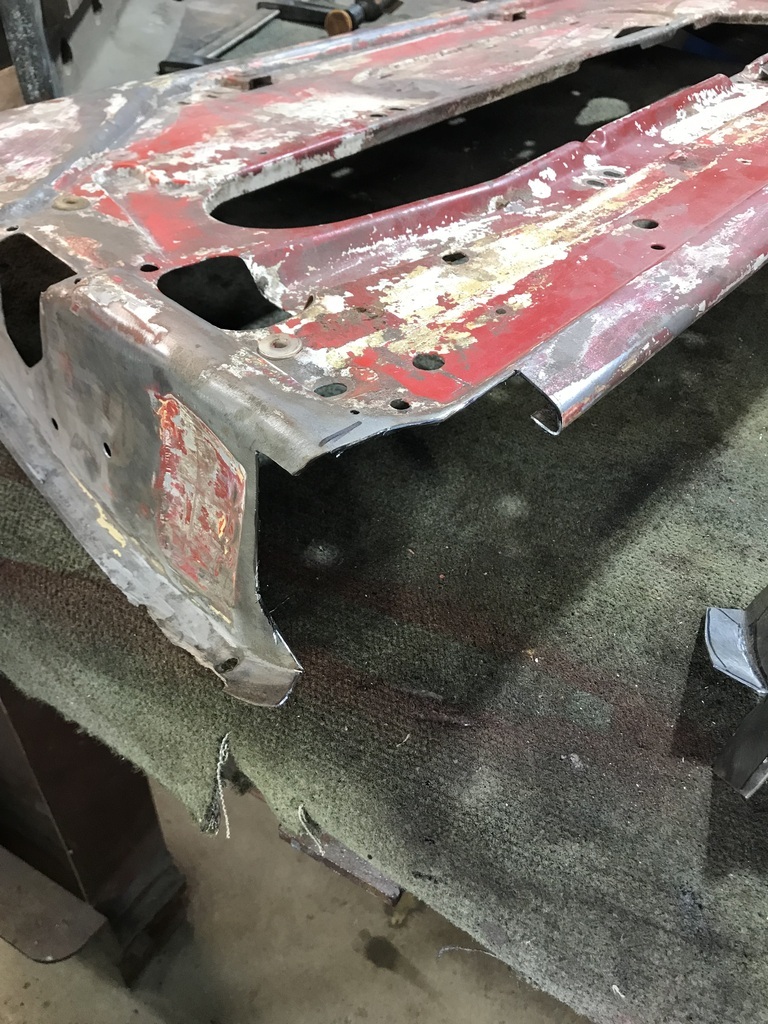 Once I had one face into position, the rest of the sides could be trimmed, a small amount at a time. And I was lucky, it went into place like it wanted to! Didn’t fight much at all. Got some MIG tacks on it before it could change it’s mind. 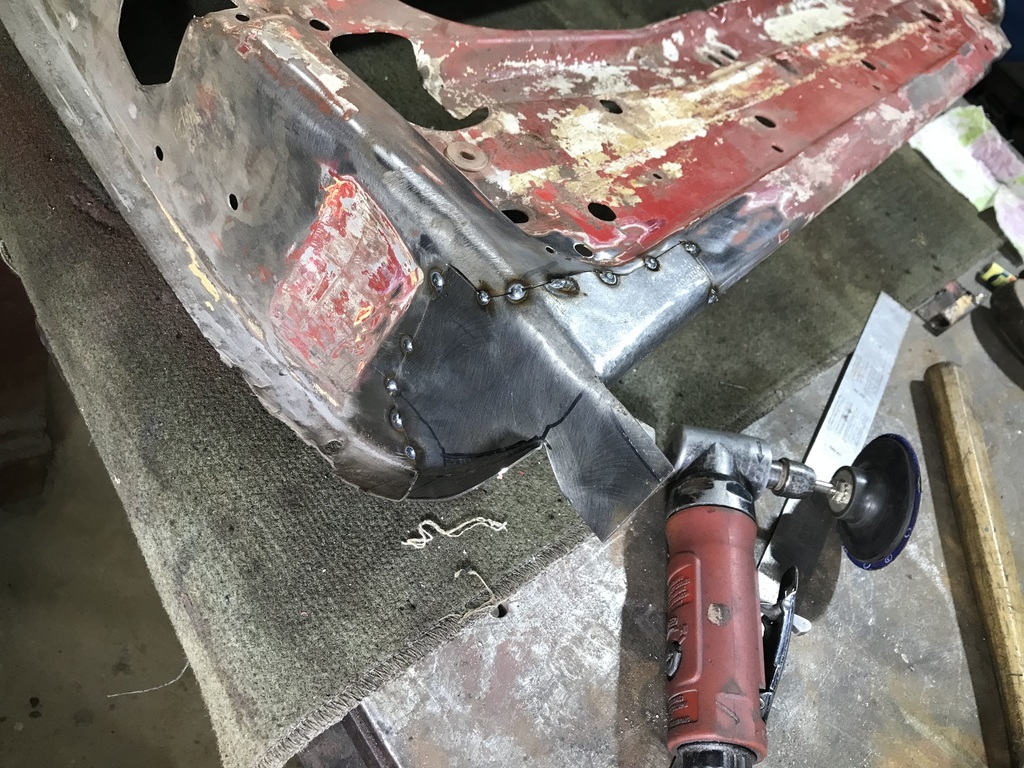 Ground the tacks down in preparation for the TIG. As you can see the fit turned out pretty good, so no excuses for not using the TIG. 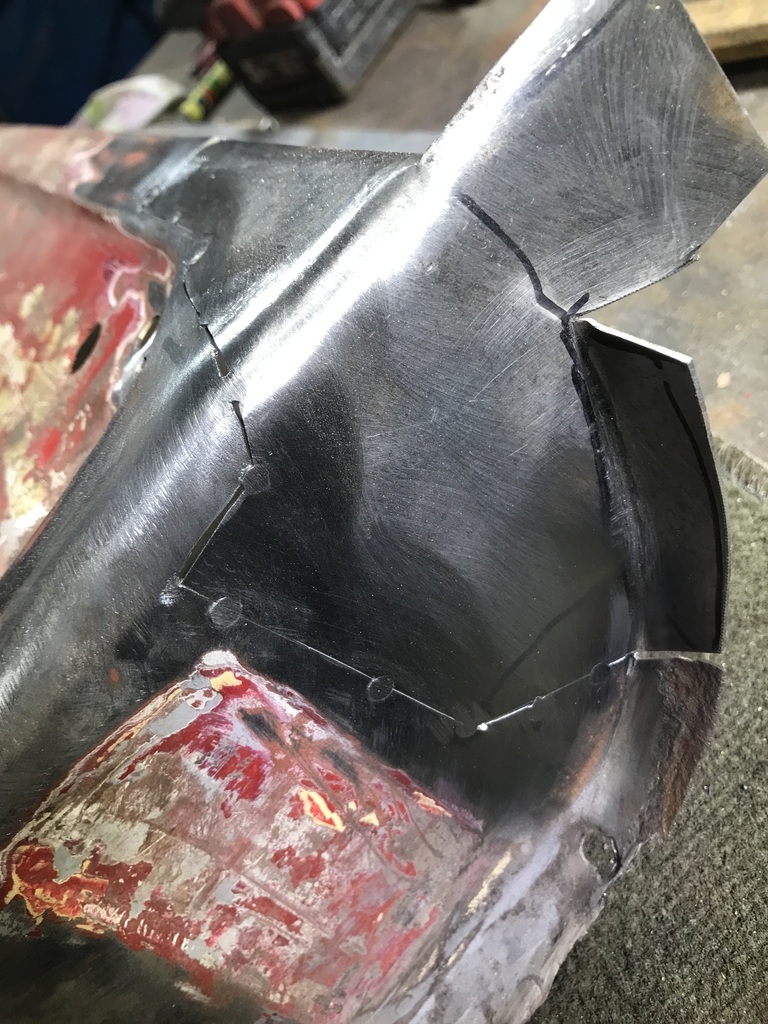 And it went well. I bought some new filler rods, but I still get that brown discolouration, not as much but it’s there. 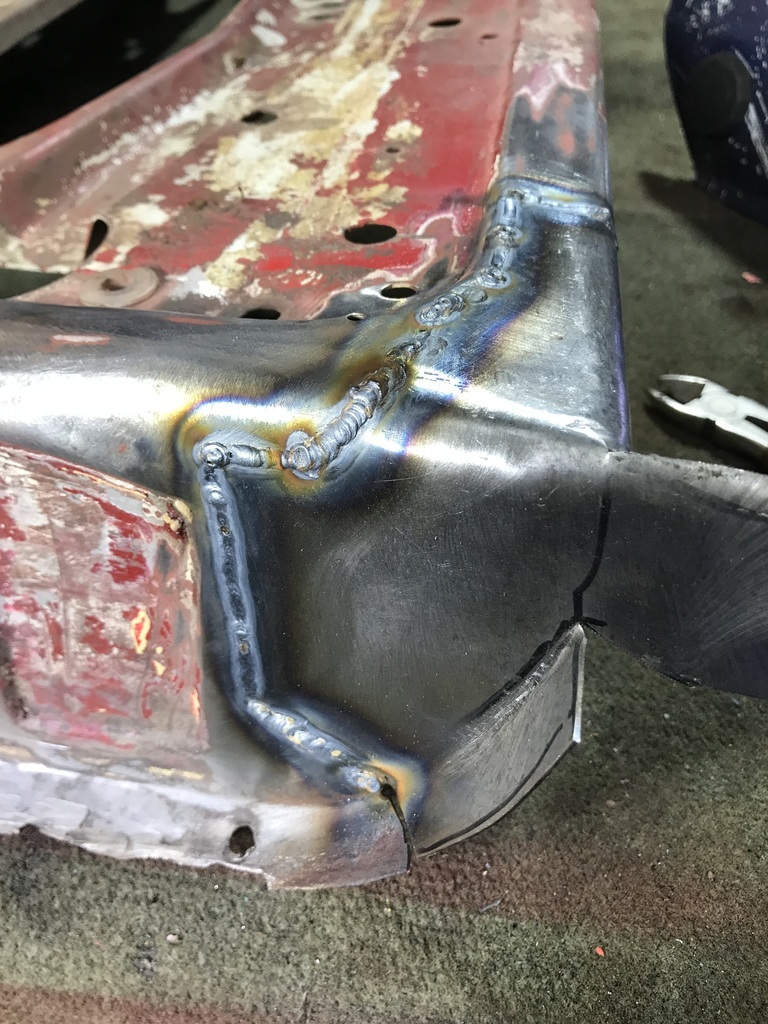 The back view shows acceptable penetration. 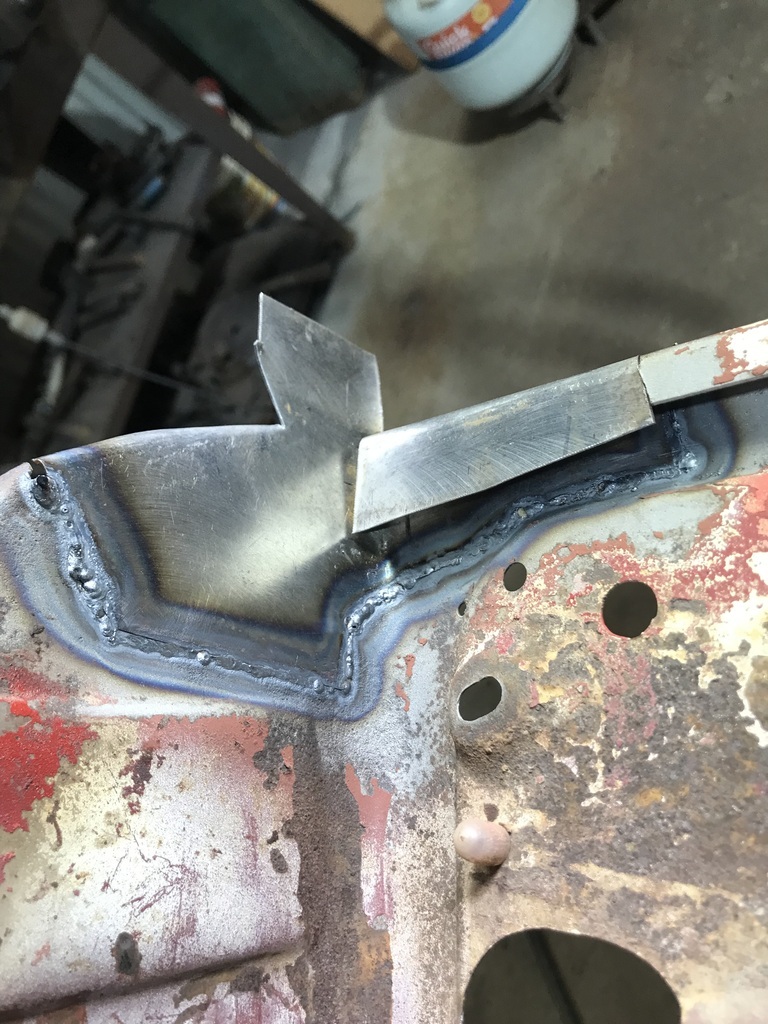 And ground back. Pretty happy with that repair. Still have to work out how to finish that flap sticking up, need to do some fiddling with the skin in that area. I'm sure it will involve bending and welding metal… 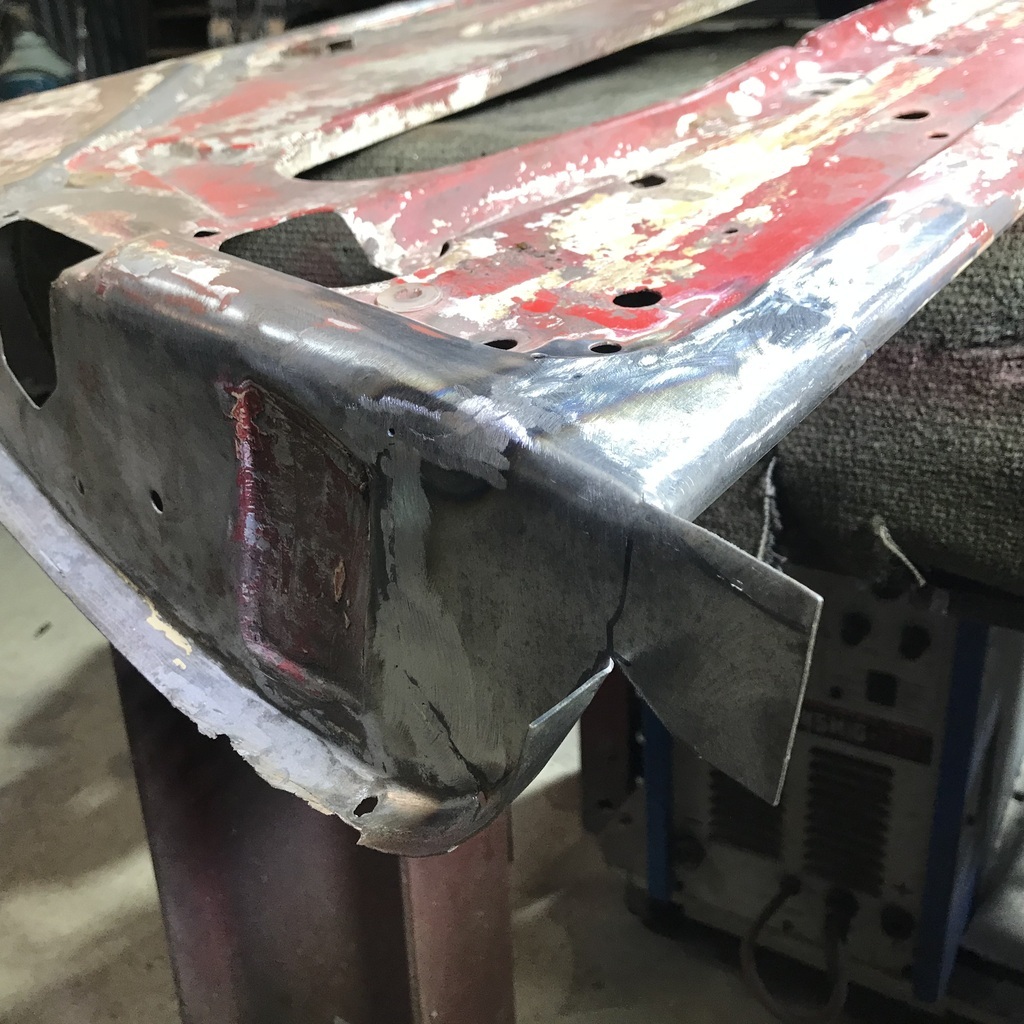 Thanks for looking. |
| |
|
|
|
|
|
|
|
|
The brown is the argon burning aparrently. I don't think it matters.
|
| |
|
|
gazzam
Part of things
 
Posts: 746 
|
|
|
|
This little bit is next to fix. 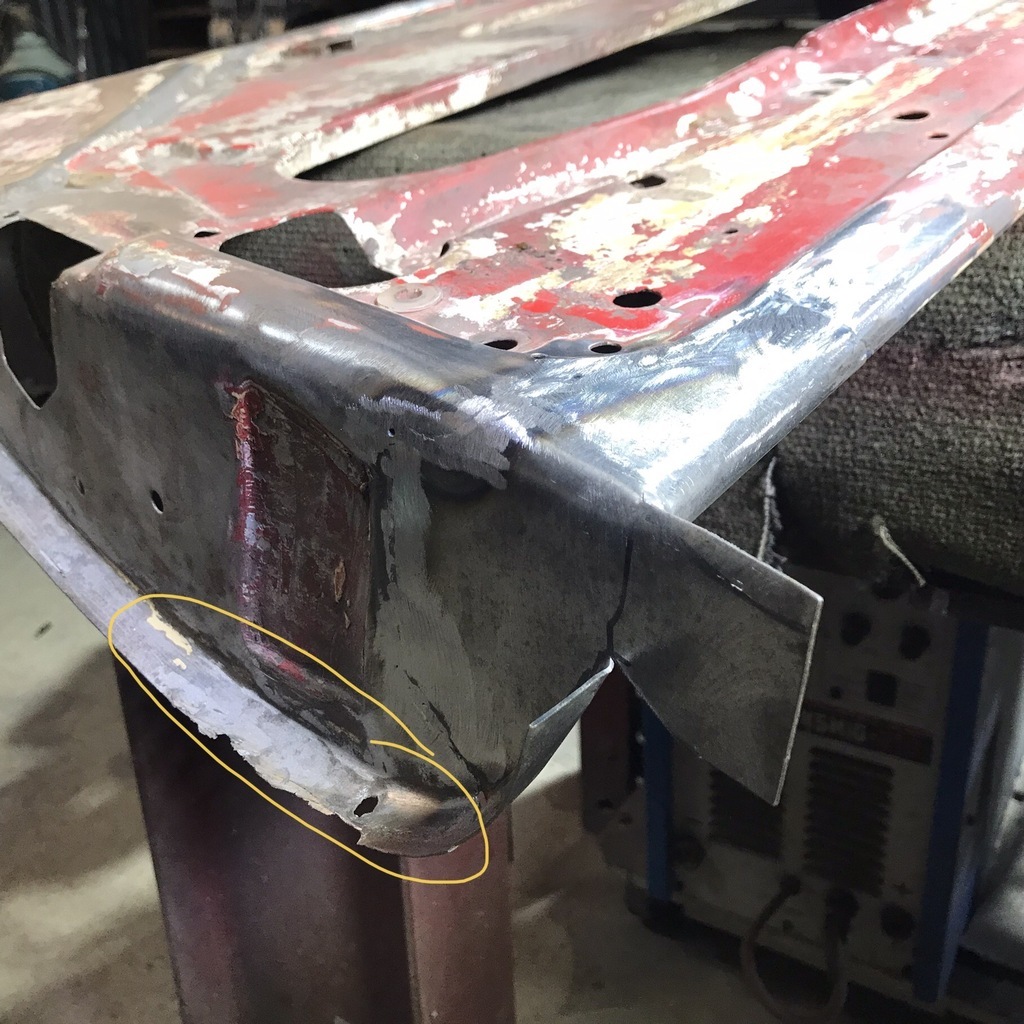 Cut a piece of 20#. Not worried about the width, it’ll be trimmed once it’s in place. 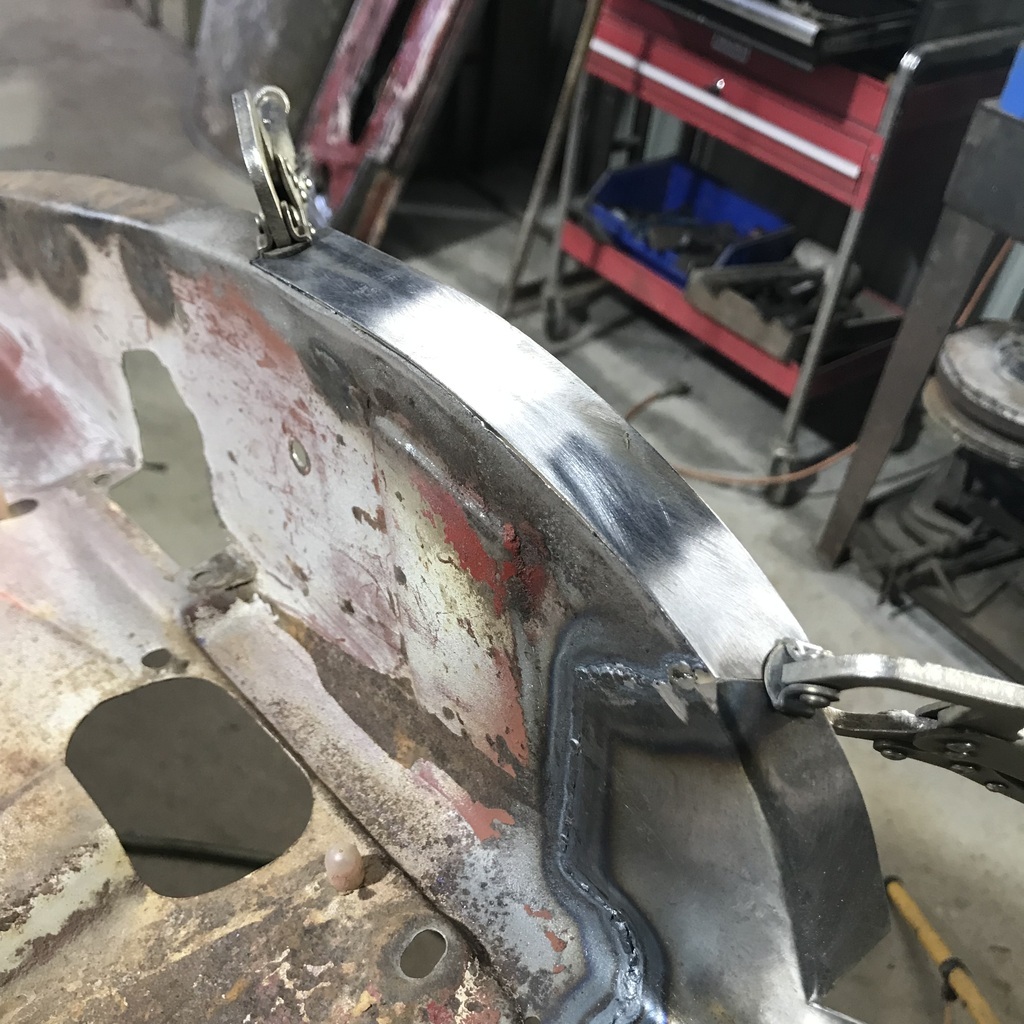 Tacked with MIG. 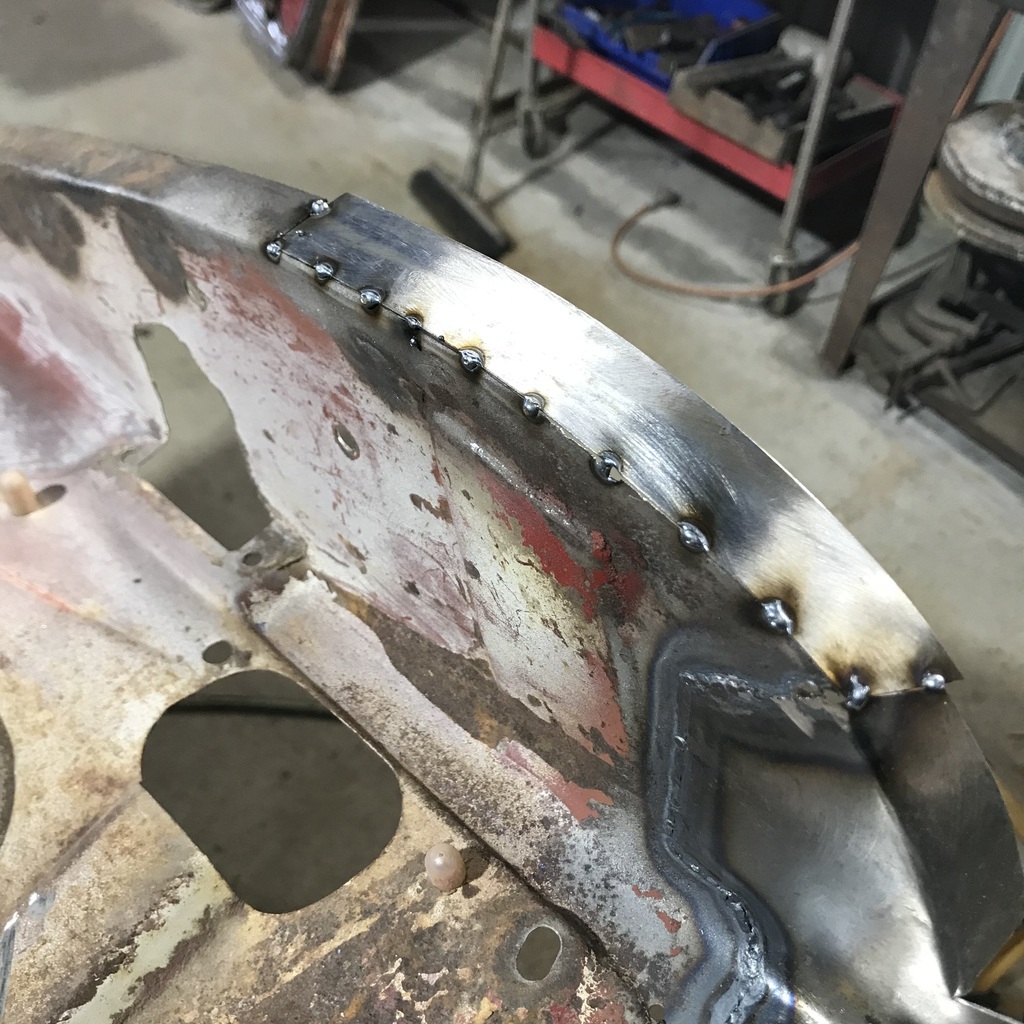 Ground the tacks back a bit then fully welded with the TIG. 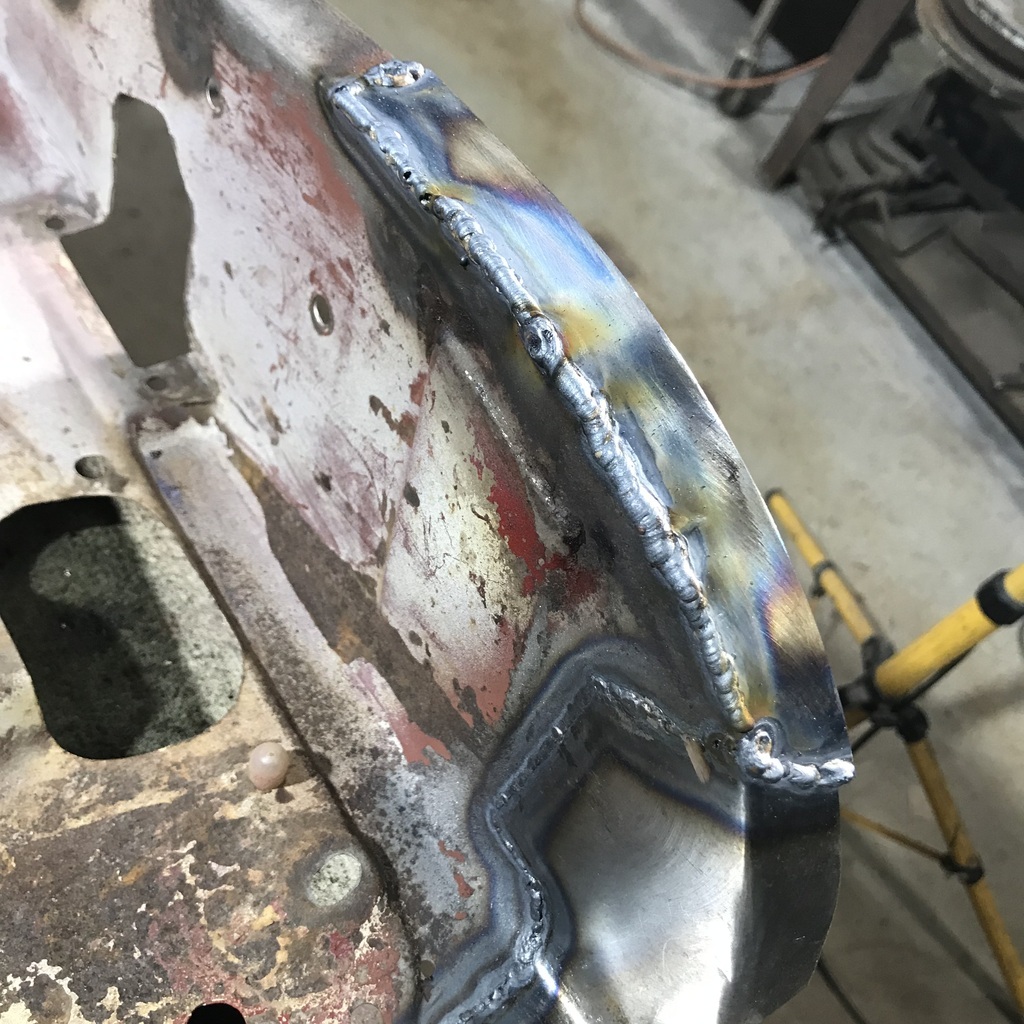 Next is the bottom of the frame. A few holes and quite a bit of pitting. 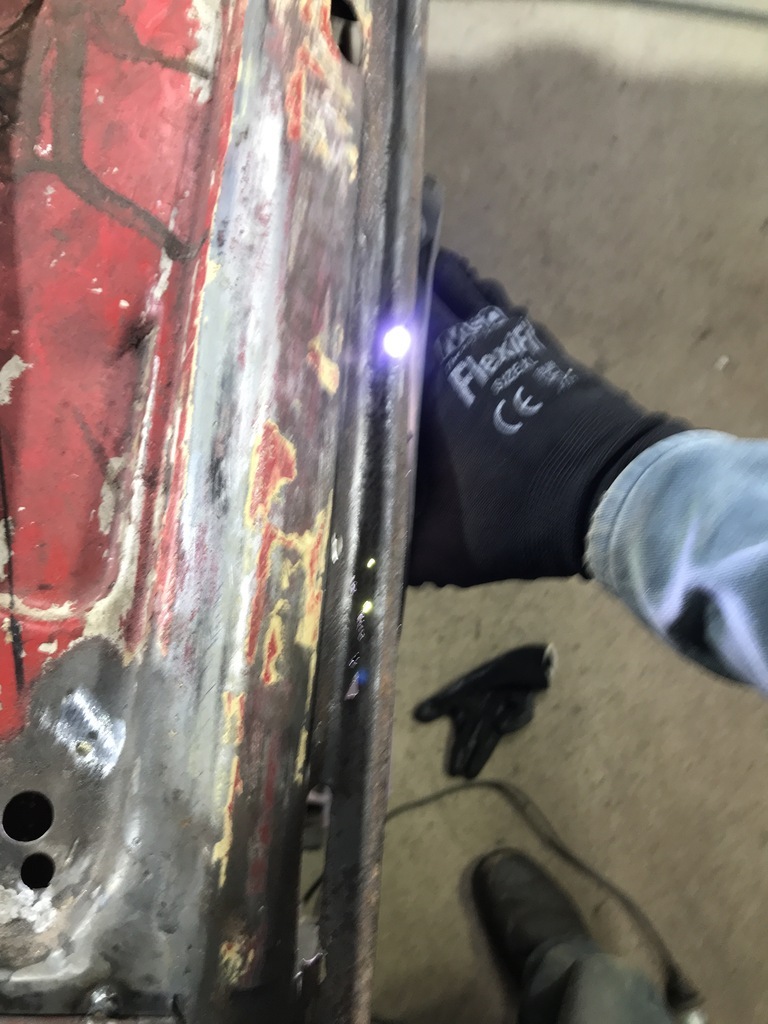 So after a lot of measuring, I cut off the lower edge. 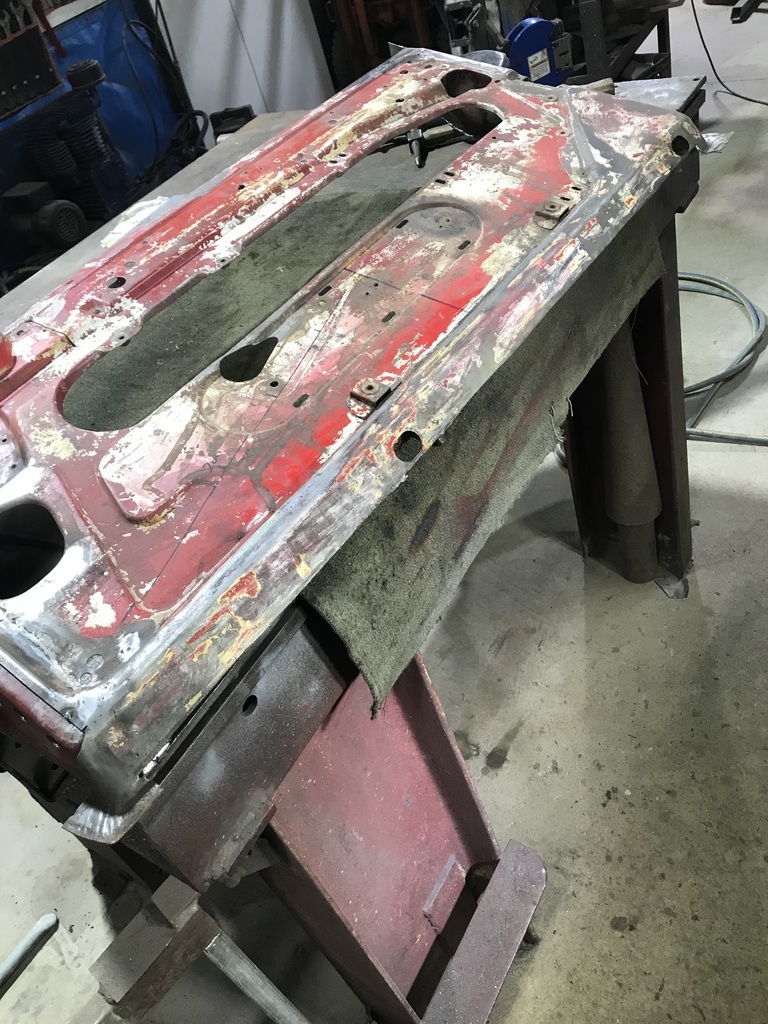 Cut and folded a piece of 20#, then a lot of fettling. Finally clamped it into position and started tacking with the MIG. Lots of clamps as the edge of the frame was fairly wavy. 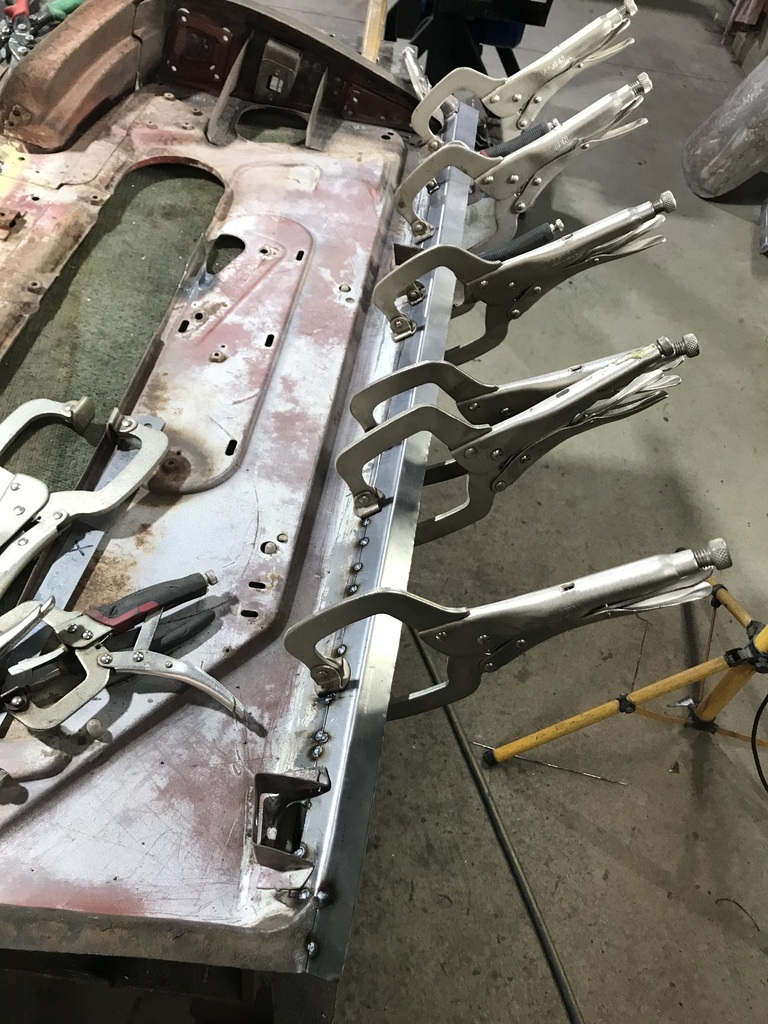 Once it was fully tacked, turned it over and TIG welded it from the other side. 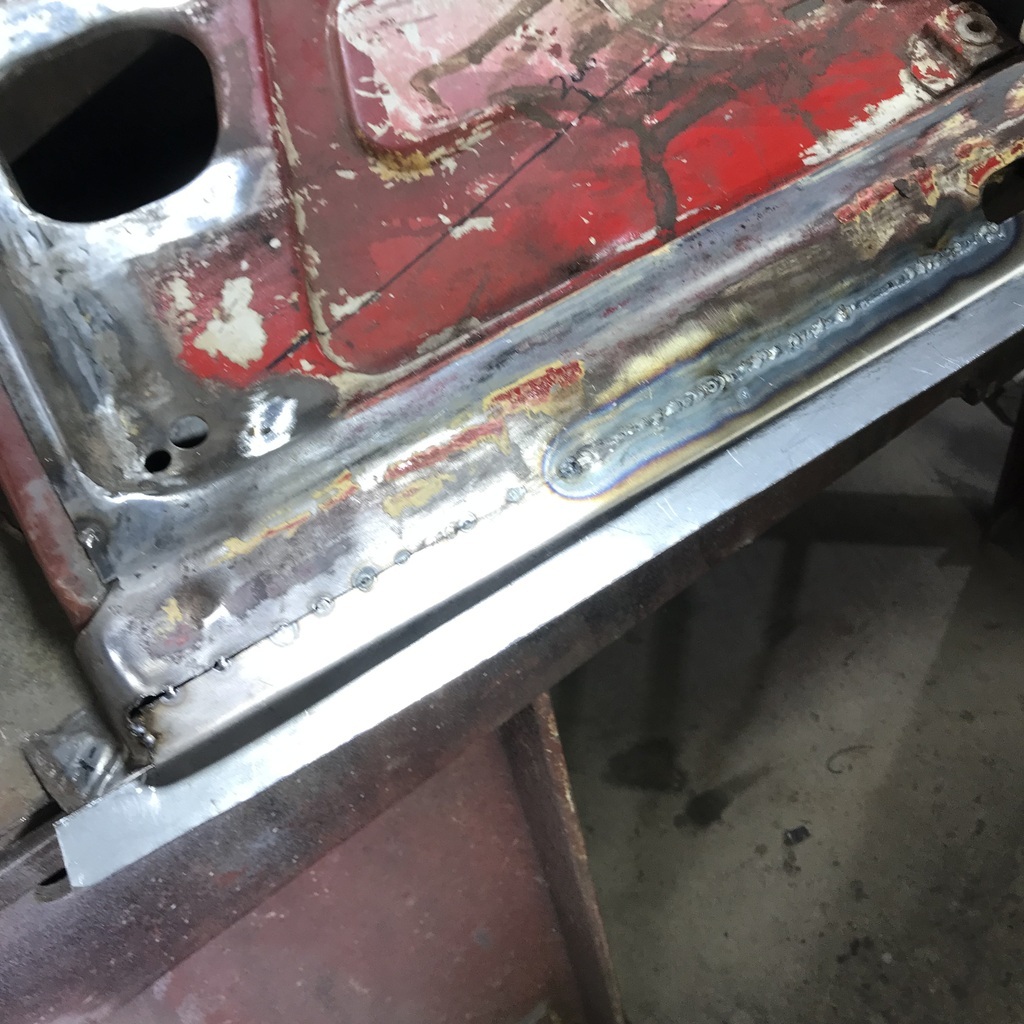 This went ok, except here at the end where a few tacks let go and I had to hammer and dolly the edges back into alignment. Ground back the welds and am fairly confident it’s going to fit the door aperture. But I didn’t take any pics and it was knock off time. Thanks. |
| |
Last Edit: Oct 5, 2024 9:53:15 GMT by gazzam
|
|
|
|
gazzam
Part of things
 
Posts: 746 
|
|
|
|
Thanks Phil, for the feedback and more for the kind words. I think this is the last rusty piece on the frame. It’s the front upper bit that the door skin folds over. Why it would rust up there, I have no idea. 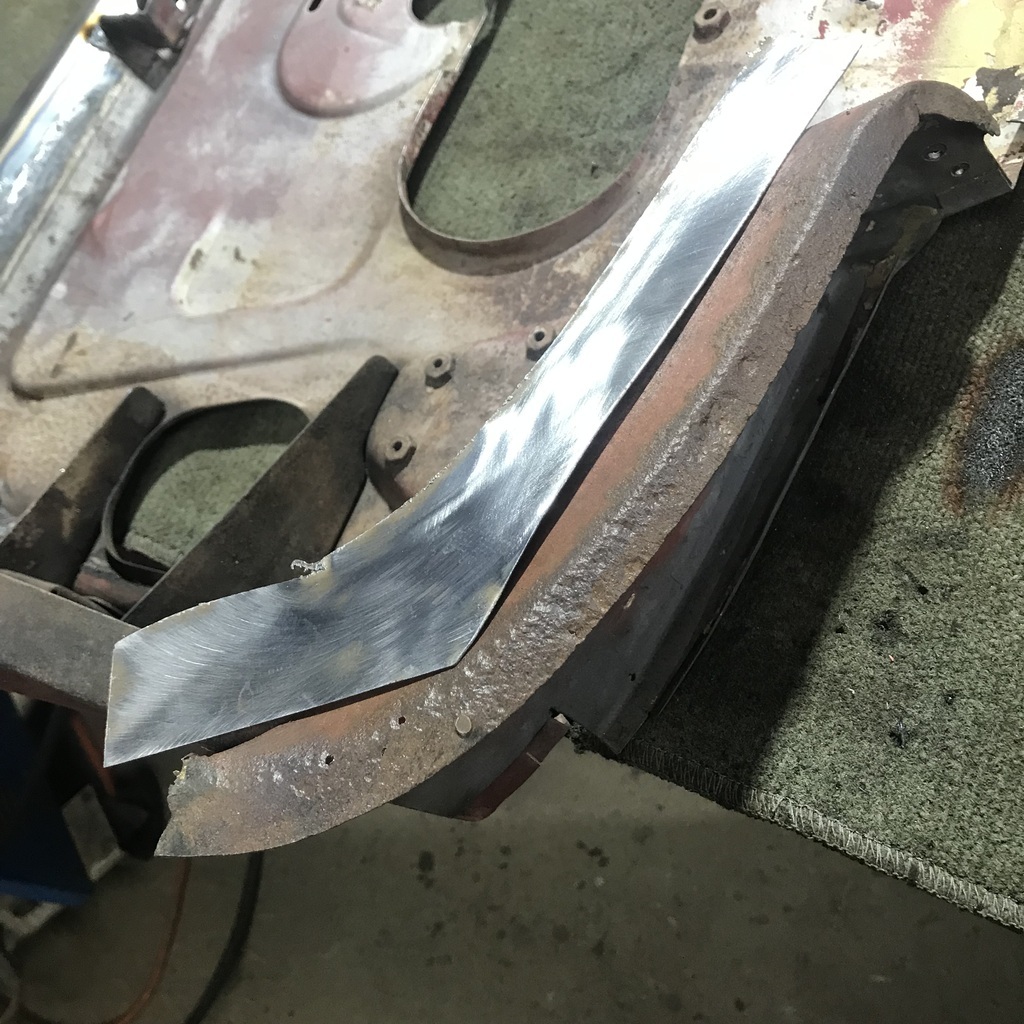 It looks like a simple shape, but there’s not a flat part on it. There’s a twist through the length of it. I got it very close, but it needed to be really accurate. It has to accept the existing fold in the door skin. Once I’ve cut it off, I have no point of reference. So it needs to fit like a glove over the old metal. But I was chasing my tail. I'd get it nice and tight in one area and it didn’t quite fit in another. So I clamped it along one side. 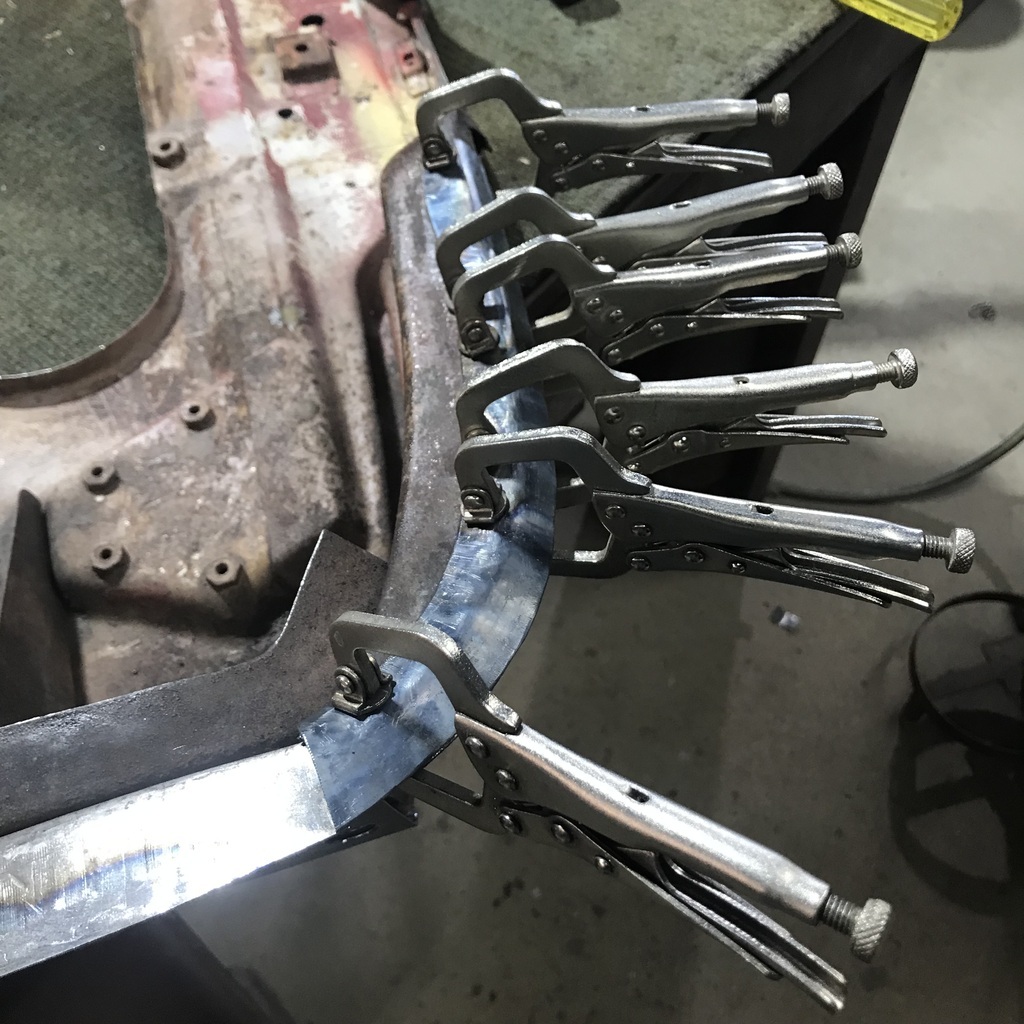 And then heated it to a dull red with the oxy acetylene and squeezed in with some pliers. Worked my way along between the clamps and it worked like a charm. Wasn’t getting enough heat into the door frame to move it, just the repair piece. Let it cool in place and it was perfect! Then I welded in the face repair piece I made a few days back. It has to meet up with this new piece. 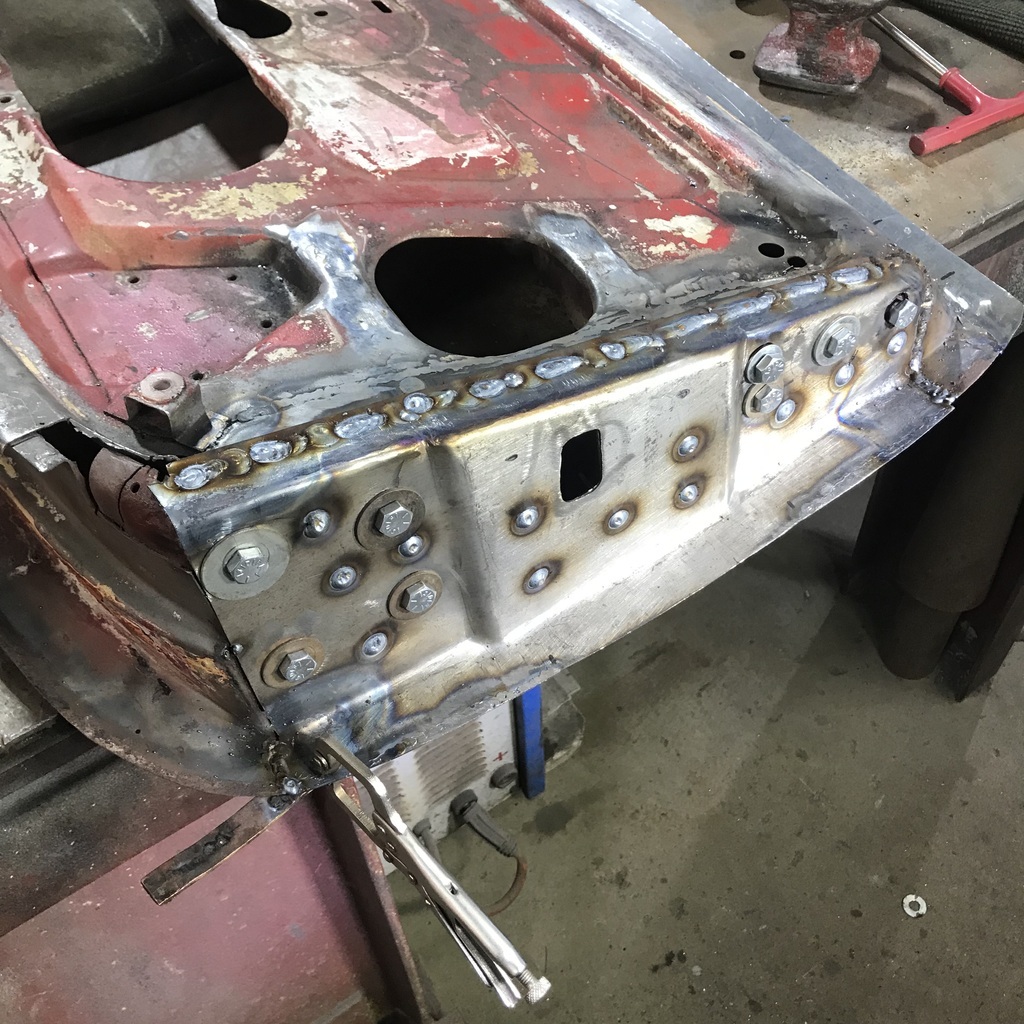 Cut the rusty piece out and fettled the new bit into place. 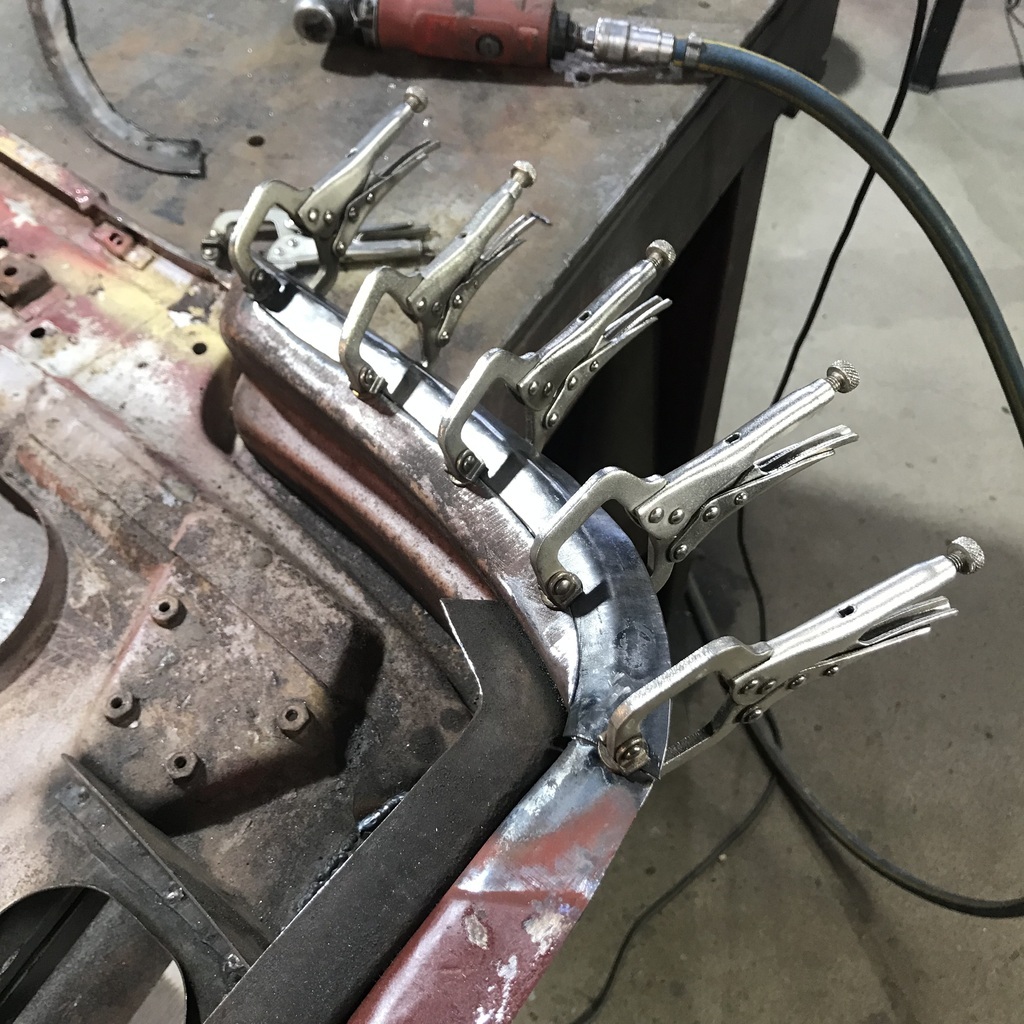 Tacked it in. 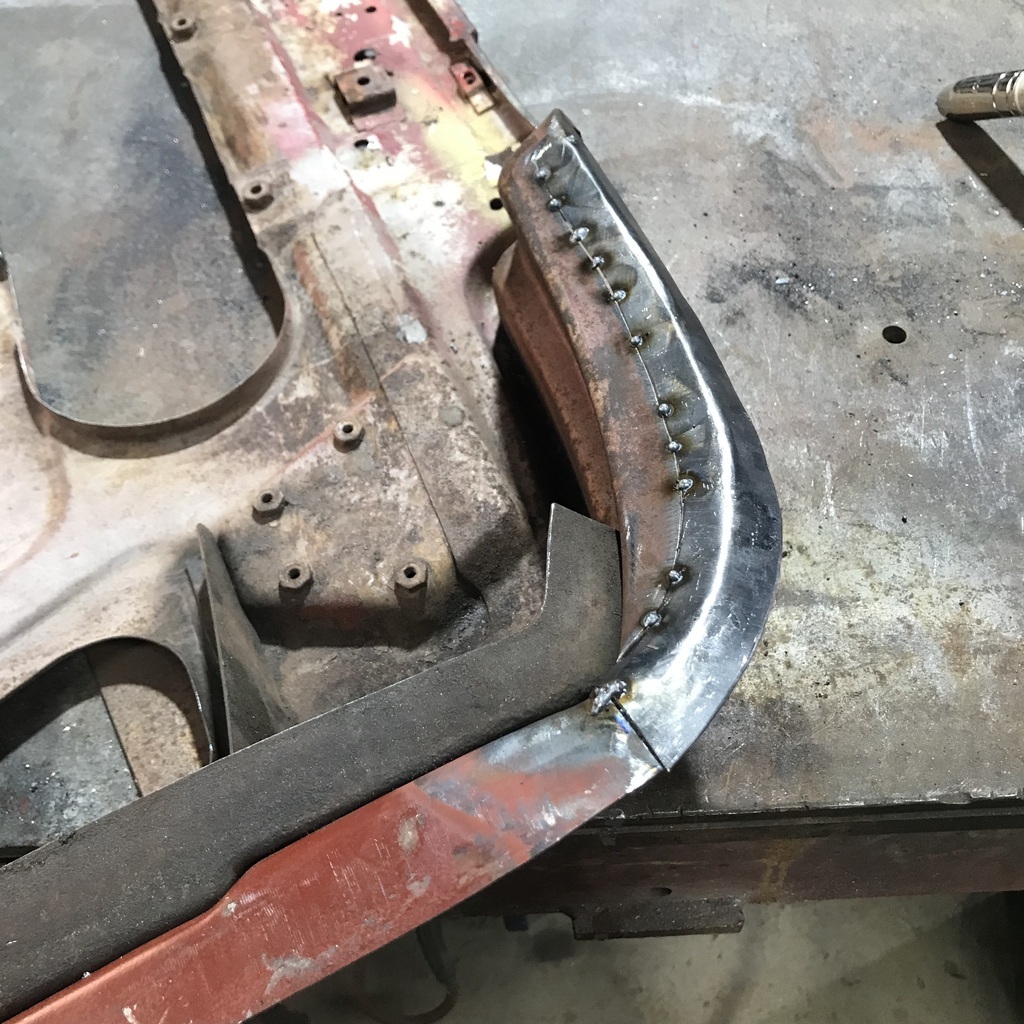 TIG welded it in from the other side. 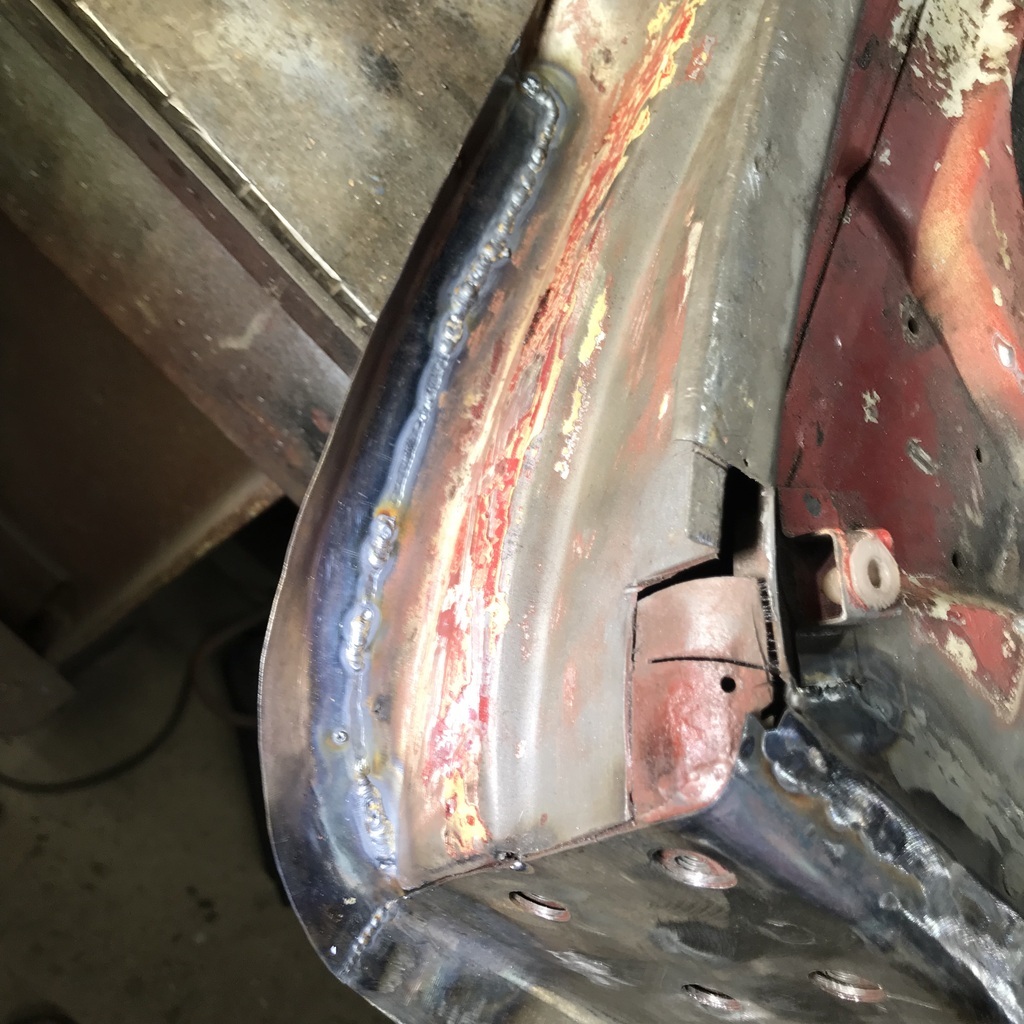 Now the third layer piece at the top hinge. Well done if you can follow this, I’m getting confused myself. It’s the highlighted bit. A nice simple piece to make. Pleasant change. 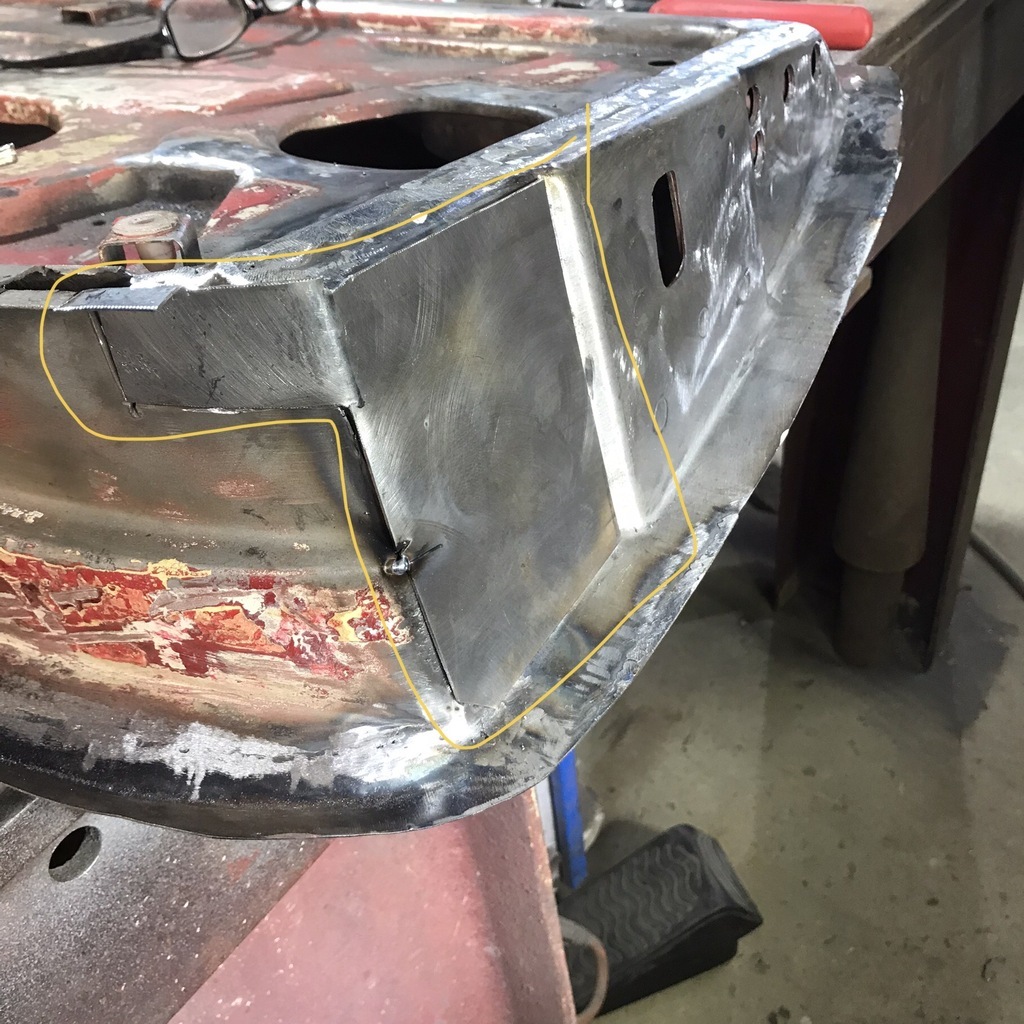 Got it tacked in place and realised it had to have holes. Took it off and made a template. Dirty finger technique. 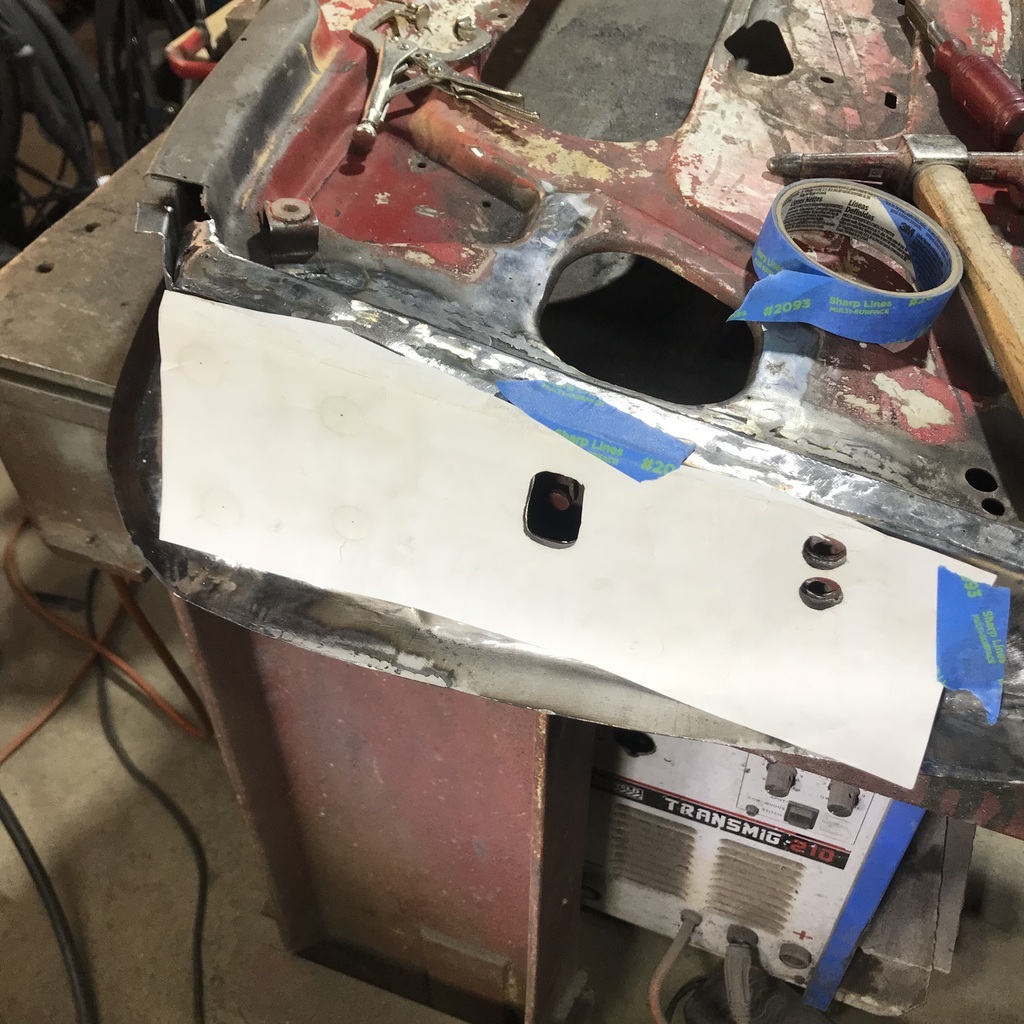 Tacked it on again and centre punched the holes. Took it off and drilled them, undersize. I’ll open them up with the die grinder later. Tacked it on. 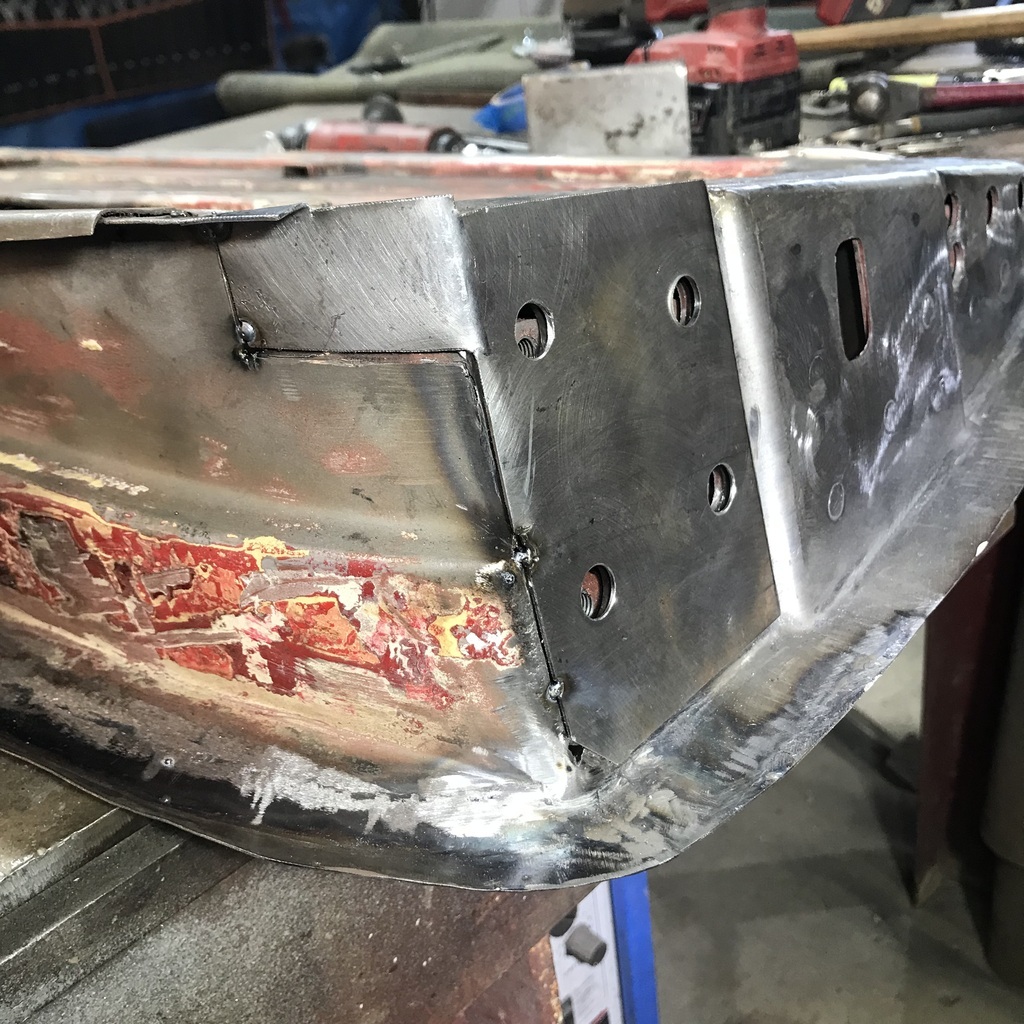 All looked ok, so I welded it in and cleaned it up. Sprayed some red oxide on the bit that will be covered by the dust collector and went home for a beer. 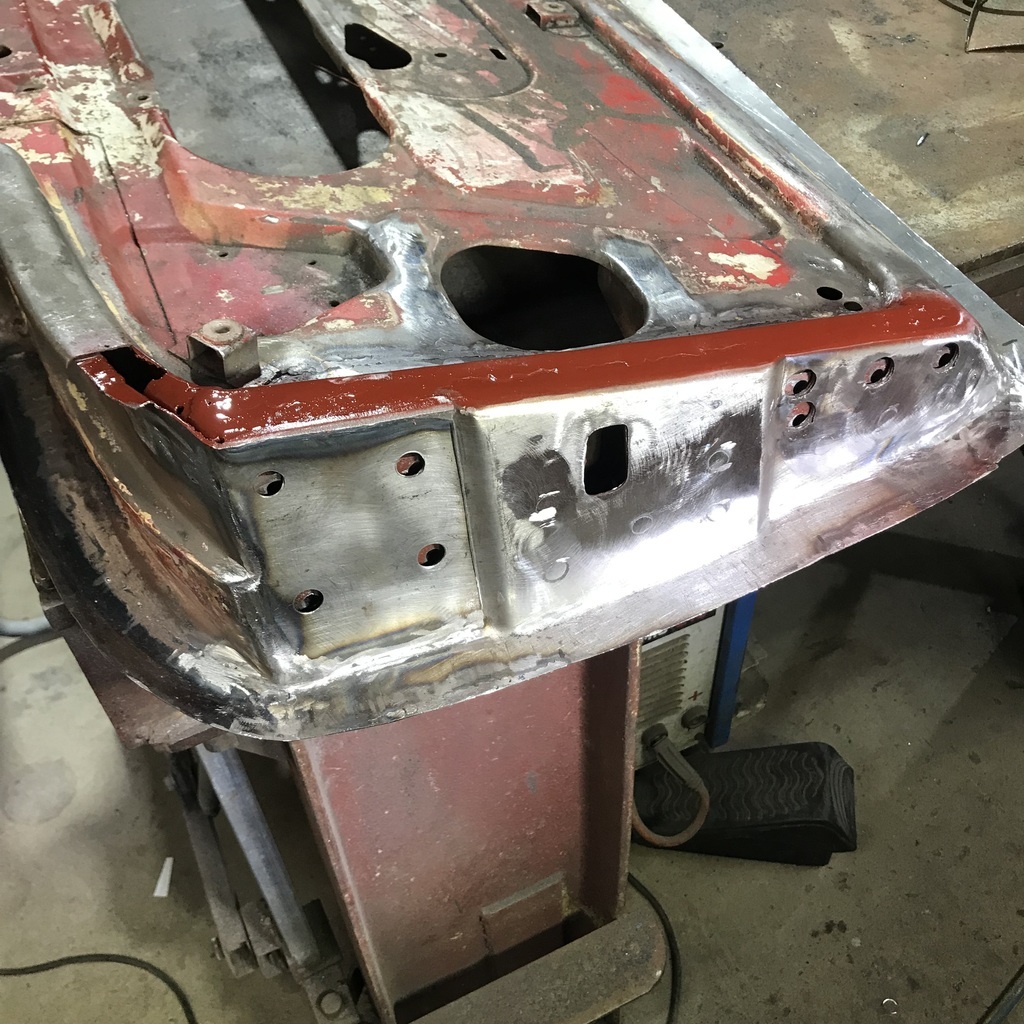 Thanks. |
| |
|
|
gazzam
Part of things
 
Posts: 746 
|
|
|
|
Time to check if the door frame still fits the hole in the body. 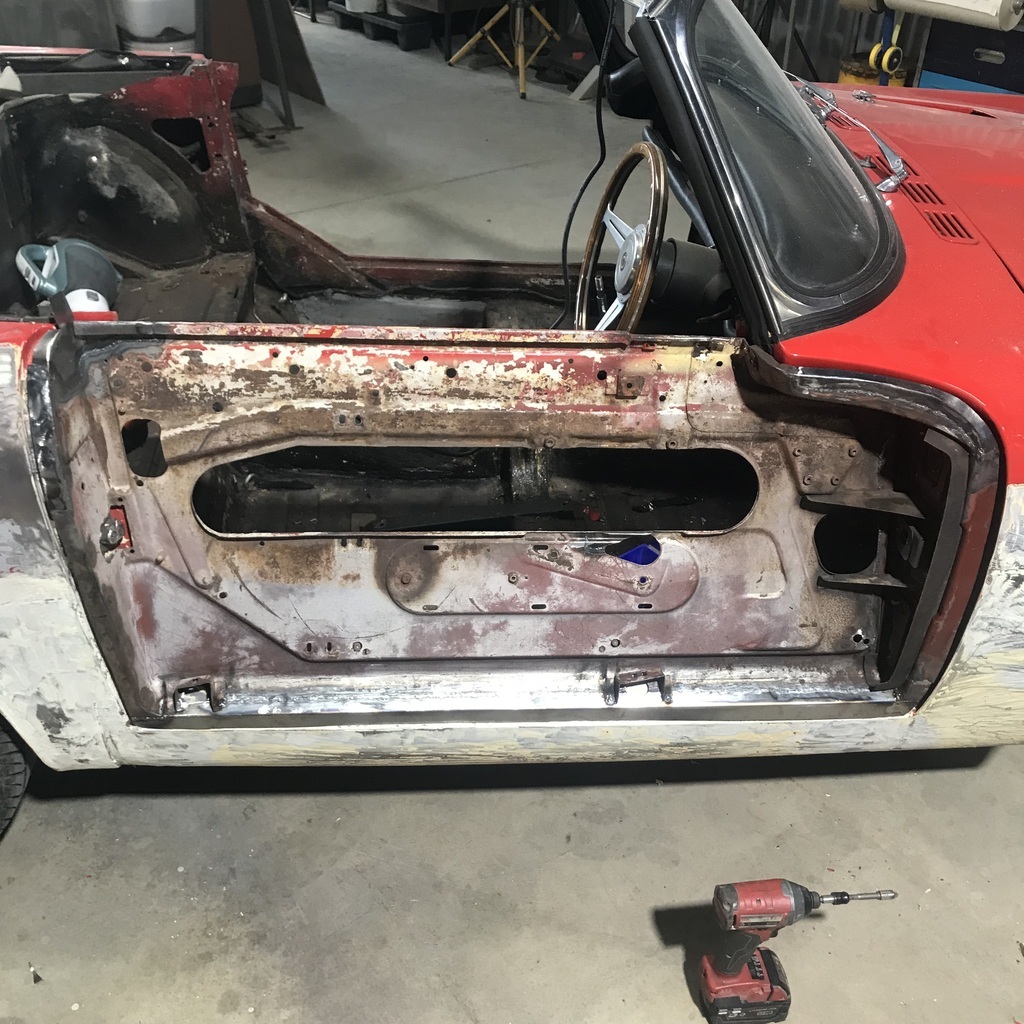 Looks like it’s a possibility. First up I marked the bottom (that I had replaced) and a few other areas that needed adjusting. Then took it off for the first of many such fettles. 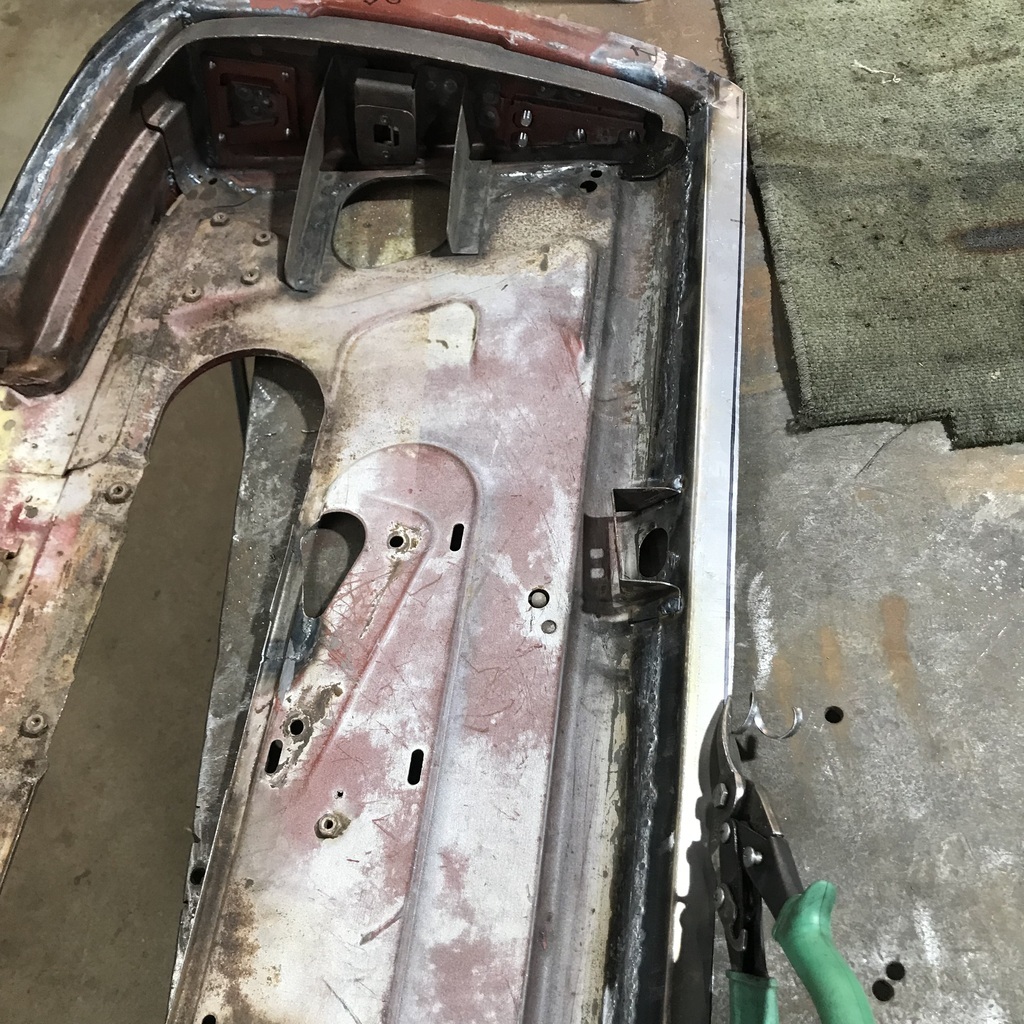 I needed to pack the bottom hinge so the plasma cutter got a run. 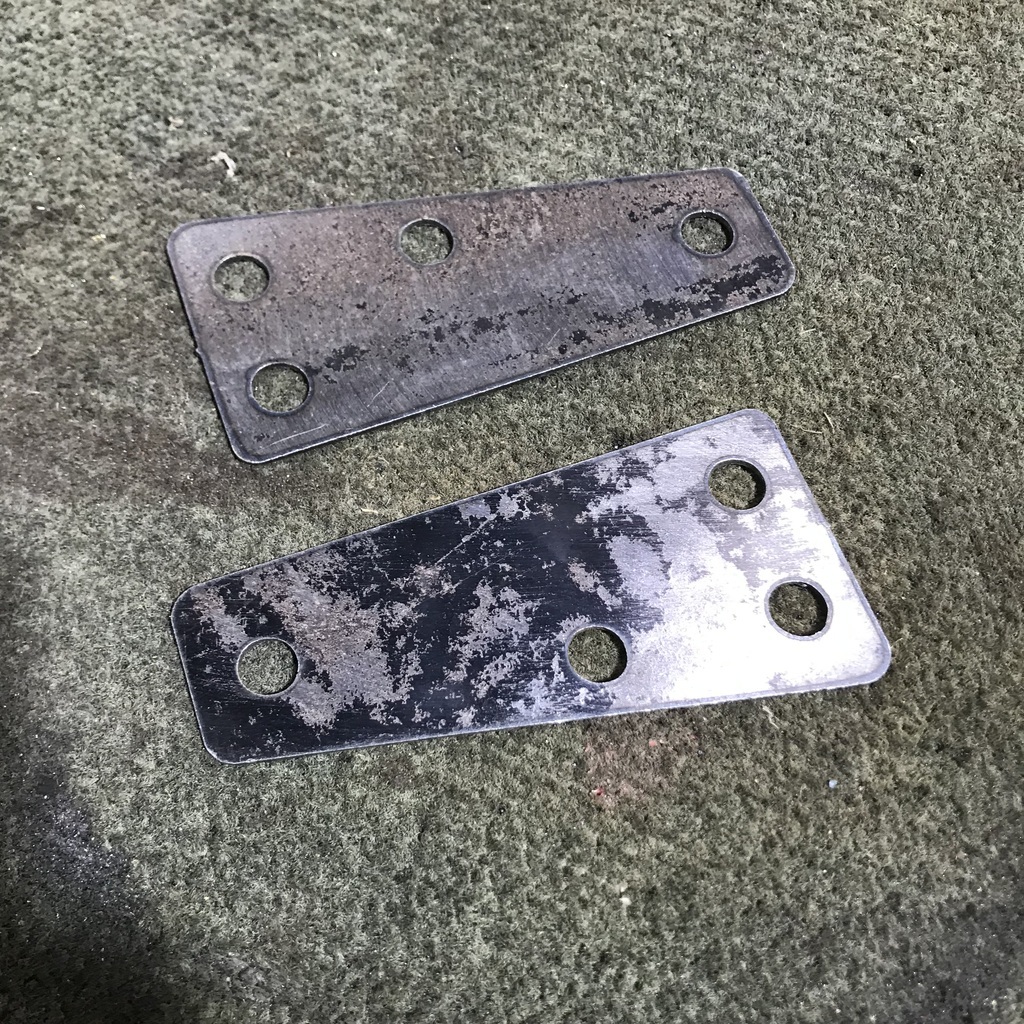 It’s a marvellous thing. I took probably the same amount of time to draw these as it would have done to make one manually. But I’d be surprised if the hand cut one was as ‘bought’ looking. And now if I need another, and I bet I will, it’s a matter of a few minutes to cut another one or two. In whatever thickness I need. Much more fiddly and time consuming to get this area sorted. It’s the upper rear corner that I butchered getting the skin off. 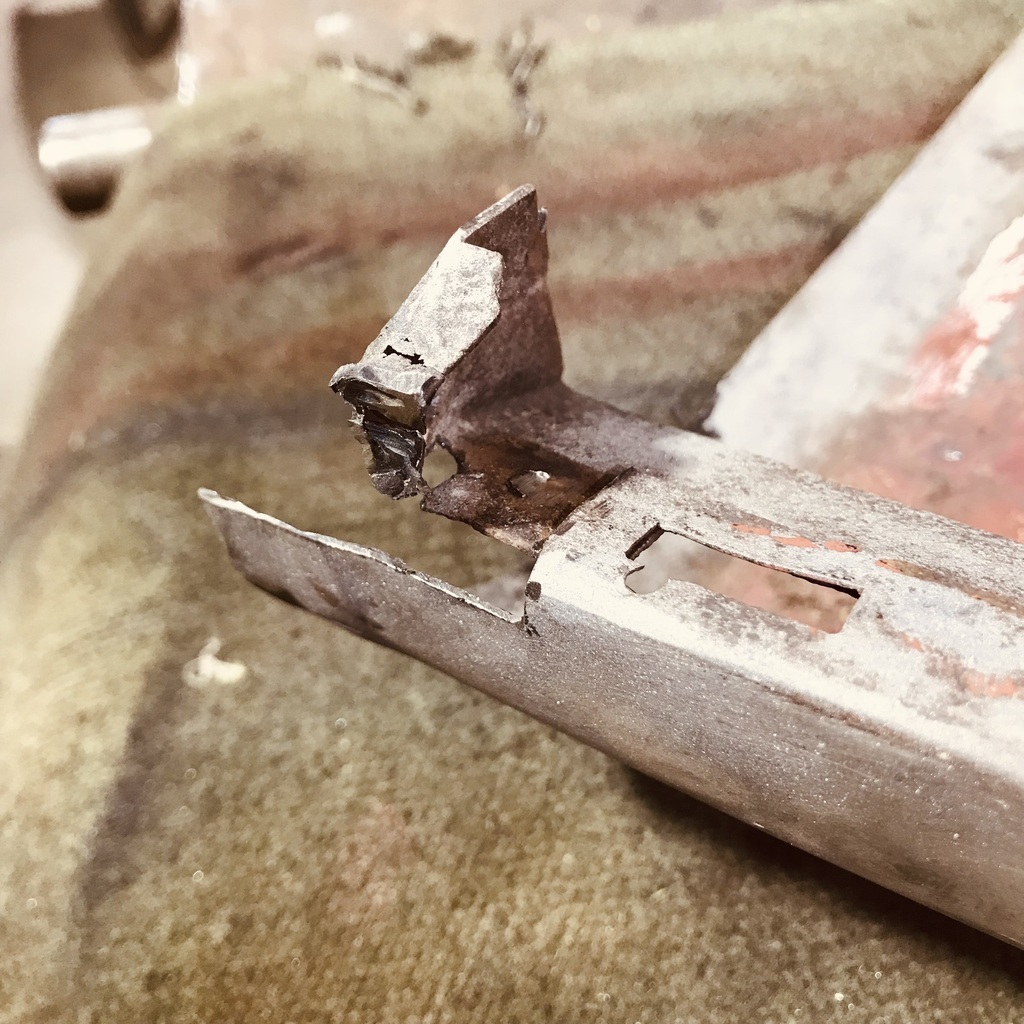 Cut and folded this piece of 16#. Then much faffing around to get it to fit. 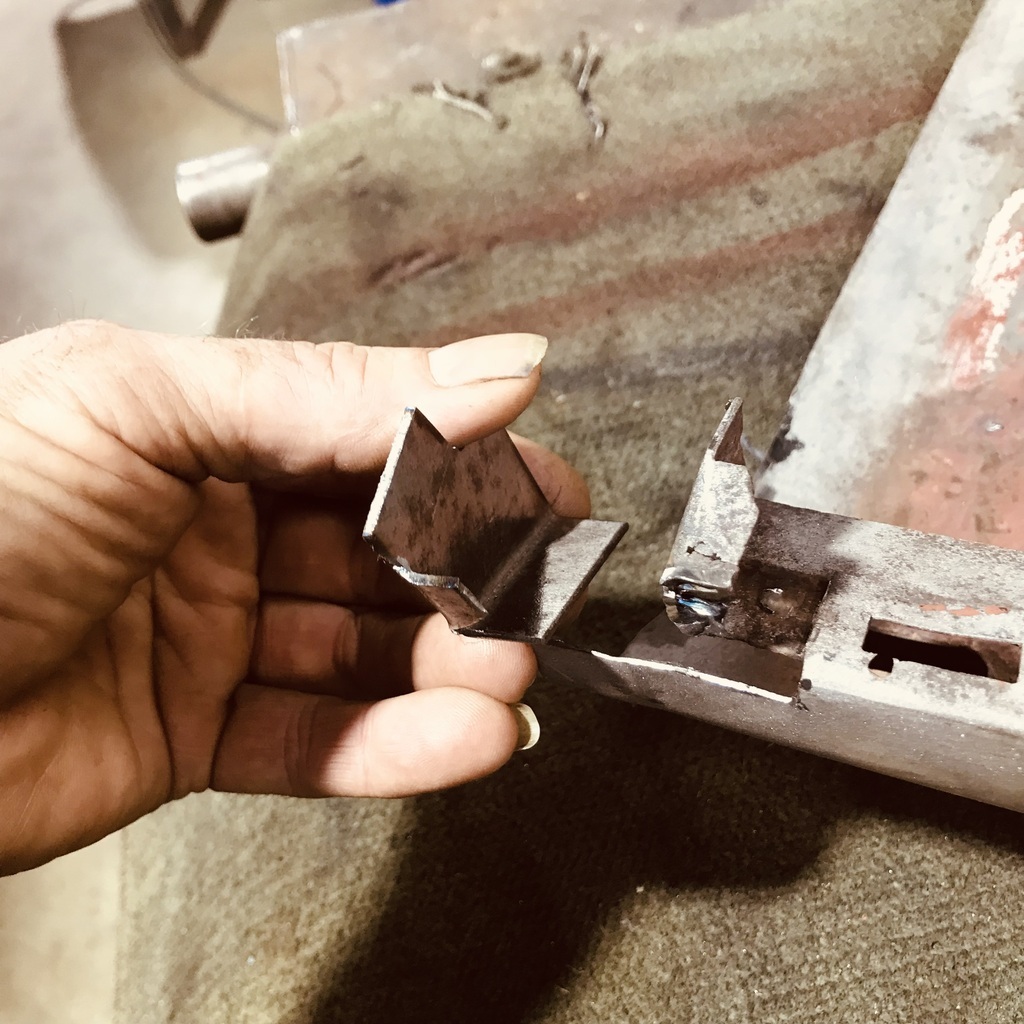 So, at the end of the day I have the skin, just hanging on the frame. 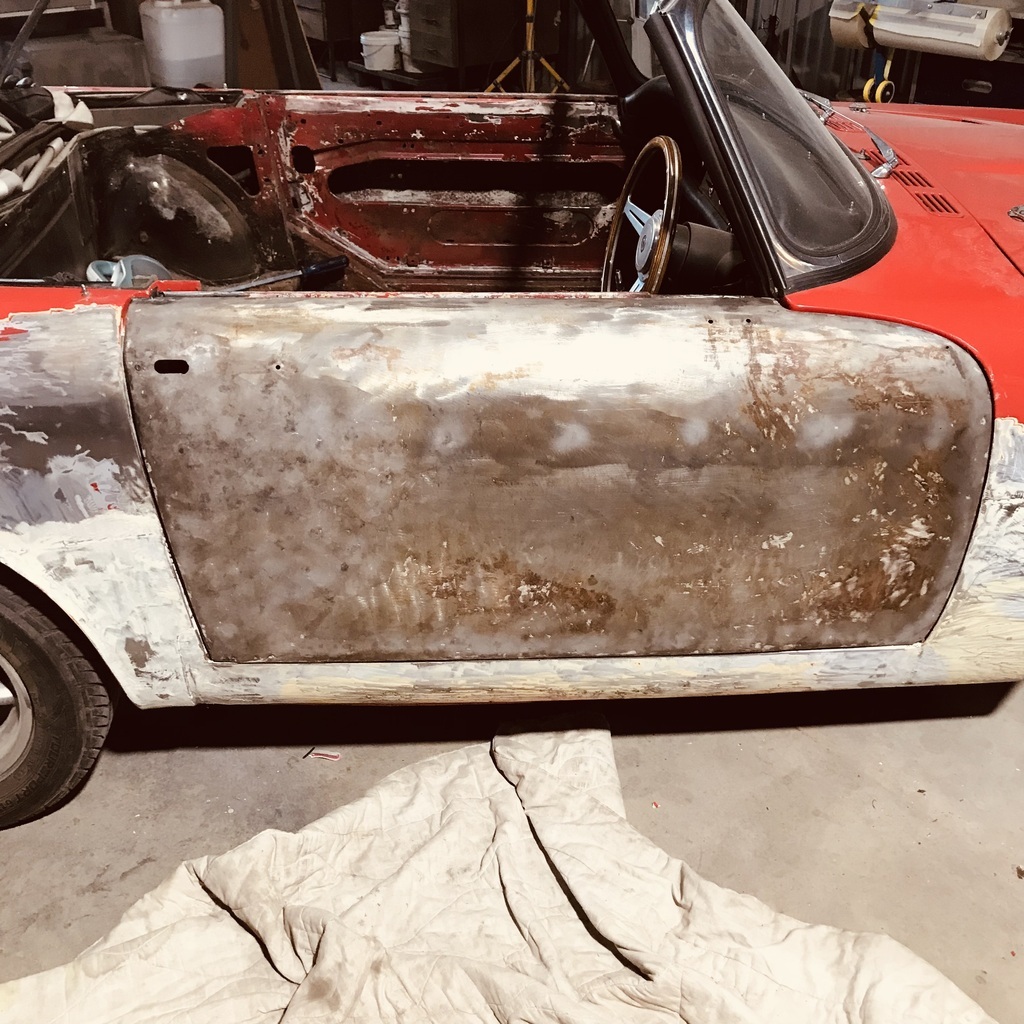 Happy with the fit, but unsure how to proceed. I’m ok with adding a strip around the three sides, but getting it sized to the hole (and therefore the gaps) is something I haven’t worked out. I’ll look for a YouTube video on how to fit a door skin. Any tips would be much appreciated. Thanks. |
| |
|
|
gazzam
Part of things
 
Posts: 746 
|
|
|
|
Sorting the doorskin. I'd ground the edges off to remove the skin. There was pitting and a couple of rust holes along some of the edges, but pretty much only right at the edge. It was fairly good but still needed some work. So the plan was/is to replace a narrow strip of metal around the two ends and the bottom. Took me a while to work out how to do this and get the fold overs and the gaps right. I was unable to find anything of use on YouTube. That surprises me, surely I’m not reinventing the wheel here? Anyway I decided to cut strips of a known width and tack them to the body. Like this. 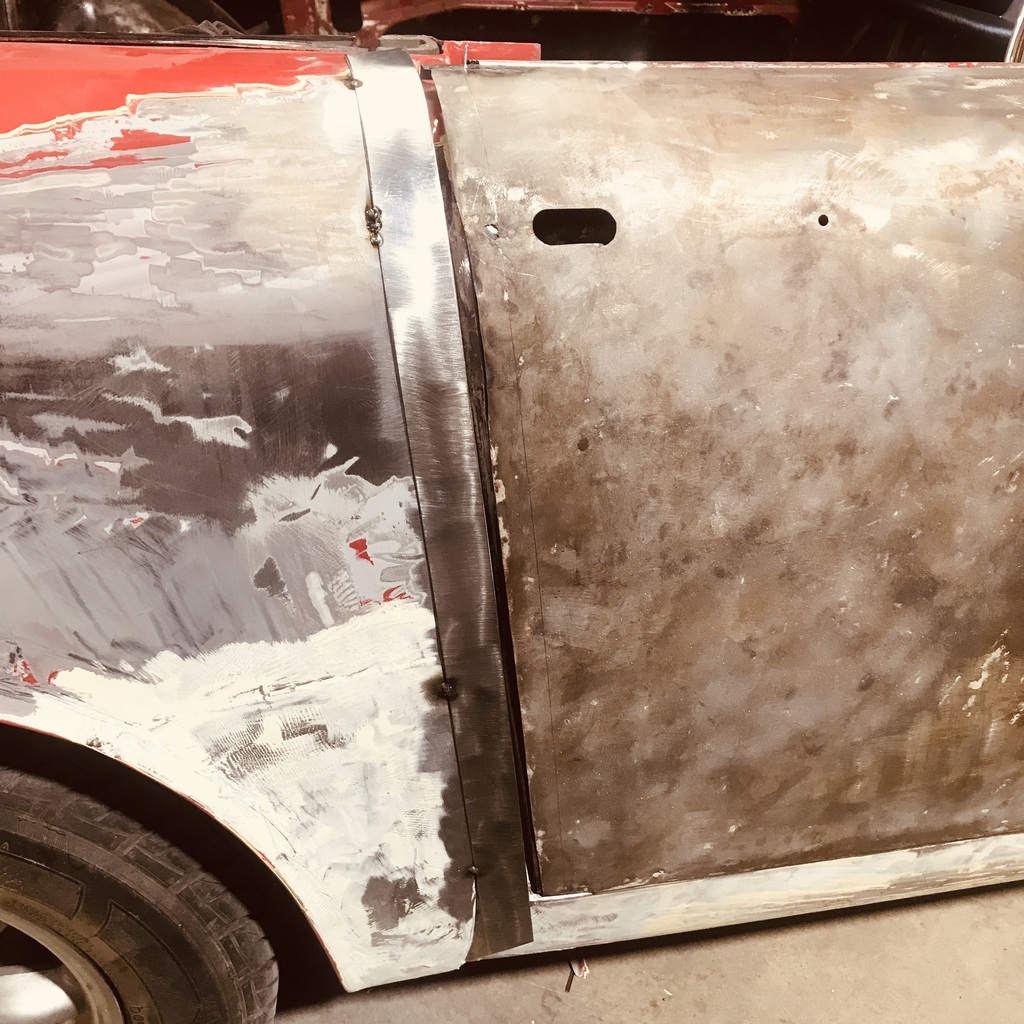 That’s the first one. Now for one at the front and one along the bottom edge. They’re tacked to the body so I can use them to scribe a line on the skin. 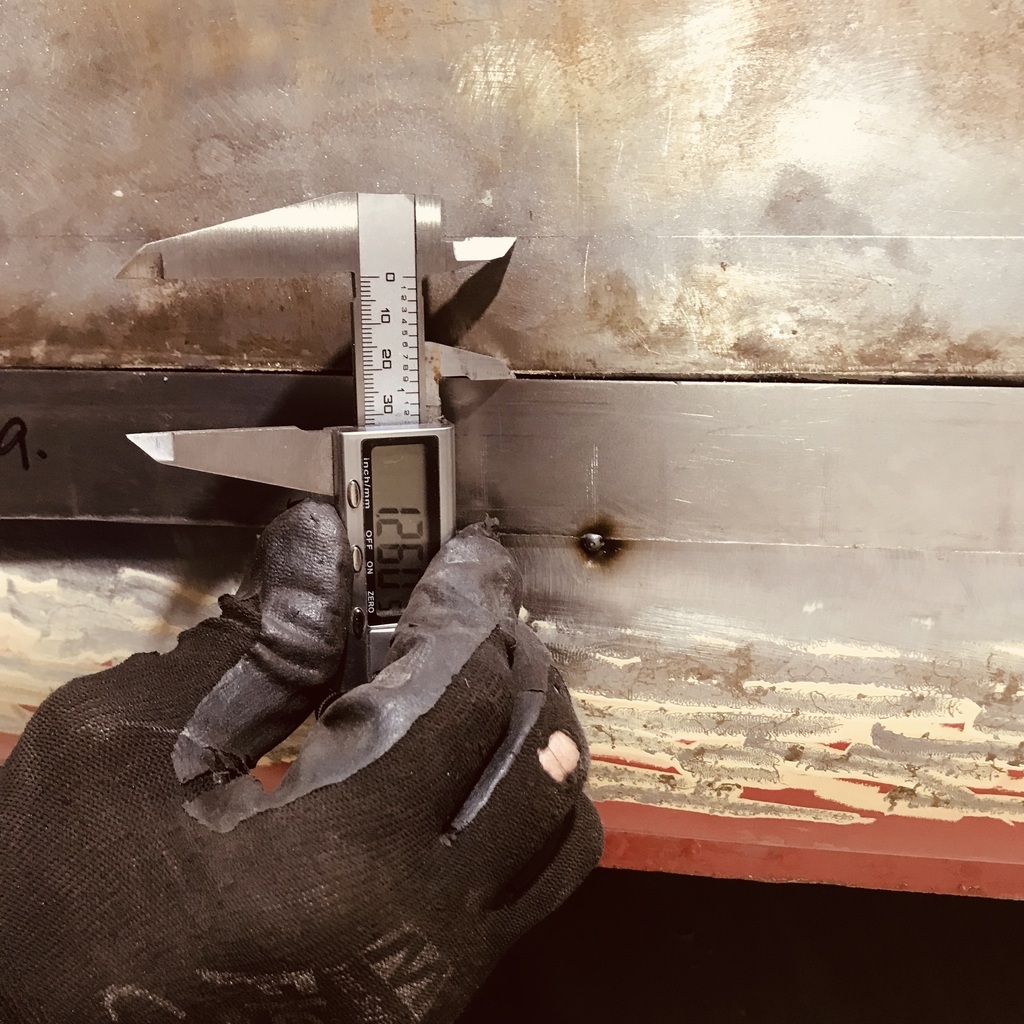 Scribing a line using the the body itself as a guide won’t work. The edges of the door jambs aren’t nice and flat - all sorts of angles and slopes. The tacked on pieces are an excellent guide, they’re tacked on at a 'line of best fit' along the relevant edge. And then they are used to repair the doorskin. All three pieces tacked on. 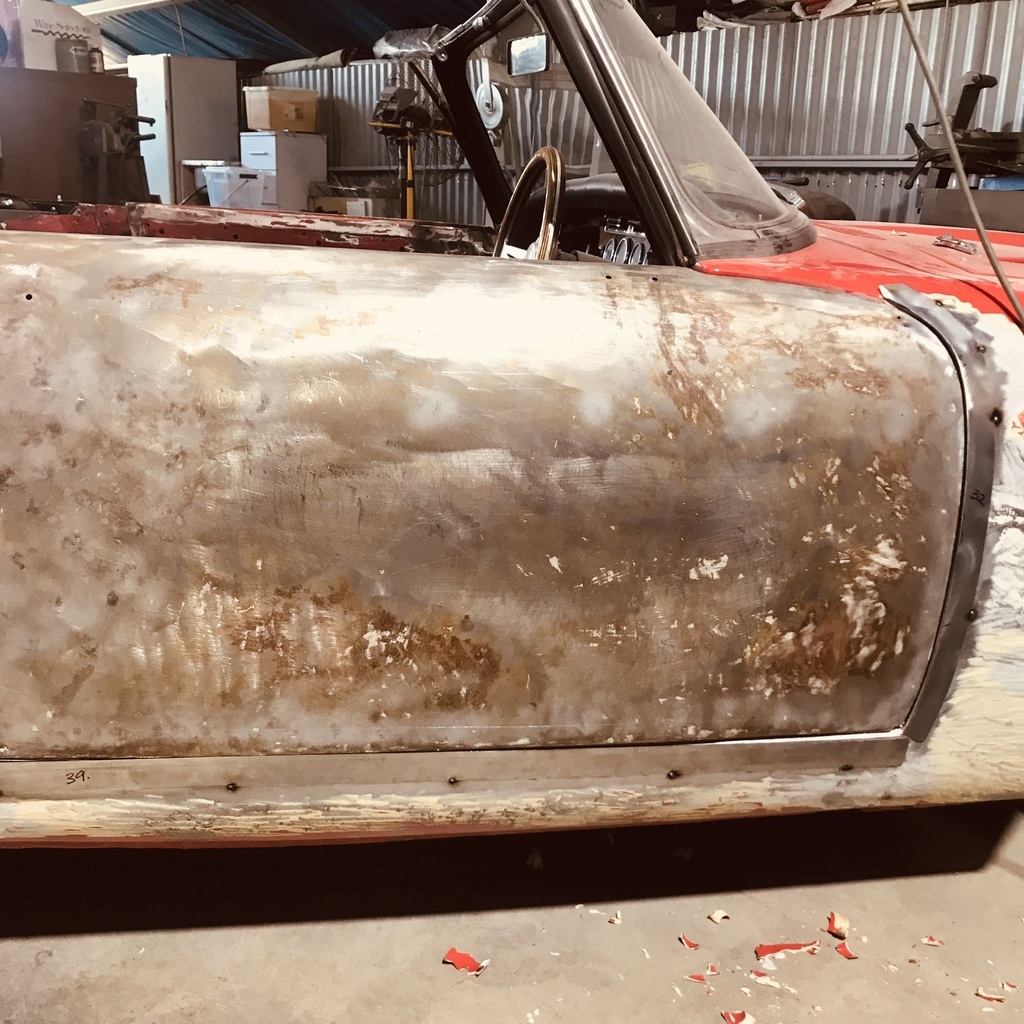 Once all three sides are scribed, the skin can be cut. 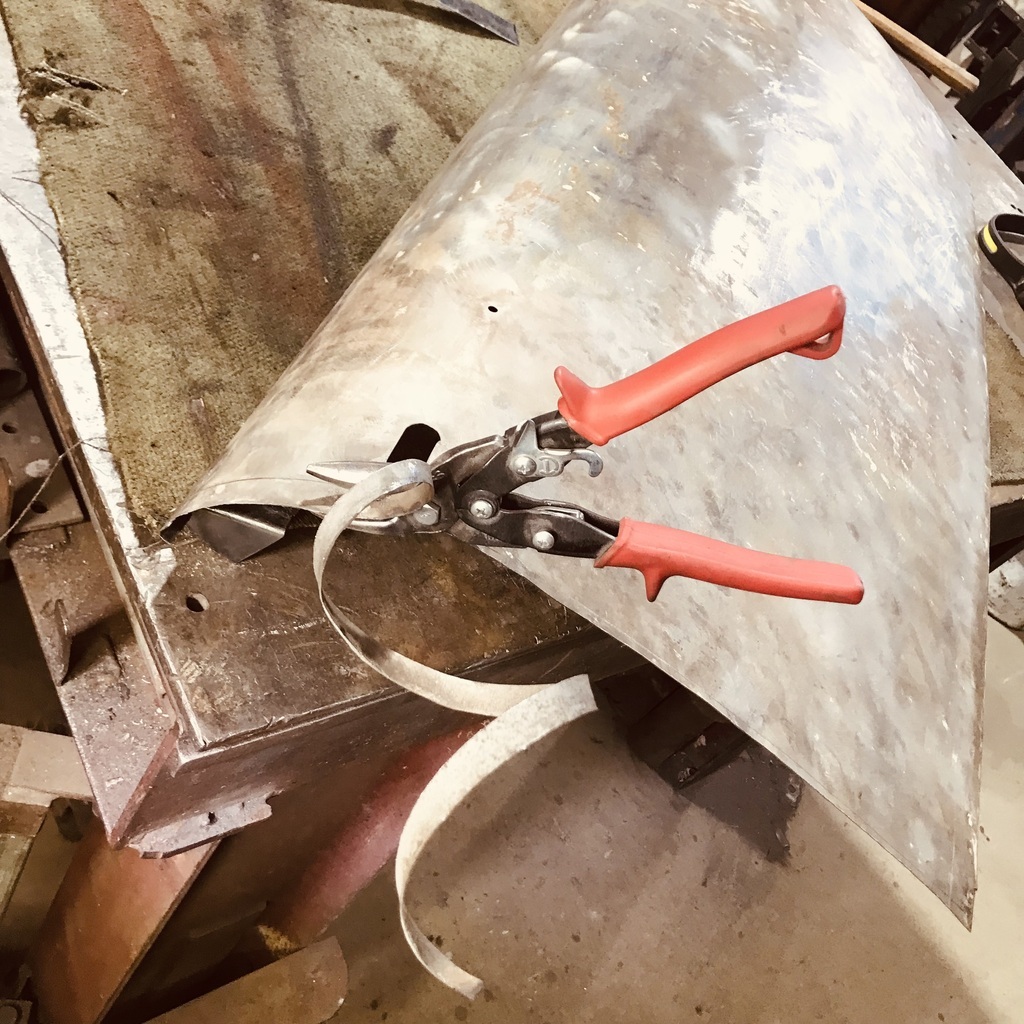 And the tacks on the body cut, pieces removed and cleaned up ready to fit to the skin. First one clamped (!) in place. 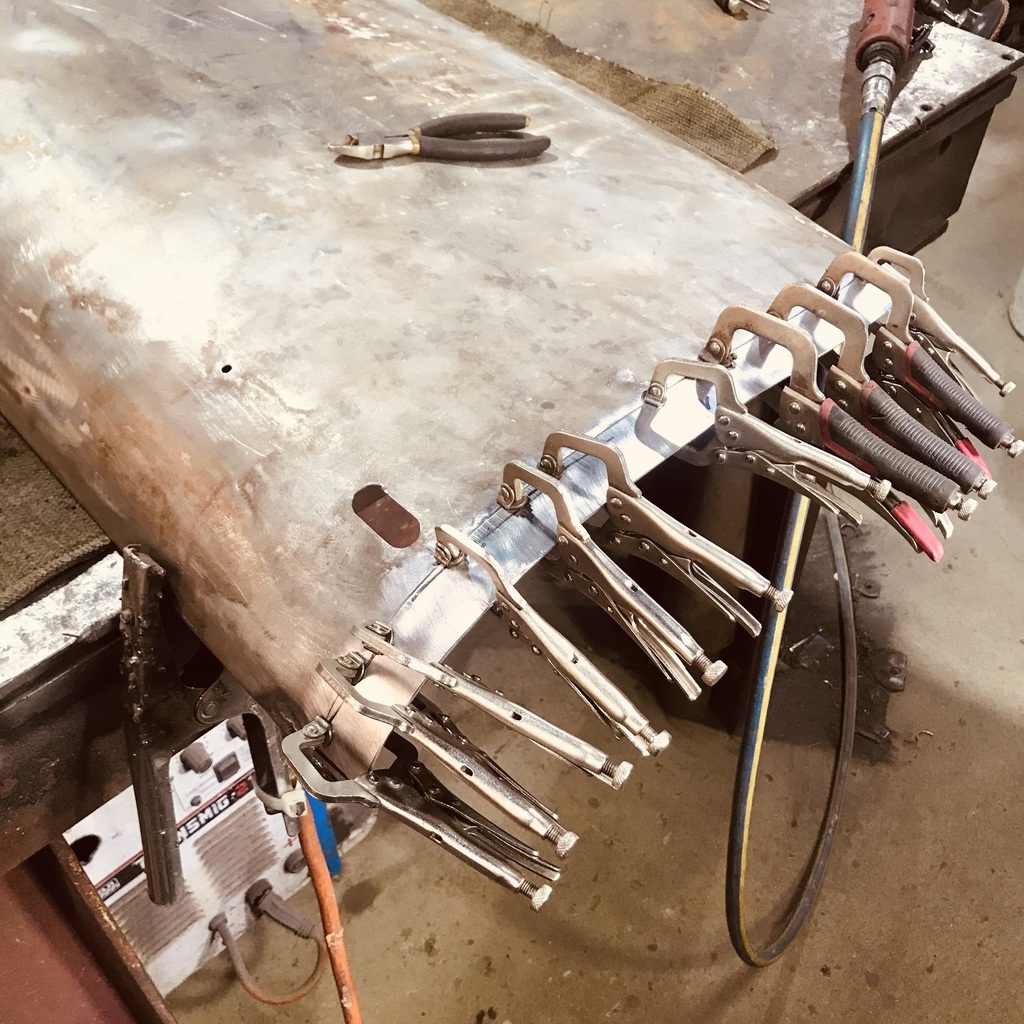 Then tacked with the MIG. Tacks ground back and poorly photographed. 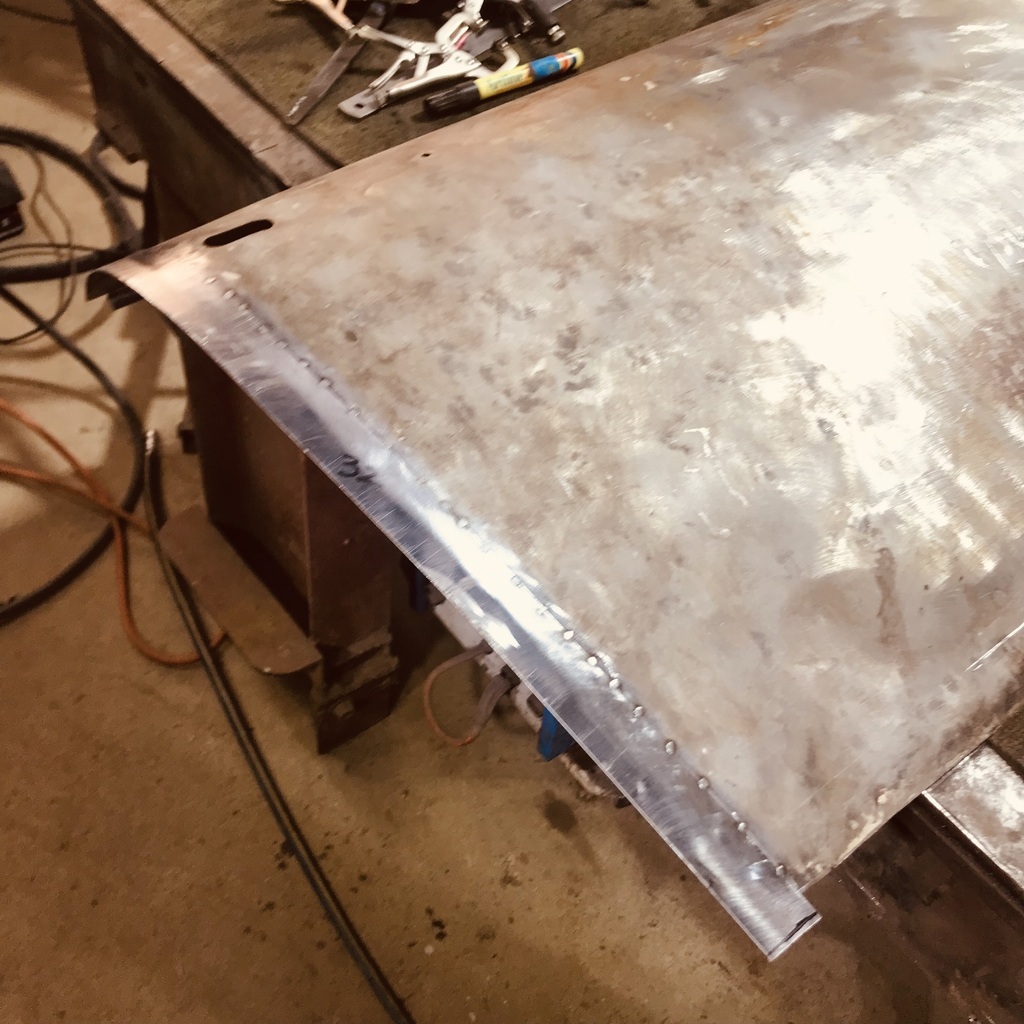 And TIG welded. Barely any filler wire. A couple of blowouts, to be expected as there was damage and therefore thin patches. 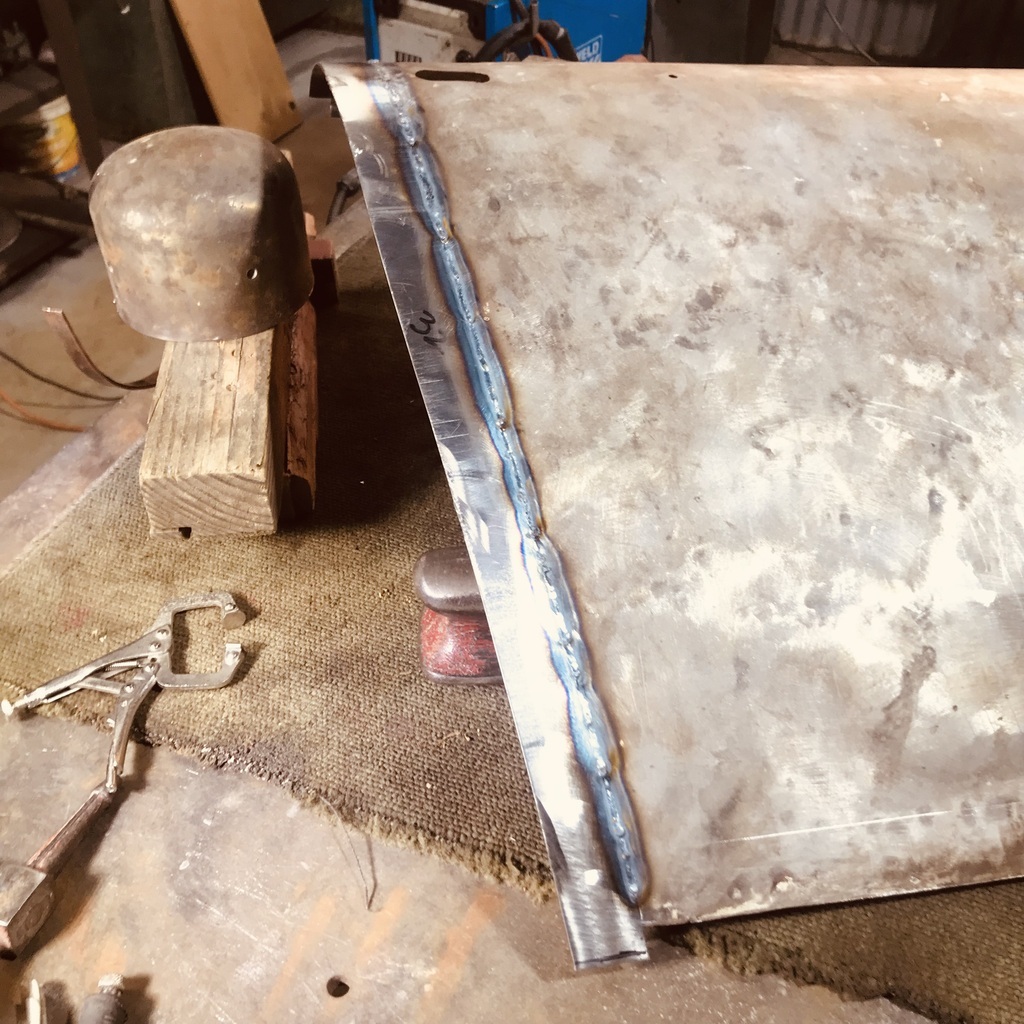 Then the bottom edge. 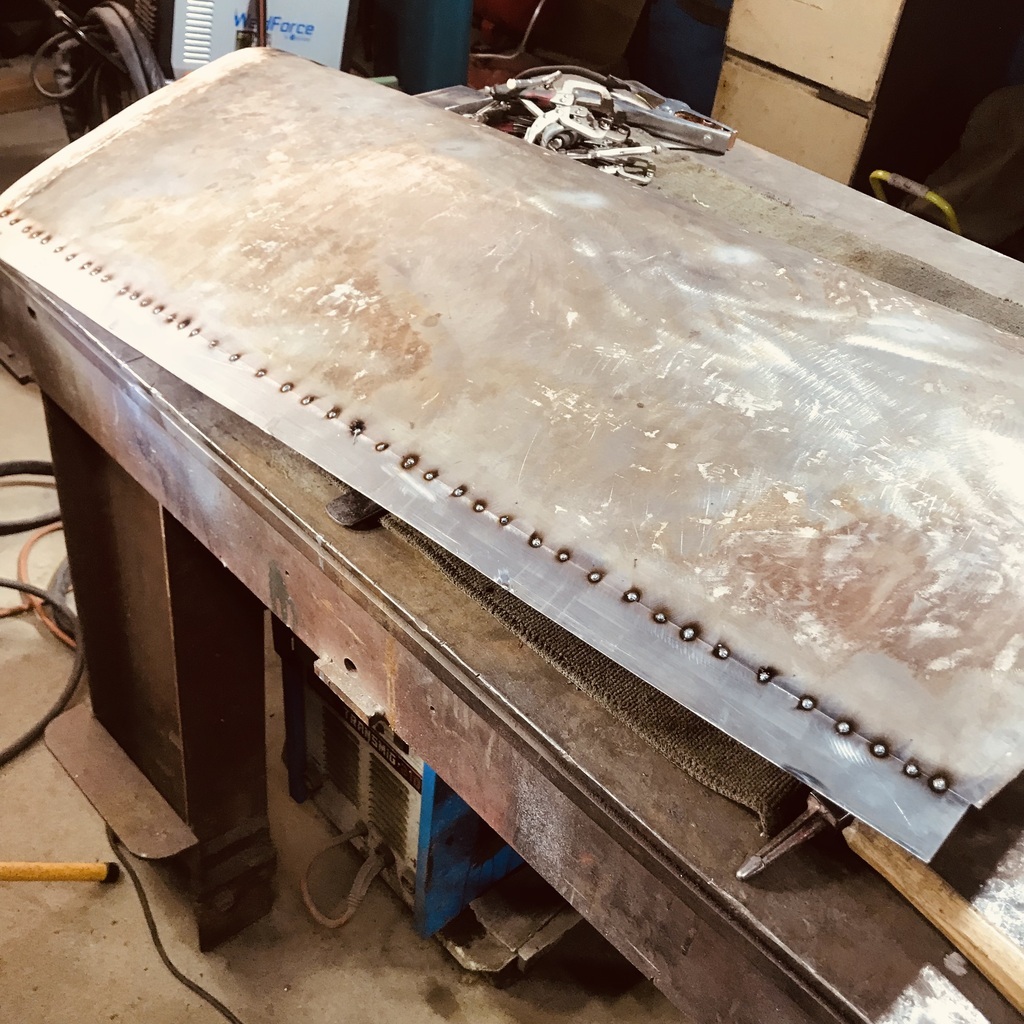 Fully welded. 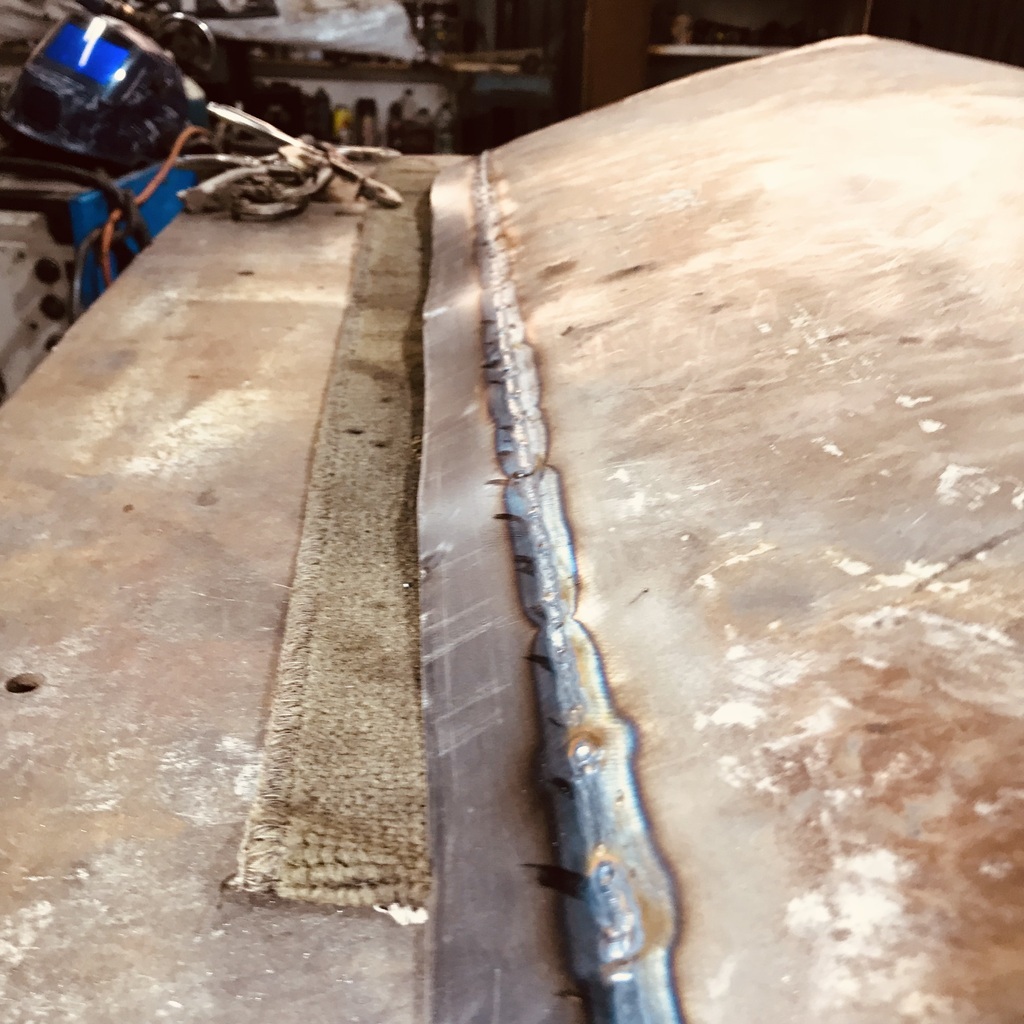 You can see the distortion in that pic. Once the weld is ground back a bit and planished, most of that is sorted. 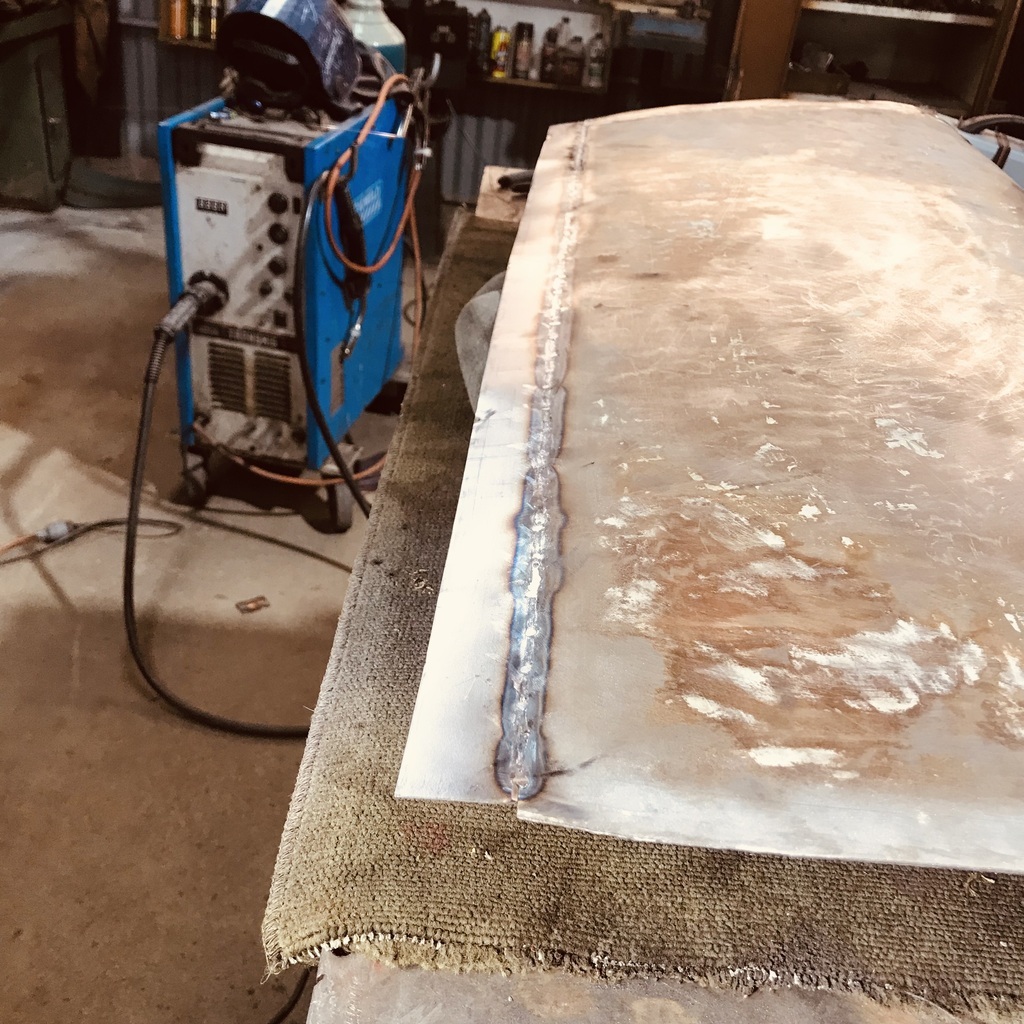 Three sides welded, two tidied and planished. 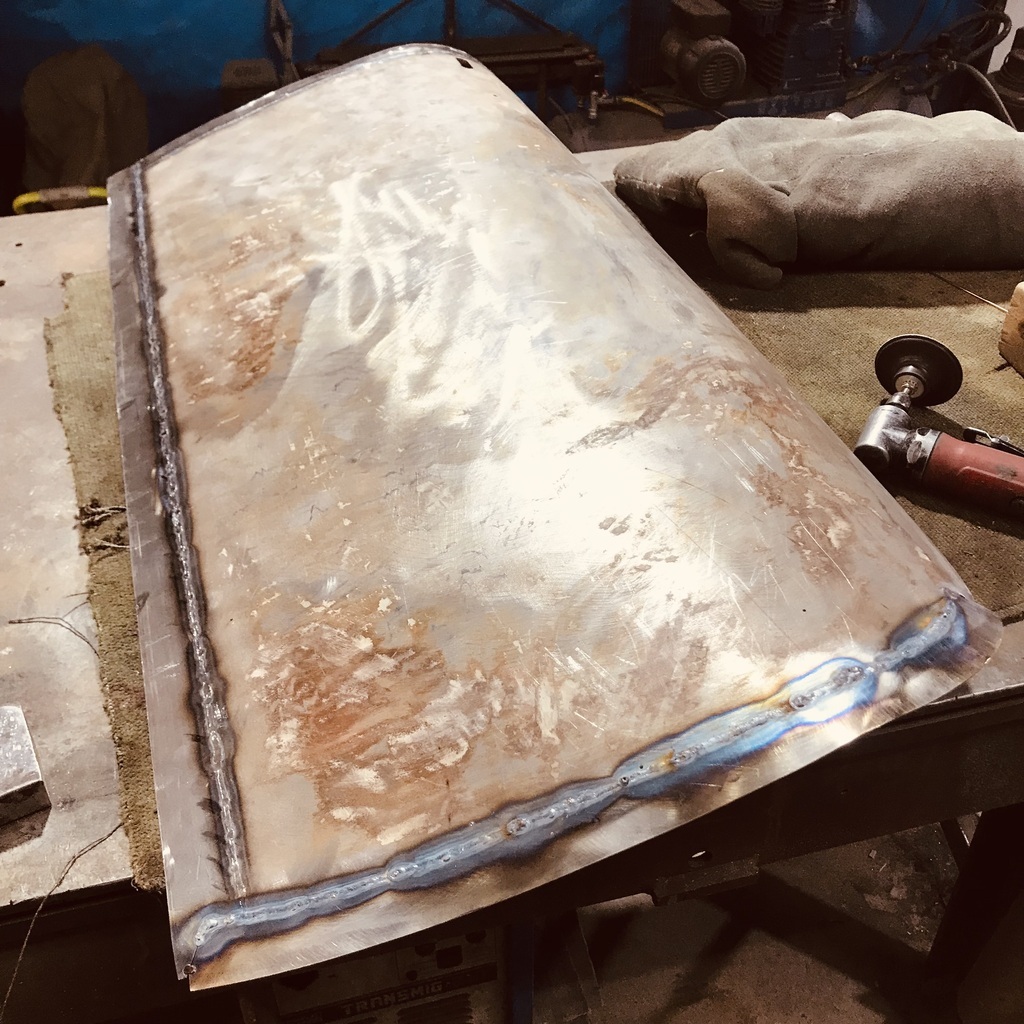 A very satisfying day. I’m pleased to be getting a bit better at the TIG. When it goes well like this, it’s so quick. Hardly anything to grind. What there is to grind is soft. Next is to use the bead roller to crease the edge, so I can get the folds started and get the skin back onto the frame. Thanks. |
| |
|
|
|
|
|
|
|
|
Incredible work going on there
|
| |
|
|
|
|
|
|
gazzam
Part of things
 
Posts: 746 
|
|
|
|
Thanks guys, but read on… Didn’t do much on the Tiger yesterday. I was too discouraged. After all the trouble I went to, making accurate width strips and tacking them to the body. Then using the edge of the strips as a guide to scribe the door skin. My idea was to cut strips of a known width, eg the front and rear ones were 32mm. These were carefully shaped to the relevant edge of the body and tacked on (to the body), lining up wth the edge of the door jamb. (The width is only important when these same strips are welded to the cut down door skin.) Then scribe a line 25mm from the edge of the strip onto the door skin. Allowing for a 12mm fold, this should leave my desired gap of 5mm. I hope I’ve described this well enough. I even did four test folds to see if there was any need to account for loss on the fold. (No) So after welding the strips to the door skin, I was able to fit it to the door frame with the edges laying over the body. Then I traced around the outside with a marker. When I lifted the skin off, the front was obviously way off. The bottom and rear edge looked ok. Maybe I had a senior moment and scribed the front line using the wrong measurement. But I don’t think so. I’m pretty careful and this whole business has me out of my comfort zone. Maybe it’s like the mathematics of Italian restaurants, as one of my uni tutors once told me, referring to things that just don’t add up. Anyway it was enough to make me walk away from it. Today I went back to it. I guesstimated the excess at the front and trimmed it back about 7mm. Scribed a line 12mm in from the edge of the skin, three sides, where it needs to be folded. I had my favourite girl (wife) help me by turning the bead roller while I steered the door skin. Then used the hammer and various dollies to turn the edge to 90 degrees. 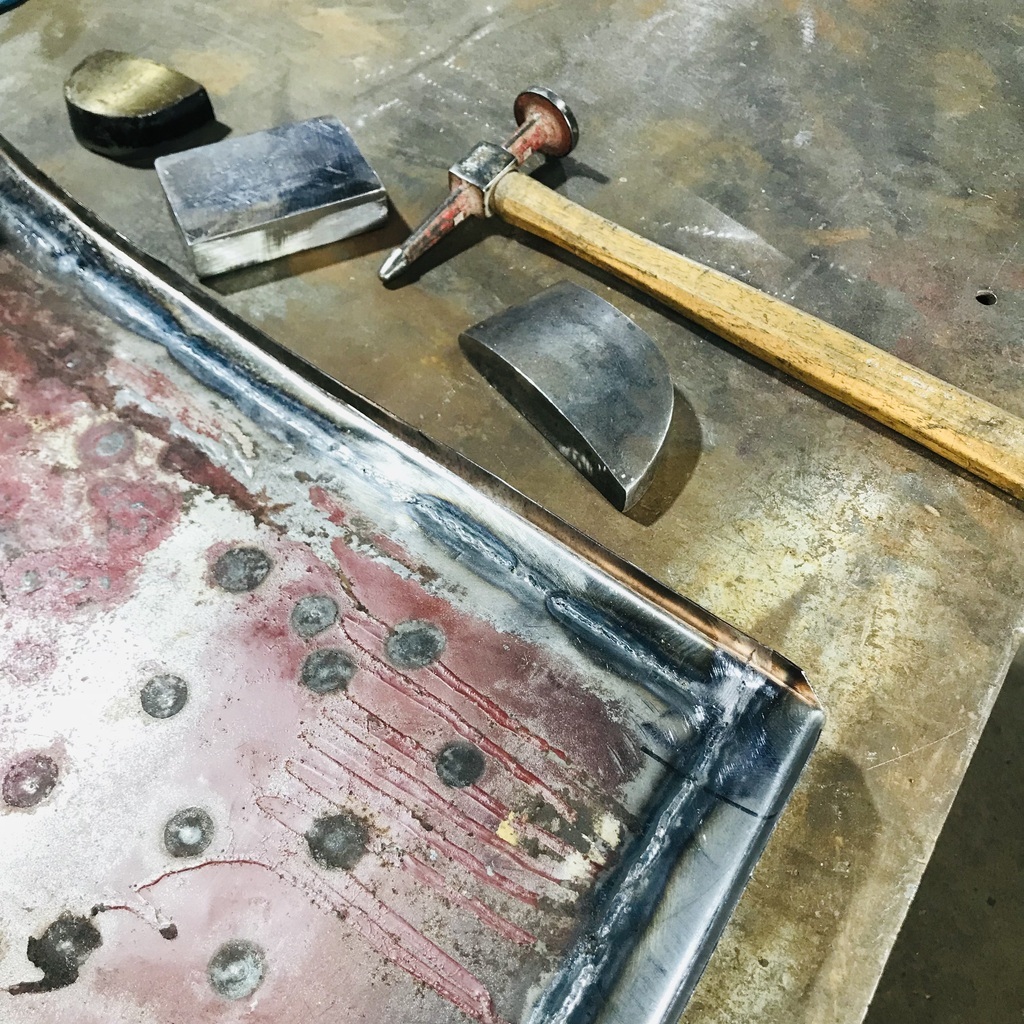 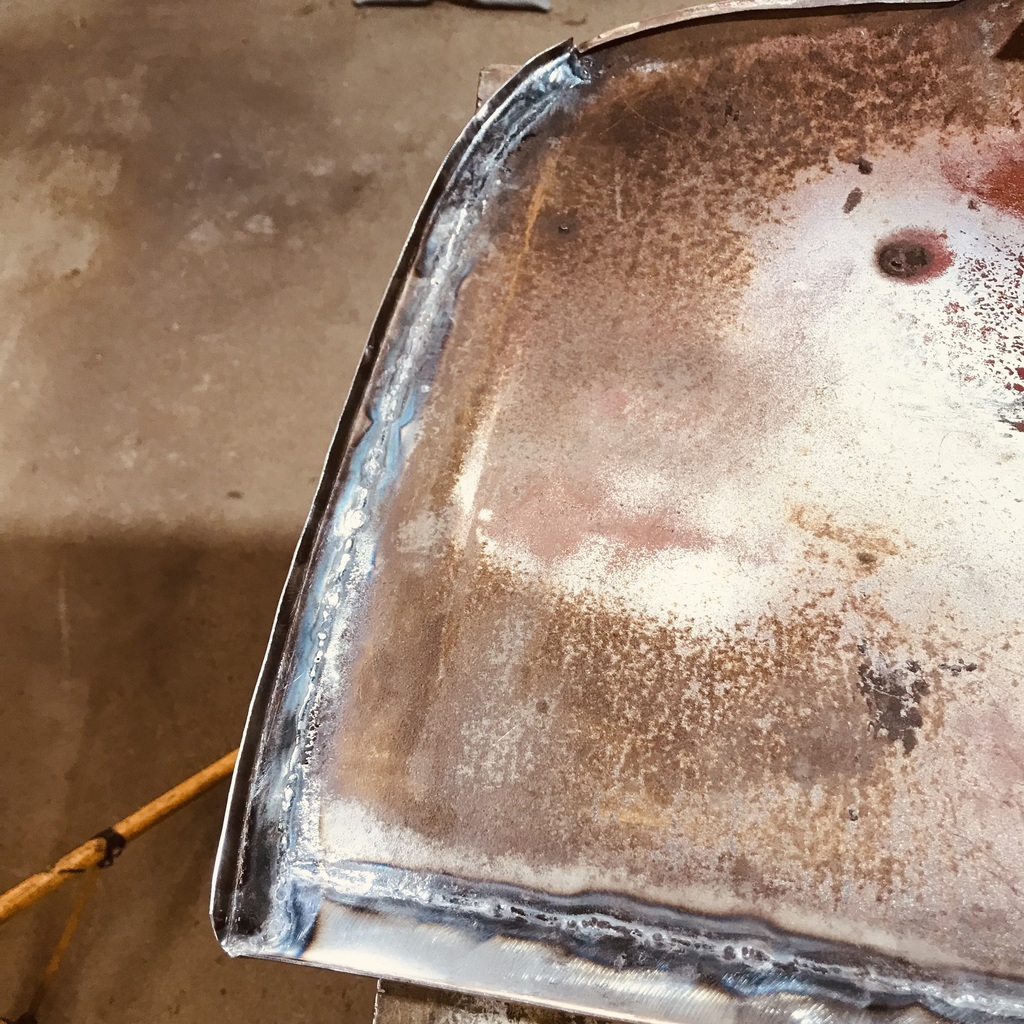 Again I hooked it over the door frame, on the car. Now the front and rear seem ok, but the bottom edge needs to come up! At least it’s not too short, I suppose. Anyway I’ll double check everything and if needs be I can flatten the bottom edge and bring it up a bit. More Italian restaurants! Thanks. |
| |
|
|
teaboy
Posted a lot
   Make tea, not war.
Posts: 2,126
|
|
|
|
|
It’s a conspiracy, Gazza!
|
| |
|
|
|
|
|
Oct 10, 2024 10:33:28 GMT
|
|
oof ,that's a horrible feeling when it should all make sense ,but then doesn't. much sympathy Gazza.
|
| |
|
|
|
|
|
Oct 11, 2024 20:54:25 GMT
|
|
I'm sure you will get it sorted and have panel gaps closer and more consistent than any that the factory produced!
|
| |
|
|
gazzam
Part of things
 
Posts: 746 
|
|
|
|
Thanks for the sympathy men. Progress has been slow. Getting the door skin to fit the body moves like molasses on a cold day. It’s a seemingly never ending cycle of laying it on the frame, noting where it needs to go this way or that, and then hammer and dolly work to try and achieve it. I’m pretty close now. Rosie's getting bored, must work faster… 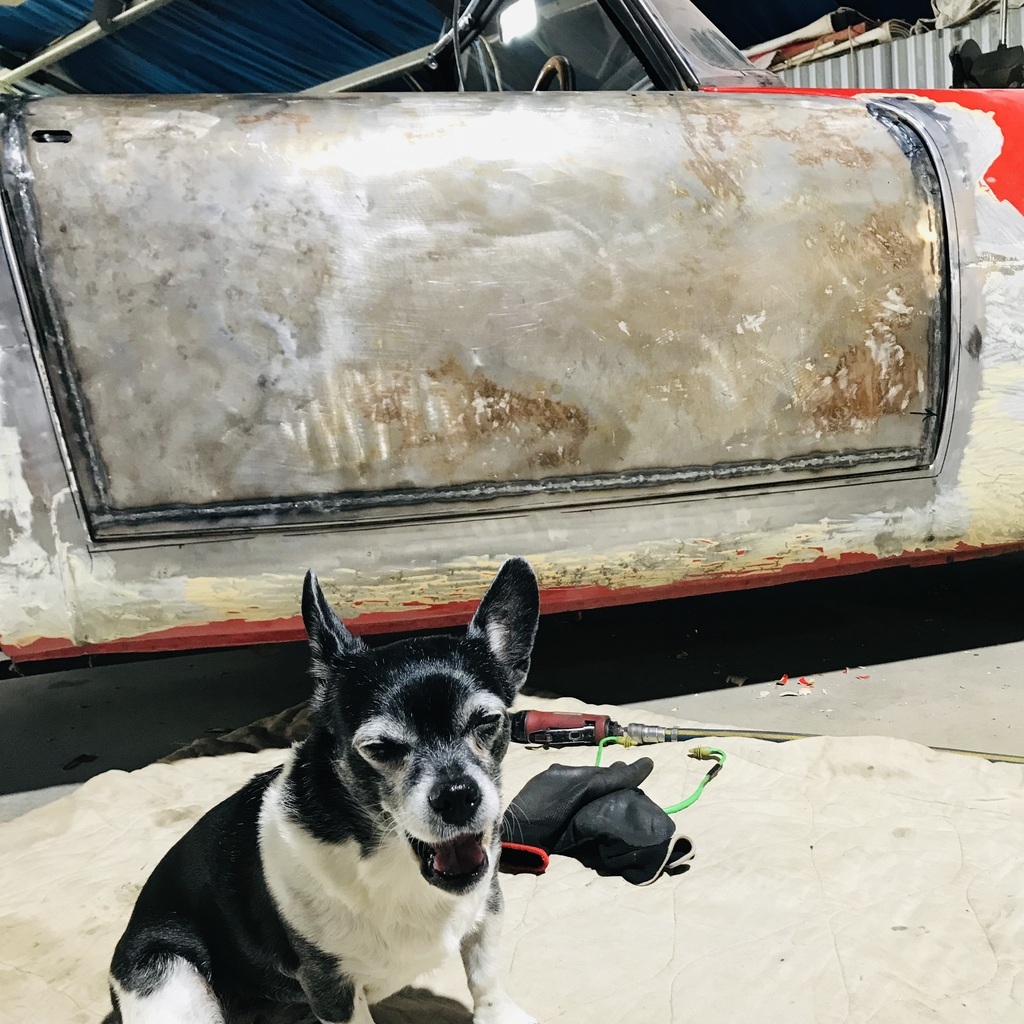 Seeing as I am very afraid of finally fitting the skin to the frame (what if it’s wrong?), I thought I’d try a dry build of the window mechanism. 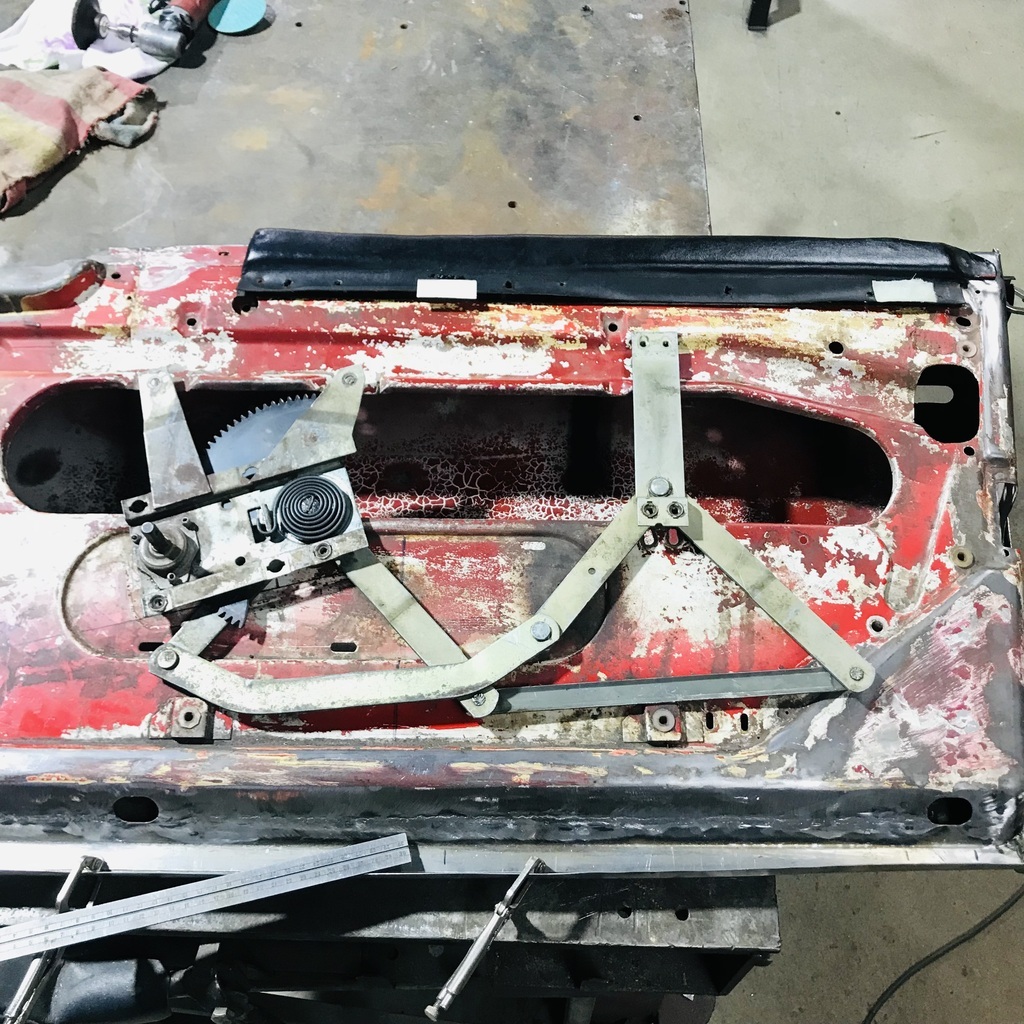 I’ve already cleaned all the grunge off it in that pic. Made it much nicer to handle if nothing else. Noticed that these pop rivets, not original, were the reason the frame had been hacked previously. 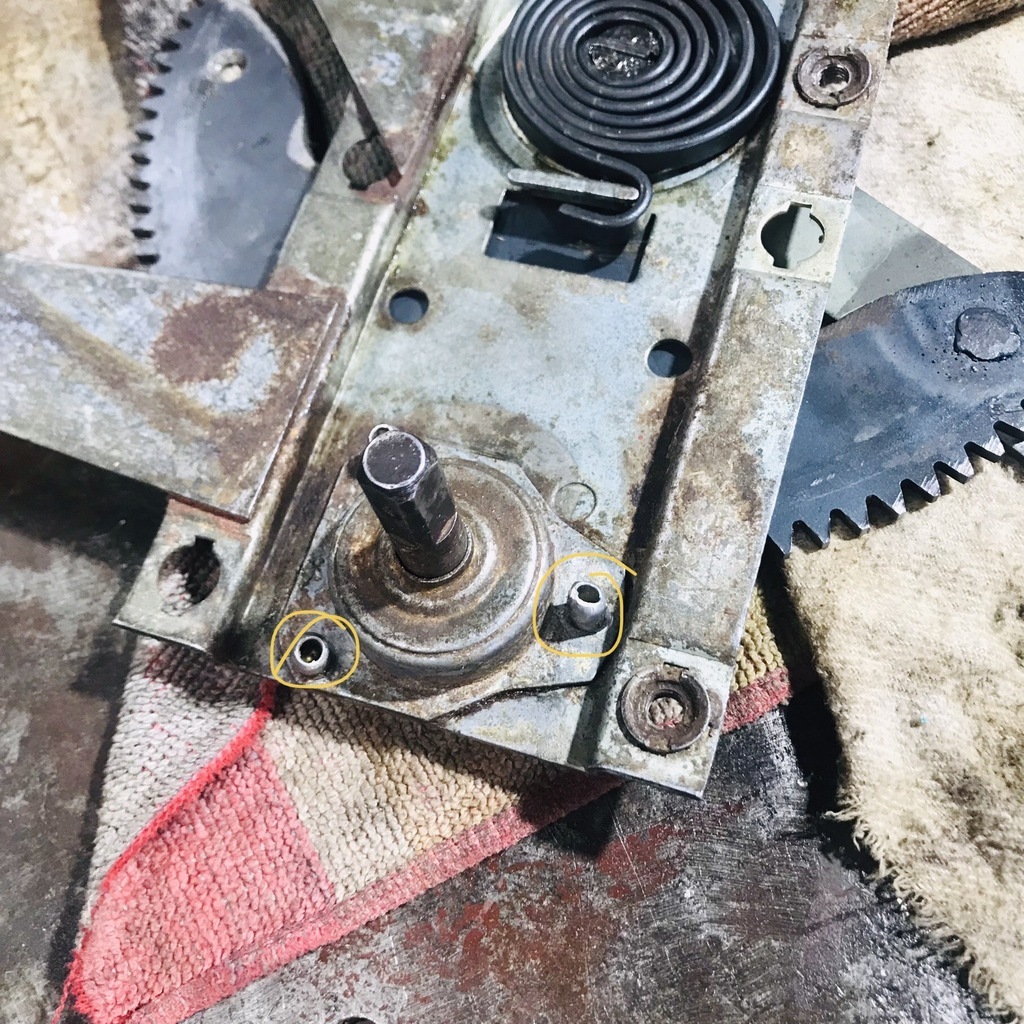 You may recall the small repair I did on the frame. The pop rivets were stopping the mechanism from sitting properly here: 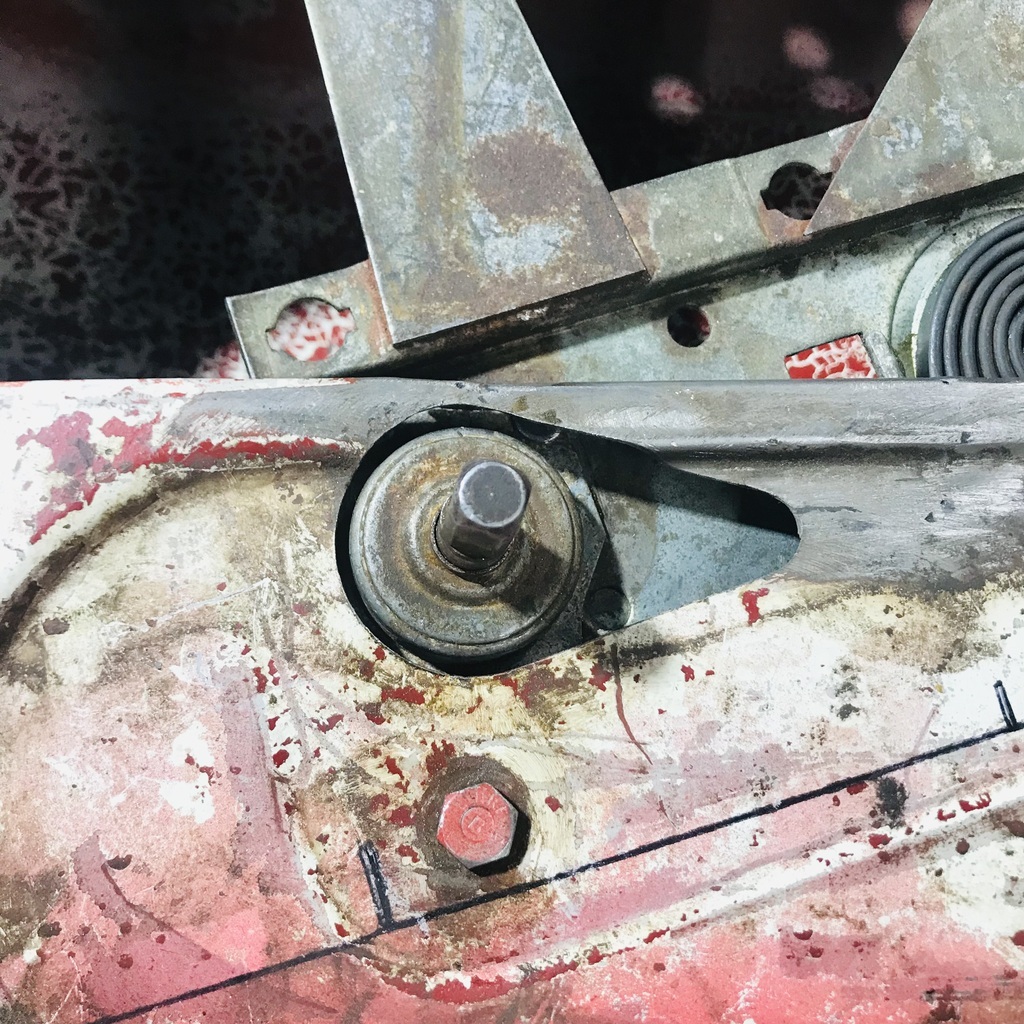 So it wasn’t to make it easier to get the mech in, though it would, it was to allow it to sit flat when bolted in. I drilled out the two offending rivets. Made mild steel replacements. Very difficult to get a good pic of small stuff like that. 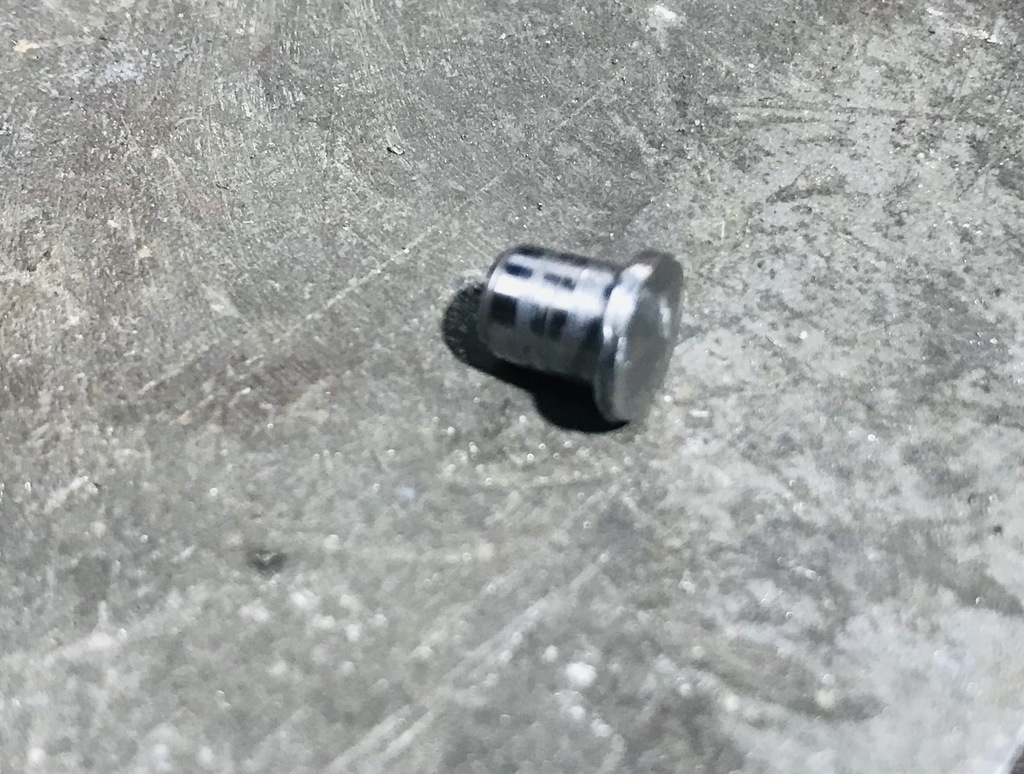 Put them in and peened them over. 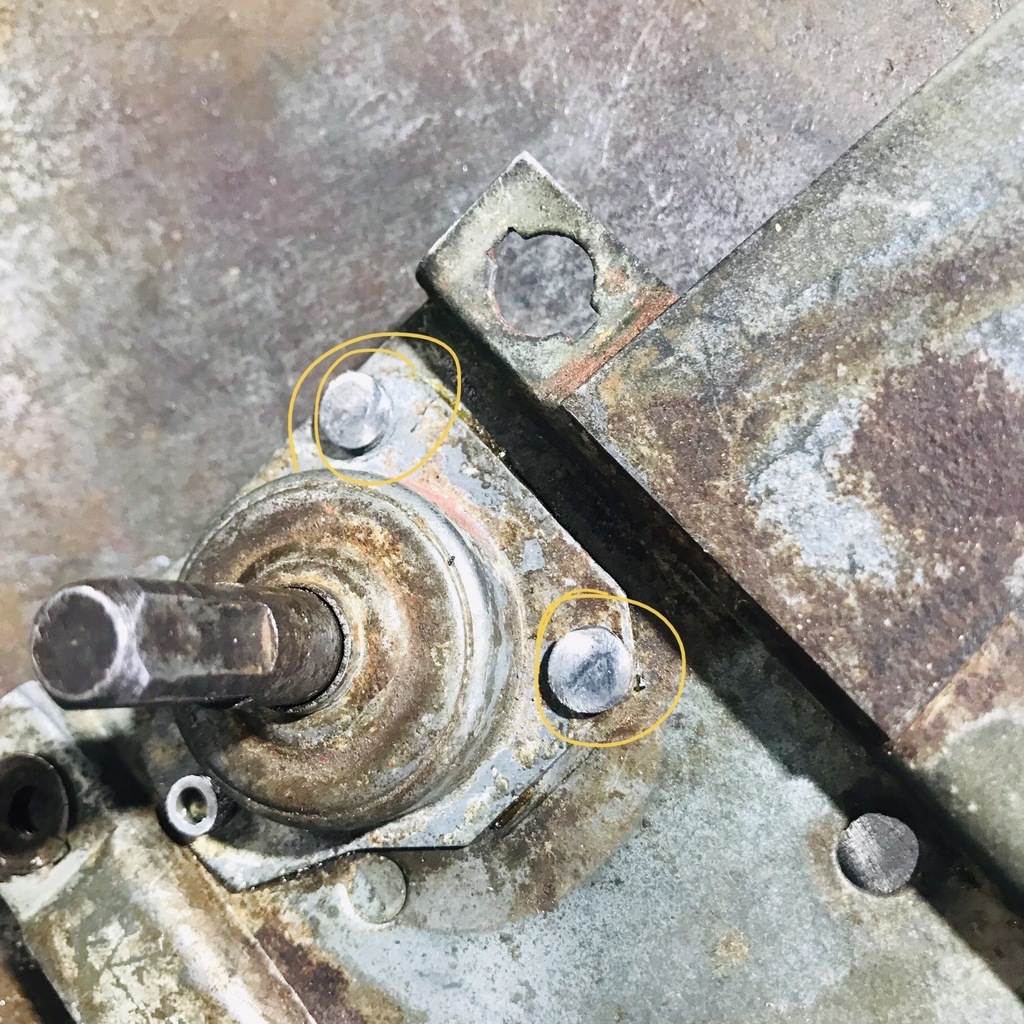 I also wanted to get all the paint off before the skin is attached. But before I could do that I had to replace this trim keeper bracket, or I'd lose my measurement. 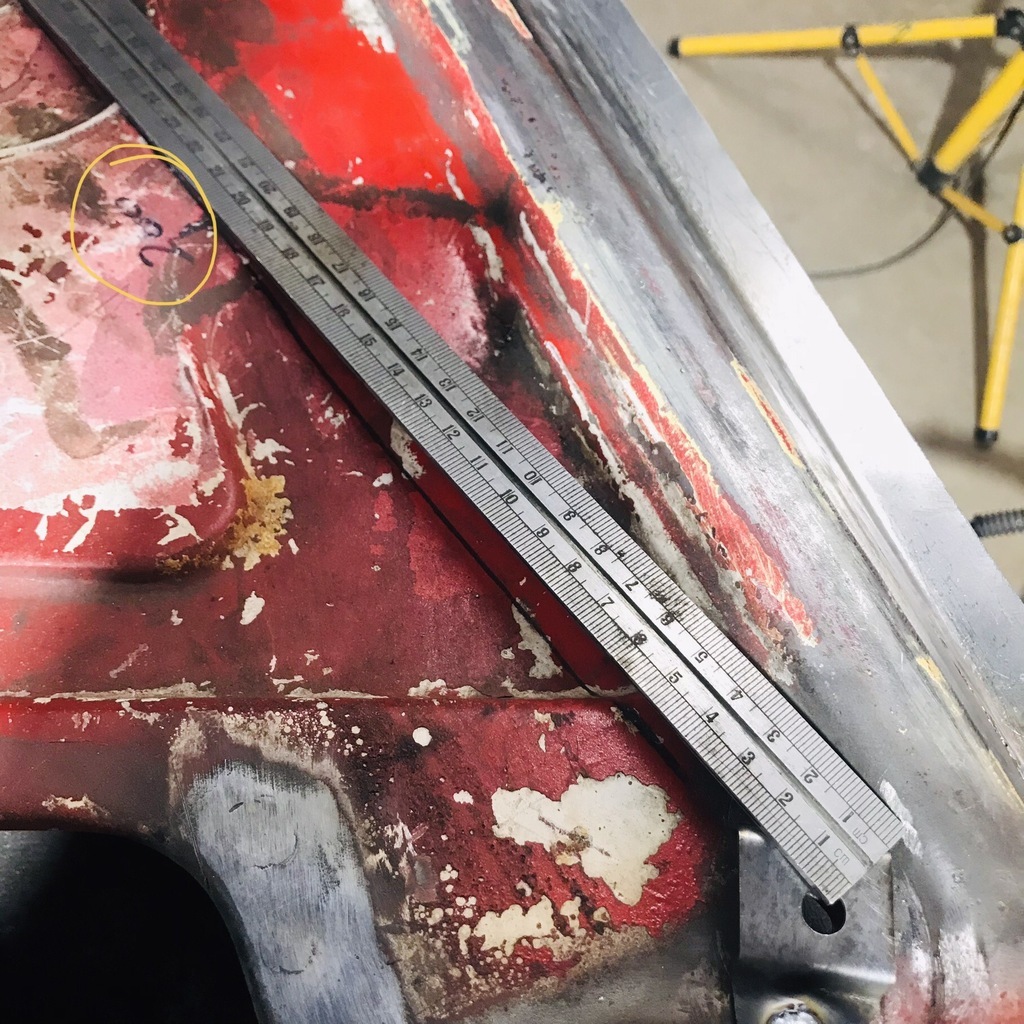 The figure circled is the distance to the centre of the hole along the marked line. A few applications of stripper, and a wire brush in the drill and we have these. 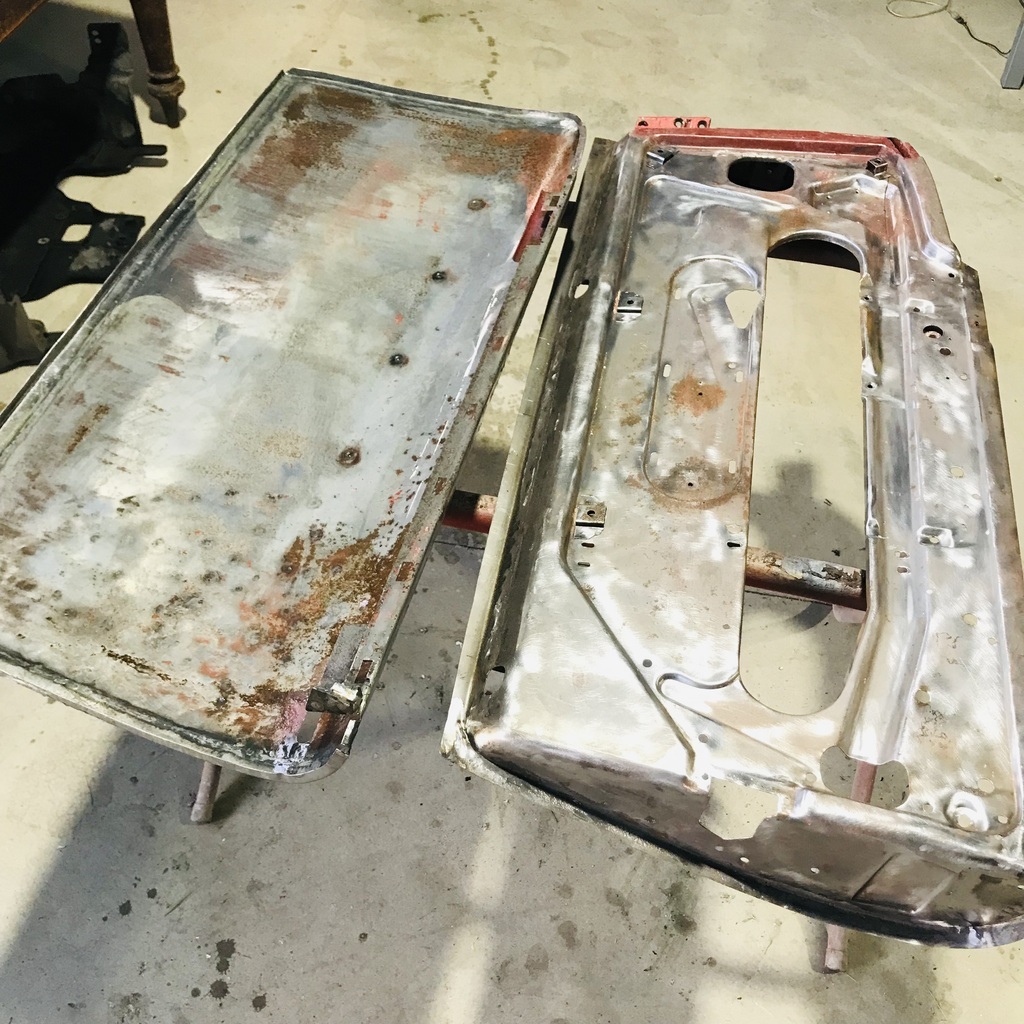 Some fairly heavy surface rust to remove from the inside of the skin, but I might as well get all this sorted while it’s easy to get at. Thanks. |
| |
|
|
|
|
|
Oct 12, 2024 18:22:03 GMT
|
Hey gazzam , I'm not an expert at this, I went through this door reskinning ( repairing ) only a couple of times. What I did on the Abarth Zagato, is that once I had the skins off, I built up the inner door flange (the part the skin will be crimped around) and then trimmed that back to give me a accurate even gap all the way around. (a bigger gap than I want to end up with to allow for the extra material of the skin, when it goes back on). And then put the flat (not flanged) skin back on the frame. Then trim the skin to a even extra length ( using the inner door flange as a guide) and work the (repaired or replaced) skin around the inner door flange, using the edge of it as a hard point for the placement of the crimp around the flange ( I hope that description makes some sense). This gave me a good hard measurement to work off that I didn't have to check and recheck, which would give me a reasonable amount of certainty the gap would be right once its done). Since I did the actual crimping of the edge with the doors off the car, that was important. Not saying this is the only ( and/or correct) way of doing things, but it worked for me. I don't know if any of that helps, and hopefully its not too late. johnbonnett may have some helpful hints too... |
| |
|
|
gazzam
Part of things
 
Posts: 746 
|
|
|
|
Thanks, MS. That’s sounds like an improvement on what I did, but I’m sort of almost there, and I think it’ll work. I need to sandblast the door frame before it can be primed. So I’m thinking that can wait till I get the sandblasting booth set up. And I don’t want to set that up till I’m ready to do a lot of blasting. So the door can go on the back burner for a bit. Passenger side upper door hinge had some play, so that was a nice little distraction from door skins. The pin was really stubborn. First off I tried giving it a good whack. I could tell from the first hit it was not going to be easy. After quite a few good whacks, with absolutely no result, I tried heat. Also no joy. I did discover that the pin was broken. Could see by the movement at each end that it was stuck to both parts of the hinge. So I decided to drill it out. It was about an 8mm pin, so I started at 6mm, then 6.5 then 7, where it finally started to move. These two little bits were about all that came out, other than shavings and the two brass washers. 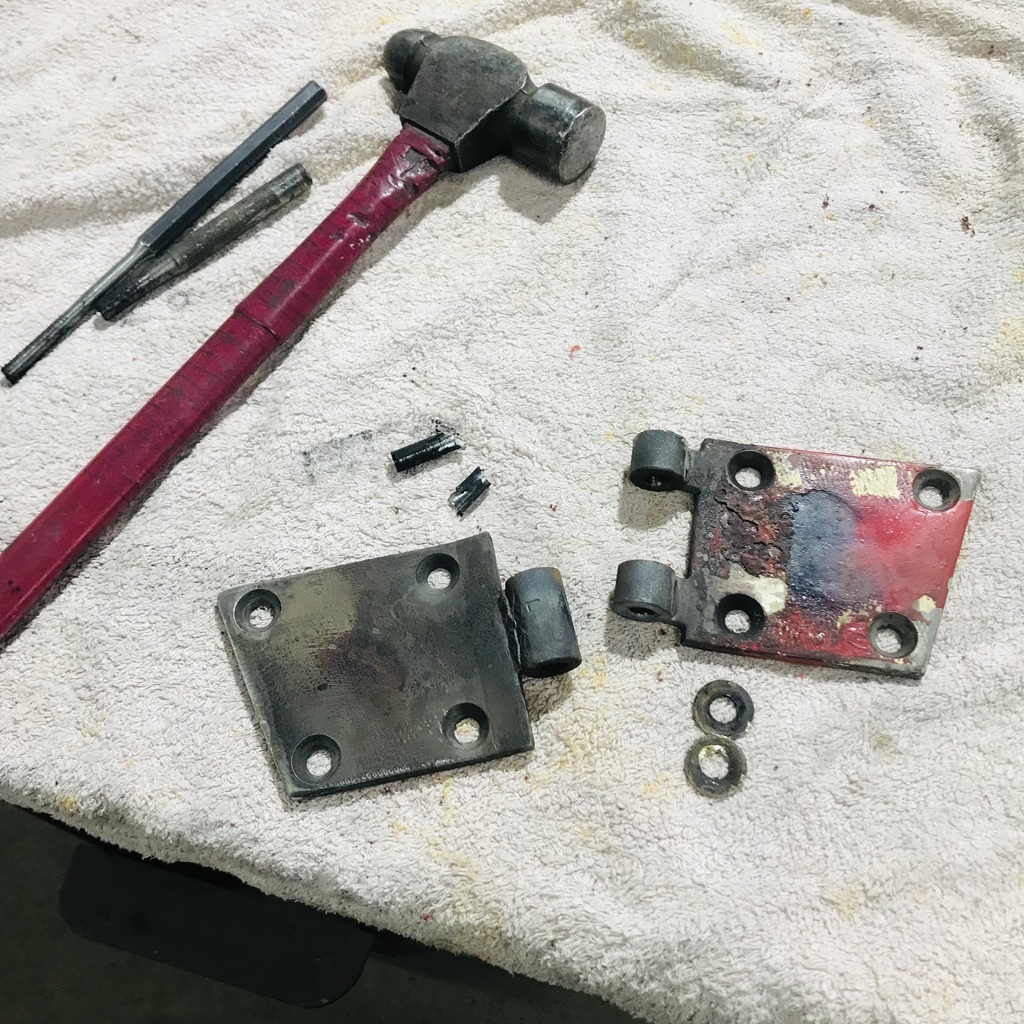 Cleaned it up with a small reamer and found that this bright stainless rod is a very nice fit. 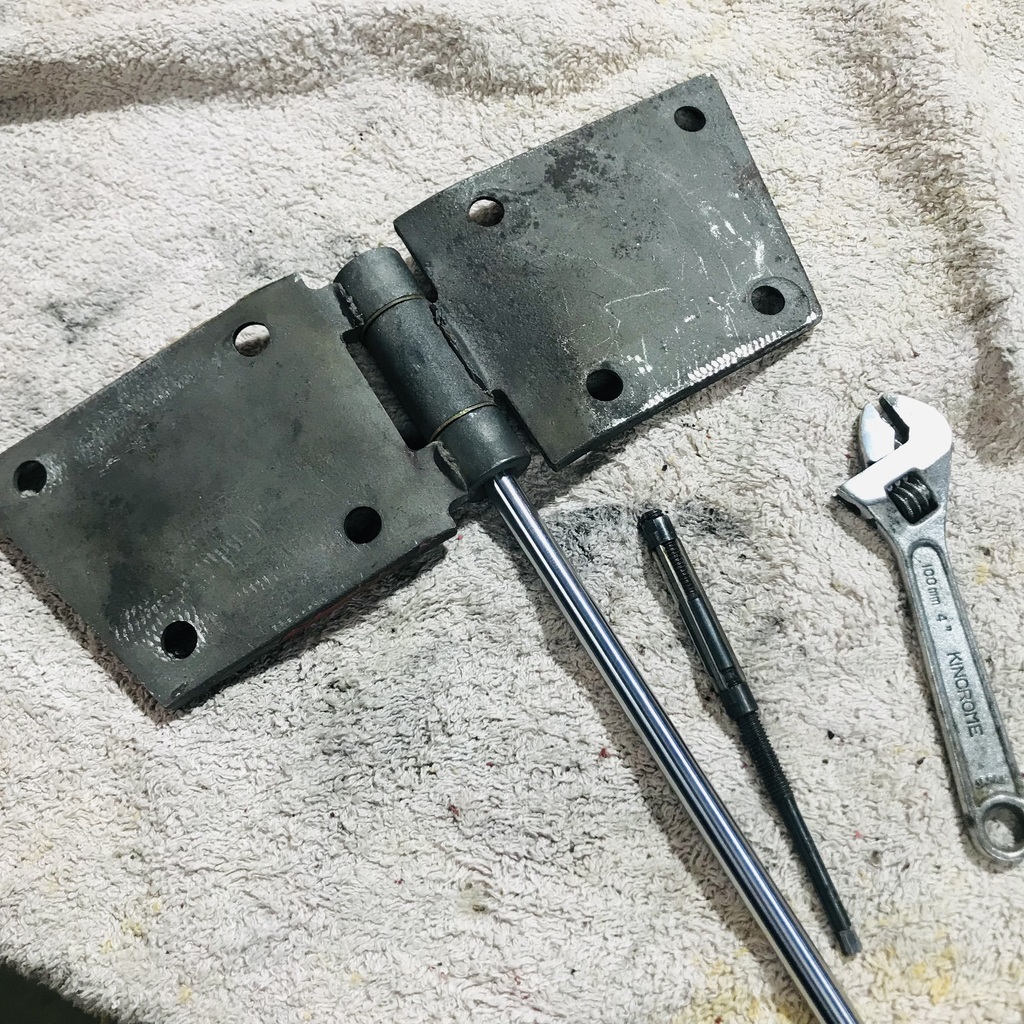 Ticked that little job off. So I got back onto the disassembly of the car. Started at the back. Bumpers off. They had stickers showing that they’re not original. Stripped out the boot, I didn’t know they had twin tanks! A lot simpler system than the XJ Jag's plethora of potential problems! Just a largish steel tube joining two small suitcase-like tanks, one in each wing. Didn’t find anything too terrible rust wise. This nest behind one of the tanks had two mummified rats in it. I can imagine the boot smelled pretty horrific at some time in the past! 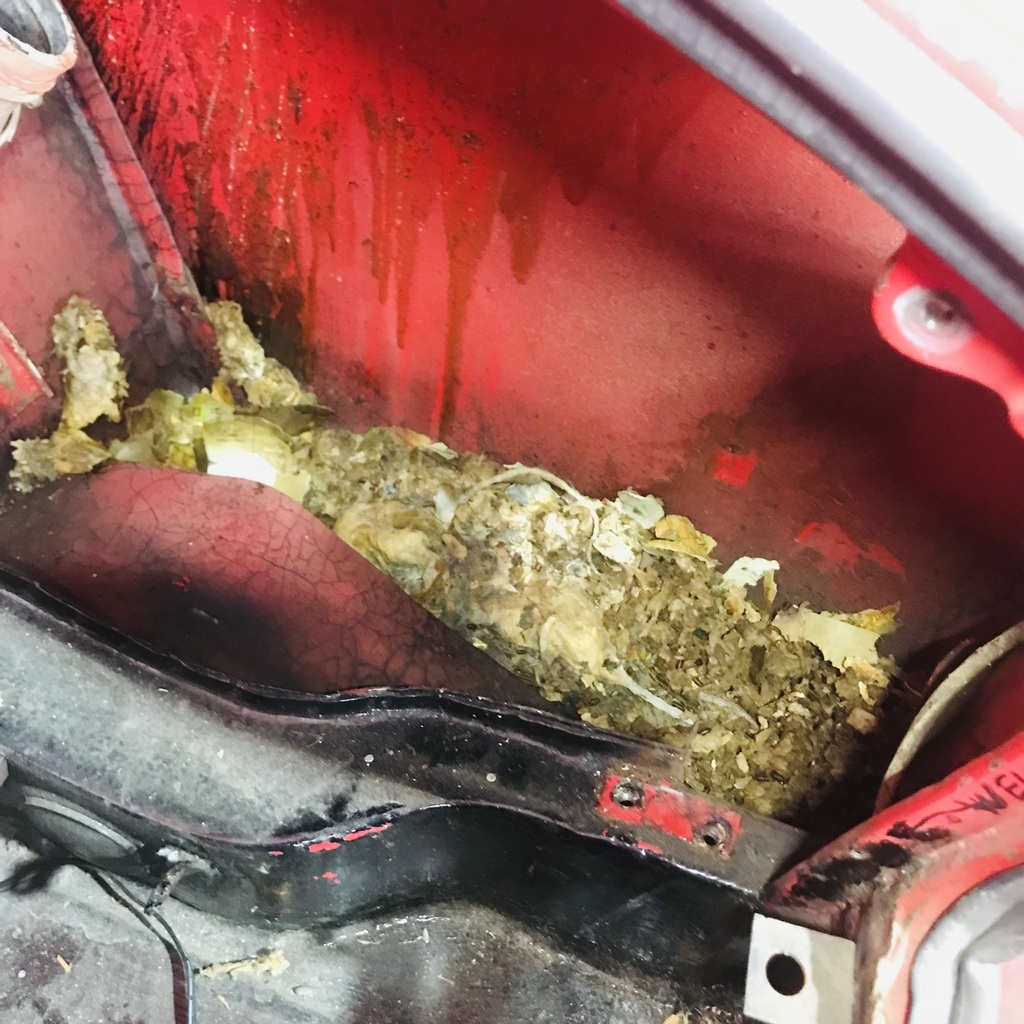 Once I had cleaned it out, the metal around it was pleasingly solid. 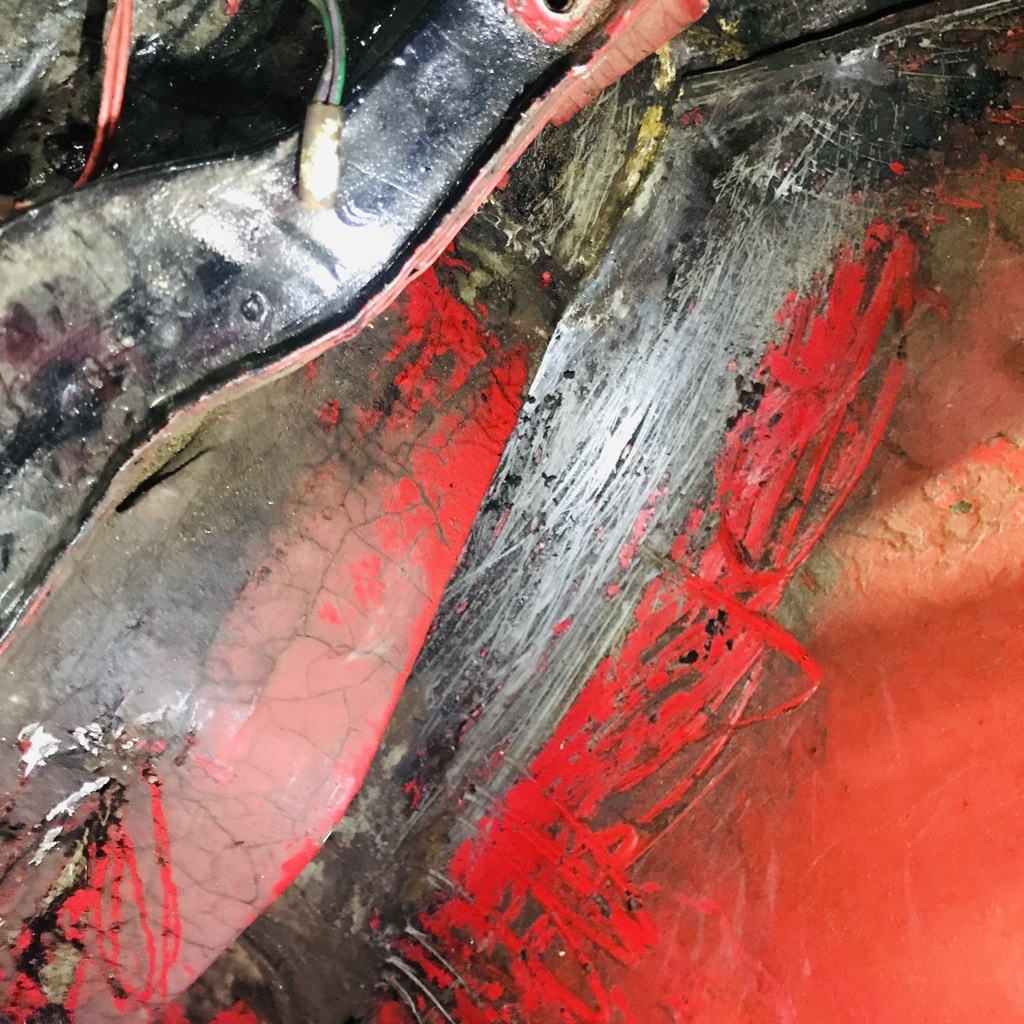 And the passenger side is just as good, unsurprisingly because it was so well covered in greasy curse word, it couldn’t have rusted. Ditto the tanks. 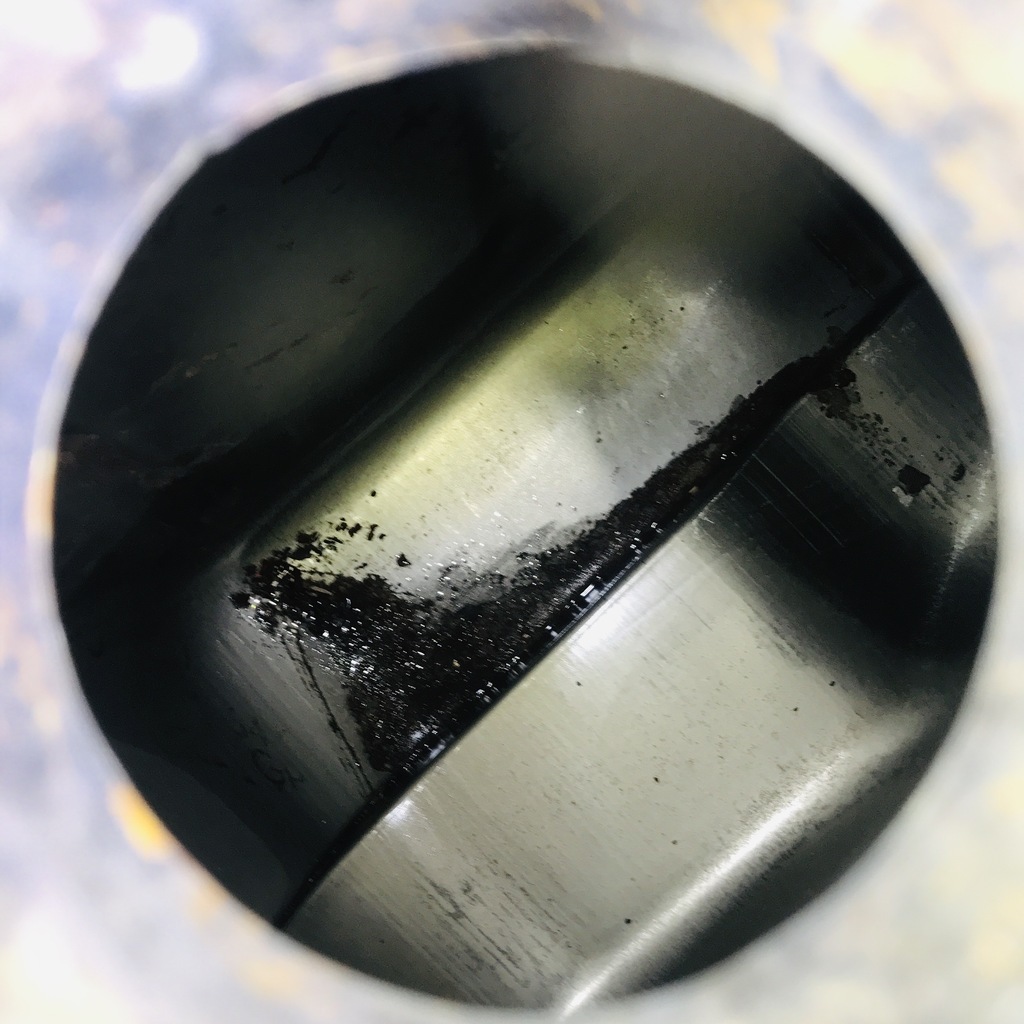 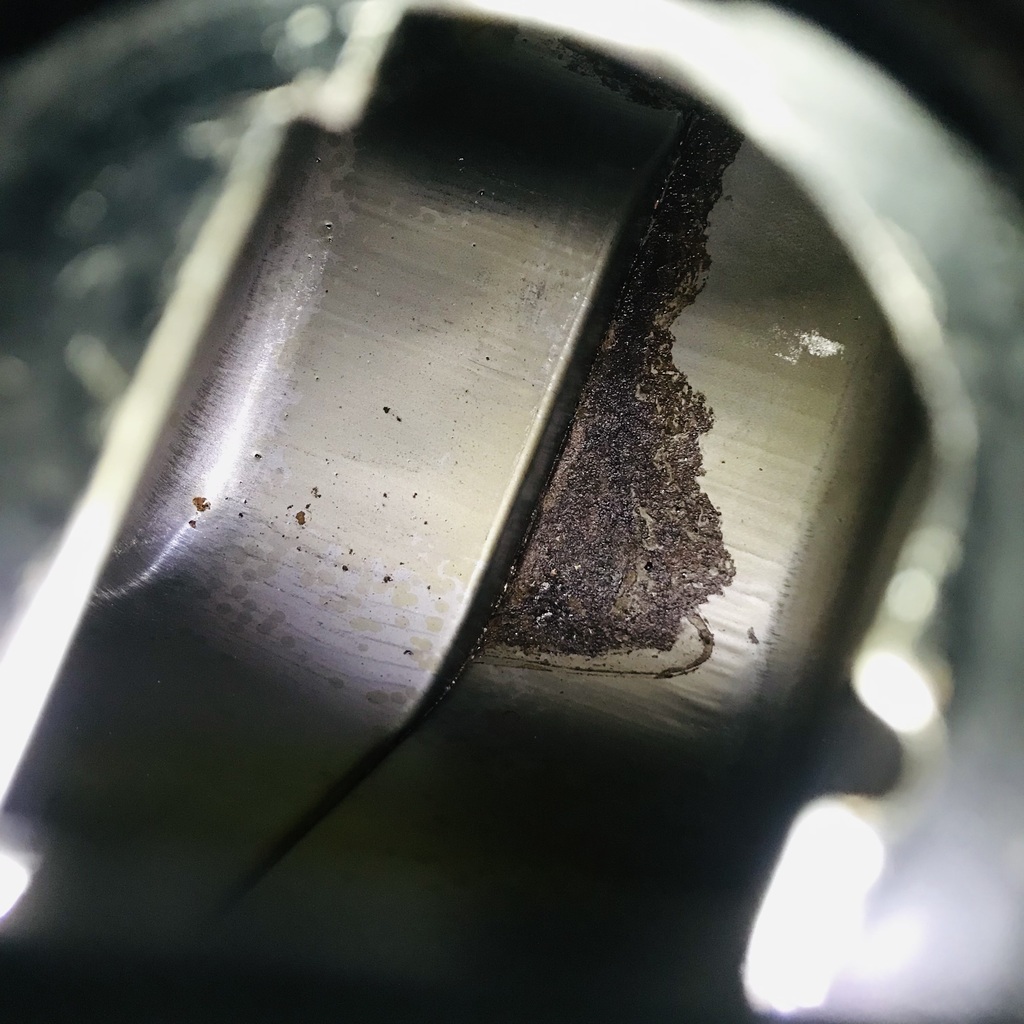 Surely they’re replacements? The boot floor seems to be ok, but there’s a heap of underseal, so could be some surprises there. 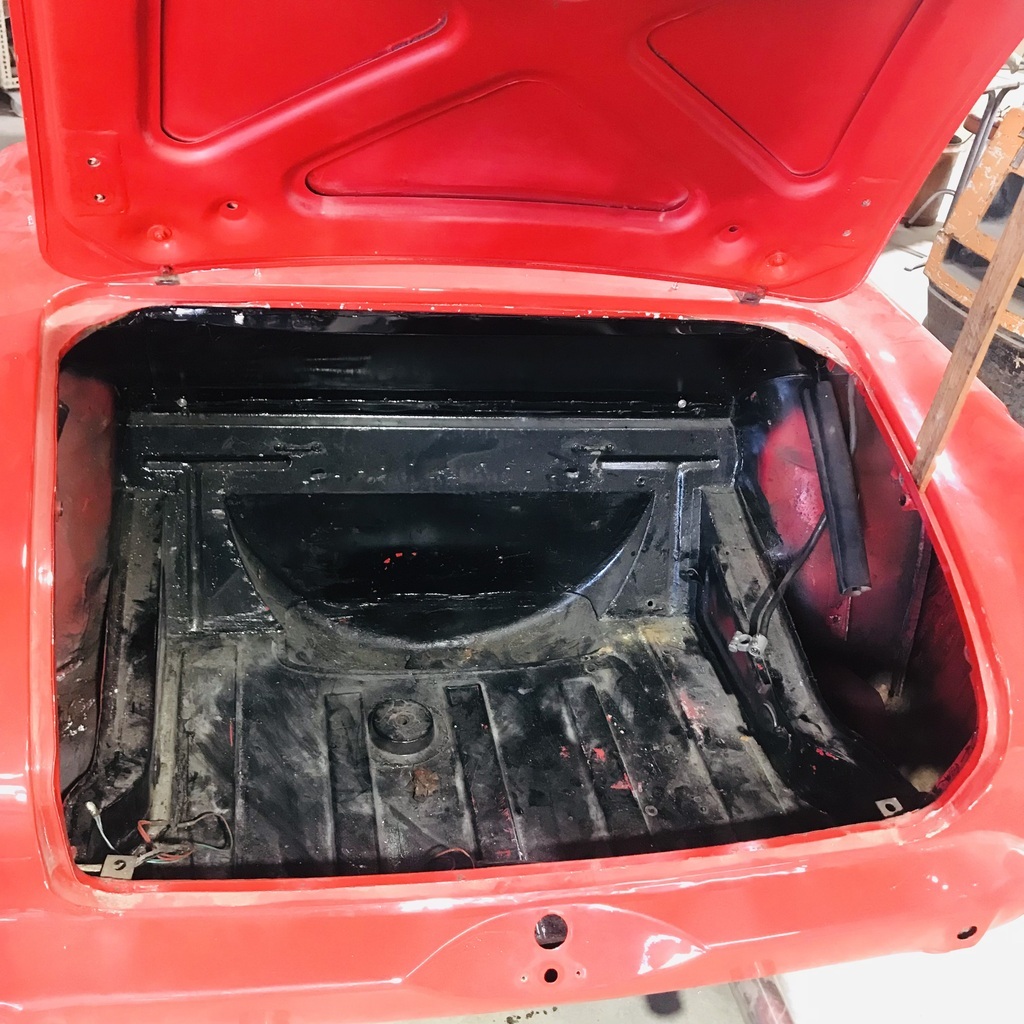 A pile of goodies to be cleaned and checked. 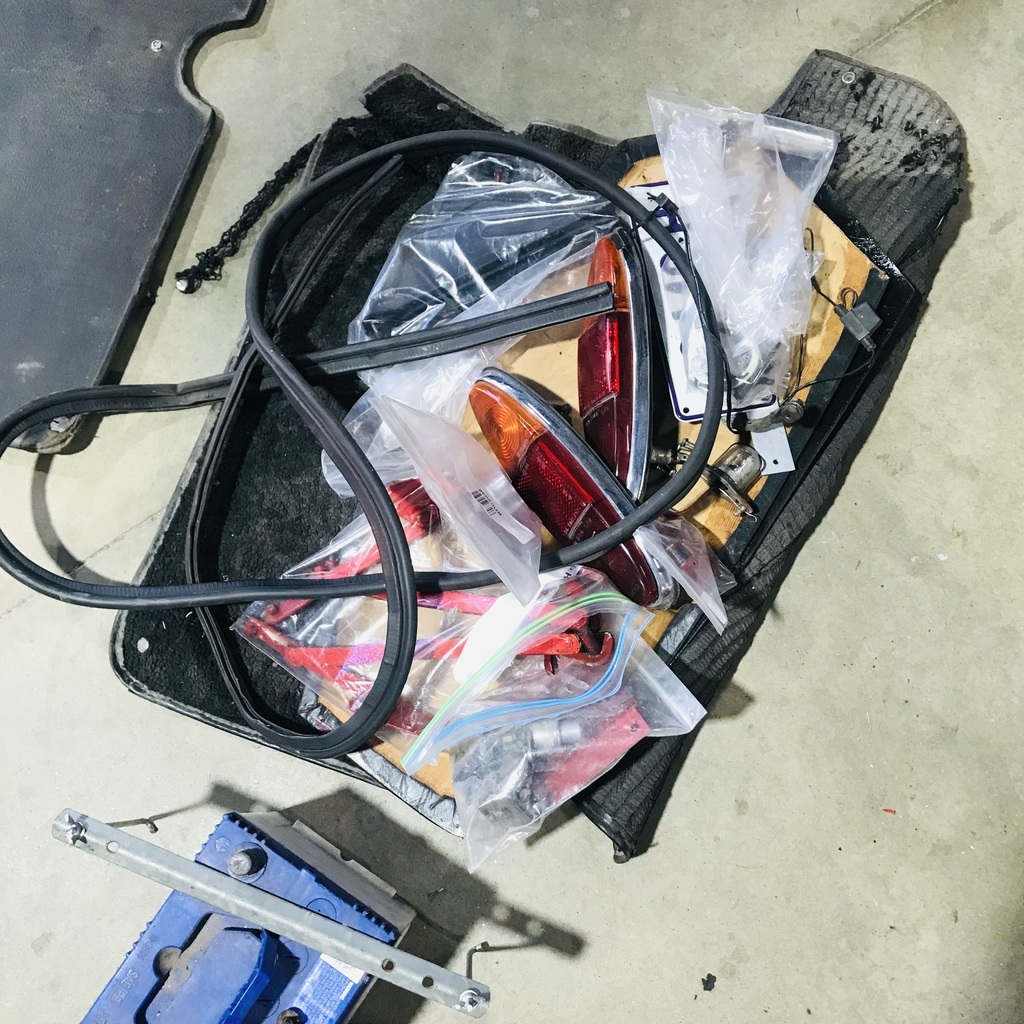 Starting to look like a teardown now. 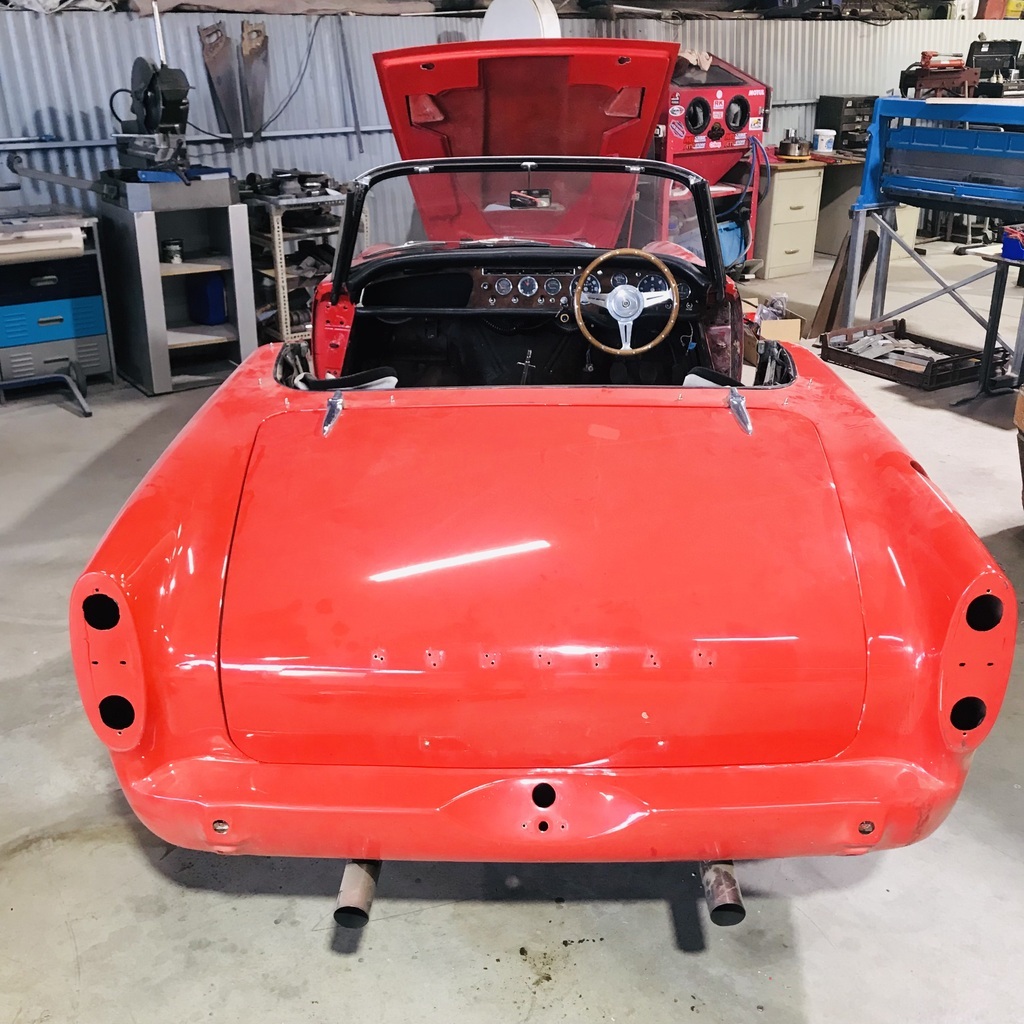 Thanks. |
| |
|
|
|
|
|
Oct 13, 2024 14:21:42 GMT
|
having had an alpine in the past , with a holbay 120 engine in it , i can testify to the fact that the t piece that joins the tanks and goes to the engine can get blocked with rusty bits ,however , looking at your tanks , i doubt that will be a problem  |
| |
|
|
gazzam
Part of things
 
Posts: 746 
|
|
|
|
You’re right Robert, I’m really pleased with the condition of the tanks. Probably swings and roundabouts… Continuing to strip the car. Under bonnet is today’s job. Before I removed anything I made a profile of the engine bay. The car came with a new (steel) bonnet, and I definitely want to use it rather than the fibreglass POS that I took off this morning. I thought this might be handy to see if it needs a scoop in order to clear this air cleaner. 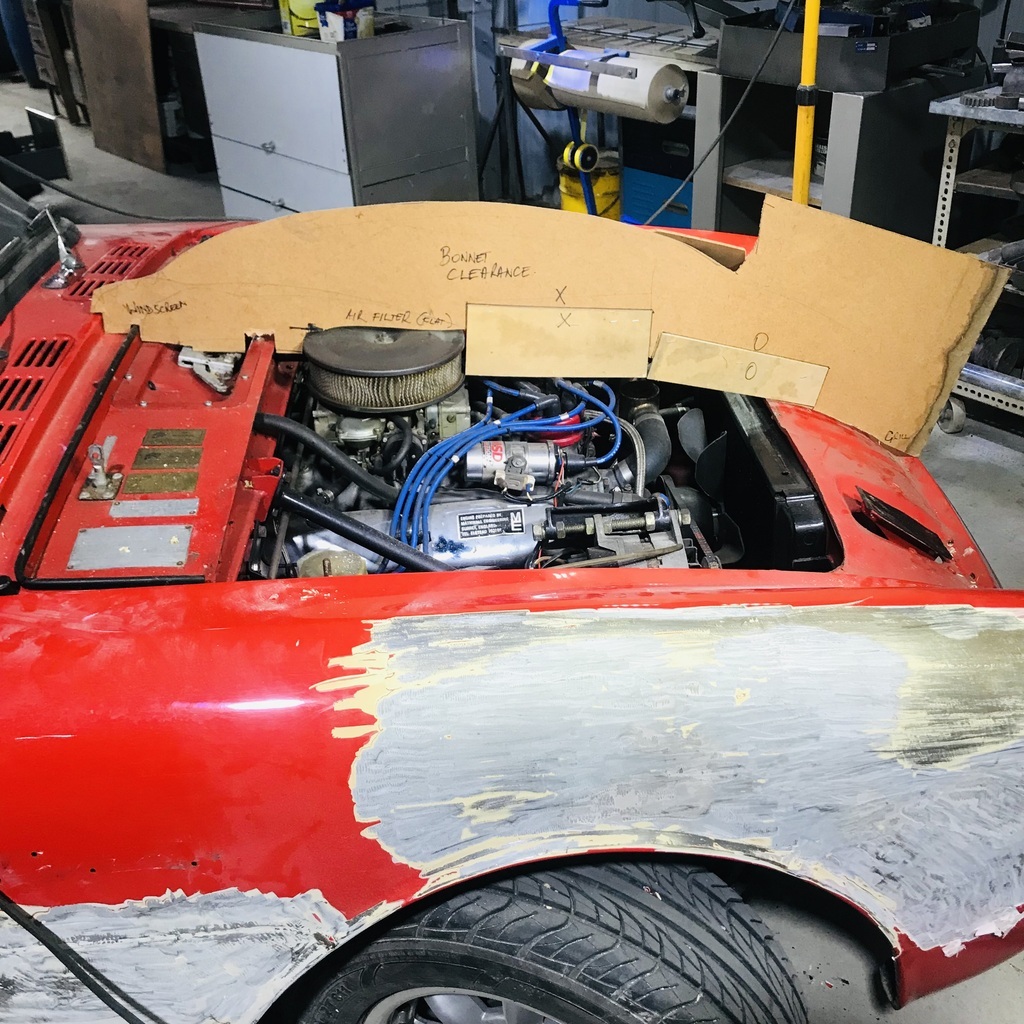 Anyway I removed various things from the engine bay. Alternator, brake booster, rad, fan, other bits and pieces. I’d like to simplify the engine bay. The alternator is mounted on a huge bracket, I’d like to do something to reduce the size of that. 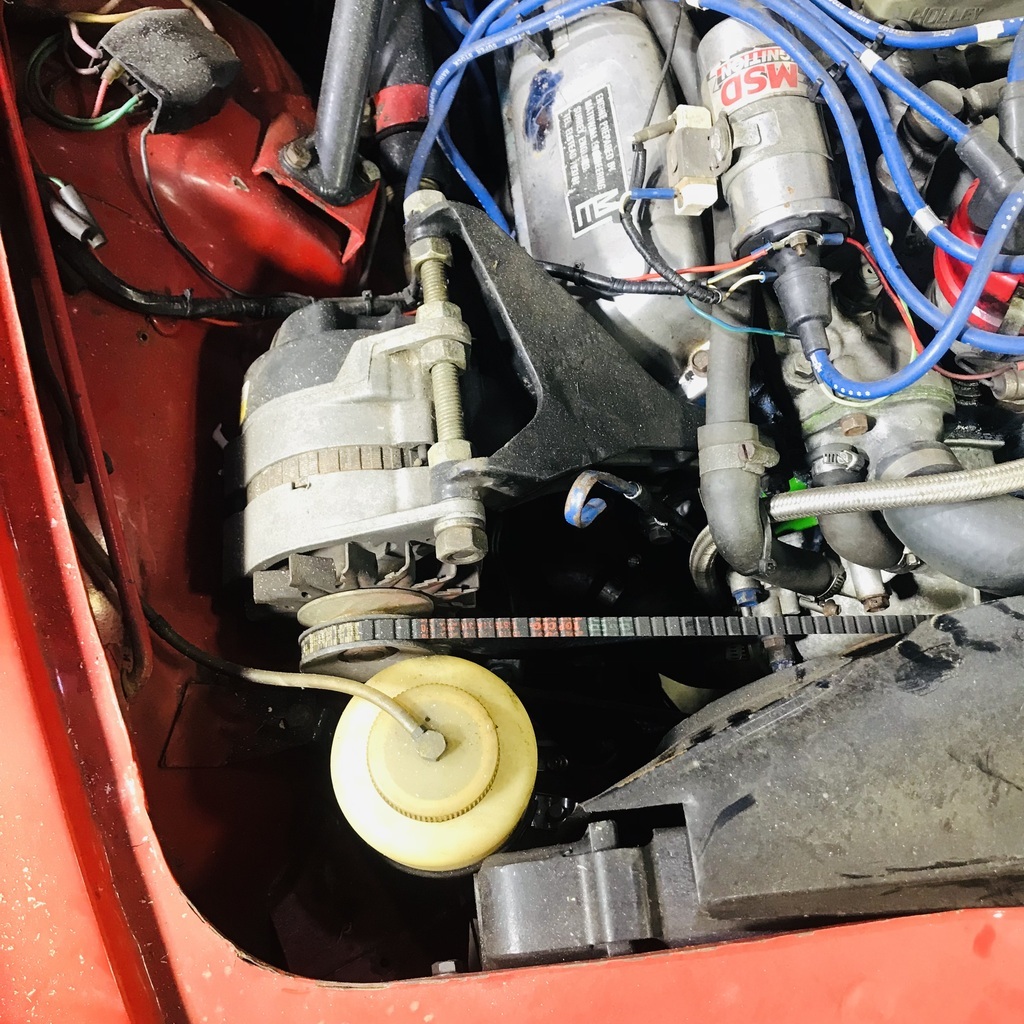 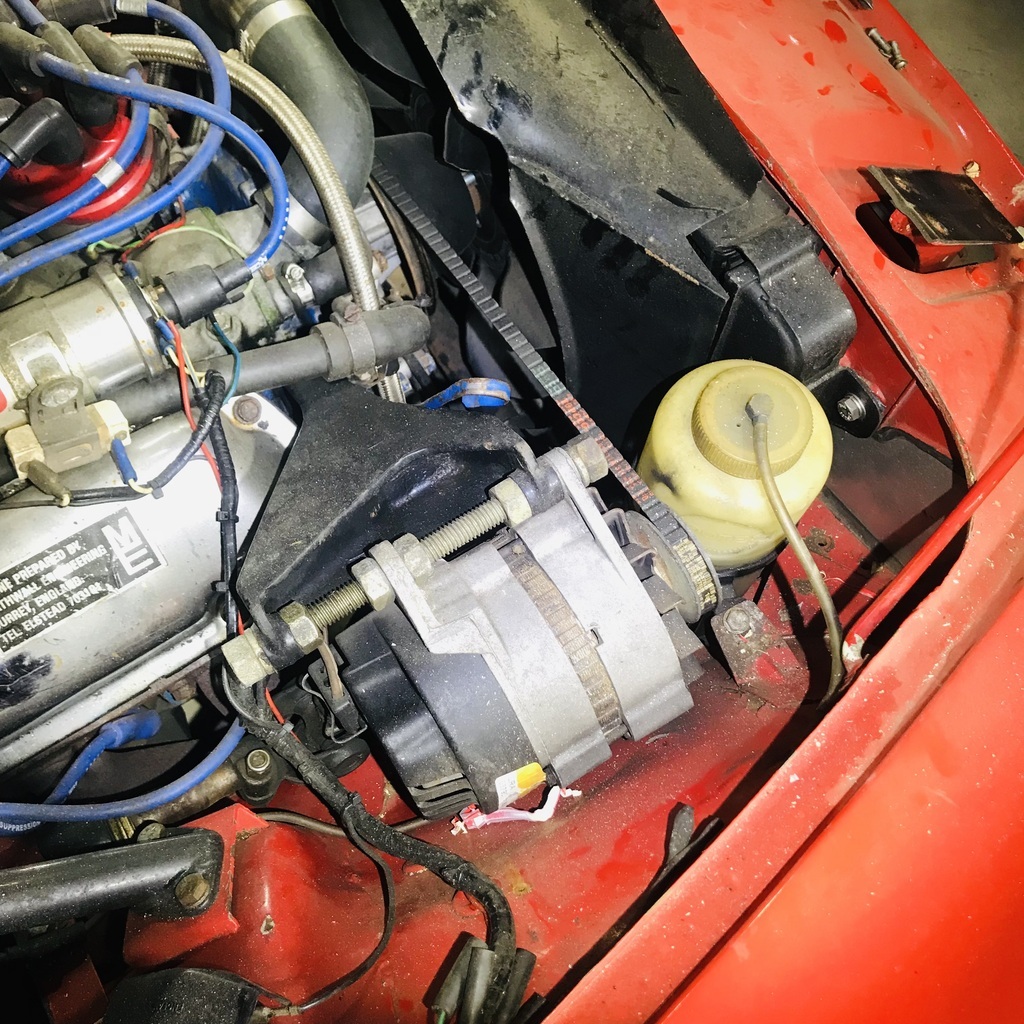 There’s also this conglomeration of stuff for the cooling system. 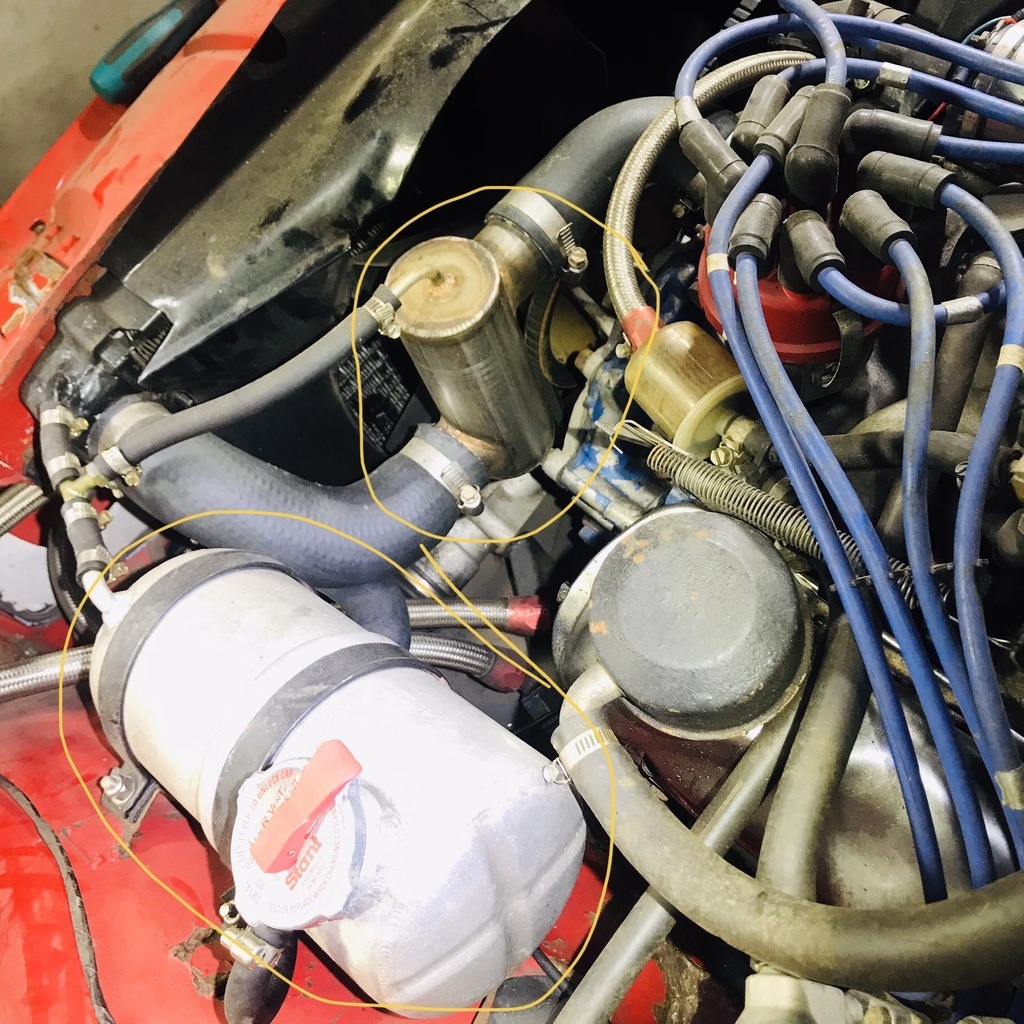 The bits I’ve circled are probably going. It means I’ll need to add a cap to the rad, but that’s not a drama. And I'd like to do away with the fan in favour of an electric one. If I can get a water pump that doesn’t have this big bearing tower, and uses a flatter pulley that would make room for an electric fan, and simplify rad installation. 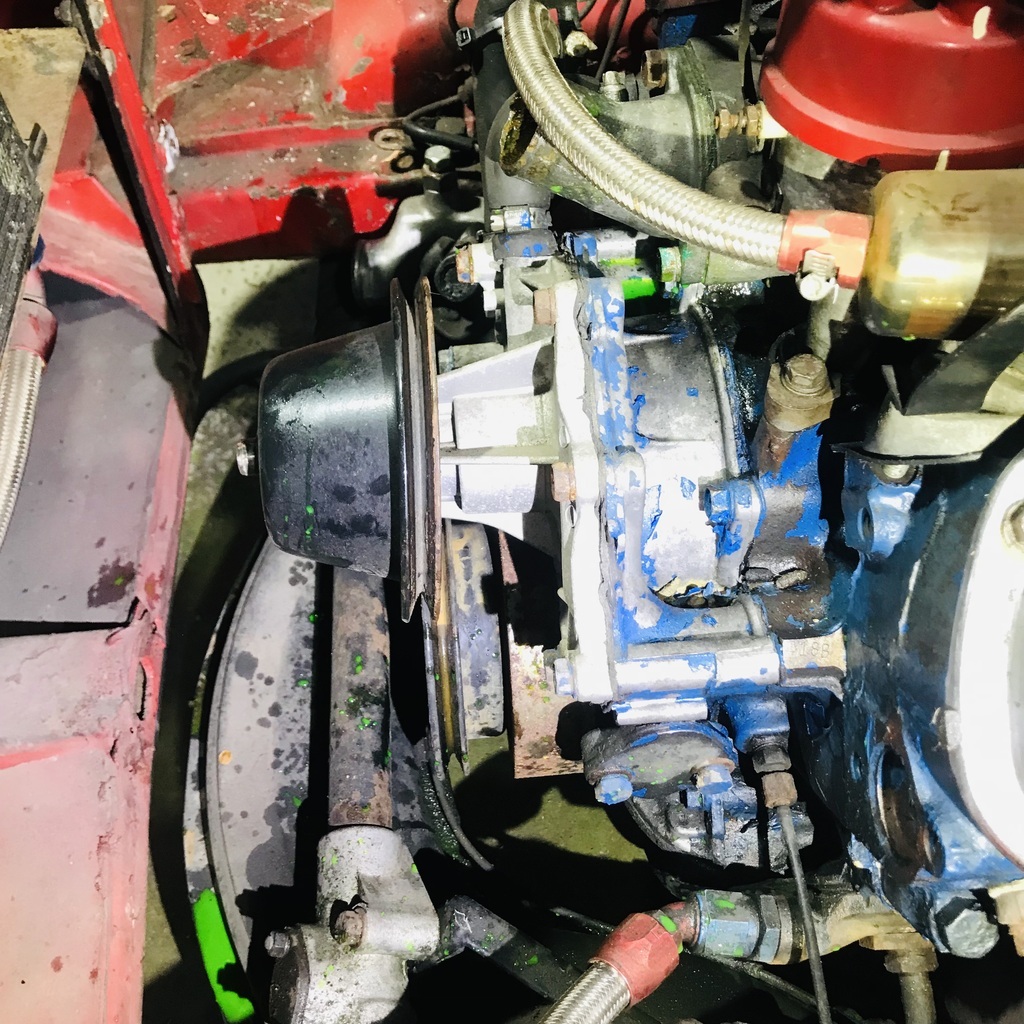 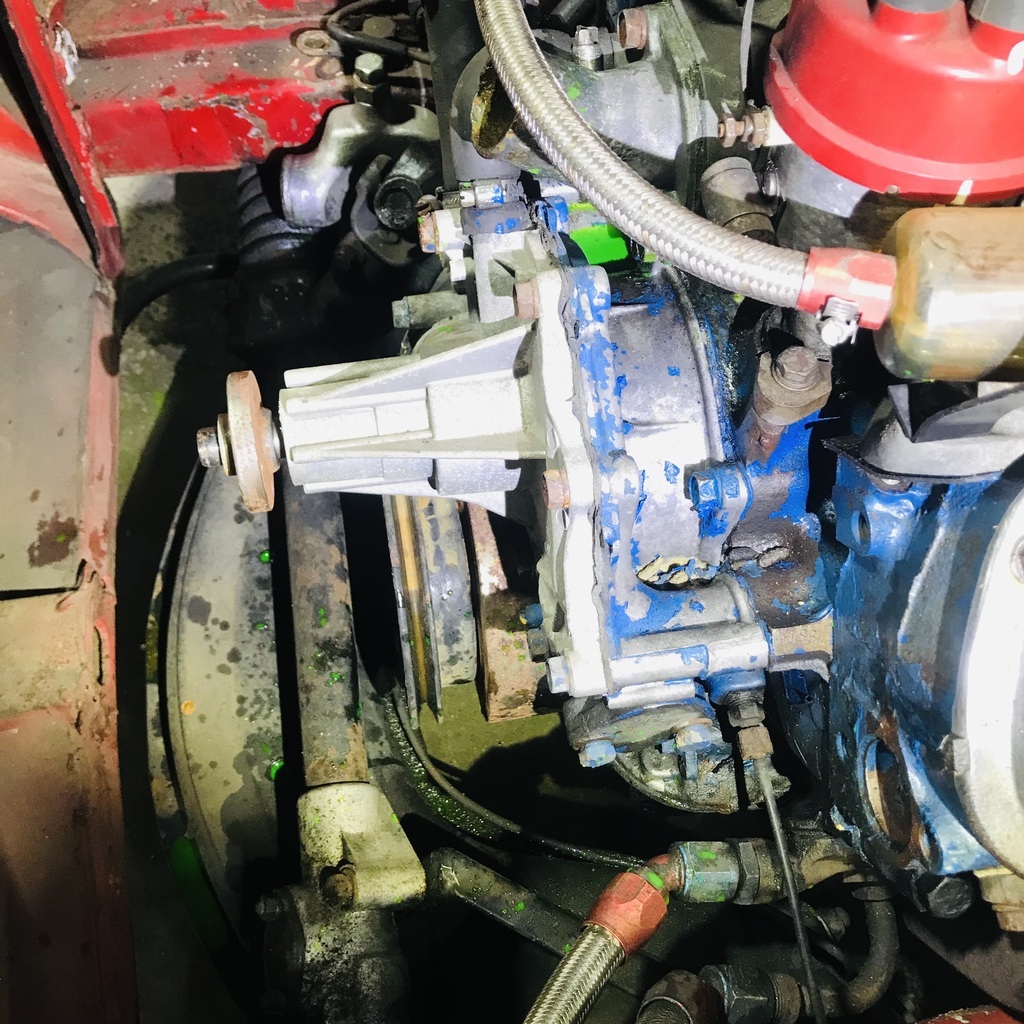 If anyone knows what I need to source a suitable water pump, please give me a yell. This sticker may be of interest to some on here: 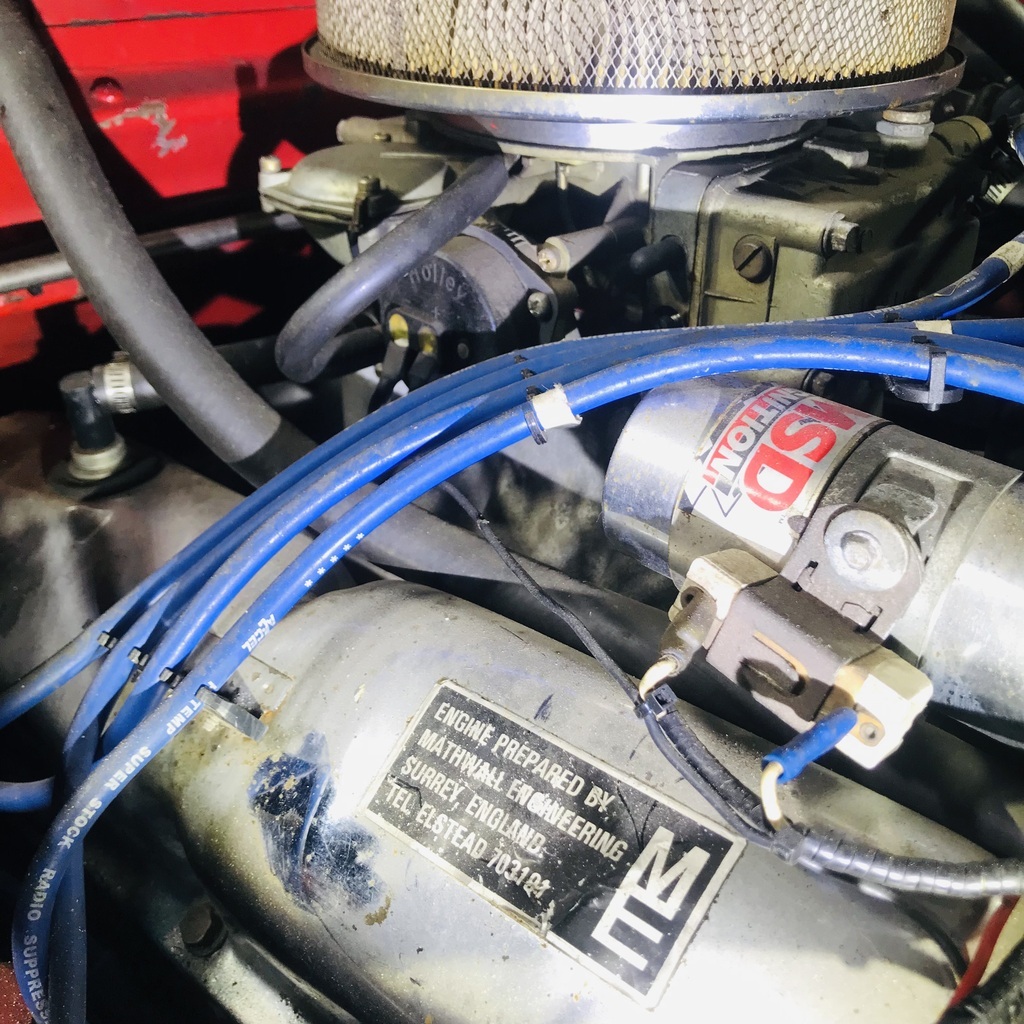 I don’t know about actually getting the engine out. I’ve read that it’s possible both from the top and bottom. But lifting the body off doesn’t look possible with the headers in place. And they look like they won’t be an easy job. I’ll get under it tomorrow and see how it looks. Thanks. |
| |
Last Edit: Oct 14, 2024 7:12:44 GMT by gazzam
|
|
|
|


