glenanderson
Club Retro Rides Member
Posts: 4,357
Club RR Member Number: 64
|
1965 Sunbeam Tigerglenanderson
@glenanderson
Club Retro Rides Member 64
|
|
|
|
I’m undecided about whether or not to invest in a blasting pot for my lorry chassis. Part of me likes the idea of nice clean metal, the other part of me is horrified by the dust, mess and expense and says that the needle gun will be fine.
Looking at this, I think the balance is tipping towards the needle gun.
|
| |
My worst worry about dying is my wife selling my stuff for what I told her it cost...
|
|
|
|
|
|
|
|
|
But the body needs cleaning out first. There are plenty of cavities that must be emptied out, either by vacuuming or blowing. Just for clarity Garry do you mean you , or the car ? 😁 |
| |
|
|
|
|
|
Nov 17, 2024 17:33:01 GMT
|
|
Blasting a car is horrible miserable work.
You have to be careful too, because the blasting can build up heat and warp the sheetmetal.
So you cant hand it off to just anybody either.
But clean blasted metal is nice to work with...
|
| |
|
|
glenanderson
Club Retro Rides Member
Posts: 4,357
Club RR Member Number: 64
|
1965 Sunbeam Tigerglenanderson
@glenanderson
Club Retro Rides Member 64
|
Nov 17, 2024 17:45:10 GMT
|
|
If I had sheet steel bodywork to sort out then I’d probably take the plunge and buy a blaster; but I have a hefty channel section chassis, so I think I’ll pass. 😃👍
|
| |
My worst worry about dying is my wife selling my stuff for what I told her it cost...
|
|
jimi
Club Retro Rides Member
Posts: 2,233 
|
|
Nov 17, 2024 18:28:22 GMT
|
Needle guns are great for heavy duty steel, but I wouldn't put one near sheet metal. They are used a lot offshore, although their use is reducing and is much more tightly monitored and controlled, mainly due to HAVS concerns. If you are using a needle gun get proper high quality ear defenders (I'd recommend 3M Peltor Optime III I used them for nearly 30 years) and take suitable HAVS precautions. Try to limit your daily usage and don't use it for long continuous periods, take frequent breaks.. Hearing loss and HAVS are permanent and not nice  |
| |
Black is not a colour ! .... Its the absence of colour
|
|
glenanderson
Club Retro Rides Member
Posts: 4,357
Club RR Member Number: 64
|
1965 Sunbeam Tigerglenanderson
@glenanderson
Club Retro Rides Member 64
|
Nov 17, 2024 19:35:42 GMT
|
|
Yeah, I have a set of Peltors and some heavy padded anti vibration gloves. 👍
|
| |
My worst worry about dying is my wife selling my stuff for what I told her it cost...
|
|
gazzam
Part of things
 
Posts: 741 
|
|
|
|
But the body needs cleaning out first. There are plenty of cavities that must be emptied out, either by vacuuming or blowing. Just for clarity Garry do you mean you , or the car ? 😁 Both bodies need cleaning out, the car by vacuuming/ blowing. Mine by flushing with ale. Hope that clears up any confusion! Almost had a break from the Tiger yesterday, but I did get as much grit and dust out of the shell as I could. Used the vacuum and the leaf blower and turned it over about a zillion times. Then used the leaf blower to blow the dust out of the shed. Today I opened the booth and moved the shell out. The booth is still filthy, but I still have the doors and boot lid to blast so I’ll leave it till they’re done. So after a bit of a tidy up, it was time to start fixing the myriad of problems on the shell. I closed my eyes and threw a dart at the shell and this is where it landed. 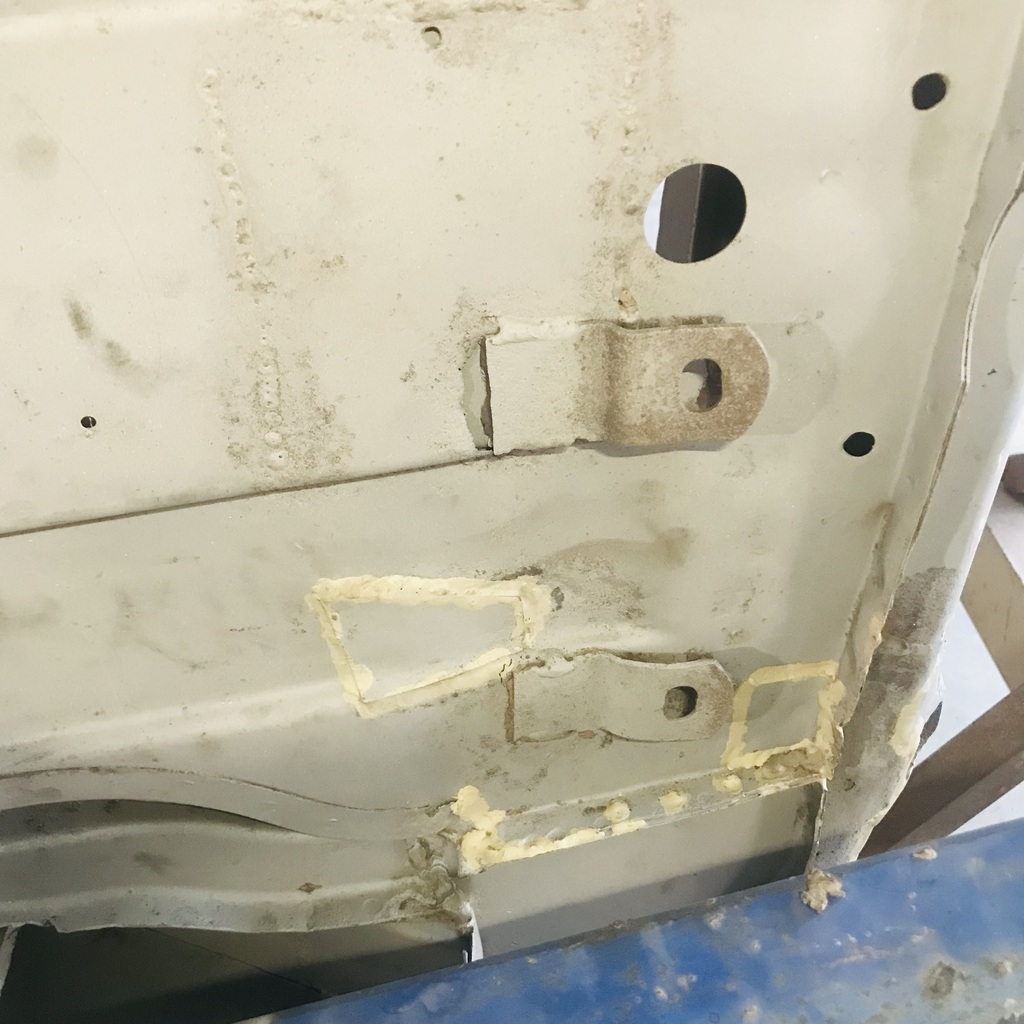 That’s the RH underside rear corner, those brackets support the RH exhaust. This is it from inside the boot: 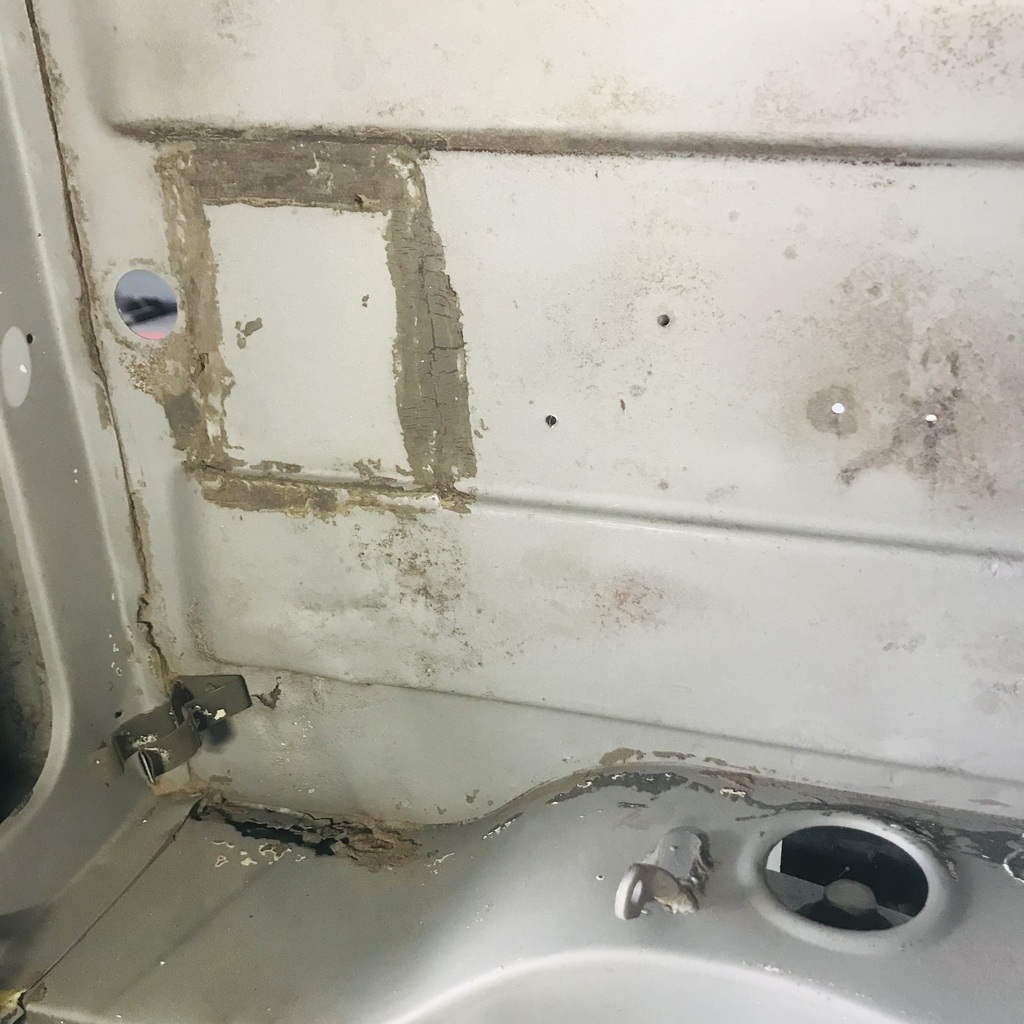 So a couple of patches, some rust, a good place to start… This is the area of the boot floor that will be replaced. 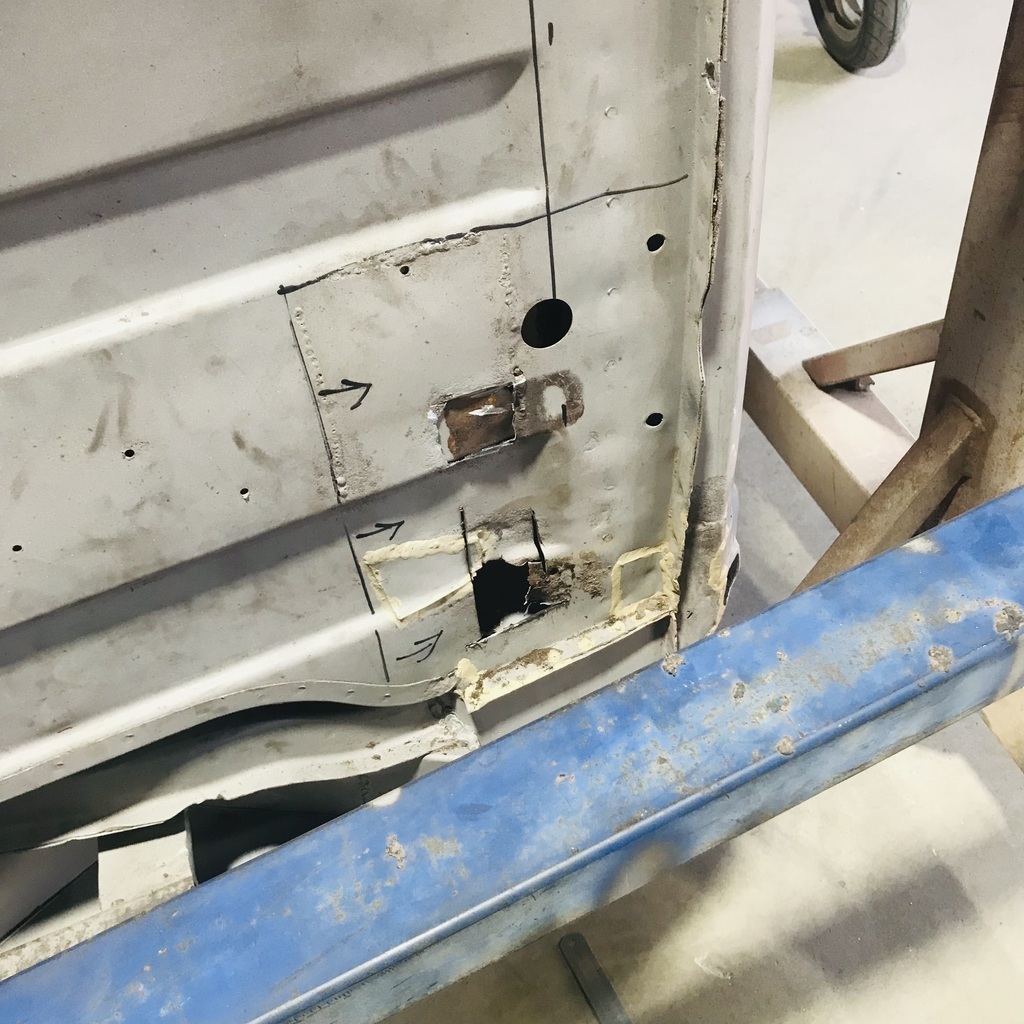 As you can see, I’ve already taken the tailpipe brackets off. Just so I could make a paper template. Not really necessary, it’s a mirror image of the other side, but sort of a measure twice, cut once approach. I have to ease myself back into bodywork, find my feet again, so to speak. Decided to make a press tool to form the necessary piece. Started with a bit of 75x6 flat. 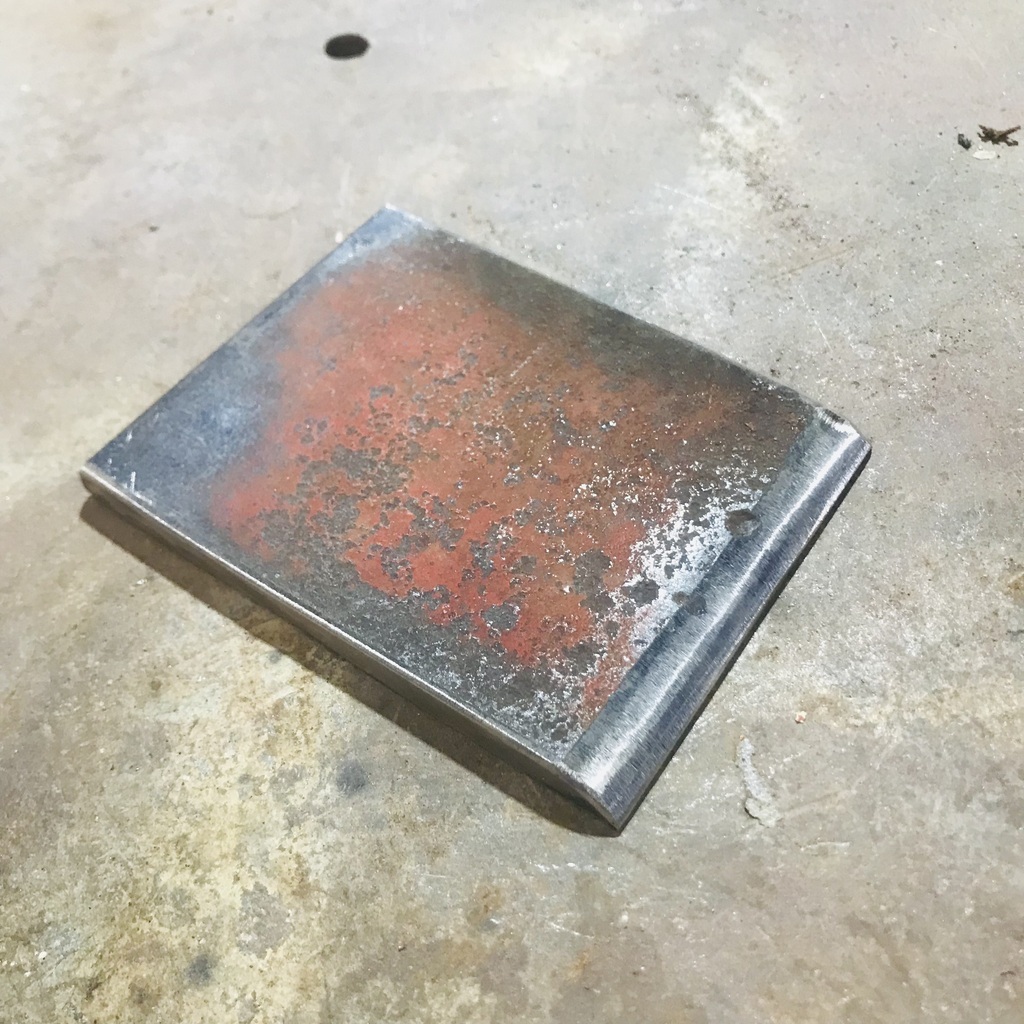 And welded some bits of 25x6 to the bottom of a railway tie. 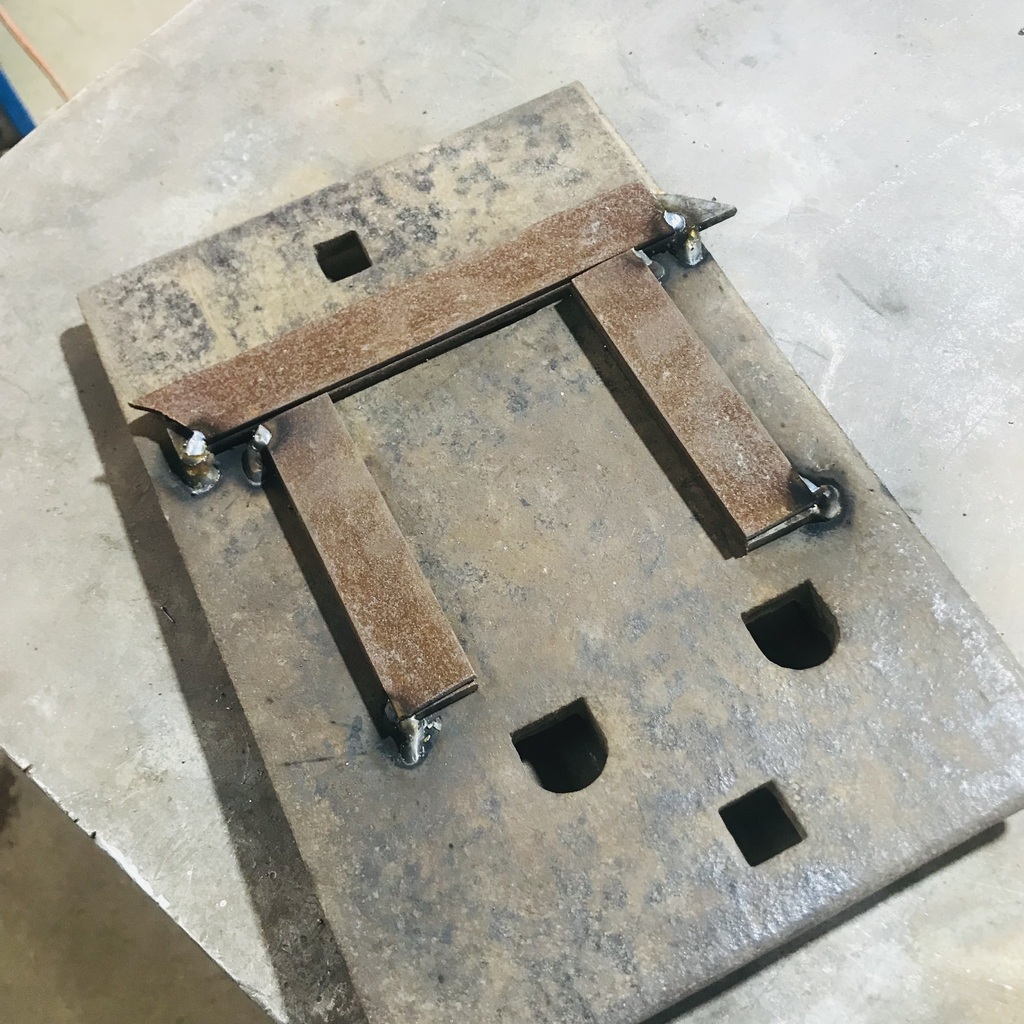 Put a piece of 20# between then and squeezed them together in the press. This was the result. After some fettling of course. 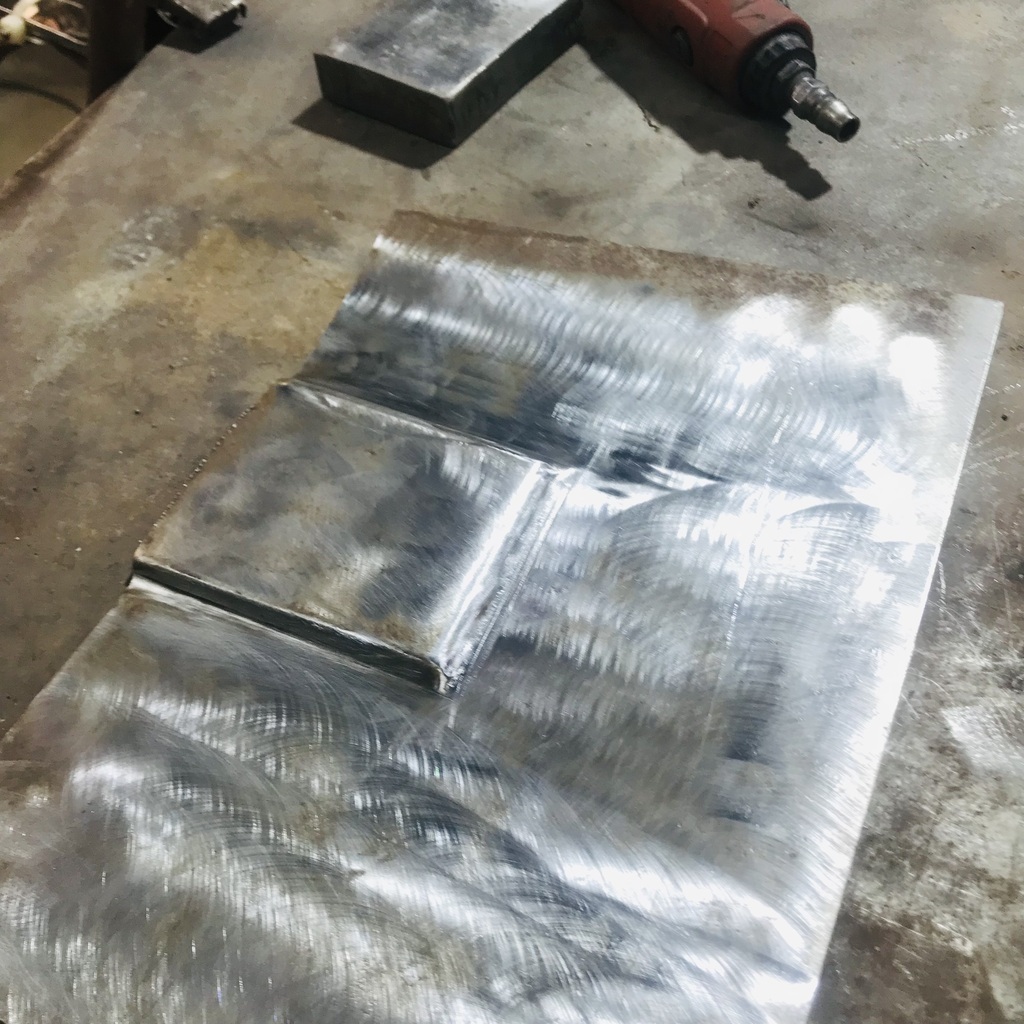 That’ll work, I think. Started to cut the old bit out, and realised the other problems would have to be sorted first. This bit also needed to come out. I realise this is hard to follow, I’m having a hard time working out what’s going on in these pics myself. The shell is on its side. The yellow line is where the fuel cross pipe would be. 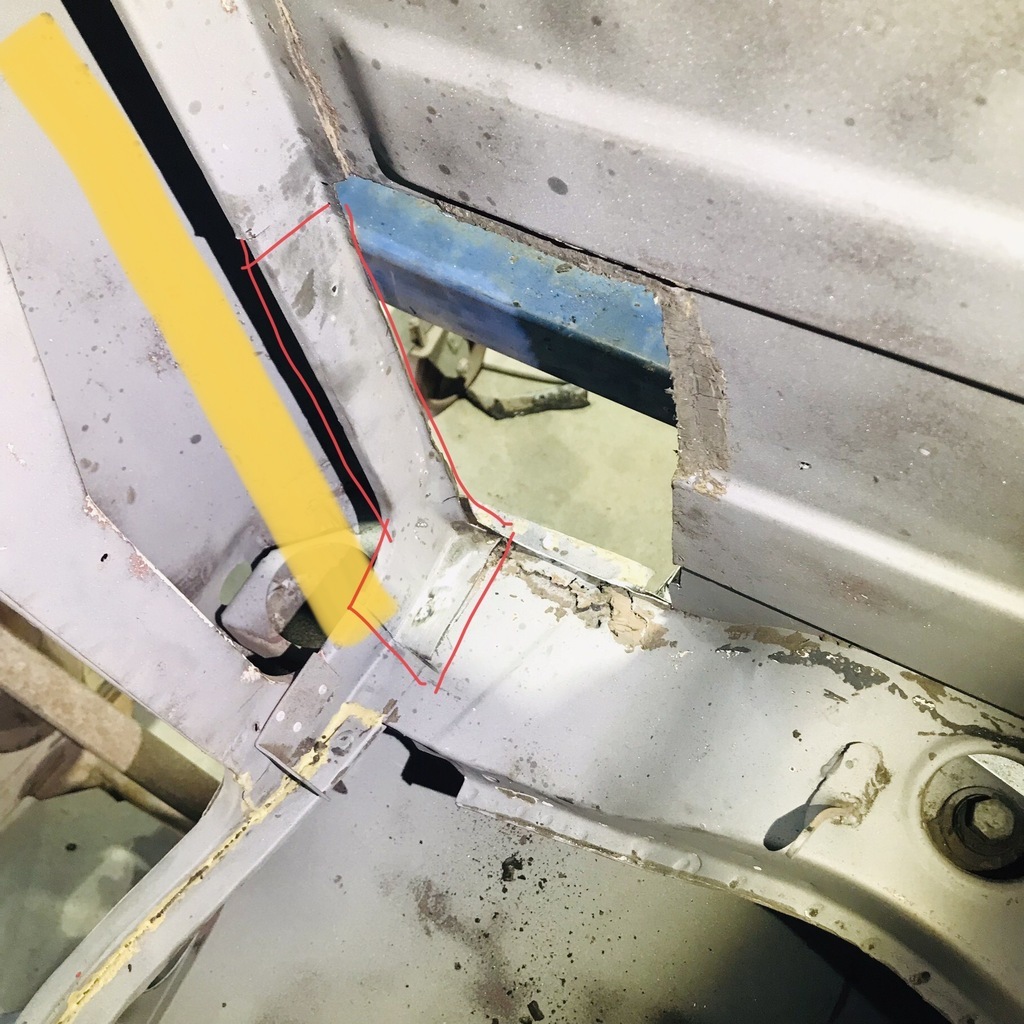 And this bit. The side of the chassis leg. 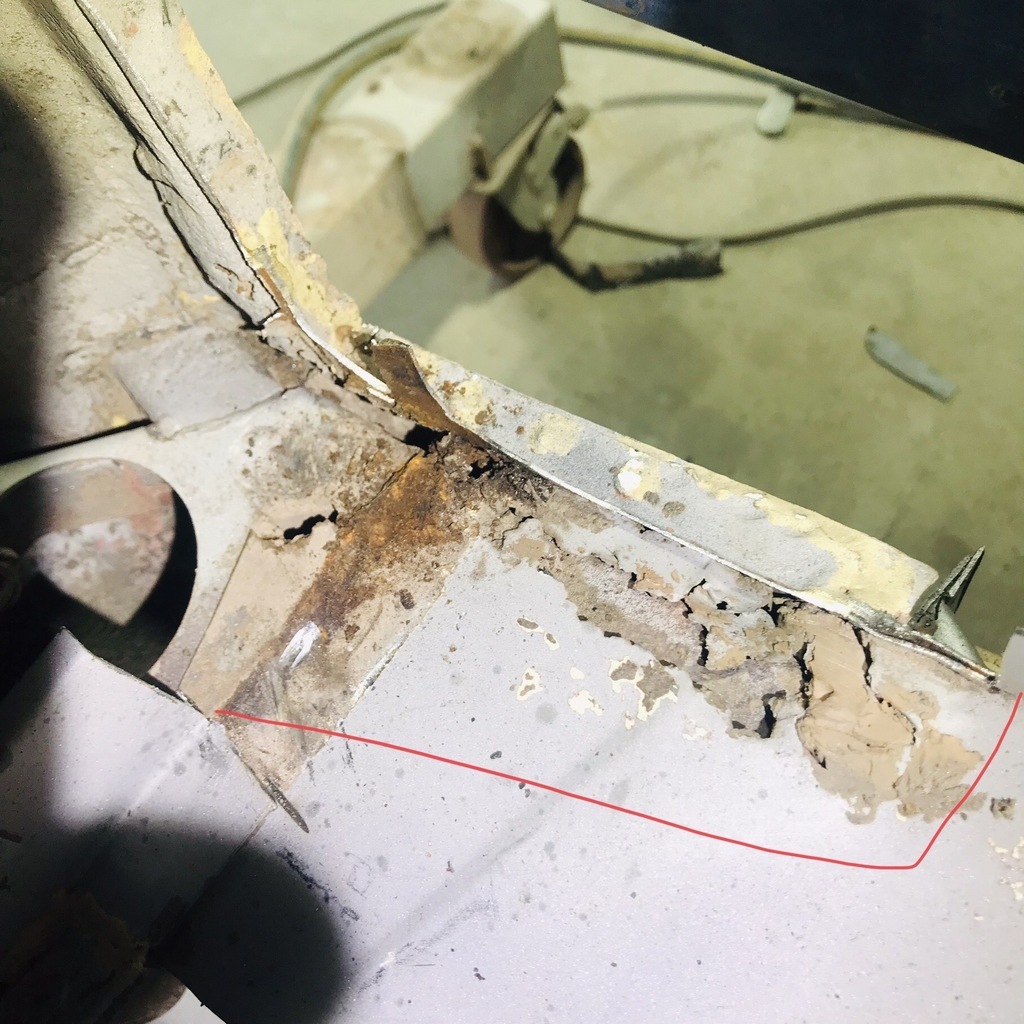 So at the end of play today we have this. From the outside. The blue thing is part of the rotisserie, not very conveniently placed. 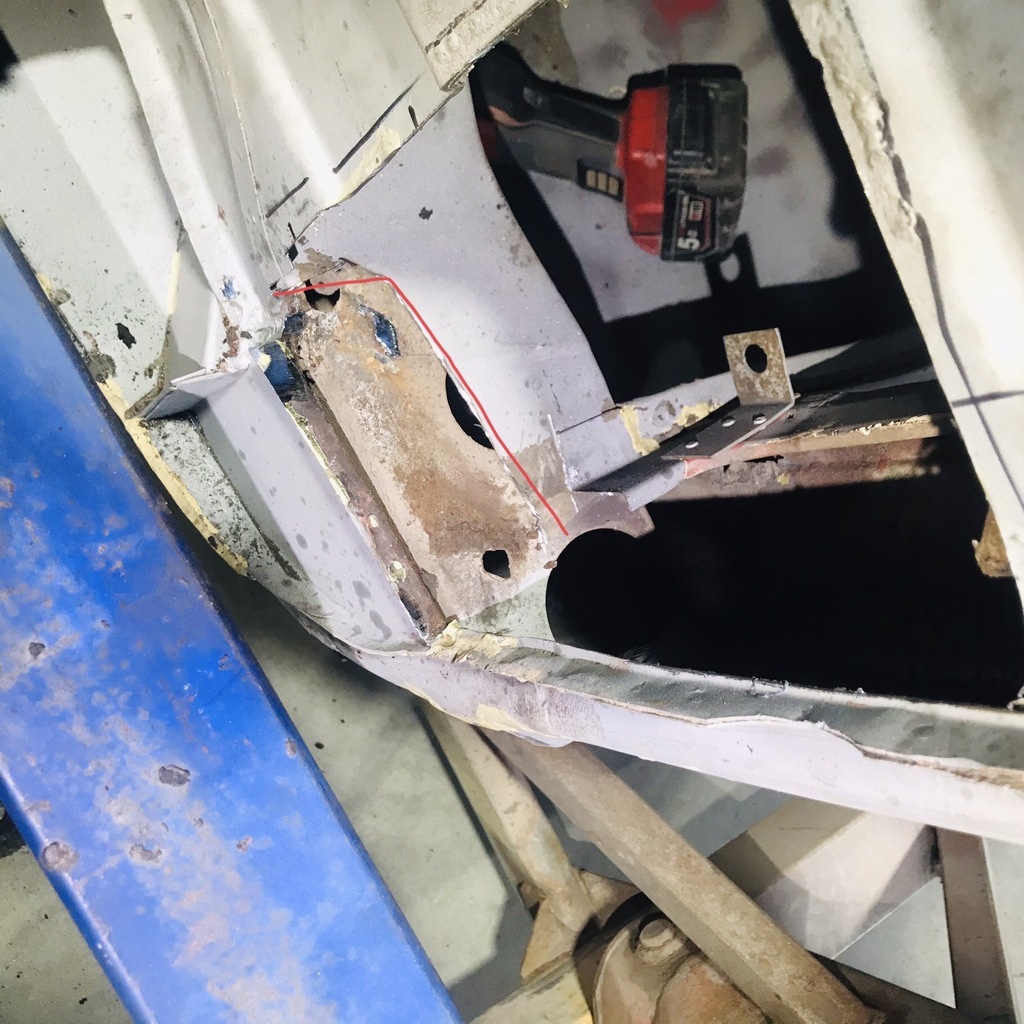 More tomorrow. Thanks. |
| |
|
|
|
|
|
Nov 19, 2024 13:18:31 GMT
|
|
Ew! crusty!
|
| |
|
|
gazzam
Part of things
 
Posts: 741 
|
|
|
|
The words 'rabbit hole' come to mind. The repair area keeps growing… I was always going to fix this. 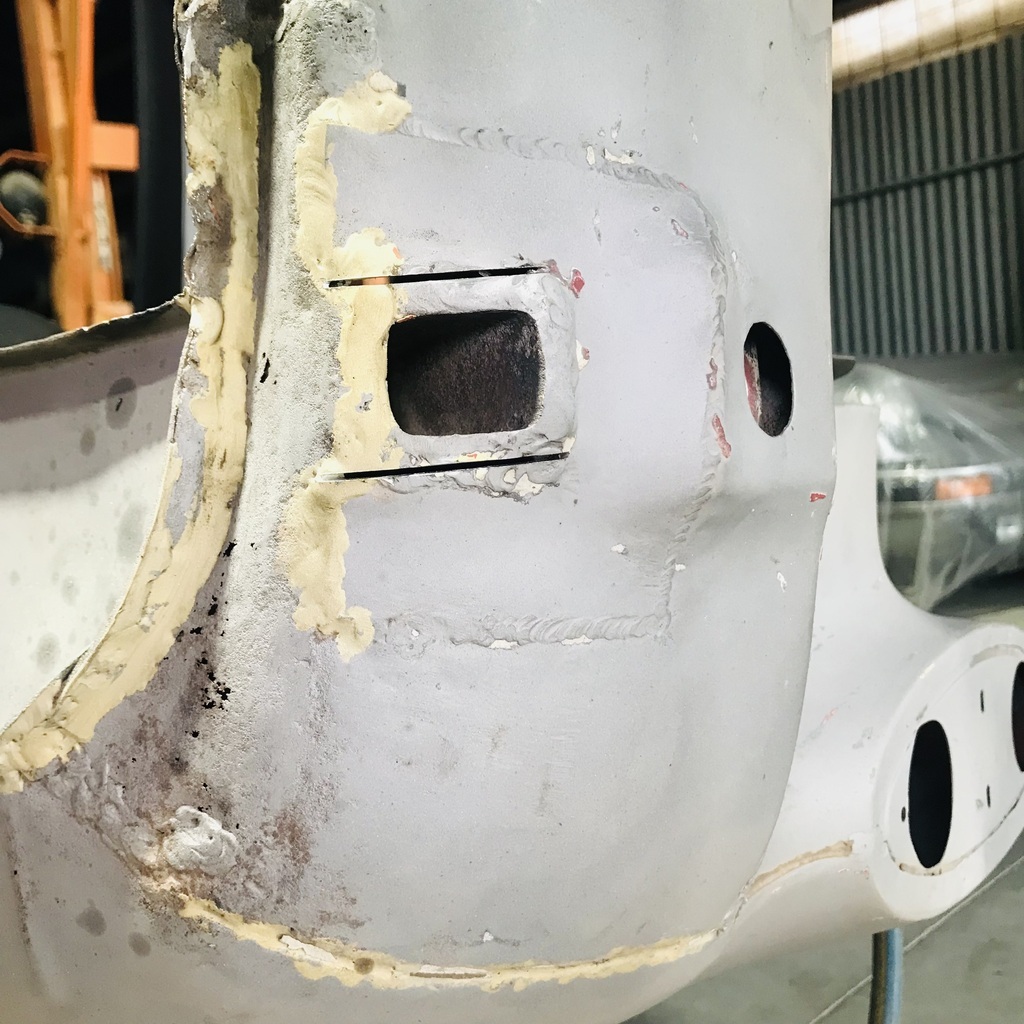 That’s the jacking point, just below the rear bumper mount. I'd already started to cut around it when I thought to take a pic. Made a paper template to get started on the repair piece. 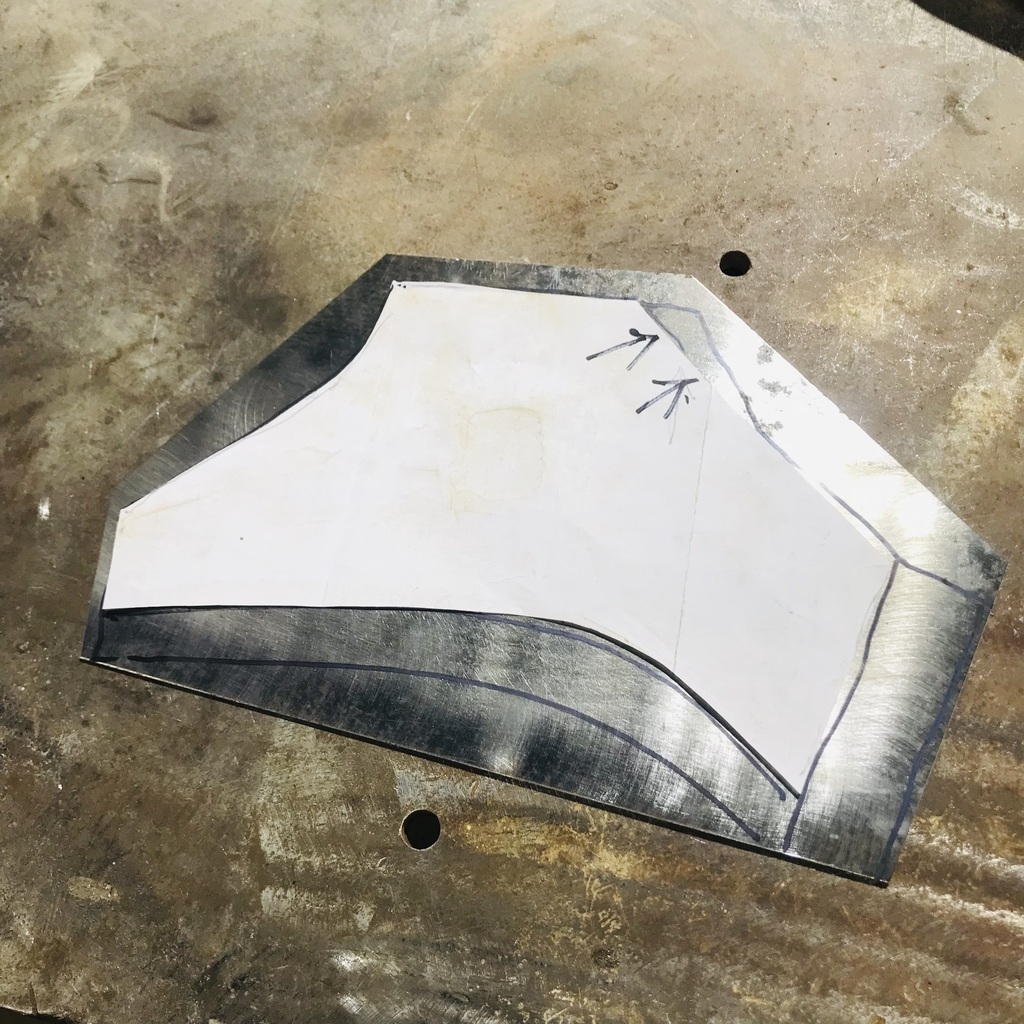 Exploratory cuts. 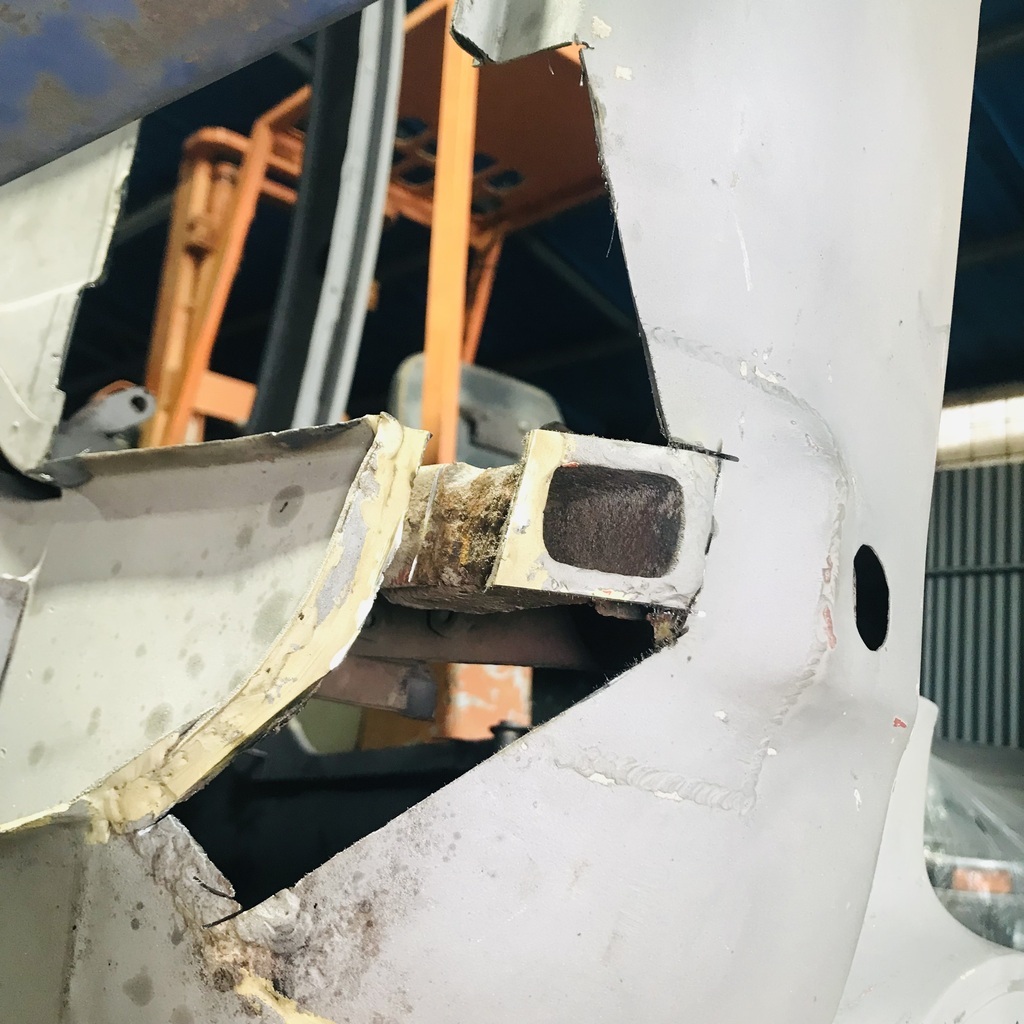 And I kept finding bits that needed sorting. The triangular bit here was solid, but badly made. There were some pinholes in the other bit. 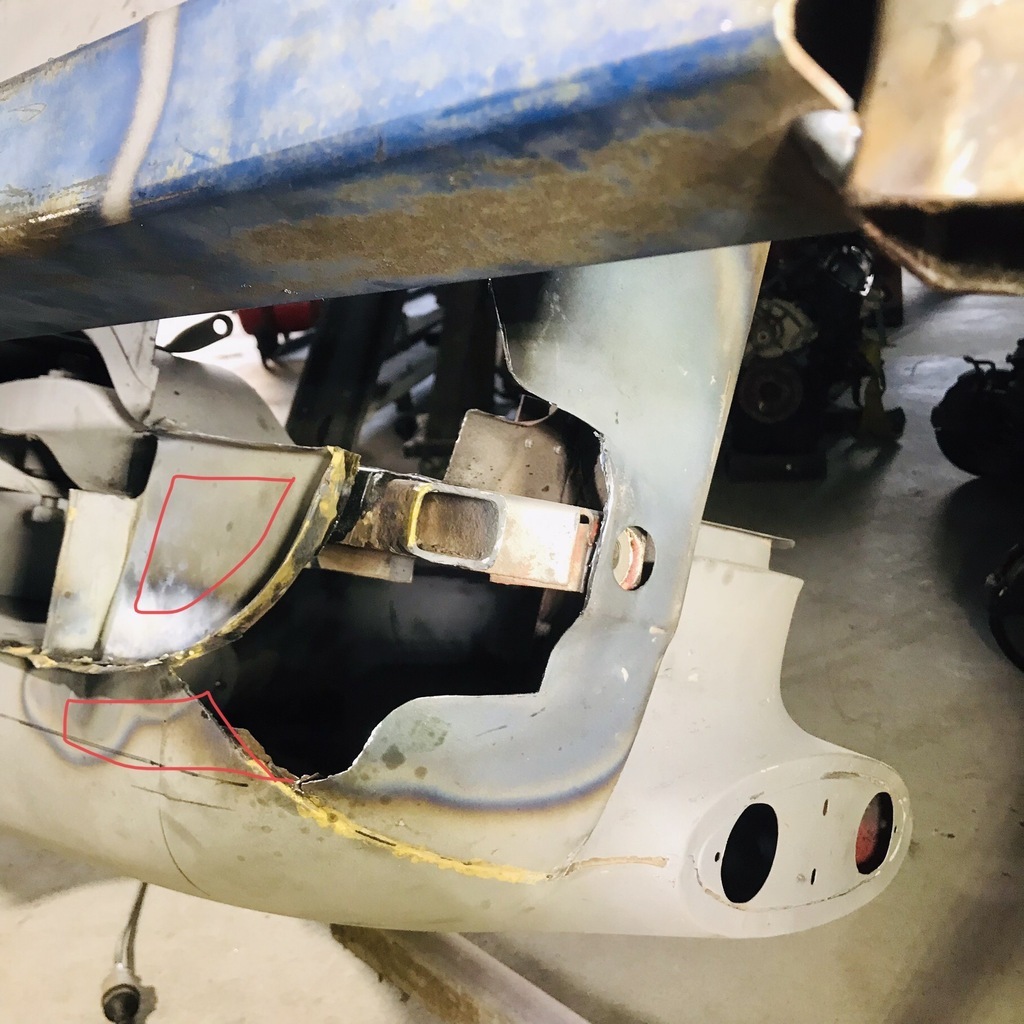 Ended up with this to fill. 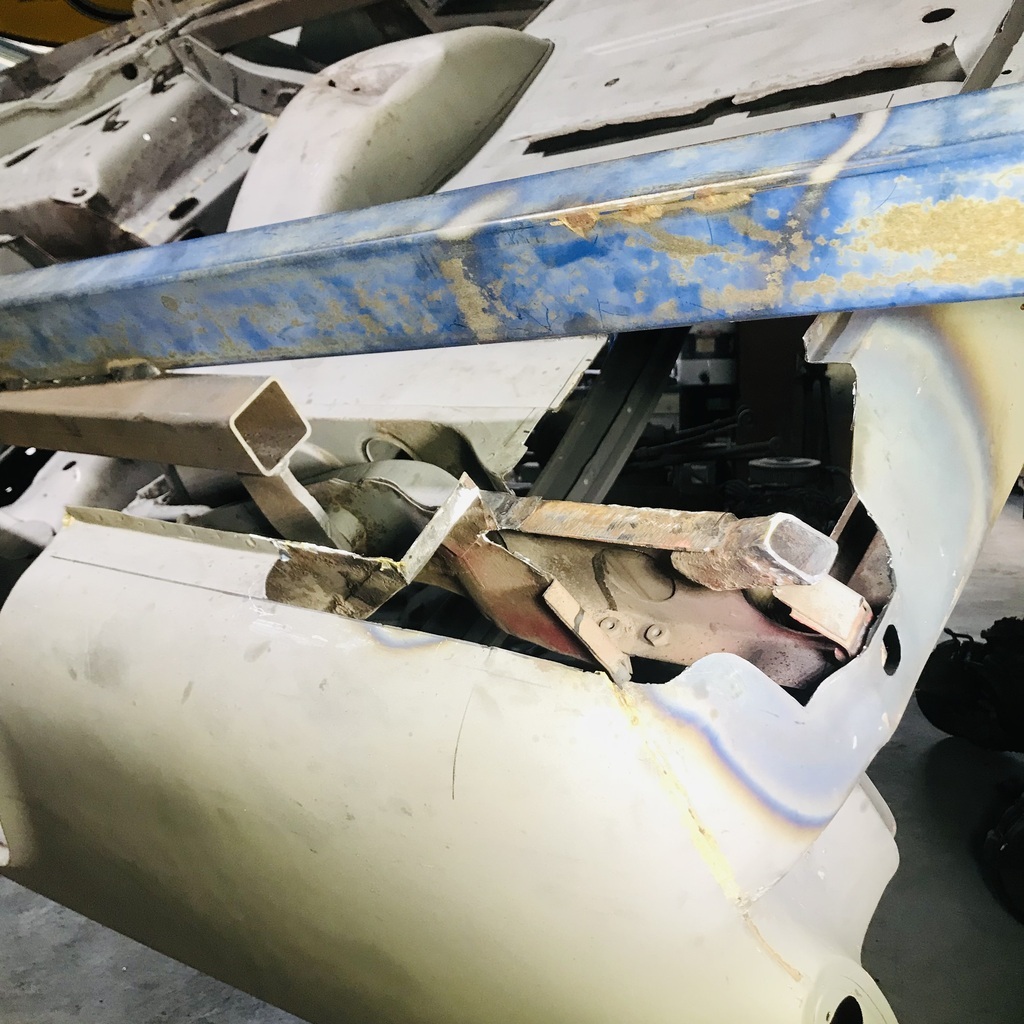 The piece to go around the jacking point took a few hours of bashing. The heat marks on the couple of photos above were the result of using the existing area as a hammerform. But the piece is now ready to weld in. 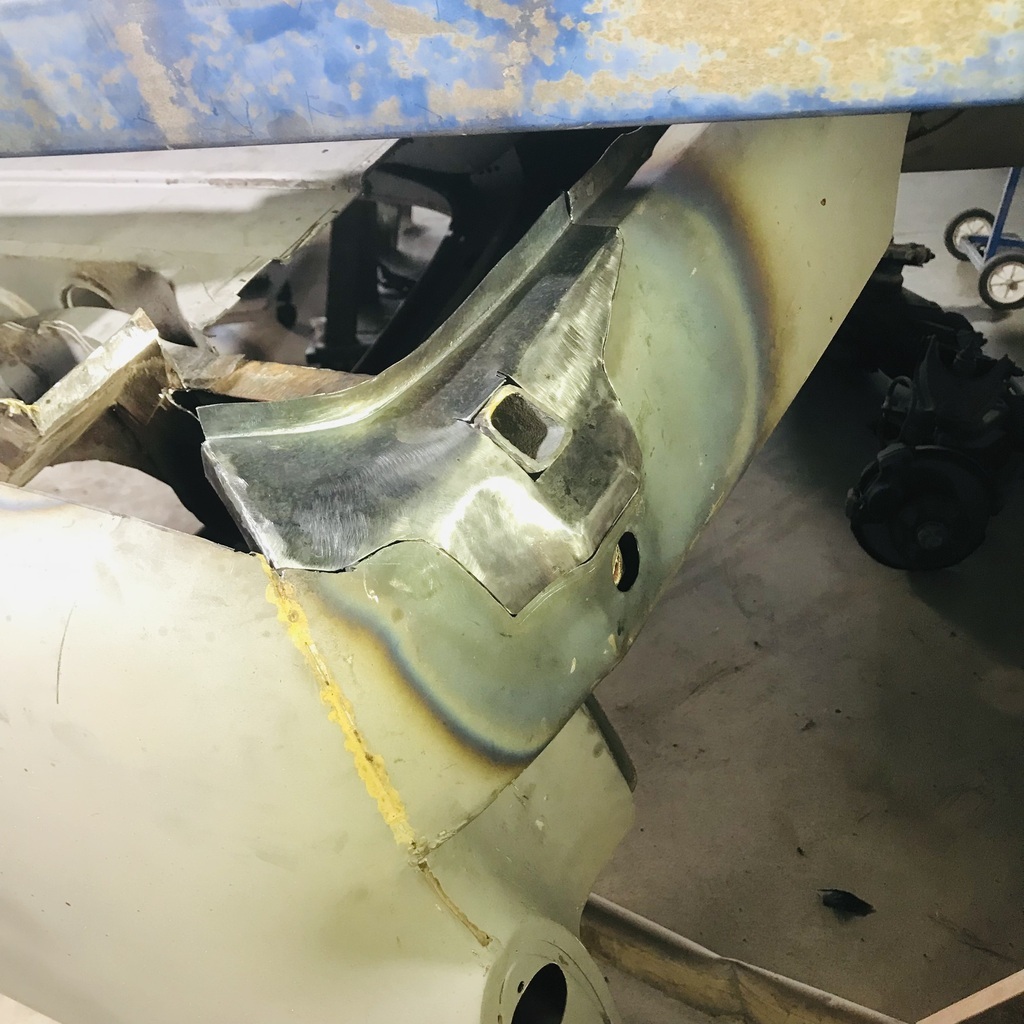 I’ll make the other couple of pieces first and then do a test fit. But that’s for tomorrow. |
| |
|
|
gazzam
Part of things
 
Posts: 741 
|
|
|
|
First piece of the puzzle tacked in. 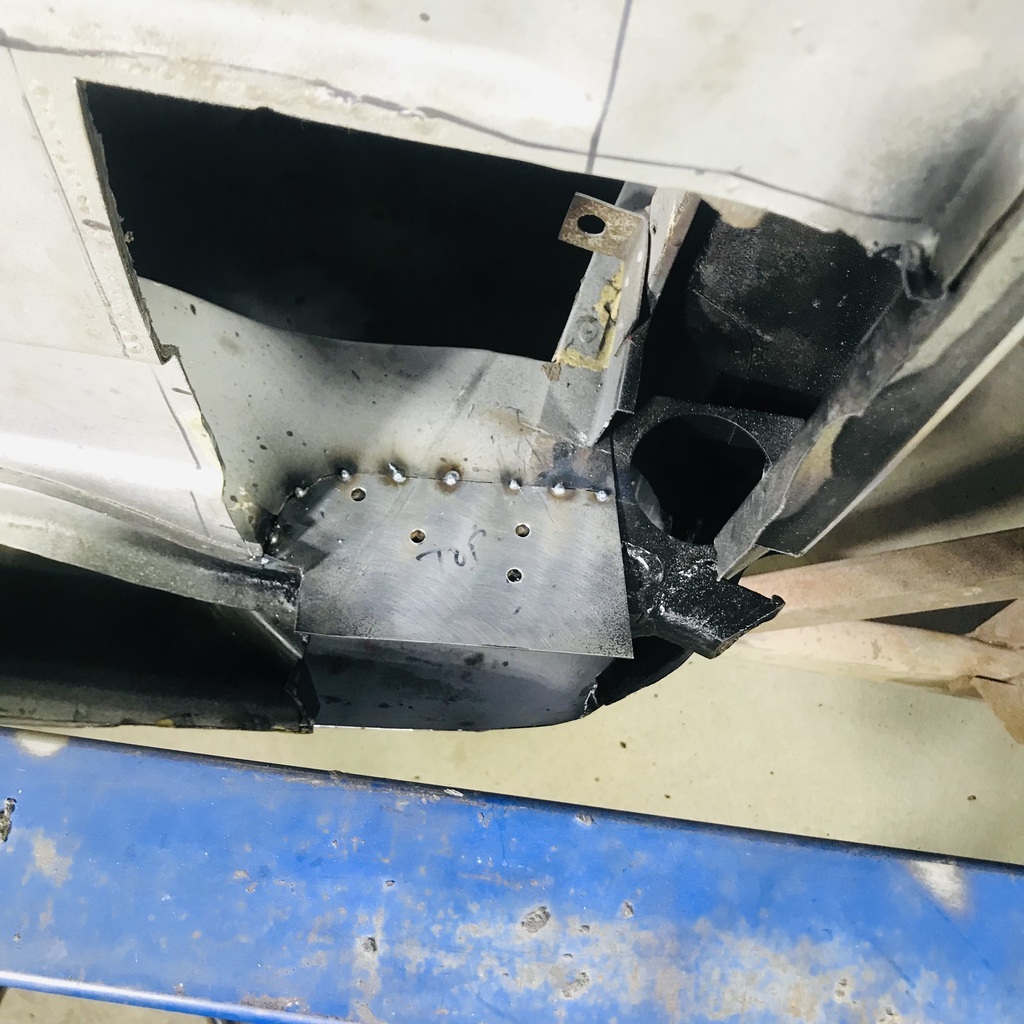 And then fully welded and ground back. 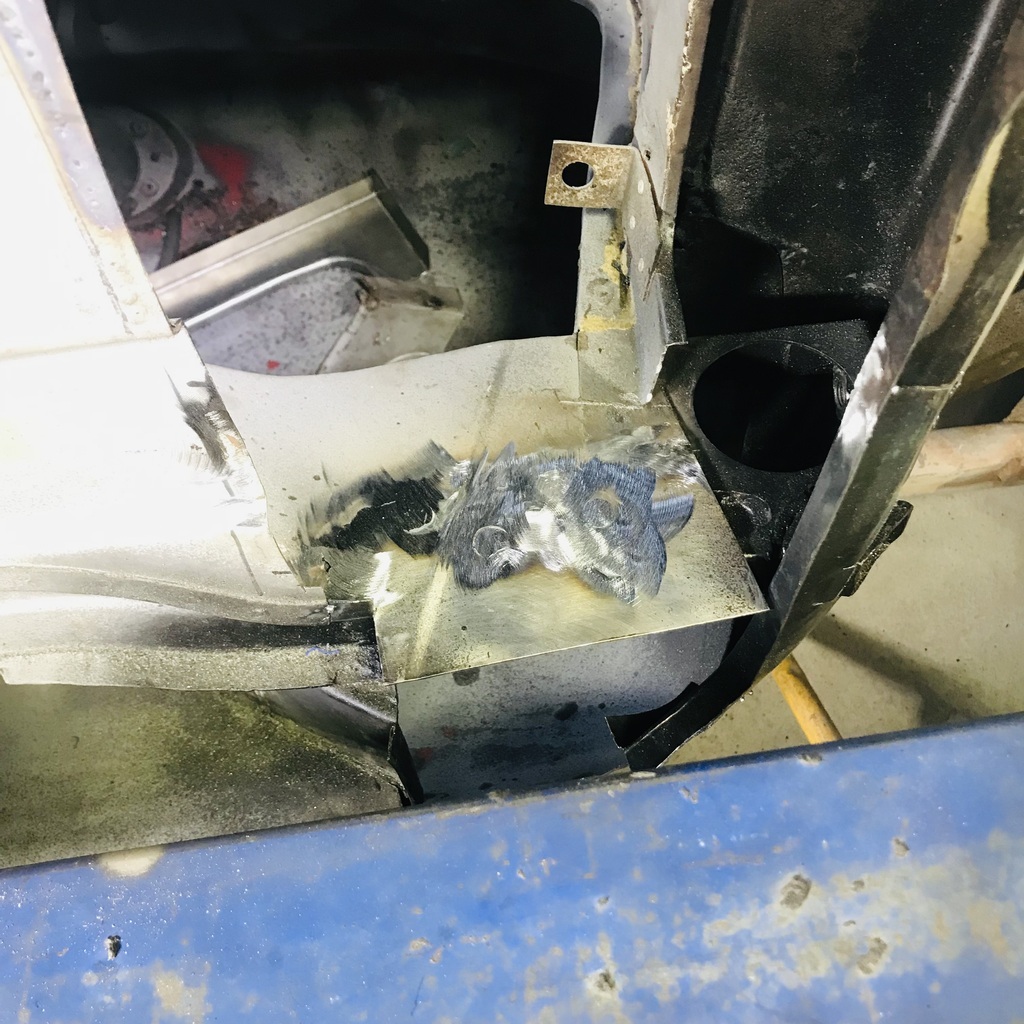 Then tacked in the only bit of this repair that can be seen from outside the car. 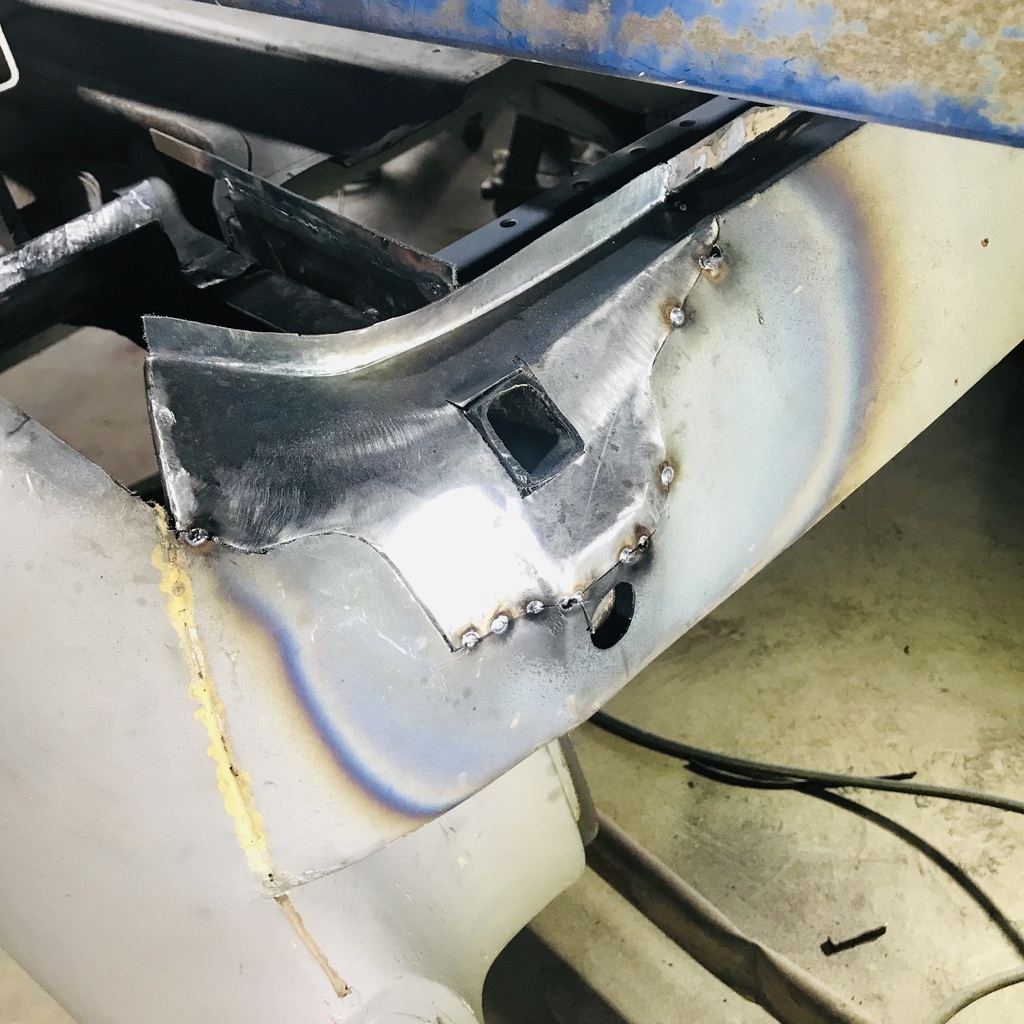 Made a new piece for the inner brace. The old bit was lacy where it attached to the boot floor. Figured it was easier to make a new piece than weld a new flange to the old in situ. 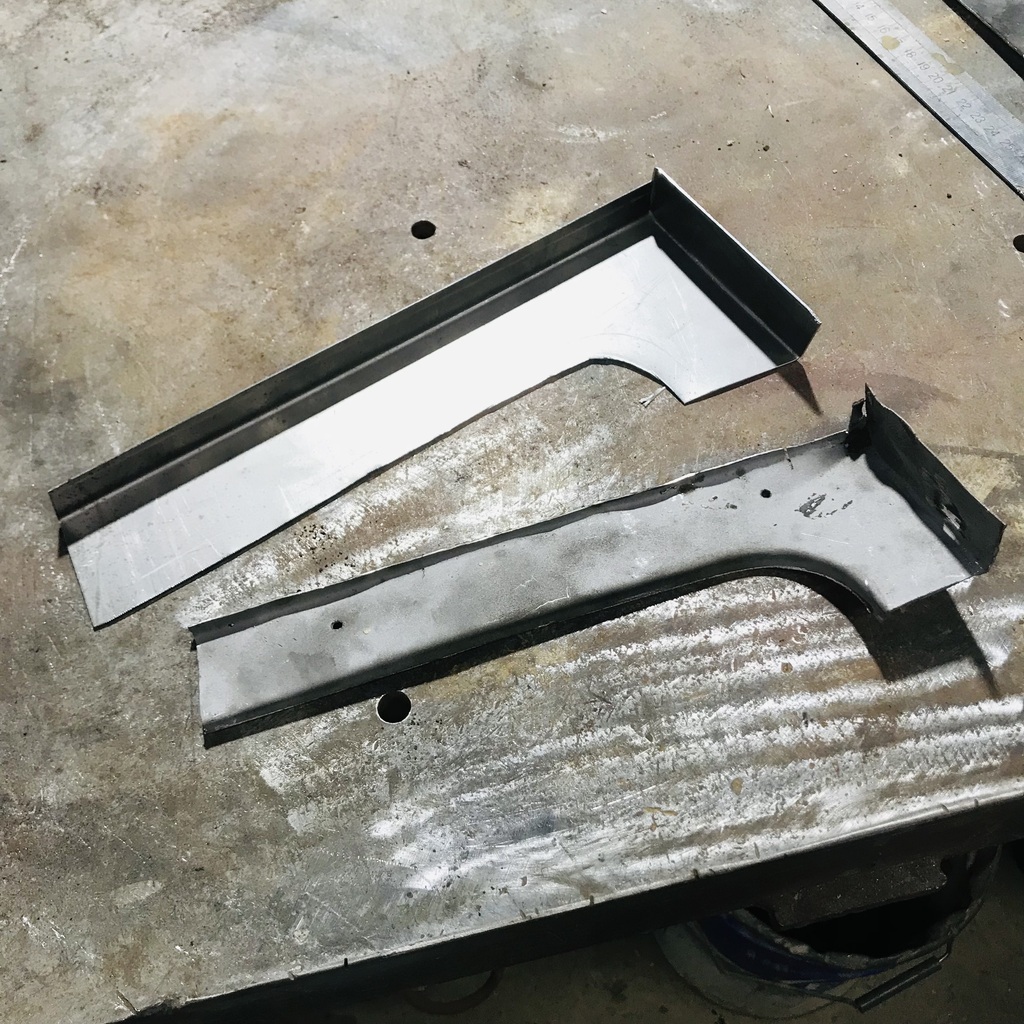 Tacked it in once I had it cut to size. 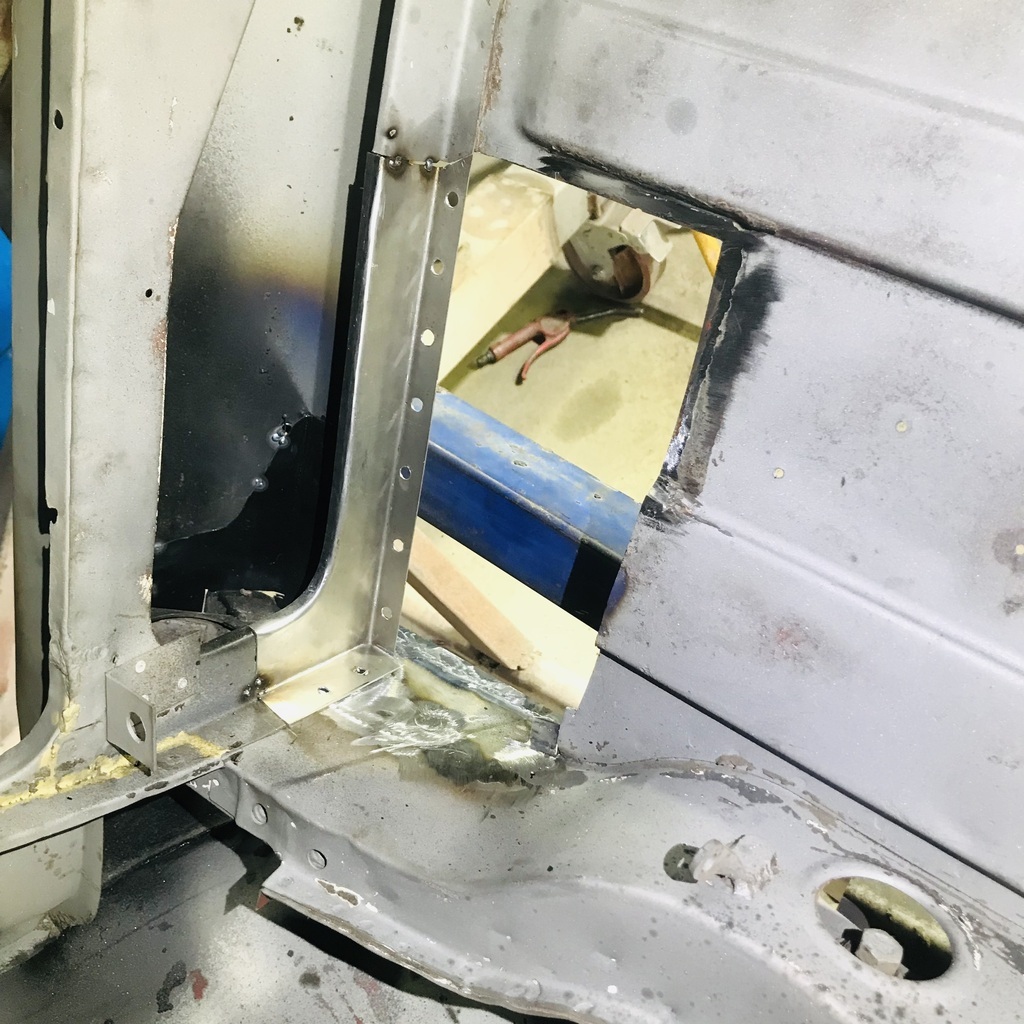 Welded and tidied up. 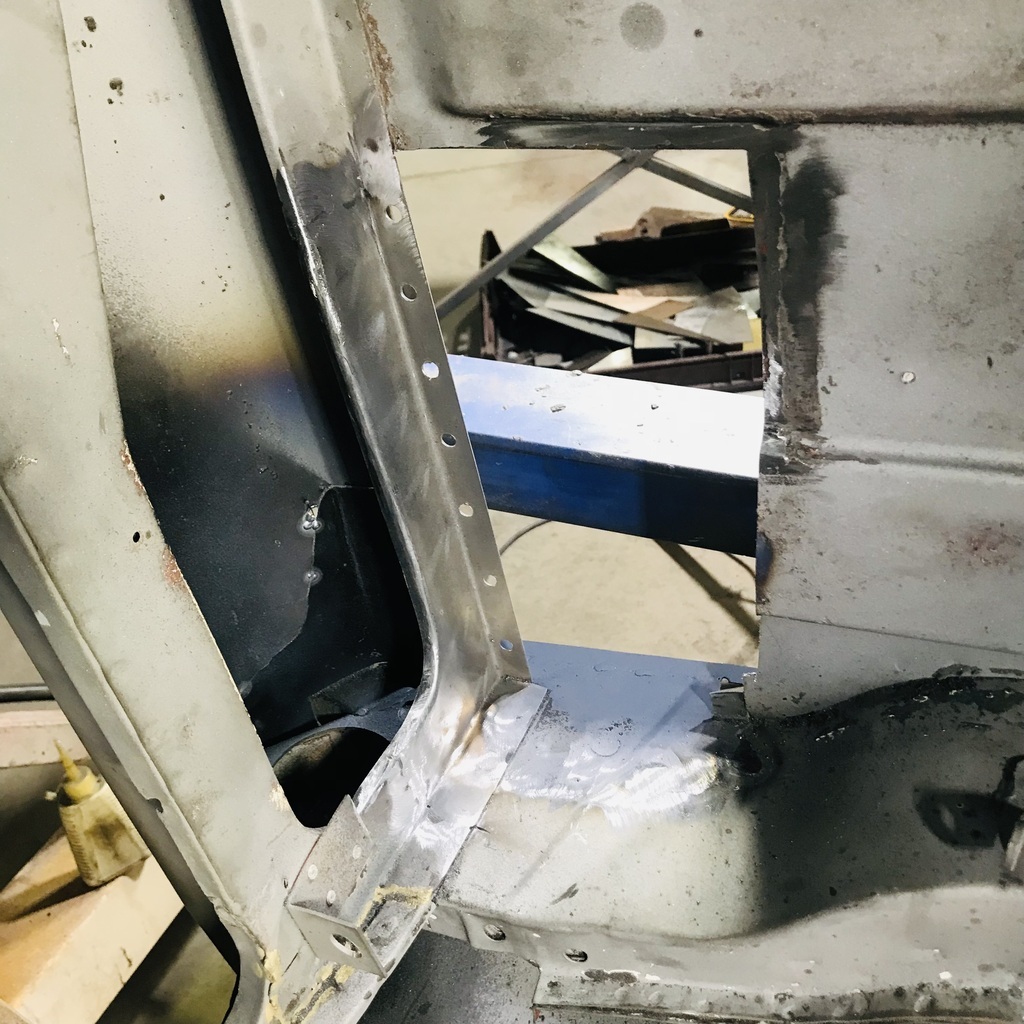 The outside piece was next to be finished off. I tacked it with the MIG then welded it fully with TIG. 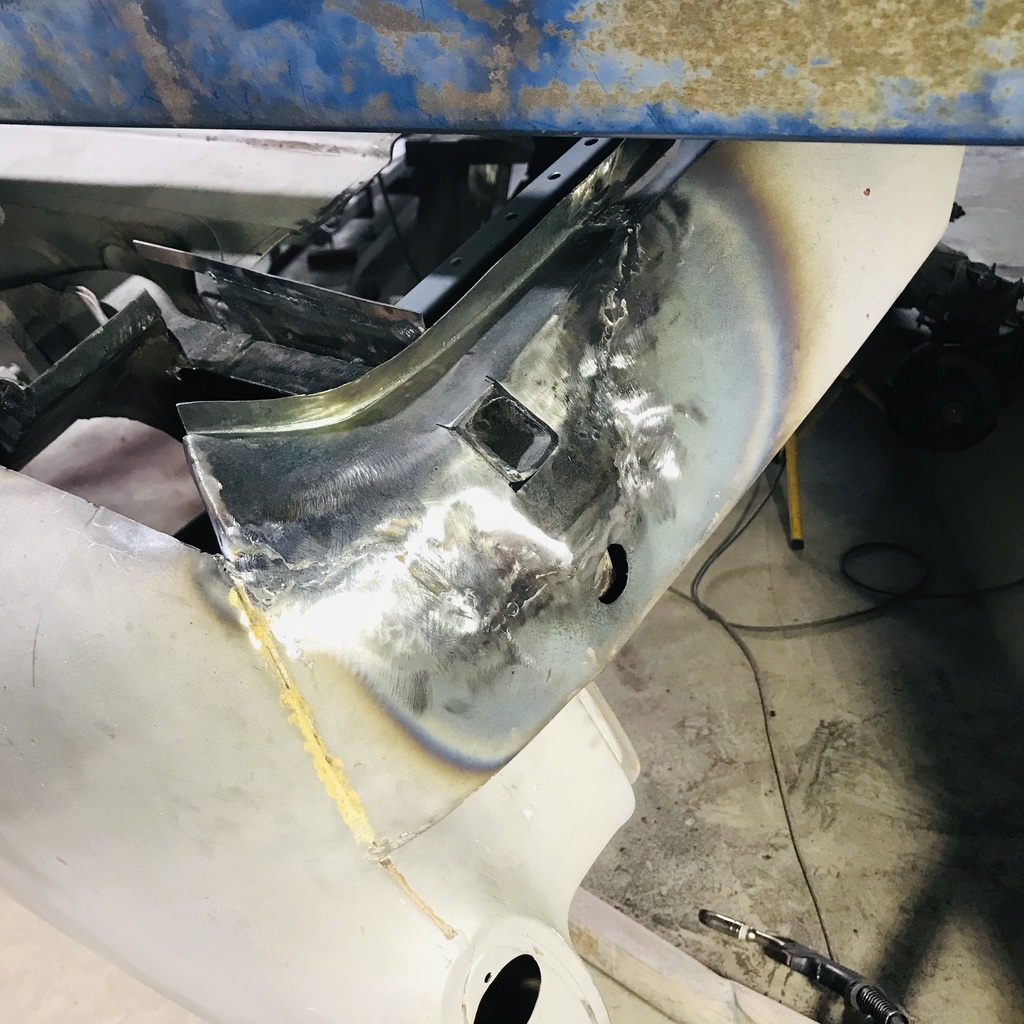 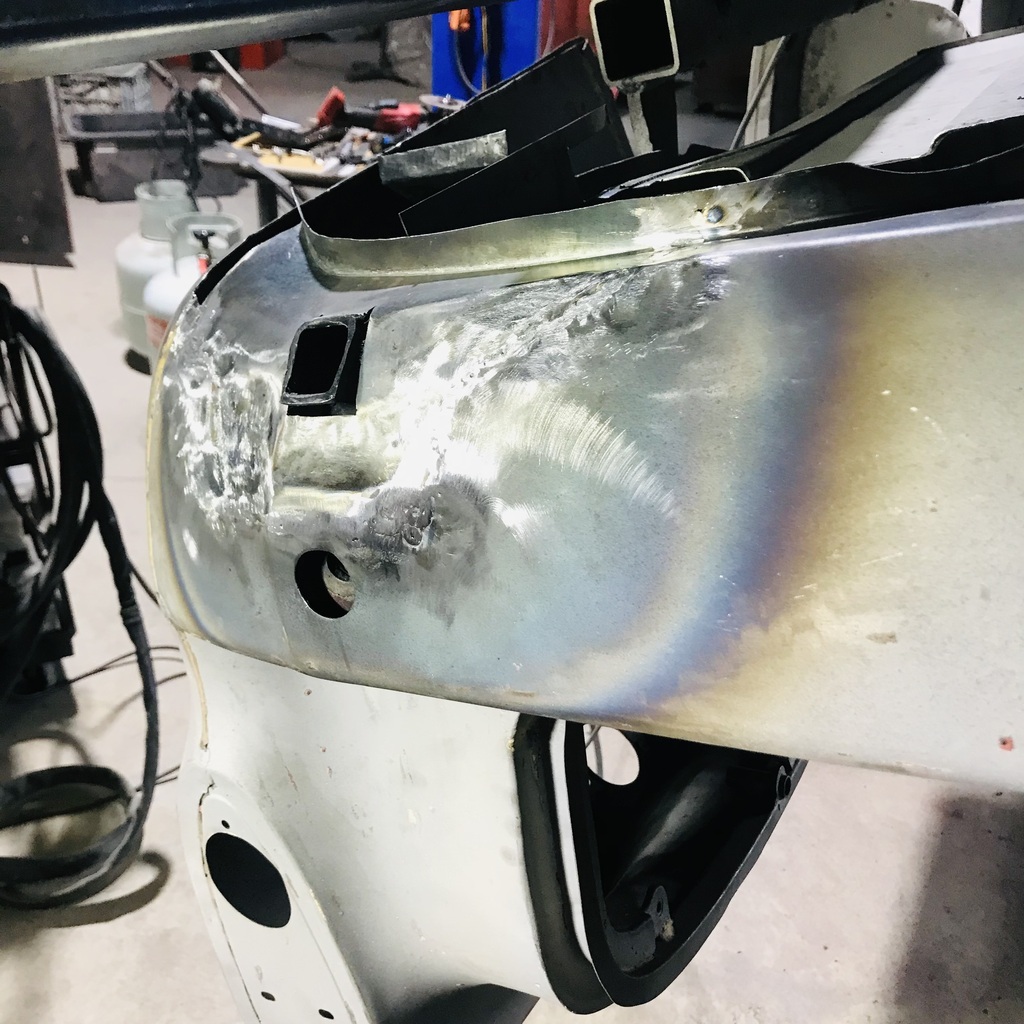 Quite pleased with how this has come up, should be very minimal filler needed. A good place to get started, under the rear bumper, so fairly out of the way. Still need to weld the jack receiver to the panel. Then I tacked in the boot floor piece. 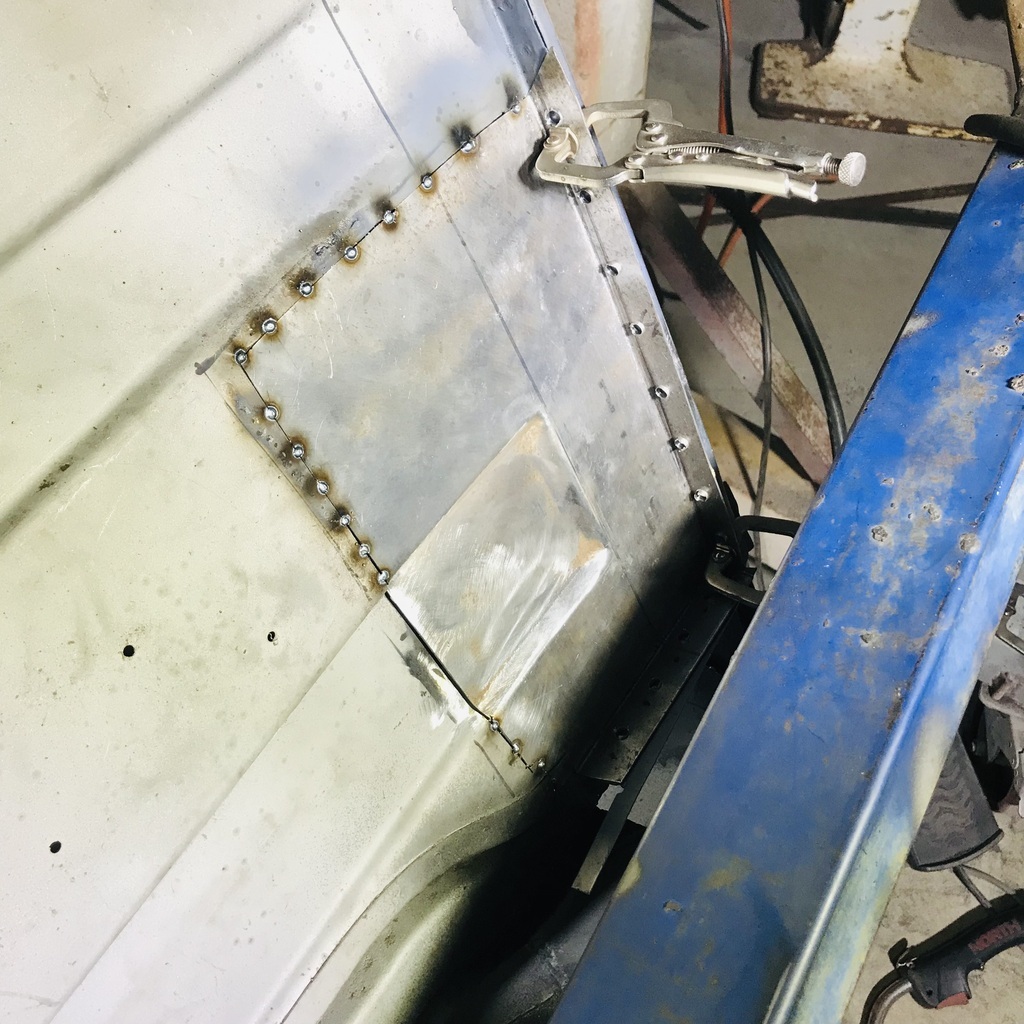 And that’s a day, more tomorrow. |
| |
|
|
|
|
|
|
|
|
|
|
Apologies if you’ve mentioned this previously, but safe to assume all that gold-ish stuff is brazing? If yes, all evidence of past restoration?
Fantastic work you’re doing, it’s become one of the go-to threads to check in on.
John
|
| |
|
|
gazzam
Part of things
 
Posts: 741 
|
|
|
|
Thanks John. You’re right, it’s braze and I don’t imagine it was done in the factory. Well, not all of it anyway. But someone sure liked it as a metal glue! This piece and its neighbour were the last bits to make. 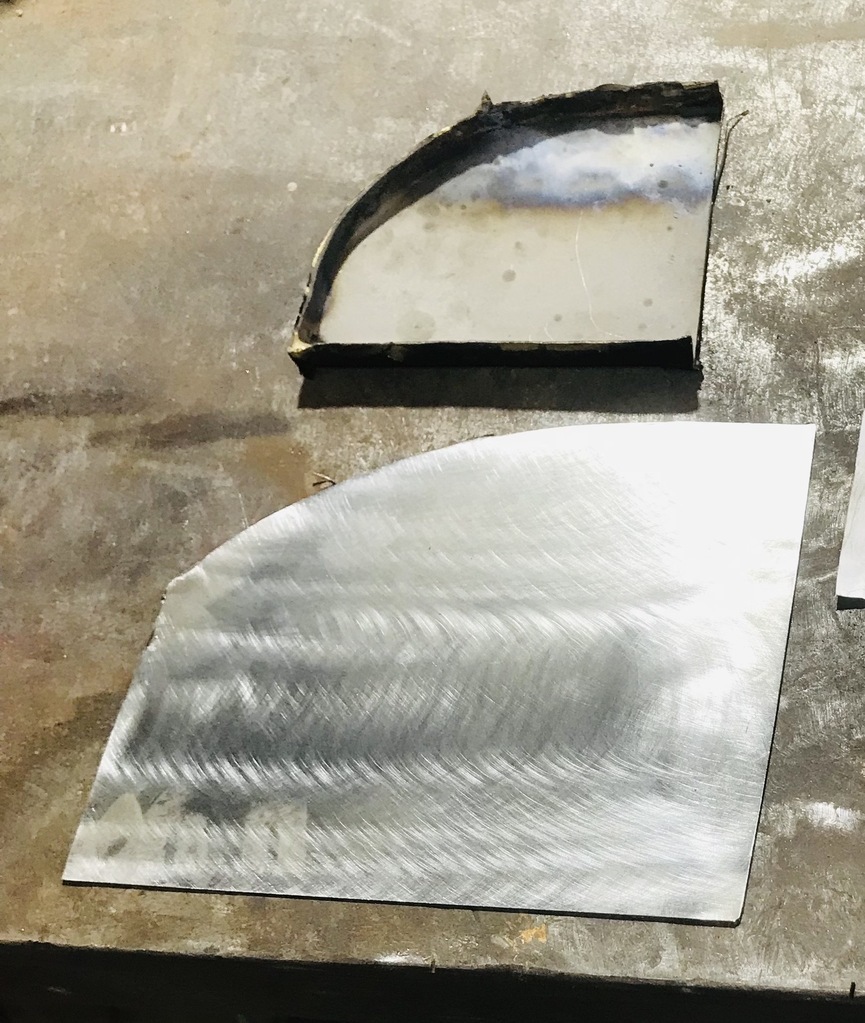 I thought they’d be simple, but no. They were both much more time consuming than I expected. Anyway I started with a template. Then cut a piece of 20# and used the bead roller to crease the curved fold. 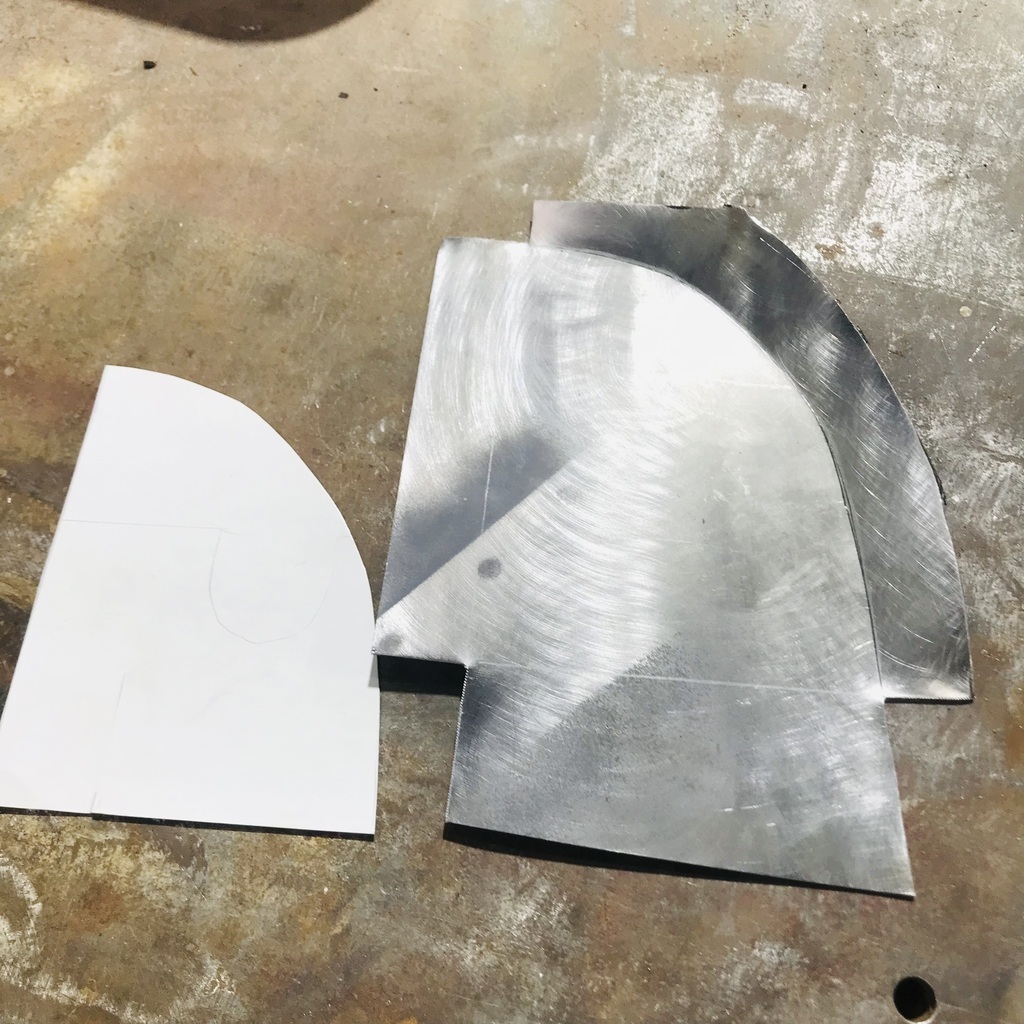 The other two folds were done in the brake. 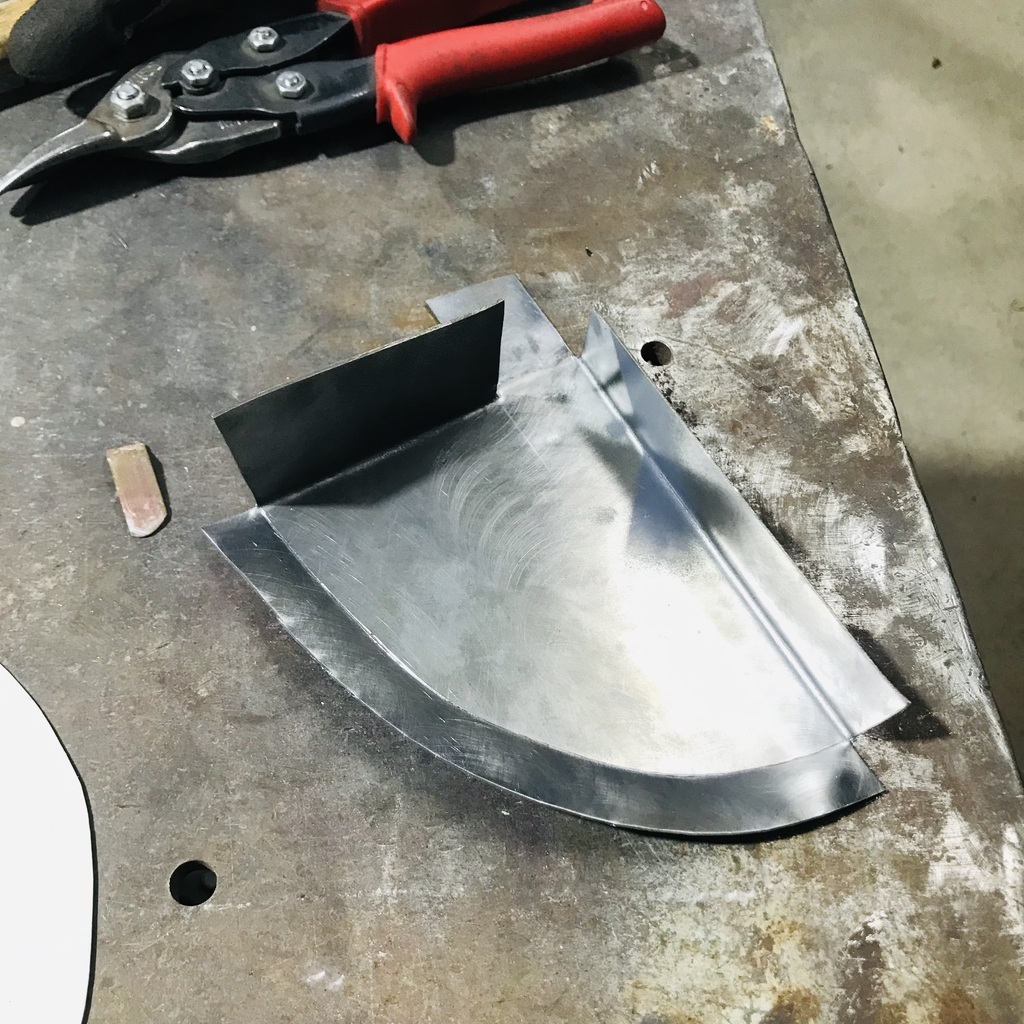 Then after a lot of fettling it finally went in the hole. And I wasn’t gonna let it get away! 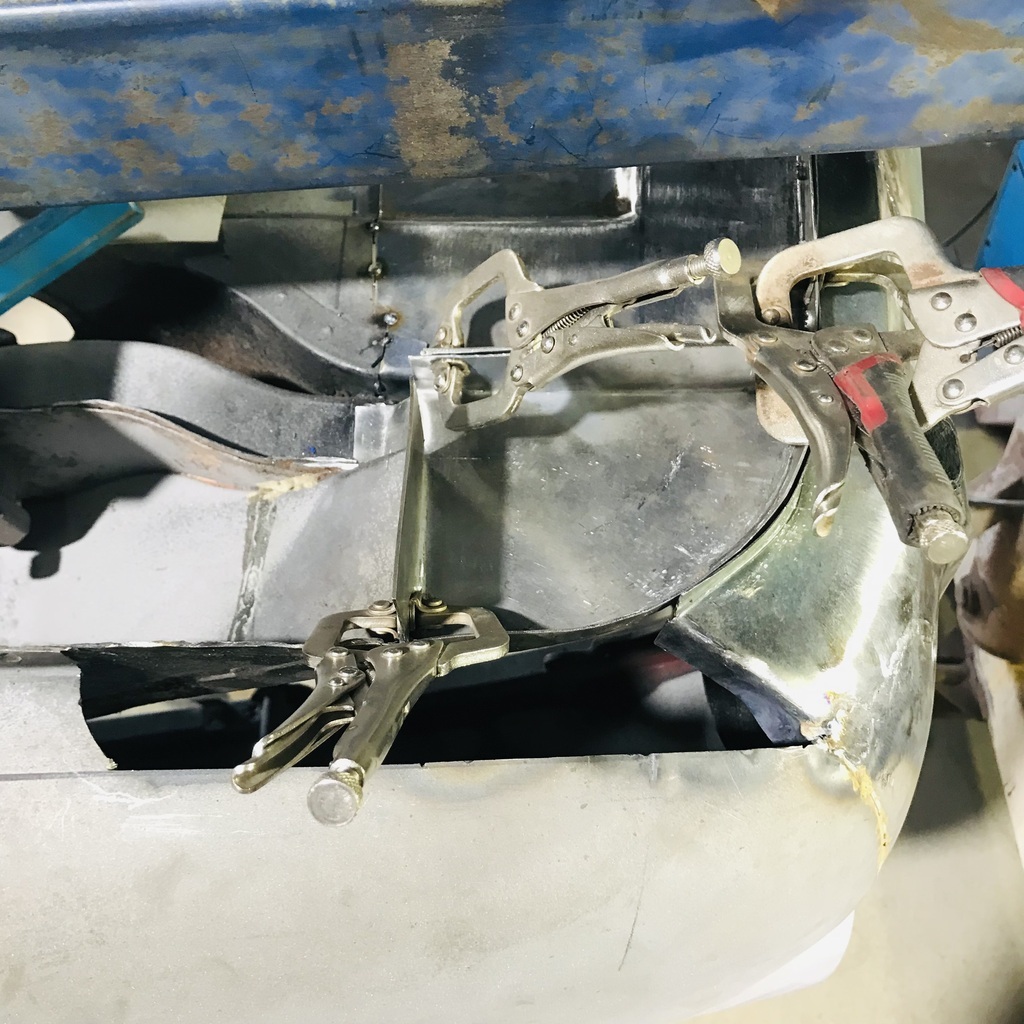 I tacked it in position before I made the other bit. Had to, it was a moveable feast otherwise. Eventually got that one made, and was able to weld them both fully into position. Then it was an all in grindathon. And other than a few holes that have to be drilled, and the exhaust brackets, and and and… it’s finished. The inside the boot view. 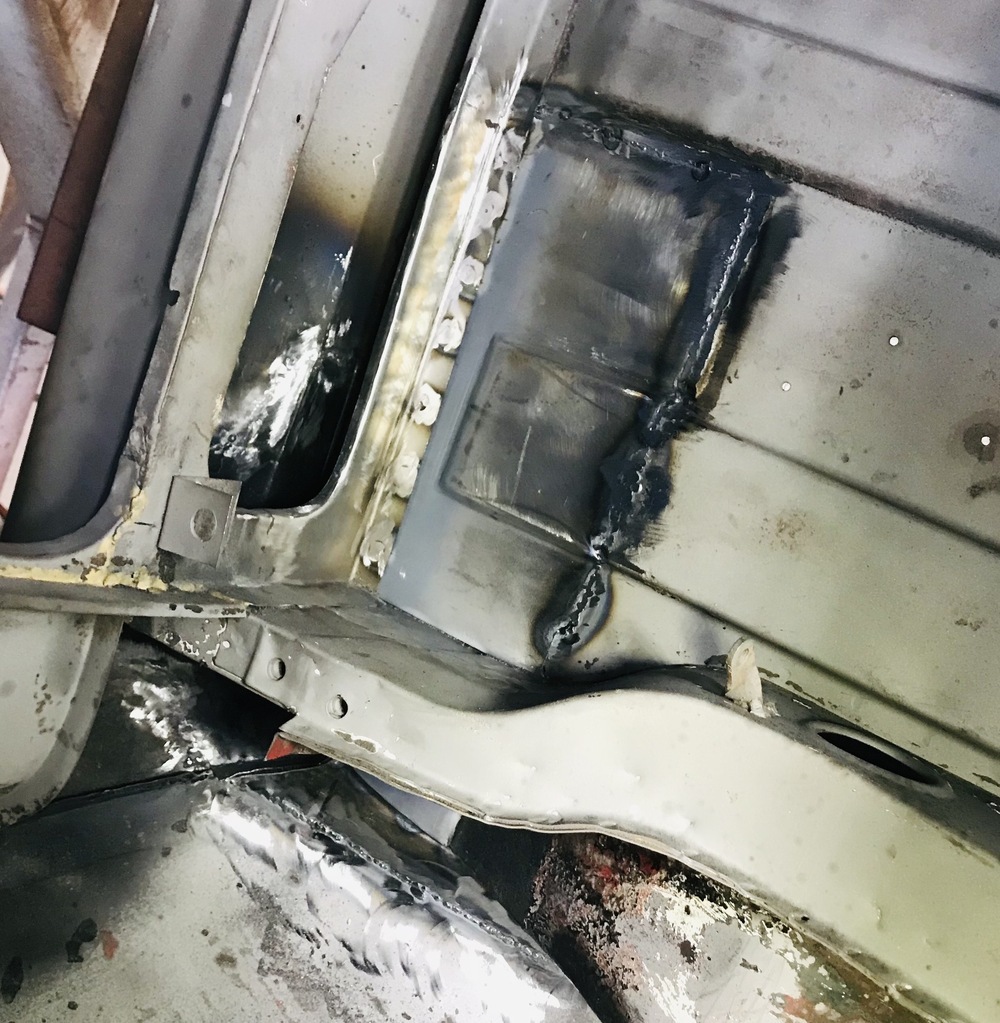 And upside down external. 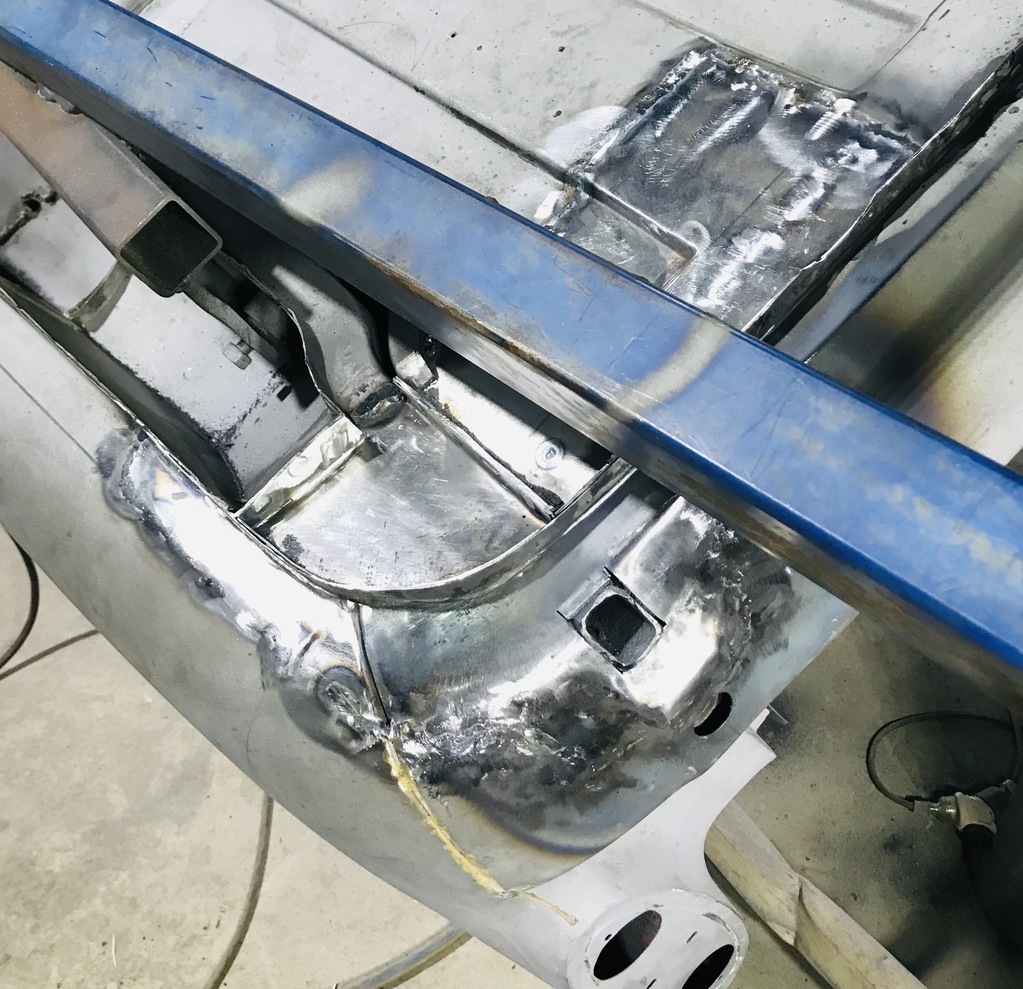 Four days, I really didn’t think that little repair would take that long. Lots more to do. |
| |
|
|
|
|
gazzam
Part of things
 
Posts: 741 
|
|
|
|
Thanks Robert, very nice of you. Made a start on the other side. Not as bad, just a minor bit of rust in the chassis leg cover piece and a nearby flange. 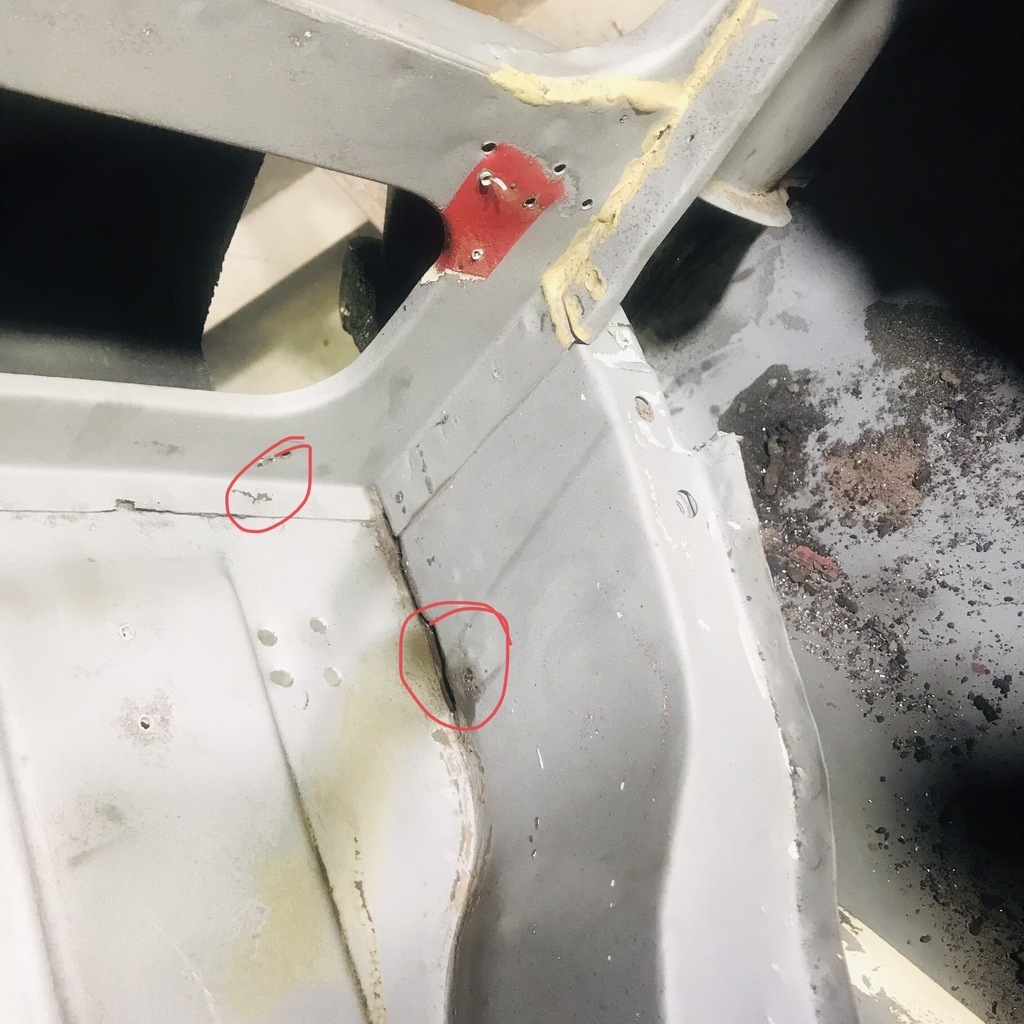 And there’s this area around the jacking point that needs tidying. 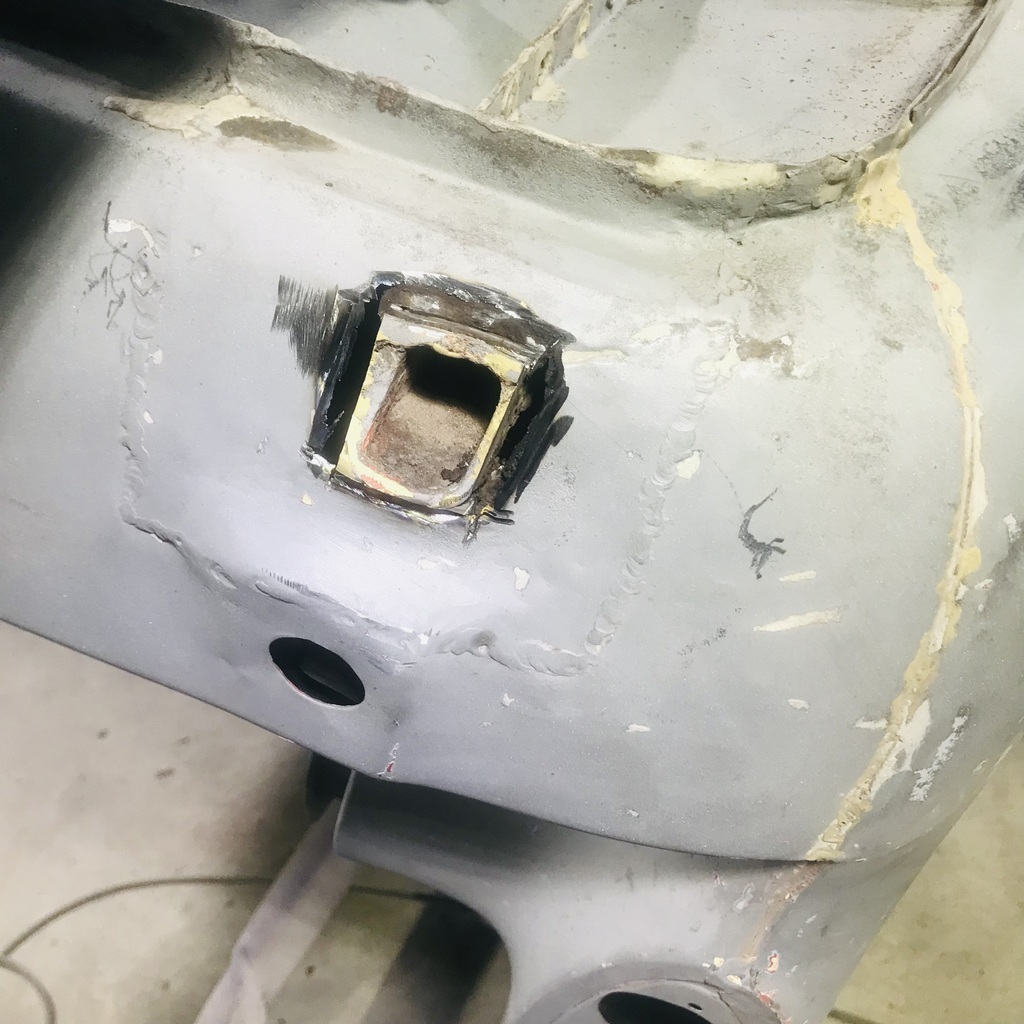 I'd already trimmed around the actual jack hole in that pic. That was in order to get this piece to fit, using the hot hammerform method that worked on the other side. 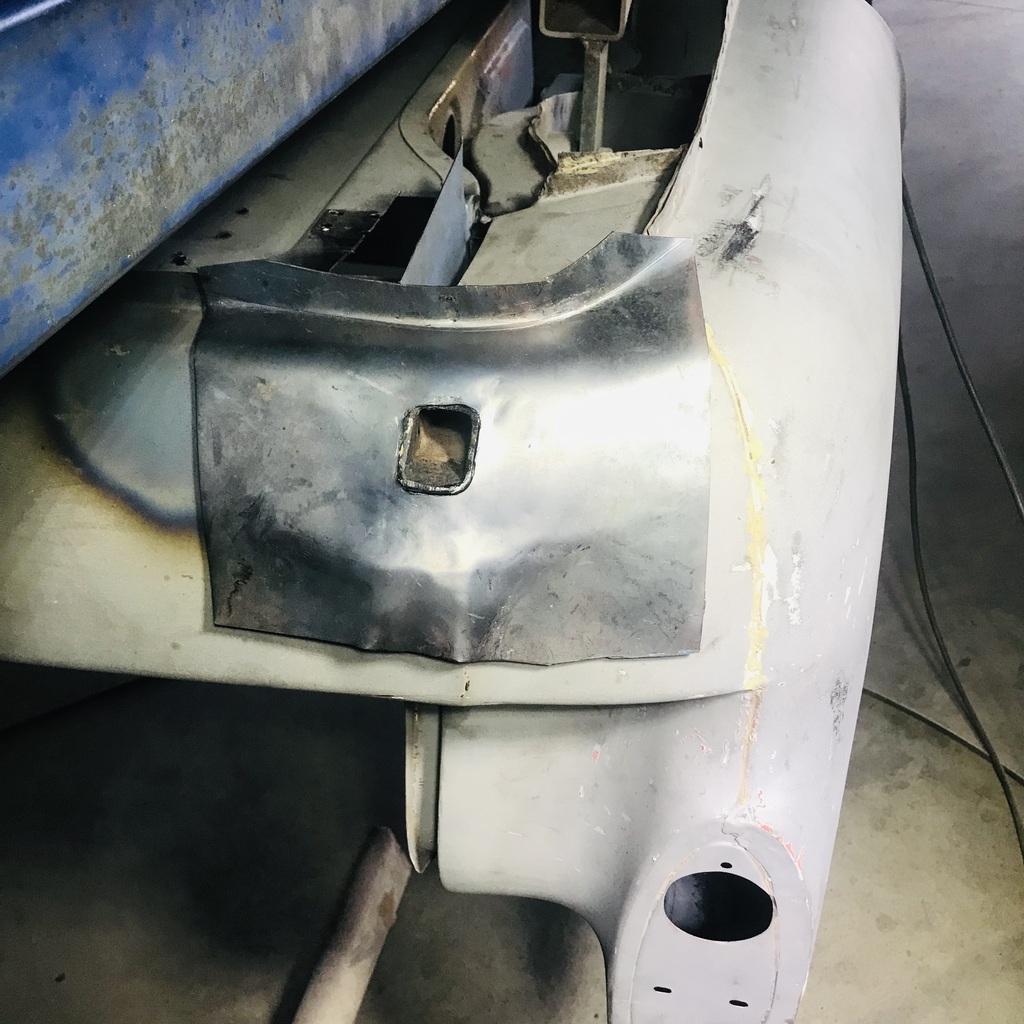 Once I had that roughly formed I cut away the bad bit to see what I was facing. No surprises, pleasingly. So I cut the inner support so I could get at the boot floor. 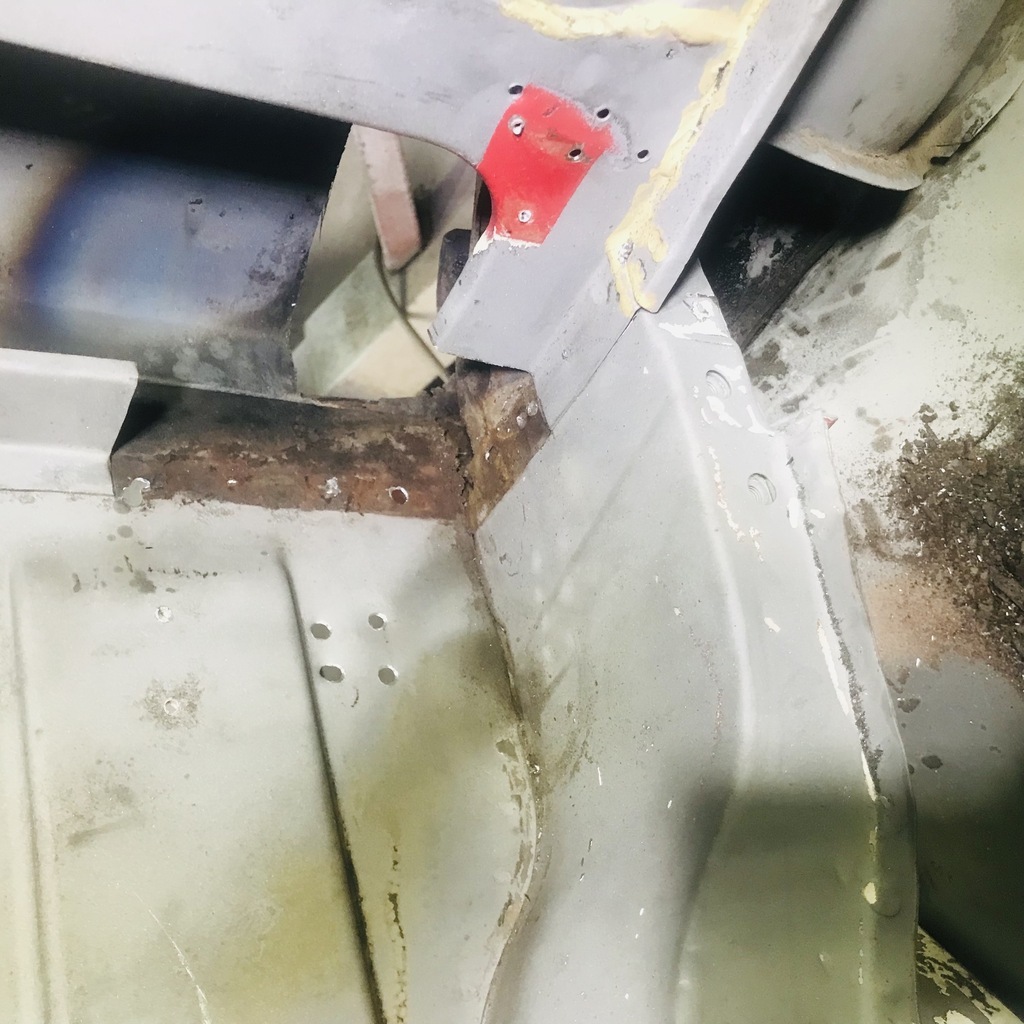 Cleaned the exposed chassis with the needle gun and gave it a shot of rust converter/ sealer. A bit hard to make out in this pic, so I drew the yellow line around it. 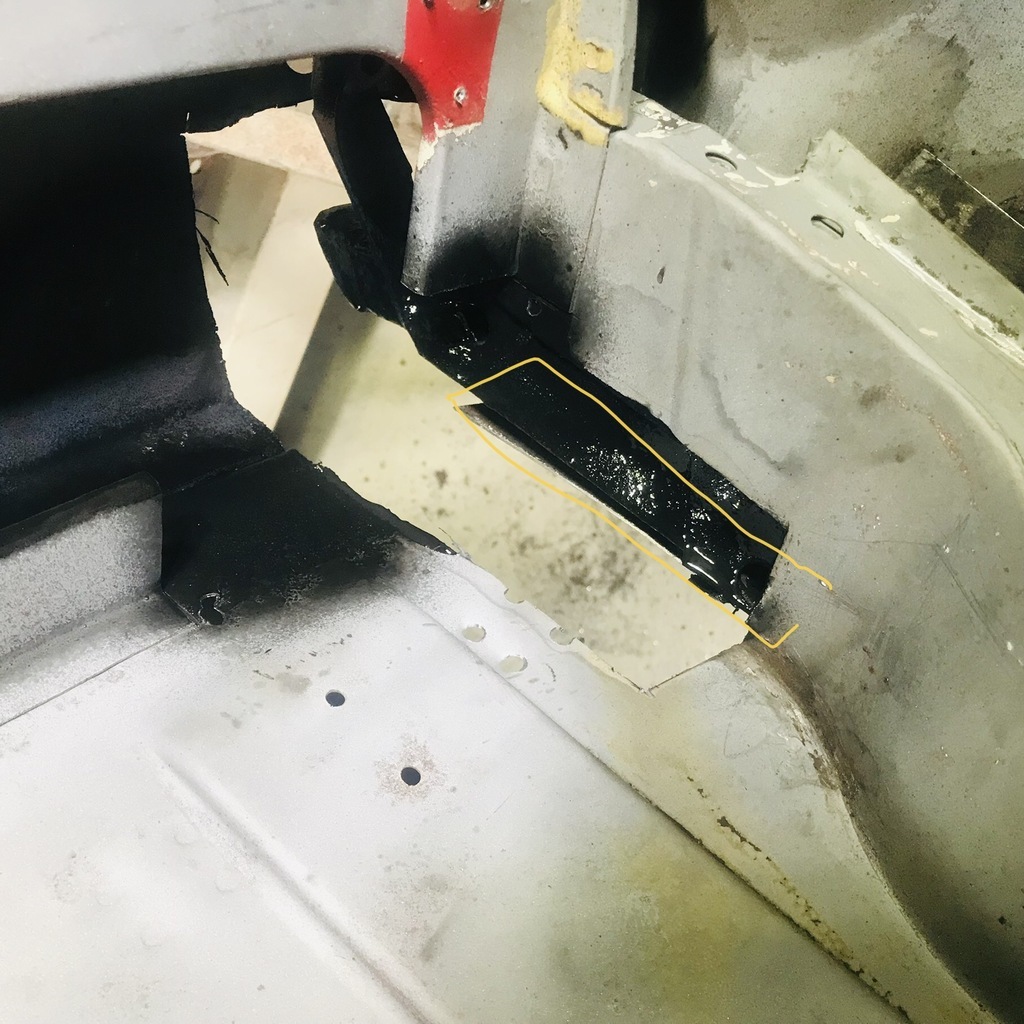 The patch was fairly straightforward, except for a small step to allow it to sit flush over another bit. I ended up making it twice because of that. Anyway it’s welded in and ground back. Just need to do the rosette welds (in those three holes) and that piece is done. 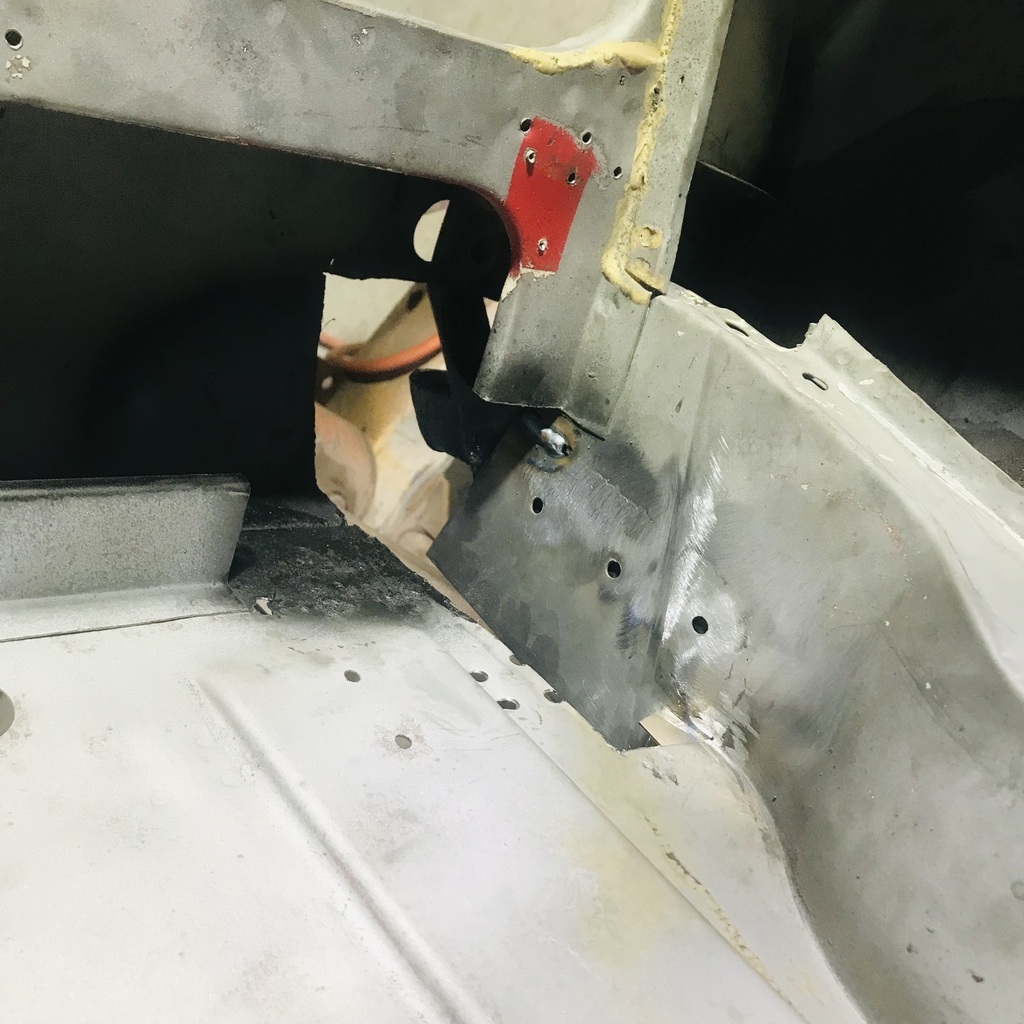 The outside is looking a bit open still… 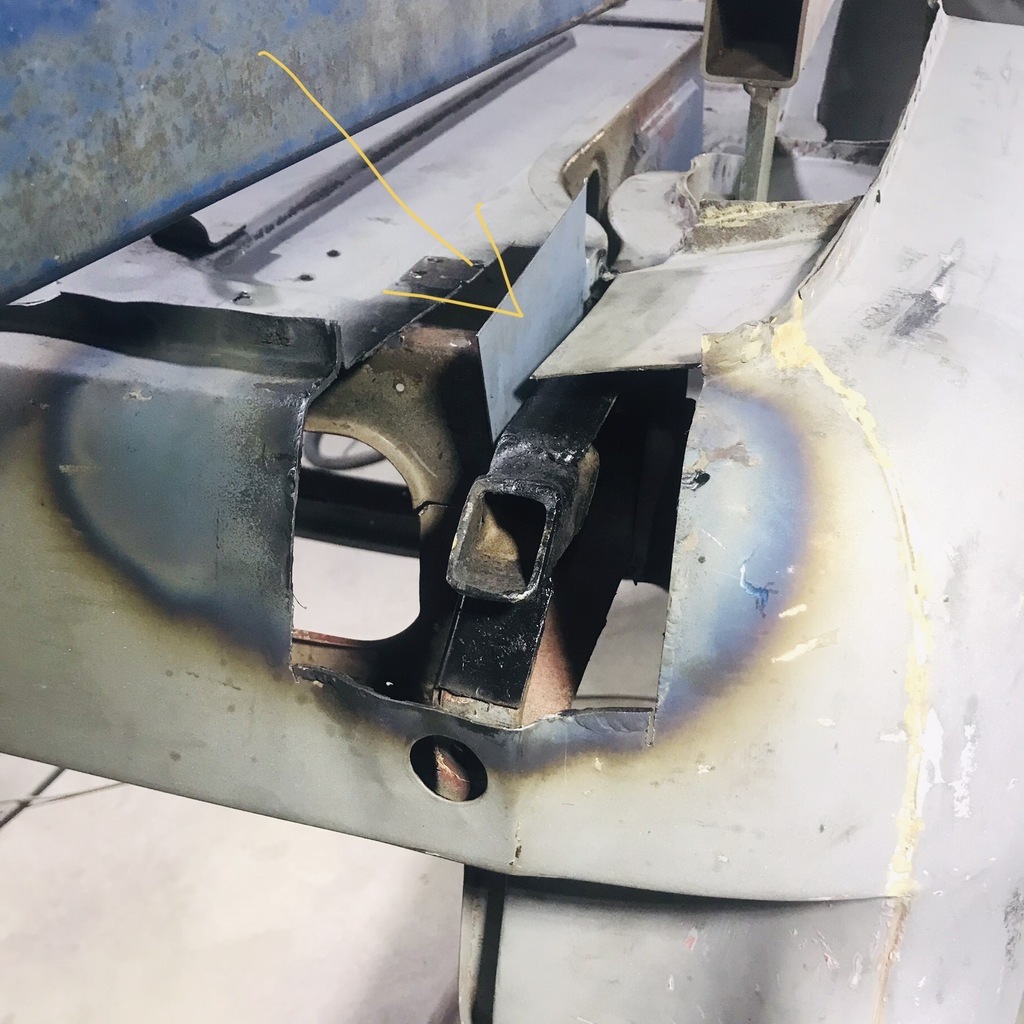 That’s the new piece arrowed. It’ll get pulled over a bit with the rosette welds. Tomorrow. |
| |
|
|
|
|
|
Nov 23, 2024 16:33:15 GMT
|
|
It is interesting to see those old brazing "repairs". Back in the 60's to 80's most car repair work on older cars was by the owner (With varying amounts of skill or knowledge) - with very little equipment and there were no "hobby" style welders, angle grinders etc. Fibre glass and pop rivets were the order of the day (- and better than wire mesh, paper and underseal!).
Even few proper garages had MiG welders!
So seeing TiG, press tooling, sand blasting, 3 D printing etc being used today is fantastic.
Well Done Gazzam.
|
| |
|
|
at200
Part of things
 
Posts: 92
|
|
Nov 23, 2024 20:53:08 GMT
|
I’m undecided about whether or not to invest in a blasting pot for my lorry chassis. Part of me likes the idea of nice clean metal, the other part of me is horrified by the dust, mess and expense and says that the needle gun will be fine. Looking at this, I think the balance is tipping towards the needle gun. I bought a cheap dual soda and sand blaster from ebay, then a cheap cabinet, just to do some small bits. Happy with it but found it takes a fair bit of fettling to set up to be effective and even the cabinet doesn't contain the dust very well. The mess doing a chassis would be huge. I think if I was doing a chassis or underneath the car I'd go for a needle gun. Discussed here on the mig forum. I'm thinking of something like the cheap one in post 16 for removing underseal and underbody light rust. OOS atm but similar ones available. www.mig-welding.co.uk/forum/threads/needle-gun.137413/#post-2444973 |
| |
|
|
gazzam
Part of things
 
Posts: 741 
|
|
|
|
Thankyou Phil. I’d hazard a guess that the body has never been fully stripped on a rotisserie before. That makes it a bit easier! First up I replaced the frilly flange on the brace. Scribed a line parallel so I knew how wide to make it. 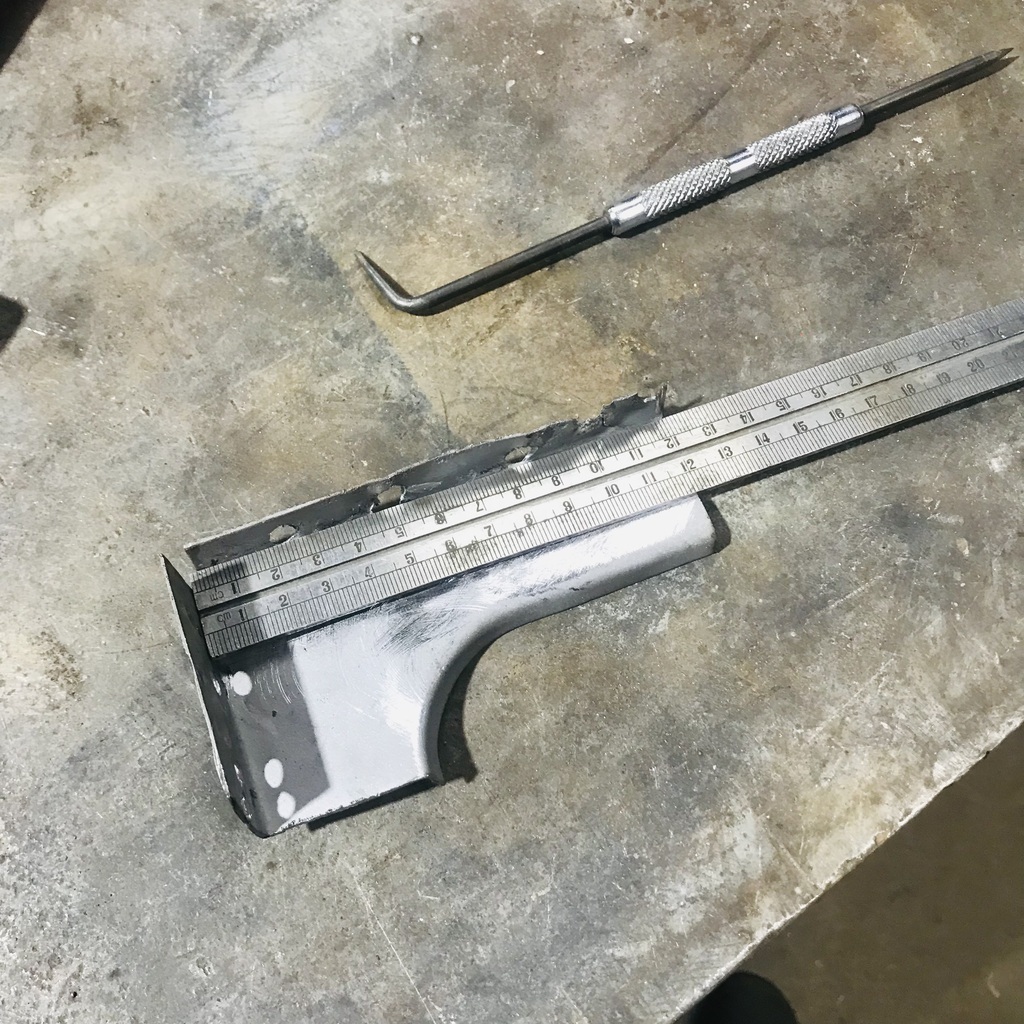 Then made a new bit and welded it on. Easier than making a whole new bit. 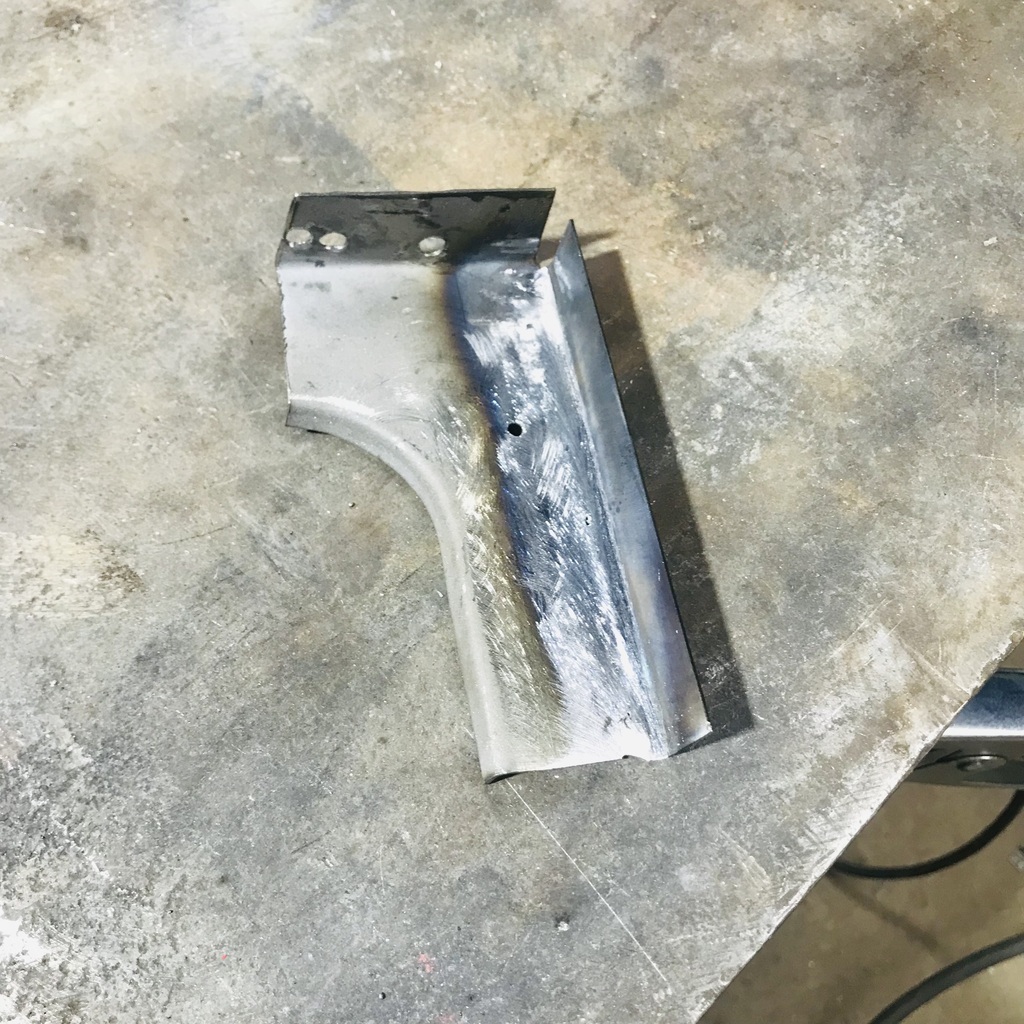 Fettled it into place, then tacked it in. Once it was welded in and tidied, I needed to get the back edge of the brace nice and neat. I use a Roloc in reverse. 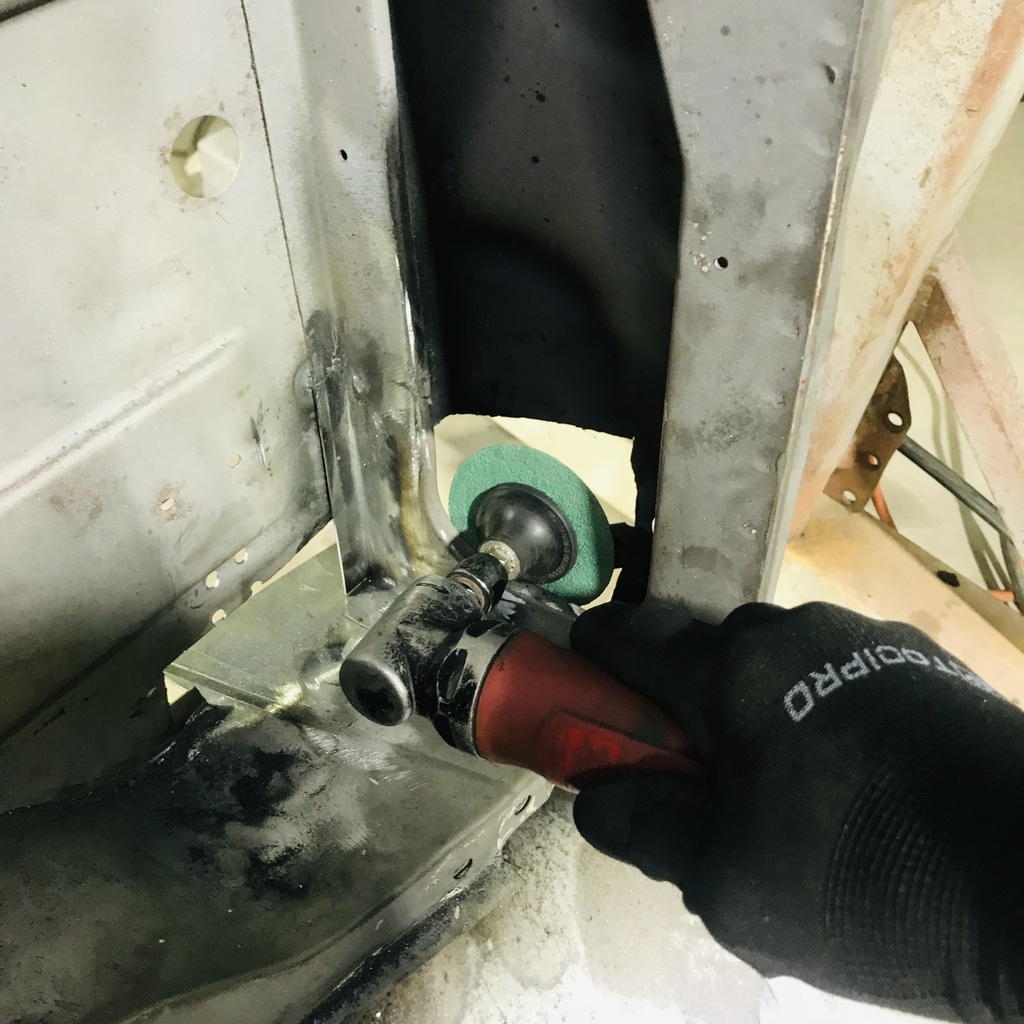 Remove the plastic threaded bit from the back of a disc. Then punch a 10mm hole in it. Put it over the plastic thread of another Roloc. 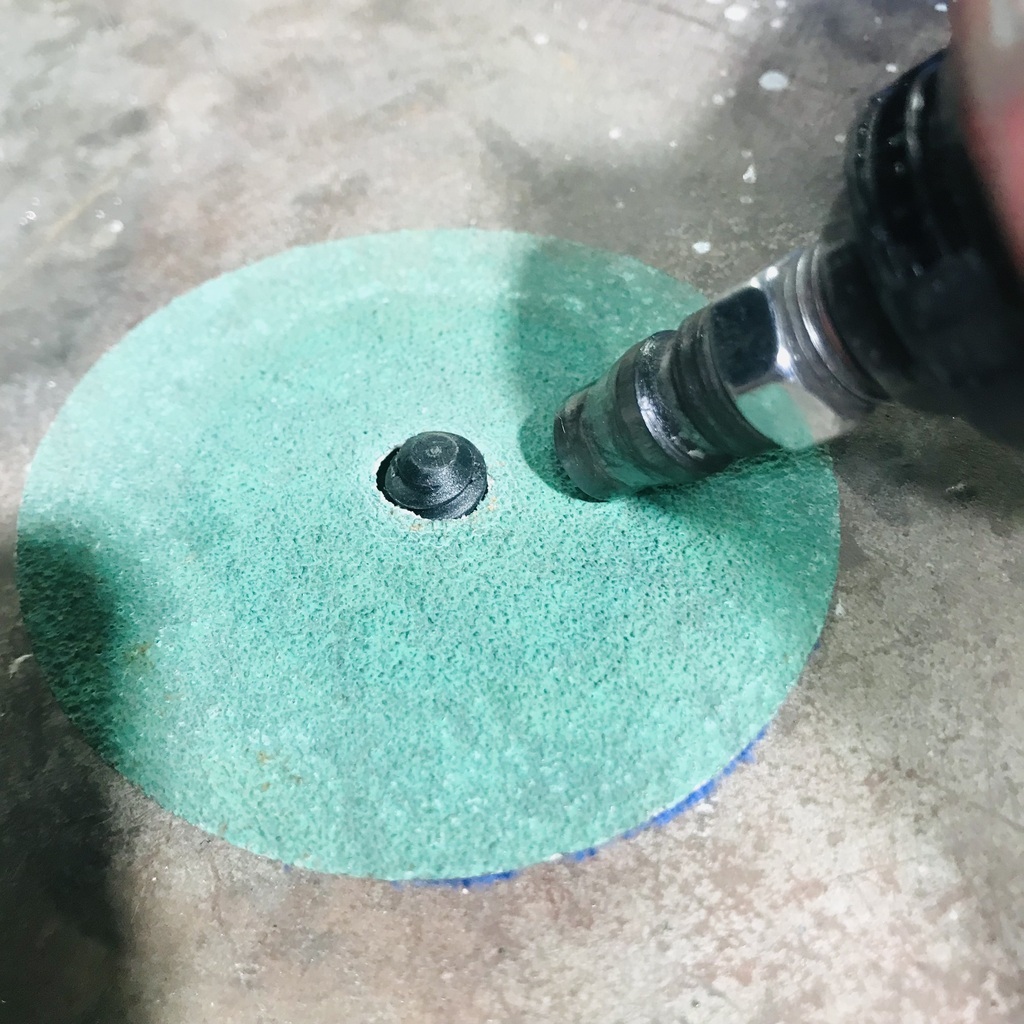 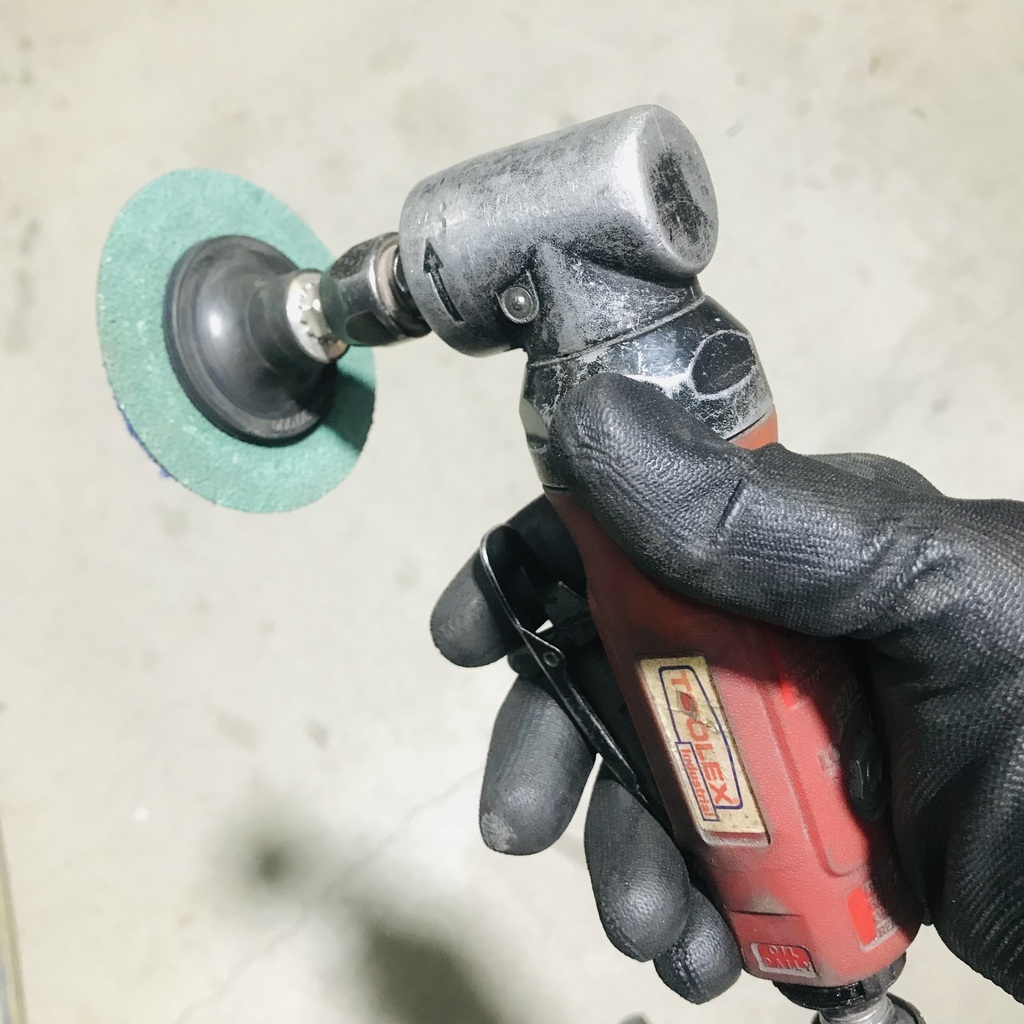 While I’m on the subject, here’s one I picked up off YouTube the other day. Cut a used 3” disc like this. 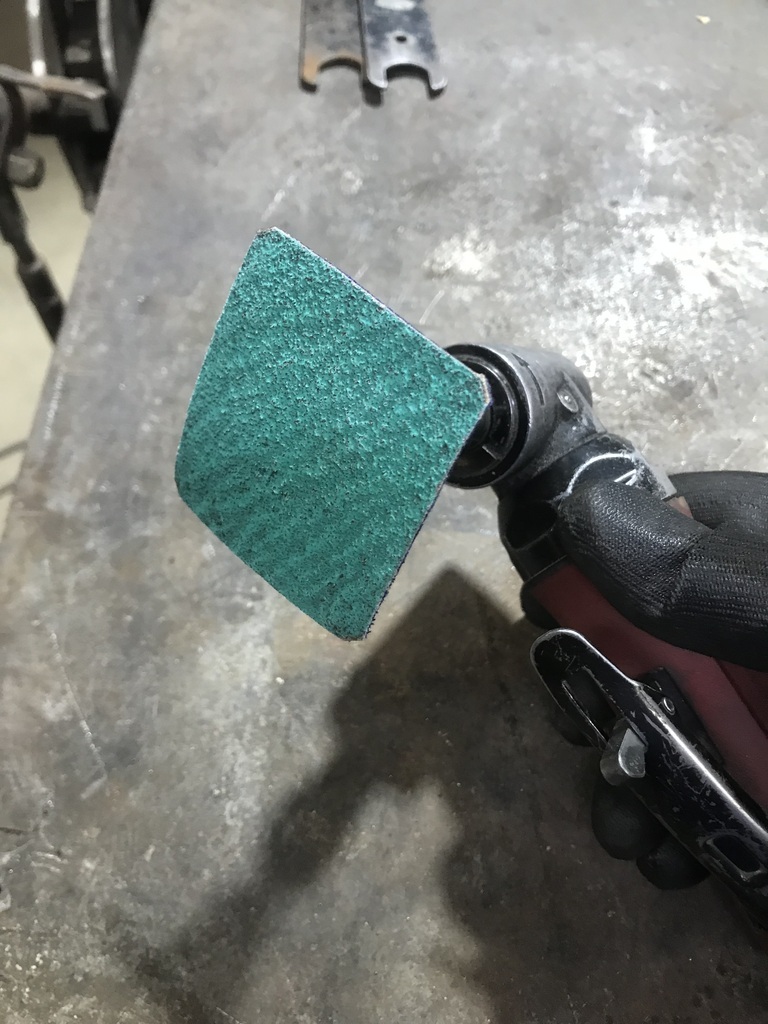 Attach it to a 2” backing thing and it does a very nice smoothing job. 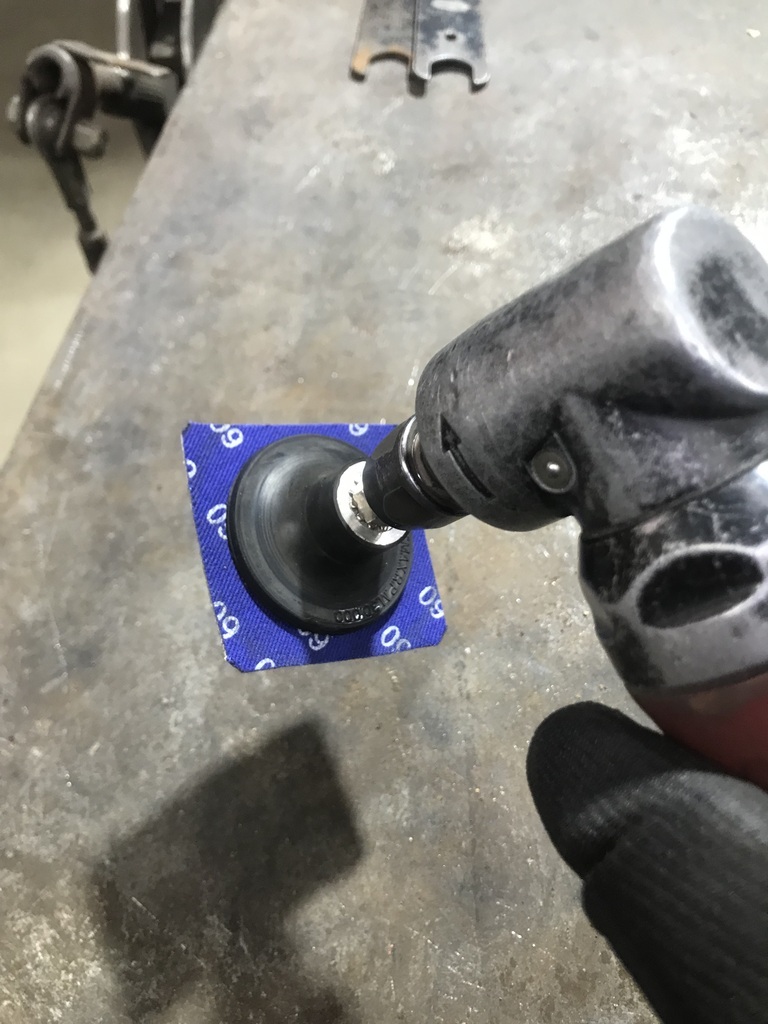 Back to bodywork. Made the boot floor piece and tacked it in. 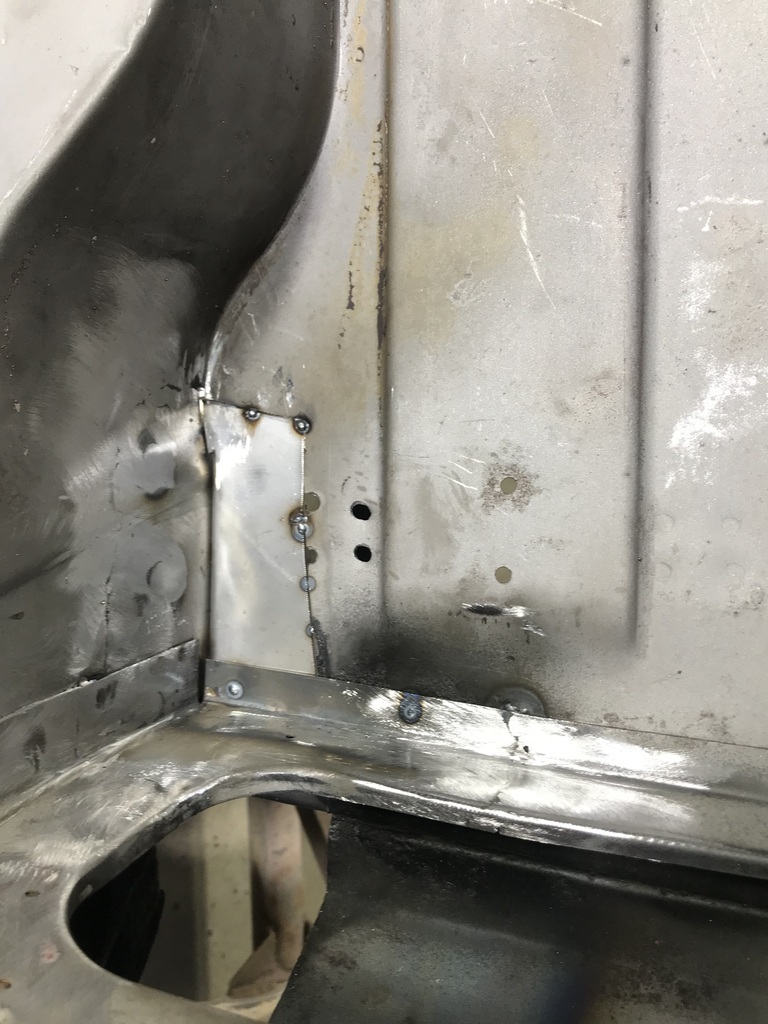 Once it was welded in I went on to this bit. Made a pie shape and tipped up two sides. 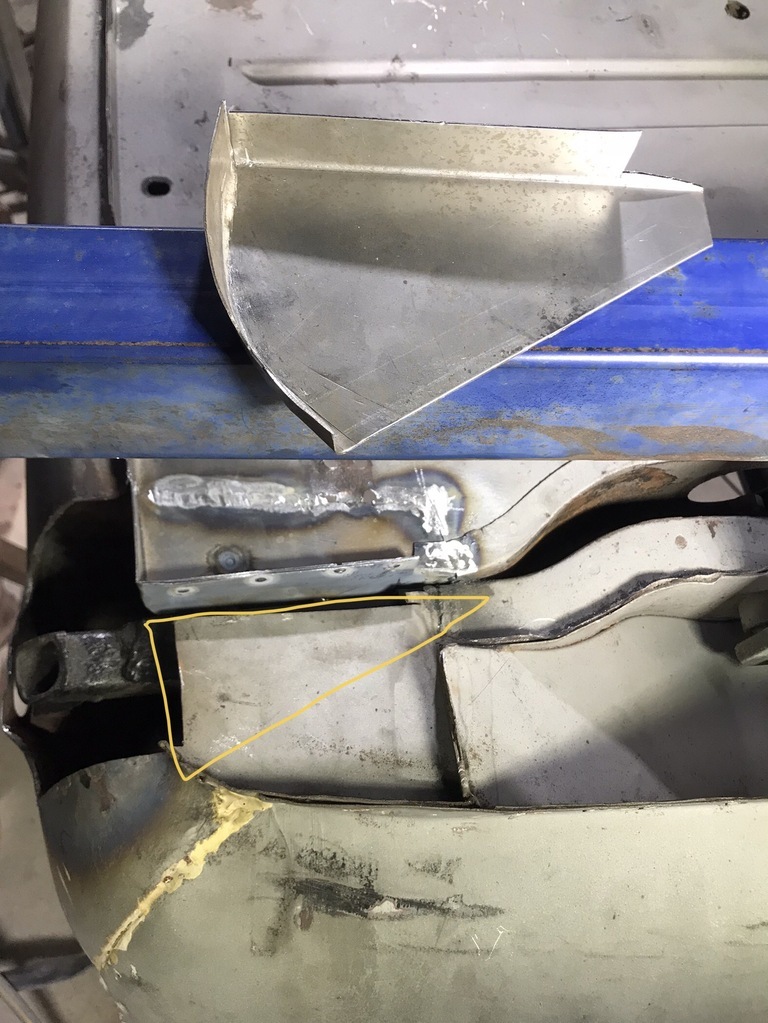 It was trimmed to fit the yellow triangle. 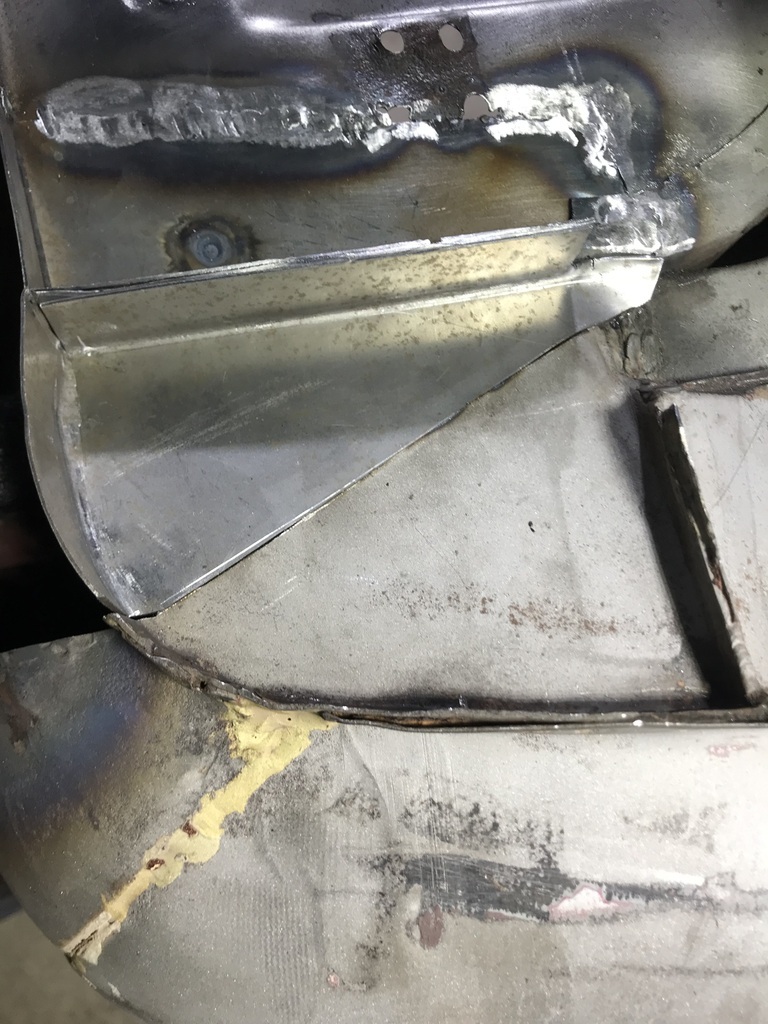 That will get welded in tomorrow. Time for a beer! |
| |
|
|
|
|
|
Nov 24, 2024 14:02:39 GMT
|
|
Enjoy the beer - you've earned it!
|
| |
|
|


